Thank you for responding, this is definitely a frontrunner for setting up dustcollection. I’ll just have to see if it clears my door as I’m planning on having it swing over top the enclosure using 4 supports. Although I may be able to run the return along the ceiling inside the enclosure as I have 30" overhead. I really like how it also doubles up as a cleanup vac with the attachments.
1 Like
WOW! Very cool setup.
I like the clean look and the use of gas struts.
Where did you get the struts and what is the weight load?
For the one I want to build I was going to order automotive struts for the weight capacity.
1 Like
Eric, Thanks
Before you decide to use automotive gas struts go-to the provided link. This company has an amazing design and simulation for gas struts.
2 Likes
WOW, this is very detailed. It will take me as long to calculate for struts as it does to design an enclosure. For me, this takes a while.
I do see there is a lot more involved than originally expected.
Thanks
2 Likes
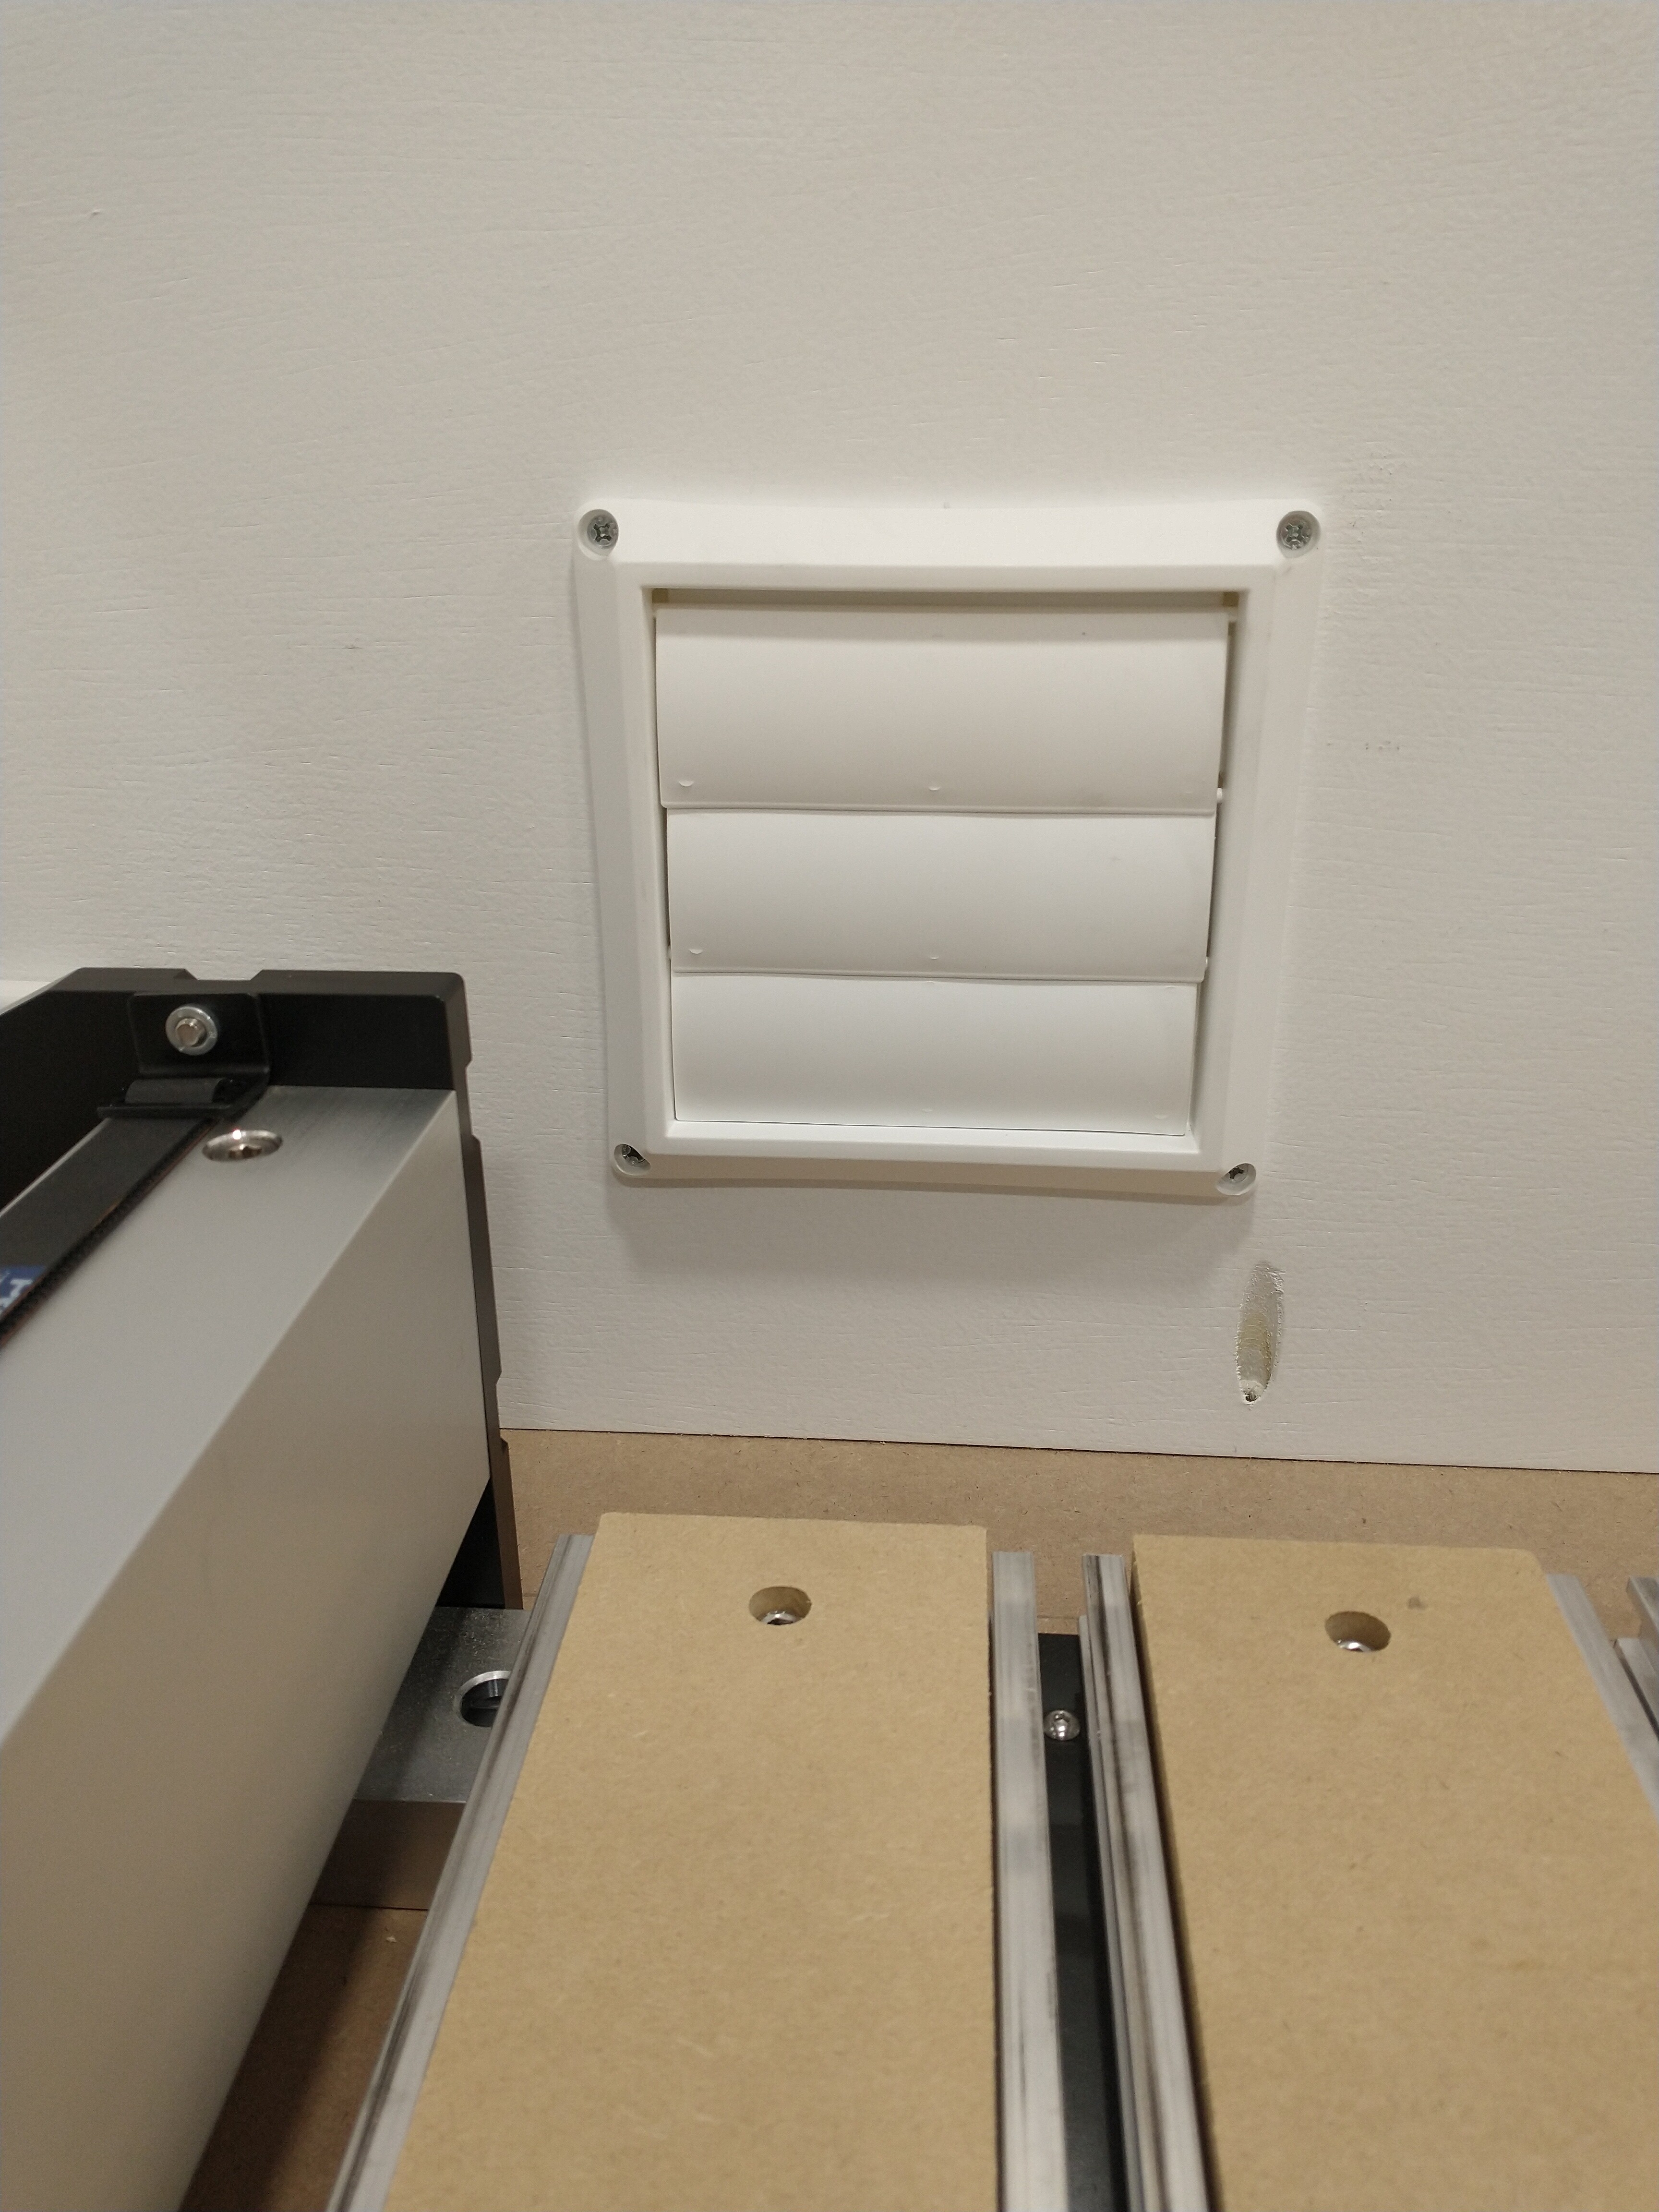
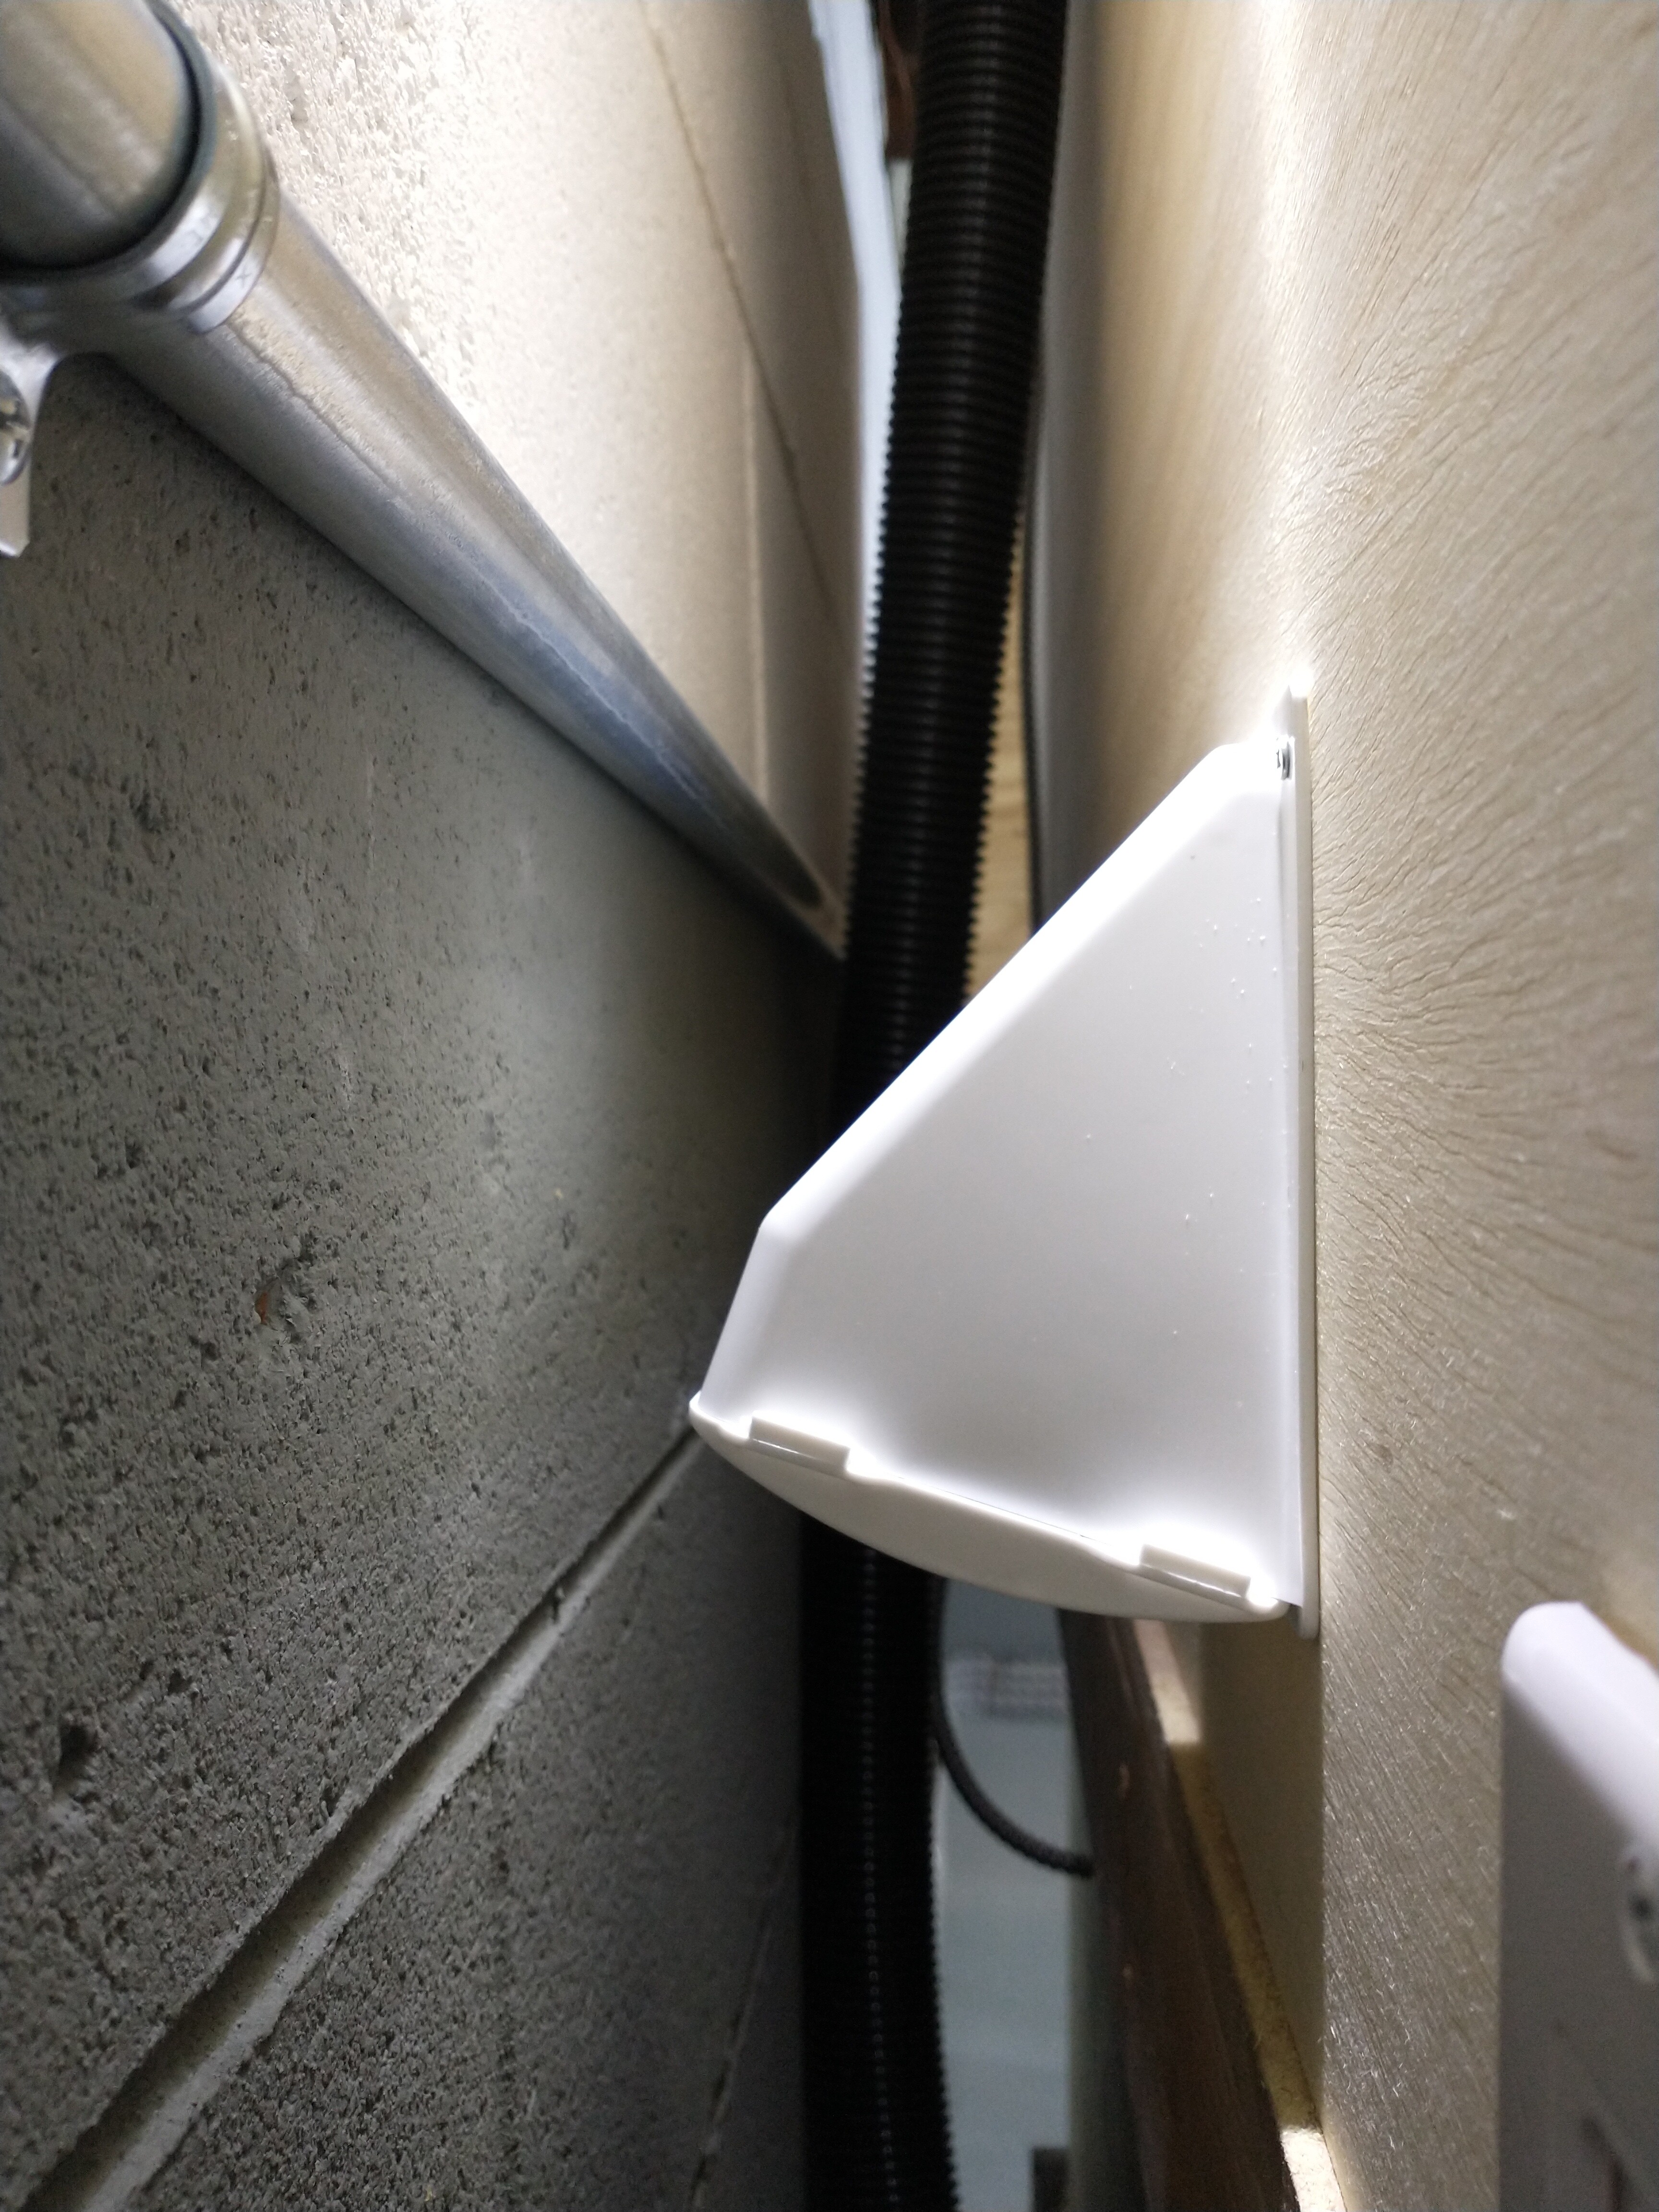
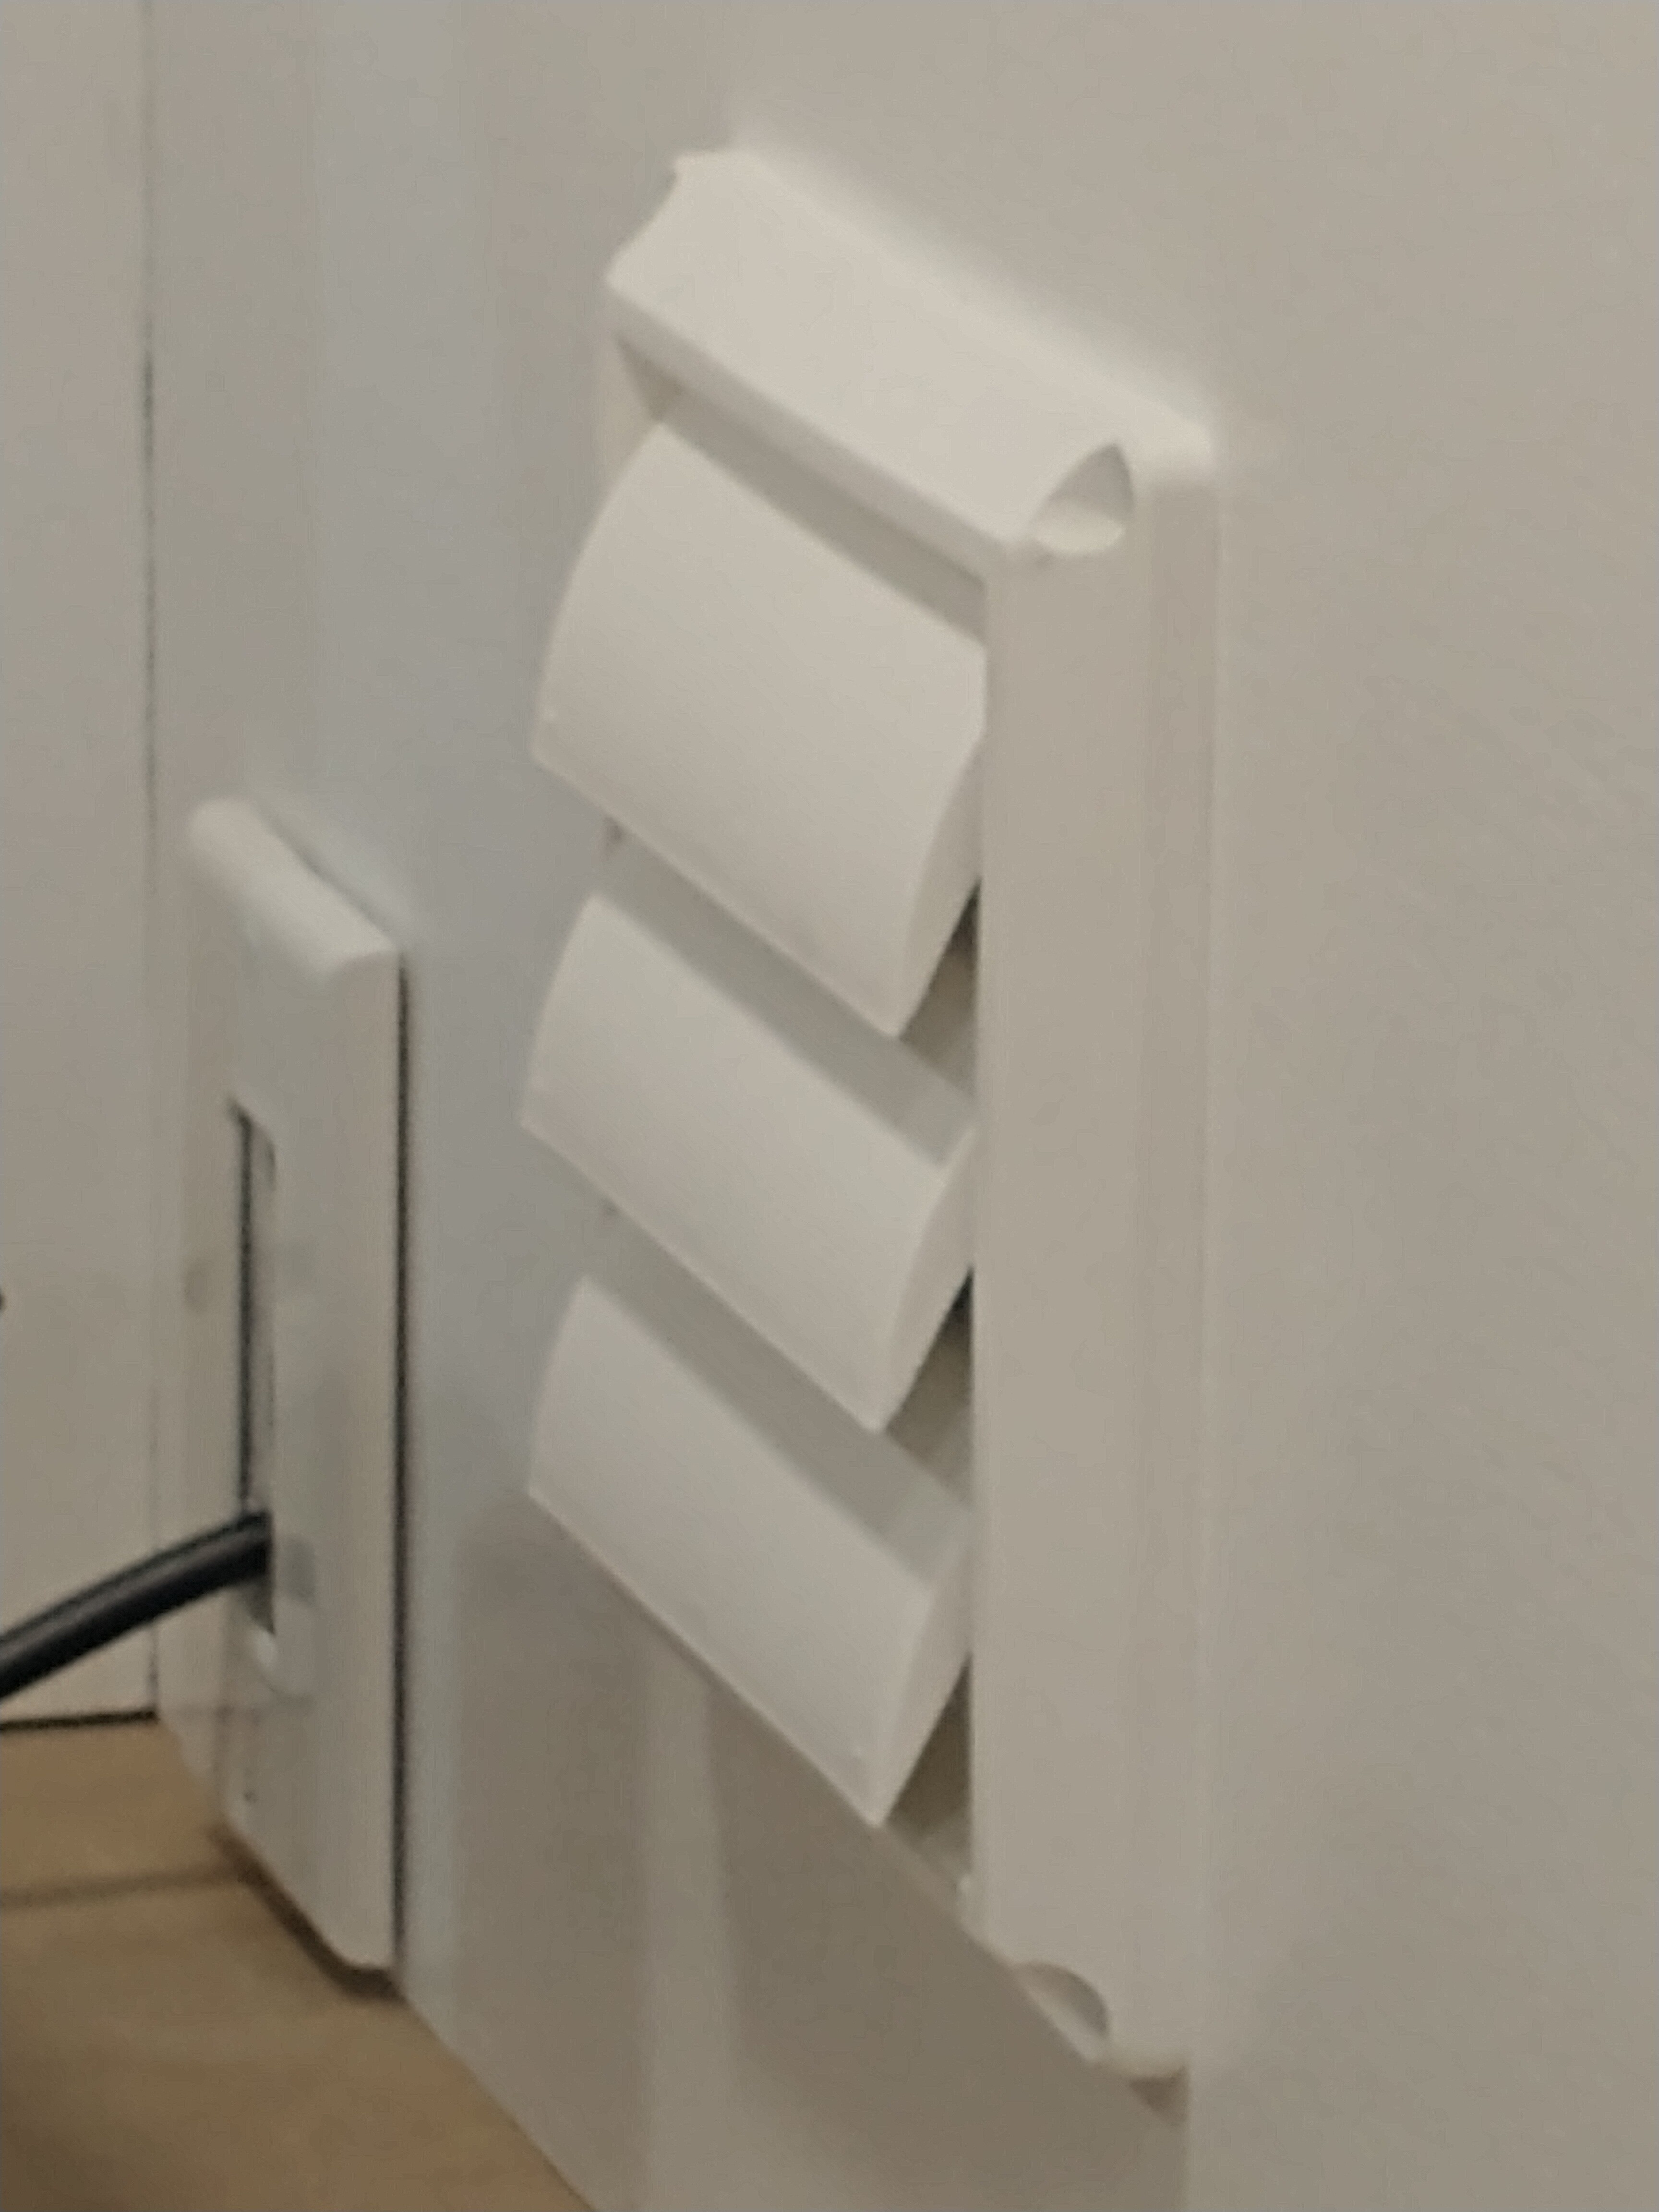
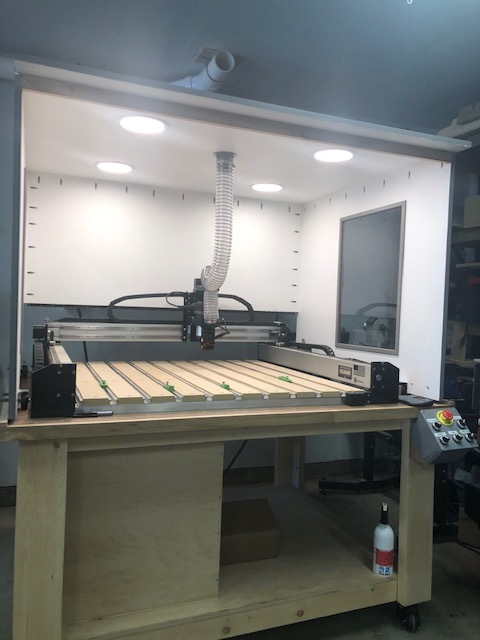
So a few months ago I found out that when operating the dust collection system it created such a low pressure within the enclosure It essentially starved the vacuum system of air. A temporary fix for this was to crack open one of my side windows allowing significant air flow into the enclosure but this created another problem with excess sound escaping out.
I decided to head down to my local big box store to look for some ideas. I found the solution! I purchased a 4" wide mouth dryer vent, 4" louvered plastic exhaust hood, and vent filters. I had to modify the louvered exhaust hood so it would open correctly while the dust collection system was operating. This would draw in fresh air from outside the enclosure. Adding vent filters inside the dryer vent itself would serve two purposes. One, filter air coming into the enclosure so not the add any dust or dirt , and second it would act as a sound barrier.
It works perfectly  !
!
When in the dust collection system is on the louvers self adjust to allow the proper amount of air to enter the enclosure.
13 Likes
Man, amazing job… you may not be a wood worker or engineer but I would put that up against anyone. It has inspired me. Well done! Always remember you are your own worst critic… unless you invite a narcissist lol
3 Likes
Matt
LMAO😂…very true!
Thank you for the compliment and I am honored that this project has given you some inspiration. This is one of the things I believe the creators of Carbide 3D intended this forum to do and that is to inspire the creative minds of its members.
I look forward to seeing your project and please if you have any questions or even suggestions feel free to message me.
Thanks again.
Darren
4 Likes
7 Likes
Ken,
Very nice work! Is that framed out in extruded aluminum?
Darren
1 Like
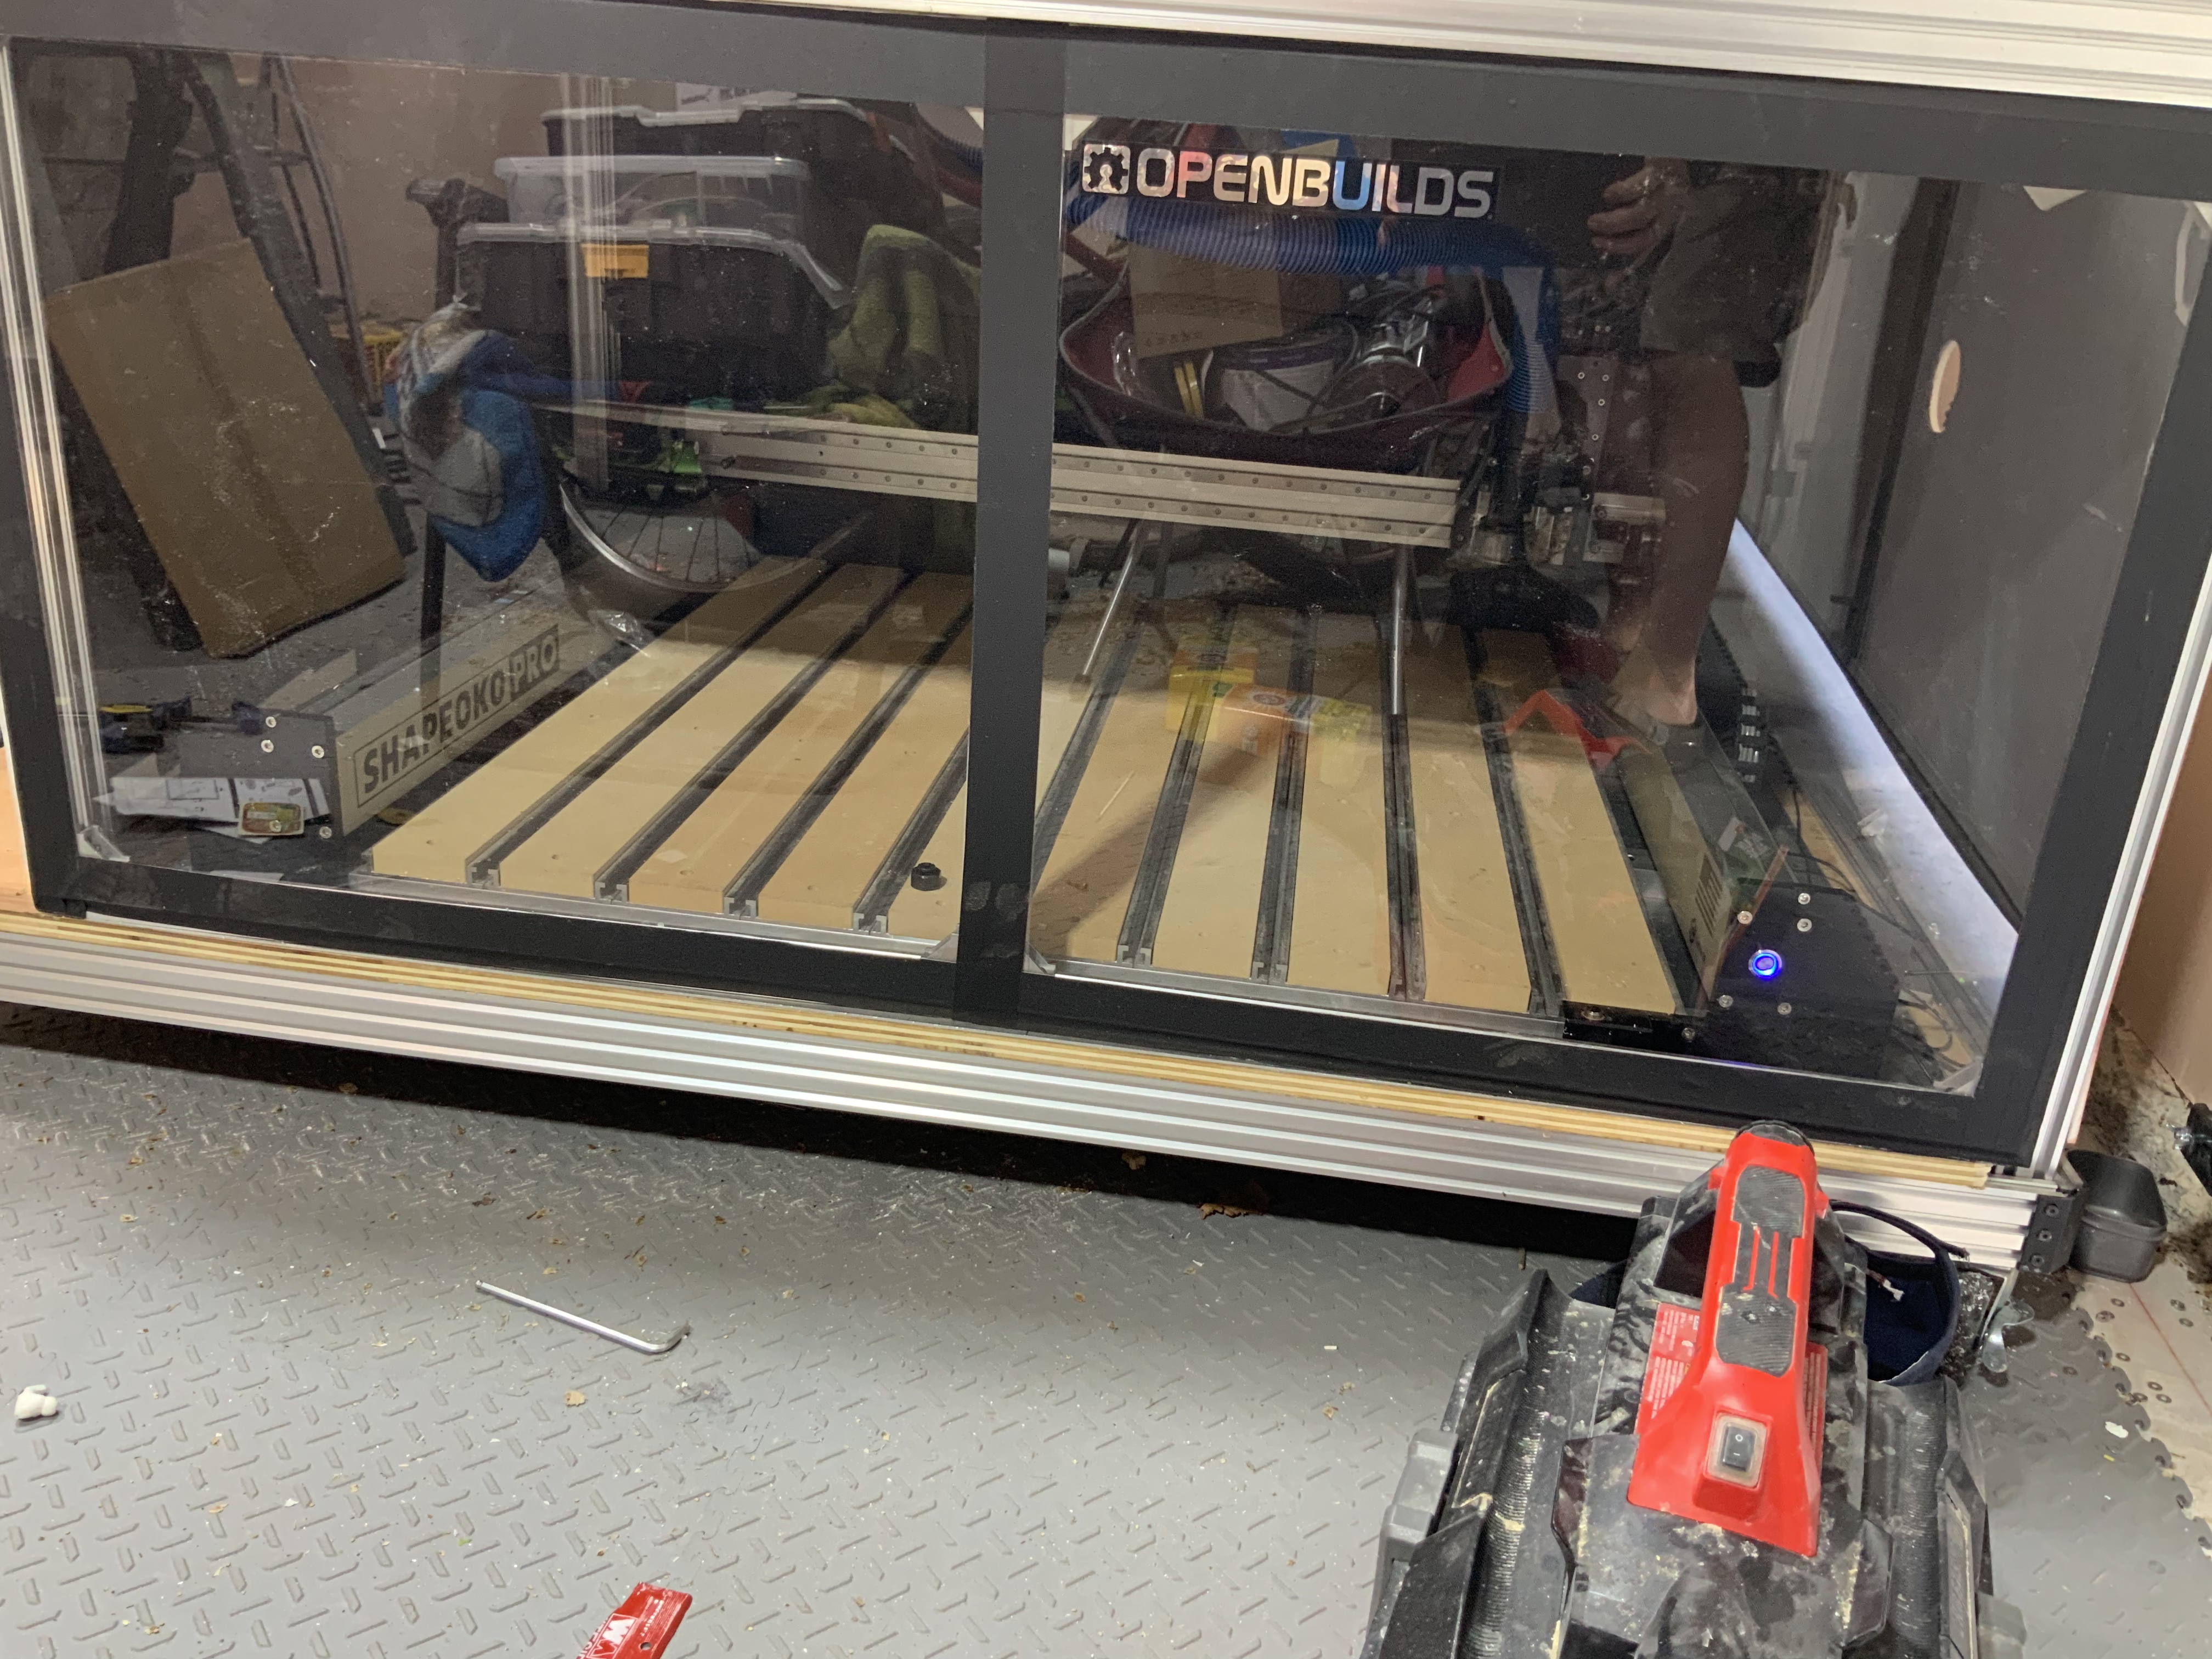
Thank you. My objective was to build an enclosure that I can take easily modify as my needs change. I started with an Openbuilds table and then added a torsion box made from 2060 extrusion for the base. My first project with the new machine will be custom aluminum composite panels for the front, sides, rear of the enclosure.
1 Like
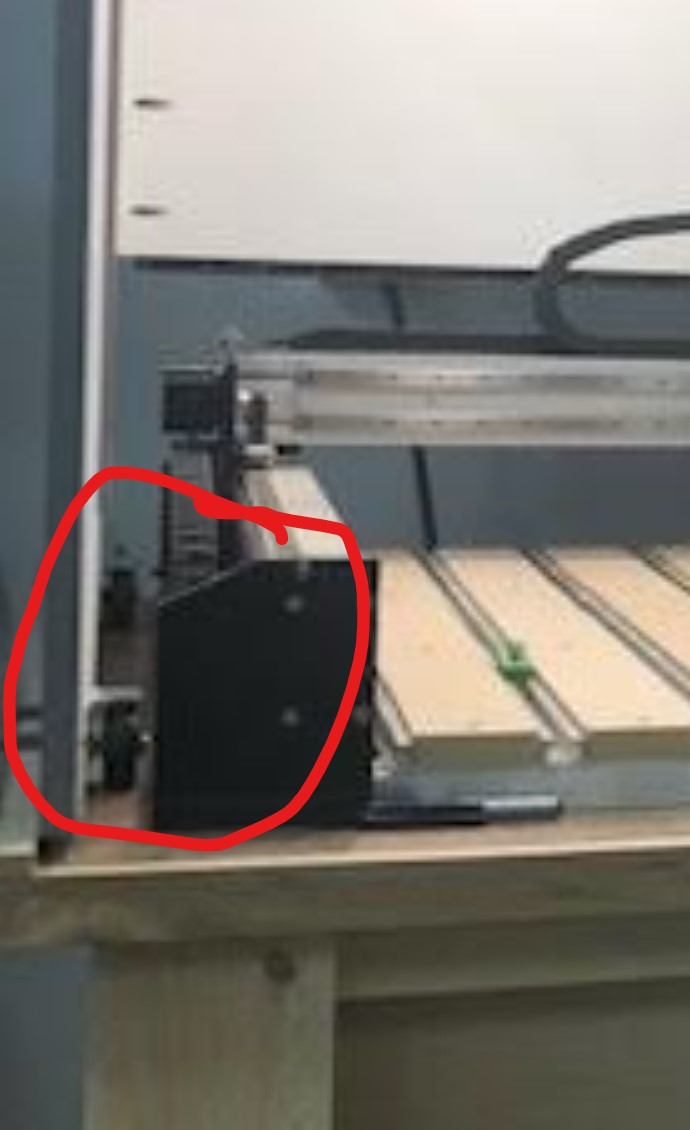
I am doing almost this exact same setup with the kill switch and 5 switches. I bought some engravable plastic that is .040" thick and is 2 colors. What bit did you use to engrave your lettering? Awesome build by the way!! I would love to know were you got the lower table with the drawers in it too. My top is awesome, but my table can use a little help
1 Like
Don’t forget pictures. In progress and completion.
3 Likes
I don’t have many pictures but I’m putting them together as I go. I installed the LED lighting in it today. I didn’t want to hijack your post with my build. Here is the latest from today.
11 Likes
WOW, that’s one BIG box! 
Looks GOOD my friend.
I like the electronic panel.
Very similar to my own table. No enclosure as of yet though.
Nice Job!
1 Like
It’s a big box but everything is somewhat modular. I have it built on wheels so that I can simply slide it off the Shapeoko onto my outfeed table (I built it at the same exact height) in case I need to service any component. It works really slick. The void in the back of the unit is in case I want to carve something bigger than my bed will allow. I have a door back there that simply lifts up and clips to the rear of the unit. It’s hard to see but there is a piano hinge that goes across the entire opening. I didn’t want to stick my head in there and worry about slamming my head on the top of the enclosure. I still have to build the door for the front to complete the sound dampening.
3 Likes
I like the wheel idea.
My shop consists of one wall of a two car garage. Not much space.
I thought the enclosure was a bit tall. Is there a reason for that?
Dewayne
Awesome job!
The lettering over my switches are P Touch labels. I like to say I made them “BCE” Before Carbide Etcher…lol
I’m still learning and experimenting with my Shapeoko Pro and have to say I am having a ton of fun. I have been creating some signs for my showroom / man cave.

11 Likes
The “Boss” marketing name was genius. Even after all these years the Boss still means something to me. There are few marketing ideas that last the test of time but Ford found one and even into the future with an electric motor seemingly in everyone’s driving future the Boss still moves you.
The electrics have great performance but they will never replace the smell of gasoline, the roar of the engine the smell of burning rubber and the fun of aggregating your neighbors with your loud pipes. Varooooooom Varoooooooom
That’s pretty nice, I’m jelly!
Love your whole concept!
Just wondering what is the whole system setting on?
Rolling tool chest?
Brand?
Where from?
Size?