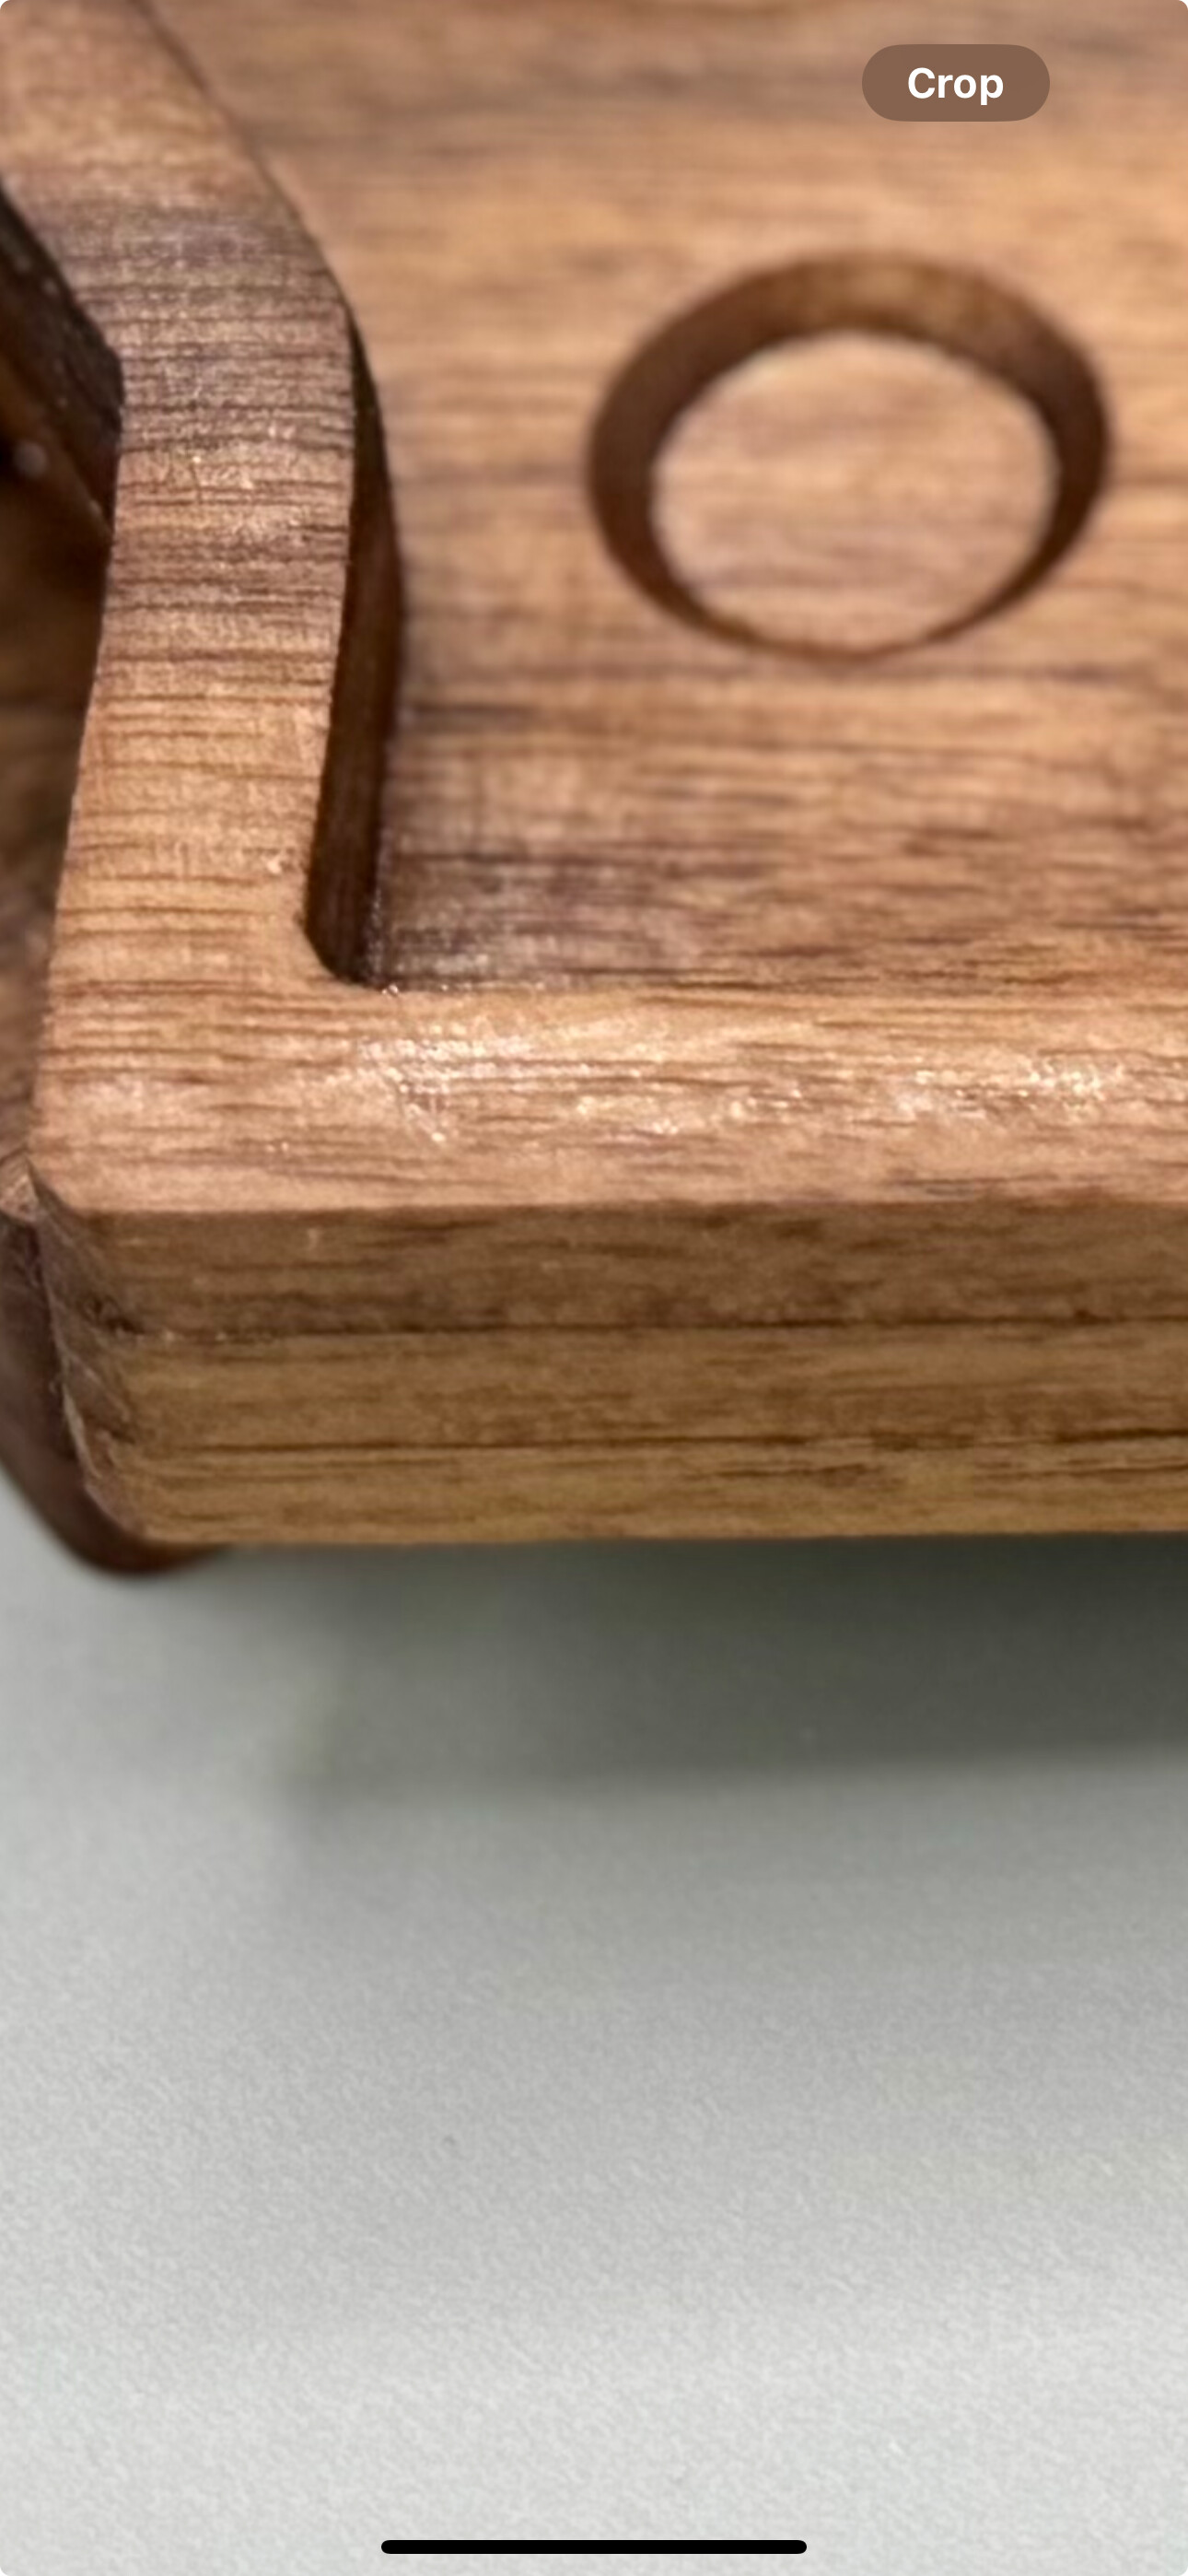
Been playing around with settings on my Shapeoko 5 with VFD. Noticed some what i would call layer lines on my recent projects on both the inside pocket and outside straight through cuts. Basically at every .25 inches there is a line and it almost looks like i cut the wood in layers and then glued them up. Hope that makes sense
What can cause this? I thought maybe the bit was angled but in my mind i would only see that line on one side. This is around the entire parameter.
These can of course be sanded out. But adds time and during all my YouTube browsing never ran across others having this issue. Any thoughts on what could cause this?
It’s not unusual. The grain of the wood can react differently to the tool depending on if the wood is being cut right at the end or further up.
There can also be runout, so that the tip of the tool is cutting a slightly larger circle than further up. There’s also tool deflection, and if there is any looseness at all in the system that can contribute.
Finally, if this is happening only in one area of the perimeter (for example, always on the left edge), then check your tram - there are guides here to make sure the bit is perfectly square to the table.
The usual approach to fix this is to do your cuts like this, but leave the piece very slightly oversize (like, 0.50mm to 0.25mm oversize), and then do a single final pass at the final size, cutting the entire thing in one pass (a “full-depth” pass). This assumes your bit has flutes long enough to cut the full depth, but in general you shouldn’t cut any deeper than the flutes for any cut.
Since you are just starting, I am sure your bit is almost pristine. I had a bit with a nick that caused issues until I spotted it. Sandpaper is going to be a friend of yours along your journey. I got sanding sticks, they work well.
What was the orientation of the cut piece relative to the machine? If it matches the photo check the “nod” of the spindle/mount/carriage/gantry as described in the VFD manual:
If everything checks out mechanically, leave a roughing clearance and make a full-depth finishing pass. Where possible avoid slotting and add geometry and cut as a pocket
and/or
and consider leaving a roughing clearance and taking a finishing pass.
Finally, if this is happening only in one area of the perimeter (for example, always on the left edge), then check your tram - there are guides here to make sure the bit is perfectly square to the table.
this is around the entire perimeter inside and out. I have not gotten around to tram yet so will be doing that. But figured if that was the whole issue (at least in my mind) then it would be mainly on one side, but its the same alll the way around. Thanks for the additional things to try, will keep at this.
Since you are just starting, I am sure your bit is almost pristine. I had a bit with a nick that caused issues until I spotted it.
I will try another bit, have some extras coming in today. Hope these last longer than a few days! but i could have done something when trying out settings. Will see soon.
CrookedWoodTex - I will confirm how the bit was set up, i’m fairly certain ive got that in there right but ive been known to fat finger a number too
Thanks for the replies and additional documentation to look into. Will also look into using this finishing pass as an option.