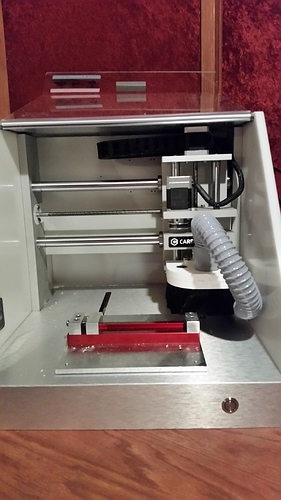
There have been a number of dust heads for the Nomad - @Flatballer, @patofoto - each with its own set of advantages and disadvantages. I’ve decided to enter the ring with a dust head for the Nomad 883 Pro.
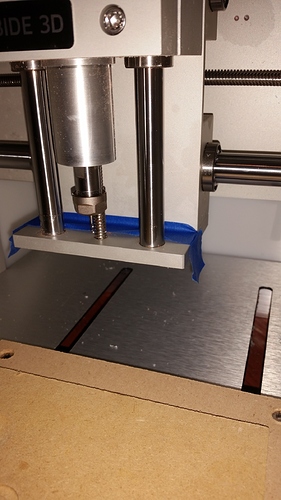
The Nomad 883 Pro is a challenge for a dust head since one of the changes made (from the Nomad 883) was to dramatically reduce the distance from the gantry to the edge of the spindle. Due to the design of the Nomad 883 Pro there is only 0.100" of usable space behind the spindle. In reality, it is even less since margin must be calculated in. My design has only 0.050" behind the spindle… and still barely clears the gantry when it is moved downward.
Because no brush can go behind the spindle and clamping the spindle using a split ring design doesn’t have much material to work with, I’ve elected to use two brackets. The brackets attach to the top plate and use a flexible pipe clamp to affix the brackets to the spindle.
The brush plate is affixed to the top plate via magnets.
Yes, that means there is no brush “behind”. The current design is quite good at controlling the “mess” but I will modify this discussion once I come up with a fourth piece - a brush which is fixed to the bottom of the gantry.
The brush plate has the standard brush mounted such that the brush cannot come in contact with the spindle - no brush eating!
Let’s get started!
PARTS YOU WILL NEED
2 - pieces of Starboard - 2.5” x 2.5” x 1”
I got these from TAP plastics. I live near one of their stores so I just stopped in and had them
cut the pieces from 1.5” thick stock to order. Their cut to order service is also available via
their WEB site.
2 - pieces of Starboard - 5.5” x 6.25” x 0.5”
I got these from TAP plastics. I live near one of their stores so I just stopped in and had them
cut the pieces from 0.5” thick stock to order. Their cut to order service is also available via
their WEB site.
4 - Neodymium magnet - 0.75” in diameter, 0.187” thick, 10 pound pull
I got these from McMaster-Carr (MMC), part number 5862K973.

WARNING! These are *VERY STRONG* and can be a real bugger to get apart. Be careful!
1 - piece of tubing - 1.5” diameter, 5 feet long.
I got this from MMC, part number 5500K31.
2 - tube fitting
I got these from MMC, part number 5500K17.
1- easy cut brush - 2 inch brush, 3 foot length
I got this from MMC, part number 7900T5.
1 - flexible pipe clamp - 0.5” tall, ~1.75” diameter when fully expanded
I got this at my local hardware store.
4 - #8 construction screws - 0.75" long
I got these at my local hardware store.
4 - #8 washers
I got these at my local hardware store.
NECESSARY TOOLS
0.125" square end end mill
Phillips screw driver (for screws)
Pliers or vise grips (for the press fit of the magnets)
Dremel or cutting tool (for the construction tabs)
Dremel abrasive disk or sand paper (to remove the construction tabs)
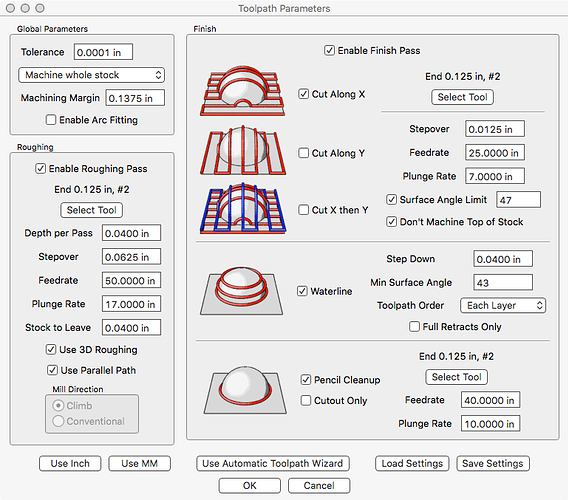
MACHINING PARAMETERS
ALL OF THE PARAMETERS IN THIS POST ARE DONE AT 10K RPM!
ALL PARTS HAVE THEIR STOCK CREATED BY ADDING 0.25" ALL AROUND IN X AND Y.
ALL CONSTRUCTION TABS ARE 0.1" IN WIDTH AND HEIGHT.
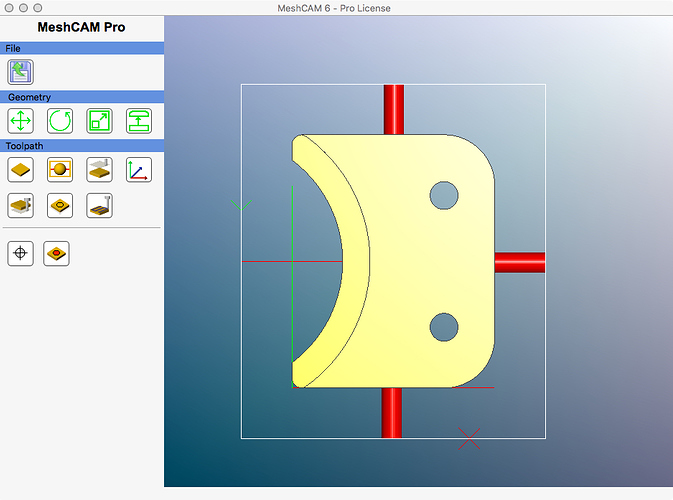
SPINDLE BRACKET
Two of these will need to be machined.
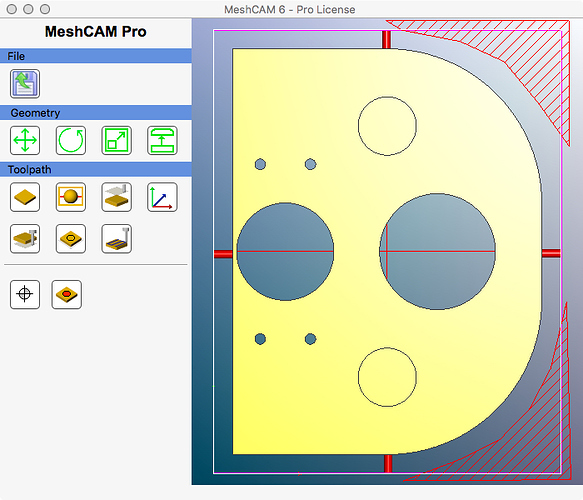
TOP PLATE
PLEASE PAY CLOSE ATTENTION! THERE ARE INCLUSION AND EXCLUSION REGIONS!
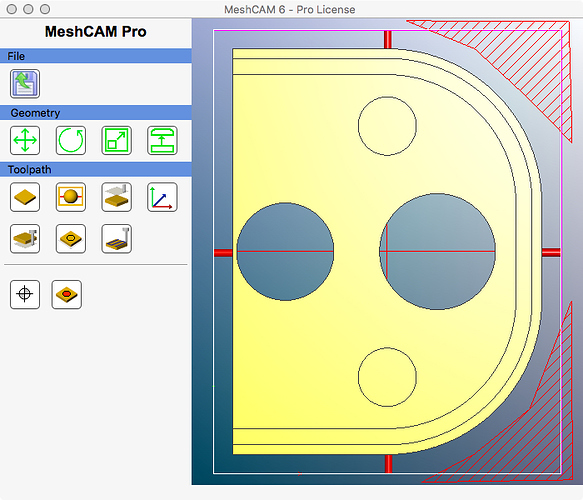
BRUSH PLATE
PLEASE PAY CLOSE ATTENTION! THERE ARE INCLUSION AND EXCLUSION REGIONS!
CONSTRUCTION NOTES
Construction tabs can be cut/sanded/ground off. I used a Dremel with a diamond covered grinding wheel.
The brackets are 1.000" inches deep. To machine these using commonly available end mills - including those from C3D - the “stick out” (the distance from the bottom of the collect nut to the bottom of the end mill) must be adjusted. Commonly available end mills are 1.500" inches long. When placed in the collet and collet nut, the “stick out” must be adjusted so that it is slightly longer than 1.000". Failure to do so will result in a collision.
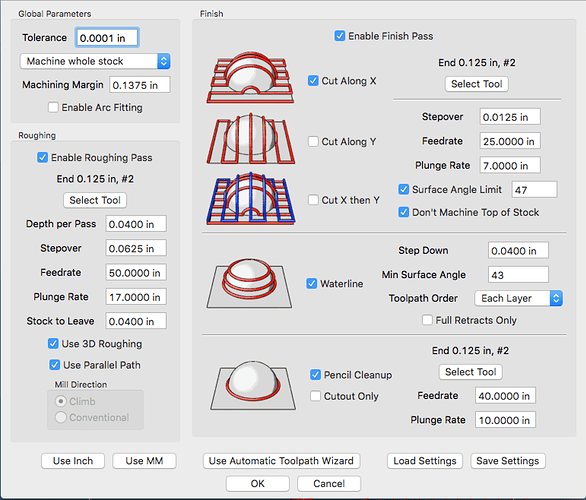
Notice the “machine whole stock”? This will remove all of the stock that is not geometry (the part).
The inclusion ensures that machining will affect everything inside (leaving the tabs). The exclusion for the corners of the top and bottom plates excludes stock that is a waste to machine… this saves a LOT of time.
Another reason things are done this way is to ensure that the large openings are machined away. This prevents anything from coming loose and potentially ruining the part and/or breaking an end mill.
The “press fit” for the magnets is a bit tough. I used a pair of vise grips. Remember that these are very strong magnets, so be careful!
I suggest mounting the magnets with opposite polarity. YMMV.
Use the washers and #8 construction screws to attach the spindle brackets to the top plate. The screws should not go through the bottom of the brush plate - do not over tighten!
Slide the top plate with brackets onto the spindle and move it up to the top. Now open the flexible pipe clamp, wrap it around the brackets and tighten it until it just closes.
Lower the gentry slowly and ensure the top plate is able to pass the bottom of the gantry. Now tighten the clamp a little bit more. Monkey tight, not gorilla tight. Over tighten and the spindle can be damaged!
The brush fits into the brush plate slot via press fit. It’s close, but not too tight. The brush can be replaced or different length brushes can be used for different jobs.
The press fit works well for me but based on feedback I may want to tighten it up by 0.010" or so.
The tube fittings screw onto the tubing. Trimming the tubing to the proper length depends on how one want to exit the Nomad enclosure.
Trim one of the tube fittings such that it passes through the top plate, a little bit into the brush plate.
PICTURES
mark
P.S.
Here are the STL files:
Spindle Bracket.stl (119.9 KB)
Top Plate.stl (345.6 KB)
Brush Plate.stl (352.6 KB)
