I use this controller with my Tormach 1100 CNC mill. Would be nice if someone could figure out how to adapt this to the SO3. I would not have a clue if it’s possible. 
PS Thanks for all the previous replies !
Brian
I use this controller with my Tormach 1100 CNC mill. Would be nice if someone could figure out how to adapt this to the SO3. I would not have a clue if it’s possible.
PS Thanks for all the previous replies !
Brian
@TOOLZ I’m sure you can adapt it to be used on the SO3. You just need to capture its keystrokes output, write a small conversion code to match that of CM.
Hi,
Thanks for the reply, but I would not have the slightest idea how to do what you referred to. 
Works great on the Tormach,though.
Brian
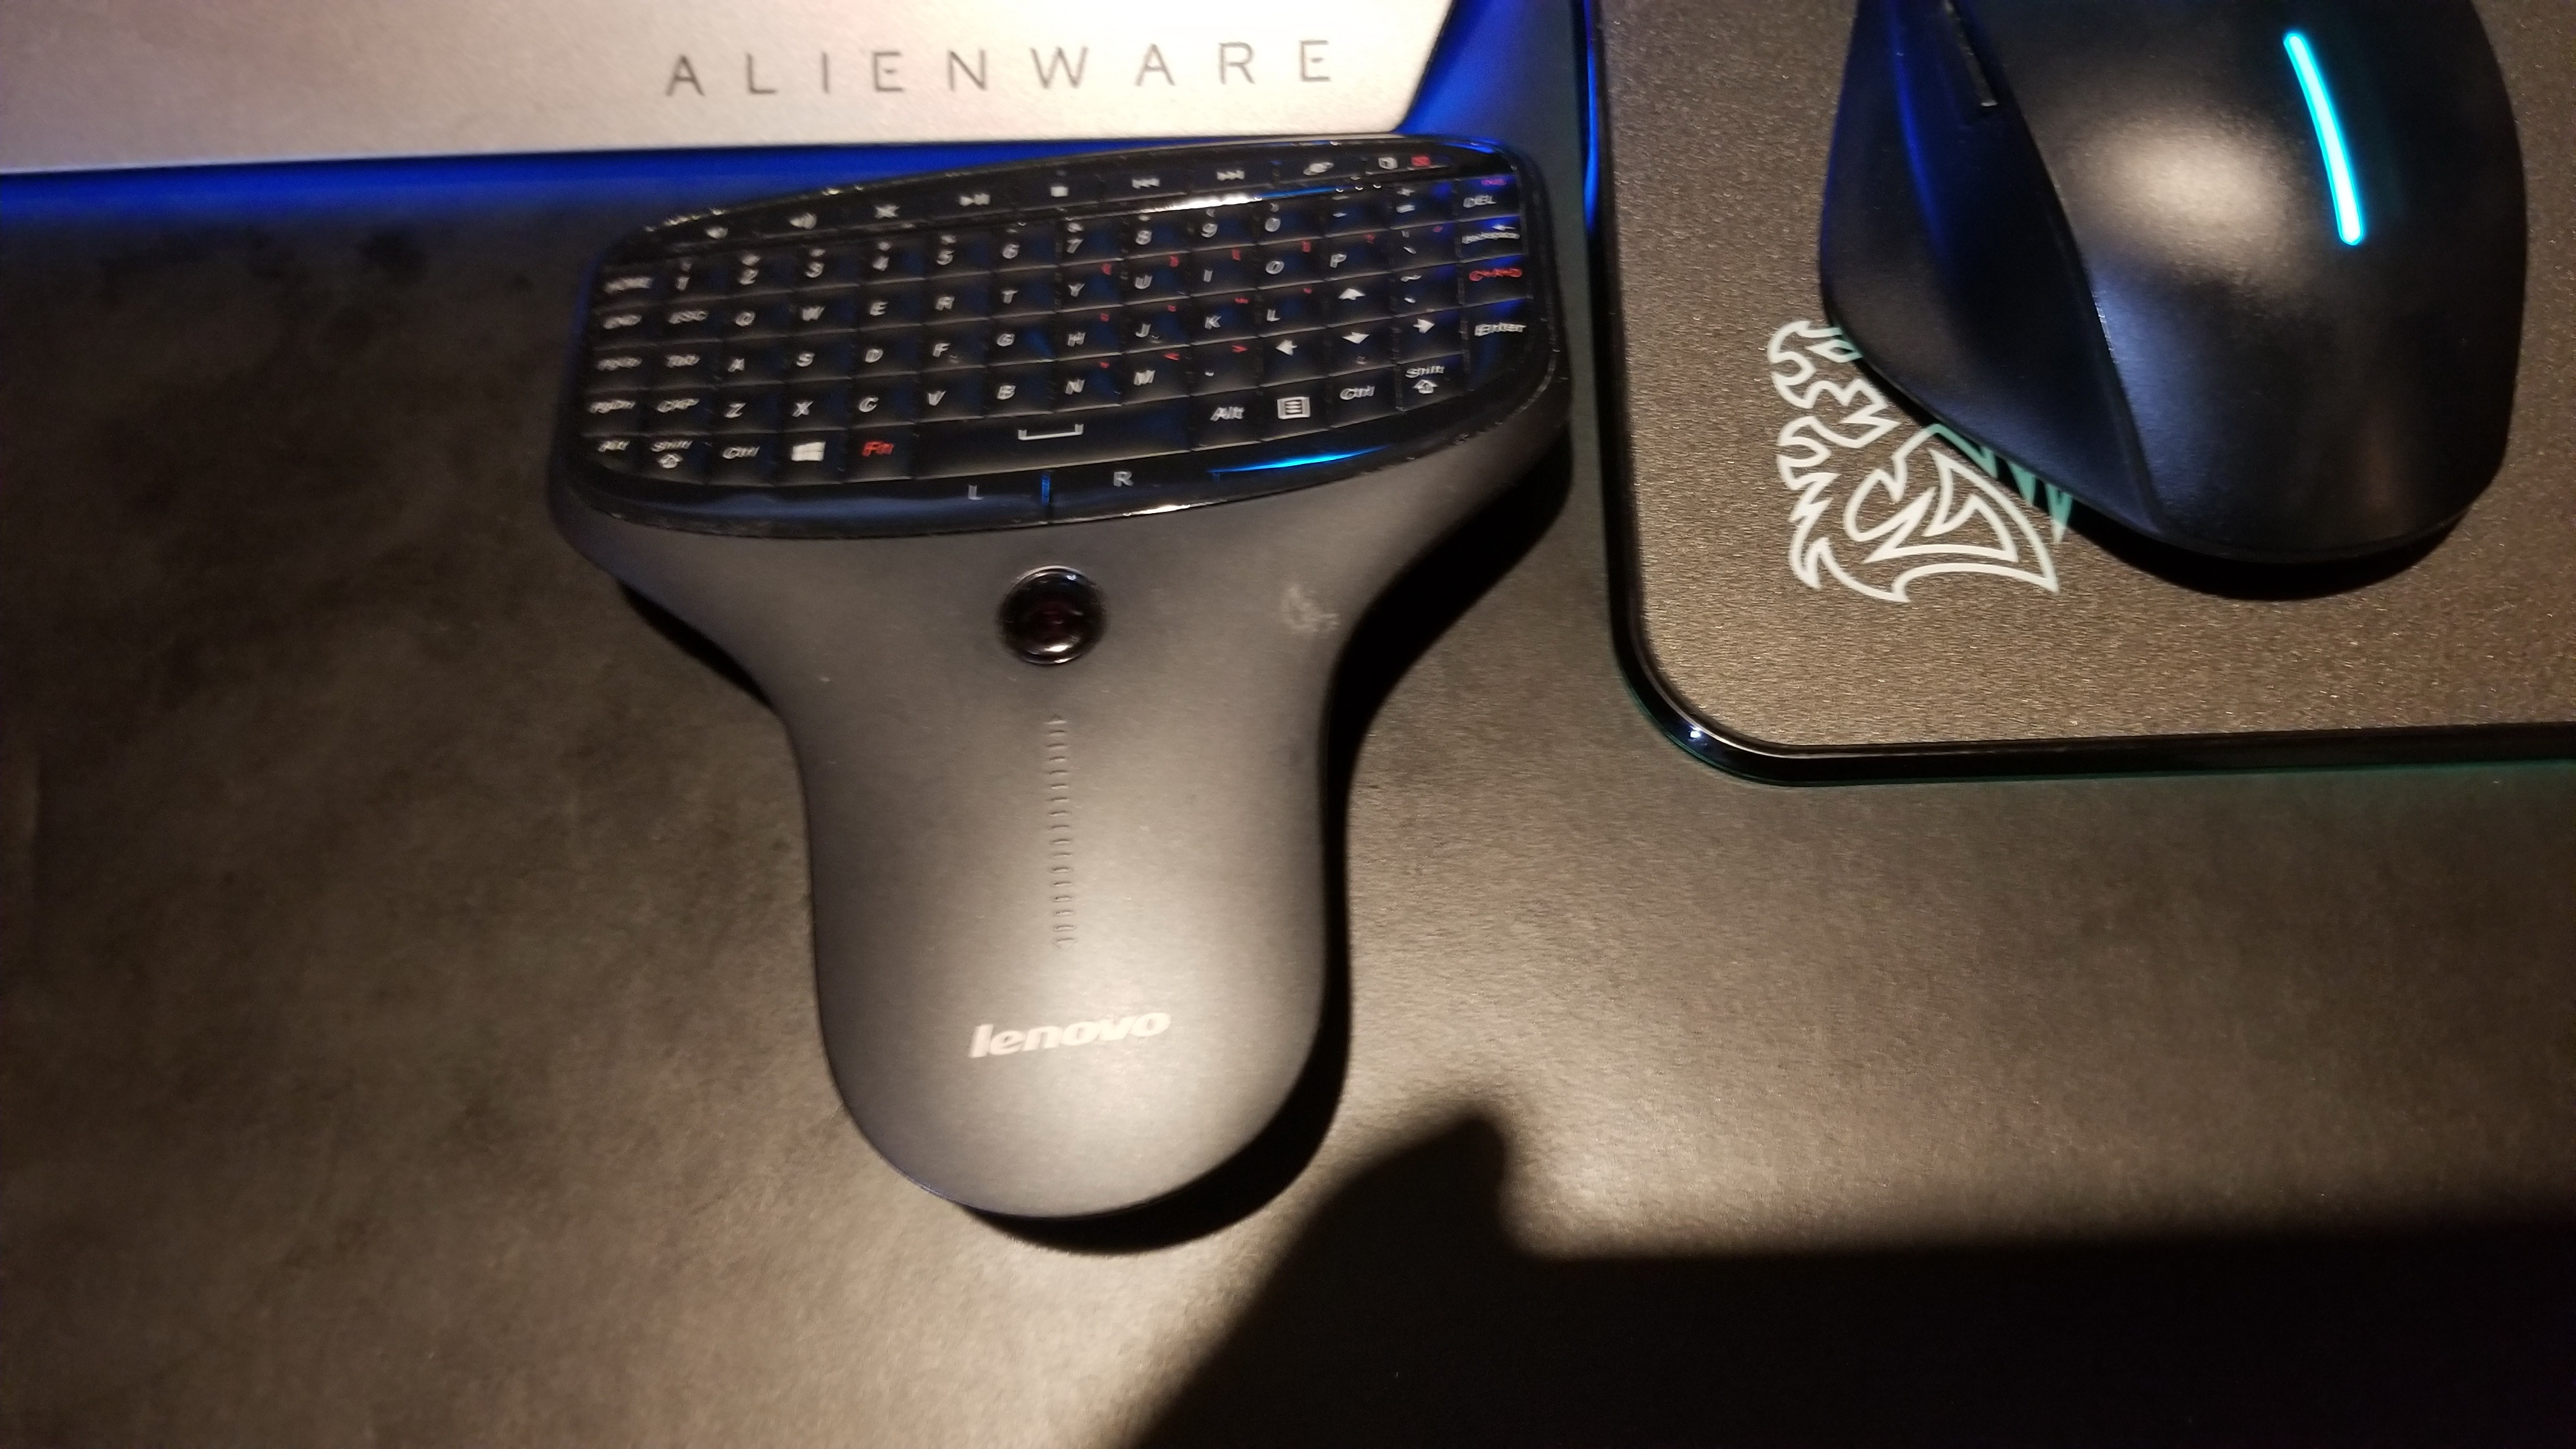
That is a rebadged Contour Design ShuttleXpress — if you download their software for it you can change the buttons used — just remap to some which match the ones CM uses per:
Interesting, but, as CM currently is designed, I don’t see that it will work. CM would need to read scroll wheel events for motion, and use axis selection via keypresses. Currently, it uses dedicated keys for each axis.
If CM gets the options to do this, I, for one, would be quite happy.
When I last looked into it, the Contour Design driver assigns most if not all of the possibilities of interaction by the ShuttleXpress to keypresses.
The documentation is rather thin, and it is not clear that the wheel can generate keypresses at all, but, presuming it can assign keypresses to the wheel, it appears that the wheel would be confined to a single axis. There is no provision to change the behaviour during operation- only via the driver setup utility. If there is something I am missing, please tell me.
If future CM could have an alternative jog form: select axis and and use scroll wheel, that would make jogging using a mouse easier, as well. There is no scrolling in the UI, so catching the scroll events won’t interfere with anything. I say this as if I don’t know that there is probably already a long list of user feature requests and that even a seemingly straightforward change like this can lead to a lot of issues and structural refactoring (a new state variable at a minimum)…
I sent Contour an inquiry (today) as to using the buttons to change wheel configuration. I am curious if there is more than the manual implies.
Seems like an idea for a nice accessory to place in the C3D store?
Or, if someone comes up with a hand wheel design they’d like to sell…take my money.
That would be neat wouldn’t it ? Now that I think about it, an ergonomic jogging device (read: not a keyboard variation) would bring that part of the workflow up to par with the probing and bit changing operations that are now smooooth and efficient thanks to the probe & bitsetter. @Luke, please do your magic !
In the meantime I will be hacking one, now that I have been inspired by @npross
The better one is the Shuttle ProV2. It has about a dozen buttons and wheel that are programmable. But at a bit over $100
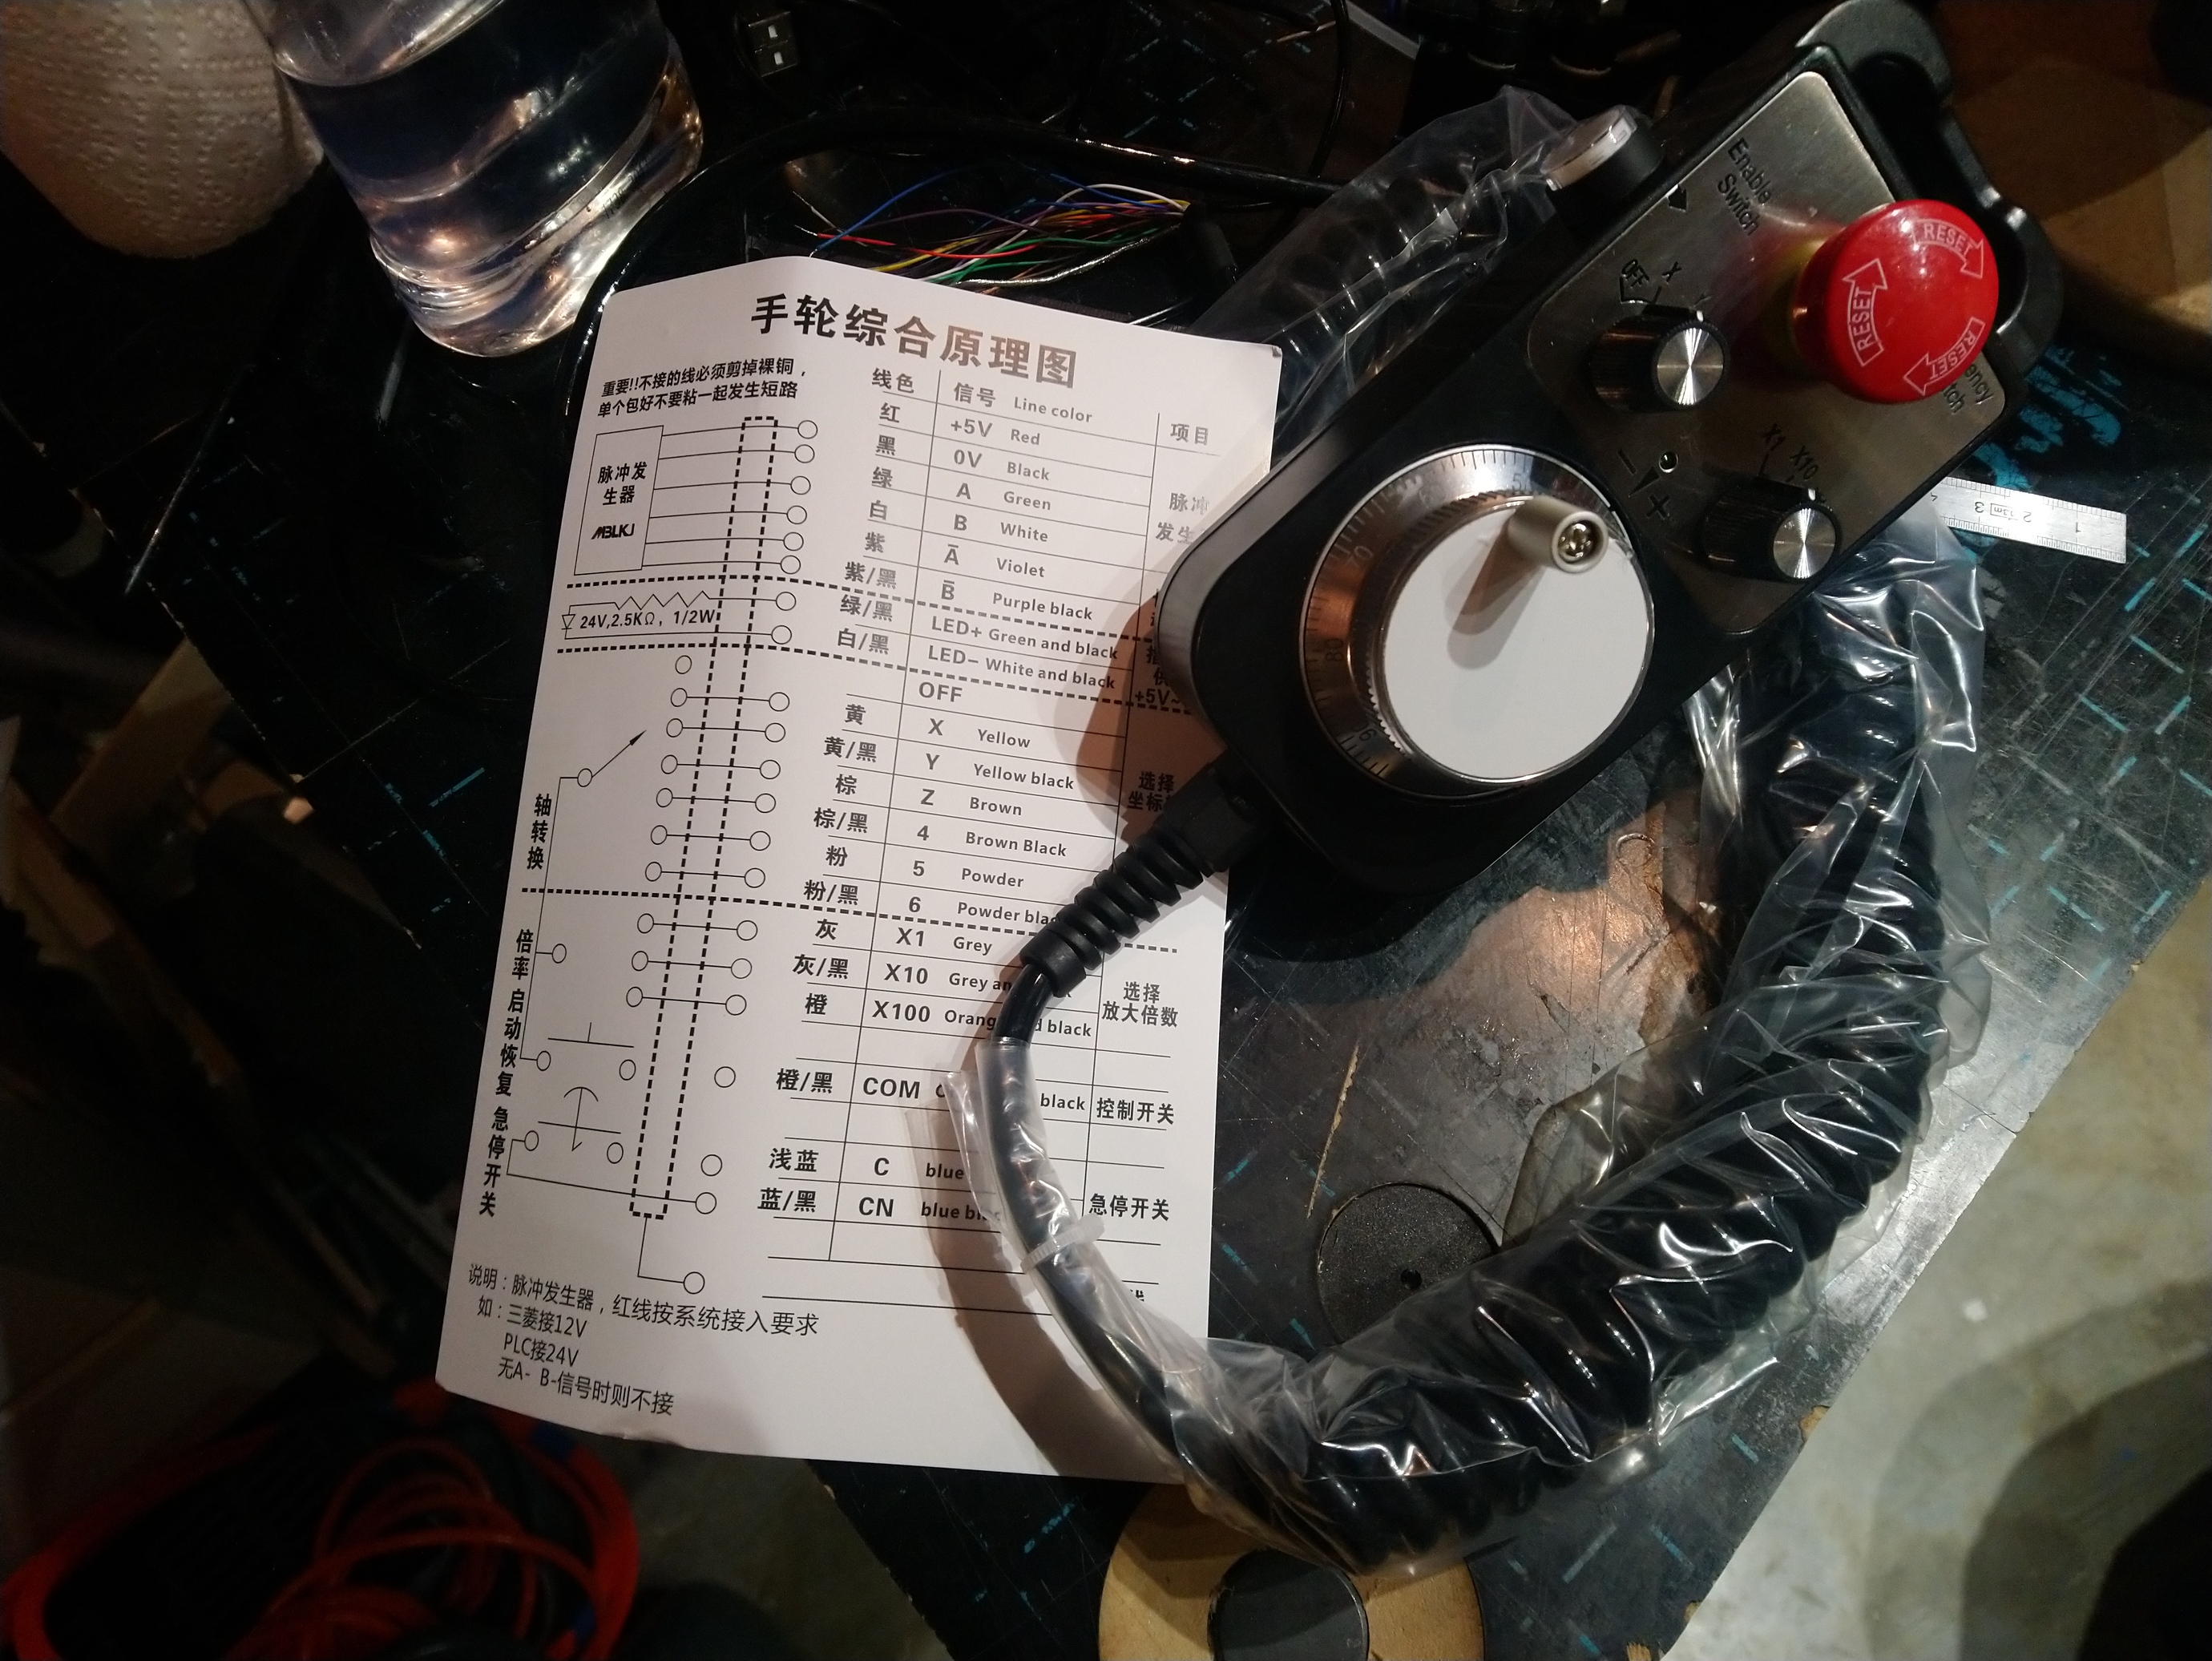
Got this in the mail tonight (less than 10 days from China to here, not bad).
I guess I know what I’ll be doing this week-end !
Wow, yours came with documentation…
Let me know if I can help. Good luck!
I rummaged through my drawer of arduinos and picked a 5V one that should work/fit in the case, and your code will be a great time saver, thanks again!
Maybe just one question : on mine, the pushbutton on the side is hardwired to open/close the selector buttons circuit internally, there is no pre-existing wire to read the pushbutton. I suppose in your case it did not matter since you rewired/soldered everything internally ? I’m hesitant between rewiring everything, and just leveraging the existing cable and plugging the arduino at the far end of the cable. Did you solder a USB connector at the end of the cable and reused 4 of the wires to carry the associated signals ?
I opened the back cover and…broke two of the six screws in the process (it would be fun to know what went in the material, not a lot of metal I guess), however the front panel/knobs are good quality, and feel right.
All the switches were broken out on the cable but had no ground wires connected so somethings didnt work and the wires were cut short so I had do some careful surgery to expose more wire solder and shrink tube.
I wired the arduino to the existing cable because I didnt know if it would work.
I havent actually had the time to put the mini in the box yet. Too many higher priority projects that are not getting done either stand in the way…
But yes I’m going to just reuse 4 wires to put the usb connector on
(OP, let me know if this is getting off topic and I should fork to a separate thread instead)
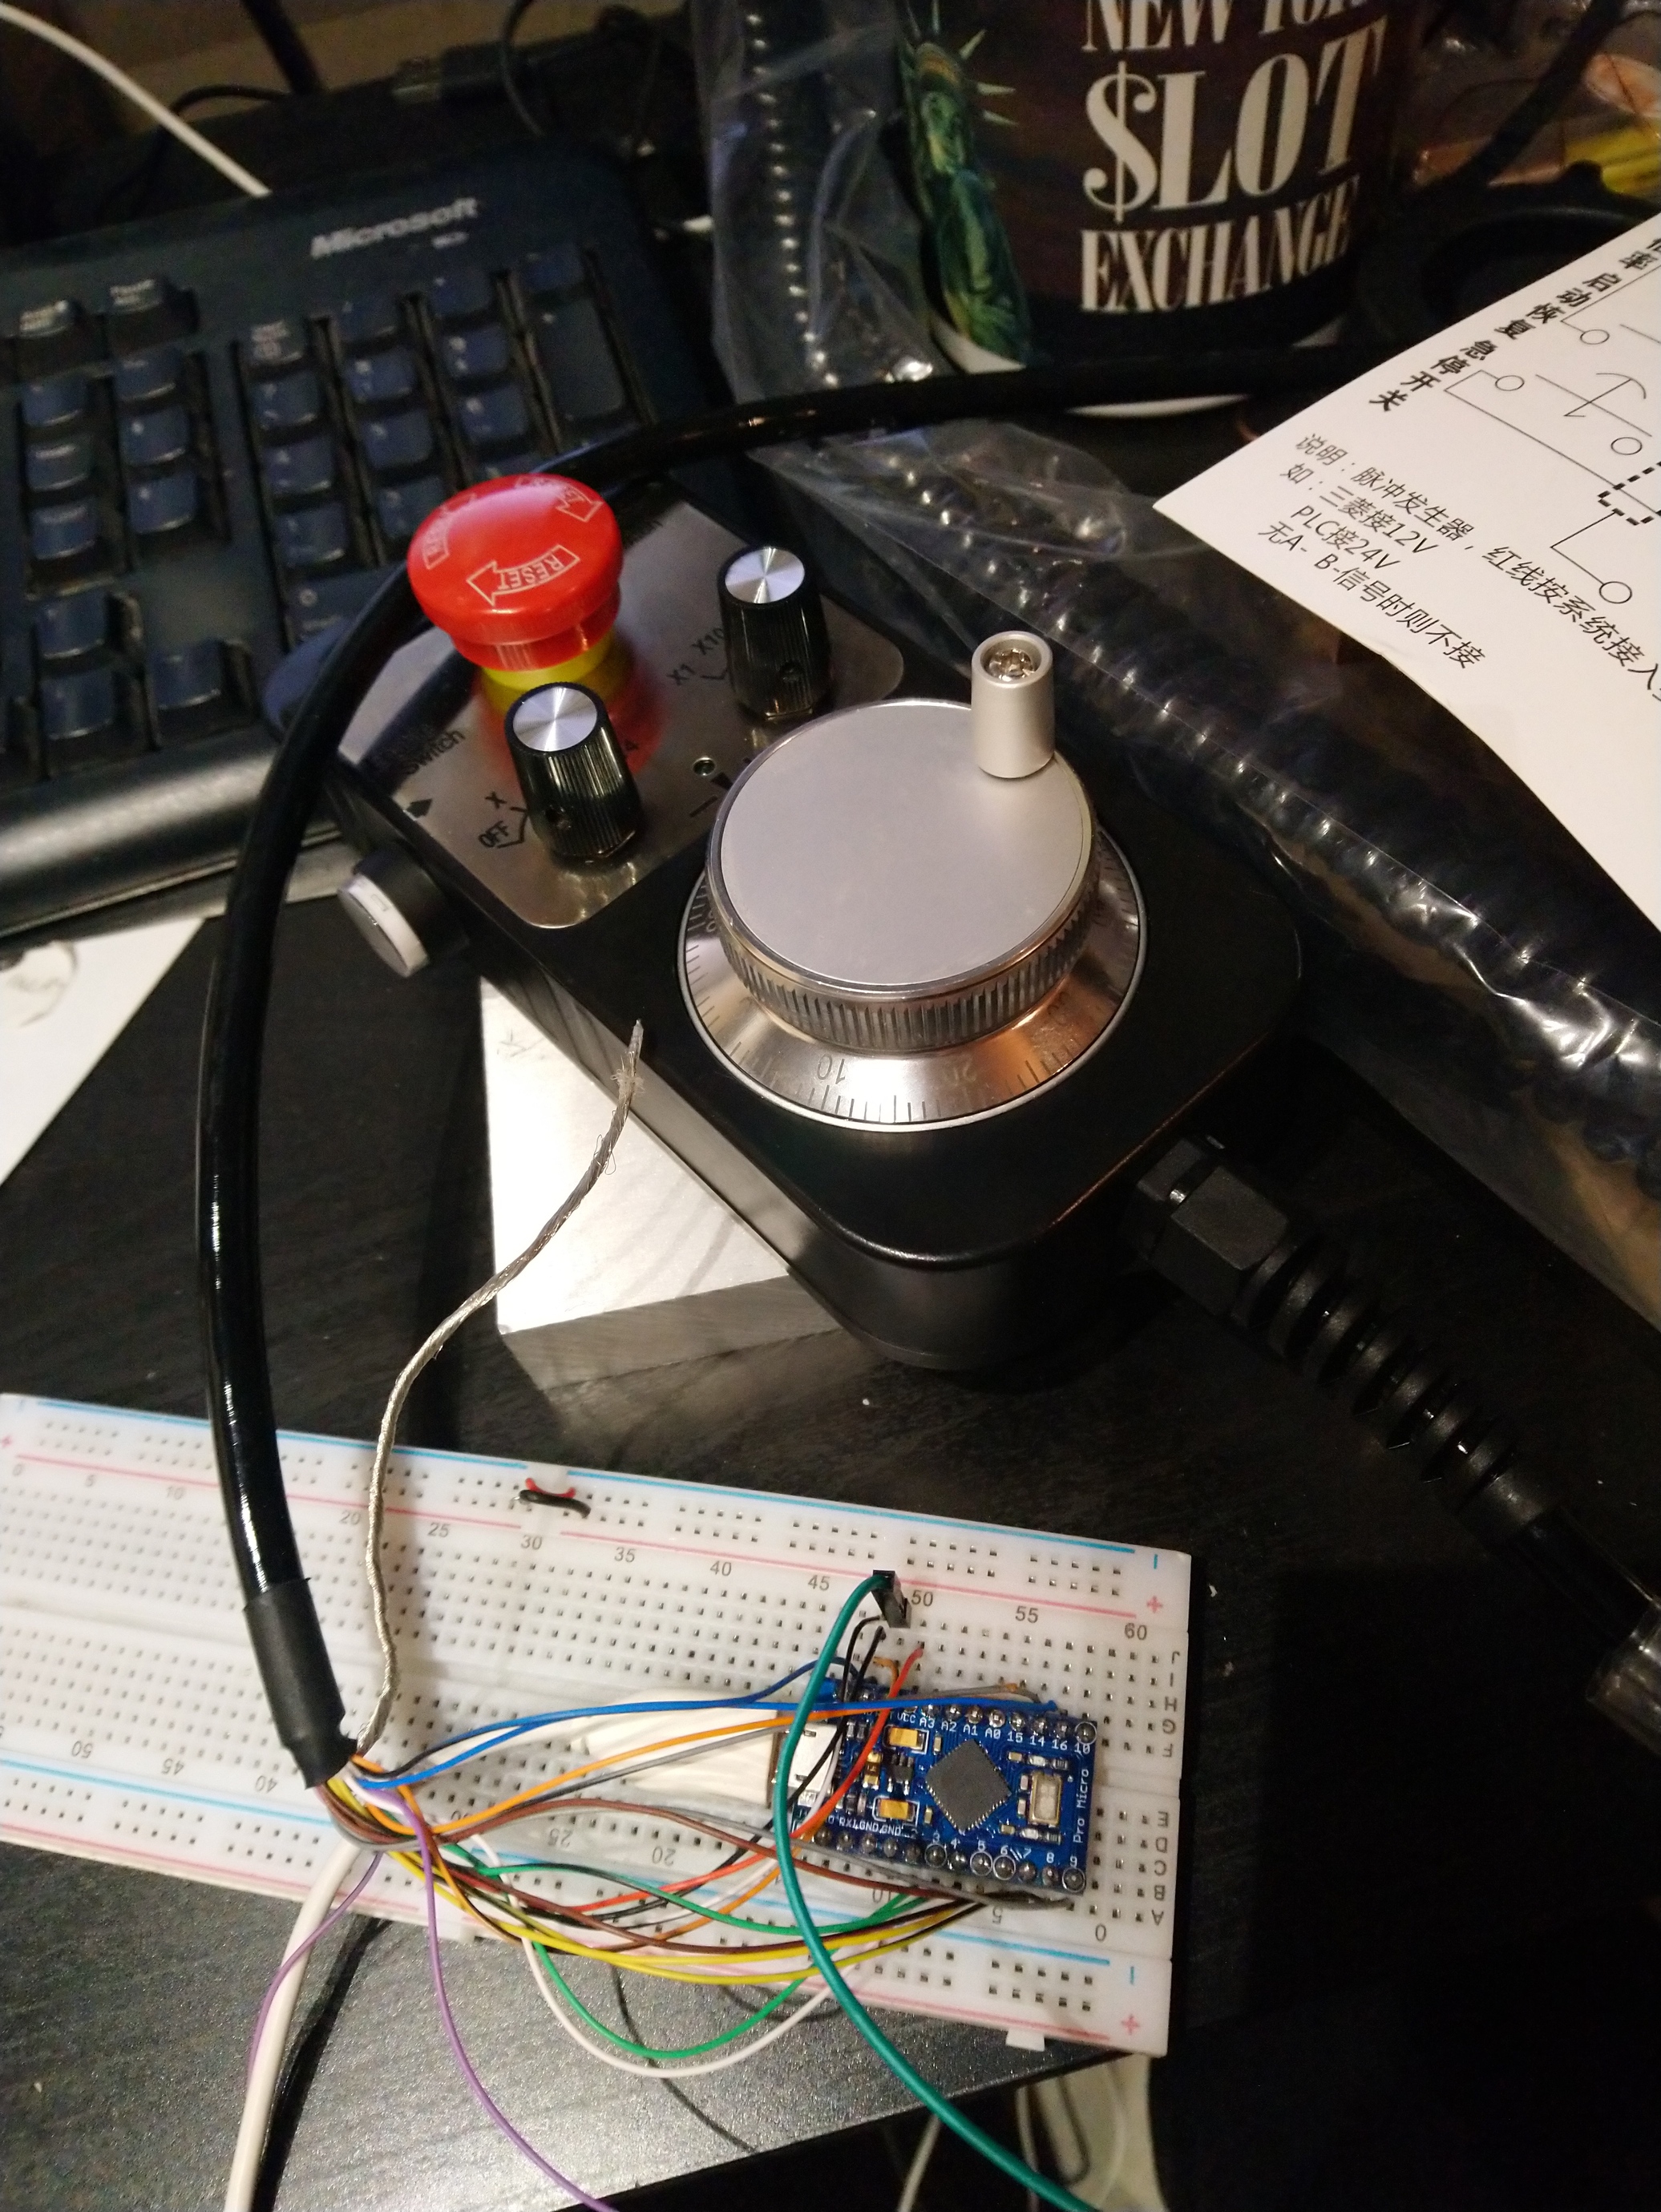
Hi @npross, your code worked like a charm, I modified it to match the wiring in my setup (arduino pro micro, on a breadboard for now) and the fact that I don’t have any direct signal to the enable pushbutton, so I added a bit of code to determine its activation based on whether at least one of X1, X10, or X100 is read as active (when the pushbutton is released, it breaks the circuit internally so all three read as inactive).
I checked that it sends the right keyboard keypresses, so I could probably use it with Motion as is, but my main gcode sender is CNCjs. I’m proceeding to try and modify the code such that I can use the dial speed to automatically adjust jog distance/speed. And since CNCjs (apparently?) still does not provide a native way to use GRBL 1.1 smooth jogging commands, I went straight down the rabbit hole of developing CNCjs pendant code so that I can send whatever GCode command sequence I like. I’ll report here when/if this turns out to work properly.
Excellent, I’m looking forward to trying out grbl based jogging.
Good luck!
Reporting from deep down in that rabbit hole. I definitely wanted to add smooth jogging ($J commands) to CNCjs, since this is the one thing that it does not have by default (and that works like a charm in CM).
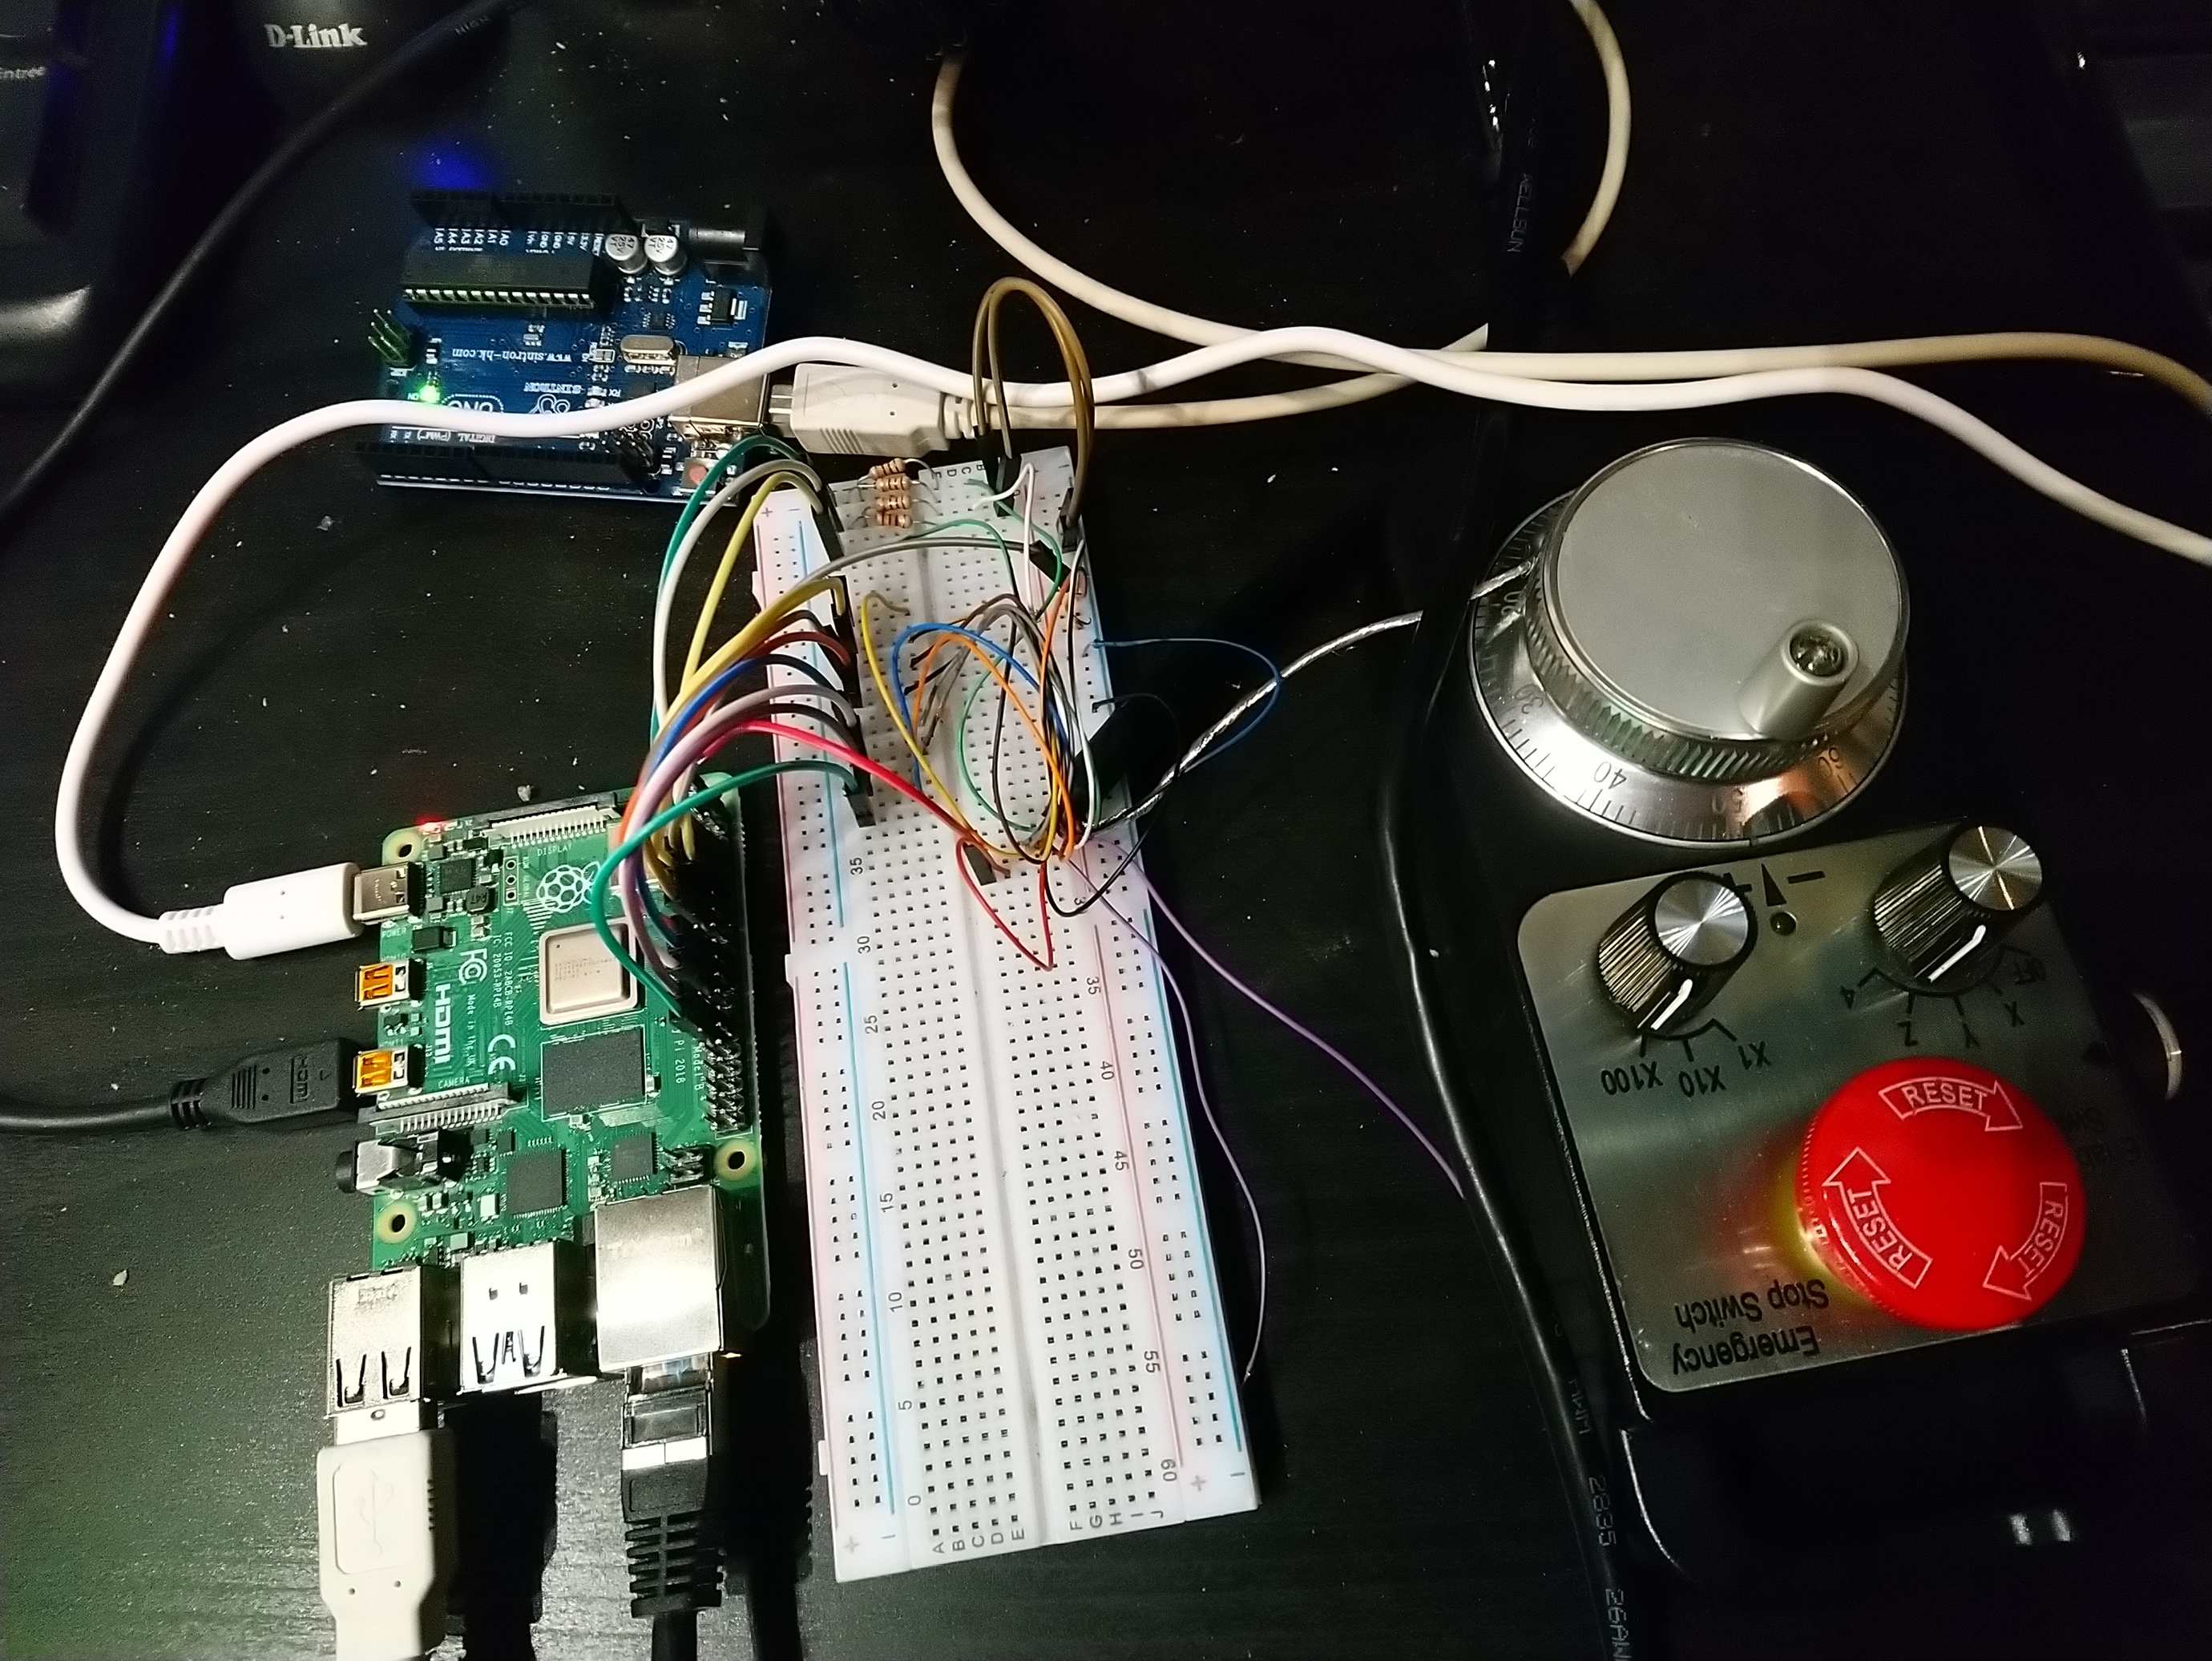
Since I was not going to achieve that by “just” emulating keyboard presses (which is intrinsincally limited to the keyboard shortcuts that happen to be implemented in CNCjs application), I restarted from scratch in another direction, by implementing a pendant that connects to the CNCjs server and can issue arbitrary G-code commands. Which was also the opportunity to migrate my CNCjs server to a Raspberry Pi, just because it is 10x better documented than its Windows counterpart, and I could then leverage the CNCjs pendant samples to kickstart everything.
Since testing with the Shapeoko was going to be cumbersome (and dangerous…my code would certainly send the gantry crashing in no time during debugging), this was also the opportunity to install GRBL on an Arduino Uno, simulating the Shapeoko. Works like a charm.
I’m not quite there yet, but I now have a setup ready for implementing this behavior:
I tricked myself into spending too much time on this to let it go now, so I need to see this thing to its end, I will be reporting on the final results later. Whether that will actually be useful/pleasing to use is another matter. I may also implement a version that connects to Carbide Motion instead of CNCjs, we’ll see.
Awesome, really looking forward to the results.
You’ve made me dig out an rpi and put it on my bench in anticipation… this will definitely be the catalyst that gets me to try cncjs.
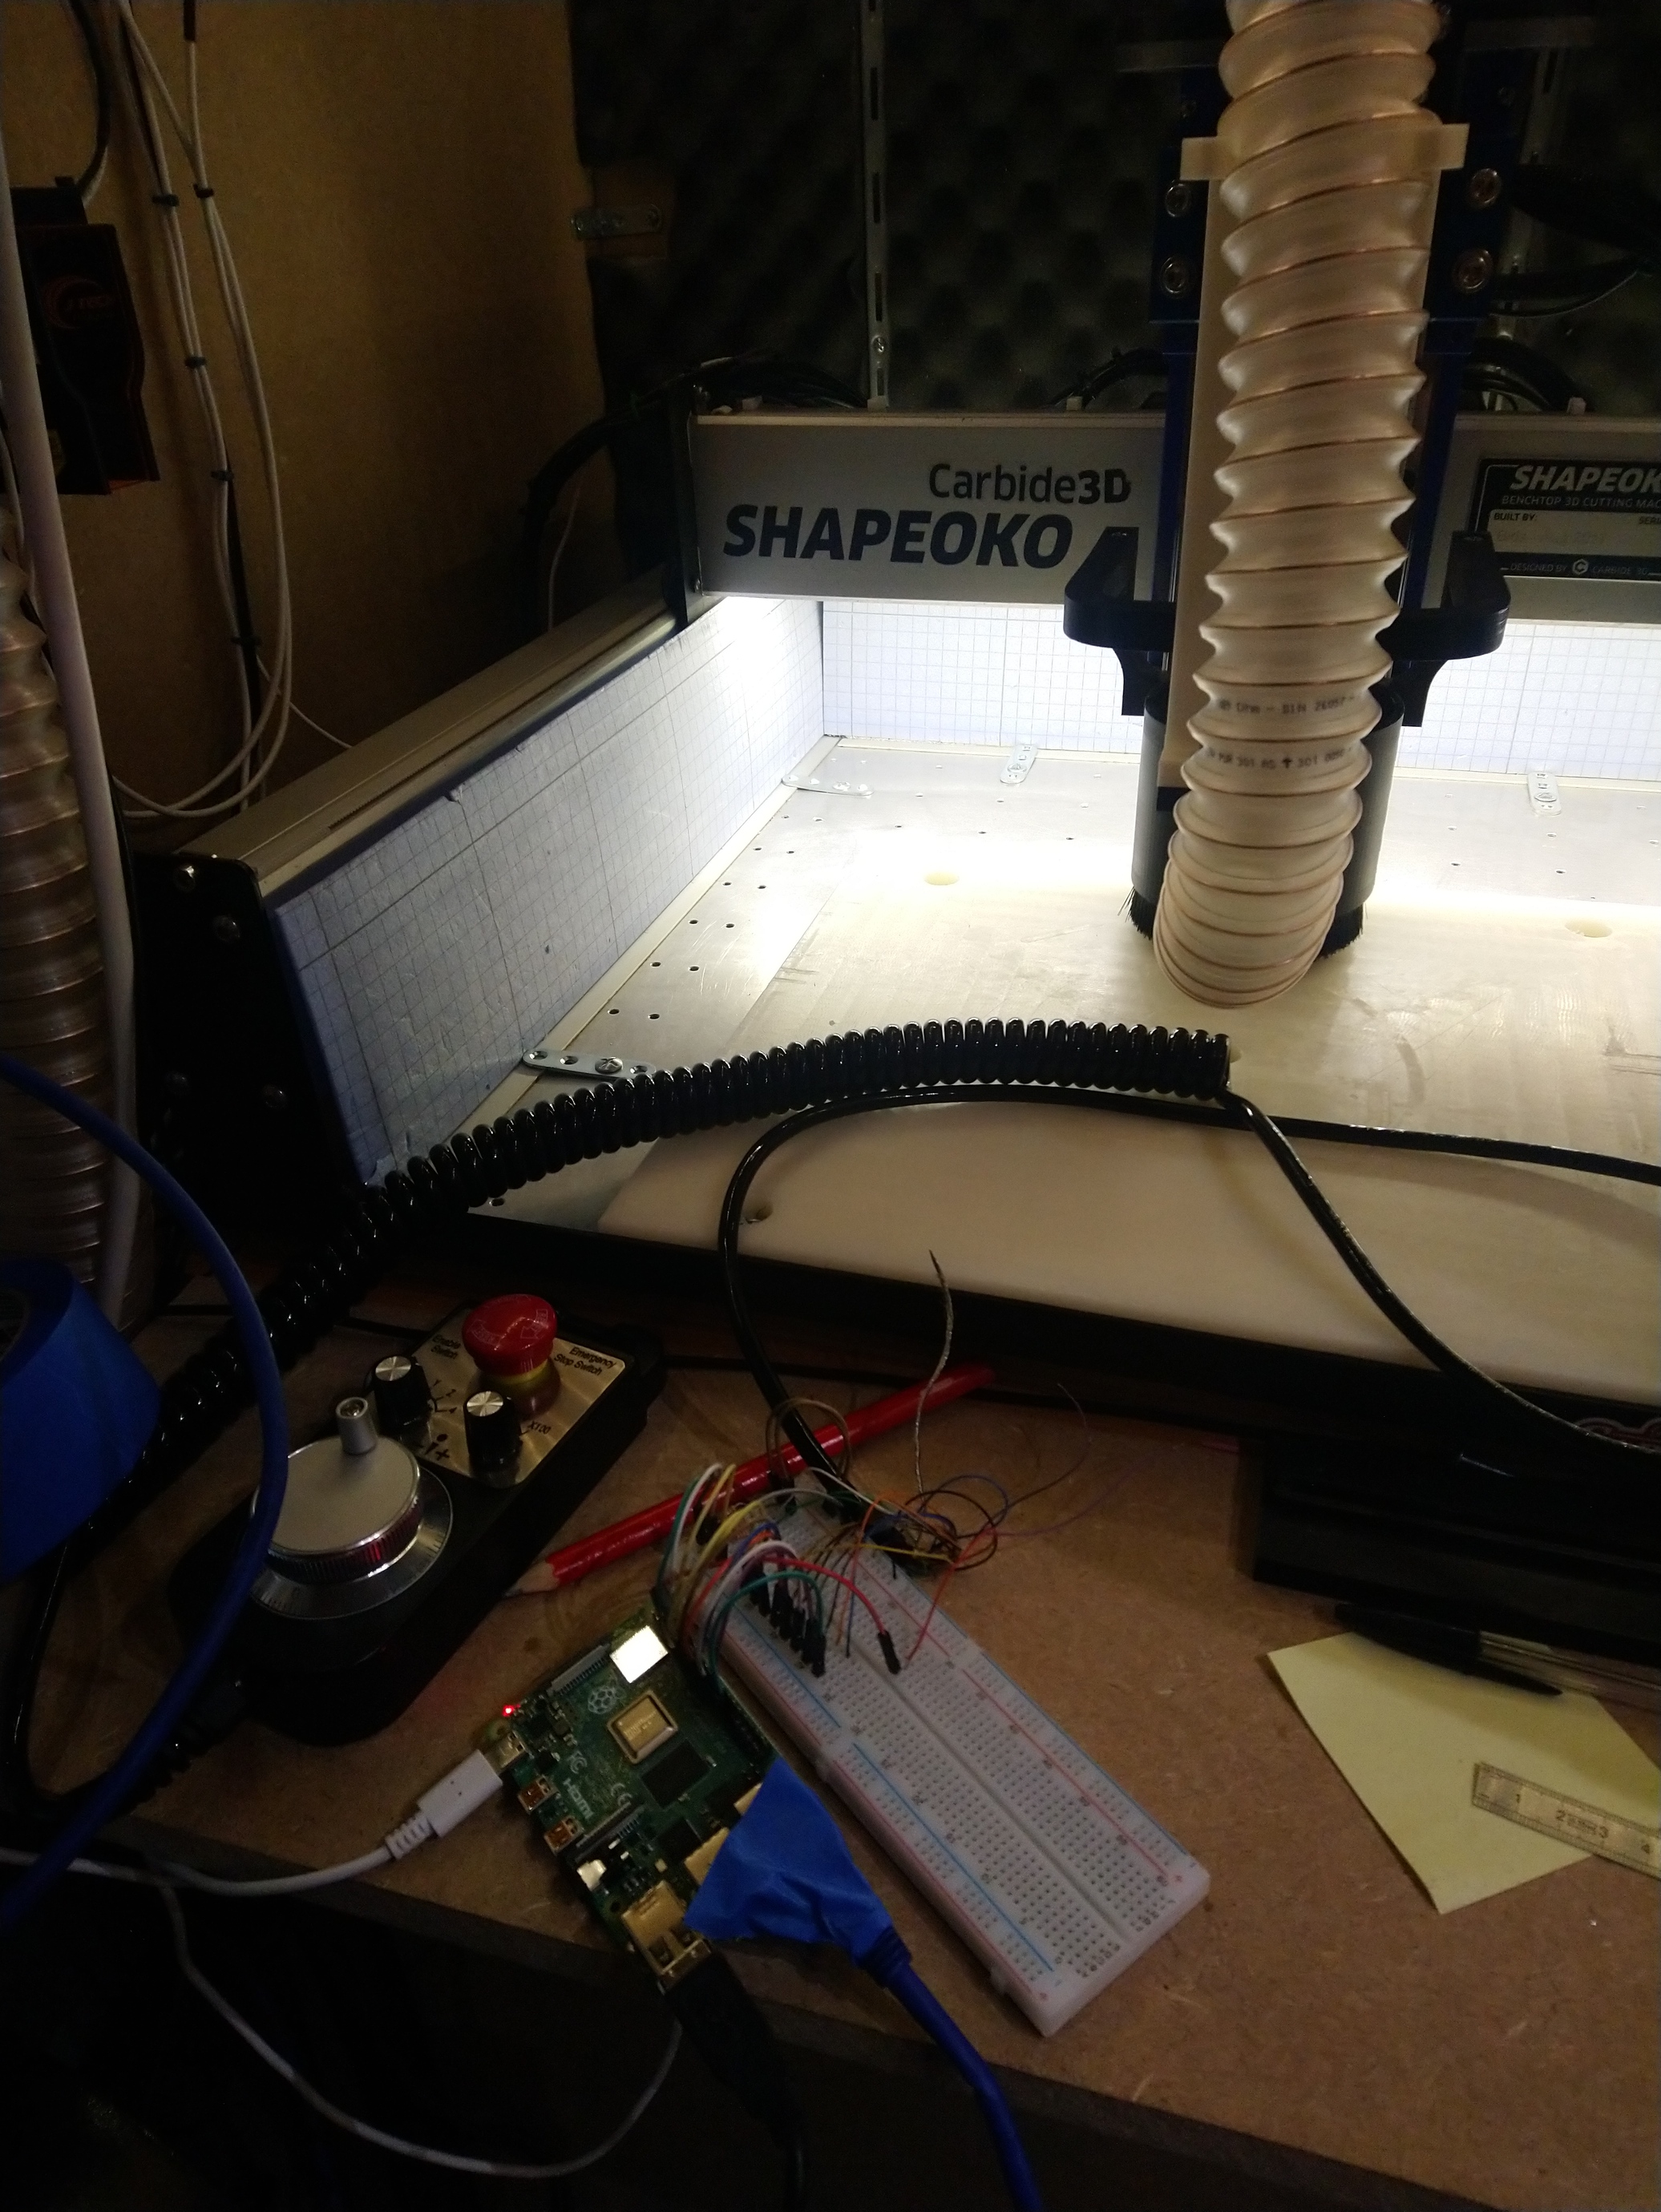
It’s alive ! First step-jog using the pendant, connected to the Raspi running CNCJs, itself connected to the Shapeoko. Makes for a great geeky evening.
The step/smooth jogging logic is in the code (small turn triggers a step, continuous turn triggers smooth jogging, which stops as soon as the dial movement stops), I’ll add the $J magic tomorrow, and then address this mess of wires.
Also, with so many usable I/O pins left on the Raspi, and the ability to map ANY g-code to each of them, I can think of a few additional things I want to try (aaaand…just like that I just went deeper down the rabbit hole…)