Standard counter height is 30-33". Like kitchen cabinets and so on. When I built my kitchen cabinets I made the top height 32". I wish I had made them slightly taller. When I wash dishes in my deep sink I have to stoop over. Now running a CNC is not washing dishes but you want a comfortable height to place material on the spoilboard.
It would be possible to double insulate the enclosure and just have thick doors. Ports on the sides and back are a good idea but building a frame and being to lift the whole side would be more helpful. Plus you need a good height inside for a vacuum hose to move around to the entire deck of the spoilboard. The gas shocks they sell are very cheap and help open and close the doors. Depending on your budget look at openbuilds.com about the alum extrusions to make an enclosure out of. They bolt together and if you need to cut them it can be done with a chop saw and a carbide blade.
You could make a frame for the enclosure with removable panels then you can just take off whichever panel is getting in the way, or all of them if you need to?
Here’s my Shapeoko 5 Pro. As you can see, I hate bending over at 74. I may not be able to get back up! LOL! This is my first CNC that I just got last month and I already have clients to help pay for it. Trying to decide if I should go with CC Pro for 3D. I have over 30 years experience with different CAD software. I don’t think I’ll put an enclosure on this. I already have bluetooth headphones and wife stays inside if she hears my machine running.
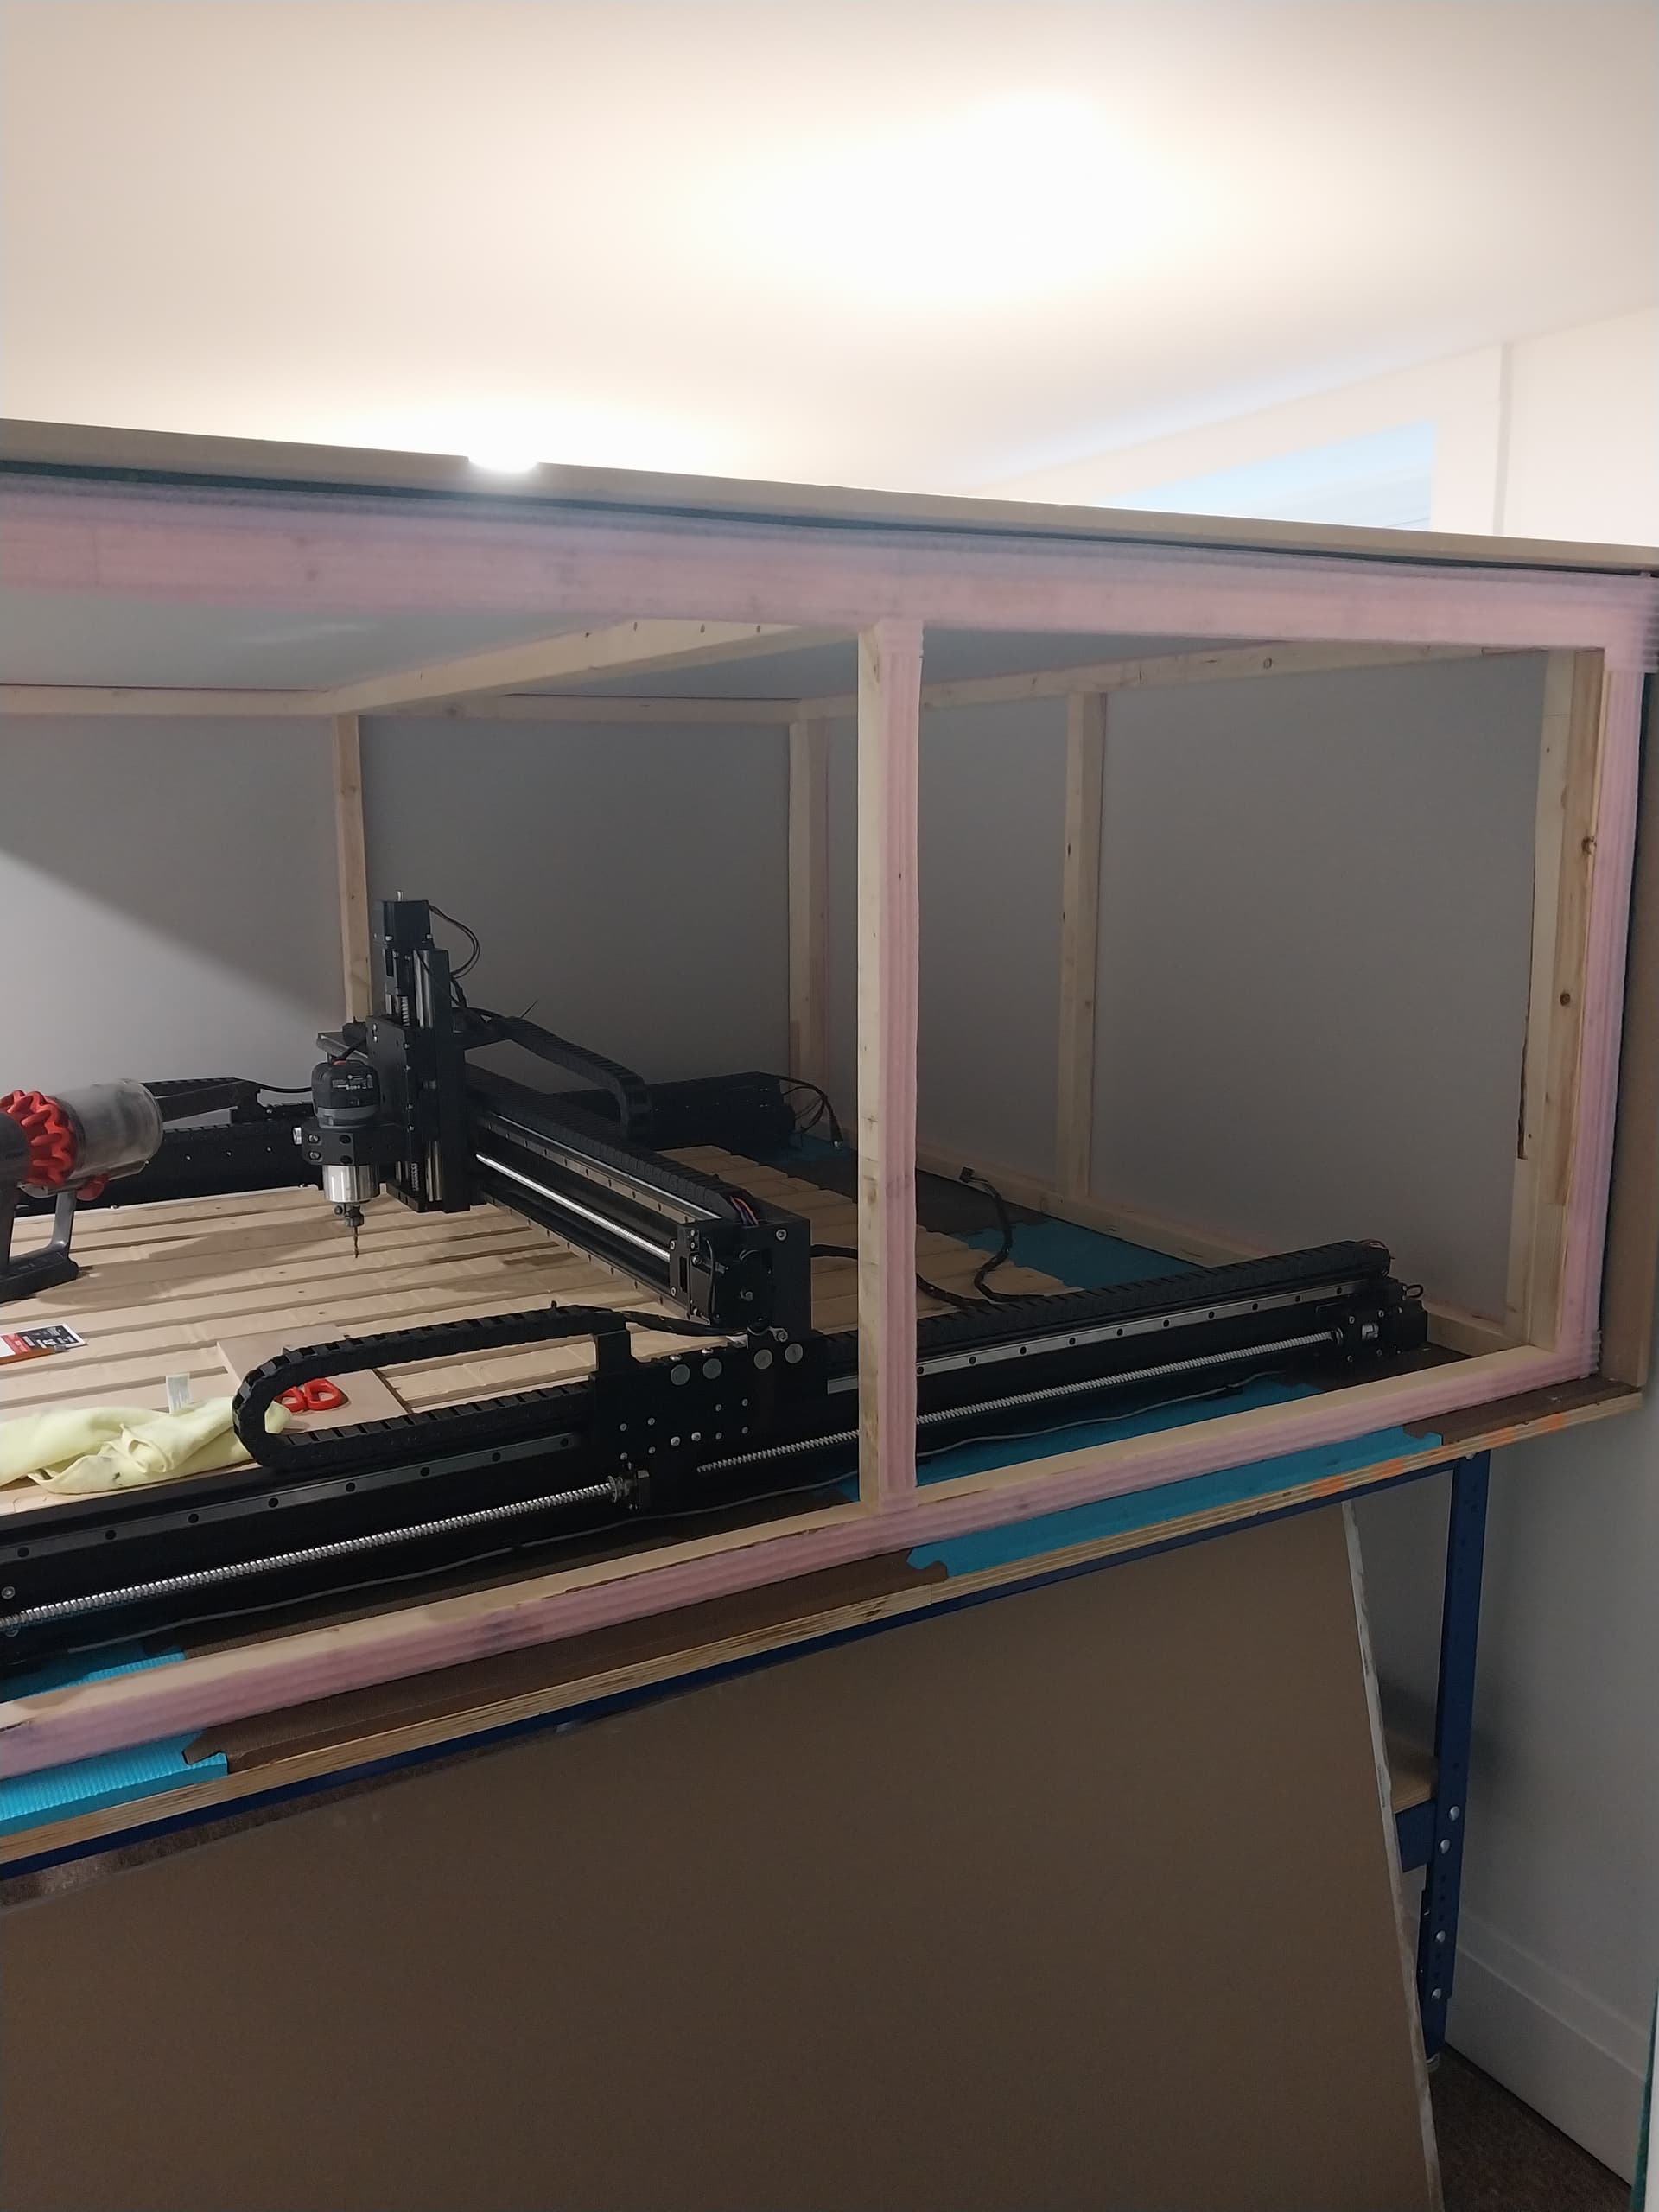
Well we e moved into our new home, and I’ve done a mock-up in the garage. I don’t have good pictures of my assembly benches, but I had some fun making this mock-up of the cnc table. 70x70, with the cnc bed at about 36 inches. It’s even on a (very rickety and cobbled together) set of casters. Nice to see that I’ll have plenty of room to move about, and having it on wheels is amazing for flexibility of the space!
I am retired and moved into my forever home 8 years ago. I have moved many times in my life and this is the last place I will live voluntarily. The moving process is stressful but eventually it will settle down and become a home.
Looks like you have a nice shop space. Now comes the hard part of spending the money to create your table. A few months ago our woodworking club was asked to make a cabinet. It was 24"x24x65" and the estimate was 318.00 to build a small cabinet. Luckily I got our club members to donate most of the material. The customer was a senior citizens center sewing club. I was amazed at how much plywood and the misc materials was. So good luck with building your table.
Yeah… I’m not excited about the startup costs of this adventure, but thankfully I have some savings set aside for this.
Griff
(Well crap, my hypometric precursor device is blown…)
72
Some food for thought for you.
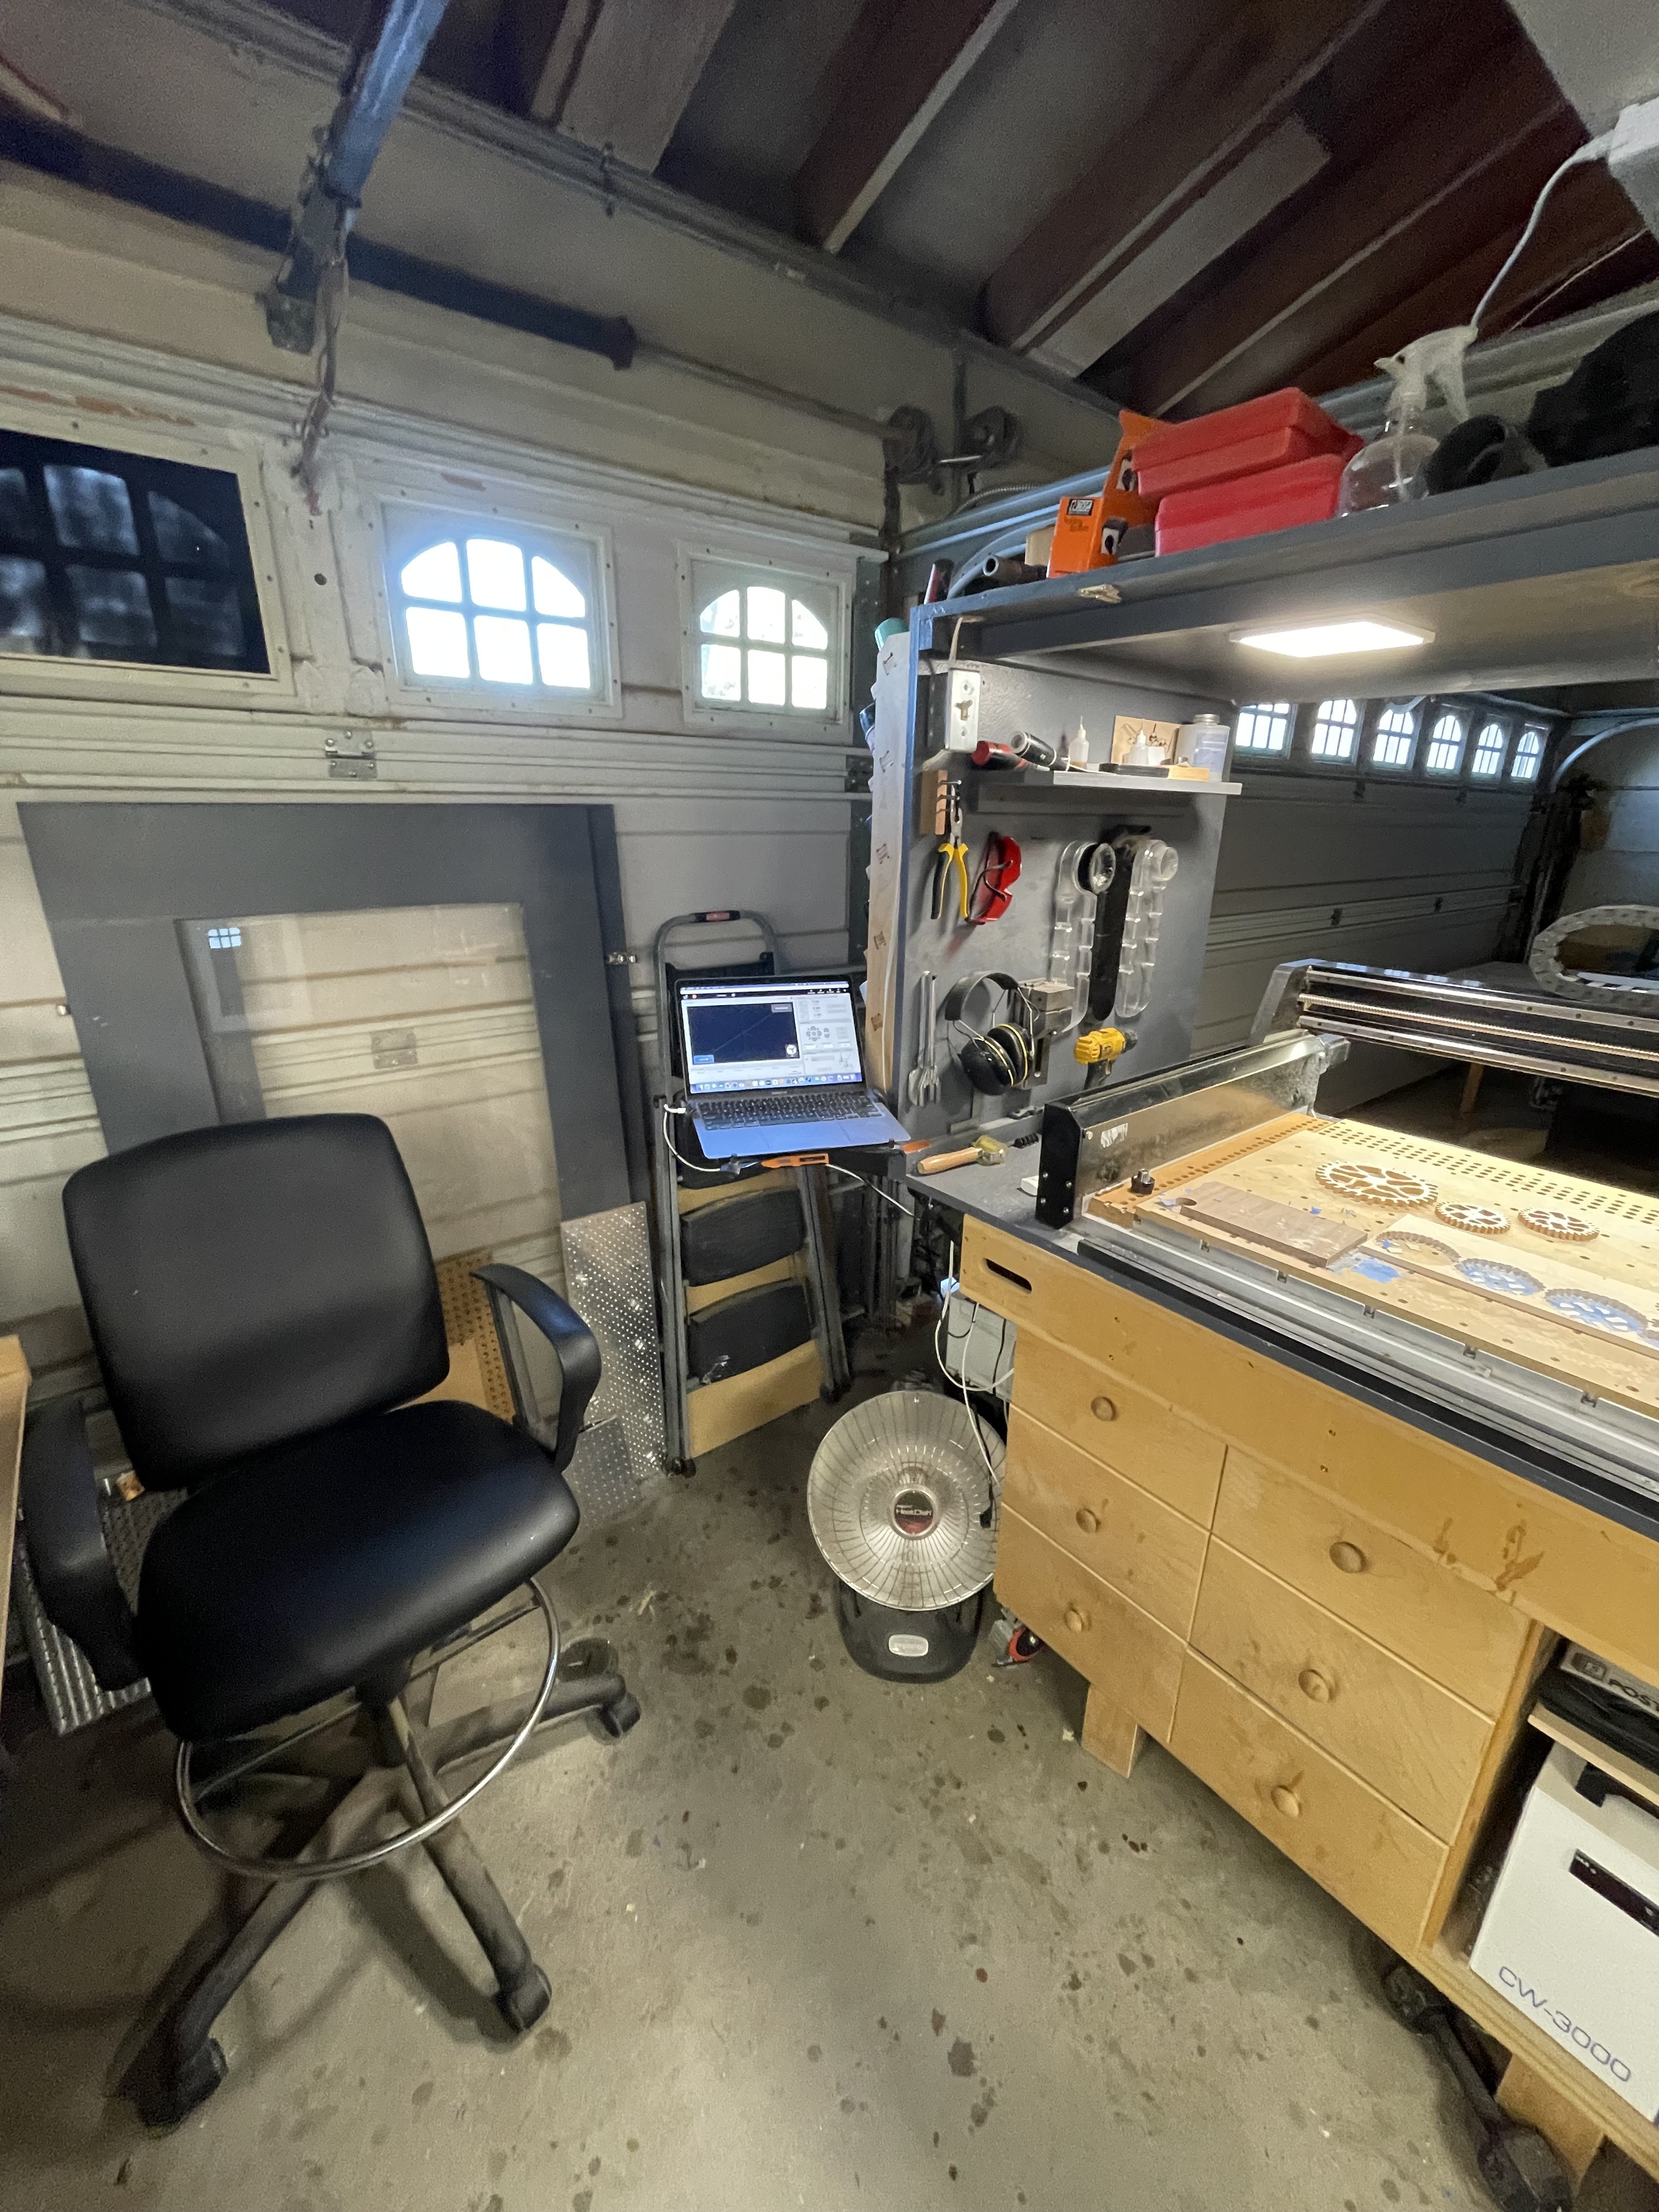
These pics represent my 4th iteration of CNC work space. Please excuse the mess, deep in the process of building a wooden clock and haven’t done a clean up in a few weeks.
The MacBook Air is overkill but convenient. I appreciate being able to swivel from my wok station to the CNC.
I built the cabinet and torsion box years ago for my original SO3.
Dust collection on the opposite side of the garage, shop vac-in-a-box with separator on top.
So, there it is, the glorious mess I walk into every morning. Use what you like, chuck the rest.
Some advice: 1 - crawling around on the floor changing tools during a multi tool job, performing maintenance, setting up fixtures etc is not fun. 2 - Making an enclosure with a too-low top (a headbanger) is not optimum.
Well, I finally purchased the CNC! S5Pro with VFD, end mill starter kit, and a few other odds and ends! And thanks to Black Friday, I will get the compact router with it! So now I need to find a good palm grip or router table to pair with it!
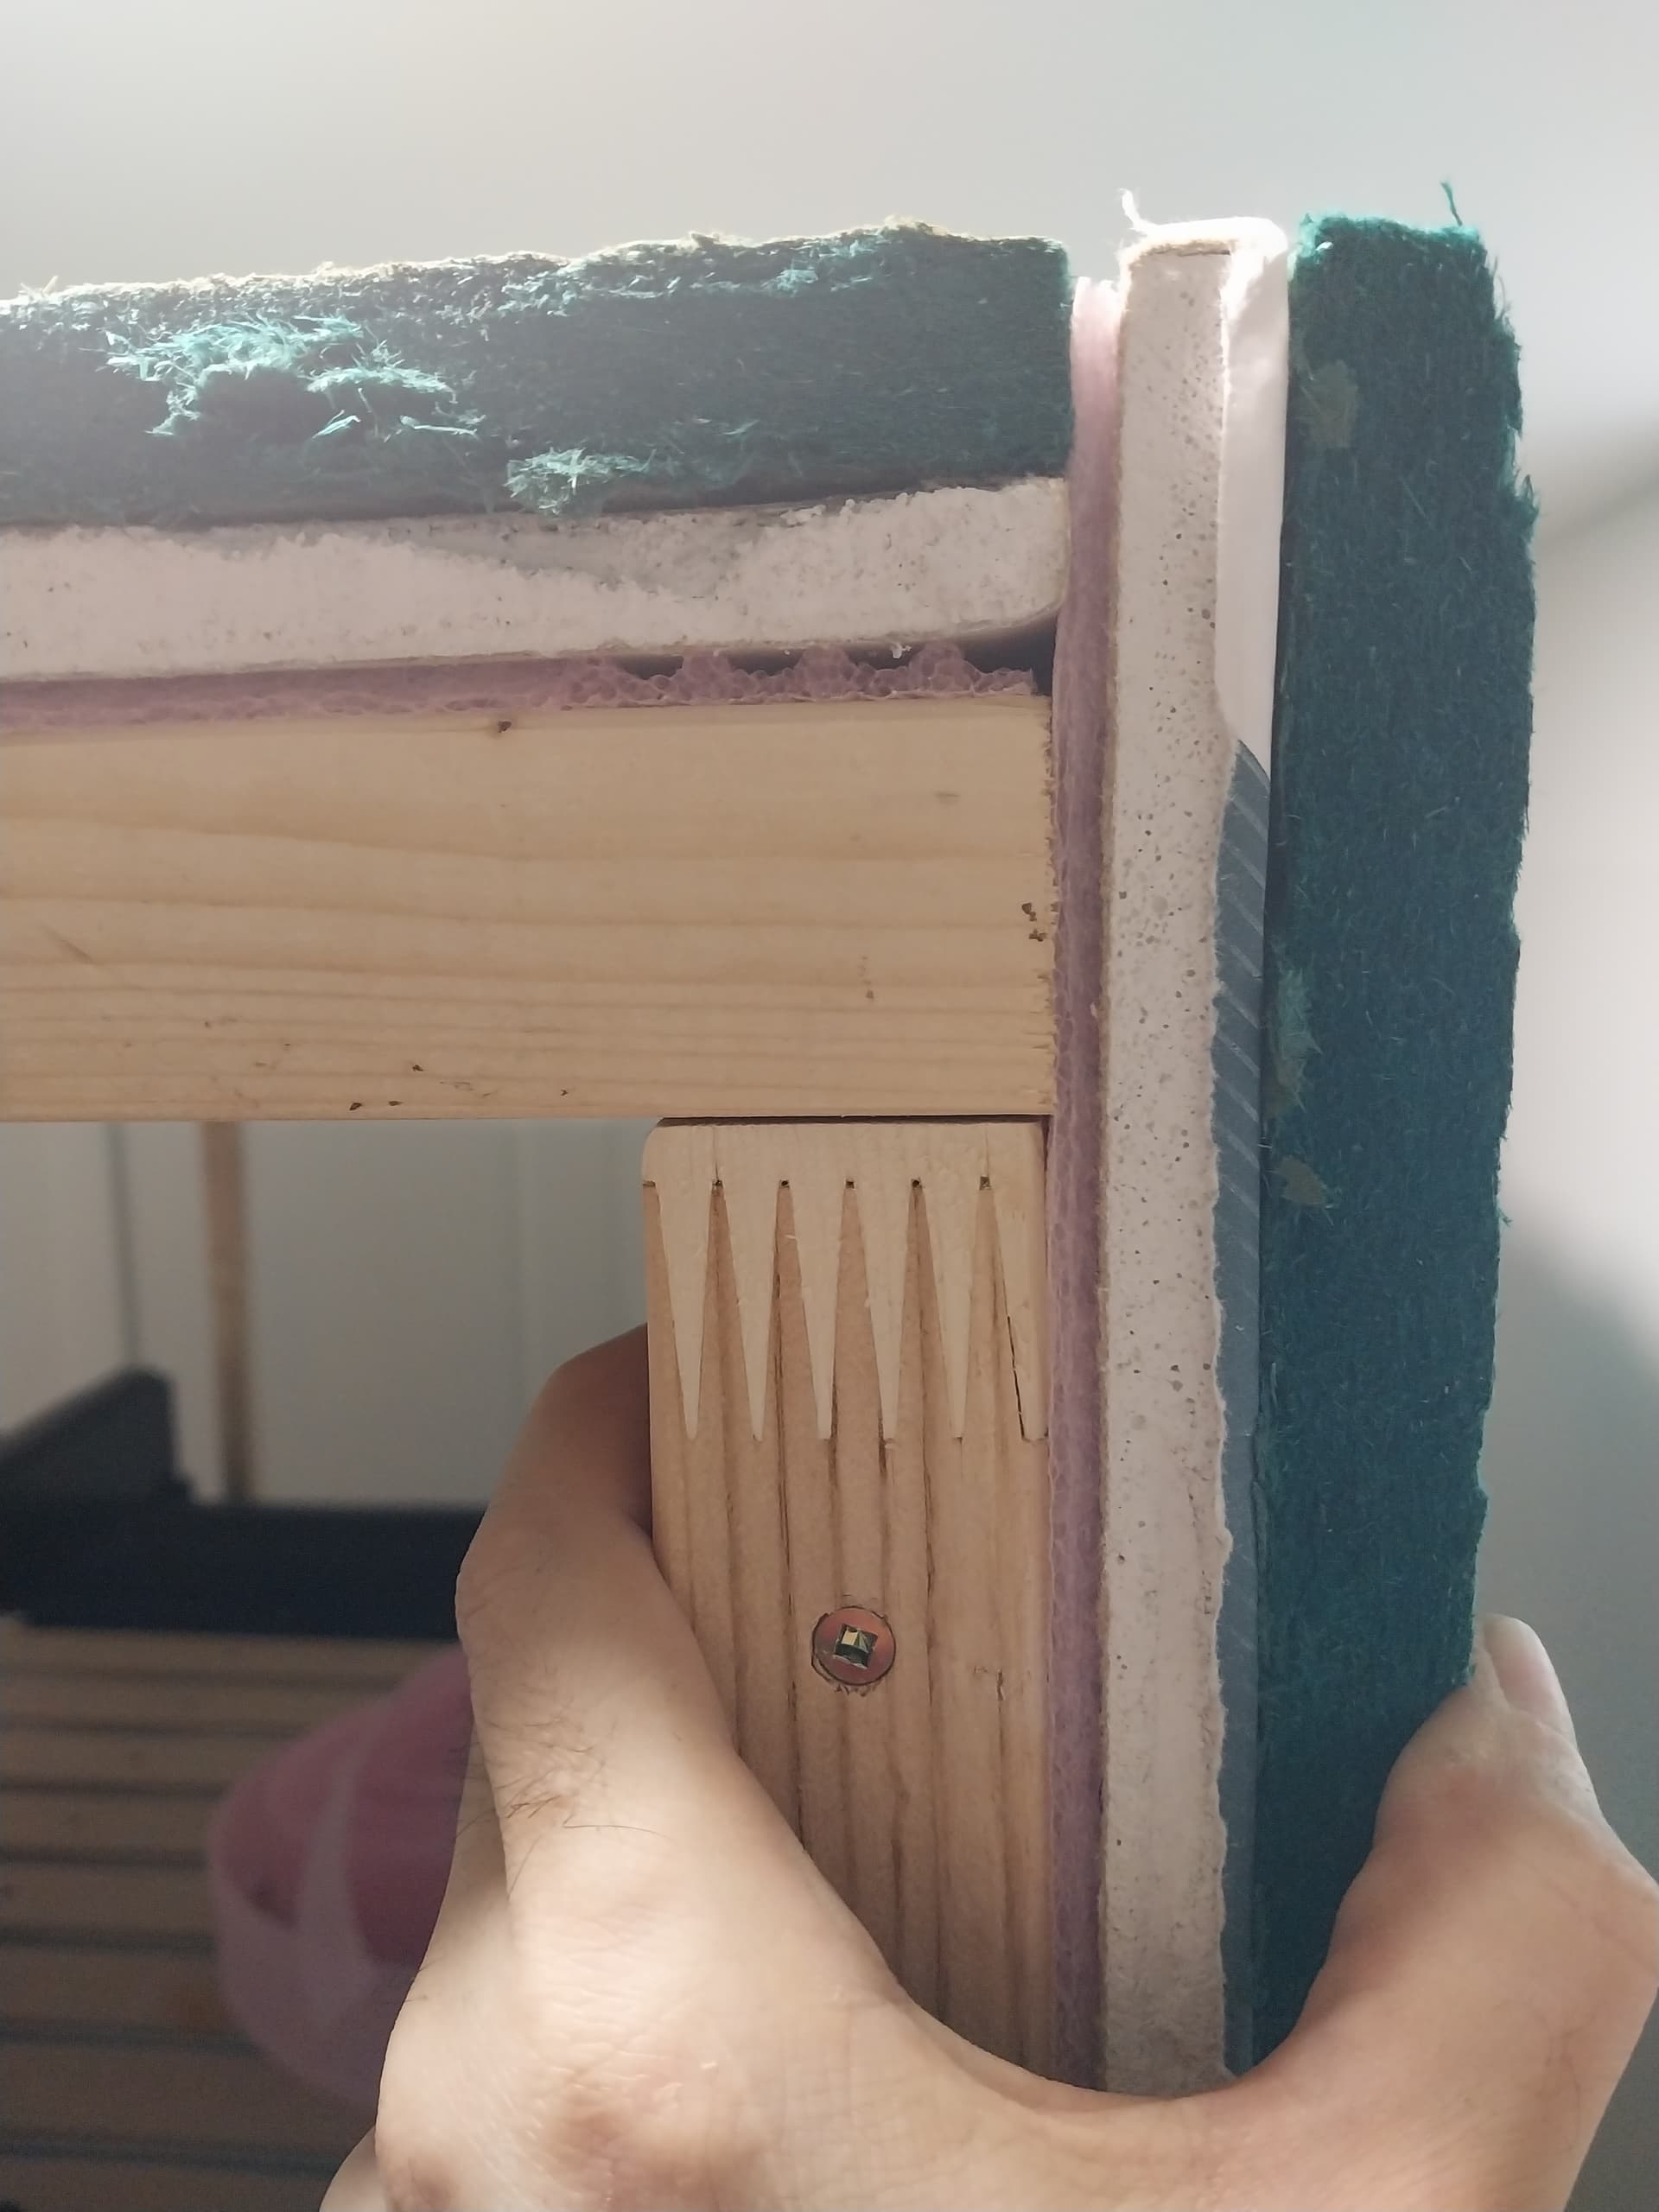
Well here’s my enclosure I just finished, after my neighbor complained about the noise when I had the machine in my 3 seasons room. I decided to move it to the basement where I can use it anytime, and lowered the noise from about 104 decibels to 70 decibels with the CNC and Vac running, which makes it easy to have a conversation with someone right in front of the doors while the machine is running. When I close the sliding glass doors to the adjacent room and sit at my desk about 5 feet away from this enclosure, I get about 50 decibels.
It’s built using 1/2" drywall, 1" SONOpan (green stuff sold here in Canada), and 5/8" MDF. The doors are just made of the MDF and 2 panels of Plexiglass with a gap between them. I could easily sound proof them more but after checking the decibels I don’t feel the need to.
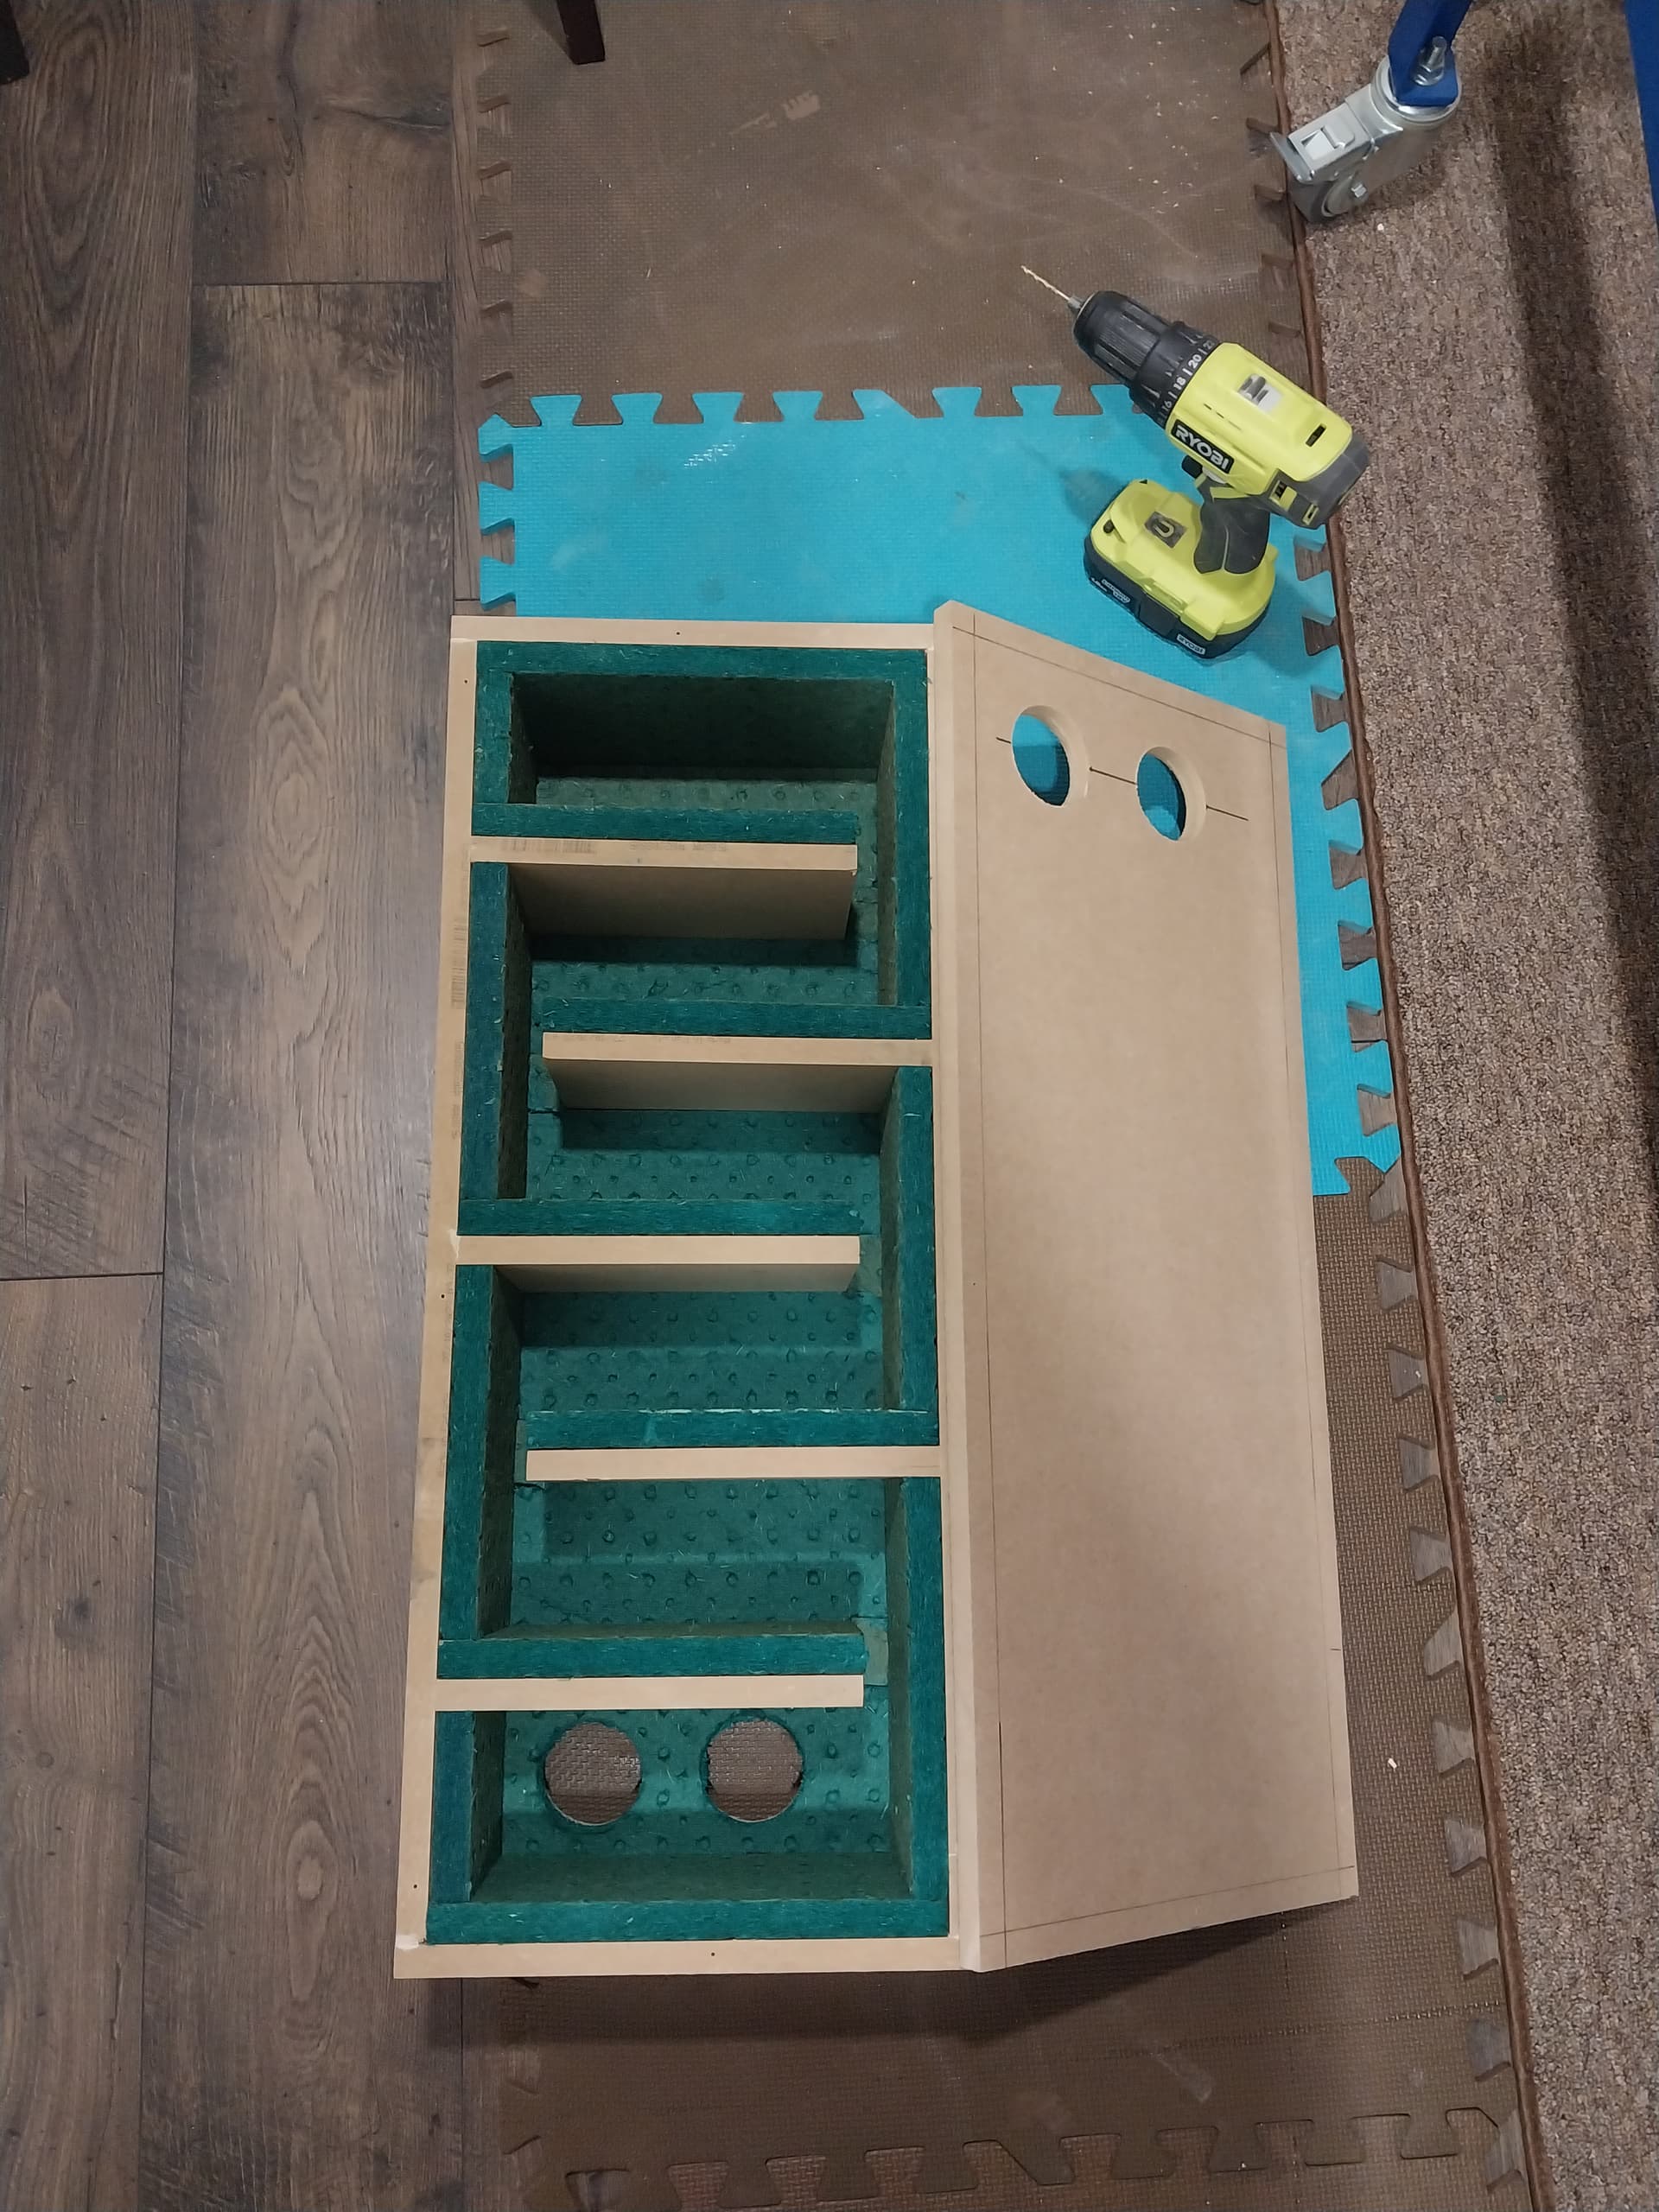
As for the vac, I wanted to make an enclosure, but after doing some research I didn’t think it was a good idea for safety reasons (possible overheating/fire) nor is it good for the vac. Apparently shop vacs can operating temp should be in the 0-40 deg Celsius range, but I couldn’t find any information on Festool. I contacted Festool and was basically told I should not put the vac in any type of enclosure, so in the end I ended up building a 3 wall enclosure with a piece of SONOpan on the top just to re-direct the noise a bit, and left a temperature gauge while running a job for about 2 hours. Top temp was about 30 degrees and the noise was significantly reduced, while the vac still has a huge opening for air circulation facing the door in the photo.
I have more photos of the build if anyone is interested, but one thing I want to pass on is the SONOpan stuff is fantastic. I did a lot of research into finding a good material to reduce noise that wasn’t difficult to work with, and ended up buying 5 panels (4x8’) of this stuff. You can cut it with a knife, or do a clean cut on the table saw, but its excellent on muffling sounds, so if you’re from Canada it’s easy to get from homedepot at an affordable $30/sheet.
I love this. Would you mind sharing more photos? I’m Especially curious of your Vac “enclosure”. I wonder if an enclosure with dedicated exhaust would be a bright idea. you could make a labyrinth’d exhaust lined with the sound proofing panels if you have the space. Or just a hole with a fan.
Definitely going to be looking for something like that Sonopan for my enclosure. I couldn’t find a nice 4x8 sheet on USA lowes or HD.
No problem, first photo is basically how I layered the sound proofing, with the MDF on top of the sonopan. I used 2x2’s to build a frame that everything was attached to, and I have 3 screws holding each side to the frame, so if I ever need to access any of the sides I can do so by removing the 3 screws and taking down the side. To your point about the exhaust, I created a baffle for that reason with MDF and sonopan that I later attached to one of the side panels with 4 L brackets and a piece of ply for it to rest most of the weight on that is attached to the table. I ended up editing the baffle a bit after this photo because I wanted to create less negative pressure after testing the enclosure, so I added two more holes and shortened the length of the baffle dividers. Now when the vac and cnc is running, the doors get slightly pulled in with the negative pressure which I like.
The enclosure for the vac was created with 2x2’s just like the main enclosure. Picture three 2x2 square picture frames screwed together created a “C” shape if seen from above, and then covered in sonopan and drywall. One piece of sonopan is just resting on the top and the rest of the enclosure is left open for air flow. This Festool has air vents on almost all sides so I made the enclosure big enough to give it plenty of space to vent. The sonopan deadens the noise really well, so while it’s a simple enclosure it ended up working really well and shouldn’t kill the vac’s lifespan since the entire room still gets warm from it while the temperature around it stays around 30 degrees at most.
I read sonopan is mostly sold in Canada and it’s the first time I’ve used it, but having used it I’d definitely use it in future home reno’s for sound proofing.
Like your plan and hope you don’t mind if I copy a bit. My shop is in my garage and I still need to get the wife’s car in it so have a unique issue and question about your table.
My plan is to make the table like yours with an open front, but make it a bit higher so I can fit my table saw (on wheels) under it. I expect top of the Shapeoko table will be about 40”.
I’m concerned about the open front though, when moving the table as I’d expect to have to do periodically. I’d prefer to go a bit light with ply like you did. How sturdy is your table when moving it with the Shapeoko on top?