The GT2 tooth profile fits into a 1.2mm 60-vee groove almost exactly, which was a nice discovery.
2 Likes
How often do you guys tension your belts?
I snapped the Z belt after only 50 or so hours on the machine, so replaced the Y belts and plan to update the X belt when installing the HDZ - no more science to my reasoning than one failed…
That aside, I am just curious over ‘correct tension’ and the various discussions around that. So tinkering with tension is the issue, and coming up with a funky clamp the challenge.
1 Like
Every other Thursday night between 8:53 and 8:58. You?
4 Likes
I check my belt tension regularly and would appreciate being able to make fine adjustments without a hassle utilizing my little tension gauge I am making. Is there a slight possibility I am spending too much time on a tensioner? Yeah… This project has been a lot less complicated then my hose pulley system which took me a month though lol. Think I have issues?
Ask me about my 35 year Corvette project sometime 
My next big project:
1.5 and 2.2 KW dust boots for the S3 HDZ/upcoming S3Pro with a built in attachment for air nozzles!
A dust boot that fits larger spindles, with built in air blast nozzles and a ramp for the chips to evacuate.
5 Likes
…
![]()
2 Likes
Don’t get me wrong. I love seeing multiple solutions to the same problem. Creativity and ingenuity are two of the best things about this forum.
I’m a little embarrassed to say that I don’t remember the last time I checked belt tension. That’ll change when something snaps I’m sure.
2 Likes
It’s actually pretty quick and easy.
I left the sharpie marks on my extrusions and just stick two old blunt 1/4" cutter shanks under each belt in turn, listen to the twang and if they all sound about the same pitch, it’s fine, if one of them sounds off, then I need to get the app out and actually check things.
1 Like
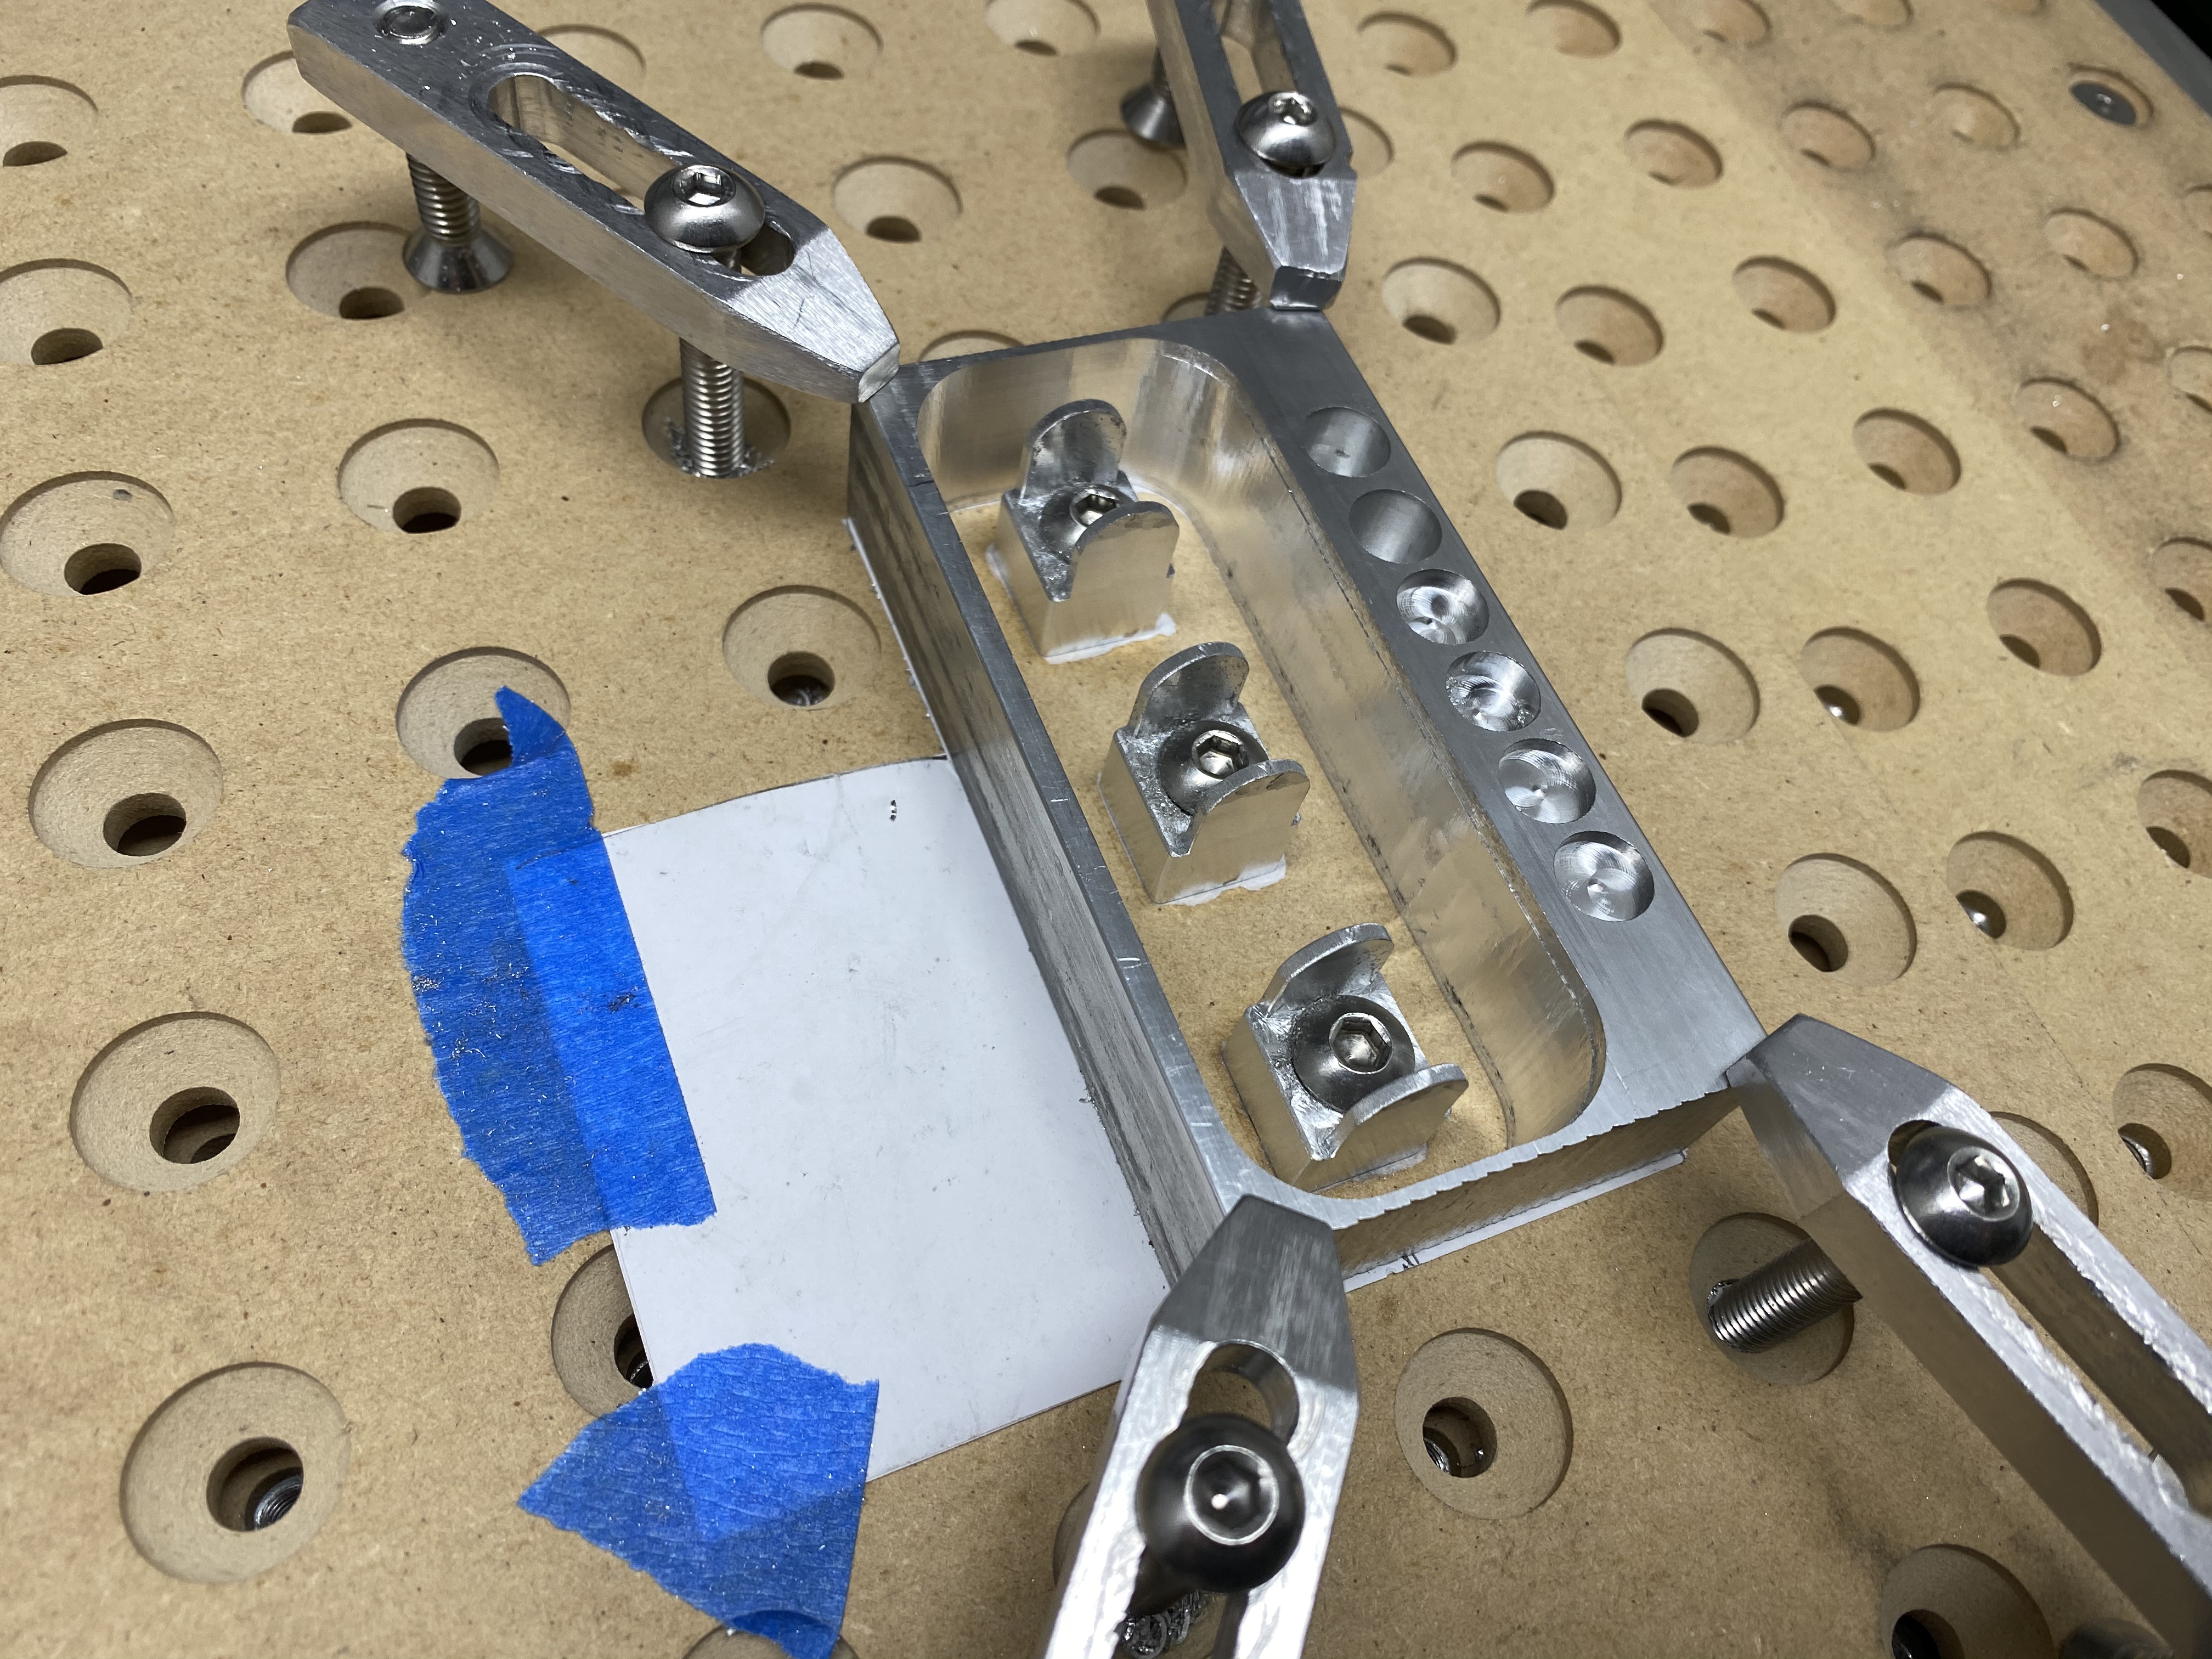
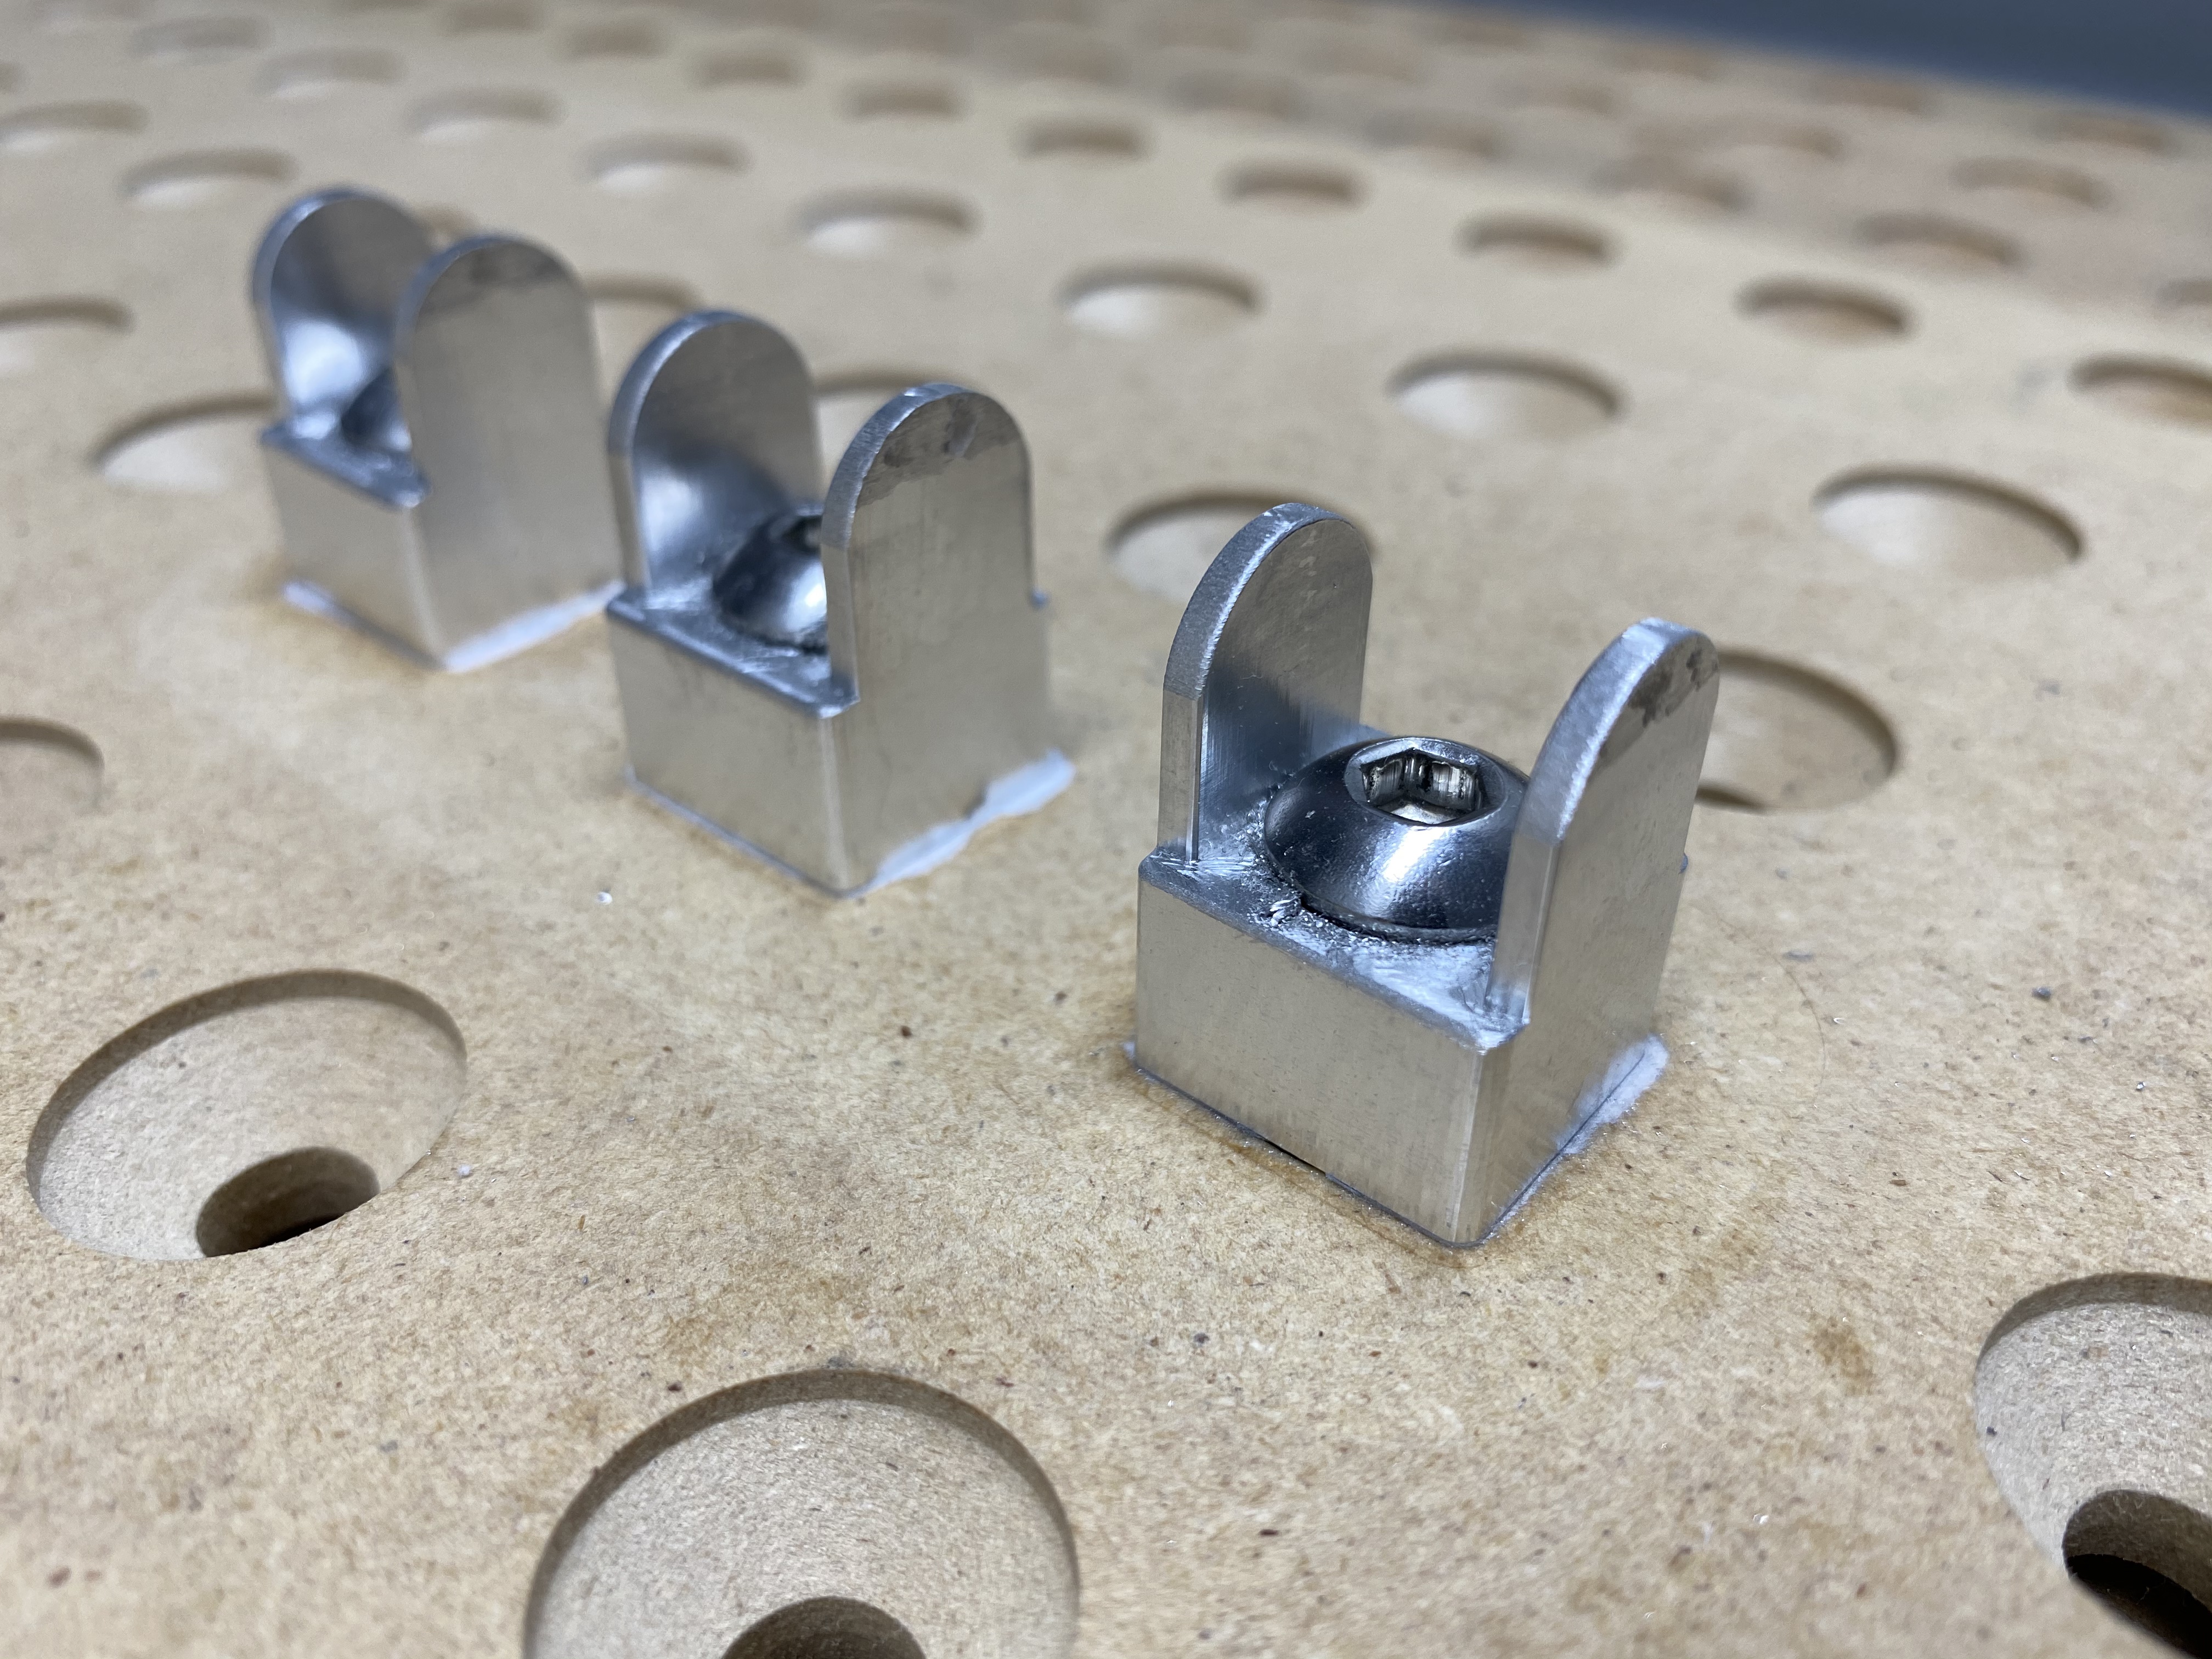
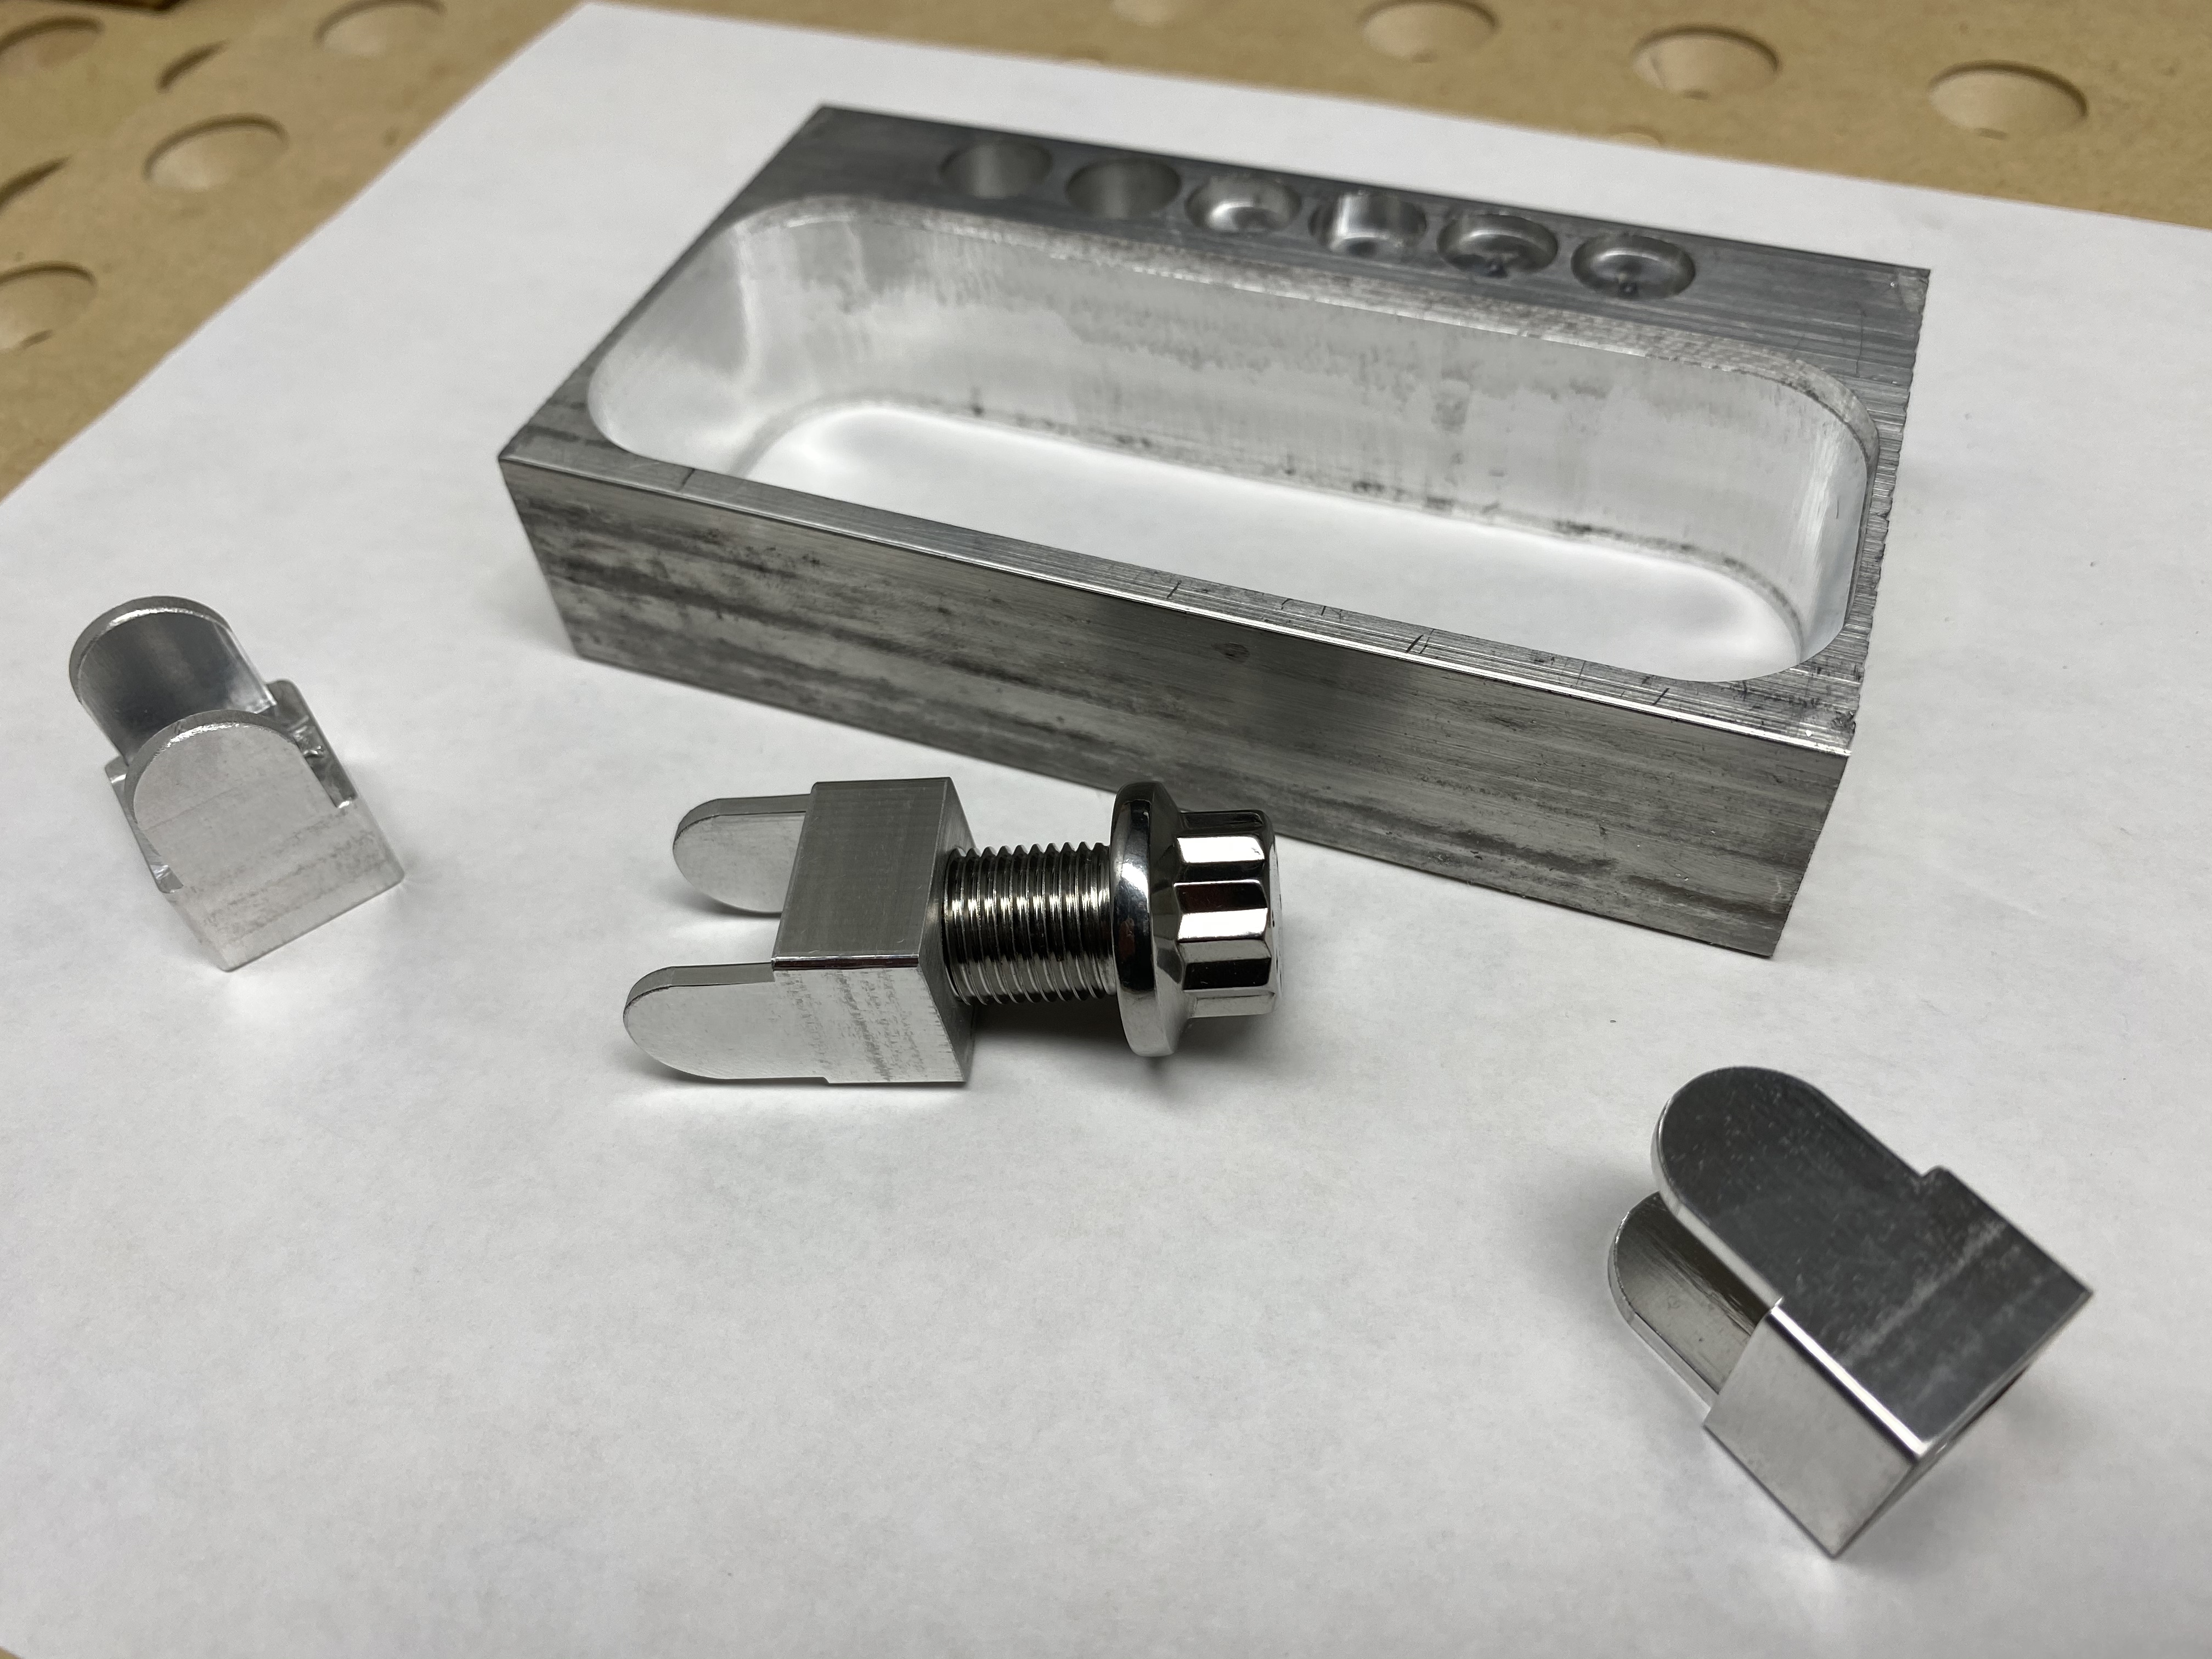
Did you mill that whole thing out of billet or was it sheet that you bent in a press brake?
It was an extruded u-section. An odd alloy that proved difficult to cut - feeds down as low as 300 mm/min and 0.5mm cut depths. The lack of stiffness from the shape didn’t help, nor that my standard Z seems to have developed some movement - the HDZ is here and waiting it’s turn to be fitted
4 Likes
The HDZ is a joy to fit and use, or you can just display it somewhere in the house as a piece of engineering 
3 Likes

Oh,
Please install the Angel in the spindle mount and make her go up and down with gcode…
2 Likes
The amount of effort for the return on that one might not be in my best interest. lol…
OK where’s my ladder…
Finished my pulley levers today, no need for any finish work, polished on the machine with my original 201 I have had forever… .025 edge fillets so no sharp edges… Tapped for 1/2-20 bolt threads.
2 Likes
You really have to pay attention to chip removal when you start going so deep, it is very easy to be running your own chips over and leaving melt on the end mill. I had to babysit the end of the carve and use a tiny wire brush and Dremel to remove the build up off the back of the 1.25" single flute a few times.
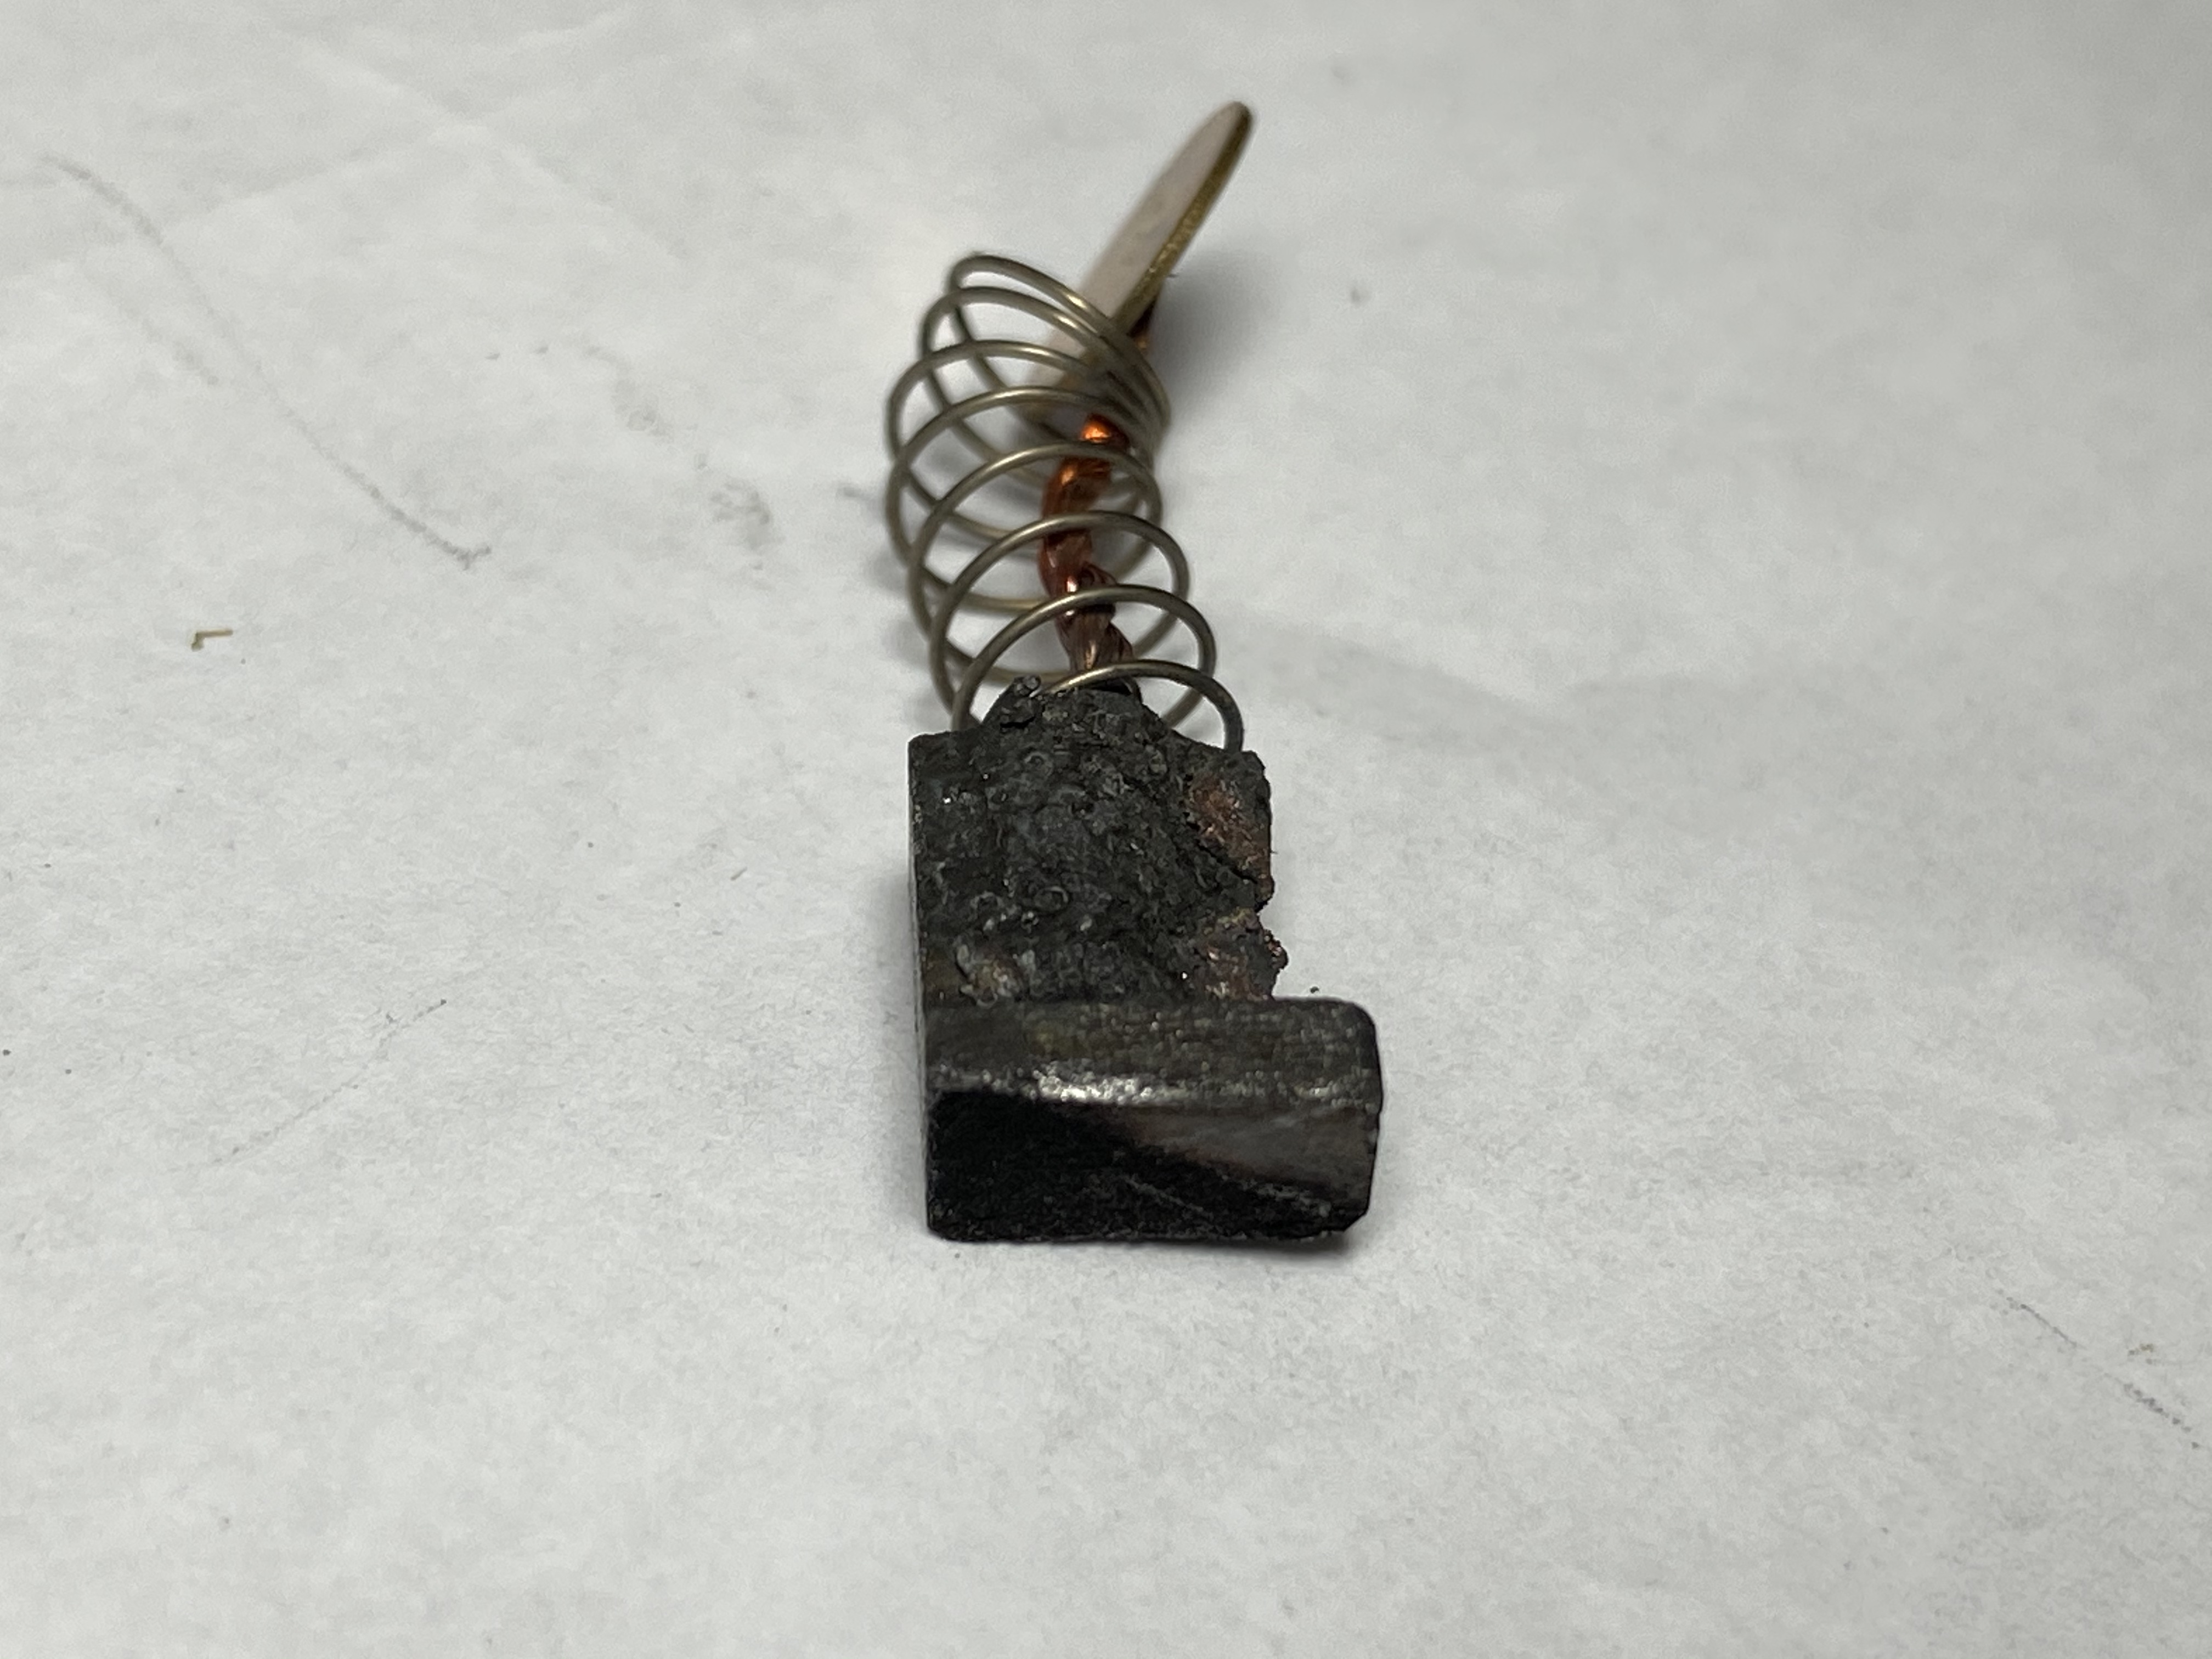
Had an interesting event happen. I replaced my router 2 weeks ago, and about 1 hour into this operation, I randomly go to check the machine and the router literally shuts off in the middle of carving right in front of me out of nowhere.
I was able to pause in time, and unfortunately had to remove the entire router and replace it with my backup and start over, luckily the carve was not affected, as I still had a nice .01 stock to leave on it. The line .15" below the top of the frame is the offset it incurred from stopping the operation, re-homing and installing the new router mid carve. Not too bad!
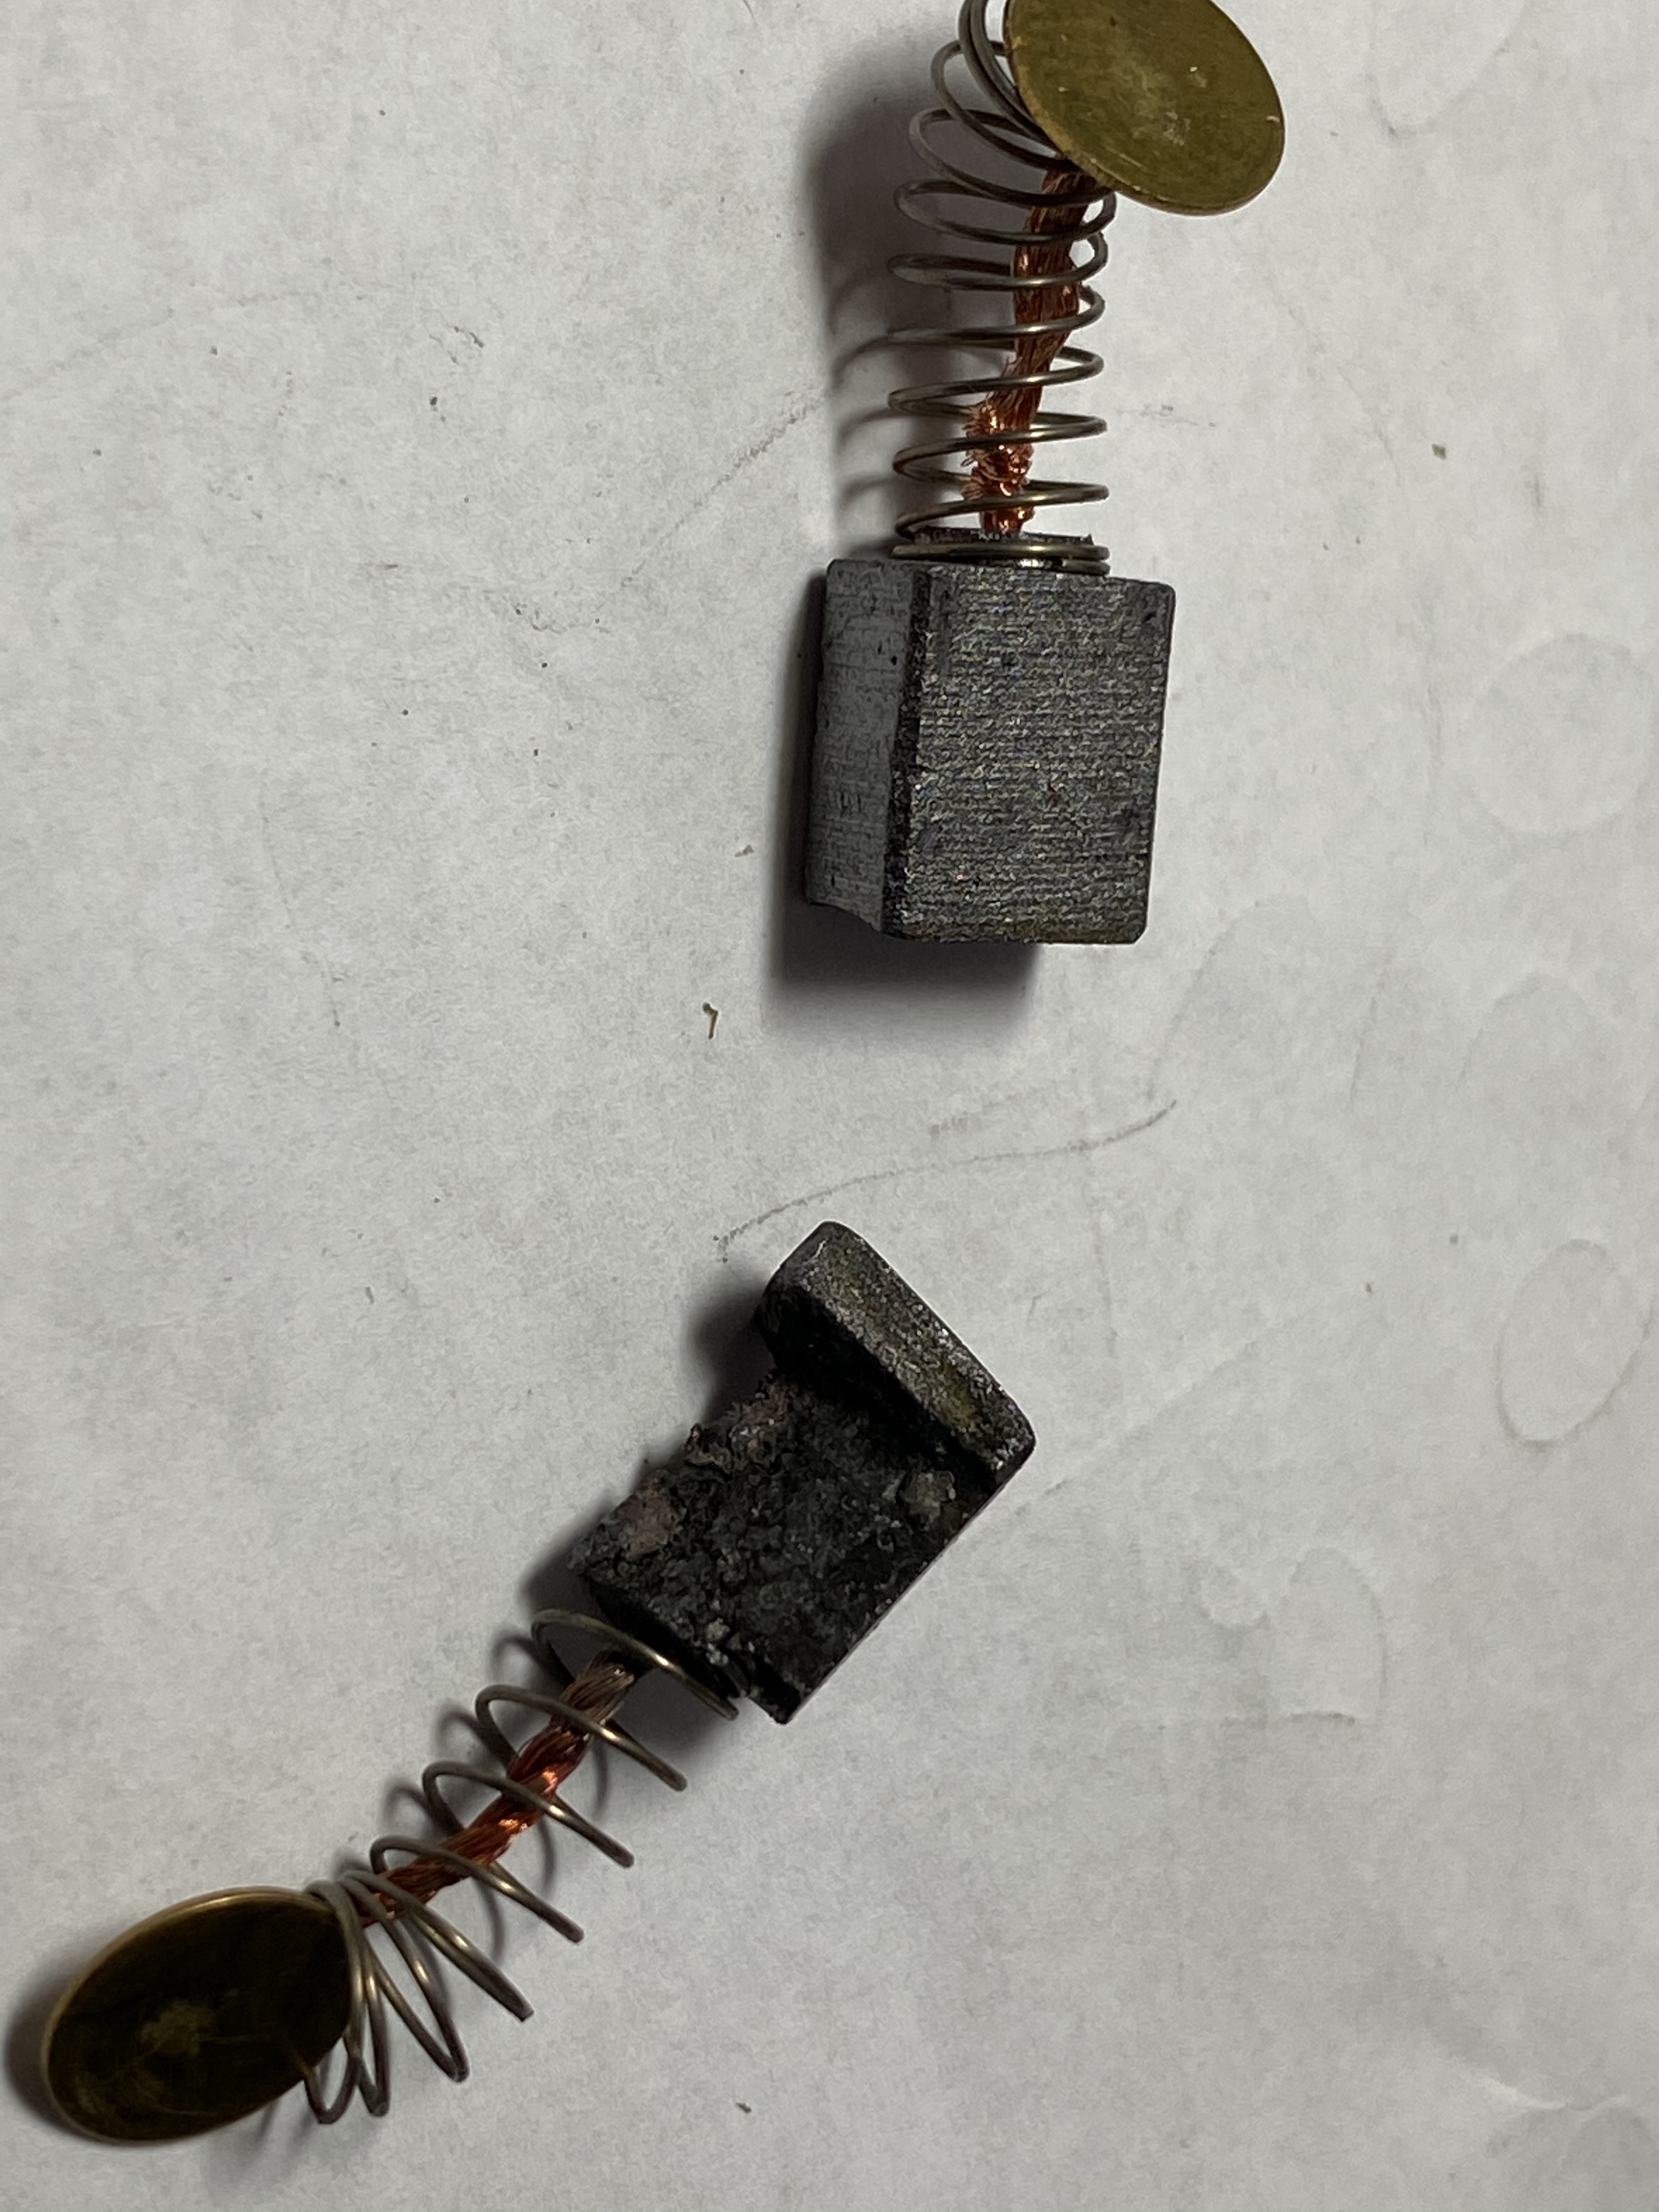
I installed new brushes and the faulty router started right back up.
Below a photo of the brush that died after about 30 hours of carving. Not sure what caused this but I don’t trust it!
1 Like
I have to say I’m one of those guys that is frustrated with the current method and long for something repeatable and defined.
How much tension to put first?
Barely able to fit a pencil, easily able to fit it but not more, what brand of pencil?
I’ll eagerly be a customer for you guys when you’ve nailed down the designs!
2 Likes
Check out this excellent thread from @LiamN:
I use the Gates smartphone app, insert two 1/4" endmills under the belt (the SHAFT part ![]() …1/4" dowel pins would be safer) 280mm apart (for my small SO3), and pre-tighten the belts by feel, such that I still have a quarter turn or so left before the bolt is fully tight against the plate, then twang the belt a couple of times to get an average frequency readout, tighten/untighten the bolt as required until I get ~120Hz (on my SO3, larger machines require different values as Liam mentions).
…1/4" dowel pins would be safer) 280mm apart (for my small SO3), and pre-tighten the belts by feel, such that I still have a quarter turn or so left before the bolt is fully tight against the plate, then twang the belt a couple of times to get an average frequency readout, tighten/untighten the bolt as required until I get ~120Hz (on my SO3, larger machines require different values as Liam mentions).
5 Likes
I have - and talk about “Pimp my Ride”!
1 Like