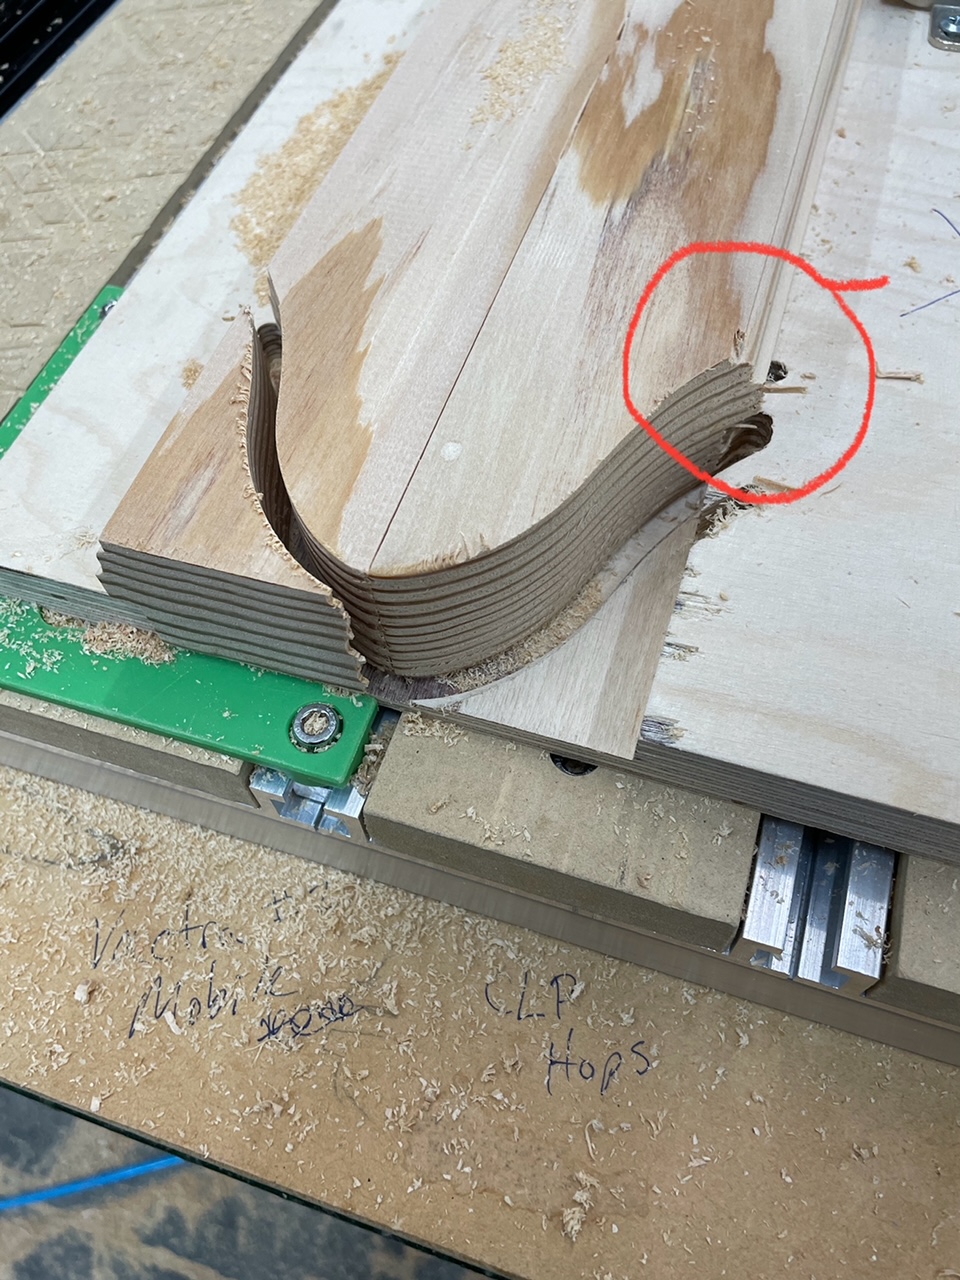
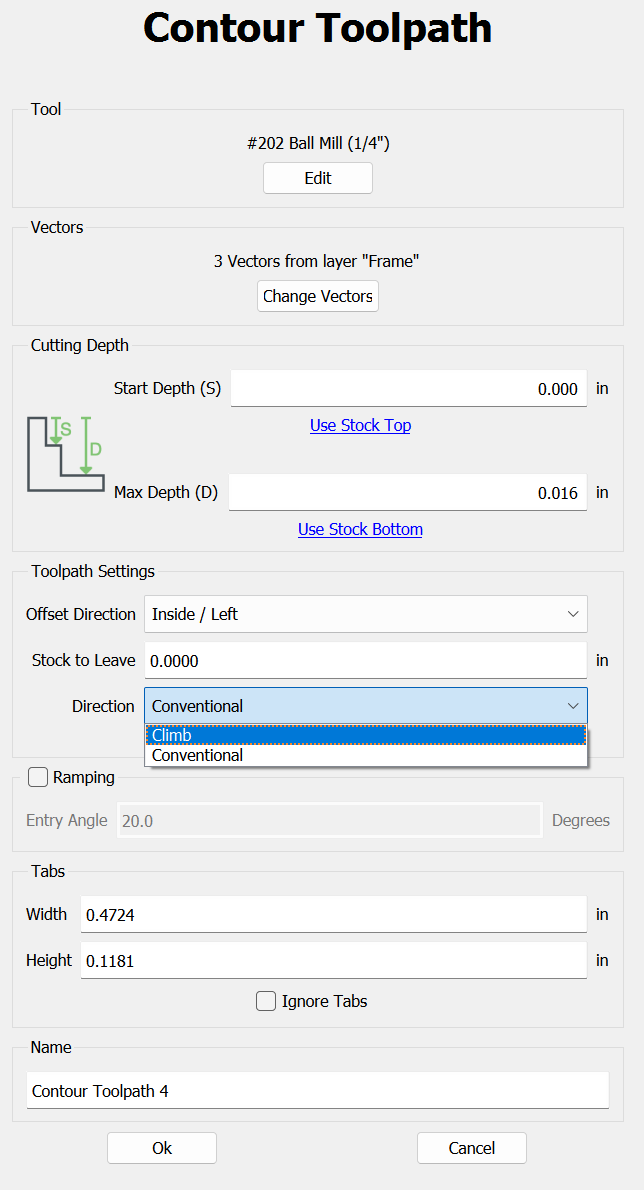
Pictured is an example of tear out in a sash part that we make quite often. This particular cut is a contour across the bottom of a stile. It happens in other cuts but is most common when the cut is exiting the lumber at anywhere near perpendicular to the grain. I am fairly new (4 months) to CNC in general and our new Shapeoko 5 (Carbide Create) in particular, so I was hoping you might offer some strategies? After reading other posts on the subject, I have experimented with speed and depth of cut, as well as adding blue tape. My first thought when approaching the problem was to look for a way in CC to adjust the toolpath so that I have an ‘entering’ cut on the left, and then come around and perform an entering cut from the right. But so far, I haven’t found a way to do that.
Edit: Sorry, more info… I am using a 1/4" up-cut spiral bit. I have tried new tooling without much change, but I have not yet tried (as some have suggested) a down-cut bit. Thanks!
Do not know if it will help, I have been using a pocket to make these types of cuts. Good to fair results. This type of material is hard to make good cuts in.
If it’s the edge of the piece you want to reduce the chip out, I would place an extra sacrifical block alongside the edge to support the wood fibers. Looks like you would need a notched block to contact the top edge of the good piece.
You may find that a good, sharp downcut endmill works at first, but then may start getting tear out again as it gets dulled.
This is typical cross grain chip out. A couple of things to try is blue painters tape over the area. Maybe a coat of shellac to stiffen up the fibers of the wood. Minwax makes a product for staining softwoods to reduce blotch. That is Minwax Pre Stain Conditioner. Like the Shellac it just stiffens up the wood fibers. As @Chaotica suggested put a sacrificial block there help support the edge fibers. The cause is as the bit exits the wood the fibers are unsupported and tends to get blown out. What @Zman is suggesting is do an offset around the outside contour wider than the bit you are going to use to cut. Then do a pocket instead of a contour cut. So if you have a .25" bit do the offset for .30 or .35" and choose both the outside contour of your trim and the offset and do a pocket. @WillAdams is always suggesting add geometry and this is adding geometry. When a bit cuts a .25" wide slot (contour) the bit gets more and more resistance on its sides as you go deeper and deeper. This heats up the wood and the bit and can cause you to lose steps in the X or Y direction. By cutting a slightly wider pocket than the .25" you relive a lot of strain on the bit going down a steep canyon created by a simple contour. It will add to the machining time but it may be worth it on wear and teat and on your bit.
Your problem is as old as people have been cutting wood. Cross grain tearout on the edge is just something that will happen. You can try to mitigate it but there is no permanent solution.
It looks like you have a small detail shape along the right edge (ogee?). If you cut the end shape first, any chipout would be on the material that the ogee is later going to remove. ??
Thank you for giving me so many ideas! I am deeply grateful for the shared knowledge.
We are an old-school sash & door shop with ancient, heavy machinery and woodworking experience that reaches back into the dimmest distance of time (no one really knows) and NONE of us have any real experience on a CNC. So this recent experiment, which all of us are enjoying has been wonderfully/terribly humbling.
Guy, I’ll have to study the ‘Pocket’ + offset strategy. That sounds promising. I don’t see an offset adjustment setting yet, but I’ll find it. And, yes, I have noticed that a .25 cutter with a .25 shank will overheat on deep contour cuts which adds carbon to the shank, thus creating more friction and heat. I was thinking of asking our machine tool guy to turn the middle section of the shank down to .22 or so, since we are so frequently cutting through 1-3/8" material. But your suggestion of spreading out the canyon with a pocket cut is a great idea.
@Chaotica, thank you! Yes, I had thought about coping some long thin sticks and clamping them, sacrificially, along the sides. I’ll have to play with that a bit and look for the right clamp, as I was worried about a clumsy clamp position interfering with the toolpath. I have banged the gantry into stuff a couple times now and I feel like a complete idiot each time I do.
@Tod1d You are abolutely right! Thank you. Yes, if we did the sash stile’s ‘lug’ end detail before adding the ogee profile along the edge, I would avoid the problem. Our moulder does a nice job of cleaning up those parts while adding the ogee. Unfortunately there is one more step to cut out after the curved lug detail and the ogee profile, but I might be able to rearrange the production process to accommodate.
Again, I am incredibly grateful for all of these ideas. Thank you!
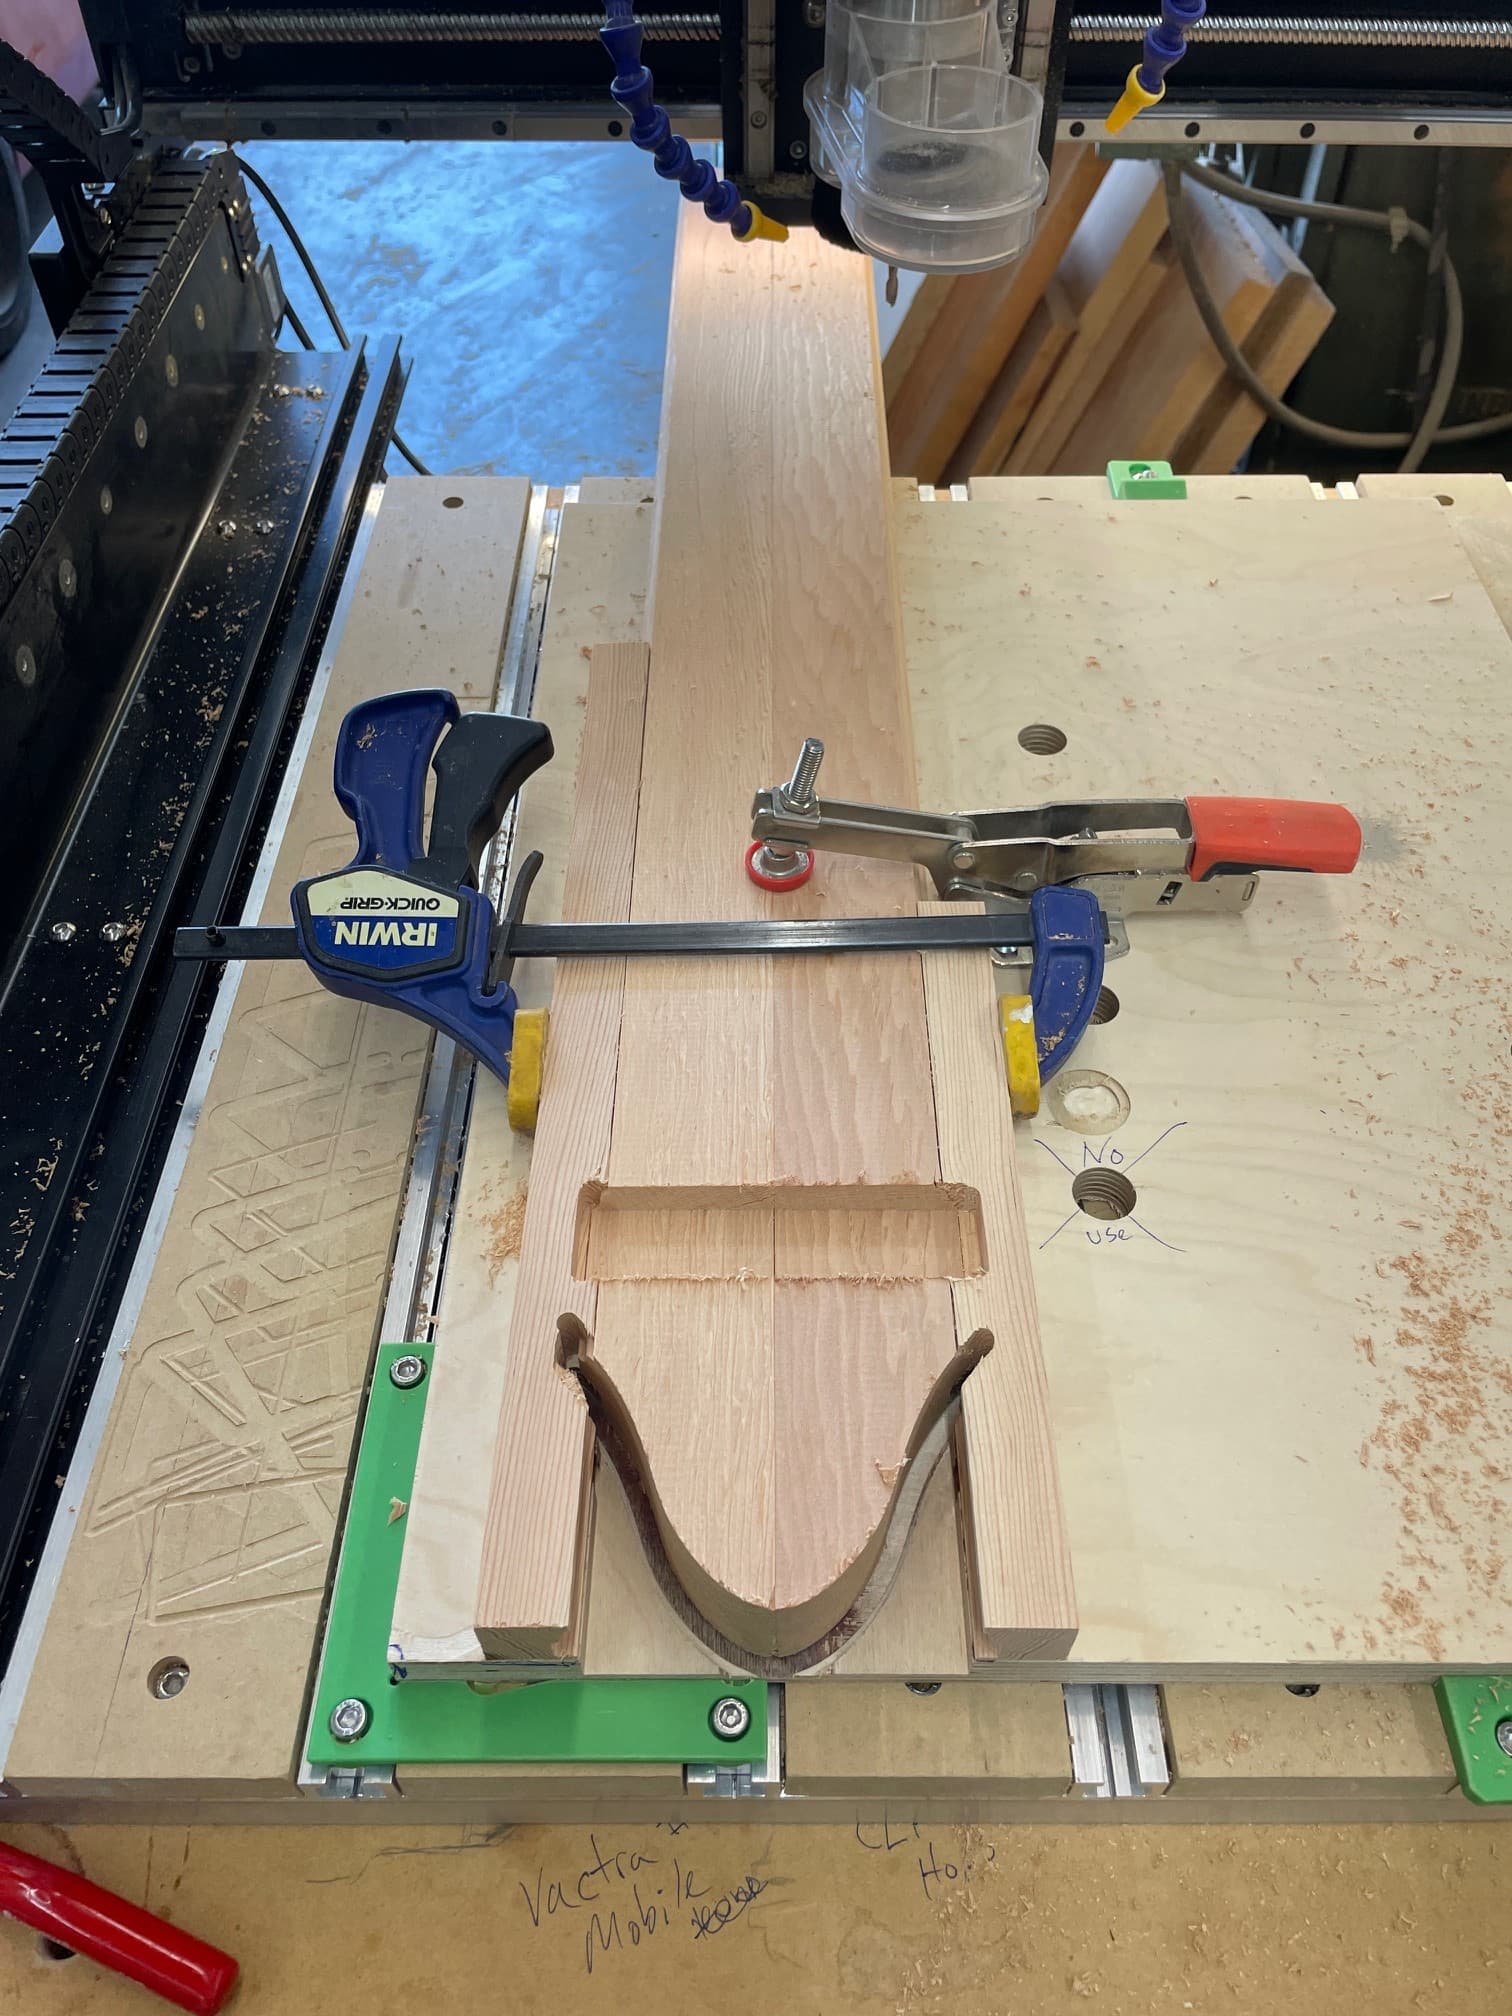
If anyone comes across this in the future, here is one of the solutions offered by @Chaotica that was pretty simple to put into place. It is made up of two sacrificial sticks clamped to either side of the needed material. In this case the sticks happen to be coped to fit on the ogee profile edge of the sash stiles but it could easily be square stock in there if your project used called for it. I had been worried about adding another clamp on the board, because I feared the gantry might hit it as it passed over. But this clamp was pretty low-profile and worked well.