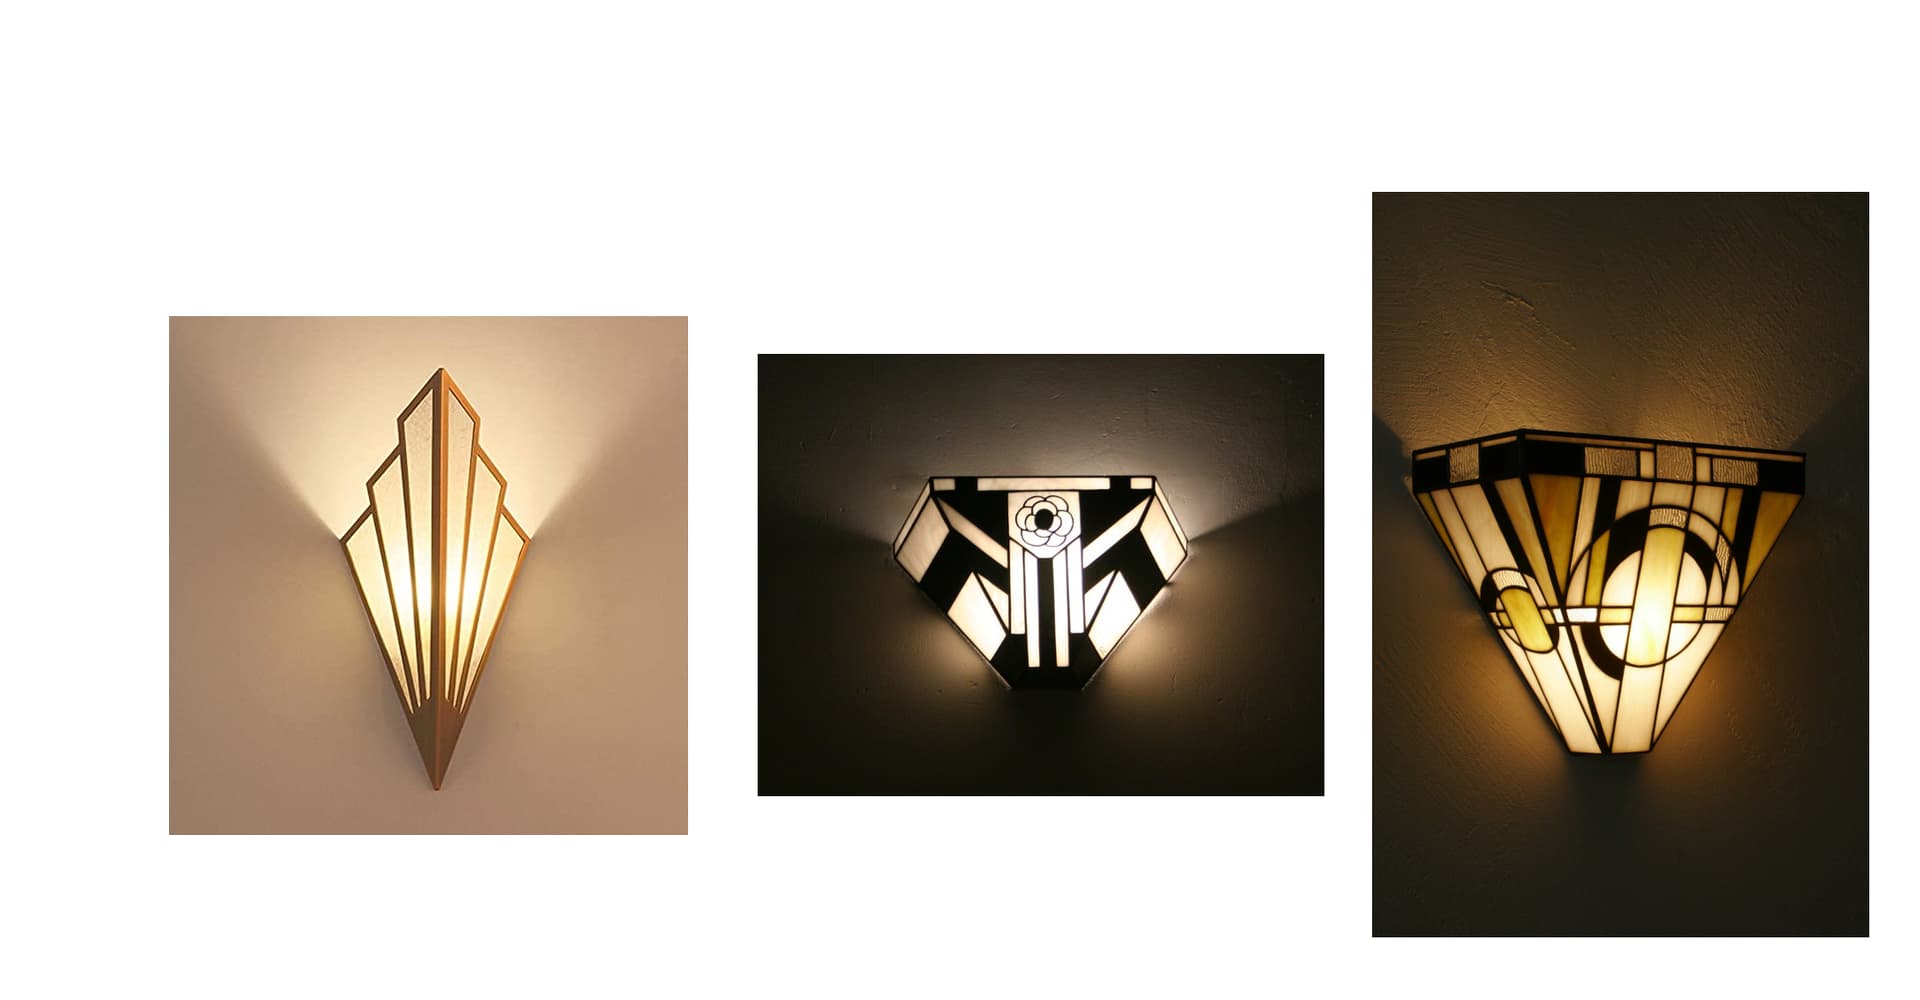
My wife would like three wall lights, they’ll be in the same dressing room for which I made this tabletop. Which means, Art Deco style. She narrowed it to one of these three candidates:
I would tend to carve the faces in wood (or possibly brass if I feel adventurous) and then fill the gaps with epoxy resin, which for once I would not sand back to transparency, to keep it translucent and diffusing light.
Does that sound reasonable? I’m not worried about heat, I will use LED bulbs in there.
The difficulty I foresee is getting the slope/angle of the edges right such that all faces join correctly. I may cheat a little bit and make them “magic” values like 30 or 45°, to be able to mill them with a regular vbit.
Anyway, it’s been a while since I last made a lamp, this should be fun!
Ha. Interesting idea. I would need to have perfect tolerances though (compared to epoxy infill). But I would be able to get a better light diffusing material than sanded epoxy…mmh
The left one could be milled from aluminum sheet and bent in a finger break or possibly be bent first then milled. Then tape it face down on a silicone soldering mat and epoxy fill the windows one side at a time.
Thanks, the “bending” approach sounds quite interesting if I go for brass, actually it may be my only option in this case, as joining two (or three) individual pieces of brass seamlessly sounds like a challenge. This would also avoid sharp edges.
I’m with you all on “I prefer the one on the left”, but it so happens that the “client” has a different opinion, so…we’ll see if I can convince her
I kind of like the one on the right, actually. It might be a bit more complicated for you…but I’m sure that’s a sacrifice Ms. Julien is willing to make!
The irony of this was that I was reading the original post quickly and didn’t look to see who was posting it…my first thought, when I saw resin pours in CNC work was, “Ask Julien”!
I can’t add a whole lot, but you might want to consider pigment additives for the resin…they can stay semi-opaque easier.
For the two more complex lamps it might be worth considering the ‘traditional’ approach of using cut pieces of glass wrapped with brass foil tape and soldered together (or soddered in America).
The lamp on the right seems to have the best ‘goes with’ factor for your table… Sorry if you didn’t want to hear that
I would be inclined to approach this as a resin fill into 3 fretwork panels with mitred/rebated joints, set in a base with suitable rebate (and possibly 15deg chamfered to accept the flare on the shape). For the resin I would tack the frets onto a sheet of plexiglass/glass to get a perfect presentation side and then linish it once released from the glass - either vertically or sympathetic angles. Getting the quantity of resin in the identical tint may take some experimentation and disciplined recipe notes…
If you do go with brass for the framing, you should be able to solder the pieces together and then feather the joints.
I think that would give you a nice clean look (assuming a bit of practice first!)
I agree with Andy regarding the “goes with” factor, of the right one. That said, my personal preference would be the left one - for many of the reasons already given. That’s all I got.


 .
.