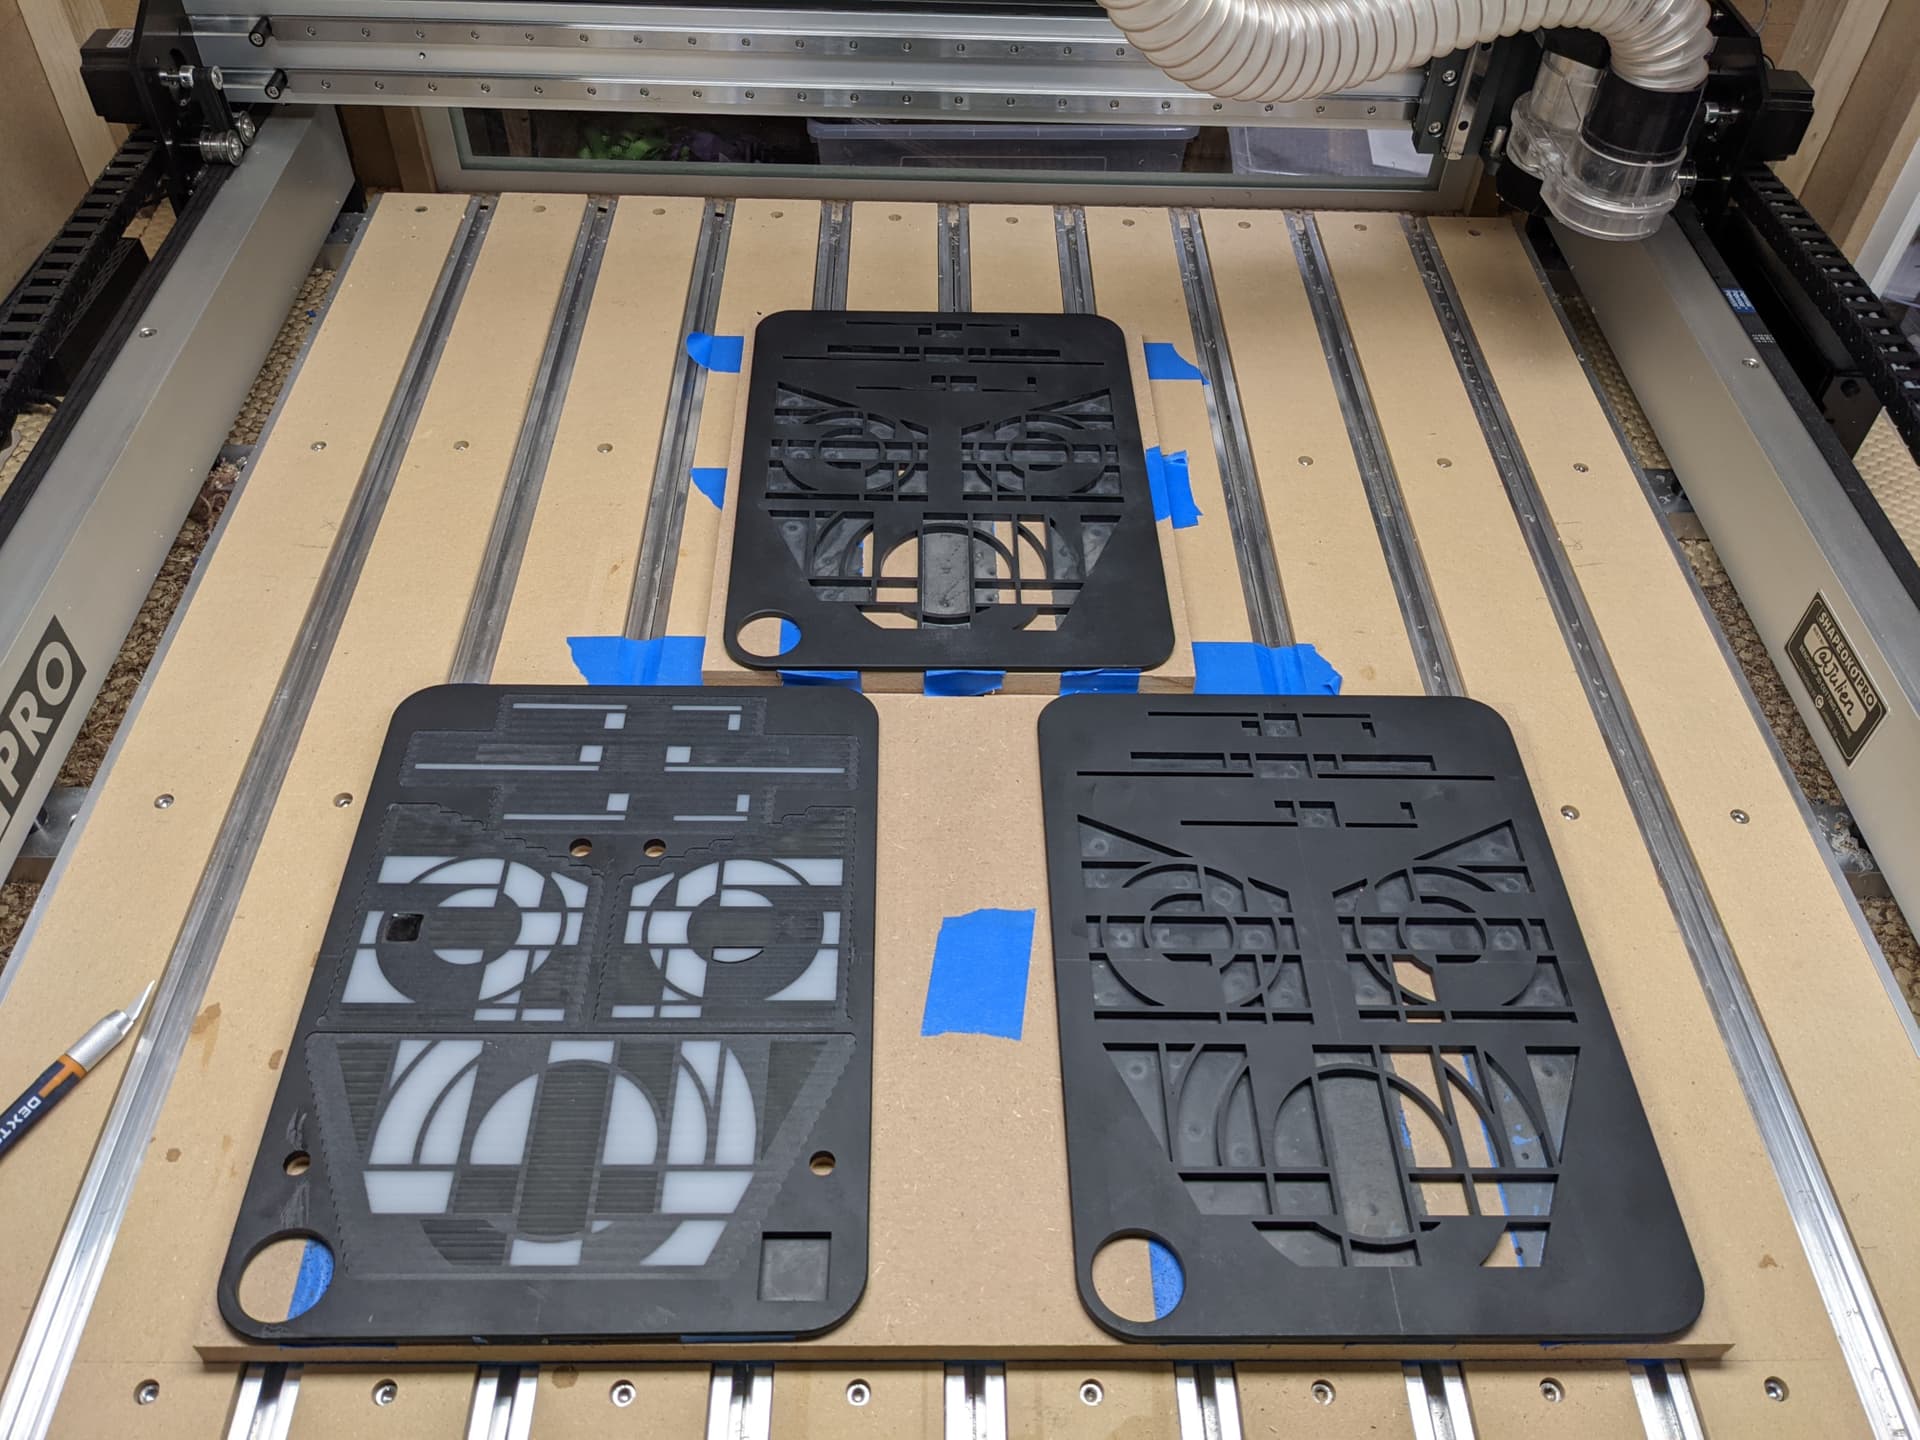
roughing pass using 2D adaptive clearing with a 1/8" downcut at full depth (6mm), 1 mm optimal load, 18000RPM, 45ipm
Straight from the machine:
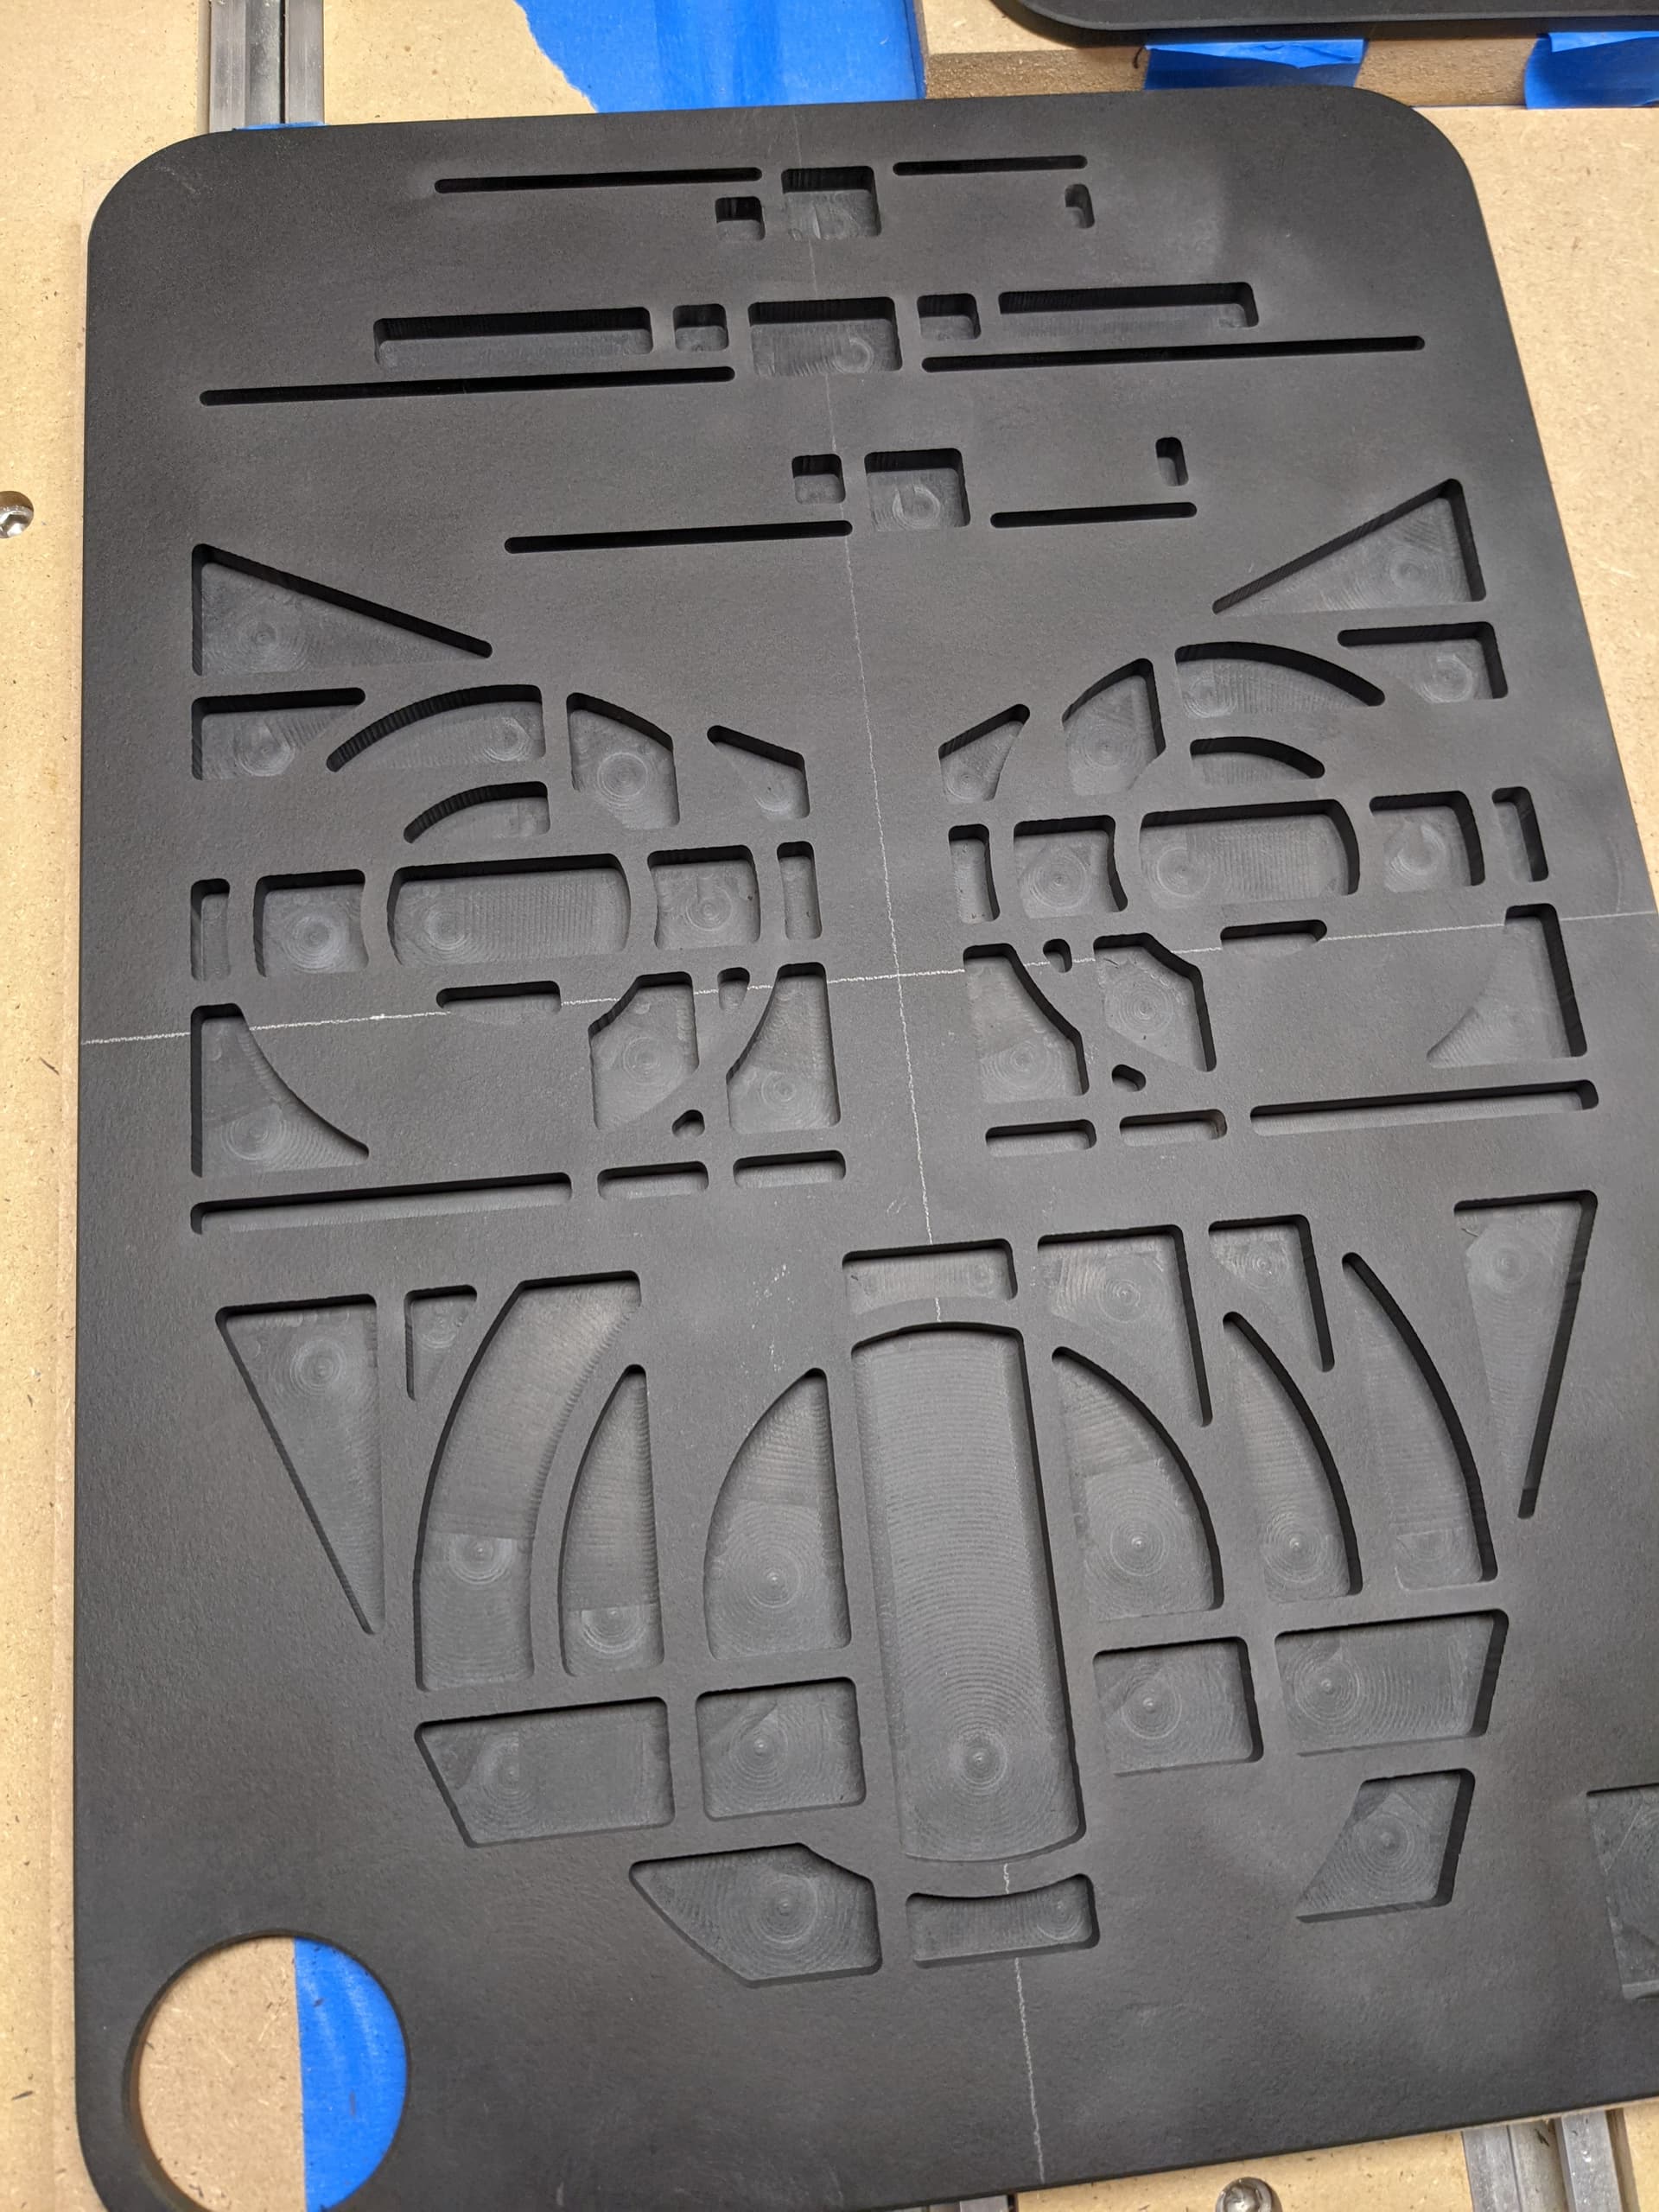
I may just have found my new favorite material !
roughing pass using 2D adaptive clearing with a 1/8" downcut at full depth (6mm), 1 mm optimal load, 18000RPM, 45ipm
Straight from the machine:
I may just have found my new favorite material !
Curious- How much was it for those three boards?
Pricy…the equivalent of $34 each.
Something to consider. Epoxies tend to yellow, including the “clear” UV stabilized variants. White pigments can show case this, and in some cases exacerbate it.
Mmh. Good point. The lamp will have a yellow-ish tint to it anyway, so hopefully that will not be too much of a problem. From your experience does the yellowing happen also indoors ?
I think those lamp styles always had some discoloration over time, on the glass, from the heat of the light bulb. I’m sure @Julien is deliberately choosing epoxy so that it simulates the aging of an incandescent bulb with his LED. Yeah, that’s it. BRILLIANT!
Yes, it is probably inevitable. But the rate at which this happens can vary considerably. Proximity to natural light, types of artificial light, temperature, humidity ect.
For types of work I do, assumed UV exposure, I typically require customer pieces be finished with a paint system. But I have a great many personal items I’ve built over the years that do not have a paint system finish. Some have amber’d to greater extents than others, some imperceptibly so.
The amber and yellow colors are in the color palette of a lot of art deco objects. Most Art Deco objects are in the warmer palette and not in the cooler color ranges. So even if your object turns slight amber/yellow it would not be out of place on an art deco object.
Hi Julian,
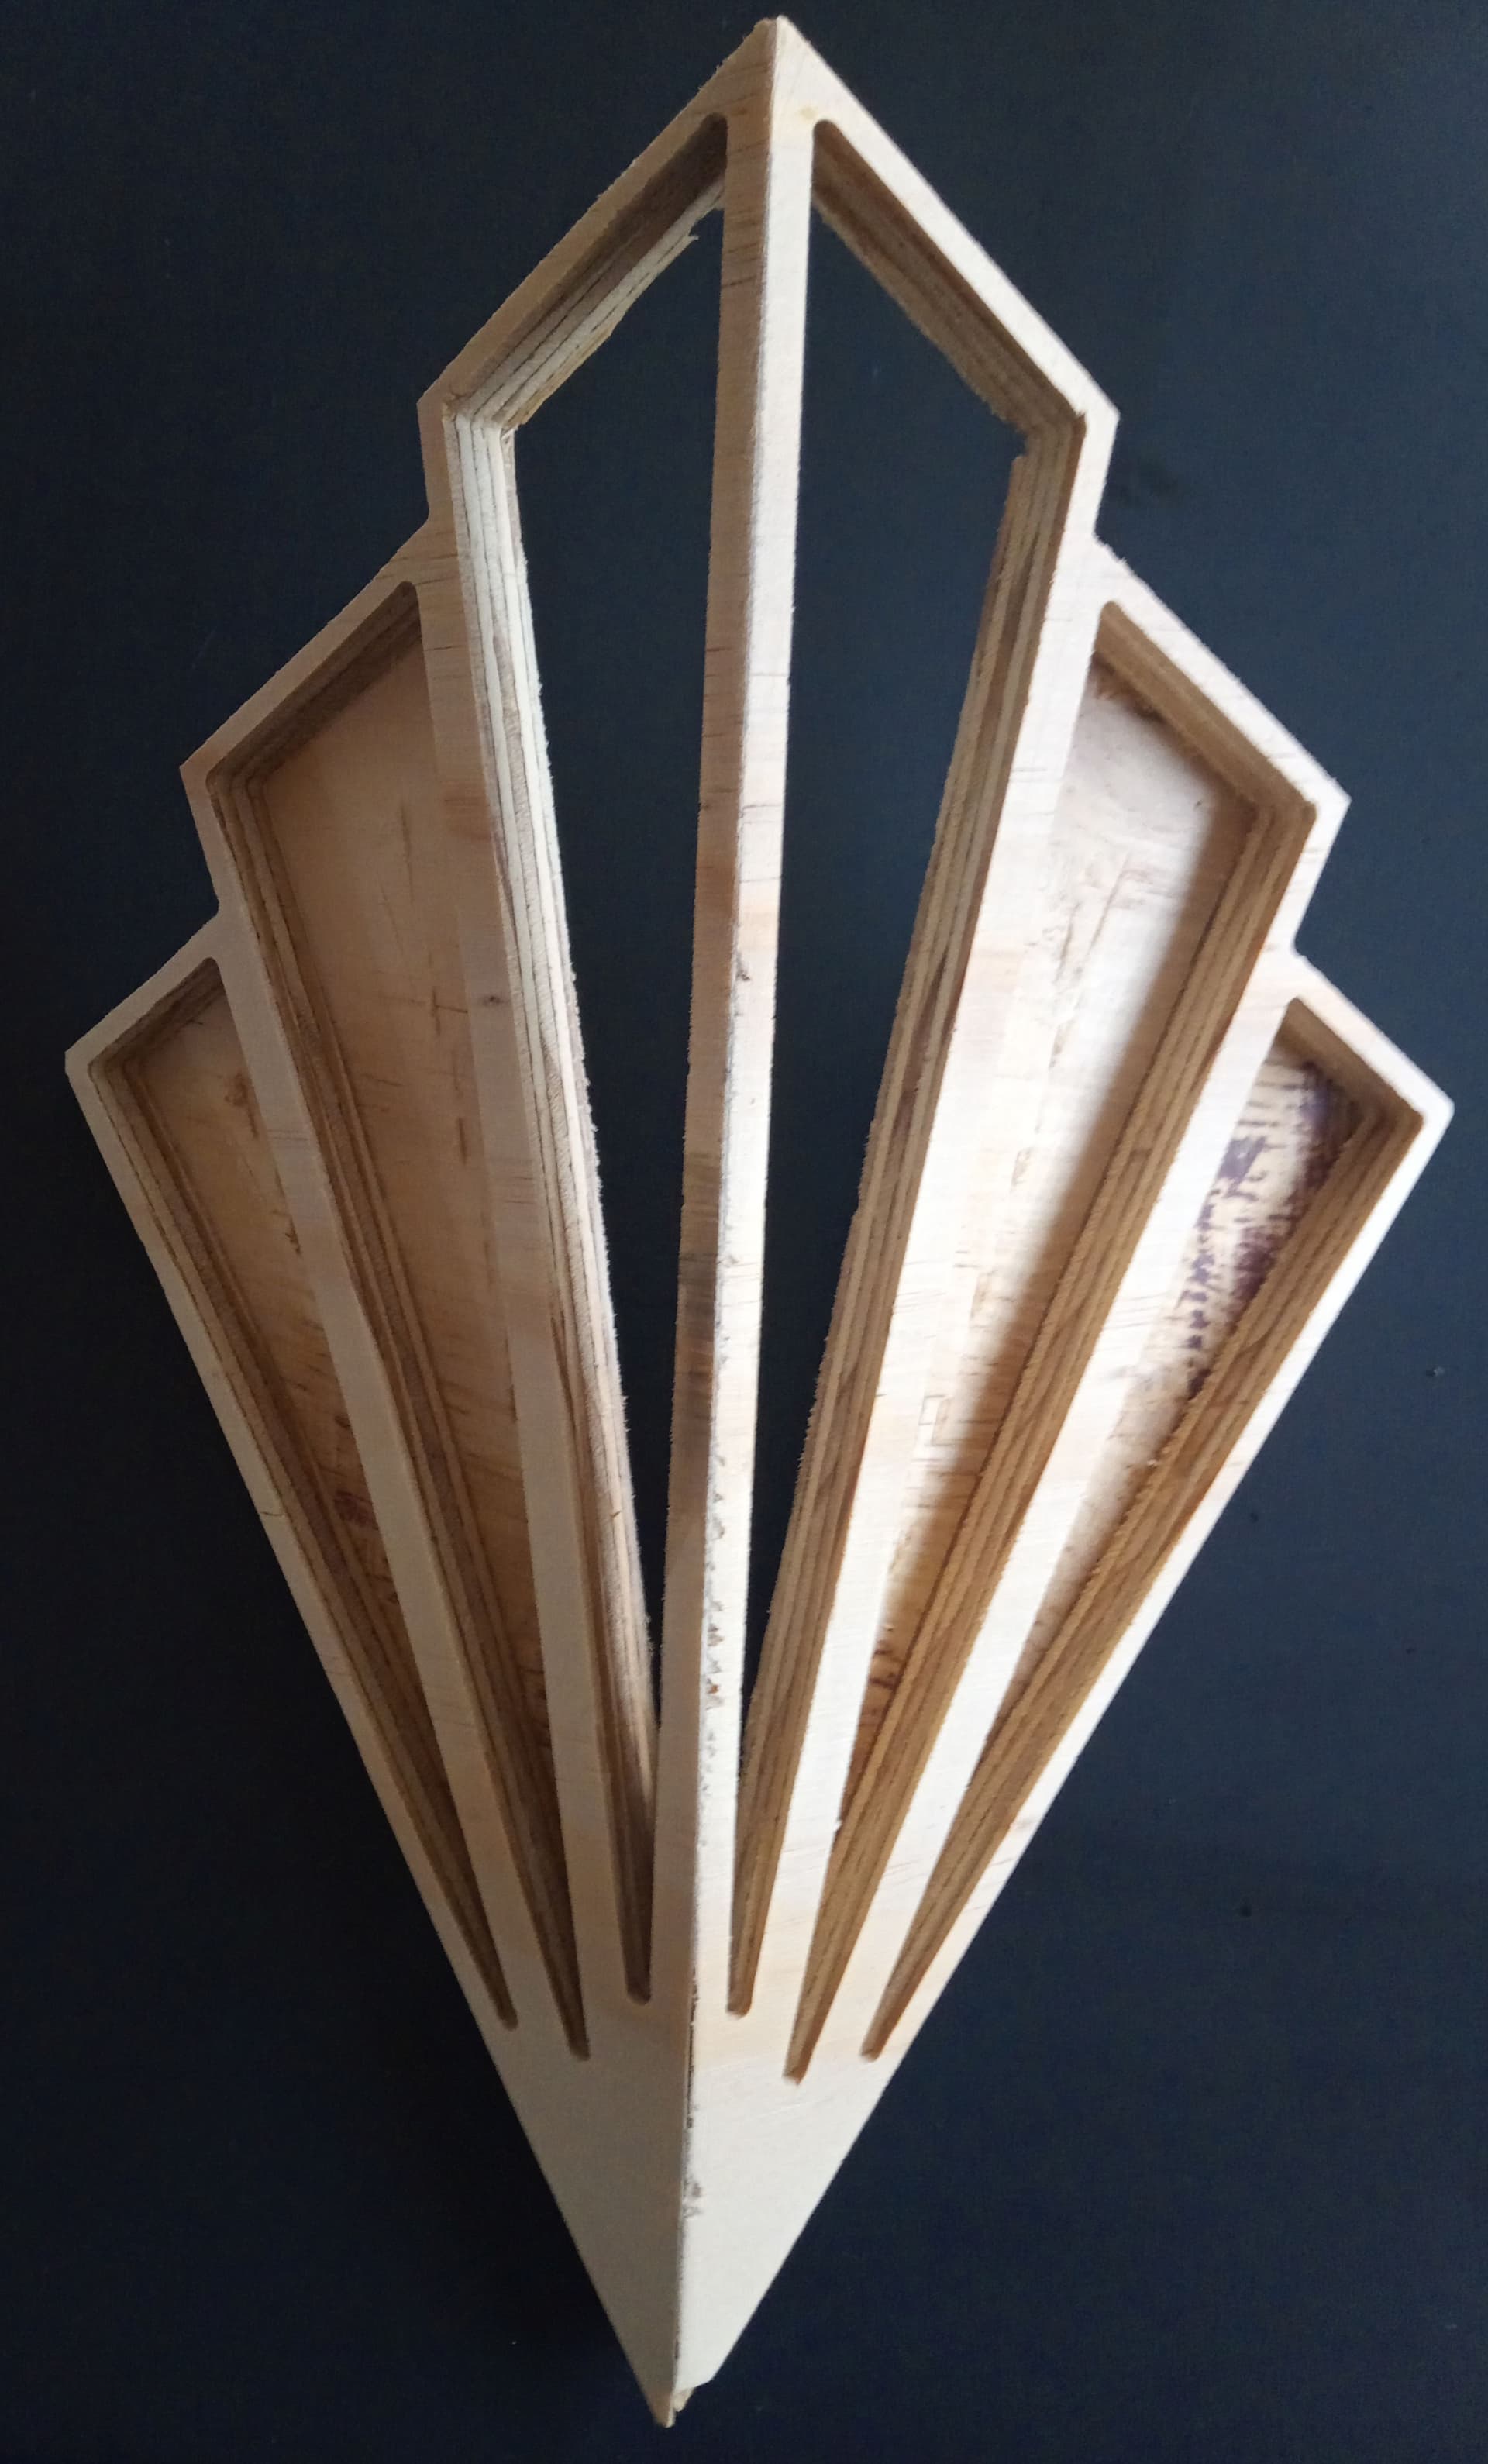
Out of curiosity I made a rough small version of one of your lights. I cut the 60 degree angle on the table saw so it’s a bit rough there. Sawing also cut into the first panels a bit so I just cut them out. The maximum height down the centre line of my model is 260mm (10 inches).
It would not be hard to make this. The only part that might be tricky is mounting the light bulb and holder, but I thought they could be mounted to the wall and the machined part could act as a cover. I won’t do it for myself as I don’t have any wall lights for one thing and my apartment is more mid century anyway.
However this has sent me down what could be a rabbit hole, of square wooden bedside box lamps with cutouts for epoxy inserts. I’m thinking possibly cloud cutouts…or fish…
With Led lamps heat is no longer a problem.
John
@OldDude somehow I failed to answer that sorry. Pretty cool prototype !
I blame @AndyC for sending us all down that rabbit hole ![]()
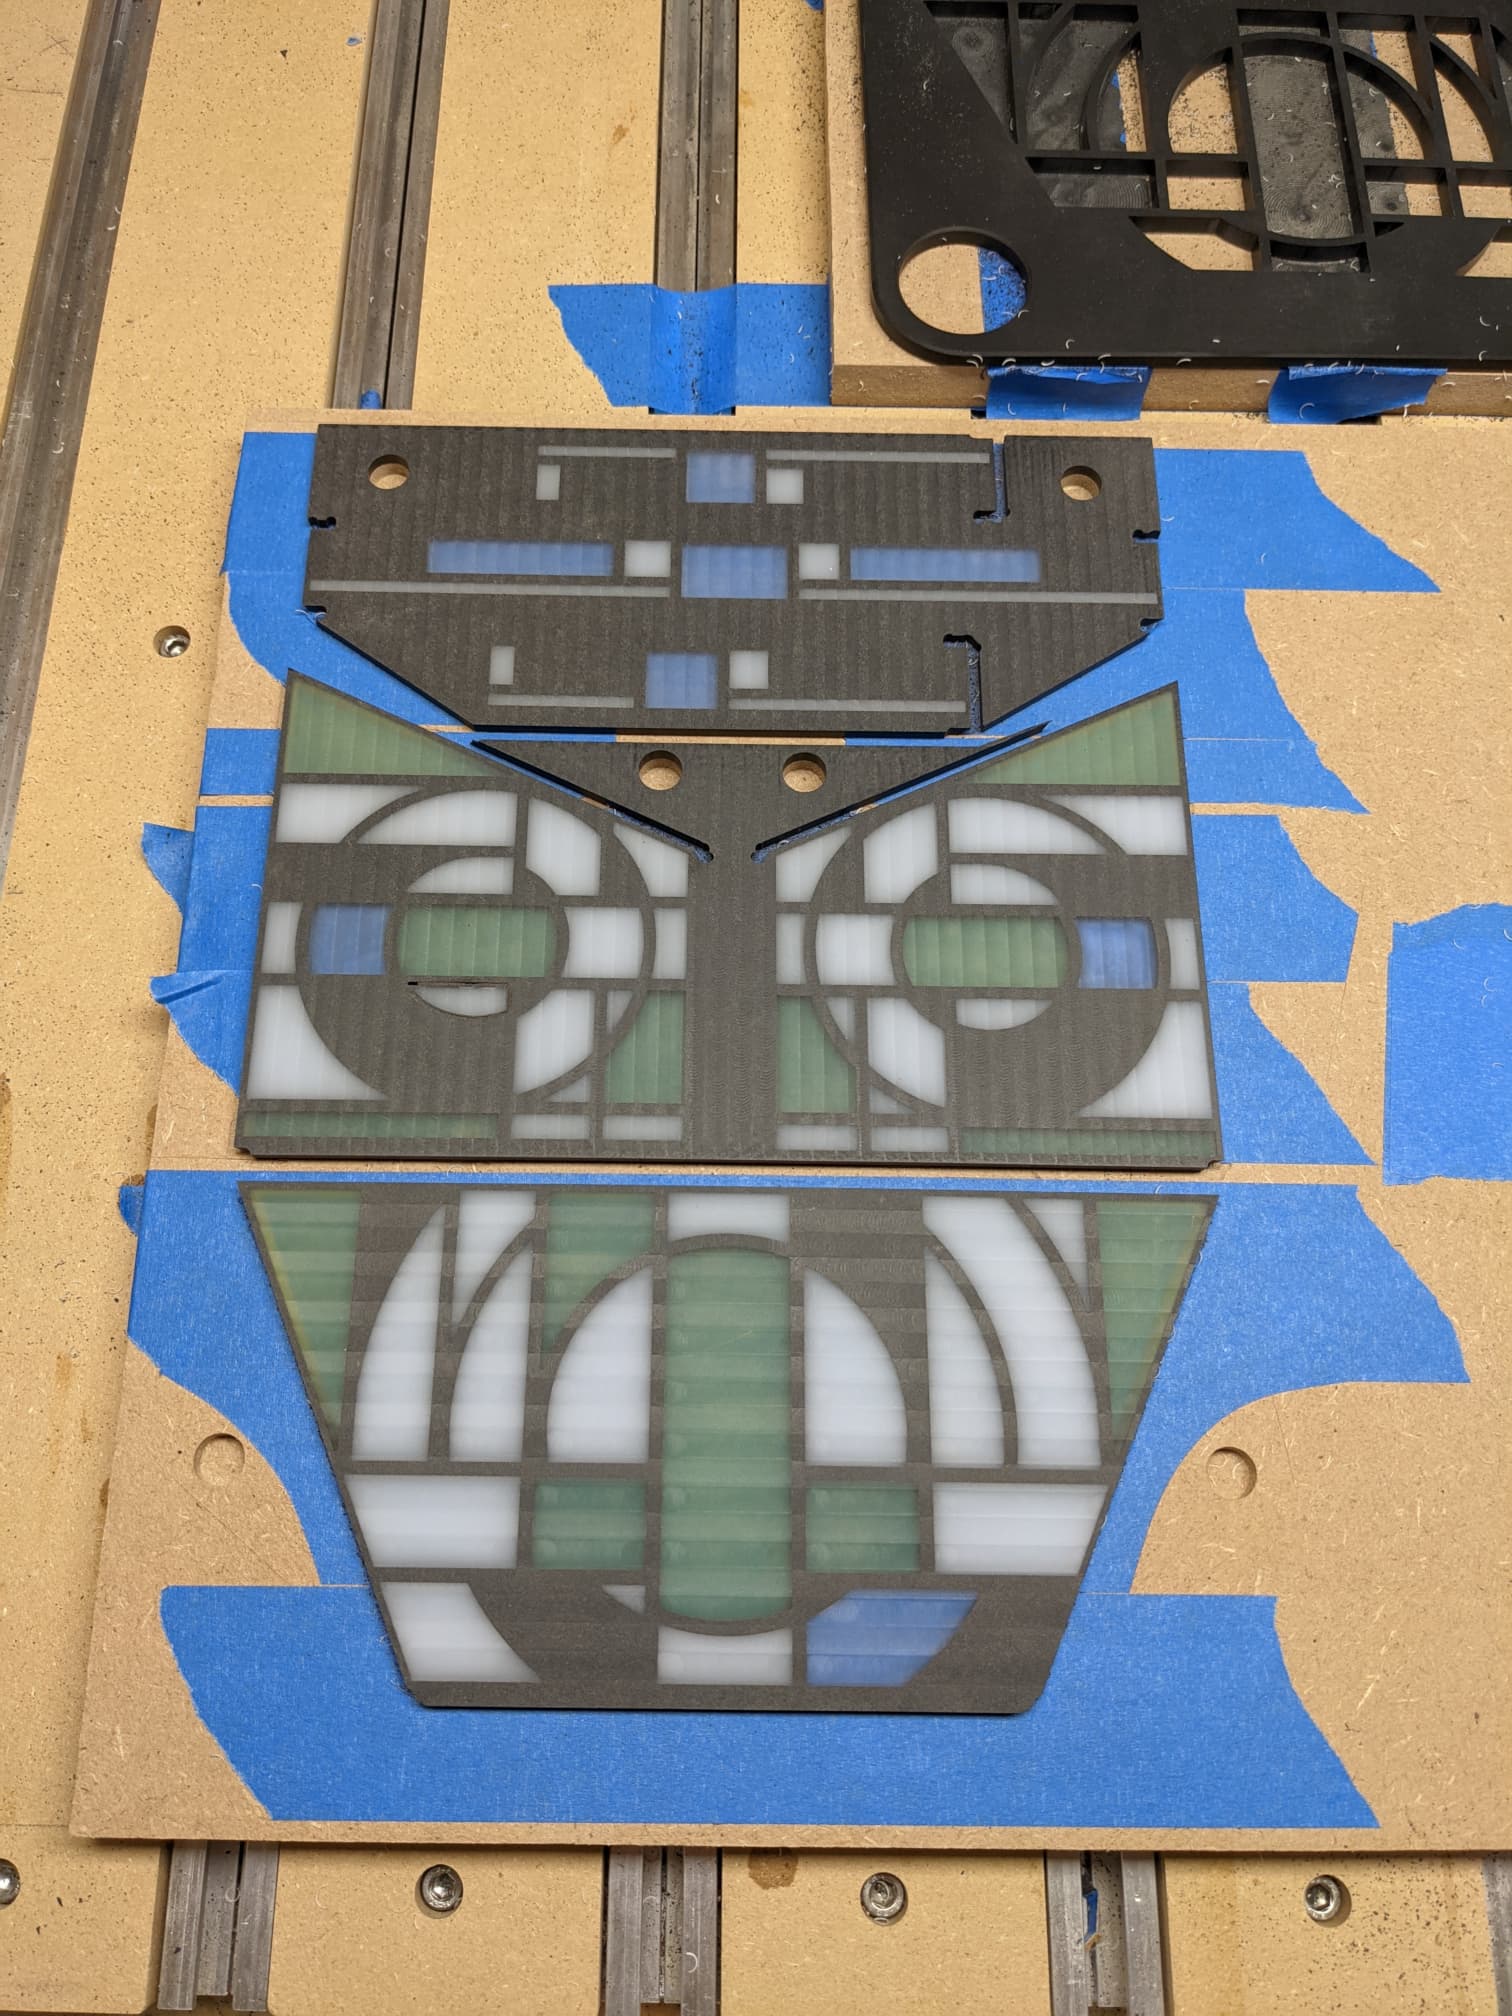
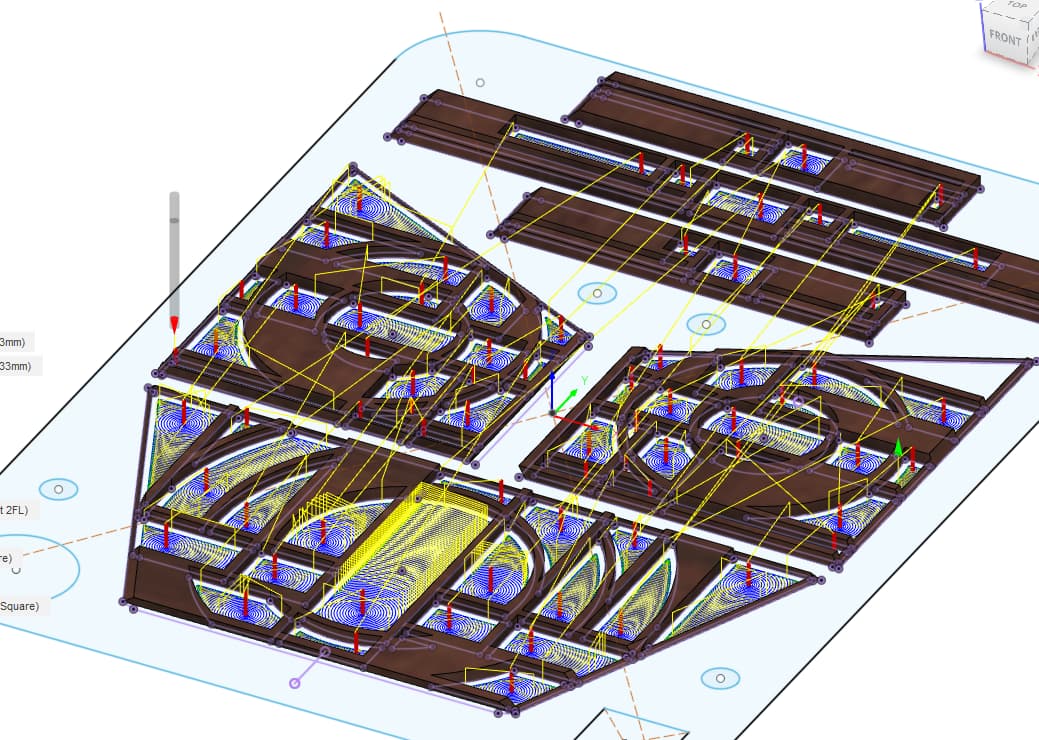
In other news, progress on the lamp is slow (because it takes forever for the epoxy to fully harden at garage temperature, but my strategy to “fail fast” worked, in the sense that I did a large number of mistakes in the CAM and on the machine that I learned from.
I’ll run the flip toolpaths for the lower left panel before I proceed with the other two.
Glad to be of service 
For the areas that have broken through, could you place a thin plexiglass or similar beneath when you pour? This would contain the resin and release very easily once set - then your surfacing could carry on as planned… For the varying thicknesses after your first surfacing, perhaps shims beneath any vulnerable areas will be necessary. If the RichLite ‘bounces’ it will upset your cut…
My plan was to brush a layer of clear epoxy at the bottom of those pockets, to see the underlying MDF, and then pour the actual epoxy color. I have 0.5mm margin on the other side to surface anyway. BUT I’m not quite sure I’ll be able to separate the piece from the MDF wasteboard after epoxy hardened at the bottom of those pockets.
Or I could say as you mention, remove the piece as it stands now, and re-install it on a piece of glass. But how do you hold it onto the glass then ?
Hold it with resin - a fine coat on the face-down side. I would choose plexiglass over glass as the workpiece has to flex slightly to release from glass, whereas with plexiglass it can be the part to flex
And later the glass/acrylic can be detached easily enough ? I should go and re-read some of your threads…
When doing my stained-glass window, I had a relatively fragile part and too was concerned at damaging it when releasing - but a gentle flex on the plexiglass was all it took to cleanly release the whole thing
If I recall, the only ‘watch for’ with plexiglass to ensure a clean release is that it is scrupulously clean prior to the resin coming in contact - no surface imperfections/scratches/dust/dirt. I used a 2mm or 3mm sheet, in order that it would flex more readily than the wood/resin part would
I’m happy I already drilled the holes for the locating pins, or I would not have had the opportunity to do this and then still be able to reposition the parts accurately for the rest of the toolpath. It will be a miracle if I pull this off, I definitely need a v2.
Flip-side facing went well…but revealed that the clearest white is way too transparent. I’ll see if sanding can fix it or not. This was my test piece anyway.
In other news:

Nice work.
Roughing the inside face may work well for making the white more translucent and less transparent. It may actually work out to let more light through too.
As for the finger, workholding is not the only thing that blue tape and CA glue is good for