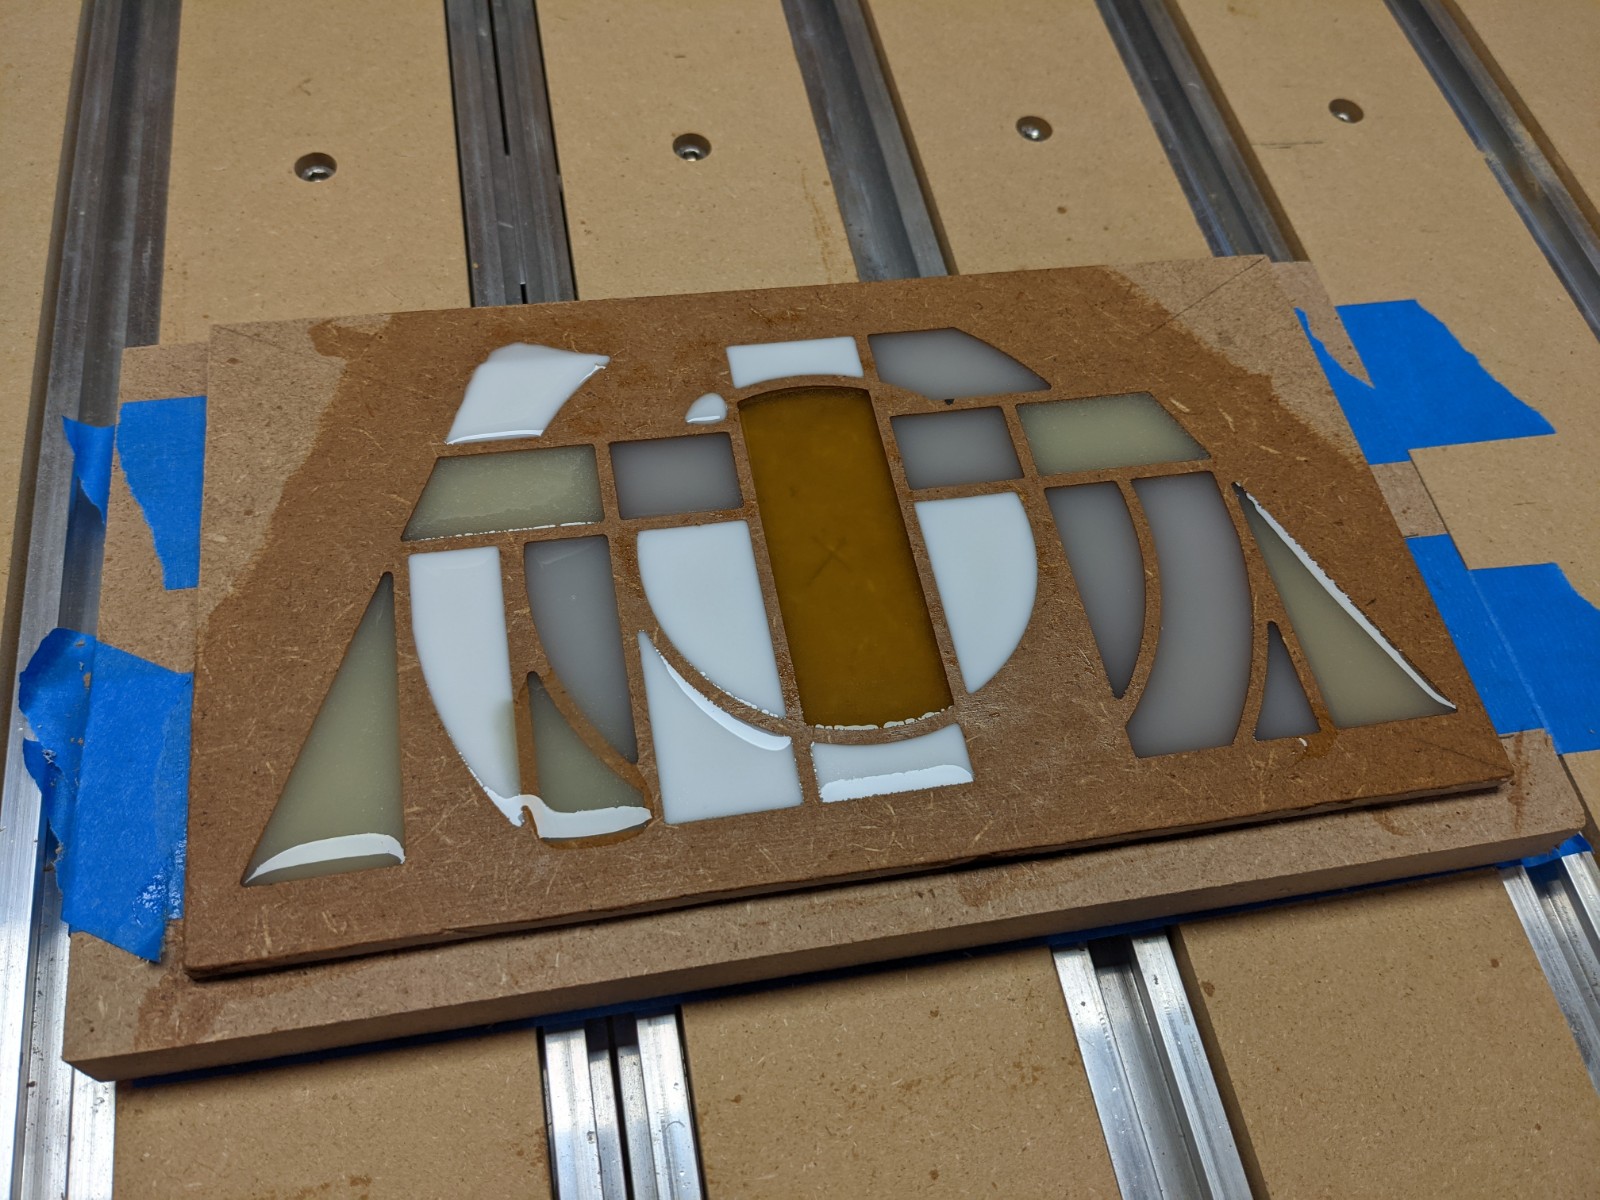
Based on my notes from these four different mixes, I’ll see how it looks once surfaced/re-sanded.
The whitest is too white/opaque, the center yellow one on the other hand is still a bit too transparent, I’ll have to experiment more.
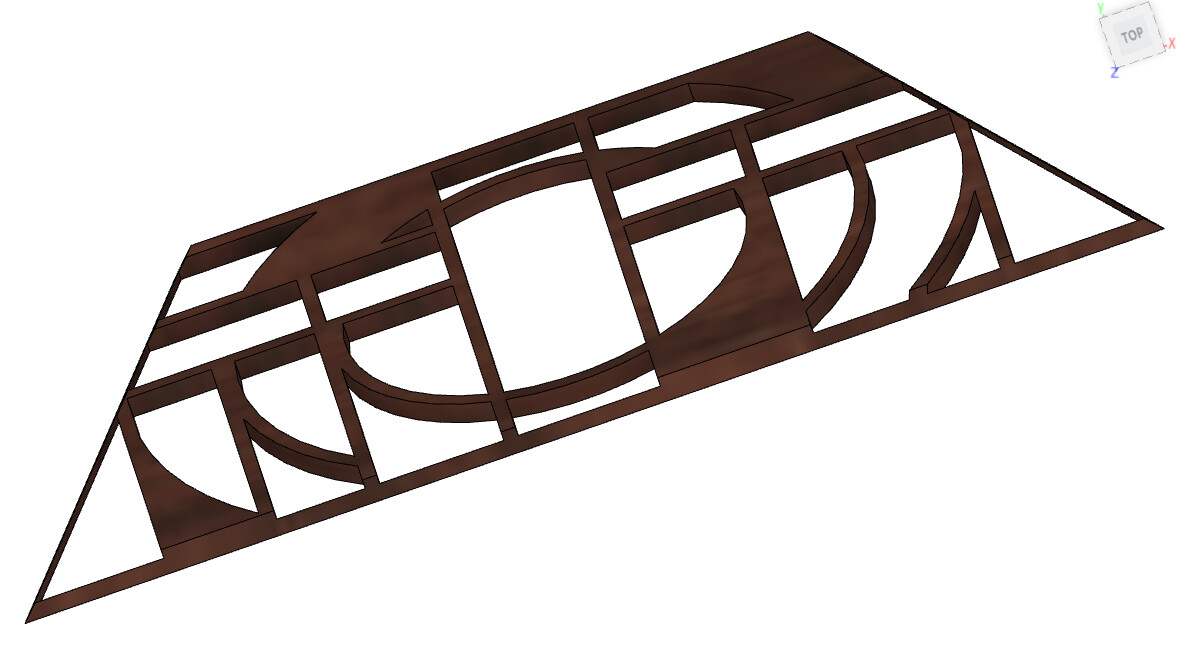
Each part of the lamp is 4.42mm thick (because…geometry, 5mm offset in sketches at an angle becomes 4.42mm), so I plan to use 6mm stock, with the piece centered in that stock (0.79mm+4.42mm+0.79mm), so the battle plan for now is :
mill pockets down to 0.79mm + 4.42mm = 5.21mm, using 1/8" endmill followed by 1/16th in the inner corners. The 1/16" endmill radius still shows, but I kinda like the slightly rounded look after all.
pour epoxy and let it harden
face off 0.79mm
drill locating holes for flip side
carve outer edges (50.4° slope…won’t be a simple vcarve at depth)
flip piece
face off the residual 0.79mm (which should reveal the epoxy from the other side), and carve the remaining angled edge
Oh, and yes this thread will turn into a build log, which should force me to see this through
So, even though it’s only an MDF prototype, it’s still progress. The steps above and associated toolpaths work fine. Running a 3D contour pass at small stepover with a ballnose 1/8" left me with the correct slopes on the edges (ignore the clear epoxy coat bleeding into the MDF…)
We have an agreement that I do projects for her and for me in turn, so the next one is a decorative backlit wall panel I have in mind. The great thing about doing epoxy in November is that it takes so long to harden that it forces me to work on the CAD/CAM of other things
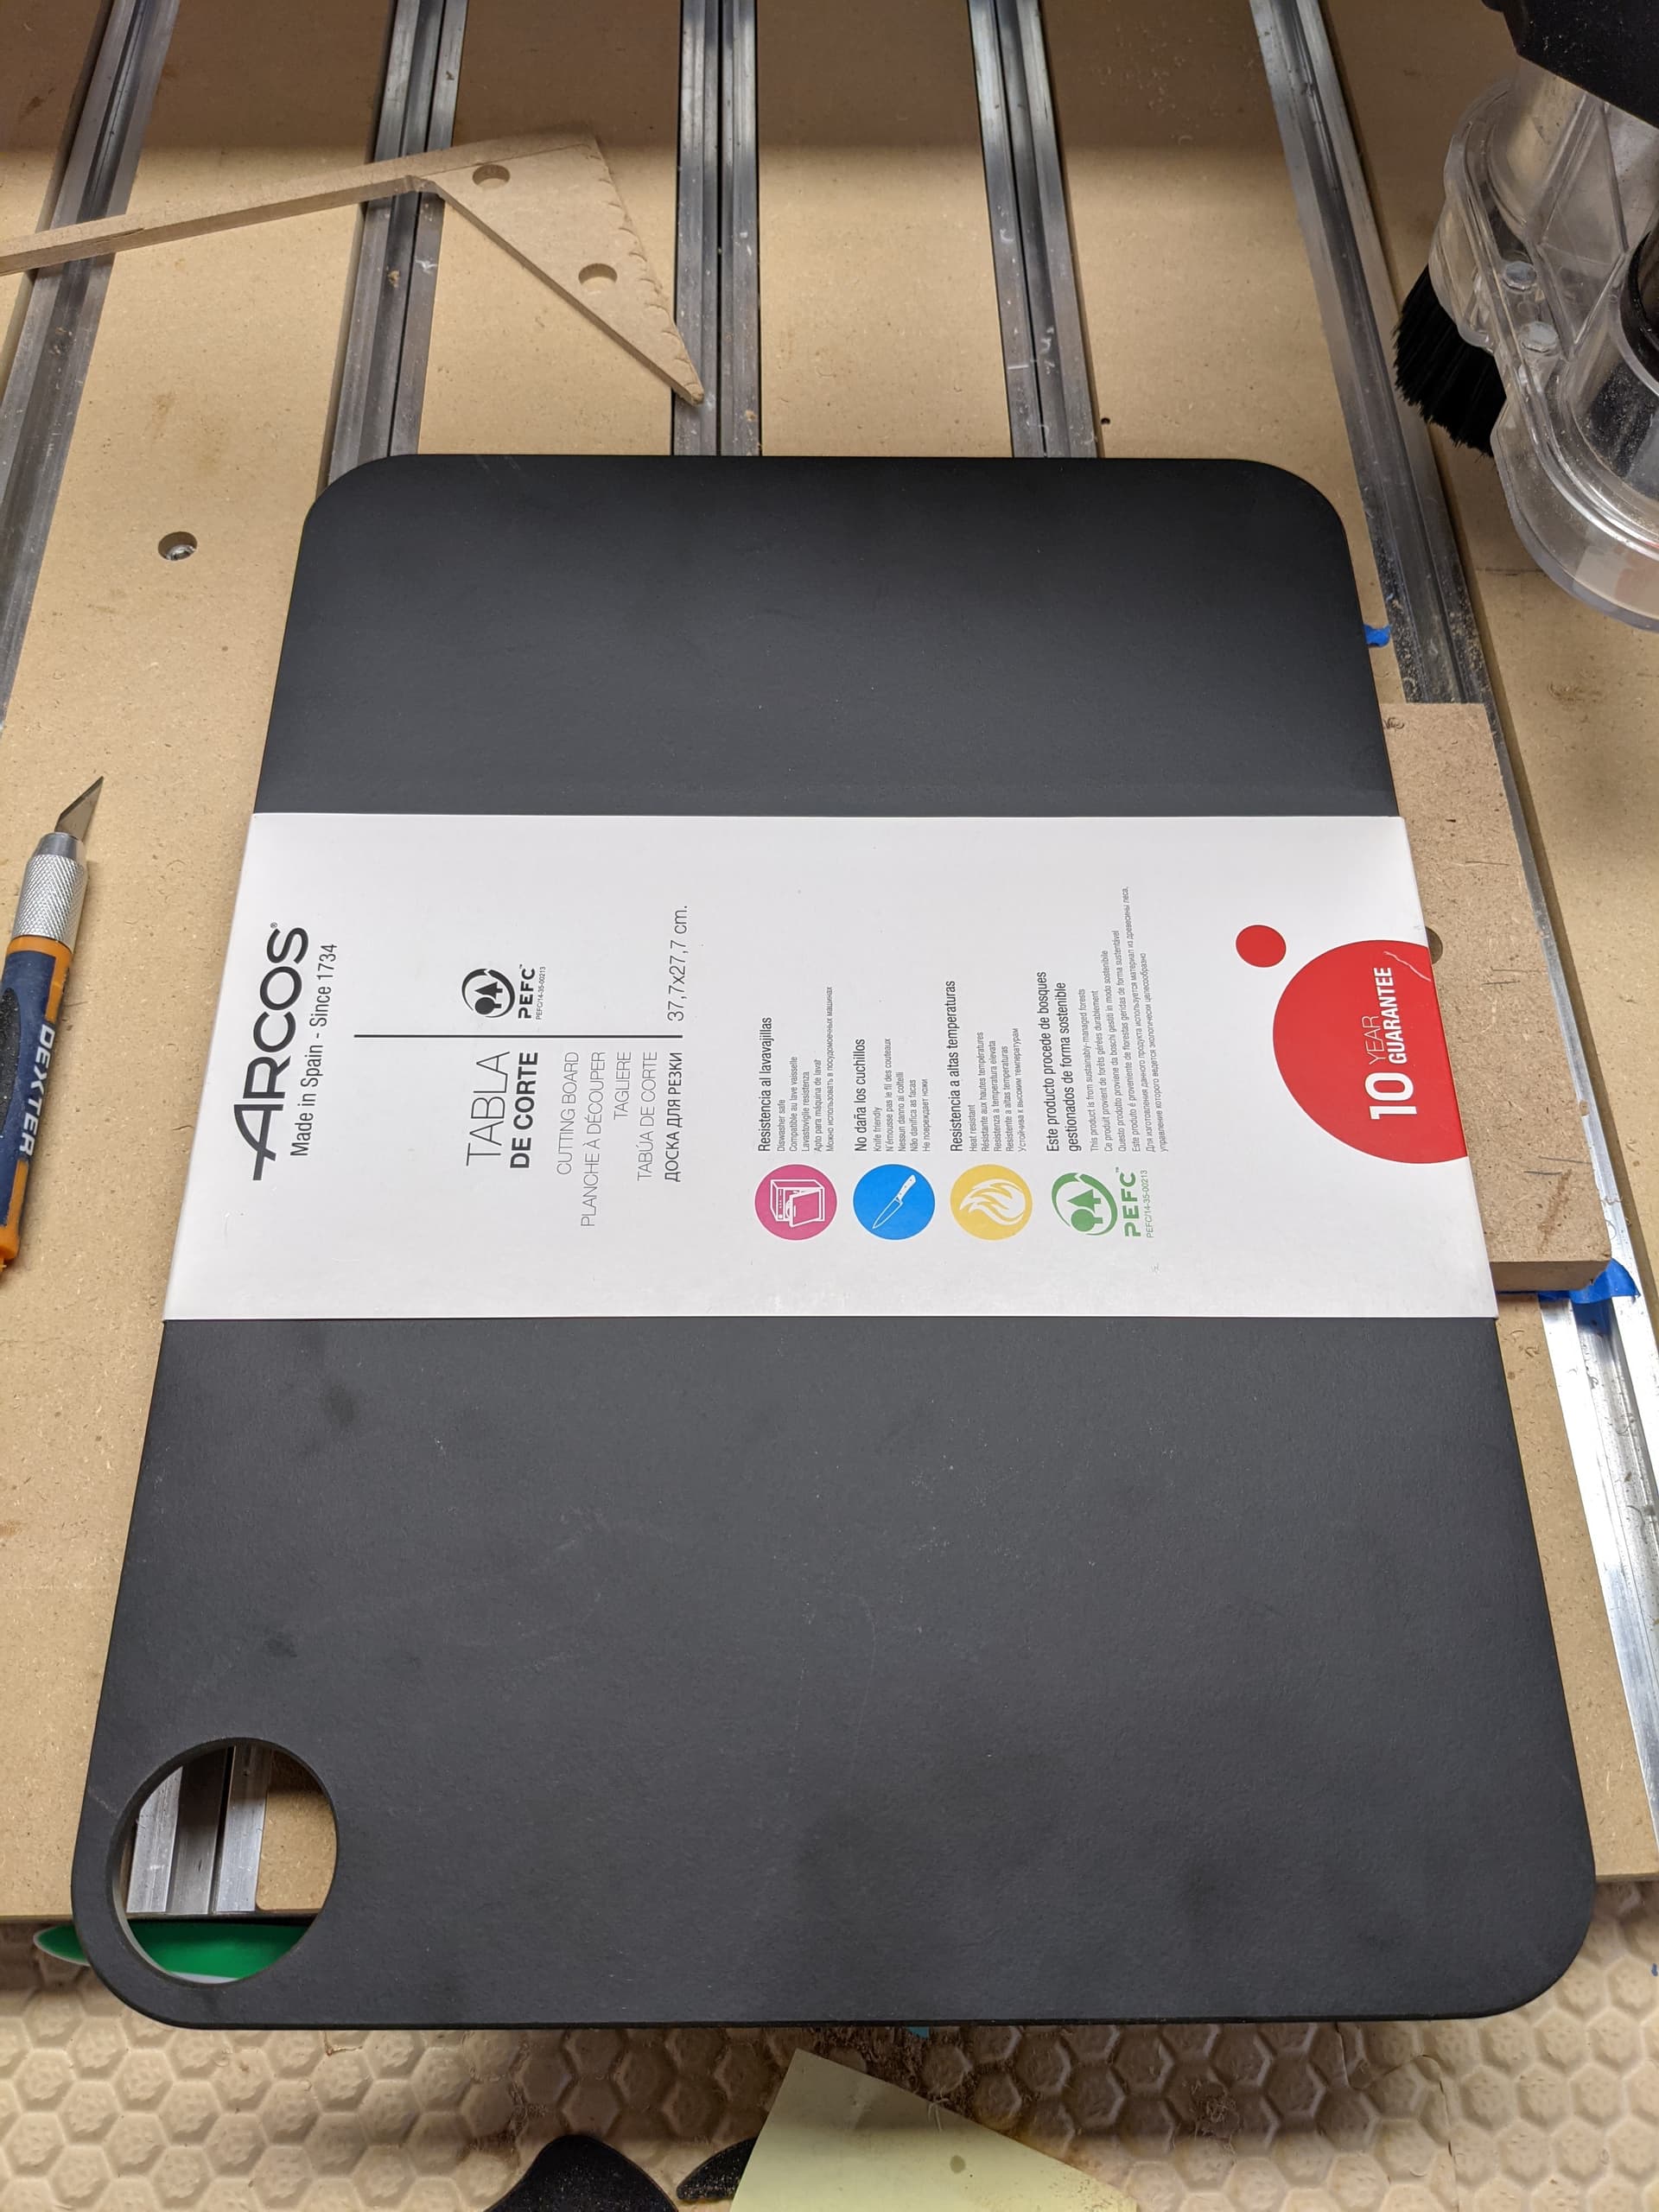
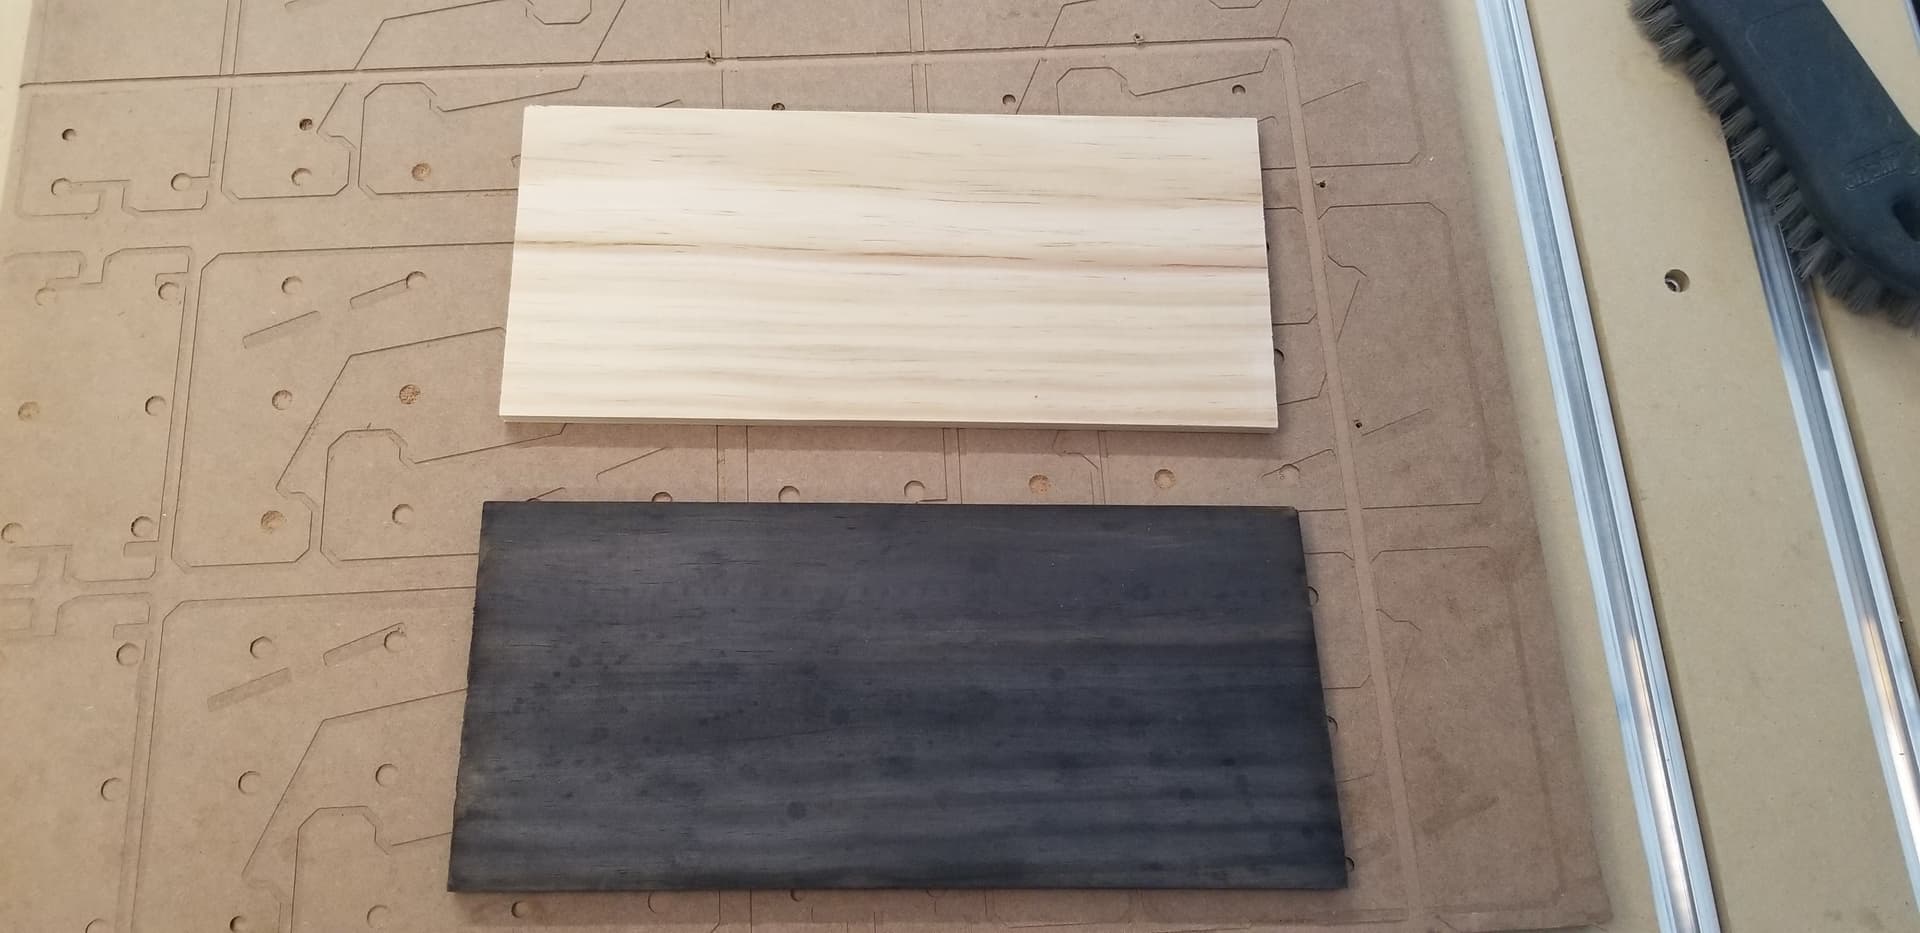
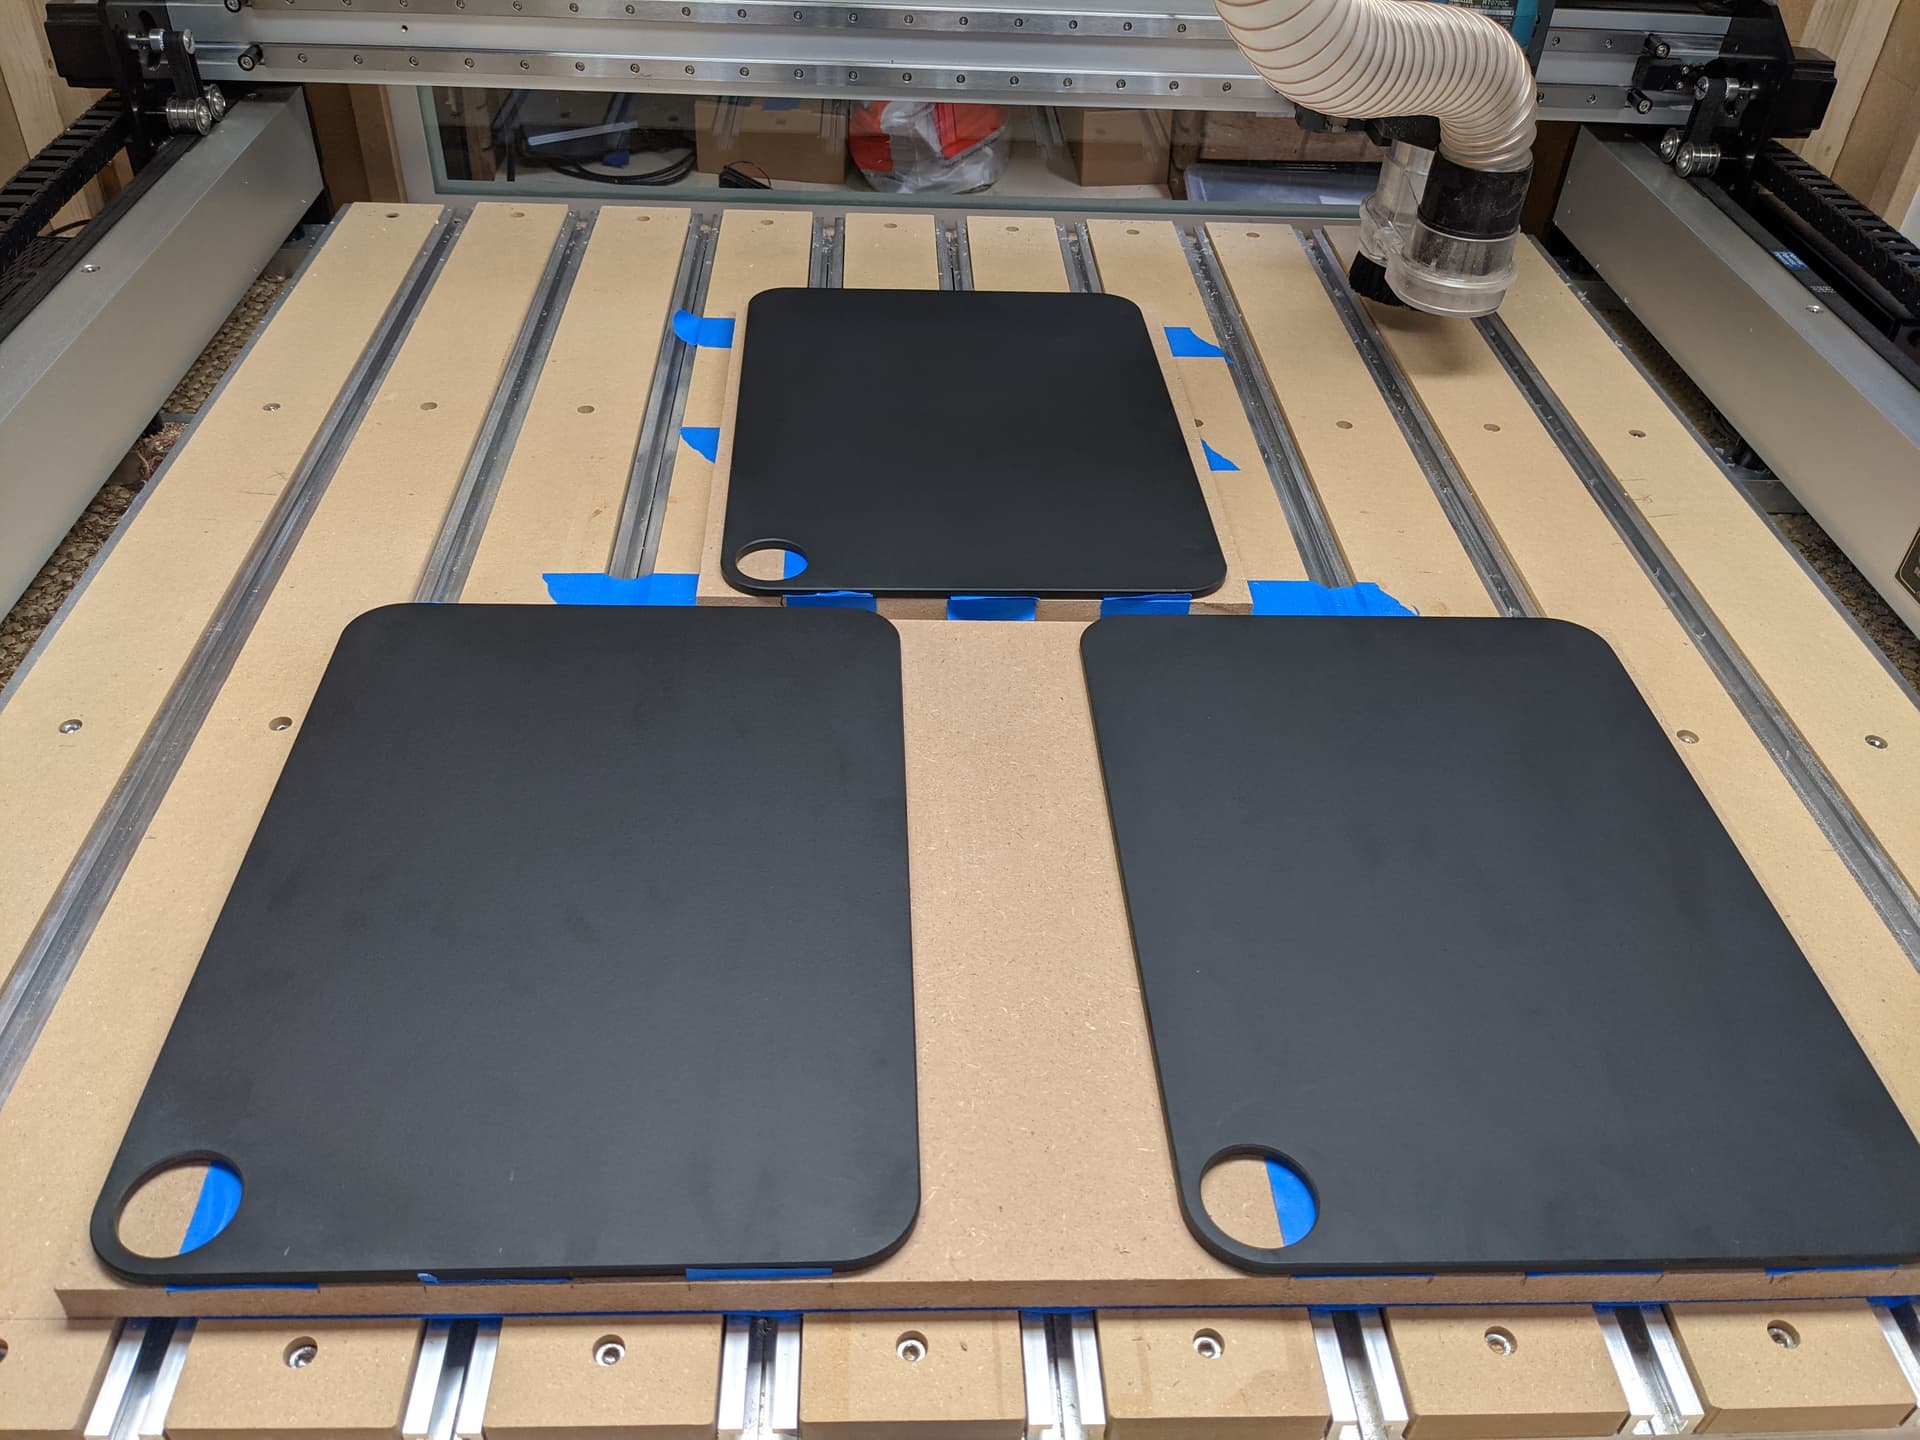
I found those matte black cutting boards, that are apparently made from cellulose fibers and resin, that I want to try instead of wood, for the skeleton of the panels (yeah I googled to find ebony wood, and stopped after 5 minutes)
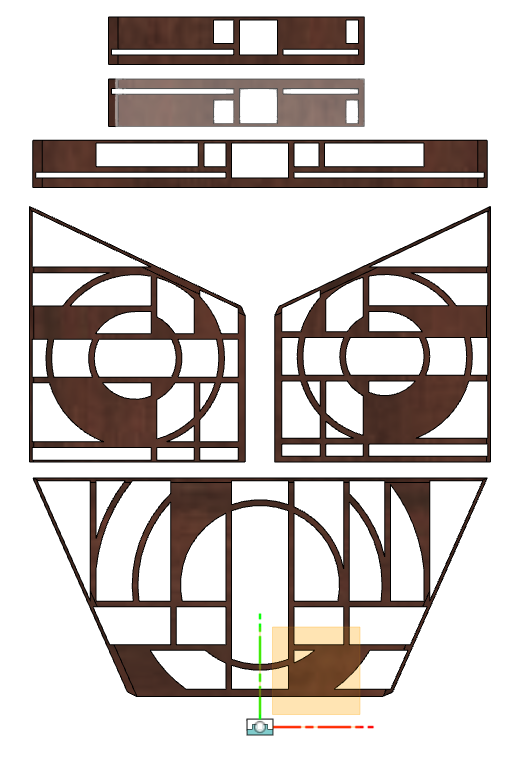
By the way, since I’m on the hobbyist version of Fusion360, I don’t have access (anymore) to the nifty “Arrange” feature that will lay all parts of a 3D model flat on a surface, BUT the guy in this video mentioned that one can use Joints instead, and it’s actually just as good as far as I am concerned. I played with the layout of the parts for a while to fit within the dimensions of the cutting board, and ended up with this. I don’t know what I did, but it’s upset (or shocked)
Consider Cocobolo - a little more cost effective (at least here in the states) and definitely a nice wood. You could also use Wenge, which is much less expensive and might even be blacker than ebony.
I was looking at ebonising wood last night. Essentially it is a staining process using a vinegar and steel wool mixture to react with the tannin in wood. Sometimes if there is insufficient tannin in the timber it is pre-treated with a strong tea solution.
I haven’t tried it myself
Pre- and post-treatment with steel wool, vinegar, and tea stain on pine, from a recent project. The “splatter” on the treated piece was intentional. I was shooting for a rustic, weathered look.
Julien,
I’m not sure if you’ve already thought of this, but after the step where you put the epoxy panels in the mdf, as pictured, could you then pocket out the mdf and put in black epoxy for the frame?
John
You all have me convinced I need to look into learning how to stain wood! How “deep” does this stain the wood, i.e. if I were to mill a stained piece, what’s the color deep inside the wood ?
Indeed, and @Radiation mentioned that idea earlier too. I gave it some thought and decided that for now I’d like to have some “material contrast” between the translucent epoxy and the material of the frame, but I may use that technique in a second iteration of the prototypes if the Richlite thing does not turn out as good as expected.
@Julien Staining wood is fine. Nothing wrong with it. There is a time and place for it. There are a couple of issues that you need to consider:
The pattern and grain of the wood describes its species. Even if you stain it - or ebonize it - the wood is still Oak, or whatever you choose to use - and it looks like it - even to an untrained eye. Ebony is desirable because there is a quality to its grain and pattern that makes it Ebony. Oak is Oak…and always feels like Oak no matter what color you make it. Same is true for Cocabolo, Wenge, Cherry, Mahogany. They all have a feel that’s unique to the species. As a general rule, pick the wood you use based on its pattern and hardness first. What feel are you looking for?
(and the answer to your question above) Wood stain penetrates based on the porosity of the species and its preparation (sanding, glue size, etc.). You cannot safely project without preparing some samples of exactly the same wood, prepared exactly the same way.
Due to #2, if the piece is ever damaged or needs to be re-sanded for any reason, it will also need to be re-stained and matched. Not always an easy task.
My opinion: Think of the cost of the piece in terms of its longevity. If you’re going to have this piece for more than a few years, invest in it. Either use Ebony or use Cocobolo, Wenge, or some other tight-grained, nicely patterned wood. In the long run - when you’re looking at the piece 10 years from now - or handing it down to your children’s children, you’ll be happy you did.
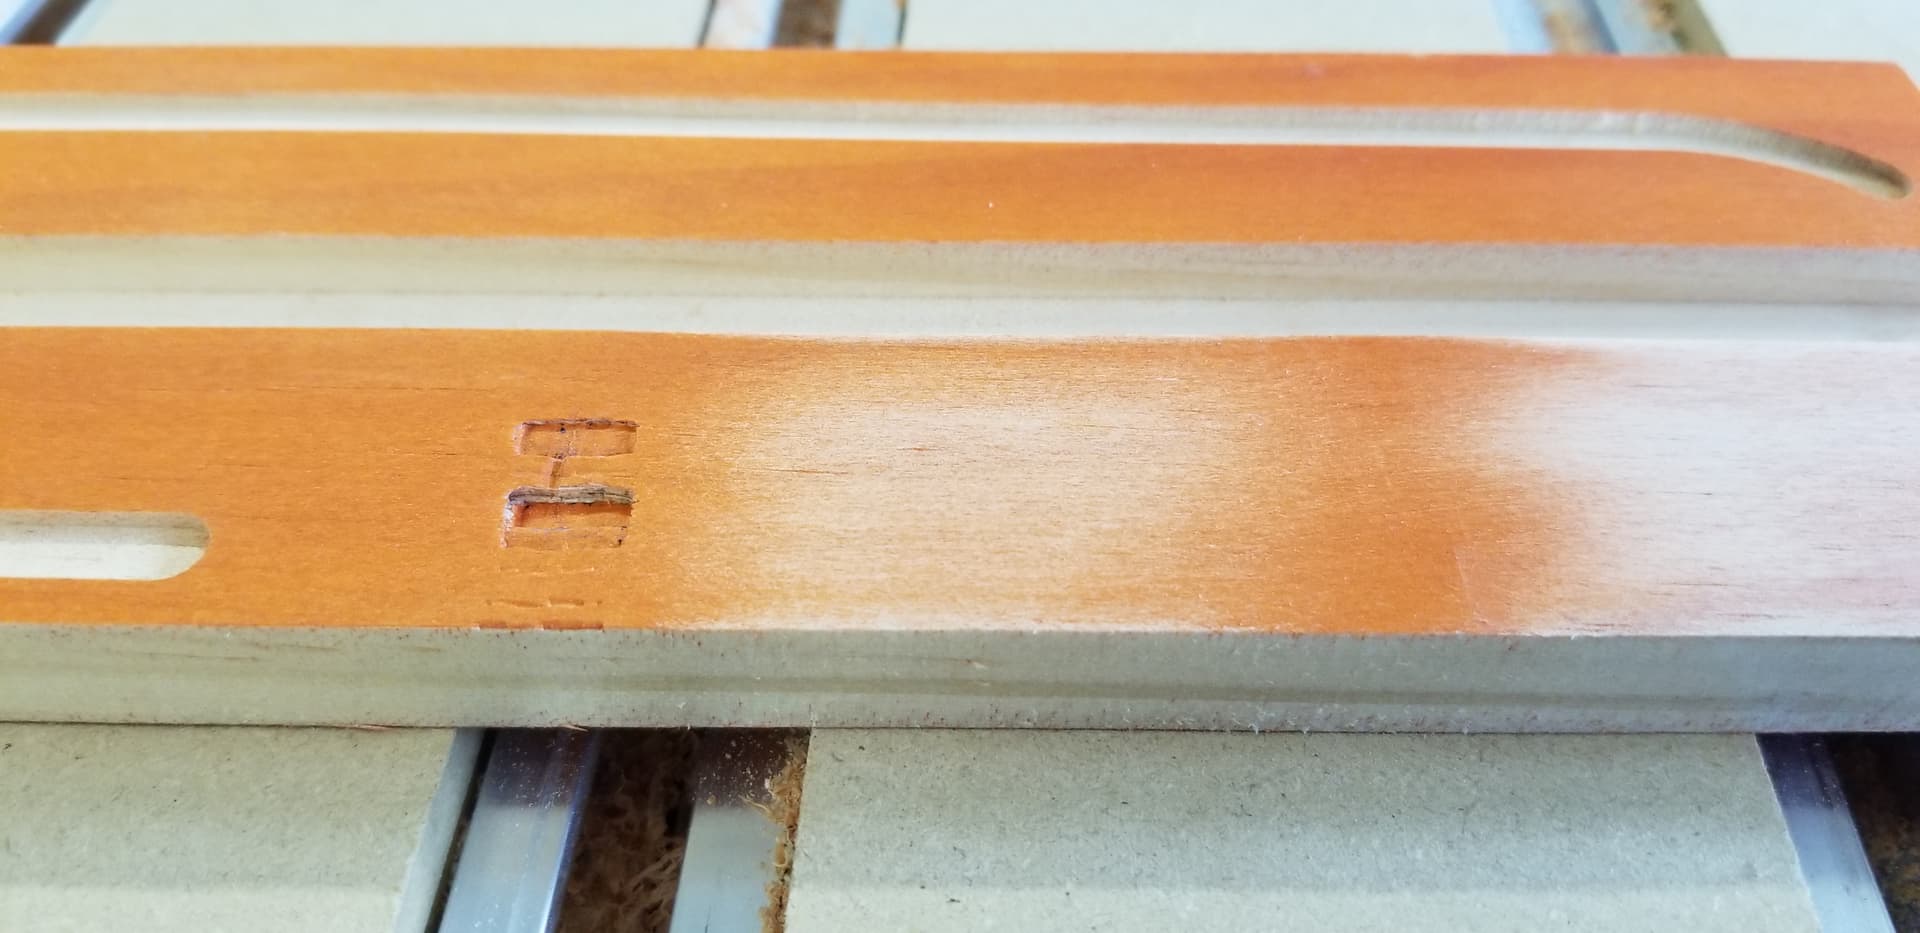
Stains and dyes are surface finishes. They typically don’t penetrate very deeply. The penetration depth is similar to the epoxy or paint “bleed” that we try to avoid in many of our projects. So, milling a stained piece would expose the original color of the wood.
I was motivated to head out to the garage to create an example to share. It started with a cut-off that had been stained and milled. I grabbed it with some pliers, hit it quickly with 120, and hit it hard with 120. You can see that the penetration was not very deep.
I prefer most woods for their natural grain and color, but, as GJM said, stain has its place in the shop. Get some stain and do some test run/sample pieces to get a feel for it.
@GJM and @Sawdust thank you for the insights and test.
cost of material is not the issue here, I would happily overspend in this specific case (happy wife, happy life!) but procuring cocobolo or wenge is the hard part, at least in the dimensions I’m after (~14" x 12" x 1/4")
Since staining won’t reach all the way inside the material, if I were to use that technique in this project, I could mill the wood, stain it and then pour the epoxy, but then of course I couldn’t face it /sand it. And if I milled, poured the epoxy, sanded, and THEN stained the whole piece, I’m not sure what the effect would be on the epoxy?
For now I’m curious what kind of finish quality I can hope to get from Richlite (interesting video from the NYCCNC folks about milling Richlite here)
The fact that I did not even consider glueing up pieces of wood is evidence that I’m still a long way from “Julien woodworks”
Thanks for the friendly reminder.
In other news, Richlite machines beautifully and both the 1/8" and 1mm endmills survived the first test cut. Now running the real deal.