That’s when I started working on a Christmas present for my girlfriend. I decided to make her a trivet using inspiration and directions from this, this and this. I have never made a trivet before or used epoxy so this was going to be a bit of a challenge to get done in 2 weeks but I did it.
She likes Harry Potter so I made a Slytherin themed one because that’s her house. That meant 2 different colors had to be poured
This is the first section cut out which will be green
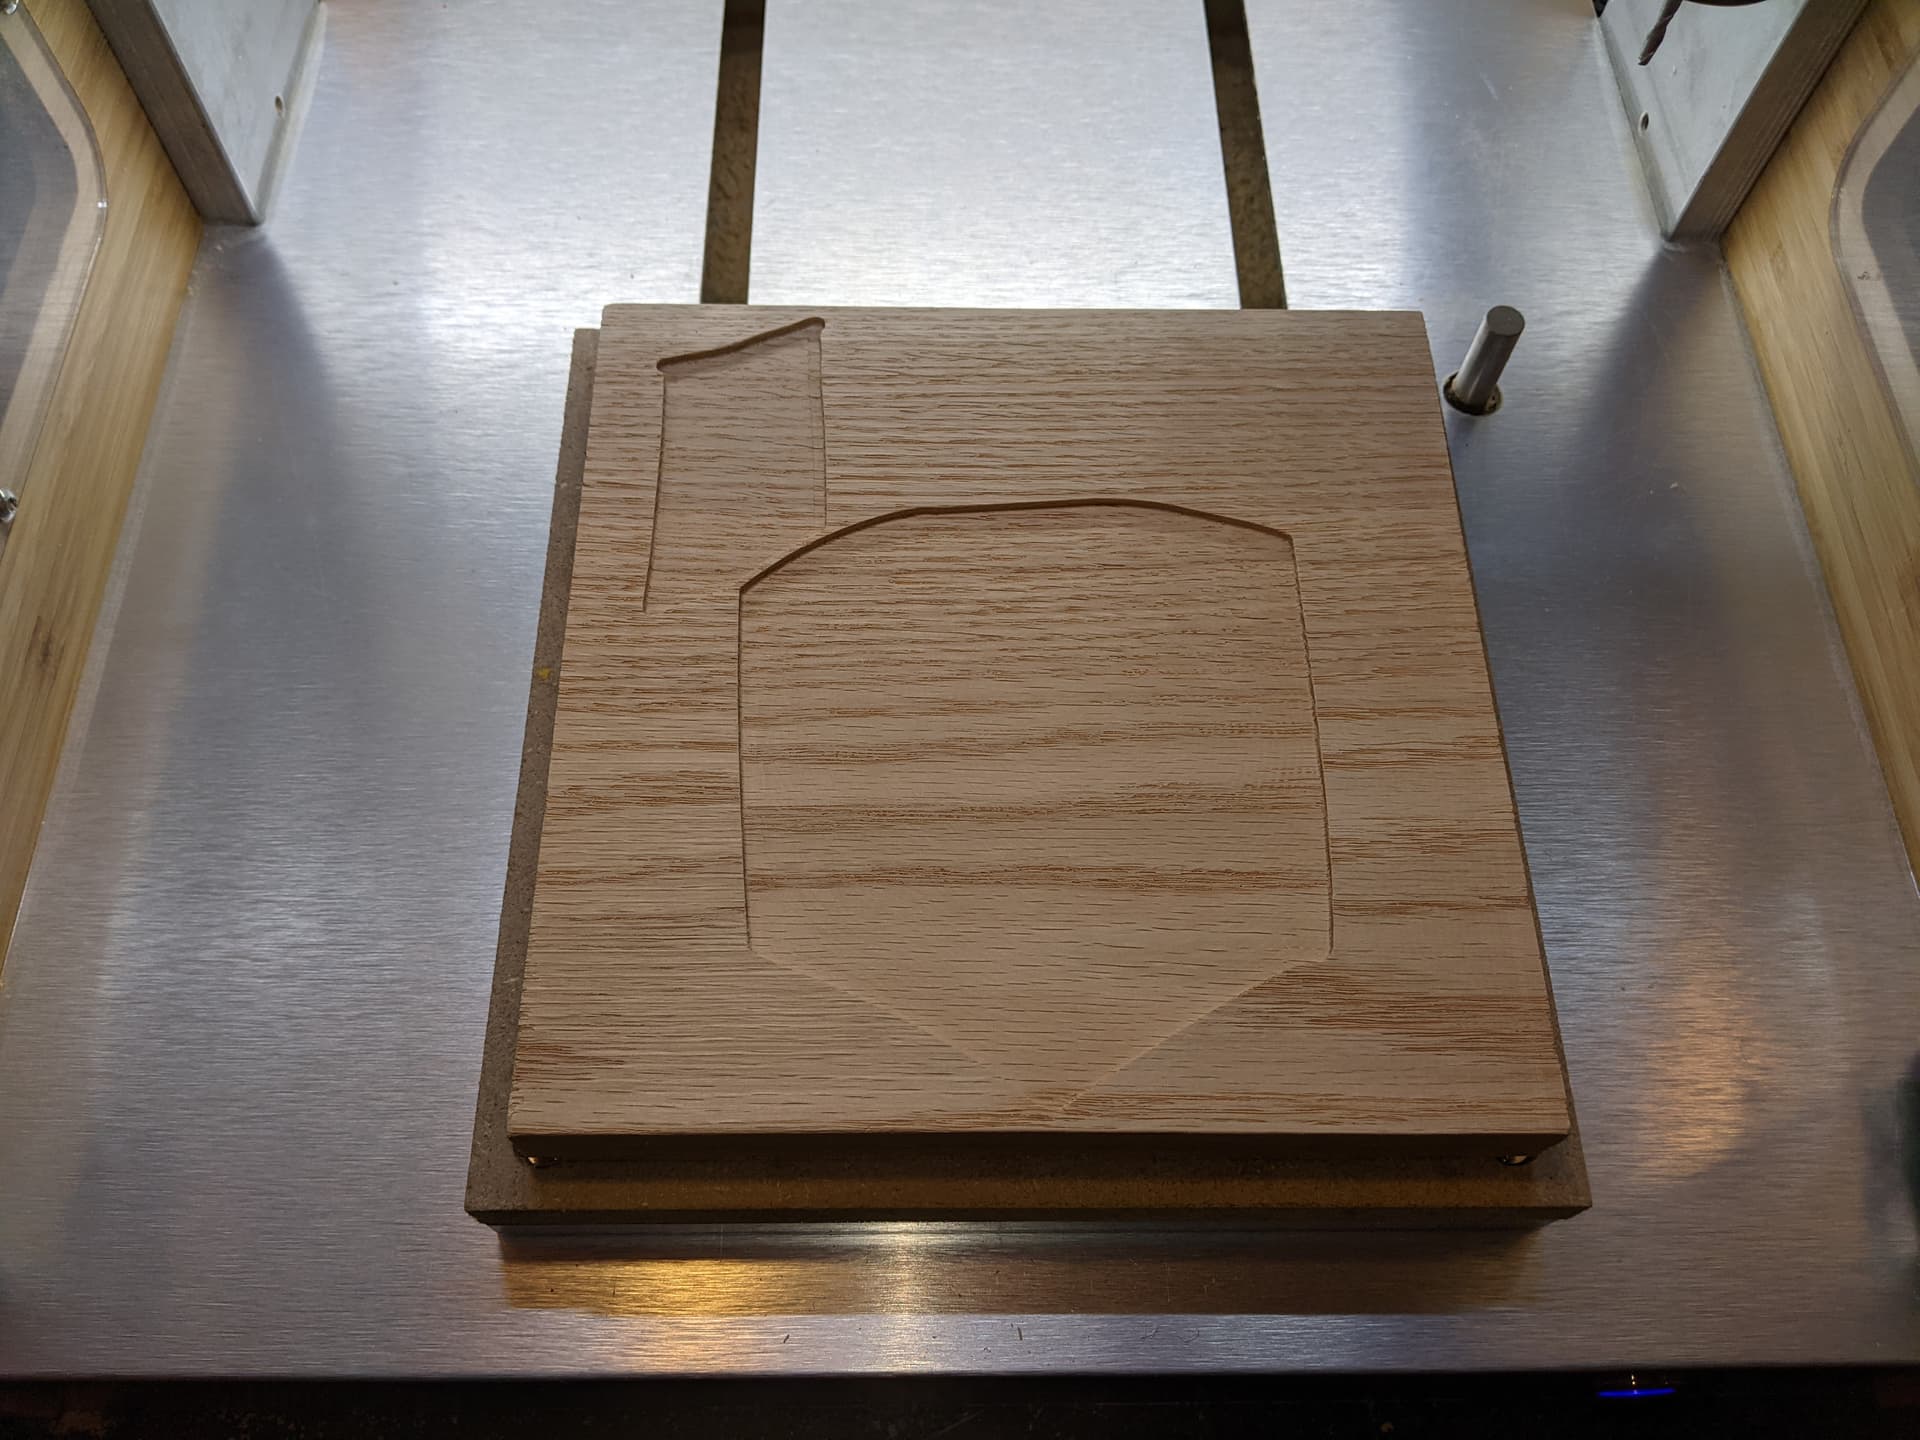
I used a 1/8 two flute endmill with a .03R from Harvey Tool. I ran it at 24k RPM, 100 IPM, 50% stepover and .02" stepdown to a depth of .09"
Since I had never done this before I wanted to be sure nothing would happen like the double sided tape ripping up so I went a little conservative with the stepdowns
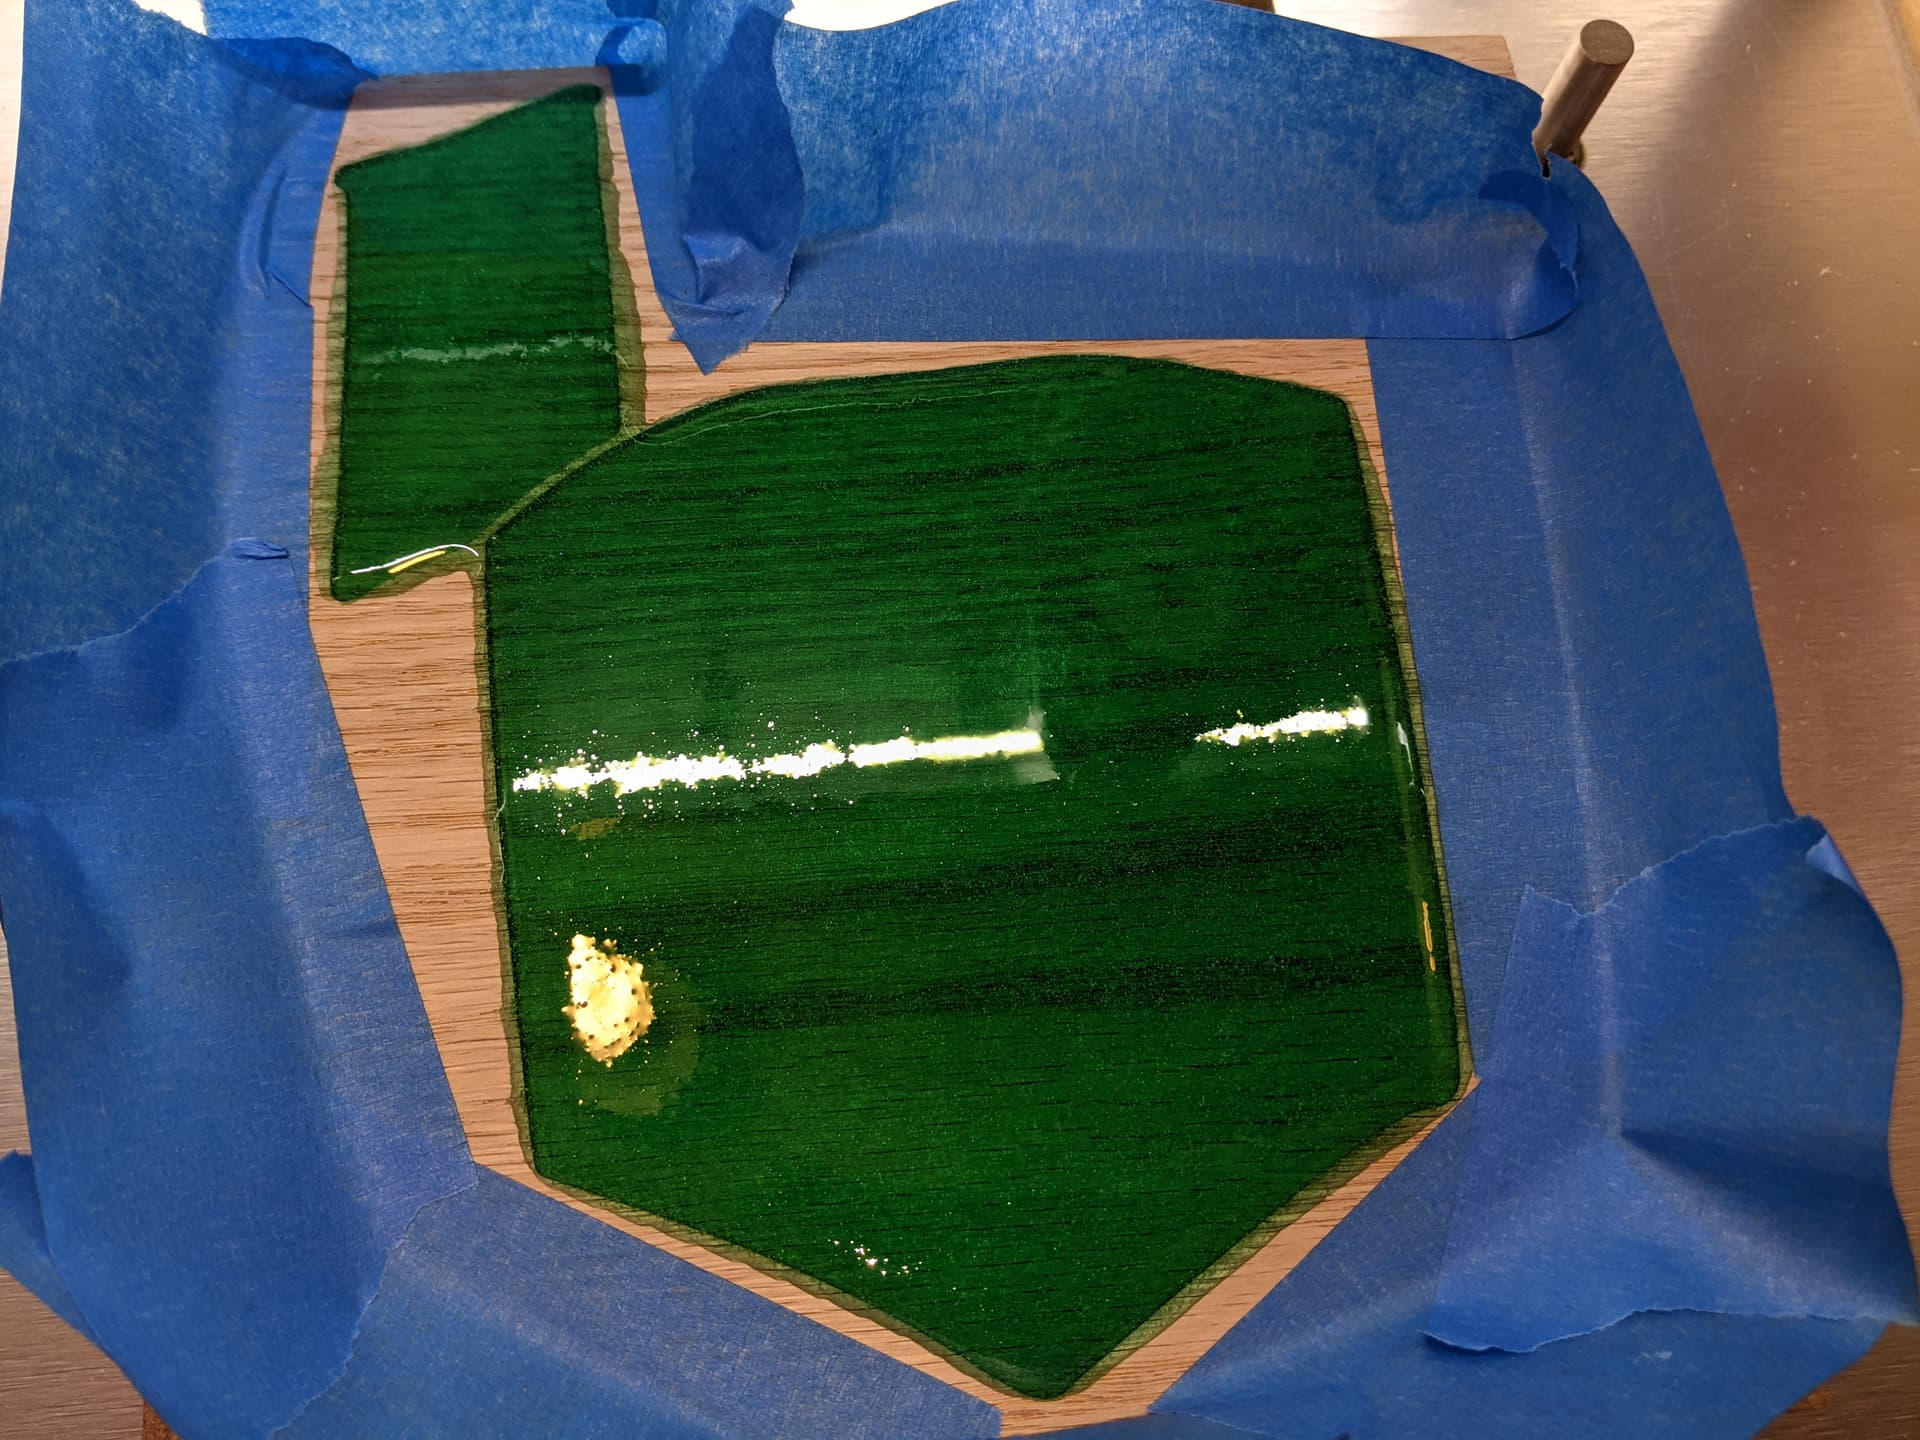
Here is the green poured and taped up just to keep it contained
I left the piece in the machine because I didn’t have a reliable way of locating it if I took it out which meant I had to make this chimney to keep dust out when I used a hair dryer to pop the bubbles
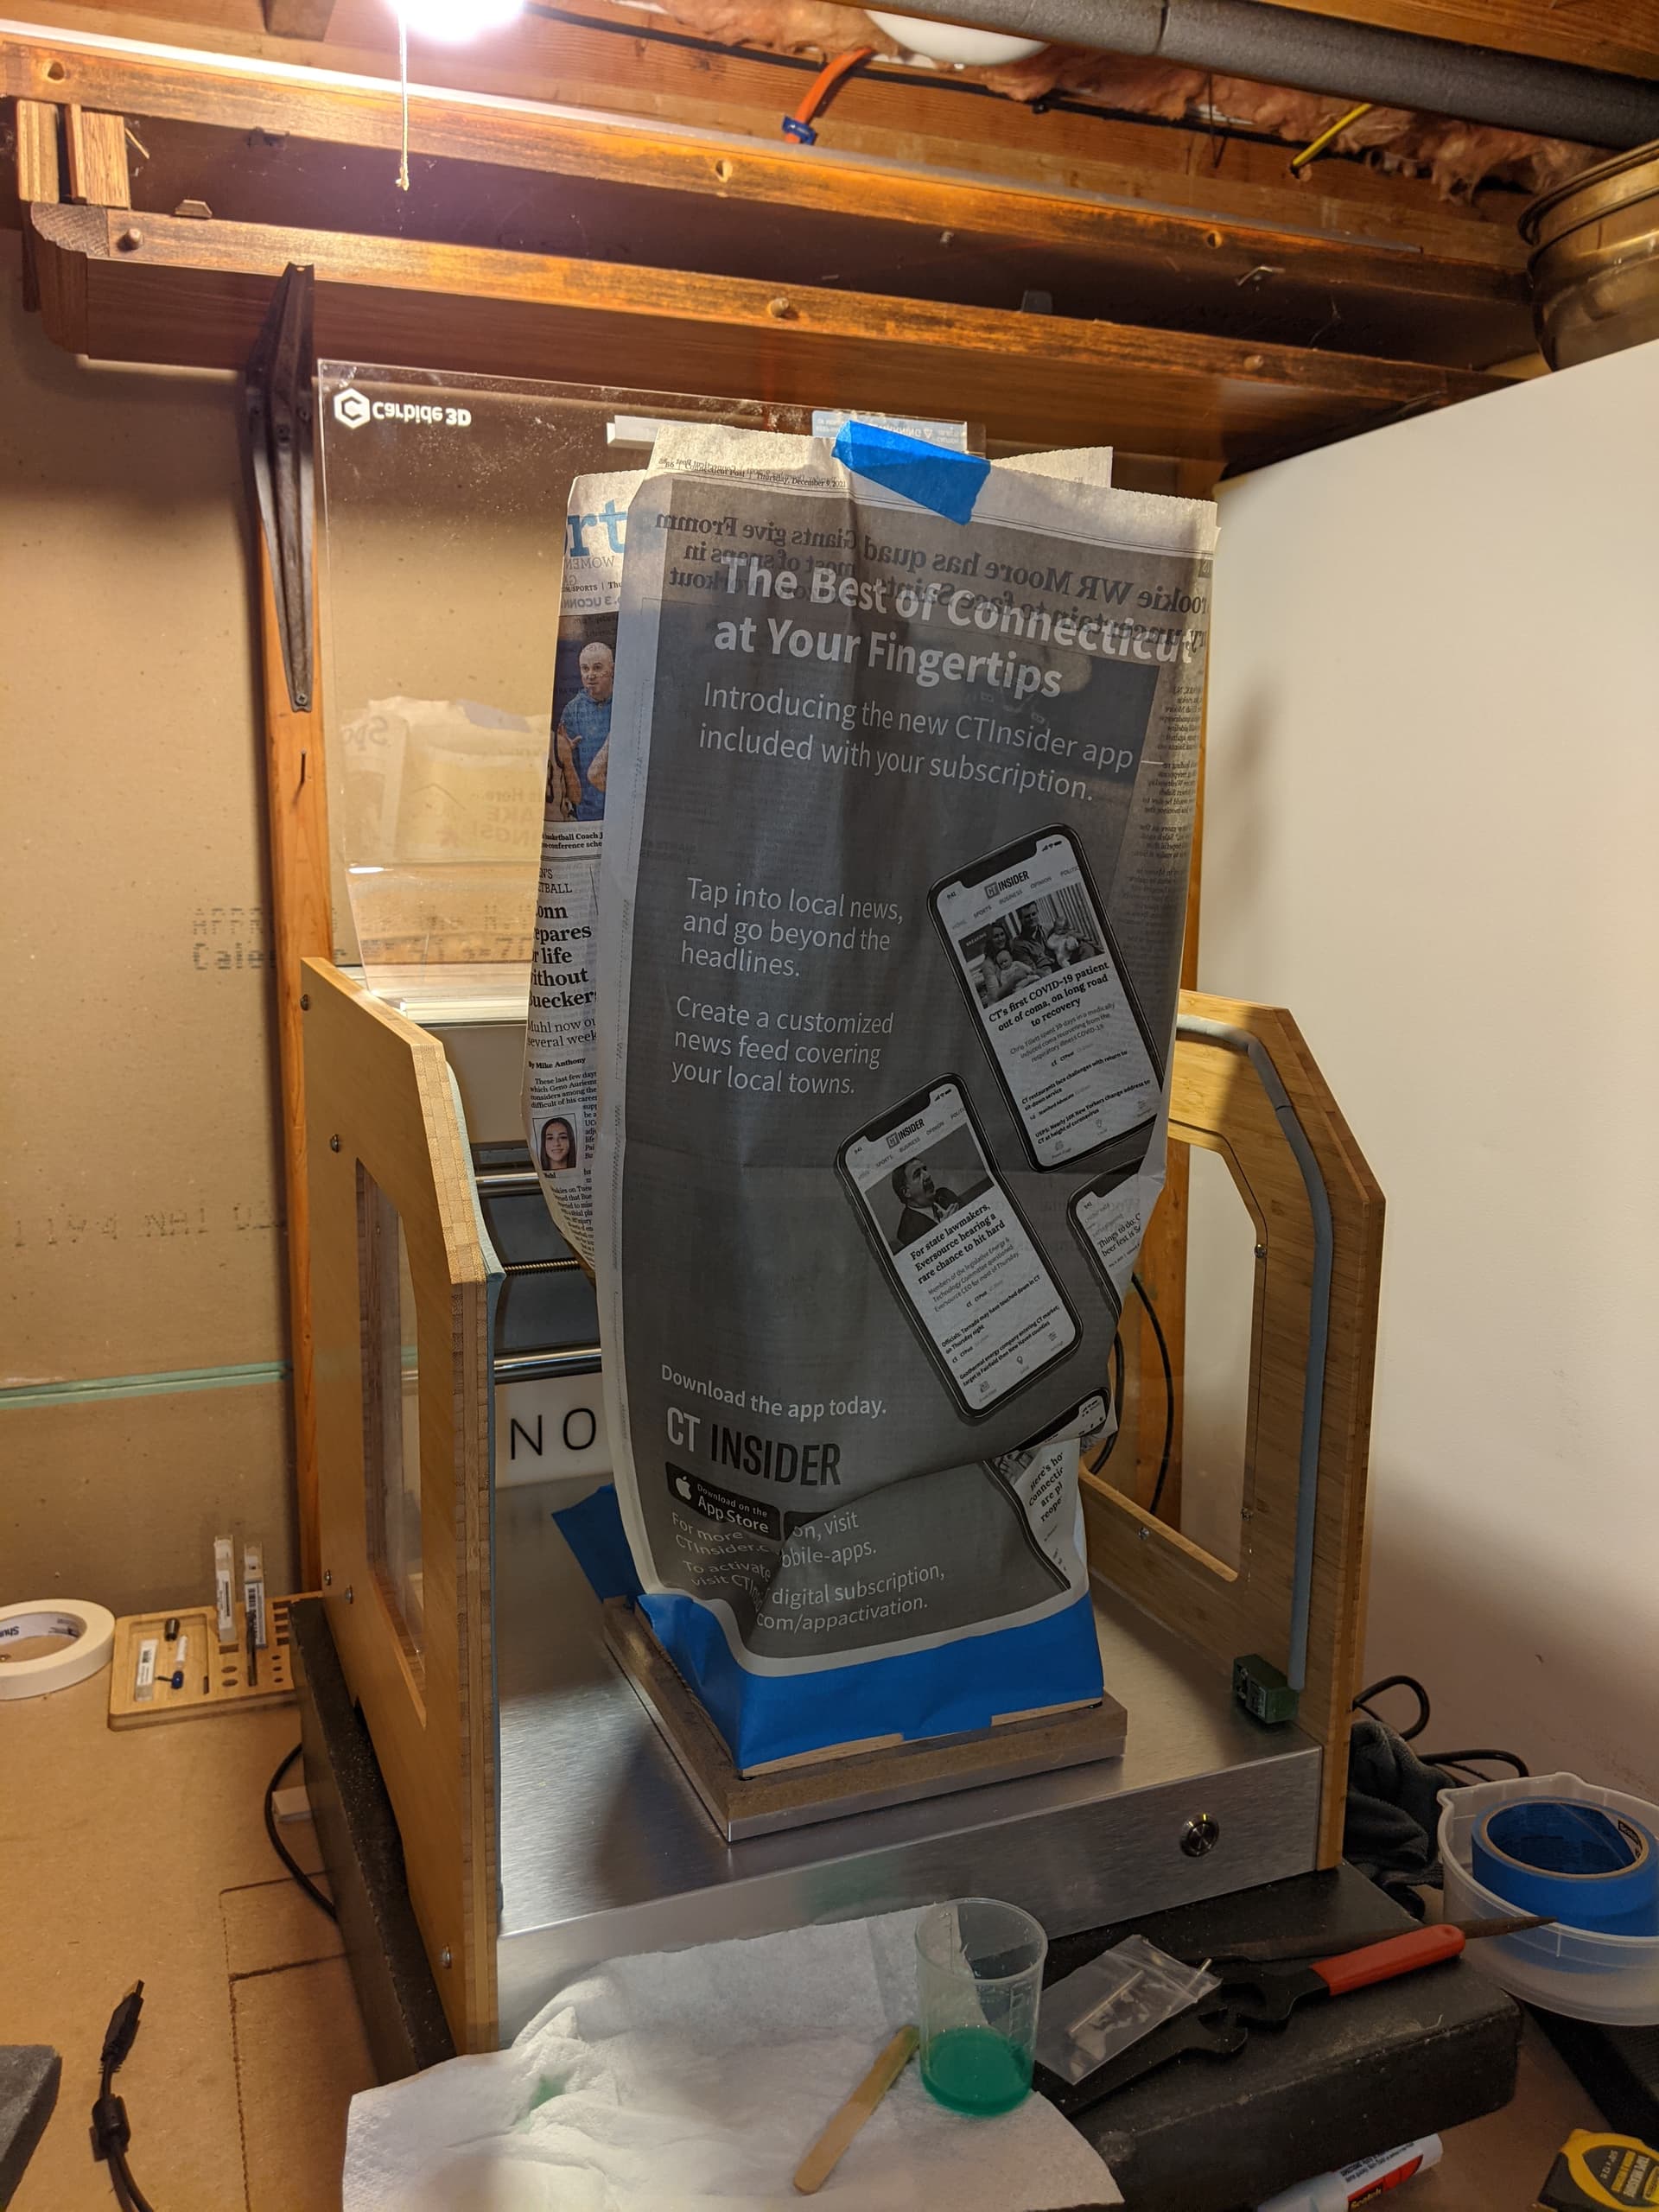
Using the newspaper and hair dryer to “hotbox” the epoxy worked surprisingly well
Next up was cutting out the snake and letters which will be black
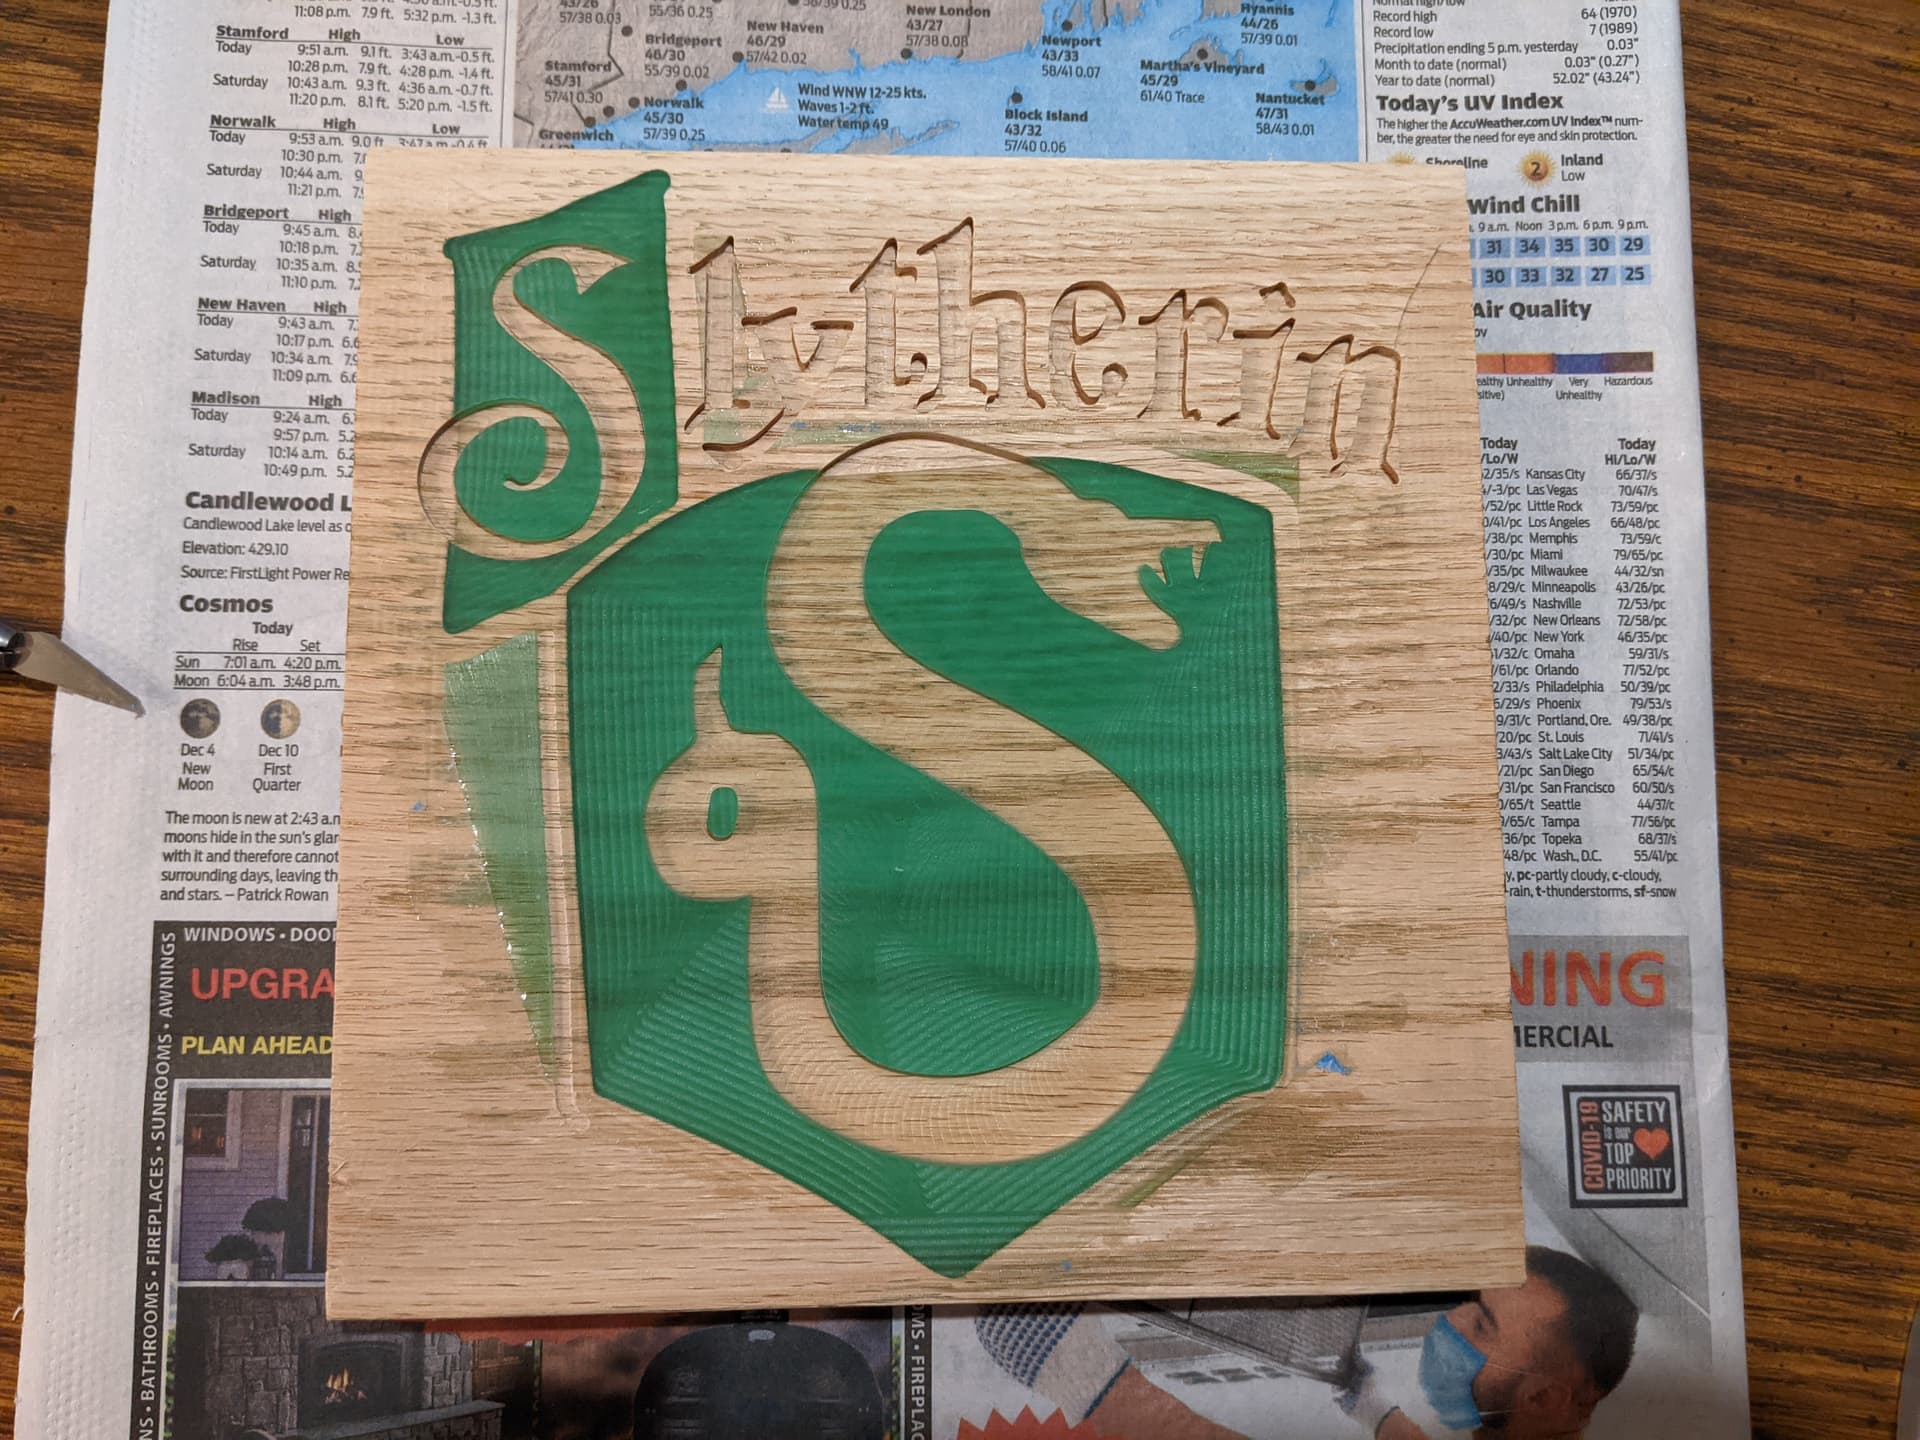
I used the same 1/8 endmill as before with the same stepover and stepdown but instead ran it at 18k RPM and 100 IPM to not melt the epoxy. To get the fine corners of the letters and the fangs I used a .03" two flute endmill from Harvey Tool. I ran it at 24k RPM and 30 IPM with a 50% stepover and .02" stepdown.
Next was to pour the black
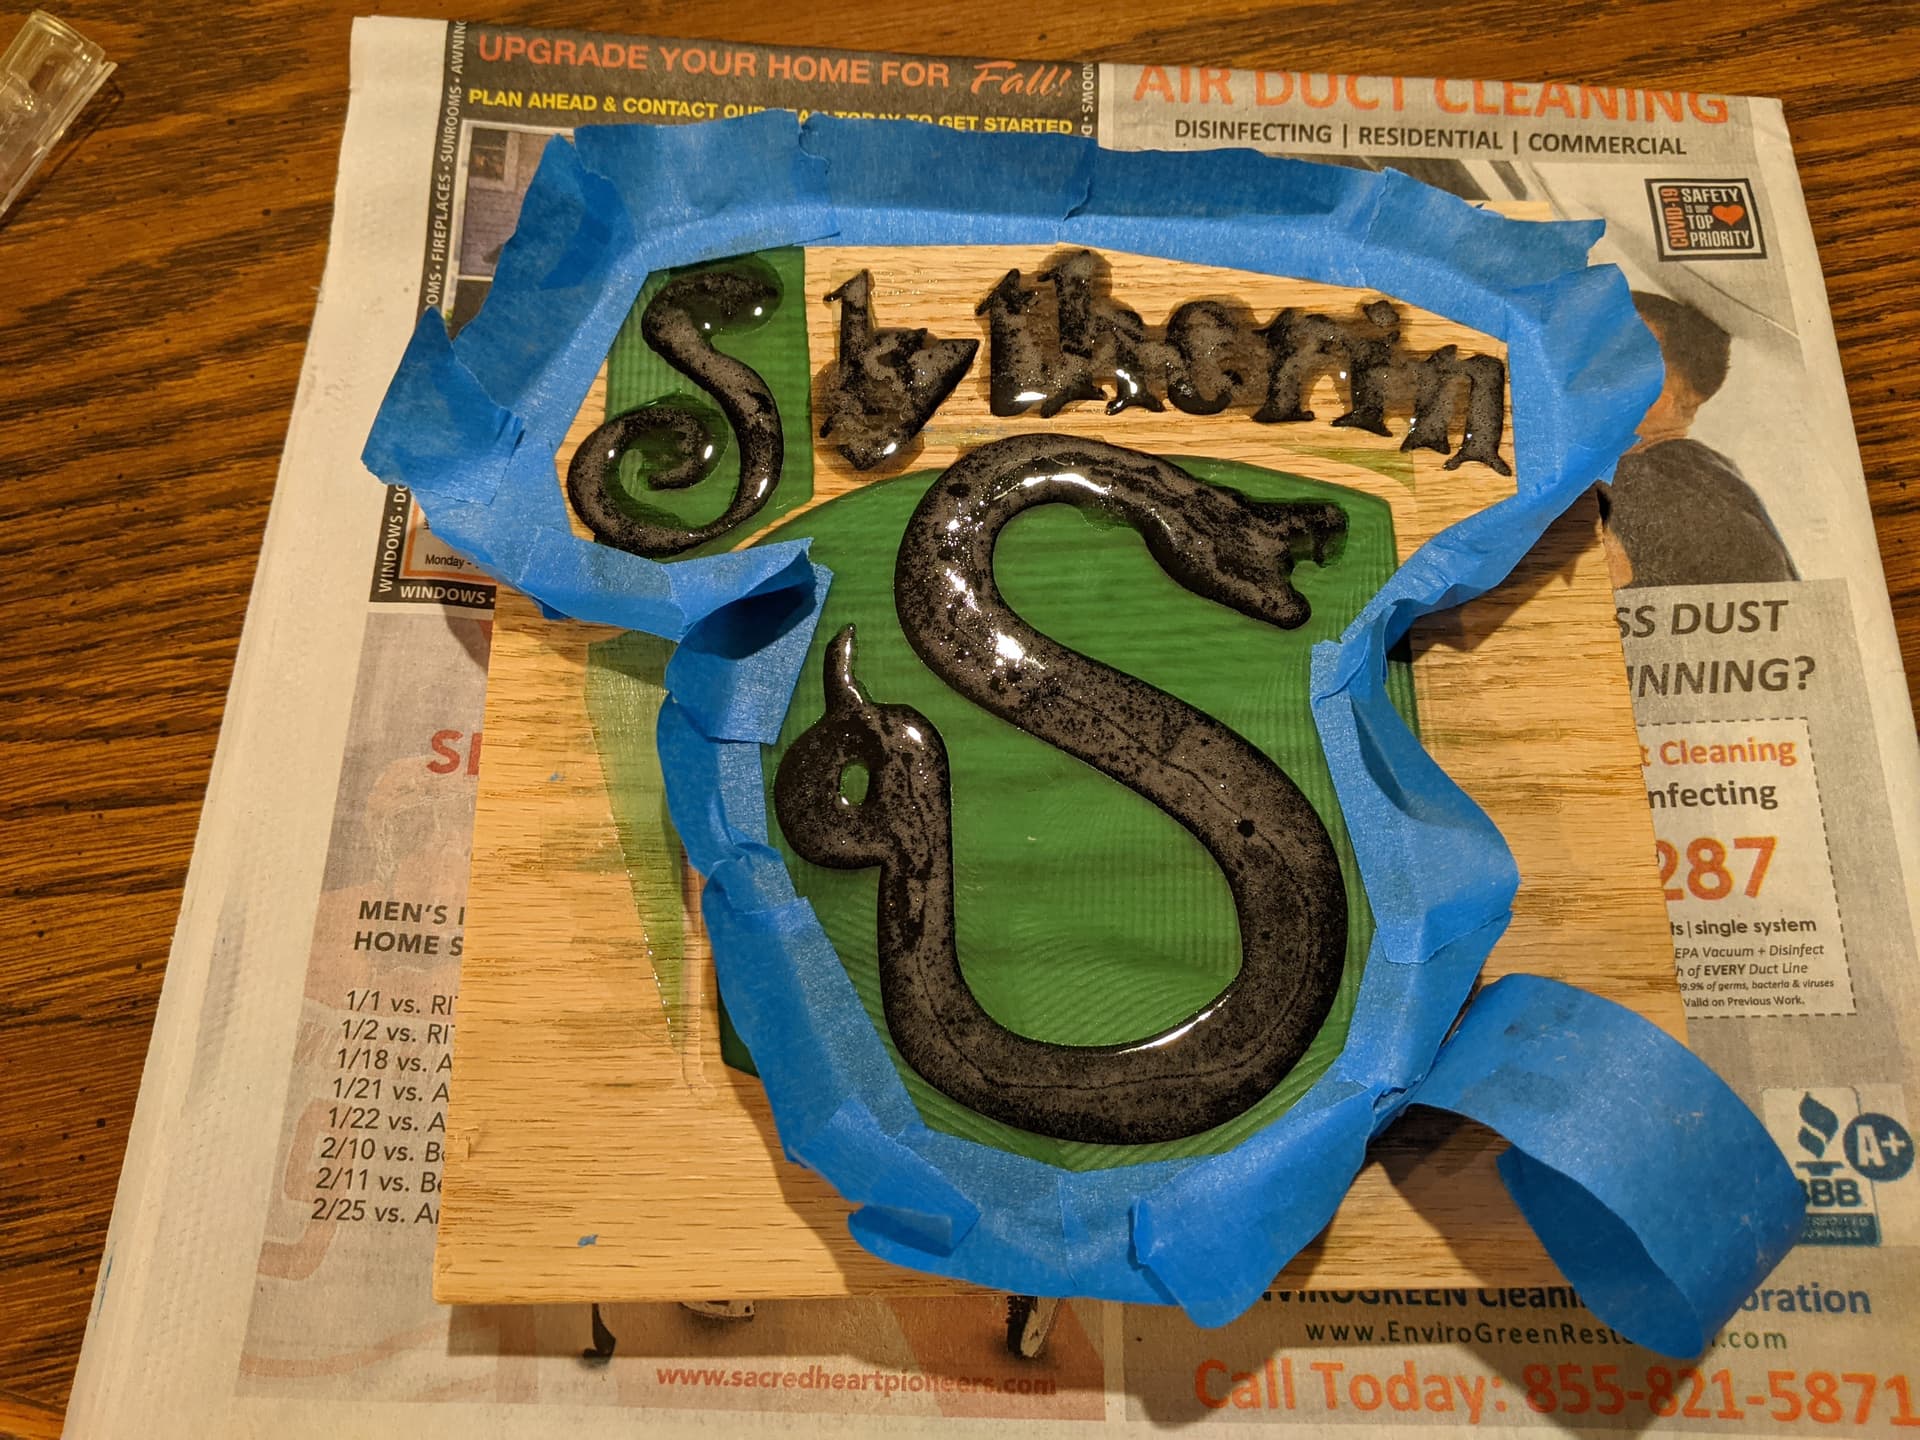
I took it out of the machine to pour the black because I thought it would have been easier to do but I had a lot more bubbles because I couldn’t hotbox it like before
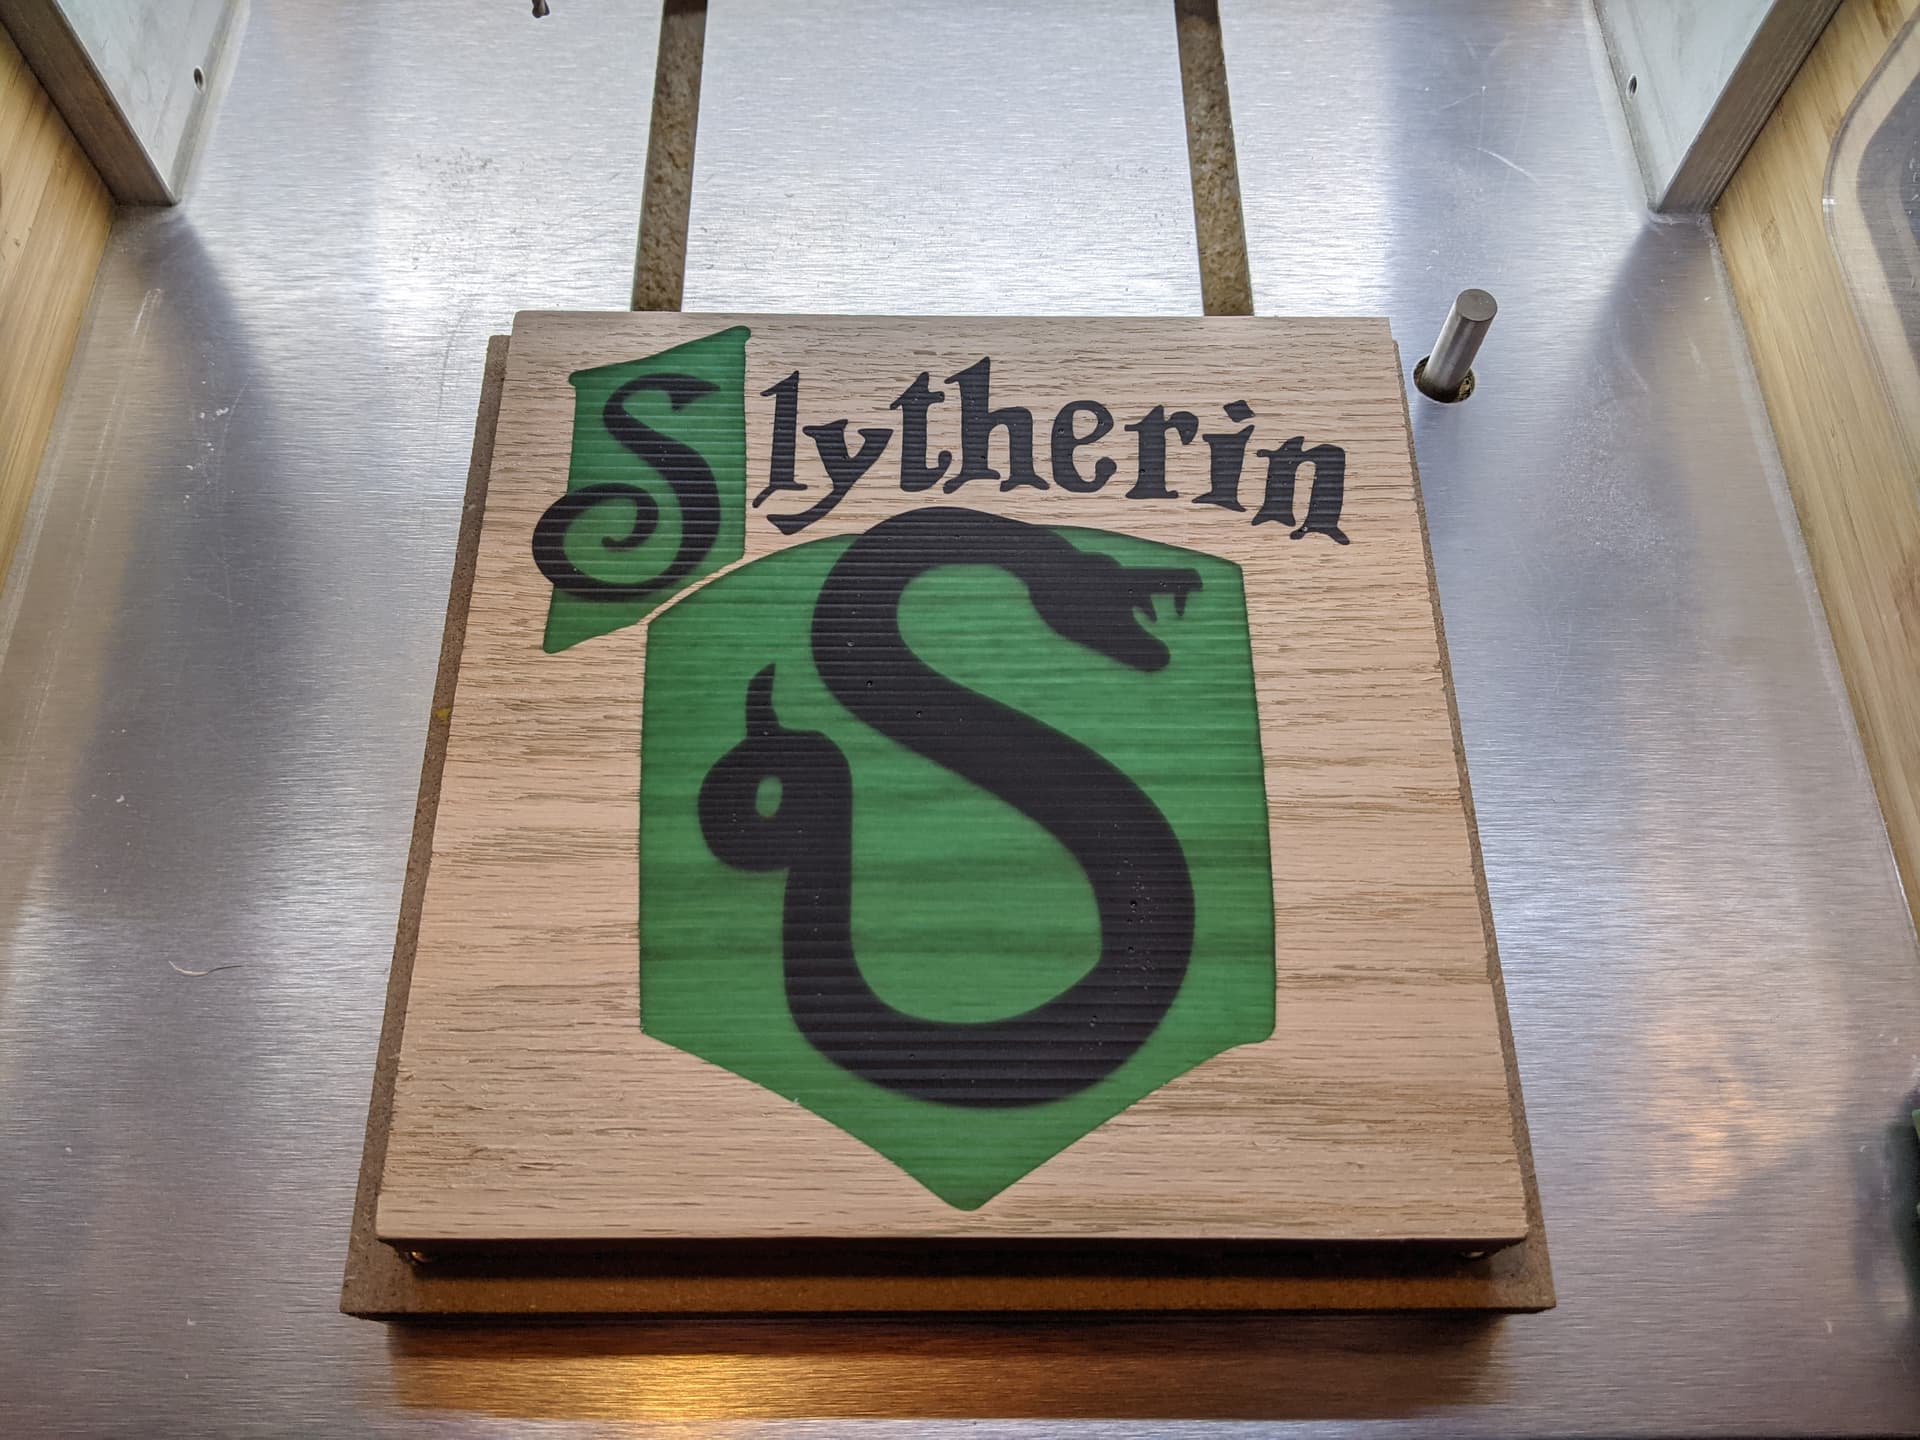
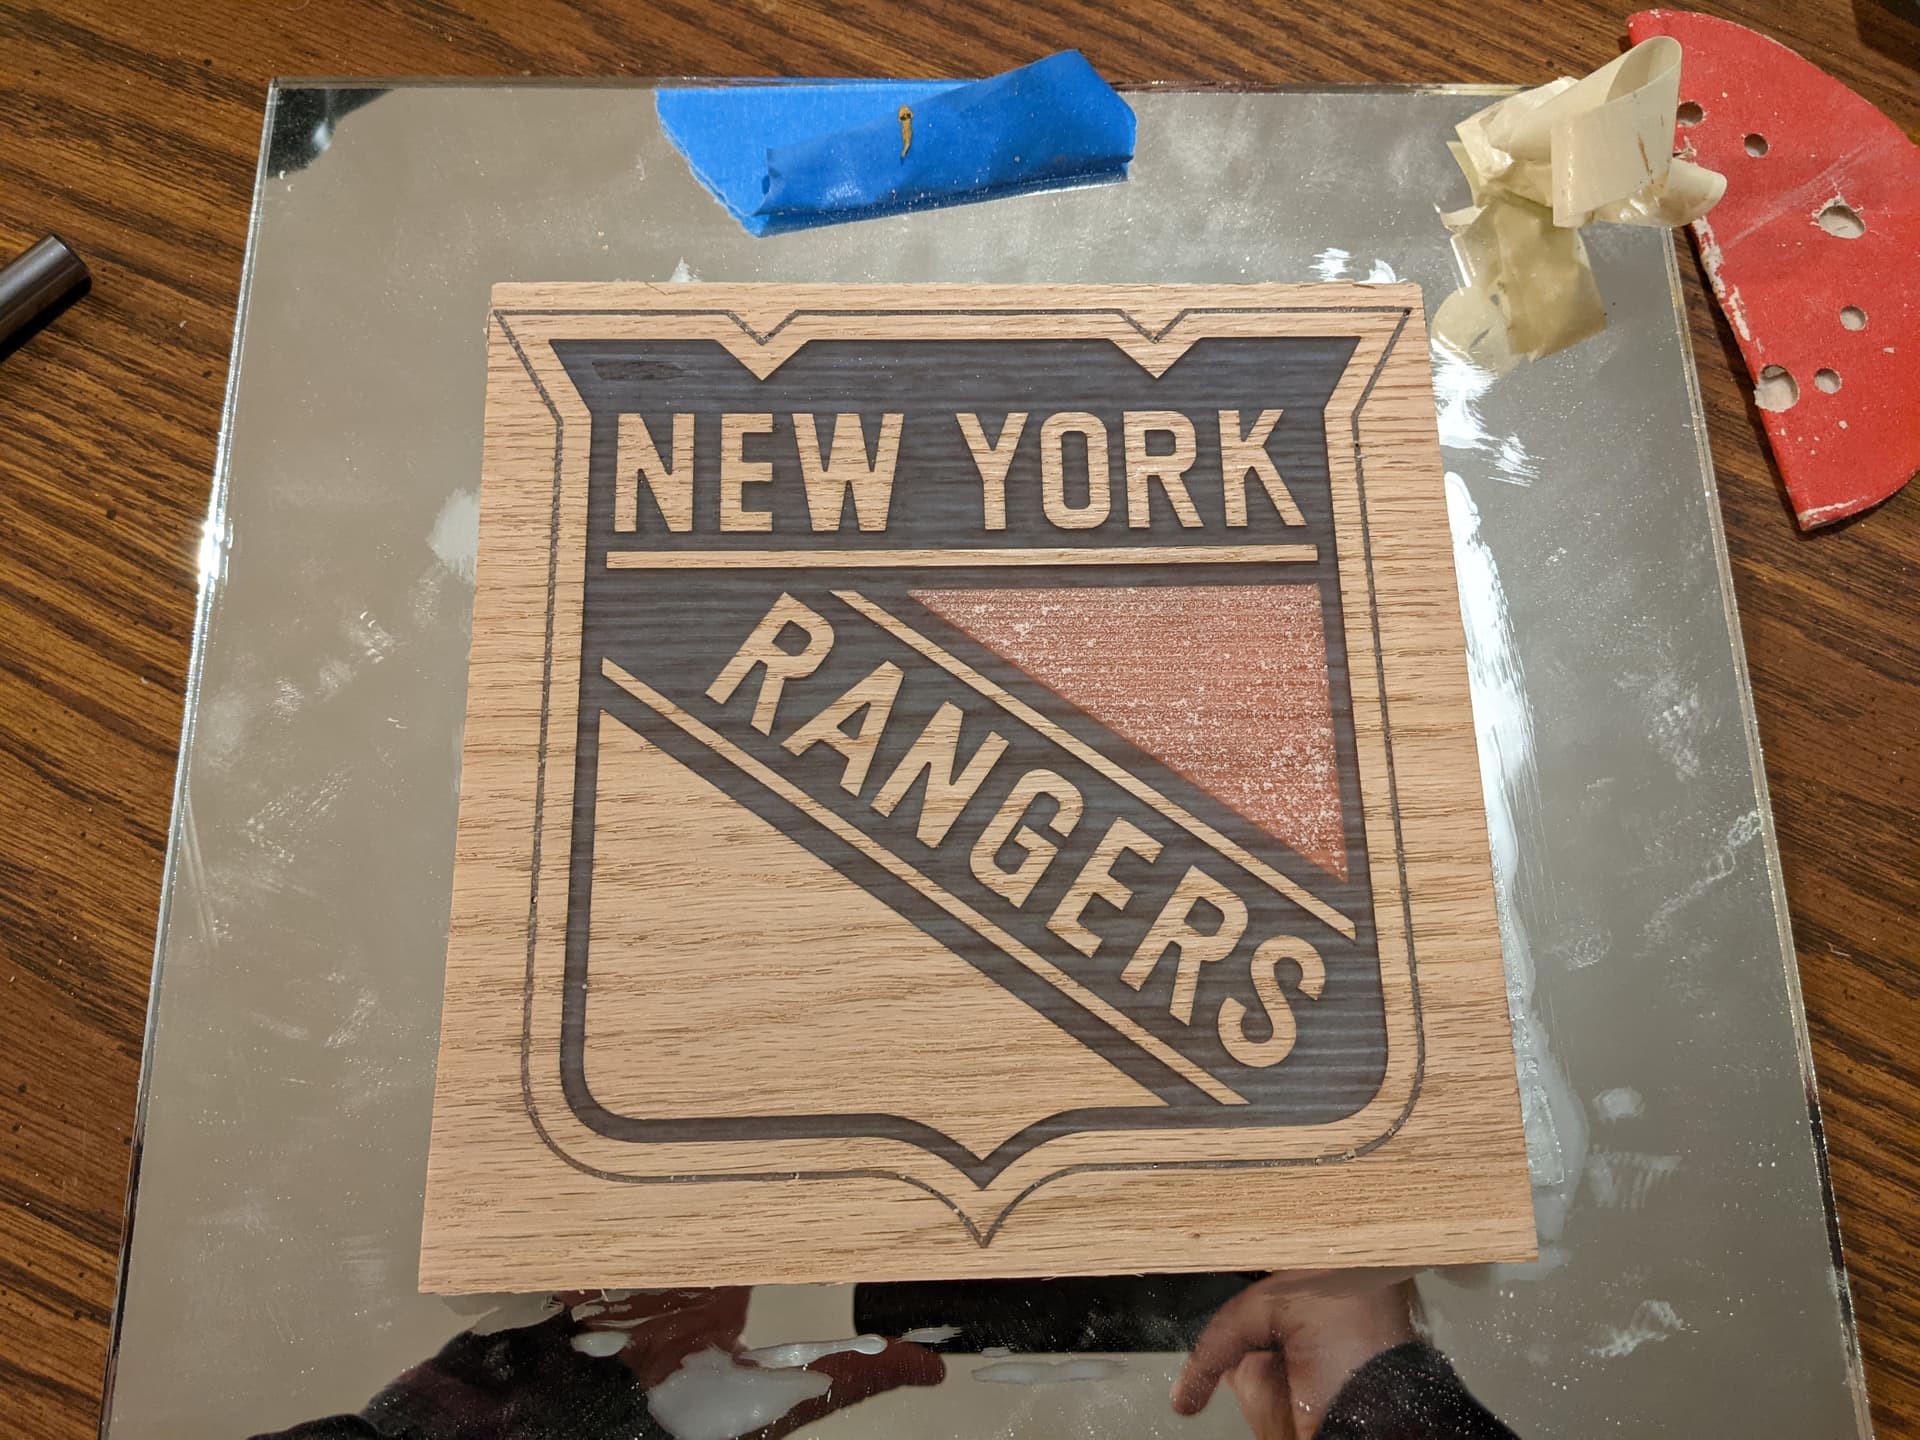
Here it is with the epoxy faced off
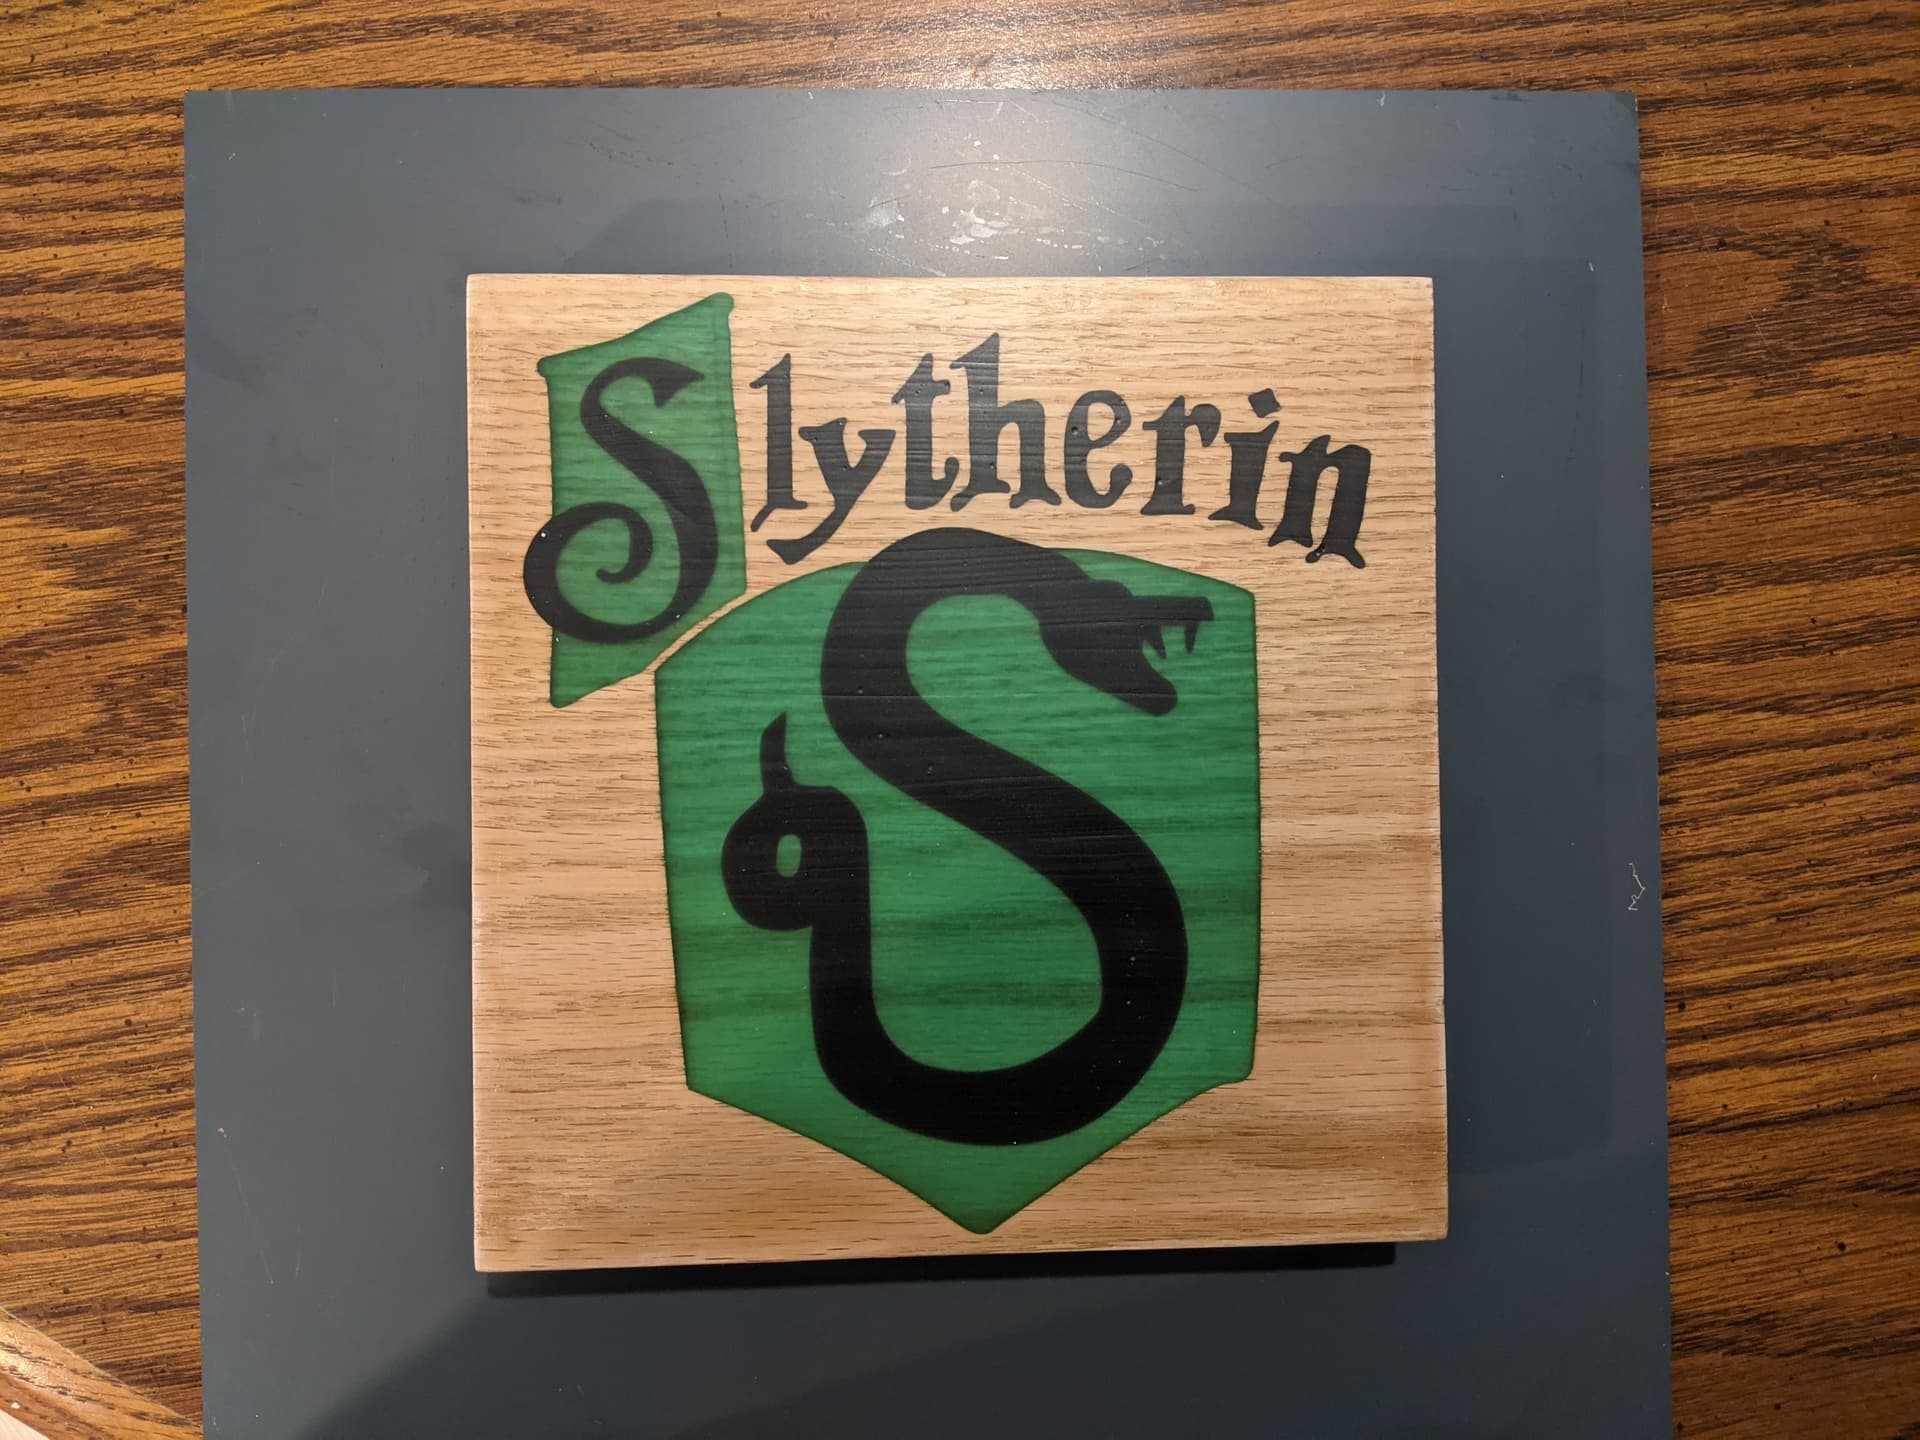
And here it is finished with polyurethane
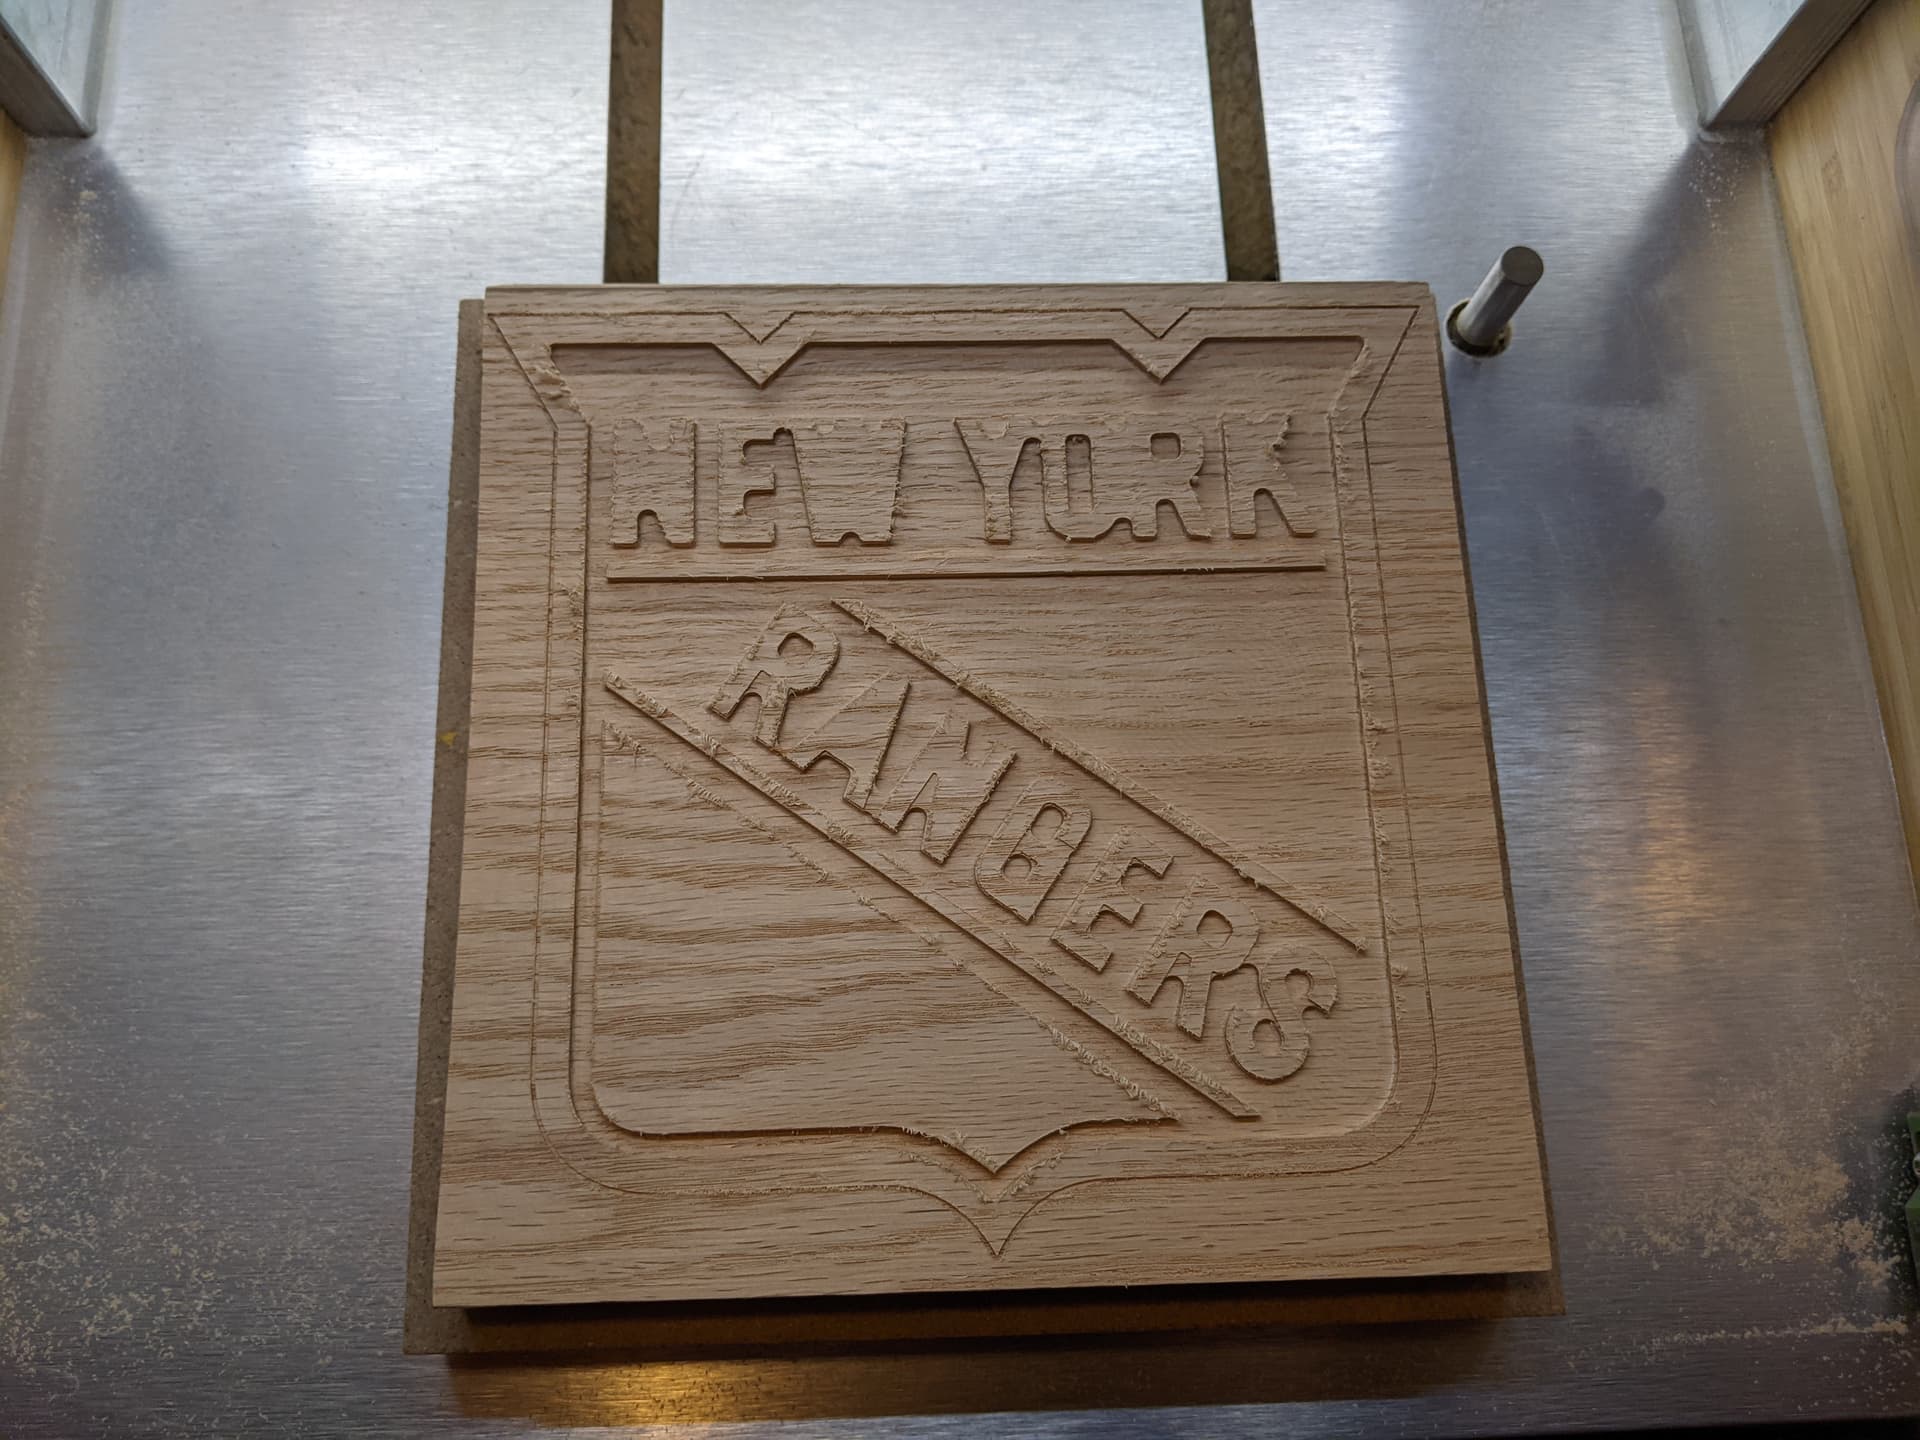
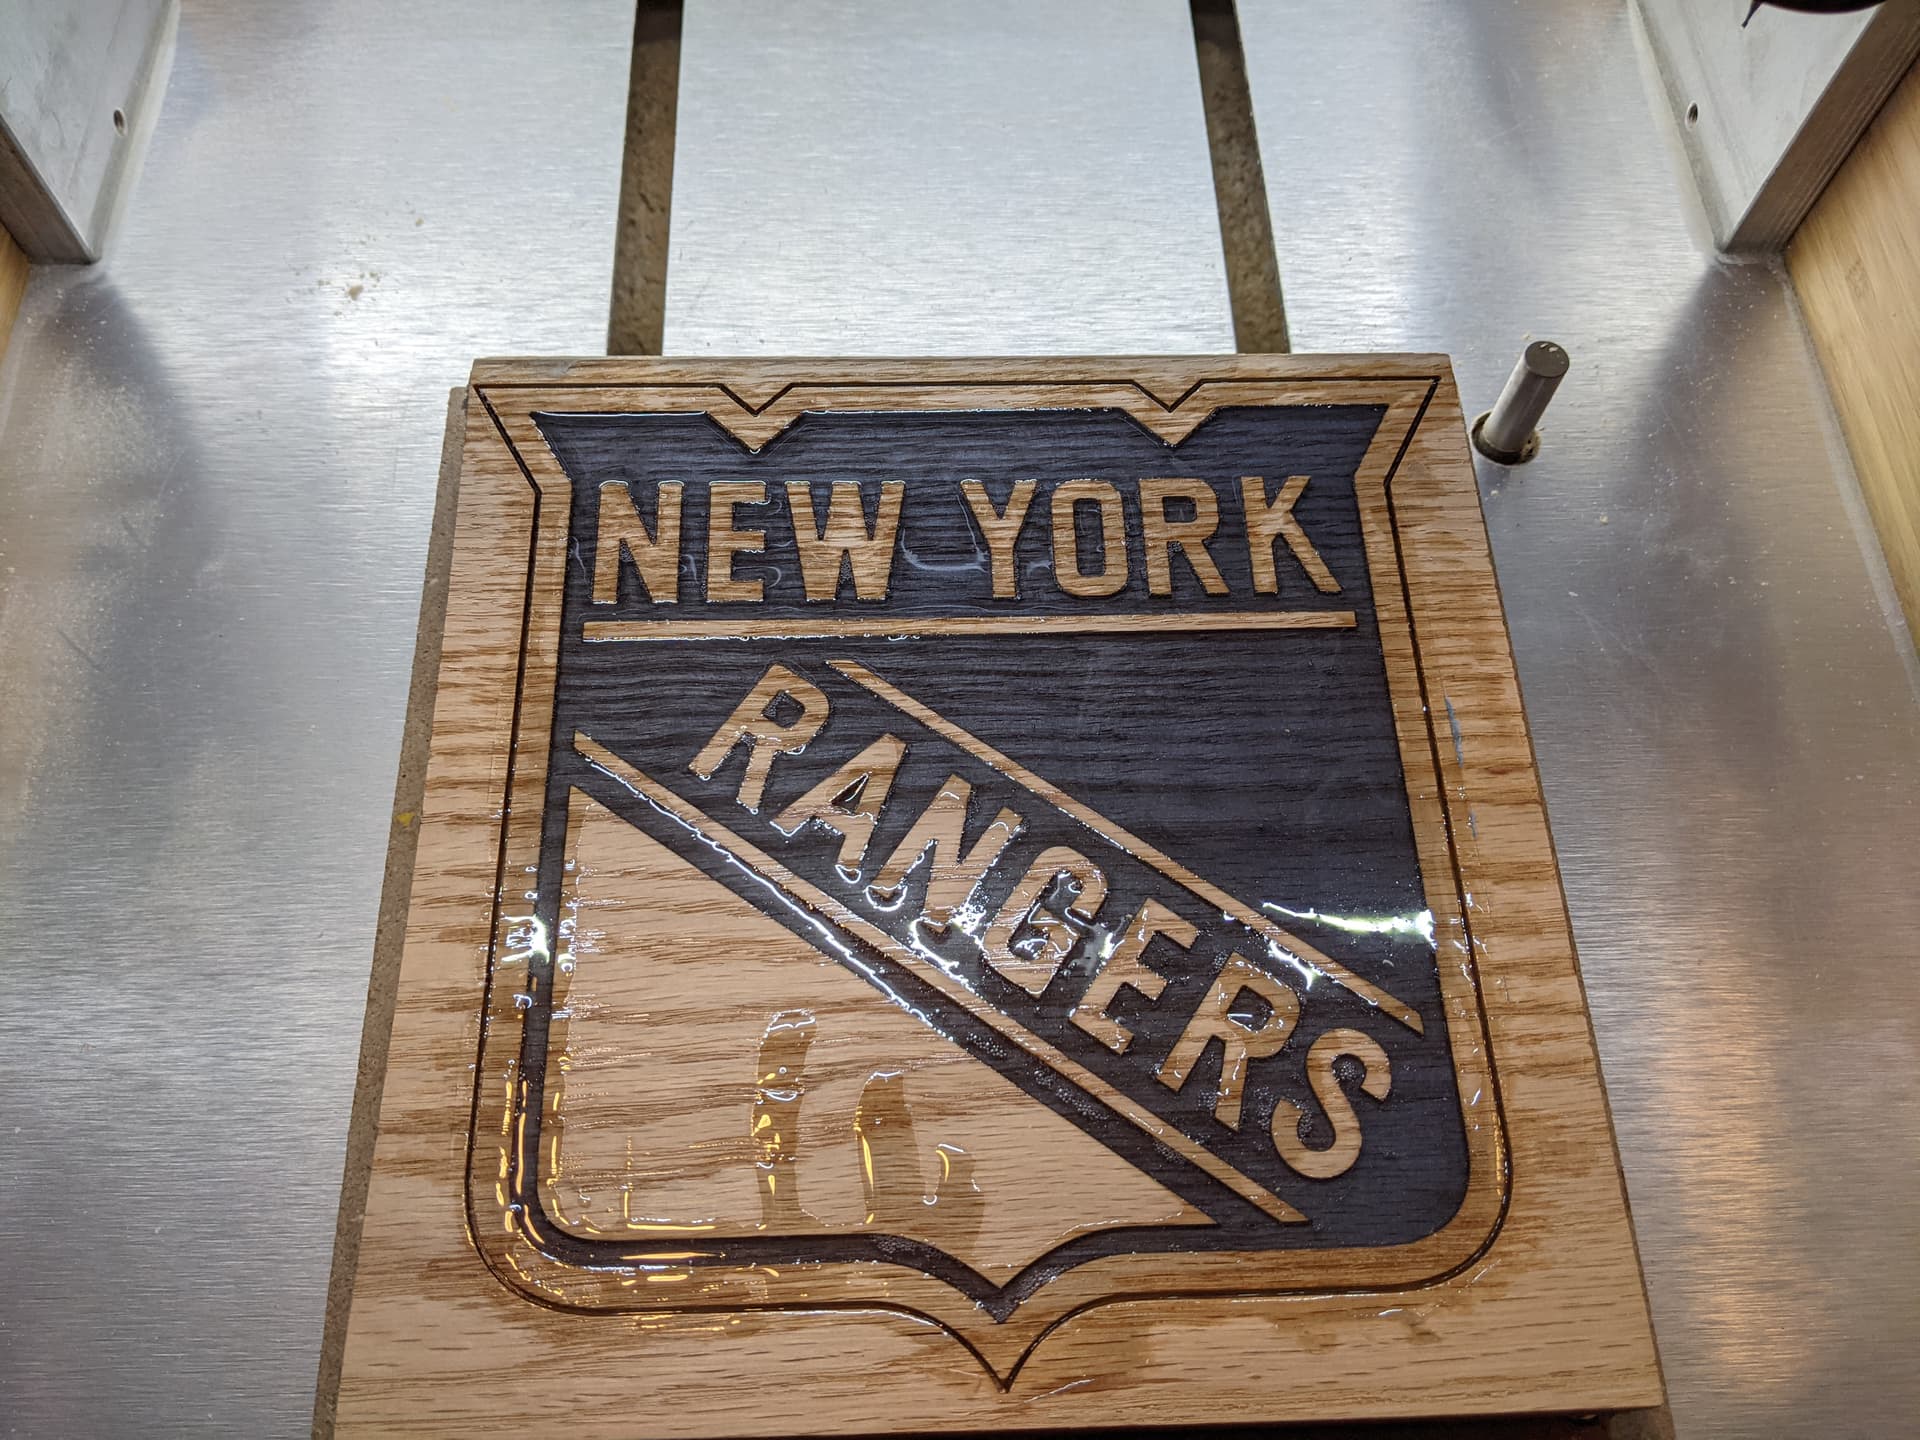
After facing off the epoxy I had the bright idea of making another one since I still had time. Since she also likes the New York Rangers I thought why not, the first one went smooth lets try it again
The next one did not go as easy but still came out great in the end. Everything was the same as before but I didn’t mix enough epoxy for the blue so it came out a little low when it dried and filling the small border around the edge was a pain and also went a little low. This time I left it in the machine the whole time and there was a lot less bubbles
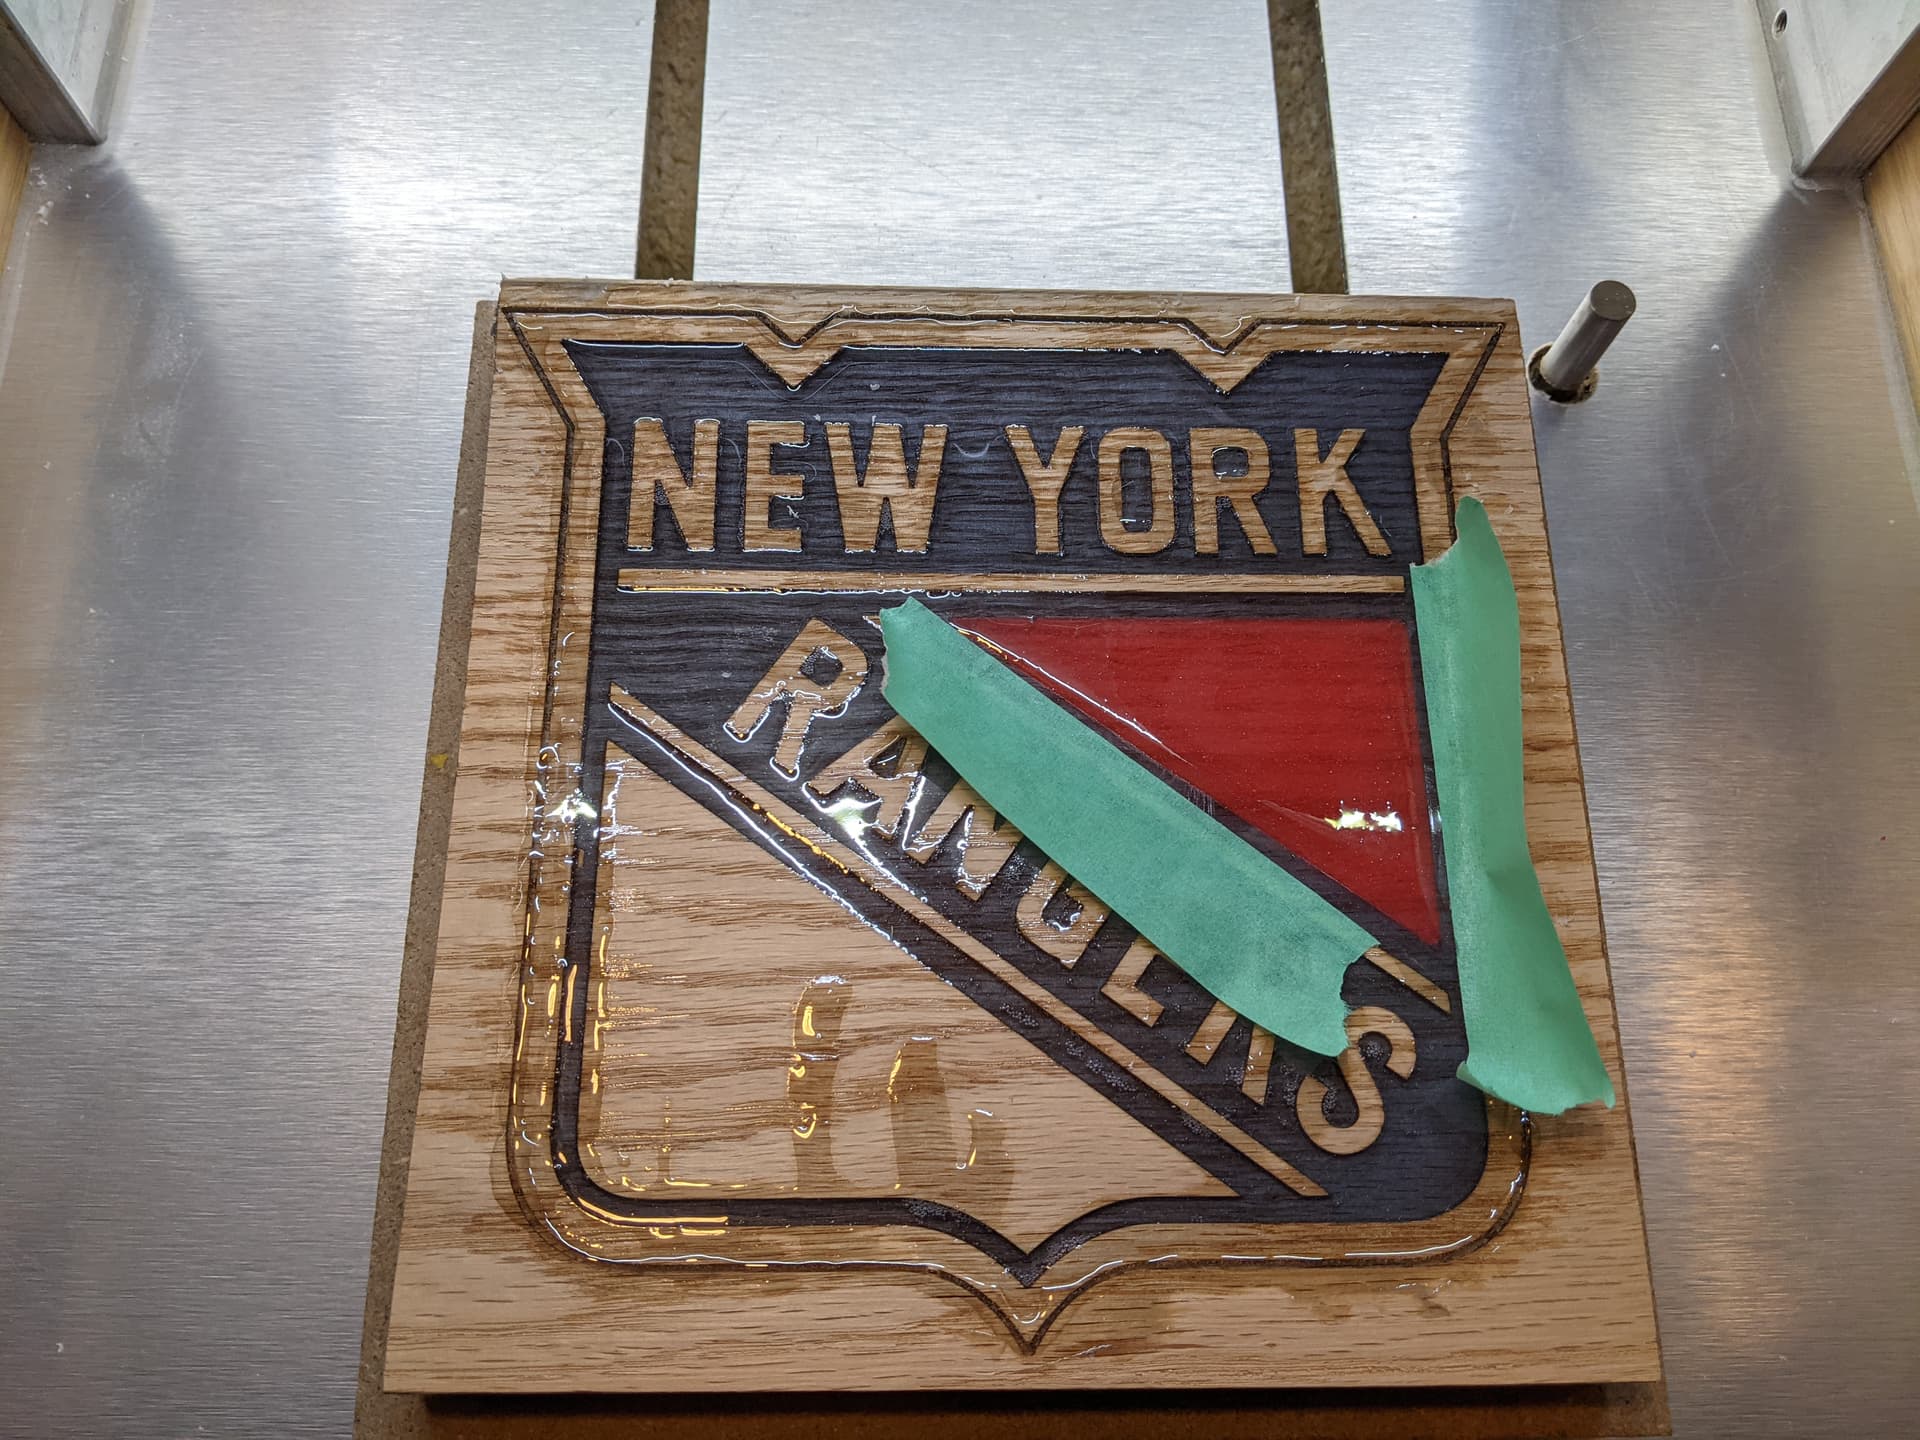
You can see here I cut the red epoxy a little too early but I couldn’t wait any longer. It all worked out in the end though

I 3d printed little feet and cut a counterbore so they would fit in securely and super glued them in
Everything was programmed with Mastercam and cut on a Nomad 3