I hope this isn’t a dumb question, but do you always have to use v-carve when lettering?
For instance, could you do cursive using only an 1/8’ bit? Flat bottom text?
Or could you use ONLY 60 or a 90 from the beginning with no flat bit?
No, not at all. You can use a contour or pocket path with a flat end mill.
If pocketing or contouring inside, the tool needs to fit between the lines.
You can also use ‘single line fonts’** and contour with no offset using either an endmill, ballmill, or V-bit.
**Misnomer, as there is no true single line FONT. Fonts are defined by closed regions, some of them can be very skinny, but they’re still closed curves. There are sites available that will create open vectors representing a single line font.
I tend to think in the opposite direction, first determine what you want the finished part to look like, then decide on the tool & operation to use.
2 Likes
No, but the problem which V-carving addresses is fitting the tool into the text — see:
and the feature “Check Cutter Access”.
The usual approach is “single-stroke” fonts, but those are mostly ugly. c.f., the Hershey Fonts which have a plug-in for Inkscape for setting text in them.
For an alternative see:
1 Like
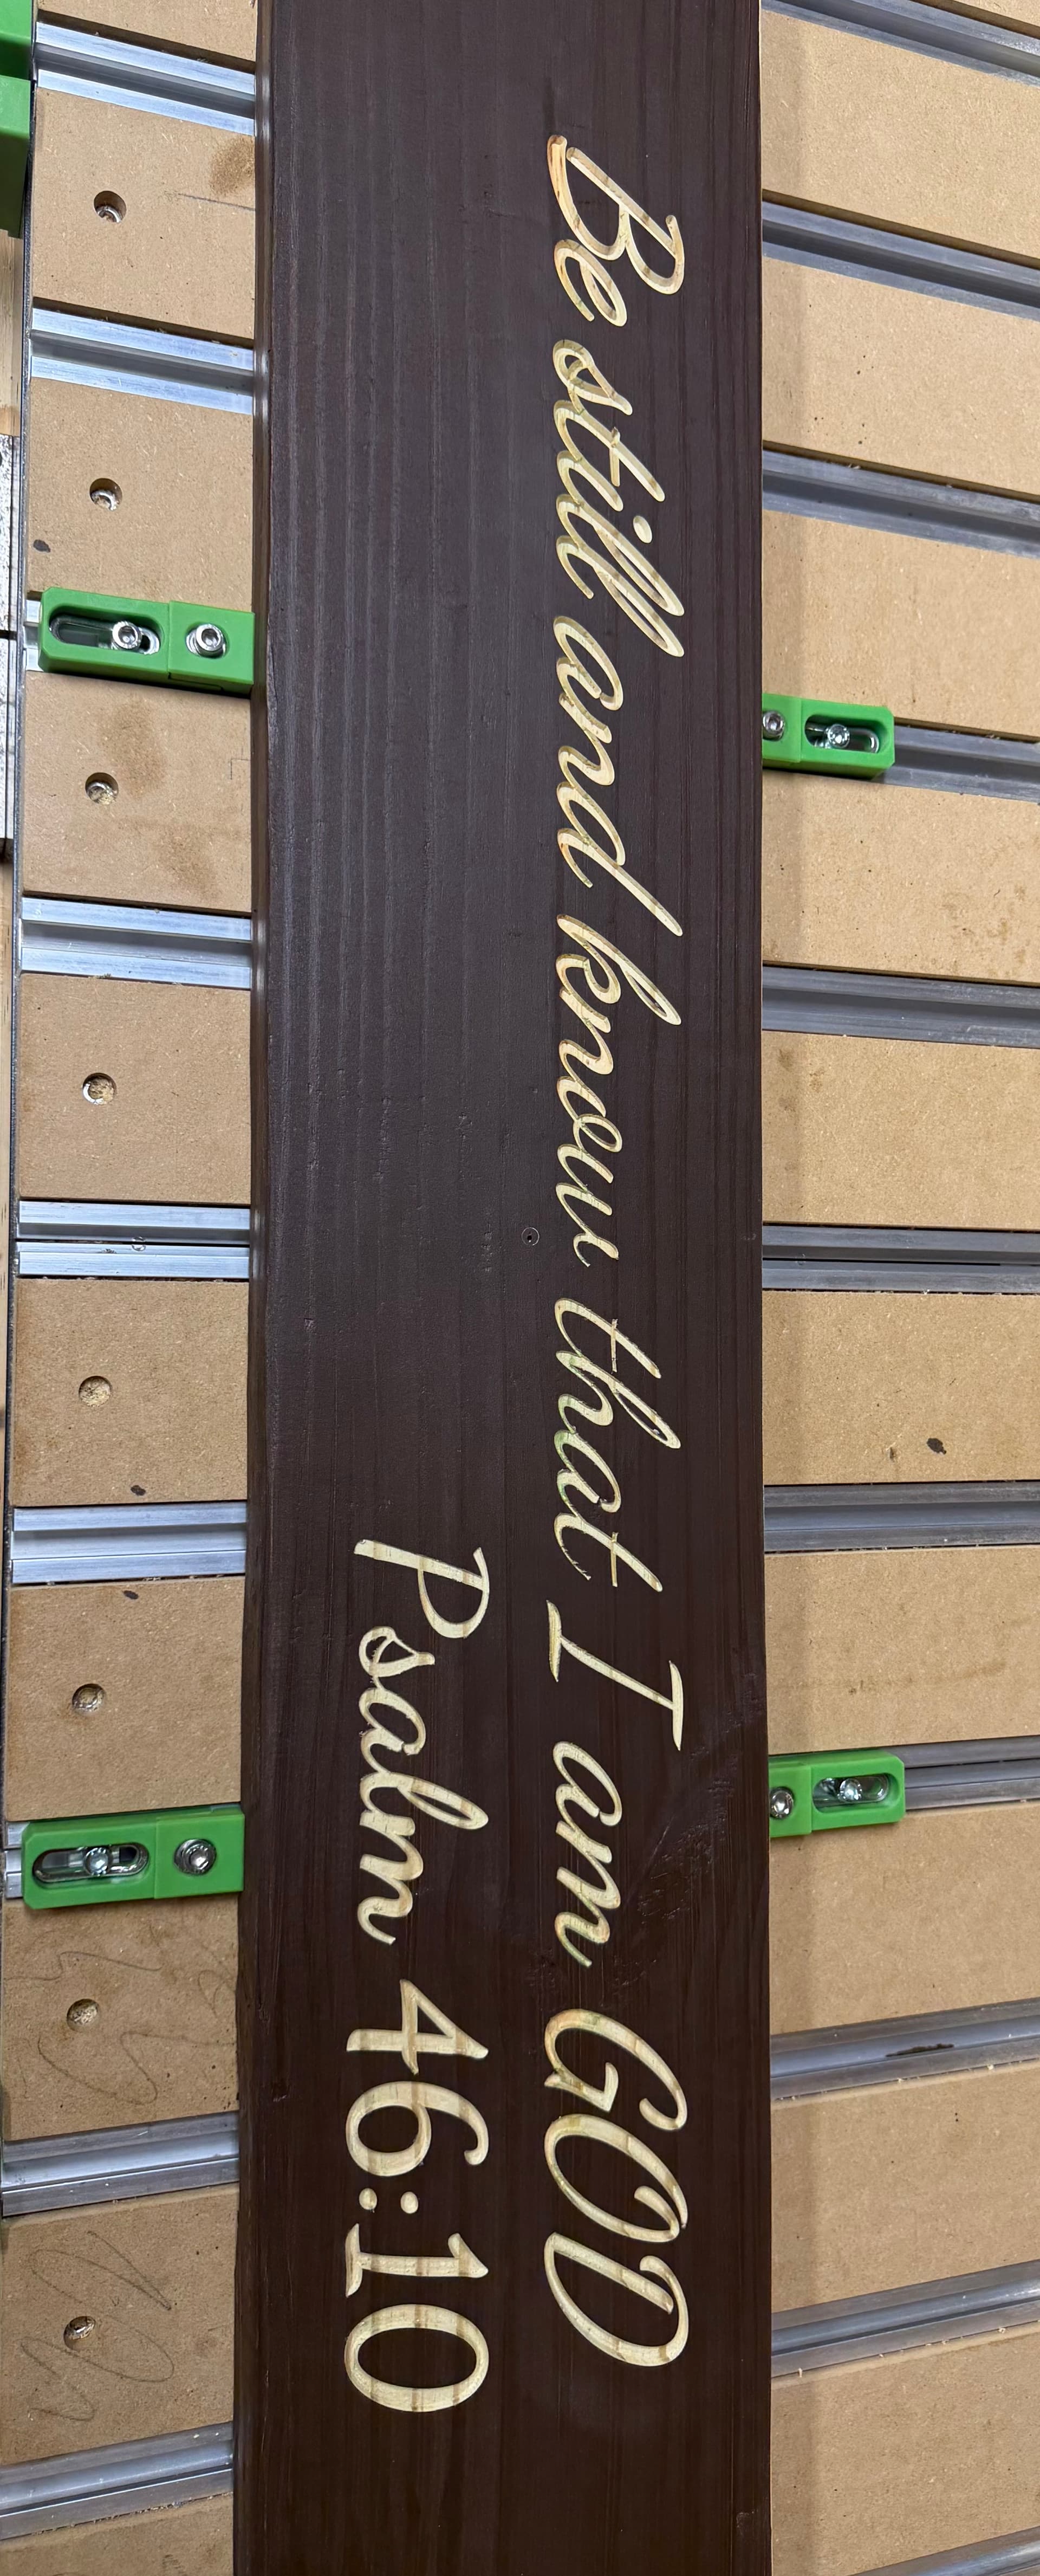
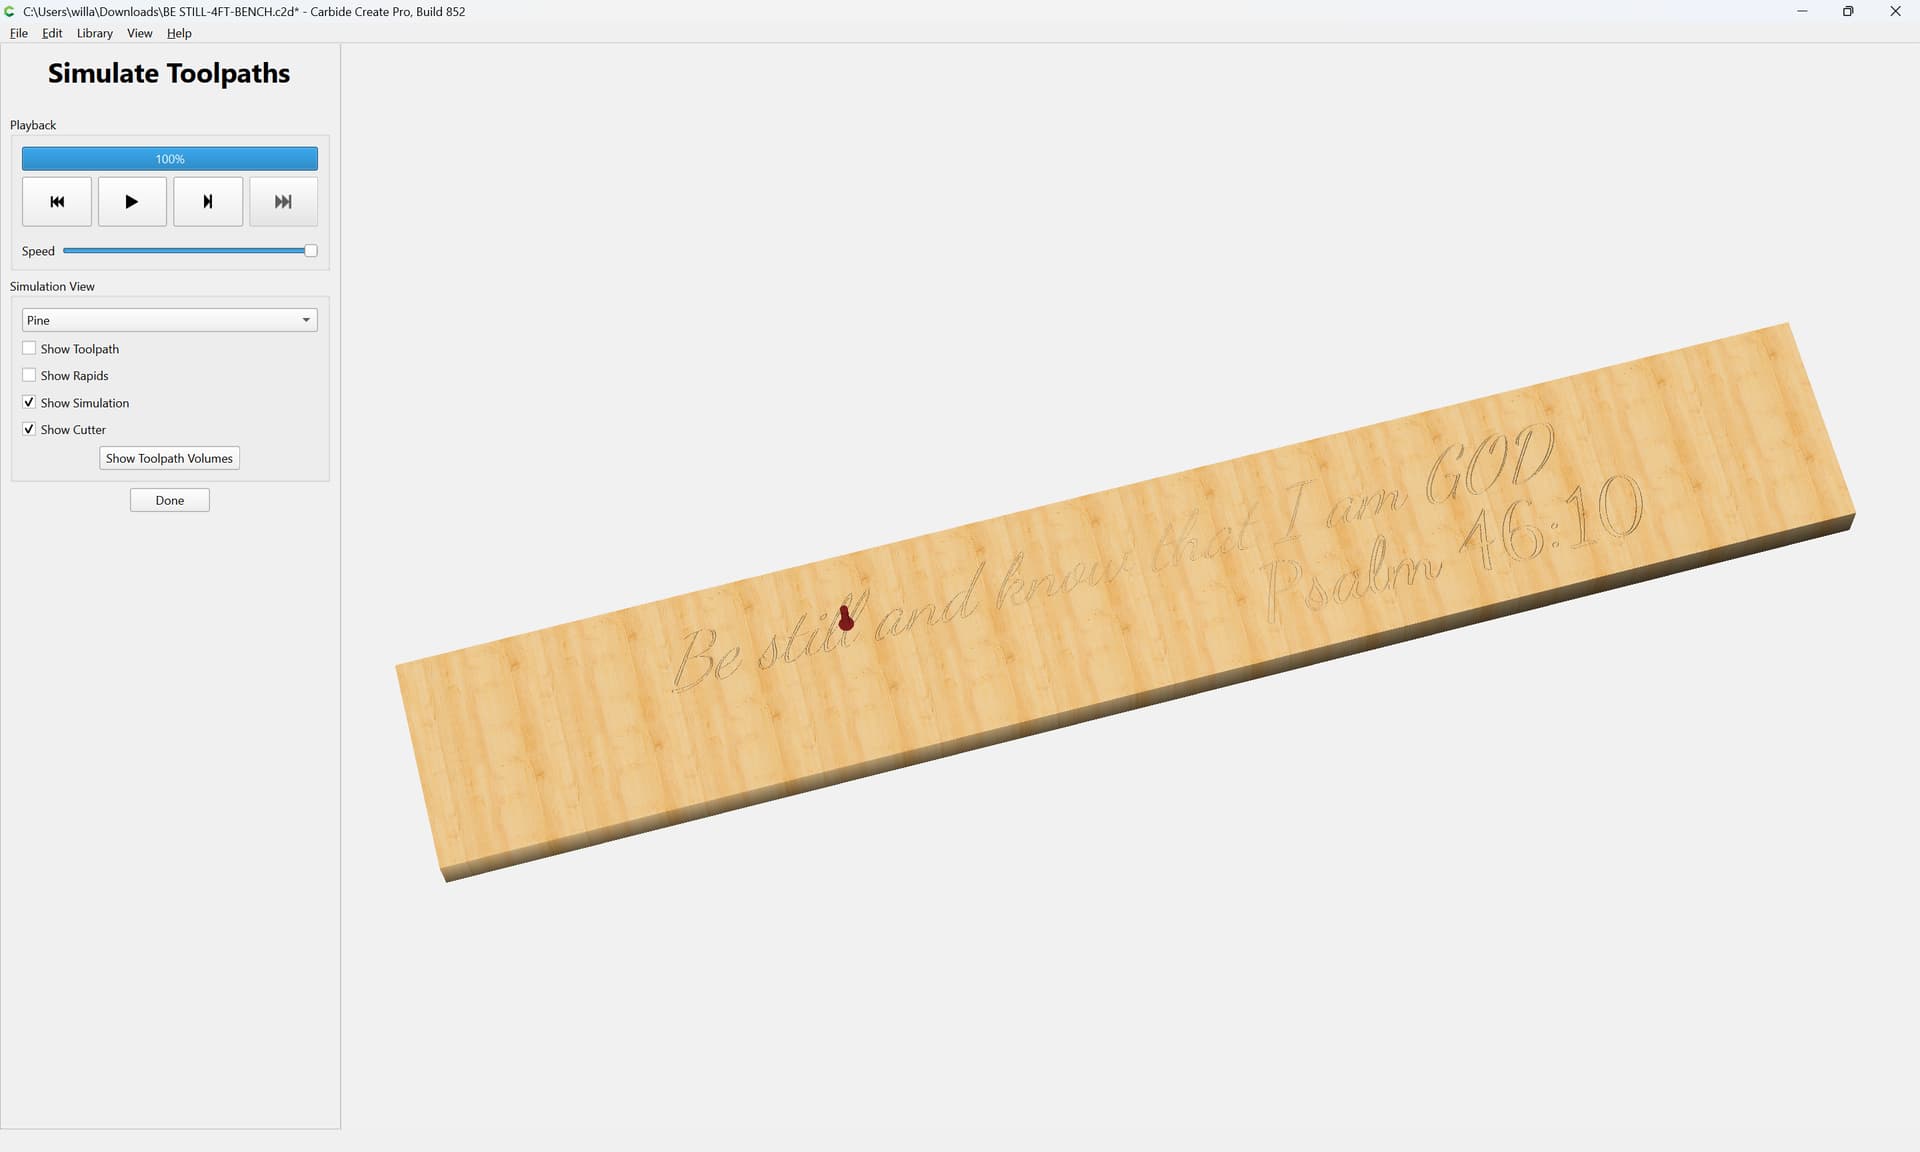
Yes, I knew the font “line thickness” would have to be wide enough to accommodate an 1/8" endmill and also have no pointed parts. I had already done a large block style text with a 1/4" bit but did it with v-carve also because I thought you had to. What got me asking this question is that I had done some cursive text on the back of a bench. The width of much of the text was like 3/16 wide and I used a 1/8" bit. When it went to cut, it just cut a few little dits and tittles here and there for like 2 minutes and then used v-carve to do the rest, leaving all kinds of cleanup in the middle of the font carve for the 60 degree bit which took forever.
Pocket clearing didn’t work well? Photo of the cut? Upload the file?
It came out really good I just don’t understand the 3 minutes 1/8 endmill then the 40 minutes
v-carve
Not sure I know how to share the file but I will try
BE STILL-4FT-BENCH.c2d (440 KB)
See if this works
There are few areas where the 1/8" bit will fit at the bottom of a 0.050" deep cut. So the V-bit gets taxed with the rest of the clearing. Note that because of the angled walls, the floor is narrower at the max depth than at the top of material.
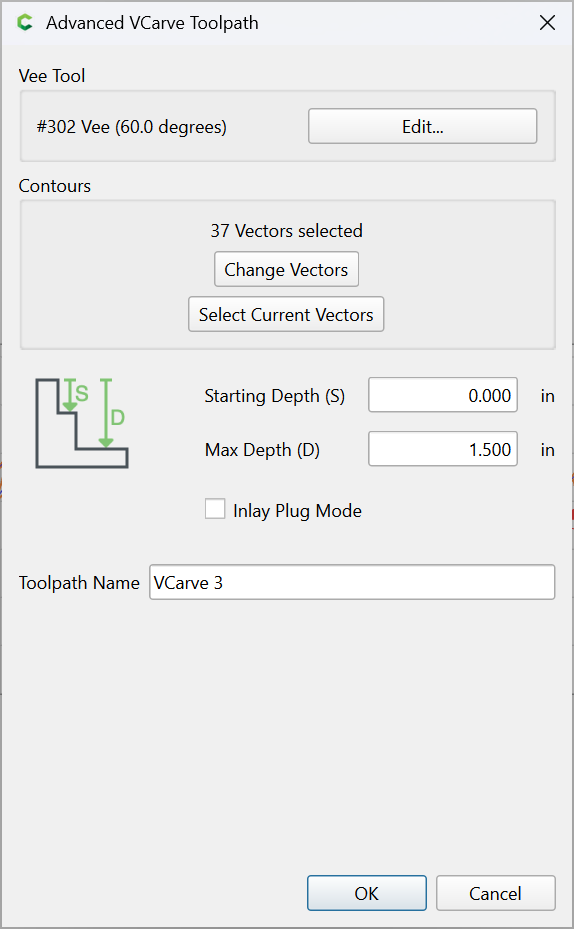
Change the max depth to 1.000" and it will only use the V-bit.
Reduce the max depth, or use a smaller clearing tool & it will use the clearing tool more & the V-bit for clearing less.
3 Likes
When doing advanced vcarve you have a couple of options. First is using a flat end mill to give a flat bottom to areas large enough for the flat end mill to get in. The next option is to cut the pockets first with the flat end mill. That is most efficient because half of what the vee bit will remove later is already gone. The third option is the vee bit and your choice of what degree to use.
For a lot of advanced vcarves I use a 15 degree vee bit because I will be painting the text or picture. For inlays I generally use a 60 degree vee bit because that gives me more glue surface for the inlay to hold onto the substrate.
You can certainly cut simple pockets as long as your space between the lines is big enough for the bit to fit. @Tod1d gave that advise above and he is correct. If any areas are not big enough for the chosen end mill to fit then the vee bit will try to hog out the waste. That takes a long time because a vee bit does not remove as much material as a flat end mill. That can also lead to places being rougher than the areas where the flat end mill had room to cut. You can step down one size and see if that improves the simulation. It would likely lead to longer tool path times because you are removing less material so it takes longer. However the final product is smoother.
As usual with a CNC you are speed vs quality. Ideally you want both but realistically sometimes you cannot get both so you have to choose one or the other.
Today at lunch I saw a sticker on the back of a car window. I laughed for 5 minutes or more. In the simulation you can see that there are places where my straight bit did not fit. I started with a 1/8" but then reduced it to 1/16". Look at the “Load” and the a has narrow places that the vee bit will have to remove.
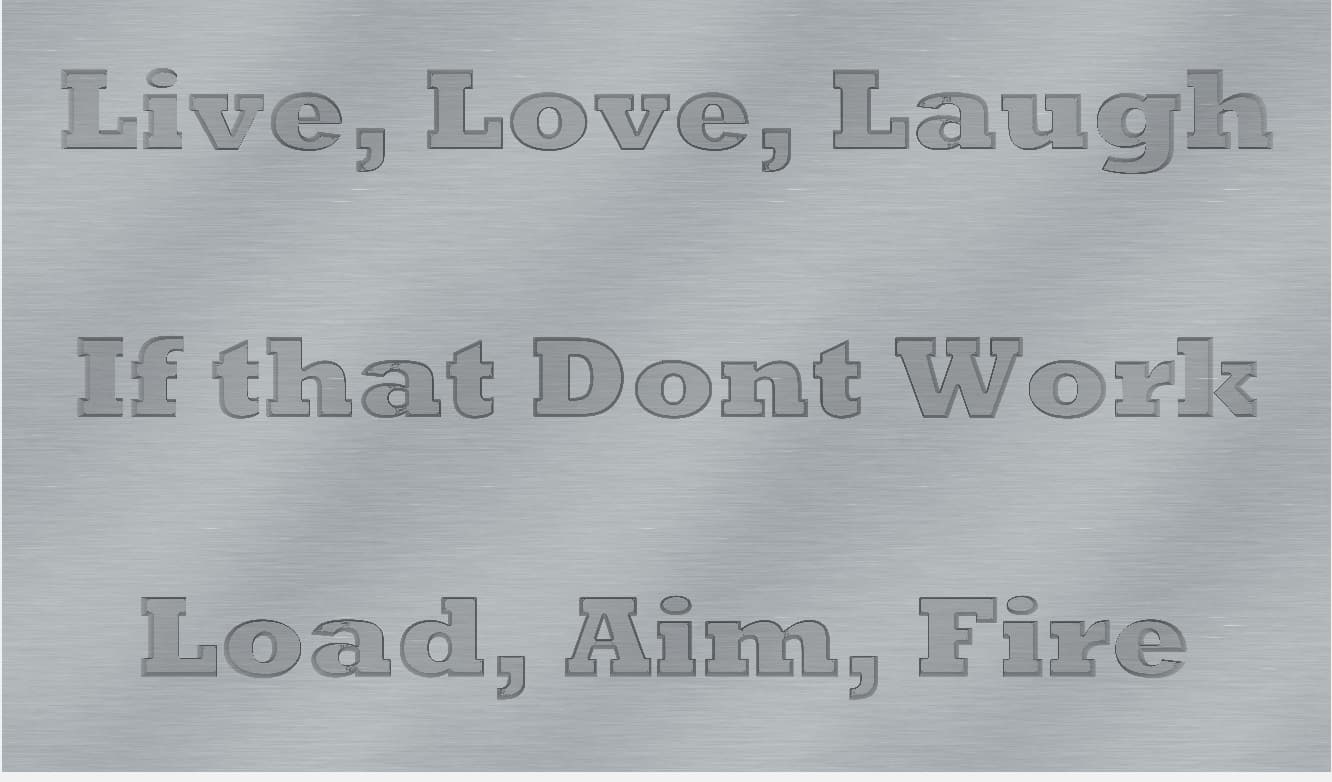
Although the text was 3/16" at the top, the angle of the VBit means that the width of the text at the bottom of the pocket can be considerably narrower.
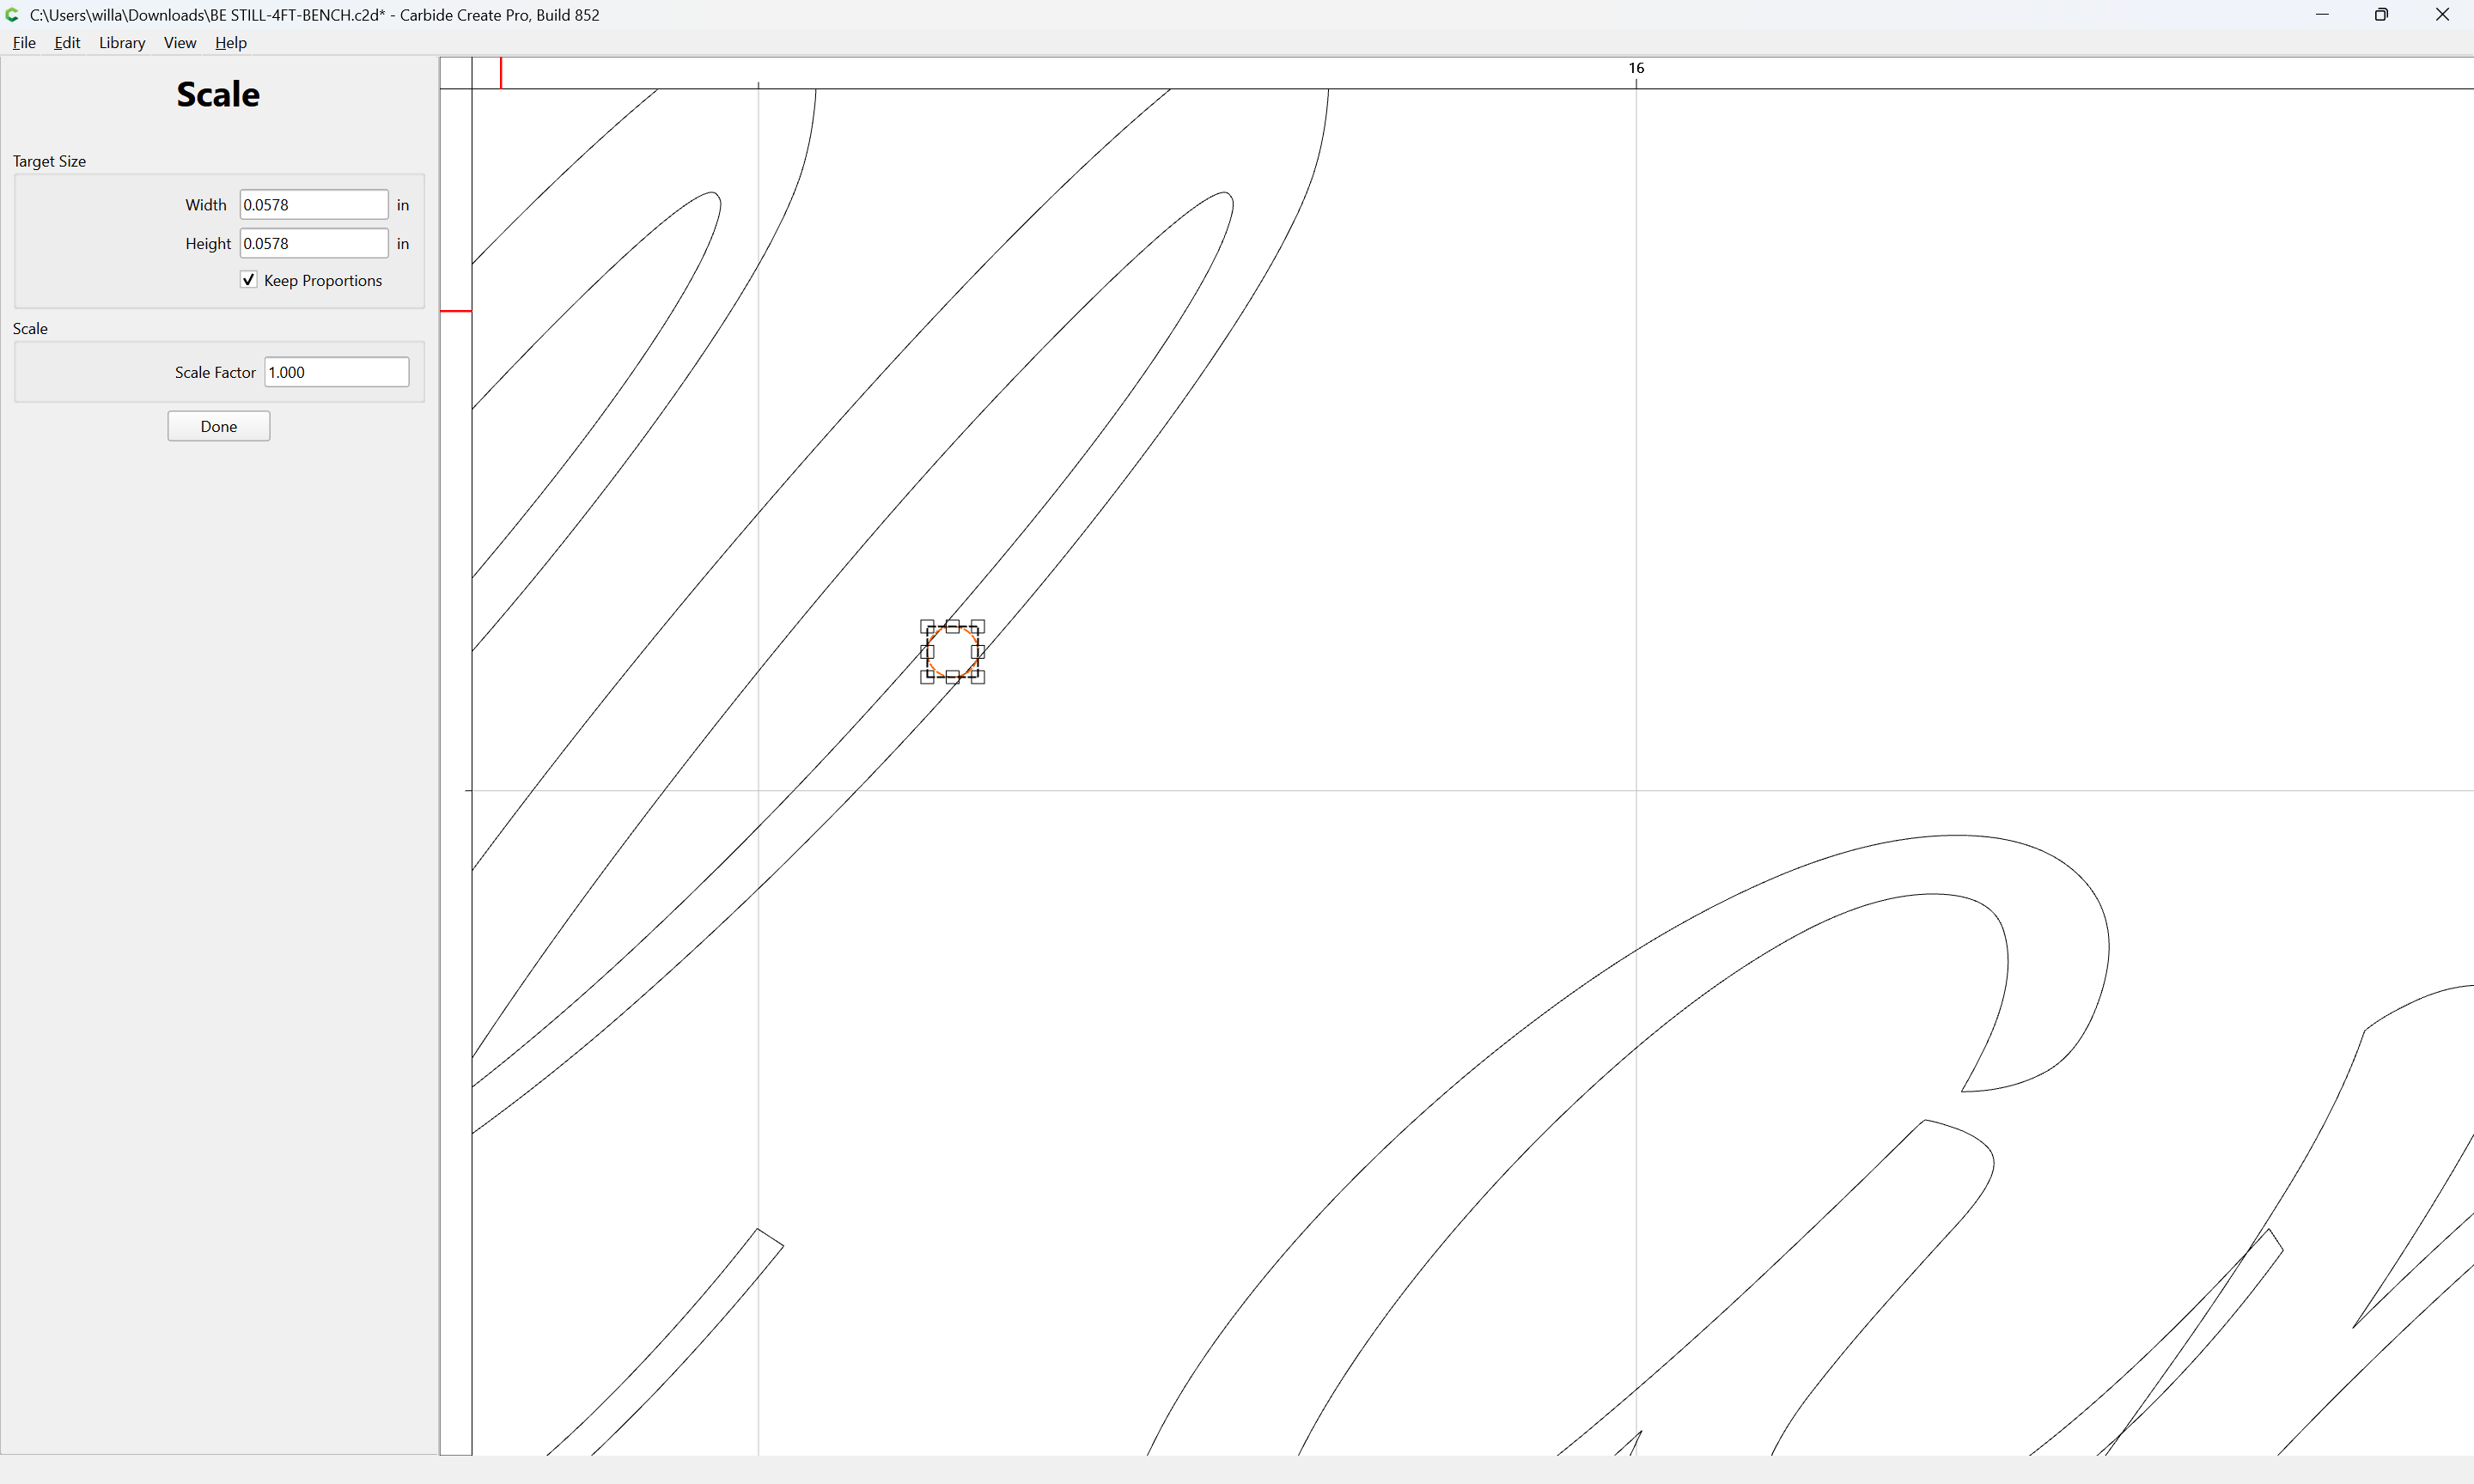
Here each square is 1/16" of an inch, carved 3/32" deep. You can see a 1/8" bit wont fit.
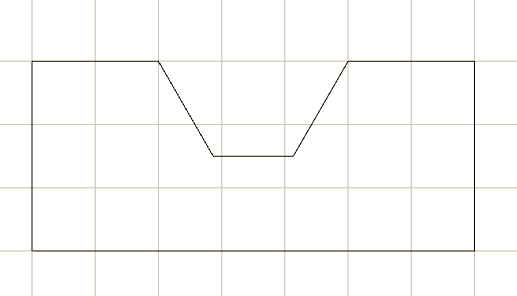
Aligning to the grid, yuou can see the depth has to somewhat less that 1/16" for a 1/8" bit to fit:
2 Likes
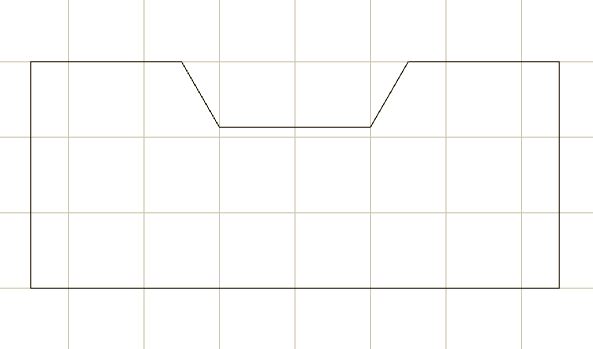
Consider that to cut the narrower regions you would need a quite narrow tool:
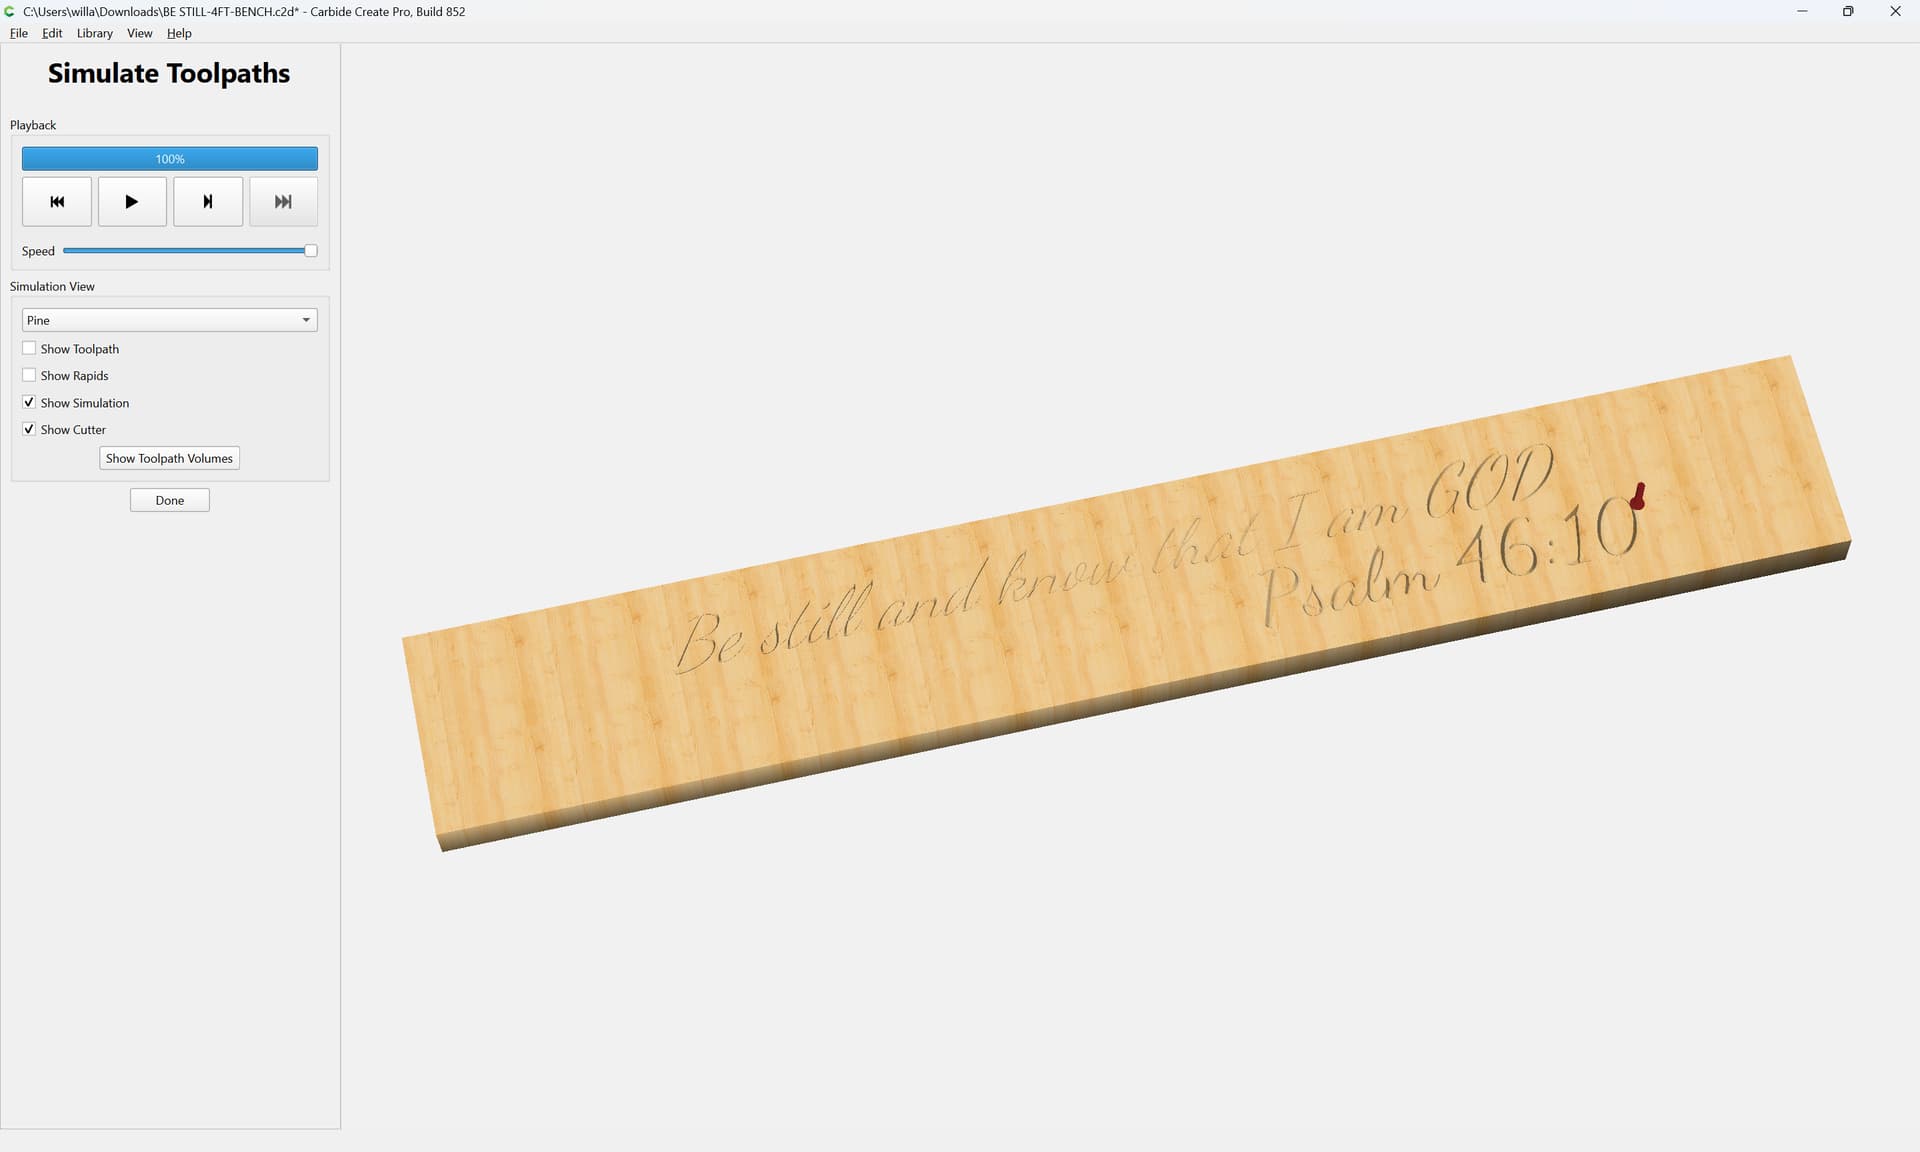
Probably, this would have been better w/ a full-depth V-carving — as it is, you are leaving a channel uncut in the center:
If instead you “allow the tool its head” (to mix metaphors) and set the depth to full:
So max depth on the tool has nothing to do with how deep you want your letters? Also are you saying the whole thing could have been JUST cut with the 60v at a deeper depth to achieve a good cursive text overall. No 1/8 pocket tool at all?
Max Depth sets the maximum depth to which a V carve will cut — but if it is composed of narrower regions than would be cut width-wise when cutting to that depth then the V tool will not reach that depth.
See @mhotchin 's excellent diagram above, or draw things up in profile.