I tried rather unsuccessfully to V carve with my SO3 using Carbide Create. I know this topic has been explored before and sorry in advance for not being able to find what I needed in previous posts.
I was trying to do some rather small letters so I purchased the Amana 30 degree V mill with a .005 tip width and a .440 cutting length. When I try to carve anything, the bit just scratches the surface. In fact, it looks exactly like the line preview in the toolpath section of CC. It only carved the blue lines, nothing deeper. I can’t find (or don’t understand) the information being presented to me regarding the depth of cut of a V bit. I’ve read that CC knows how deep to cut based on the tip width of the tool and the width of the letters, but all I get is the blue outline on my piece (see attached).
I don’t understand how to set the carving depth, or the depth per pass in CC to have the bit go deeper. The Amana website says the depth of cut is:
1xD (use recommended chip load) - where chip load for this tool is .003 to .007.
If my line width is .25 inches and I’m cutting .007 per pass, is it really possible that it would take 40 passes to do one line? This is theoretical of course, as I can’t get the cutter to do more than scratch the surface with those settings.
Should I be using a bigger cutter? A 60 degree or 90 degree? According to some images I’ve seen here, a higher angle cutter will yield an even shallower cut.
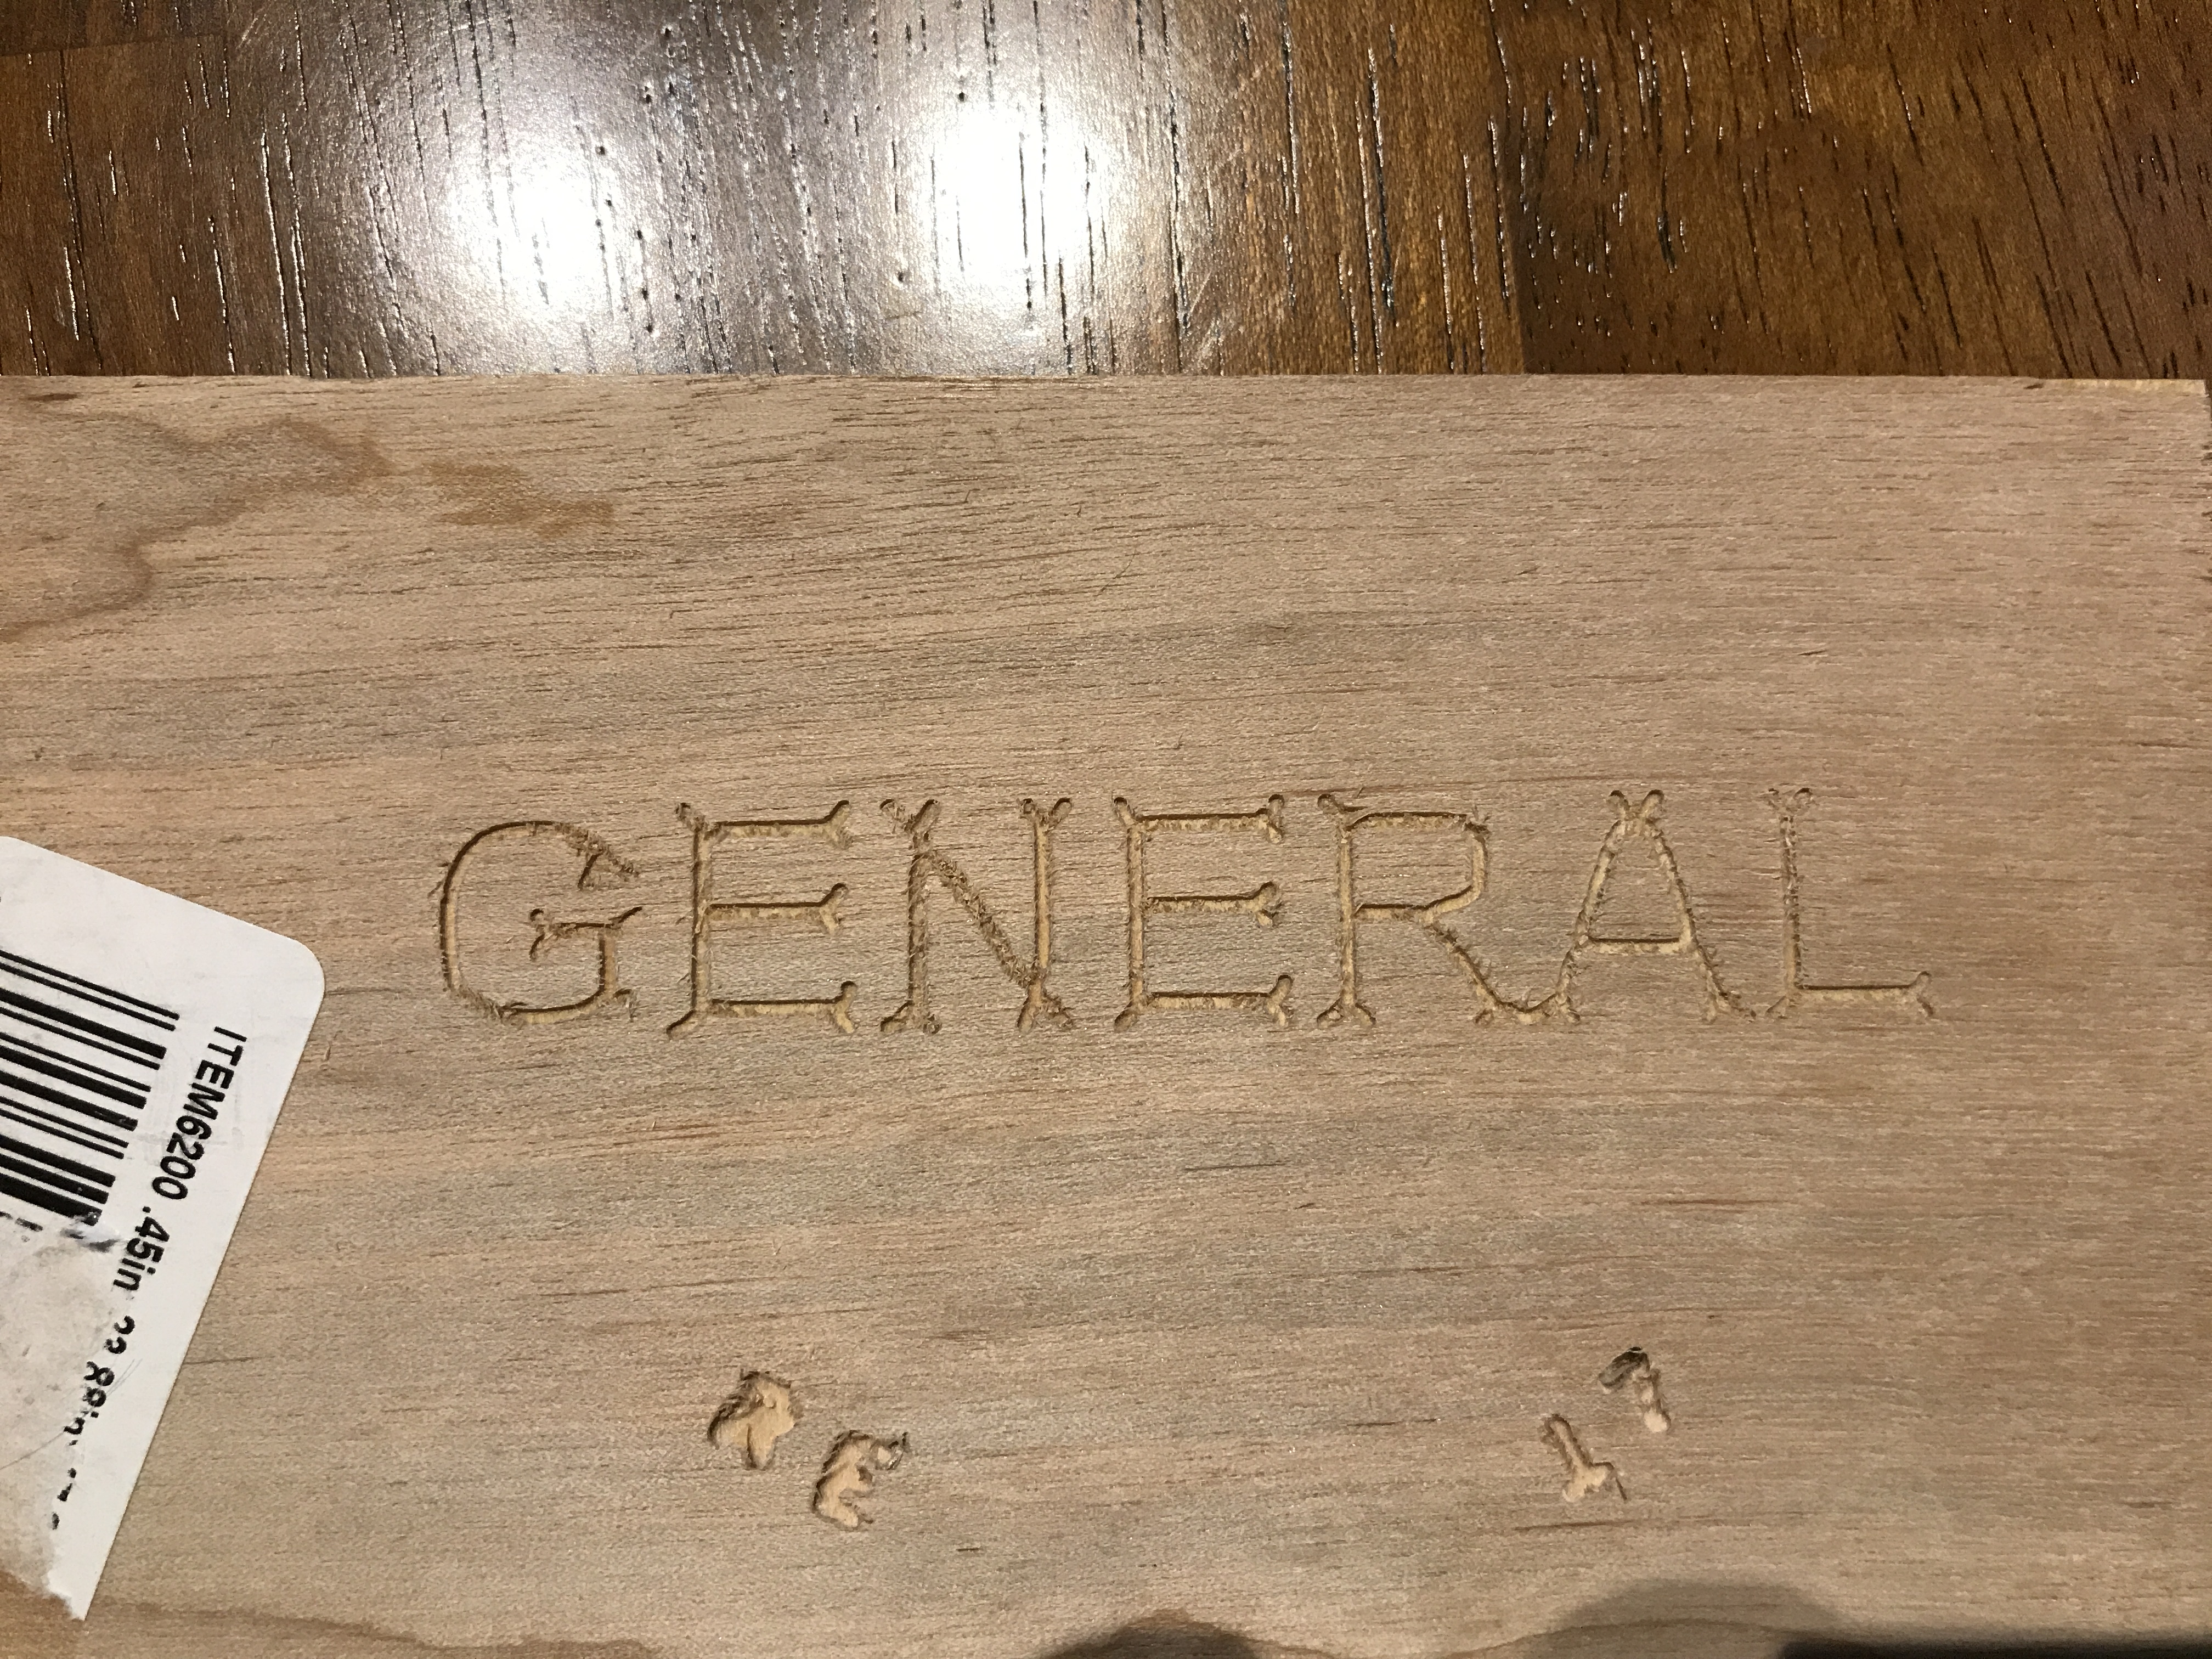
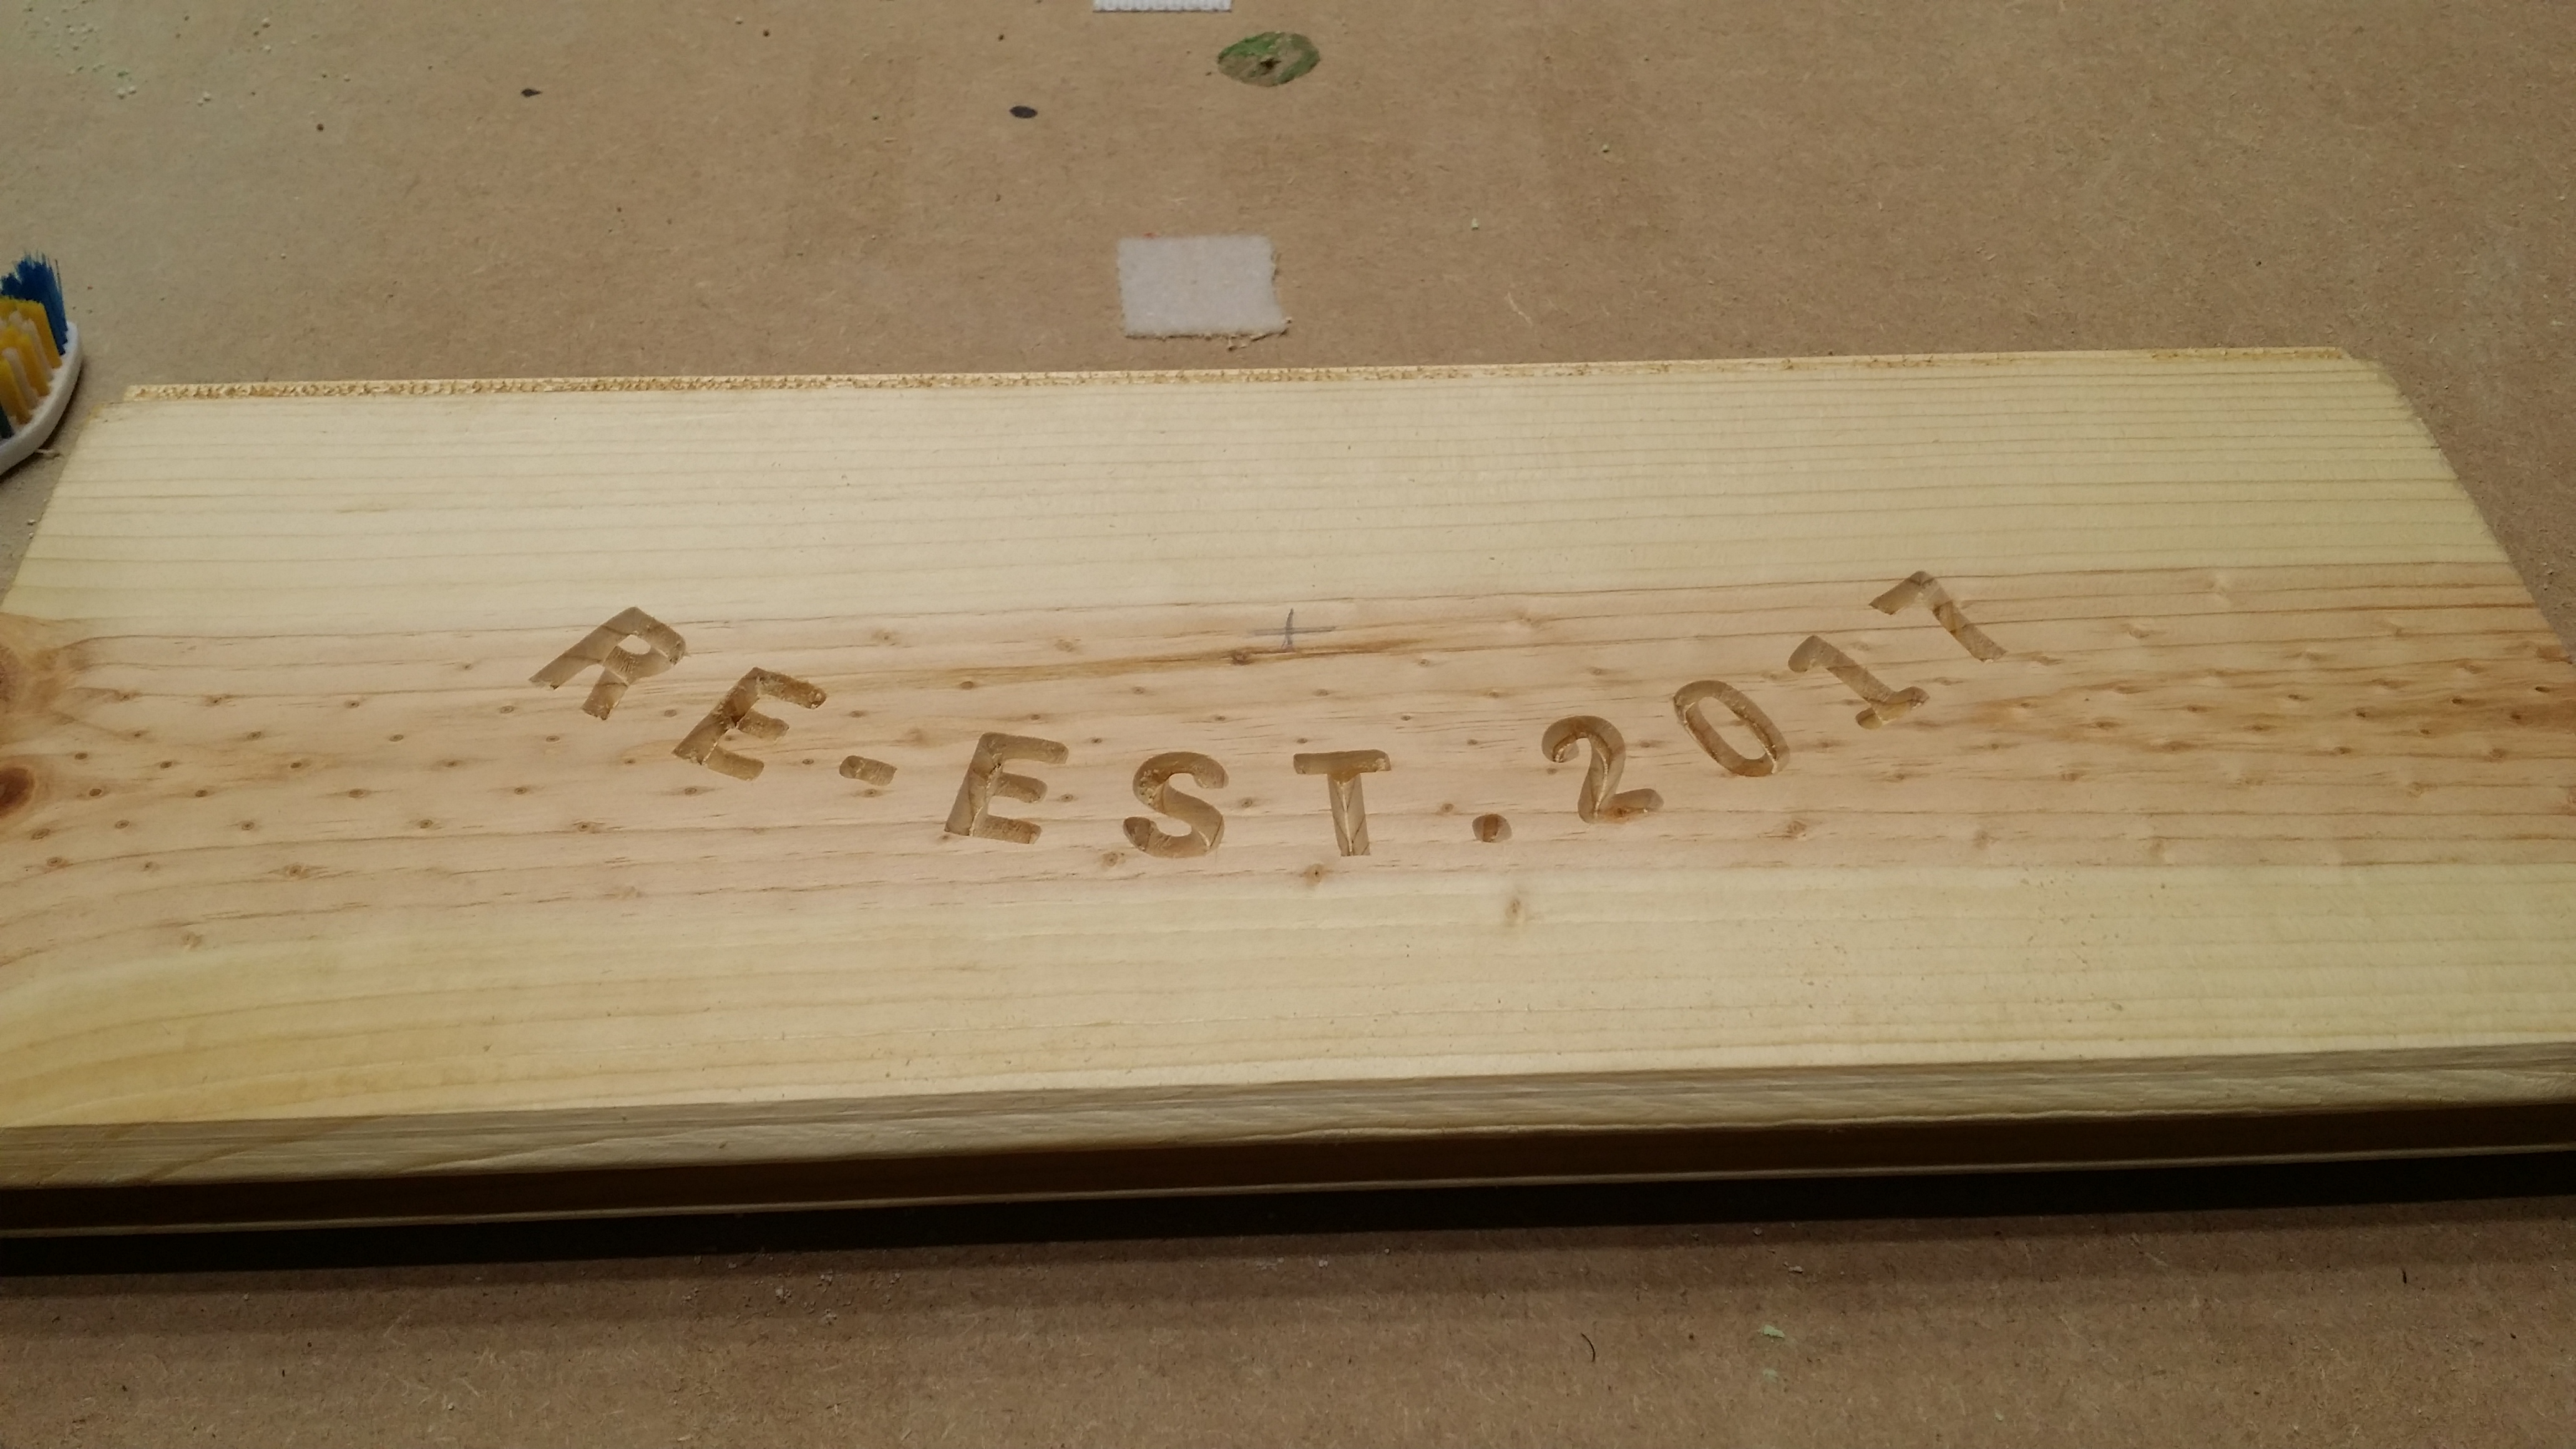
The letters on top are about 1" tall. The smaller letters on the bottom are about 1/4" high. I tried cutting those with a .031 flat mill. Those didn’t work out so well either.
I also did it with the 60 degree bit (first picture) and it came out with more definition, Not sure why. Do I have unreasonable expectations for how sharp this should be?
V carve bit will cut to the widest point of your letters, so if letters are say 10 mm wide a 60 degree v bit #302 will cut approx. 8.5 mm deep to get this cut done.
Wider v bits can cut letters without going as deep to touch both sides of letters.
You could try offsetting your text to create a thinner path for the v bit to carve, will have much more detail.
Without the file I can’t me much help other than that, converting your image to svg leaves many things changed in conversion. So further processing that won’t be of much help as my image size could be off by a few mm or a few inches, which wouldn’t help you with the fine details.
If you can send file, Ill work on it to get the best possible outcome, I’m in my shop running jobs for clients so I have idle time while the machine does its thing. It’s up to you
If you are running a #302 and your letters are 1" in height, your sample cut points to the Z not being properly zeroed.
Note: When I zero my V bits I take a small piece of paper or backing to Velcro/ double sided tape and lower my Z until its just barely over, then adjust to .01 and lower until bit just grabs paper and allows to spin, no further as your cuts will end up gouged when it would otherwise come out looking rather clean.
I will switch to phone and add image of test cut
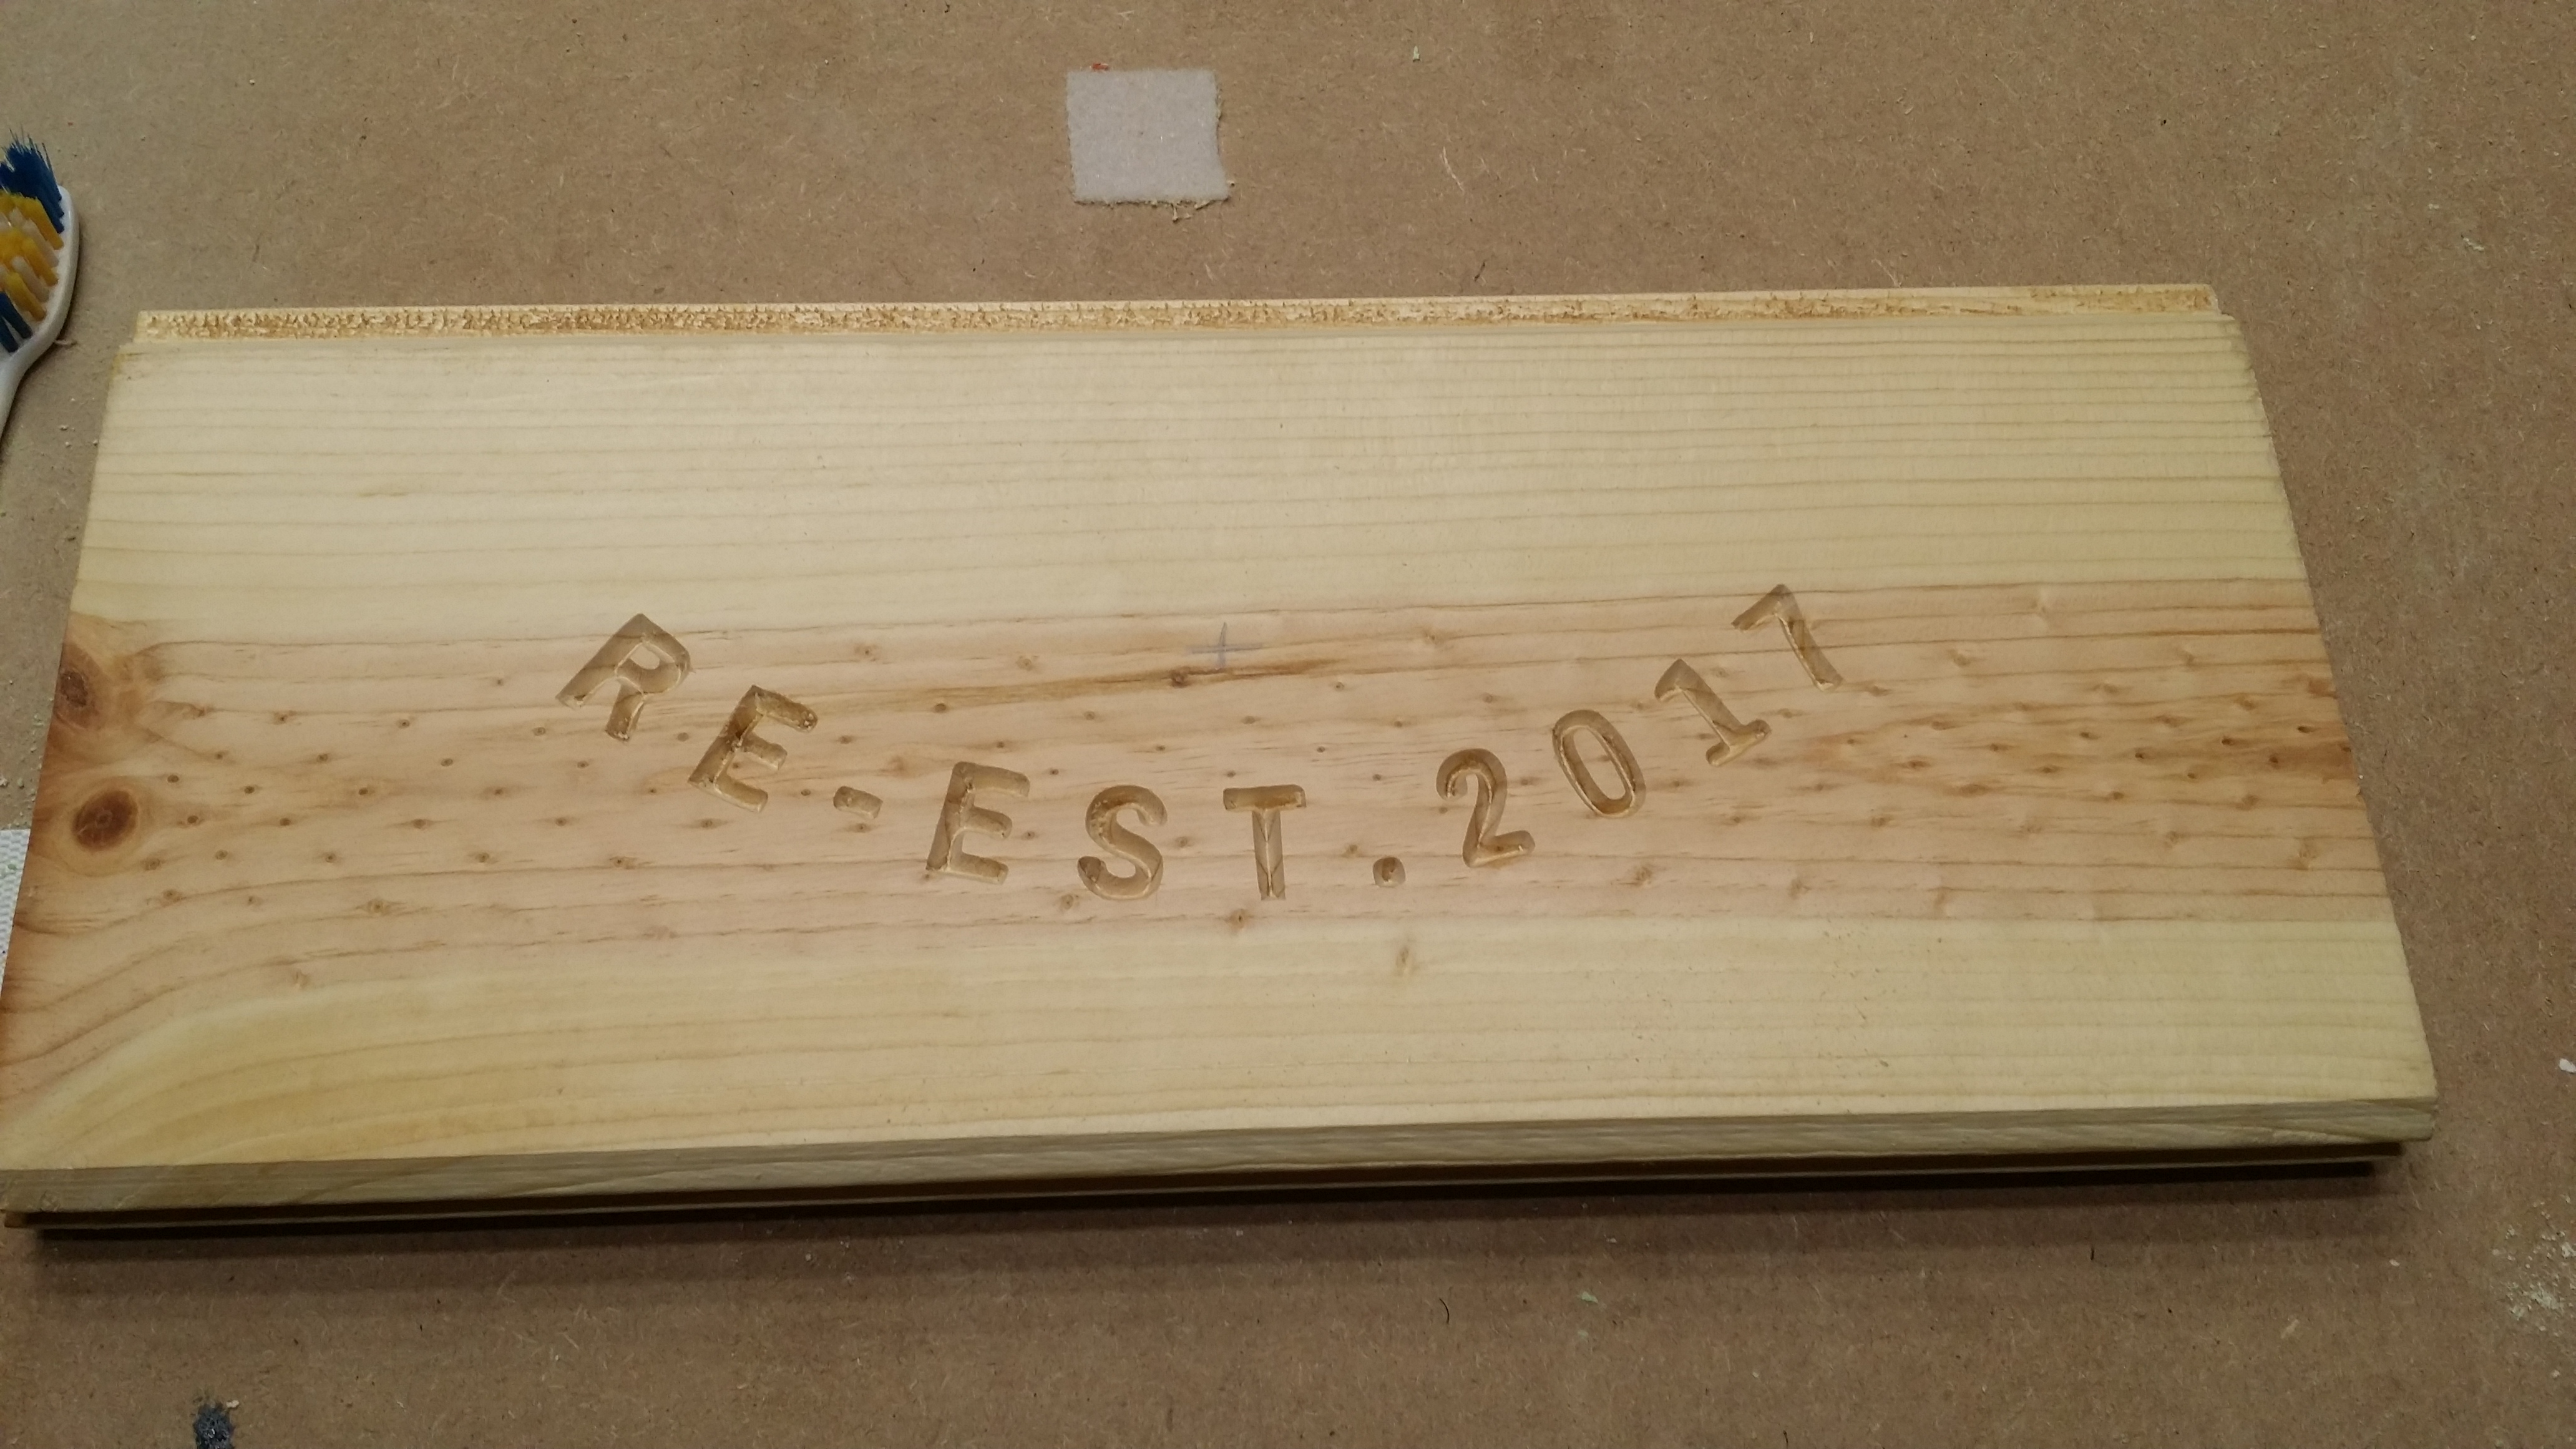
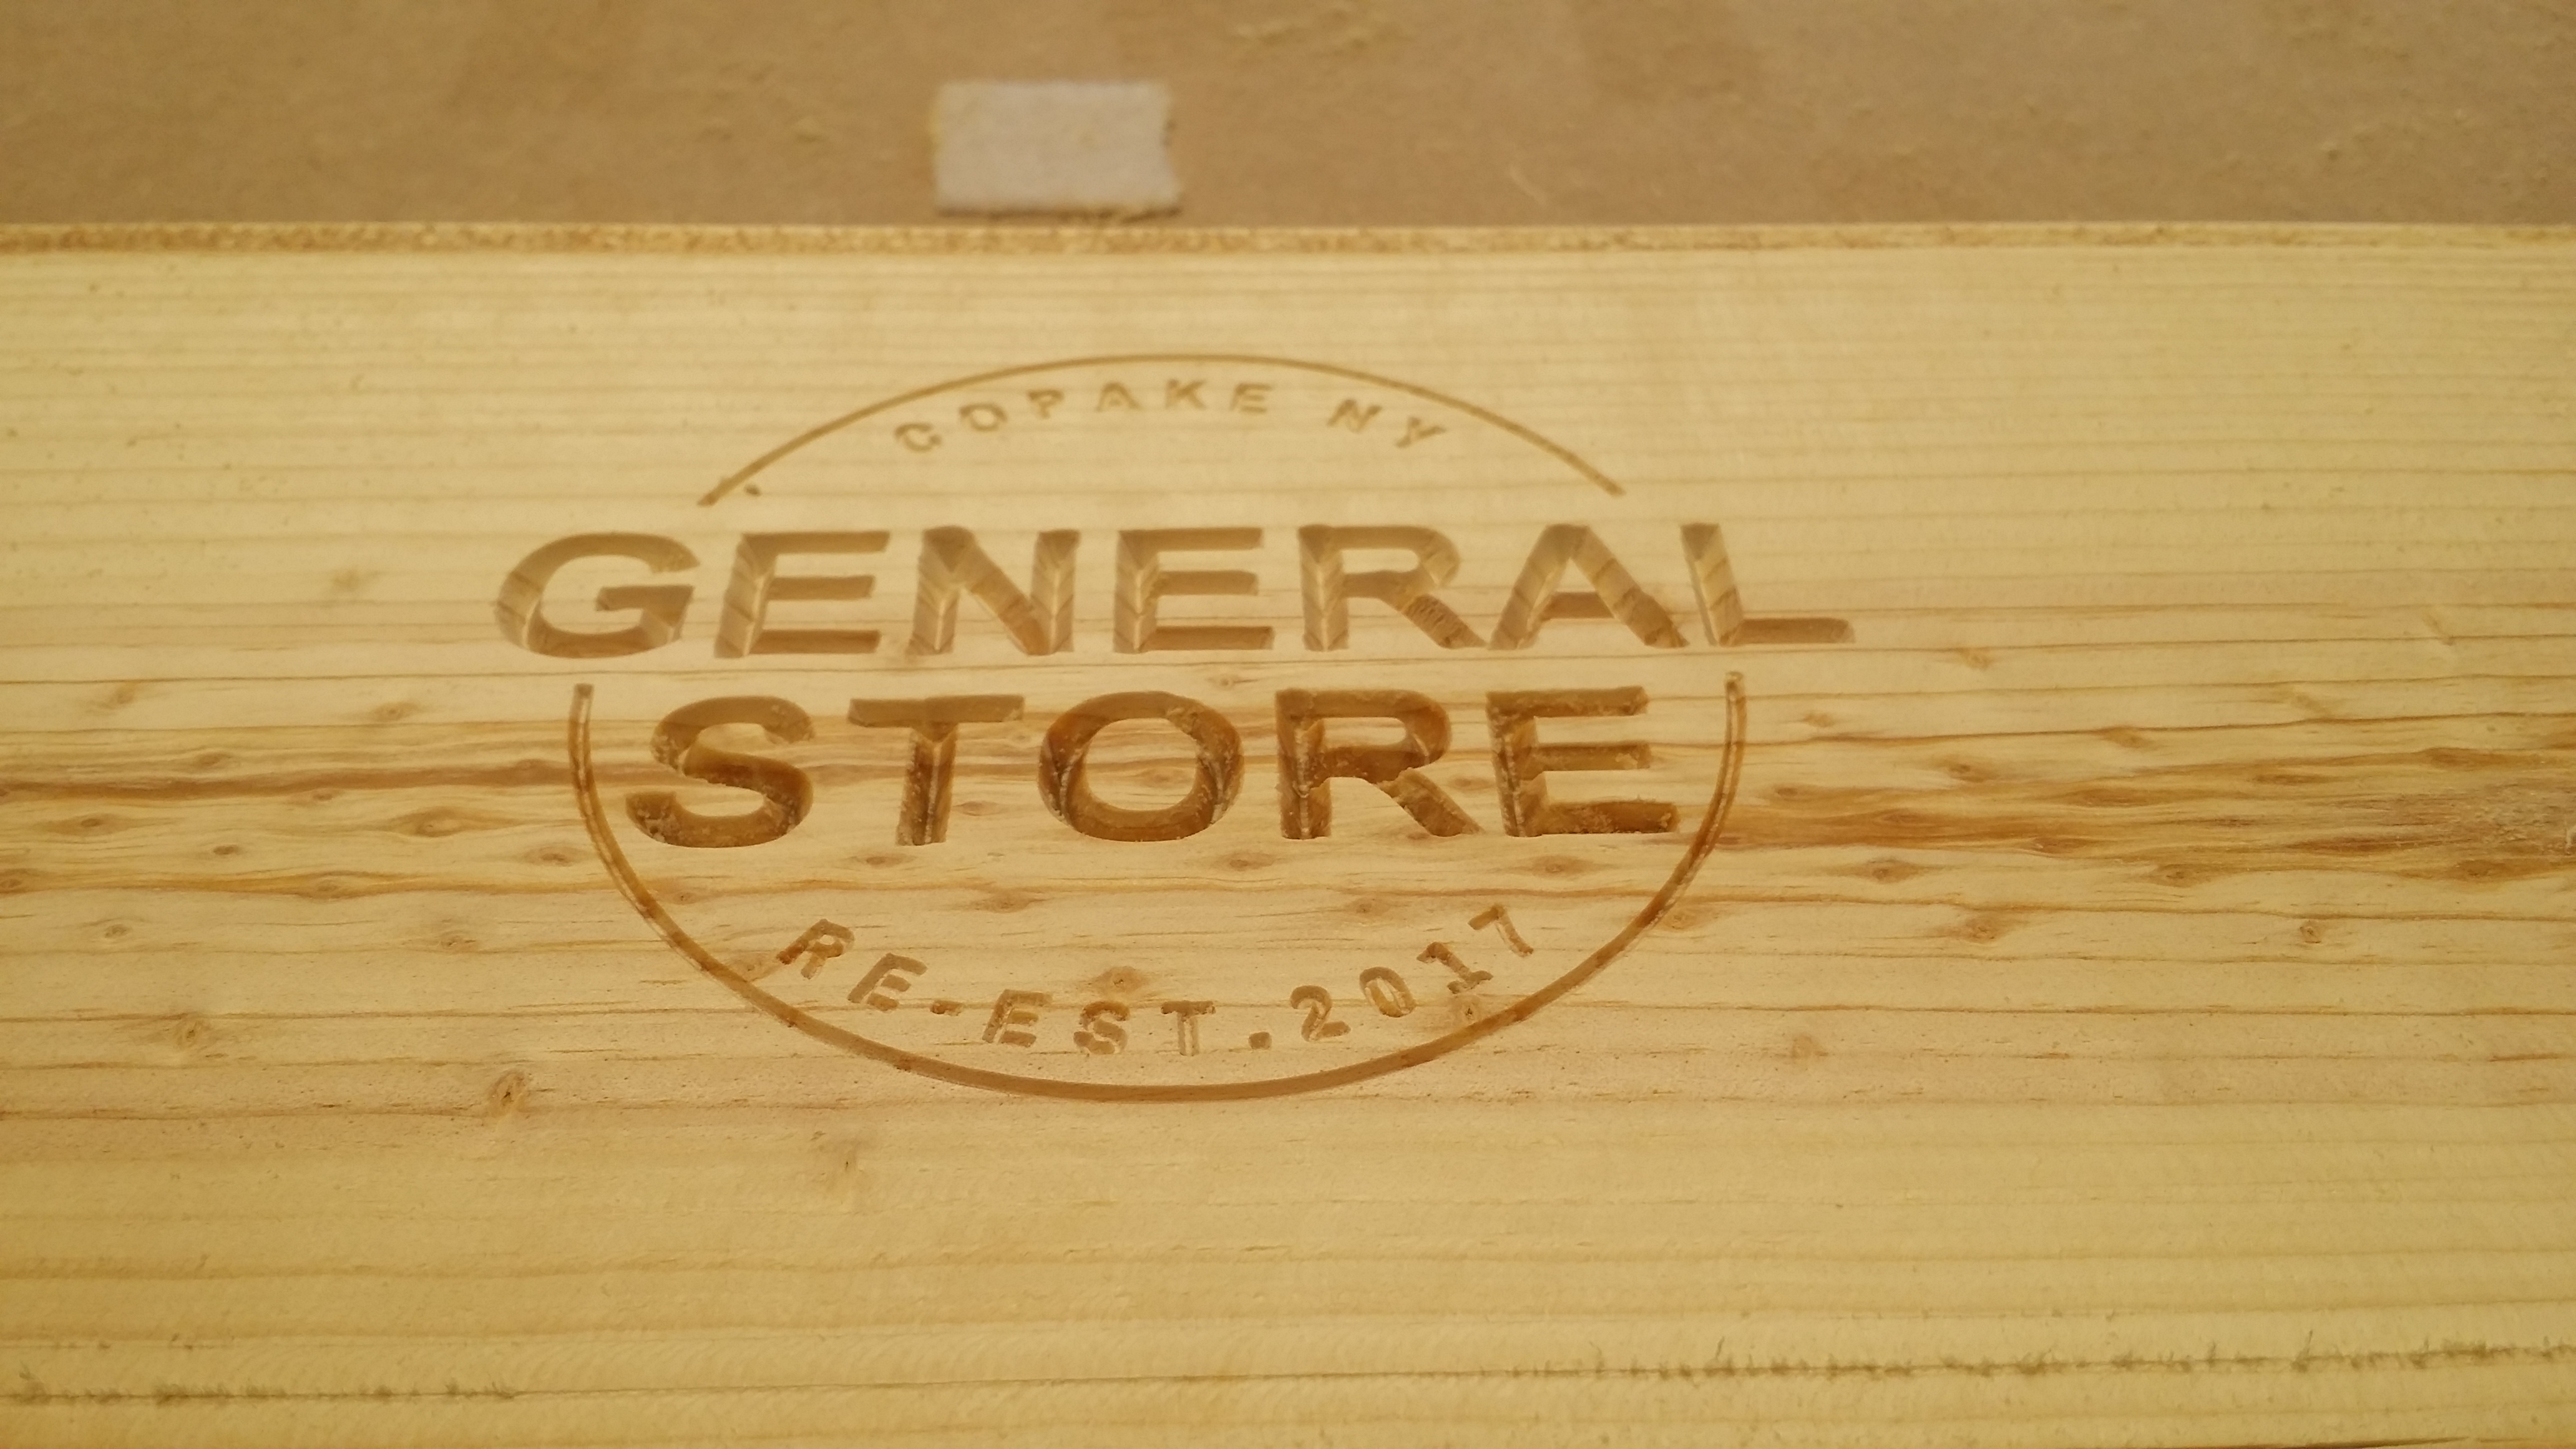
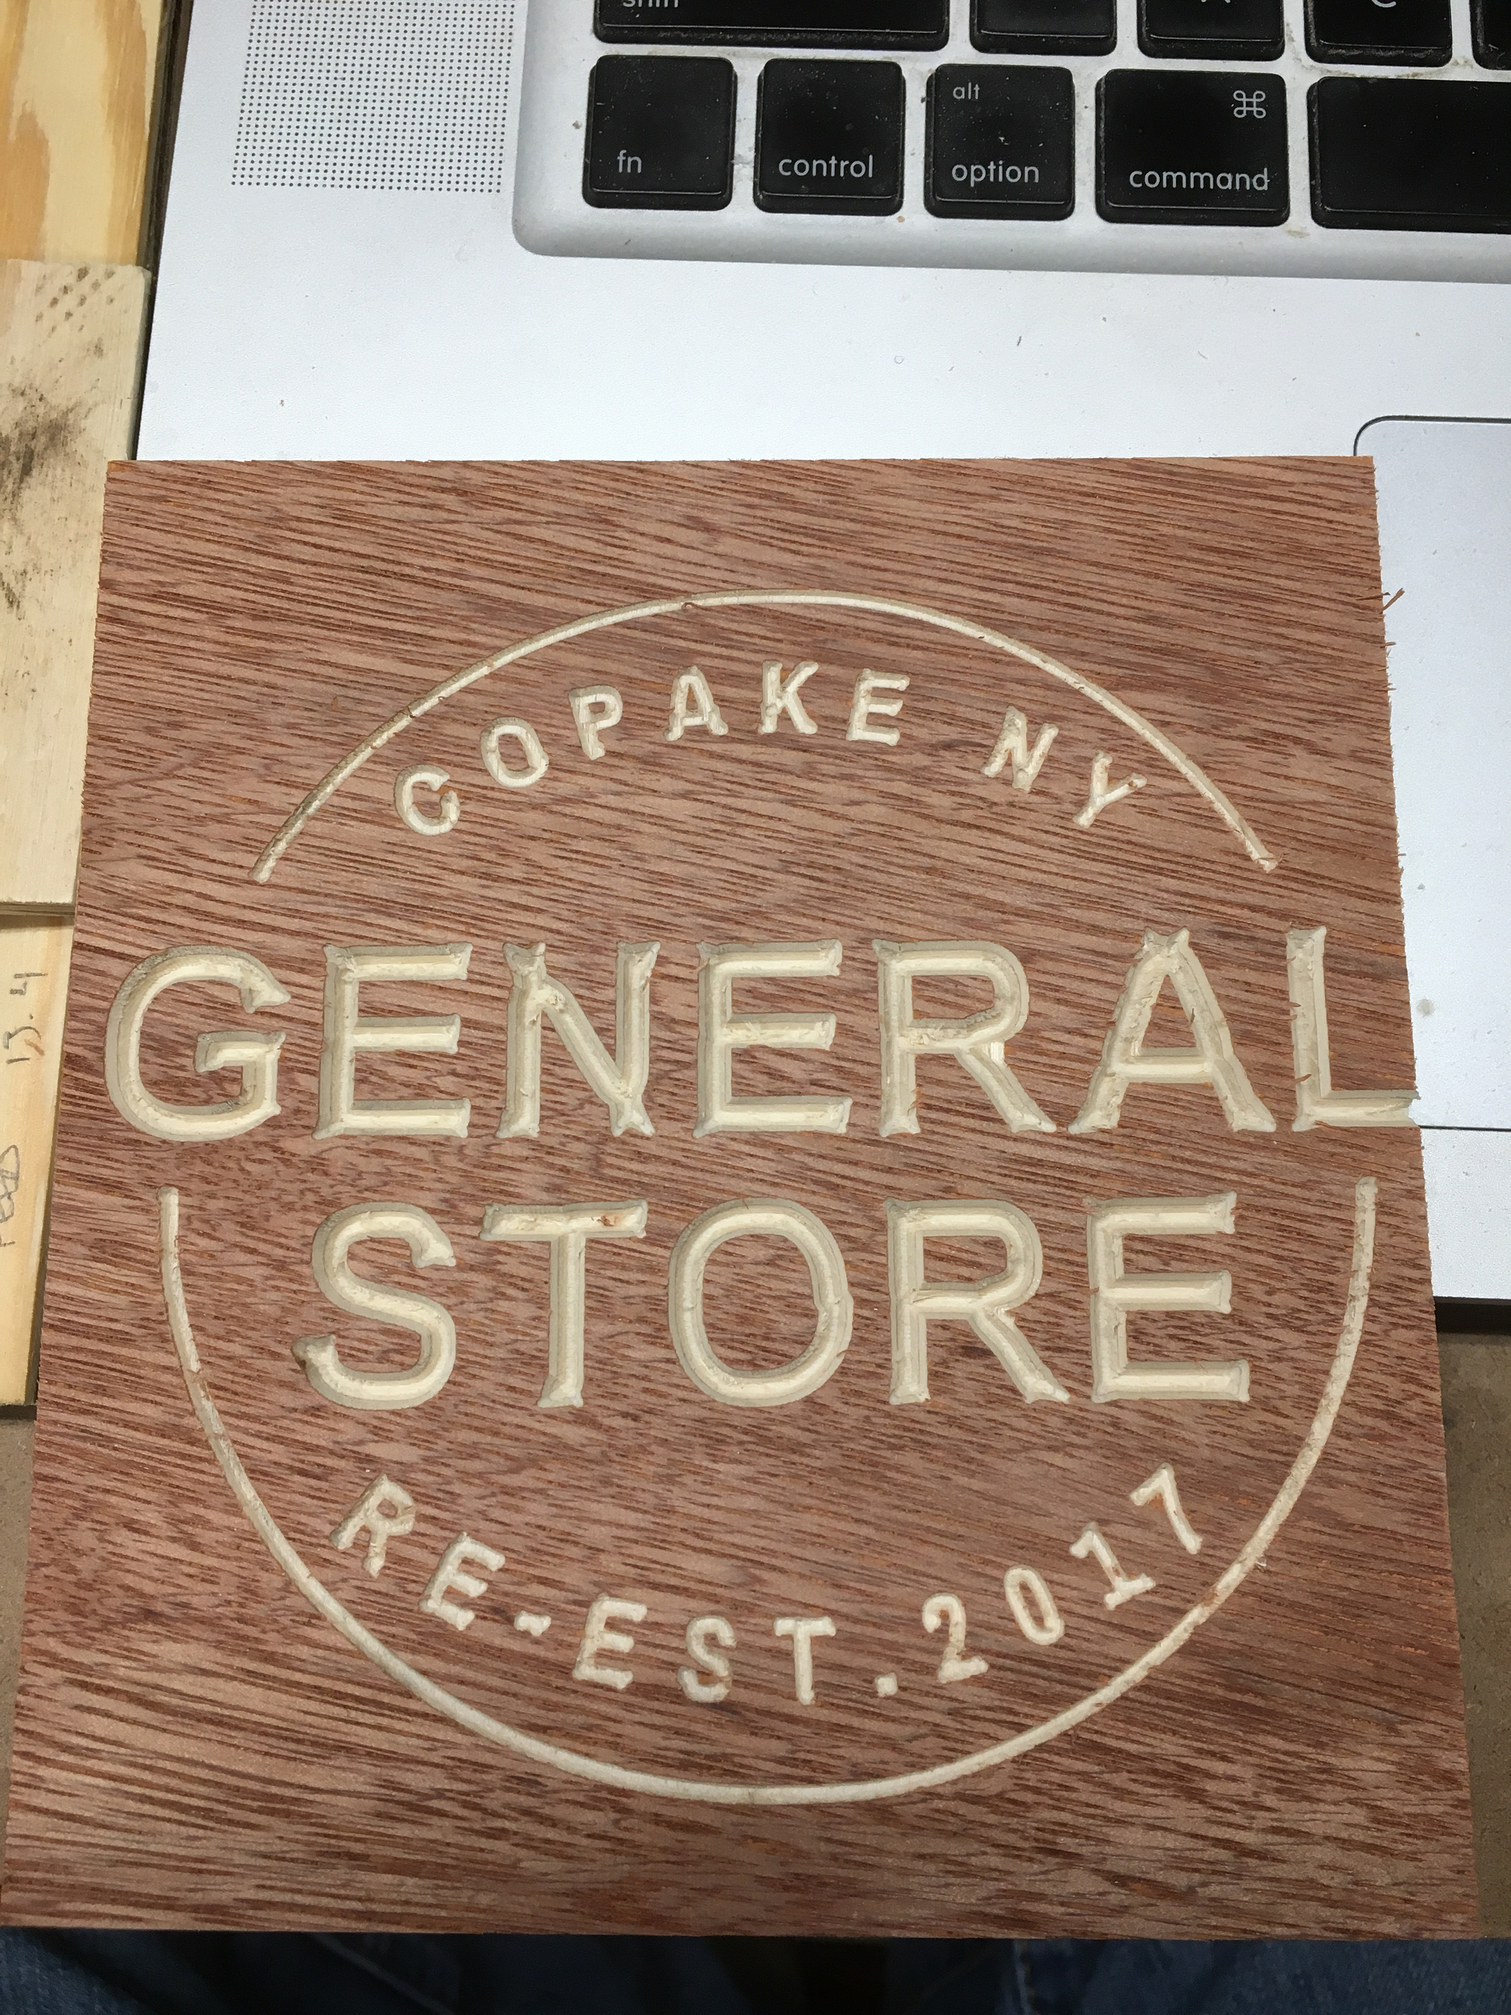
I am running a file now, scooped up your image and converted. While my conversion was not perfect, here are the results.
Single cut, # 302. Cut center is @ center of material.
Be sure to barely kiss whatever you use to zero IE- piece of paper. Get the V bit close using 1mm, .1 then final approach using .01 can be used…
This is essential or job will not come out properly.
Paper should spin on center radius but not move xy.
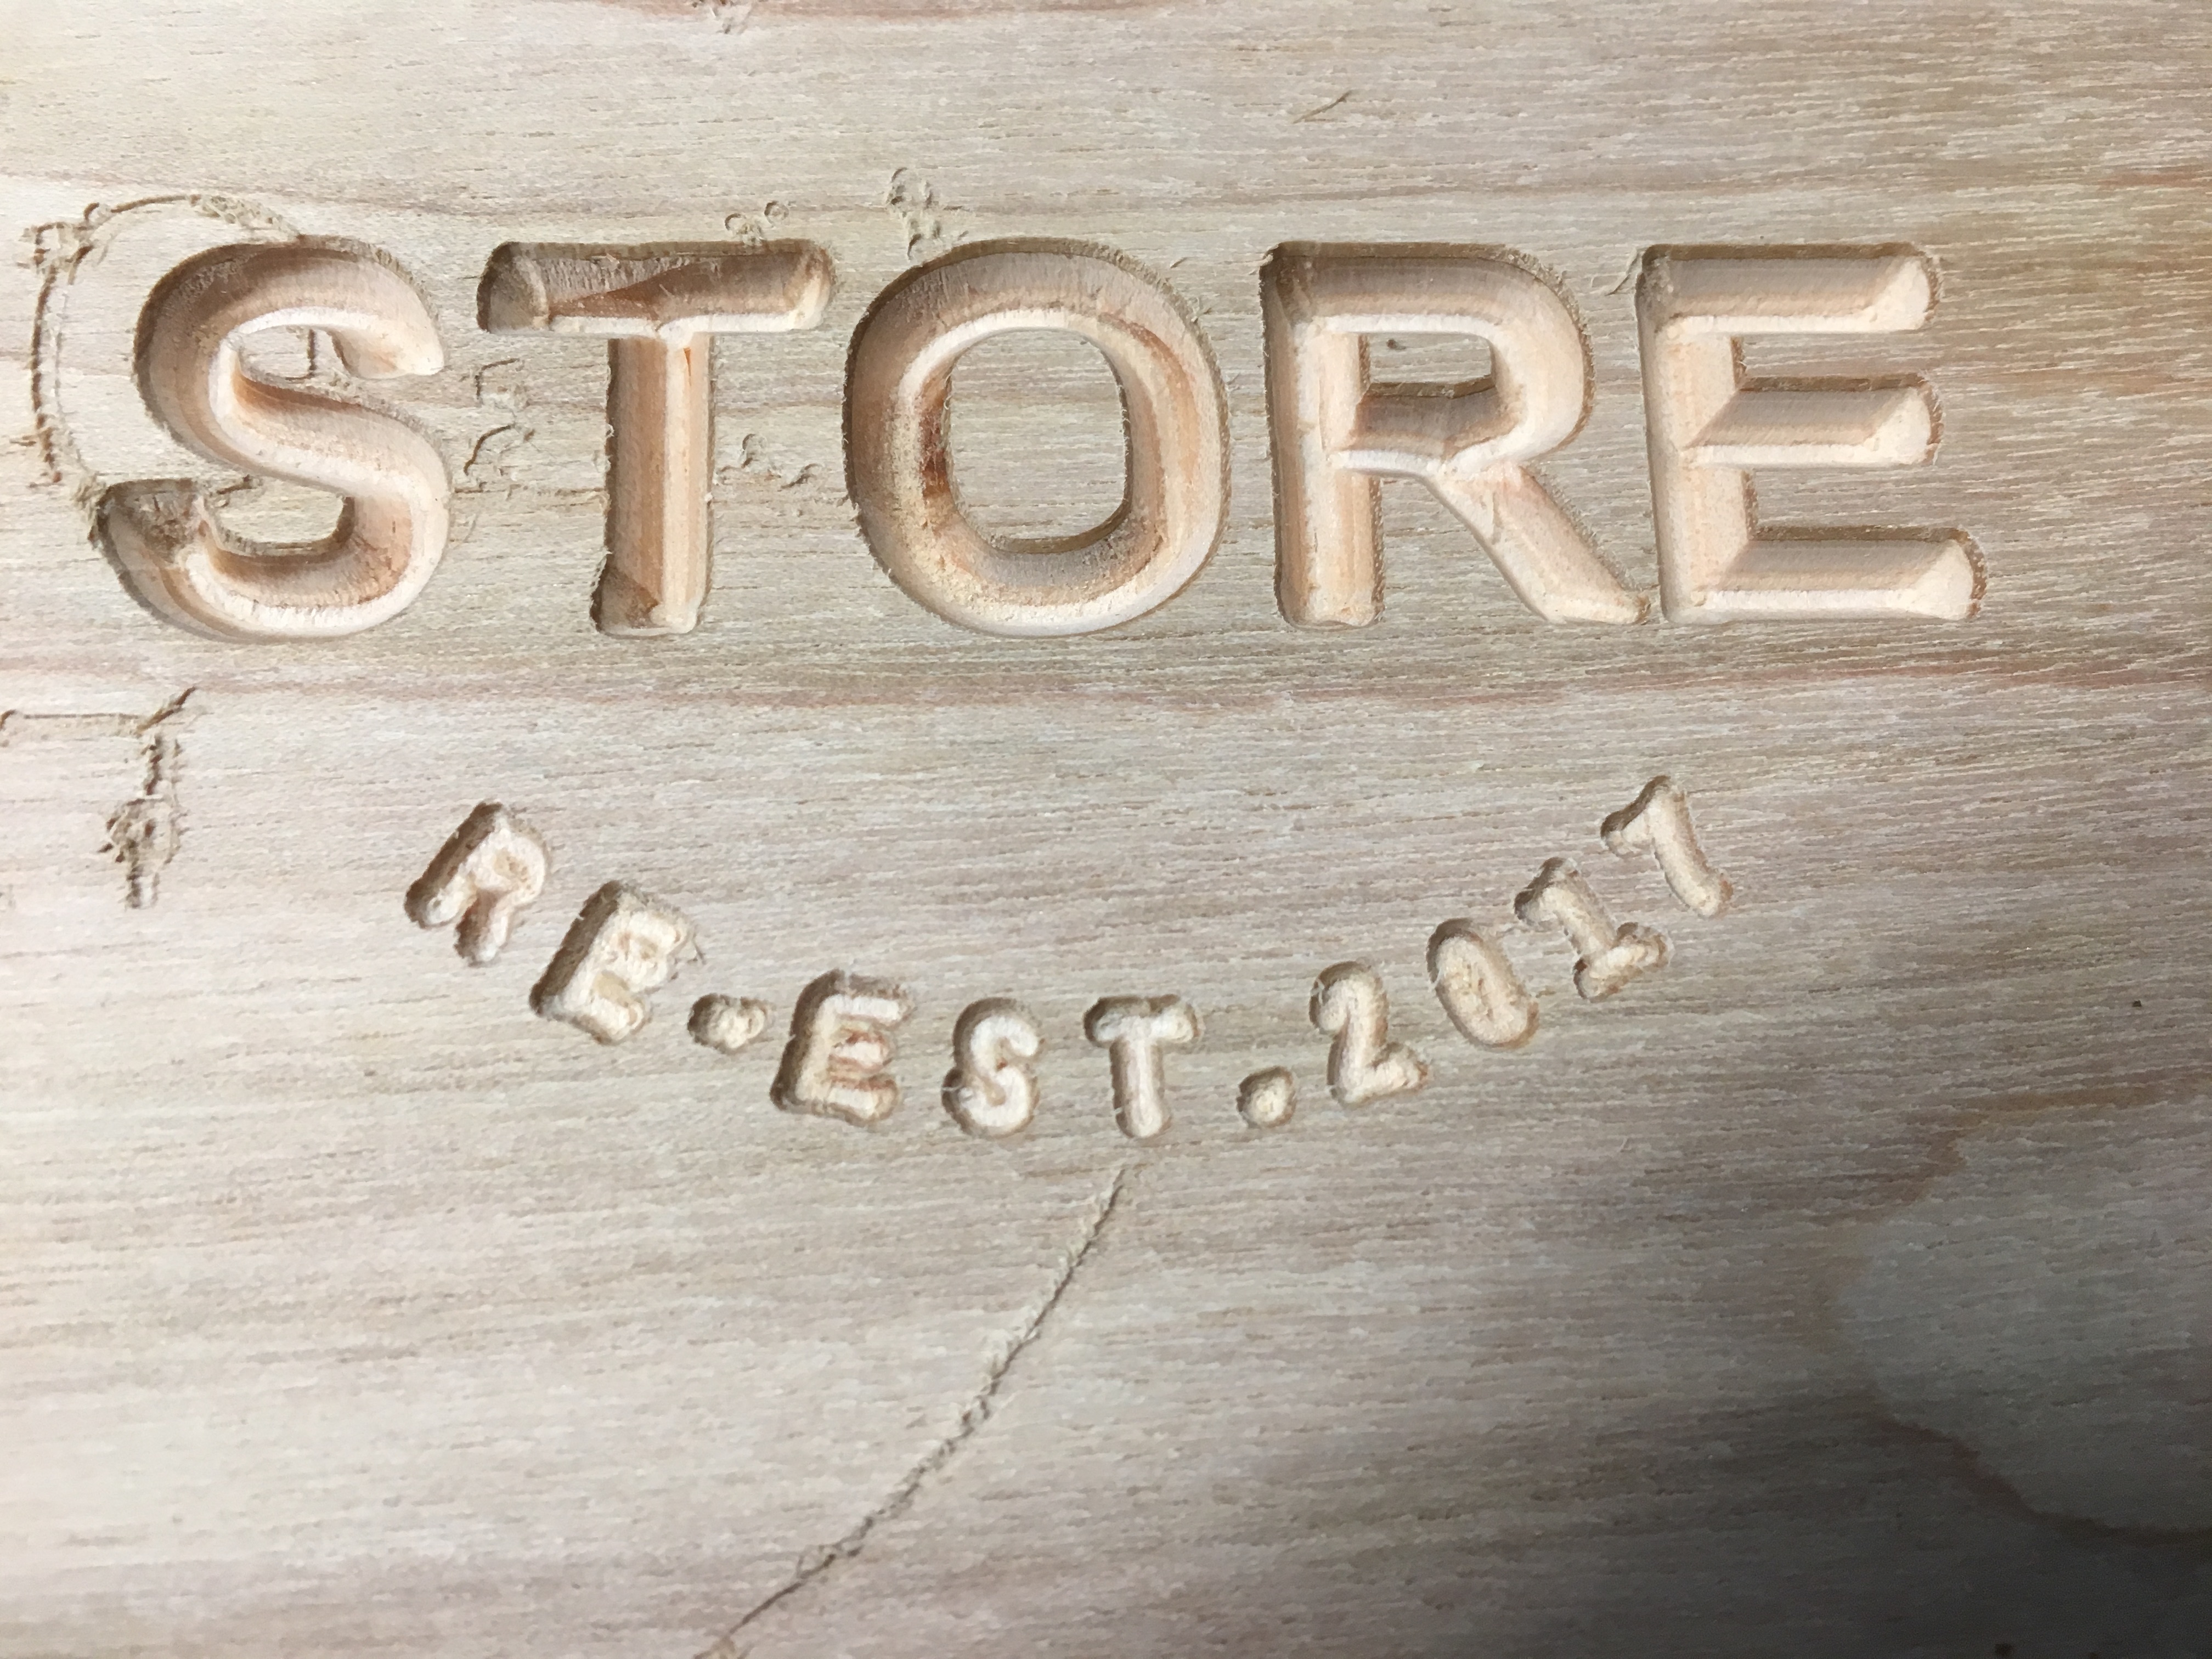
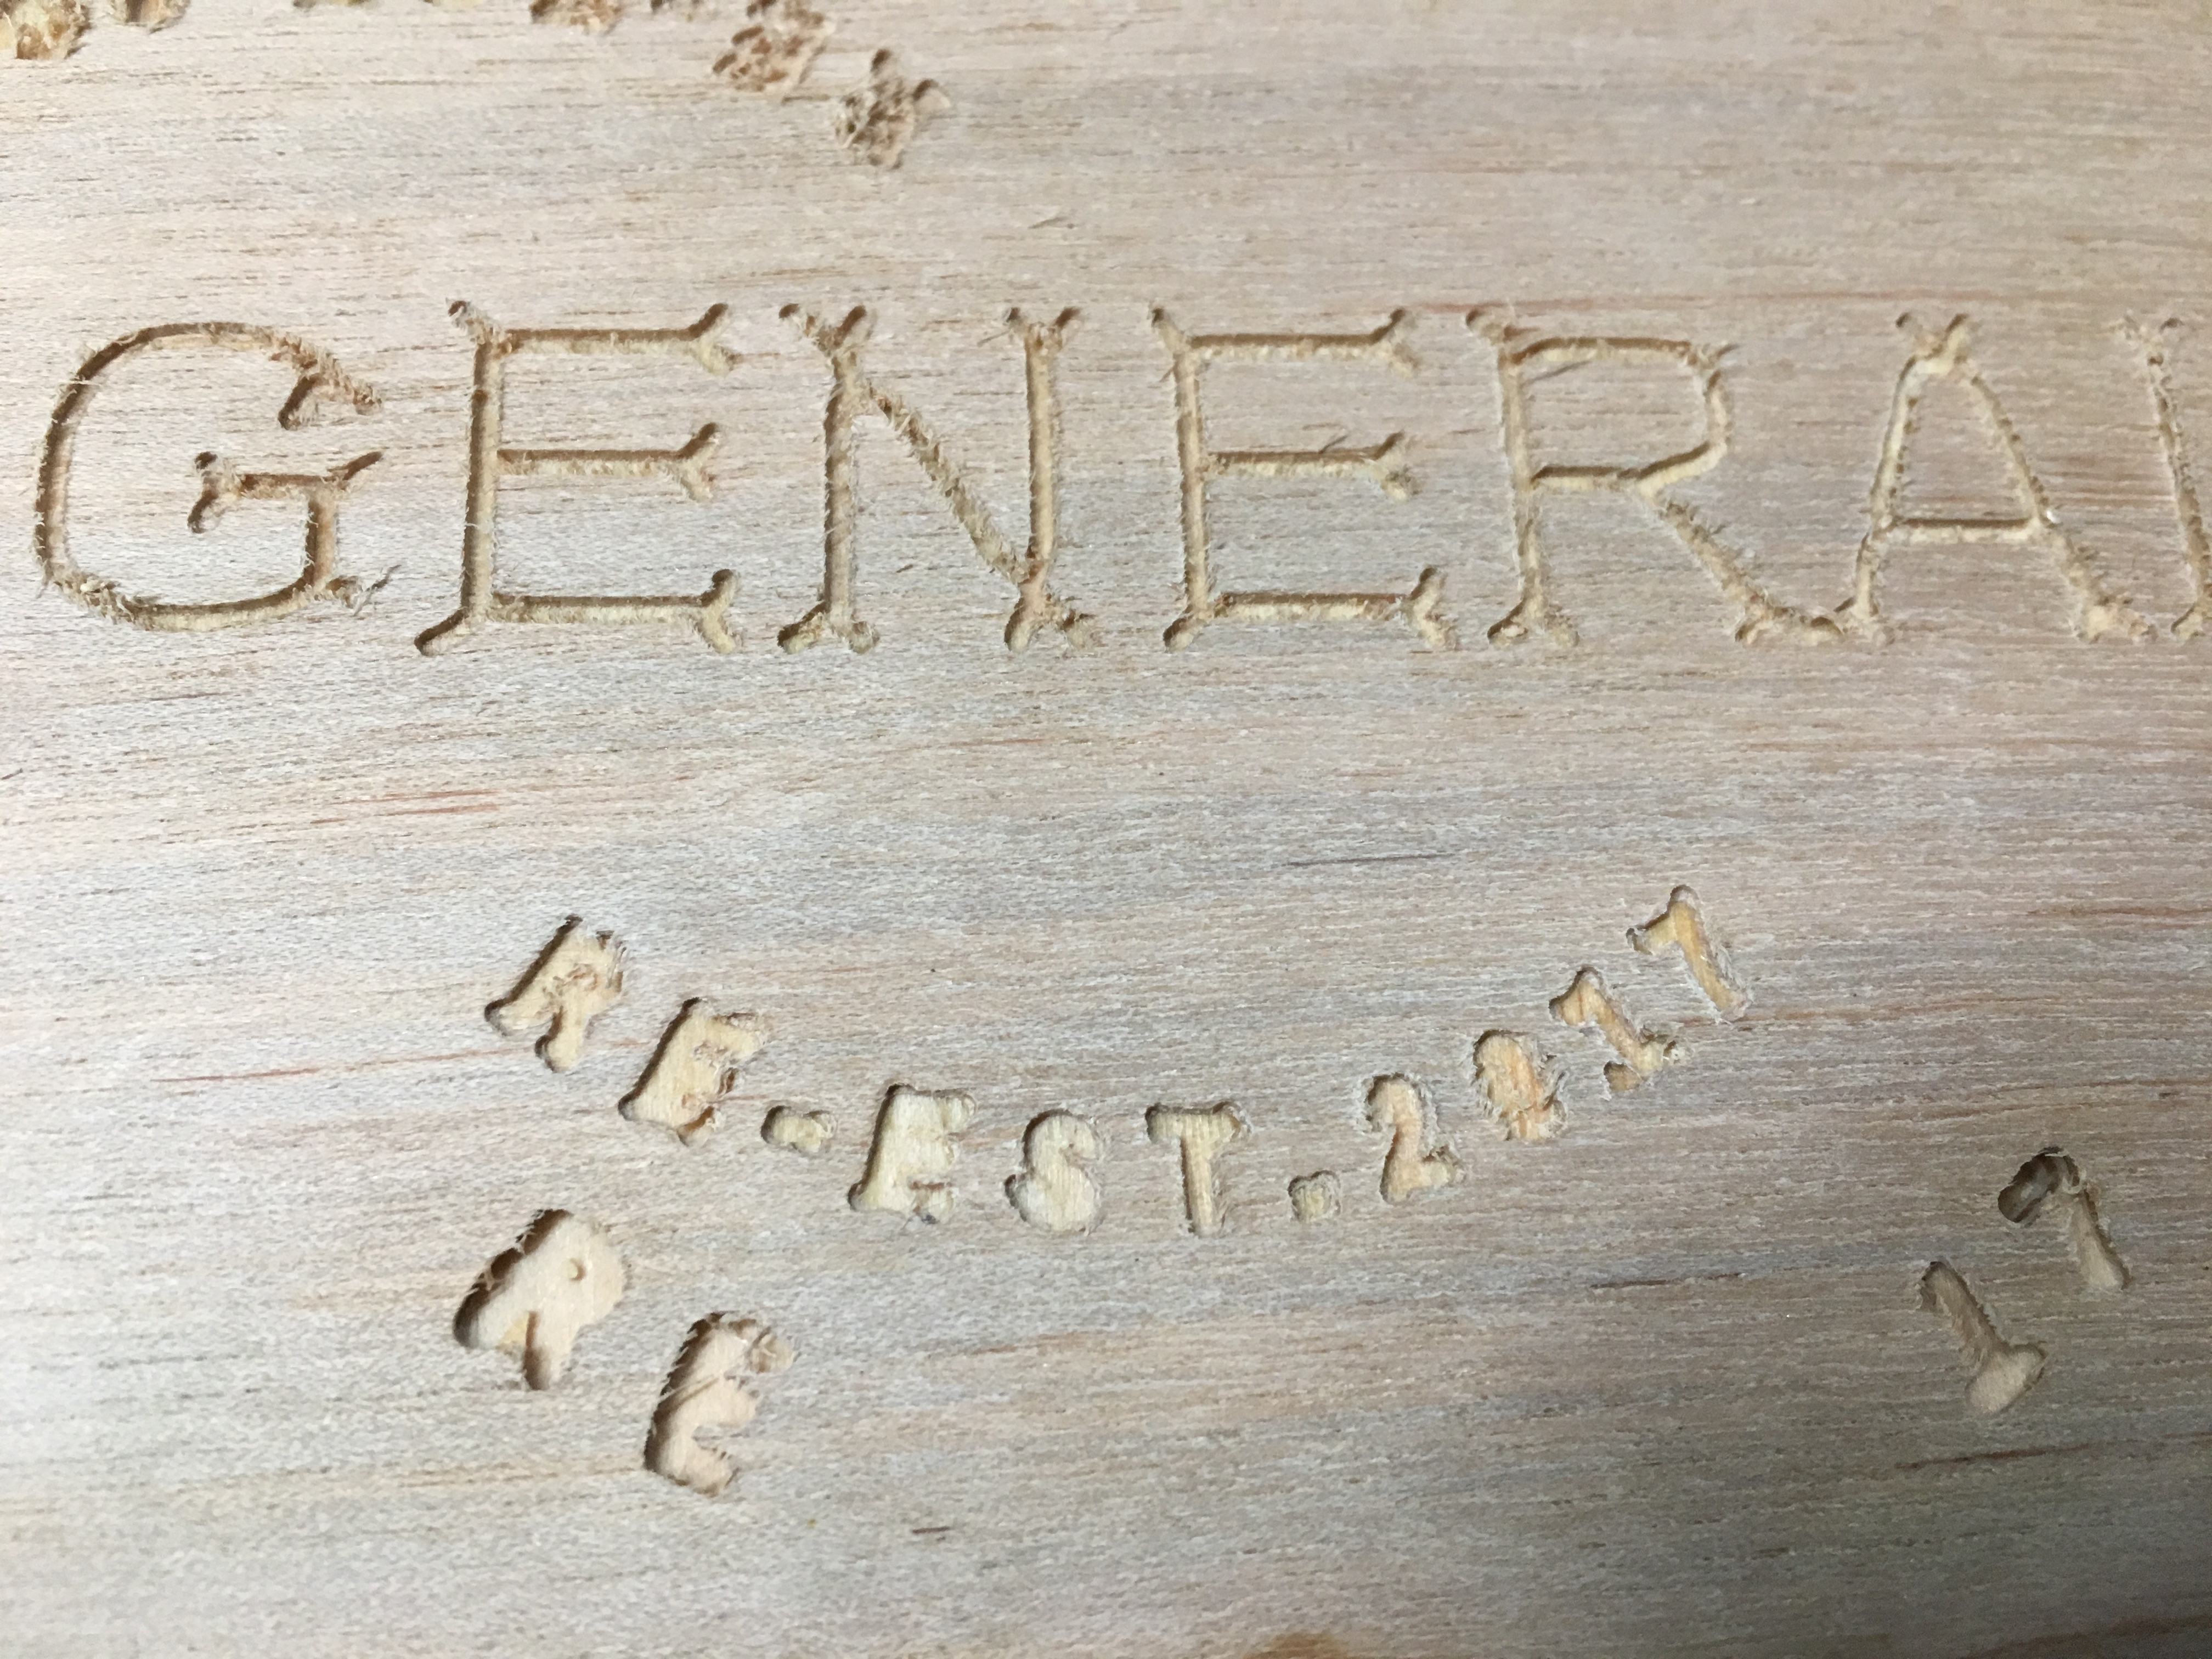
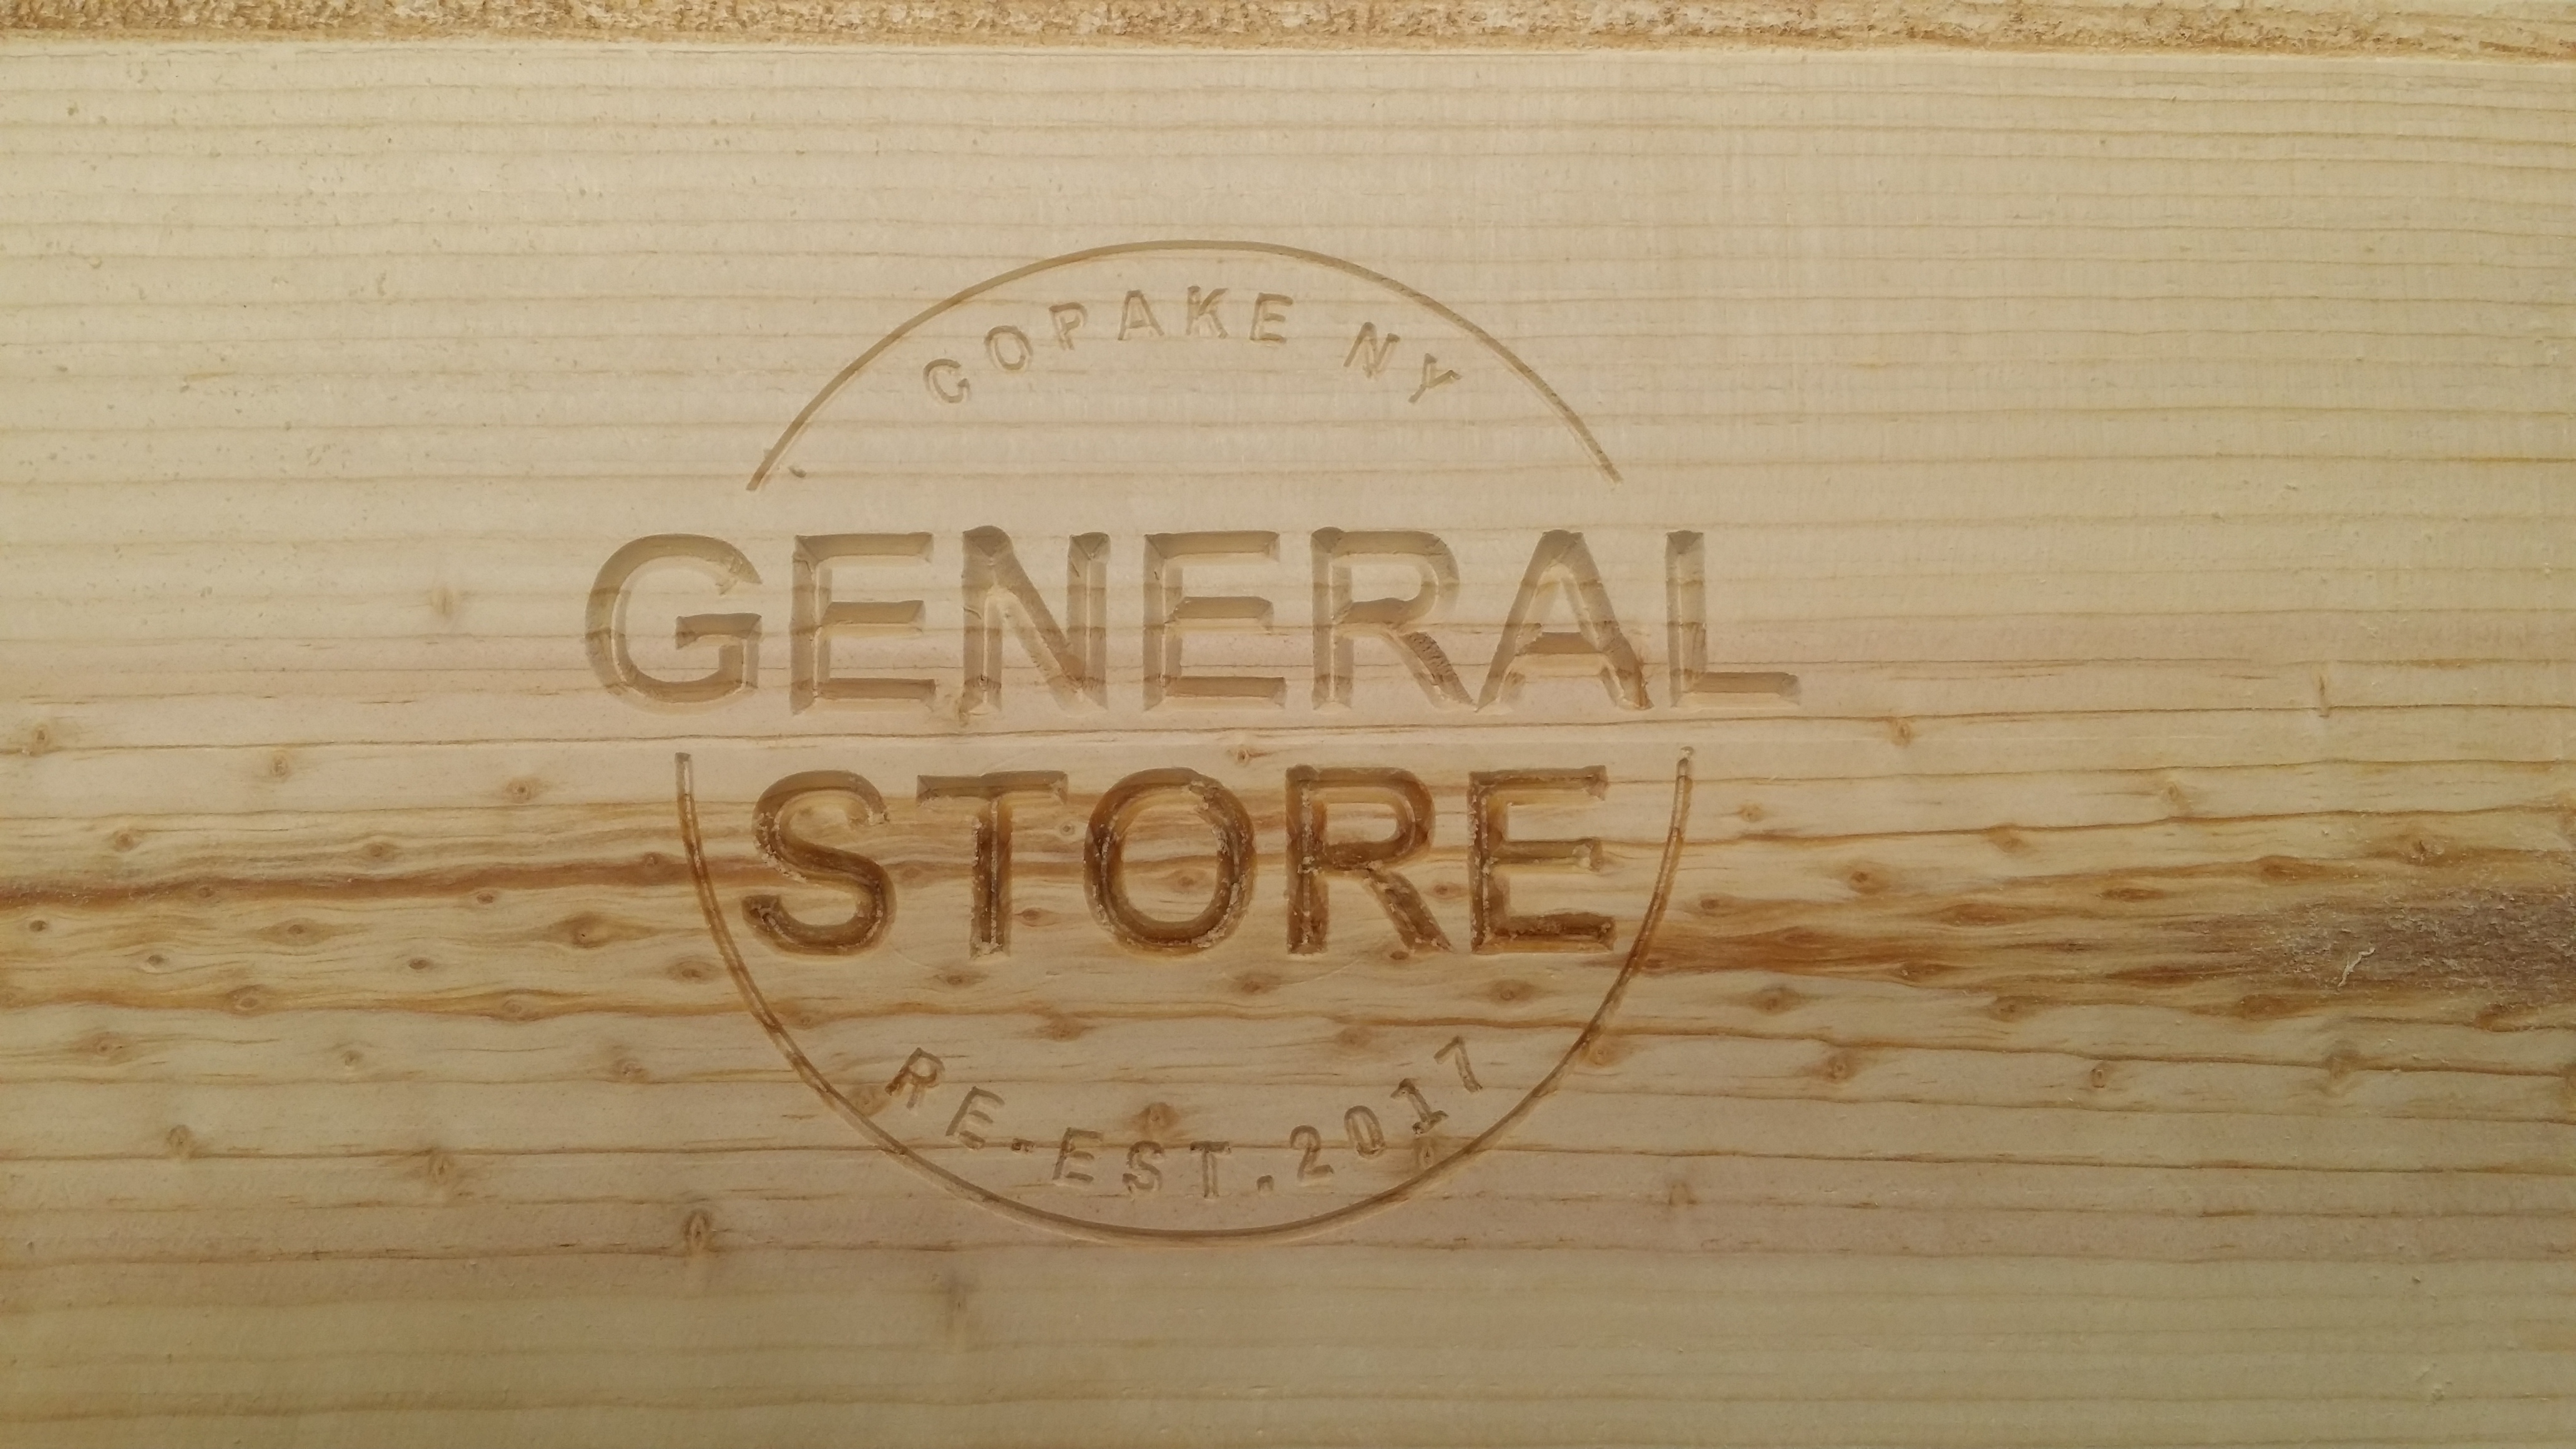
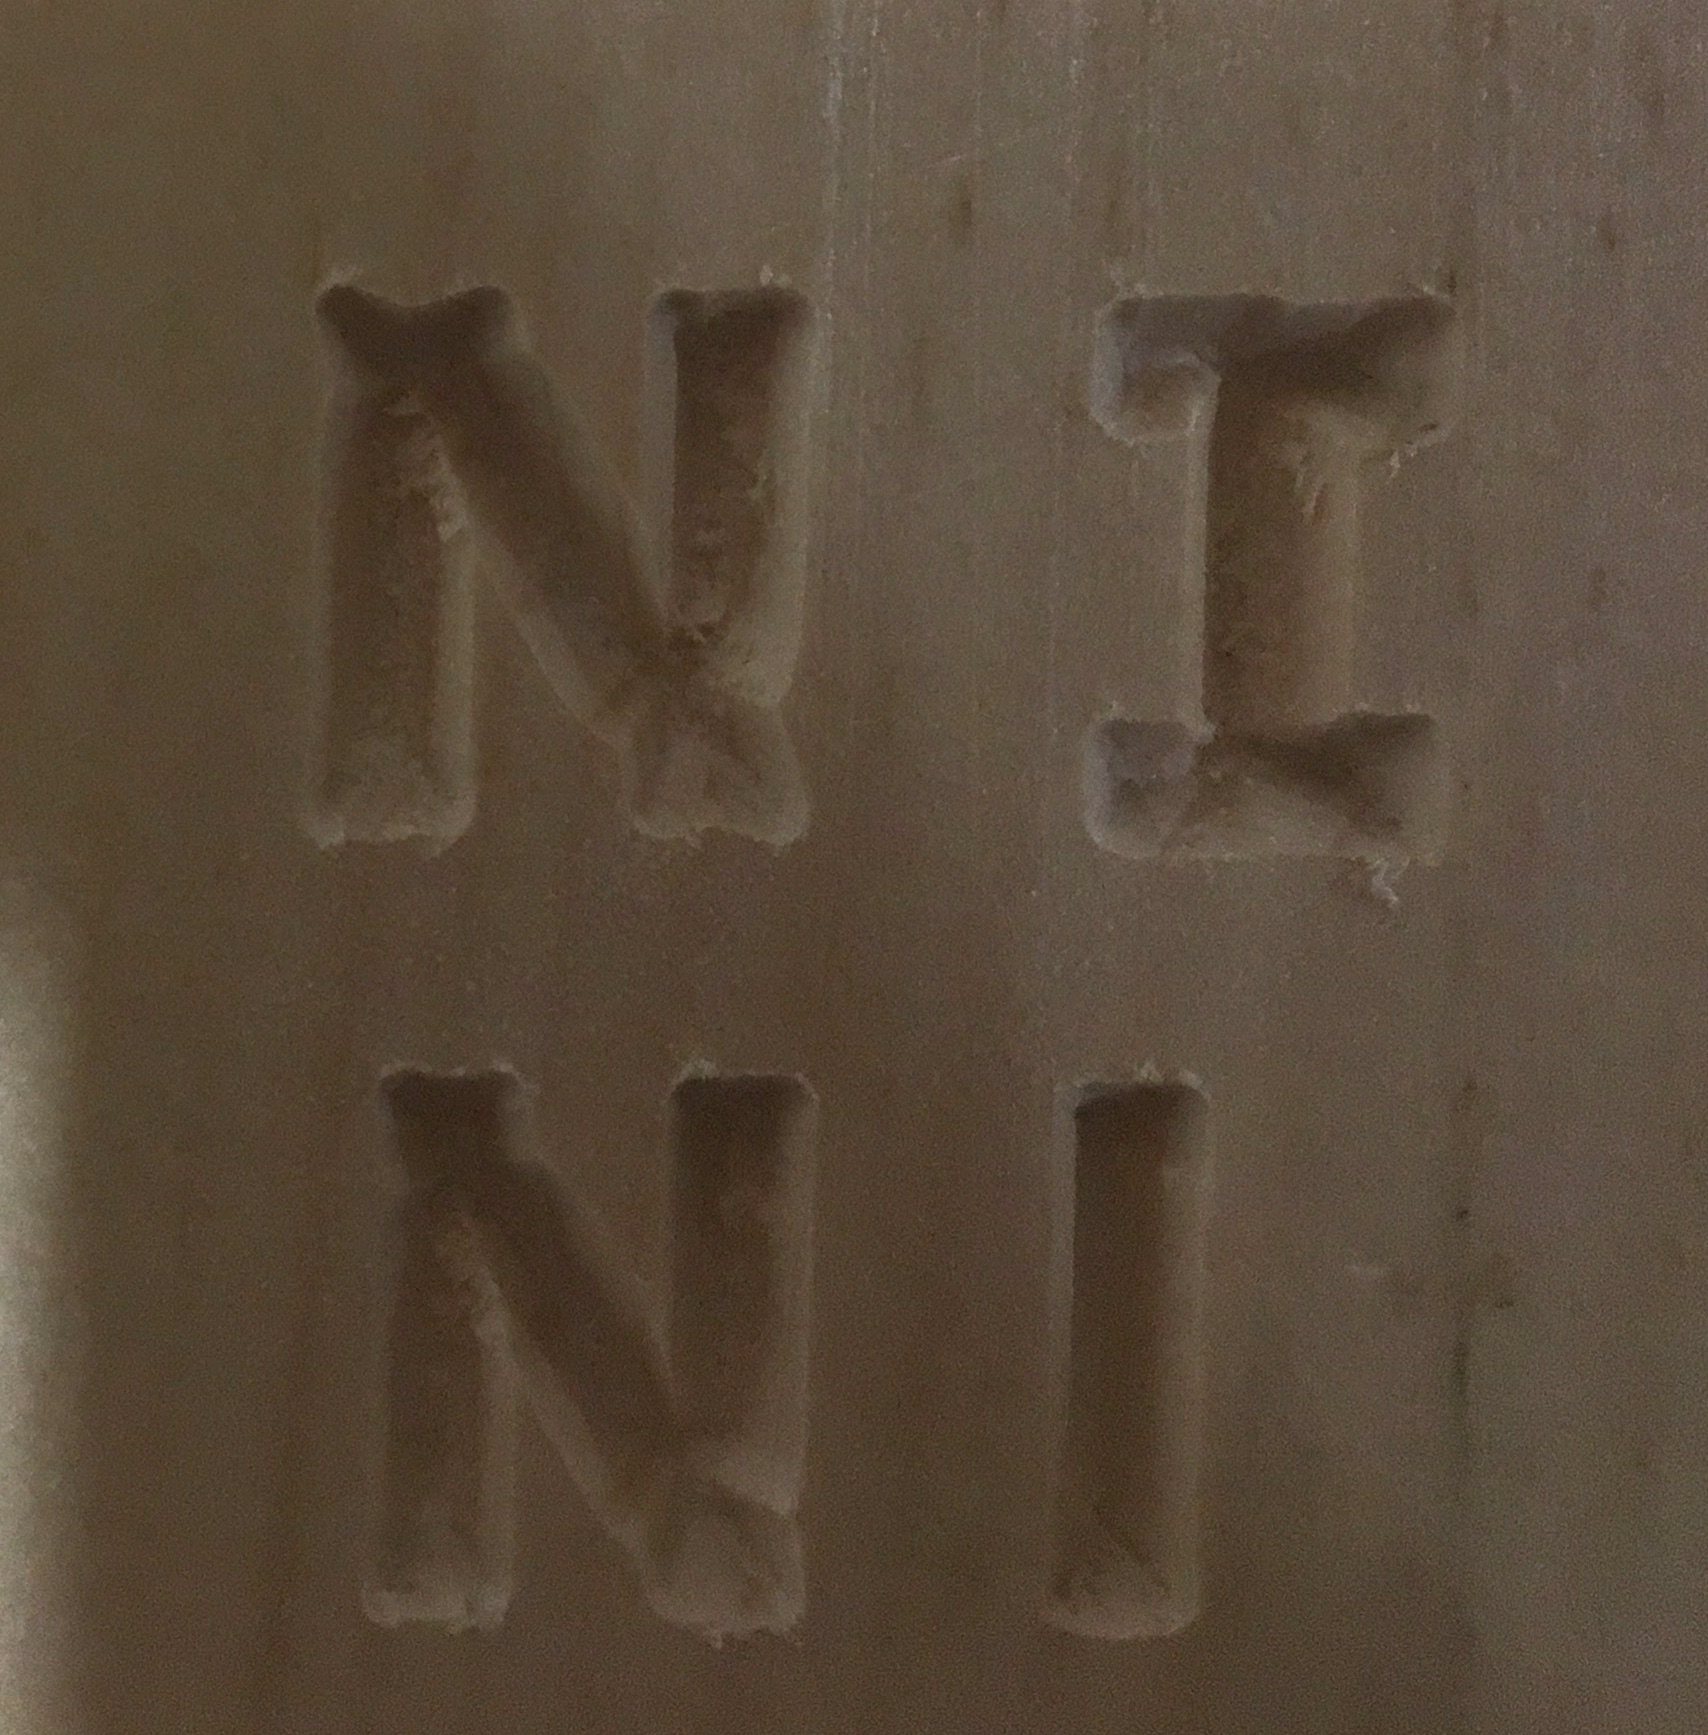
Thanks for that. I don’t have a #302 cutter, just using a 60 degree bit from Inventables now. I do notice on yours and mine, that the smaller letters actually look better. They have straighter lines. If you’ll look at mine, you can see that it’s most dramatic on the N. Also, at the top and bottom of the N, it looks like the cutter missed a pass and just left the outline there. It looks like a serif font. Very weird. The O also has a weird misshapen part of the inner circle on both yours and mine. Looking closer again, ALL the letters have that weird serif.
I’m just doing tests in luan, but that shouldn’t matter, right?
How wide is your 60* bit at its widest point? and are you sure it’s 60*, my #302 1/2", 1/4" & 1/8" 60* v bits all fit in the profile of the letters fine.
I see what your talking about on your O, mine is not like that, kinda looks weird in my photo but its cut through a knot in the wood and looks perfectly round.
You may want to go through your machine and check v wheel tightness, belt tightness etc… basically the daily chores.
If you want just clean letters for the bigger ones, I find finding the largest bit that will fit in the pocket to provide a clean cut and use that.
A 1/16th SE 2FL Endmill would fit inside General Store and provide a very clean look.
That very much looks like something moving where it shouldn’t, in amounts that would seem to be in excess of what I’d expect from deflection. As Mike says, I’d definitely check out belt tension and v-wheel fit as those are the likeliest culprits. Somewhat less likely is the stock itself moving - how do you have it held down?
If all of those are fine, then I think you get into the weirder stuff, like the stepper motor gears being loose. I say “gears” because it looks like the errors are in both X and Y directions - it seems unlikely that both would be loose.
So far, I’ve rechecked my belt tension and all seems ok (though there really is no way to know as there’s no actual way to know just how tight they are).
There is no deflection when I try to move the bit in the spindle, nor can I really make the carriage move in any direction when I try. The whole machine just moves as one, which seems to indicate the assemblies are all tight. The V-wheels seem tight as well. The stock is held down by 4 clamps and is not moving at all.
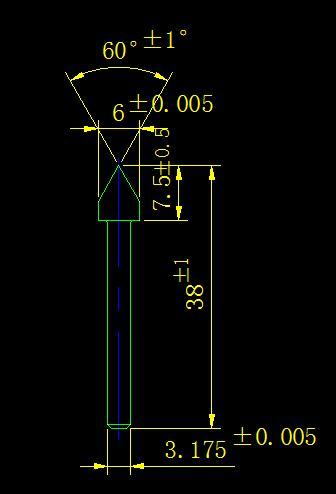
My 60 degree V bit (specs attached) is .23 inches wide.
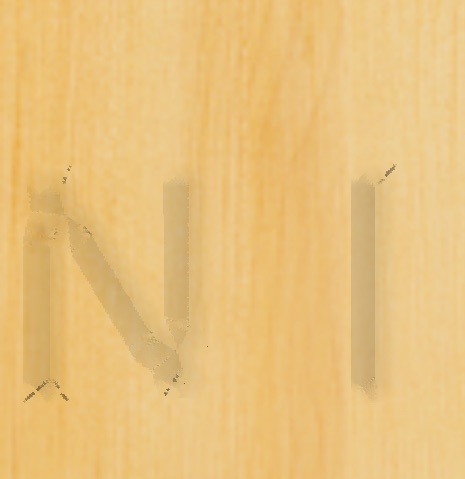
I just carved an N and an I. I watched the bit as it went. I can actually see it making those squirrely curved moves. Like there is something wrong with the code or the interpretation of the code.
The original letters in “GENERAL STORE” are about .125 inches wide, again significantly less than the bit width.
As far as the simulation goes Will, it doesn’t reflect at all what it carved. Attached is a JPG of that as well. Thanks in advance for all your help!
Hi Will, I haven’t tried the inset yet as it seems likely that there is some other underlying issue.
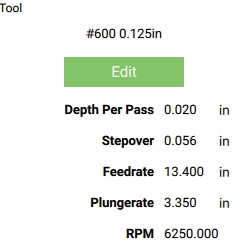
Attached is the screen grab of the tool and the file as well. N and I.nc (6.7 KB)
Sorry - here’s the definition from the tool creation menu and another carve of the same letters in a different font, which seem to me to exhibit exactly the same issues with the N as the other font.