What did you cut on your Shapeoko/ Nomad today?

There’s a distributor within 35 miles here as well, SoCal, thanks!

1 Like

This post has been updated.

8 Likes

Clever idea, I shall be making some of these. Appreciate the inspiration.

It’ll be nice to get back to wood again (been making a lot of aluminum glitter lately) also, my wife will be more then happy to endure a few wood chips and a bit of dust tracked in rather then tinker bell dust.

1 Like

Glad you like the idea. I’d appreciate anyone not selling these commercially or publishing them. It’s meant to be confidential within this forum.
Thx

AZ

3 Likes

AZ, how can you expect to publish something in a public forum and expect it to be “confidential?” You can have intellectual property that belongs to you, but not this way.

6 Likes

Messing with birds today on the HDM.

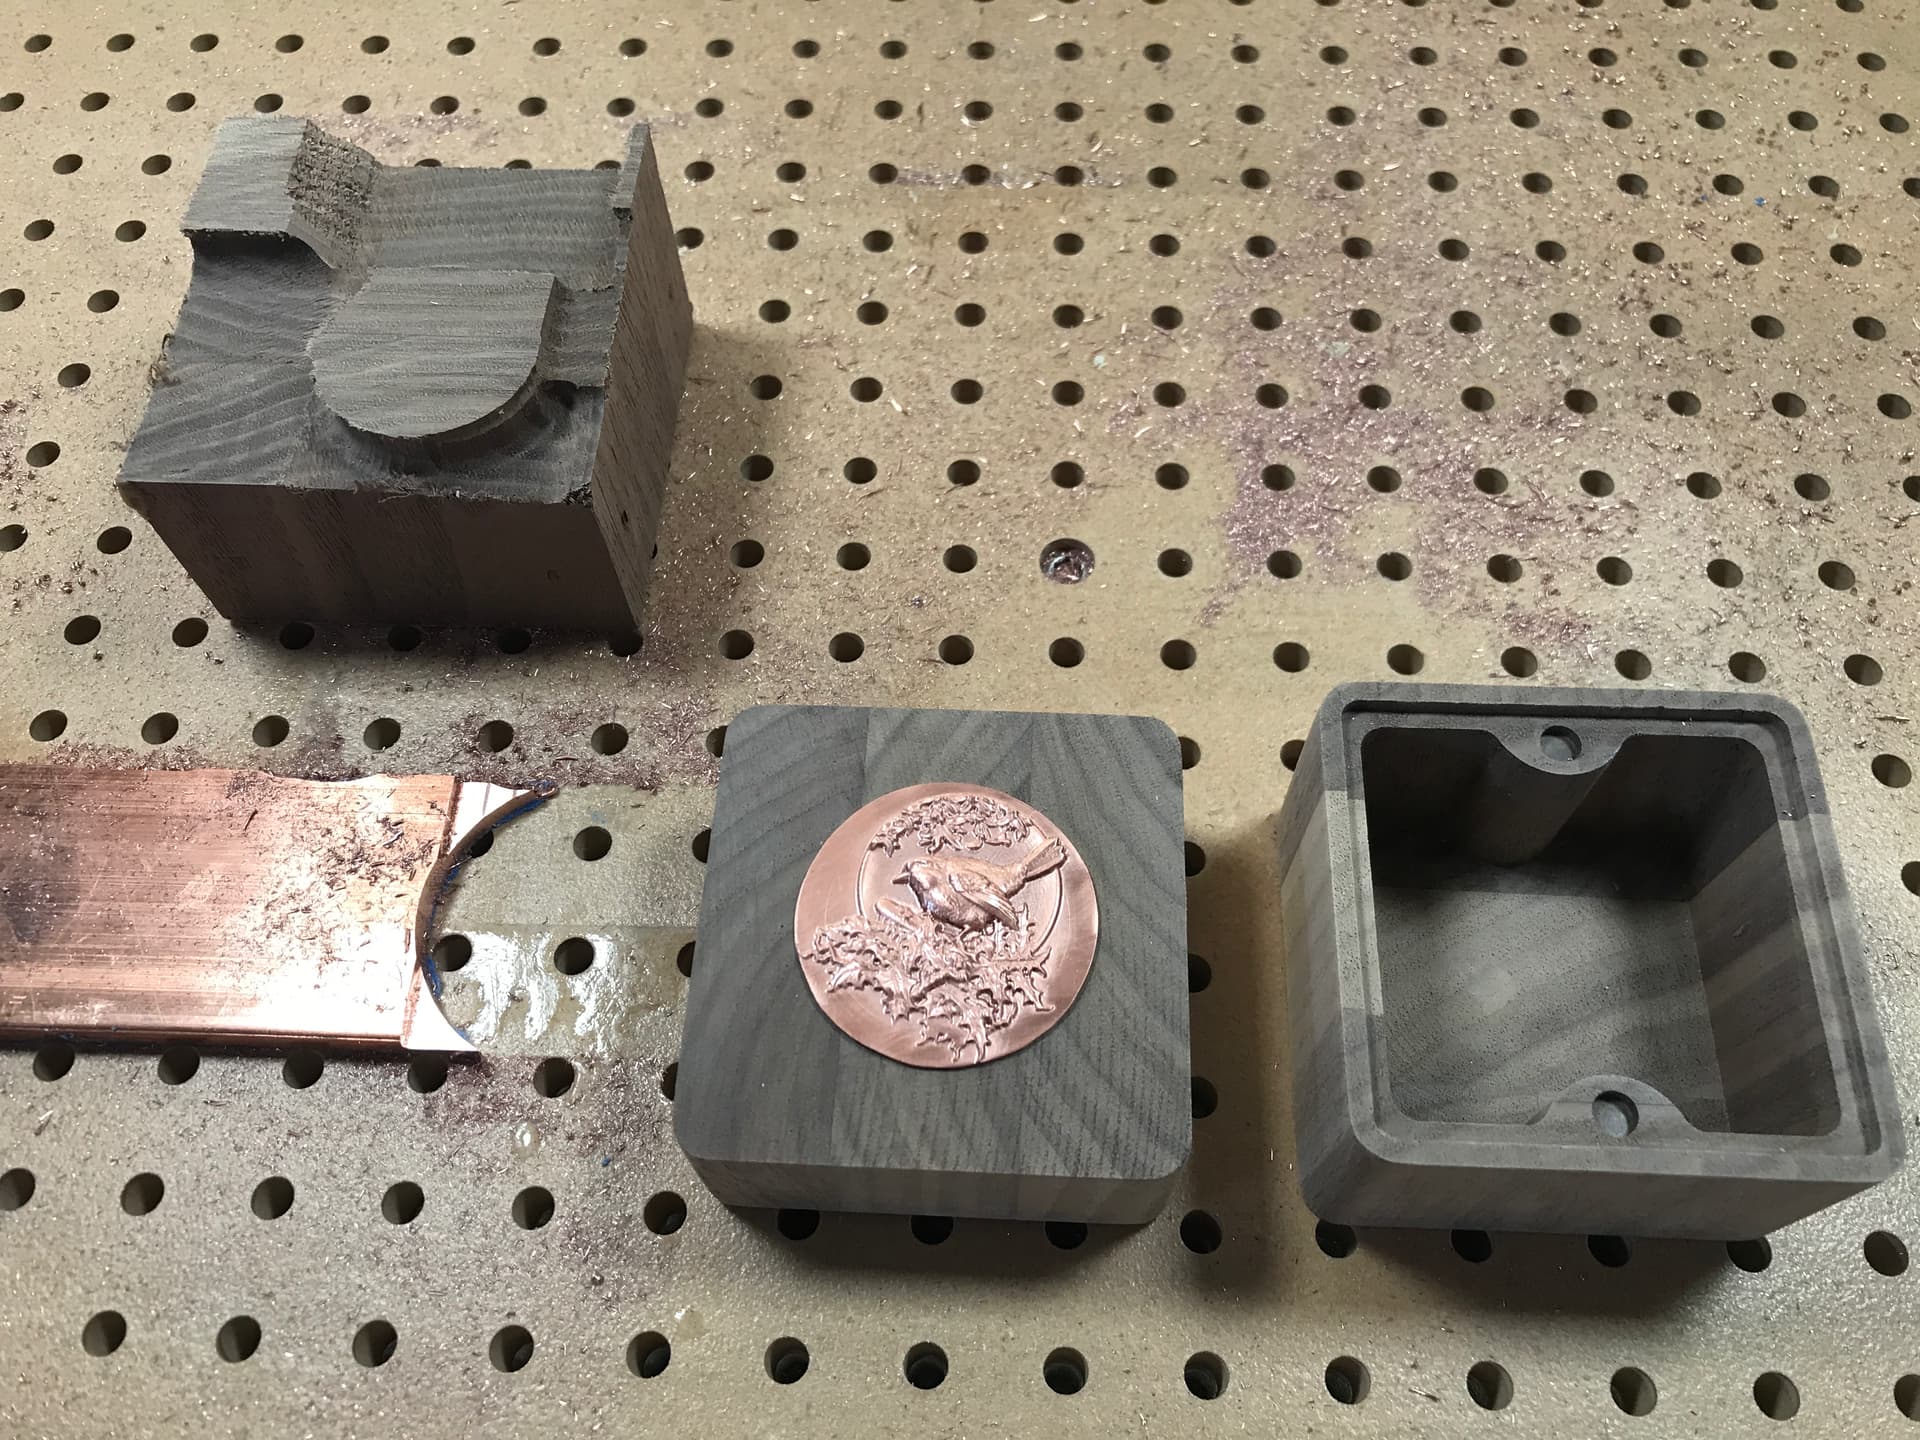
Going to eventually do some copper inlays for some boxes. Just practicing now.
The cut in the video is with 2 flute tapered ball, 1mm tip, V-Carve Pro 3D Finish tool path, .0016” stepover, 100 ipm, 24k.

And no, I did not face the stock with the HDM, work done years ago with a decidedly untrammed SO3.


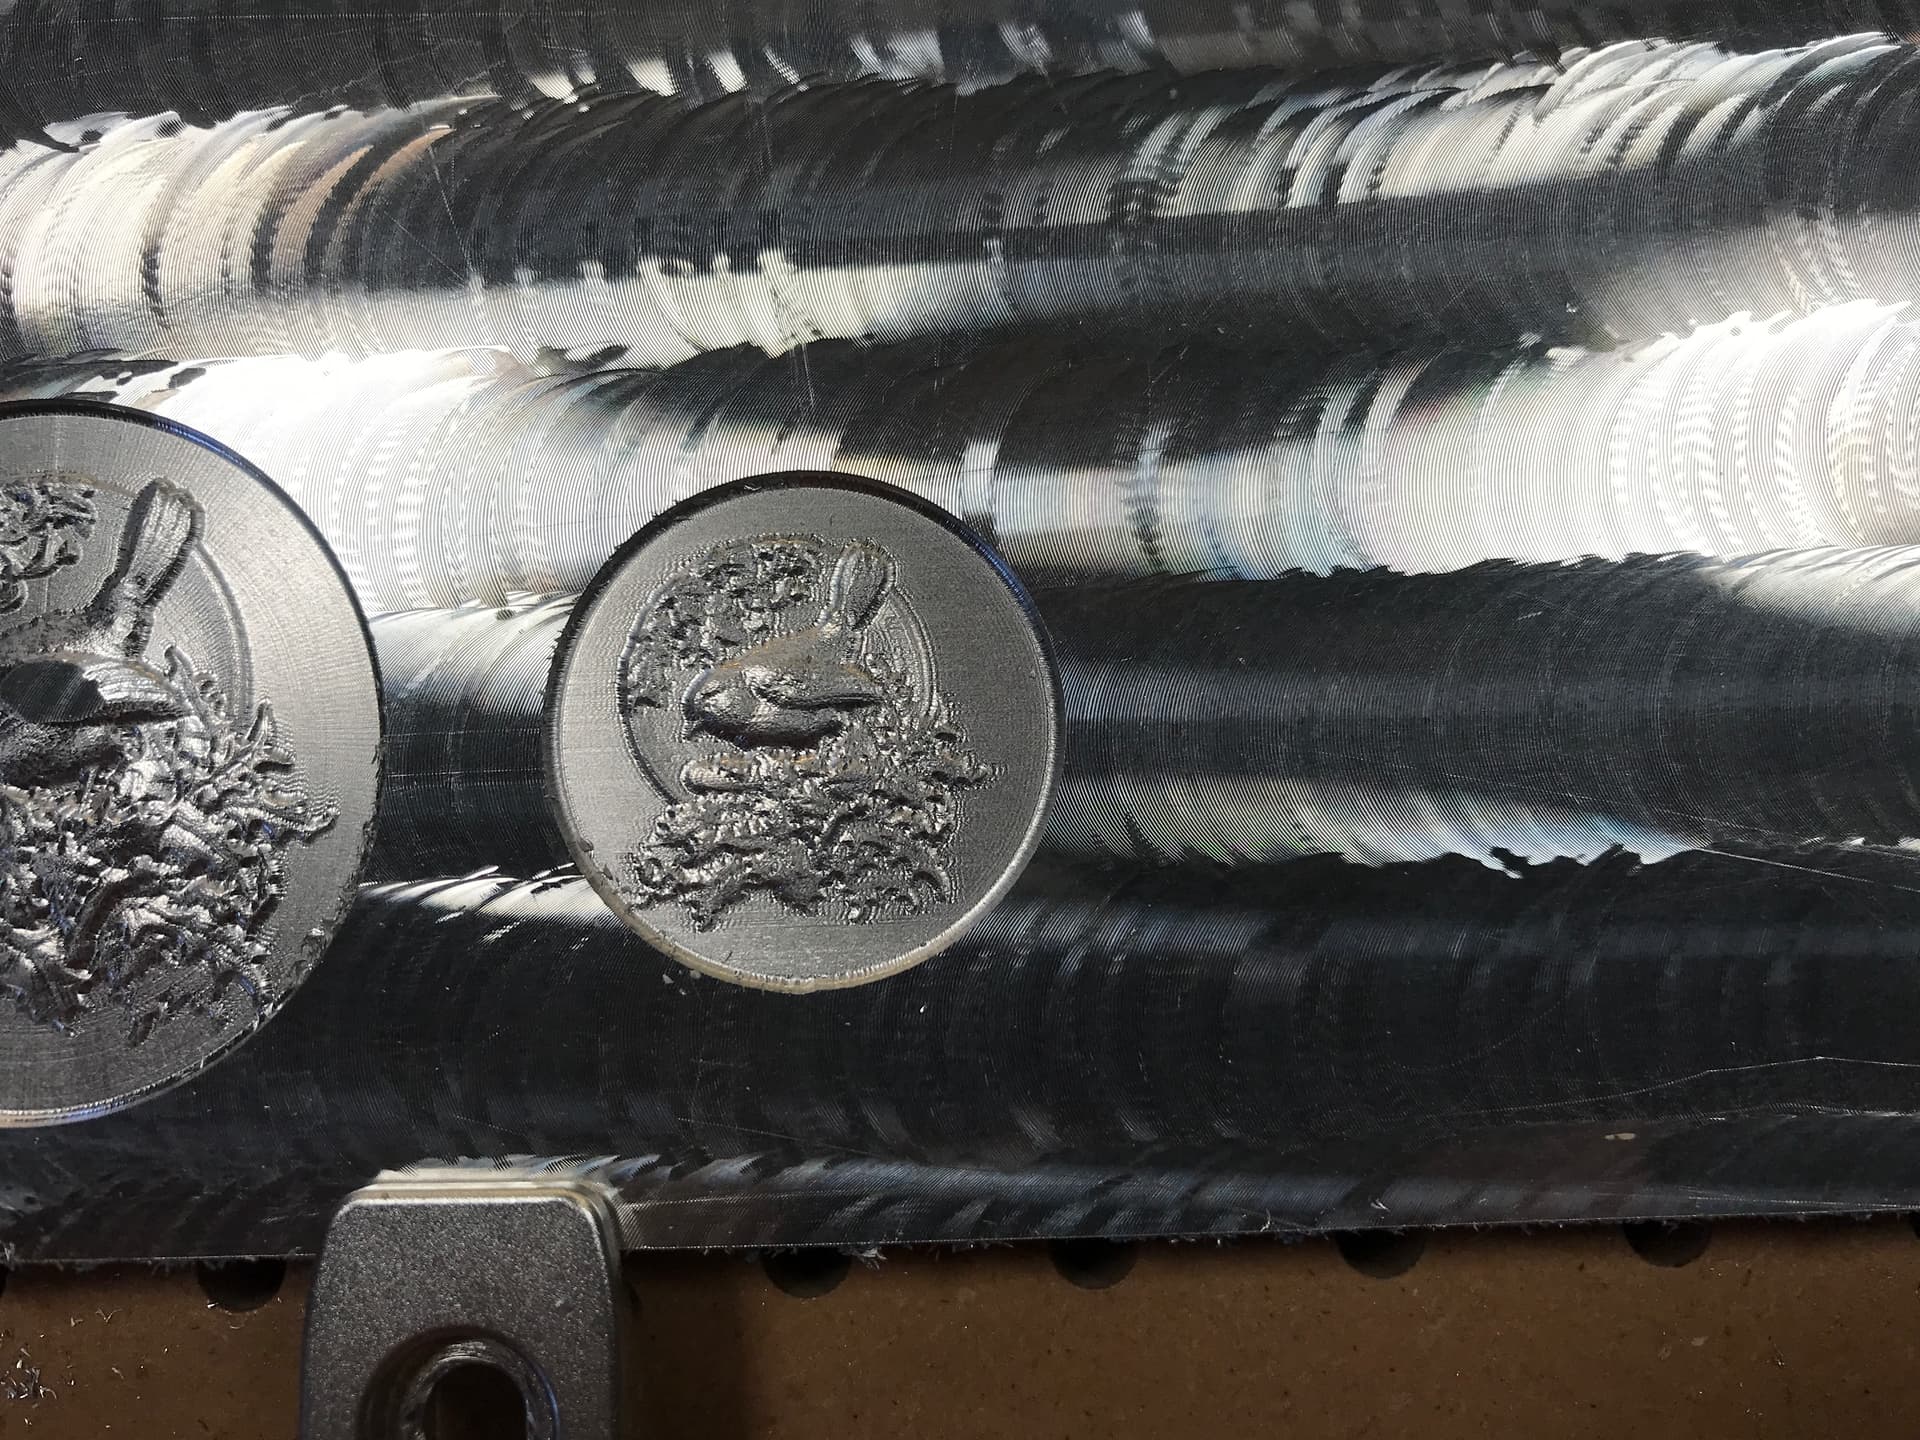
Not too bad, I’ll see if I can clean it up a bit with a tapered .25mm mill I’ve not tried yet.
It’s interesting how much worse the piece looks in the pic then to the naked eye.

EDIT
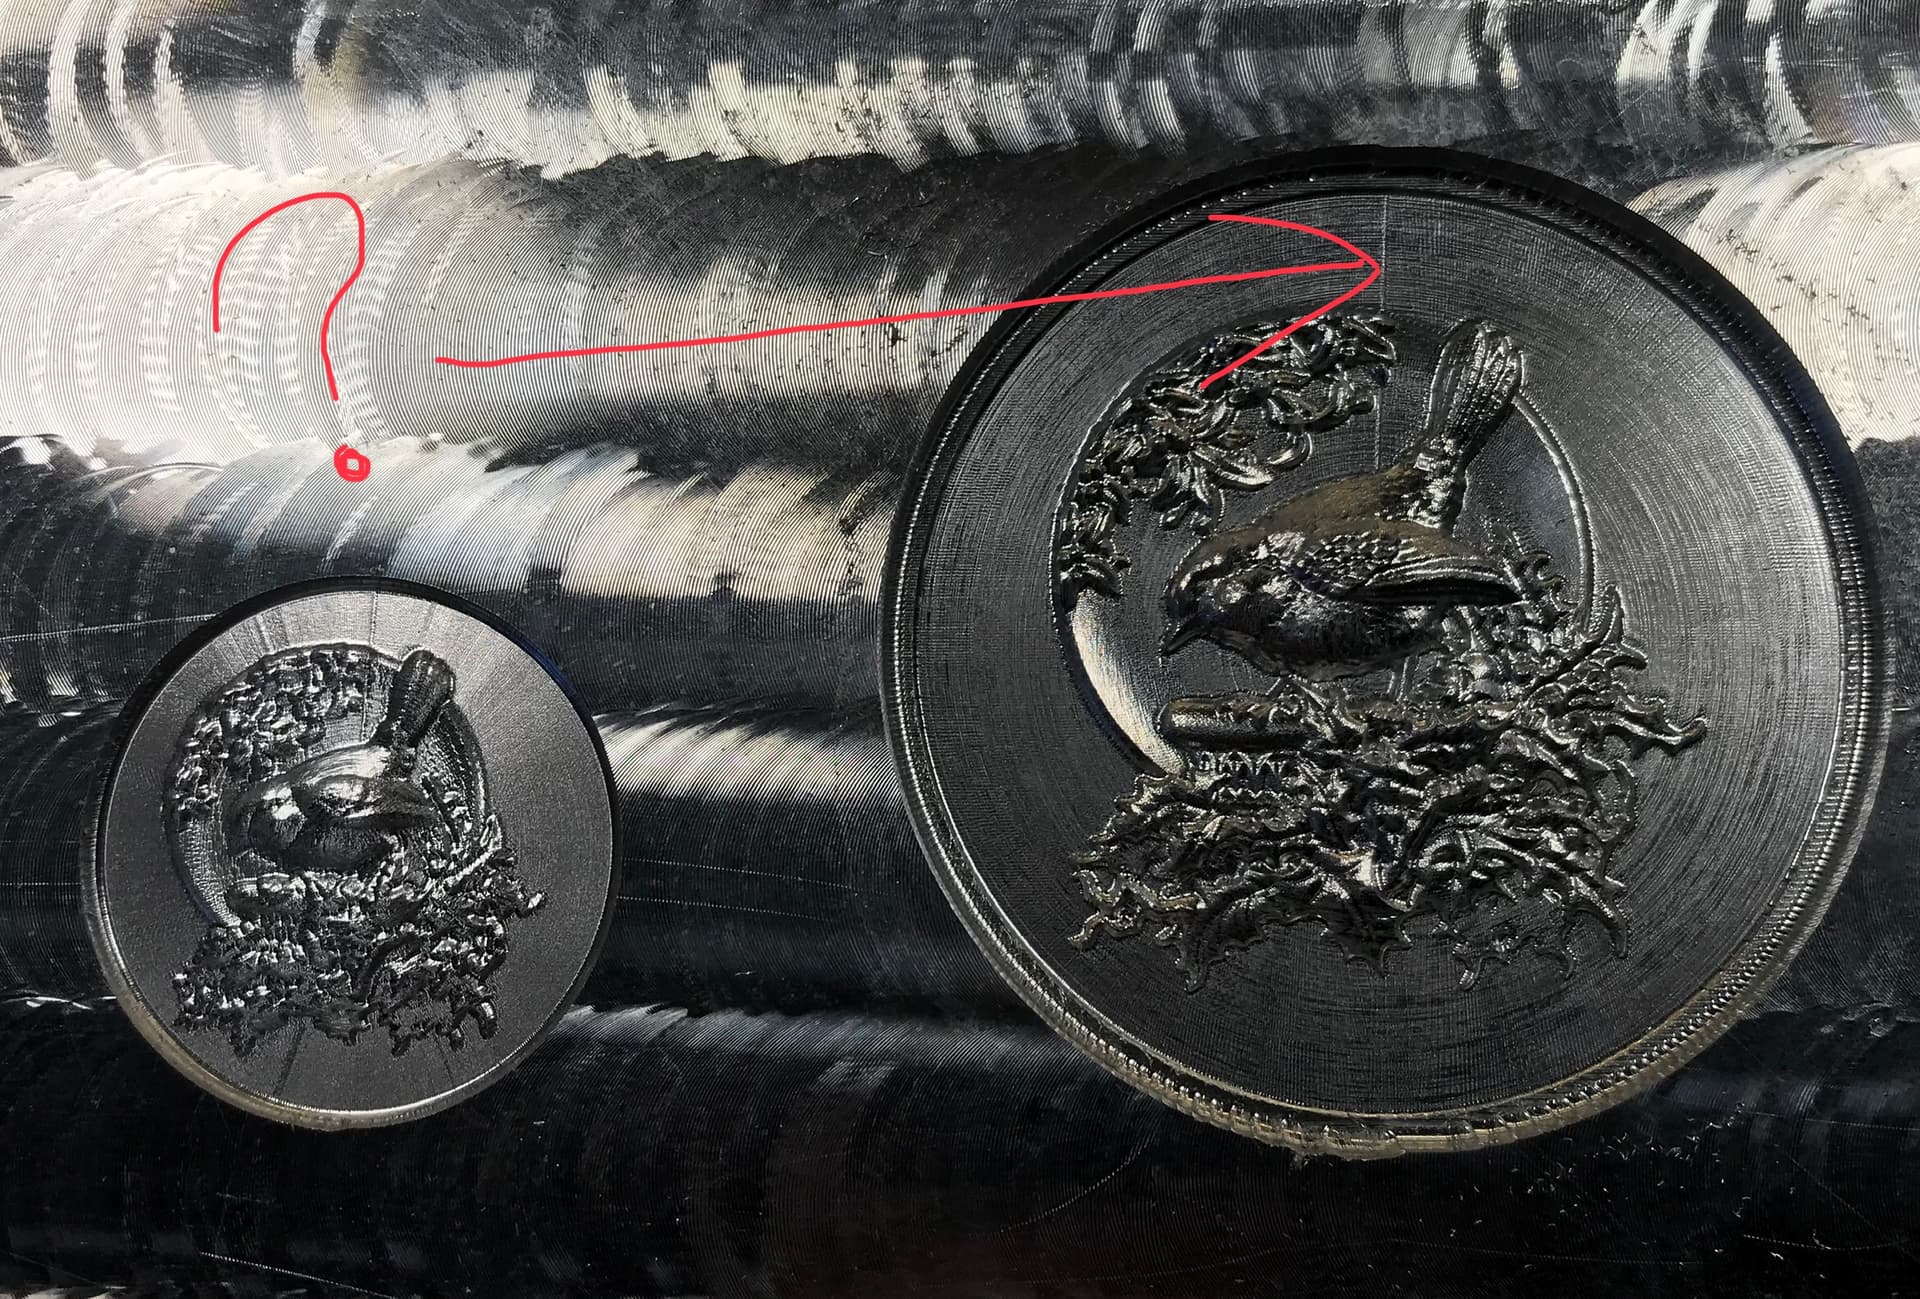
Sneaking up on something acceptable. Can someone tell me the cause of the vertical line? G-code attached. EDIT - Problem solved, a V-Carve thing, needed to add “stepover retract” to toolpath.

bird finish.zip (547.6 KB)

Progressing…made a parametric box from a file provided by Magnetic box - parametric model. Plan is to inlay the bird into the top. Box was made from walnut glueup cut offs from some coffee table legs. I use scraps whenever I can.

25 Likes

I have made the last two shelves in a series of 3 to hang in my living room.

All 3 made from one piece of walnut that was 60 x 20 x 5cm

They are designed in fusion and after flattening one side, I flip it and run one adaptive clearing with a 8mm 4 flute, then two parallel jobs with the #202 before I apply oil and hang them on the wall.


16 Likes

Pushing drills, overloading VFDs, breaking tools and threadin holes with a Multi-form TM HDM Style

BTW, camera work is tough with the HDM due to the underside light…really need to add a spindle light ring to help things out. Sorry for the focus in parts of the vid

12 Likes

Those are nice! What method are you using to attach them to the wall?

1 Like

Thanks! I use these pieces with some 35mm screws into the shelf.
I ordered another kind from abroad that can take higher loads, but I could not wait anymore for them to arrive so I went with these.

Clamped the wood on the front of the machine and machined the pockets with #102 and manually drilled the holes for the screws.

7 Likes

Today I finished a test run of a 3-inch circular jig to run discs like coasters or the like.
I had started to use a cam to lock it in place with a pin, but decided to go a non-pin route.
Jig;


Cam;

Not a good picture but you’ll understand how it turned out.


Flat side toward the disc and twist to tighten.

It took less time to run than draw up. :heavy_check_mark:

9 Likes

A box.


31 Likes

Not just a box. An invisible finger joint box with a sliding lid to be more precise.
NICEJOB!

For the next one maybe try a half moon tapered
recessed finger pull on the lid.
Challenge!

2 Likes

Thanks!

The writeup is at:

Didn’t want to make Carbide Create Pro a requirement, and figured that the finger pull could be a place where folks could customize things.

6 Likes

This can be done on the regular version of Carbide Create?
FANTASTIC!

Yes, I did step-by-step instructions for doing this sort of thing w/ the new version at:

1 Like

I made some hangers to go in the hallway between our new oak slat(?) wall.

They are made from some oak leftovers from a earlier benchtop project. I drew it in fusion and placed them offset on the stock to avoid joints in my finished product.

I had to do one more operation to get the required thickness and a radius on top.

I cut a small pocket so I could align the parts parallel to the machine.
For this I used a “deep range” 1/4 ball-end due to the height of the part.
This also prevented my dust boot from performing as well as normally so I had to rig up some scrap wood to catch some chips.

Picture of test fit before I will sand the edges and apply some finishing oil.
They sit perfectly in place, but glue will be used on the final installation.

15 Likes

Absolutely beautiful would it be possible for you to share this file? i would love to make one for my son and his fiance.

So now do you feel a single form or multi form thread mill is a better fit for the HDM?

First project. Learning basics of how to set up and run Shapeoko4 using dxf files to import to CC6 and learning how to create and improve toolpath files for better results… Other user posts are amazing so I hope to get better!!! :slight_smile:

24 Likes