Been trying out workholding and toolpaths for small, difficult to hold and machine things.
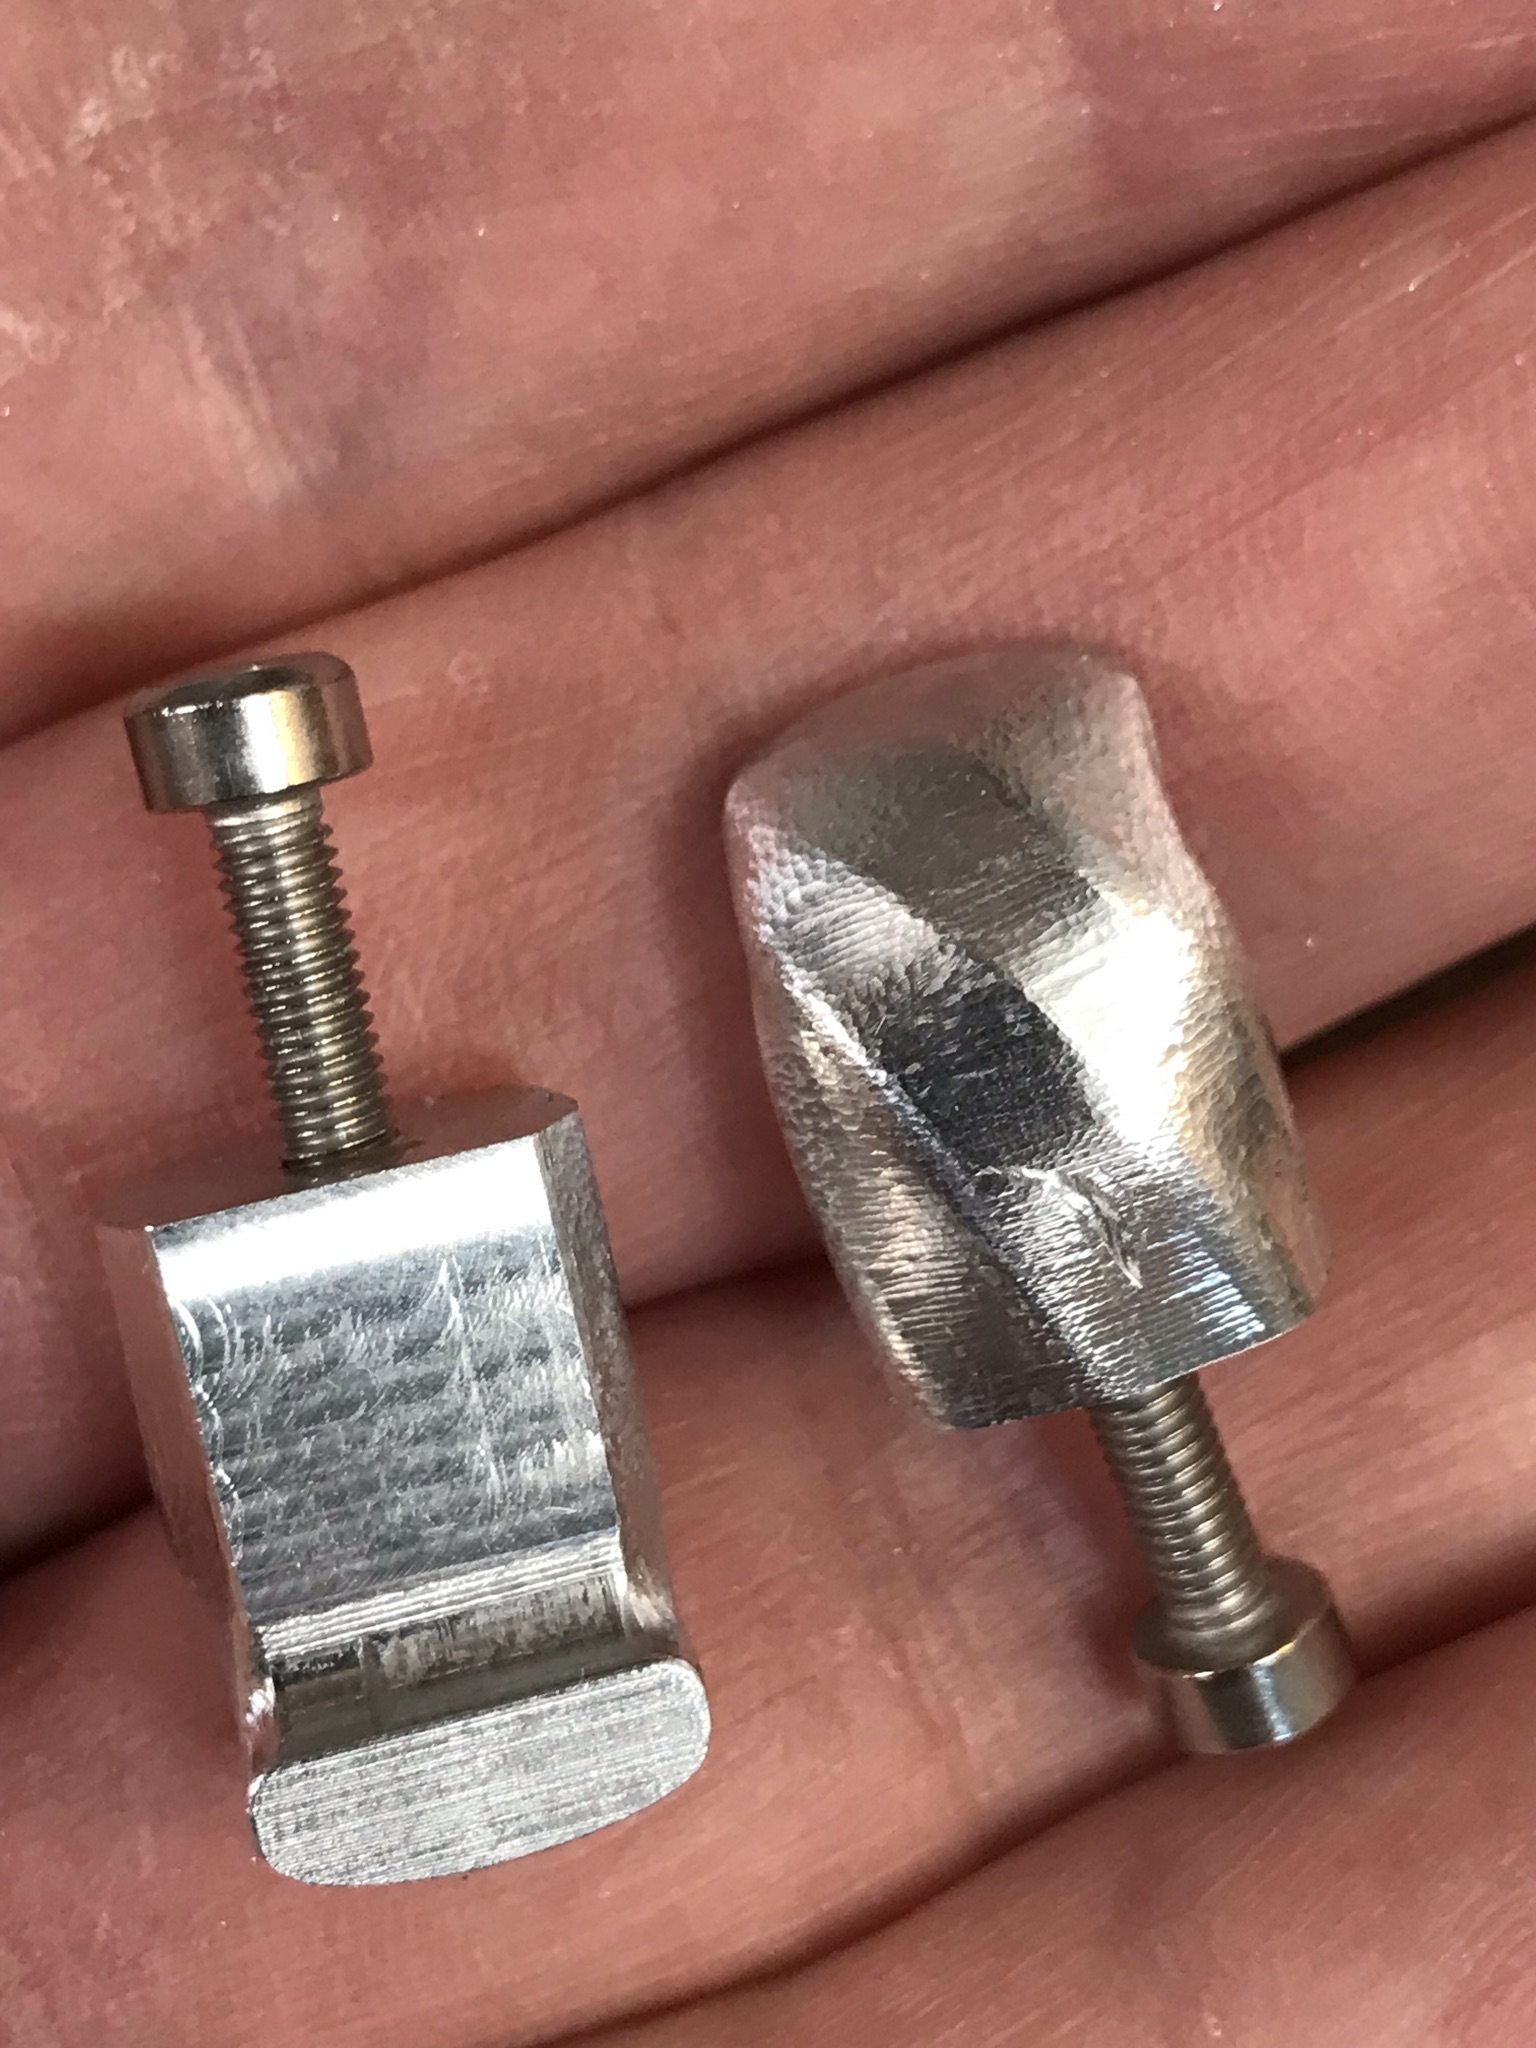
Those are M3 bolts for scale, the parts are 16mm (10/16ths of an inch, or 1.9 barleycorns) long, yes, one of them has an irritating scratch, that’s my fault not the machine’s doing.
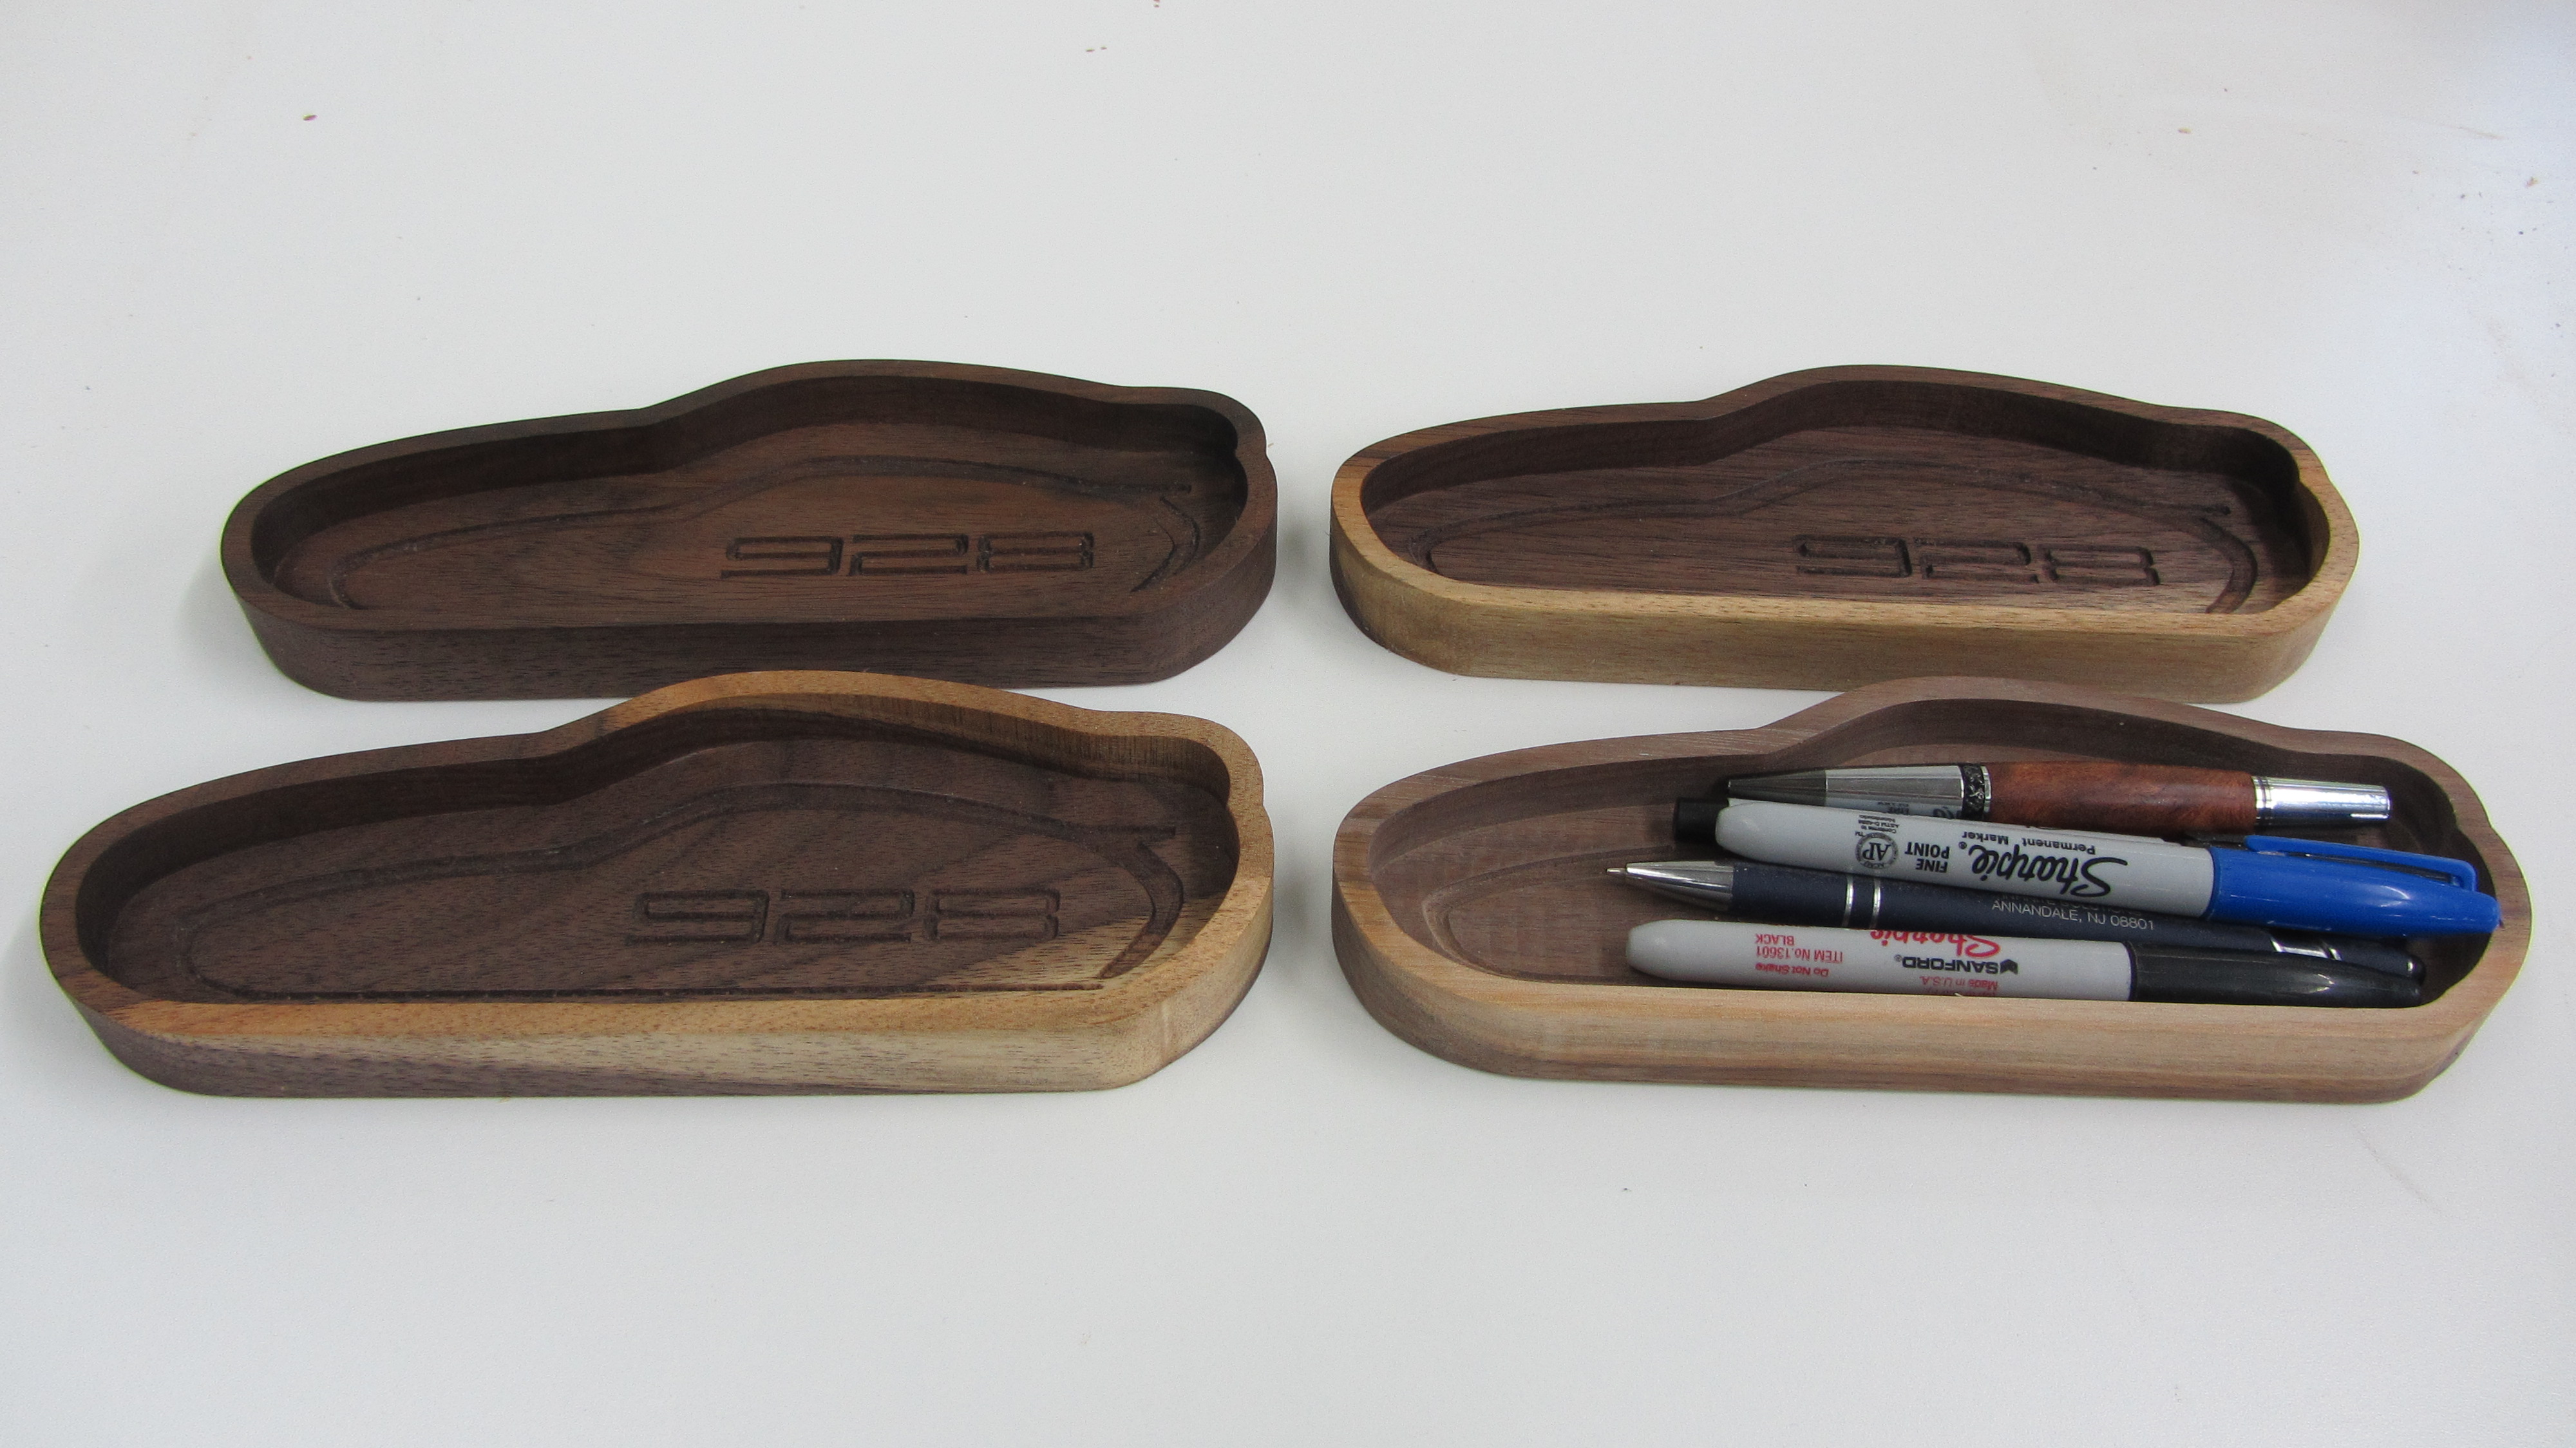
Dry fitting, need to paint and glue. Had to edit the letters to match the radius of end mill. Not a fan of popular lots of hand sanding little letters.
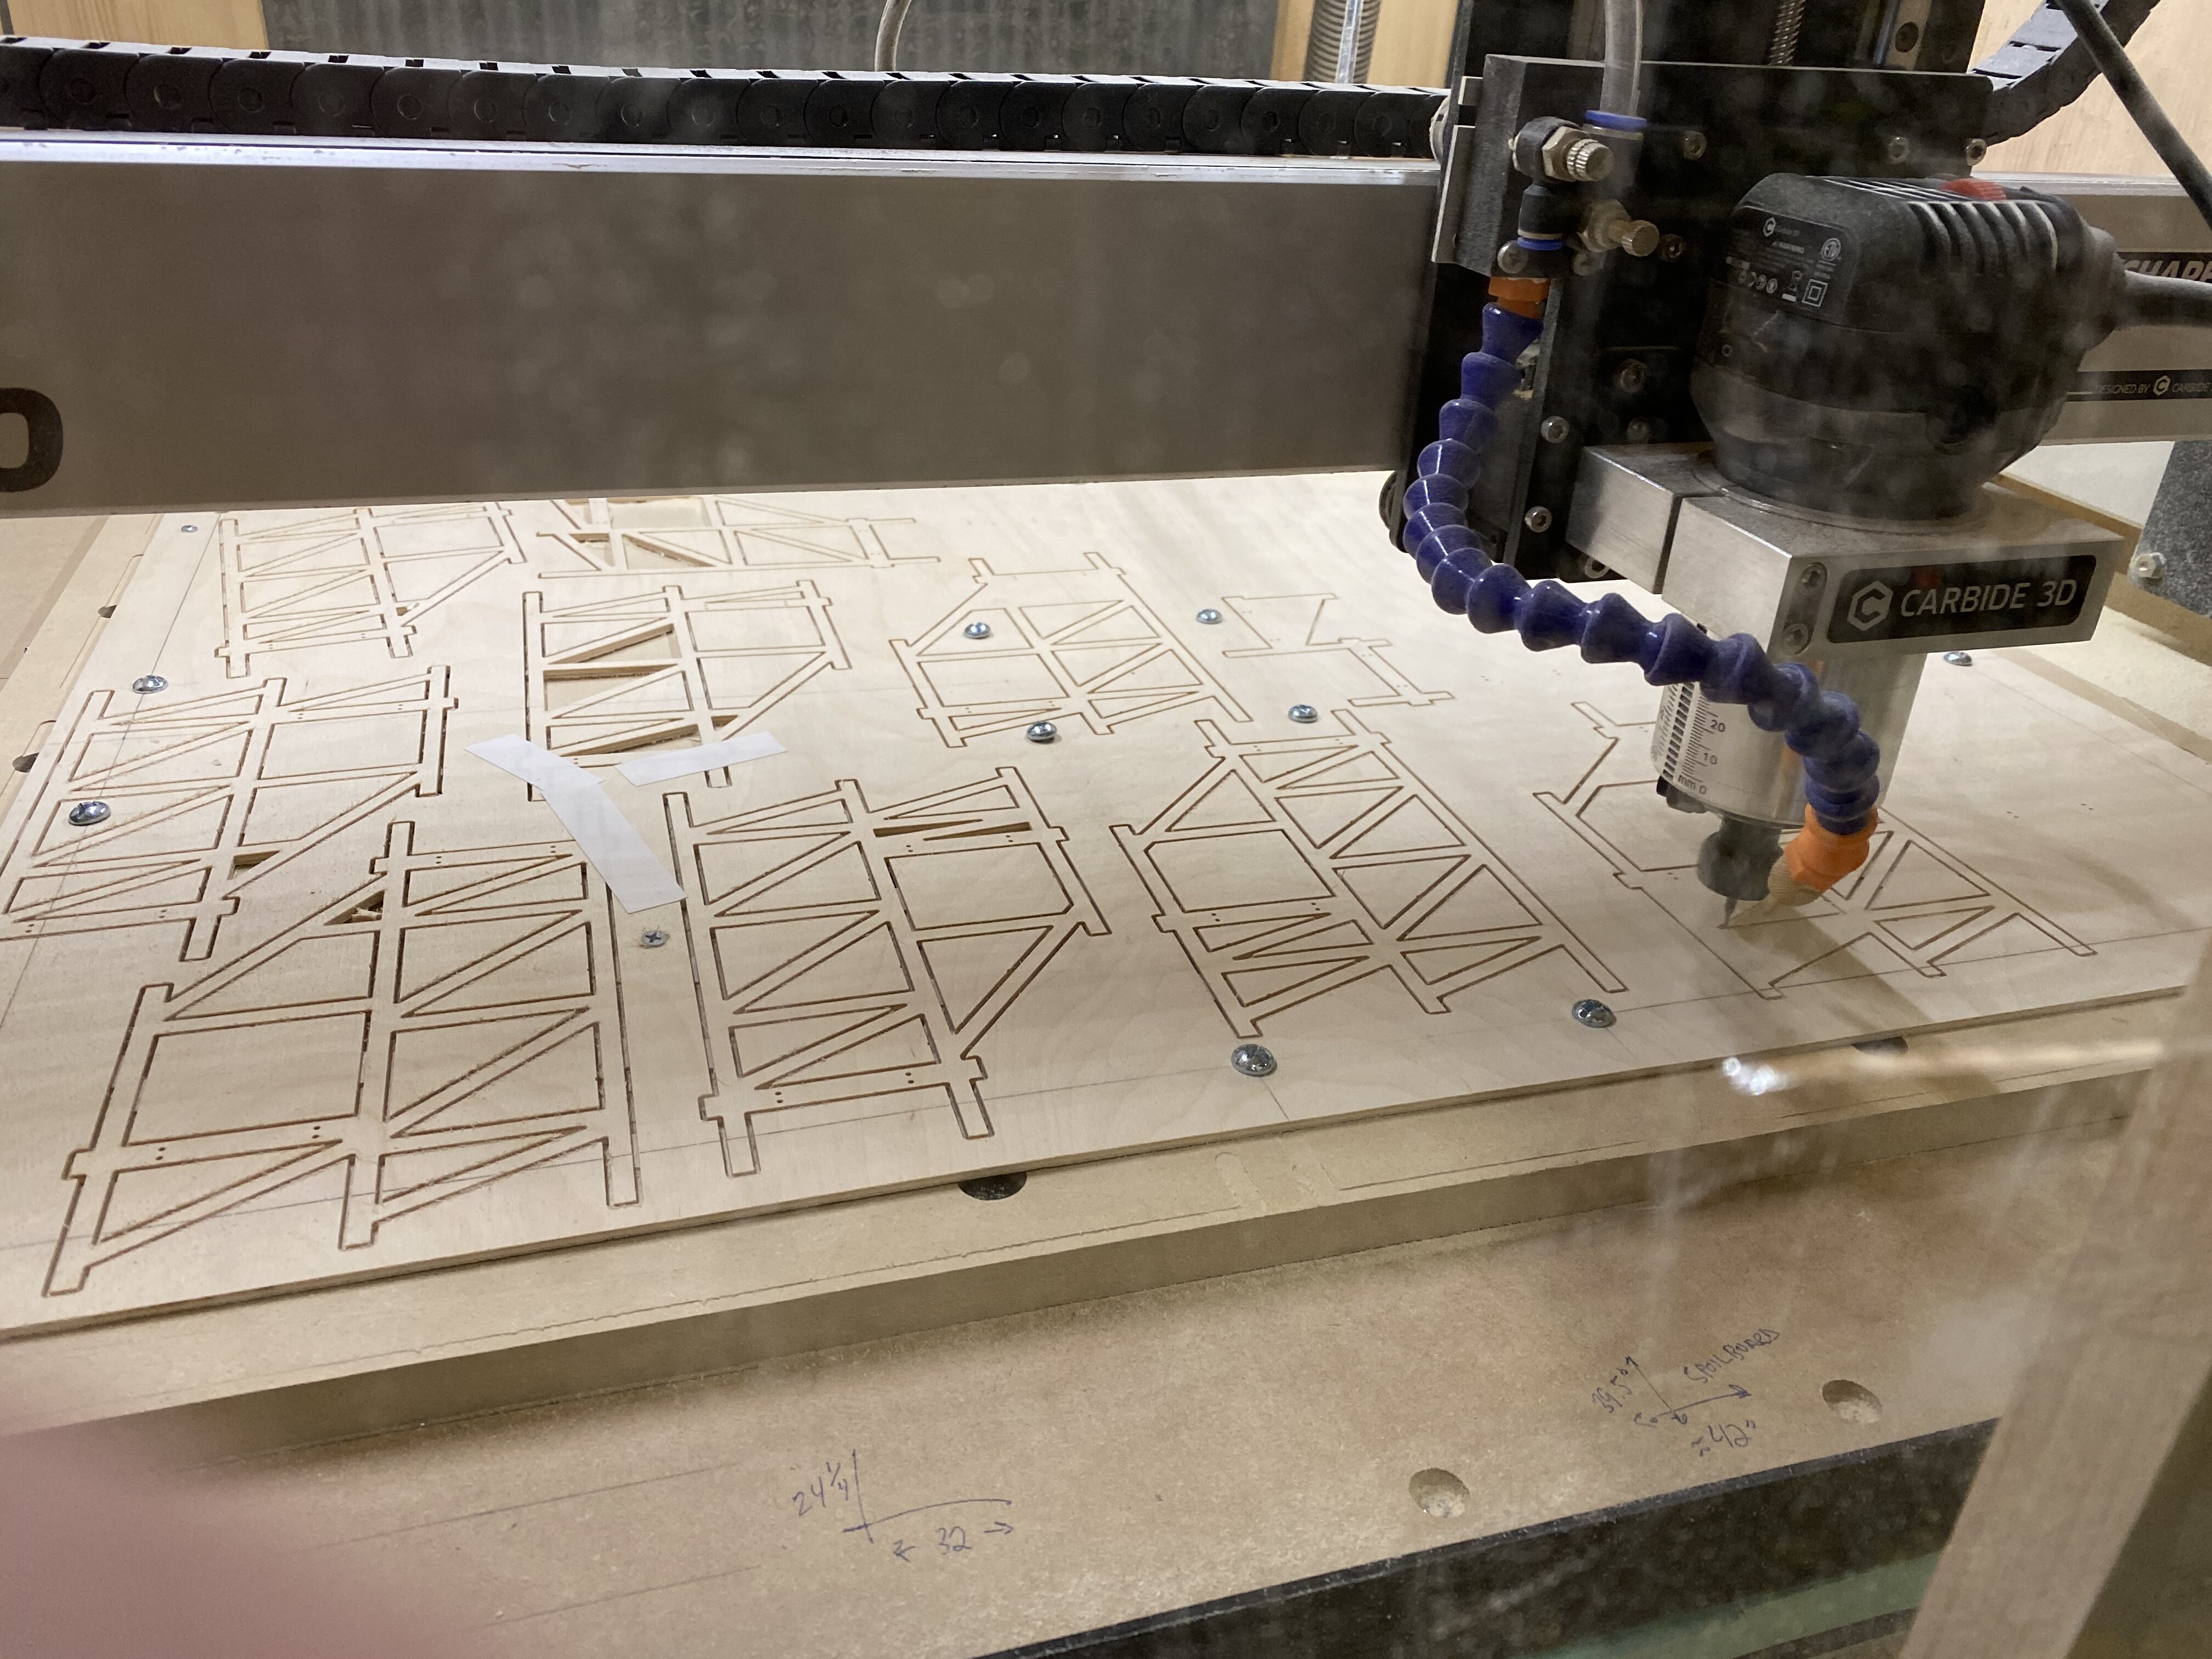
My 3rd and 4th projects on my new Pro XXL. Credit Chris Powell for the files. Nothing fancy, but off to a decent start. I like seeing what everyone posts on the forum. Wealth of knowledge and skill.
Several years ago I took my grandson to a flea market. He found a laser pointer and wanted real bad. I bought it with the warning not to look into the laser because it could cause eye problems. We bought the laser pointer and went through the rest of the flea market. We got back to the car and my grandson tore into the things he had bought. I looked over just in time to see raise the laser pointer up to his eye to look inside the beam. I reached over and grabbed the laser pointer, rolled down the window and threw it out. Needless to say he was a little upset I threw his flea market find out the window but he got over it. Never look into a laser. The laser can hit our retina and cause a blind spot to form. You likely wont go blind but you never know if that blind spot will keep you from seeing something hurtling at you at high speed.
Obviously, one should not relate a focused laser cutting device with many layers of protection for the operator and any audience, to a Makita router with an 18,000 RPM multi-faceted blade spinning and moving out in the open while kicking up breathable dust (and not to mention the noise levels.)
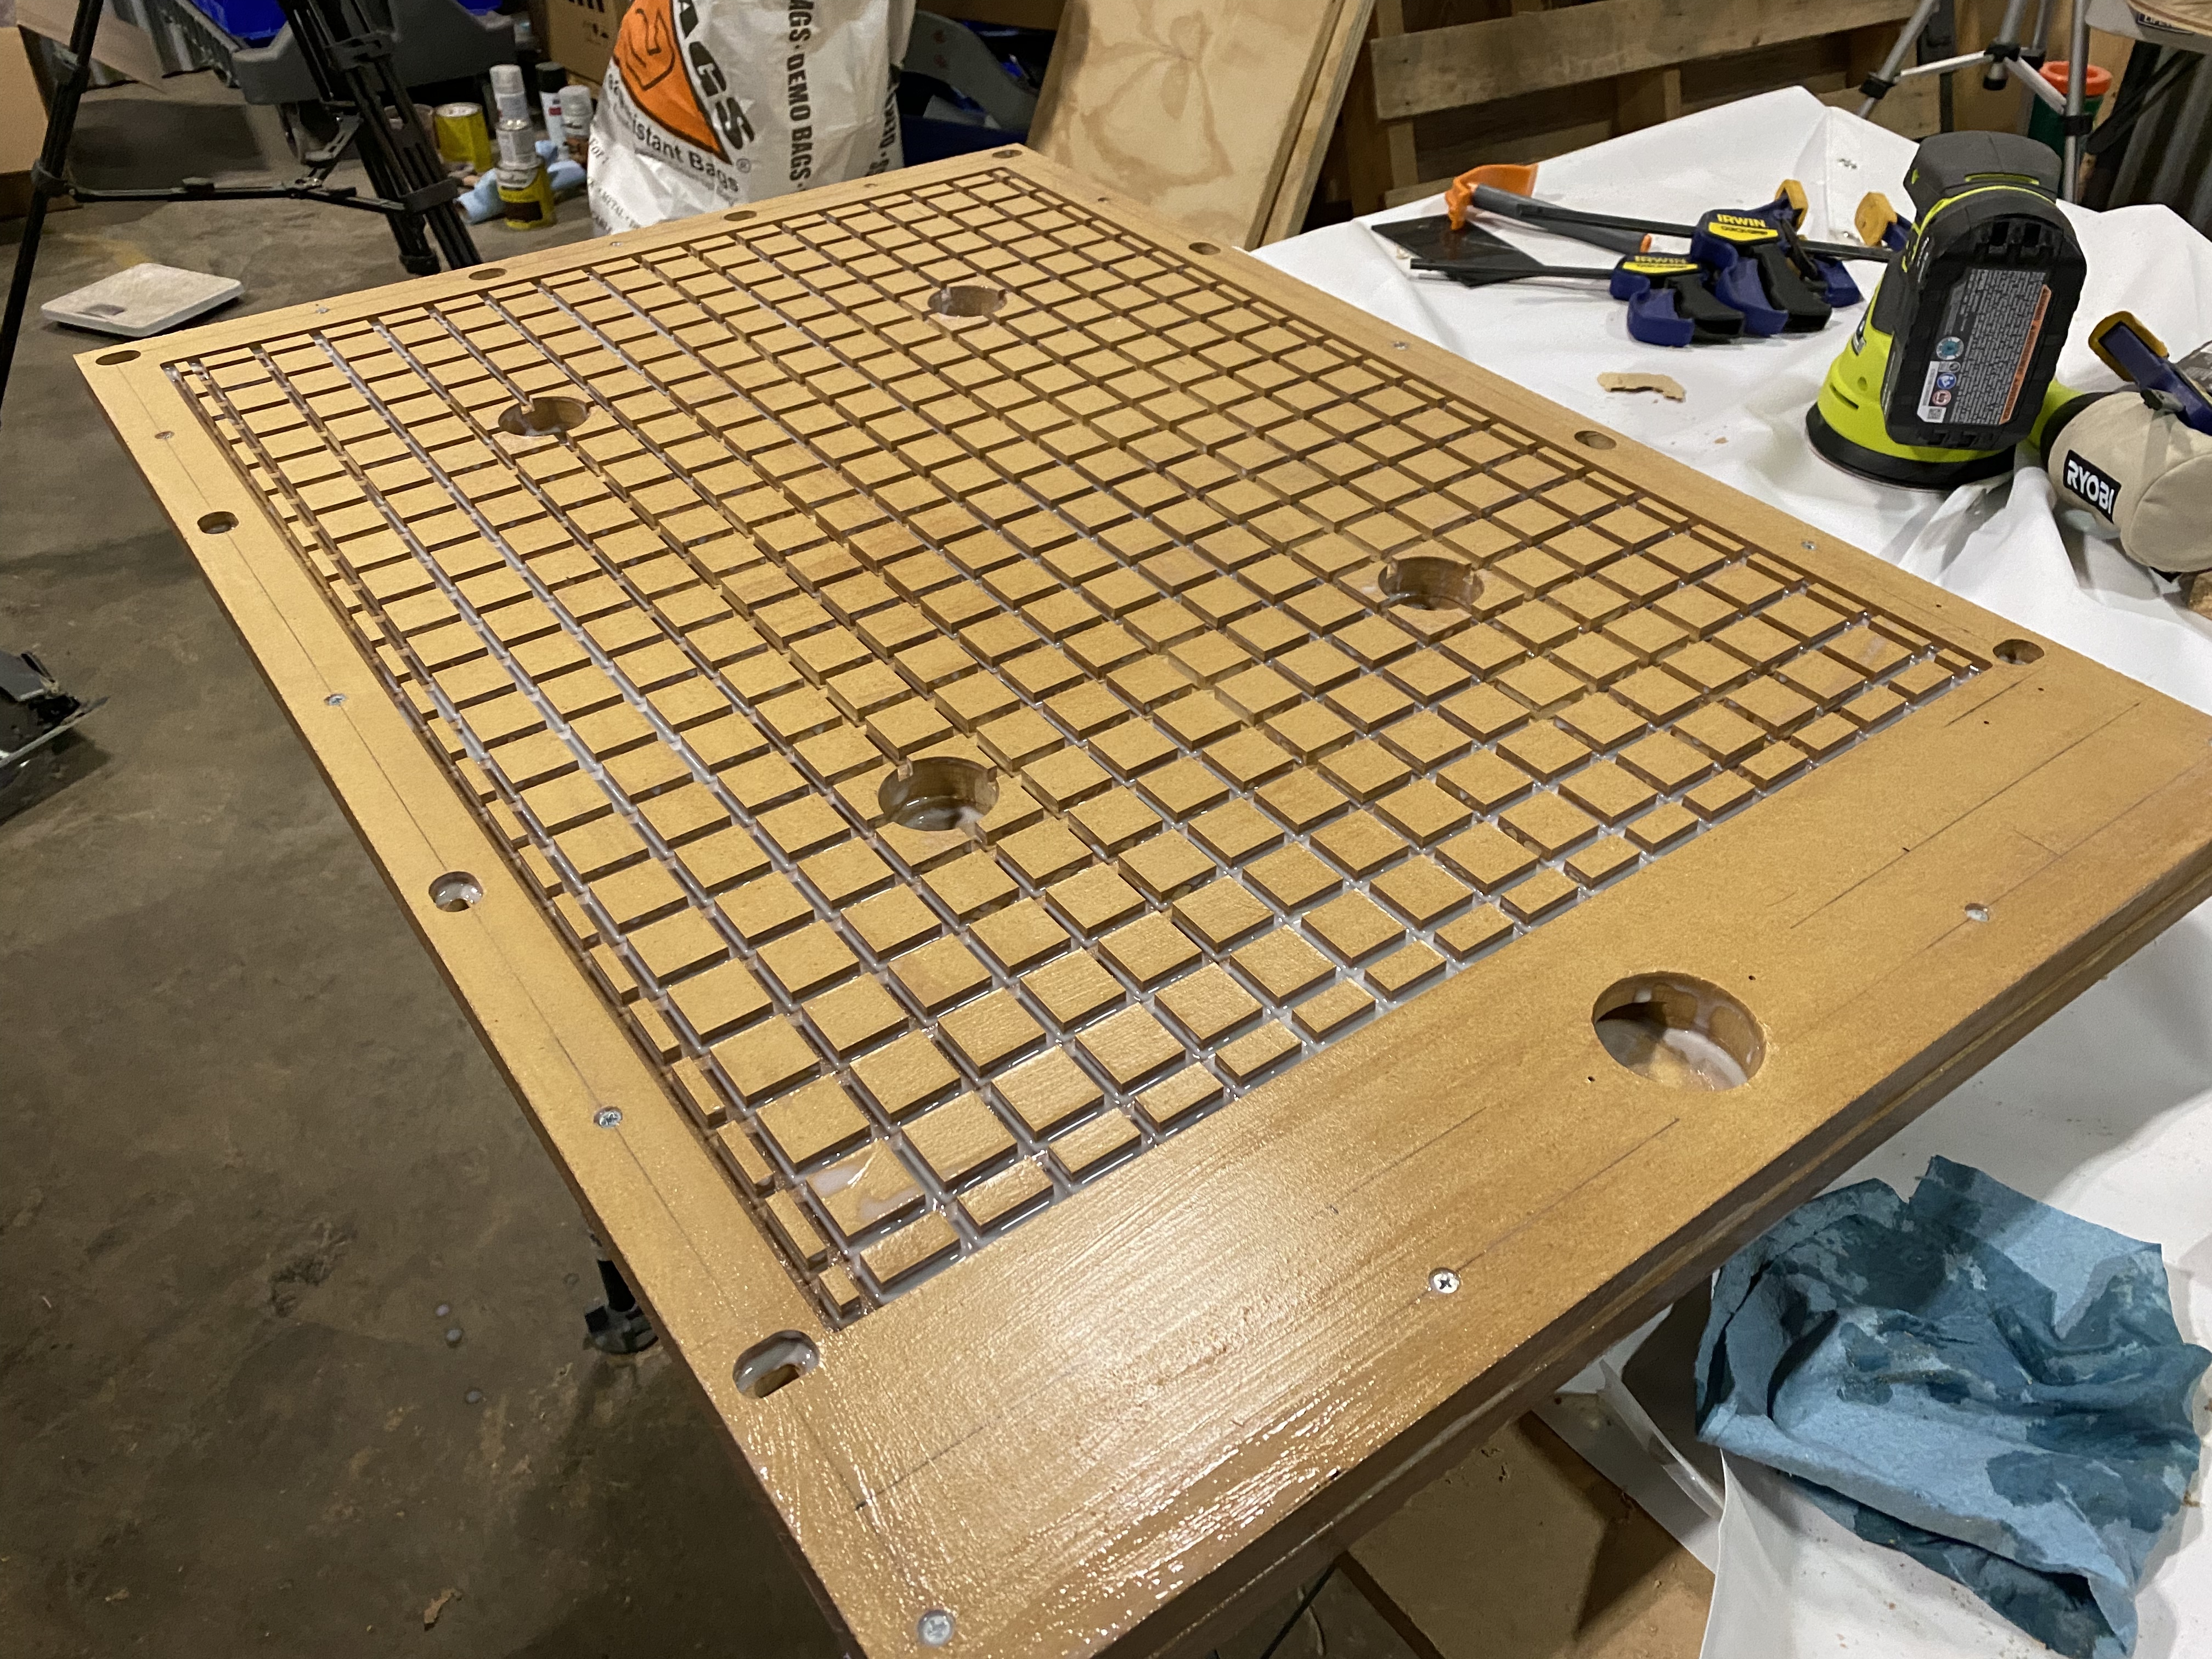
Tried my hand at making a vacuum table for my Shapeoko 3 XXL. I have some 3D printed intake parts, but the table is built up from MDF with air slots milled into the undersides.
Right now I’m sealing it with wood sealer and then I’ll mount the vacuum intake. I’m also using a cheap little RIGID wet/dry vac. My initial tests were pretty good even with lack of airtight seal for the hose. I primarily make things with thin plywood. The picture below as an example. Got tired of double sided tape and need to expedite the production for my parts.
Really cool! I would be curious how the shopvac holds up over time, as it would typically use the airflow to cool the motor, which in a vacuum table would be non-existant.
I’m pretty curious about it too as I run for about an hour for each sheet. I have a Venturi style setup for my Nomad. If push comes to shove, I can invest some money into HDPE and make a large vacuum table for the Shapeoko.
Last week I saw where a person had used an 0.032" ball nose to carve a trinket from wood. It looked pretty clean and neat. Before, I had not really considered using such a small bit with wood… until then.
Finishing passes were with a 0.5mm ball nose.