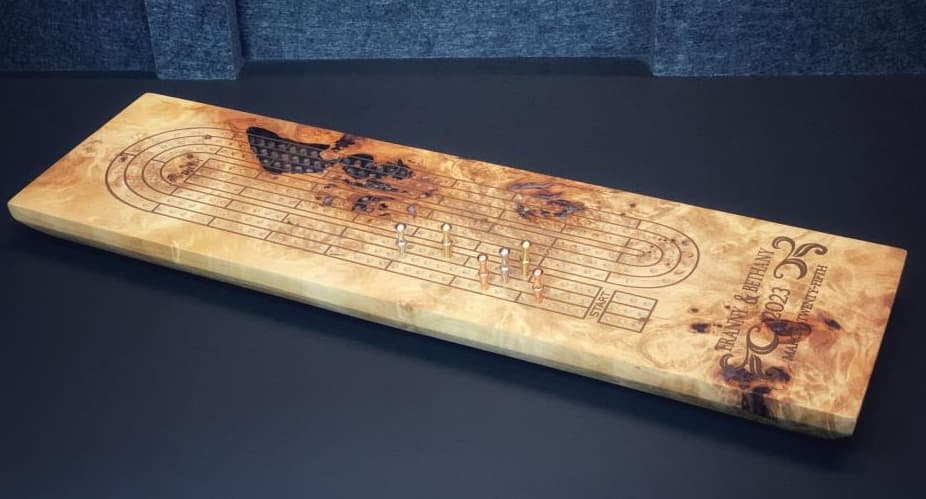
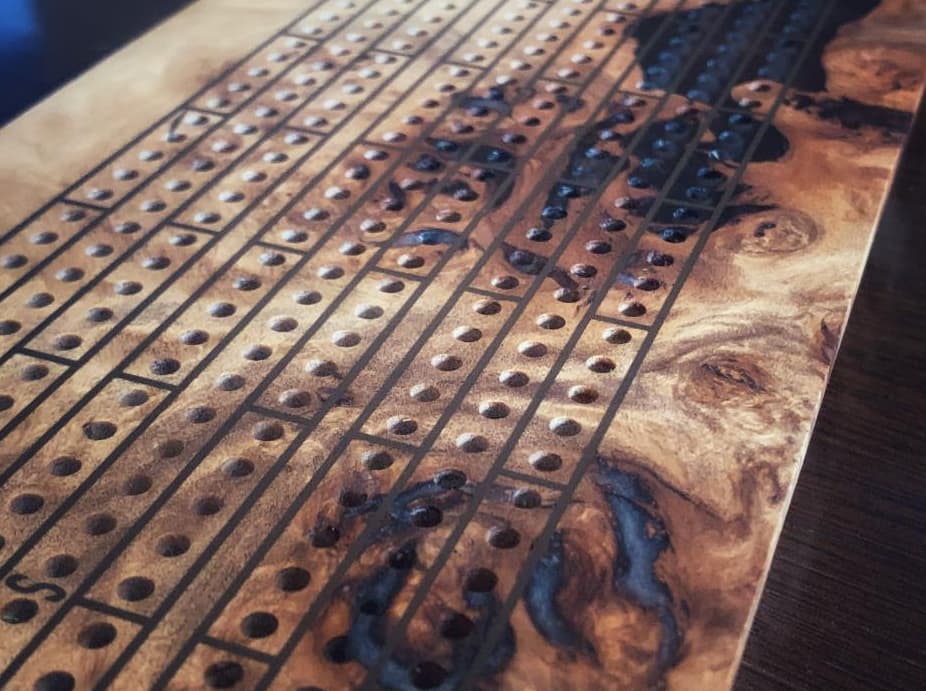
finished up a new cribbage board. Tried to go real fancy this time. Maple Burl, was super punky and soft, so I did a few coats of penetrating epoxy, bit of pearlescent white and the lines are bronze powder with resin, I was hoping they’d come out a bit brighter but it worked out ok.
edge bending is of course good for cabinets etc, yours look excellent, for chairs it is the 2nd choice because of the necessarily rather sharp edges, no way to get a radius, or you have to attach a rounded cleat. That is the functional aspect. Aesthetically I love the edges of multi layer plywood, 11 layers for 0.5 inch thickness, 15 layers for 0.75. Nothing to hide. And: the fascinating aspect of that chair what was first puplished by shaper is the 3D-design with switching wood orientation. I think the project I got was inspired by the shaper design, these people never published their plans. https://design-milk.com/?attachment_id=275589.https://www.youtube.com/watch?v=Kg2HOk1XHsA. The Swedish Maker has a similar design on his page, and also under projects at the inventables site. (Thing is: there is no such plywood made in the US. There is so called “baltic” plywood what is russian and not baltic of origin, and that has the abovementioned holes inside, and is only available with B/BB surfaces. Just russian. ApplePly imports russian plywood, and applies veneer on both sides. Acceptable. There is Europly from Columbia Forest, that is imported from Poland. I just ordered it, HomeDepot have 2x4’ sheets on their website. We will see how that comes.)
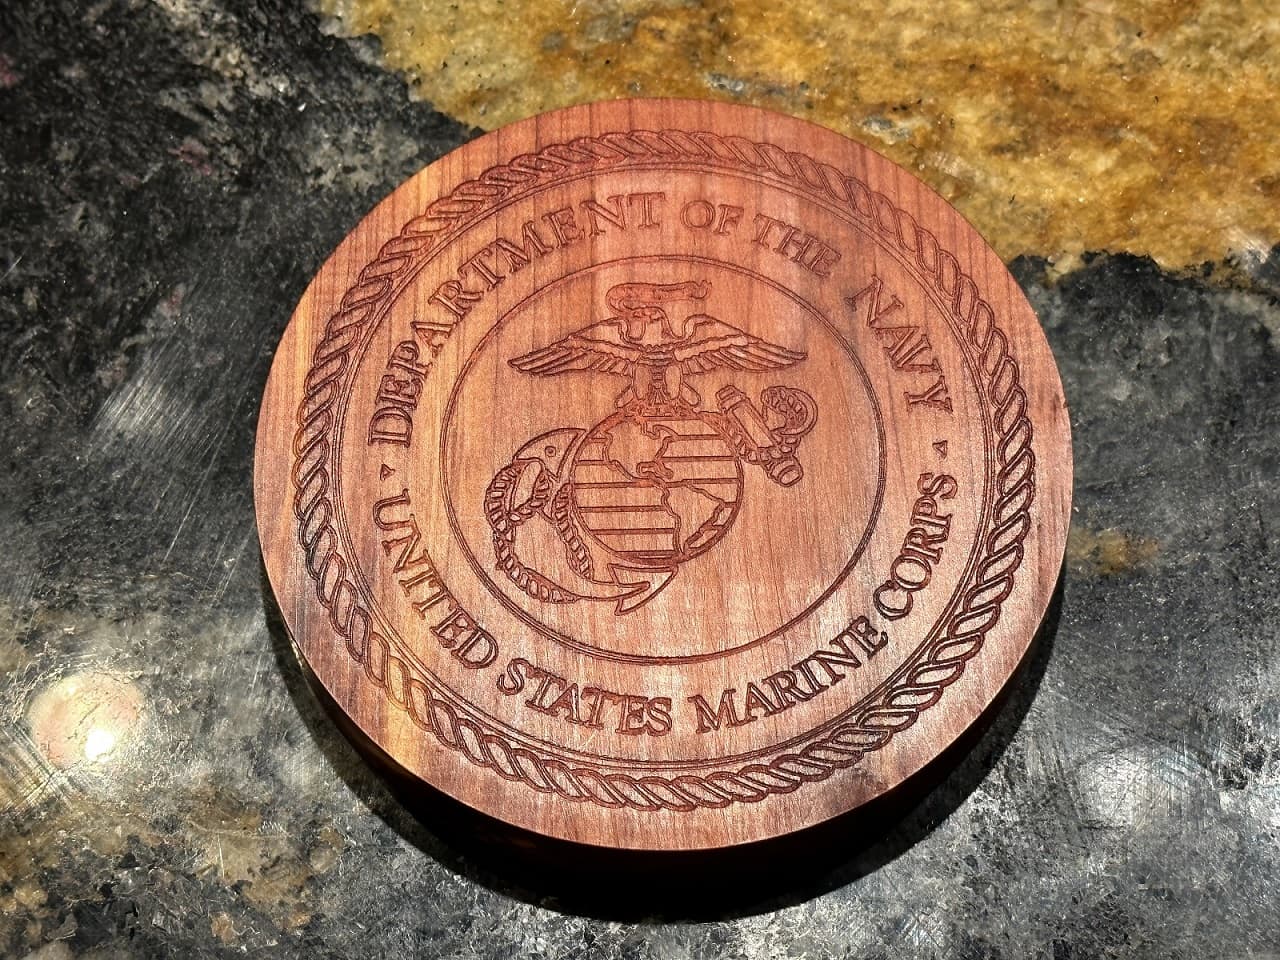
I used a very fine ball mill. This was a file I purchased off Etsy. There are hundreds available for purchase/download. Carbide Create did the hard work. Super easy files to use with 3D Rough and 3D Finish.
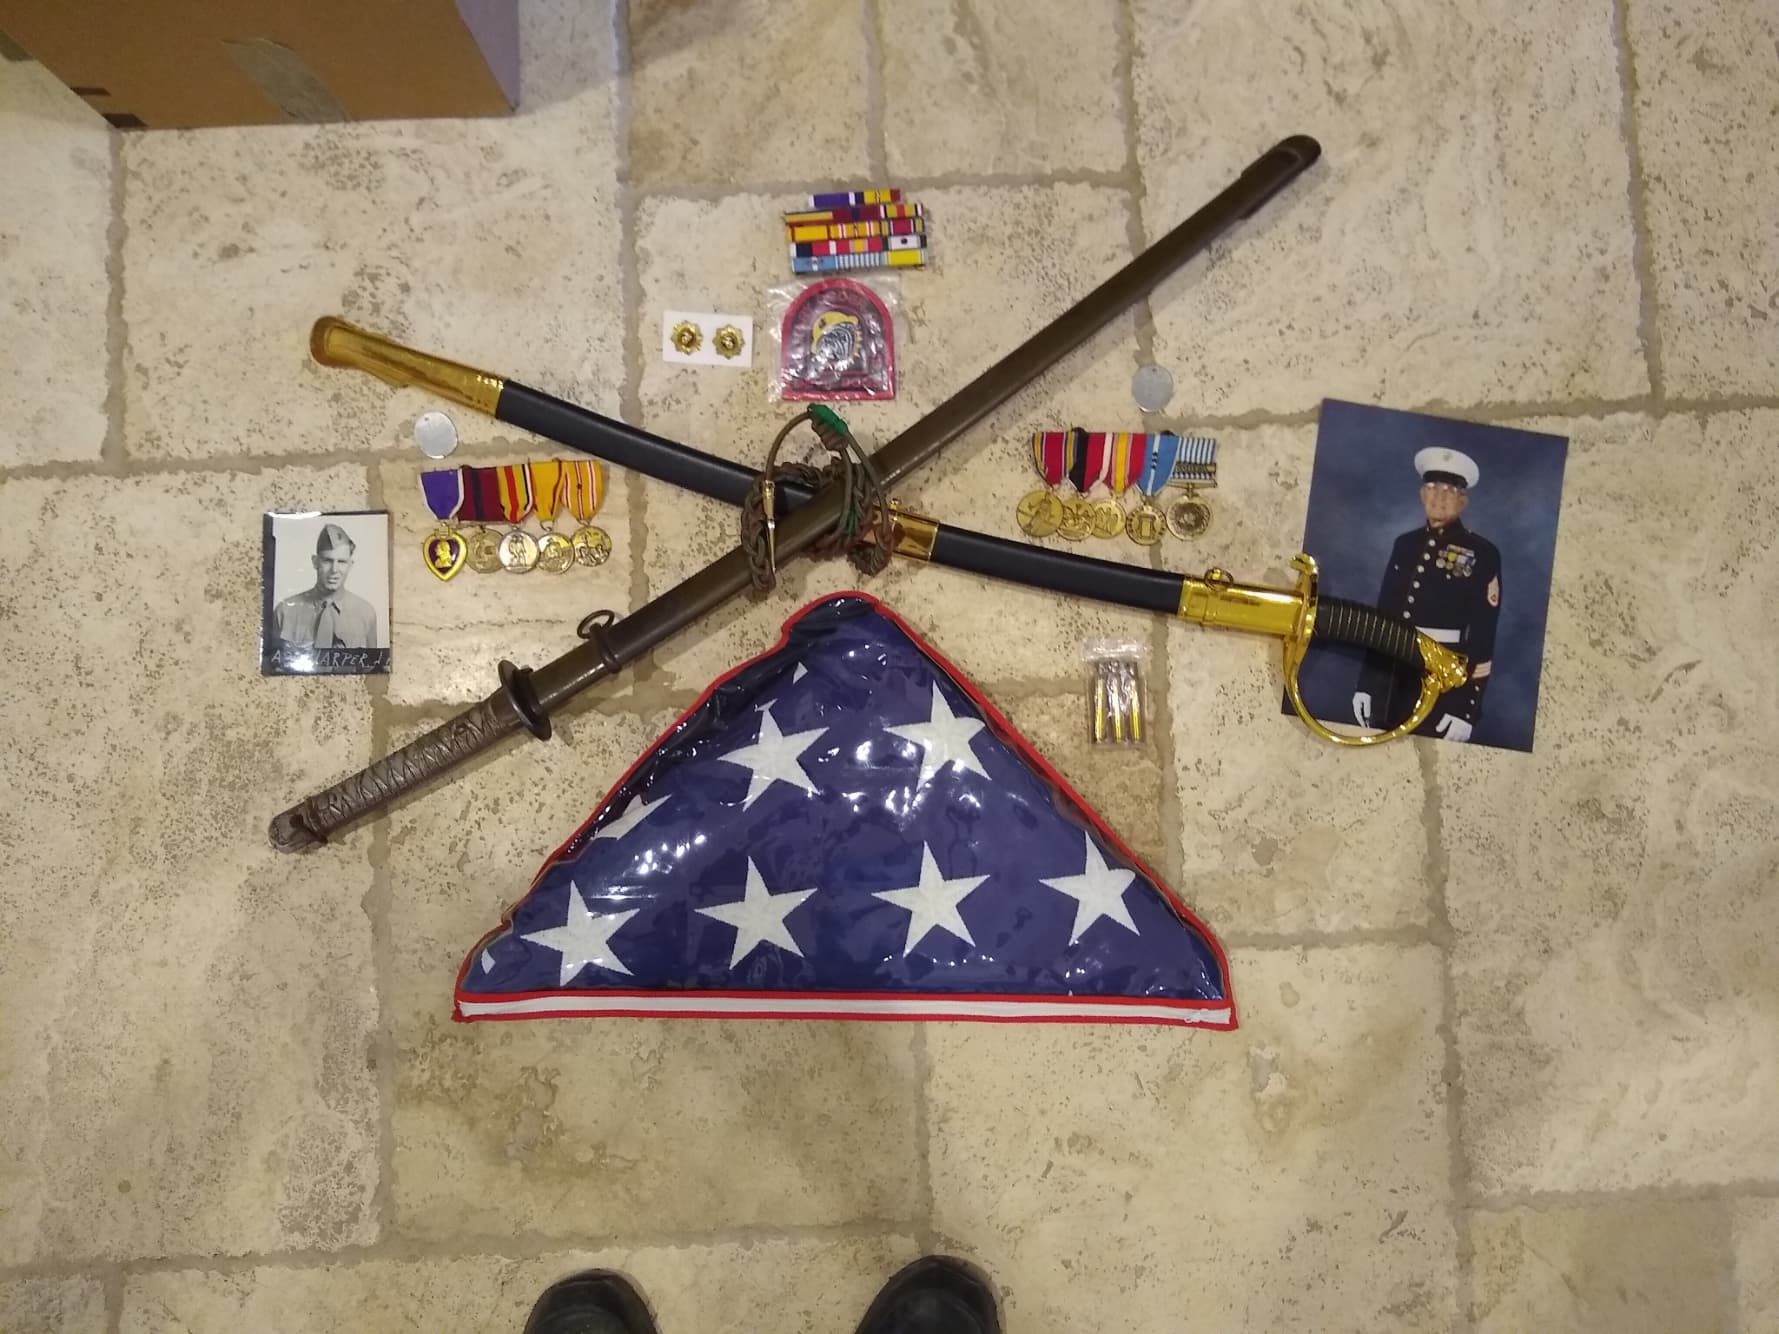
I am working on a project for my father in-law. He was in the occupation of Japan at the end of WWII. He was in the reserves and was called up to go to Korea. He was in the Chosin Reservoir which was one of the first battles of the Korean War. He received two purple hearts in that battle. The American Marines were landed without winter gear and were in a dry reservoir and the North Koreans and Chinese surrounded them and almost killed them all. I have his memorial flag and two swords to put in a wall cabinet with his service metals and a picture of him in boot camp and a later picture in his dress blues while in the Marine Corp Association. All the years I knew him he never talked about his time in Korea.
There was a whole generation of WWII and Korean veterans that would not talk about their experiences.
I will use the Shapeoko to carve his name in the cabinet. Here is a picture of the layout of the memorabilia for his cabinet. One sword is a WWII Japanese NCO Sword he removed from someone he killed and the other is a ceremonial sword he wore with his dress blues. The Japanese were all over Korea during WWII and was likely taken from a Japanese soldier.
I will make a walnut cabinet and a memorial flag case to go inside that cabinet along with the other material. His daughters laid out the material and I will place it in the cabinet as they laid it out. I will make some hangers for the swords on the Shapeoko.
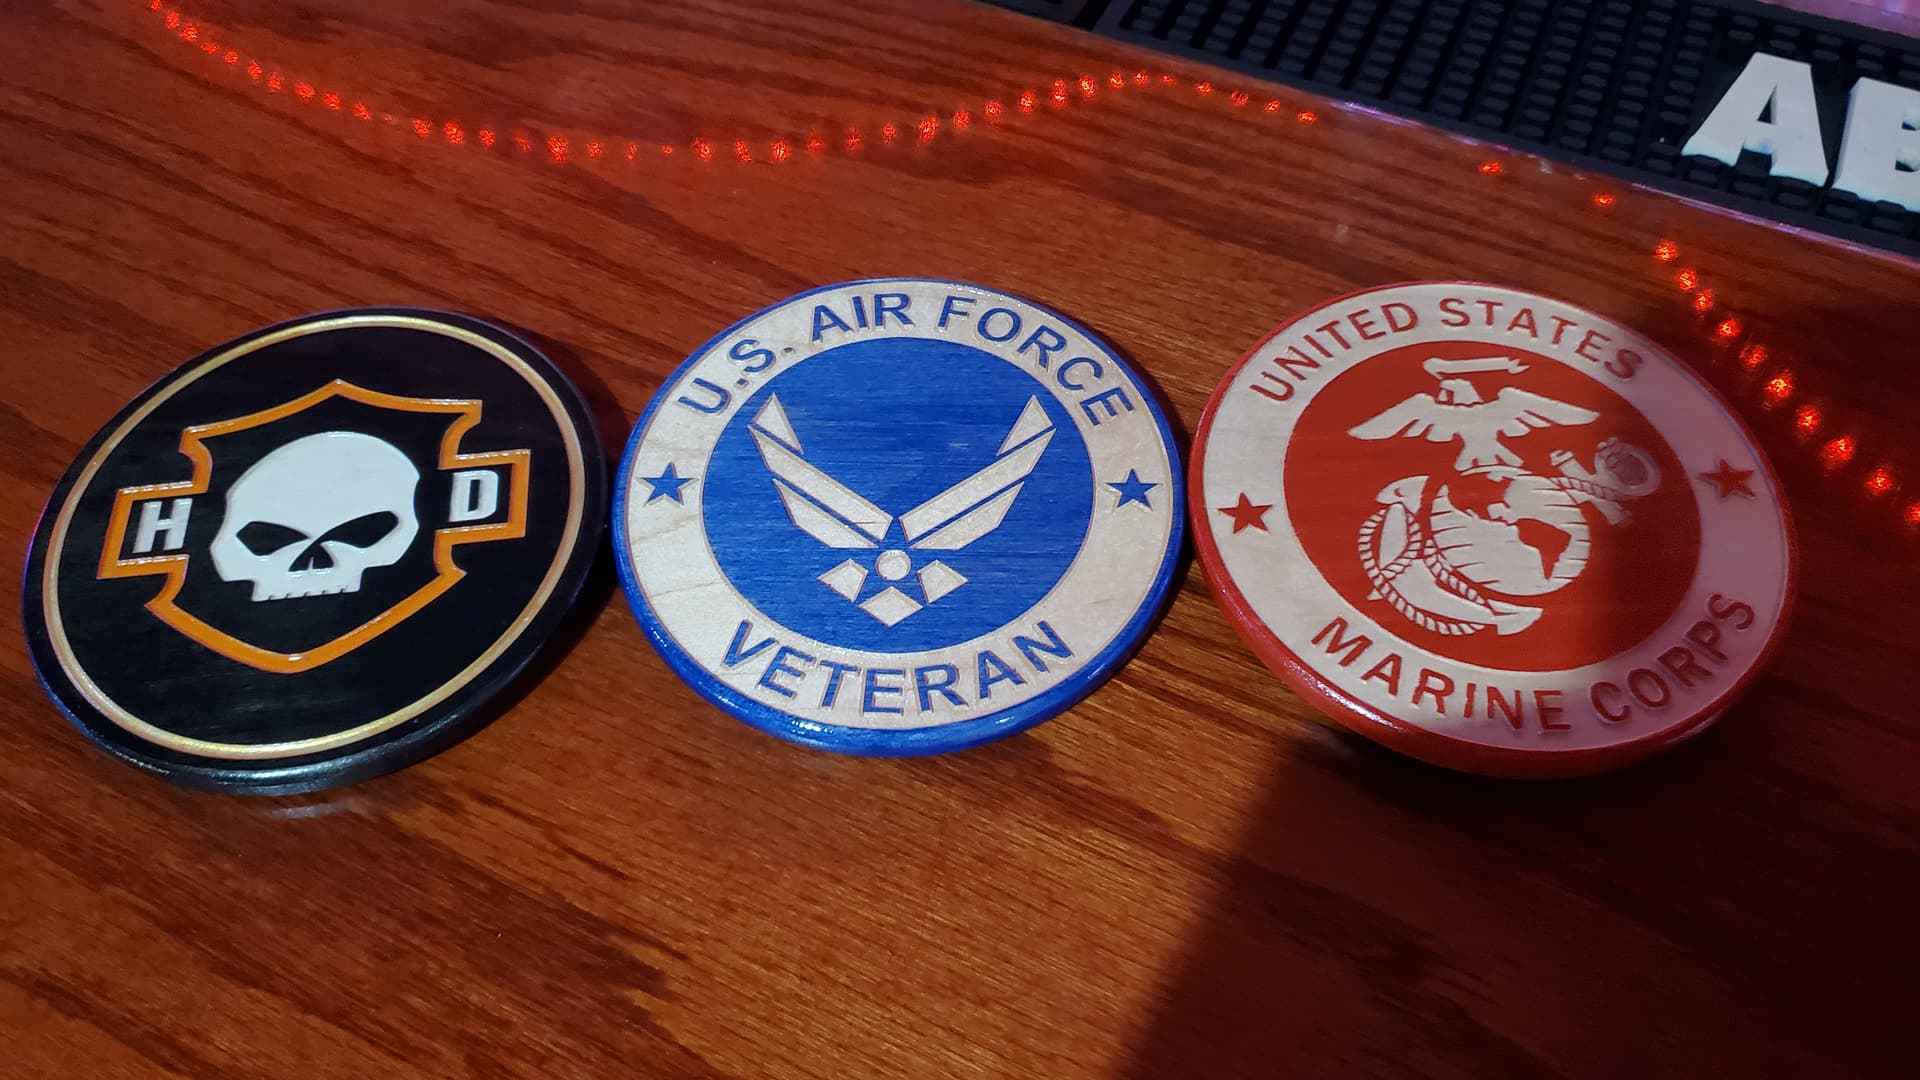
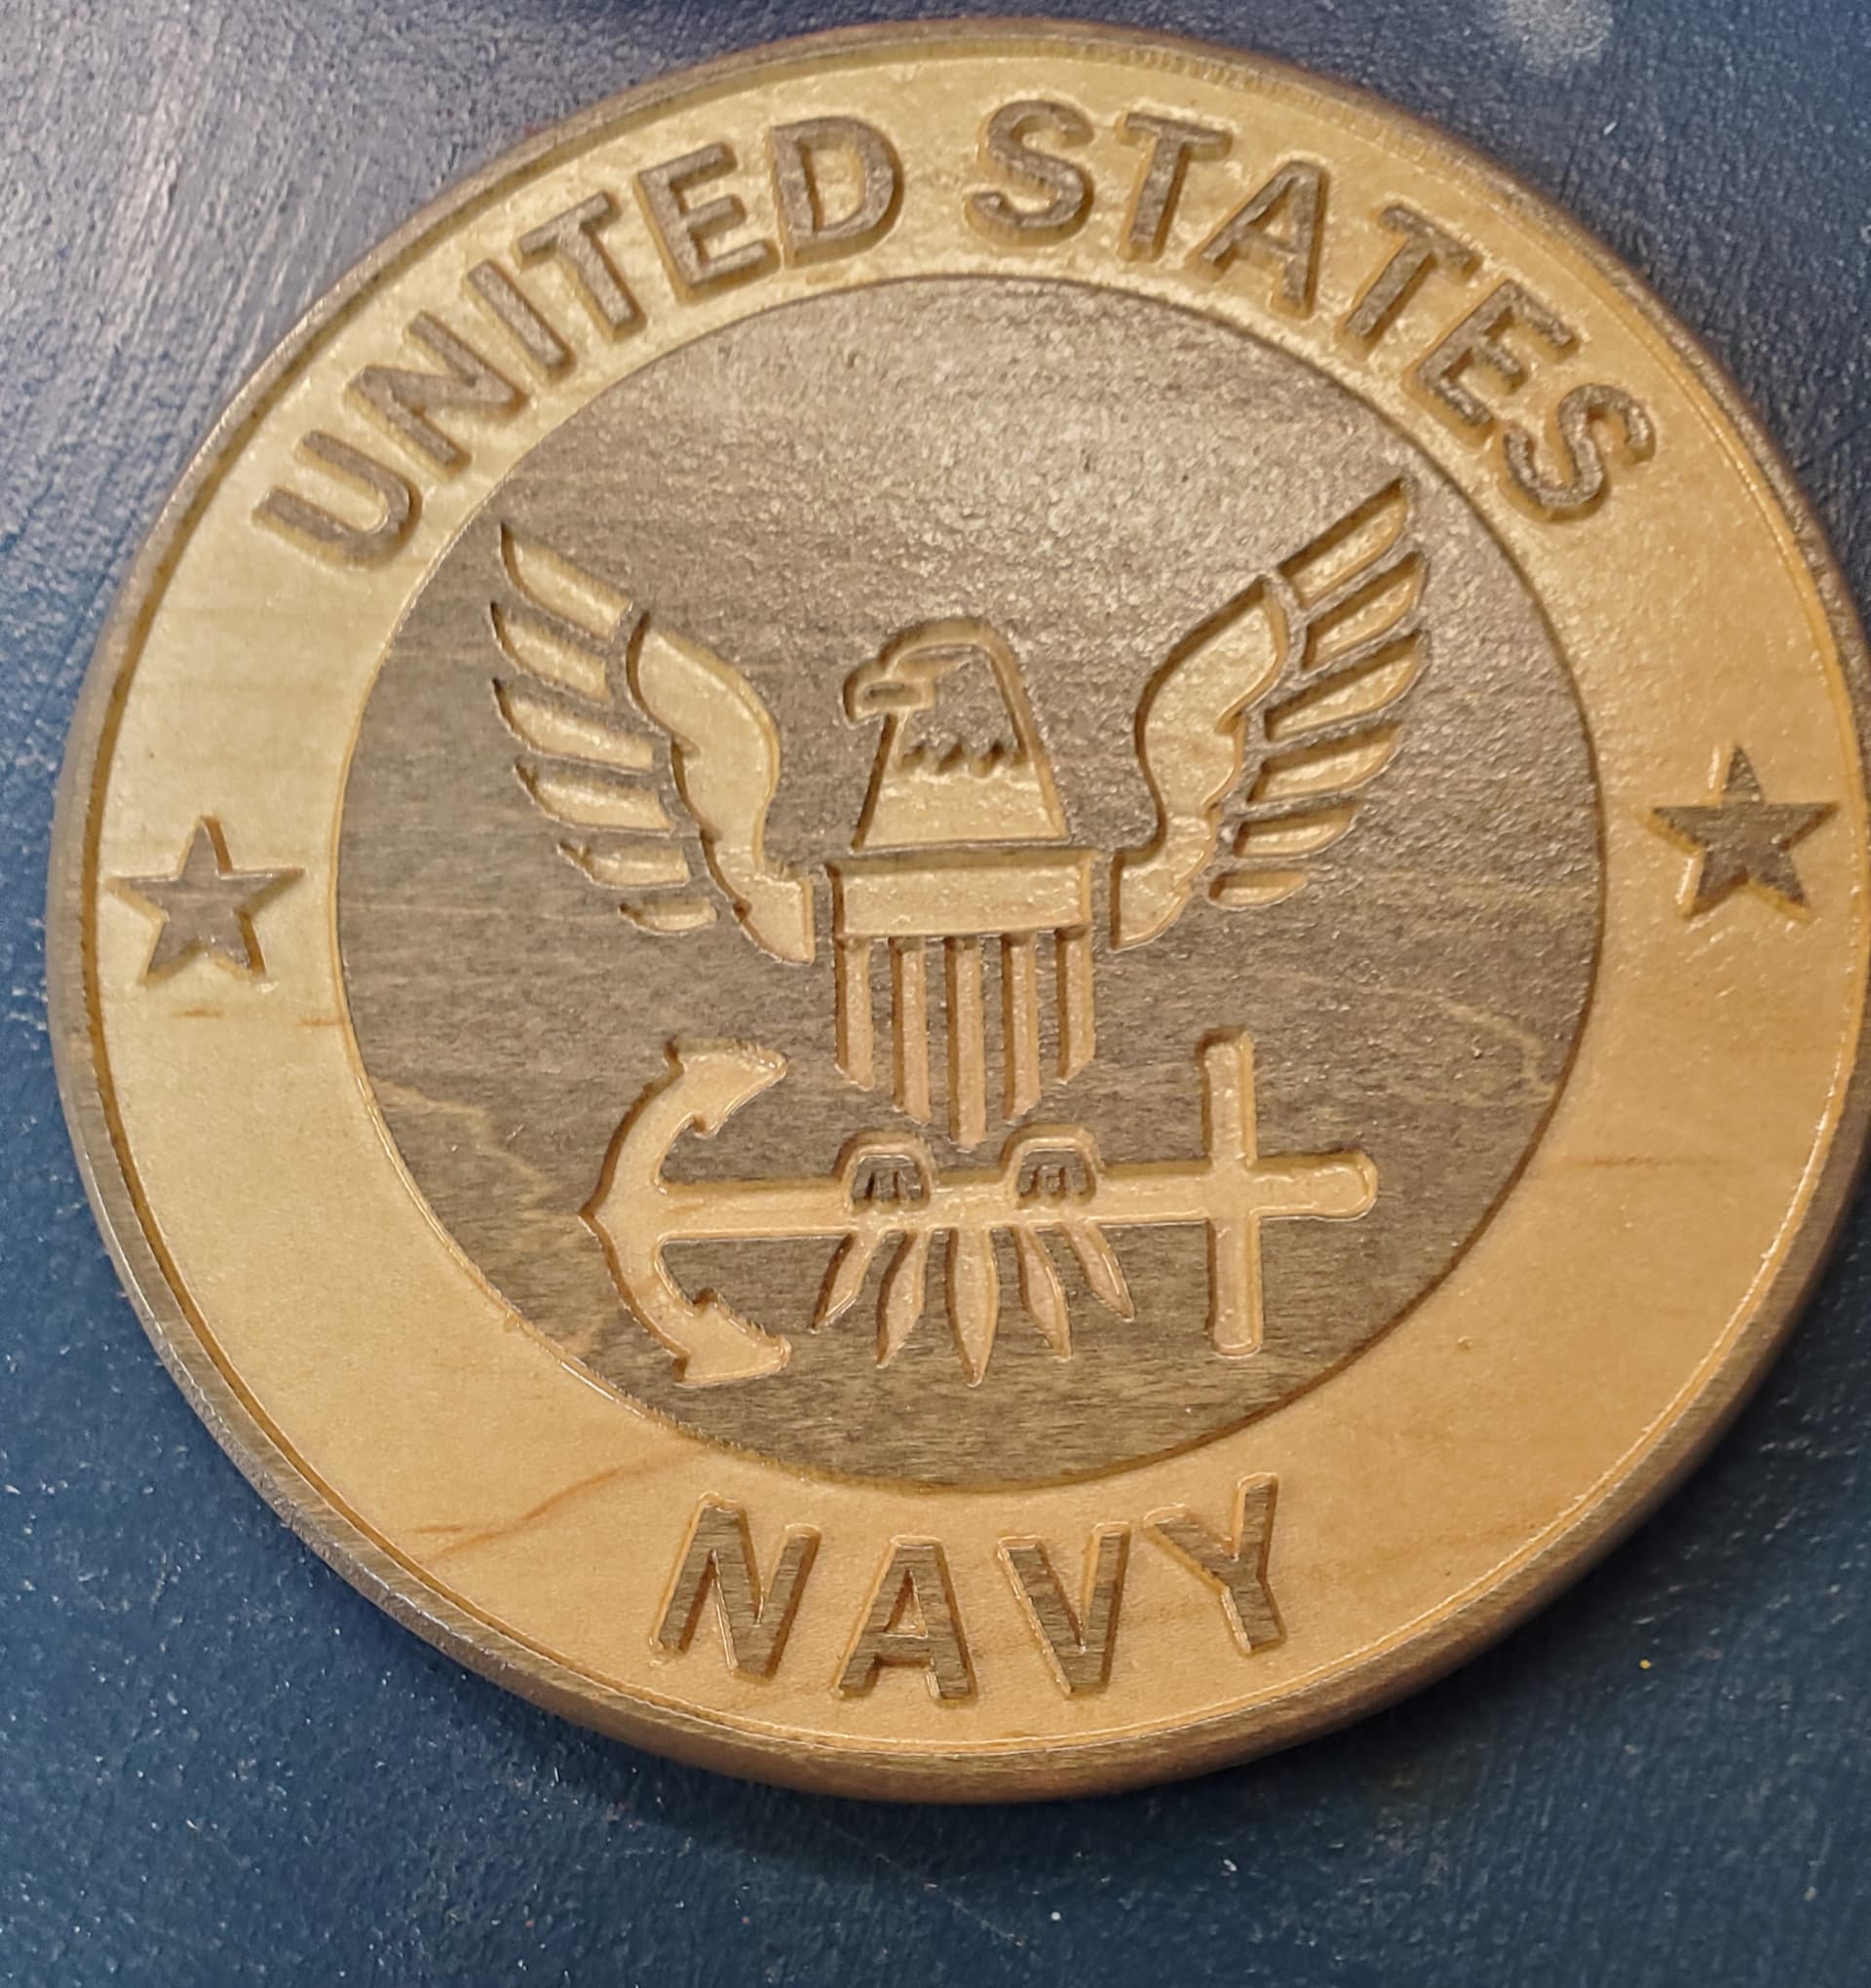
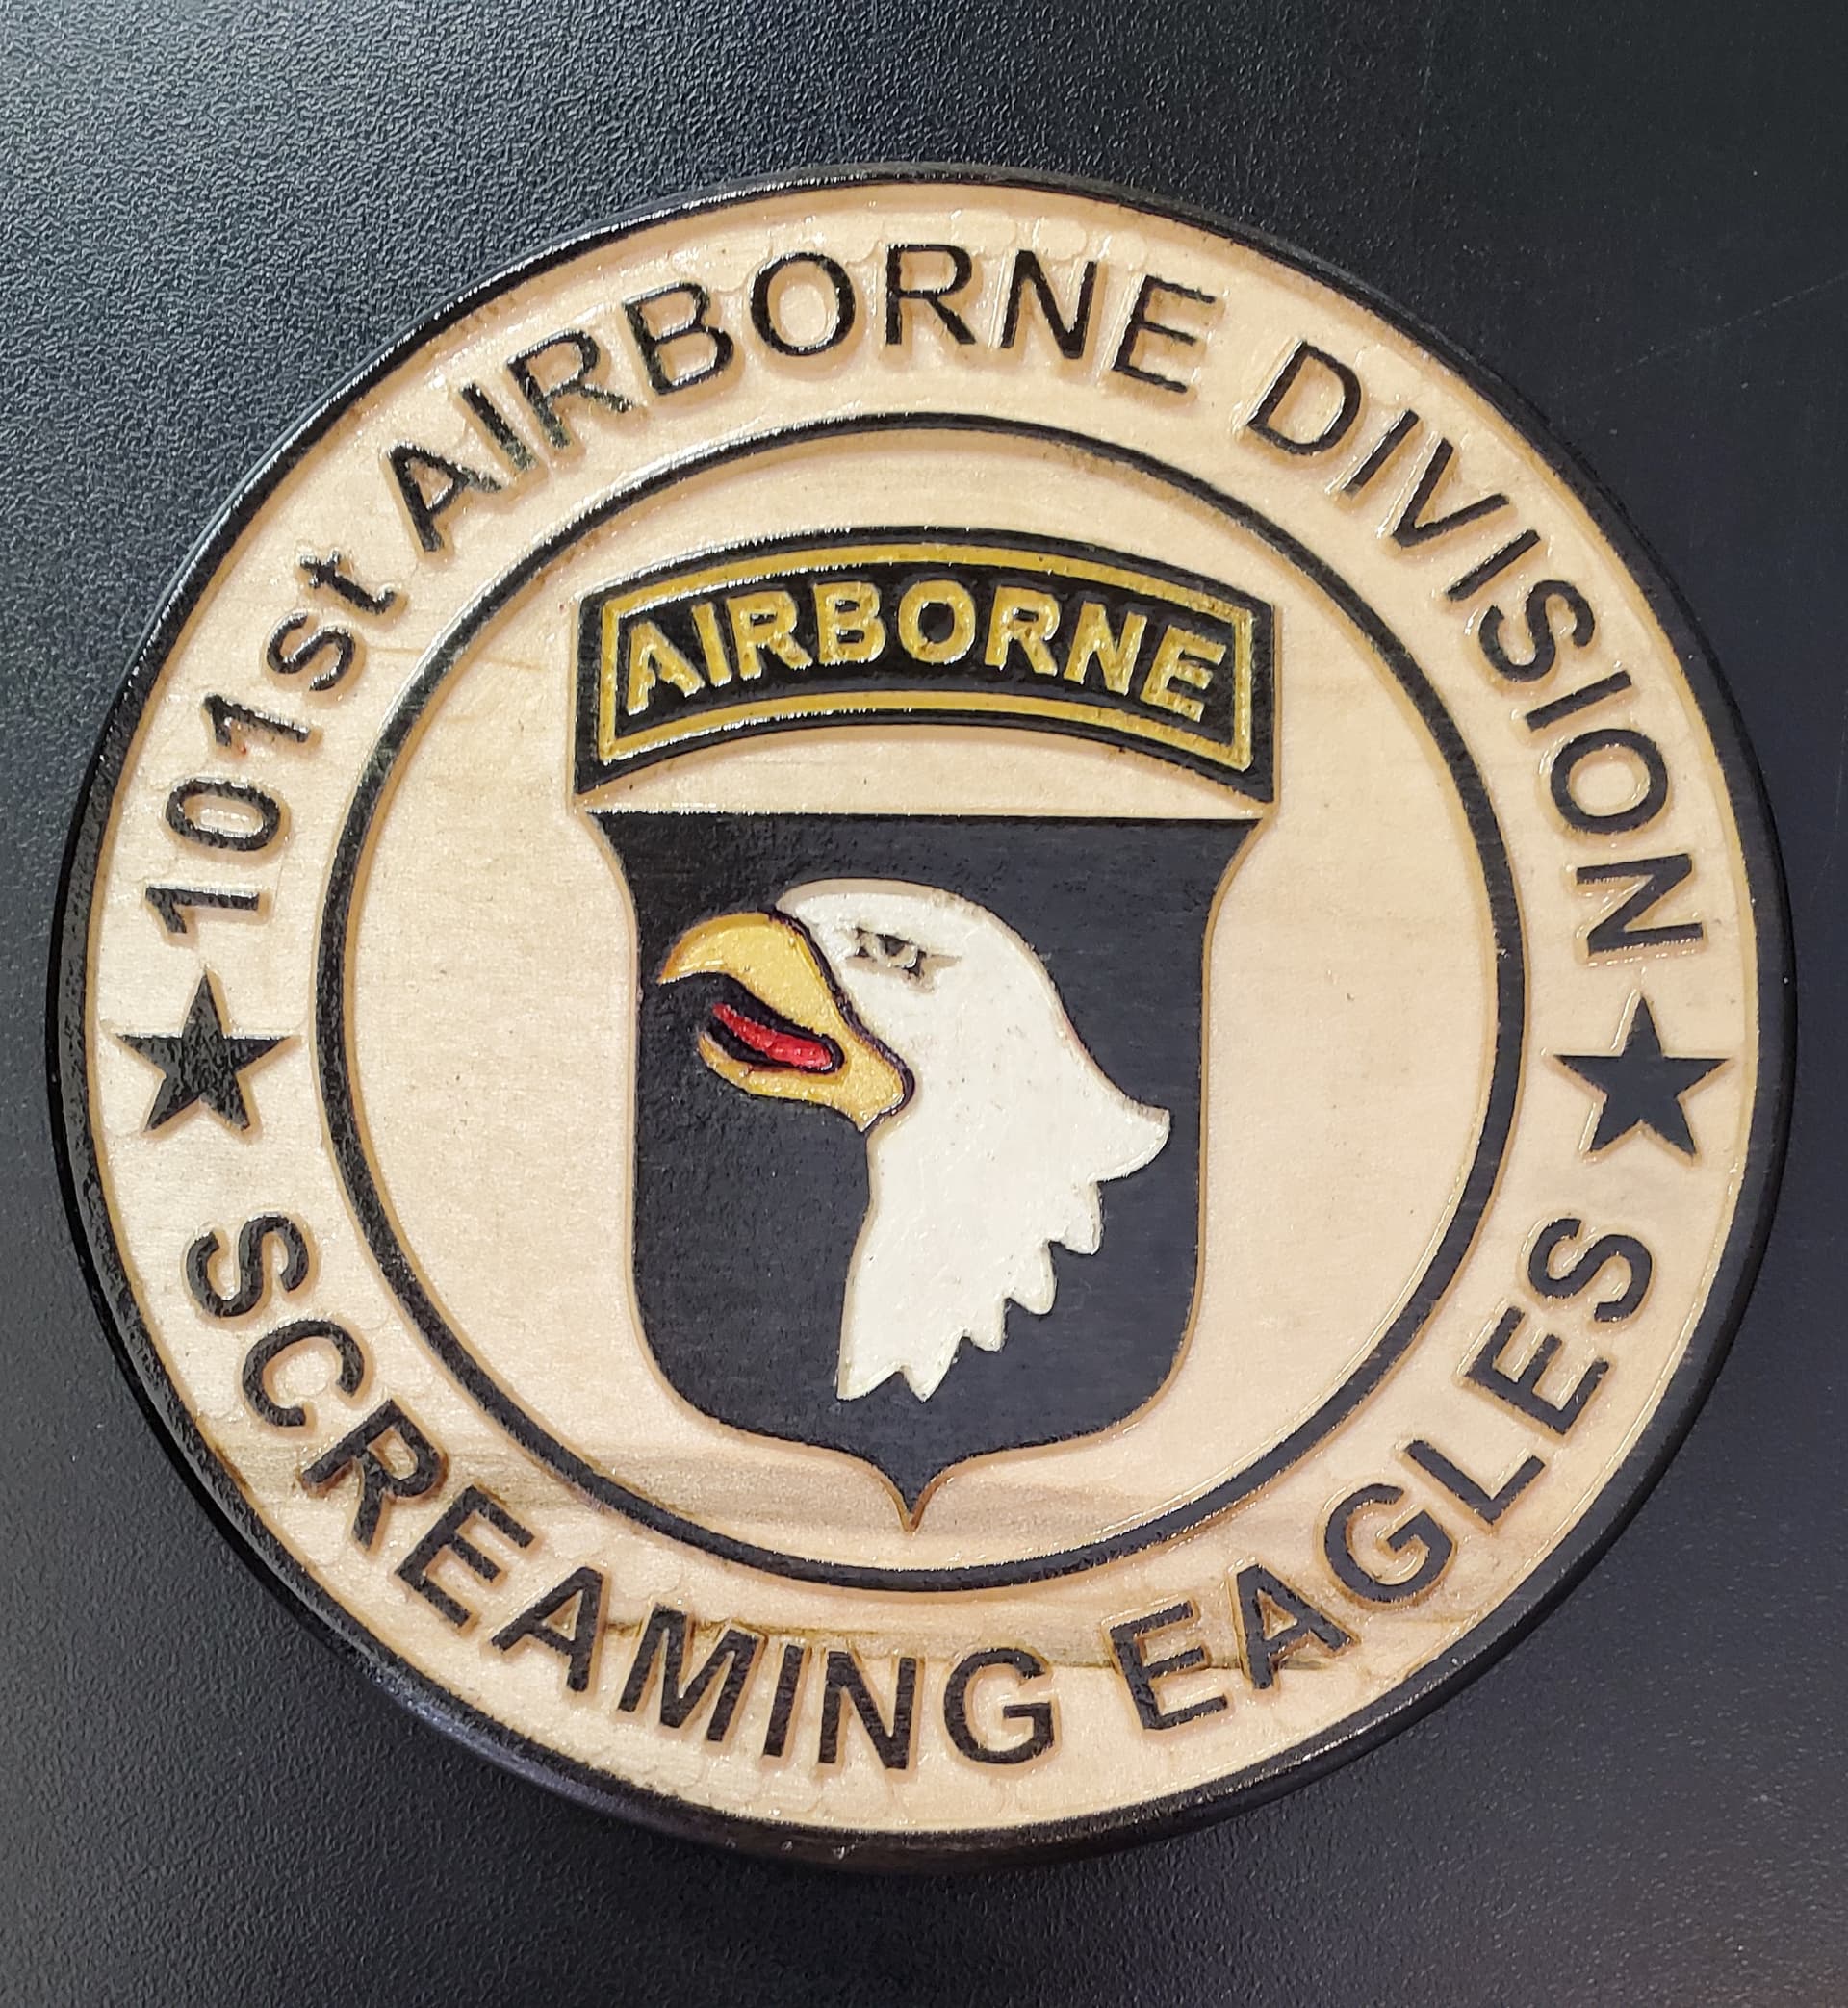
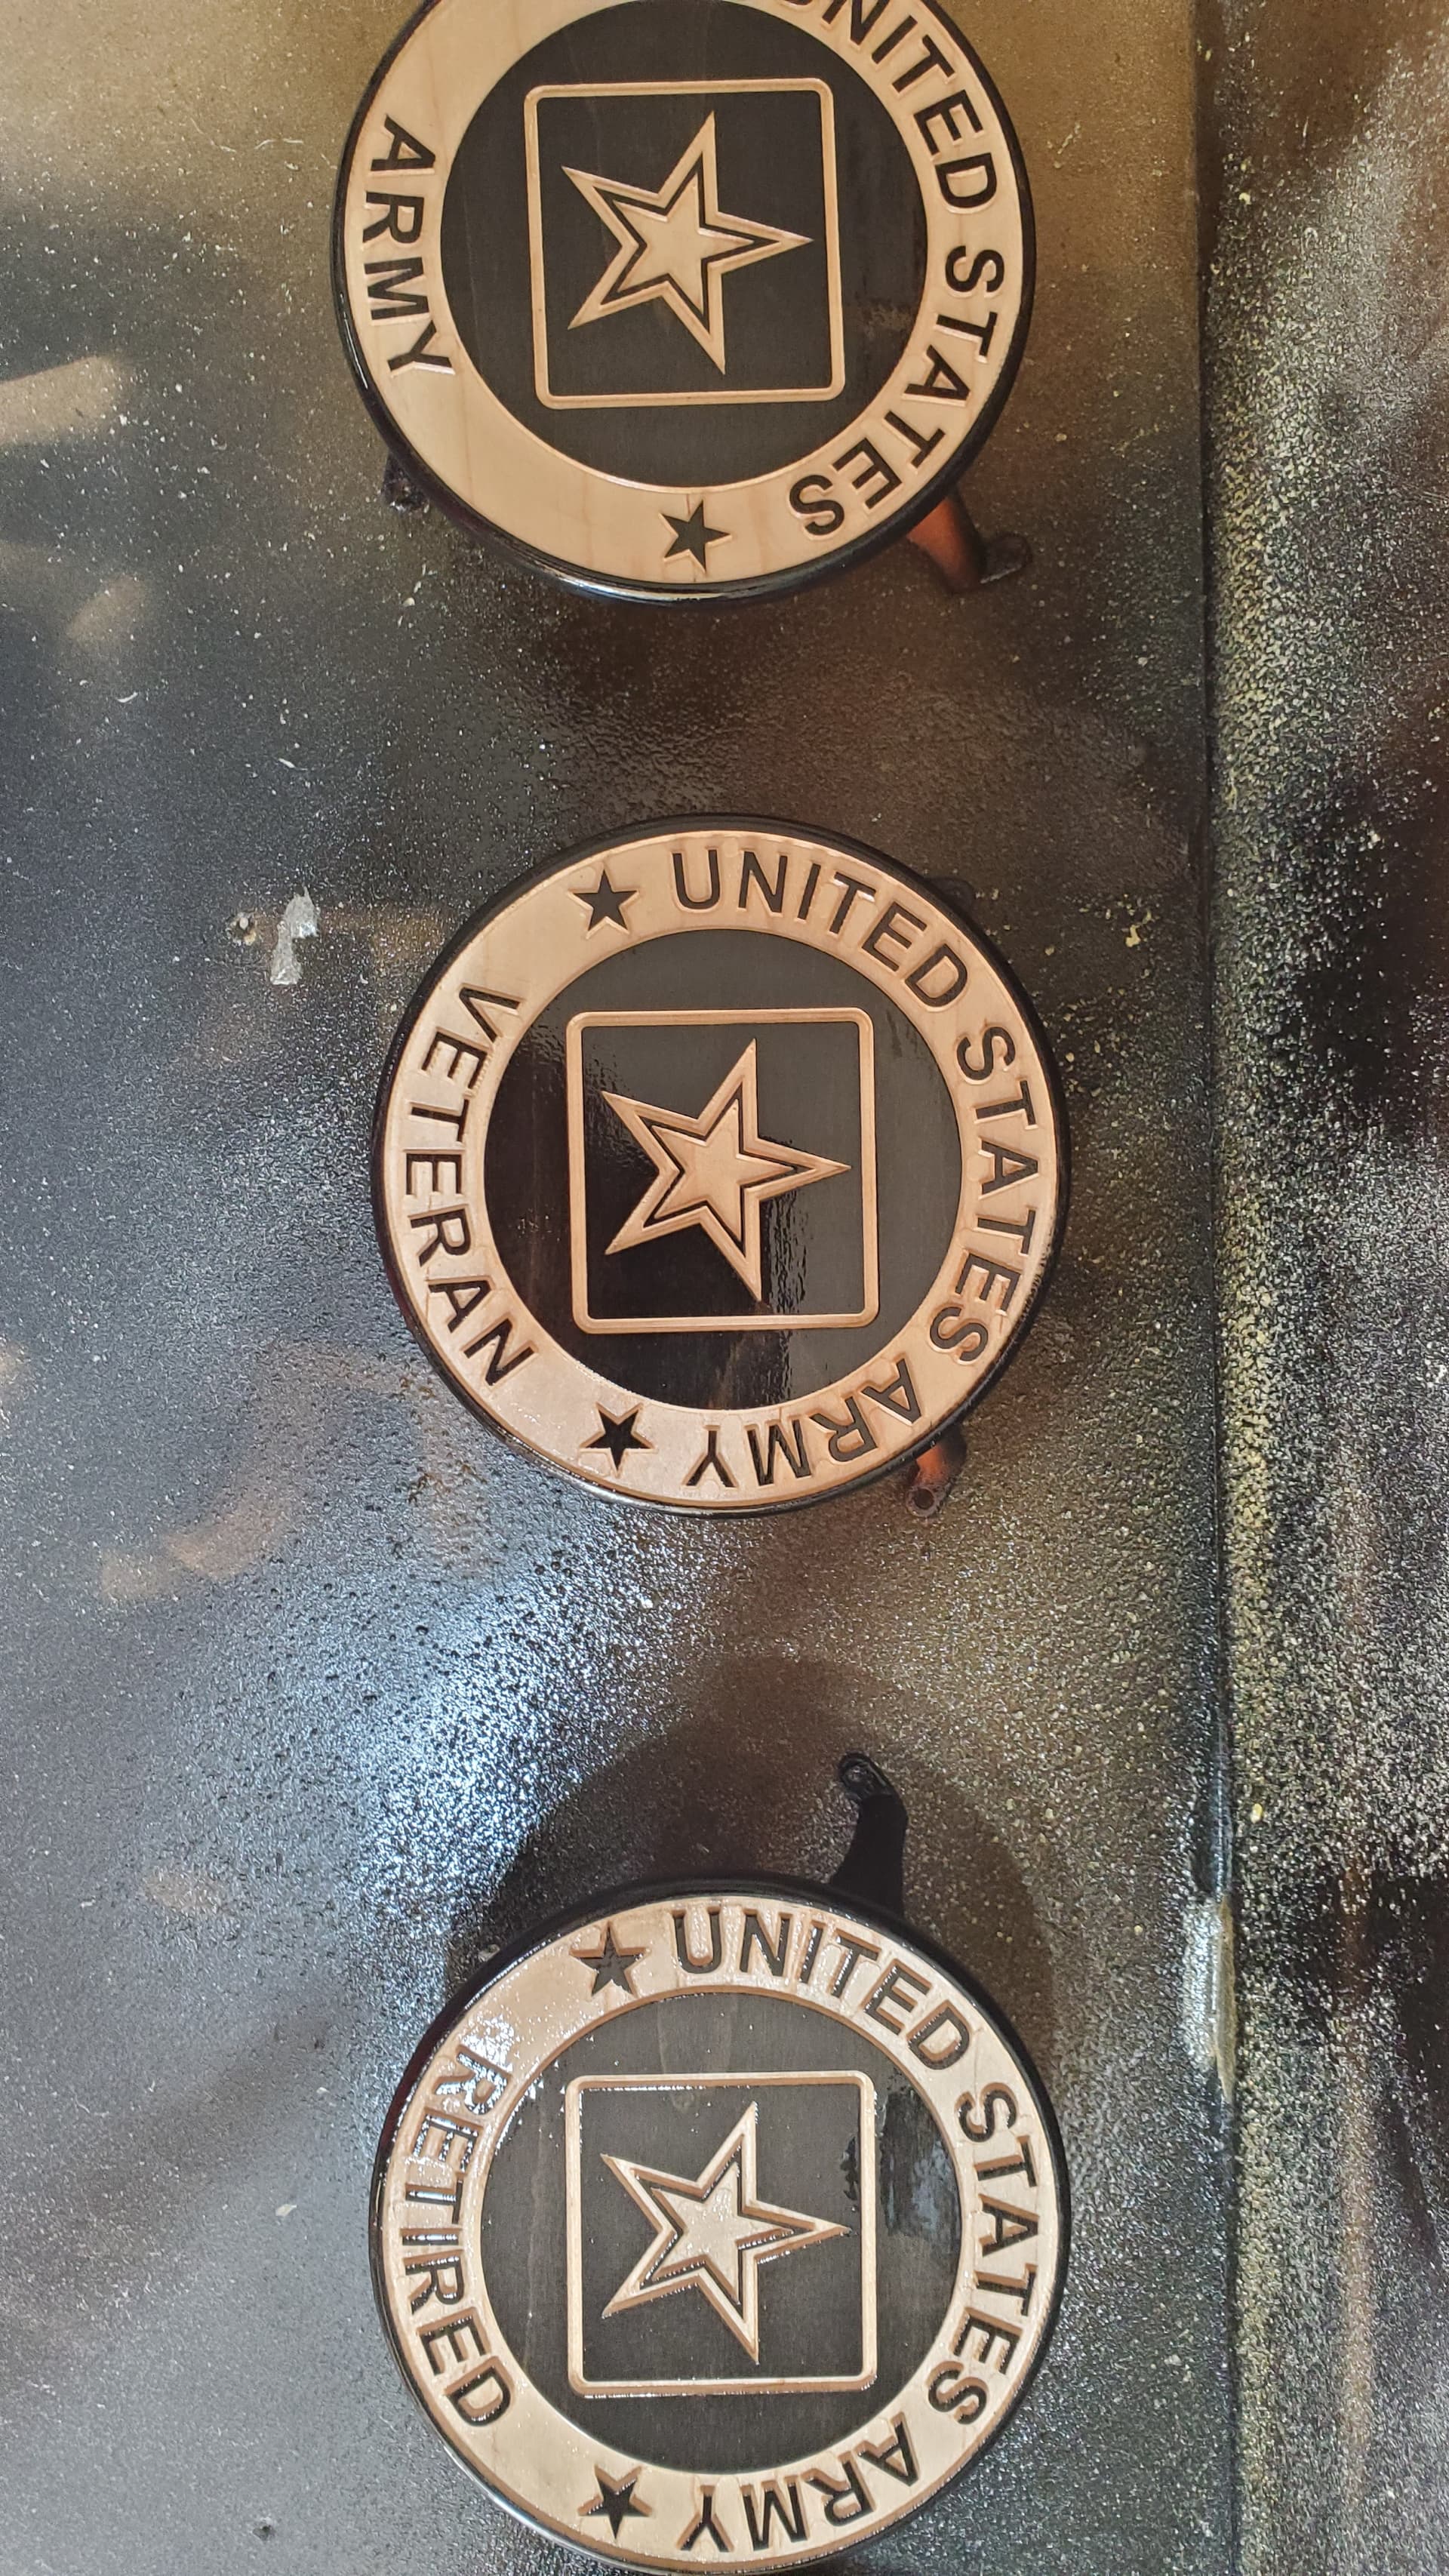
I’m looking to make coasters for our new non-profit for adults with mental and physical challenges. We will most likely give them as gifts to our doners.
Would you consider sharing either the file you used such that we might be able to adapt it to our organization, or at a minimun, maybe share what font you used and the size of it?
Overall, what diameter did you use for the coaster and what thickness did you settle on …1/2" or something else.
Really great you are doing that! That generation is diminishing quickly, and more should be done to memorialize what they did not only for us, but for the world.
General Davis who was the Marine comander during that battle in Korea lived right down the road from my uncle when he died. Wish id have gotten to meet him.
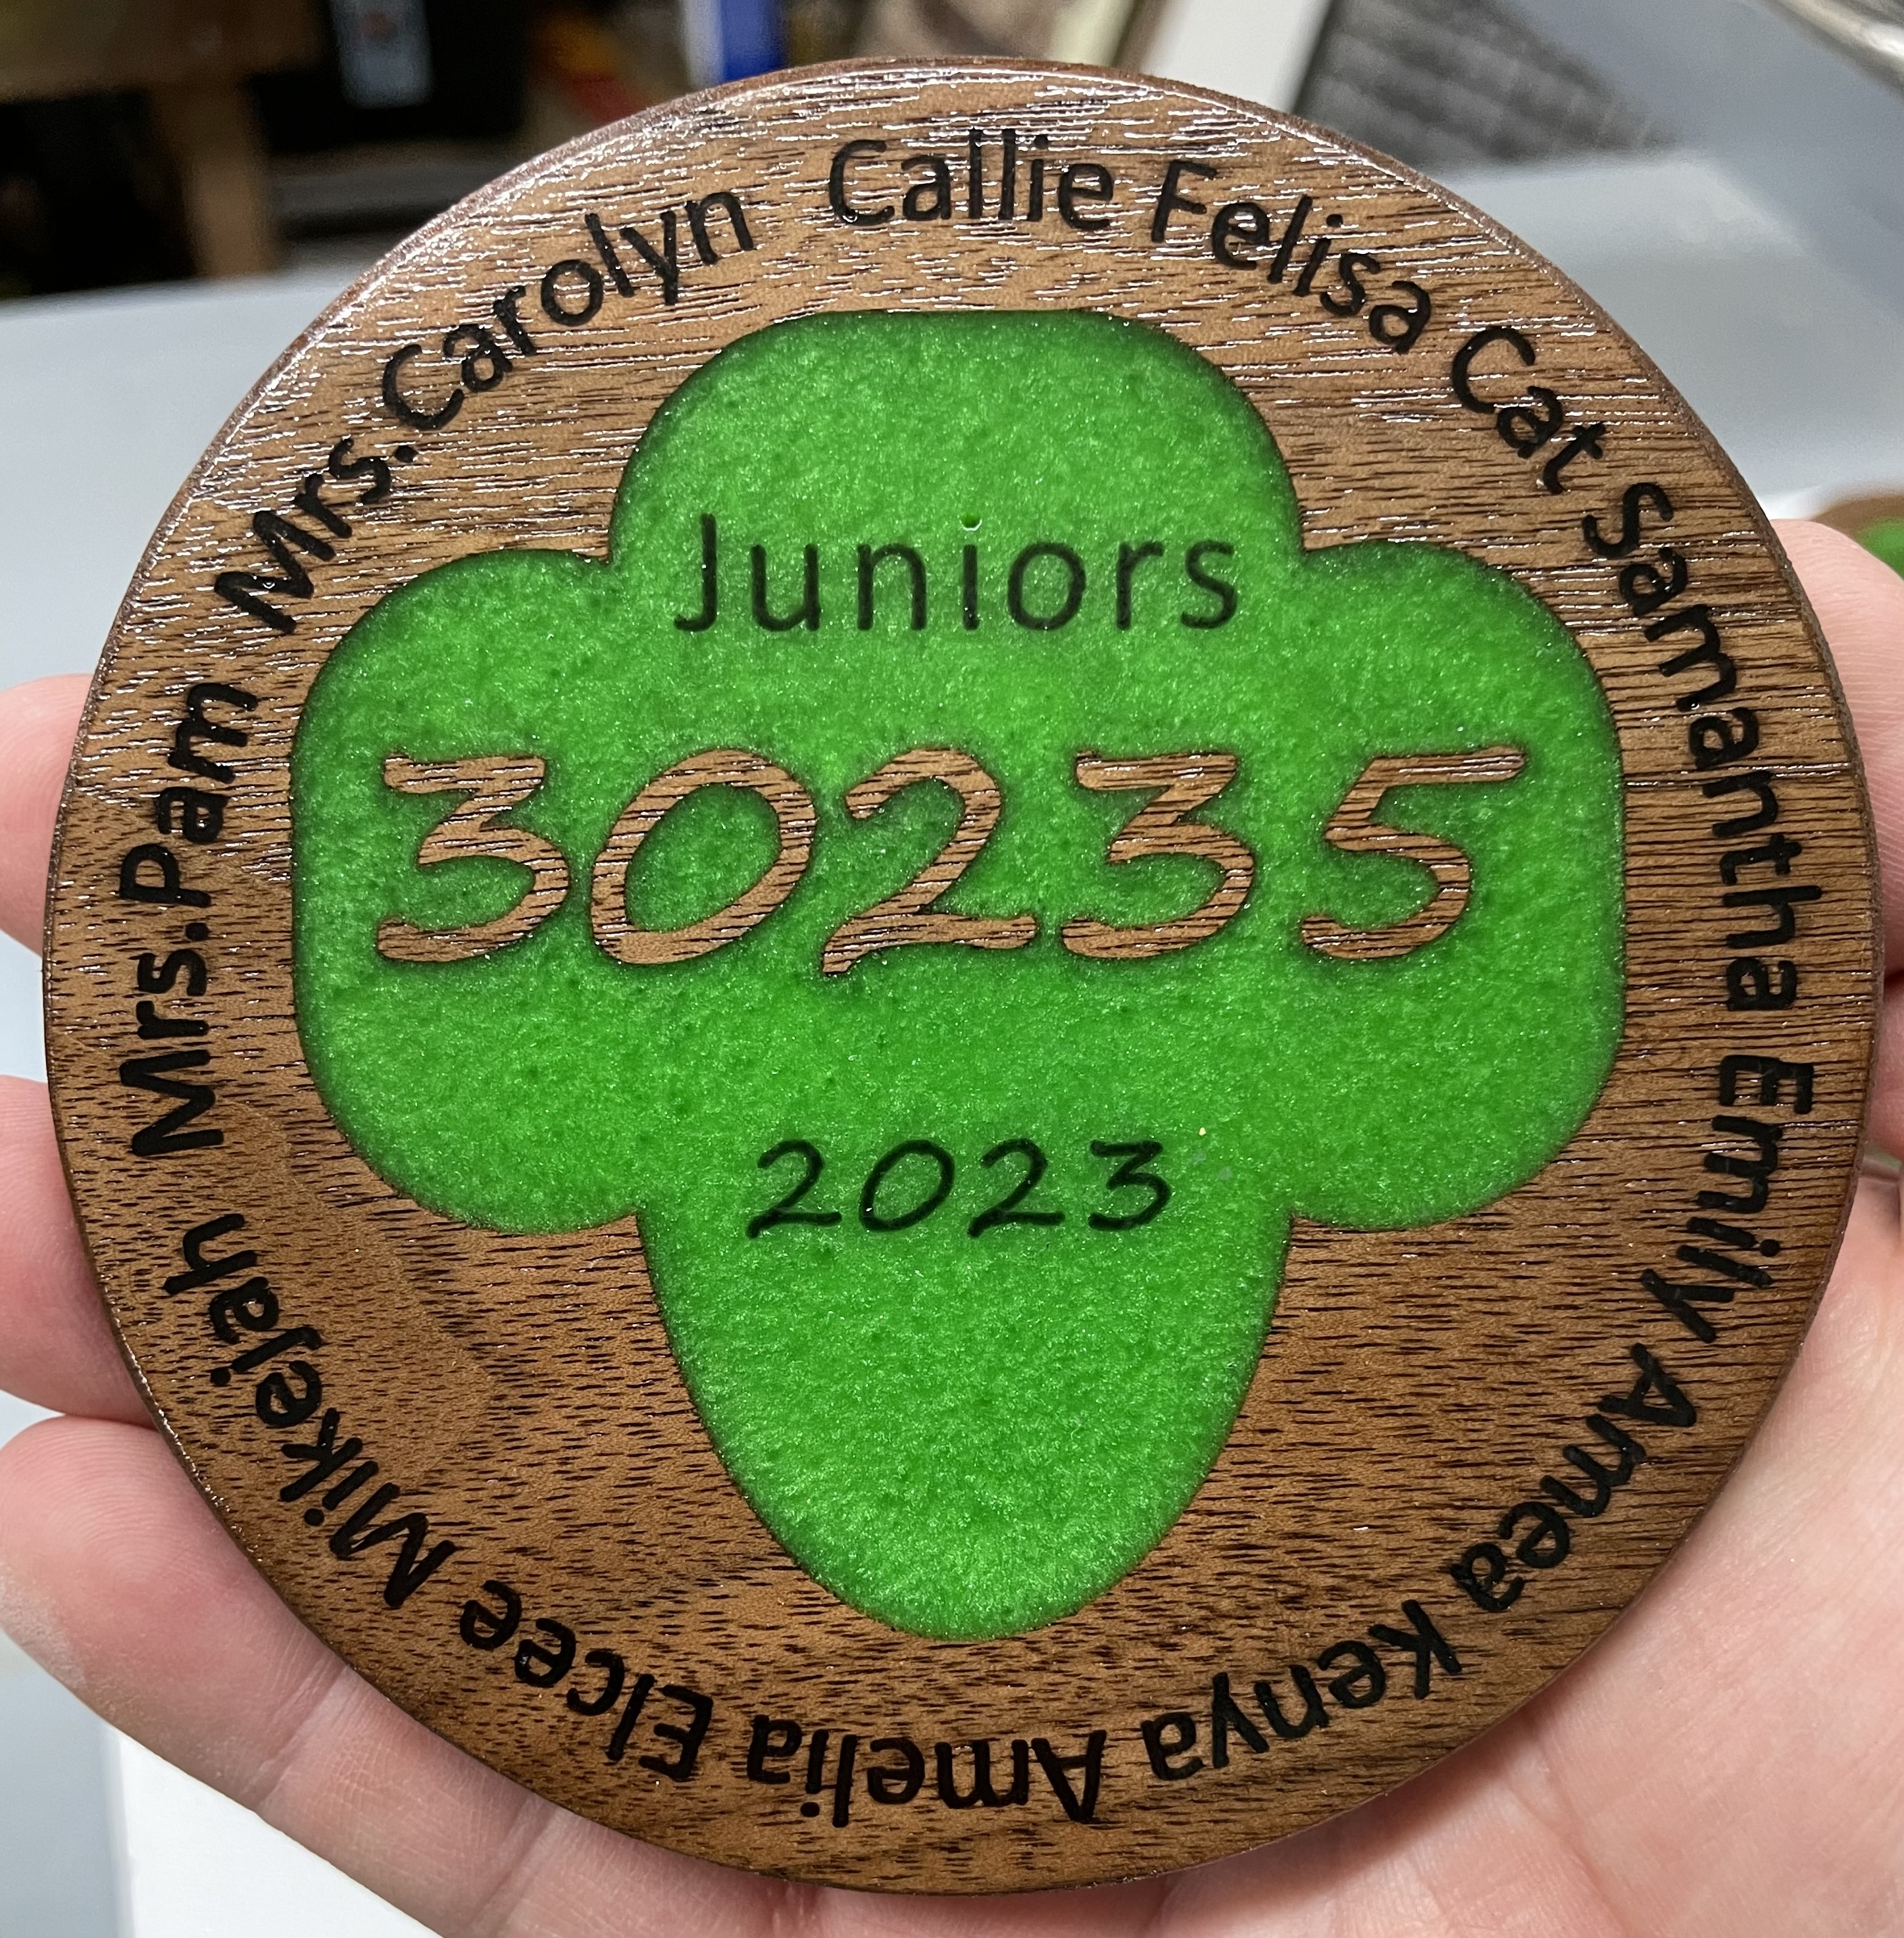
All the coasters I find on CutRocket are either basic circles with either a figure or logo or large letter. I find none with small lettering that is actually readable as show in these postings.
A logo with readable text in a 4" circle with ringed designed as above would be most desirable.
Additionally, some of the coasters that are on CutRocket are no importable into CCPro and I don’t have other s/w to utilize them.
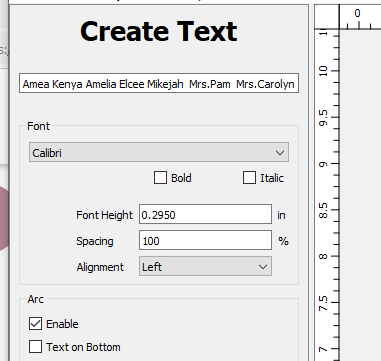
Appreciate it. I have used the arc and would probably use it as you have for some kind of border. Can you tell me what font you used and what bit for the text? Getting small text like you have seems to elude me.
The would be helpful, but the font, font size and bit to cut it would be most helpful.
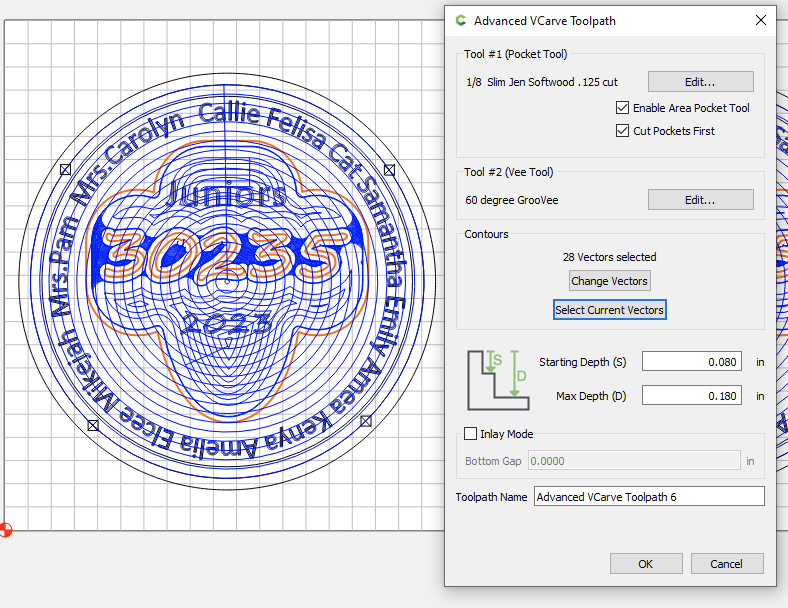
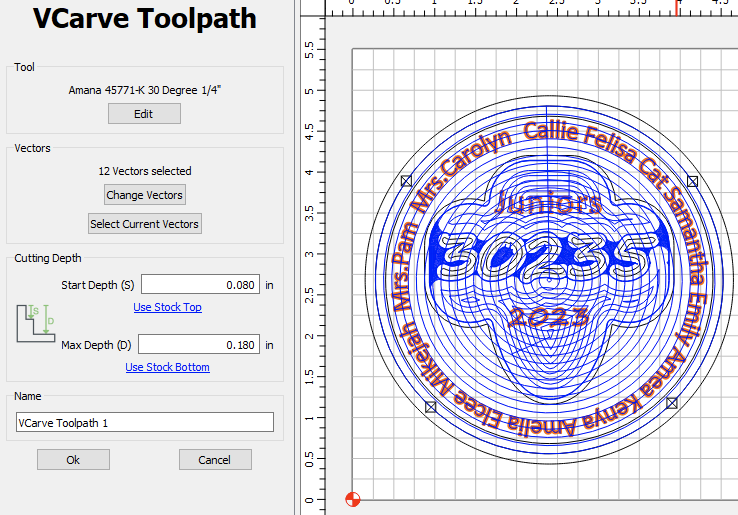
I will have to check for sure tomorrow morning but most likely I used the 60 degree Groovee downcut bit for both the lettering and the logo. Then filled both with epoxy.
@Frank246 here are the settings I used for the circular text. Nothing fancy:
I was wrong about the bits, I use the 60 degree Groovee for the logo with an advanced v-carve and then a cleanup pass on that v-carve. Note that the start depth is .08 because I had an earlier step cut a circular pocket that deep in the board.
That text is pretty small but it mostly worked out. However, as you can see the “i” in Juniors lost its black epoxy dot while I was flattening/sanding. It was not very deep. I am working on different but similar set now and after it was all cut I used the tip of an x-acto knife to enlarge the hole for the “i” and “.” slightly hoping that would give the epoxy a little more surface to cling to.
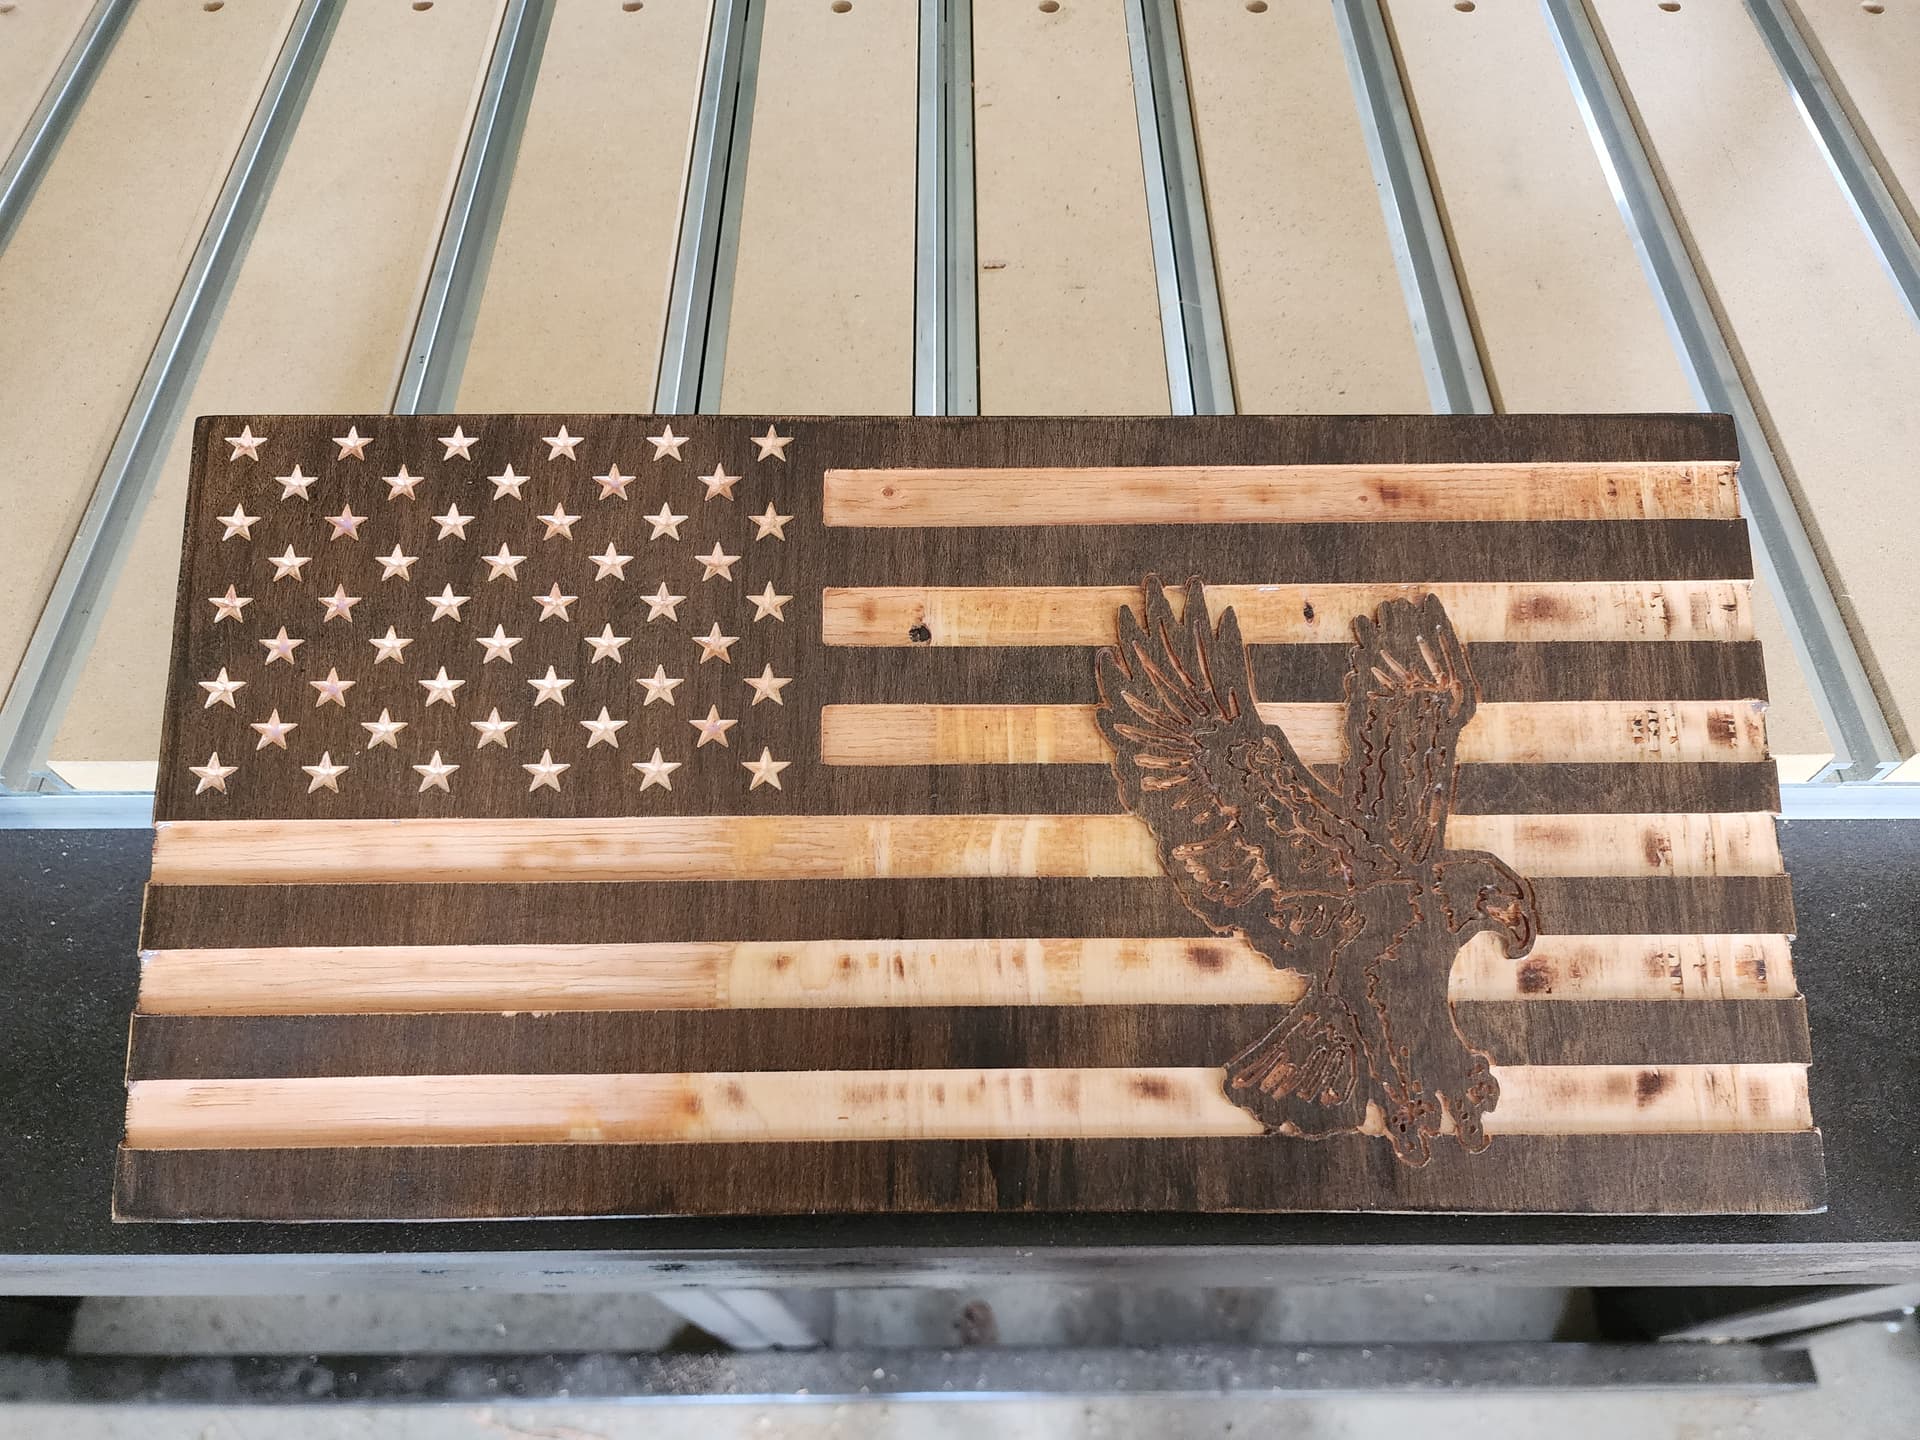
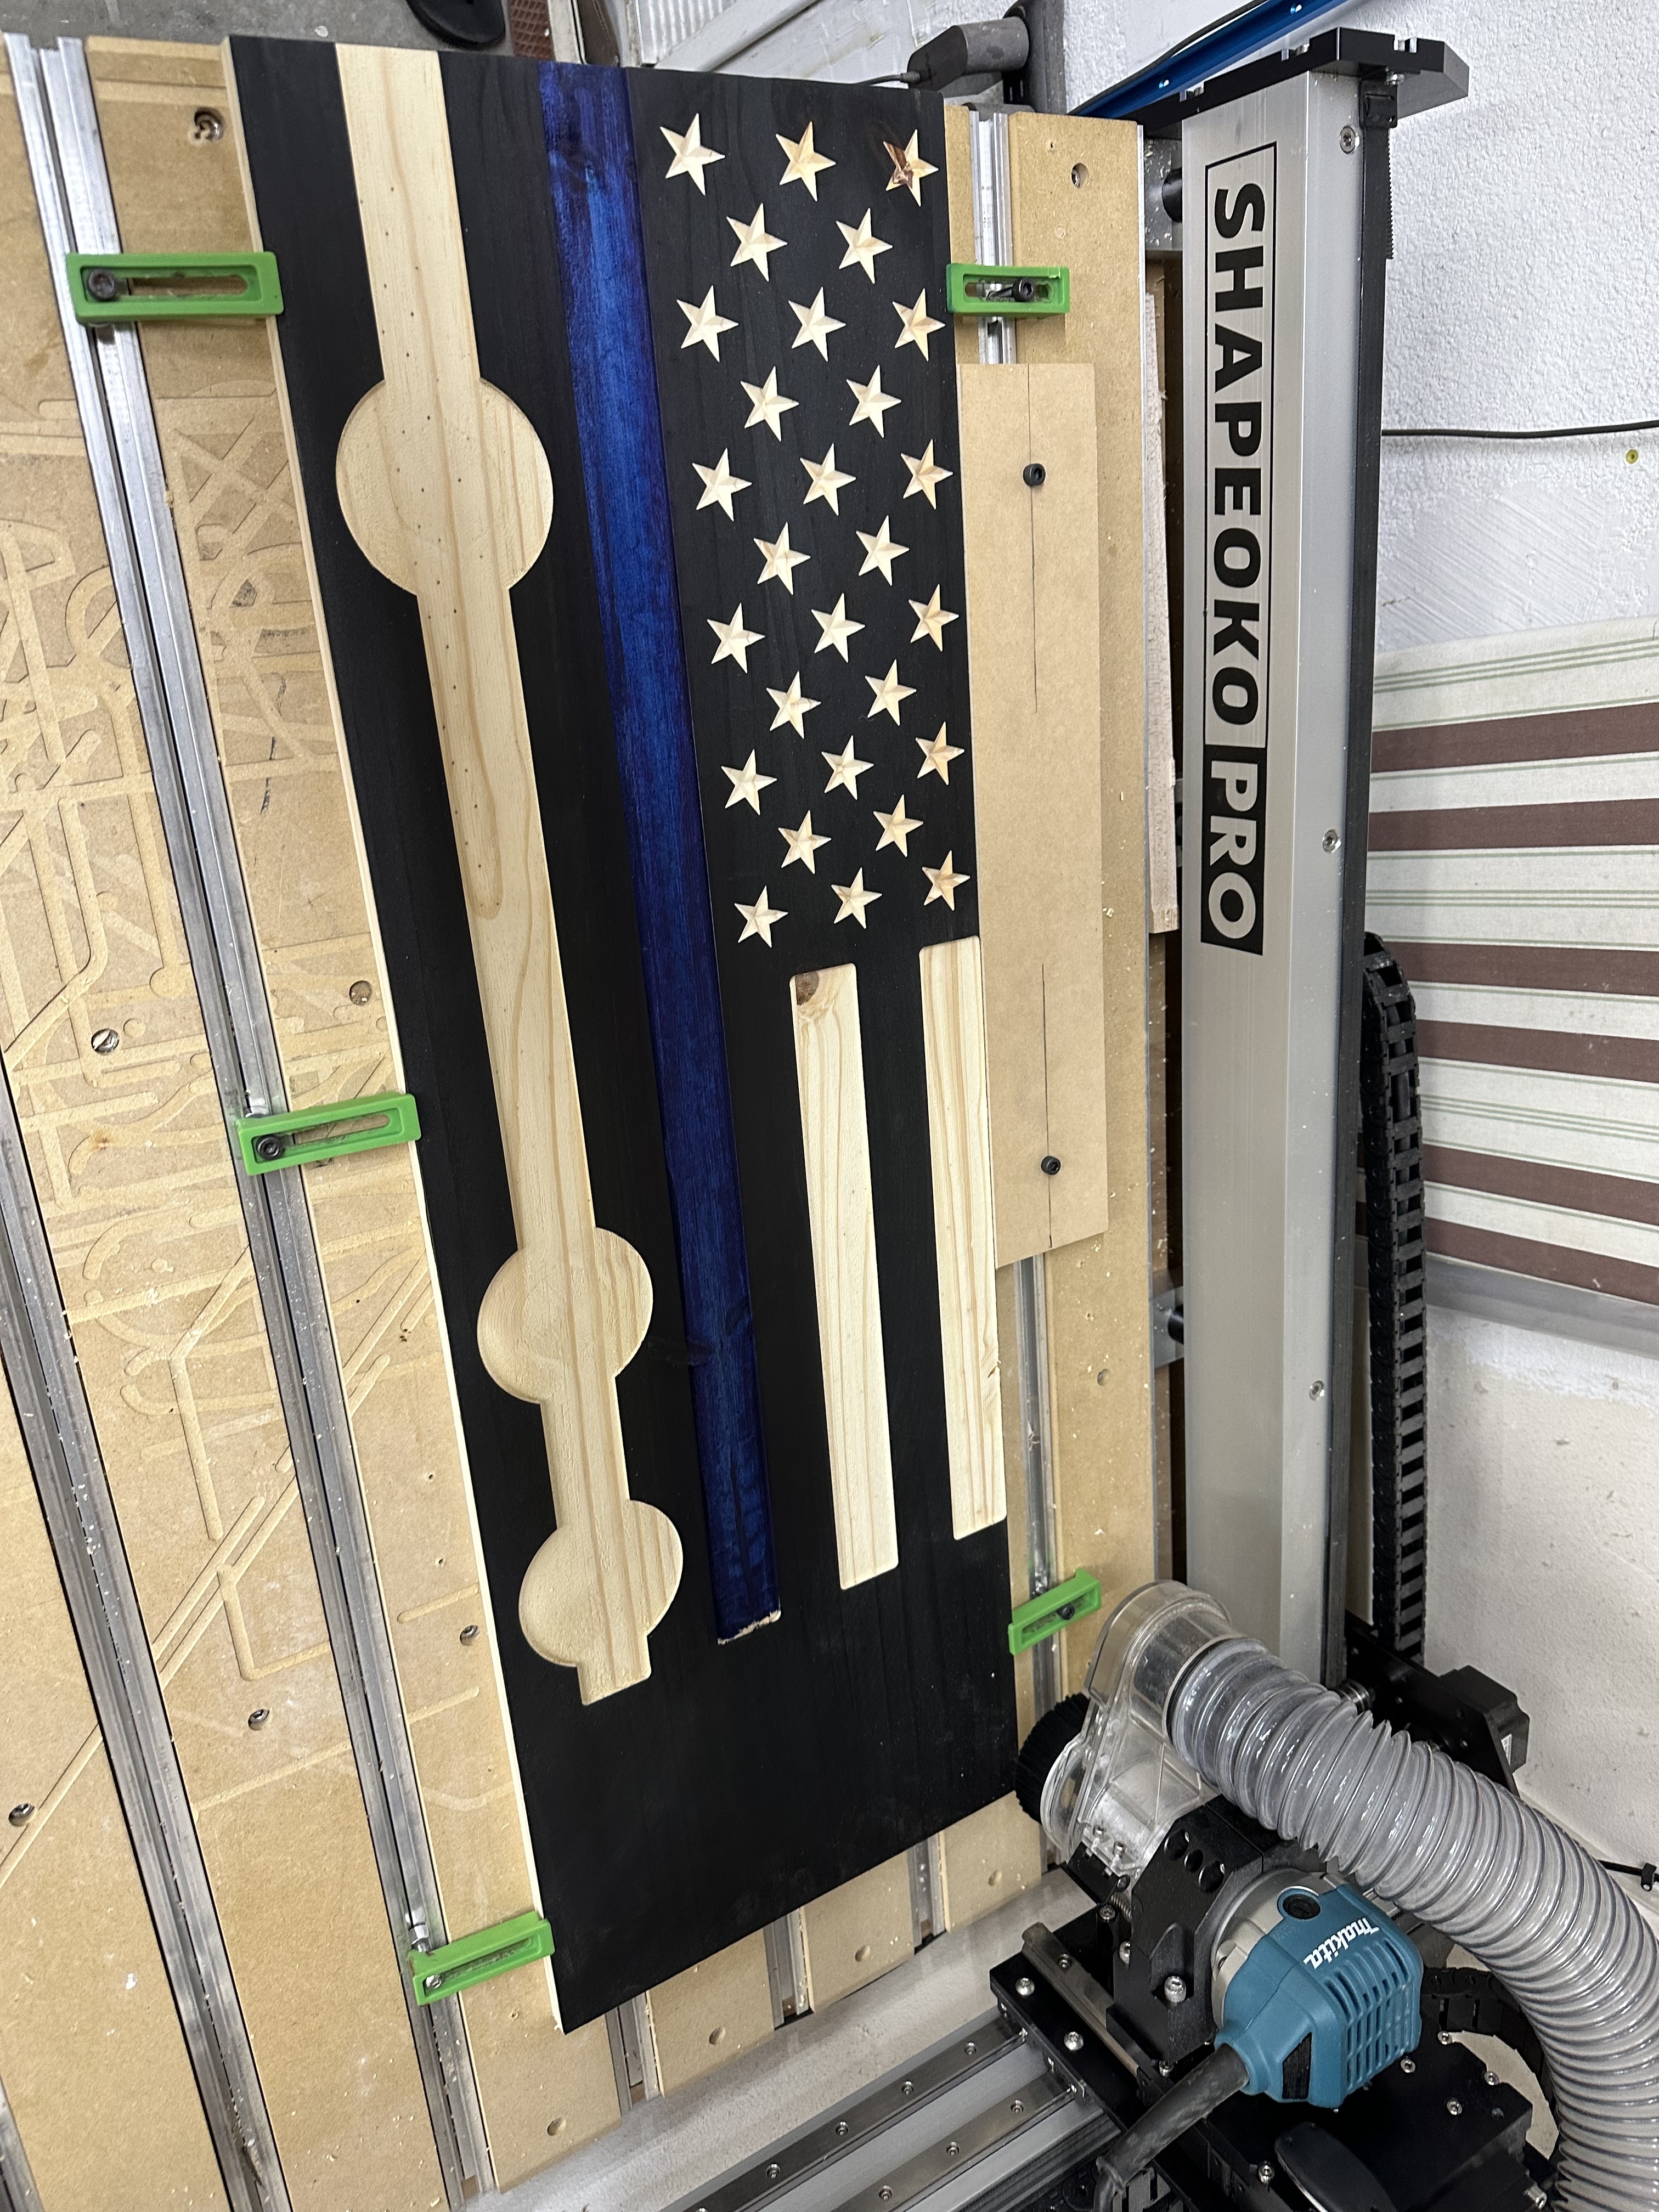
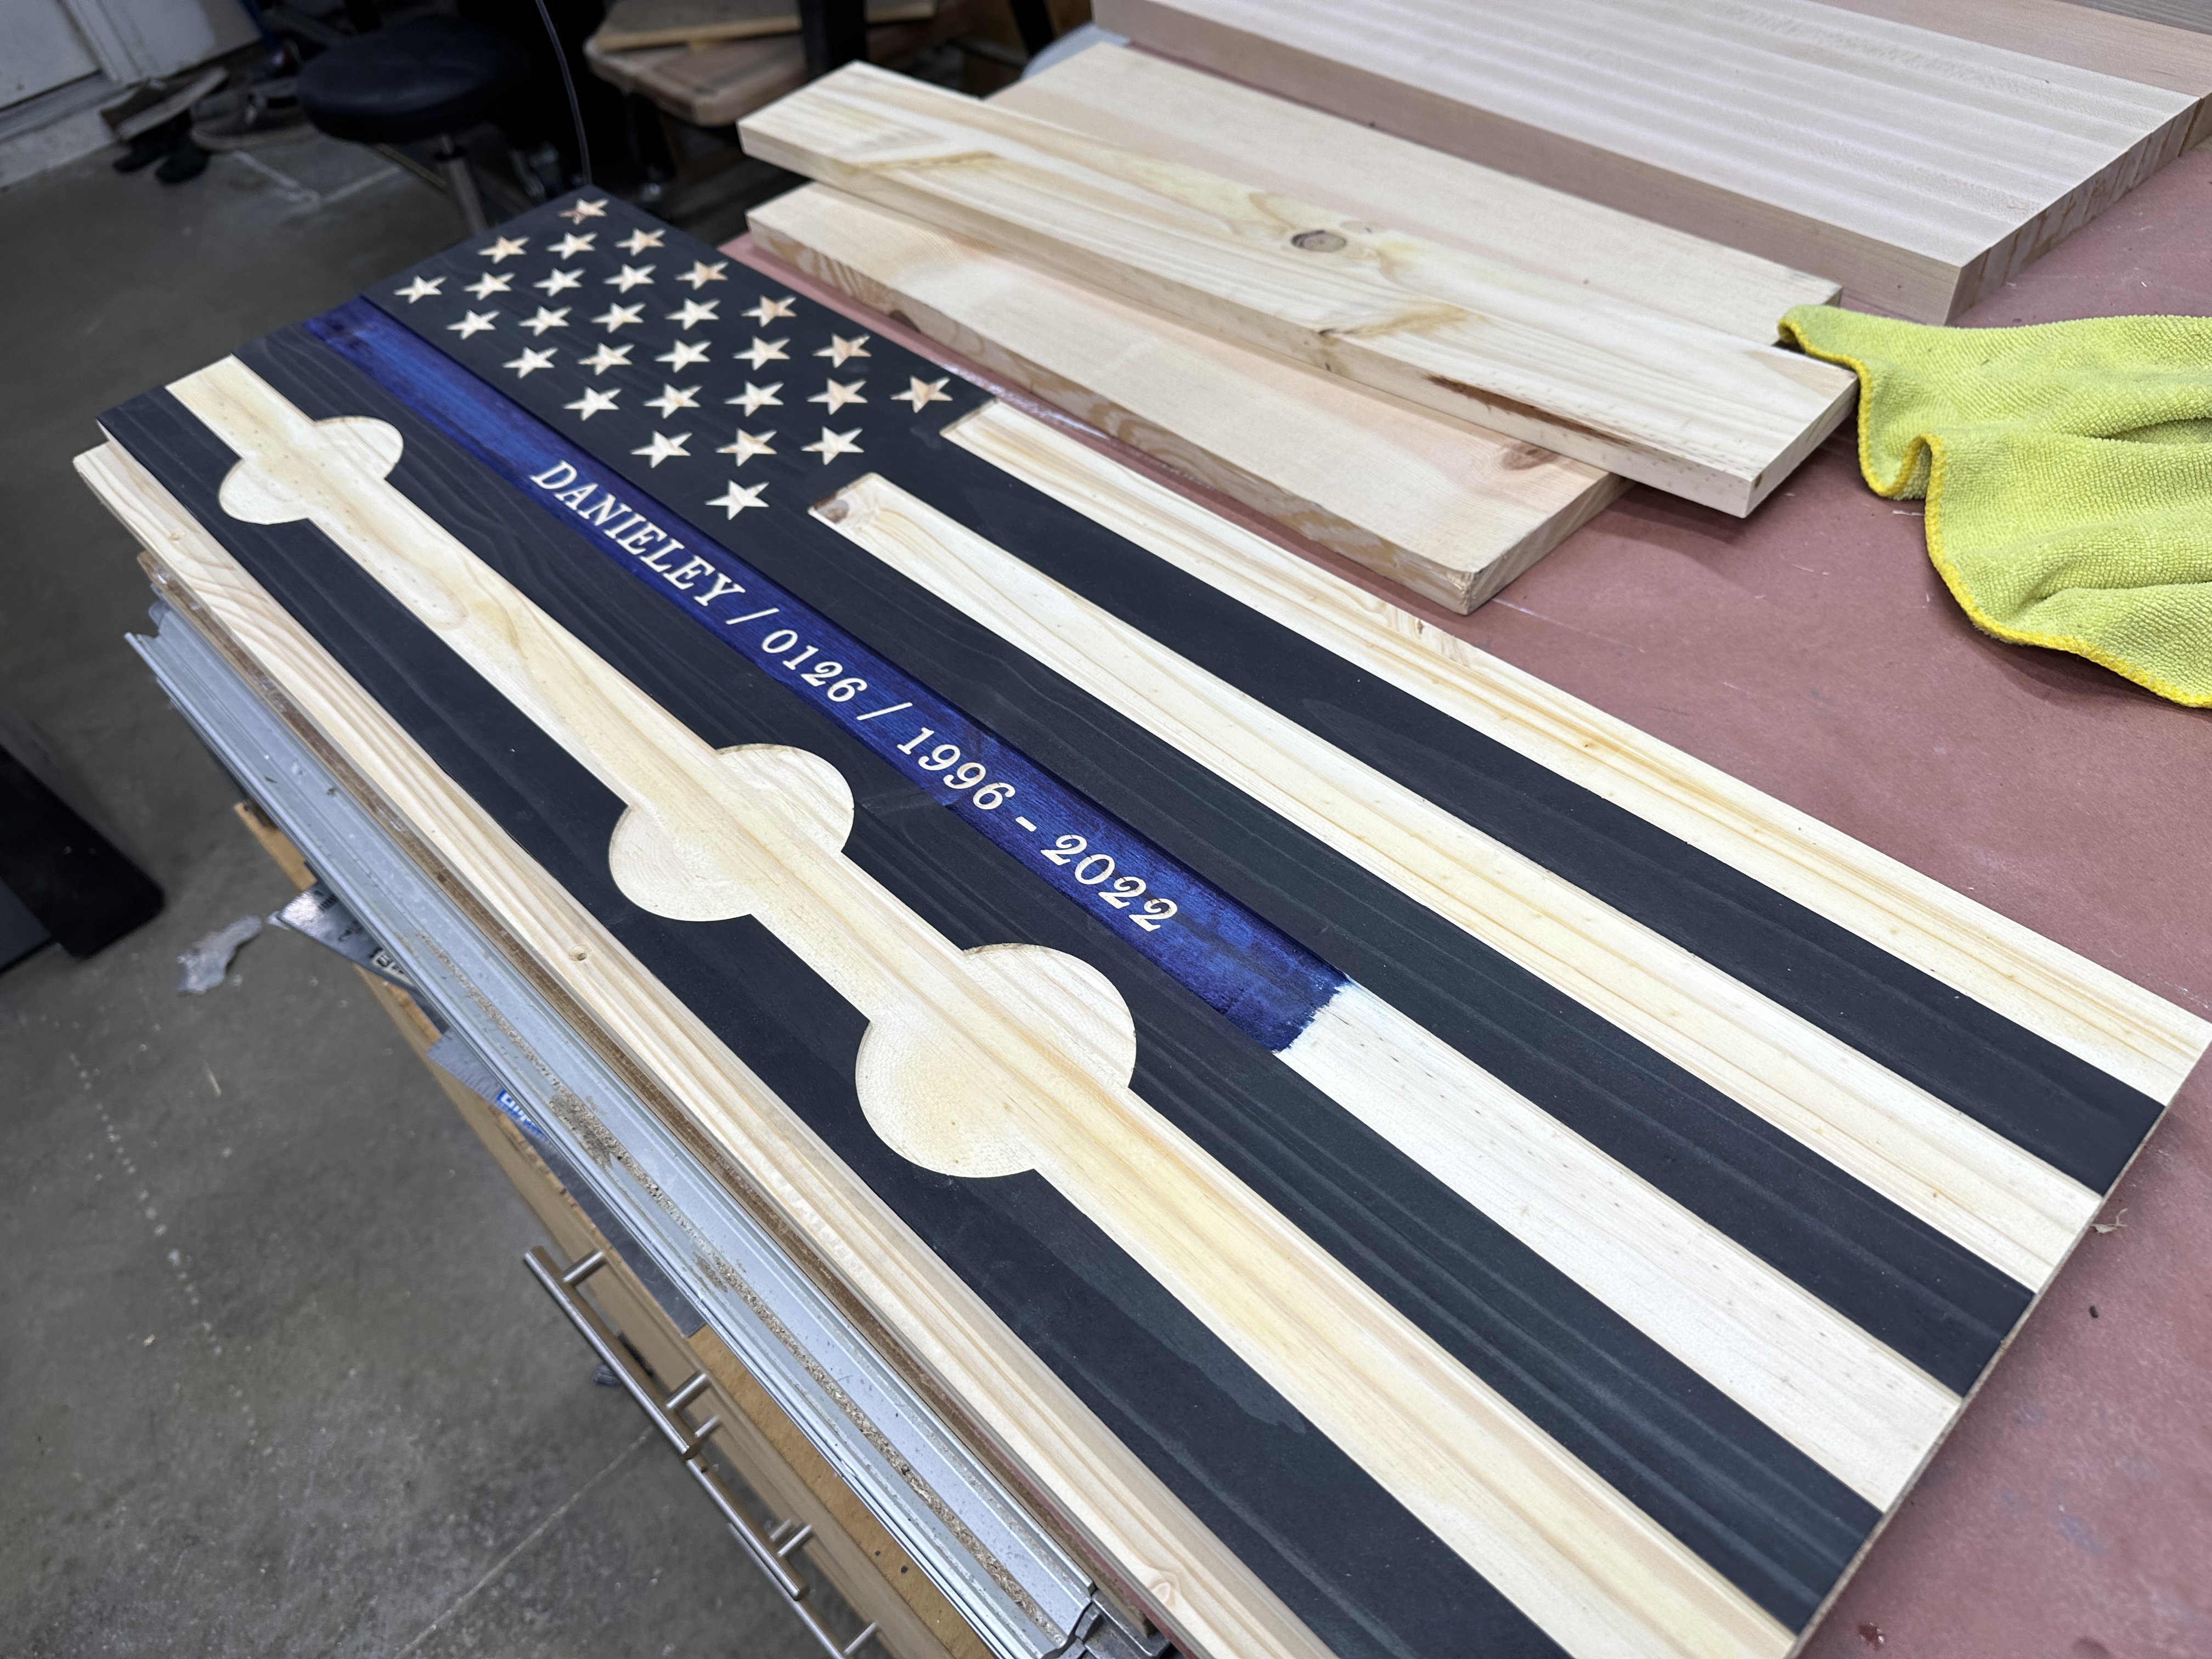
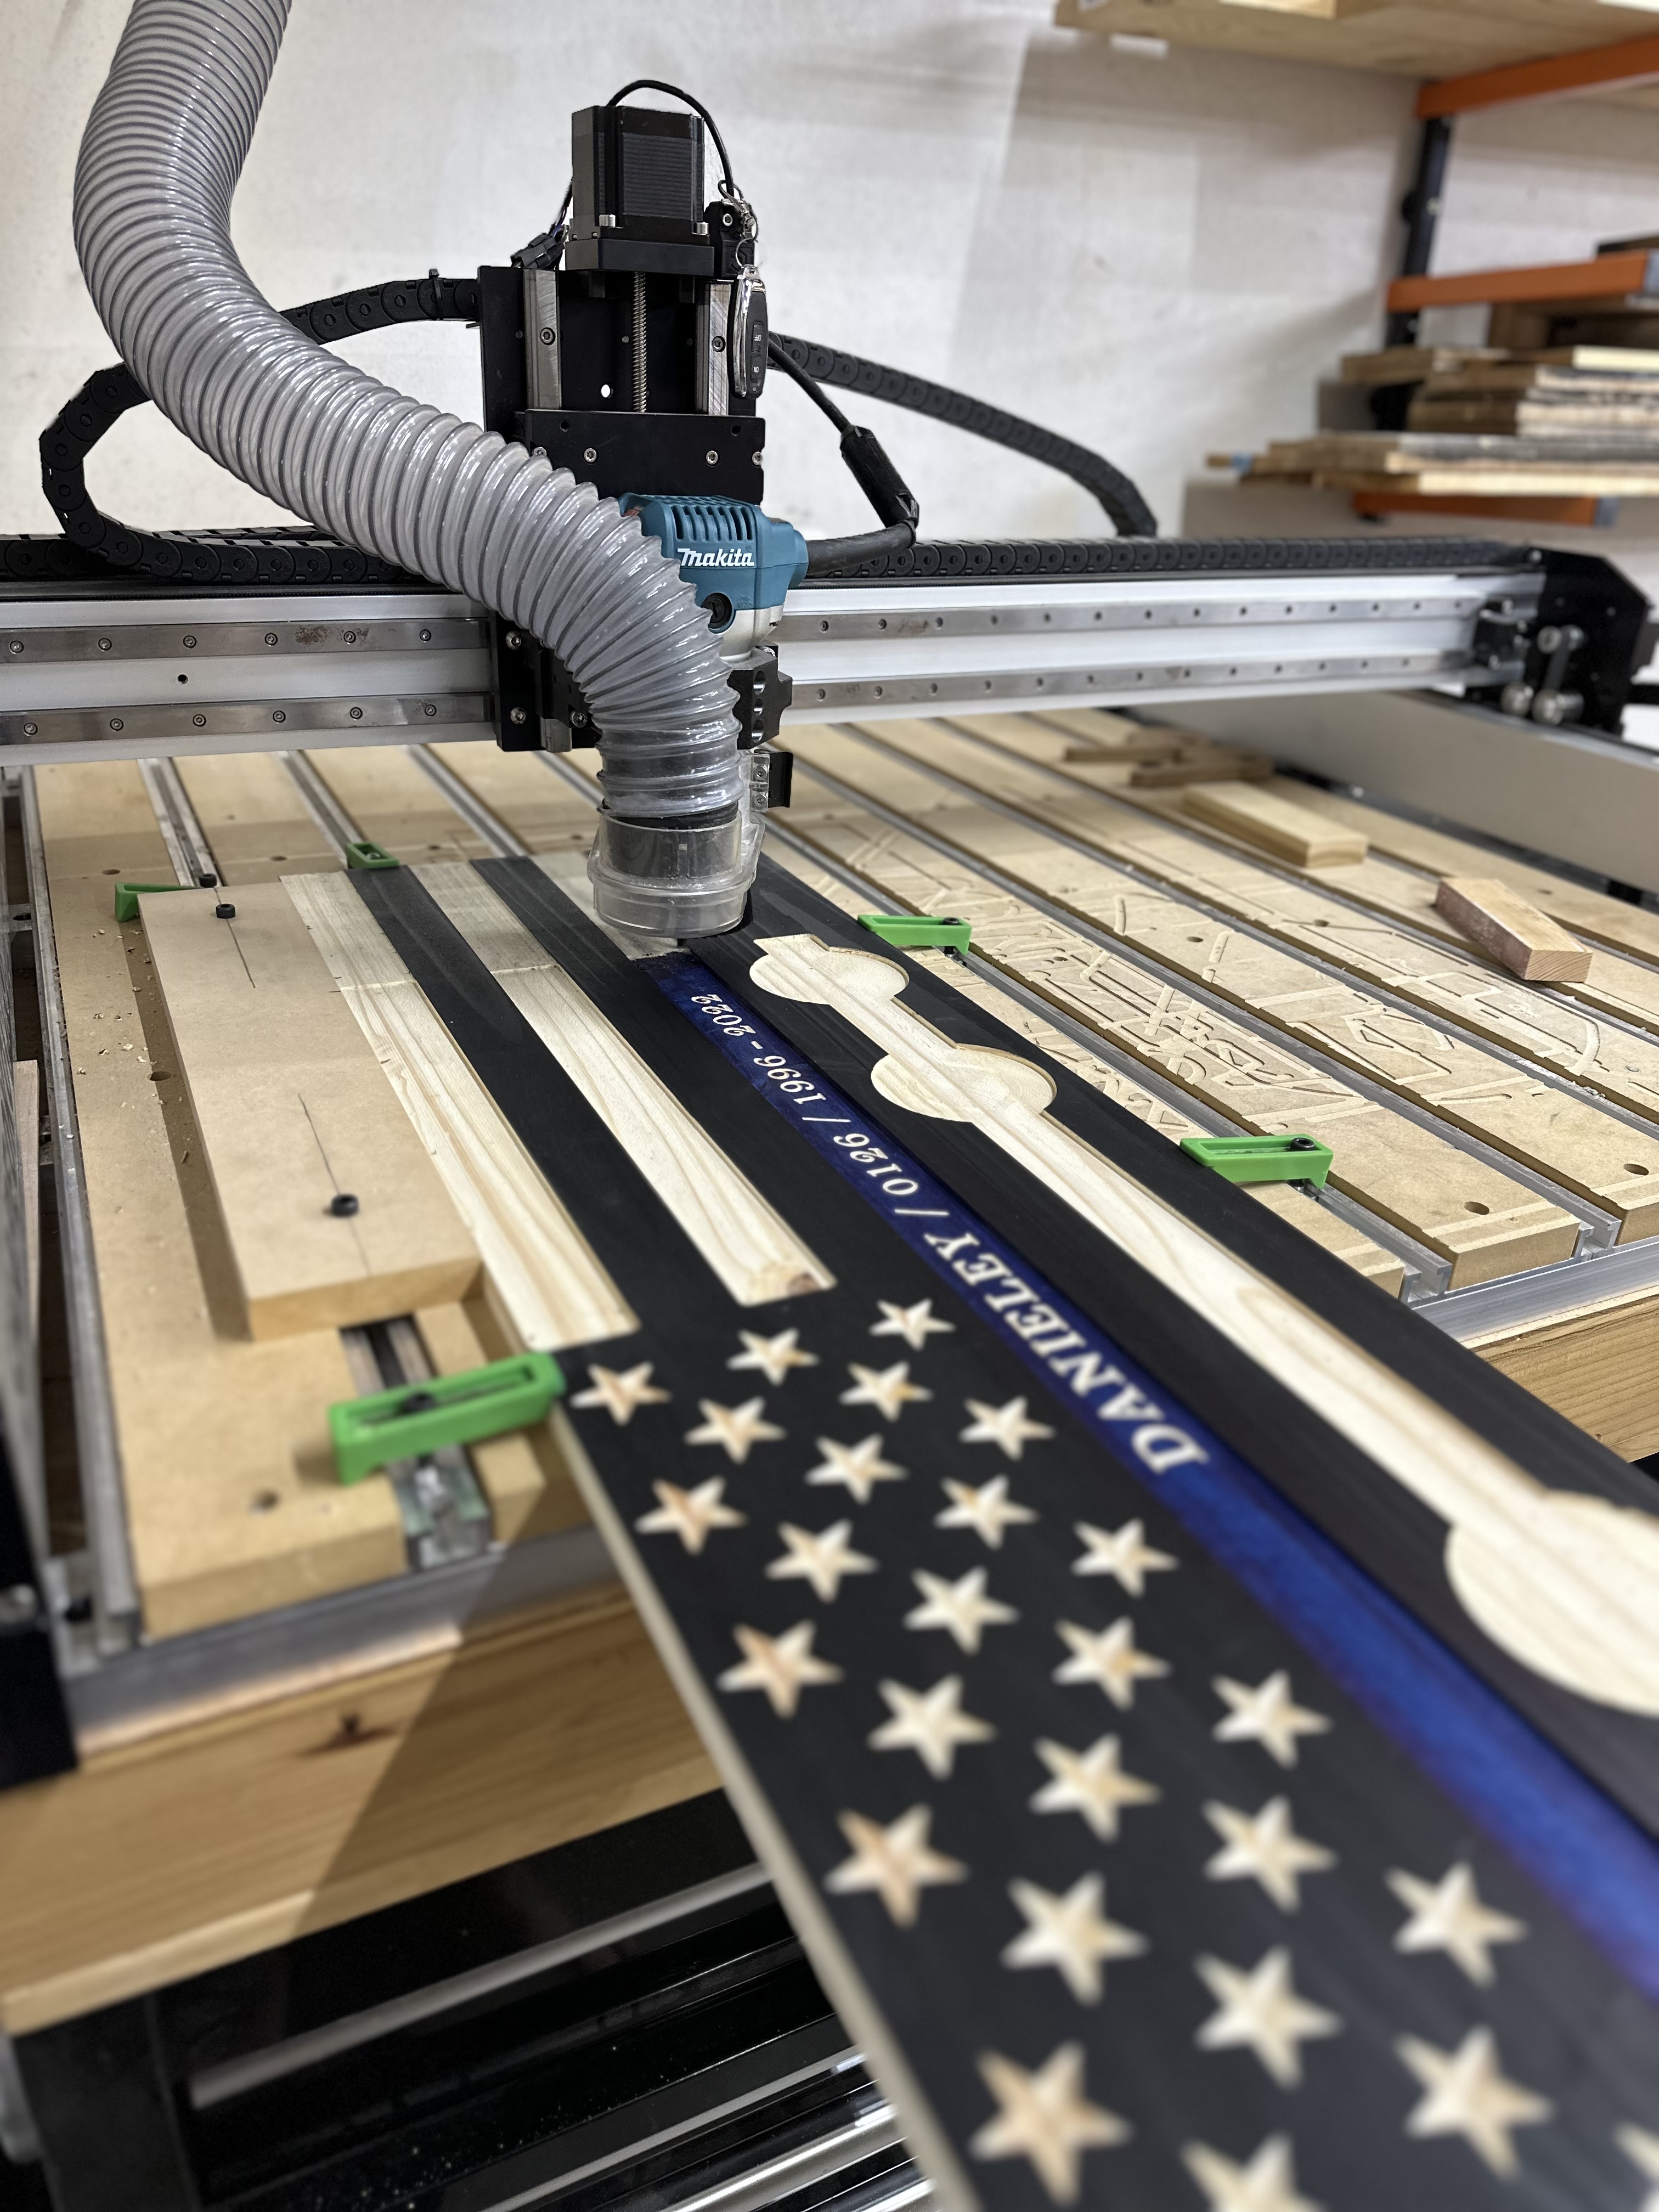
Got around to making a 37” long partial flag for a duty gear rack on my Shapeoko Pro. I made two different two paths to tile the design in CC. Worked out pretty good.