What software did you use to make the pits? I know @Caffein8ted uses Fusion 360.
I used carbide create pro for that. I started with circles then added some nodes and messed with the points. I then copied and rotated/flipped them. Then you create a 3d section that adds material for the board and a subtract for the pits. This is very long but it will show me making this board in software. How to make an interesting mancala board in carbide create - YouTube. The section where I talk about my feed/speed. Ignore that I don’t know what I am talking about and it’s not even what I used ![]()
4 Likes
That’s a very different design. Excellant.
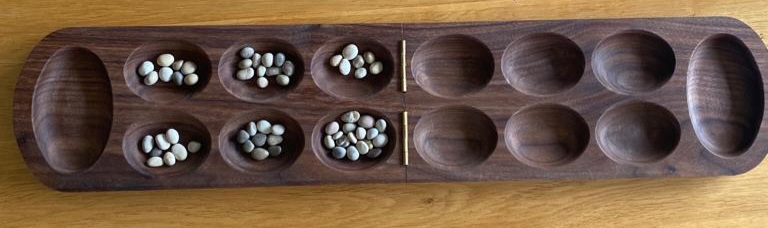
Nice. I have some more ideas when I get a chance to get out to the shop. I am looking for a unique/organic look. I like the folding aspect too store the pieces too. I have a design in mind where I turn the inside into a storage area but we will see…
I am having a hard time seeing the stones on my phone this morning. What did you use?
They’re stone from the ground outside.
1 Like
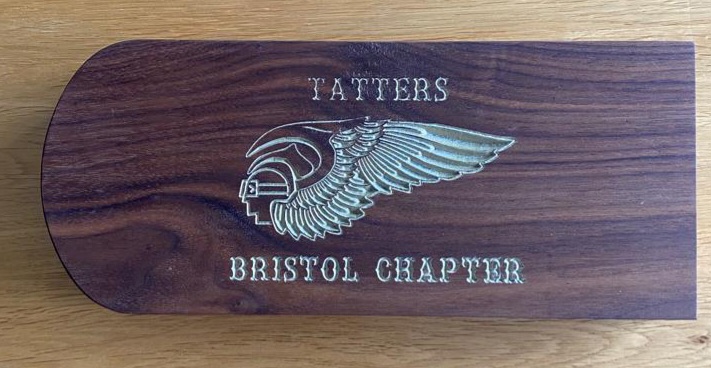
Chris,
Awesome!
The vector’s built into Carbide Create’s library, it’s in the US Armed Forces section under “USMC Seal”.
I had my best results in aromatic cedar using the #302 V-Bit at a depth of 0.01".
Happy carving!
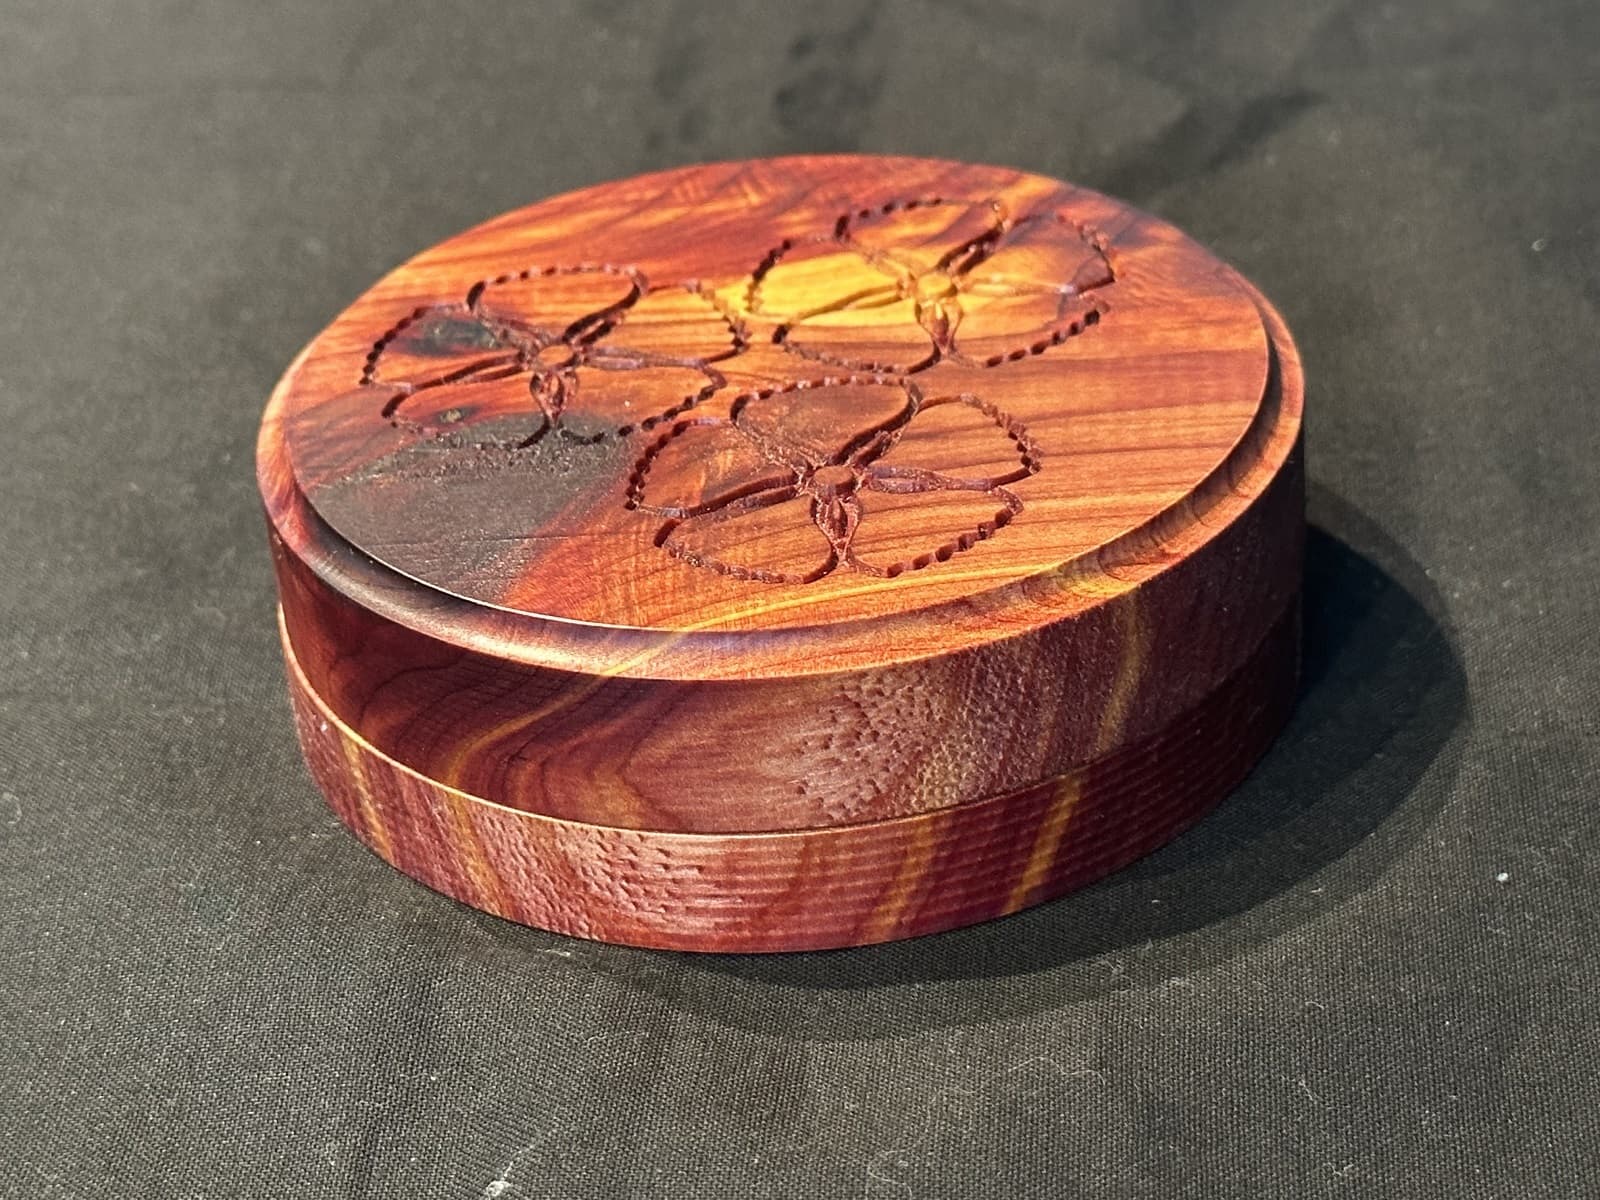
This 4" aromatic cedar box gets its coloration from several coats of butcher block oil. The round bevel on the lid is my favorite part of the design.
For carving the top of the lid, I used a technique I’d seen in various YouTube videos and taped the two halves together so I could tape the base down and still bevel the top of the lid.
12 Likes
Pop the lens out of your glasses where the good eye is. You wont need those glasses again!
after seeing how HOA’s treated friends of mine I have always made sure to never live in one. if anyone ever tries to start one in my neighborhood I will be that guy who does not join.
3 Likes
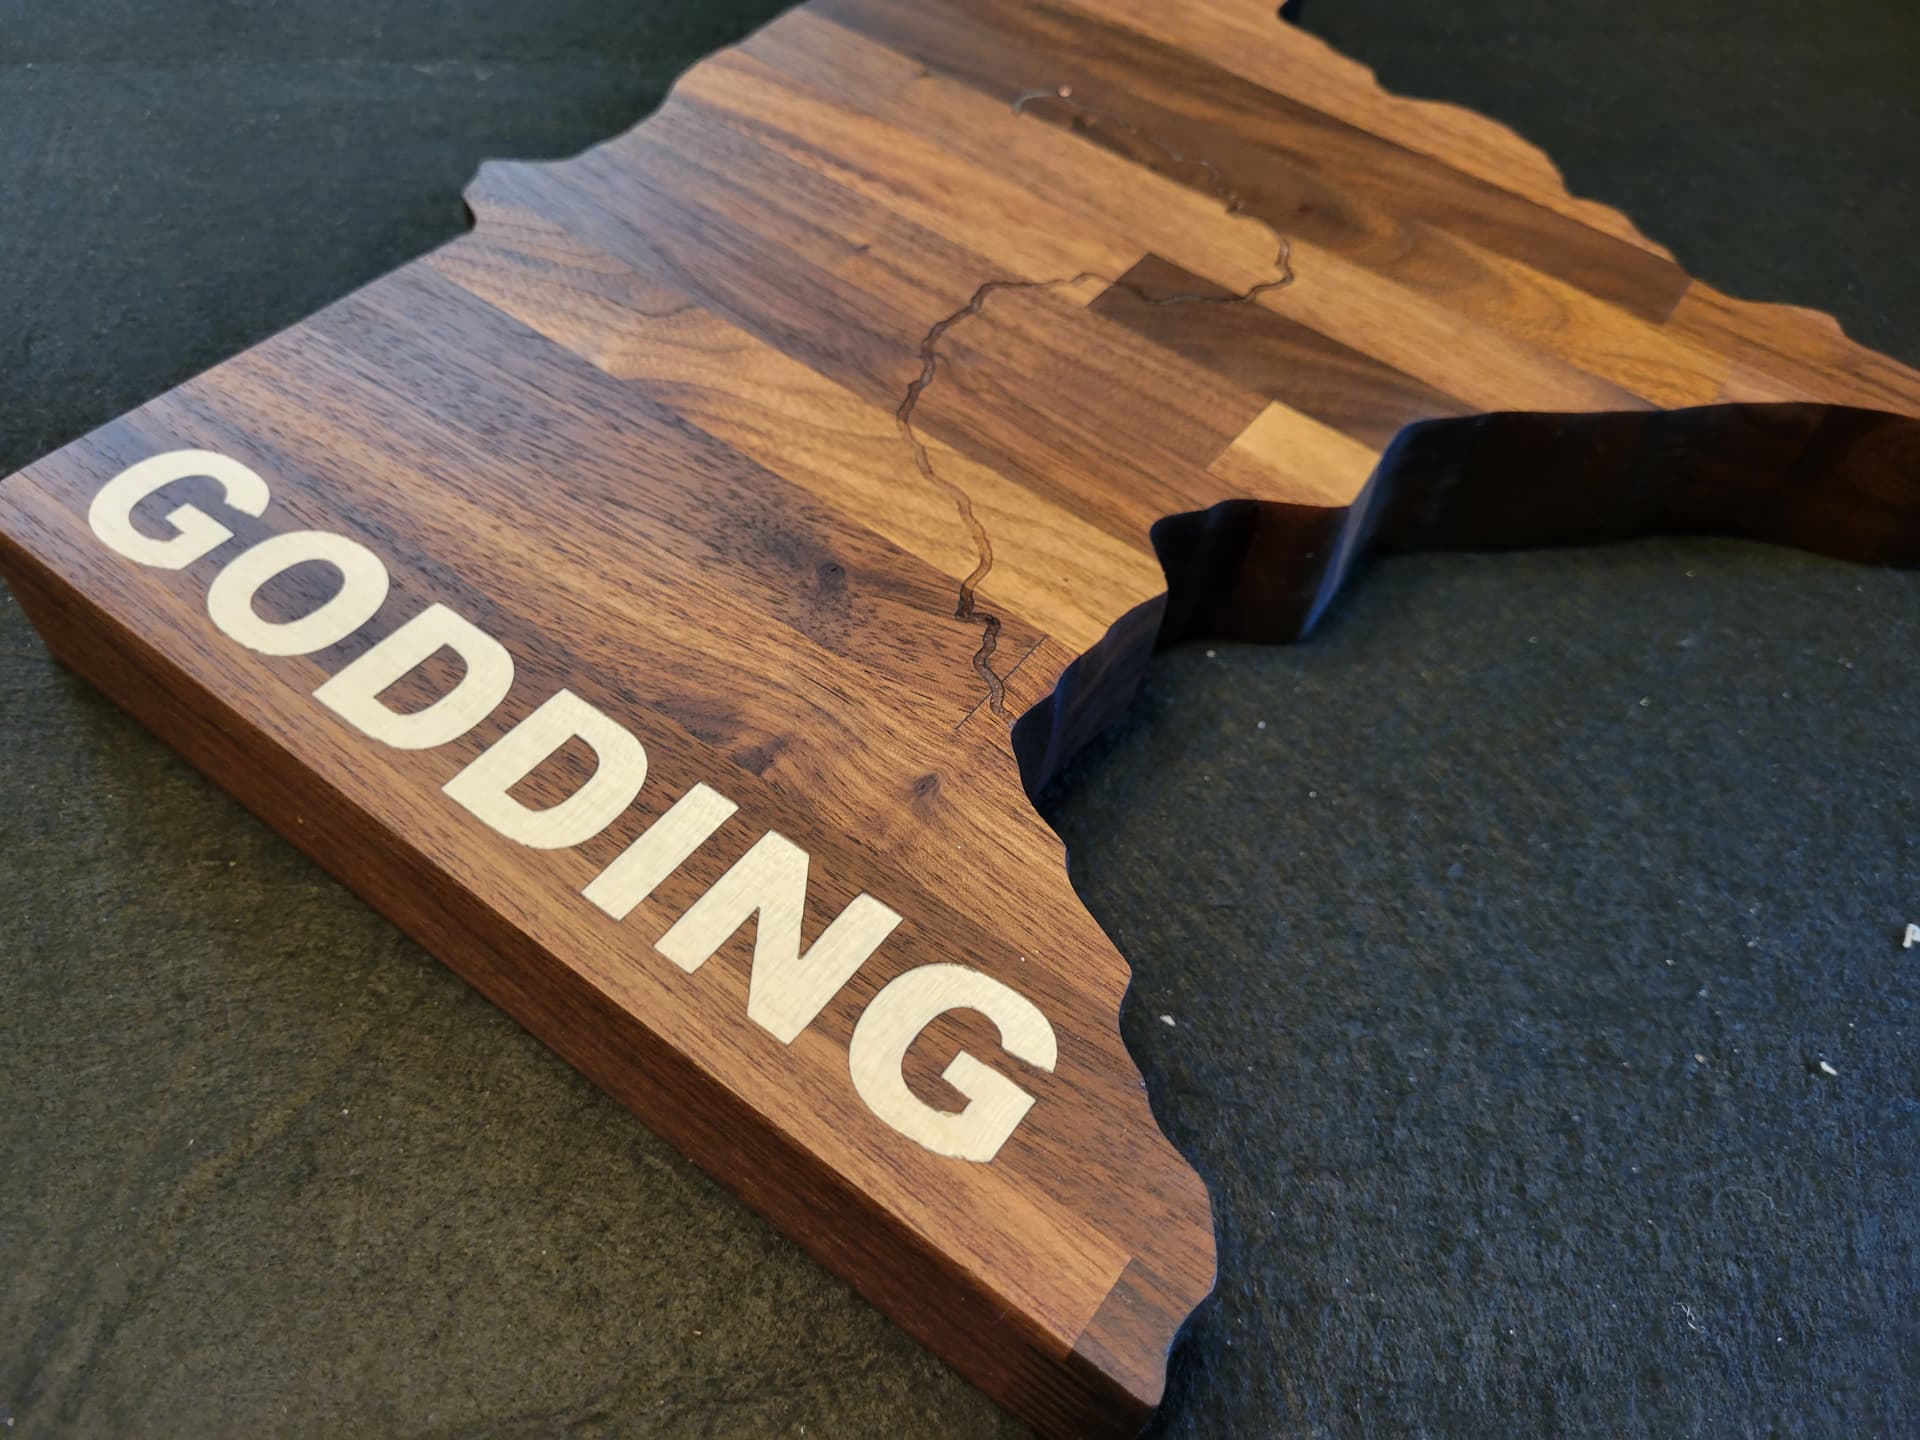
I made a little sign for the in-laws we are heading up to visit for the whole month of July. That sadly means no machine time for me for a while, but I am bringing my new laptop with plans to do some design work while gone. I really want to experiment with 2 sided and more 3D work. I will be working remotely part of the time up there but hopefully have enough down time to design something as well.
This was my first attempt at stacked text. I originally had the kid’s birthdays on the smaller signs as well but after two tries I was t happy with I just skipped it. The smaller signs are 2” tall and the larger is 5ish.
We will link them with chains.
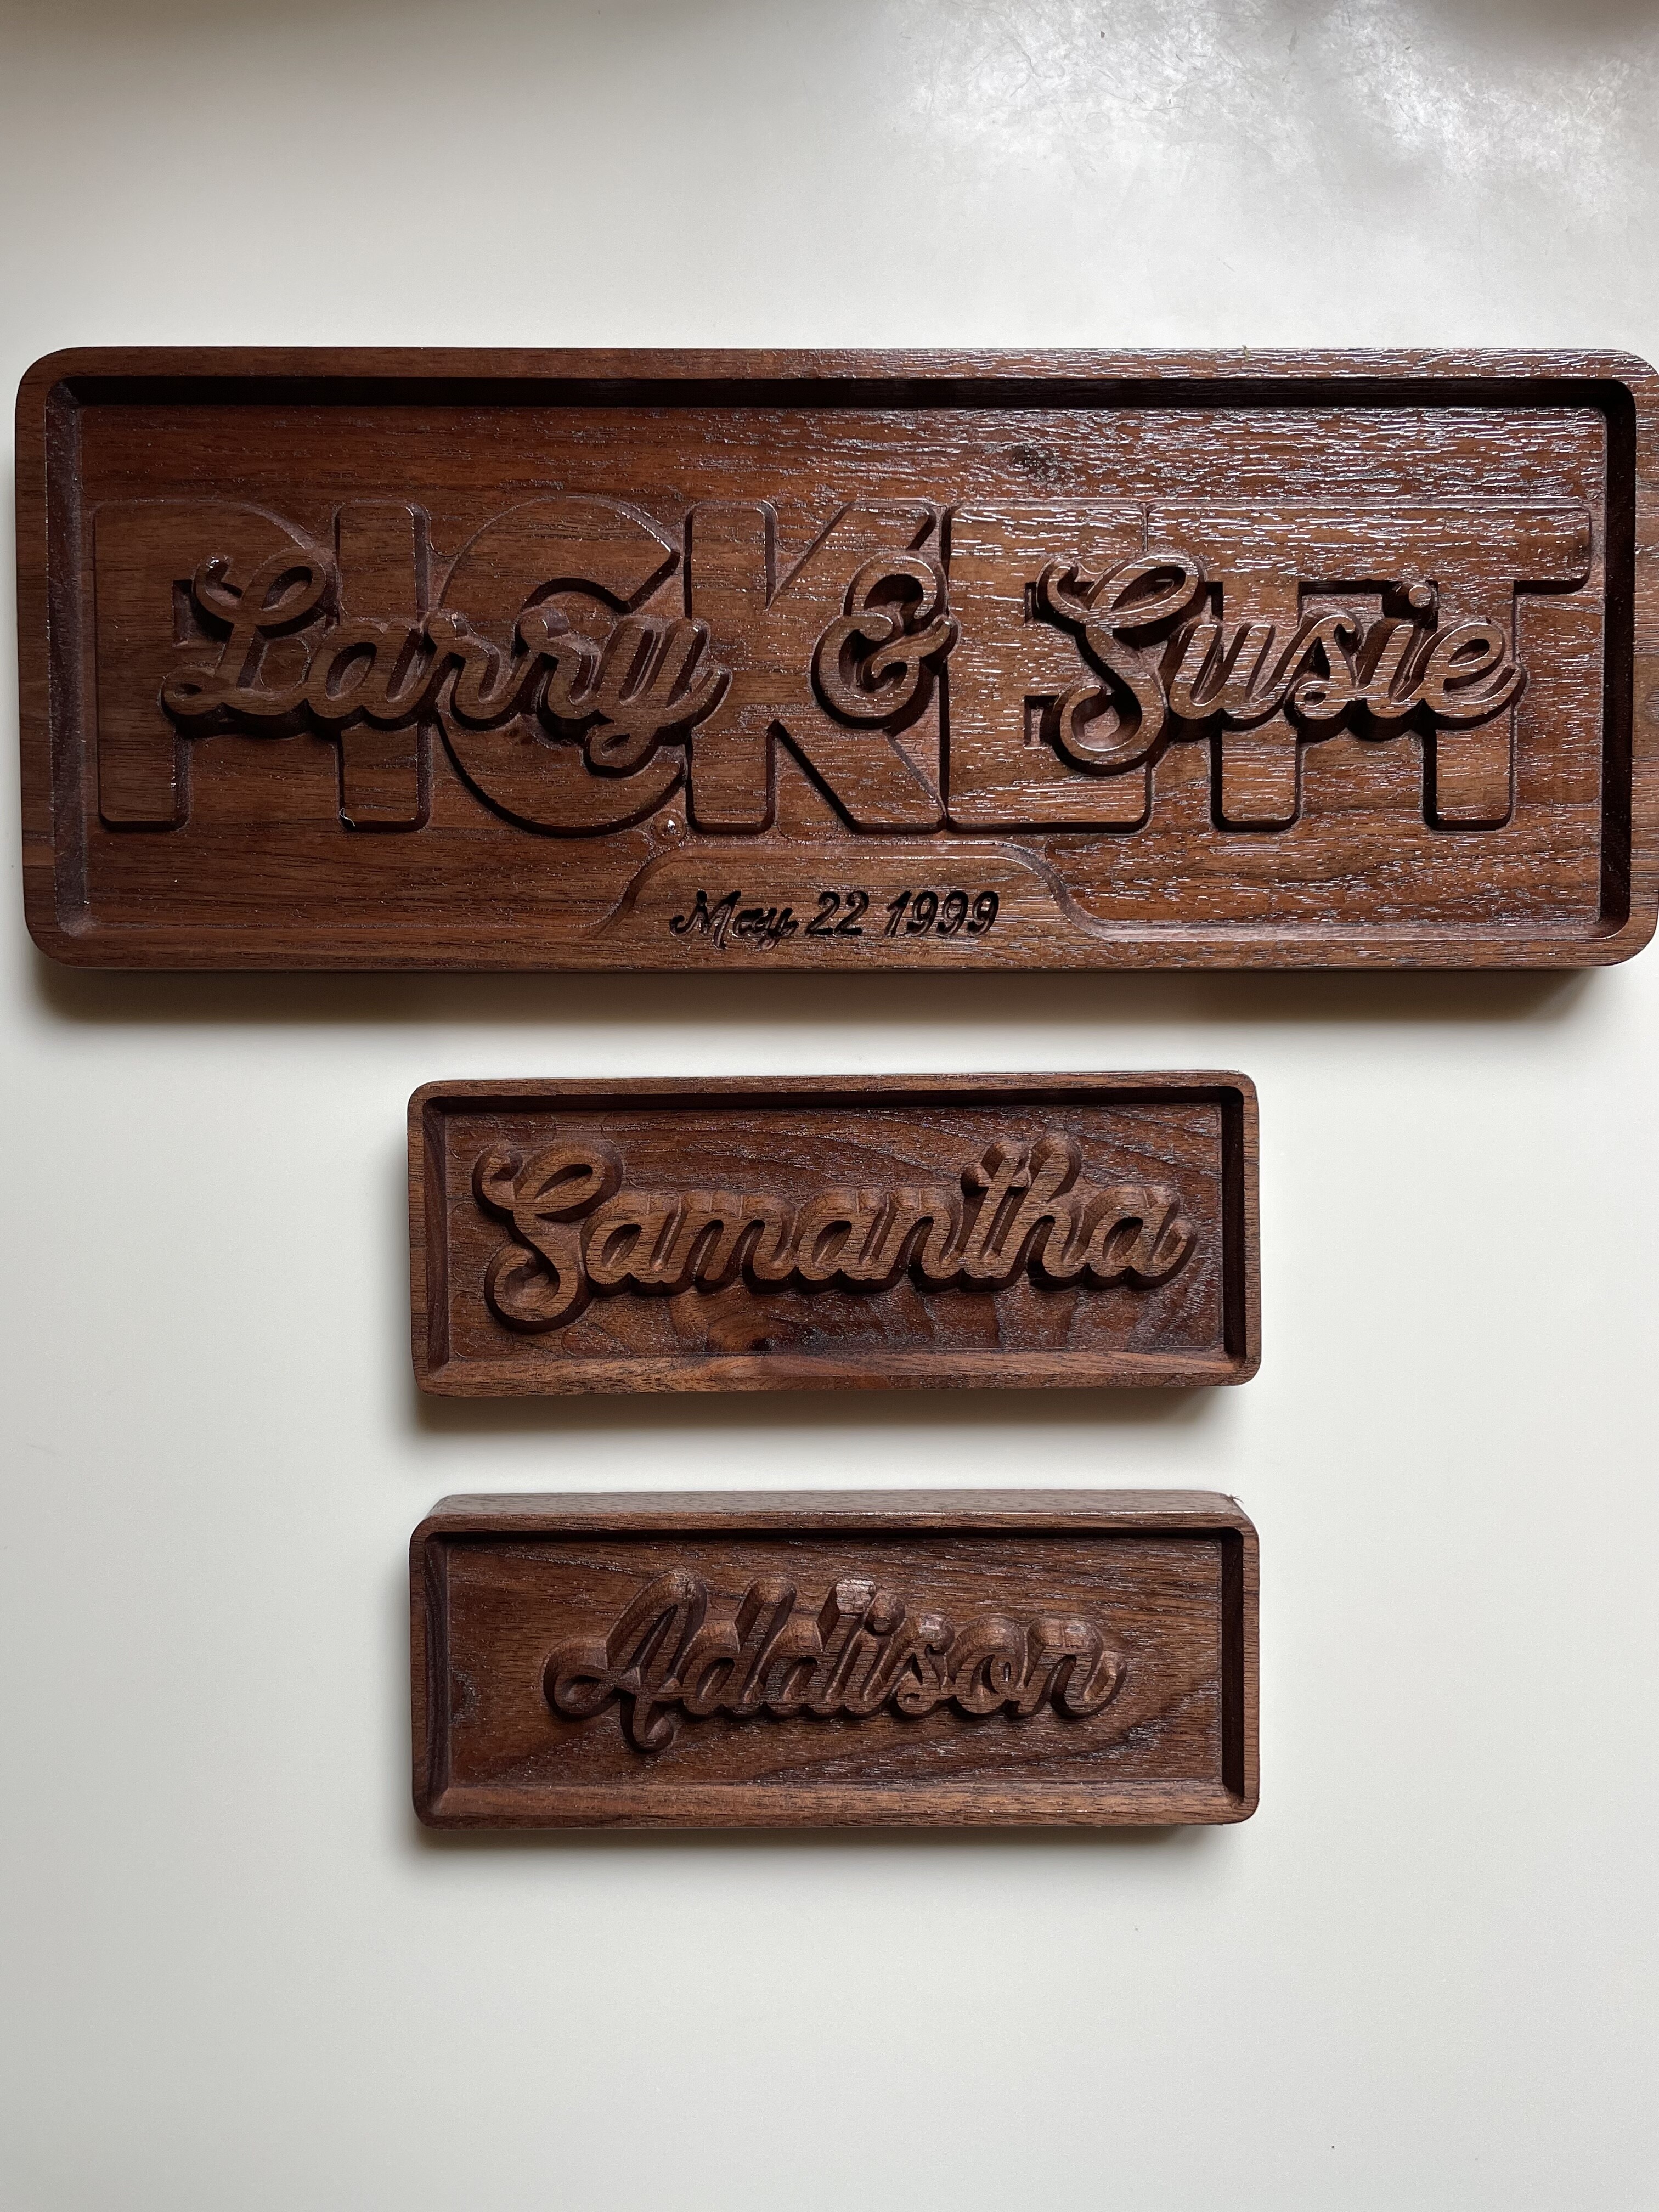
I probably should have made the last name thicker. It is cut at .2 for a base and the upper part at .1.
15 Likes
I think it is proportioned about right. I’m tired of stacked text that is made so the top text is almost unreadable. +1
3 Likes
I agree with Tex. That looks good. Everything is definitely readable. I’ve got a couple of signs lined up that I’ll with stacked text. It will be my first attempt. Hopefully it’s close to being as nice as yours.
Thanks. If I had more time I would have gotten the ones with the kids dates to work and spent more time on finishing. This is just a couple of coats of shellac.
I didn’t want to show up at the in-laws empty handed.
1 Like
Everyone posts cool stuff. I just make circles. I made pair for a client’s Wharfedale drivers.
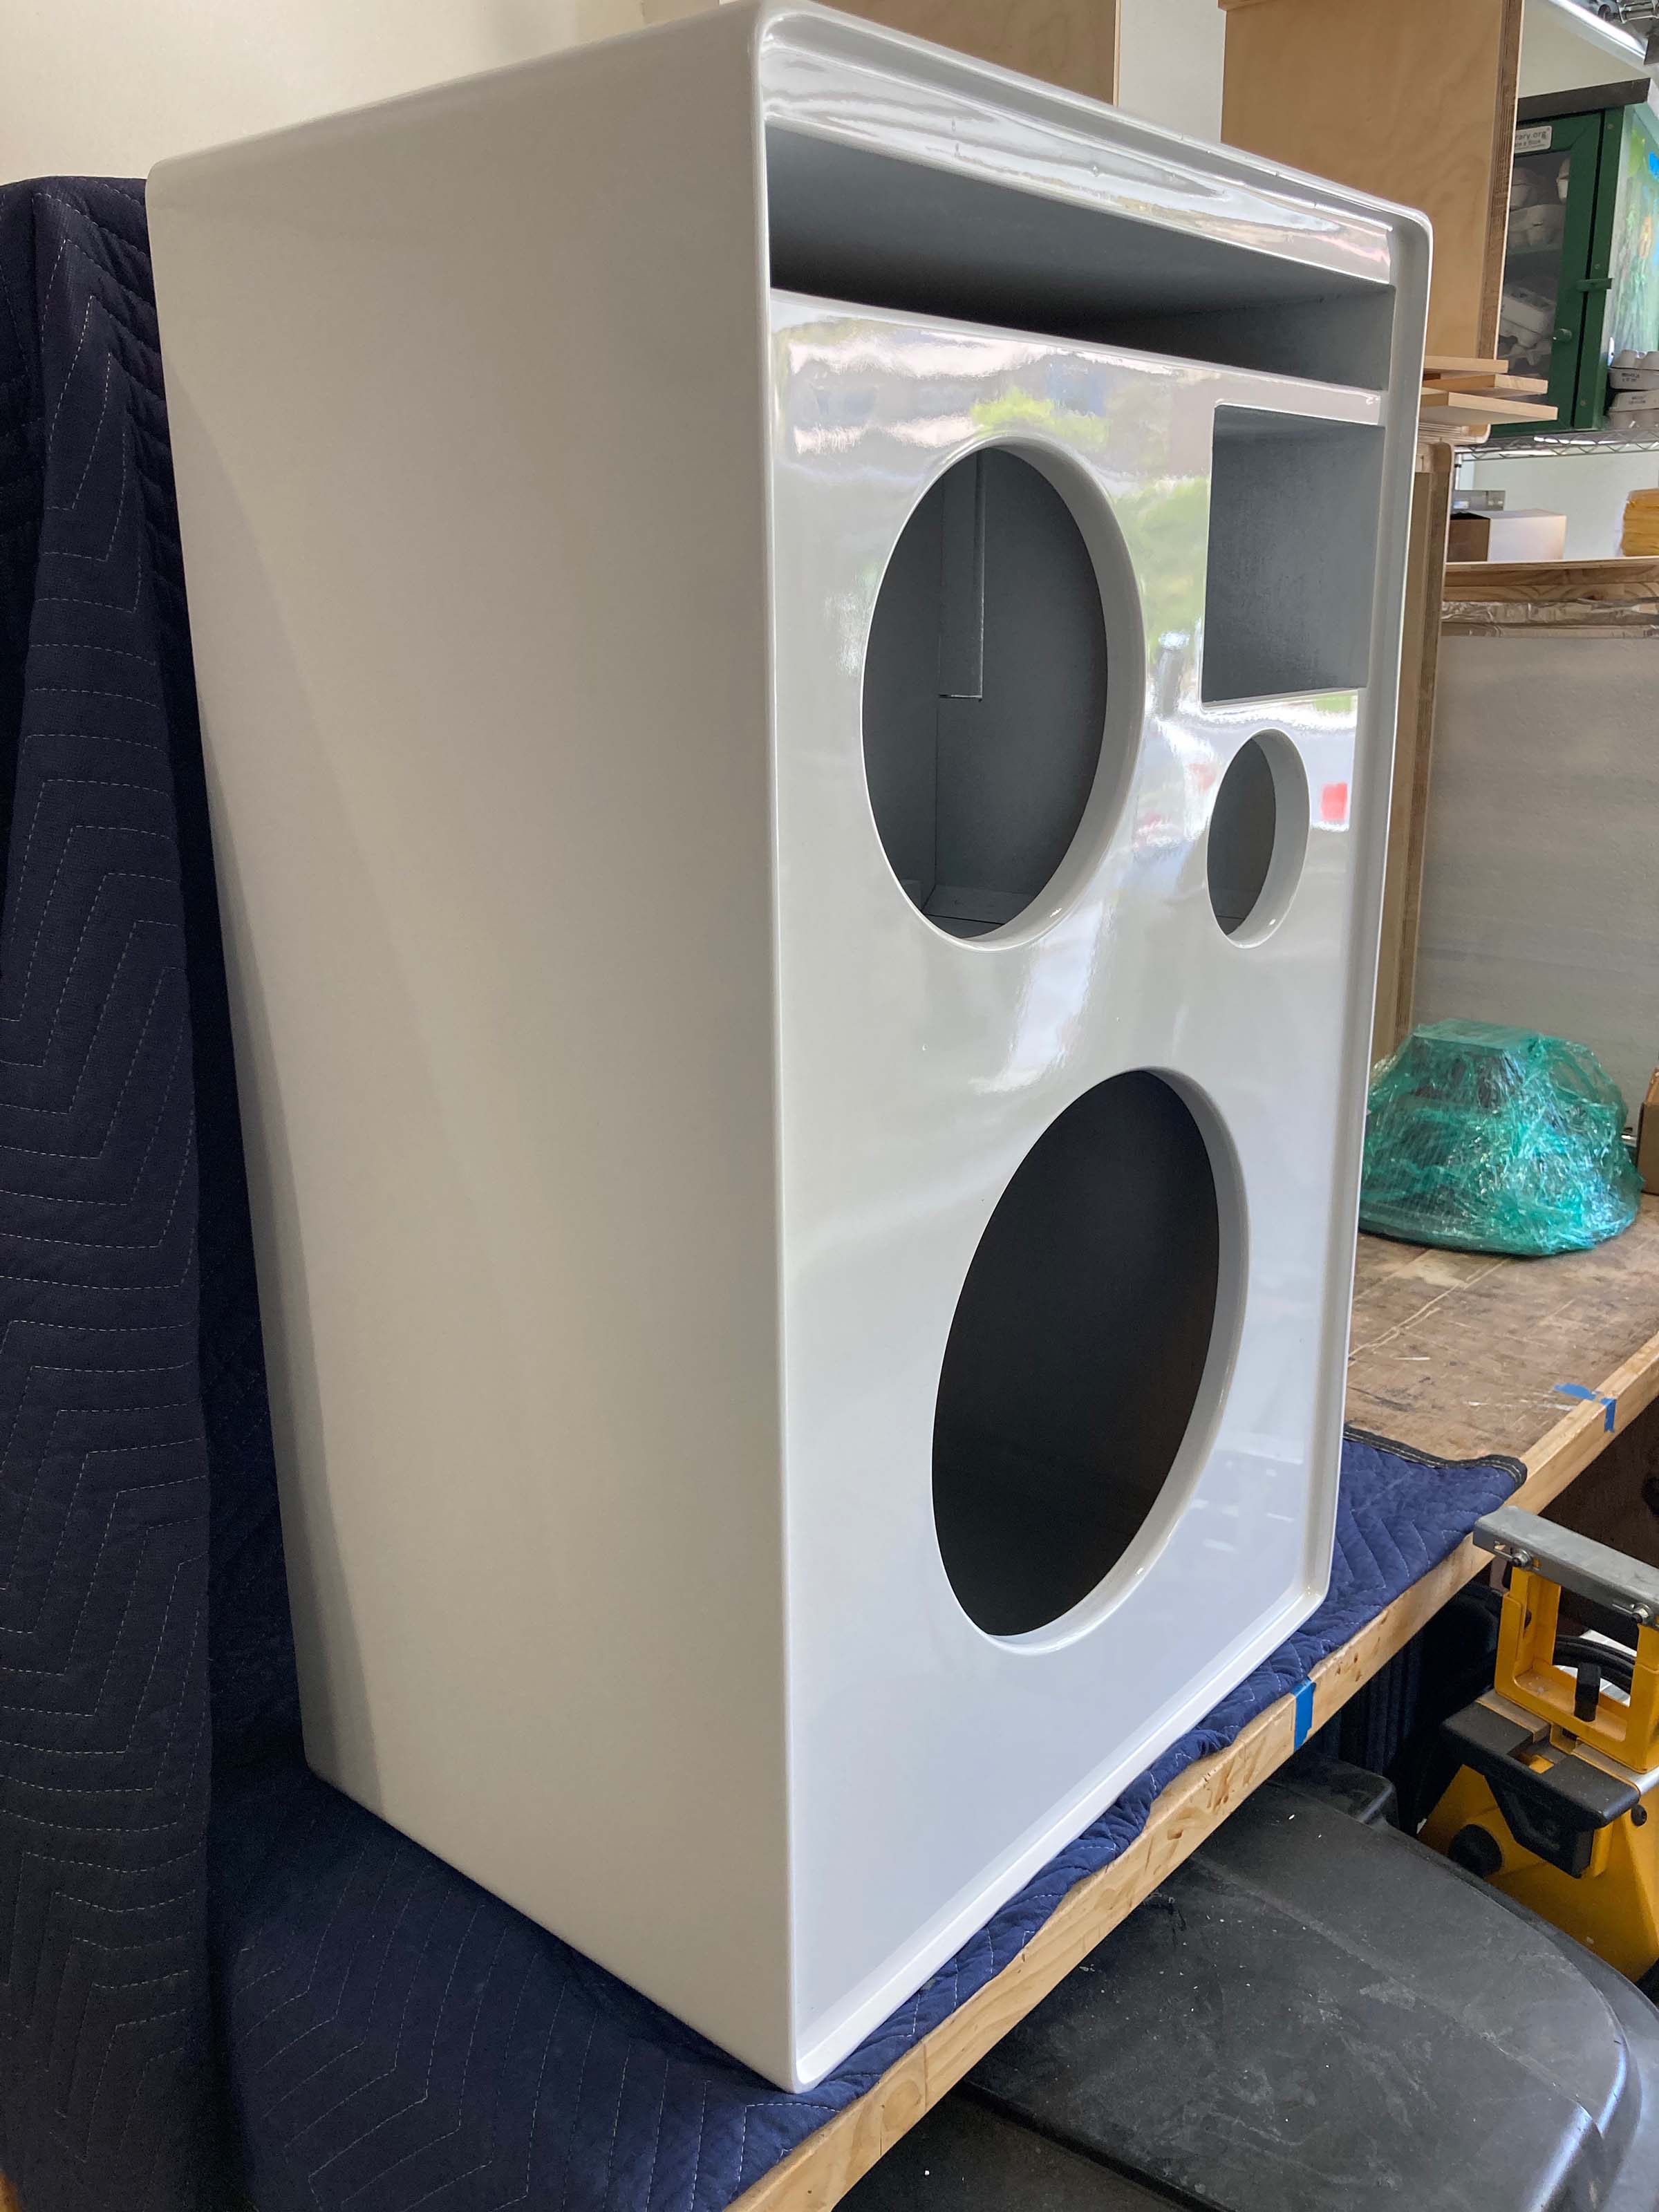
video here: DIY: Wharfedale Speaker Cabinets - YouTube
18 Likes
This reminds me of Lord of the Rings for some reason!
1 Like
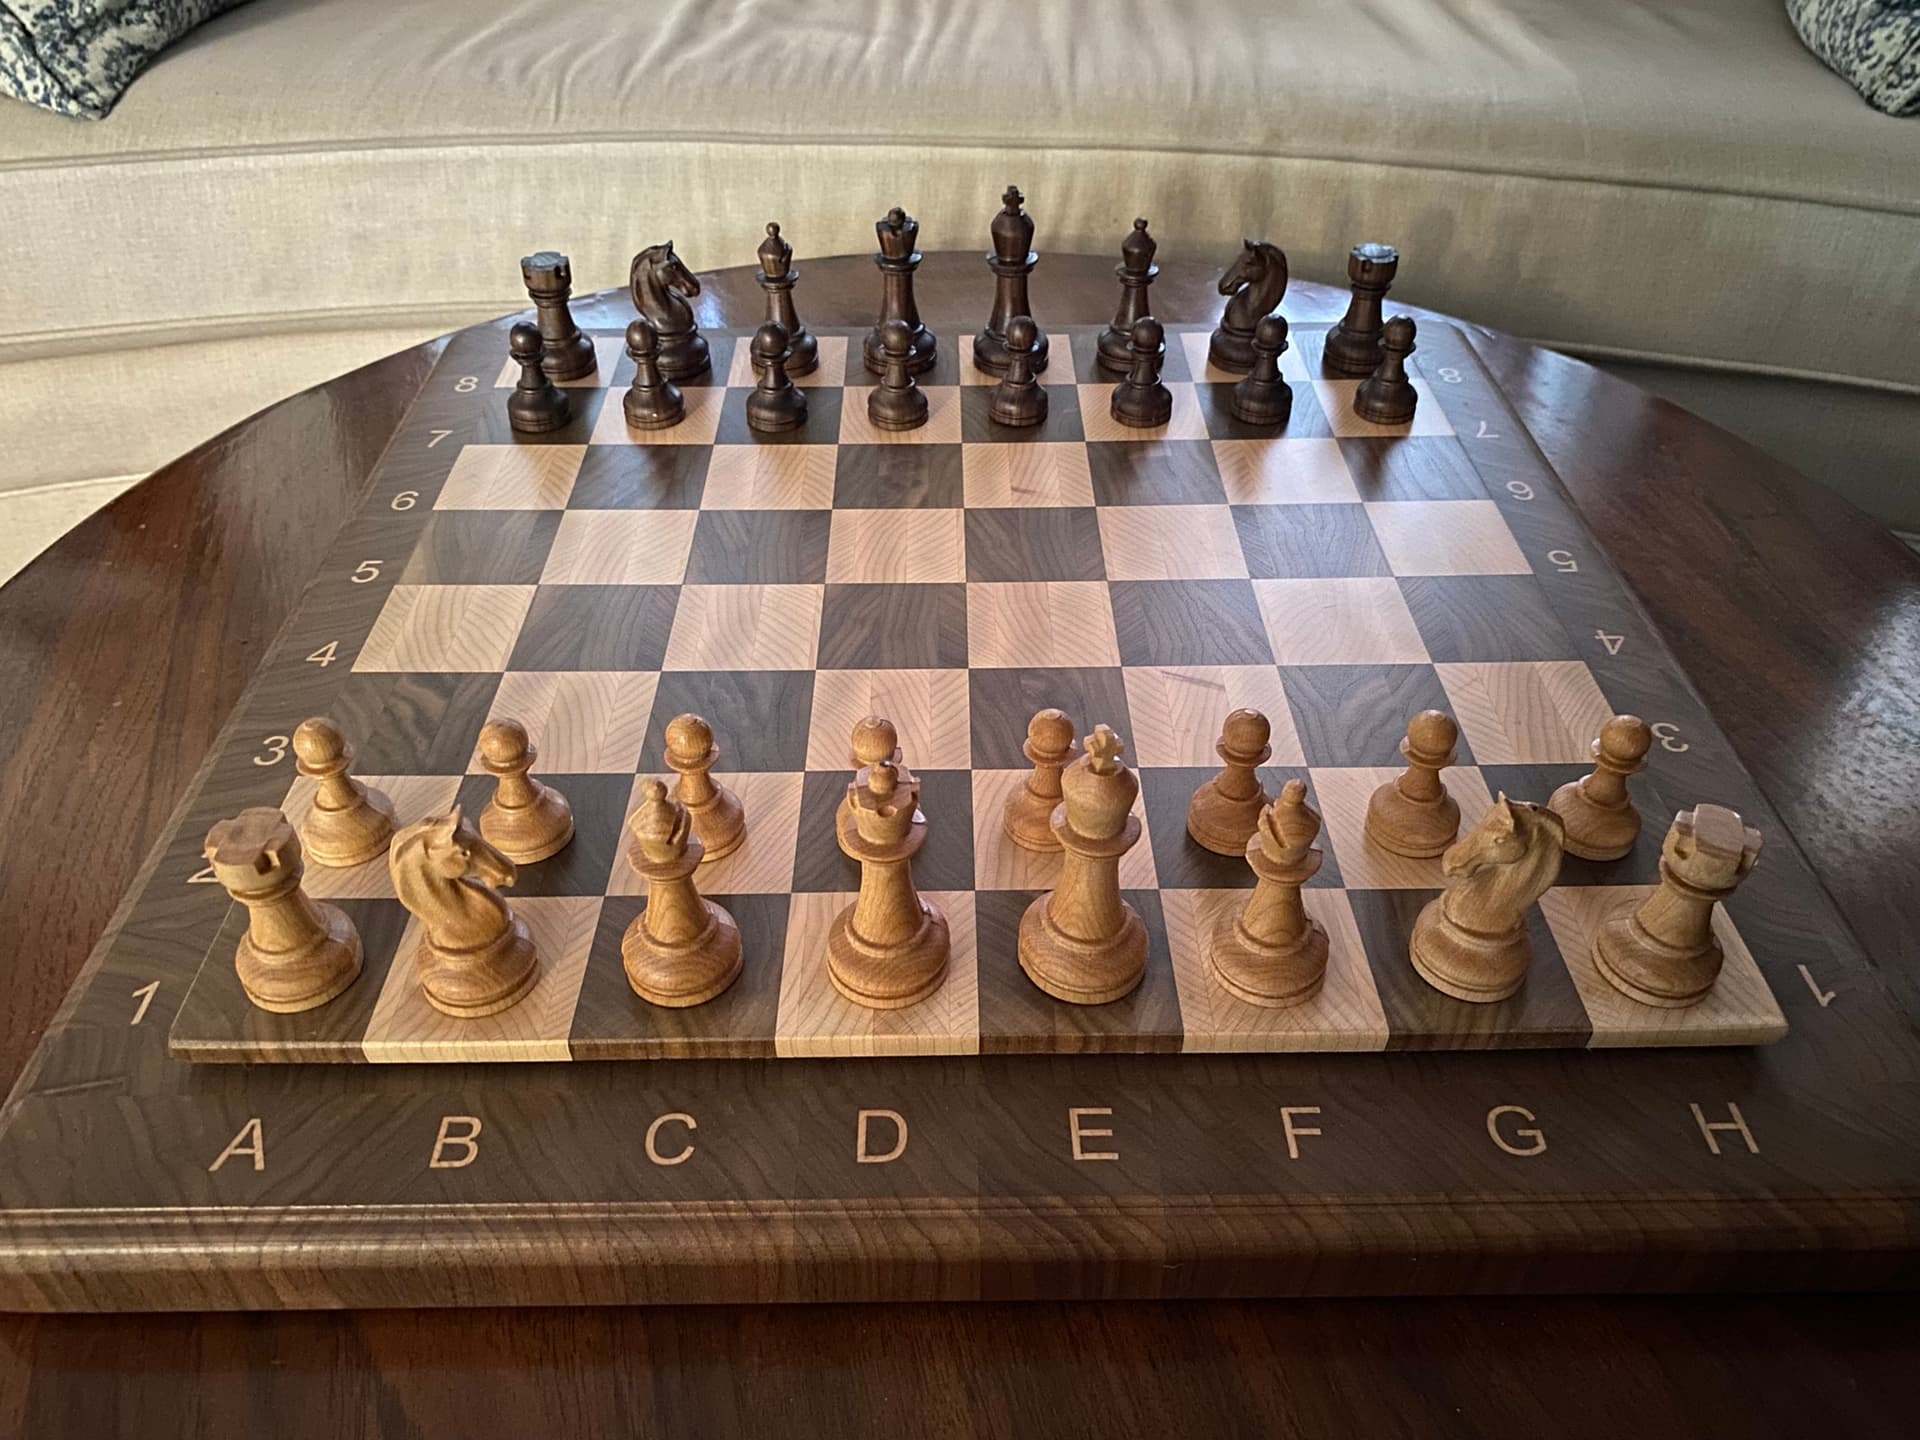
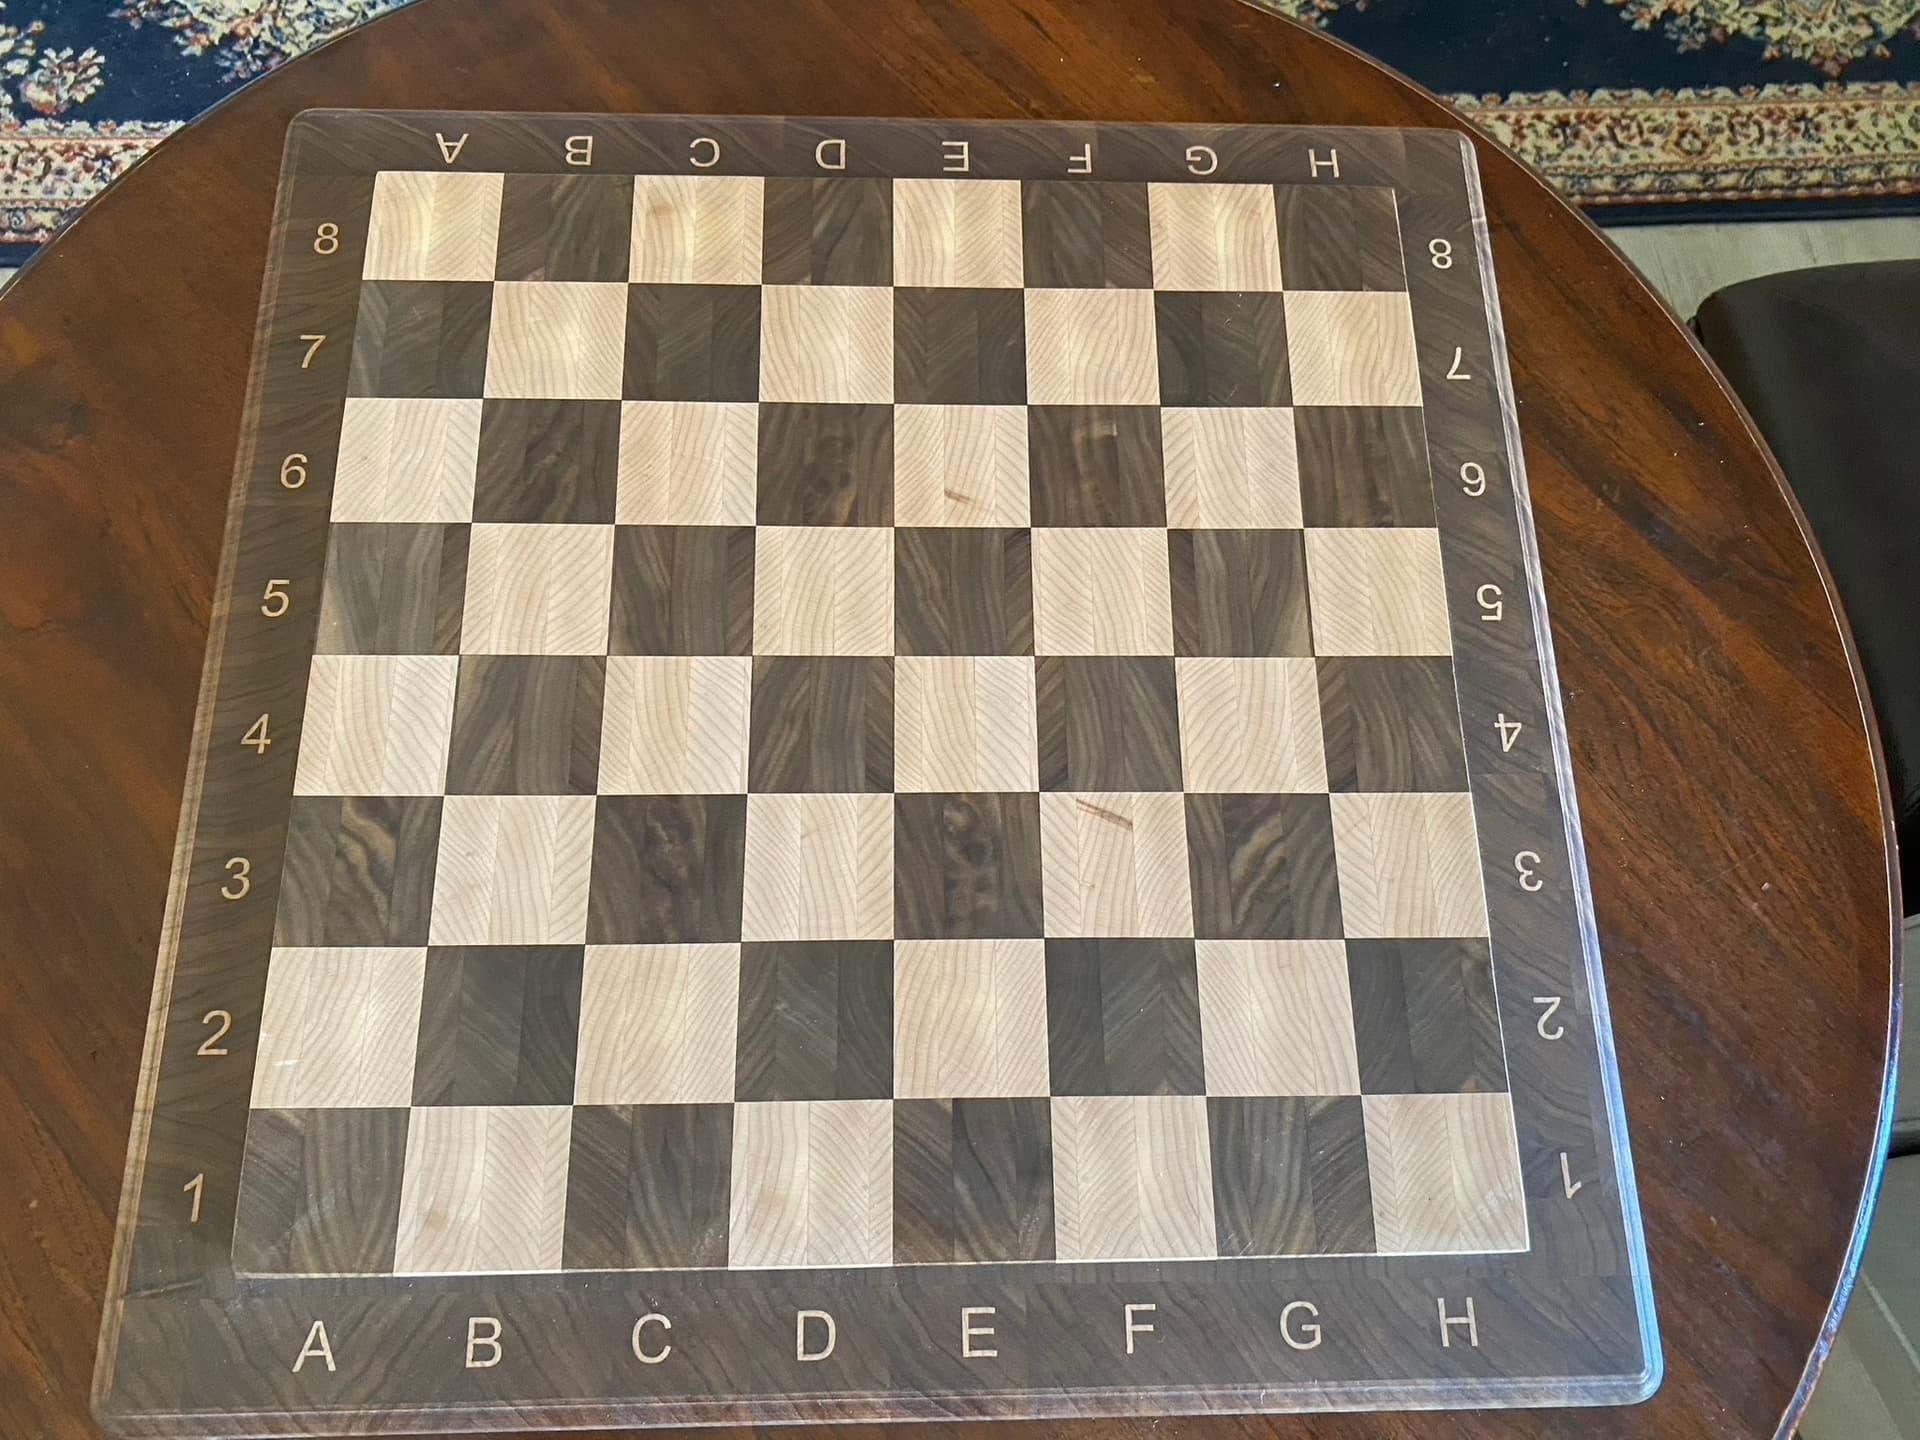
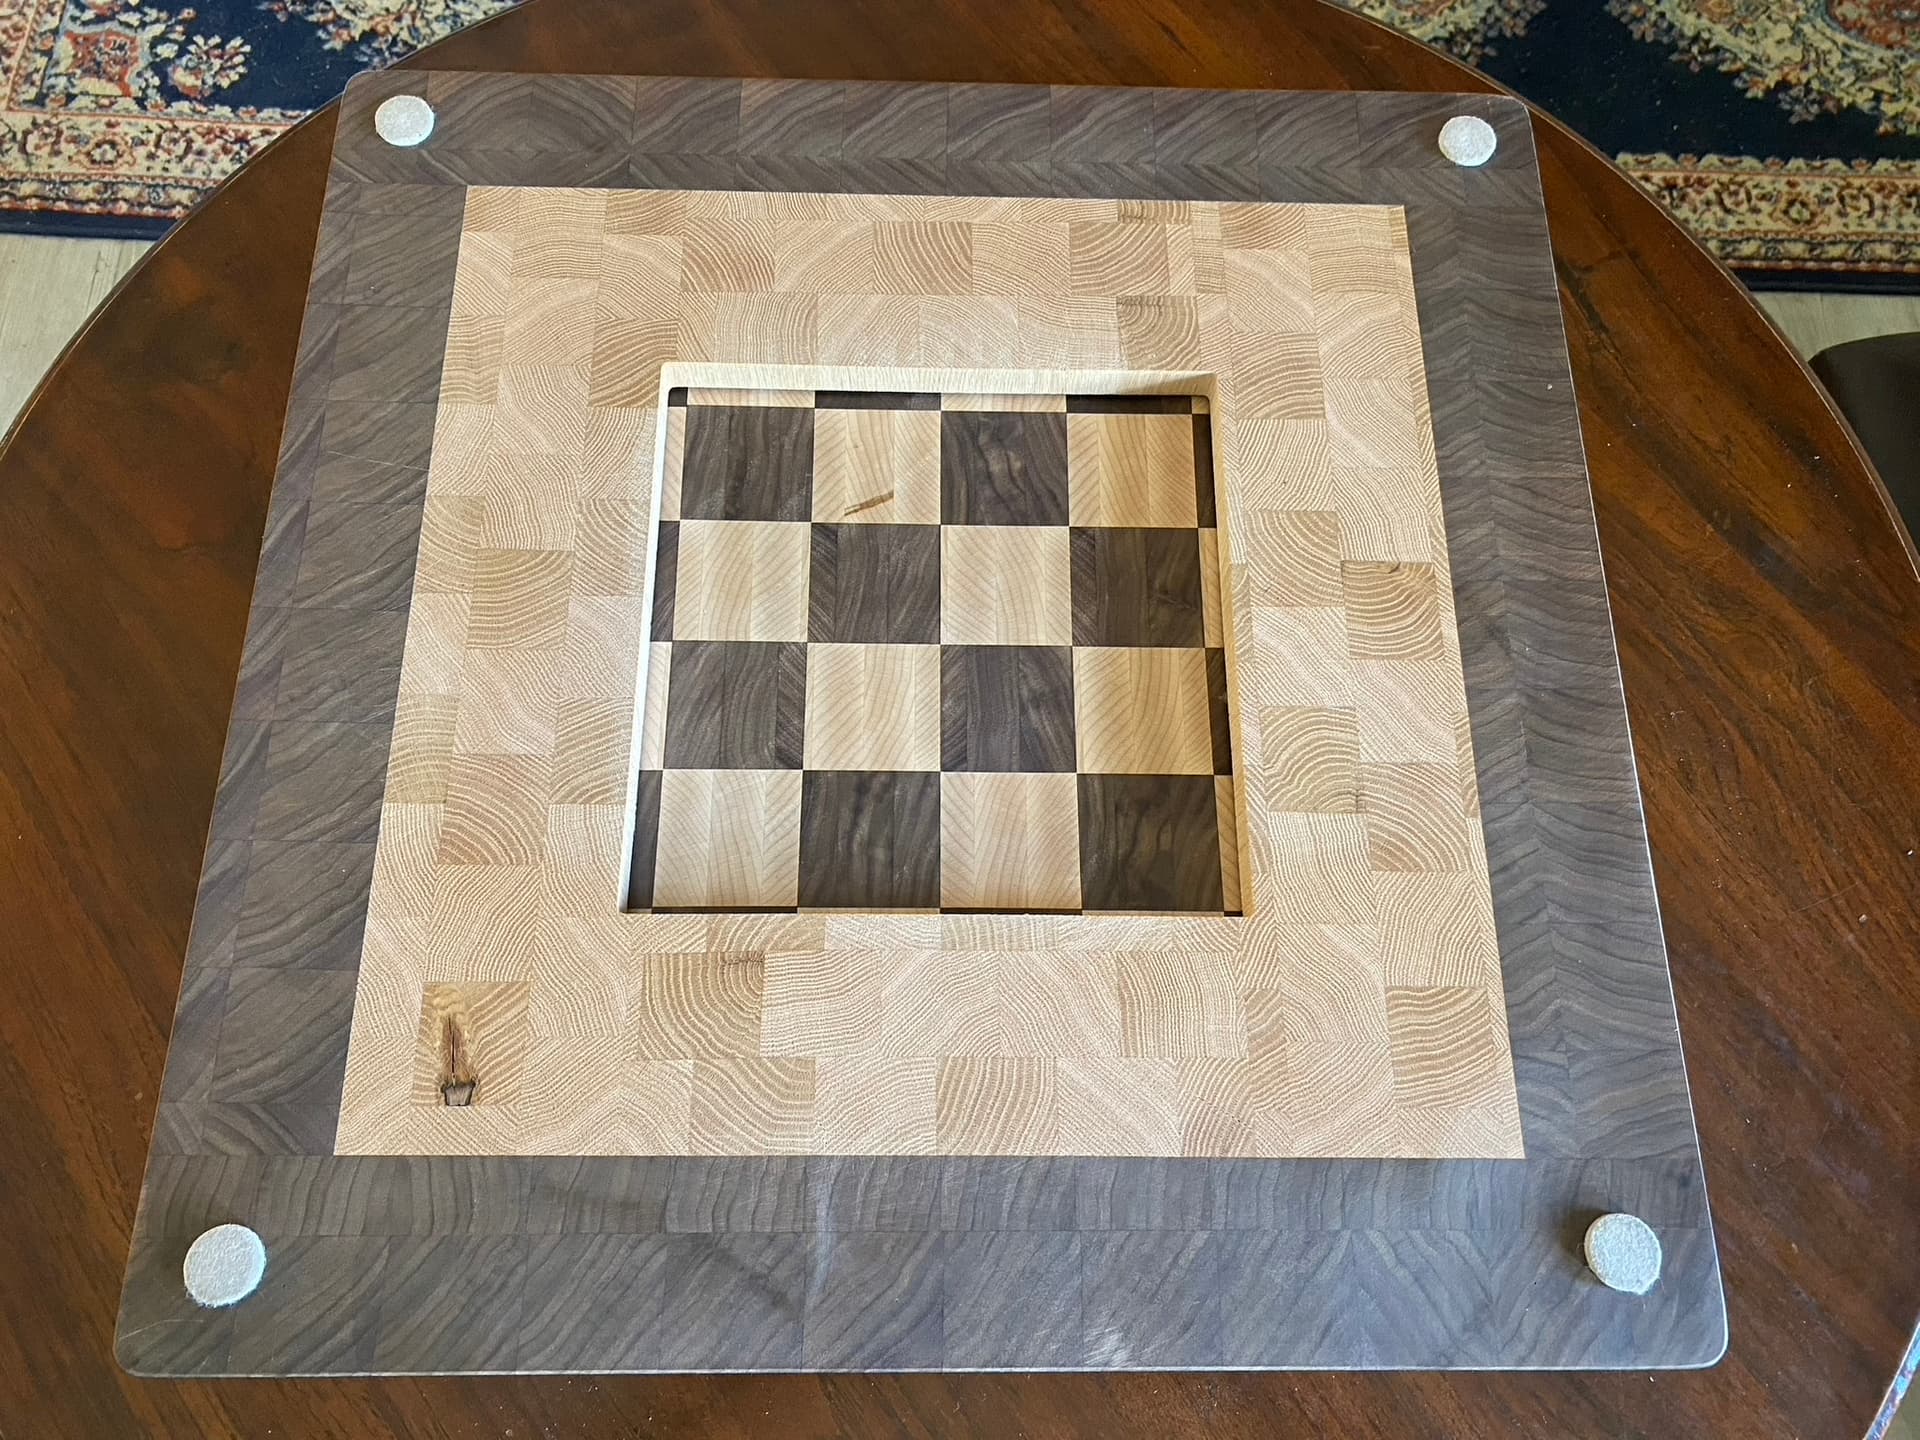
This is my first effort at making a chess board. It is tournament size, the squares being 55 x 55mm. The playing surface, perimeter and inlaid coordinates are all end grain walnut and maple. The inner frame seen on the back view supports the playing surface and is made of red oak (also end grain). The pieces are walnut and maple. I made the board several months ago using my 3XXL to do the inlay work and to plane the walnut and maple to the same thickness to ensure the squares all came out the same size.
Plans for the chess board were purchased from MTMWOOD back in the day when we were still doing business with Russia. I used my 5Pro to cut the pieces from a file purchased from MiniMegaProjects in Etsy after having seen it mentioned on this forum. Using Vcarve Pro I scaled the image up about 140% to get the pieces to come out to a size suitable for the board.
36 Likes
Awesome work I mentioned the minimegaprojects before on here the seller is awesome and glad to see someone else do the file too!
I love the board. I bought the file with the pieces as well and it’s on my list to get to.
Do you think it is doable with CC Pro or would it require Vectric?
1 Like