Not sure how Patrick did it, but I have these…
cube_texture.stl (1.5 MB)
I see @Tod1d already shared a cube wall asset but I’ll add mine as well. I created it in Fusion 360 and trimmed it square however your can tile it next to itself to cover a larger surface area or scale it.
Cubic Wall Tile.stl (105.2 KB)
I cut this 11 1/8" x 18" sign out of Radiata Pine and gave it three coats of butcher block conditioner to get it shiny.
That is super clean text for pine. What bit/toolpath are you using?
Thanks!
That’s a VCarve Toolpath at a depth of 0.1" with the #302 V-Bit carving the Constantia font.
It must be the fonts I’m using, because every time I try to use the 302, I get material left in the center of the text. I really like that font, so maybe I’ll give it a try again.
What depth are you allowing the V carving to cut to?
What is the stock thickness? It’s best to use stock thickness for max depth unless there is a reason to use a different depth.
Does it match the 3D preview?
What height is your text?
My most recent project was .03 max depth, with a stock of .75", and the letters were 1" high (there was a .3" pocket I was putting text at the bottom of). I tried both vcarve and advanced vcarve, and nothing was giving me a single clean cut for the text. So much up and down, cutting a tiny dot here or there. The 3D preview looked ok, but I can never tell if the pixelated preview is because of CC, or there is an actual issue with the vector. I’ve done very nice text with the 301, with the bit cutting to a single point at the bottom of the groove, but the 302 always tries to trace the edges of the fonts, leaving a bump in the middle.
Simple vcarves must use the bottom of material or “t”. The reason is a simple vcarve goes down the middle of the object and cuts until both sides of the lines are touched by the vee bit. So if you limit depth you will get weird results. If you want to limit depth use advanced vcarve. With advanced vcarve the vee bit cuts around the perimeter and not down the middle like simple vcarve. You can use a clearing bit if the object is wide enough or not check it but the vee bit will clear out the spaces too wide.
The only issue with using the bottom of material with a simple vcarve is thin material can cut through. The smaller the angle the deeper the vee bit cuts. Remember the vee bit tries to touch both sides of the object. So for thicker lines a 60 or 90 degree vee bits works well but for fine lines you barely get the surface scratched by a 60 or 90 degree bit. So for fine lines use a 15 degree or similar bit.
That makes a lot of sense. I’ve been playing around with the max depth to try and get it to go the depth I want, and likely messing myself up instead. Thanks for the insight.
That is why I was asking above what the height of the letters was as that would be more telling than the specified DOC.

this one?
![]()
That’s the one! ![]()
Thanks a lot! ![]()
Finally got to a scrap wood cribbage board I had been meaning to do up. Glued the pieces weeks ago. I used the same design I did on my euchre score board for the peg storage but made it longer to get the pegs for 3 players to fit into the storage. Going to make the euchre board the same size so I can keep the covers consistent and it won’t matter which ones I have made for each board style. This new basic style is 13.75 inches by 4 inches and this one is walnut and ambrosia maple.

Also did another one of my 3D tree of life oval boards. Did not take a picture of it after making it and it is now being finished so I can’t get a good shot now. Here is a screenshot of the topper from a short video I took. The topper is maple and the base is sapele.

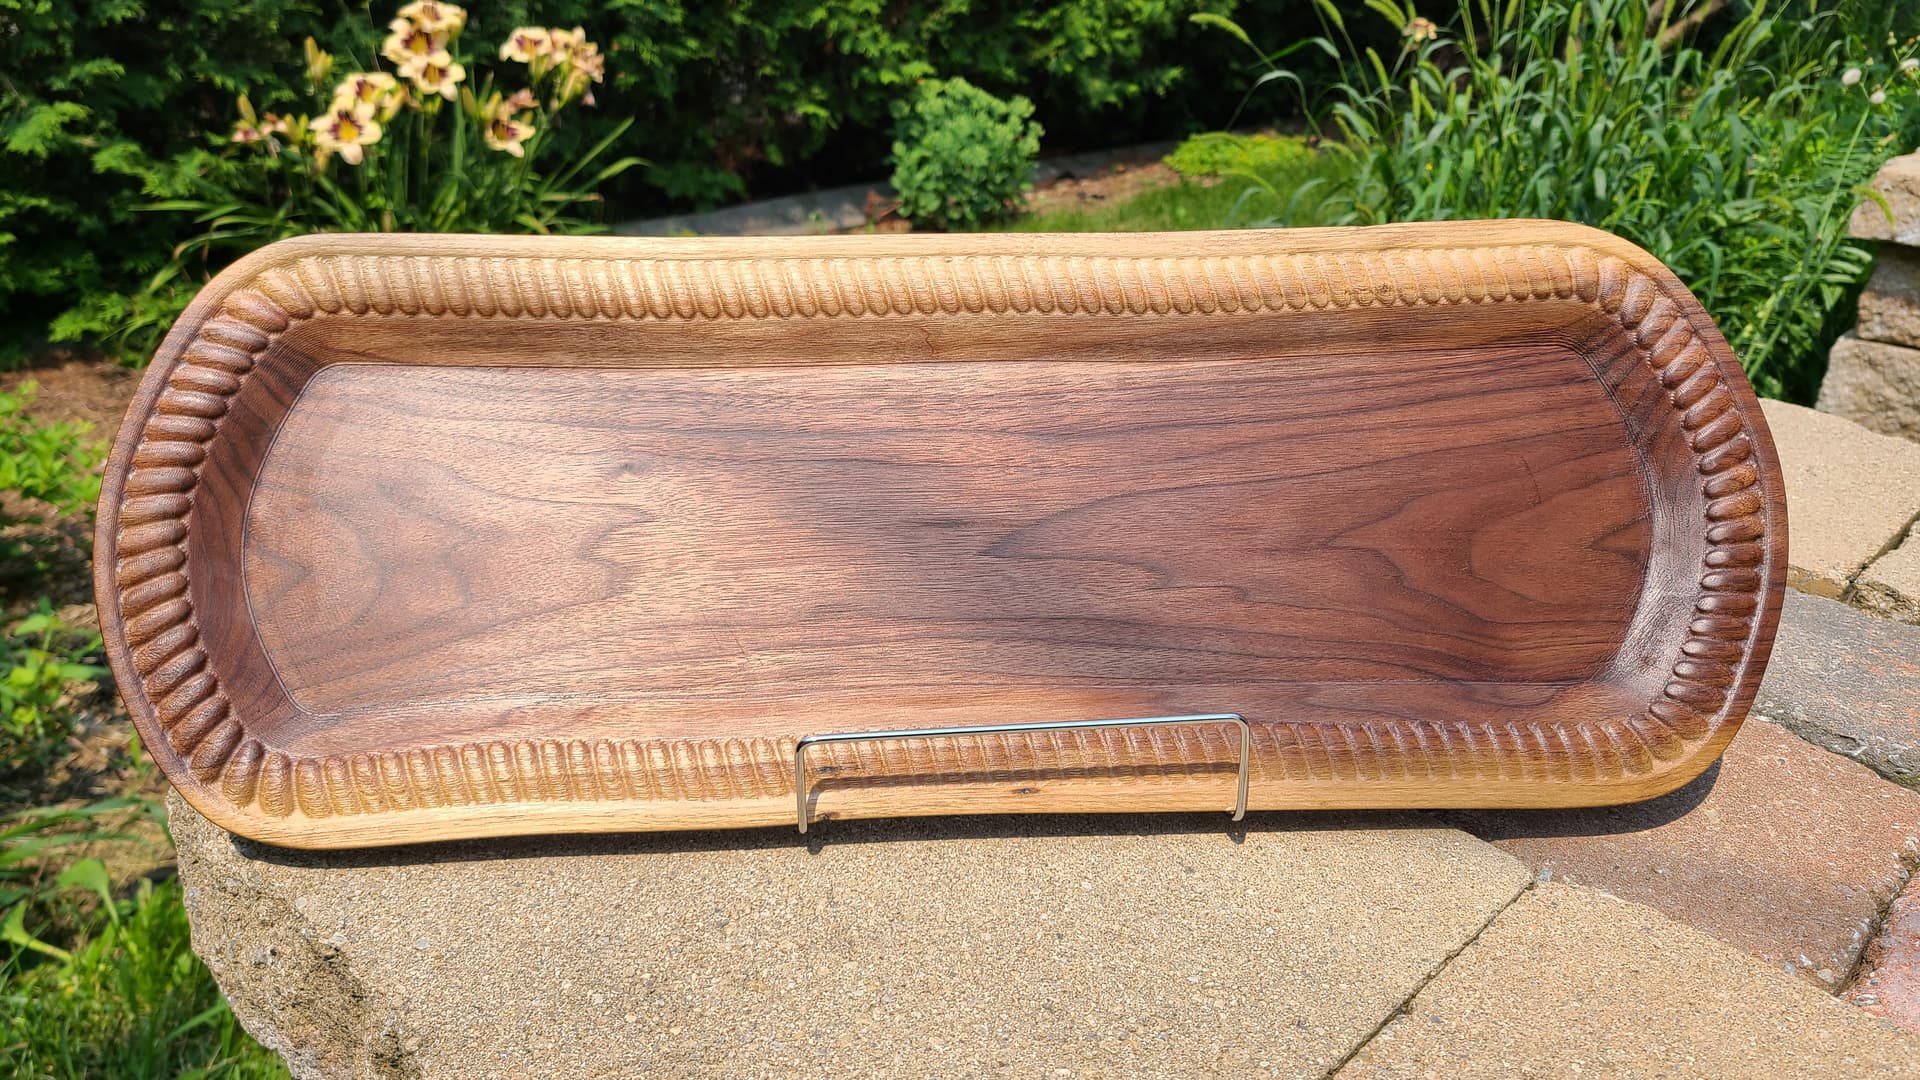
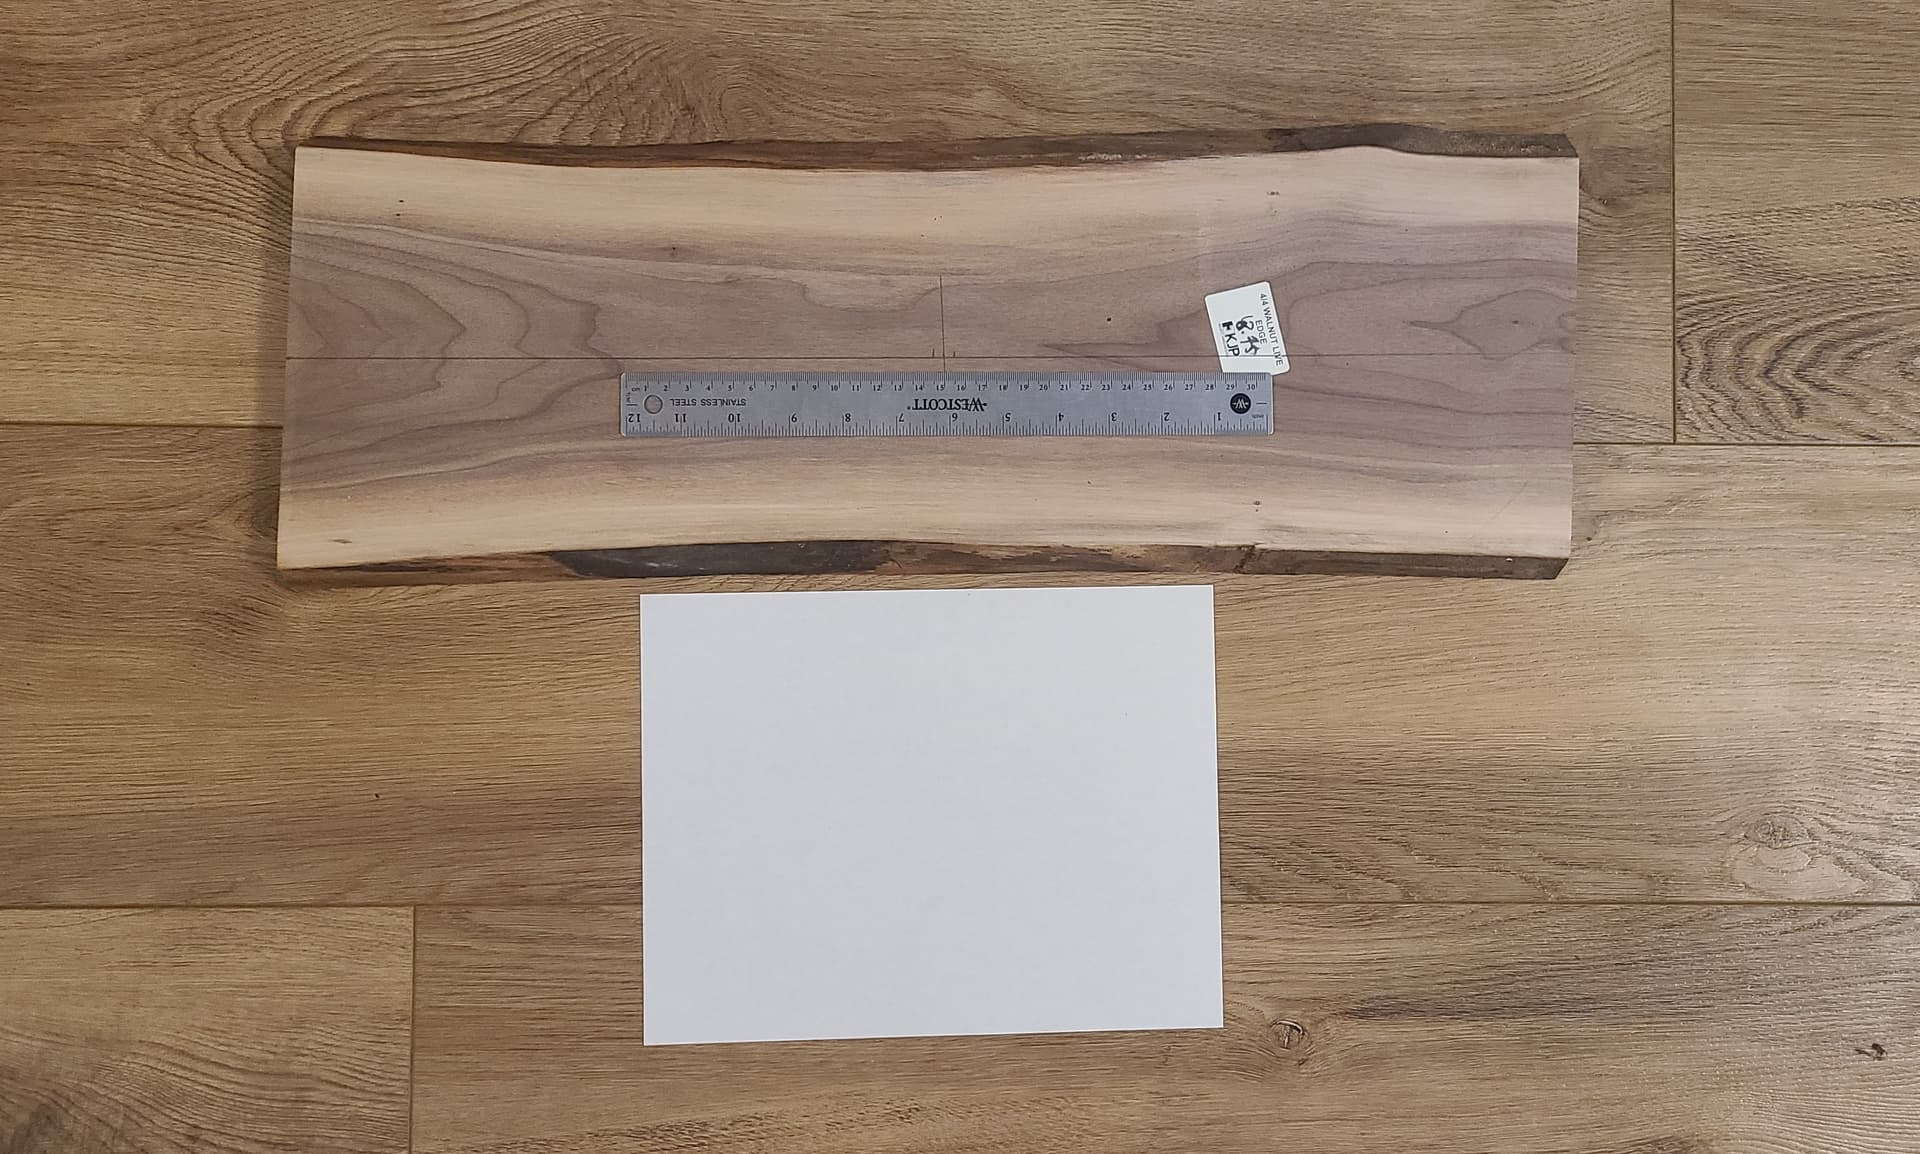
The Shapeoko probably ran 20 hours over the weekend… many projects on the go getting ready for an artisan market but here’s pictures of 2 more serving trays finished this weekend, live edge walnut was the stock.
Edit: Original Borads
I like it Patrick. Well done. What CAD software are you using?
I’ve been using a mix of software but for CAD/CAM I’m solely using Fusion 360. On more complex 3D models I’ve made myself using Blender I’ve hit some performance issues but that’s likely because the object mesh had too many vertices/faces on the model but in the end things worked out. That said for these live edge boards I created my SVG files using Affinity Designer/Photo software to trace out the live edge and also to adjust the picture if there’s any keystone/perspective issues, however I see no reason why I couldn’t go direct into the CAD software if the initial picture is taken at the right distance/angle for stock proportions to be within an acceptable tolerance.
Question;
Did you use tabs or maybe double-sided tape when cutting it out?
Thanks again for the line art of the BeeGee.
I found there was a lot of extra lines in the drawing I had to edit out to get it to look right.
This is cool! ![]()