The catchall trays are 4" x 6" and various depths of .75" to 1". Attached are the files for the catchall trays I have machined. Basically you secure your work and cut a .5" deep pocket. Then use a vee cutter to make your design. I use Inkscape to convert google images to an SVG. Then I start the vcarve cut at .5" and use the bottom of material as max depth. I mostly used a 15 degree vee bit.
Some of the files in the zip have not been machined yet and may be too busy for a good result. So look at each image and determine if you think you can use them.
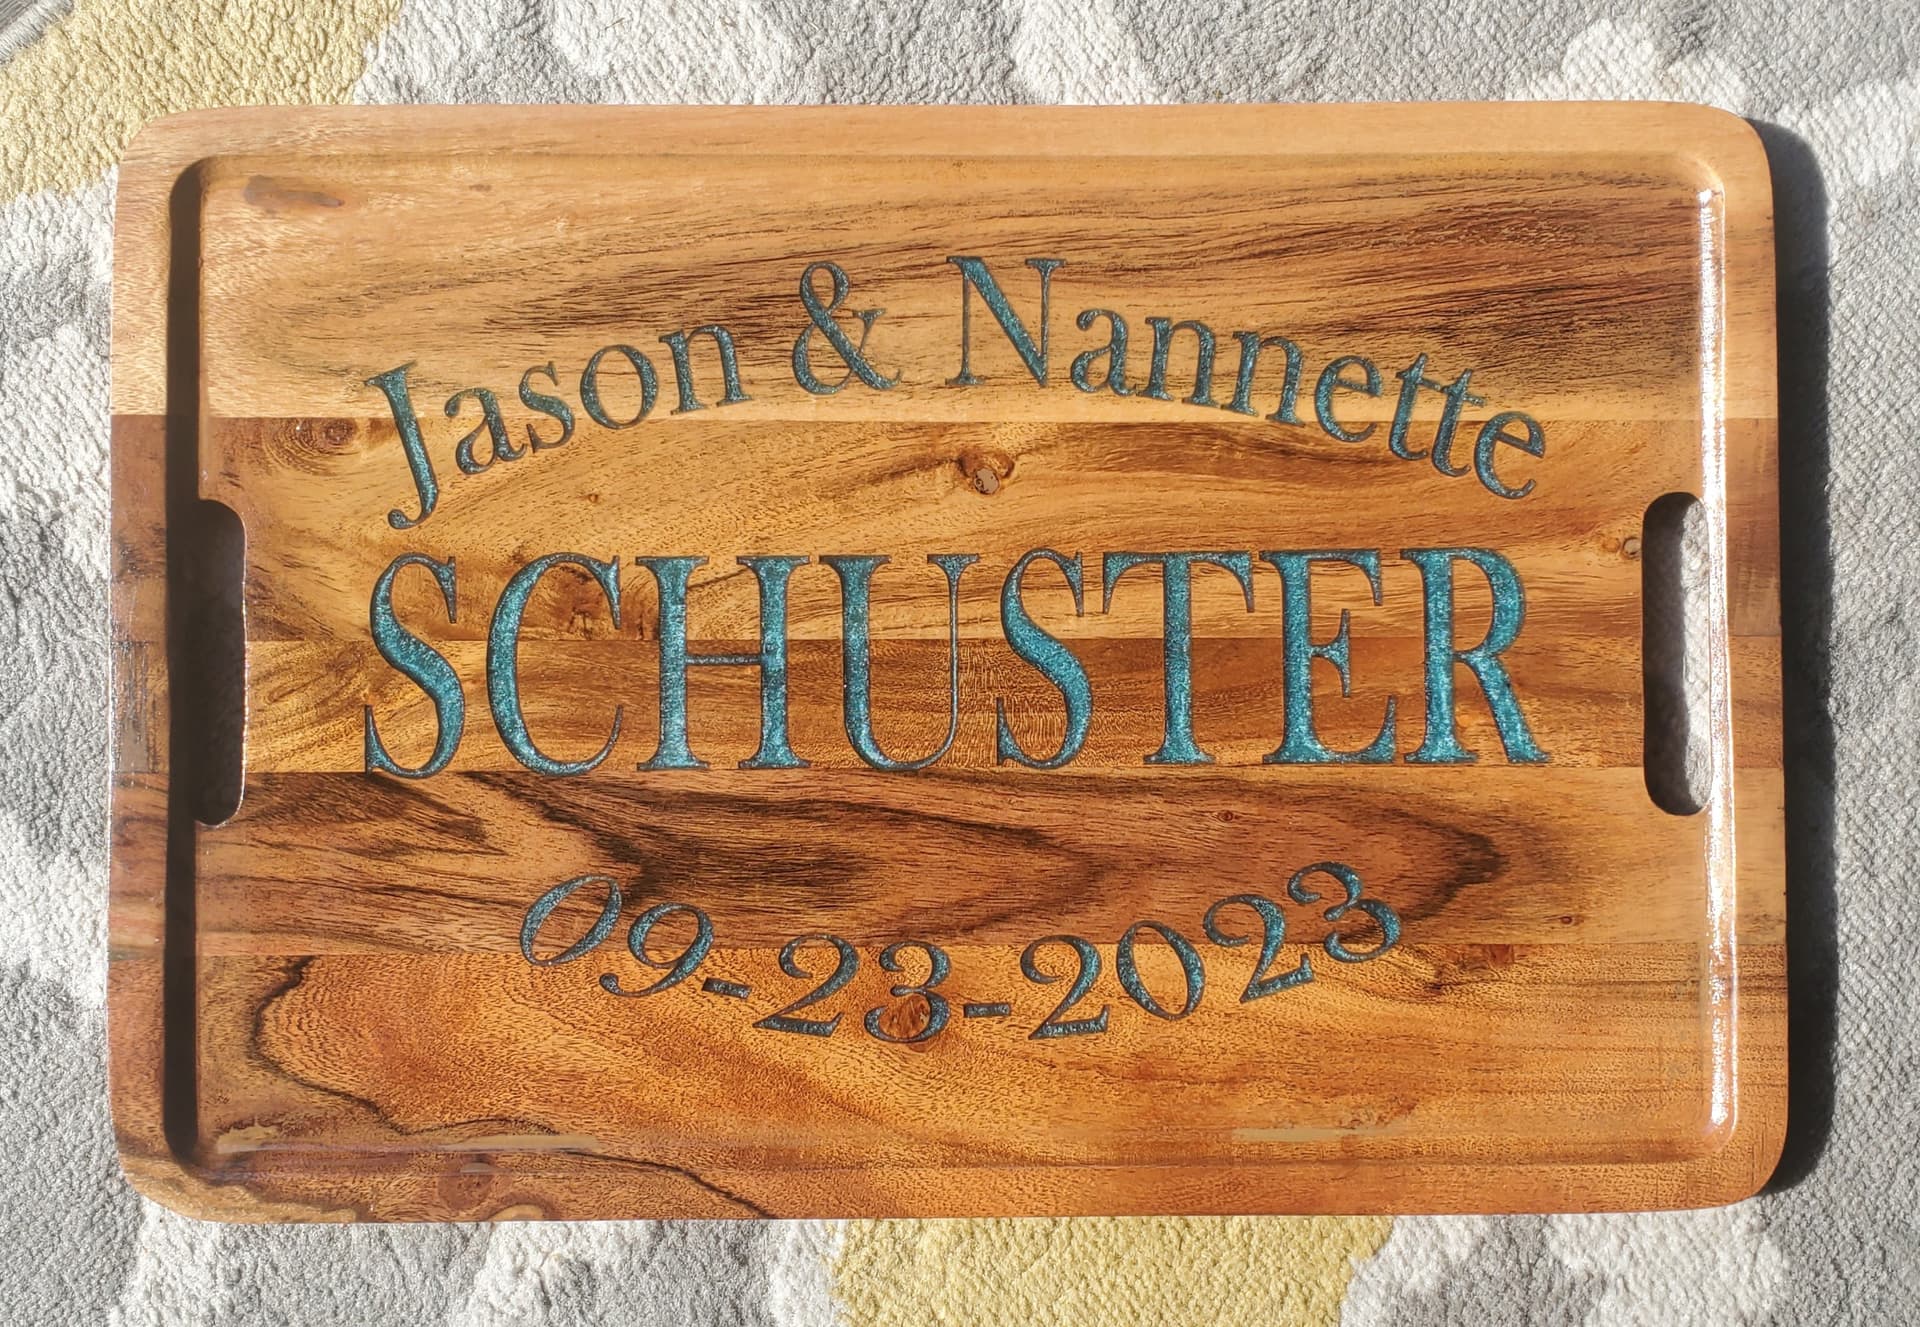
These have been made and came out good. I used Watco natural oil for the finish.
Check the files very carefully. I think I used top but sometimes use bottom of material. All should be using center for origin. Obviously you can make any changes in size you want to make bigger ones. The images are far enough away from the sides so the router collet does not hit the sides during machining.
Enjoy.
Edit: Got more cut out today. One is cutting and 2 more in the pipeline. Trying to get these done, sanded and Watch Natural Oil so they are finished.
1st post here. This is a new hobby for me and I had zero experience with any sort of CNC prior to ordering the 4 xxl in July. This continues to be a journey of discovery and rabbit holes. After sinking a bunch of time into the steep learning curve this hobby has and experiencing a few of the more valuable “teachable moments” that one can have (mistakes, and how to fix them and avoid them afterwards) I was finally able to decently carve out a flag that had caught my eye. I wanted to carve it and have it look like the svg example that the site had and that meant I had to learn a bunch of new stuff. I saw plenty of examples where others did this carve without any of the pocketing and it just didn’t have that “wow” factor for me.
5/4 redwood cedar deck boards with rattle can finish. 31"x18"
This was version 7. Not all the previous versions made it to the router table. It took a long time to get all the paths cut as the bits I ultimately used were a .25mm radius taper bit and 1/16, 1/8th, and 1/4" endmills. It probably can be cut faster but anytime I see Math my brain just says “oh no…” and turns to jello. It’s almost a tangible aversion, but I cope as best I can. V bits were killing me on tear out, especially on paths where the remaining wood was to be a thin line, so I moved away from using a v bit and the details got a lot nicer. I paid for that change in added run time though.
One thing that I liked about using the .25mm taper bit was that if I used it outline everything first it kept the Oramask lines 100% crisp at the expense of adding a lot of time to the cut. I could then come in with the progressively larger bits without having that Oramask getting ragged edges. This was most apparent on the Stencil fonts along the bottom where without a v bit the tiny gaps that needed to be between the letter fragments couldn’t happen. That .25mm got in there and got the job done though. So basically I am trading time for a bit more detail and less sanding.
I need to improve a bit on the finish aspect on future runs. Shot it with a light coat of clear before hitting it with the black but I still got a little bit of black bleed thru here and there. Probably need to go a little heavier on that clear to let the fibers really suck it up. Very light milling lines in the crowded star area might have me converting an electric toothbrush to a micro sander as that is a painful area to work with giant hands. Mixed feelings on the presence of knot voids. They could be filled in but some locations would make sanding a pain and on the other hand they do add a bit of character to the overall piece. On an early version one knot ended up in the center of the soldier’s fanny pack which lent a rather unfortunate look to the guy. Need to learn to check board placement against the carve preview to prevent things like that.
So there it is. Happy to receive pointers and tips as “I don’t know what I don’t know”. It has been a fun ride so far.
Very nice job! You putting in all the time and trying different techniques is what’s all about. I’ve been doing woodworking for for a long time now and one thing I’ve learned along the way is there’s no short cuts.
One thing you mentioned was trying to keep the edges clean to avoid extra sanding. A down cut bit is the ideal tool that helps with this.
Keep up the great work and looking forward to what else you created.
That looks great. I really admire your tenacity for sticking with it through 7 revisions. It’s easy to get discouraged but better to learn from our failures.
Your short calendar time with the machine is certainly not apparent in that work.
Stencil ink? Never heard of it but I’ll look into it. At about 2.5 times the cost of what I am currently using (which is only a 5 minute drive away to pick up) it would have to bring something pretty significant to the process. Thanks for pointing it out.
And also I cut these recently. A question though: what bit do you use for a through cut? I used a ¼" end mill. I know when removing material you shouldn’t remove more than half the diameter of the bit, but what about when doing a through cut? It seemed my machine was really working too make this cut. The material is fir and about 1 inch thick… it seems like it shouldn’t have worked that hard.
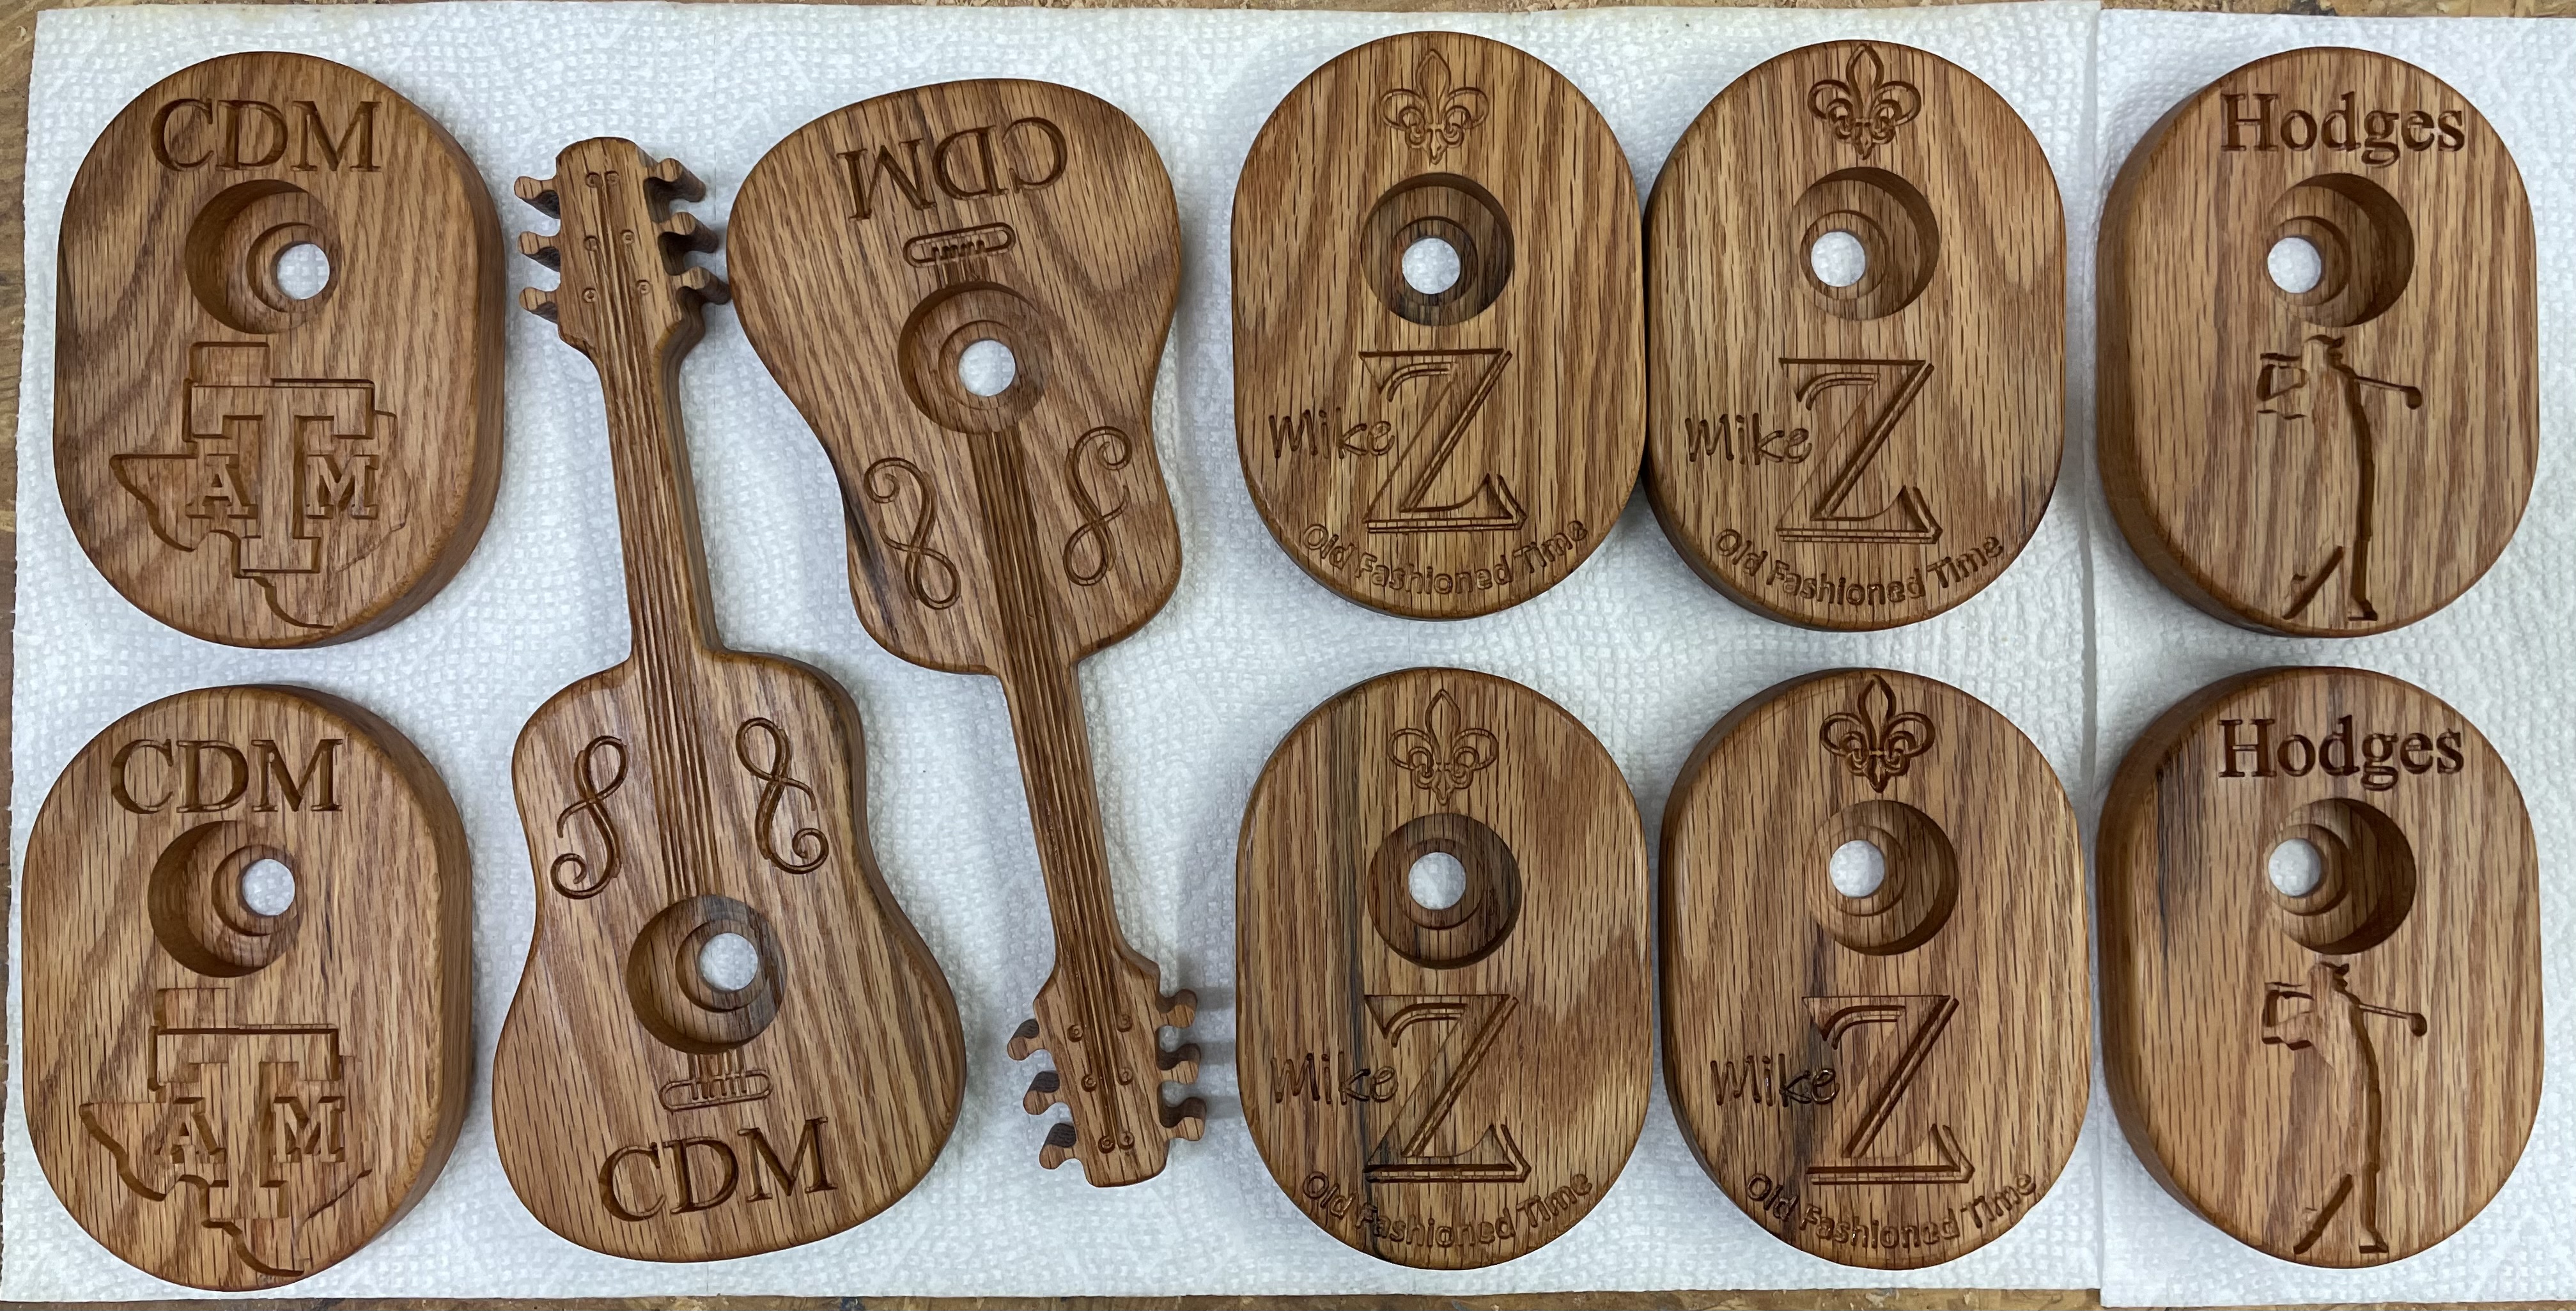
Not super happy with the smaller text. I used a 3 degree V bit but the inside of the letters was lost on a couple. The guitars are more of a novelty. They may not really be functional unless you have a smallish glass.
Each set of 5 took about 2 hours of run time. Doing the pocket instead of the contour ate a lot of time. I think that path was 38 minutes.
I have never actually used one of these and none of these are for me so I guess I will have to wait to see what the recipients say.
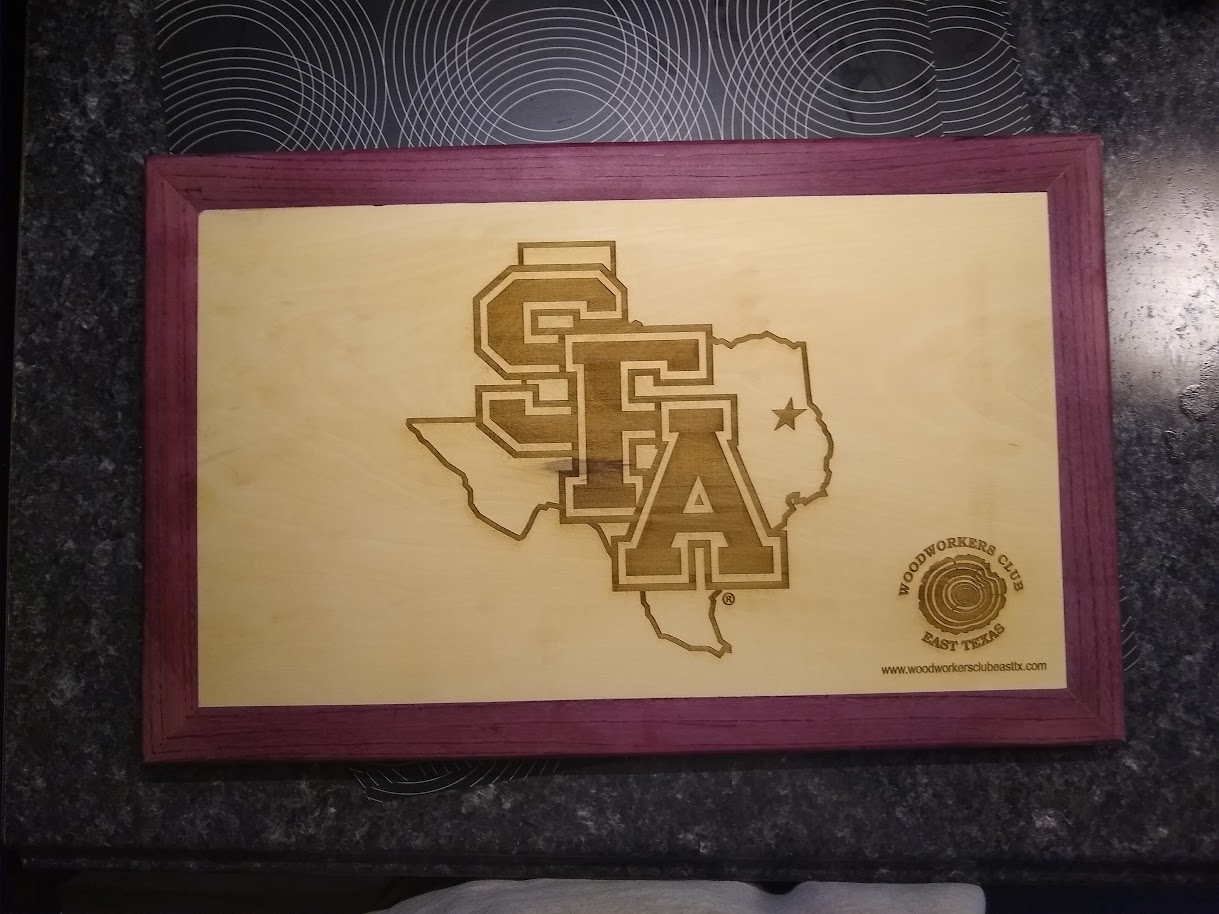
Nice work. I was recently working on Stephen F Austin University (SFA) using their official logo. The people at the university were trying to get permission for us to use the logo and sell the cutting boards to fund a Friends of Forestry scholarship. One of my friends is an Aggie Vet and from him and others TAMU is pretty much a stickler for using their official logo. Since you are giving these away it is not likely TAMU will ever know. However if you sell the logo items TAMU is pretty aggressive about protecting their logo.
FYI. Not telling you to not use the registered trademark of TAMU but just dont try to mass market them or you could find yourself in trouble. A lot of people here on the forum make football and other logo items and can potentially find themselves in copyright infringement.
Here is a prototype of the cutting board. Notice the copyright sign in the lower right corner. These are only prototypes and have not yet been approved.
I wanted to try out some new cutters I got on Friday, I’ve also been wanting something to hold my collets so I can actually find them so seemed like a perfect opportunity.
Roughing was done with Harvey Tool’s 1/4" and 1/8" Variable Helix Chipbreakers. Finishing (minus the chamfer and engravings) was done entirely with Harvey Tool’s 1/8" 60° High Helix cutter.
I’m suuuuuuuper happy with these new bits, highly recommend them. Especially the Chipbreakers. Fastest clearing I’ve done while also being the quietest (by a lot).
Ignore the bite taken out of the 1/8" one That’s what I get for not paying attention to lead-ins. The little wing-looking things on the sides are 45° ramps so I can mount it and have it look all pretty.
I built a prototype of one of these for whisky drinkers to try. None of them could find a single reason to use one! Guess one has to be really trying to impress the crowd for this to be used.
That is a great question.
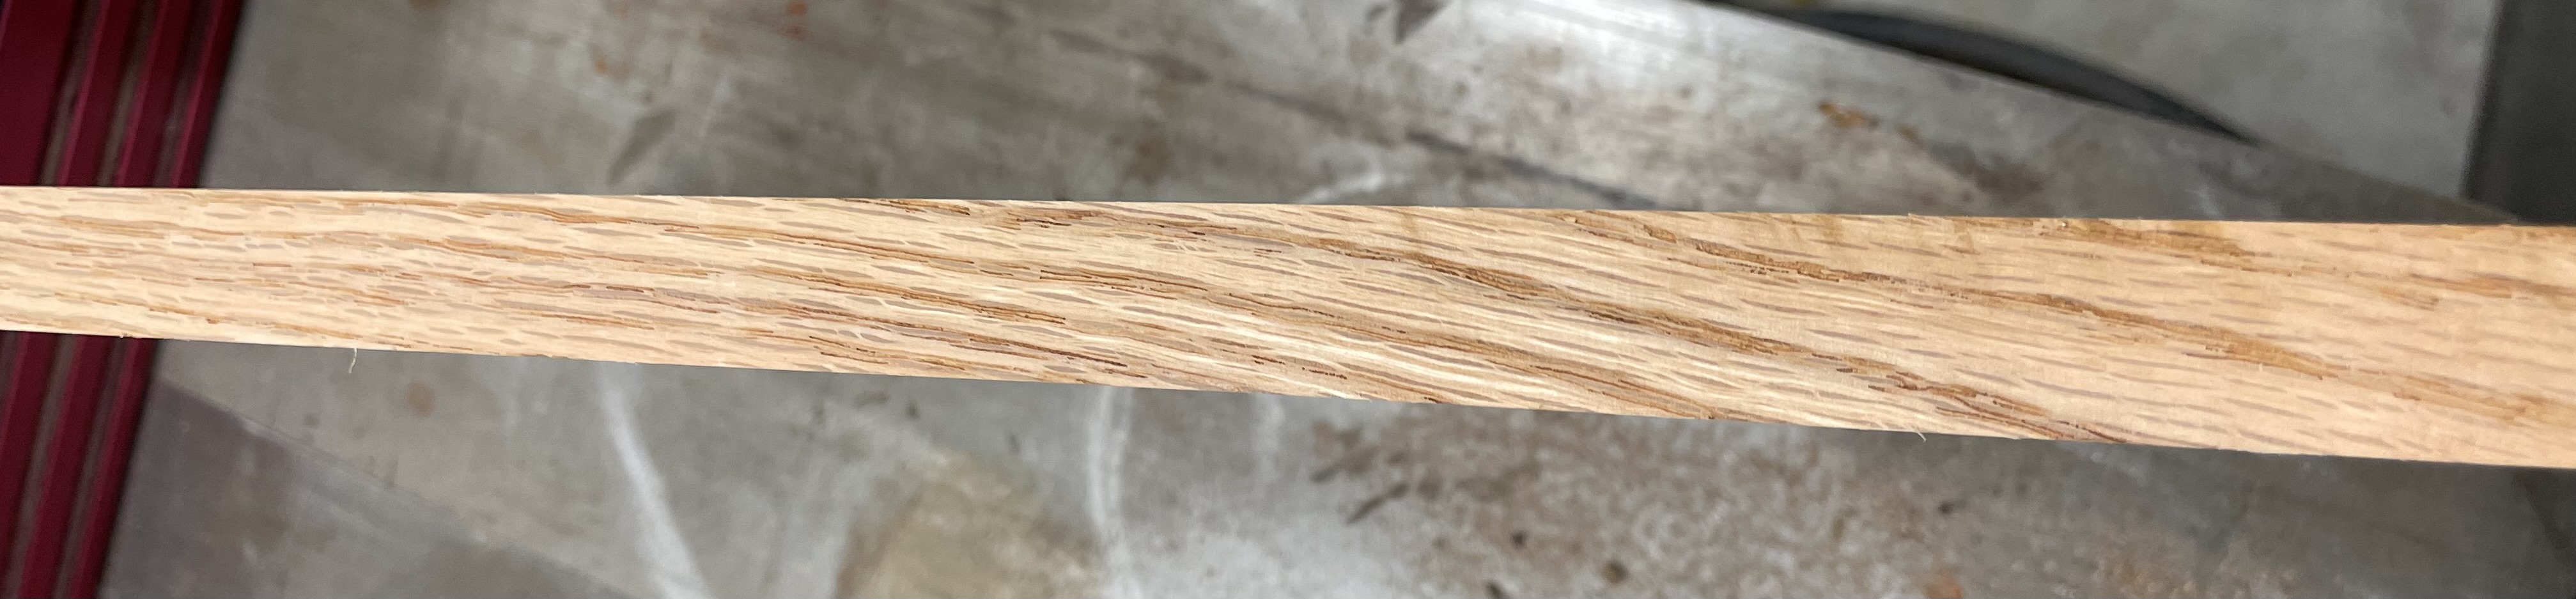
I went to my storage unit and pulled out a hunk of white oak which I did bring home but it was 2” thick and I really need to replace the resaw blade on my bandsaw. I have the blade but didn’t want to take time this weekend for that activity.
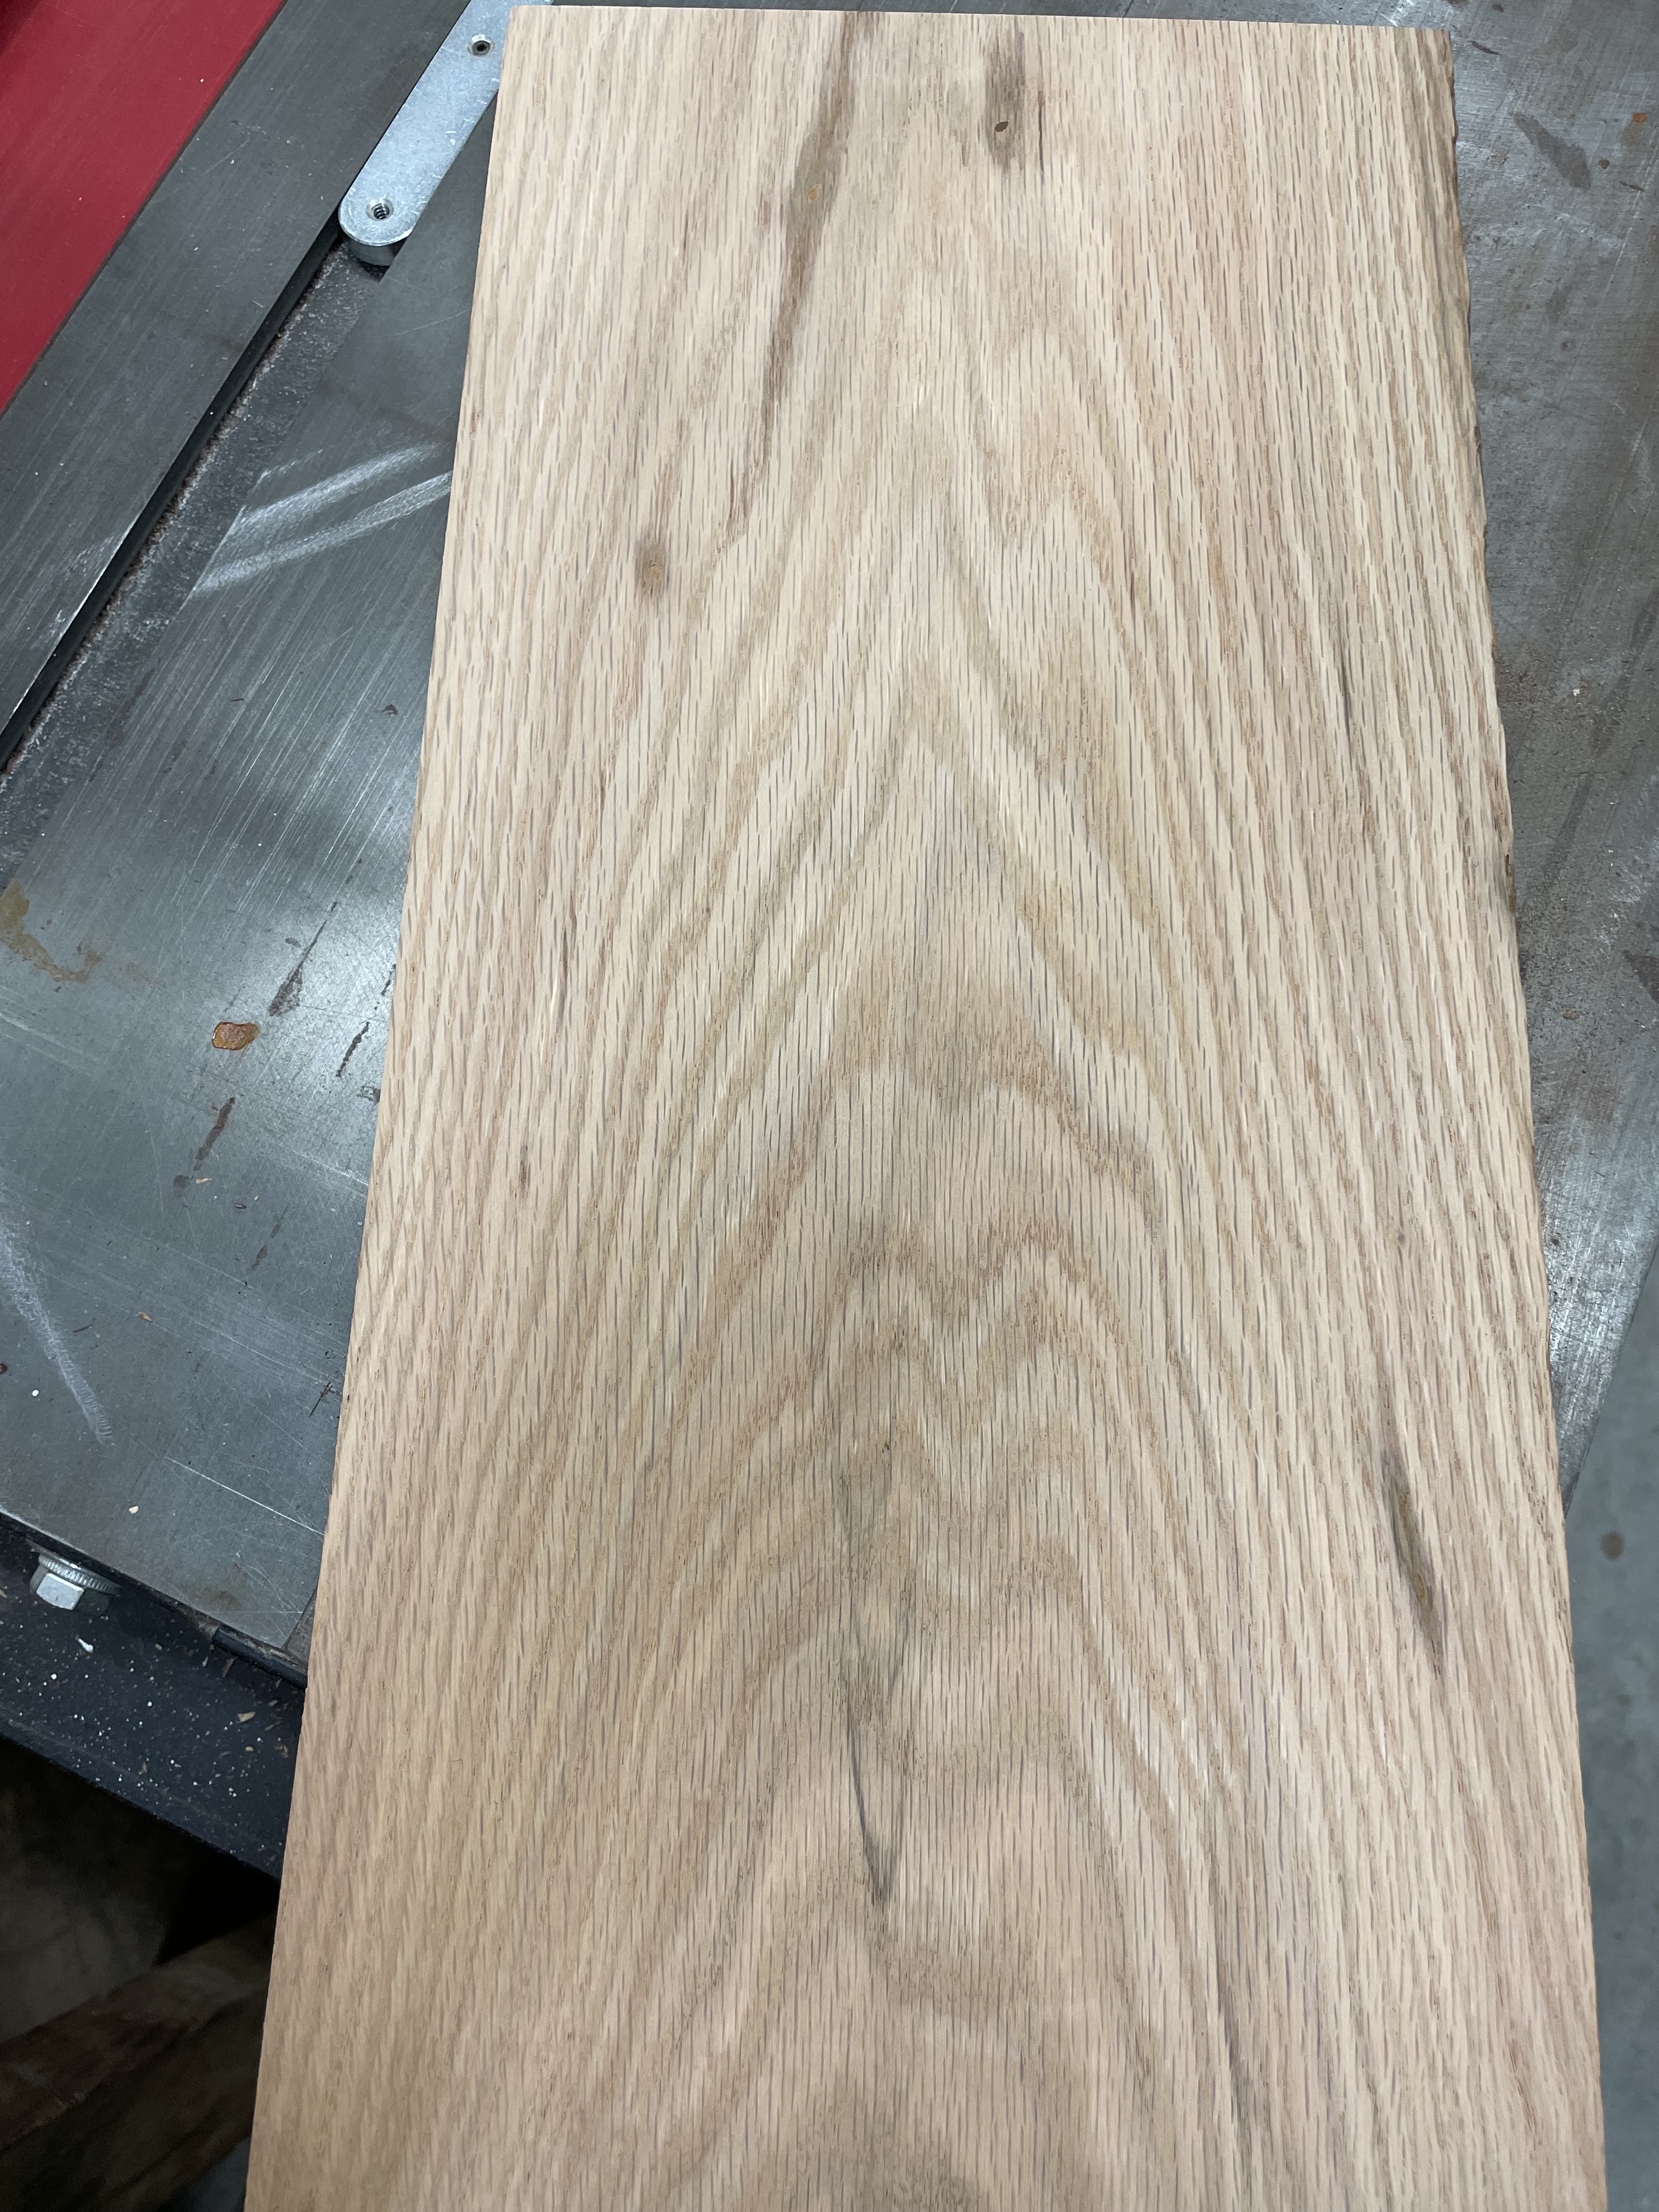
So, I grabbed another rough cut board that looked like white oak.
I have accumulated a lot of different wood from different sources over the years and don’t have it organized well.
I got home and found these markings on the side which I can’t interpret.
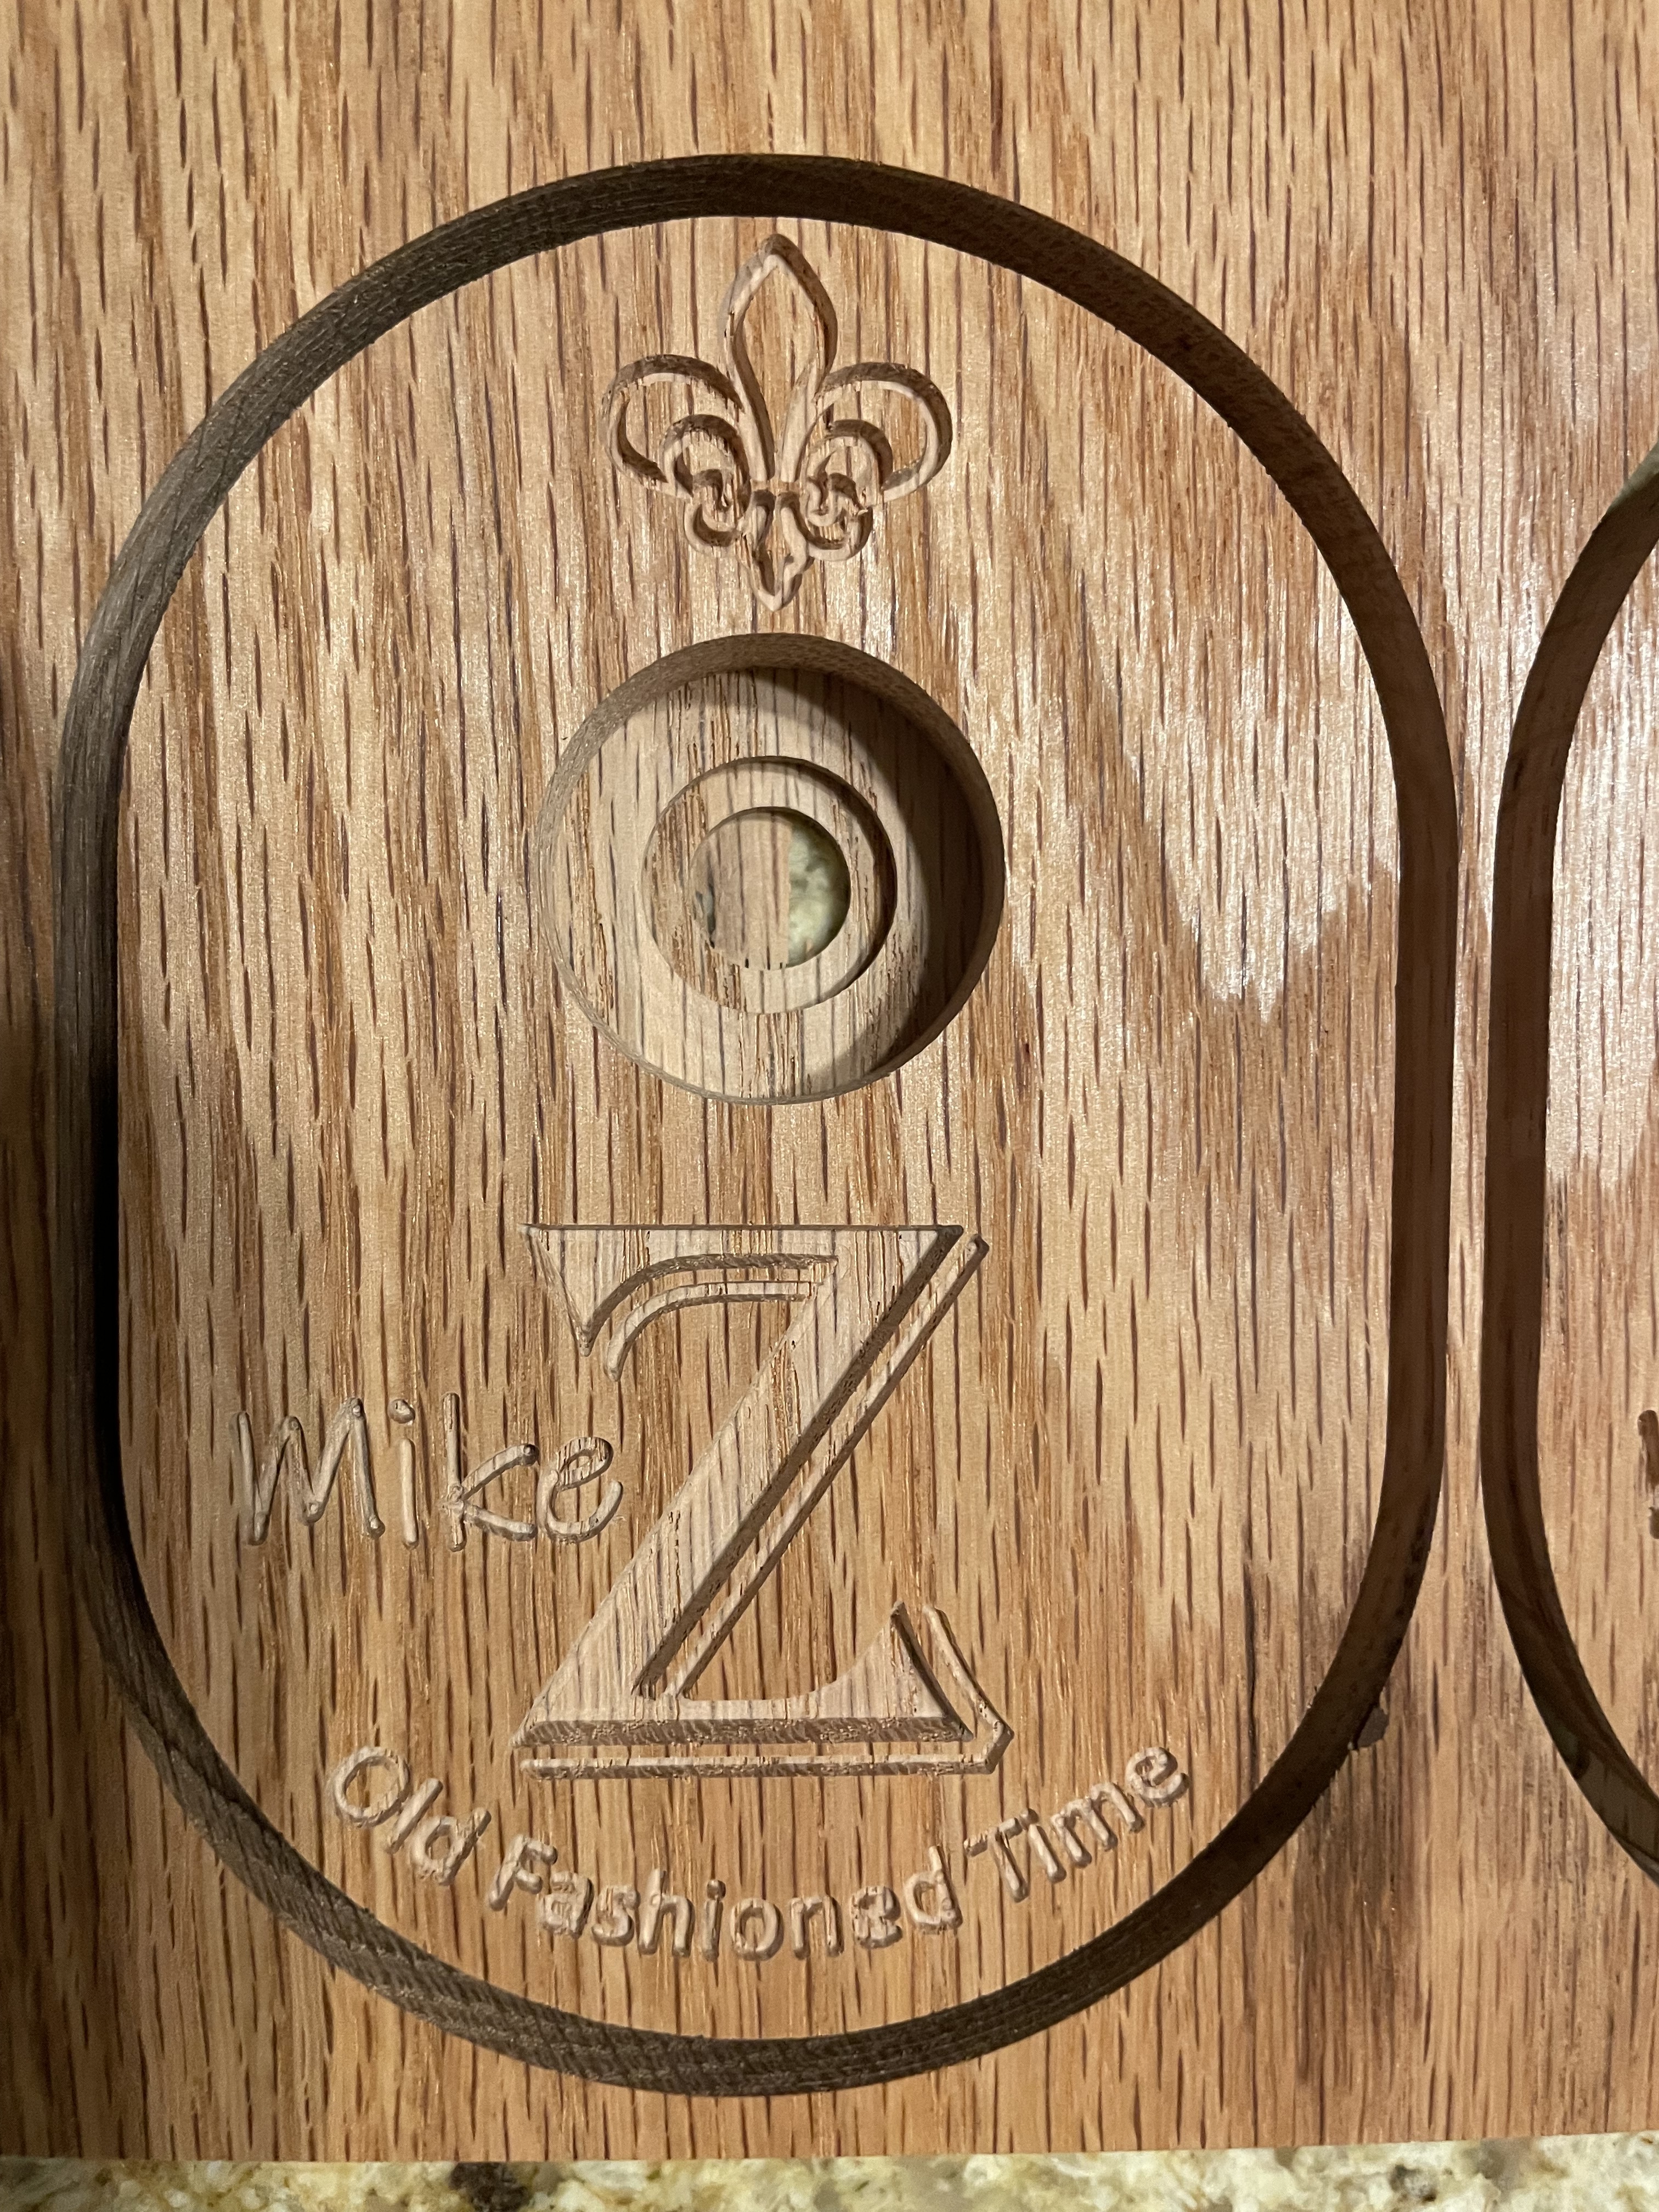
I pulled it from an image online and traced. I modified slightly to make it work better in a V Carve I think.
Those and the guitar ones are gifts for a friend. I don’t have any intent to go into business selling them.
However, given the proliferation of people selling things on the internet I think any entity would need a huge staff of lawyers to fully protect their interests.
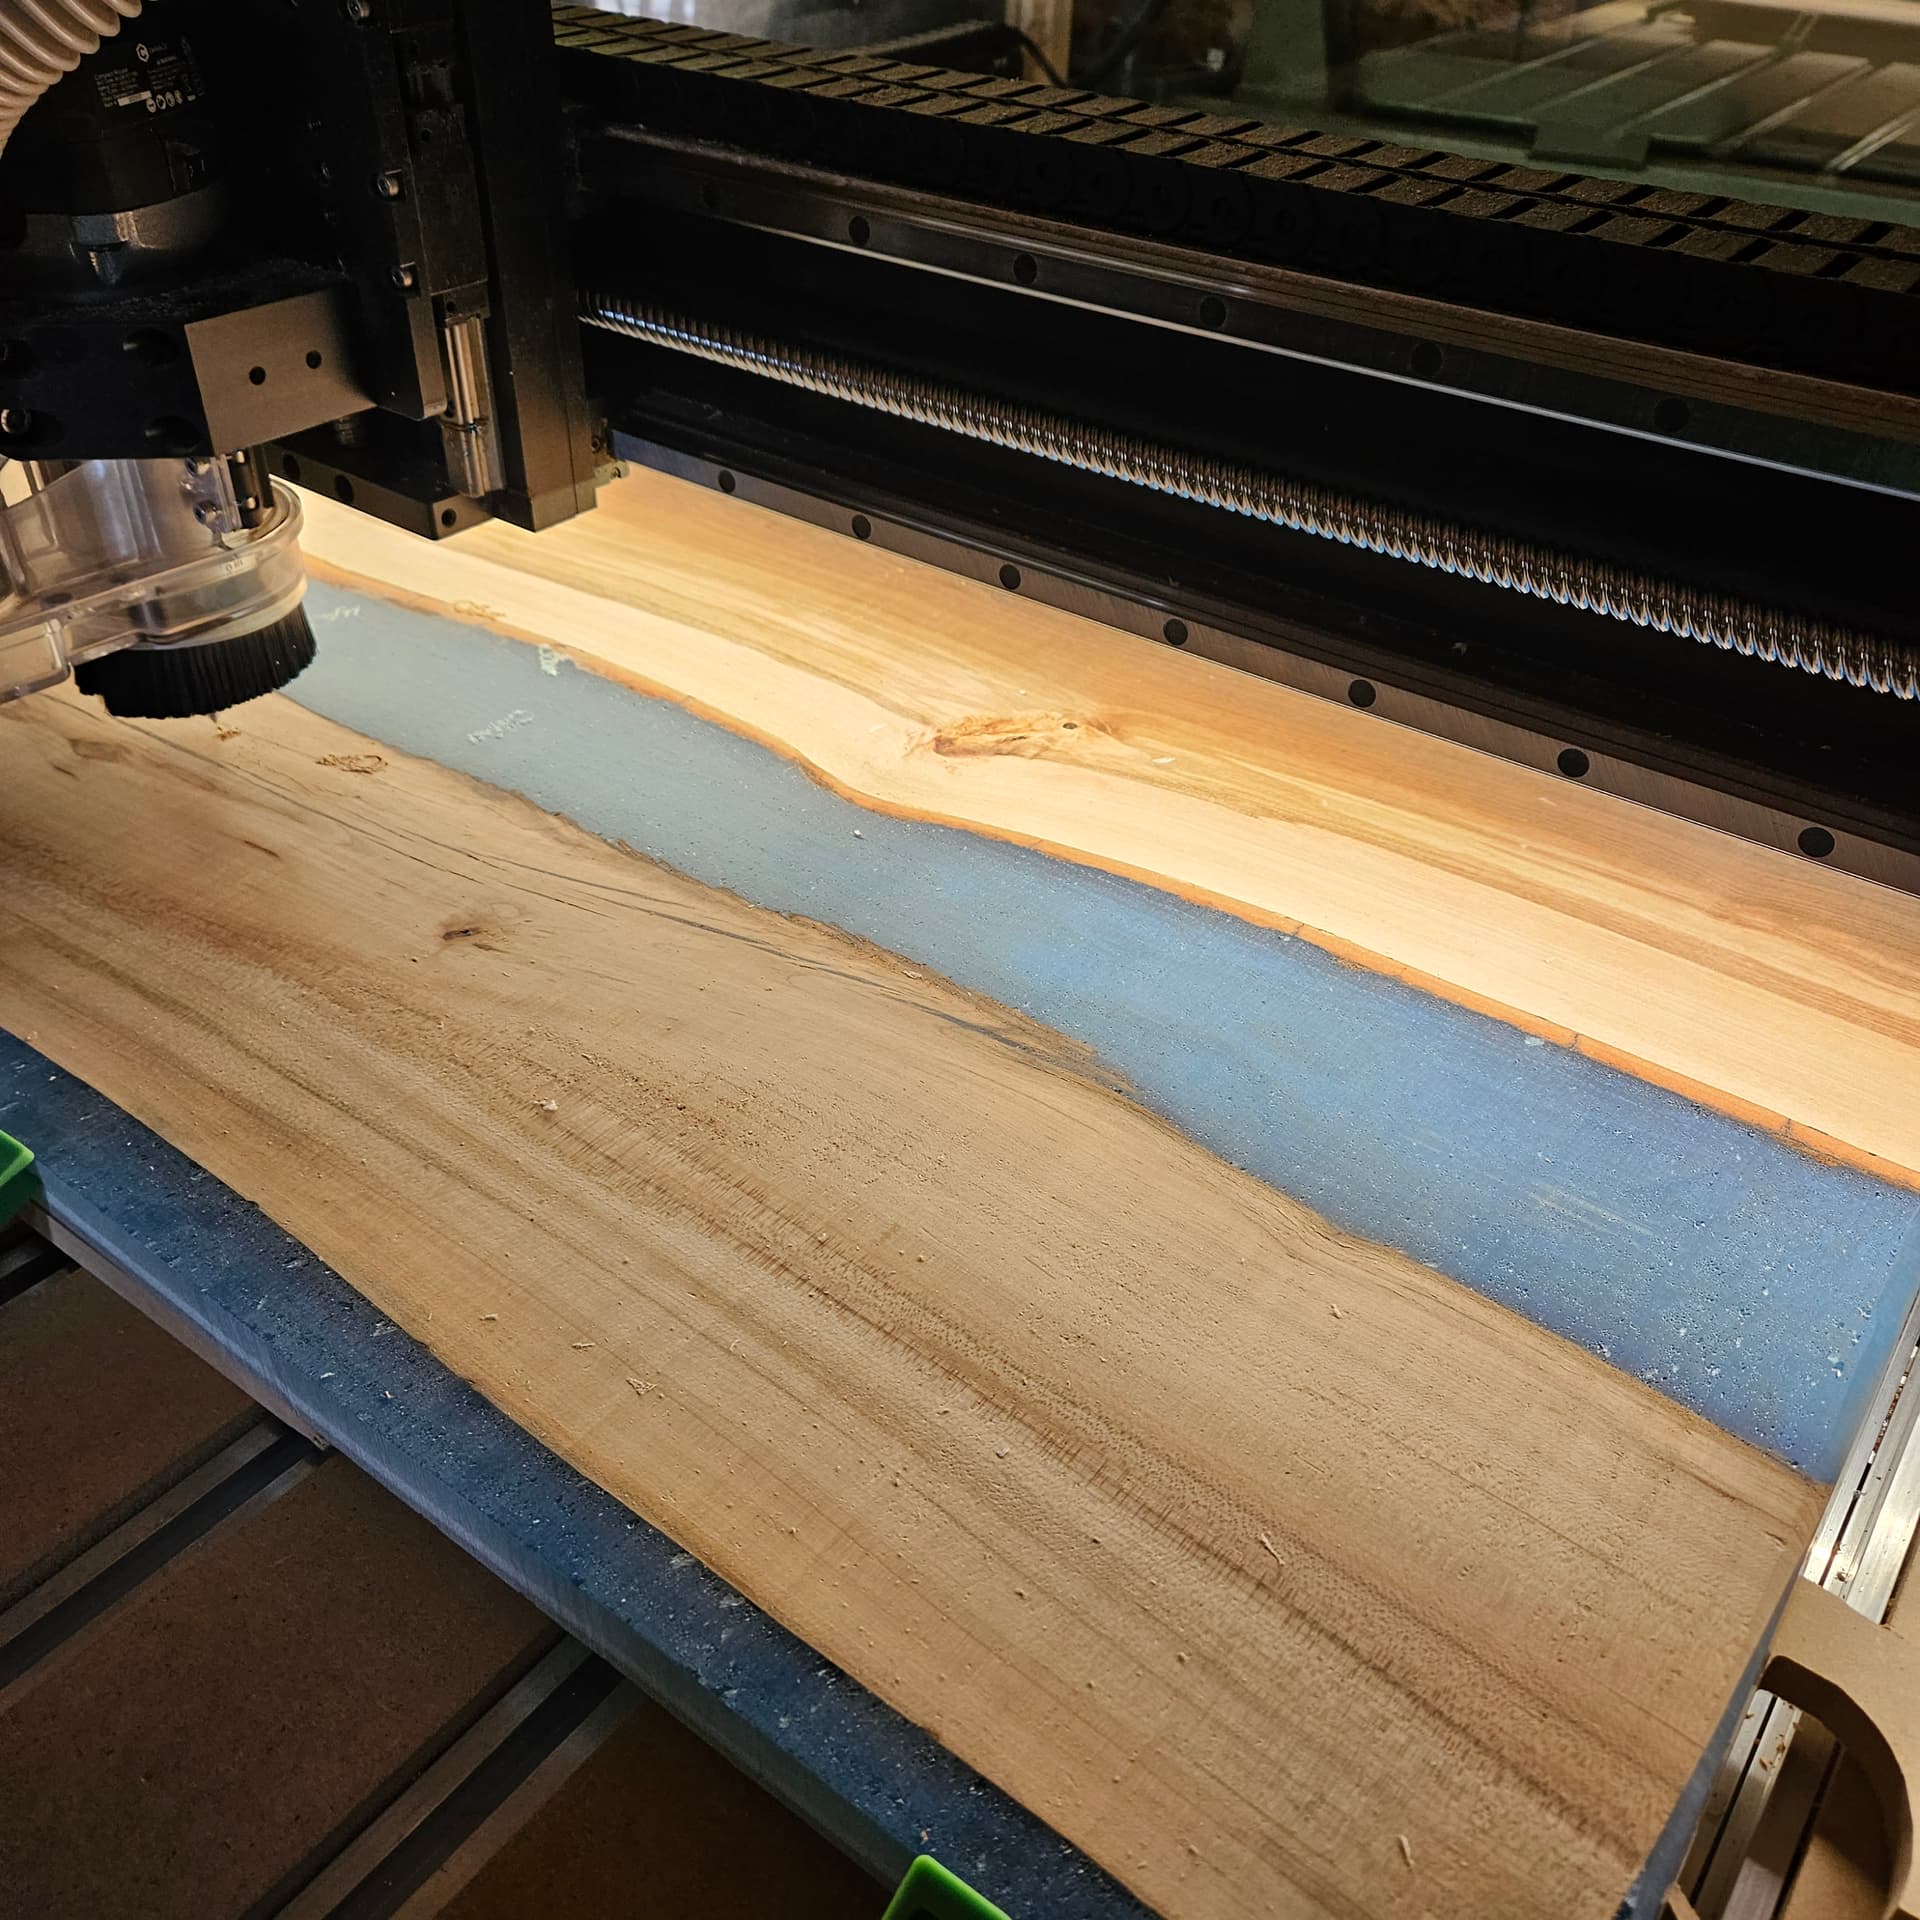
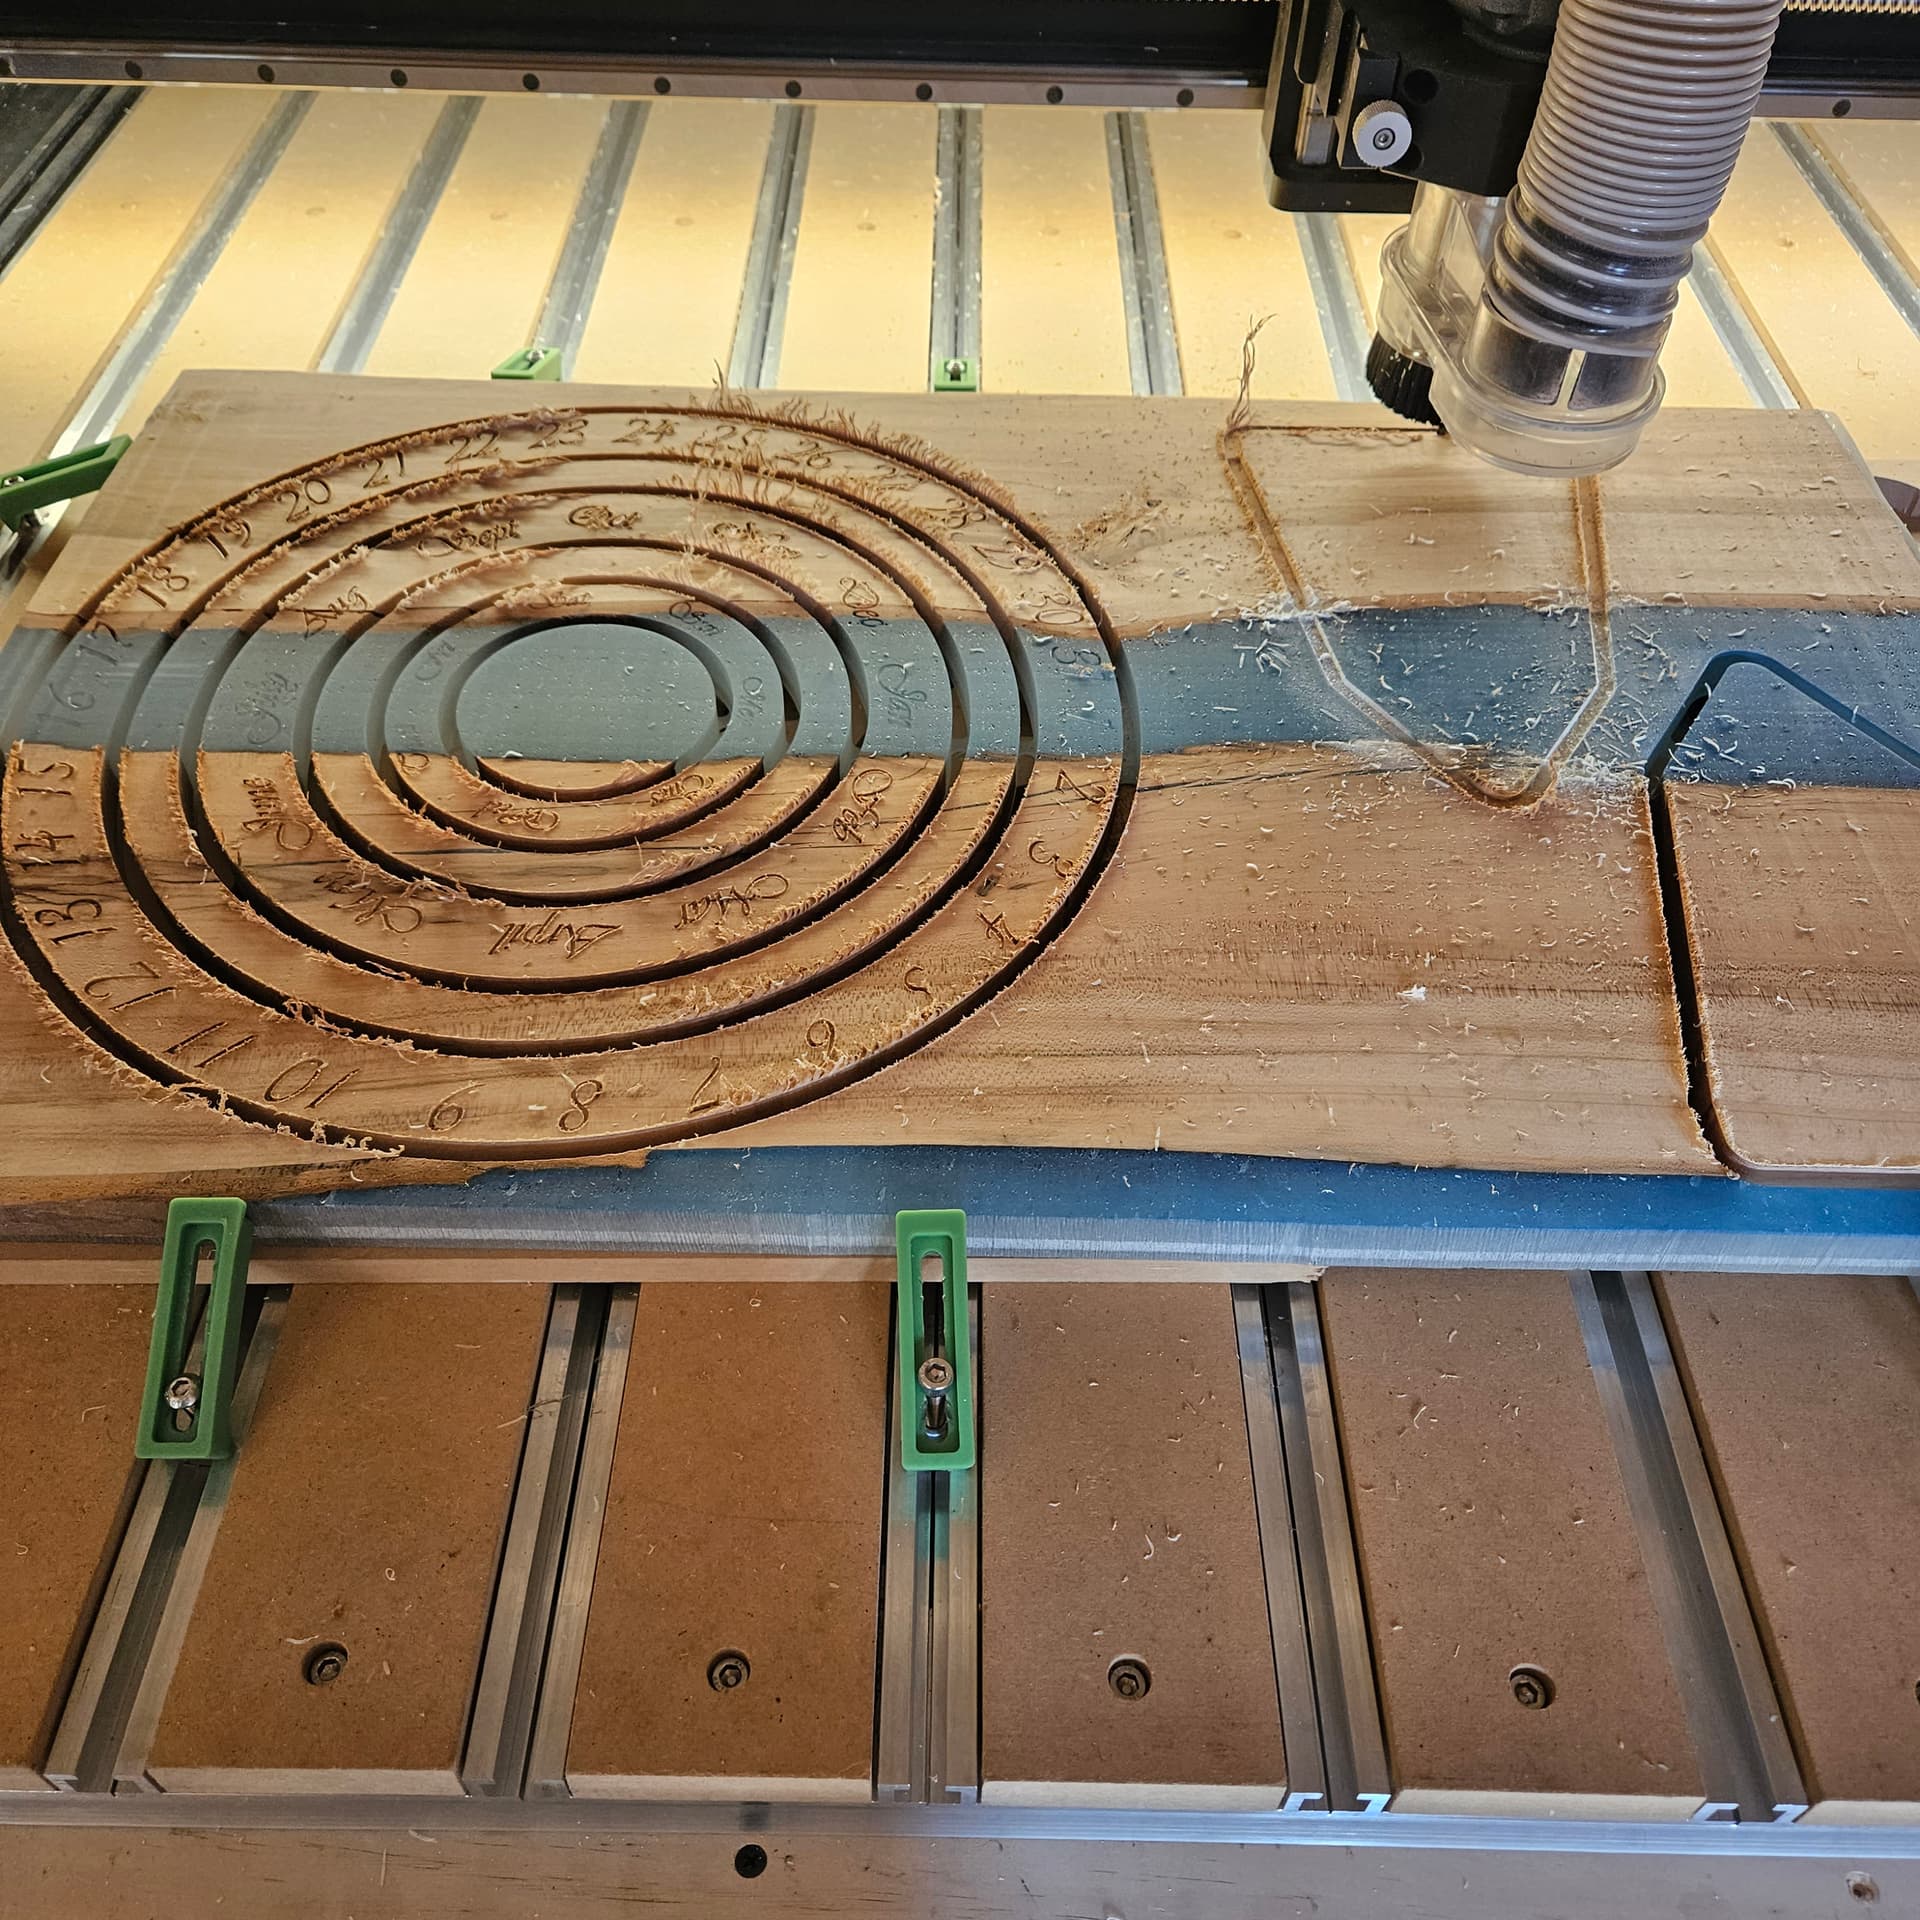
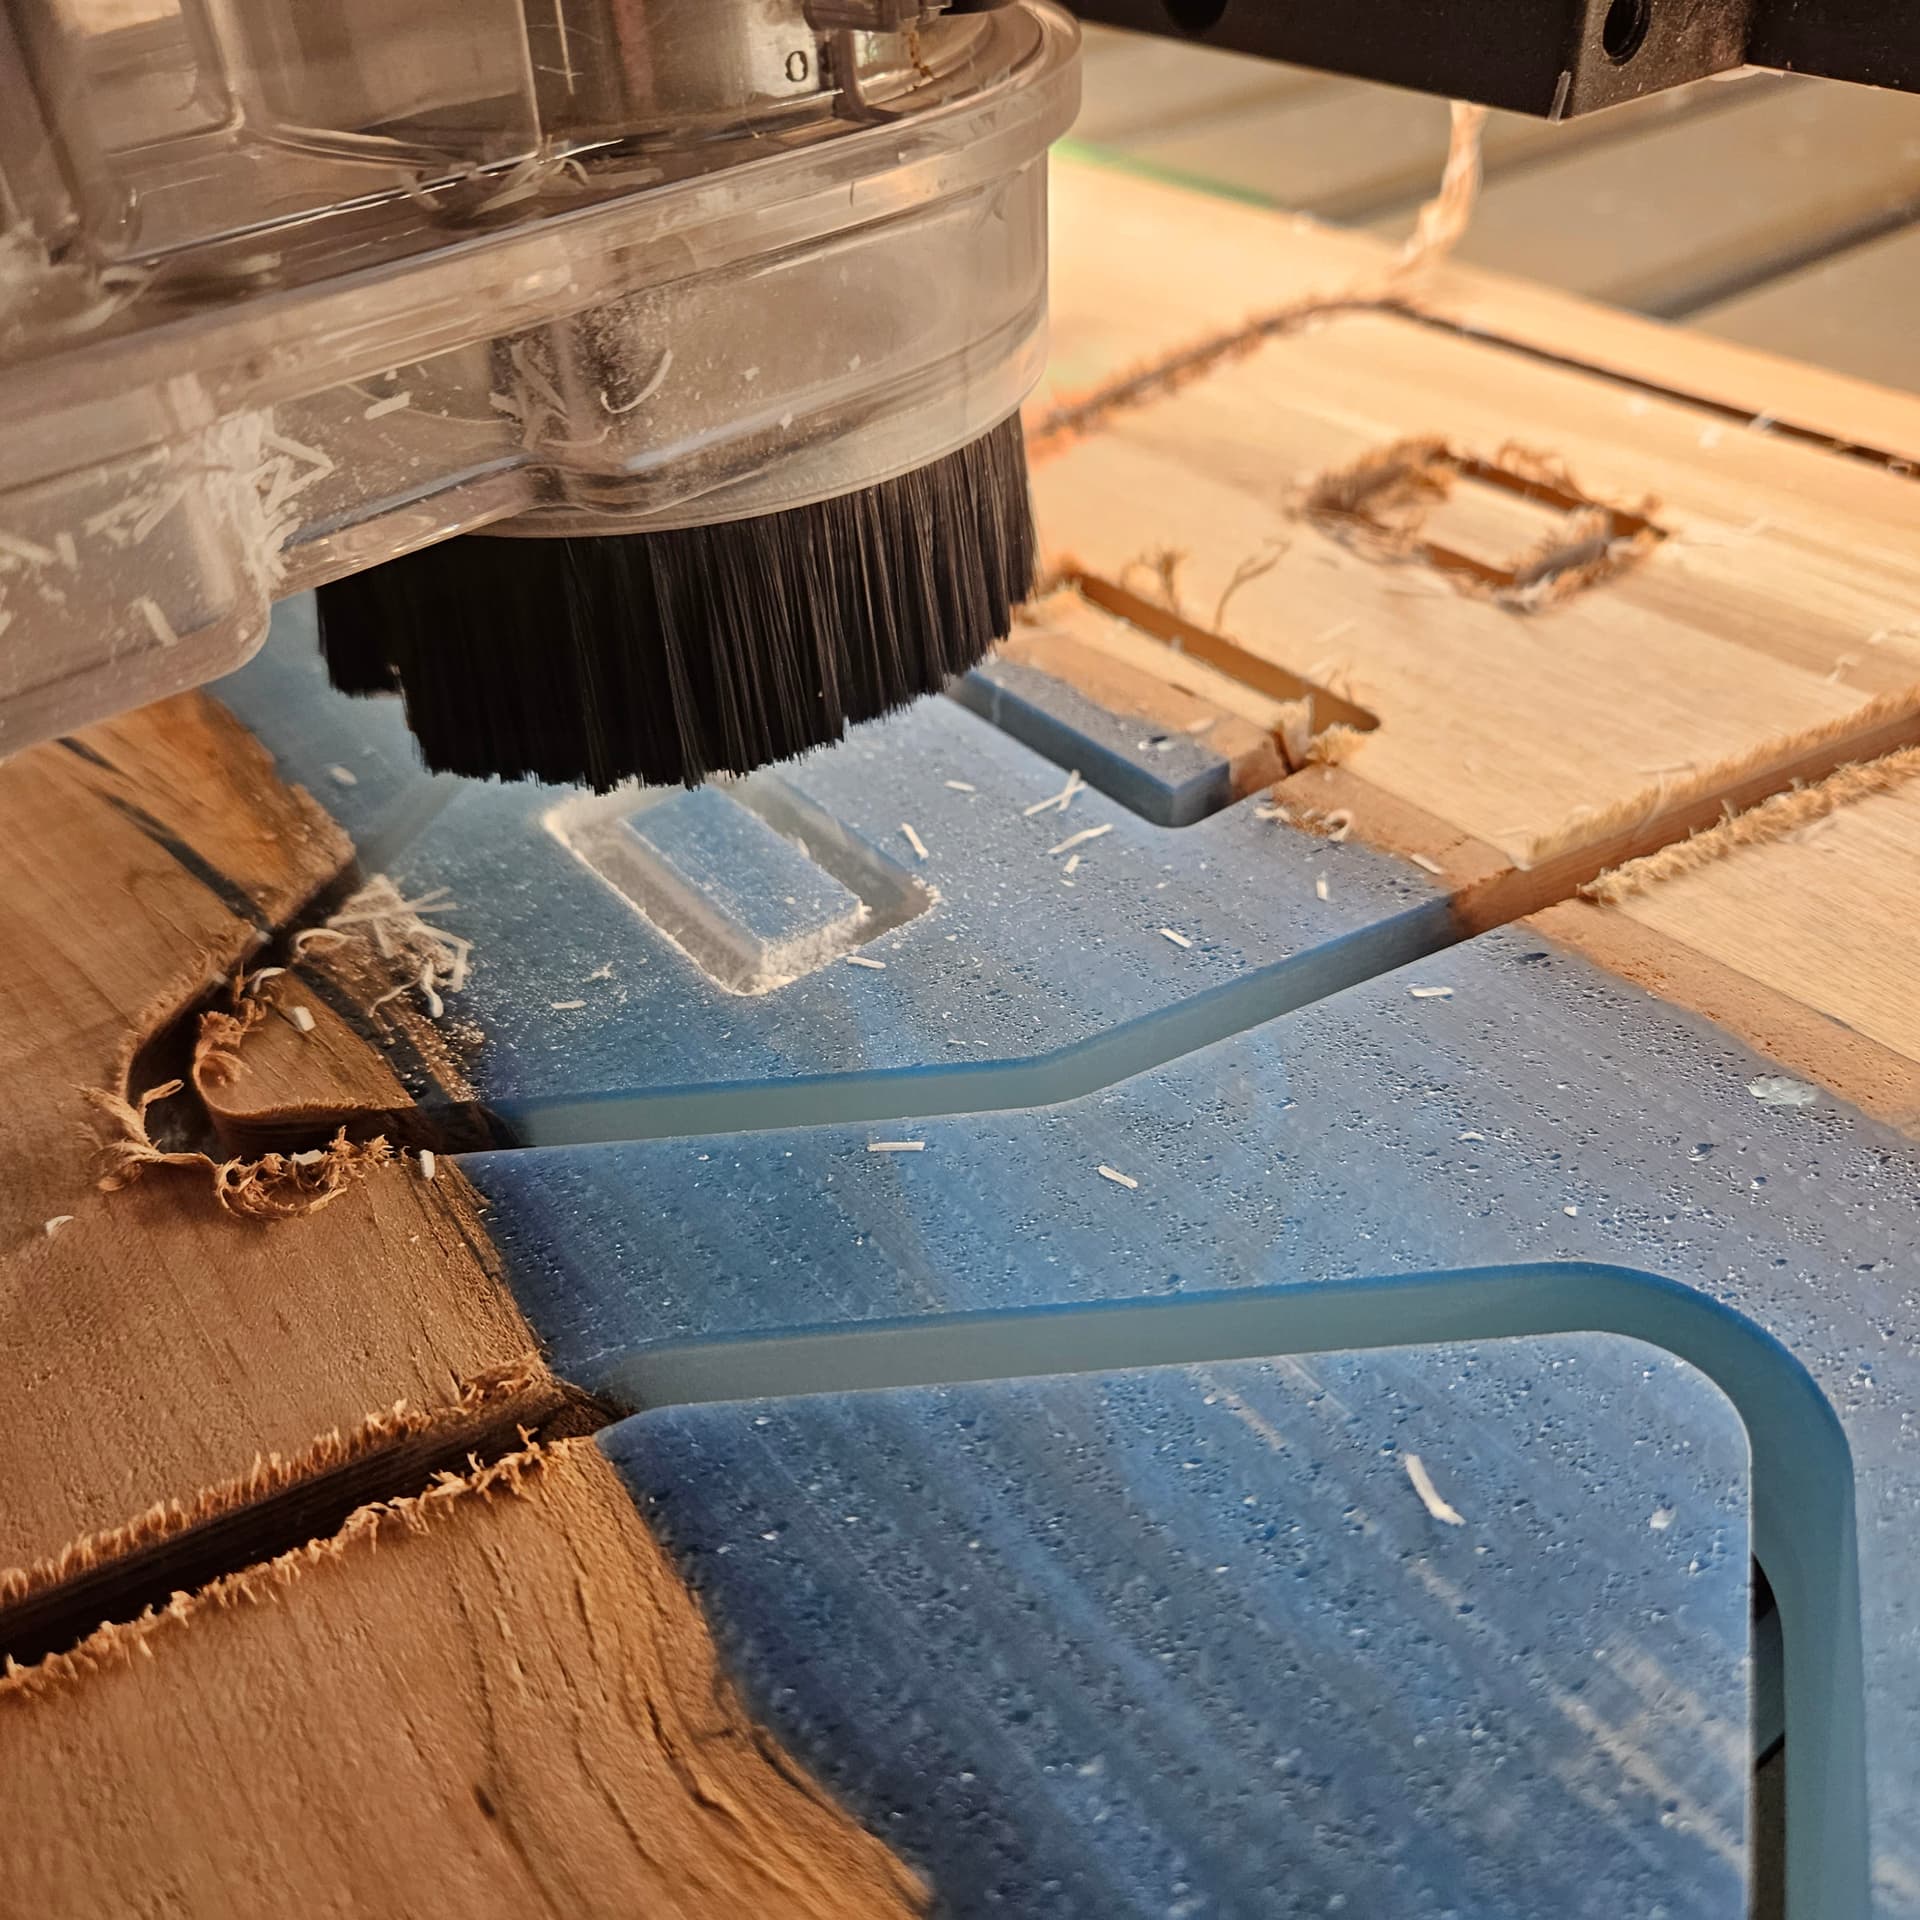
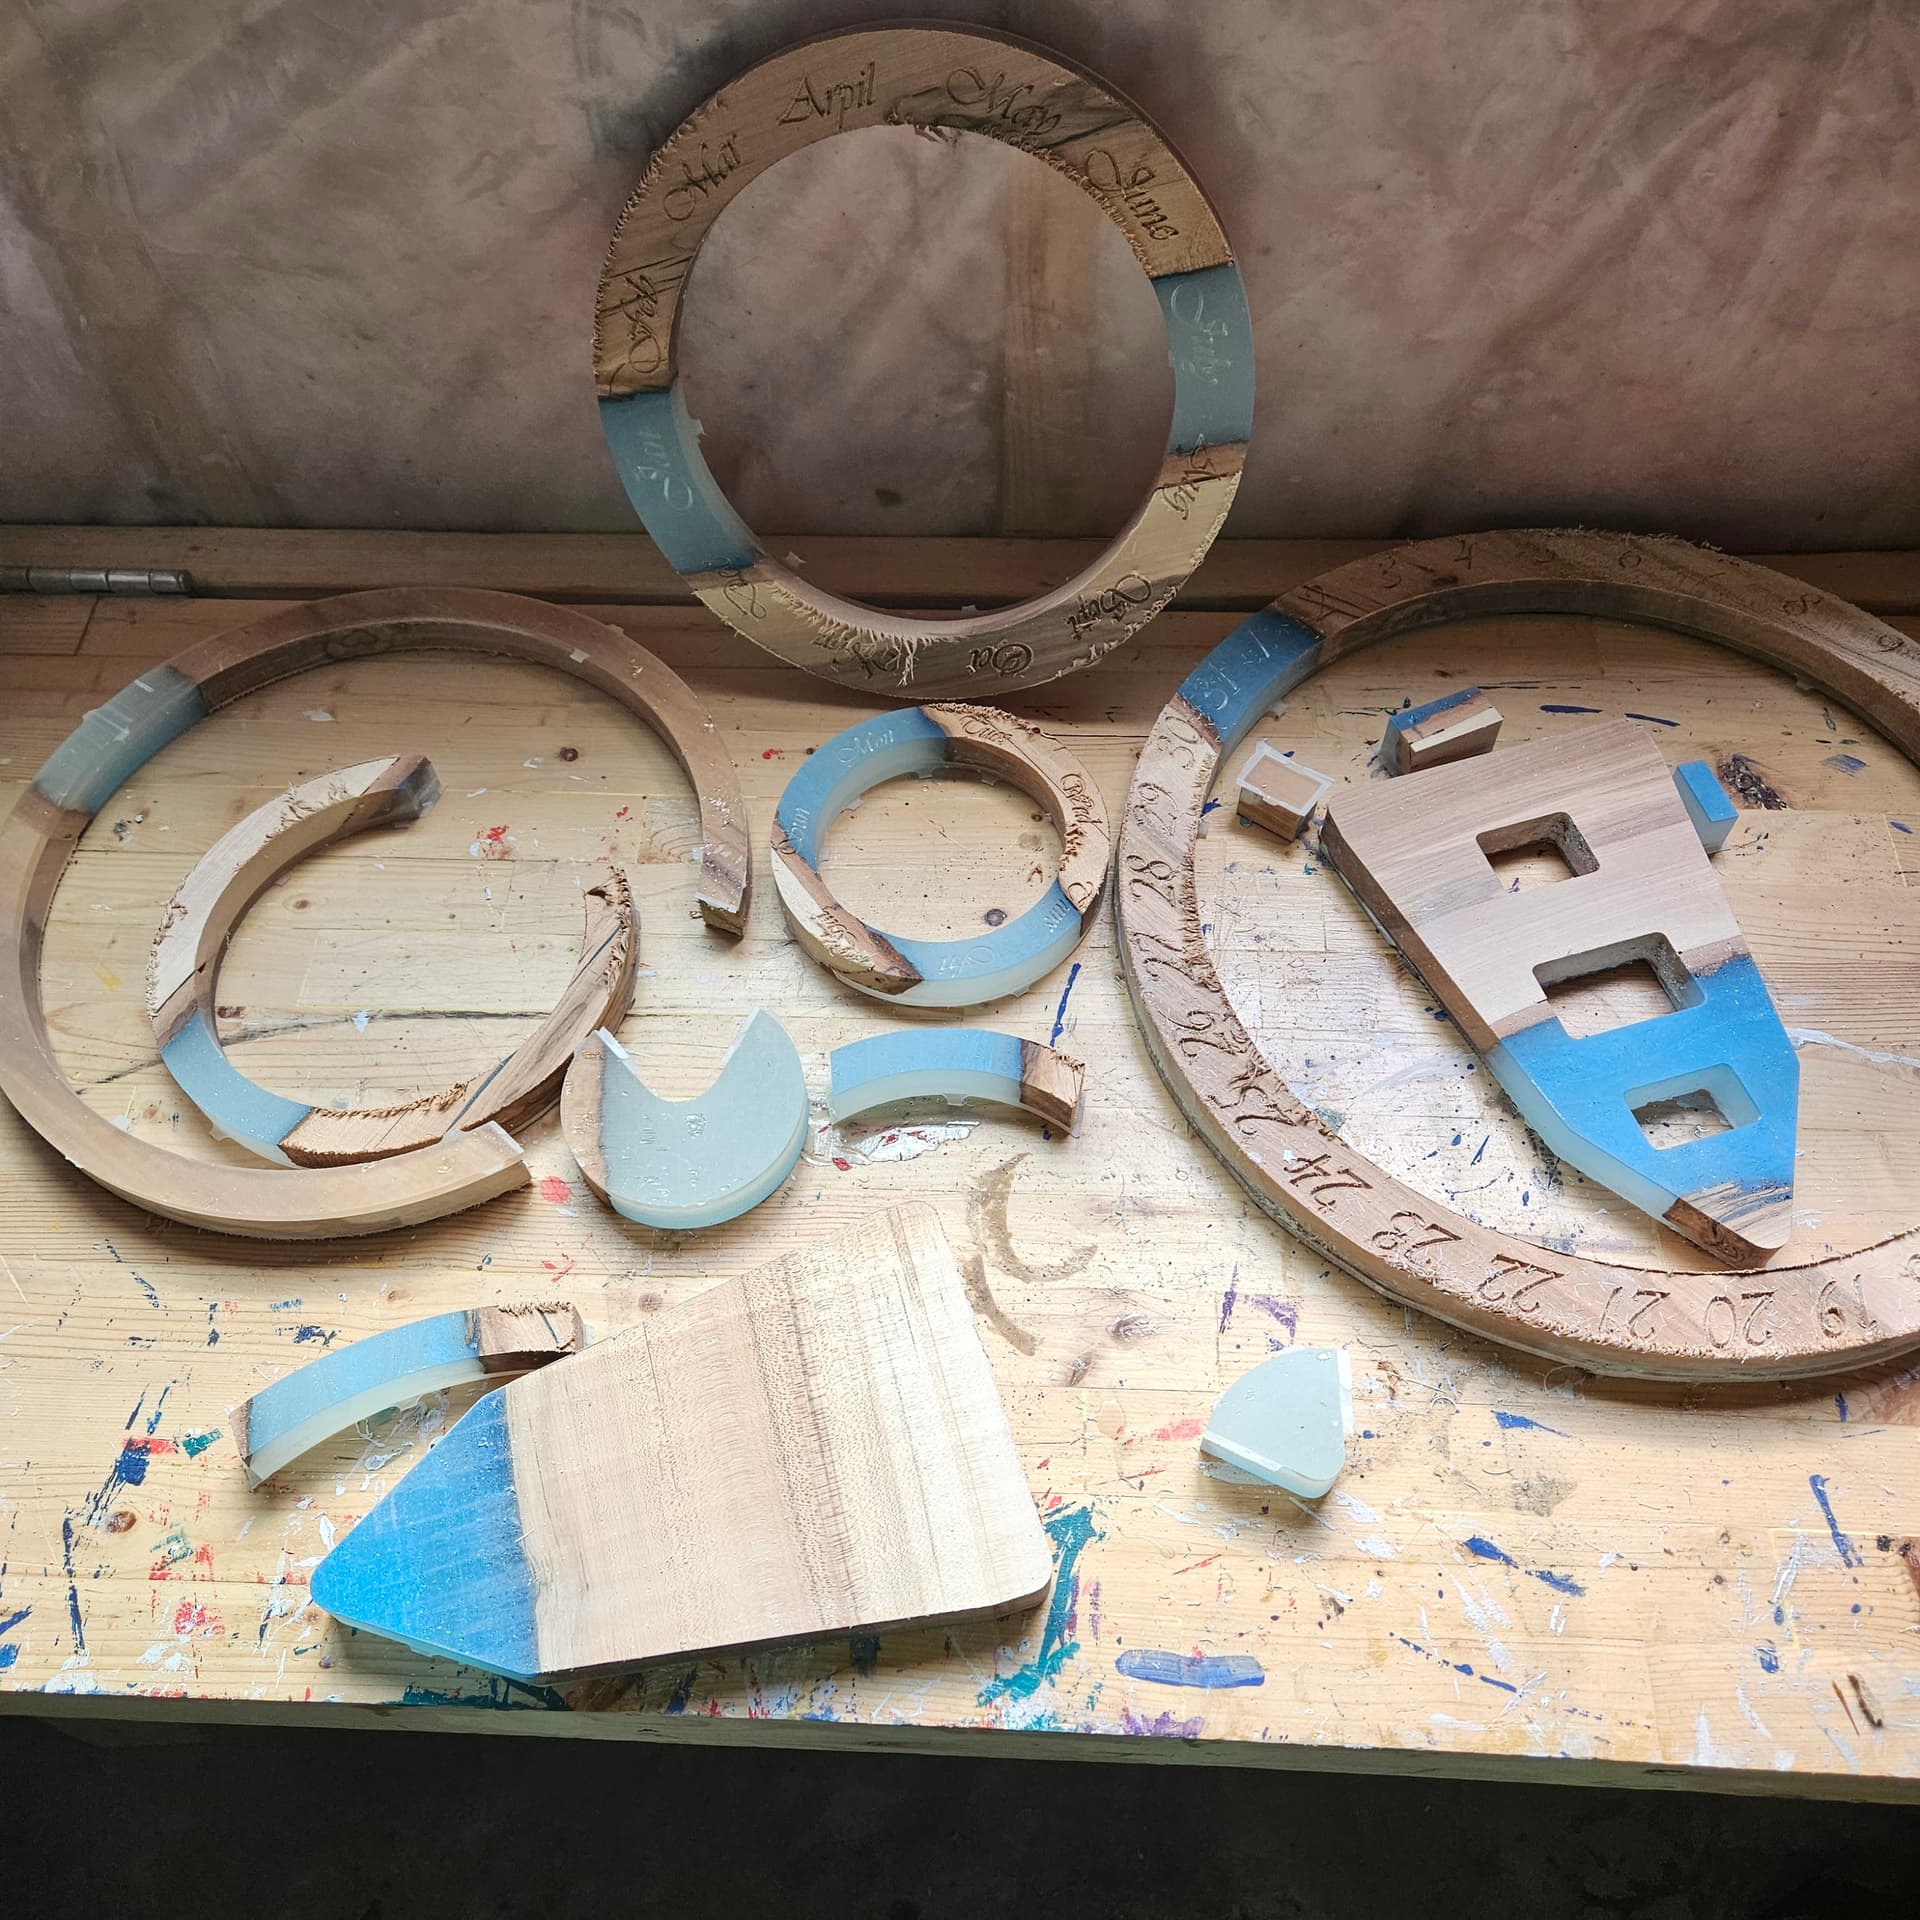
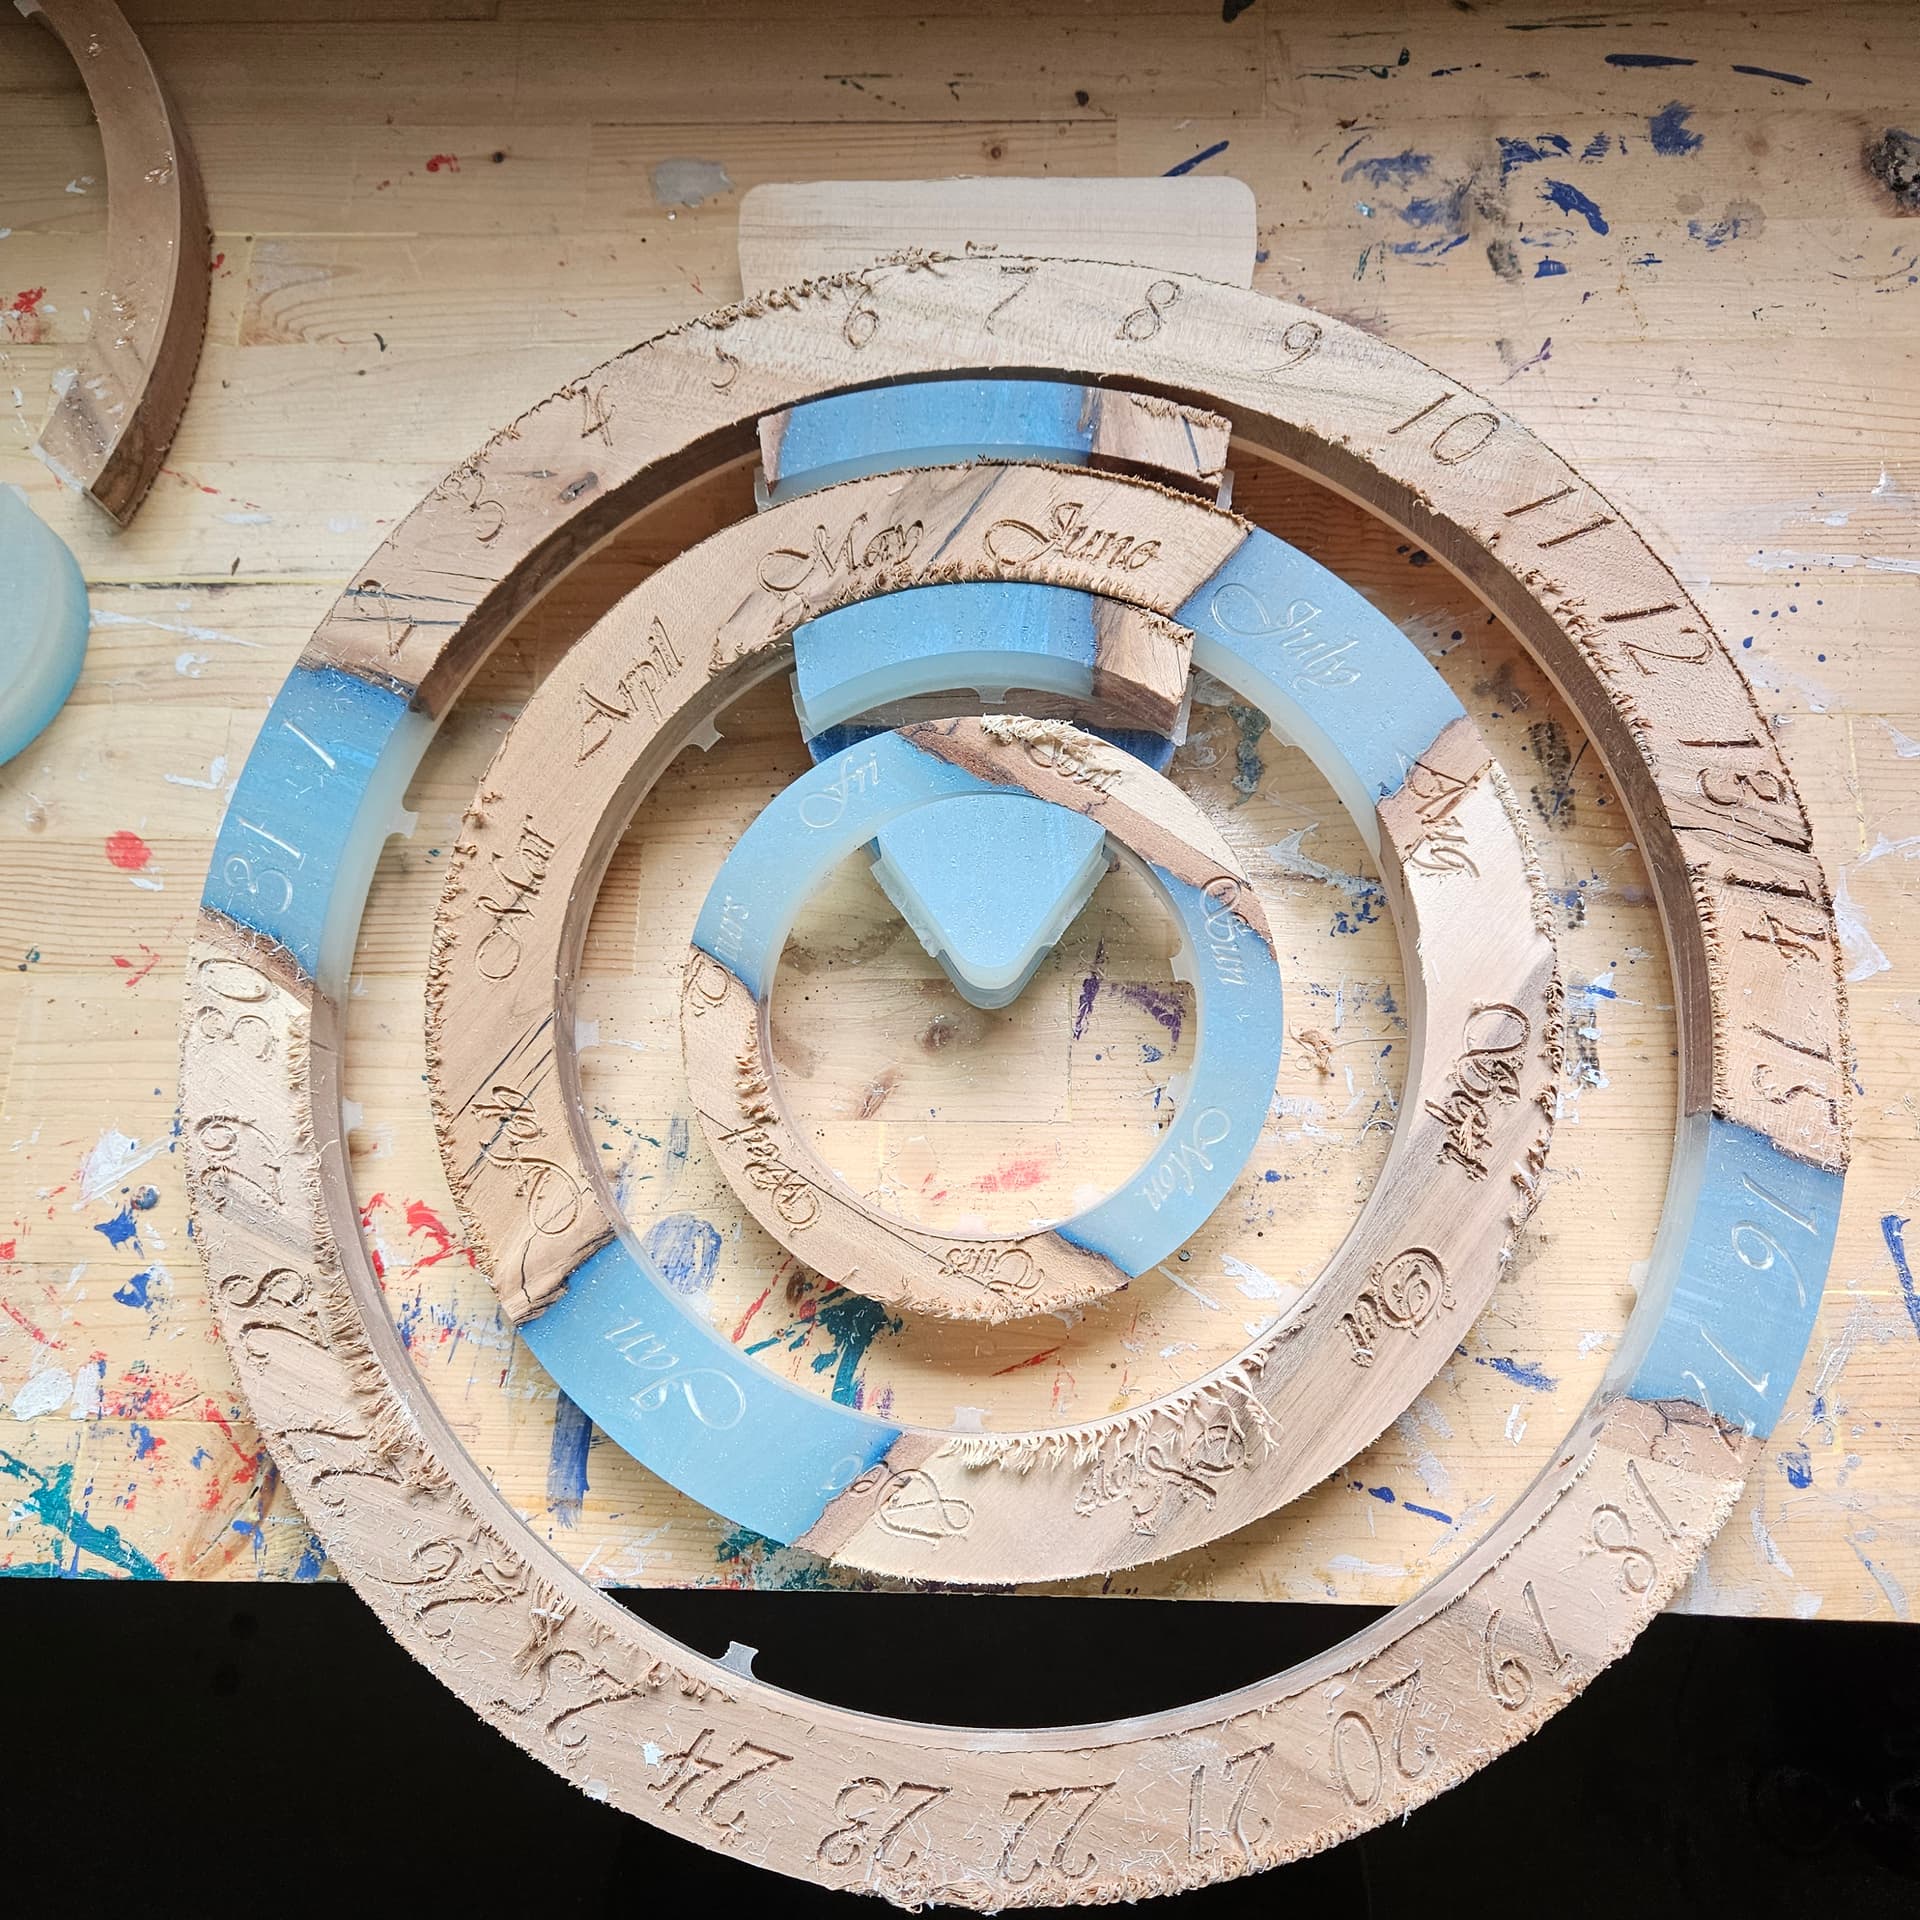
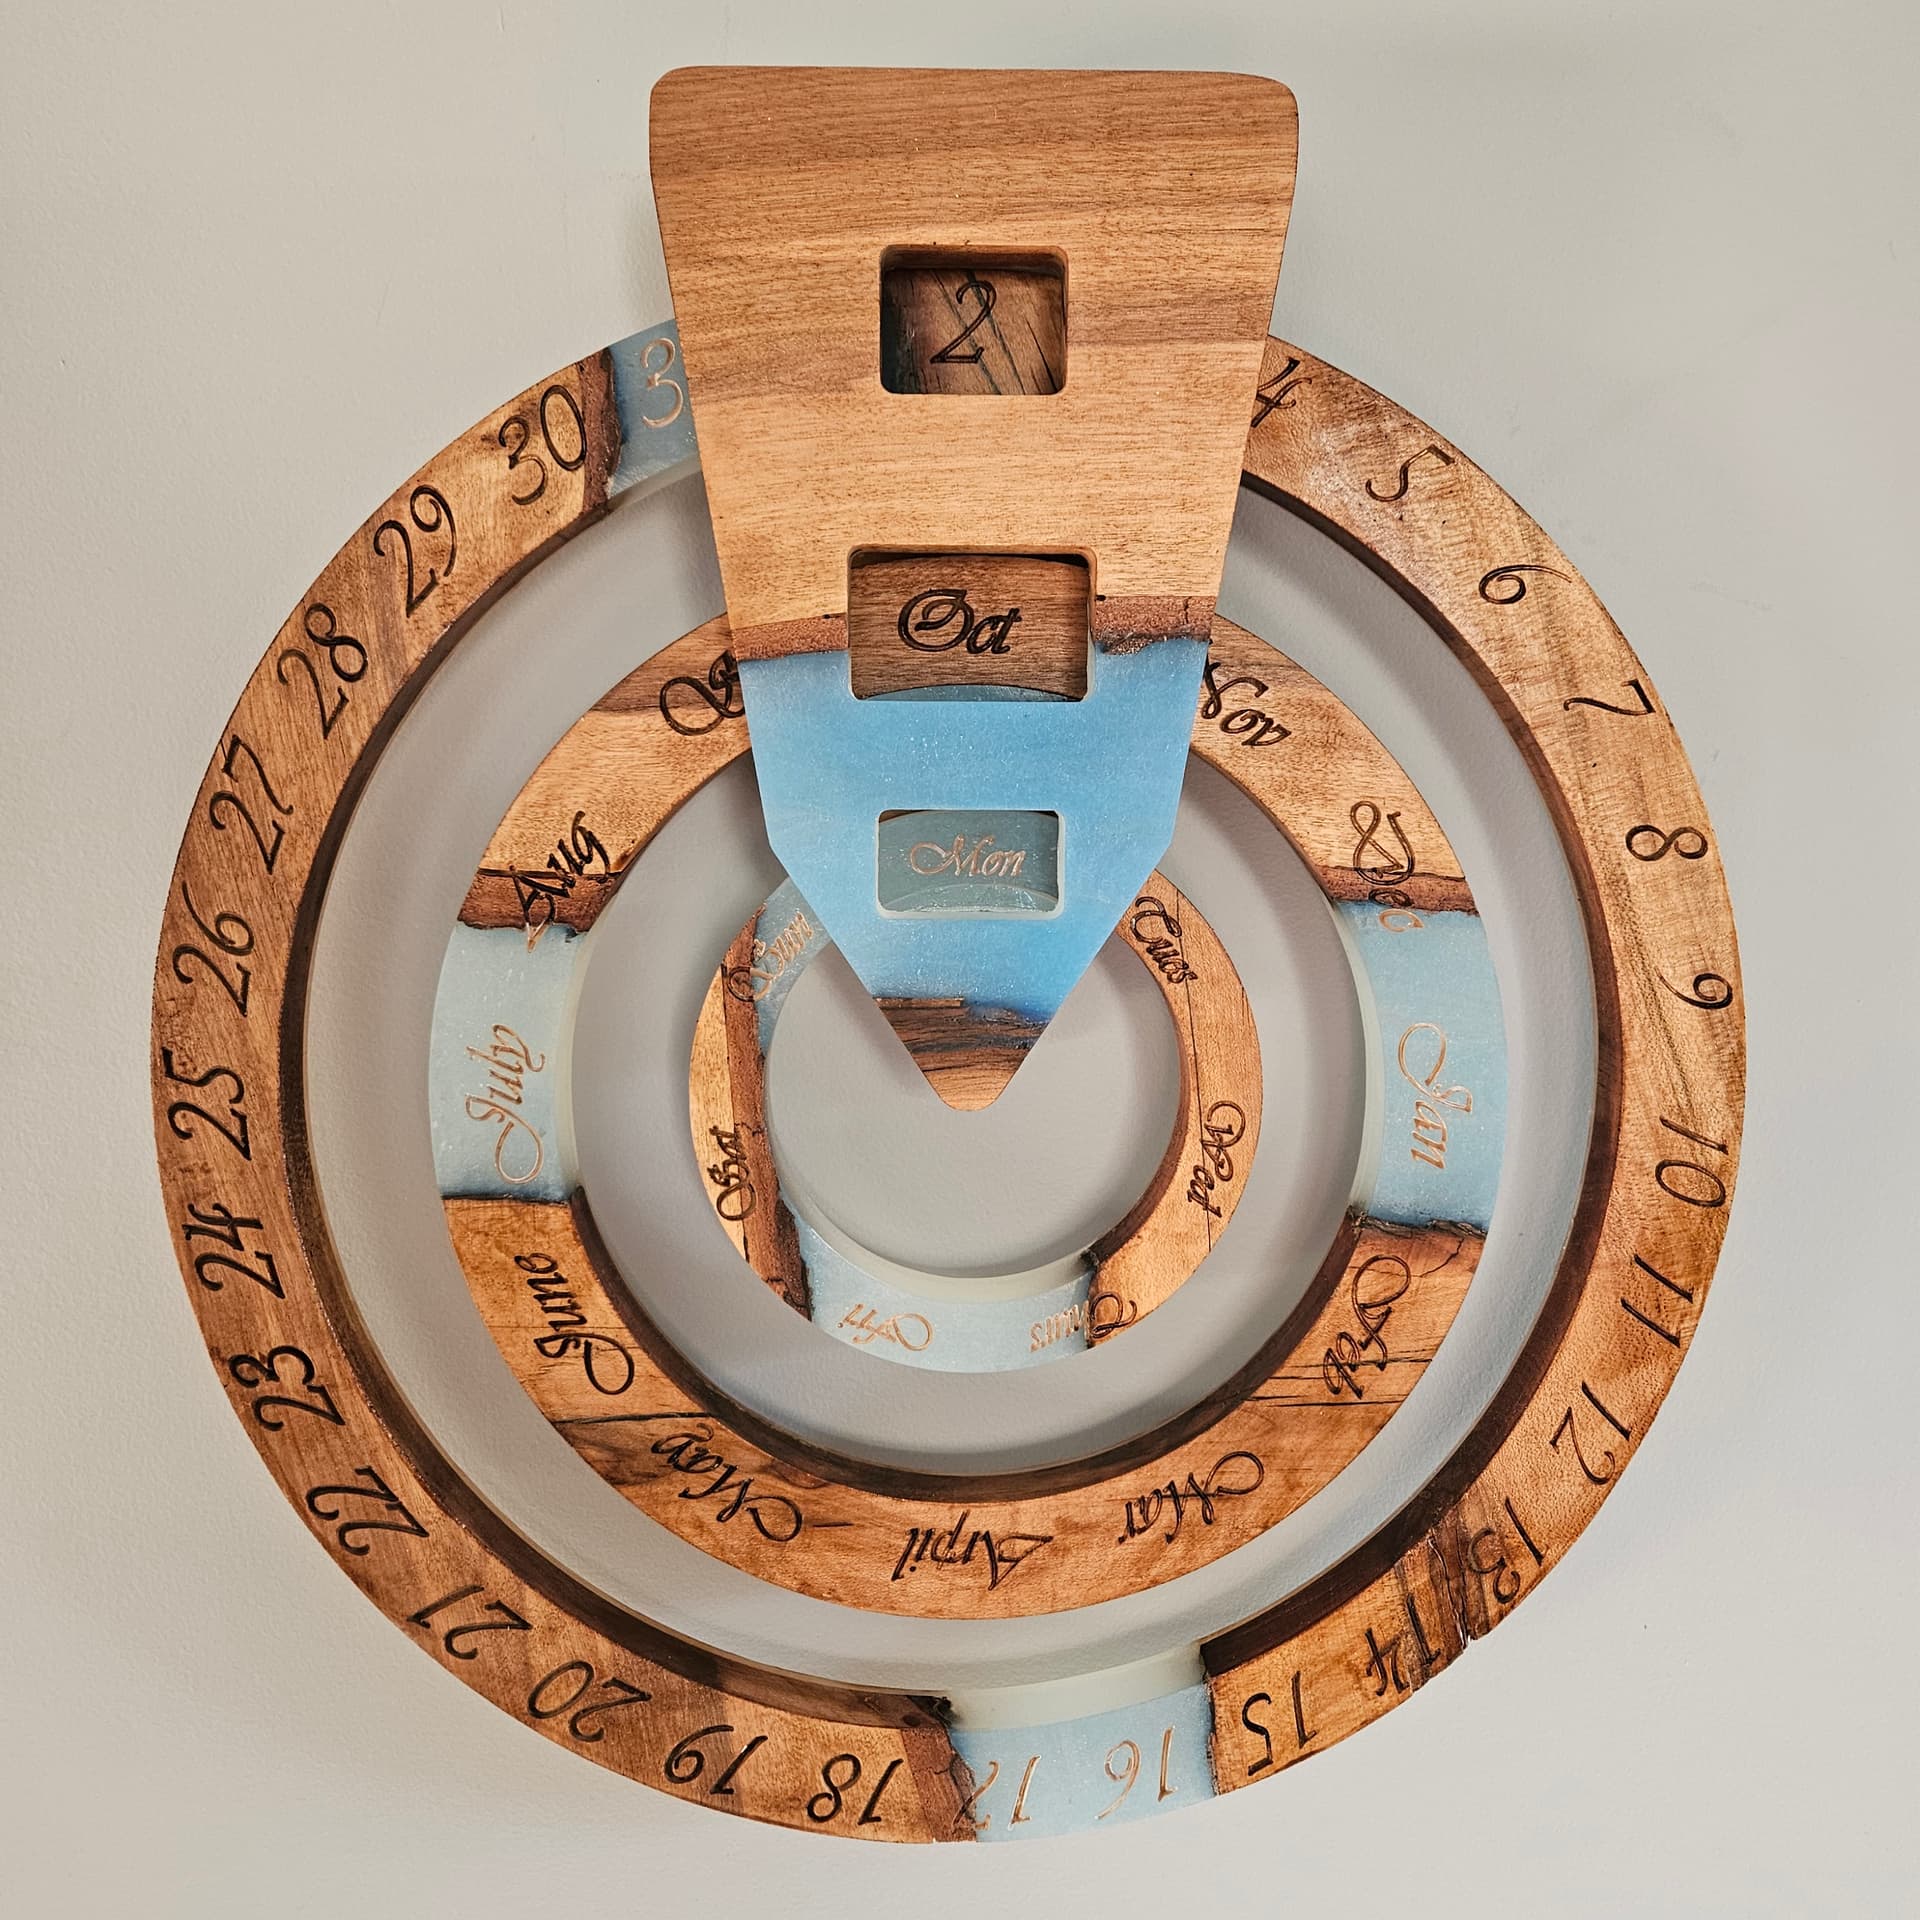
I have had a live edge and resin table top with matching end tables in my shop for months. Never made or bought legs. I had a new idea that i had to try mostly for the process and geometry in making the pieces.
Again, i really enjoy how the cnc makes me view things differently now. So the table top became a perpetual calendar. Light stain on the wood and light polish done on the resin. Hand painted the 60d vcarve on the resin portions.
(A Google picture was my inspiration - the rest was me