Note to self:
Doing the same thing over and over and getting the same result…certainly is the definition.
If the v-wheels turned without moving the gantry then adjust the v-wheels. With the v-wheels not tight it will cause slop in the movement.
My SO3 from 2016 has the original v-wheels so unless they are deformed or have a nick they are still good.
After adjustment grab the gantry on both ends and lift up and it should not move up and down. Same for your Z axis. Pull up and down and adjust the wheels as necessary. Only the bottom two on each bracket are adjustable. The top ones are fixed.
1 Like
I don’t have a SO3 and have no experience with v-wheels but I’d assume if all is good there should be little to no slack/movement so what @gdon_2003 is suggesting is probably your starting point. Circles and Squares maybe yielded acceptable results but the changes in direction are limited (square) or smooth (circle). I’d assume any inlay with many changes in direction would not result in a desirable outcome if there is slack in you machines movements.
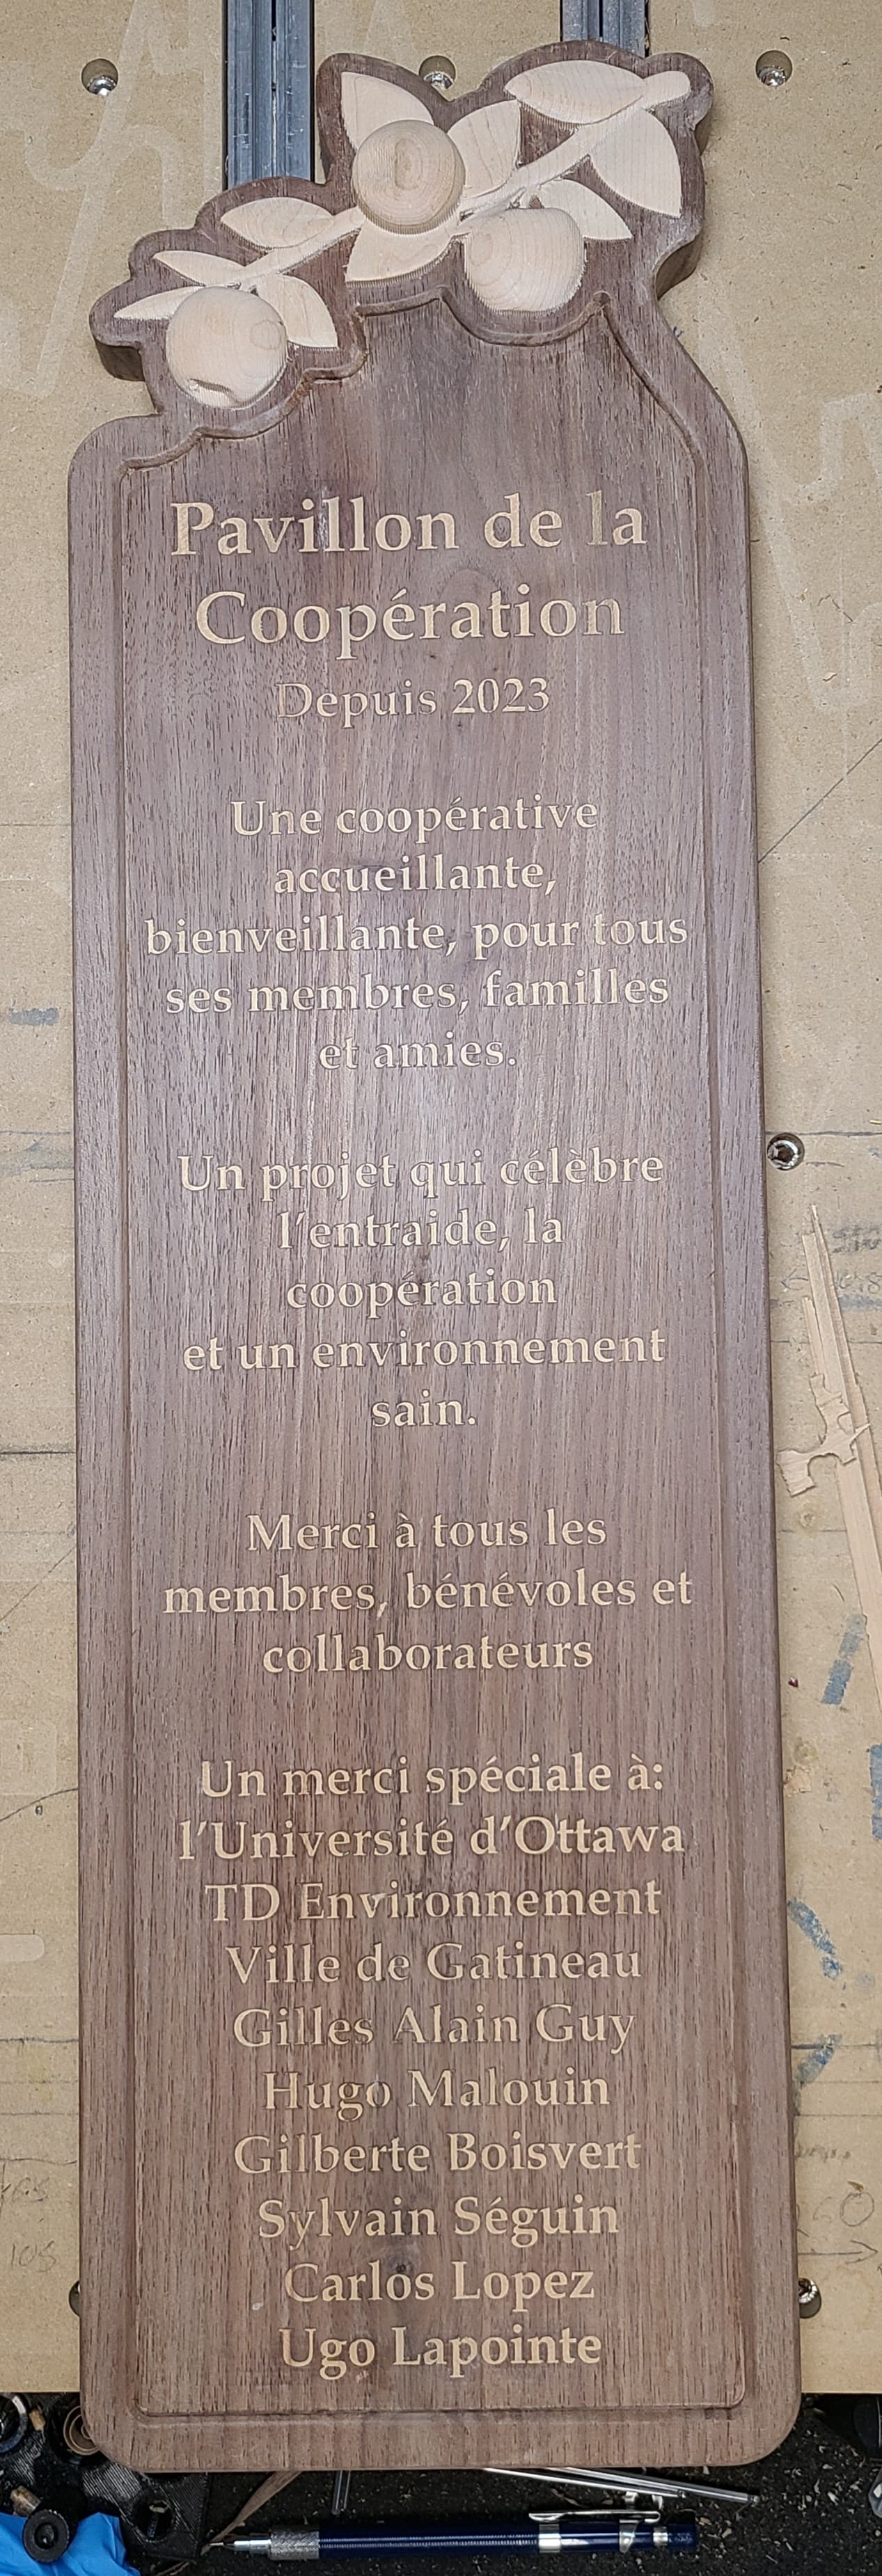
As for how I cut out my inlays I use the Engrave toolpath in Fusion 360 which I’m assuming works like VCarve in Carbide Create and use a 60deg vbit (Amana RC-1148 is what I’m currently using) for general use but when I do an inlay with very fine detail I’ll likely experiment with even pointier vbits to avoid having inlay pocket that are too shallow. When there is fine detail in the carve often end up doing multiple stepdowns because I’ve had more problems with chipout (pieces tearing out) when going full depth at once (for text this applies more to the plug (male) then it actual carve (female). Now I know some methods leave a glue gap but for this inlay I didn’t, and simply followed the exact same contours as the initial carve. I also let the vbit go to a bottom depth of 2mm to 3mm deeper then the inlay contours. Once the toolpath with the vbit is done I then use flat endmills of varying sizes to clear our excess material remaining between the inlay contours to a bottom depth about .5mm to 1 mm higher then the bottom depth of the vbit. This way if any material wants to tearout it likely will not affect the male part of the inlay plug and stays contained to the grove left behind by the vbit in the first toolpath.
Now I am noticing the glue seam leaving a shadow effect around the letters in this latest inlay attempt but I’ll attribute that to my poor clamping method that I used this time around. Usually I remove the project from the CNC bed and sandwich the inlay/project between scrap boards and clamp down hard using many, many clamps (ideally I’d love to have a hydraulic press but space is at a premium).
3 Likes
I grabbed Titebond III Exterior glue one time on a test piece. That glue dried a brown color and did look like a shadow. Titebond Original Interior glue was essentially clear.
The better the fit of the inlay means that there is less of an exposed glue line to see. Your project is very ambitious in that it has all those letters. +1 for making it look so good.
2 Likes
I would say +5 for that.
Another thing I should have maybe done was not keep the inlay as a single piece and cut it between each grouping of text/paragraph and glue them one at a time using more clamps.
Can’t wait to get a finish on this and bring the grain and wood color to life.
1 Like
I would have done that not out of foresight over clamping issues but over fear that I would butcher it during the cutting.
1 Like
I saw a similar box somewhere in the vast jungle of the internet and wanted to try and make my own. It was fun taking the stock right off the machine and being able to do the glue up without any serious work. Super happy with it, despite some chatter in the pockets, but I don’t know if it’s entirely avoidable with a 1/16" bit in this material without doing a light perimeter pass at depth.

21 Likes
But what did you trap inside? ![]()
John Clark a member here on the forum has a youtube channel. He did a video on cubeism. Possible him?

5 Likes
I had this one on my website for a while, but the joints are nowhere near as nice as the ones @TheWoodworker did. Nice work!

8 Likes
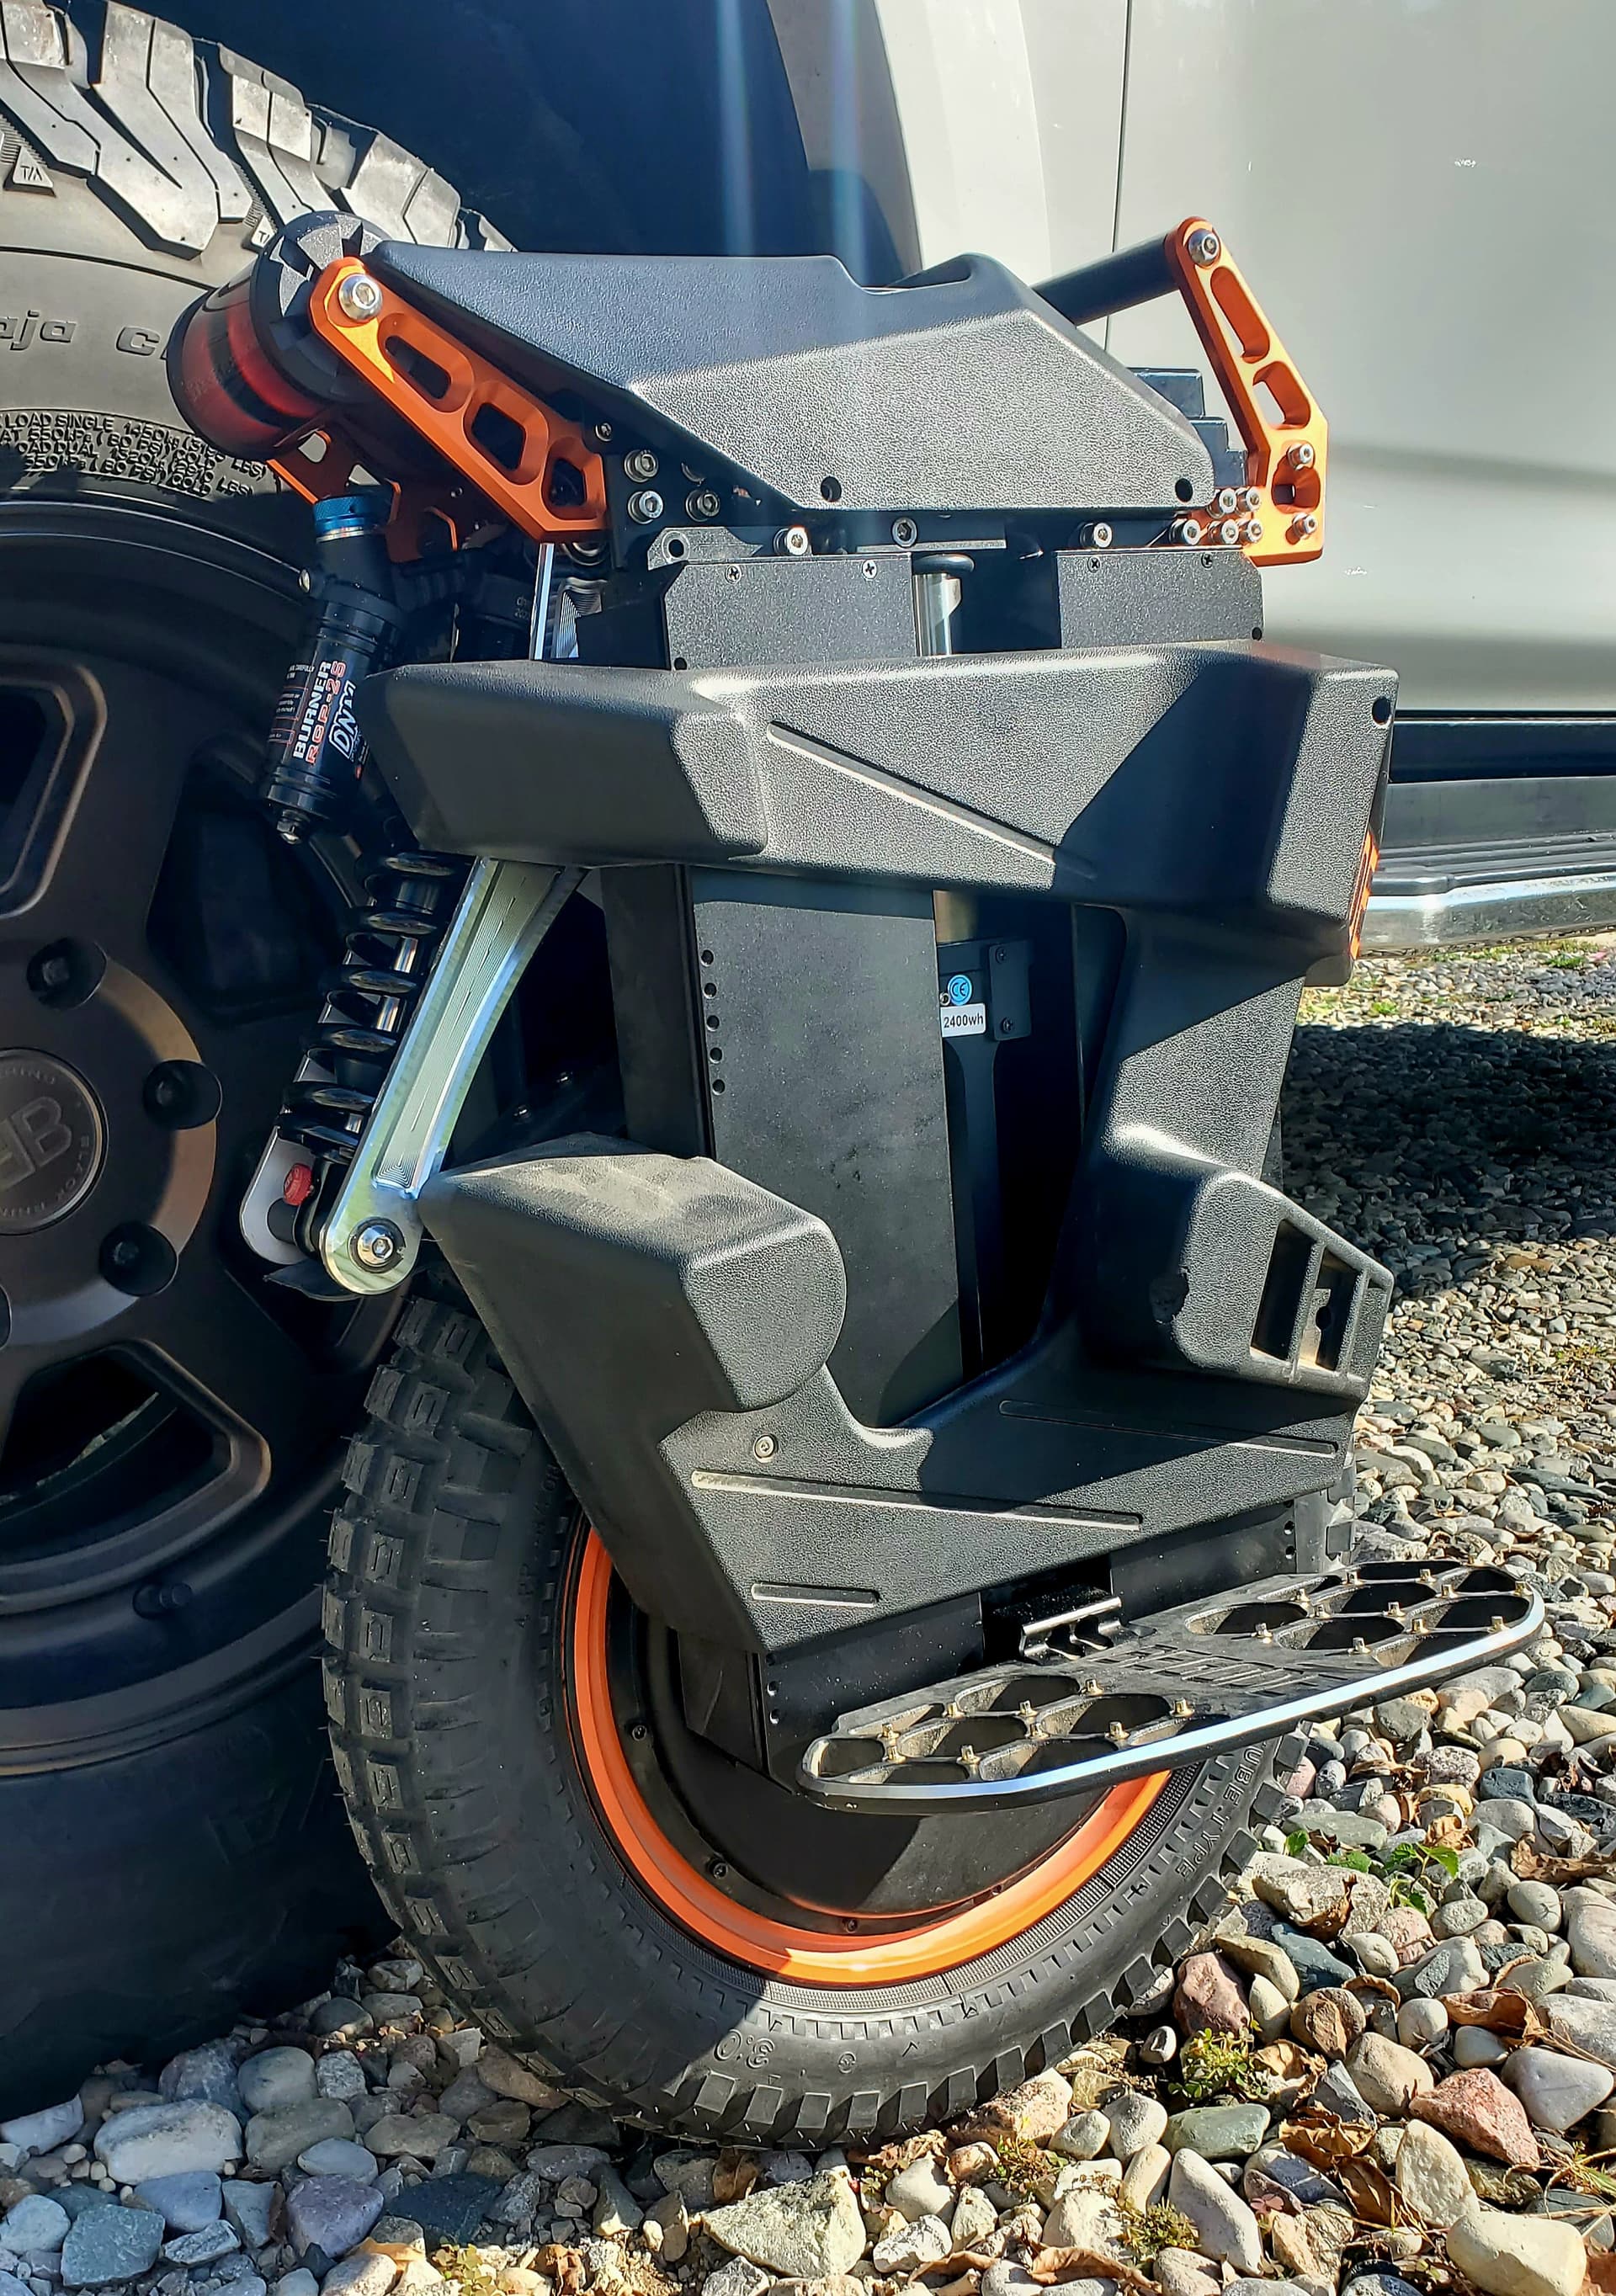
Feeling pretty bad about not checking notifications here. Lots of things going on in the background of life. Hope these billet parts make up for that. ![]()
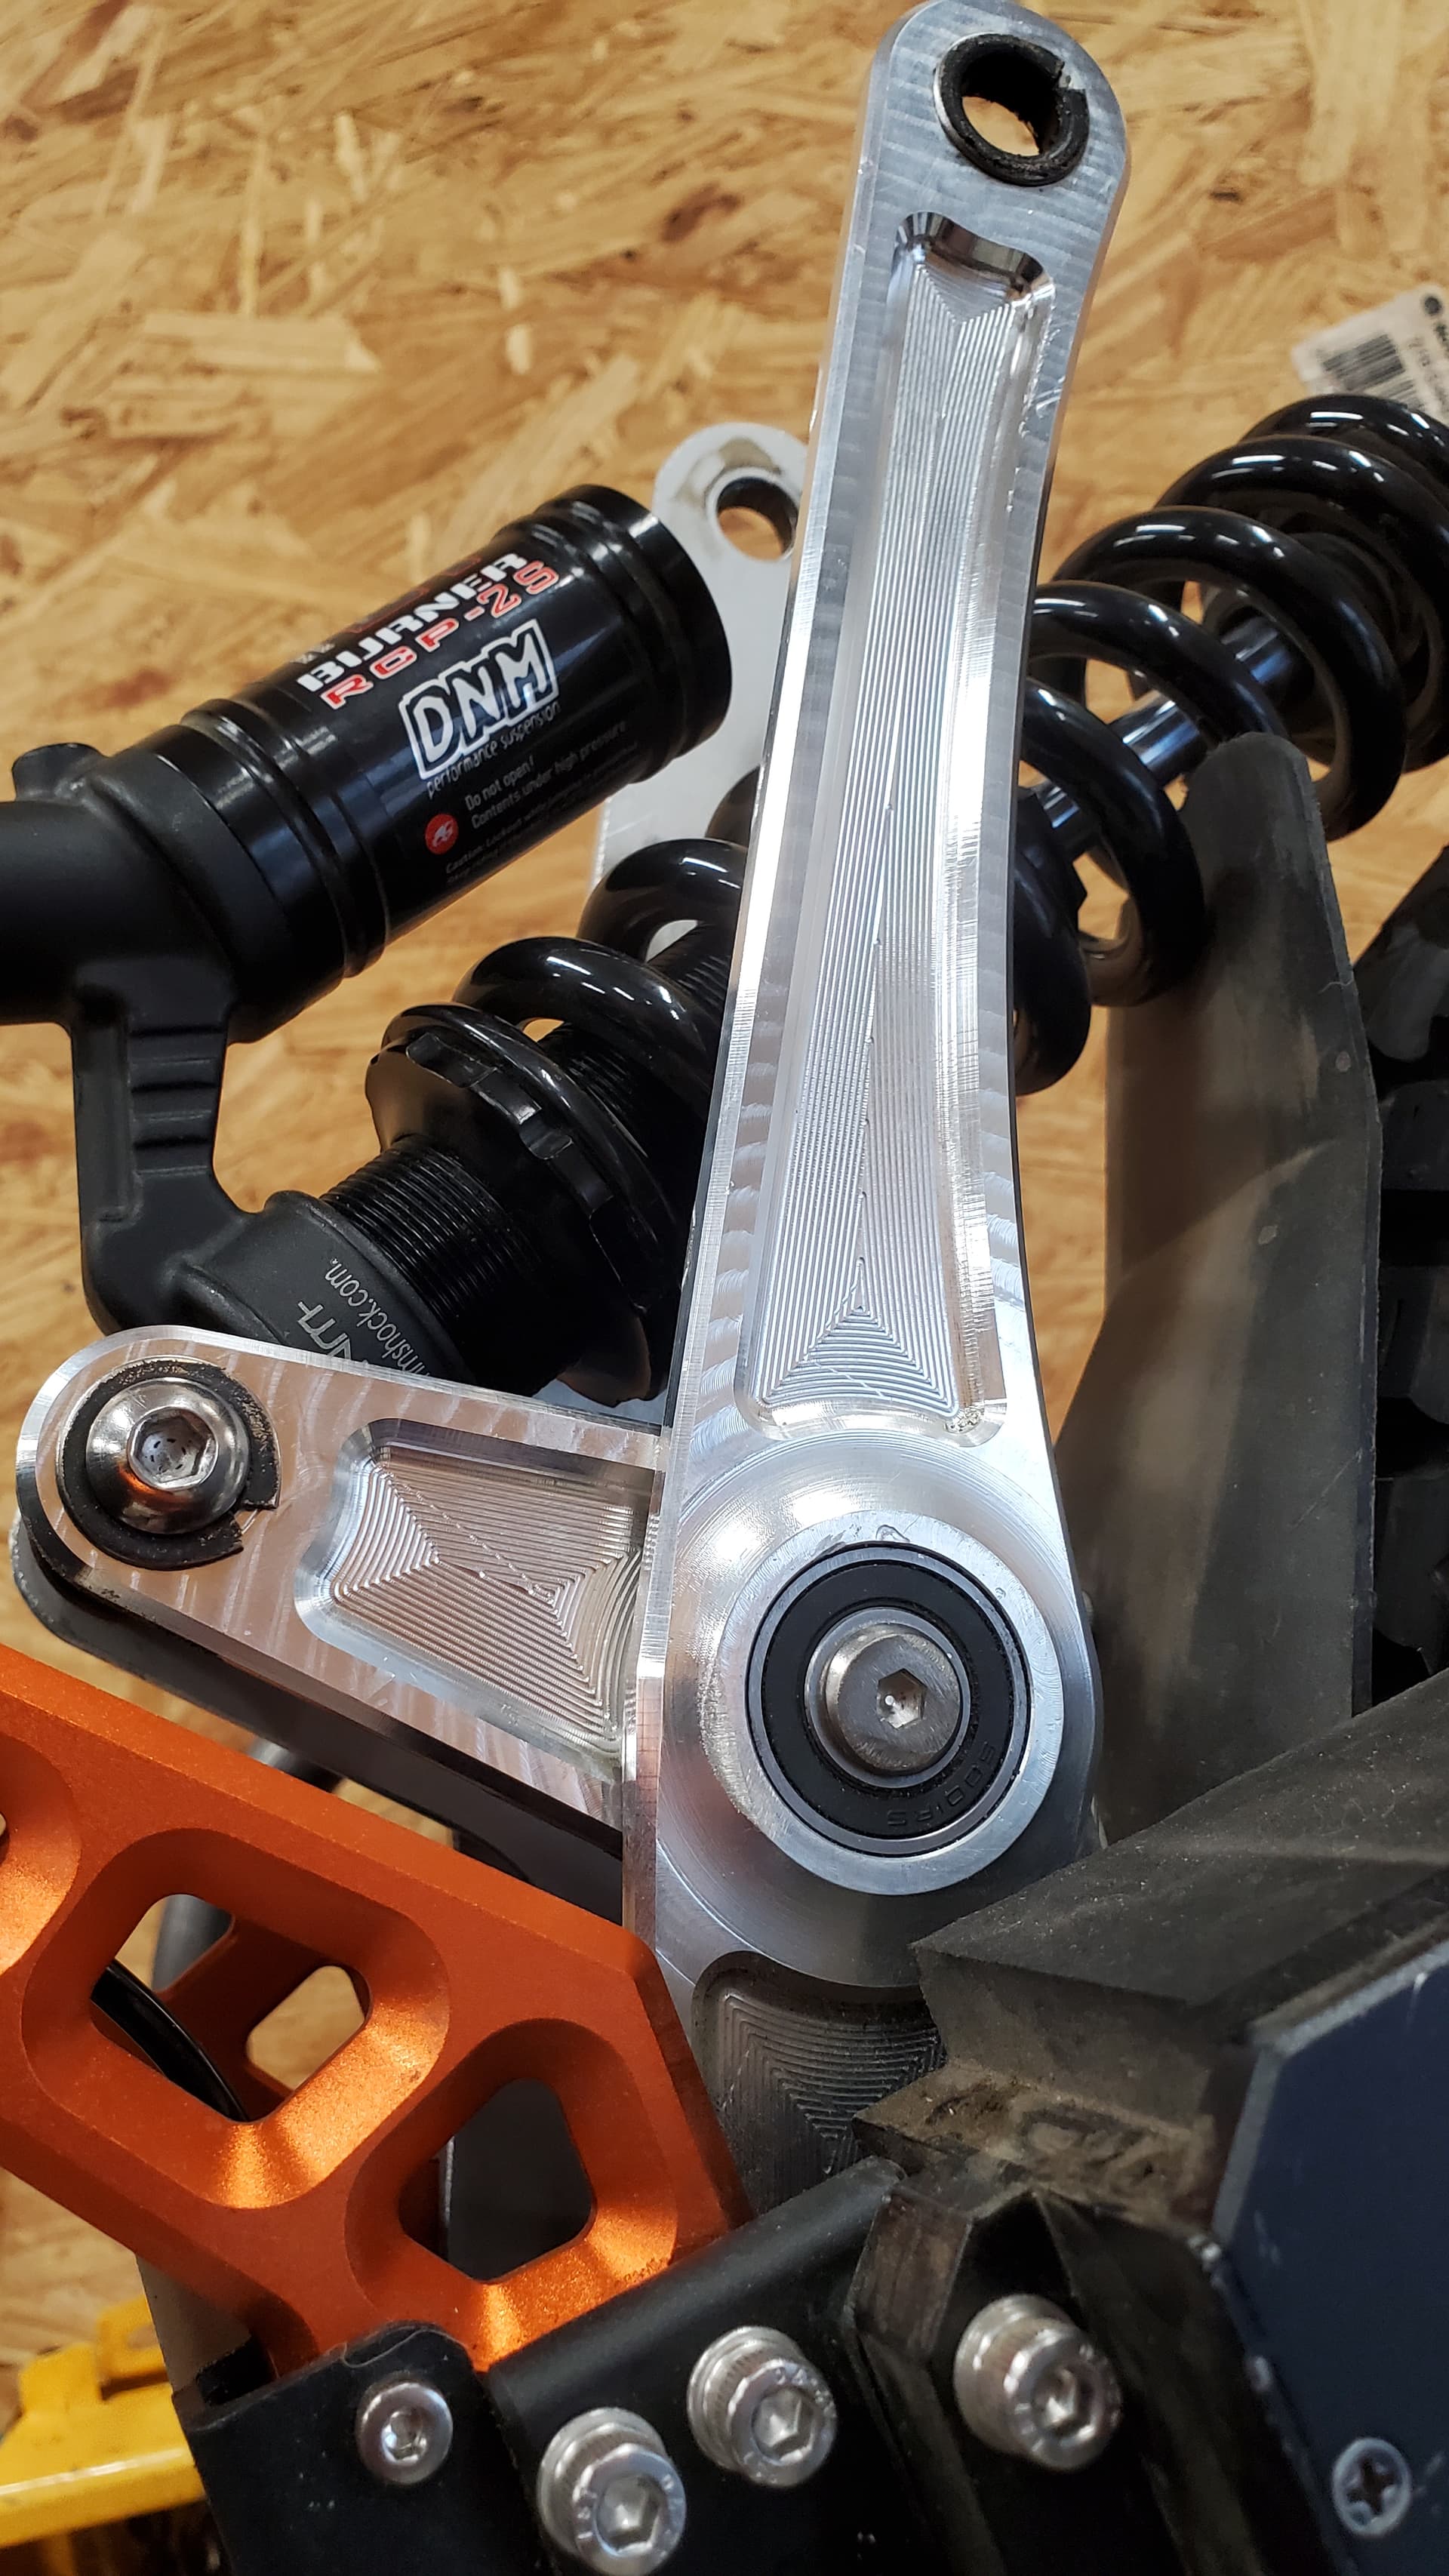
I have a short video that needs to be put together with the machining. HDM makes easy work out of large plate work and 3d surfaces.
@LiamN this is my current baby. Begode Extreme, 134 volts with 115mm suspension travel. I redesigned the linkage to make it rising rate with a much better rate curve than factory. Yes, I’ve taken it off some sweet jumps
20 Likes
I do think it was John’s video!
1 Like
How thin did you make the support structure between the pocketed areas? Looks nice.
1 Like
The hex grid edges are .065 according to the calipers. The wood is Sapele, which is pretty stable. I remember it looked really thin and delicate when I was cutting it, but it worked out fine.
I like the thinner frame edges you got on yours better. It looks cleaner and more in line with the actual thickness. I think the wood I use is about .12 inches thick.
1 Like
Give the edges a good sand - im sure it will lookgreat.
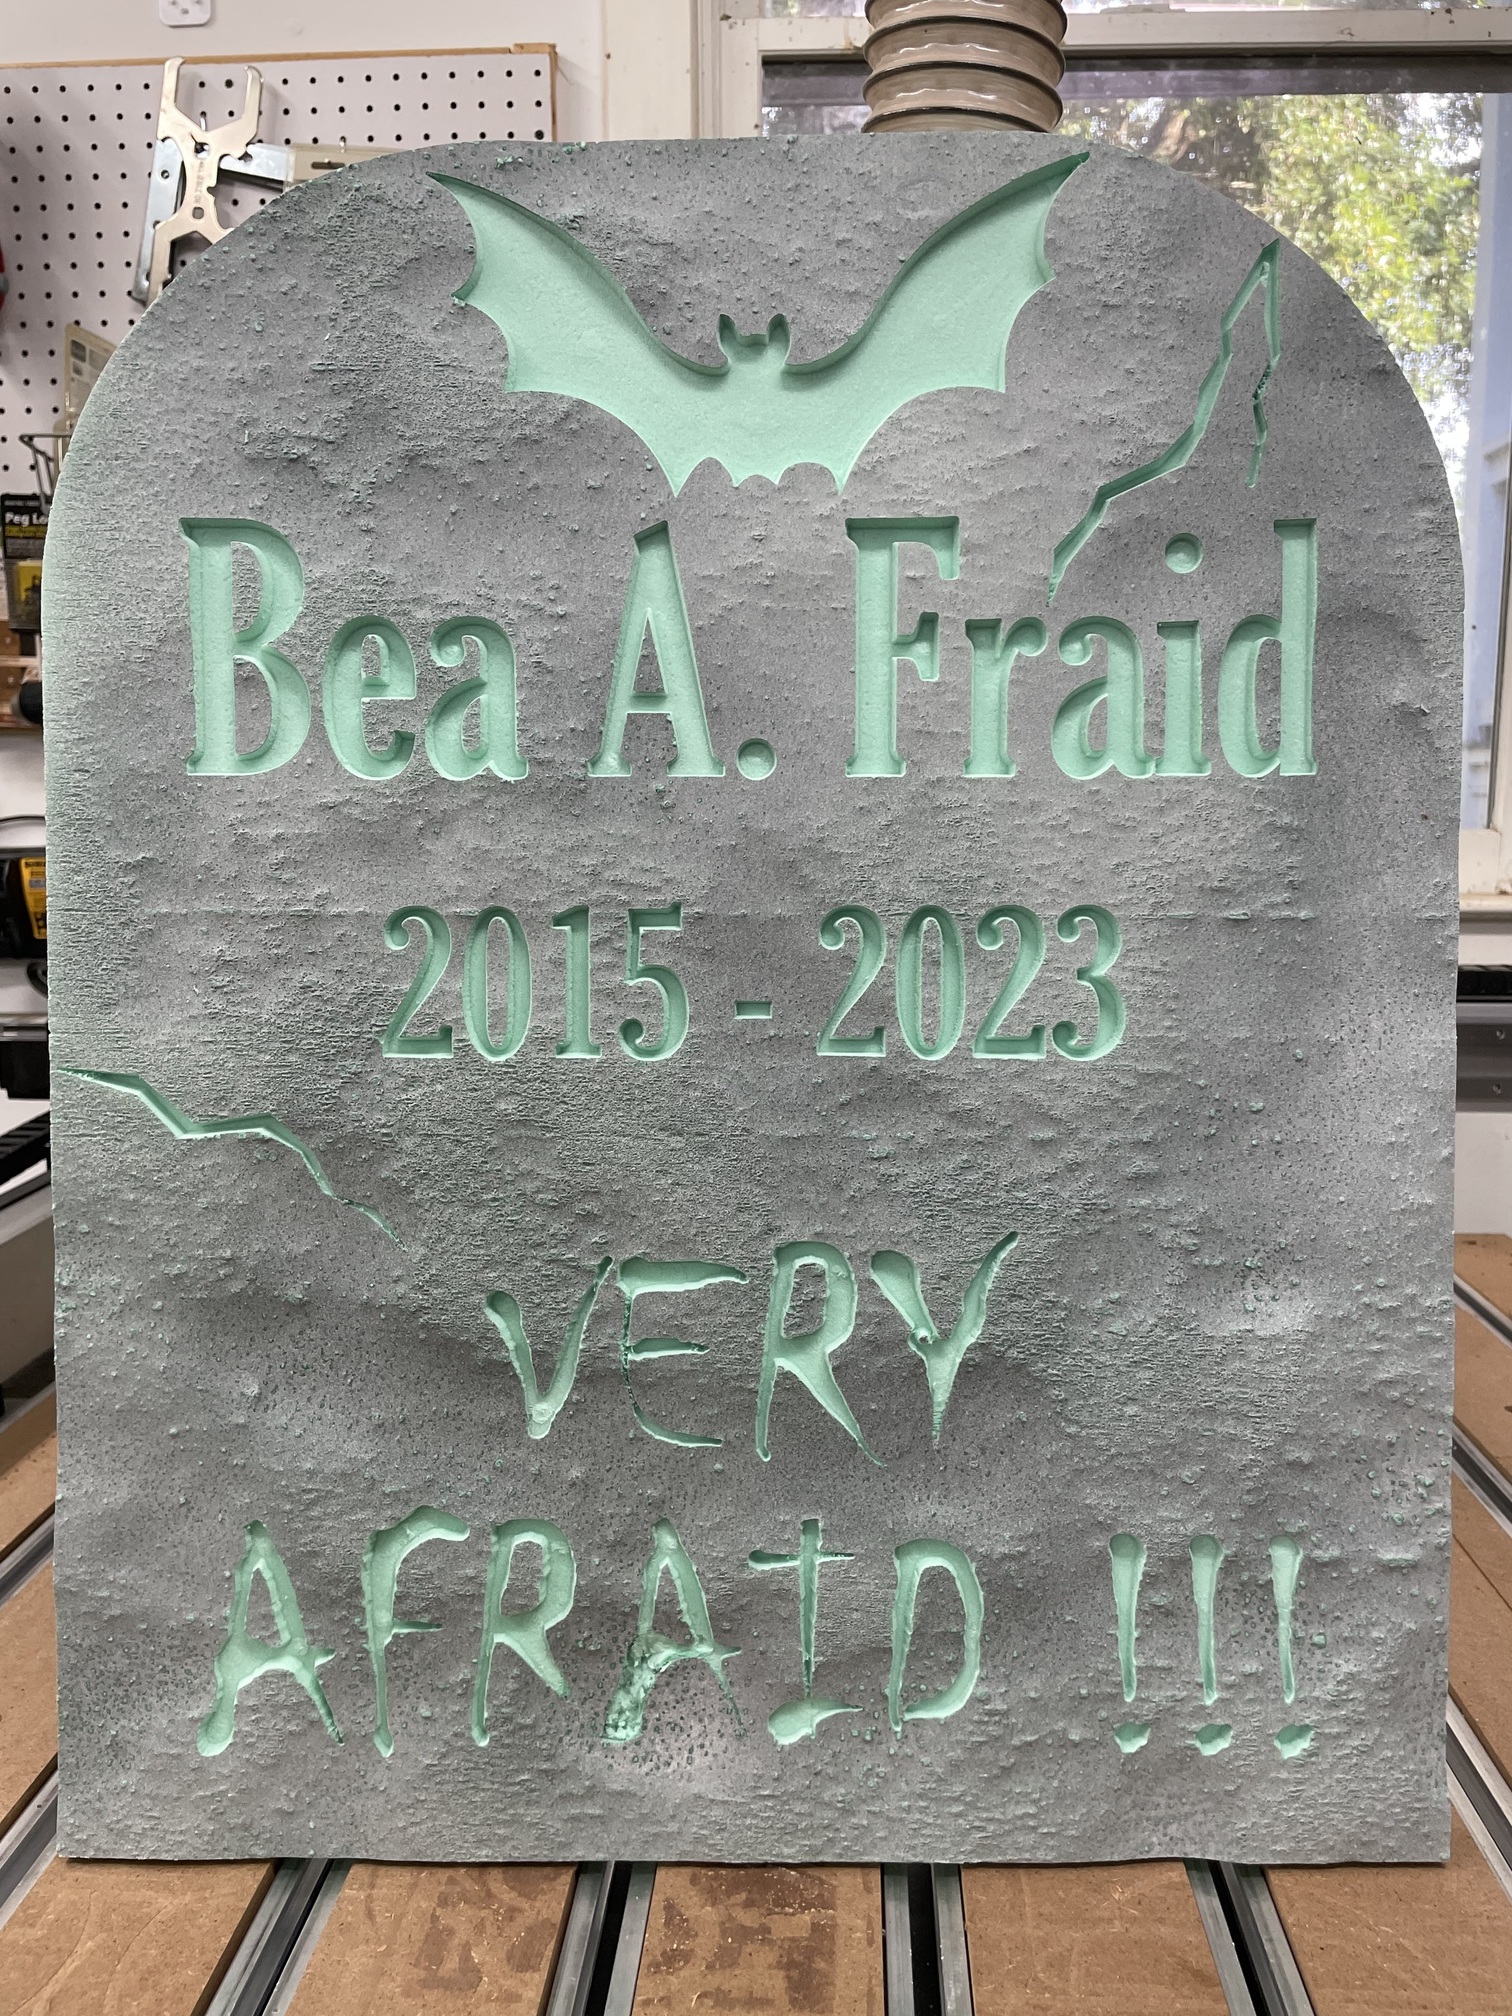
I wanted to make some Halloween tombstones for the yard. I bought some cheap $7 pieces of 2x2 foam at Lowe’s and some $8 cans of textured granite color spray paint.
The plan was to paint the foam and then put shelf liner on it , cut and then paint the cut portions in black.
I had no idea how this paint would do on the foam. Well, something in the propellant I guess did not play well with the structure of the foam. It caused the surface to deform in pockets such that there was no way the shelf liner would work so I just put it on the machine and cut away with my daughter’s design.
In the end, the damage from the paint looks pretty cool. It looks more worn. Now we have to paint the cut portions by hand though. Several more of these to make.
BTW, it took 1 entire can of paint for 1 side of each piece of foam. I tried shellac on a spare piece and that didn’t mess up the surface, but like I said we like the texturing as is.
15 Likes
This was a really quick thing. Lots I’d change but I had a long lunch break to work with. No judging. Lol
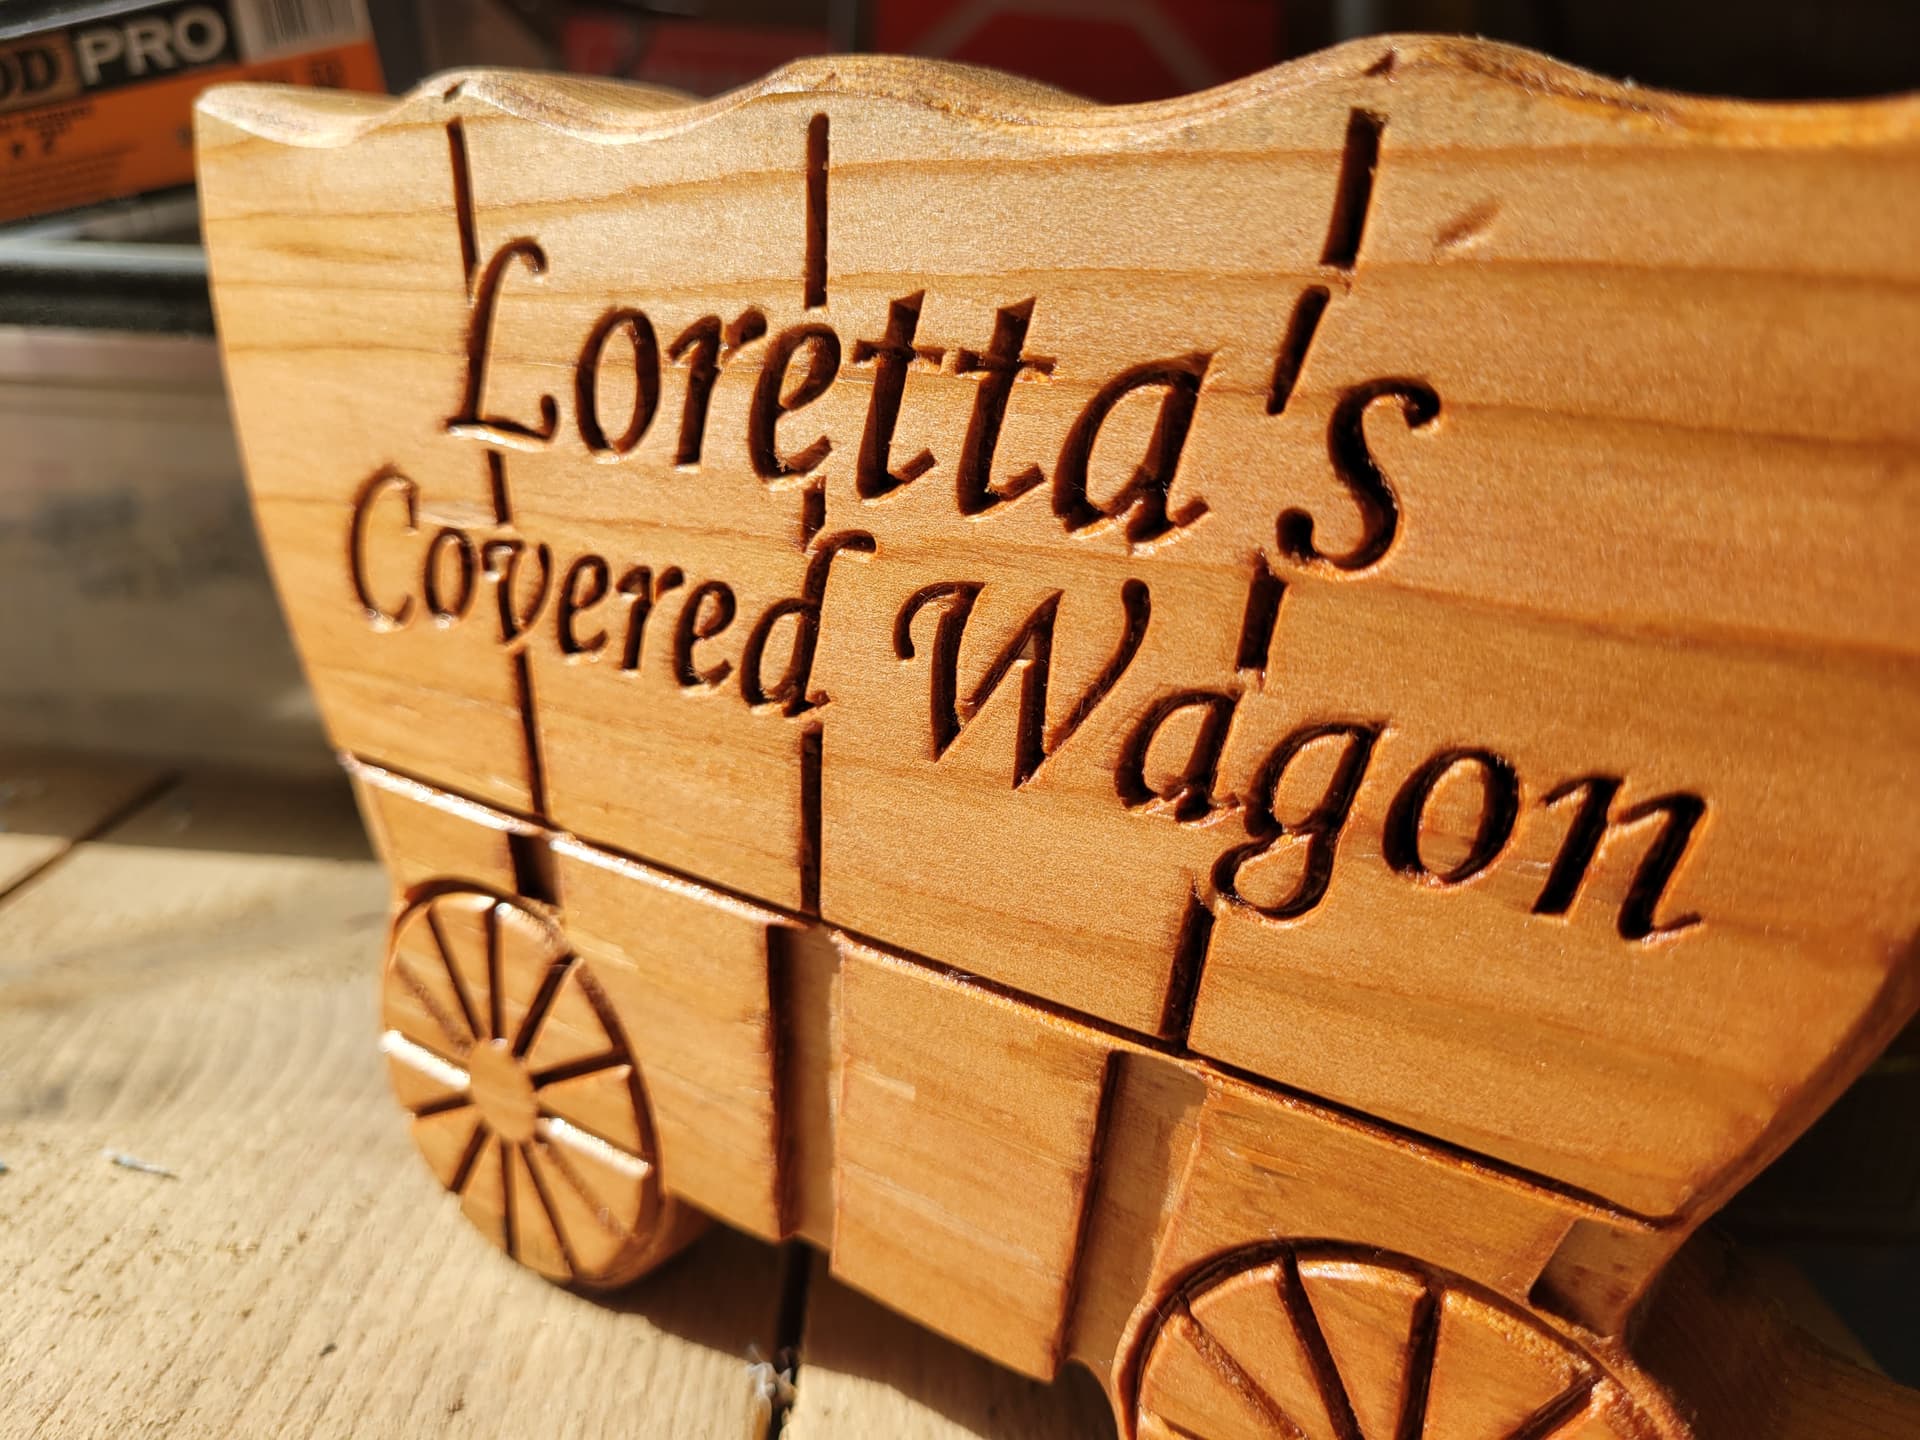
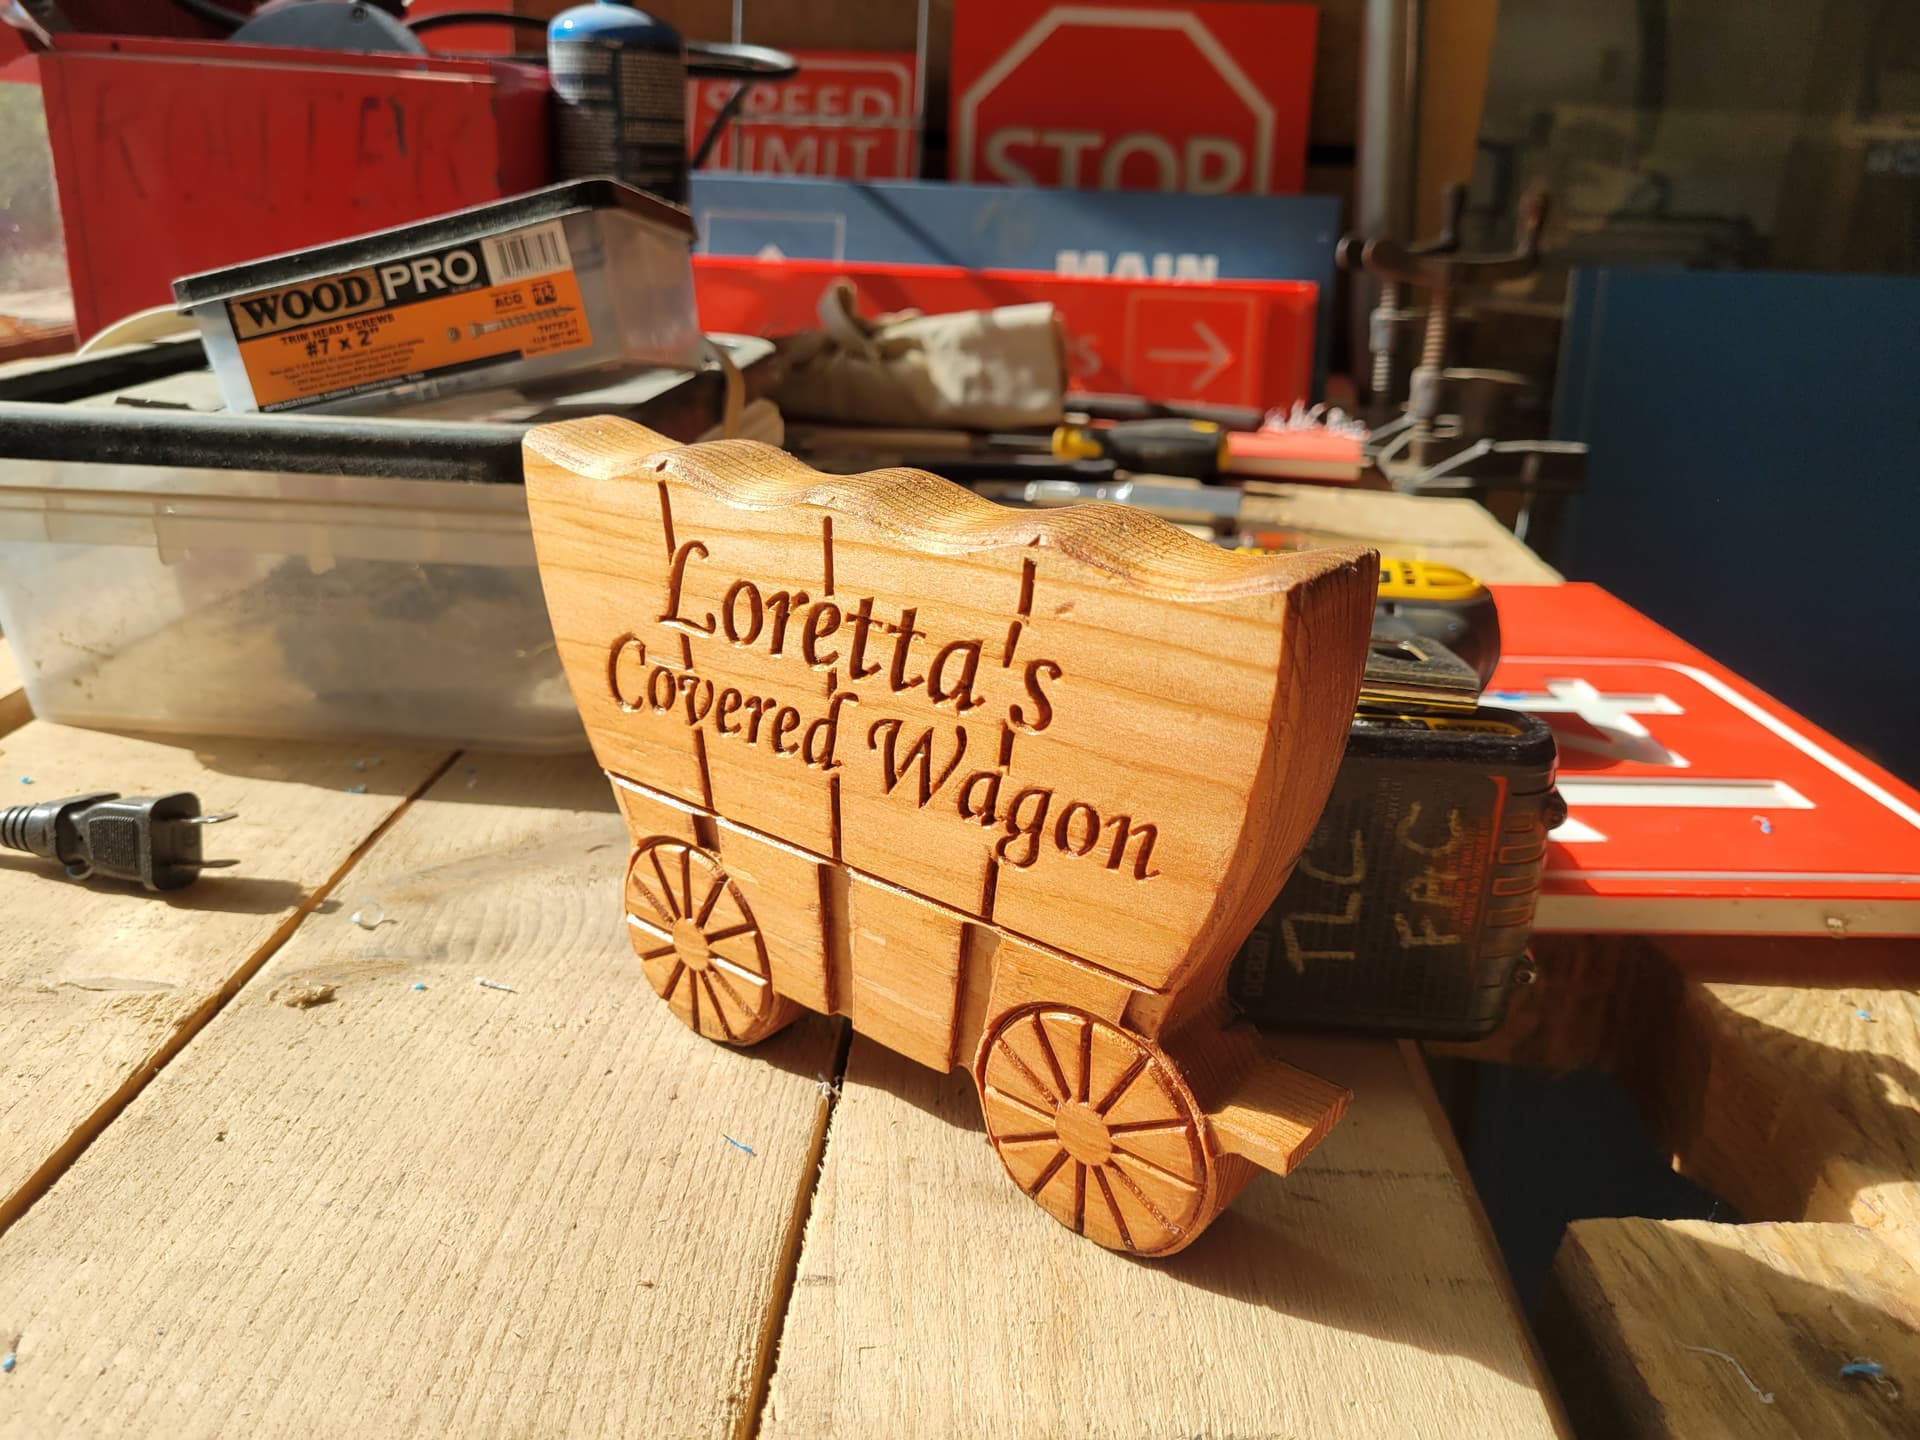
16 Likes
You said no judging… I like it
4 Likes