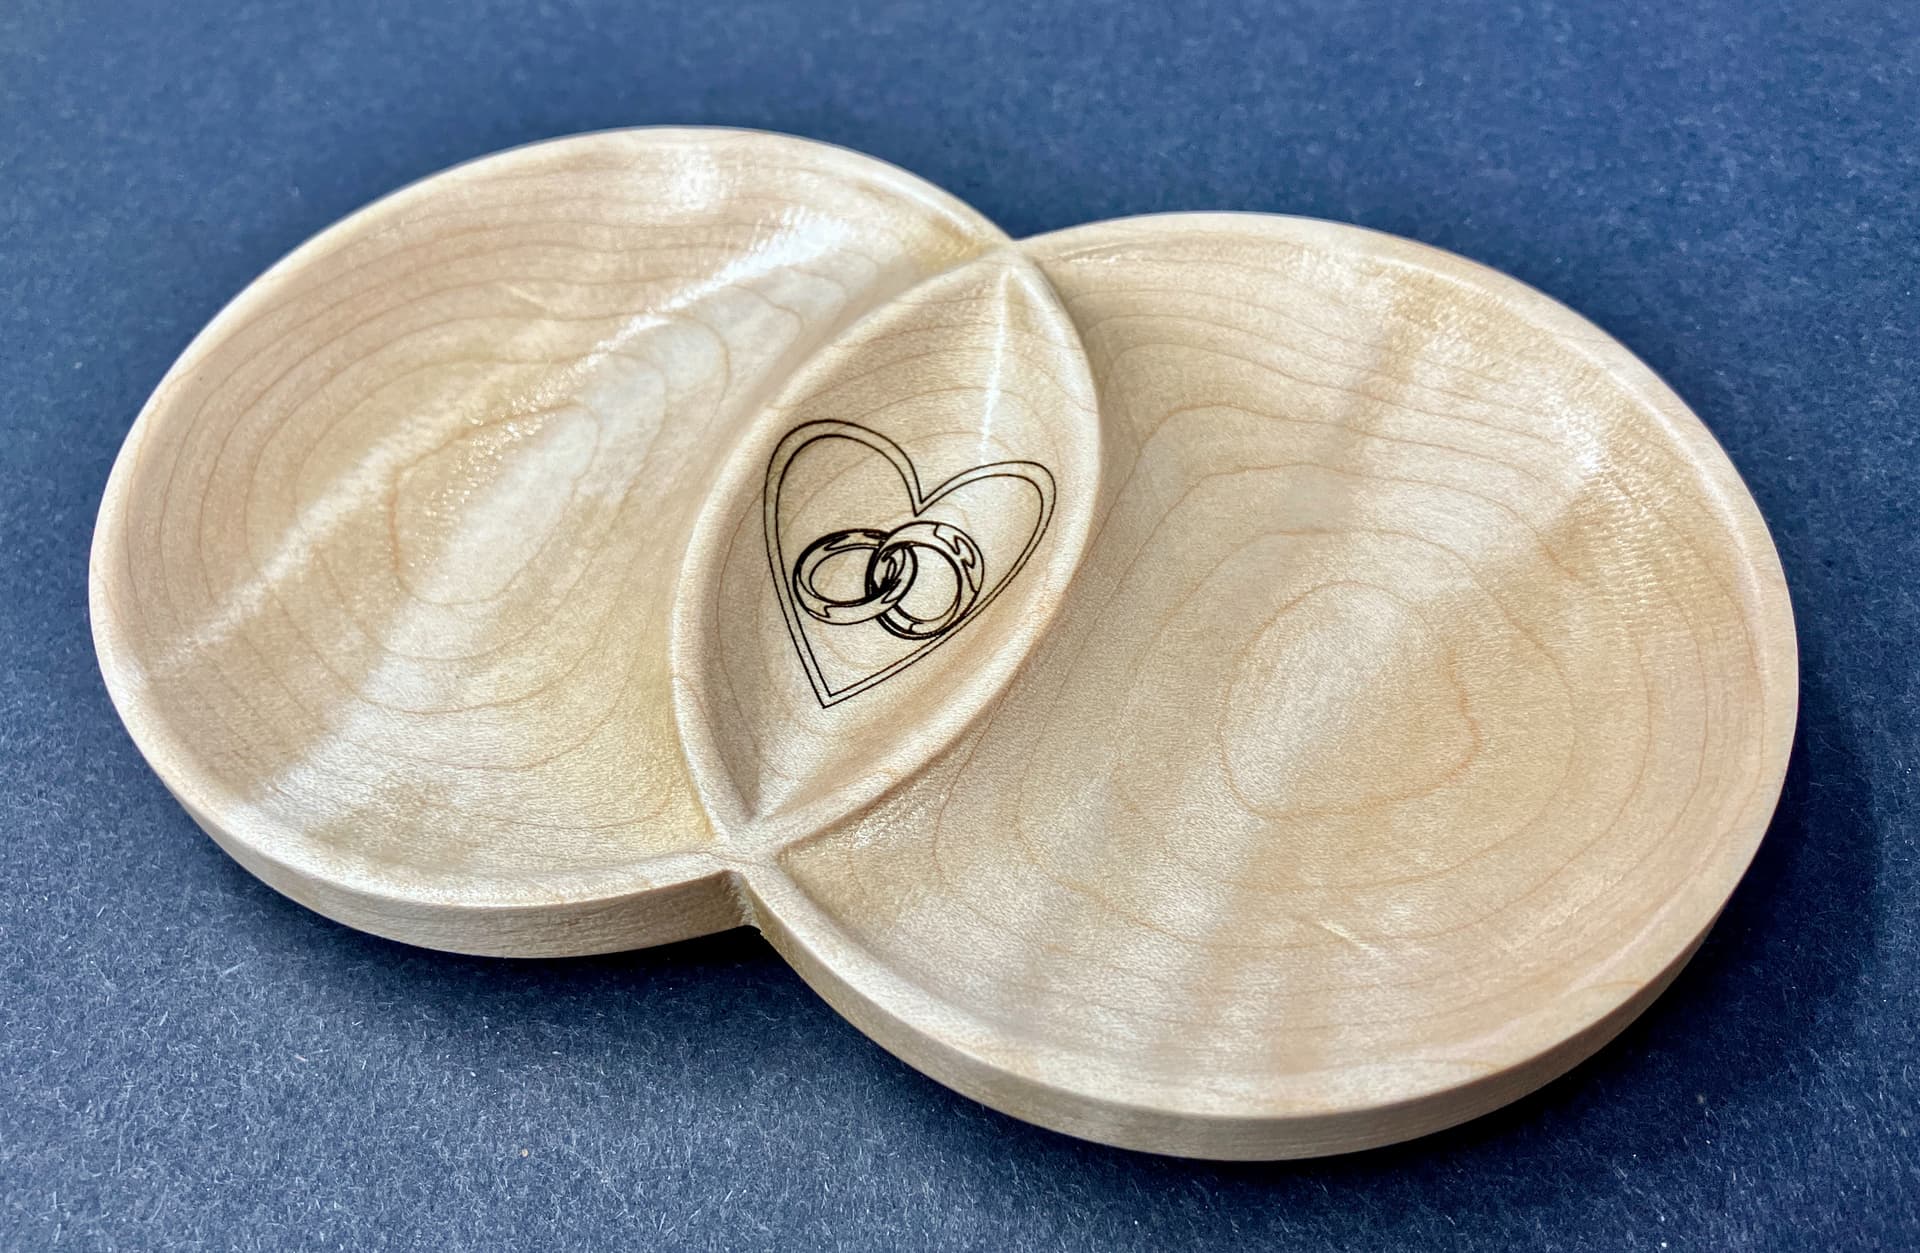
Last project for 2023. I’m always complaining at dinner that I don’t have a bread plate. Well. We can fix that.

Thought about having a flying biscuit on it but then thought maybe one day that wouldn’t be funny. ![]()
Last project for 2023. I’m always complaining at dinner that I don’t have a bread plate. Well. We can fix that.
Thought about having a flying biscuit on it but then thought maybe one day that wouldn’t be funny. ![]()
Super nice! For my second project ever I think I’ll something similar. Maybe a set of coasters since my wife is always complaining I’m leaving water rings all over the furniture.
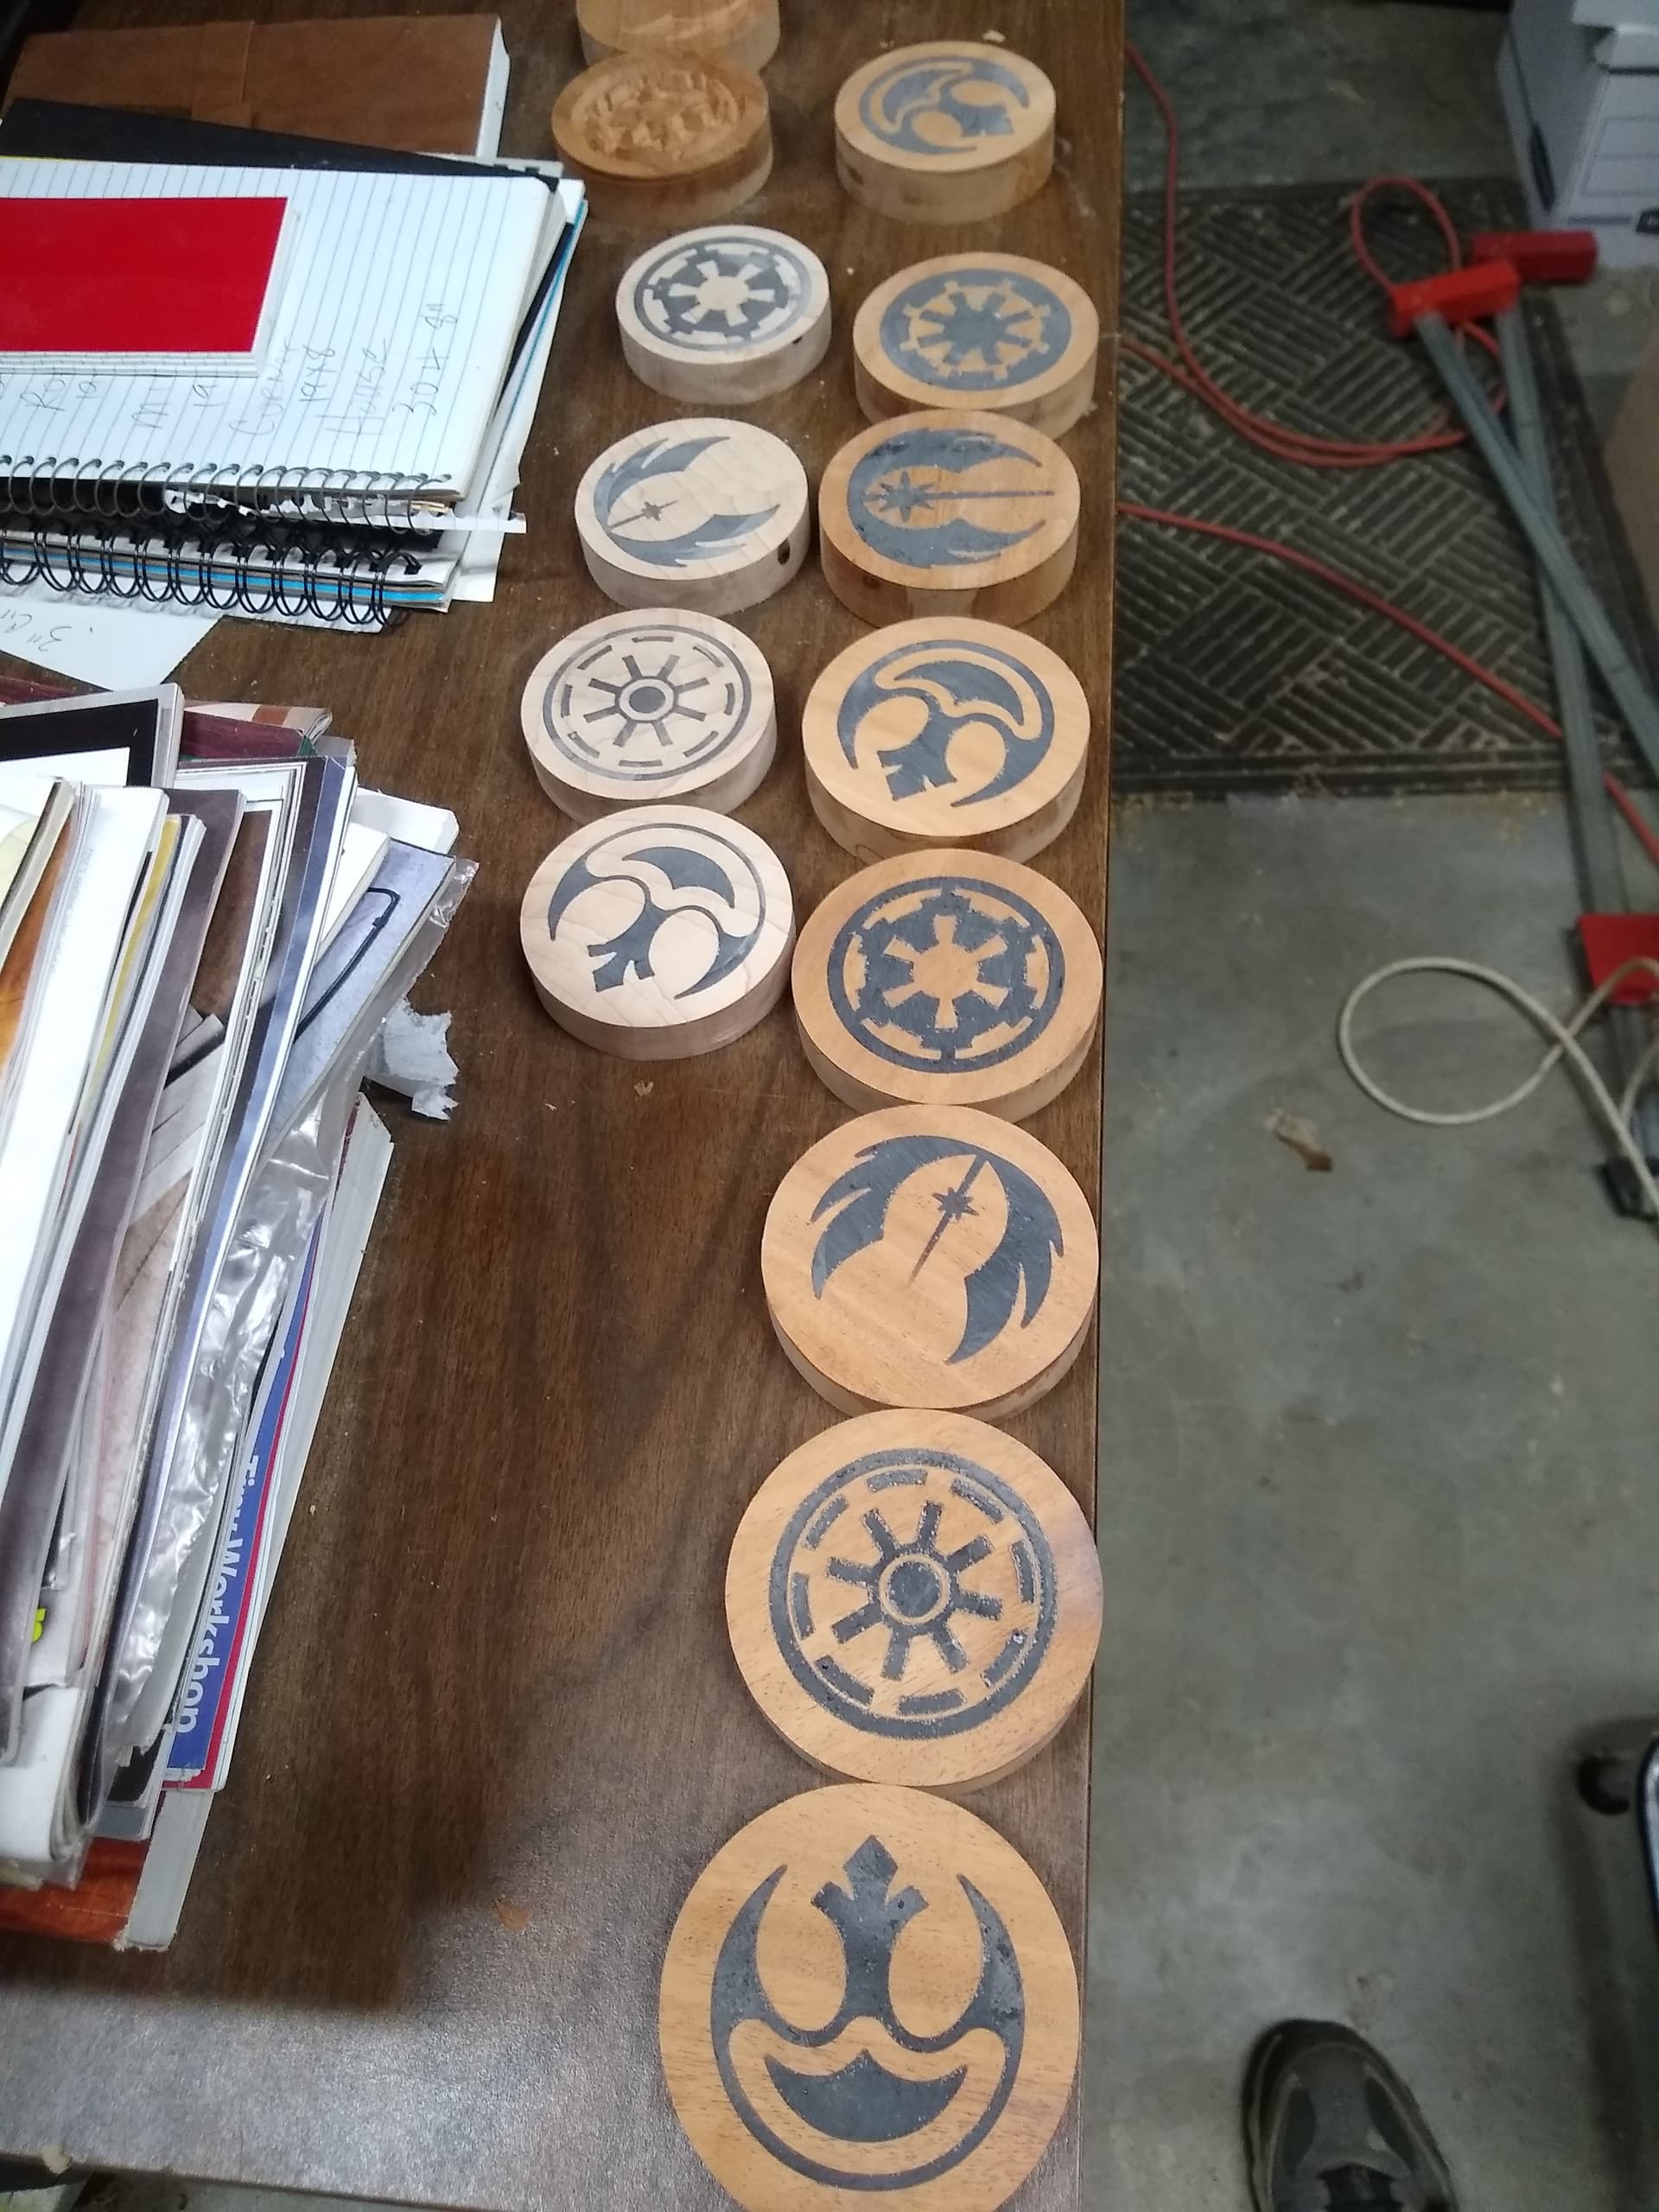
I like @lordofcandy coasters because the texture will help wick away moisture. If you like Star wars I made the and epoxy filled for my fanboy family.
Do a quick calculation on the volume of “drip” that a coaster will hold. It doesn’t seem, to me, that a flat surface coaster is much better than a paper napkin. (Of course, around here we tend to get a lot of condensation on our drinks.)
I hear you, Mr. CrookedWoodTex. I think it’s just the thought that counts. We have some coasters of “absorbent stone” and I still have to mop them off with a paper towel.
Have a great new year.
Wow! Those are really nice.
What is this star wars you speak of🤔
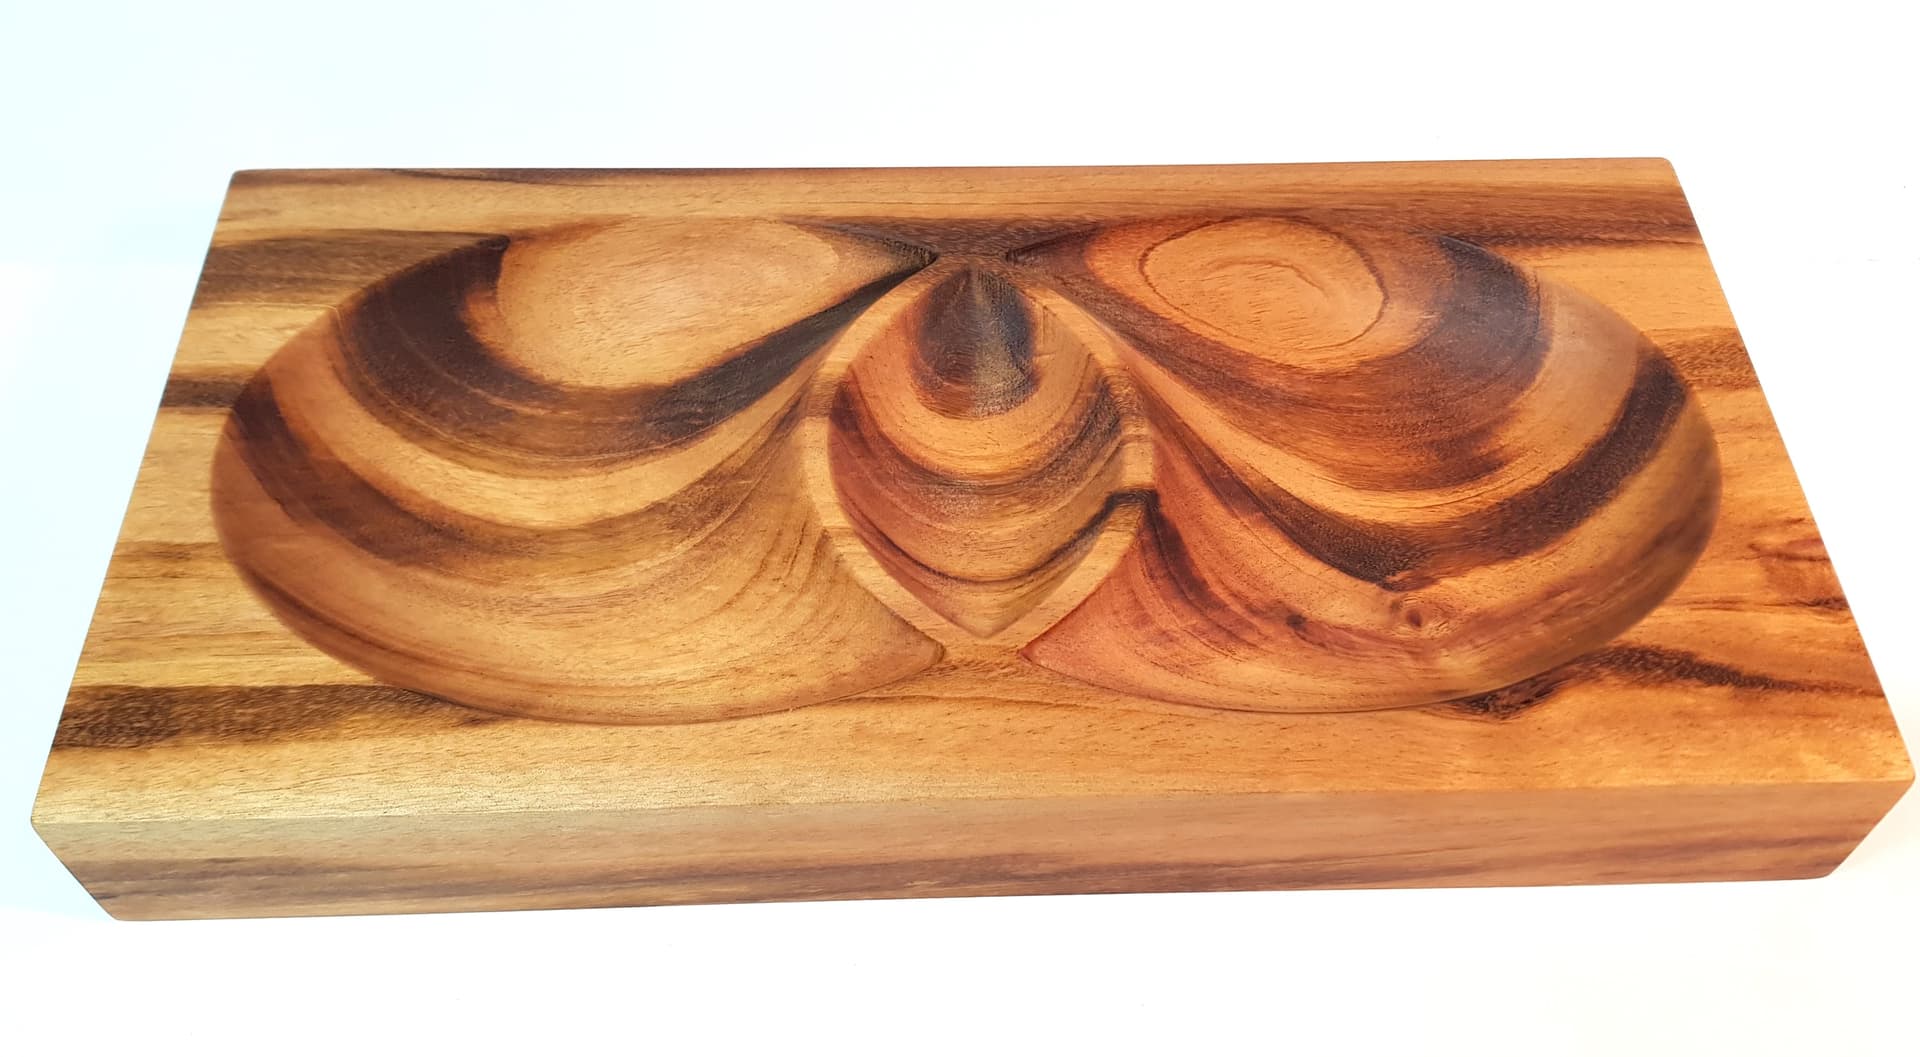
I made these entwined bowls in Elm as a Christmas gift
I thought that it might have looked better without the outside cut of the bowls, so I had to make another, this time in Tigerwood.
And I still can’t decide which design looks the best!
They both look great–Traditional or modern.
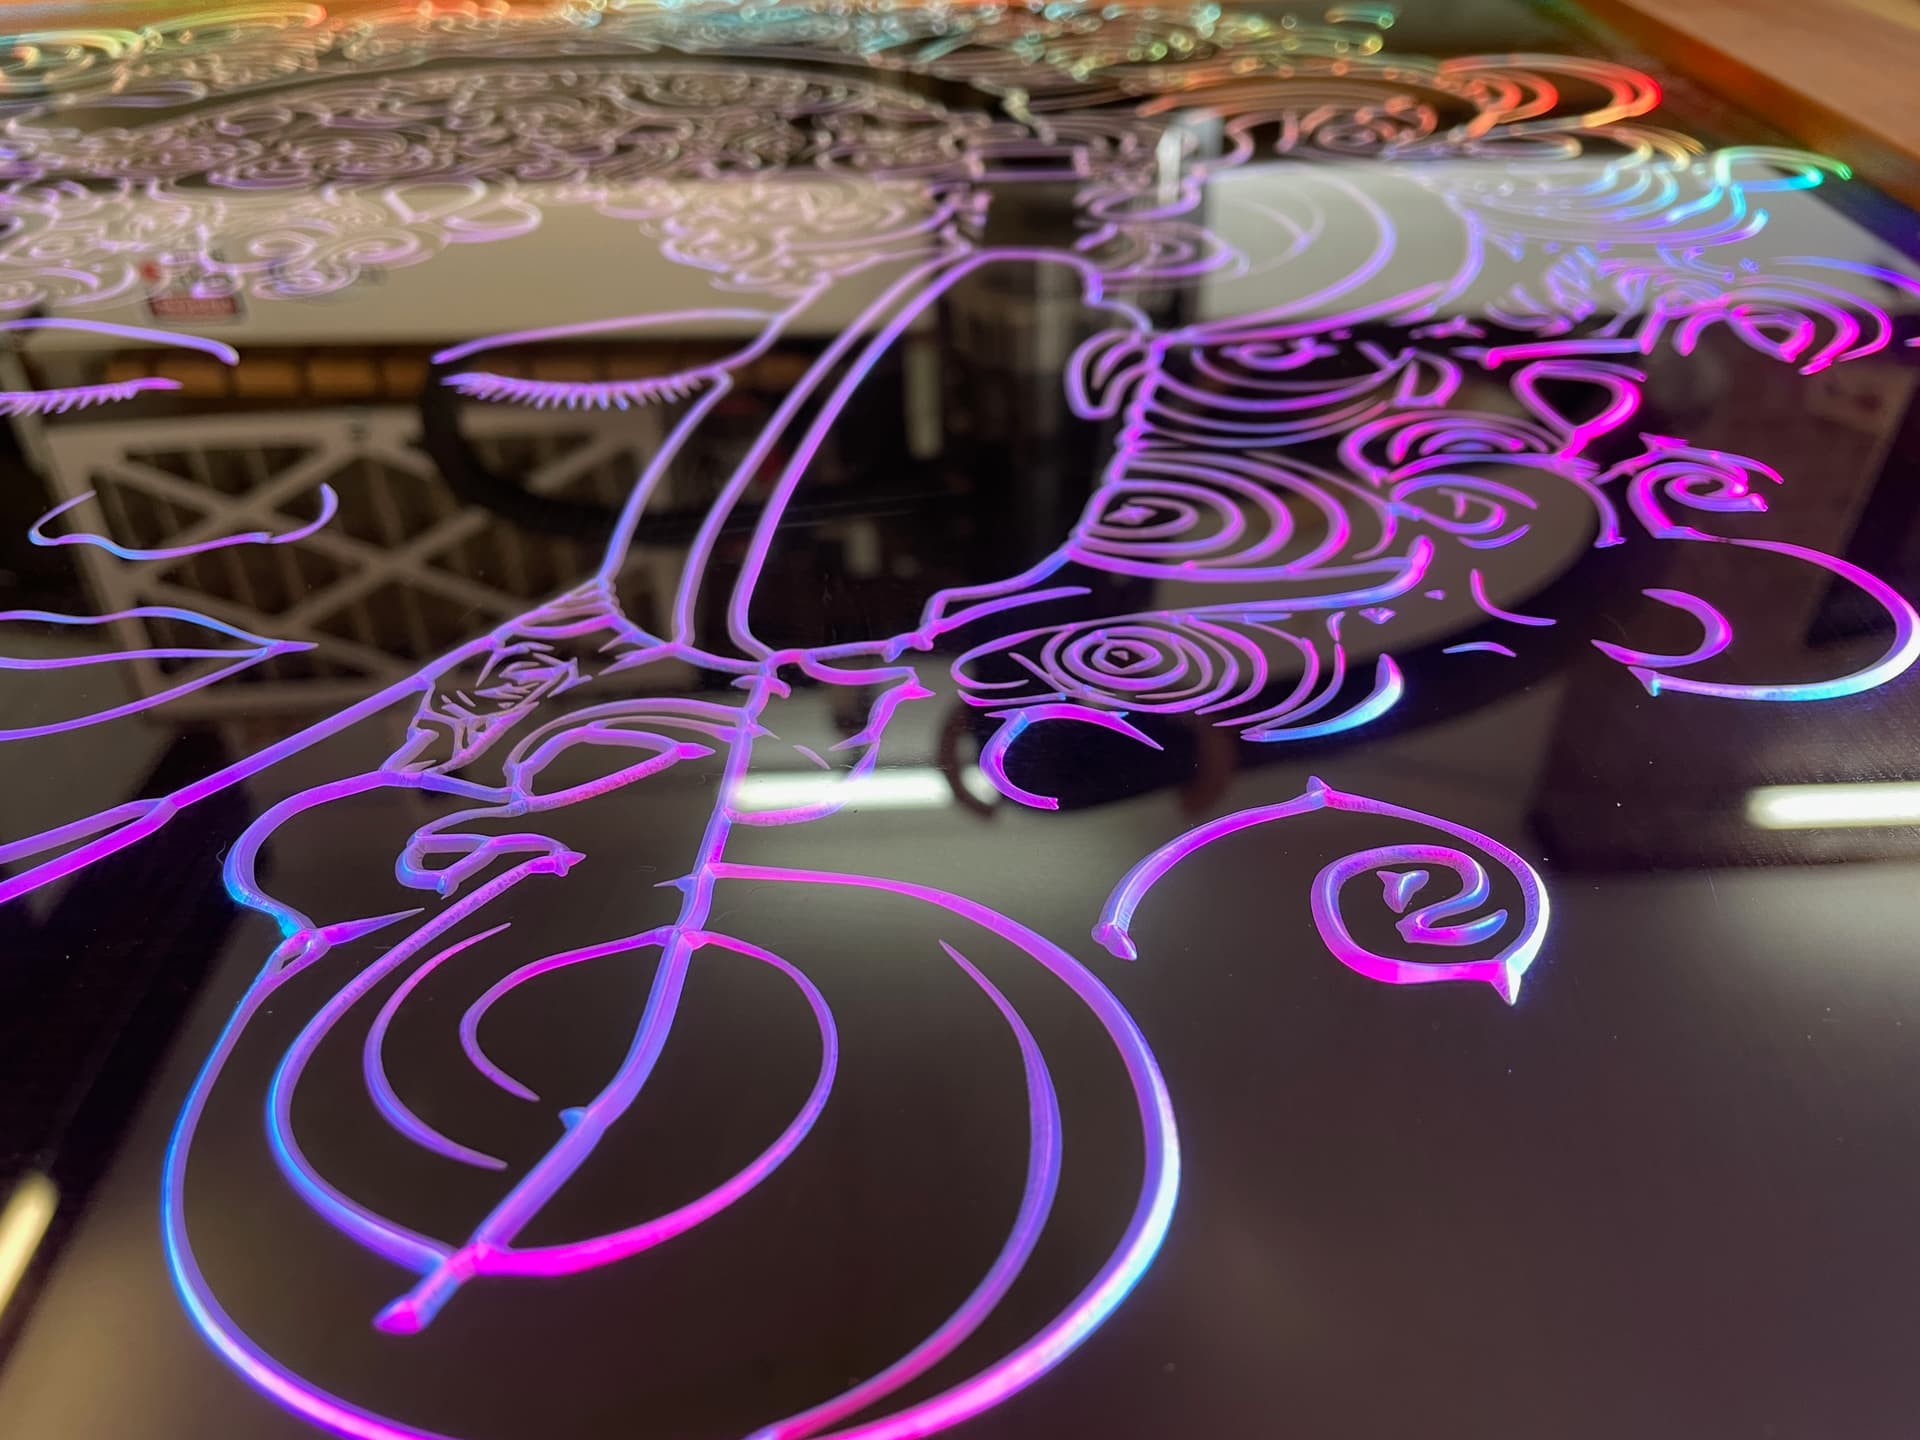
New project finally posted. This is a framed edge lit acrylic piece with a snazzy LED controller. It’s a bit different because I used thick acrylic and vCarving instead of something like the MC Etcher.
The neat thing with the vCarving is the depth and color shifts that occur when you look closely:
Because of the height of the lines, it seems to catch different parts of the light.
Here it is in action:

There is a link to the full build video in the description.
Looks like we both got the same model from the same place. Mine’s out of maple and I left more on the rim for edge strength.
The fact that they are intertwined seems a bit lost on the one with the full board.
What if you cut a pocket down about half an inch around the bowls so that their rims are proud of the surface?
I like both designs but as @CullenS said above I think the bowl one (without board) is more attractive. It gives you the chip and dip options as well as just looking more visually appealing to me. The board one is nice and maybe it is the busy wood but it just does not appeal to me as much.
I like the first one. Very elegant, simple, beautiful.
That might work, it would then have a similar edge profile to the one that Tex cut (from the same design!).
I think that Guy has hit the nail on the head, the wood I used in the second one is just too busy, it detracts from the design, which is the opposite to what I would have expected. Live and learn.
Thanks for the comments.
Nice work @Jonathan_Blank Carbide 3D on Instagram
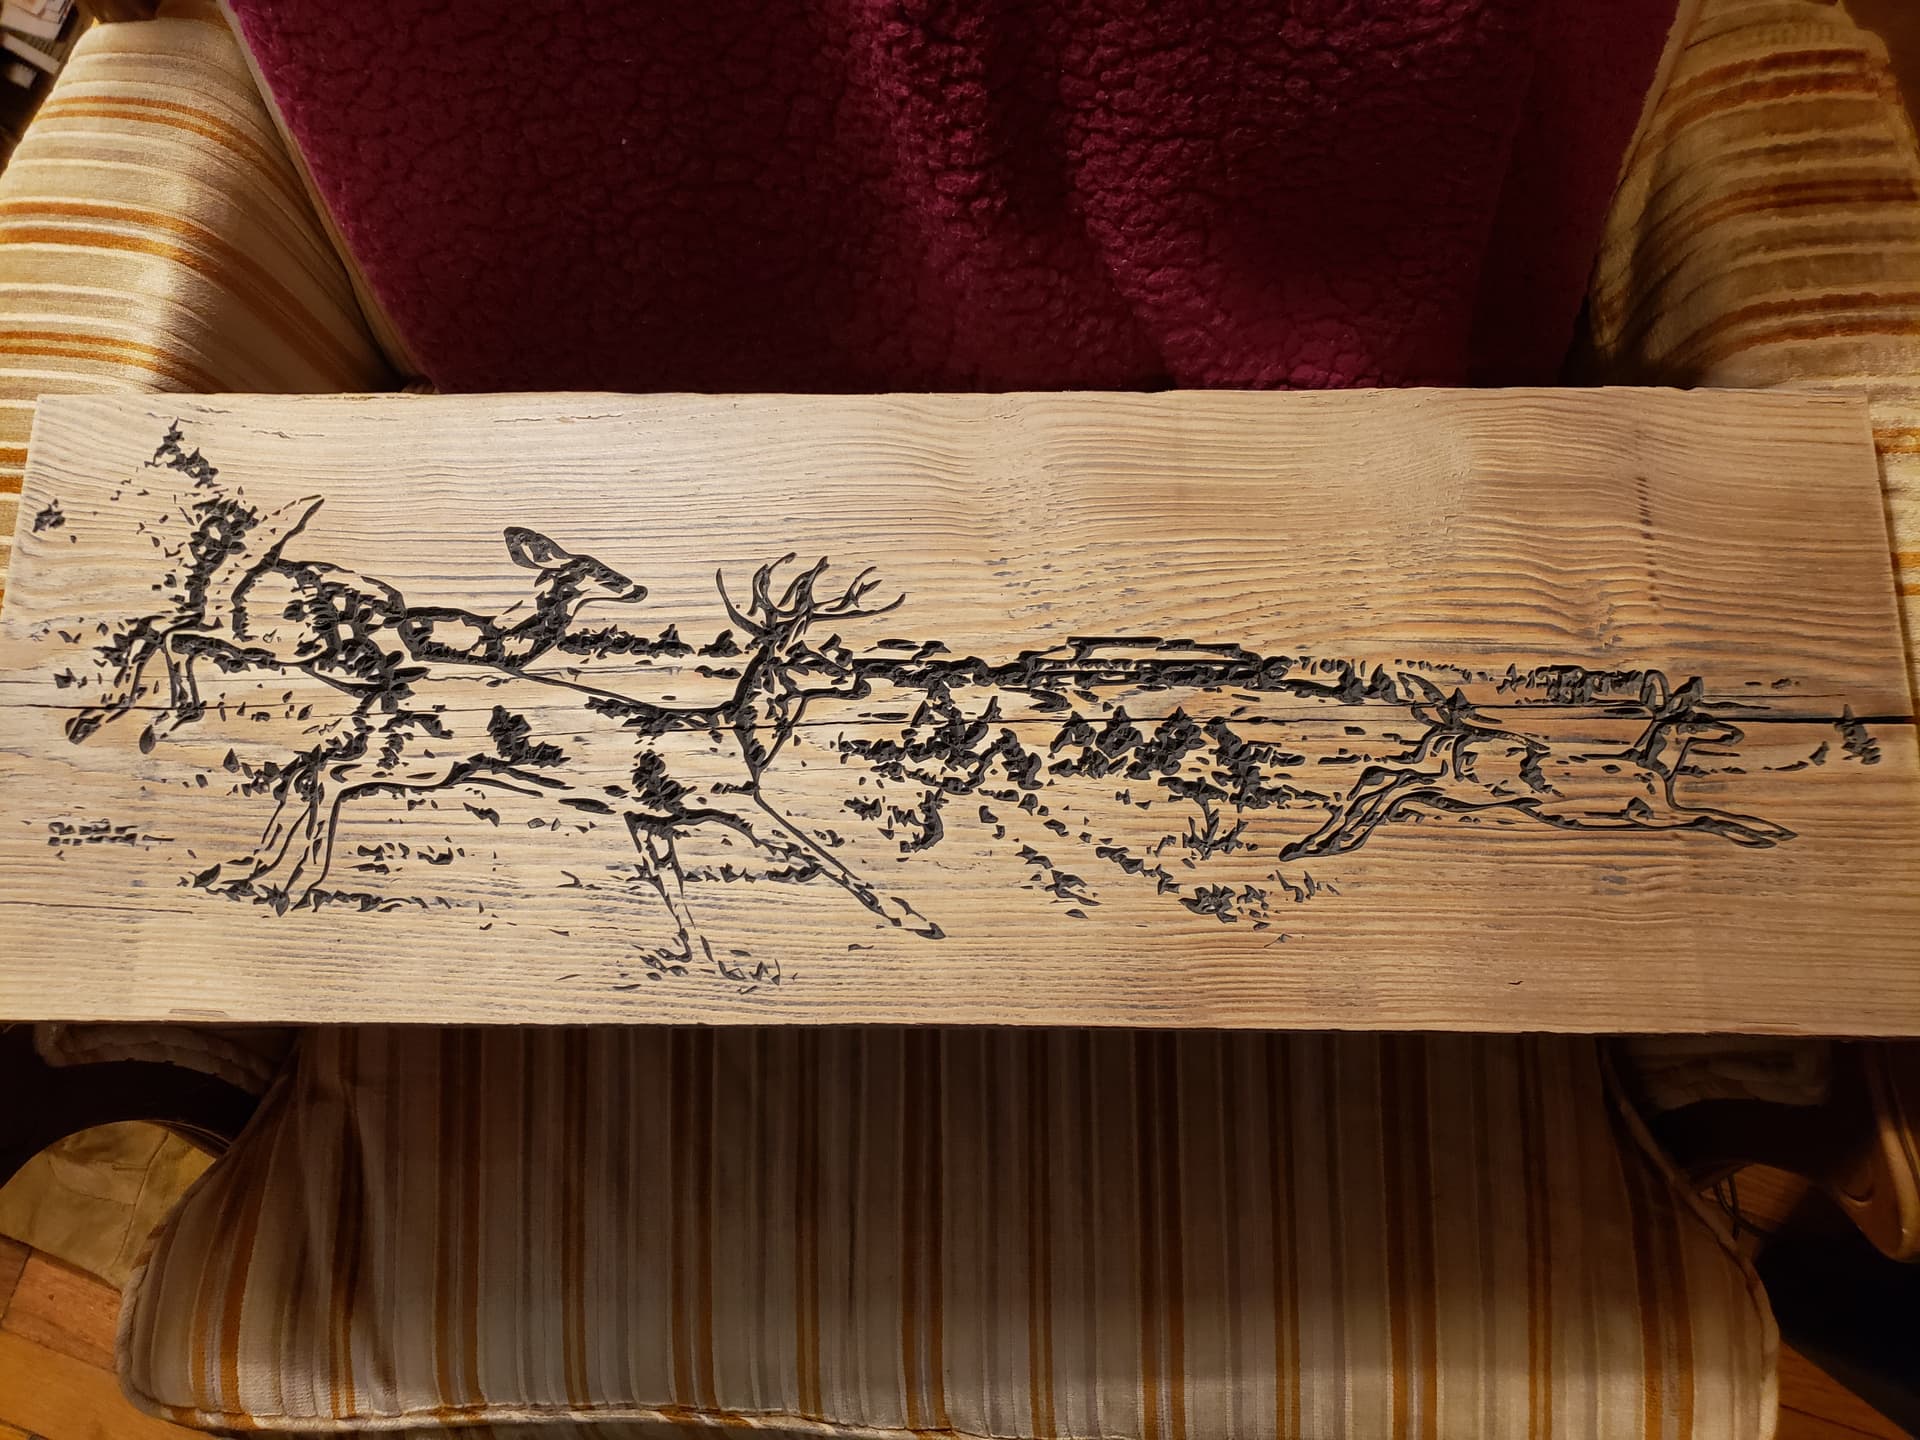
I got my S5 Pro and took my time putting it together. I had to fix a few things on the machine to make it work right and better. Then I did a simple sign. Just 3 words in a fancy script. Then figured I would test the idea of landscape carving on the machine. Came up with this to carve.
I didn’t finish the project as you can see. It’s just carved and plain wood. It was carved in an old oak board, but wasn’t planning on sanding and finishing the project. I moved on to try to get better at the 3D carving and can’t seem to get that down in CC Pro. So, some day I hope to be able to afford a program that is more catered to 3D design. One can dream at this point.
Find an STL you like and import it.
Cncplanetart.com has some nice ones or just search online. Tons of stuff out there. Then you have to figure out how to size it appropriately and get the toolpaths set up.
I got my Shapeoko 5 Pro and over all I am super happy with it. I contacted customer service about an issue with my power pendant. They responded the very next day. Turns out I just didn’t understand how it functioned. Customer service was professional and I appreciated their professionalism. This is my very first CNC machine and also my first time milling anything since I was in high school (during the last milennium) ![]() For my first project I designed a simple sign for my grandson’s room. It only took a couple of minutes to create a simple design in Carbide Create. I bought the S5PRO 4x4 with a VFD Spindle, BitZero, SweepyHD and got the Black Friday kit so I also have the compact router, bit runner deluxe 2.0, sweepy 2.0 and the endmill starter kit. I ran my hello world program with the included marker earlier in the week and realized the machine could also double as a plotter. For newbie’s like me wondering whether to buy a table or build one, I decided to build mine since I would have had to cut a top anyway for the tables I was looking at. I ended up using 2x4’s along with particle board and a simpson workbench kit. I purchased it at Lowes but I have also seen them on amazon. My table is 65x65 to accommodate the massive footprint of the 4x4 cutting bed. Overall assembly was straight forward and I really appreciate Carbide’s design of the machine and customer service. I now have all sorts of fun things floating around in my head for projects.
For my first project I designed a simple sign for my grandson’s room. It only took a couple of minutes to create a simple design in Carbide Create. I bought the S5PRO 4x4 with a VFD Spindle, BitZero, SweepyHD and got the Black Friday kit so I also have the compact router, bit runner deluxe 2.0, sweepy 2.0 and the endmill starter kit. I ran my hello world program with the included marker earlier in the week and realized the machine could also double as a plotter. For newbie’s like me wondering whether to buy a table or build one, I decided to build mine since I would have had to cut a top anyway for the tables I was looking at. I ended up using 2x4’s along with particle board and a simpson workbench kit. I purchased it at Lowes but I have also seen them on amazon. My table is 65x65 to accommodate the massive footprint of the 4x4 cutting bed. Overall assembly was straight forward and I really appreciate Carbide’s design of the machine and customer service. I now have all sorts of fun things floating around in my head for projects.