I would agree with @Stankus a stretcher would be advisable. Children do unexpected things and they may dance or be jumping around. You would not want the stool to collapse unexpectedly.
1 Like
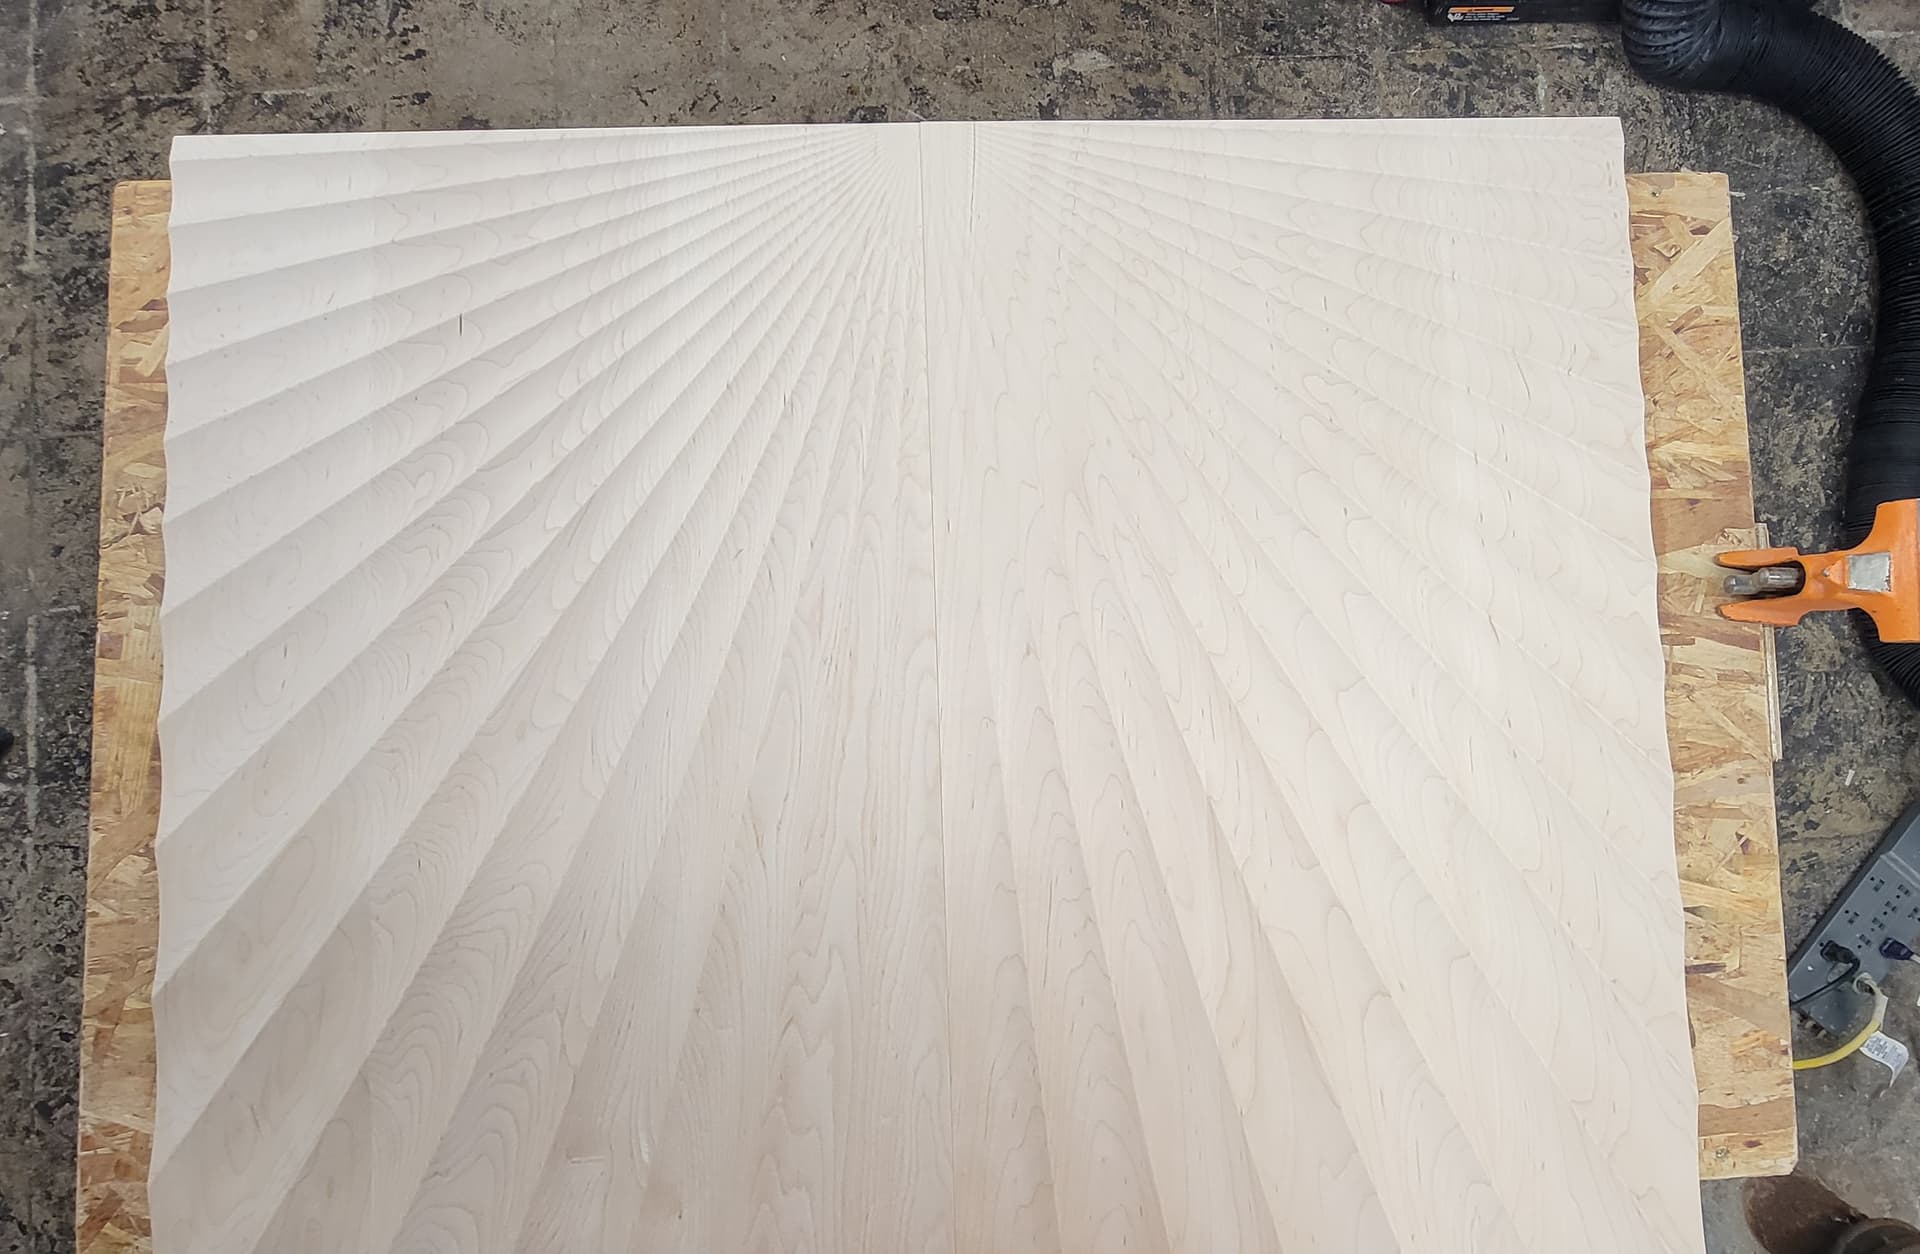
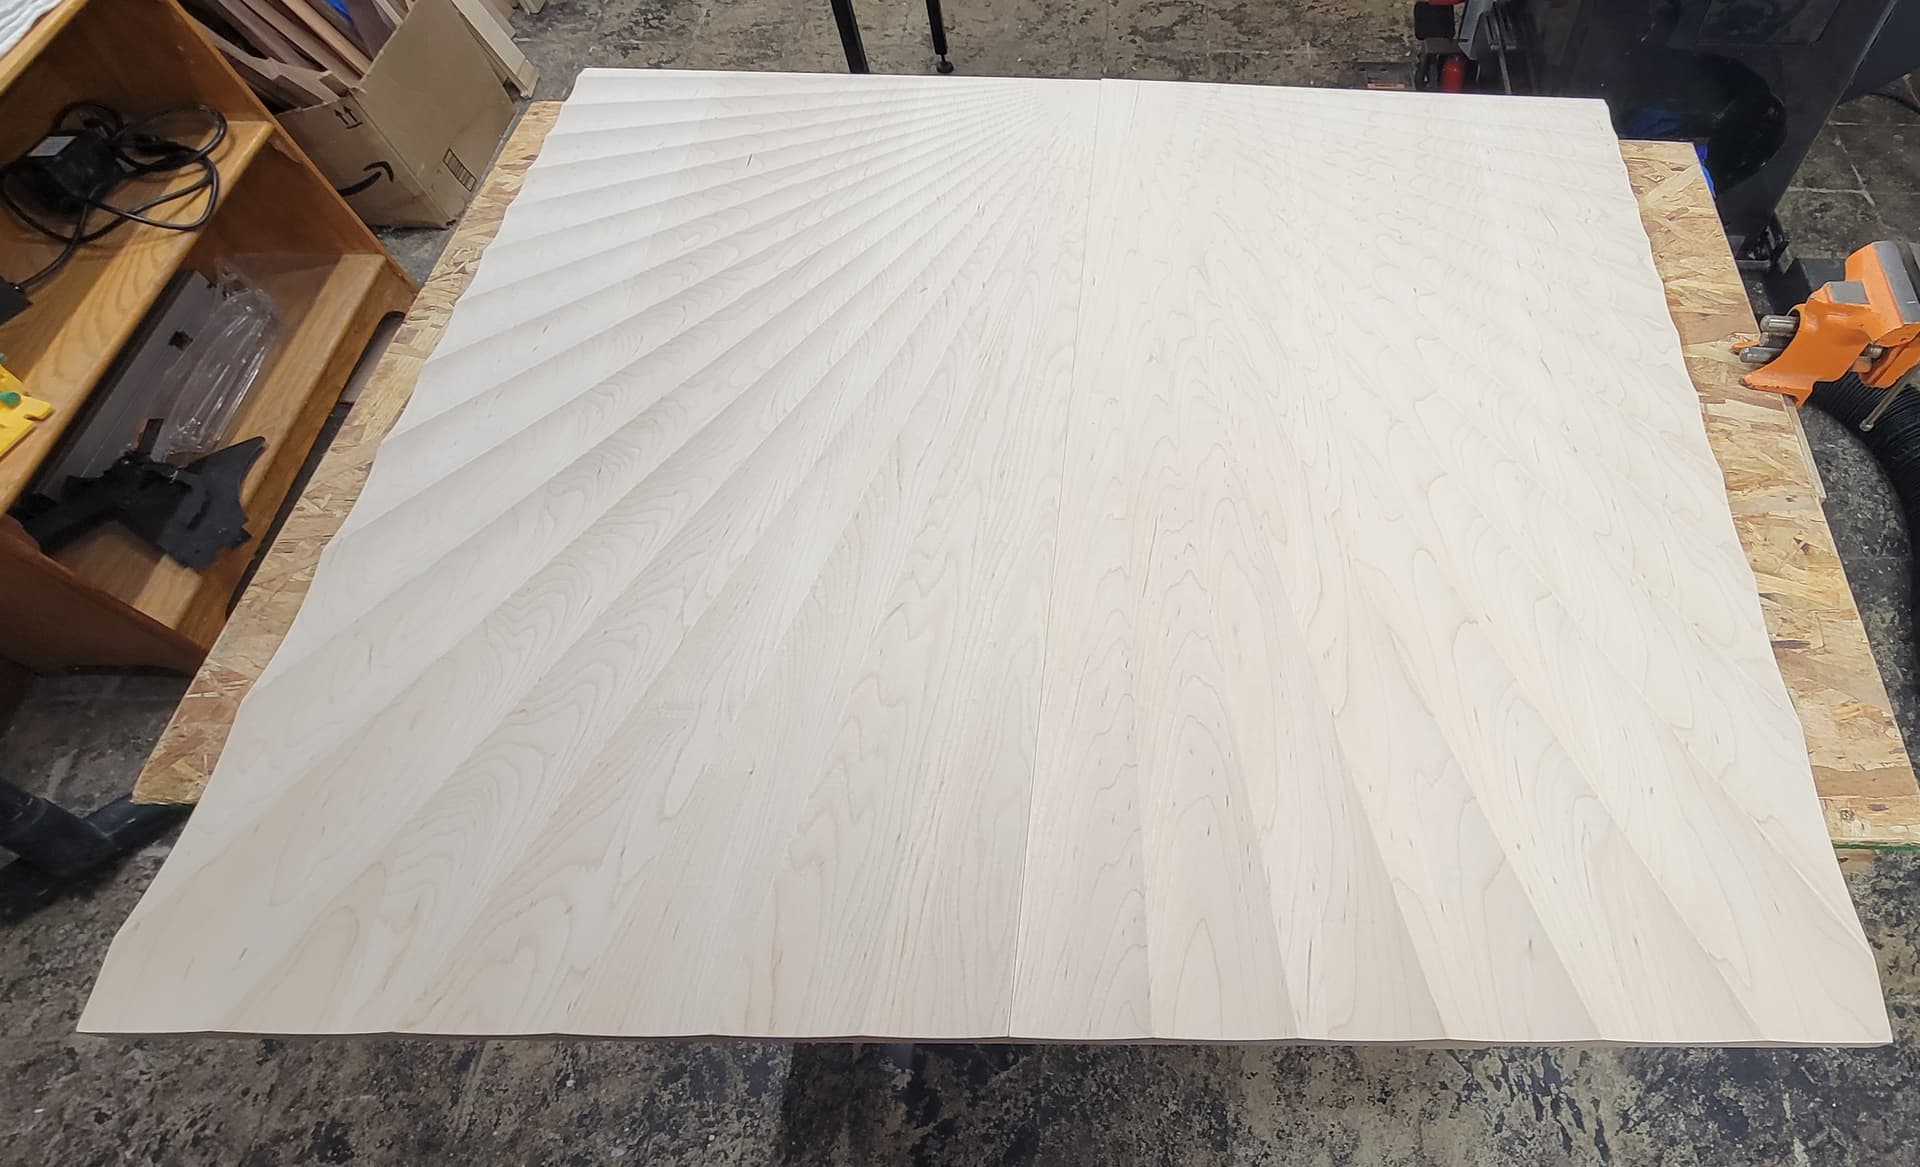
My next project will be a midsized cabinet. These are the doors that I just cut out. I am really torn on what kind of hardware to use as pulls.
Both doors together are 33in wide and 29 inch tall. Maple.
17 Likes
John, thank you for the advice. I will add a cross member. I hadn’t considered that.
Tom
1 Like
Maybe something minimal like this that would not cover up your radial rays.

After posting I realized the image was very small. Here is the website where I got the image.
5 Likes
HOLD MY BEER!

It would be much appreciated if you vote for me JoeA if you like it! Poll 2 of 2

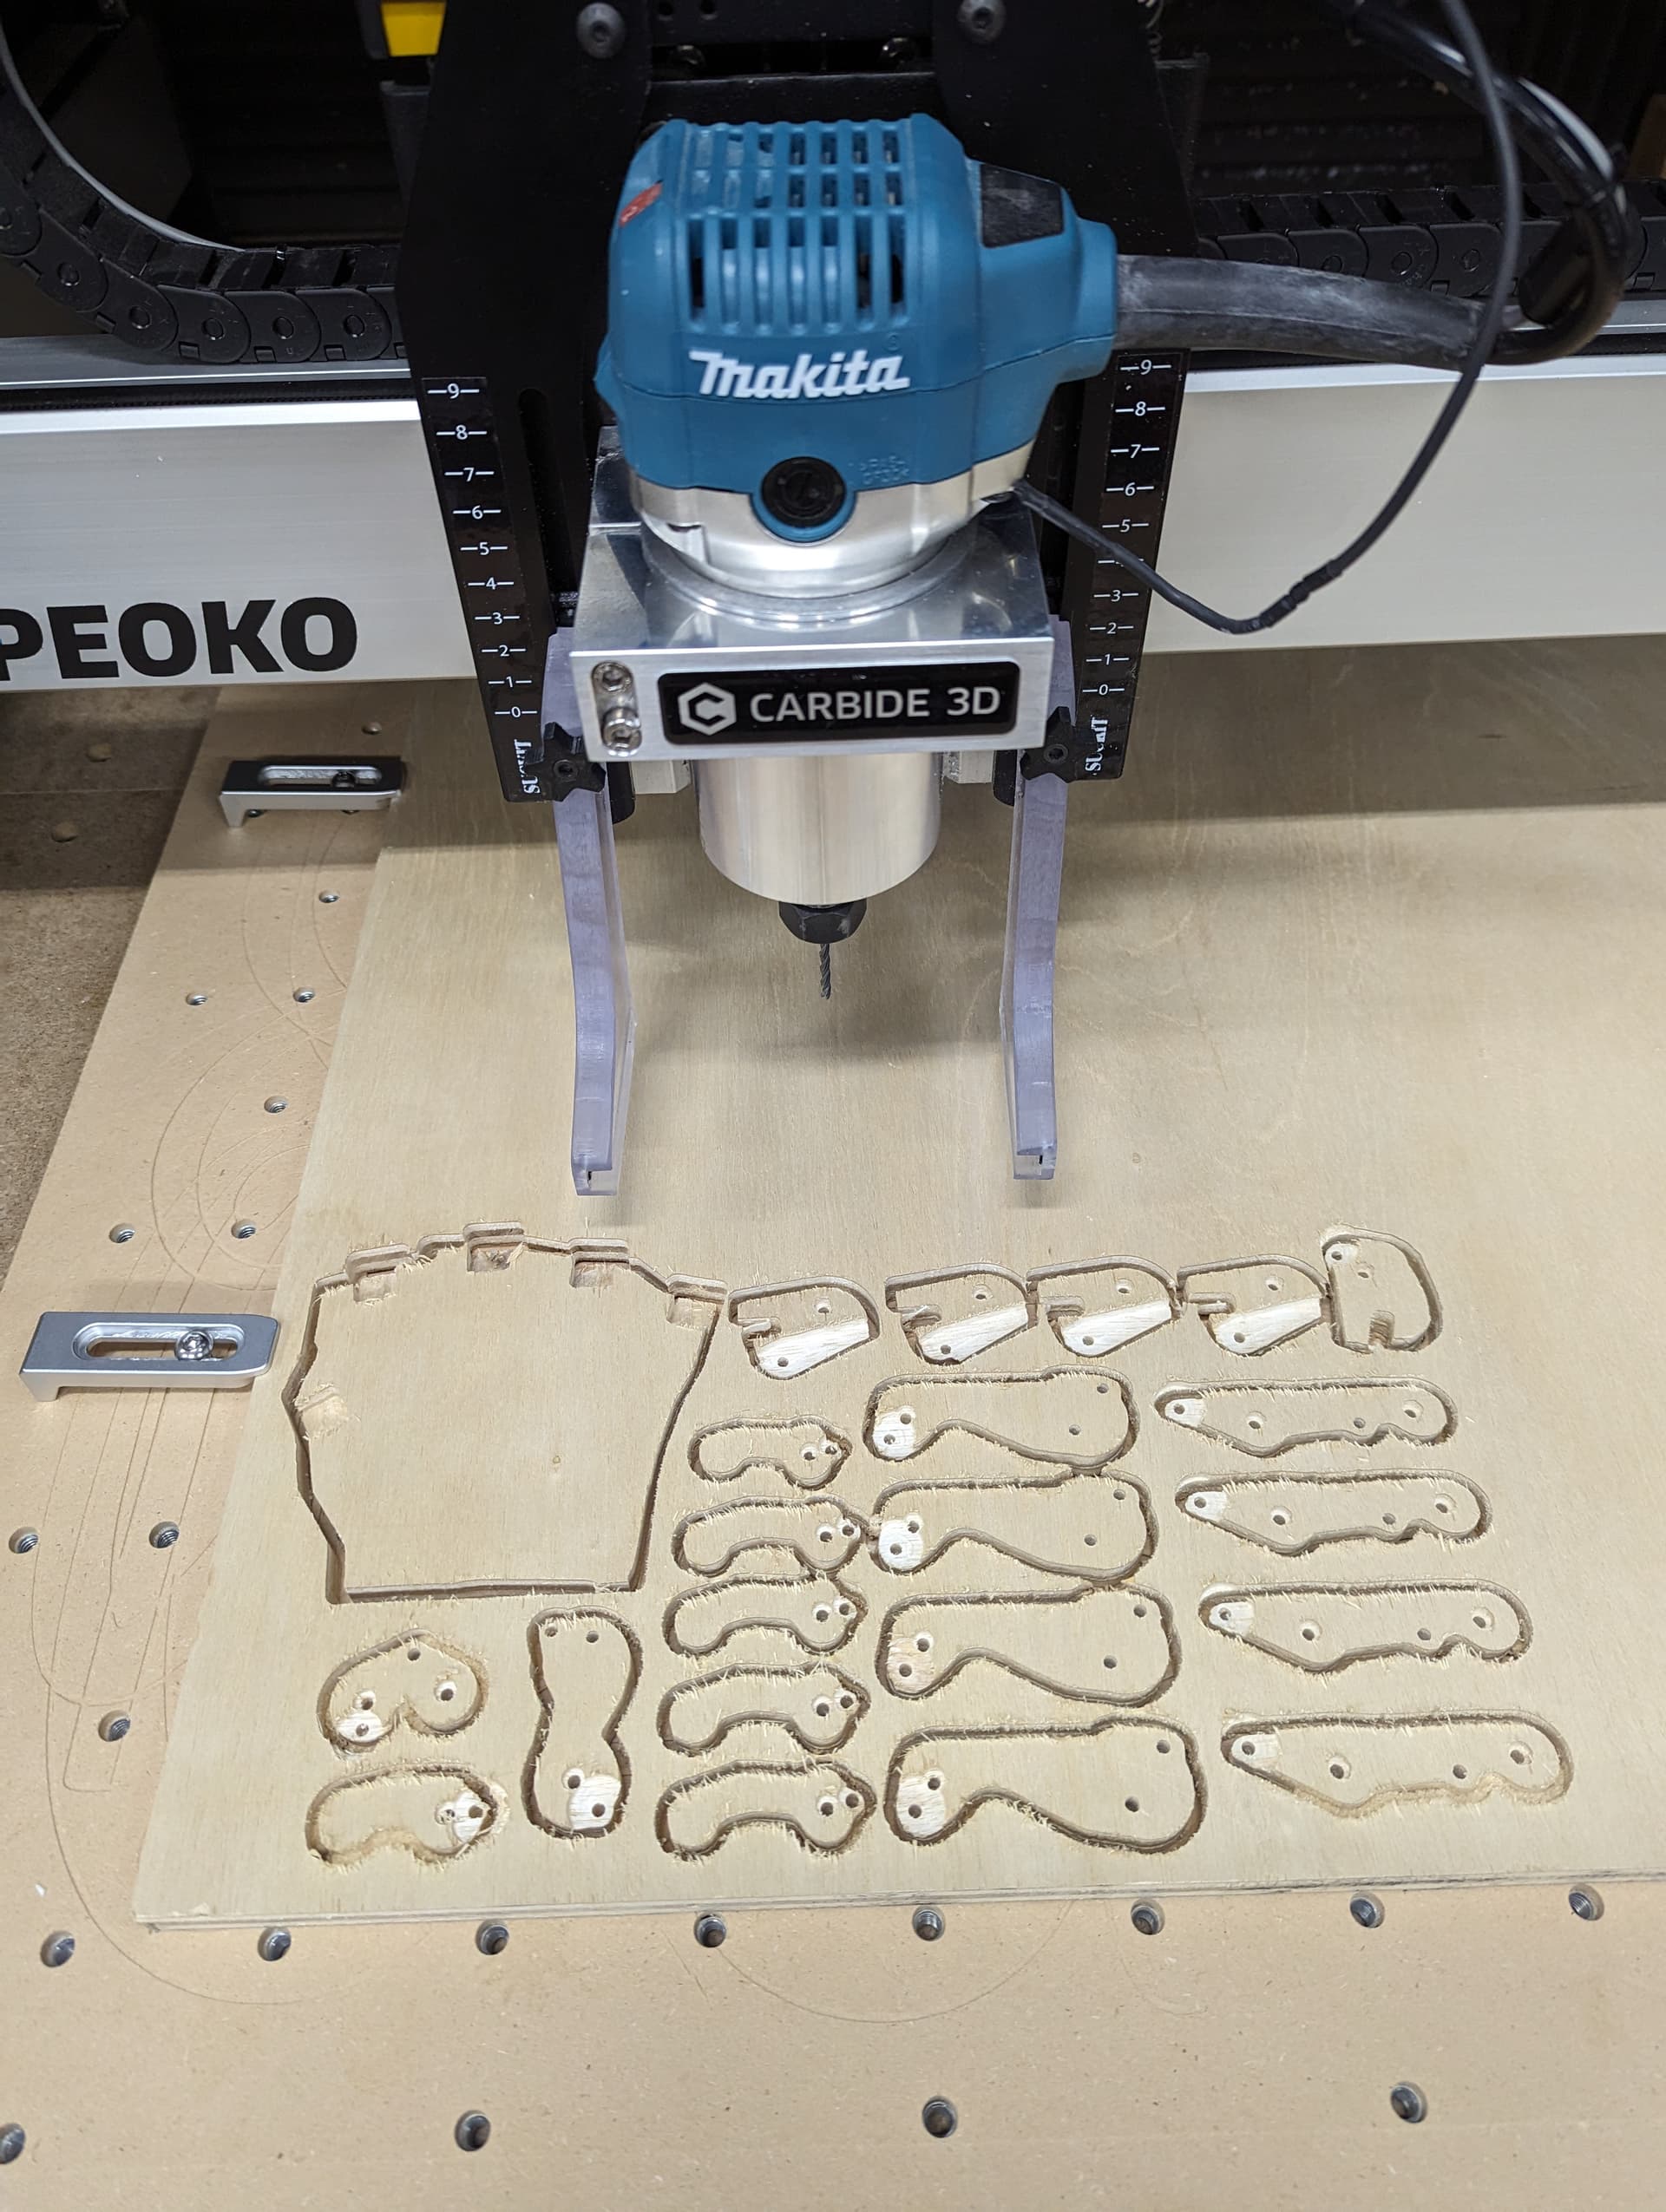
I made this for my Pops as we always jokingly say the phrase “Hold My Beer!” and now this can be taken literally! This took some time to figure out all the movements but should be very easy to download the files and make it yourself now that all the kinks are sorted out!
Files are on CutRocket
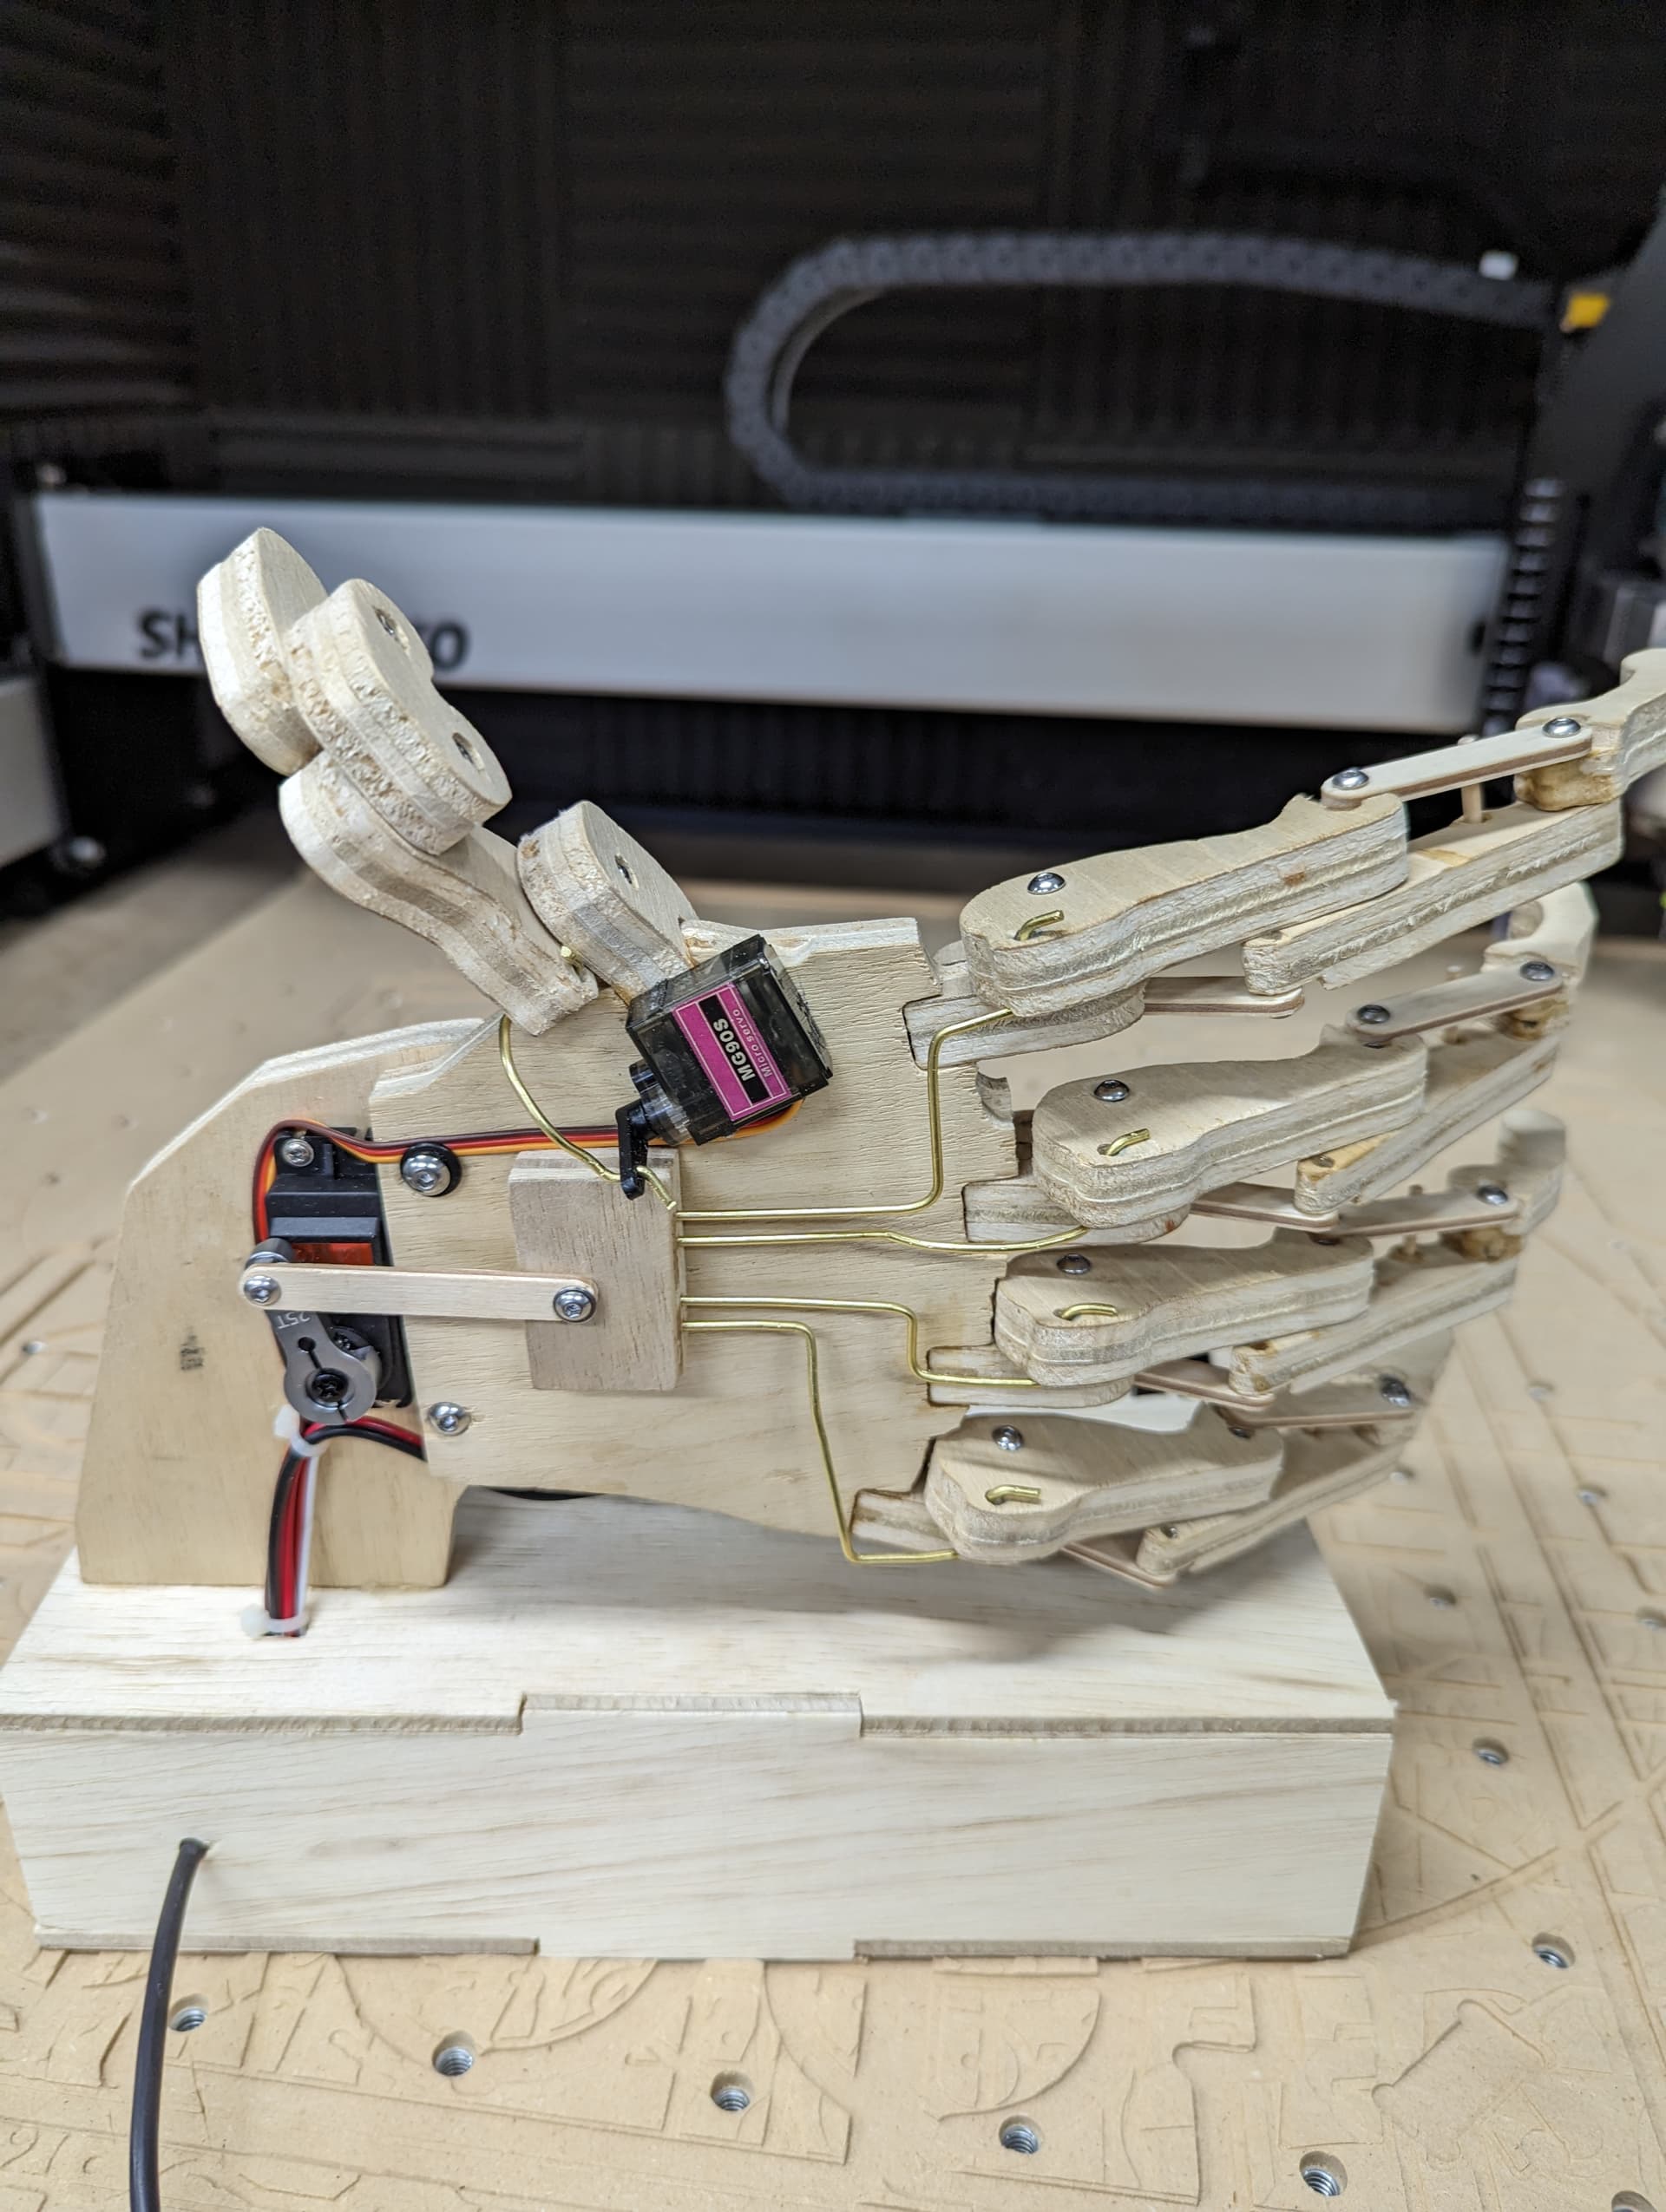
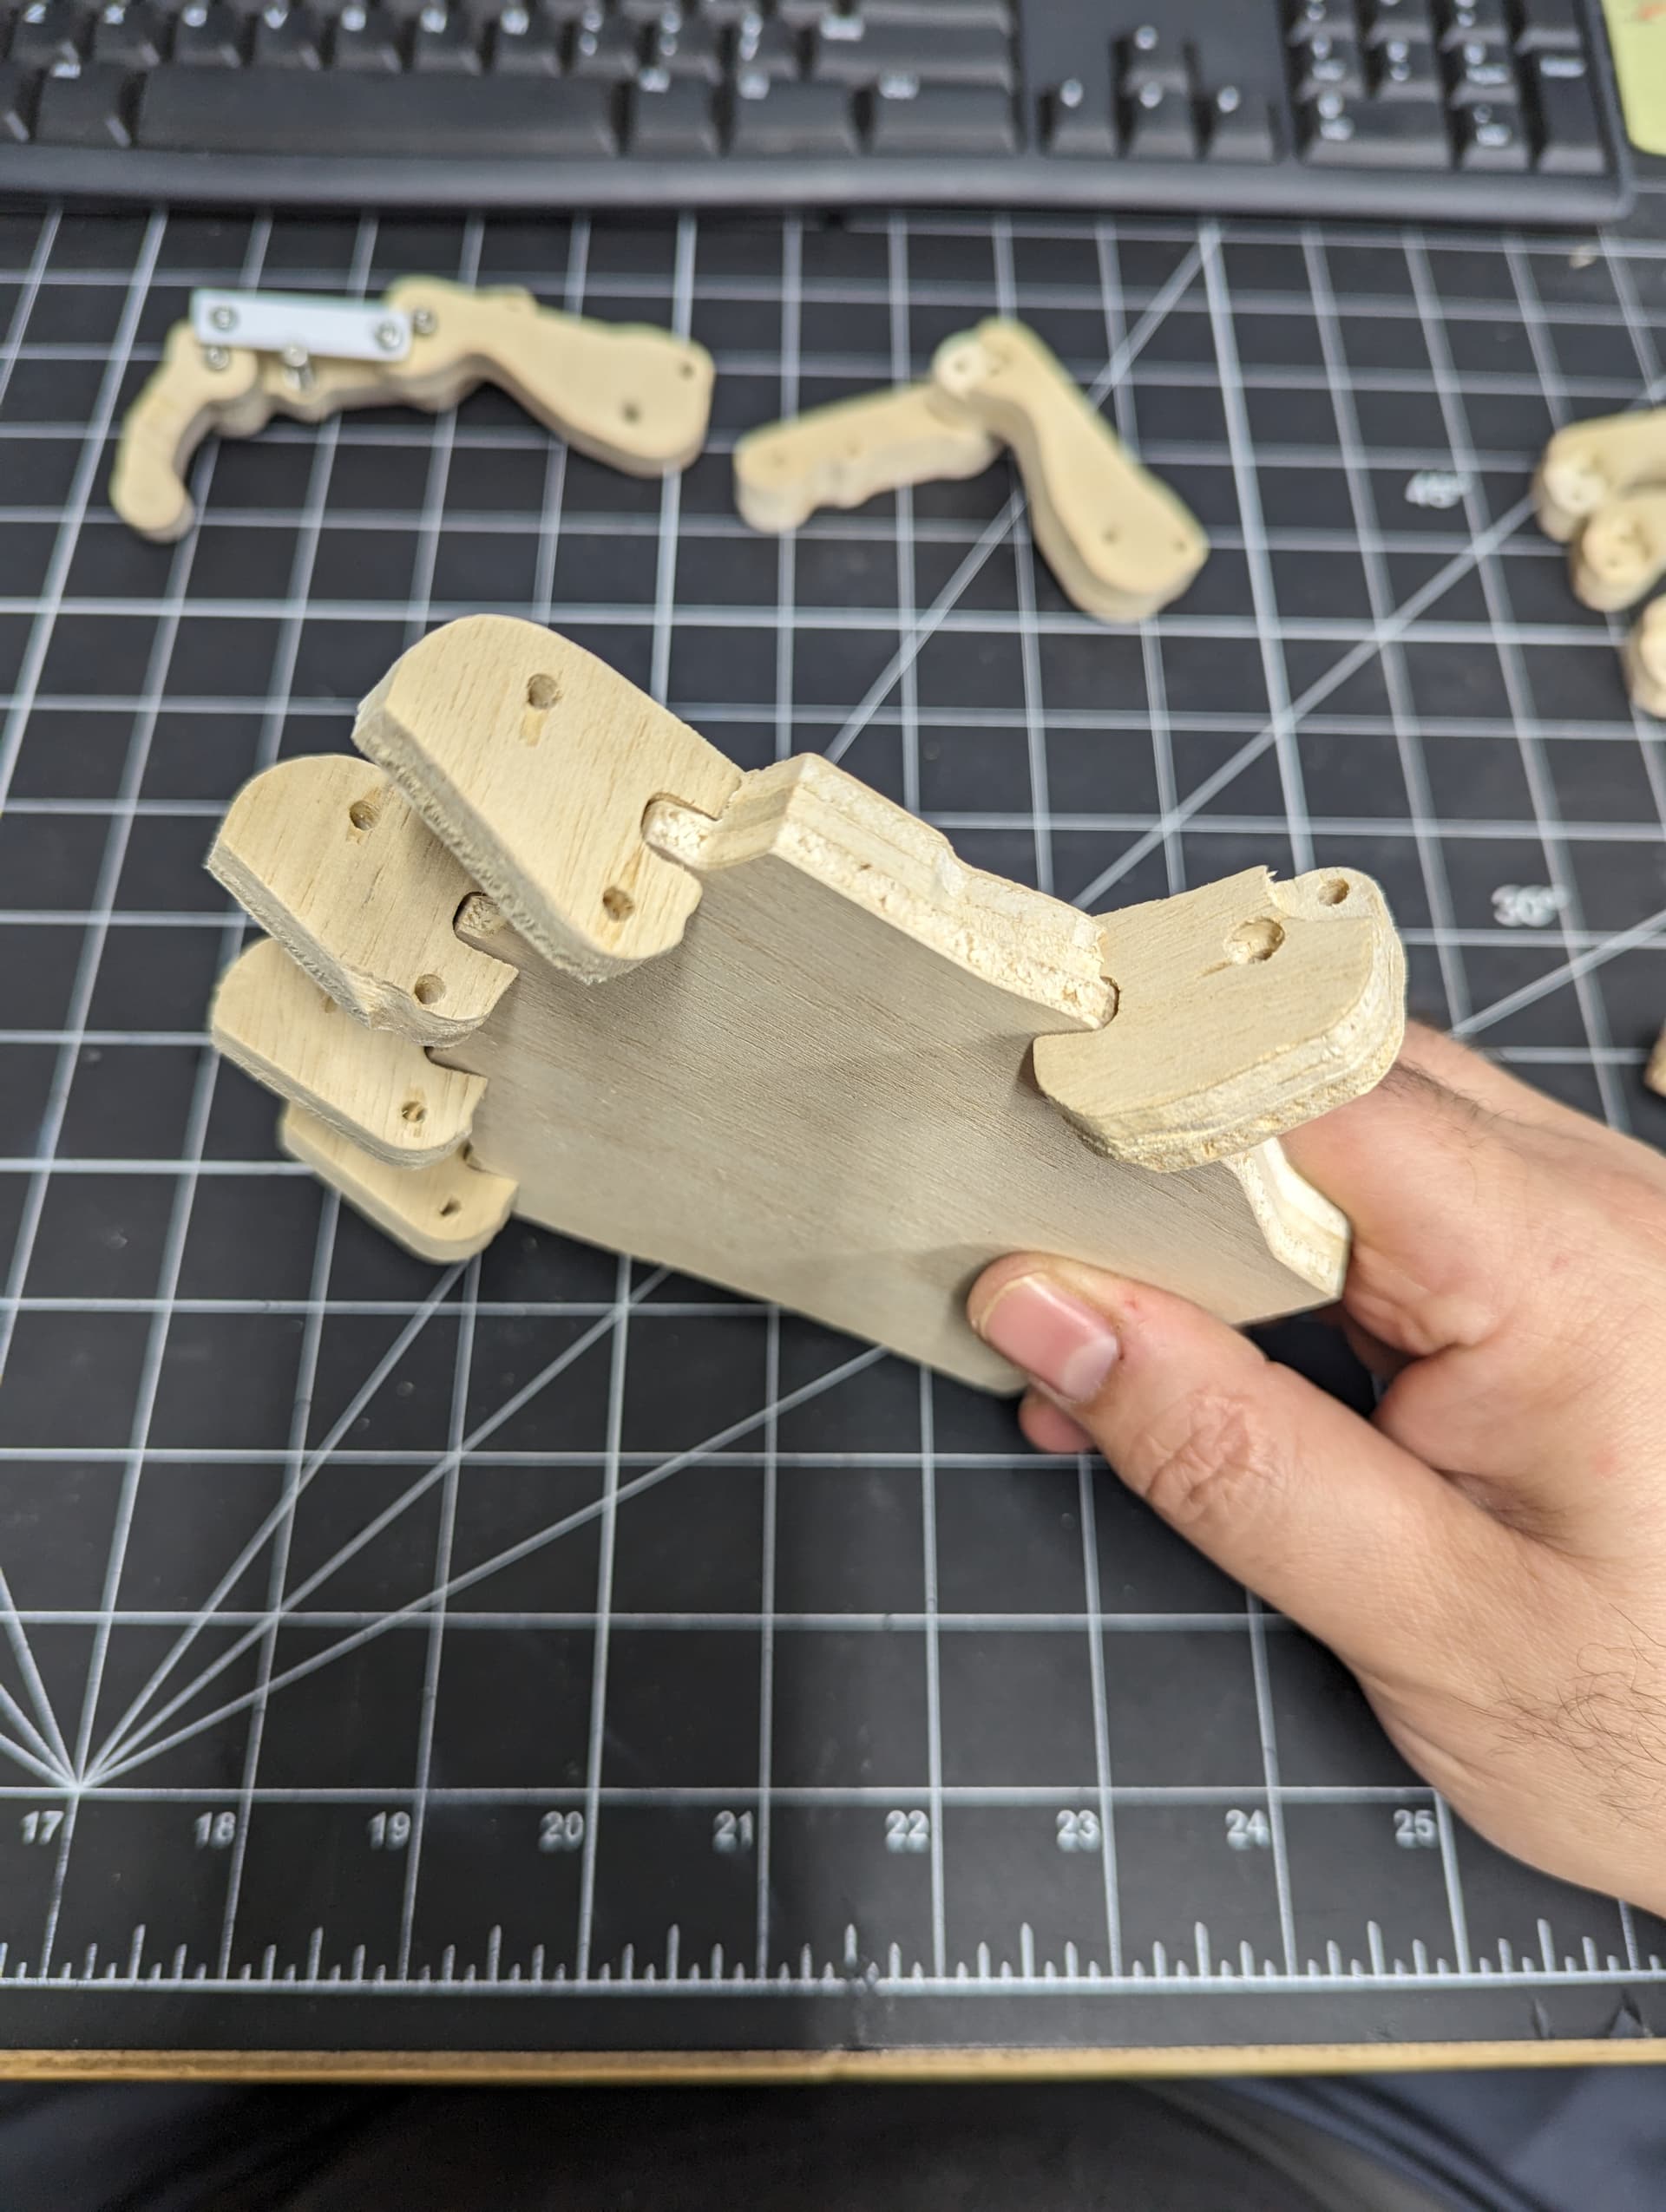
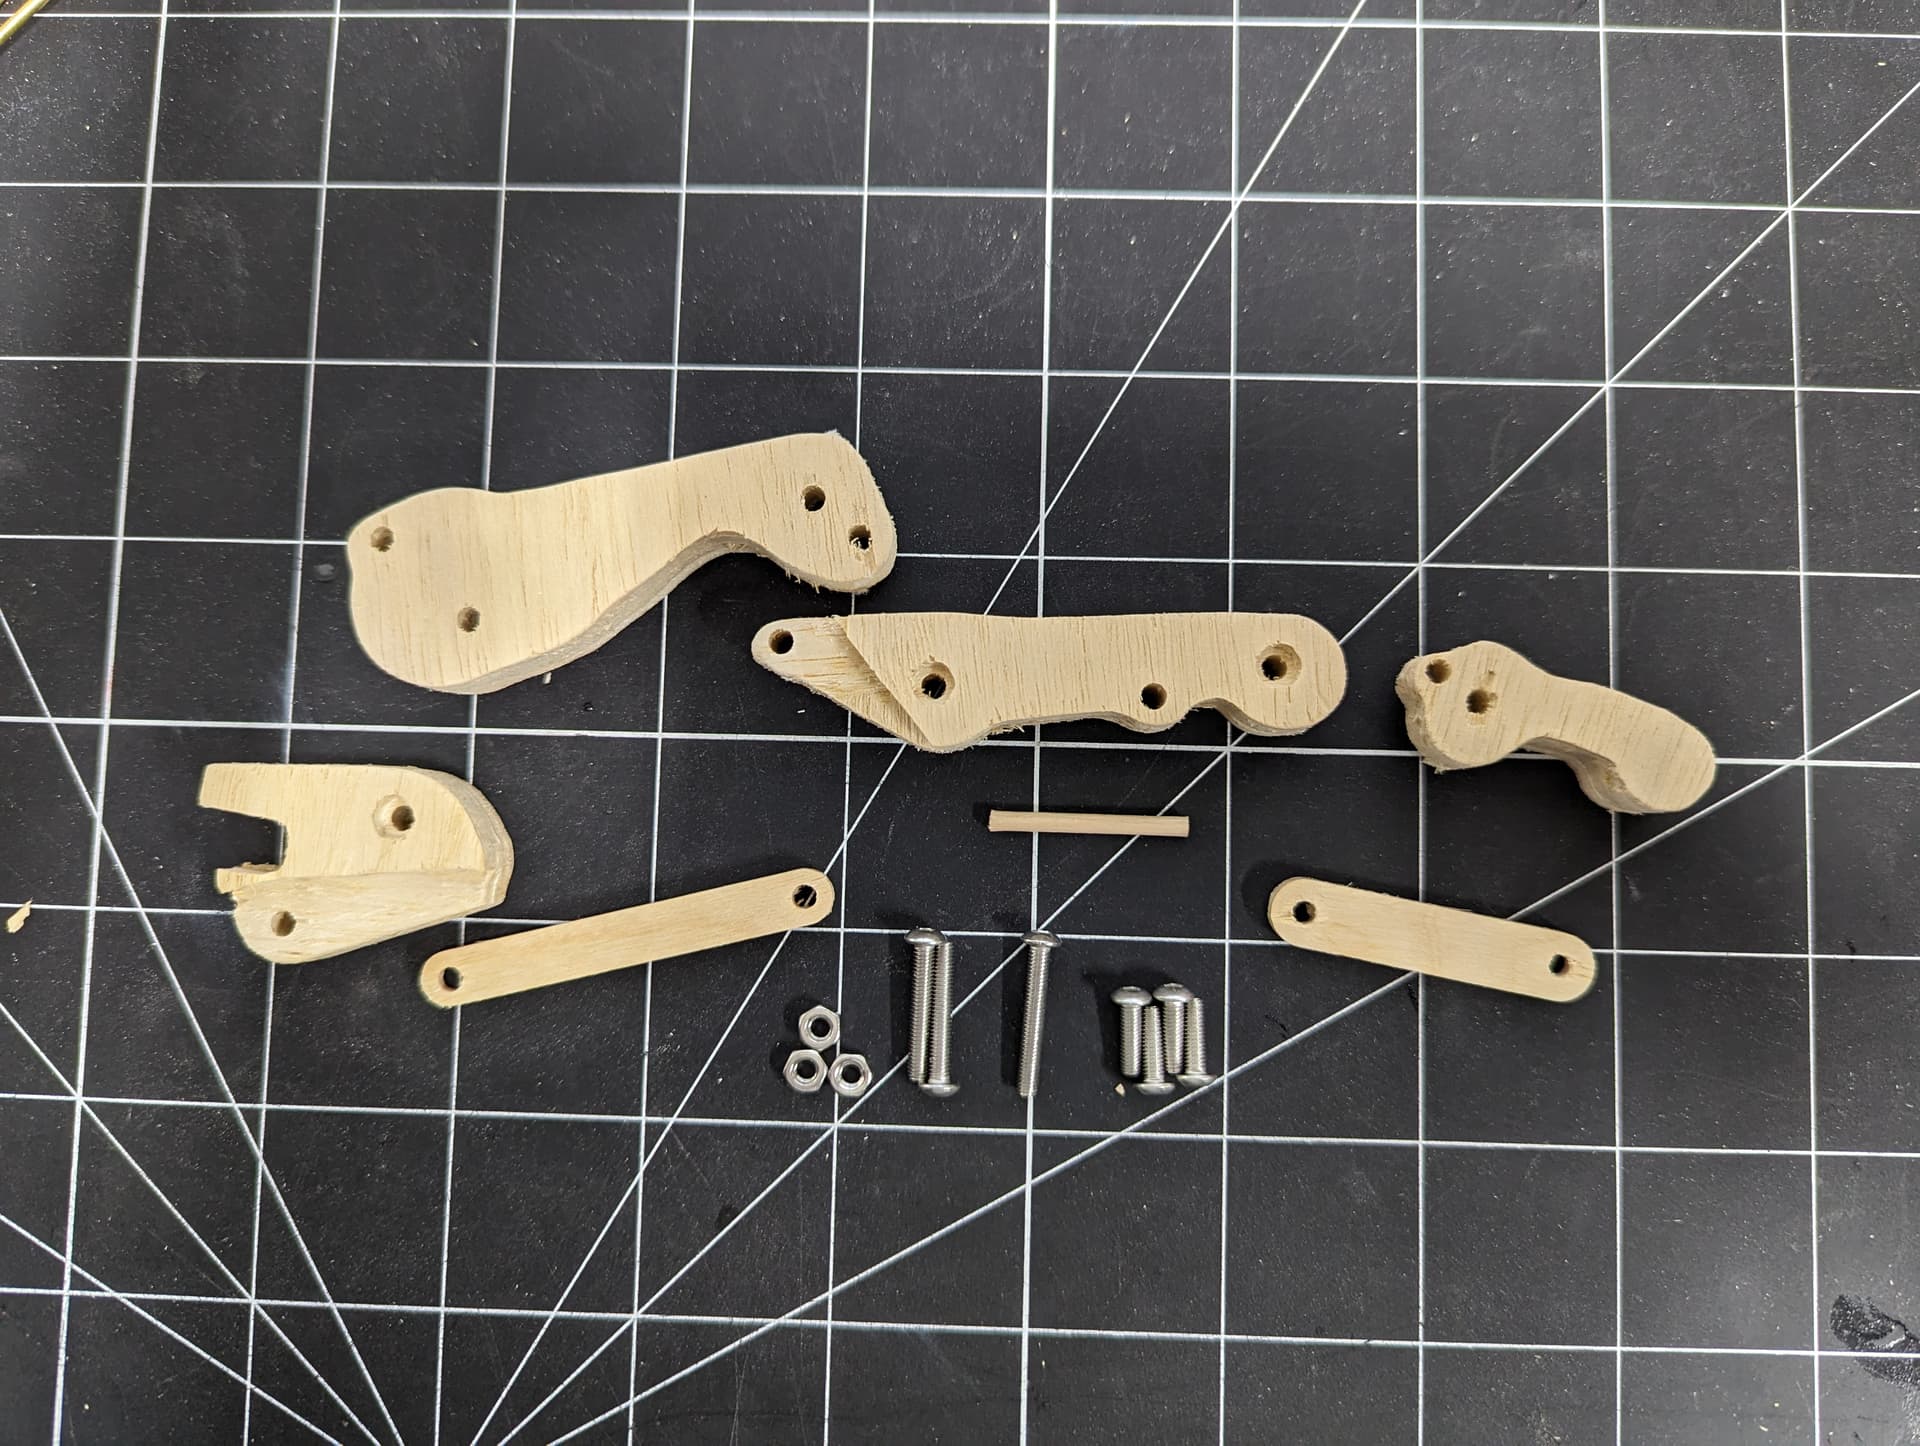
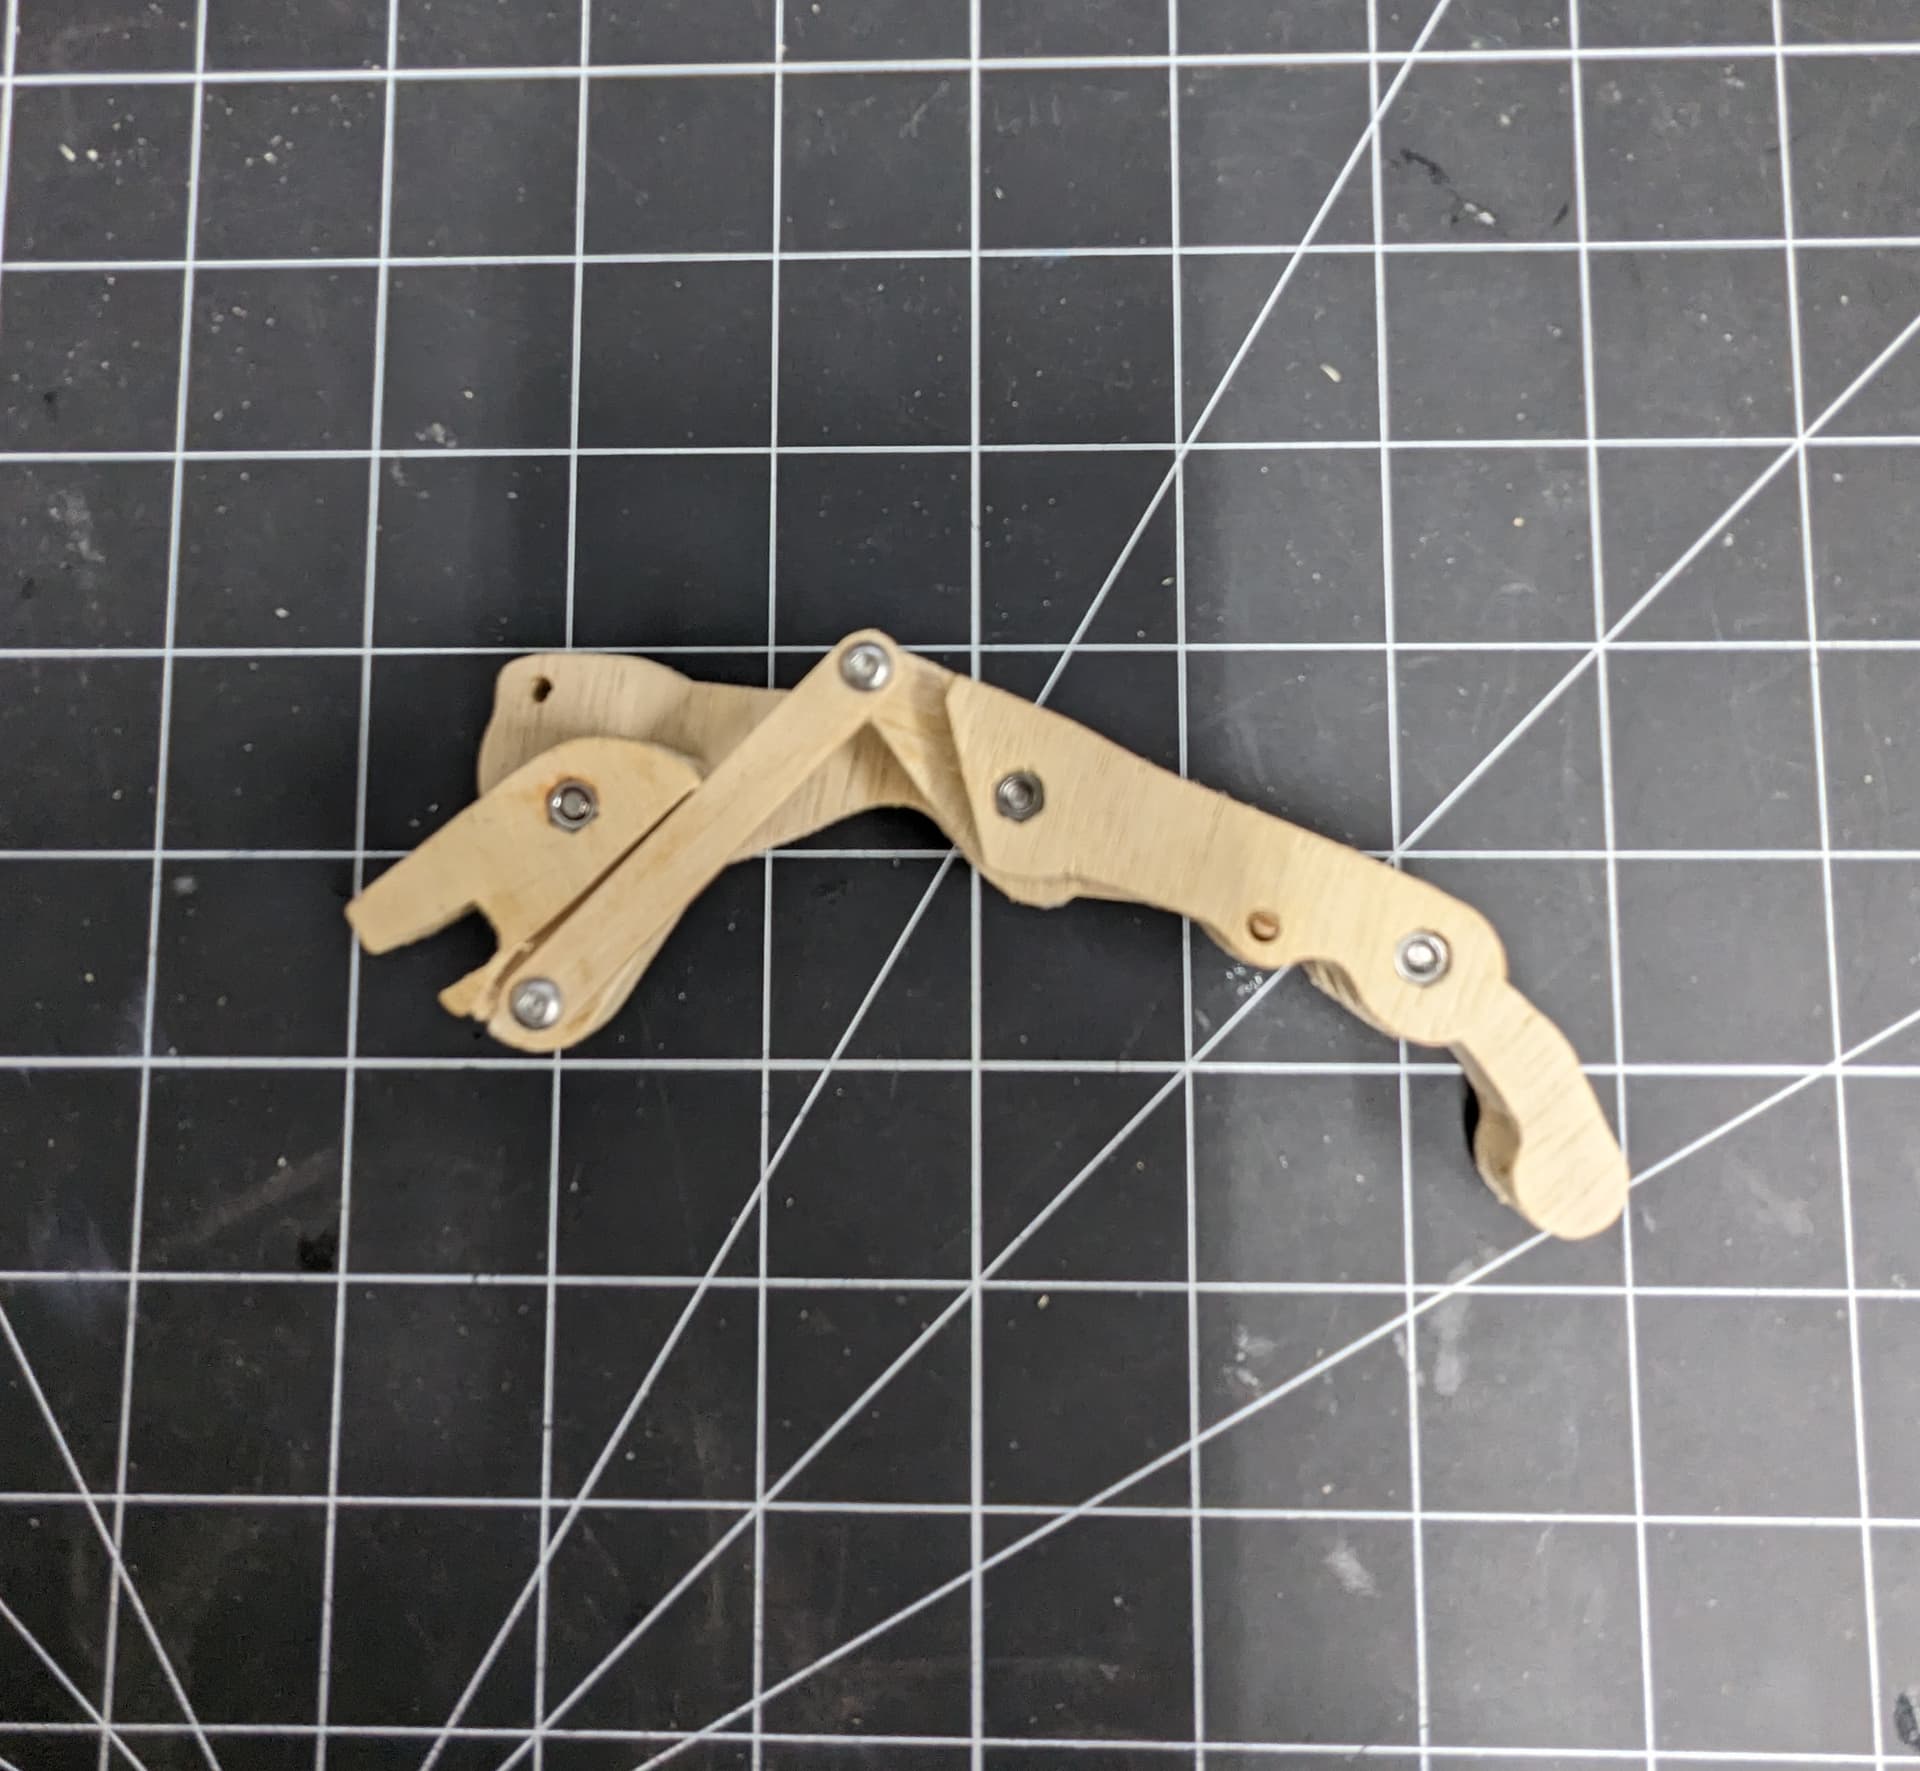
I used an Arduino to control the opening and closing, but to make it way simpler you can easily use a servo tester (hooks up to the servos so you can control the hand with a knob) for around $5

Let me know if you would like a full build tutorial and I’ll make one!
Again a vote for JoeA would be greatly appreciated
19 Likes
I started cutting clock parts in soft wood before putting the good stuff under the bit. I’m amazed on how close a tolerance the SO3 can hold.

11 Likes
My SO3 XXL with HDZ is a work horse. It is very precise. I would like an SO5 but my SO3 cuts everything I need so the SO5 will stay on the wish list.
5 Likes
I feel the same way. I’d like a shinny new SO5 or HDM but SO3 just keeps going and going, never any real problems. I honestly think I’d feel bad about selling it.
5 Likes


Just a test cut on some scrap on my new S5P. Went really well, despite just using a cheap HF router - Spindle arrives today!
8 Likes
Spindle gets here tomorrow, so still tinkering and building on the cabinet. Today was laptop pullout shelf day.


Come on Fed-Ex!
10 Likes


So tell us how you cut your rays and modeled it please. If possible could you PM me your c2d file. I really like what you did and am going to make a mail center cabinet to handle my mail when I come in the front door. My mail tends to collect. I do a rough sort when I bring it in the door but I want a cabinet inside the door to immediately take action, file, shred or throw away. I am tired of getting a stack 6" high to go through of noncritical mail occasionally finding something I should have taken care of earlier. I also want a place to store envelopes, stamps and mailing labels. A one stop mail center.
Your cabinet looks very nice and will really pop when you get some finish on it. What is the purpose of this cabinet.
Unfortunately, I used Fusion 360 for both modeling and CAM. Happy to send you those files if you are setup with Fusion.
This cabinet is going to be a dining room cabinet. So probably plates or other things that go in the dining room. My other half will figure out what to do with it. I build; she uses the things… If it were up to me: tote bins for everything. Coffee table: tote. Dining table: a series of totes.
8 Likes
It reminds me of those sculpted mdf panels you can get that are ridiculously expensive. The maple is much nicer. ![]()
1 Like
Thanks for the offer but I do not use F360. Good work.
You are not far off. Those things were the inspiration.
Maple is definitely nicer, but probably a bad choice of wood. Those pictures are with the finish on. Maple just doesn’t pop like other woods. If I did it again, I would probably pick a different wood and maybe a different finish.
1 Like
What was the finish you used? I find that oil finishes bring warmth to maple and things like Boiled Linseed Oil makes grain pop. Even Shellac helps bring out the grain. Water based top coats do not bring out the grain and do not add any color. Maple itself is rather blah but can look quite fantastic with the right top coats.
5 Likes
I used oil and wax (homemade hard wax oil). It could also just be the pictures that make it look duller. It’s a small bit more vibrant in person.
1 Like
I would agree. Boiled Linseed Oil really makes the wood zing. I finished this bird Box for Blue Tits this afternoon having coated it yesterday. I think the wood is Macrocarpa (Monterey Cypress), though not sure as it was a big log I picked up on our local beach having washed down the River Severn last winter.


5 Likes