Griff
(Well crap, my hypometric precursor device is blown…)
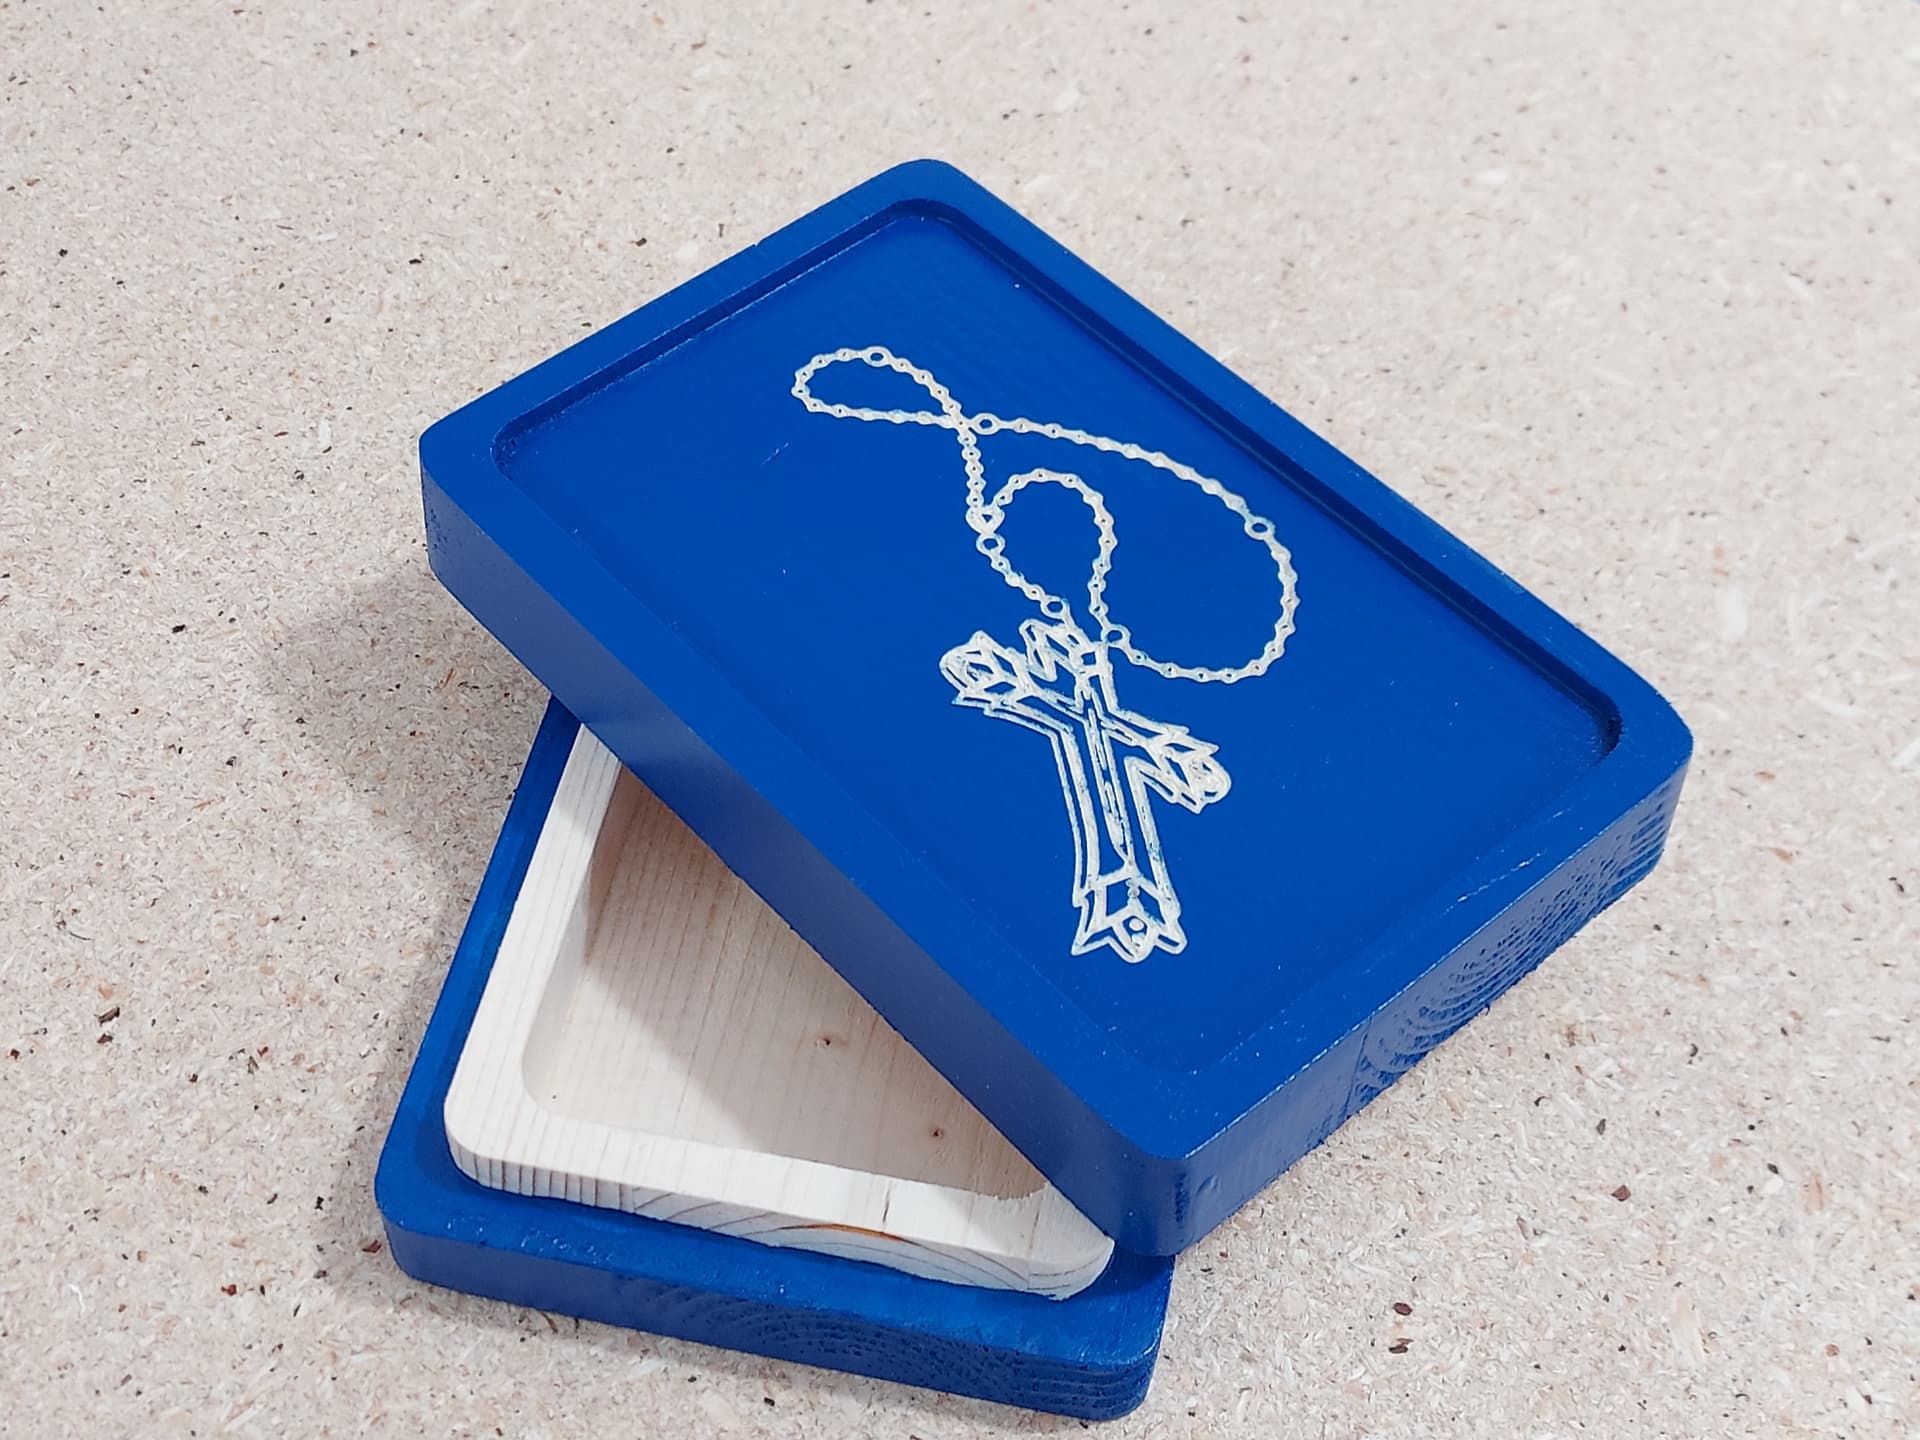
405
Revisited my educational fixture plate prototype today.
Thanks to Mr. Saunders at NYCCNC learned how to threadmill, a skill I’ve always admired but not thought I’d ever manage. Also polished my amateur chamfer skills.
Inexpensive thread mill from Carbide Tool Source, worked like a charm.
I also learned re-zeroing a project that was set aside weeks ago is not a problem when you have a hybrid table.
Moving forward now to a modular design similar to Saunders Machine Works.
Griff
(Well crap, my hypometric precursor device is blown…)
407
Mostly to do, I’m sure, with my poor practices in the past with secondary and tertiary spoil board alignment to the machine axes. Never was able to perfectly re-zero projects that had been removed and remounted.
Very handy to be able to have the cnc do the thread tapping vs hand taping. I’d love to see this same photo taken from about 5ft away as the bed footprint, Er 20 collet, and tool height sensor had me thinking this might be a fight club machine as in you can’t talk about it.
What feeds worked best for you and what was the machine time per hole?
I’ll understand if this post gets edited.
Griff
(Well crap, my hypometric precursor device is blown…)
409
8k on the spindle, 500mm/min feed. I’d guess 15 seconds per hole. Crippled F360 so no rapids.
As I make more plates I’ll optimize settings. This was literally my first shot at this.
This is the lower tool for a compression mold I’m working on. It’s also my first time designing my own toolpaths. Done in fusion with multiple clearance approaches and 3 tool changes. Very happy with my efforts and everything I’ve managed to learn so far. One step closer to making all my own injection tooling!
Nomad 3 at 15000 rpm using 1/8" square single flute, 2mm square single flute and a 1/32" ball nose. www.dropbox.com/s/ri2cyenlxfjdtkh/NomadTooling.mov?dl=0
For compression molding you use a slug of plastic under heat and pressure to form the final part. For injected parts I will be using a micro molder type injection press, but this tool is for compression. Here is a pic of of the formed rubber from an earlier design that used a resin printed mold. I am working on better production tooling with aluminum and integrated cartridge heaters now.
Thank you Bart,
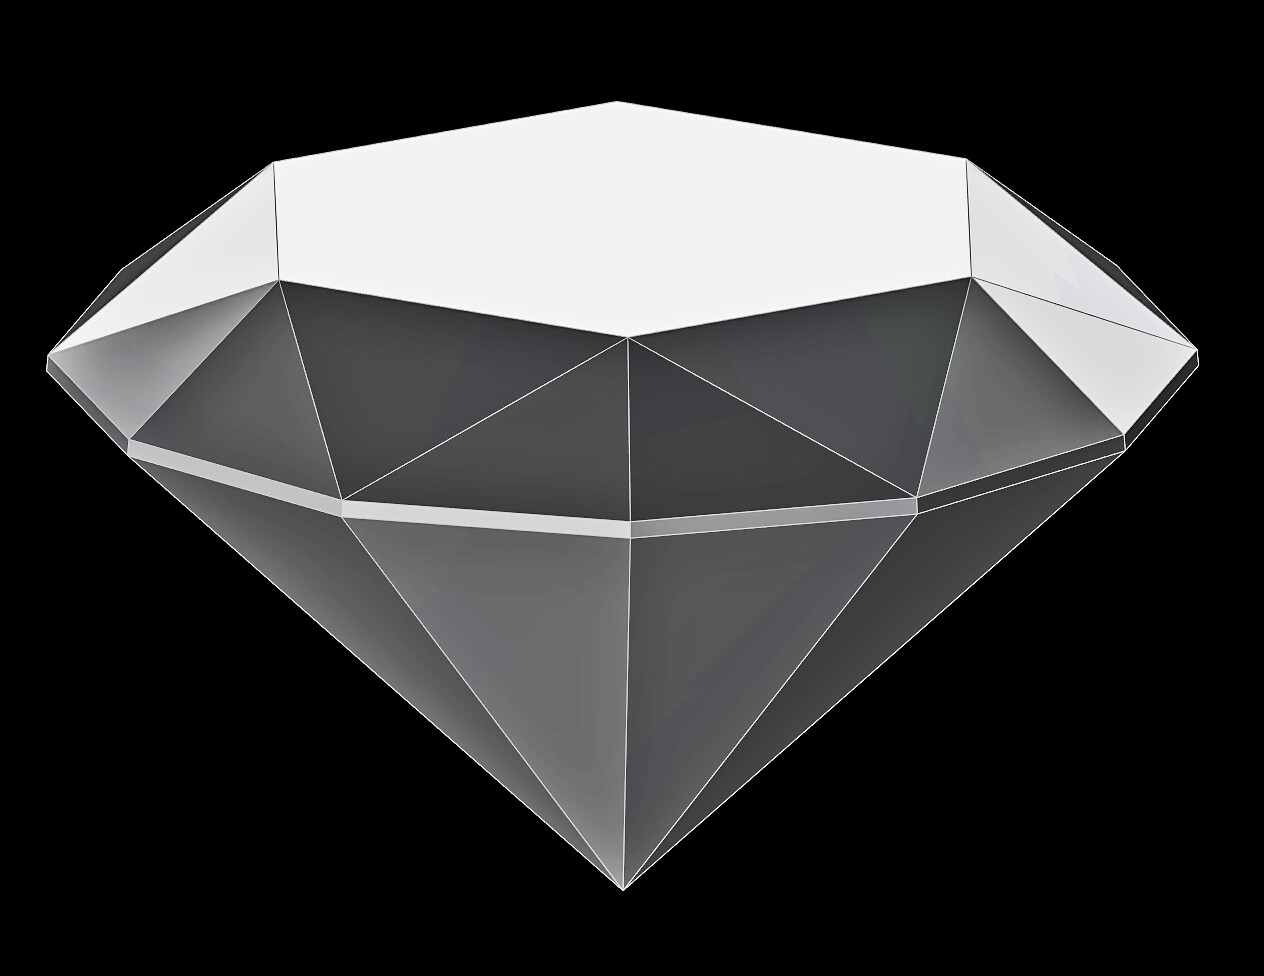
I was playing around in Fusion modeling a diamond, and sliced off the top as a centerpiece, then went with the facet theme for the ring, cutting it into 32 sections with flat edges. It is a cool look, hits the light different every angle.
I roughed it out with a 3d adaptive toolpath and finish it with a 1/8 ball mill and a contour toolpath, about 100 laps around the track, at a .001 depth of cut.
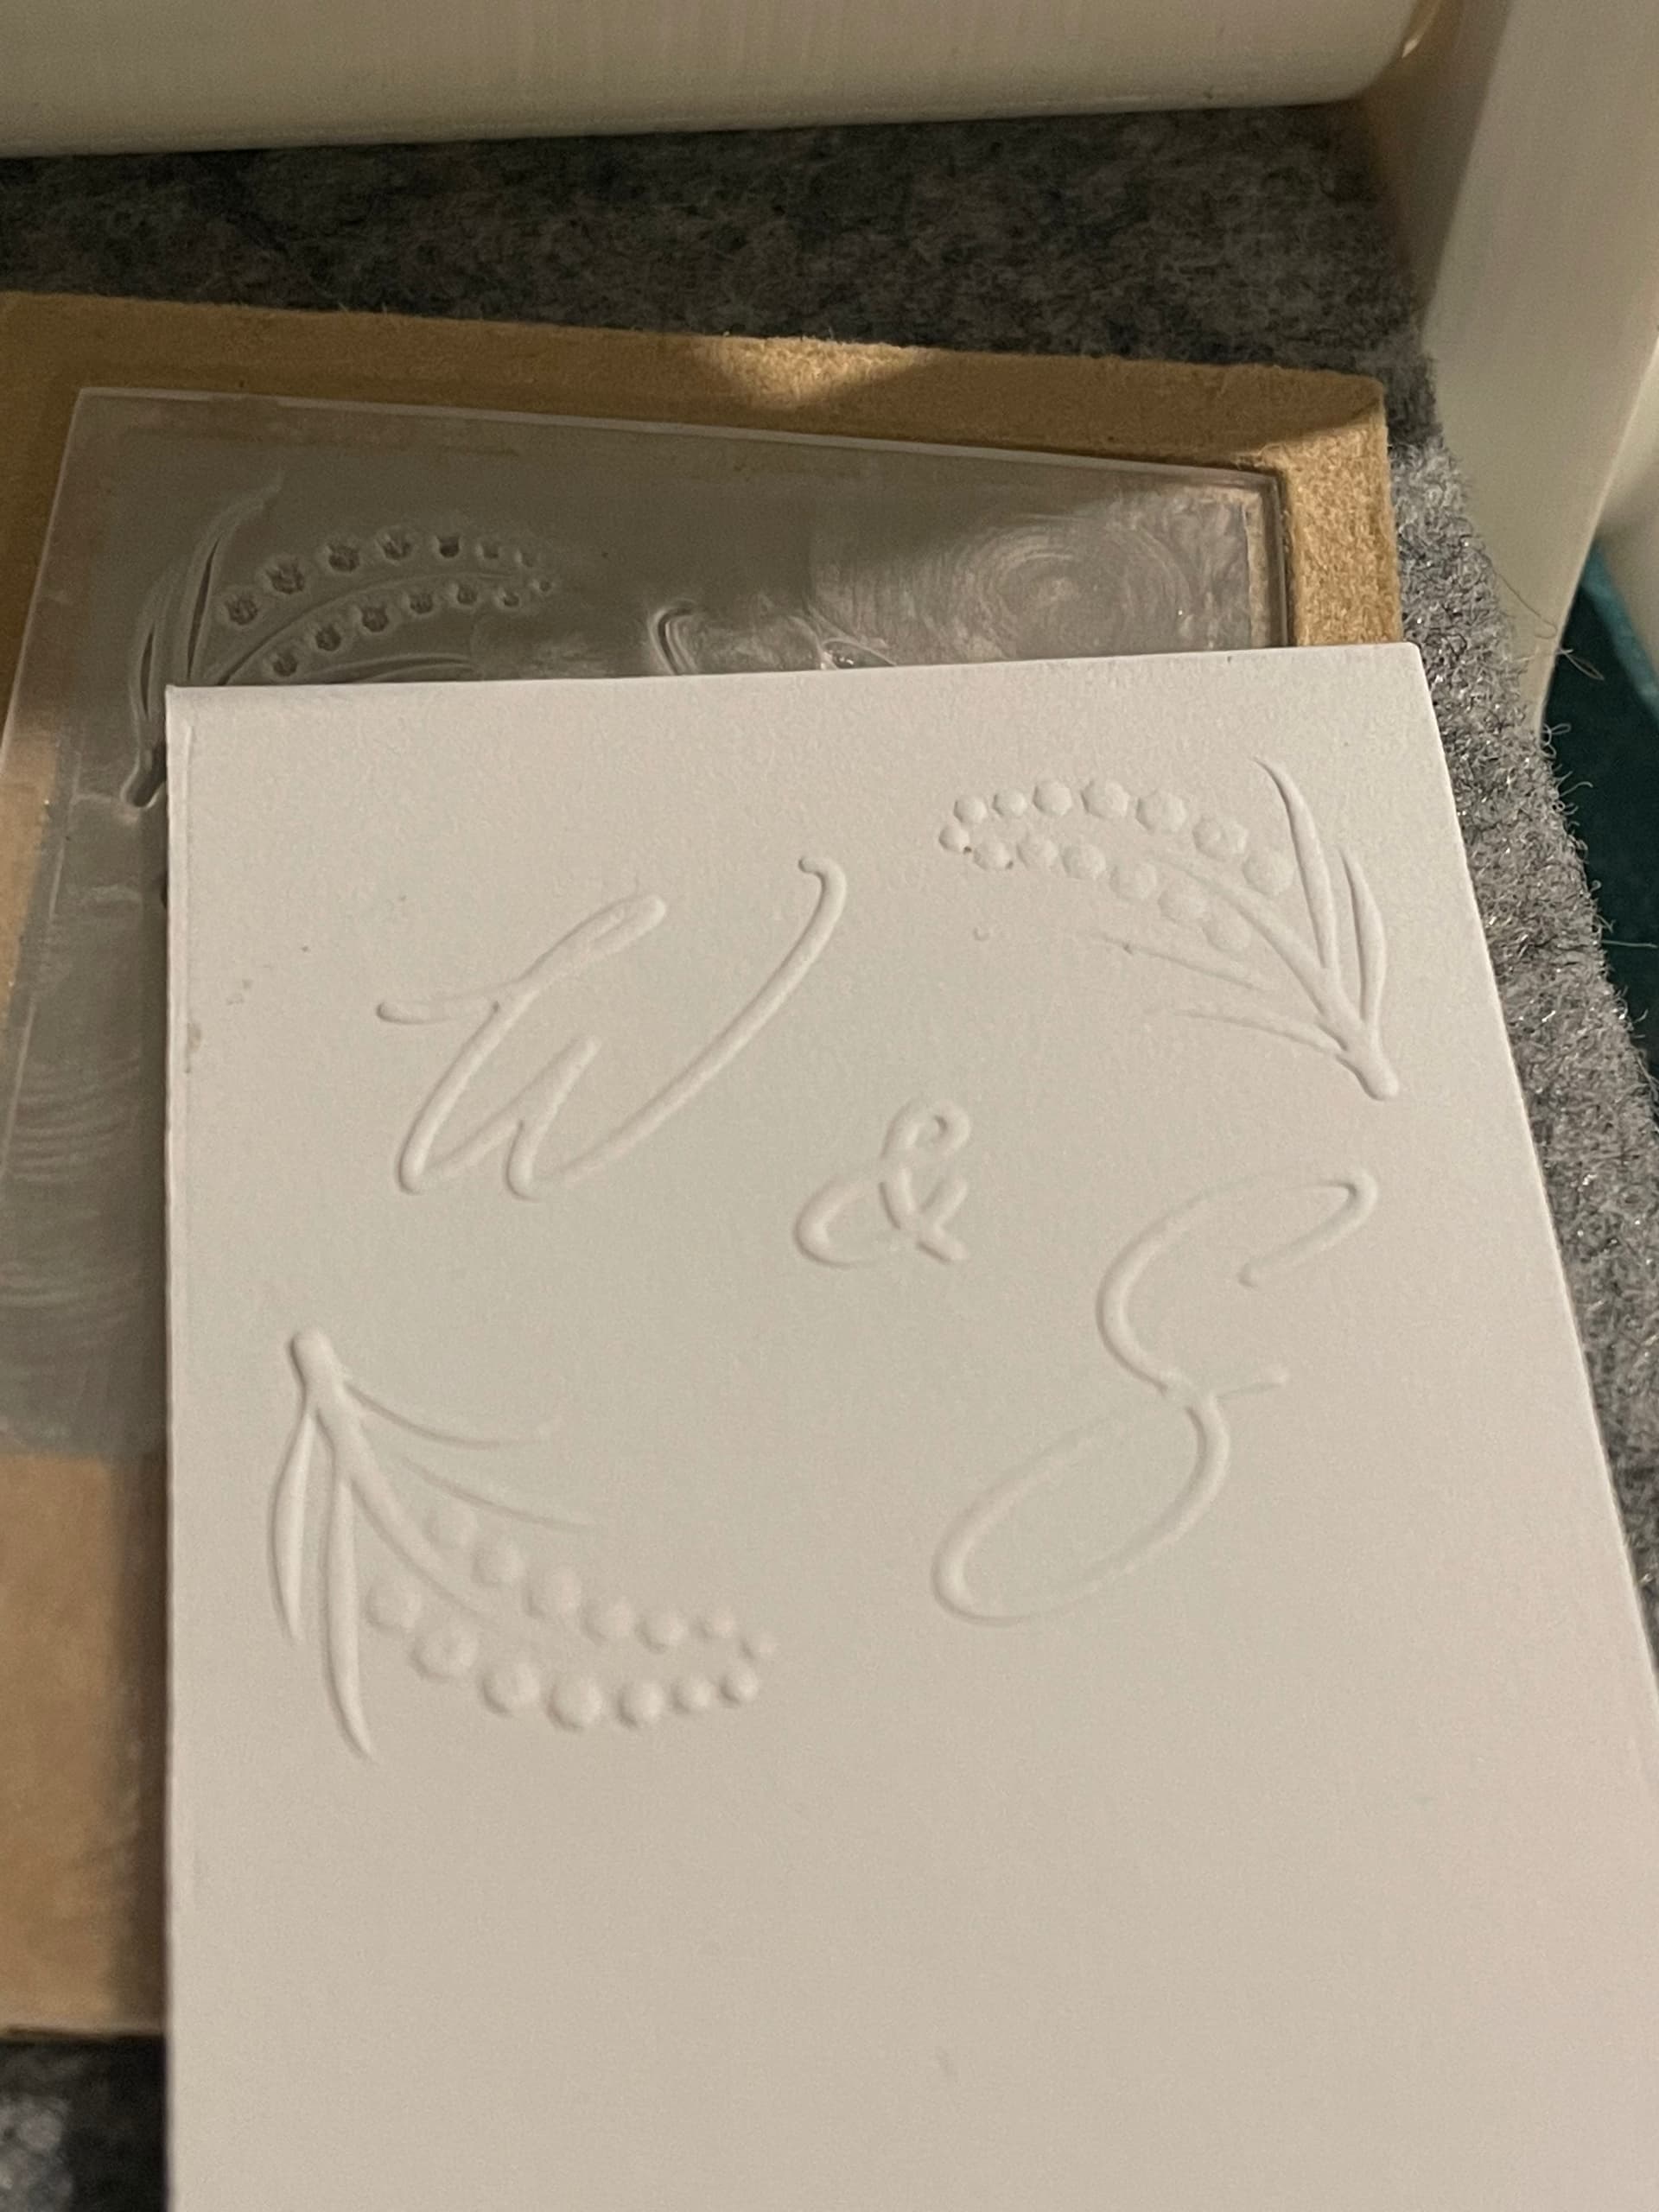
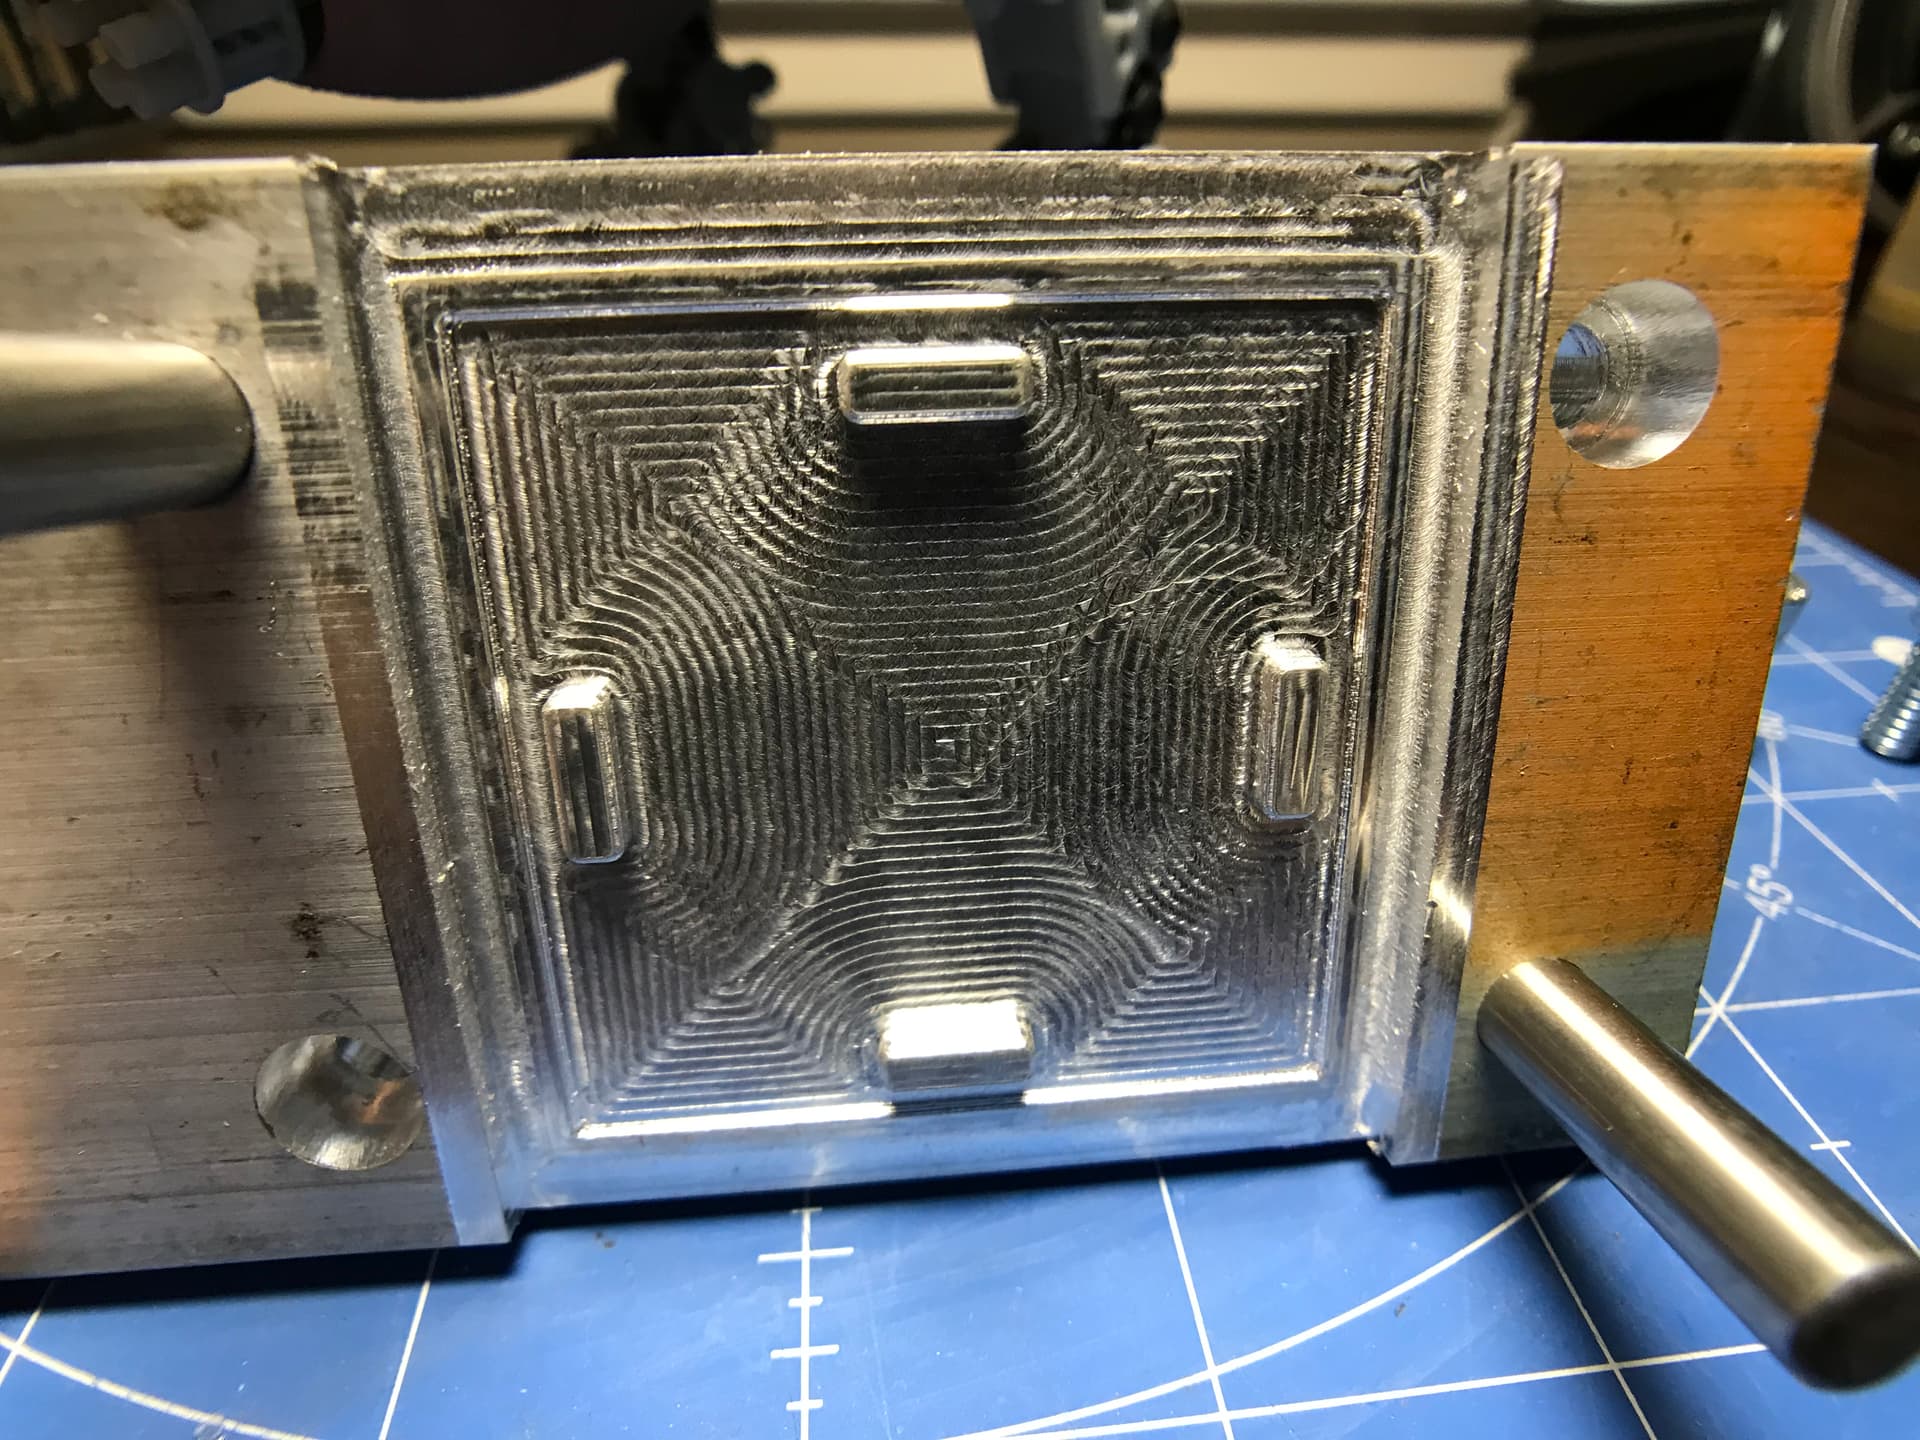
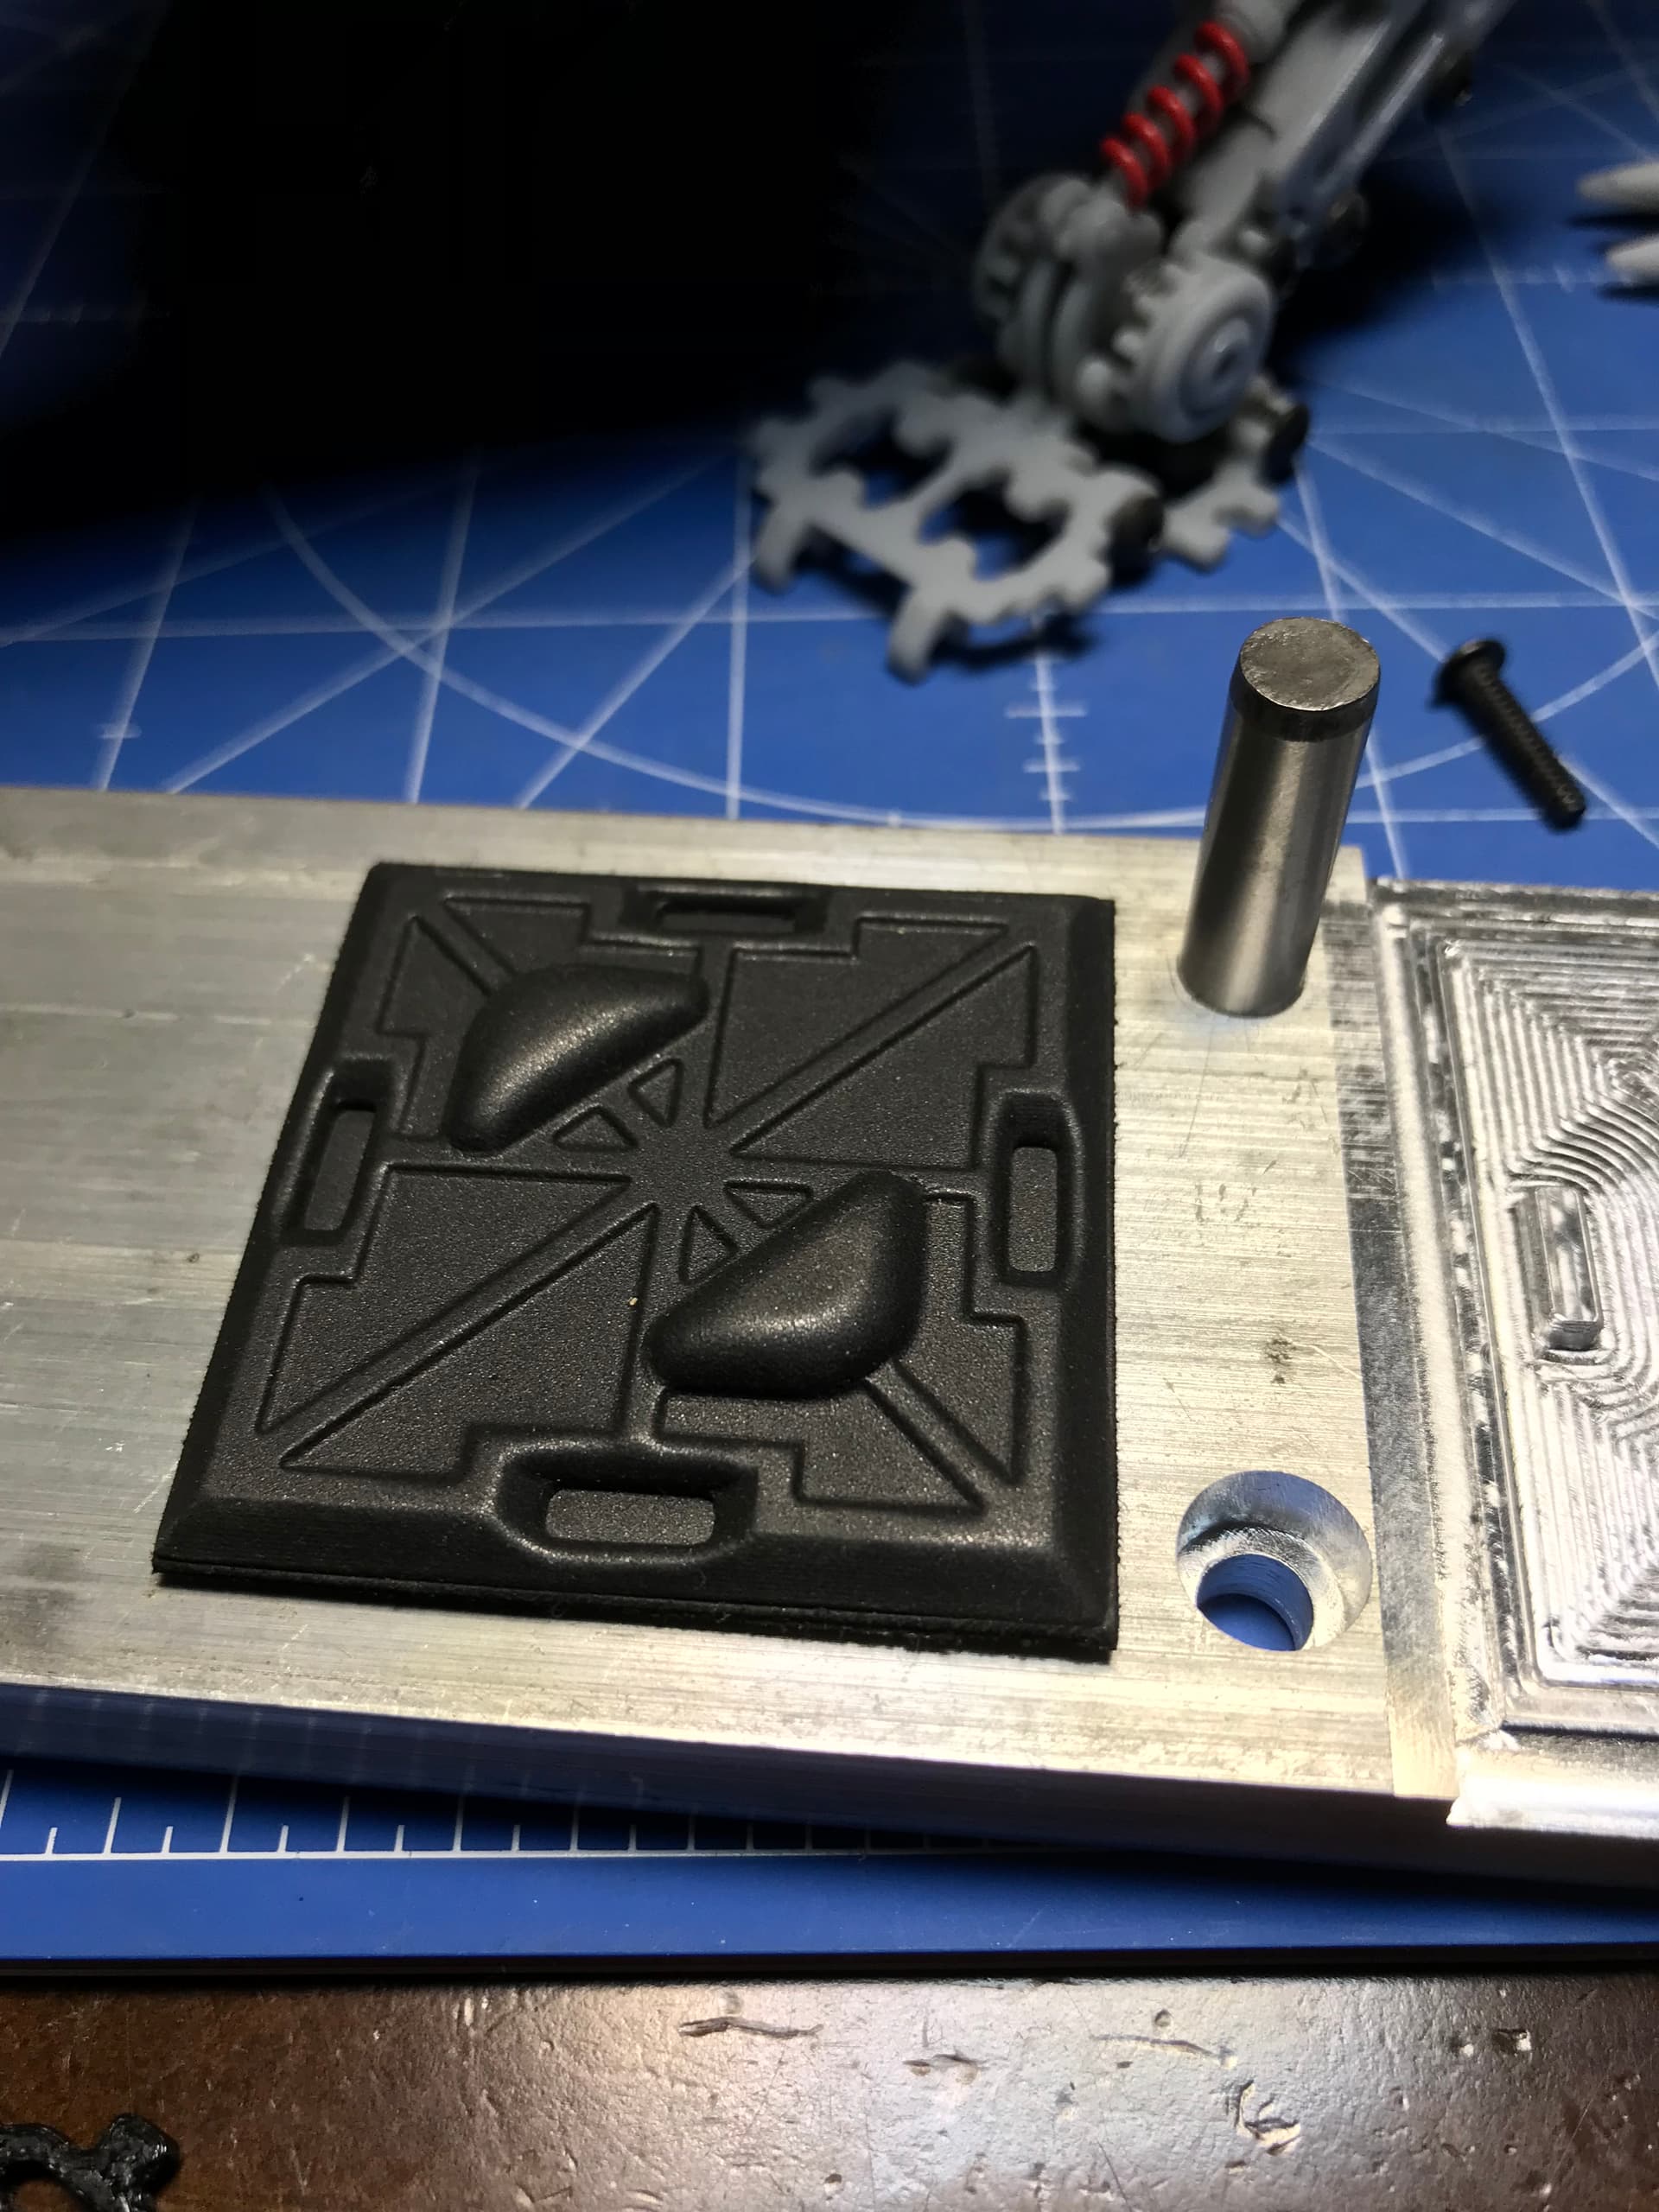
Finally got an embossing plate plus counter die dialed in. Embossing plate is cut from aluminum and the counter die from some scrap acrylic I had laying around. To save material I used a mdf holder to line up the plates and make them not dent the paper (it will be used on 190mm length but I didn’t want to waste that amount of material when only the last 50mm is embossed). I also 3D printed a mini printing press to run them through (before getting my nomad ), I got the design from openpressproject.com.
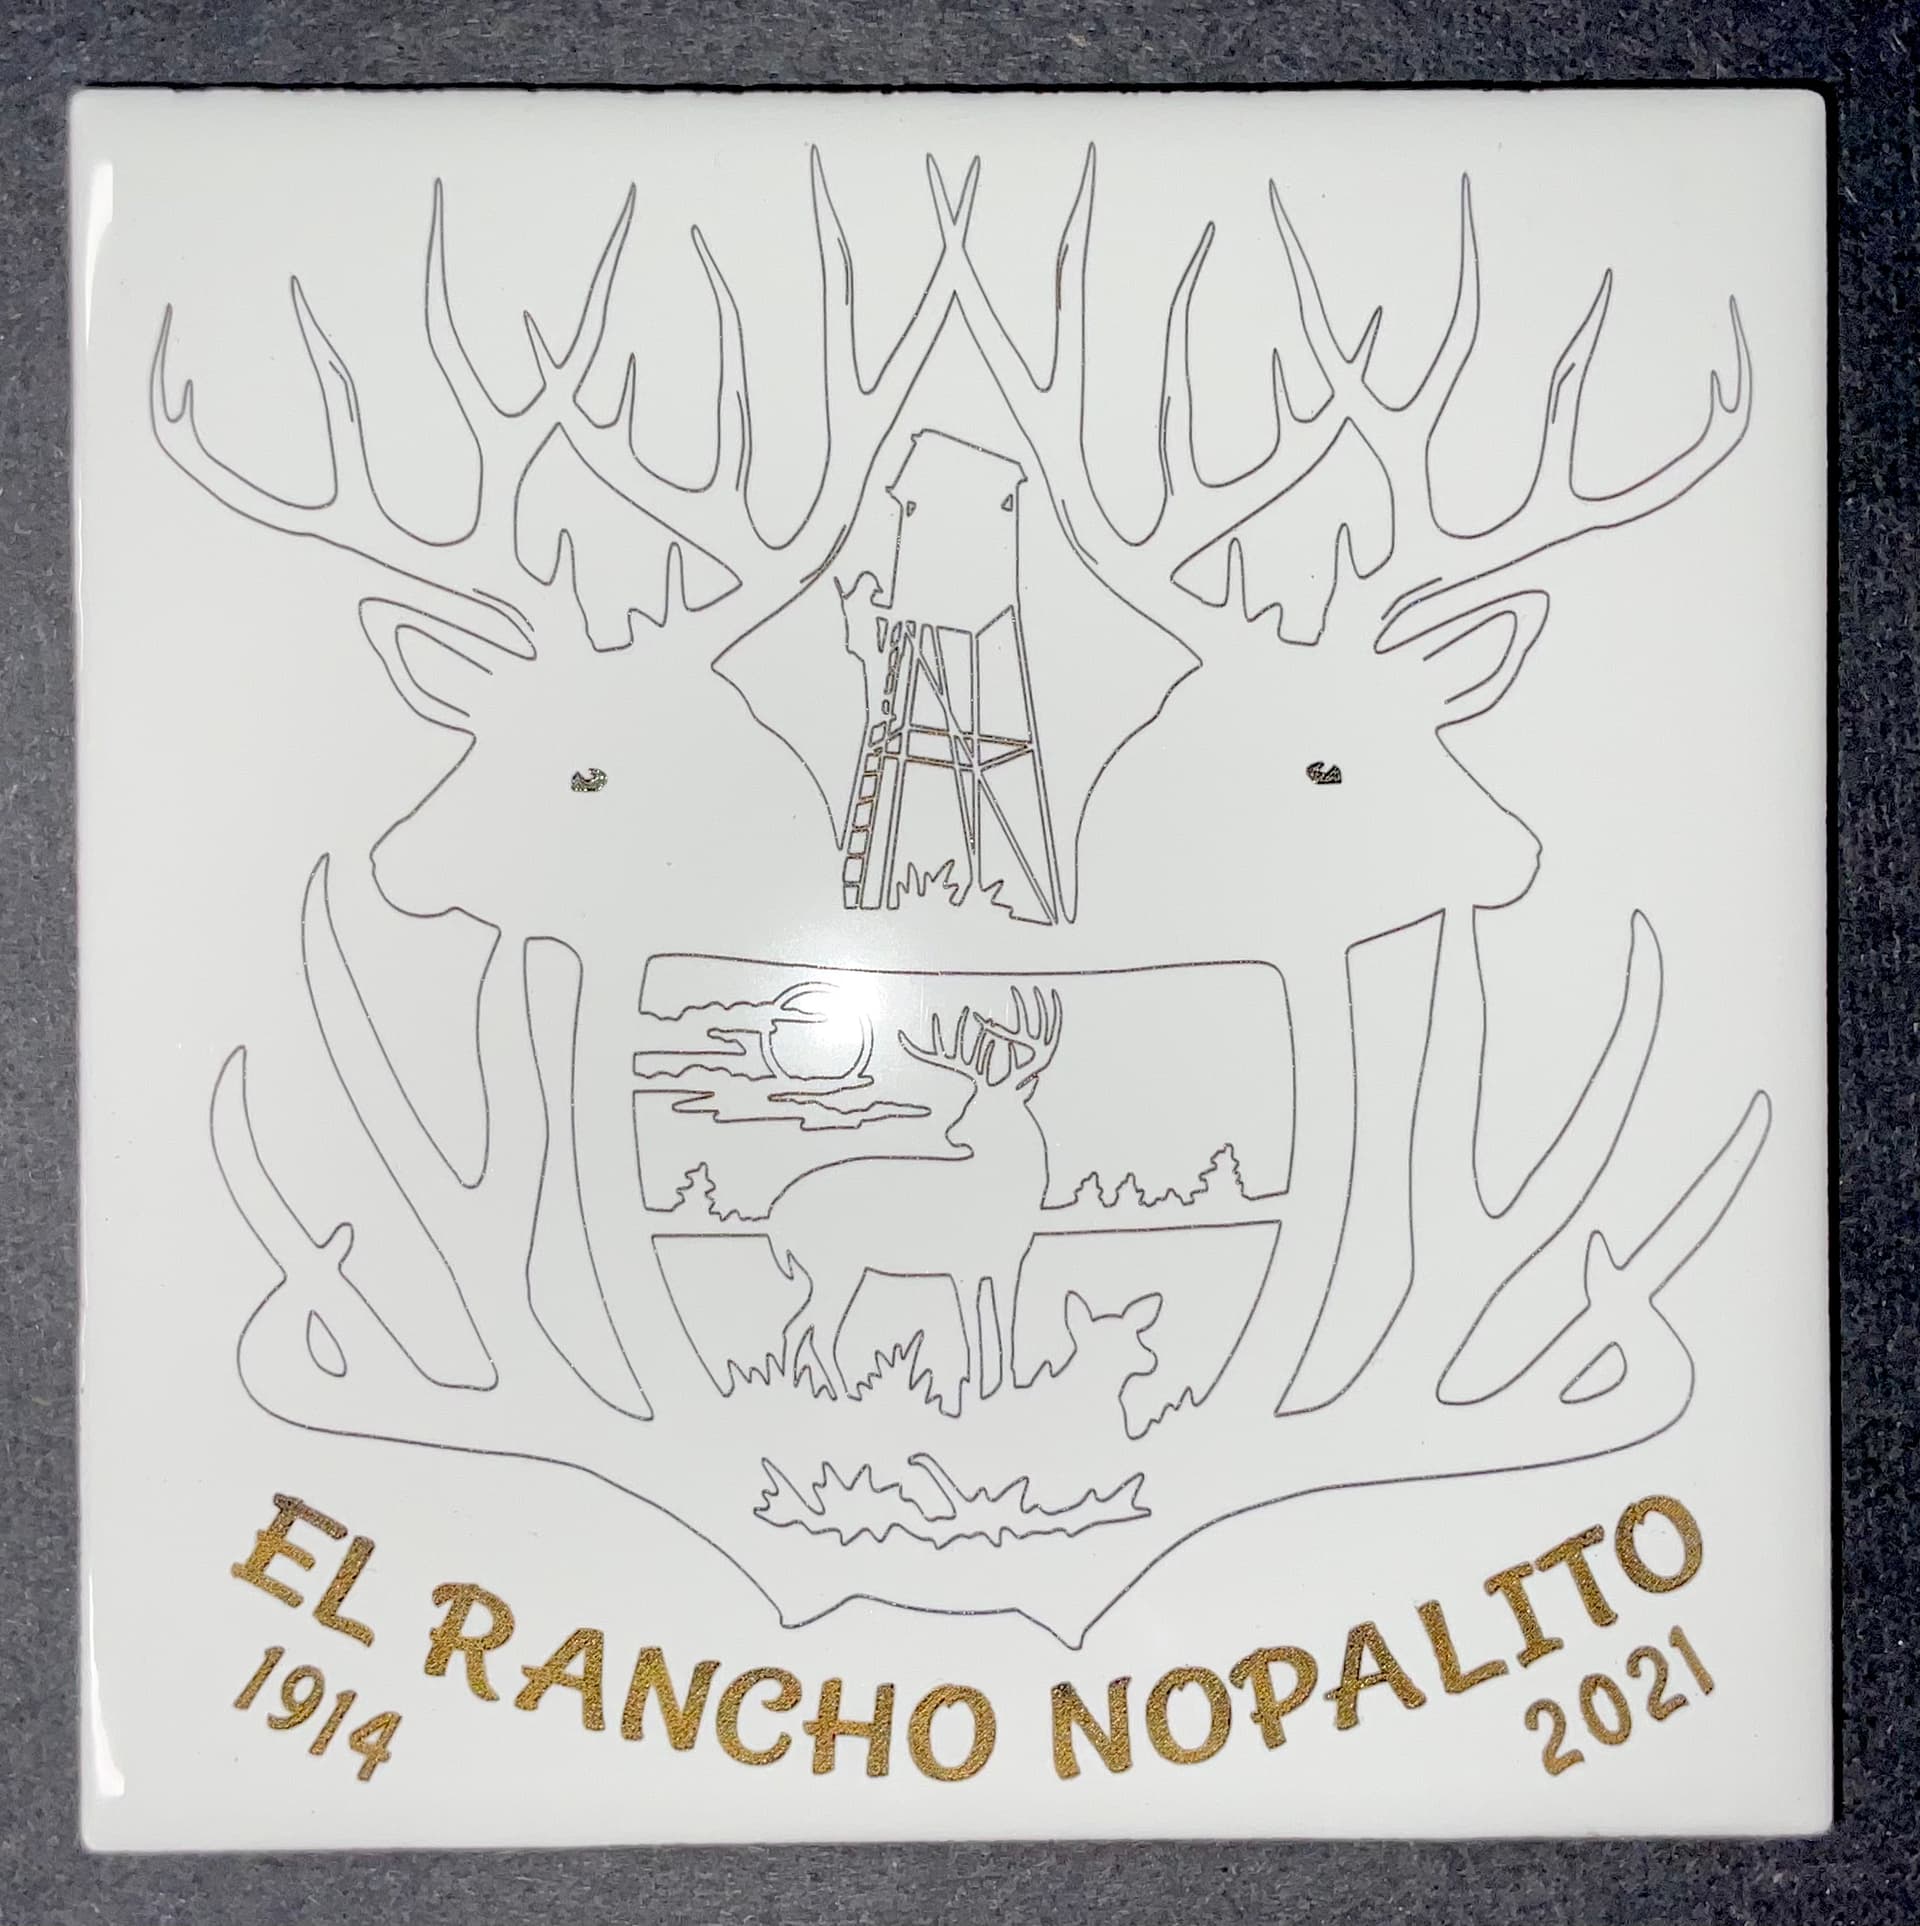
I’ve been wanting to do a tile or two with my recently acquired JTech laser. I’ve spent some time getting a proper mounting and offsets set (thanks to Gary @wb9tpg for the help). I found some old 12” floor tiles from our old house and did the ubiquitous “Aztec” calendar Darth Vader version. Wow. Just like Gilligan, I went on a “three hour tour!”
So, then to make a test on a more practical six inch tile, I spent about twenty minutes putting a design up, added a couple of light coats of plain old Rustoleum white flat and waited 20 minutes for it to cure (by the time I got my machine turned on etc. it dried about 45 minutes.)
The burn took about 20 minutes (a more viable candidate for duplication) and looked good, so I went to the next step. Using a light rubbing of acetone (I’m thinking mineral spirits would have worked just fine) I wiped all the paint off. The key is to stop smearing the liquid paint around at some point and use a dry paper towel to bring the tile’s shine back.
Then I wiped on some VERY thin amount of “Rub’nBuff” wax metallic finish on the lettering. (I couldn’t get it to stick in the tiny vector cuts.) As soon as the surface dried, I started erasing (yes, with a pencil eraser) around the letters. That’s why you want a very thin coating on the tile surface. I cleaned that up with a teeny-tiny amount of mineral spirits so it wouldn’t pull the color out of the letters.
I think this is a good representation of line art and certainly could be enhanced to be more “artsy.” The mechanics of it are as simple as I described, so its time for you to try it.
PS. My wife’s 86 year old aunt recently sold the family Texas ranch after 107 years in the family! The State of Texas even gave her an award after 100 years.
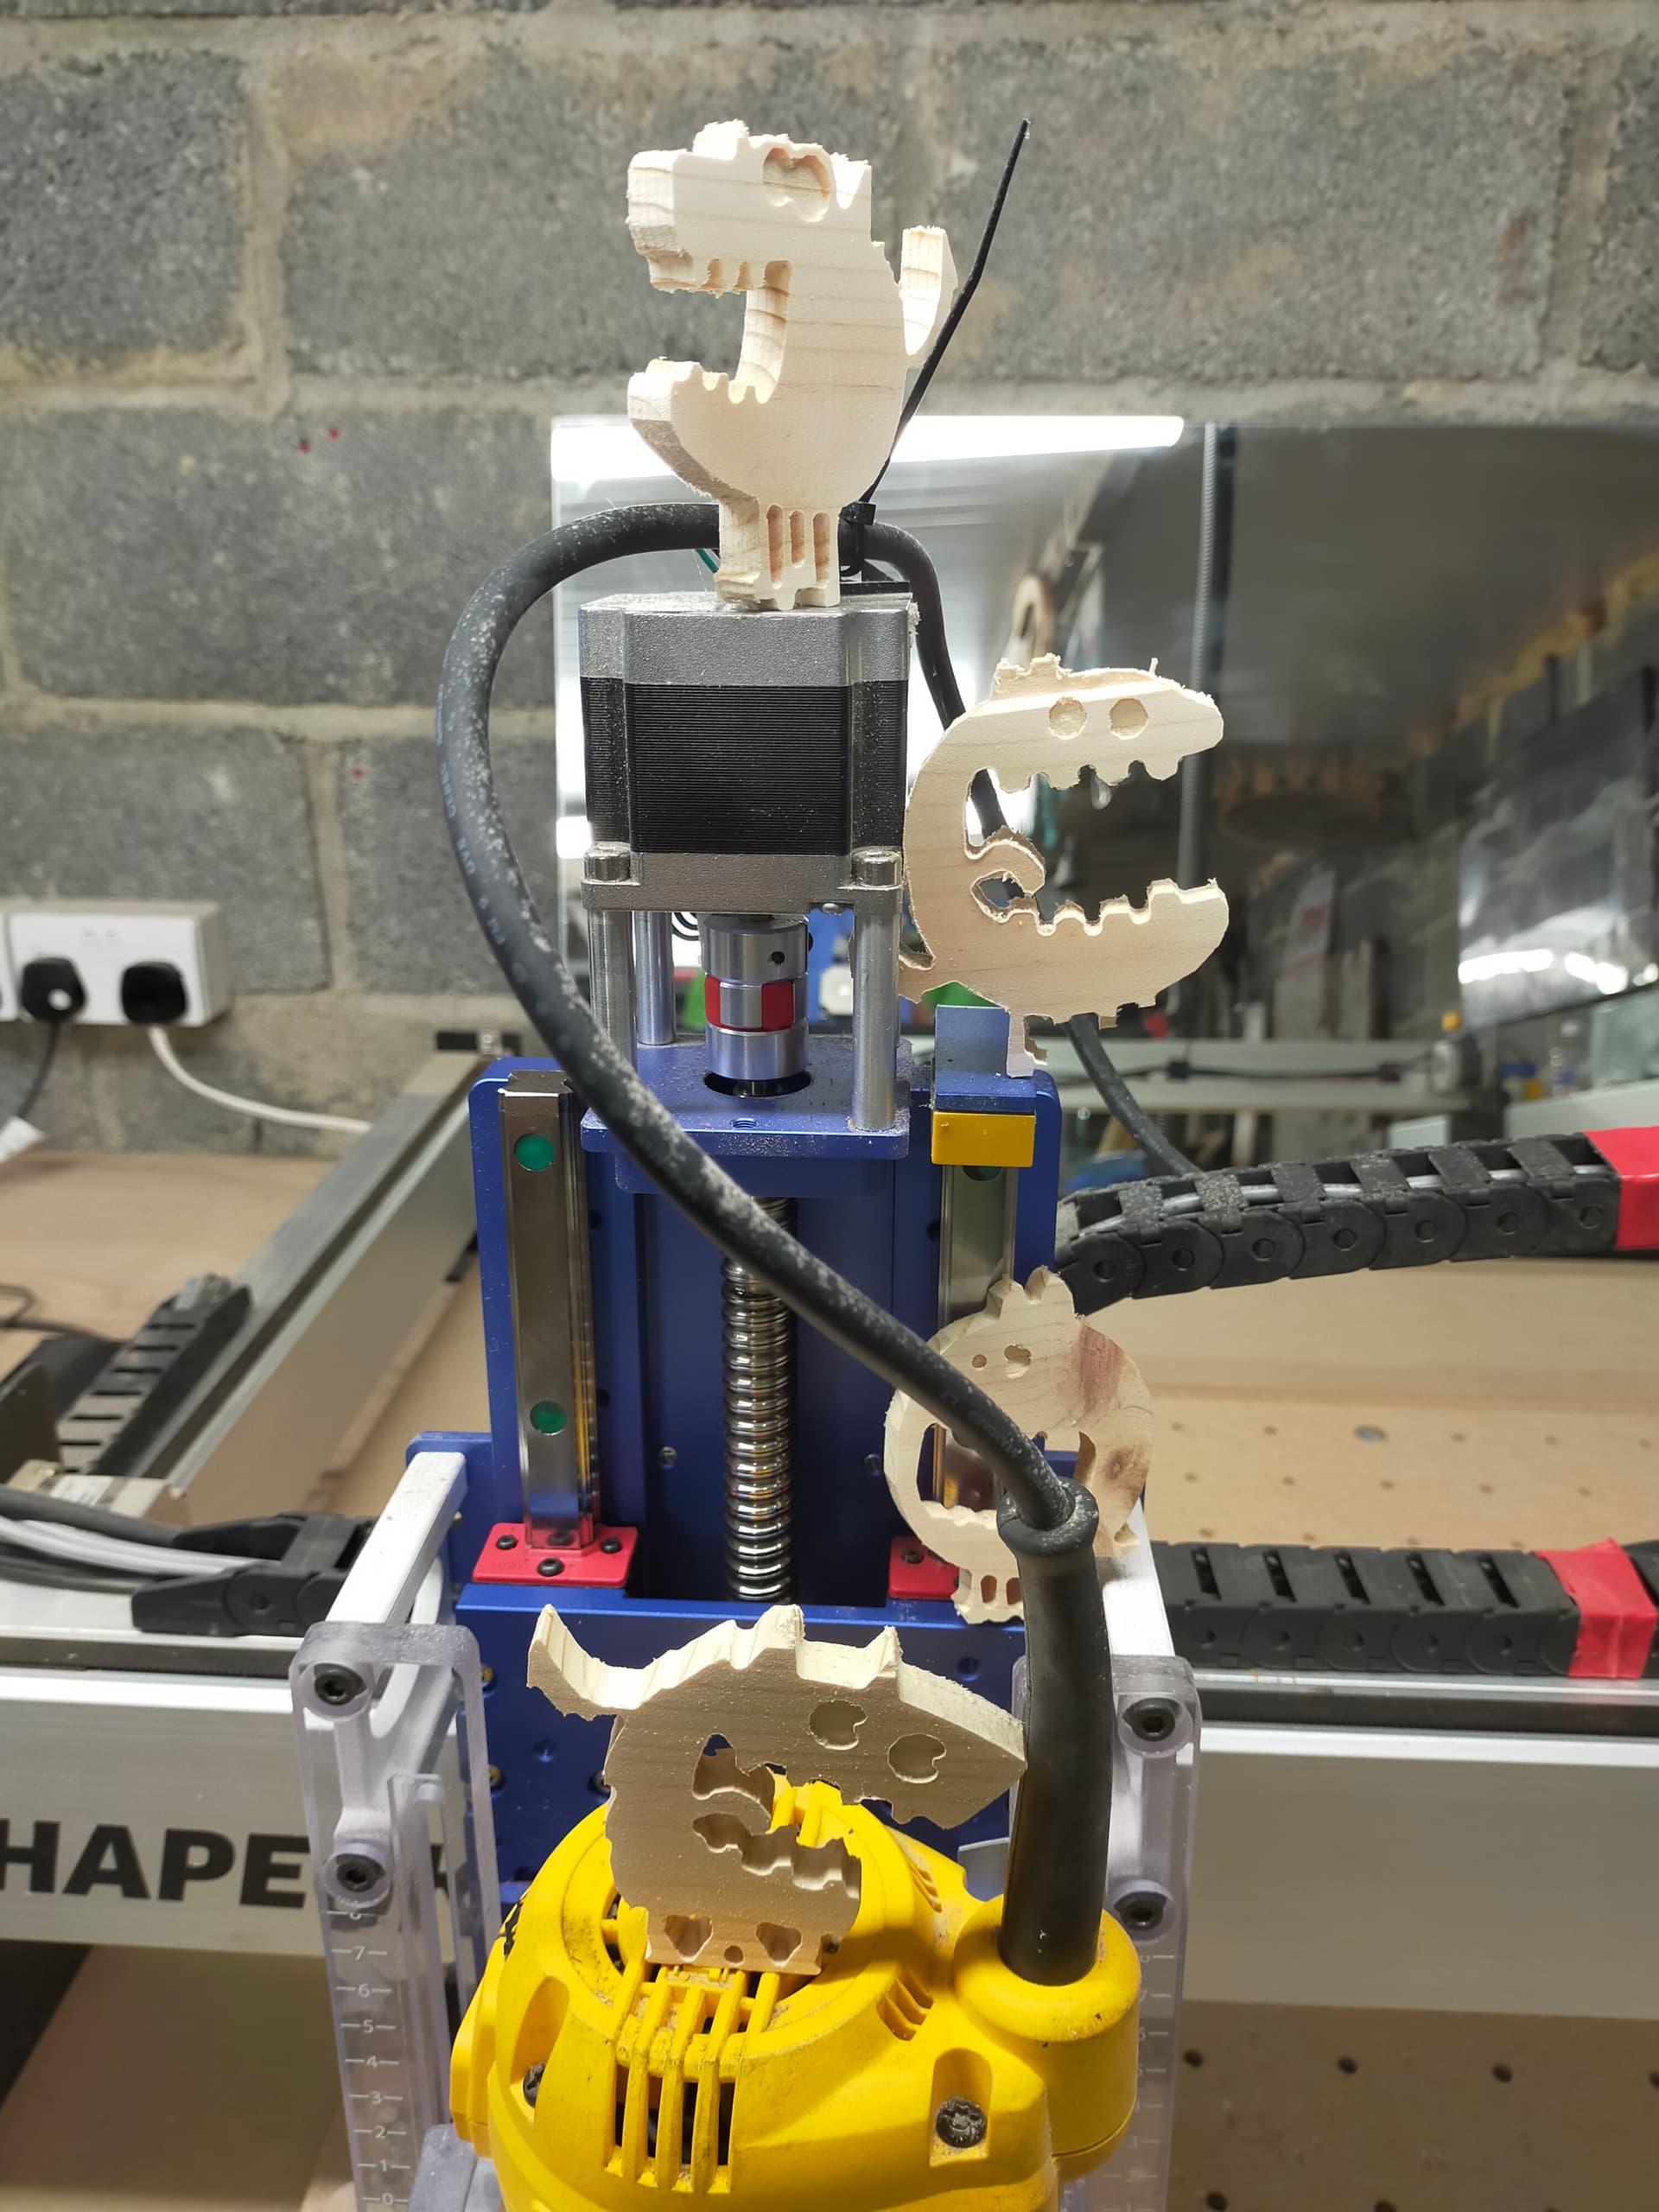
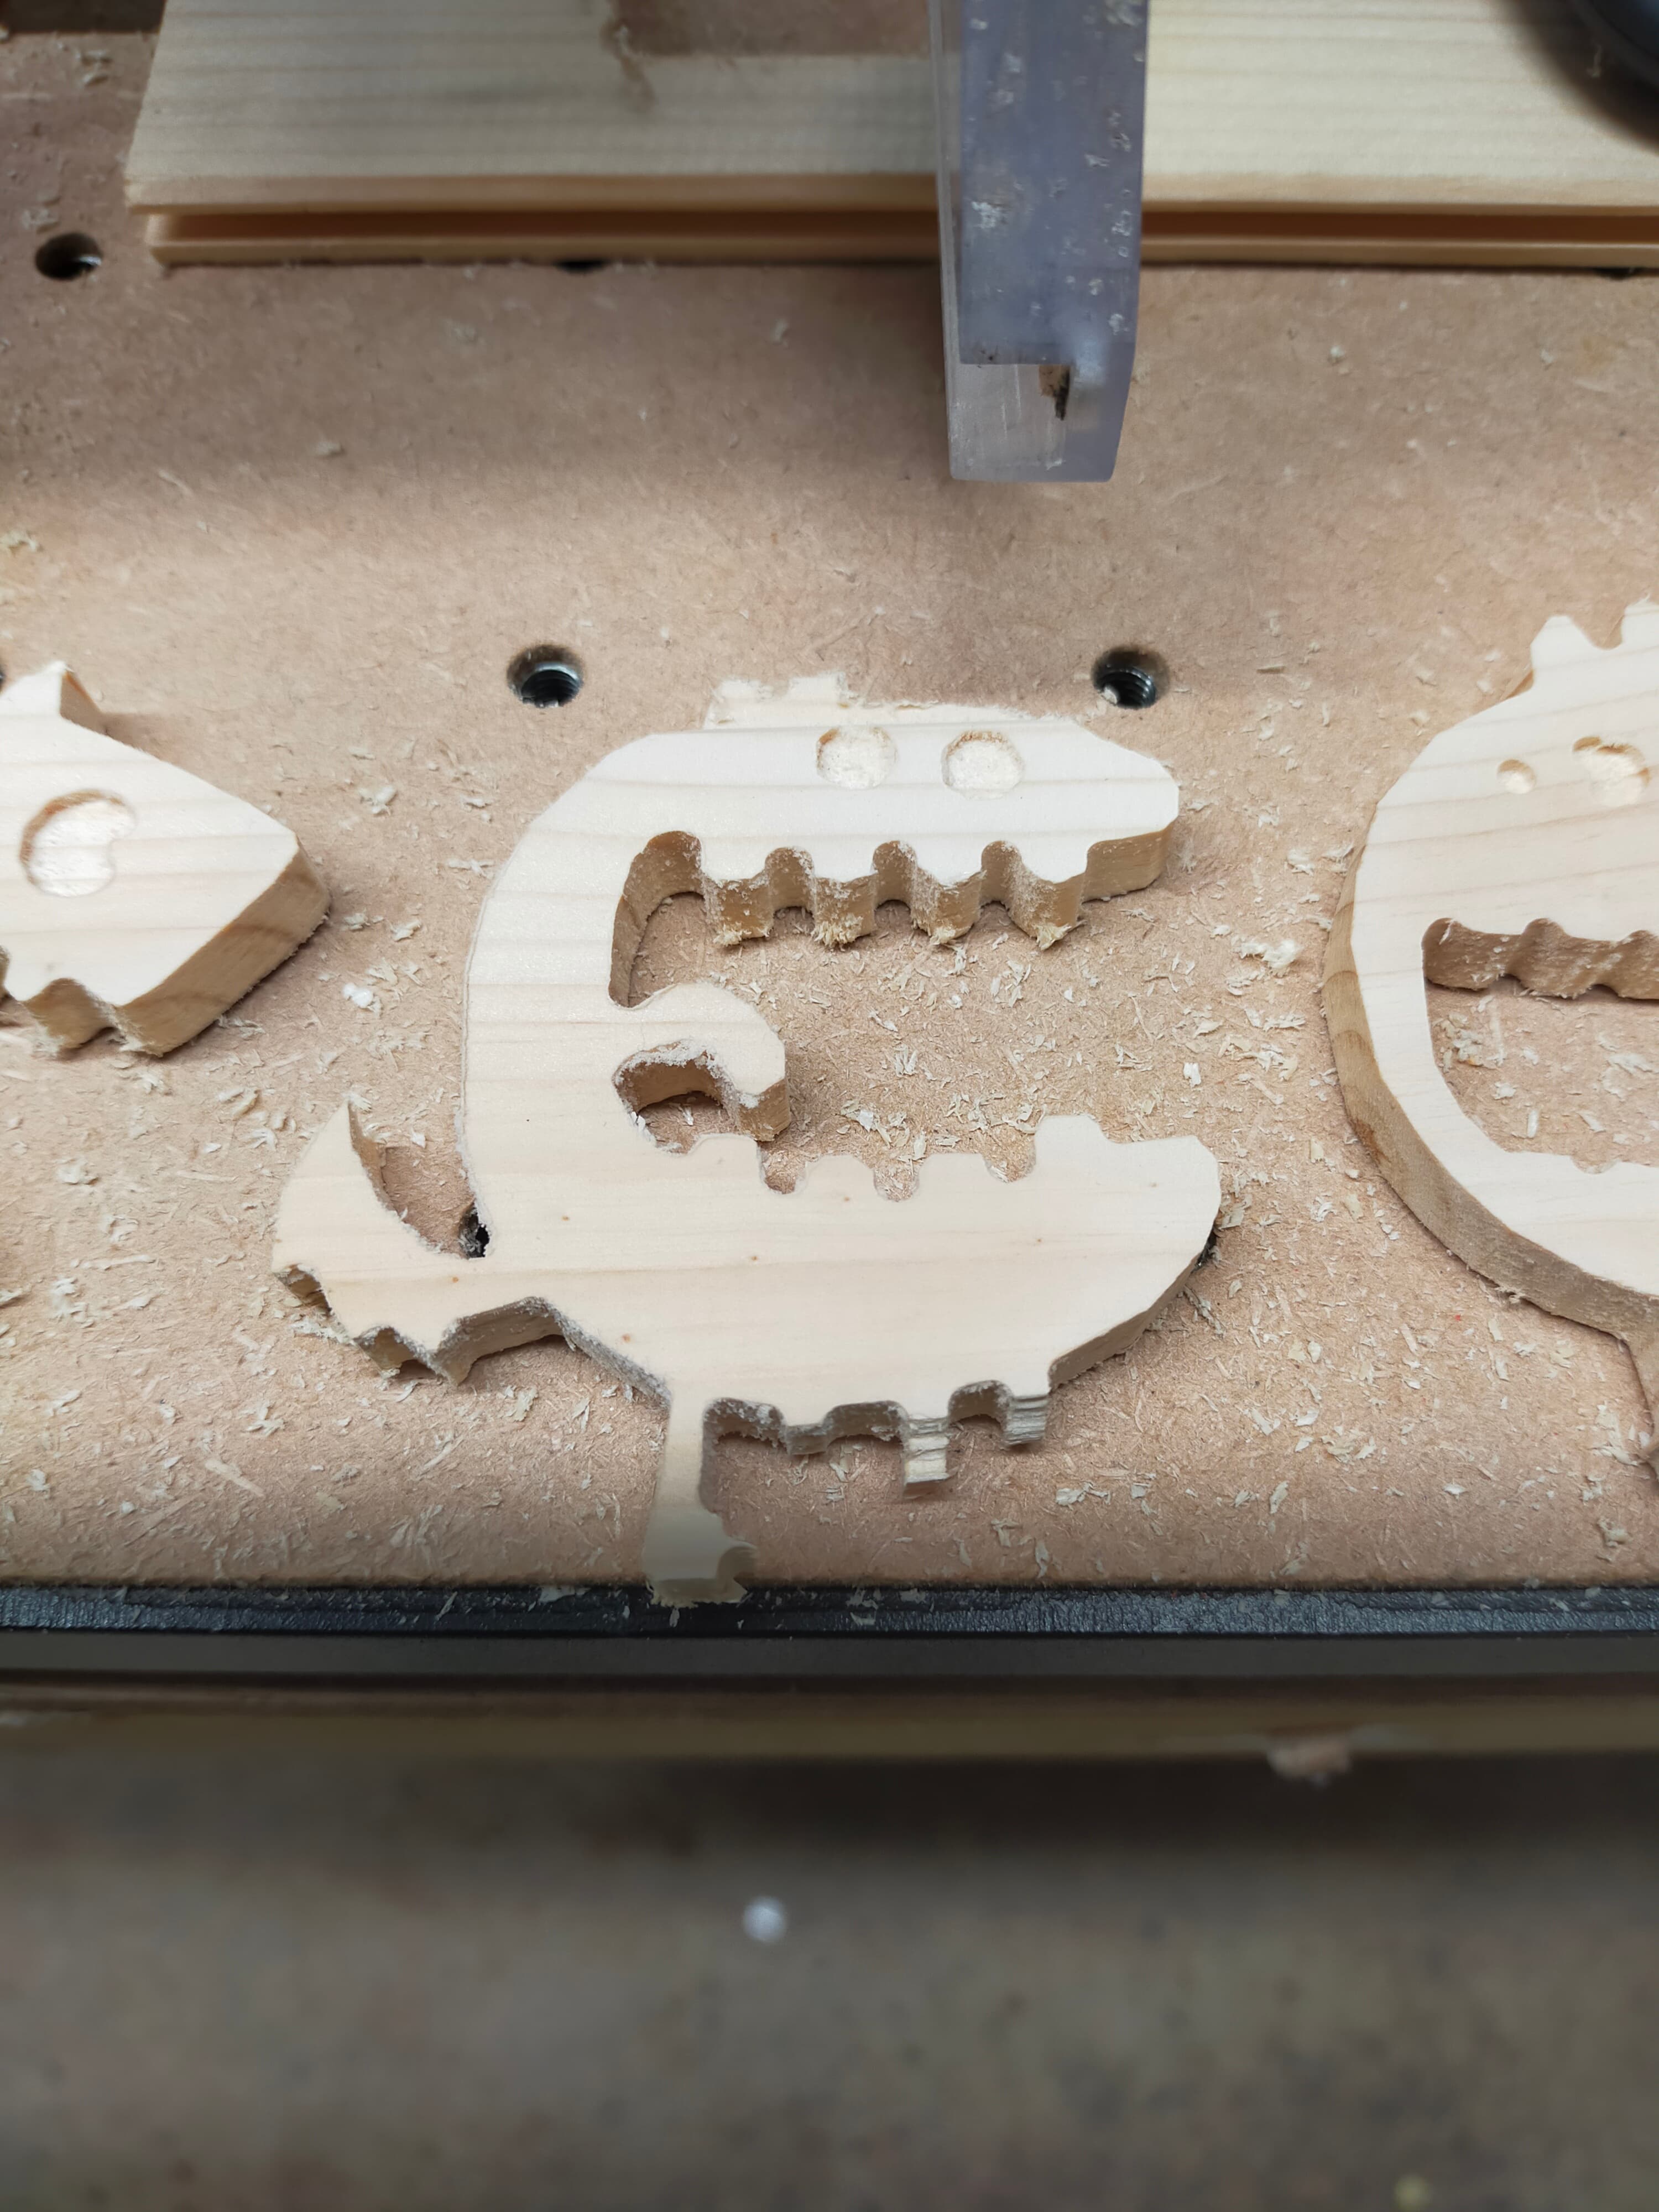
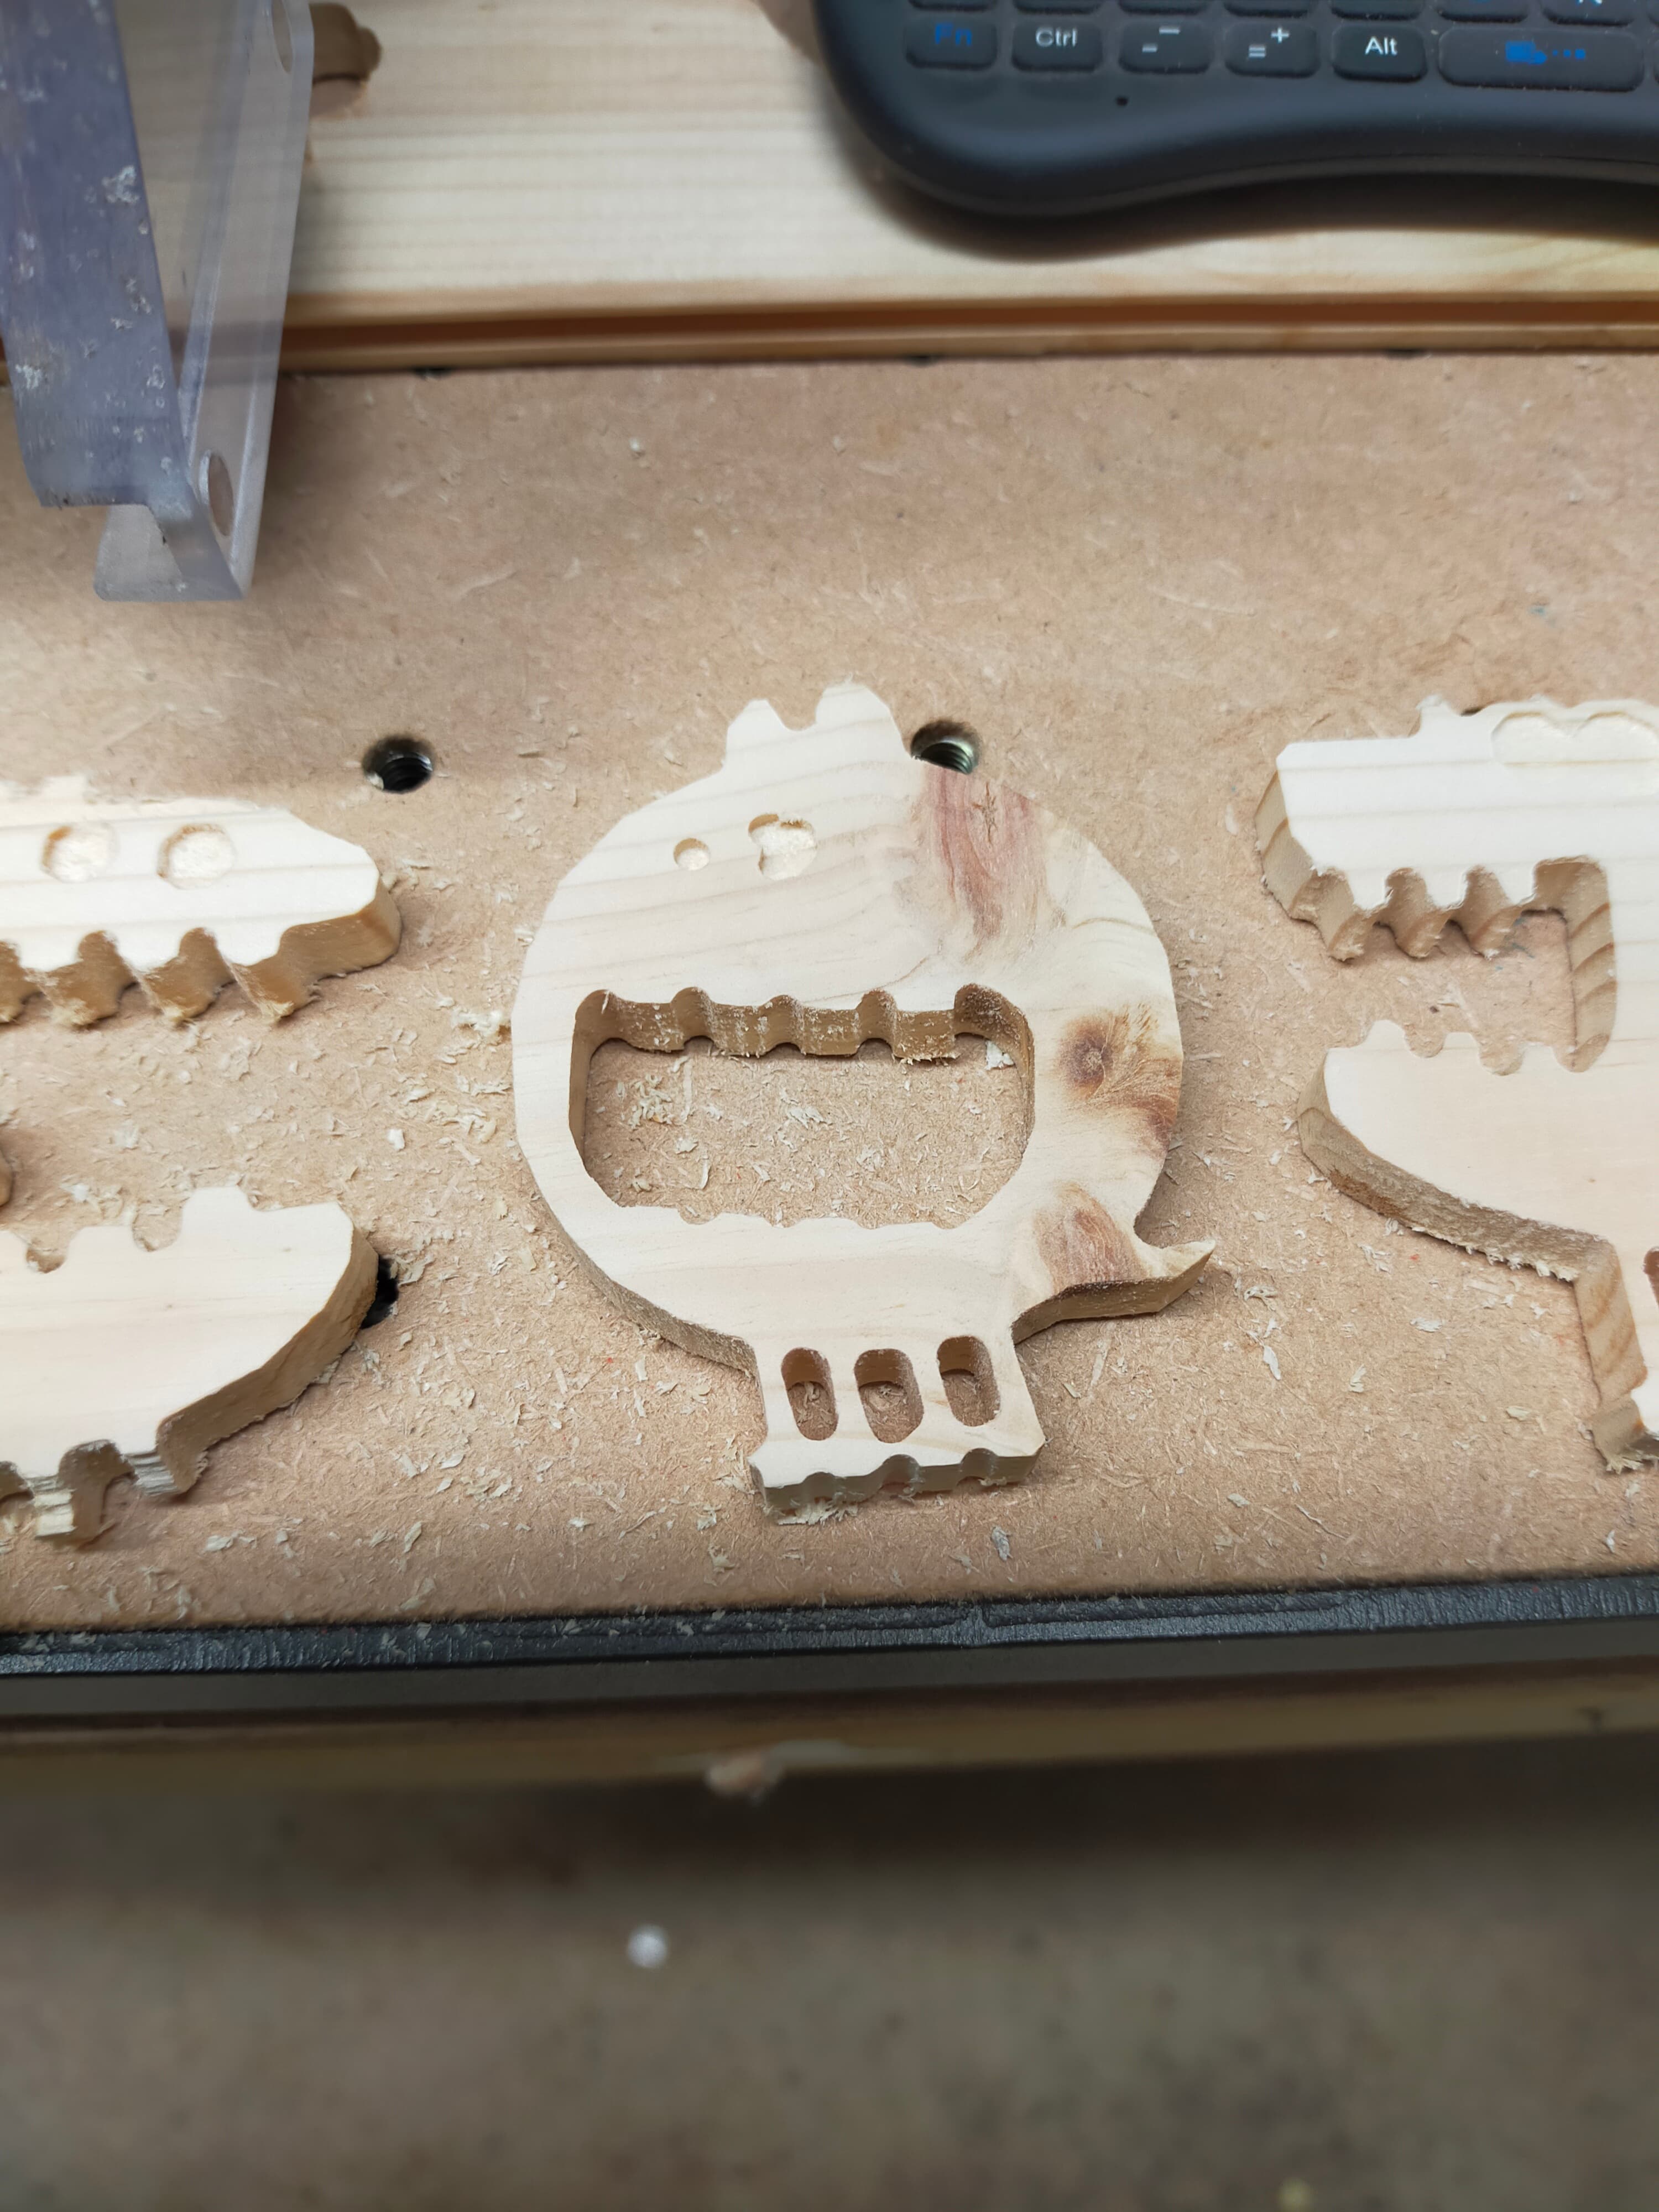
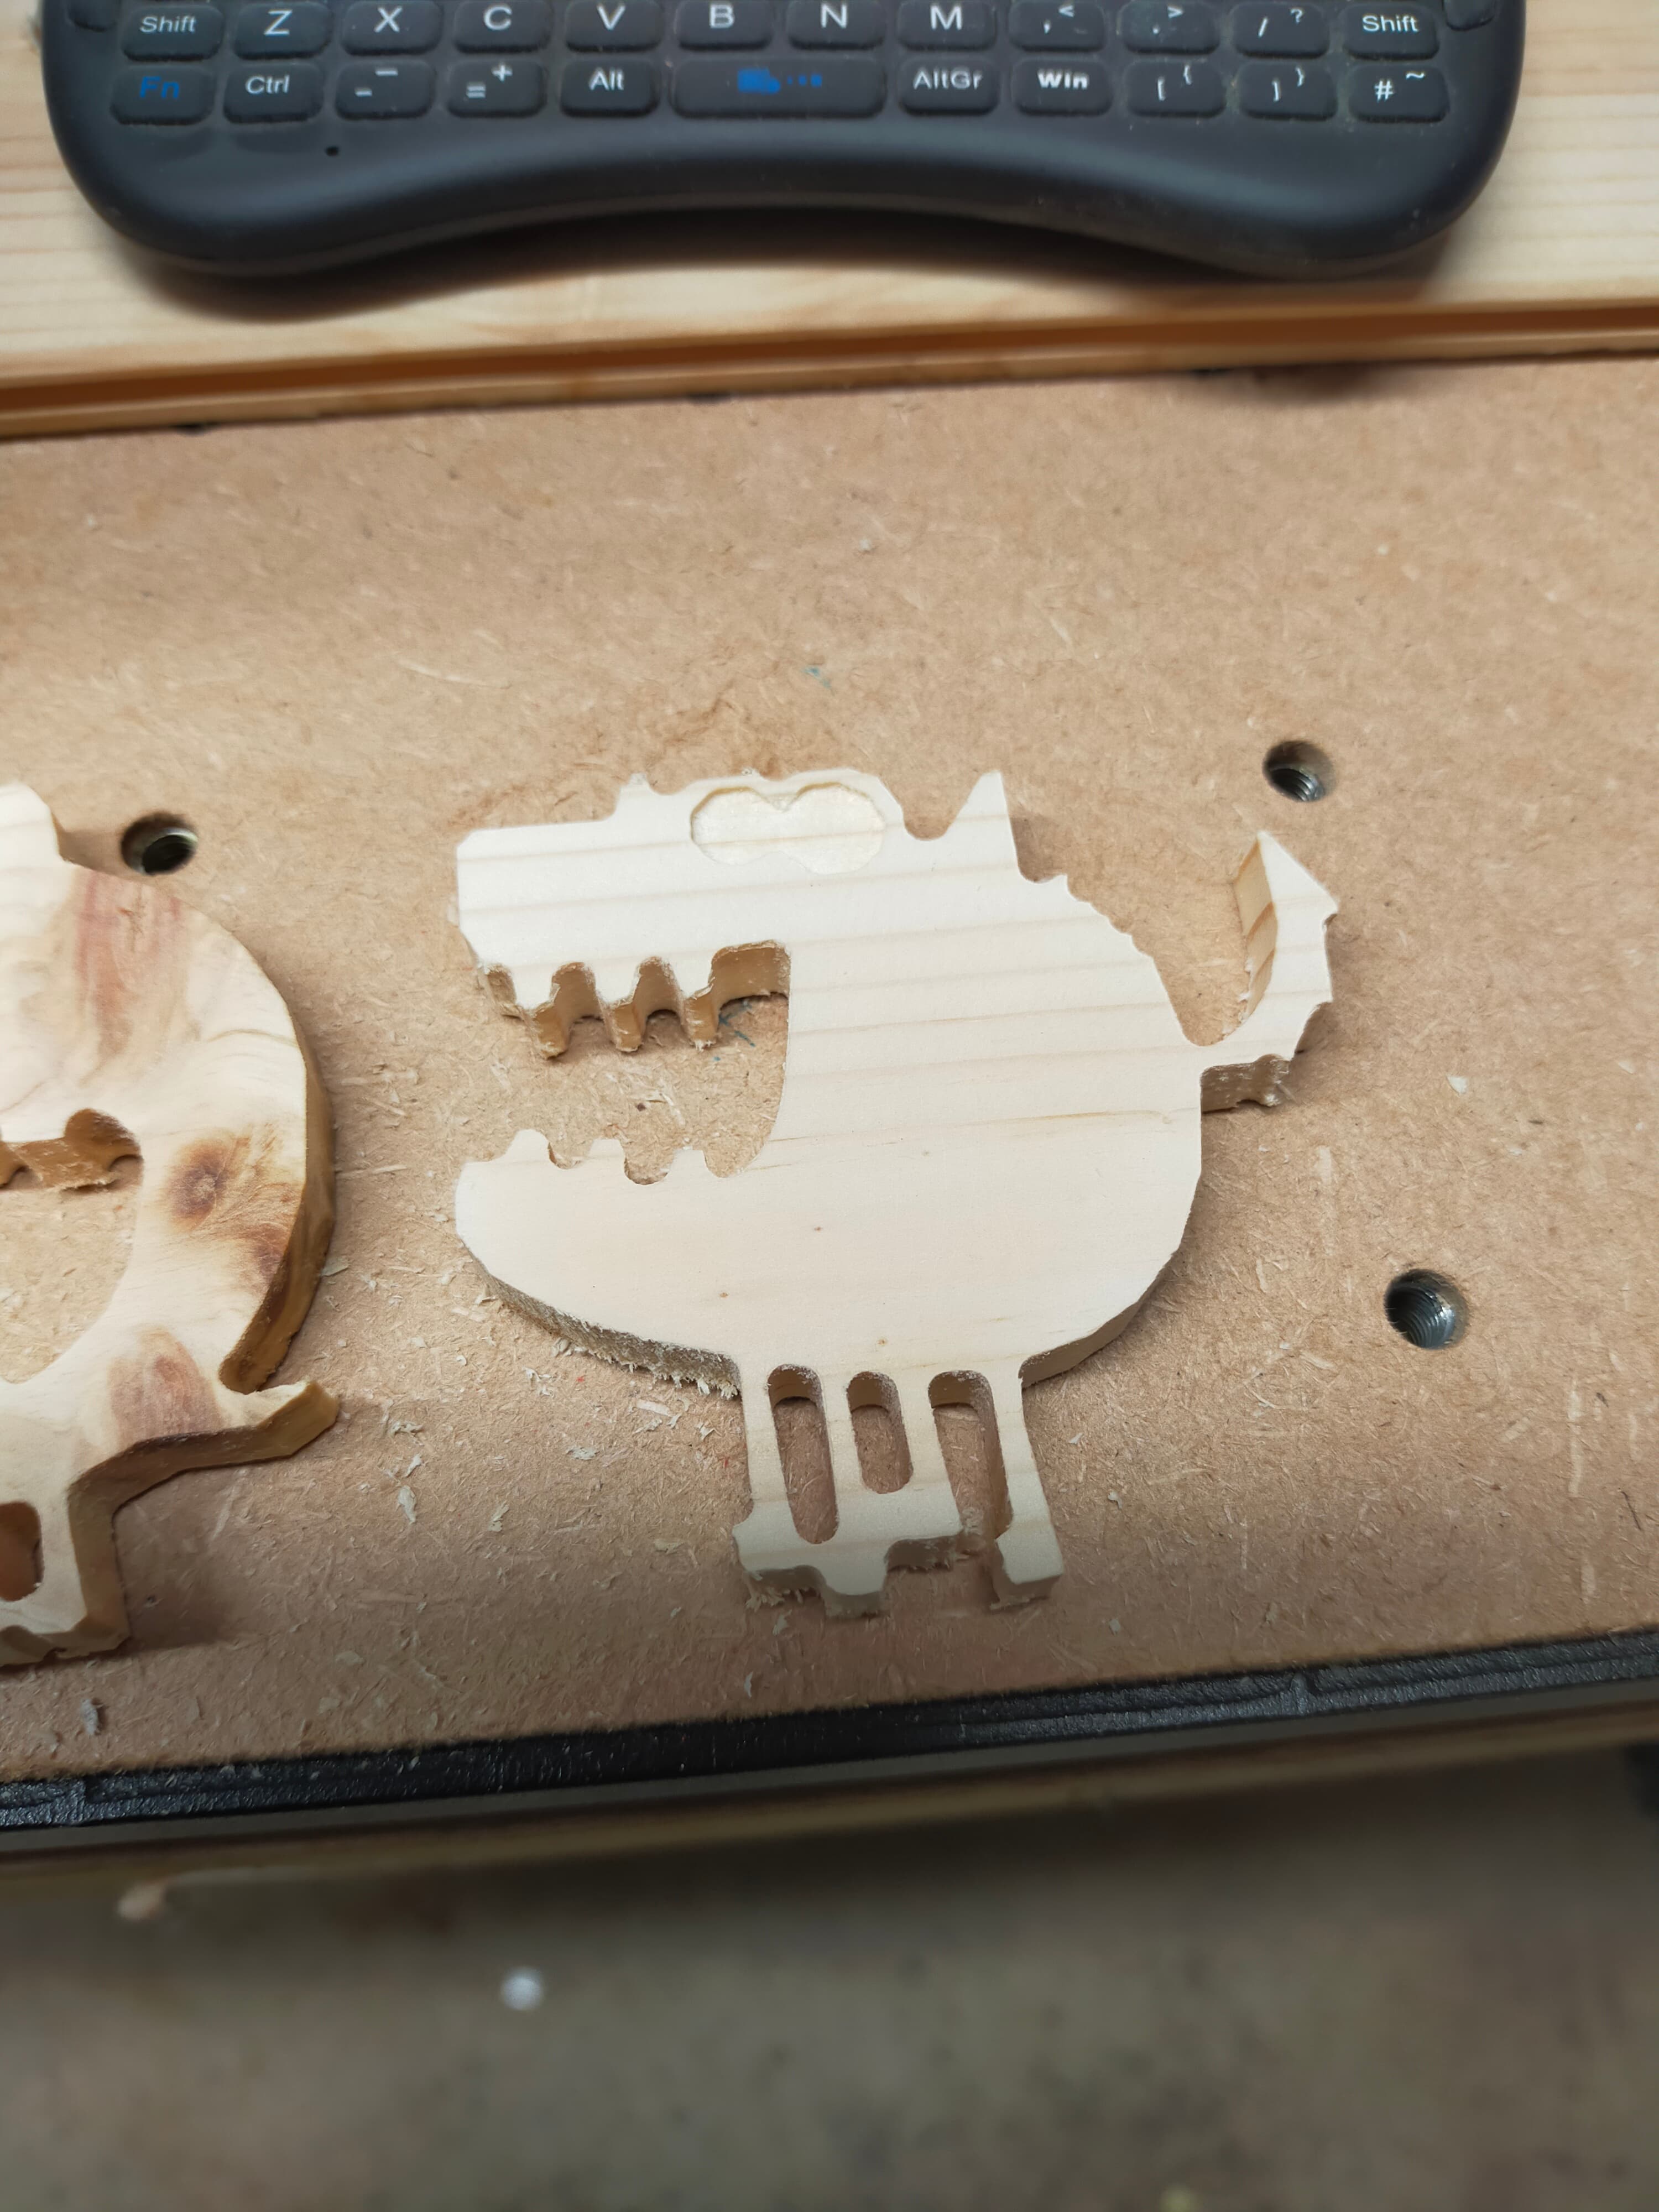
Little CNC monsters v1 working on selling these as they are cool and make me smile, need to refine but lots on relaxing fun on the machine tonight after horrendous CNC machine day yesterday.
Your youtube build video for this guitar is what inspired me to get my Shapeoko! So thanks! Been having tons of fun with it. Wanna get into designing guitars someday but learning fusion360 is quite the challenge!

 ), I got the design from