Joke gifts are the best reason to own a CNC.
3 Likes
Hey Jay, If you’re doing a ton of metal (which based on your setup it looks like you are) our airblast kit may be a nice addition: Shapeoko 5 Pro Air Assist - Carbide 3D
Keep up the good work.
1 Like
Yes I have a air blaster setup and spindle fan as well… I didn’t see that carbide had one I will need to get one ordered I like that much better than what I have… Thanks for Looking out for Me I appreciate it!
3 Likes
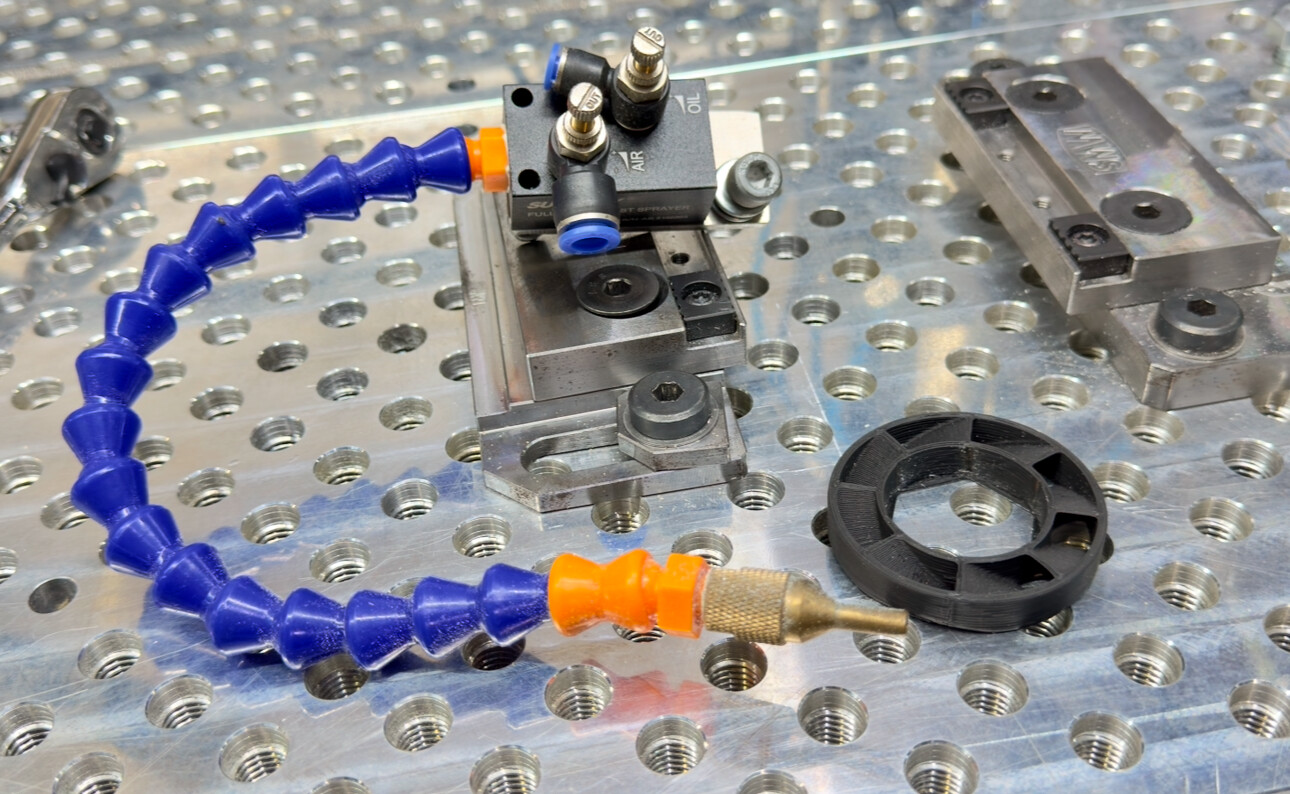
Building a oil catch can…

4 Likes
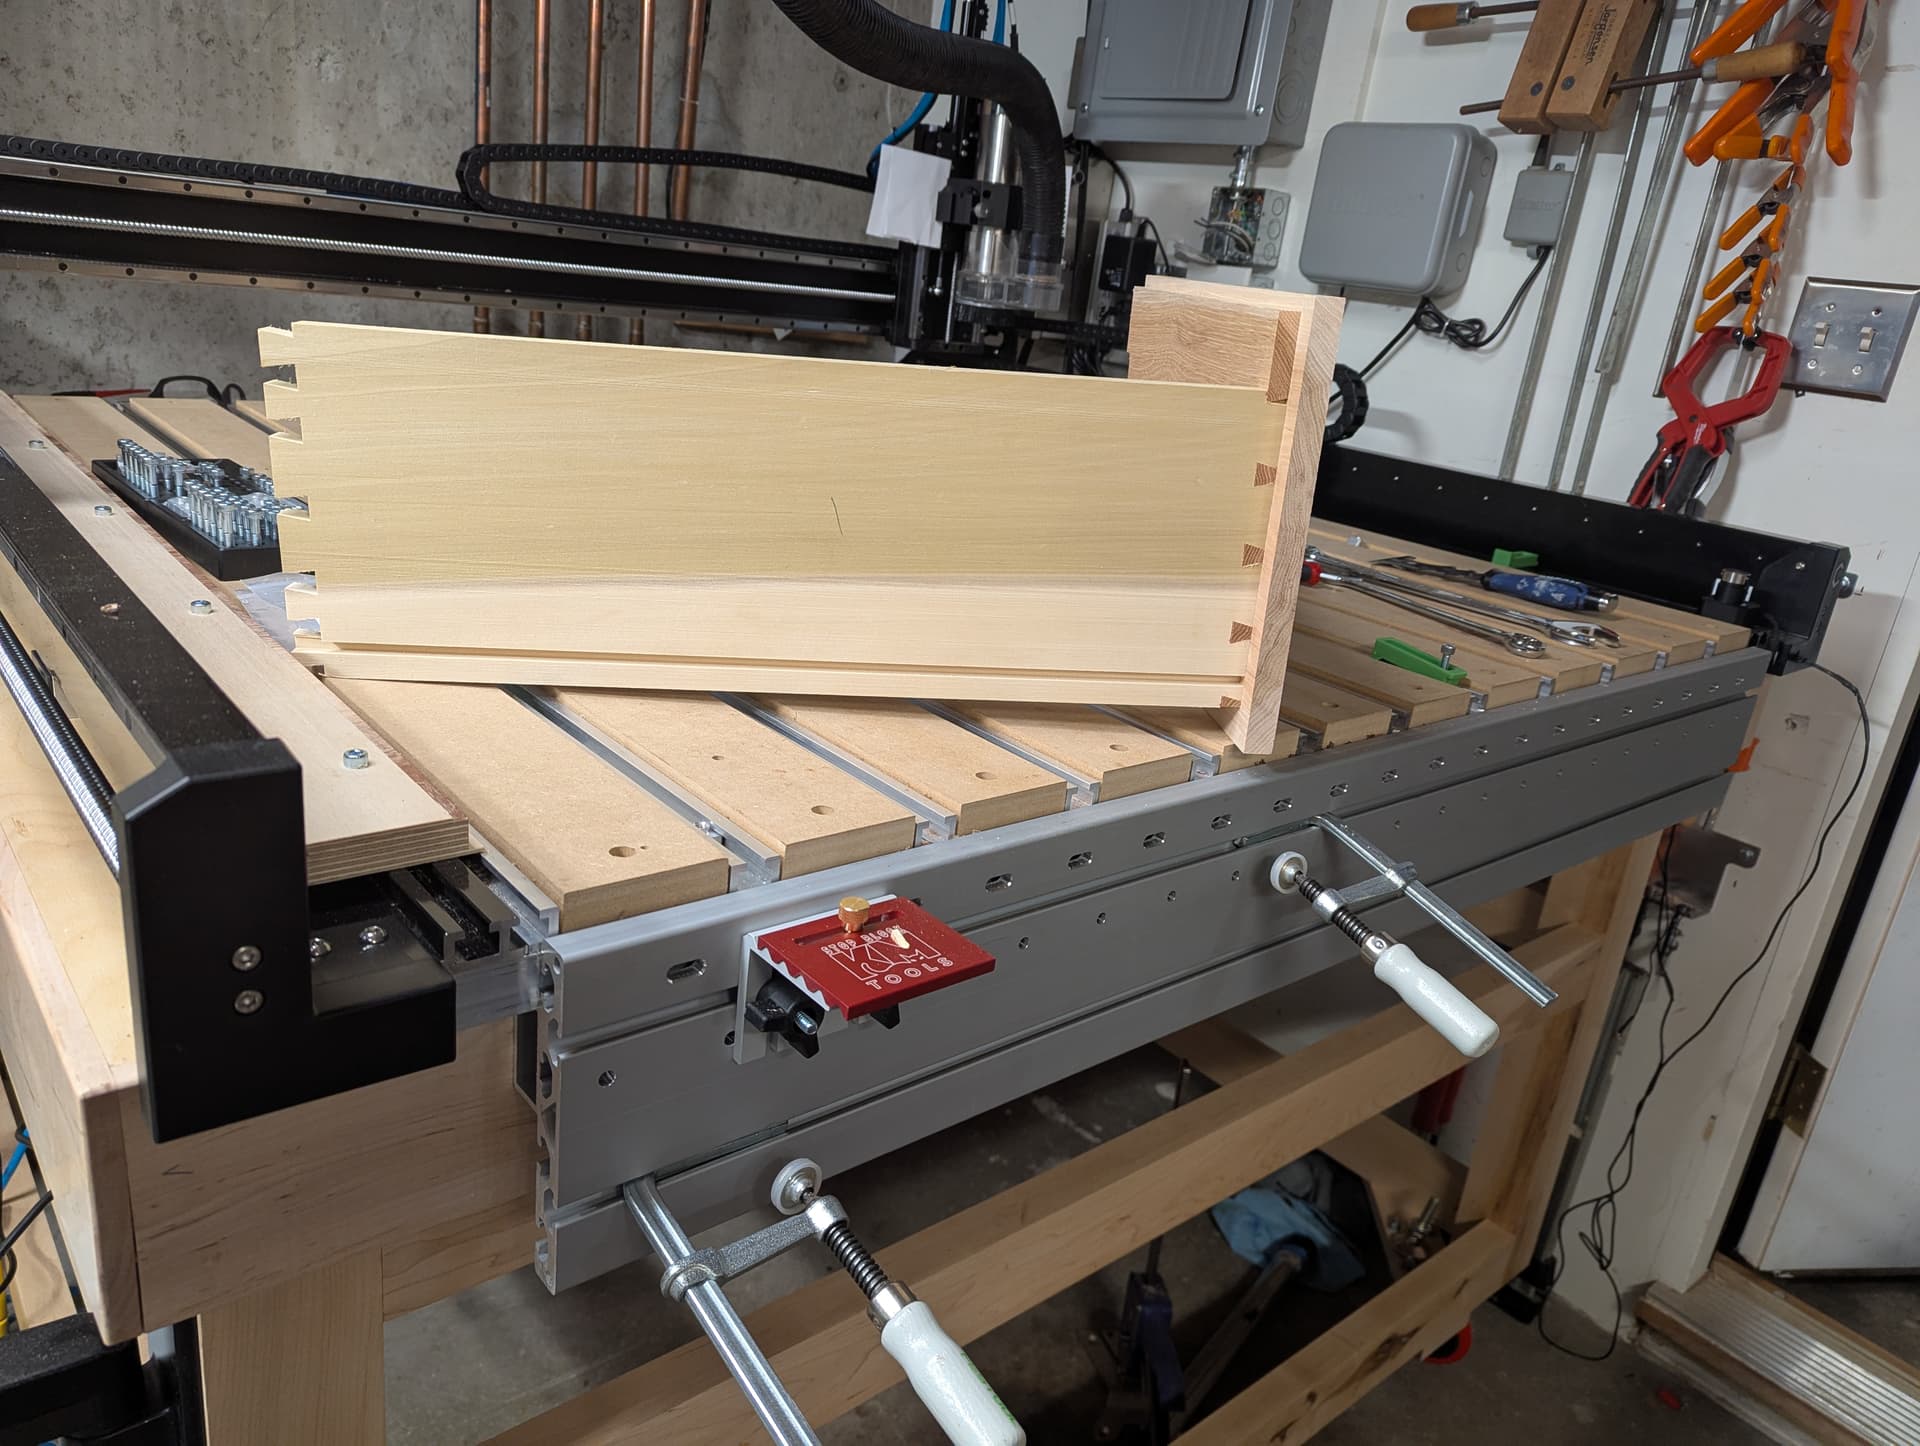
I am beyond excited that I can actually make dovetail drawers for my kitchen! This is just a first test cut to see if it would work. I will probably add a backer board to eliminate any tear-out.
25 Likes
Jay, yours is oil/air mix. C3D’s is Air only. I would keep yours & modify the nozzle with a smaller opening. This will narrow the jet & increase the airspeed, and allow for a very fine mist when using the oil side.
2 Likes
thats a sweet front rail. who makes that? (also great job on the partial drawerbox, its on the list over here as well someday
3 Likes
Excellent work, Nathan.
1 Like
Making Some Billet Bike Parts… will post more as I go, This was a single cut pass @ .187 ![]()

5 Likes
The extrusion is the 80/20 40-1620, https://8020.net/40-1620.html?srsltid=AfmBOorHJjp3wwpRCdL0EDJkCyXd0aTCUprl8wVwy3TWv4KdJdin_Qub
I added an aluminium tube and attached directly to the Shapeoko. It’s rock solid and easy to attach. Something similar would make a great c3d accessory.
FWIW, I did work up:
which was used for:
and:
(and various other boxes as have been shown here over the years)
That said, I’ve decided that it’s a lot easier to do something like to:
3 Likes
Thanks Kevin! I got my machine in December with zero experience. Since, I’ve been binge watching your videos and following along with some projects. Really great stuff, just what I need. Looking forward to the chair.
1 Like
Wow. Something else for my “try that” list. Kudos
This looks awesome, not being an aluminum guy…can you tell me what I would need to make one of these 30" across the front of my S3XXL? I looked at the website, not sure what I’m looking at, if there are additional pieces or if I need any machining to recreate your set up… thanks in advance!
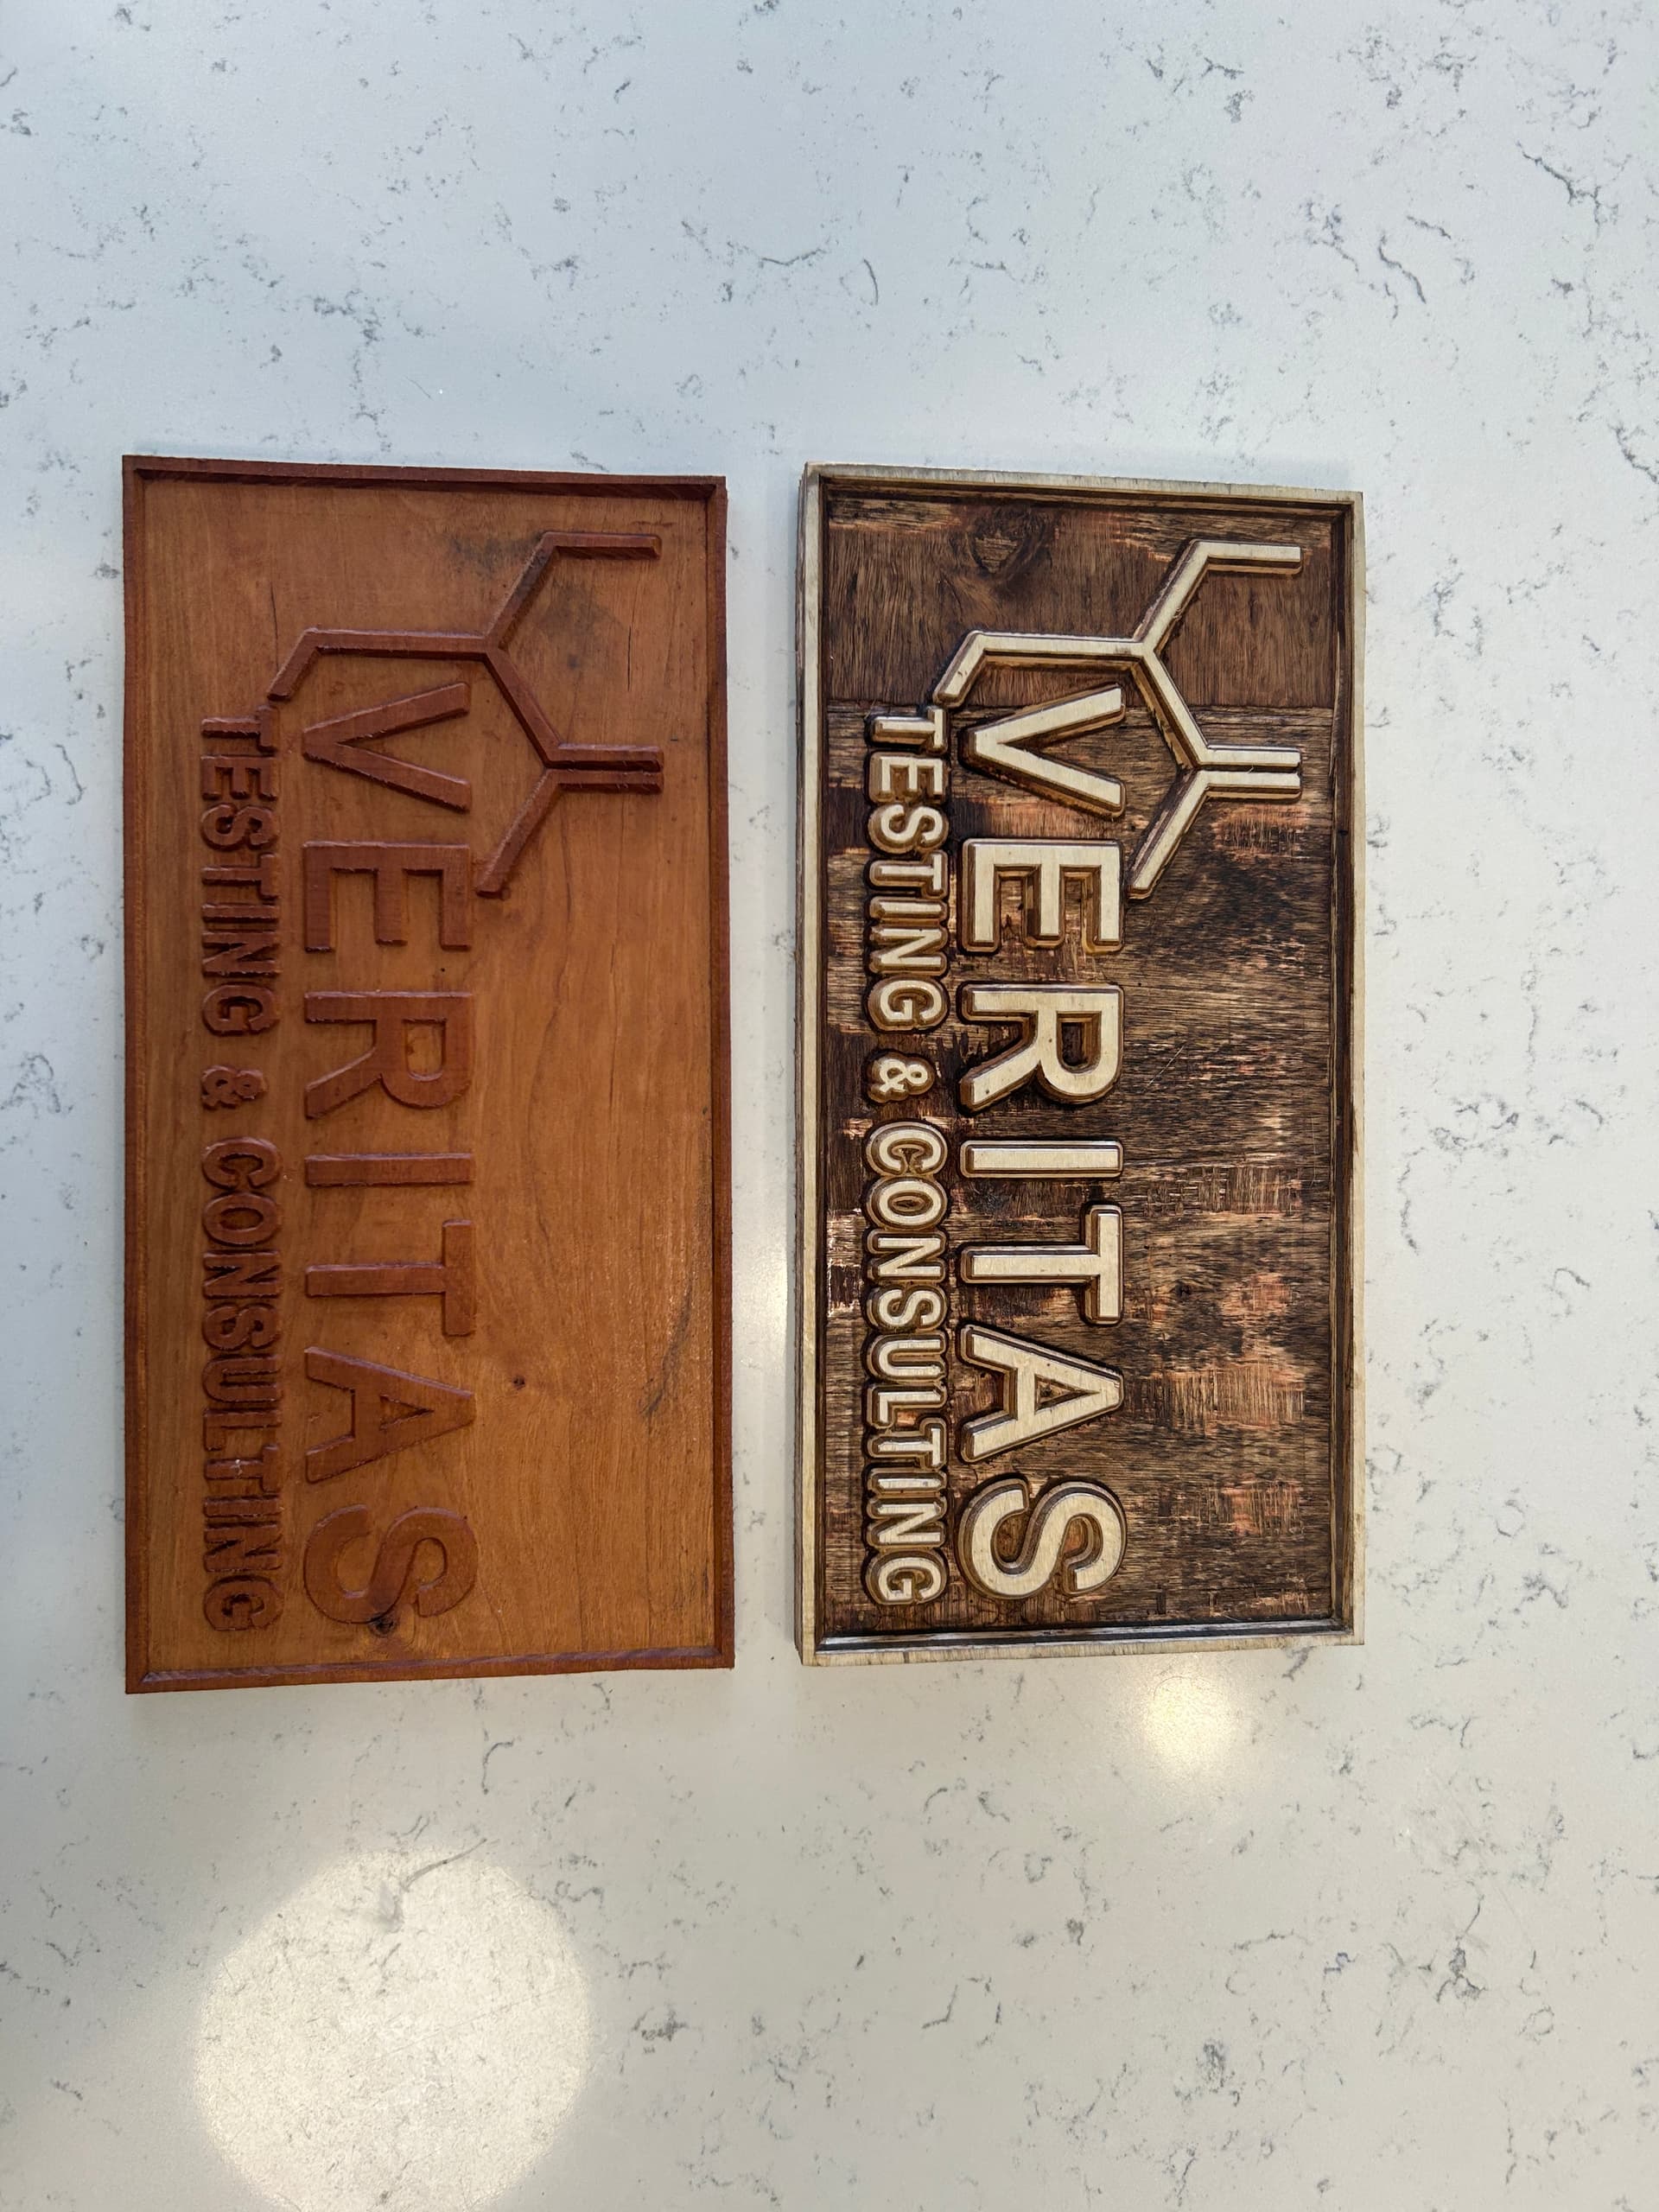
Today’s signs. For my son’s lab. For the dark back ground, I tried varnishing it first and then cutting it. After I sprayed with a wood dye, which couldn’t pentrate the letter surfaces. Seems to work.
16 Likes
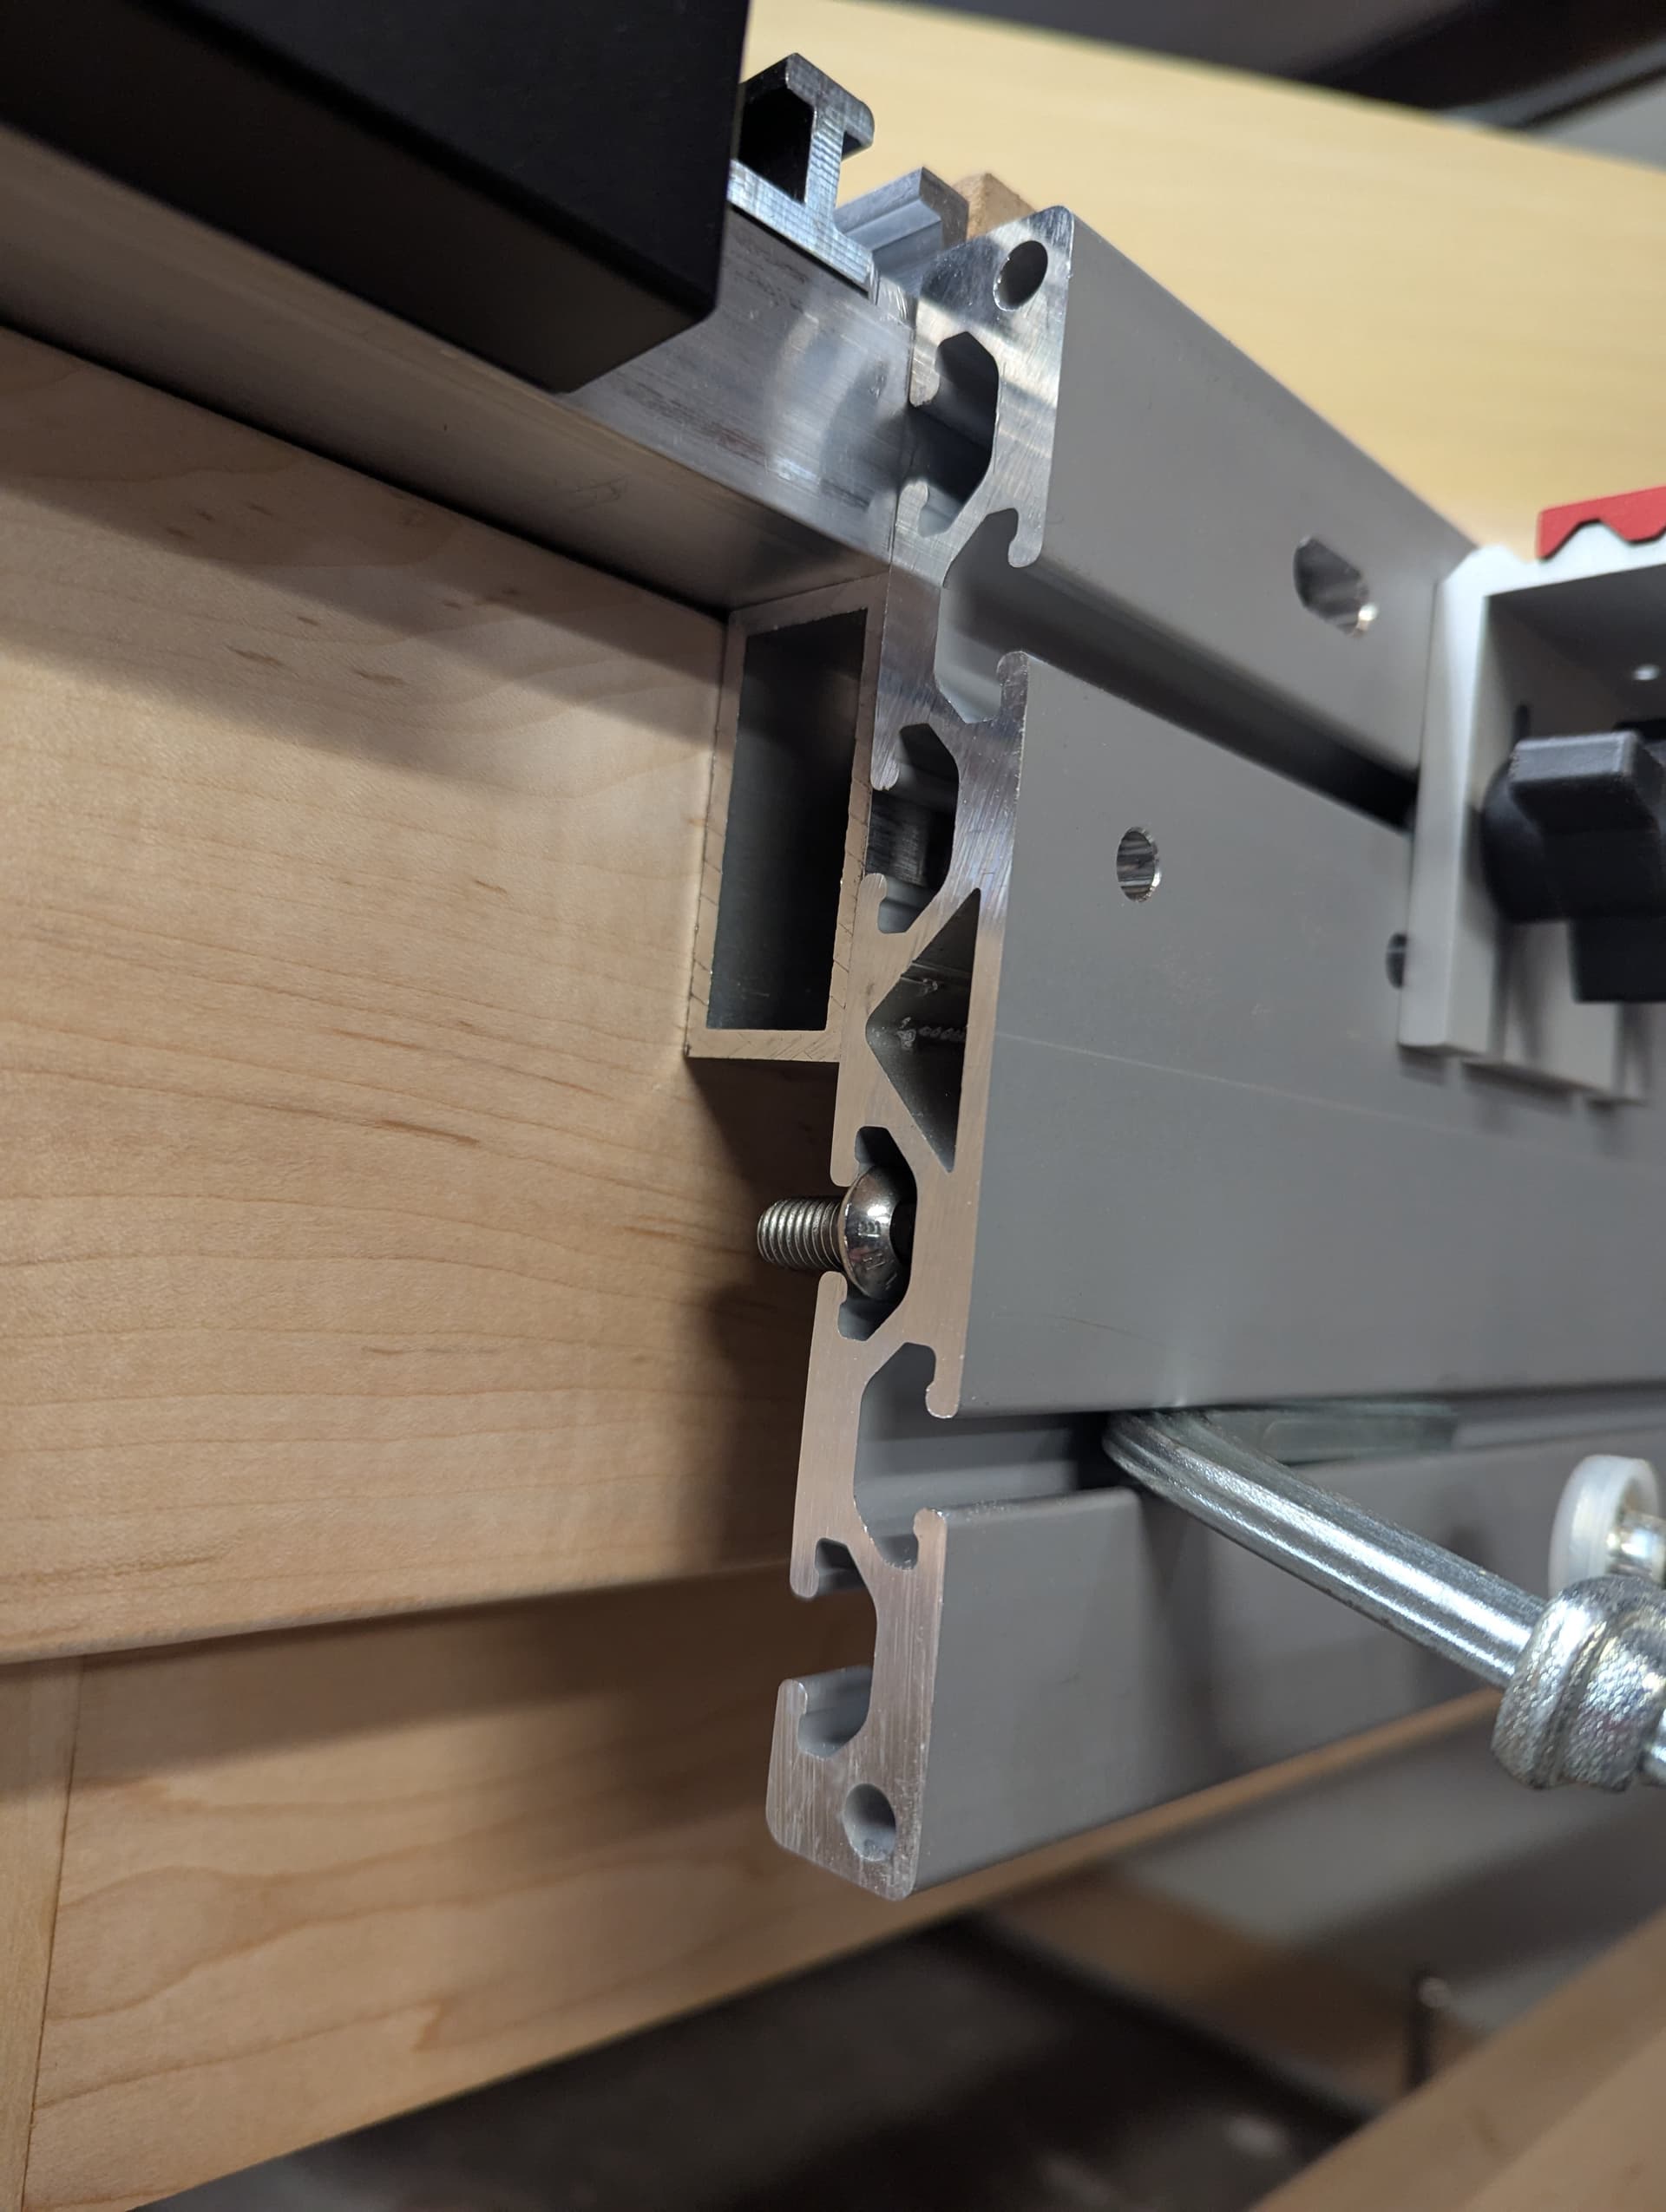
I am definitely the new guy here, so, I don’t really know what I am doing. This was like the 4th thing I made on the Shapeoko. In any case, I really do like the extrusion and how rigidly it’s coupled to the machine; here is a closeup of the assembly.
I removed the front Shapeoko 1x2 bed support, drilled and tapped a series of holes for m8 button head hex bolts in the front face and the bottom. I put a bolt in the unused track for example on how it attaches. I used a new 1x2 rectangular tube from online metals to provide extra support. This tube is attached both to the Shapeoko and the 80/20 extrusion. The holes in the 80/20 are just there to tighten the button head bolts.
There are some things I might do differently:
The extrusion is slightly too high to allow insertion of the teez nuts.
I used way too many holes.
I probably should have faced the new 1x2 aluminium tube?
I may flip the extrusion to get four T tracks in the front.
I hope this is helpful and let me know if anybody has any suggestions for improvements.
Cheers
8 Likes
Over a year ago I had an idea to make Vacuum Slats for the S5 Pro:
And they took some time to get right but I finally have the finished system installed on my S5 Pro:
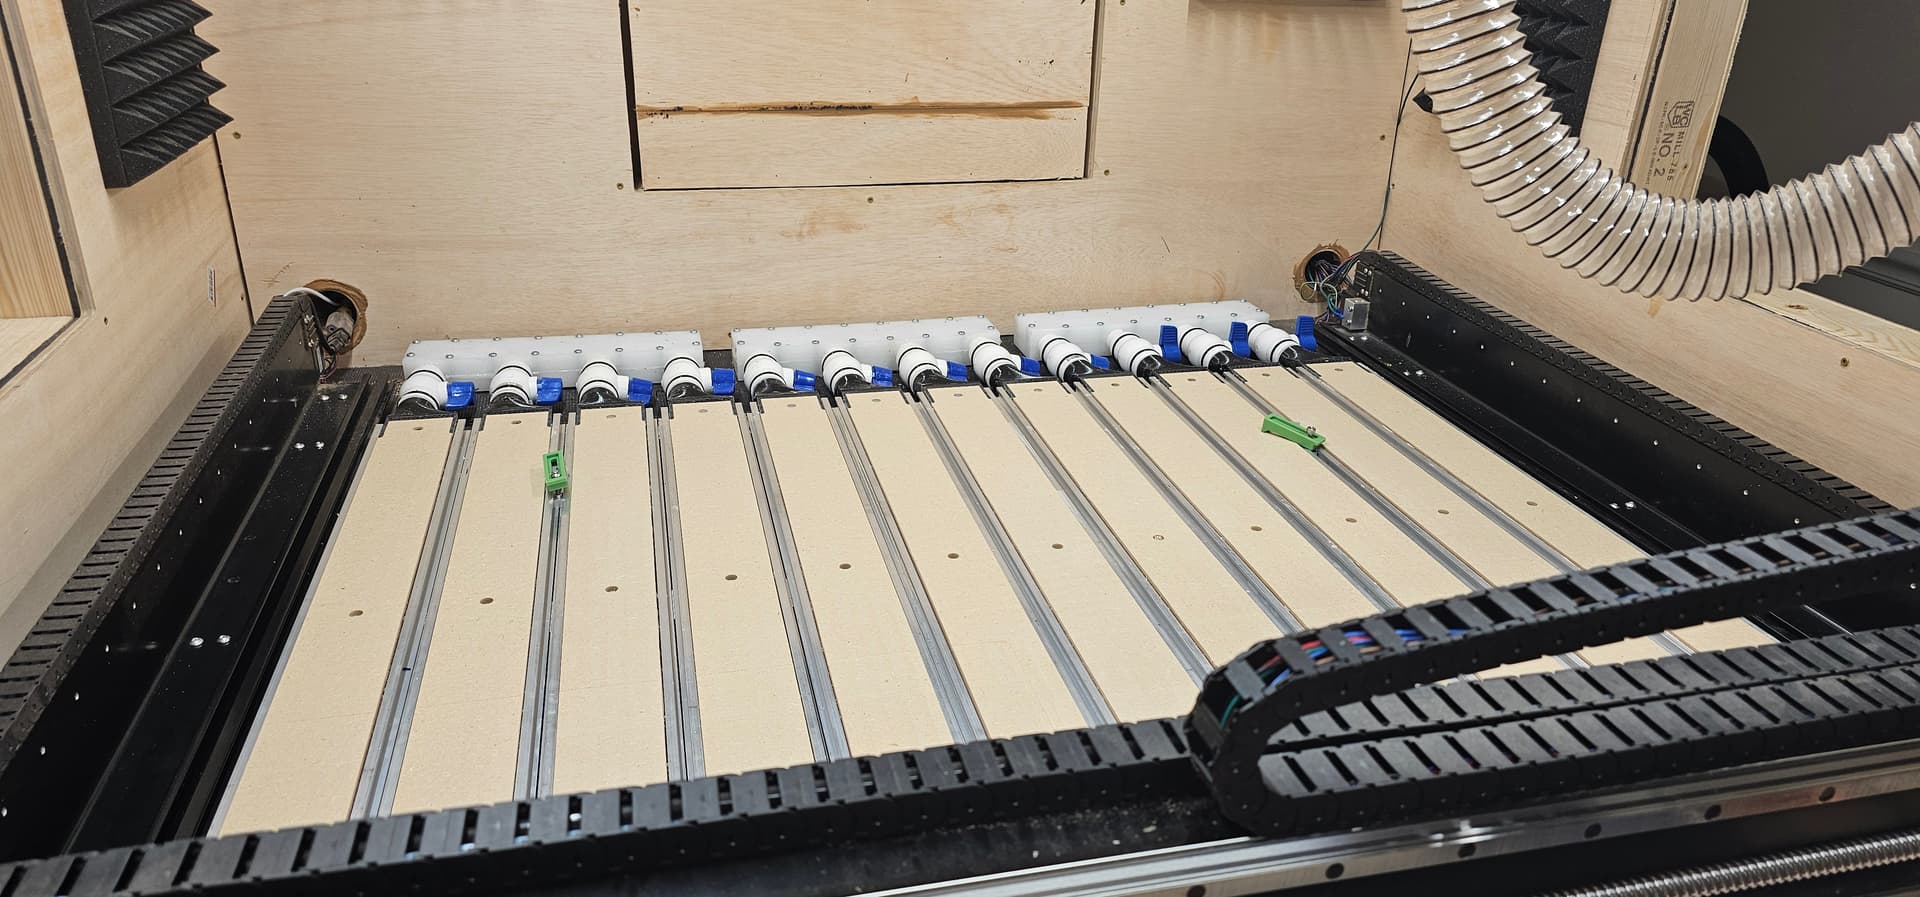
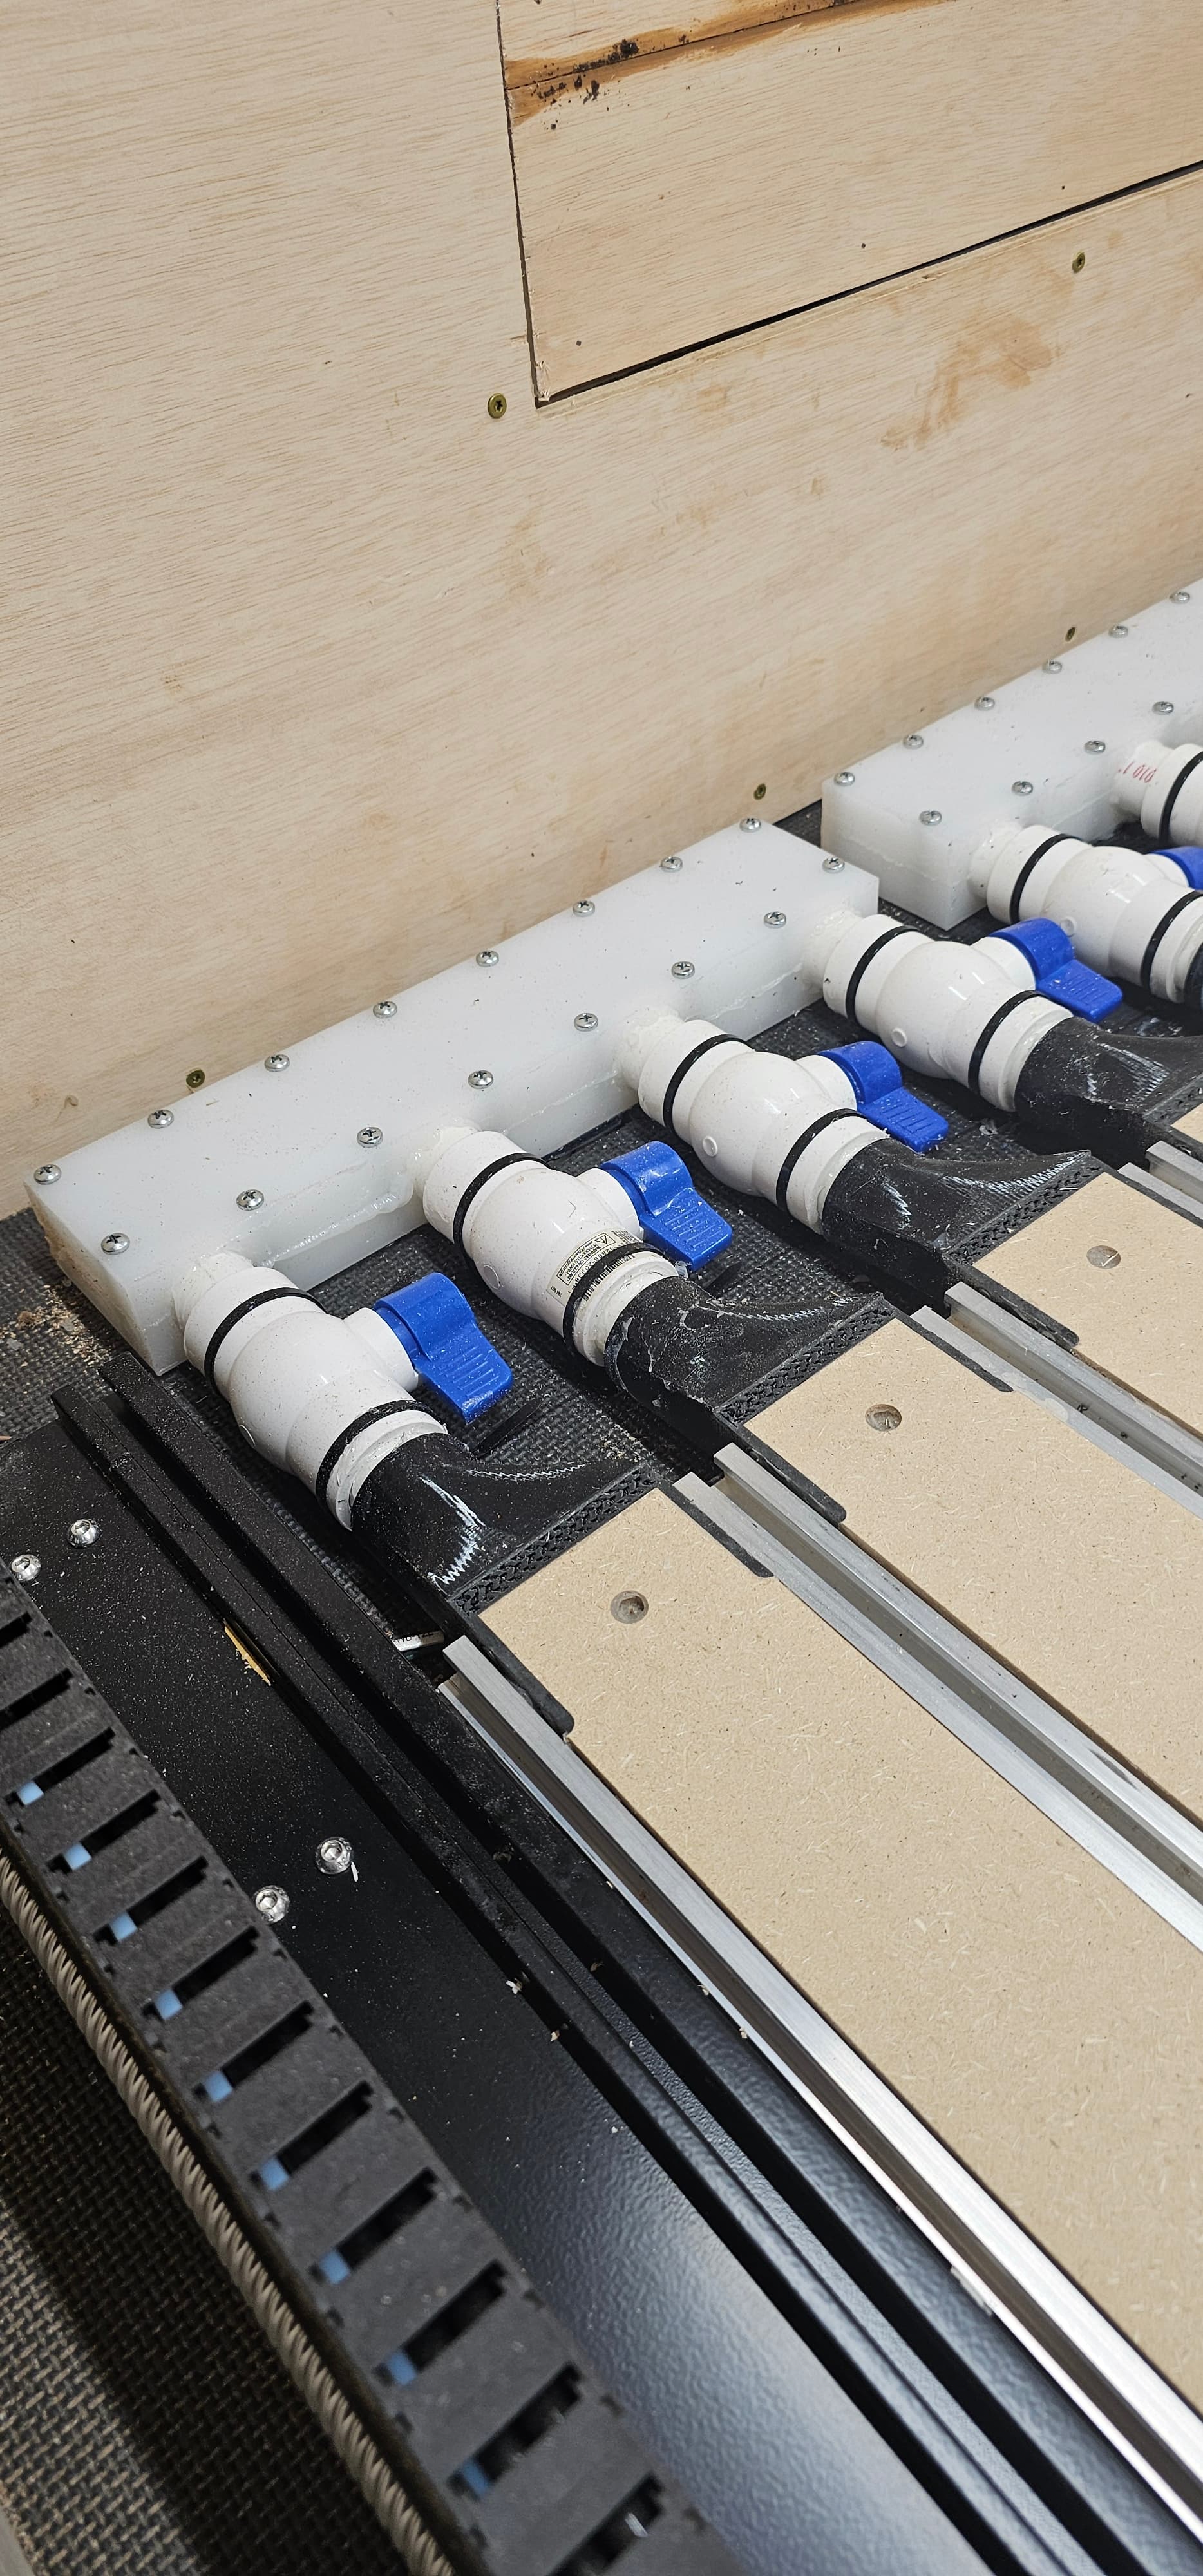
Each slat has its own ball valve so I can shut them off individually. Four of them then feed into a manifold that goes under my enclosure where the DIY vacuum system is:
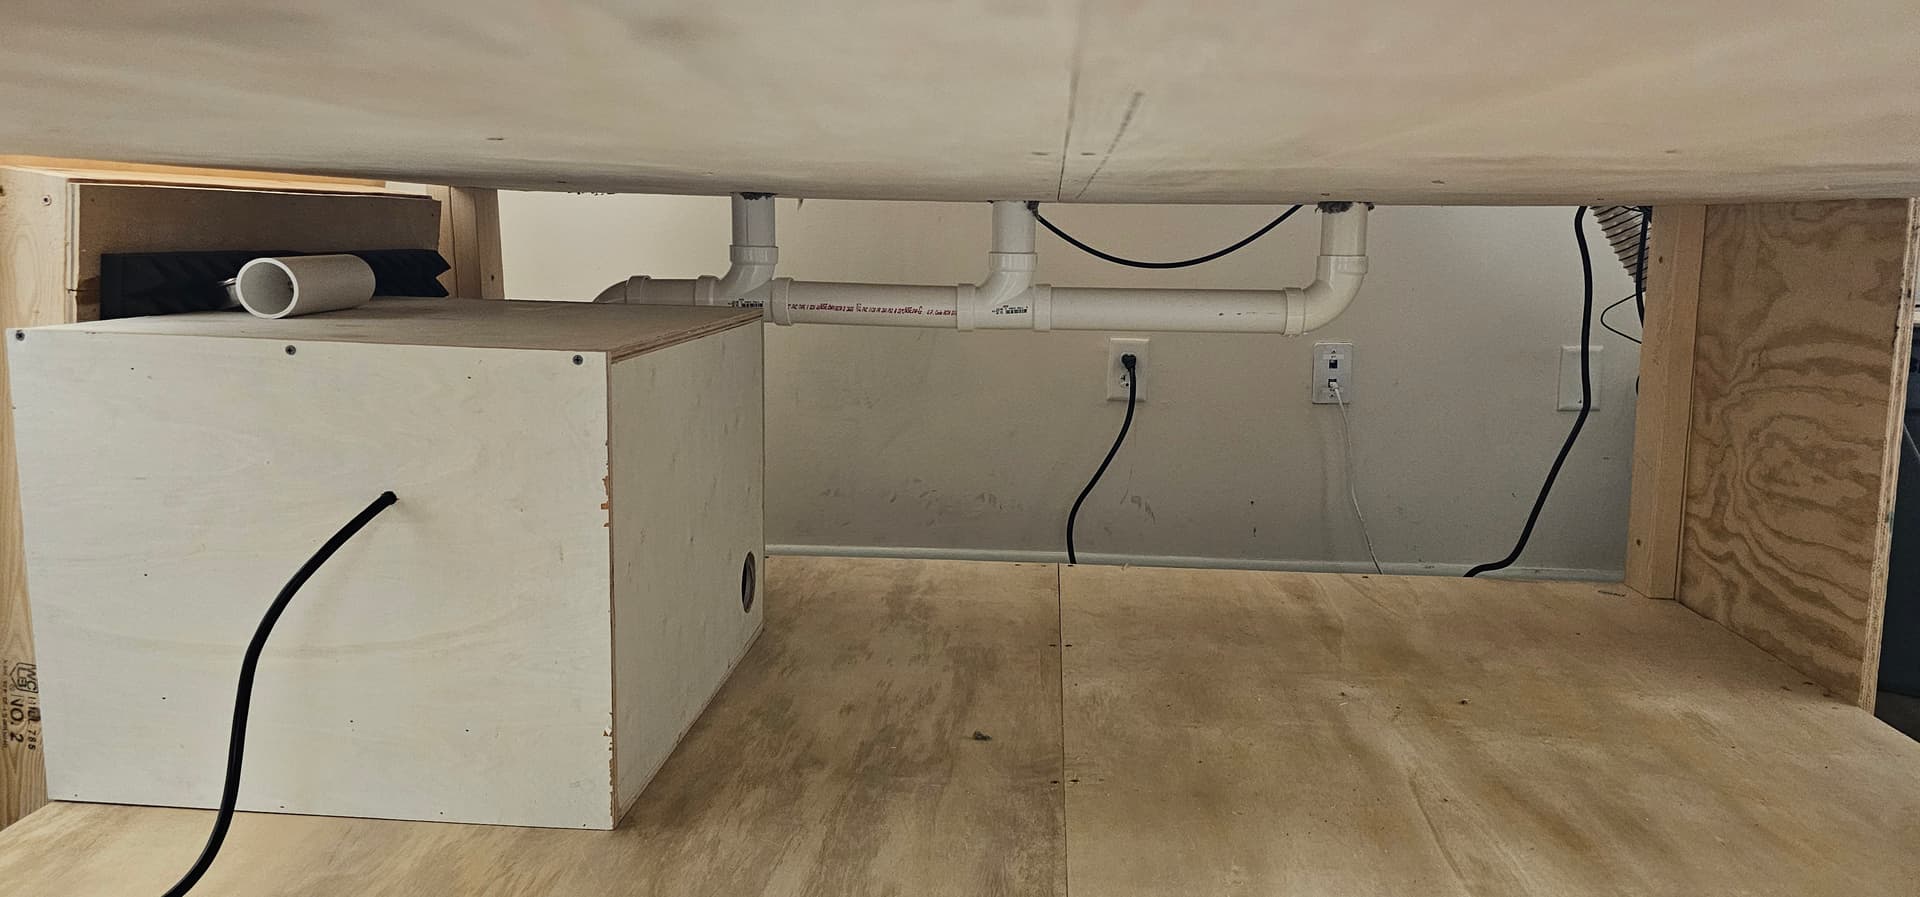
The vacuum is one of these:
https://www.amazon.com/dp/B00JZF8QHA
with one of these gaskets:
There is room inside the vacuum enclosure for a second vacuum motor and I have already ordered one. The one motor is enough to keep a flat sheet of plywood from moving around however a slightly warped one will peal up from it.
14 Likes
Absolutely impressive setup. Thanks for sharing. I’ve been looking towards vacuum clamping my self.
I am a little confused looking at you work, which is impressive.
I see a manifold attached to a transition to the end of a MDF slat.
Is the MDF machined ?
This is pretty cool.