So before @KevBarn14 carved his door I bought the file to try out and finally got around to trying it. I placed walnut on top of maple and had to play with depths but I like it.
53 Likes
Very well done ! Congrats
1 Like
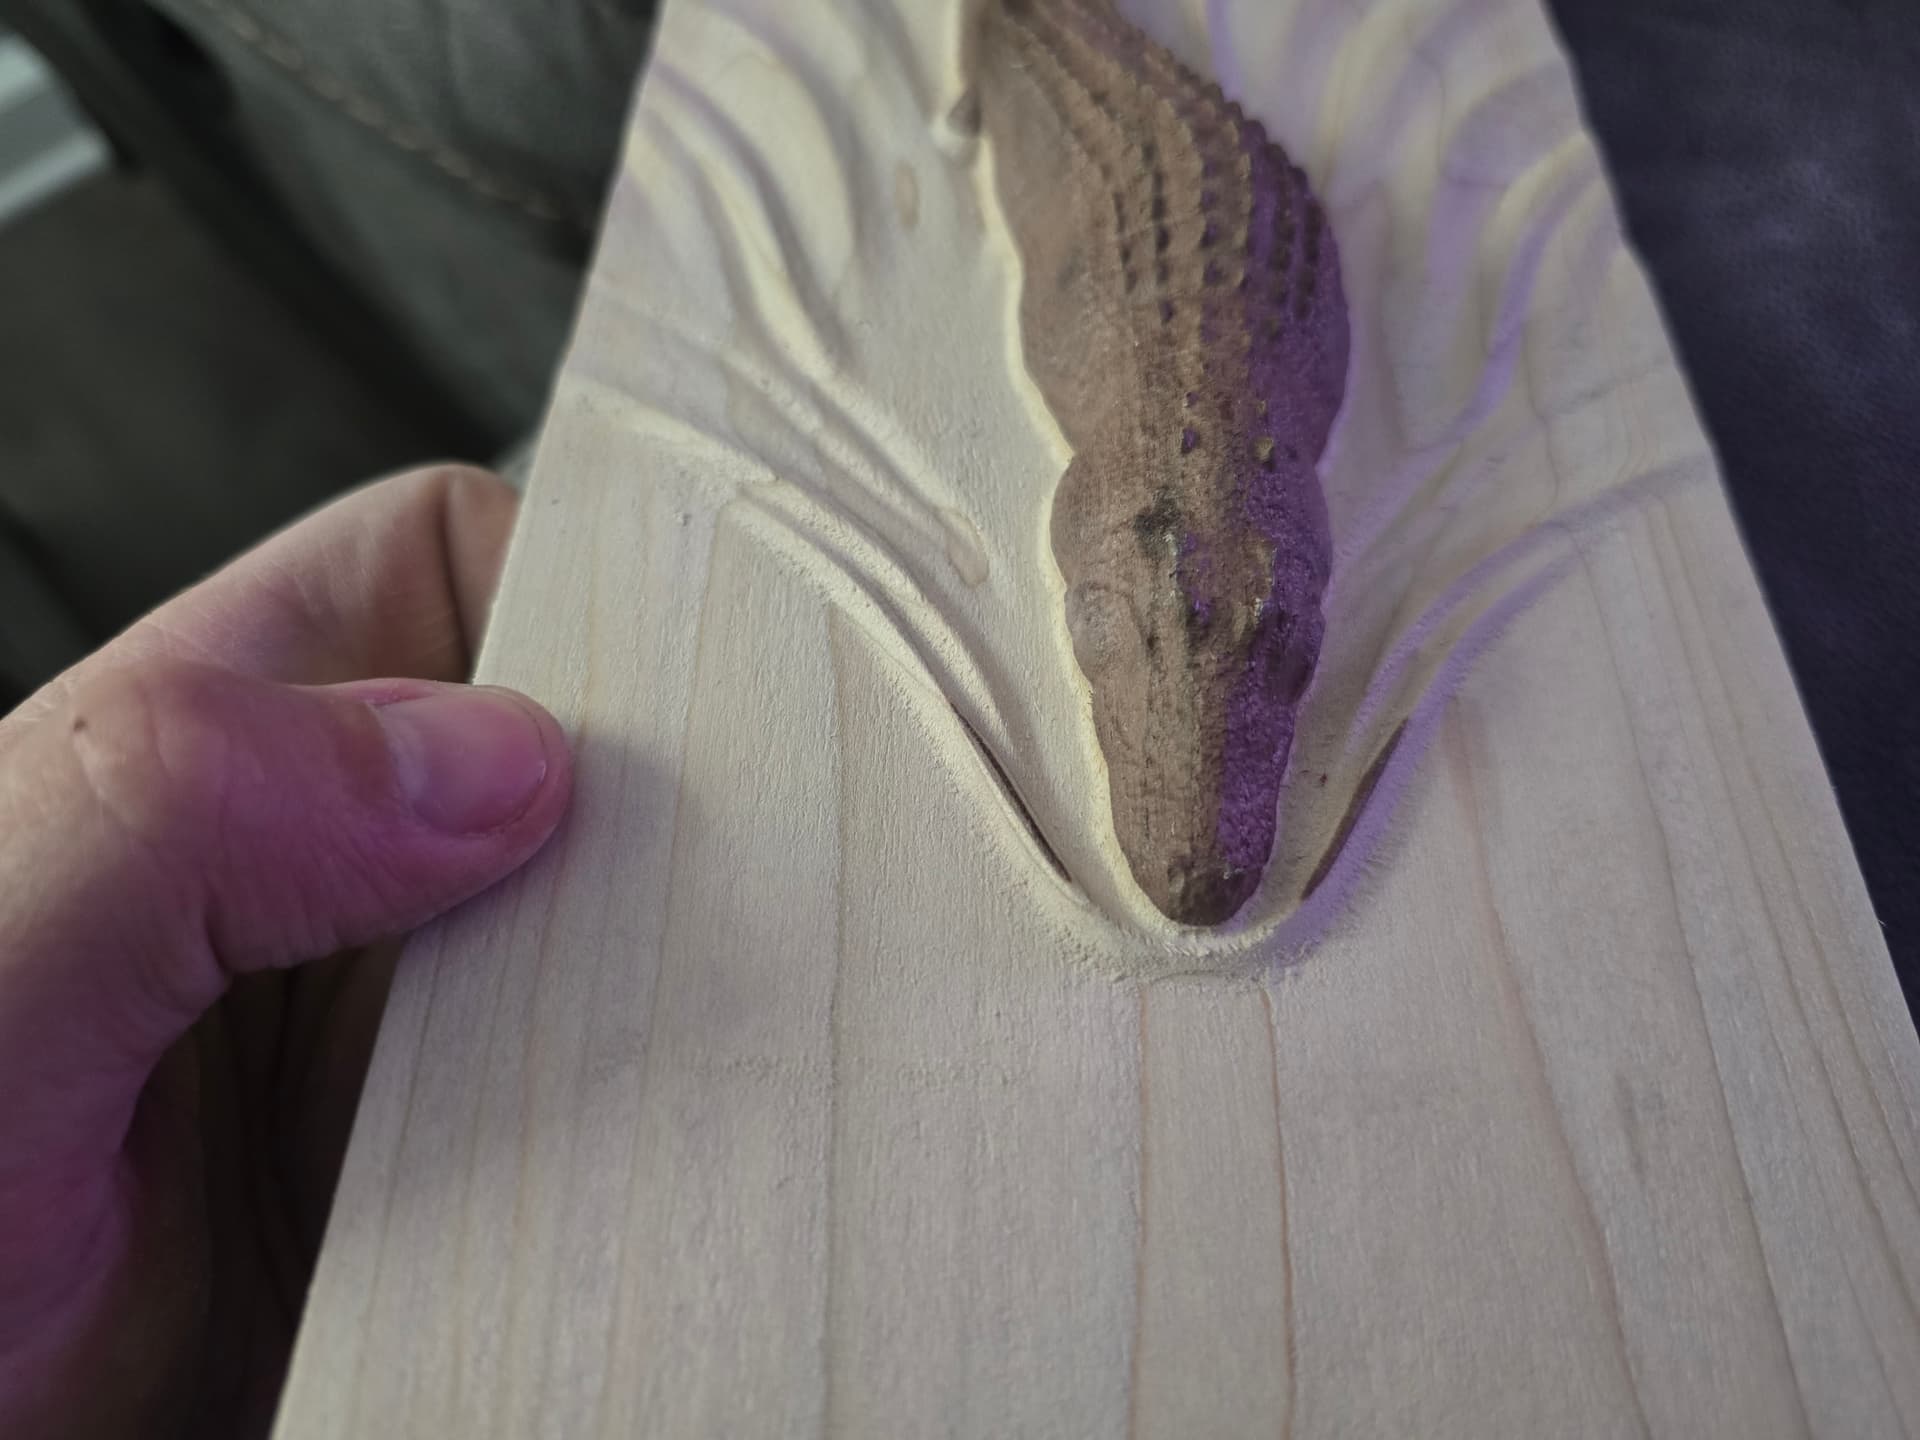
That’s so rad! I’ve been playing with inlays for the last year and just recently it occurred to me that I could use the “waste” from the plug to make inlays with 3d elements.
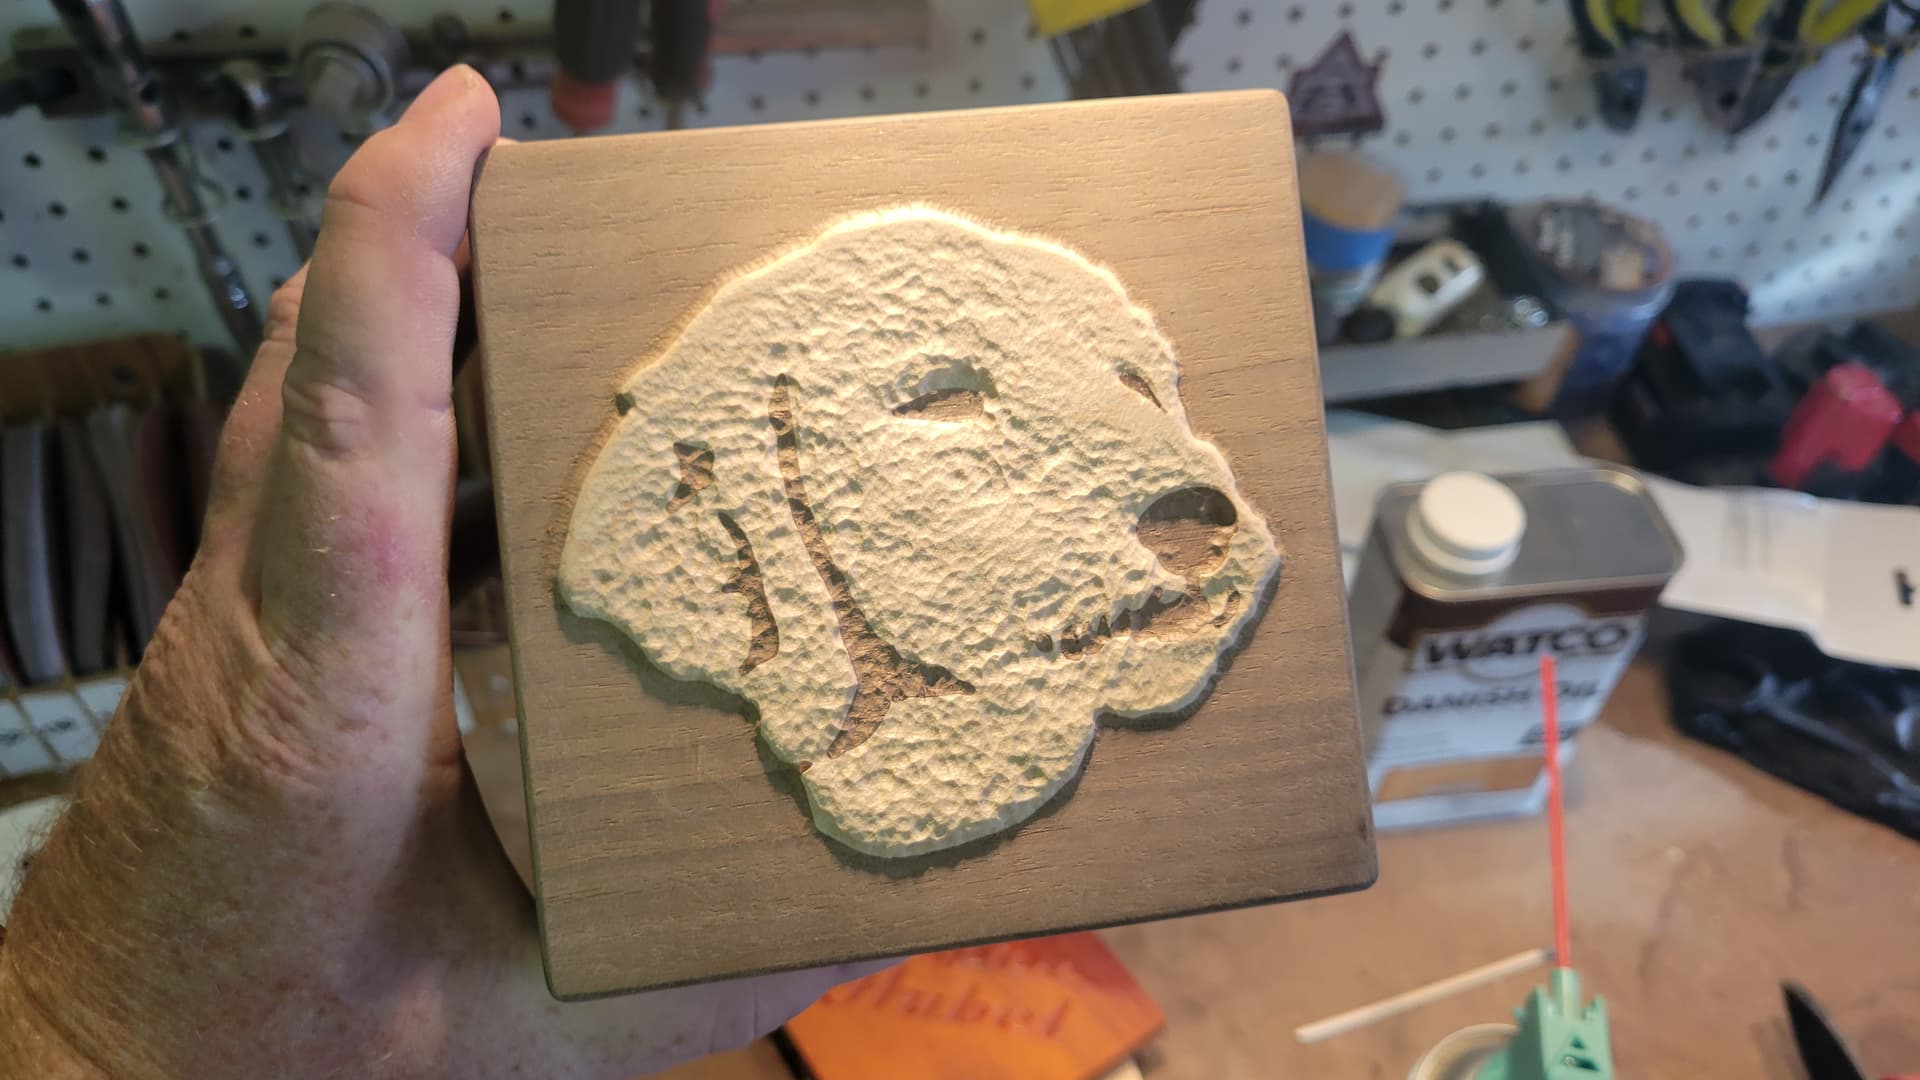
I used an image of a particular pup for the inlay base/plug. I then took that same image into Photoshop, made it black and white, exaggerated a few elements, then used that for the 3d heigh map in CC.
17 Likes
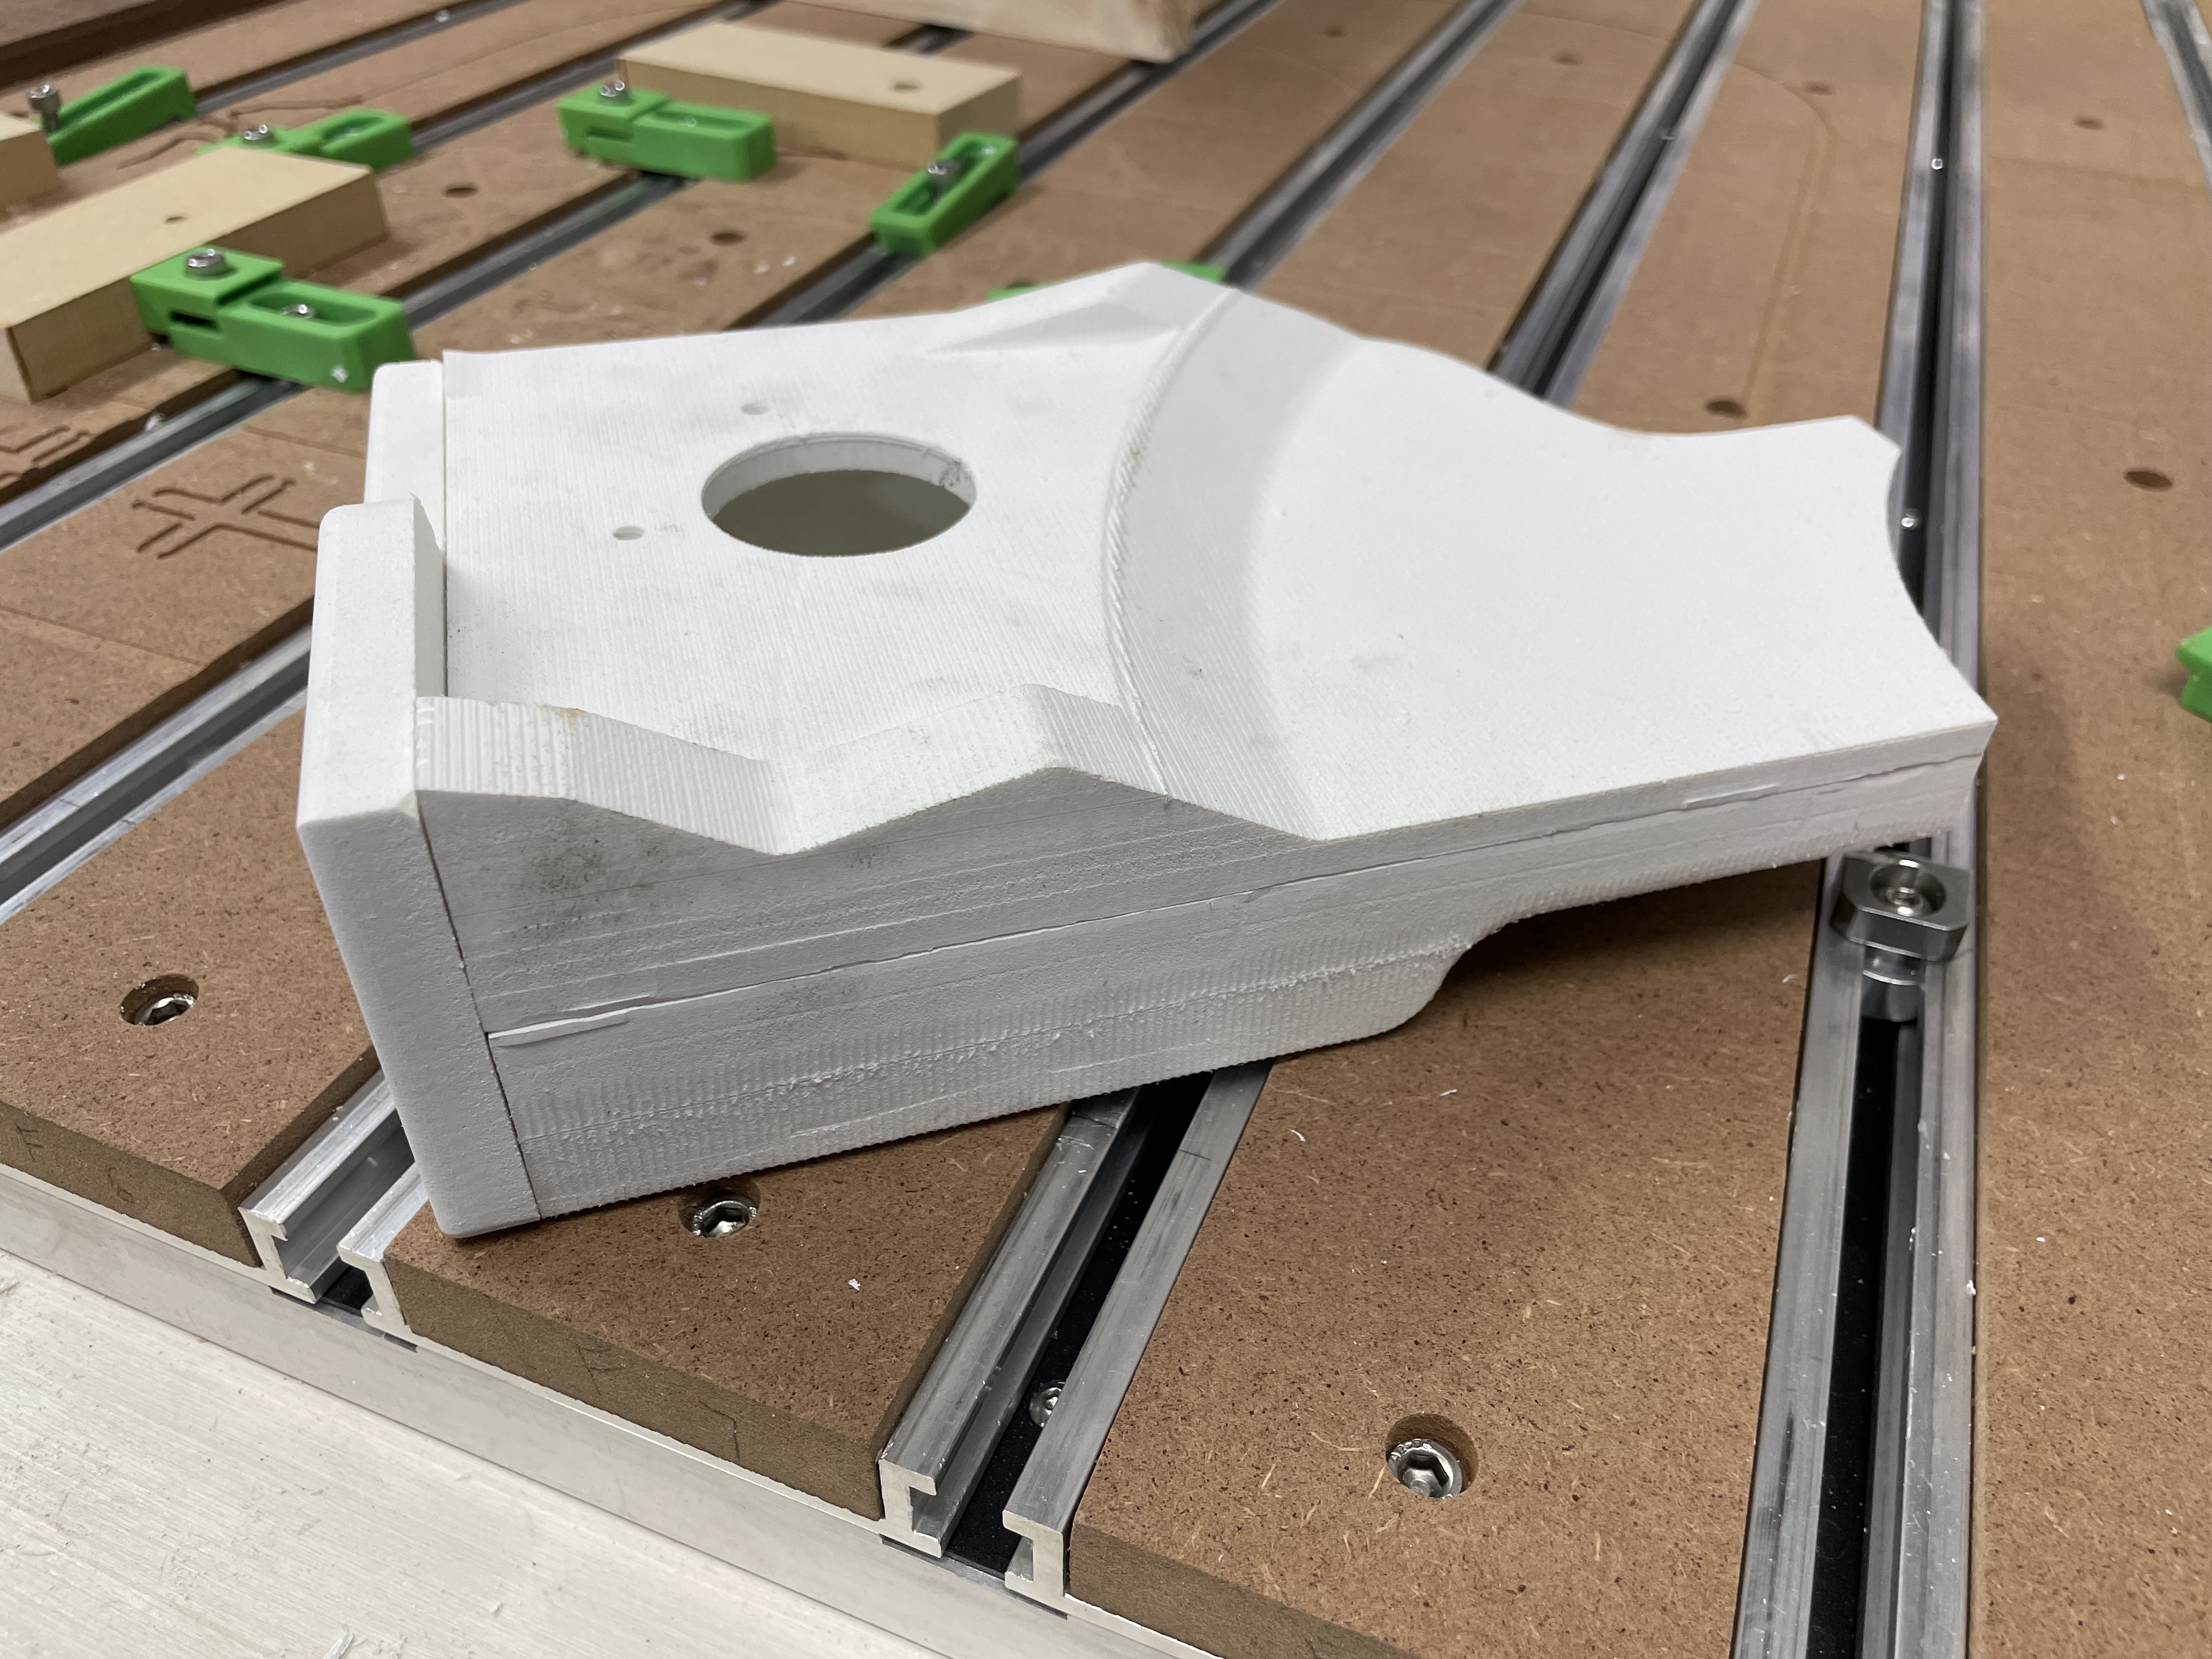
Nothing fancy, but I’m rebuilding a deck & needed to notch out the railing posts & make backers for 45° corners.
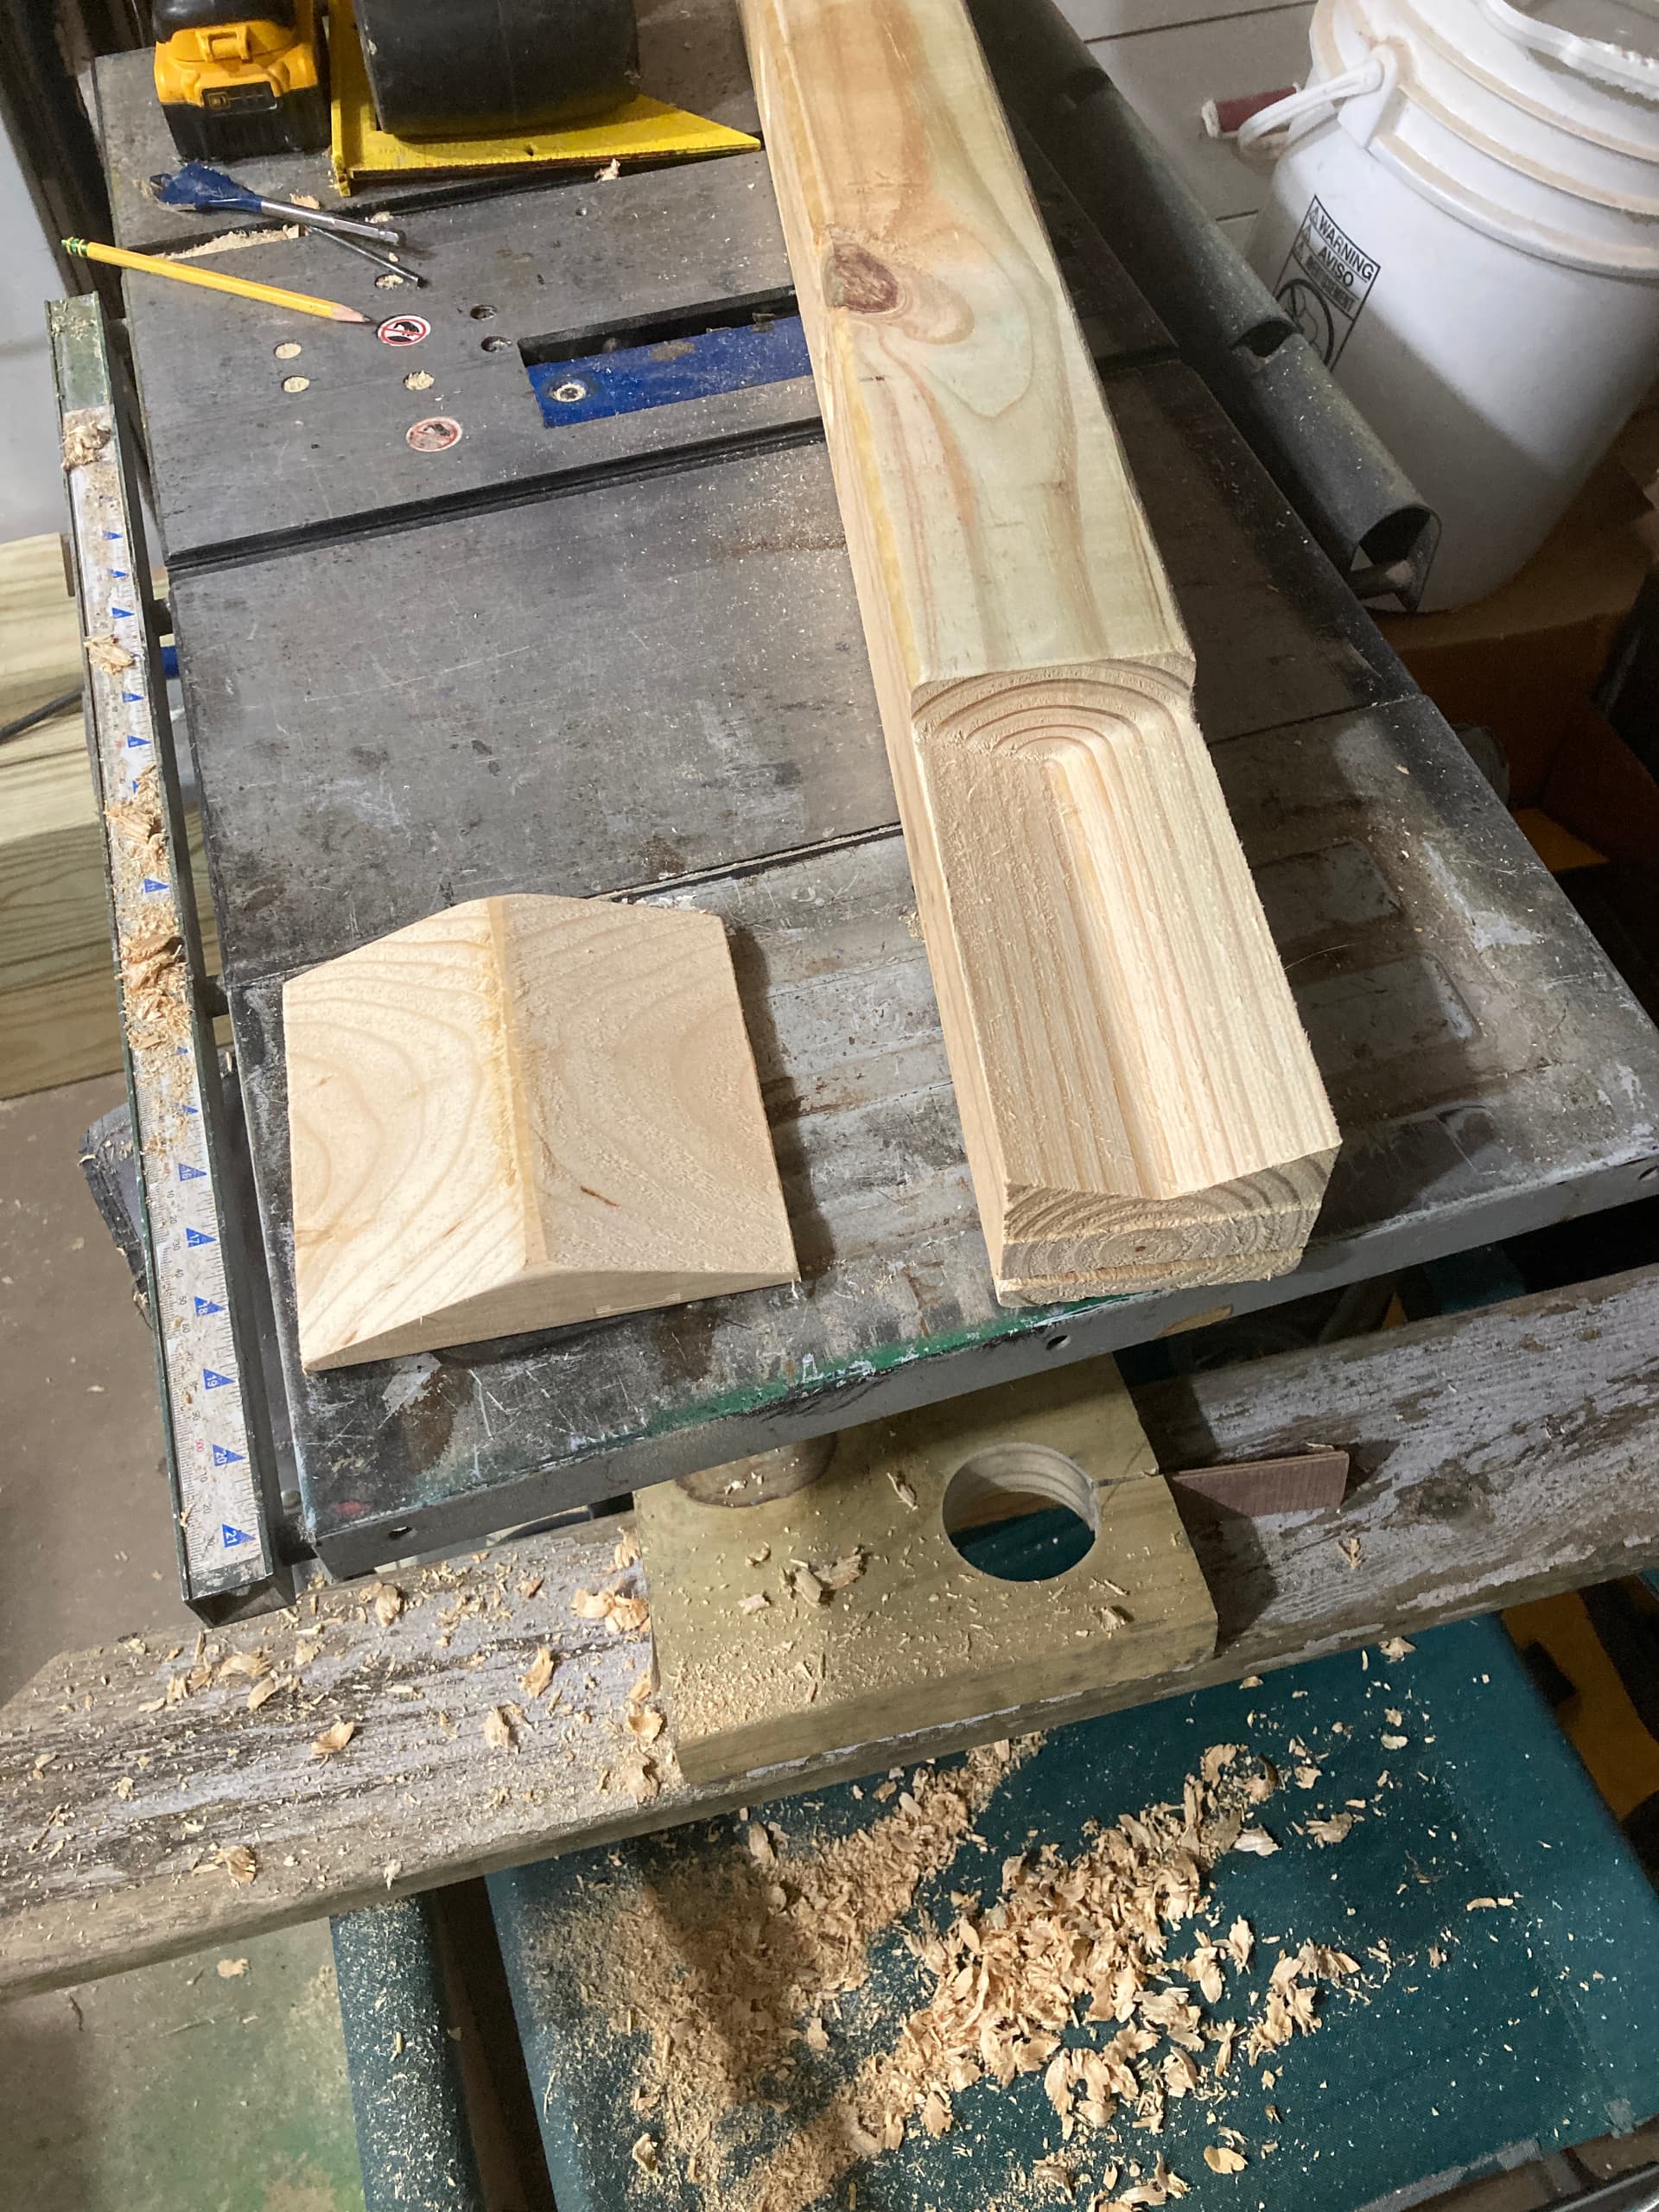
Coincidentally, the board with the block with the hole is a fixture that holds my trim router so I can flatten the base of posts that I’m replacing. Cut the hole on the machine for an exact size.
12 Likes
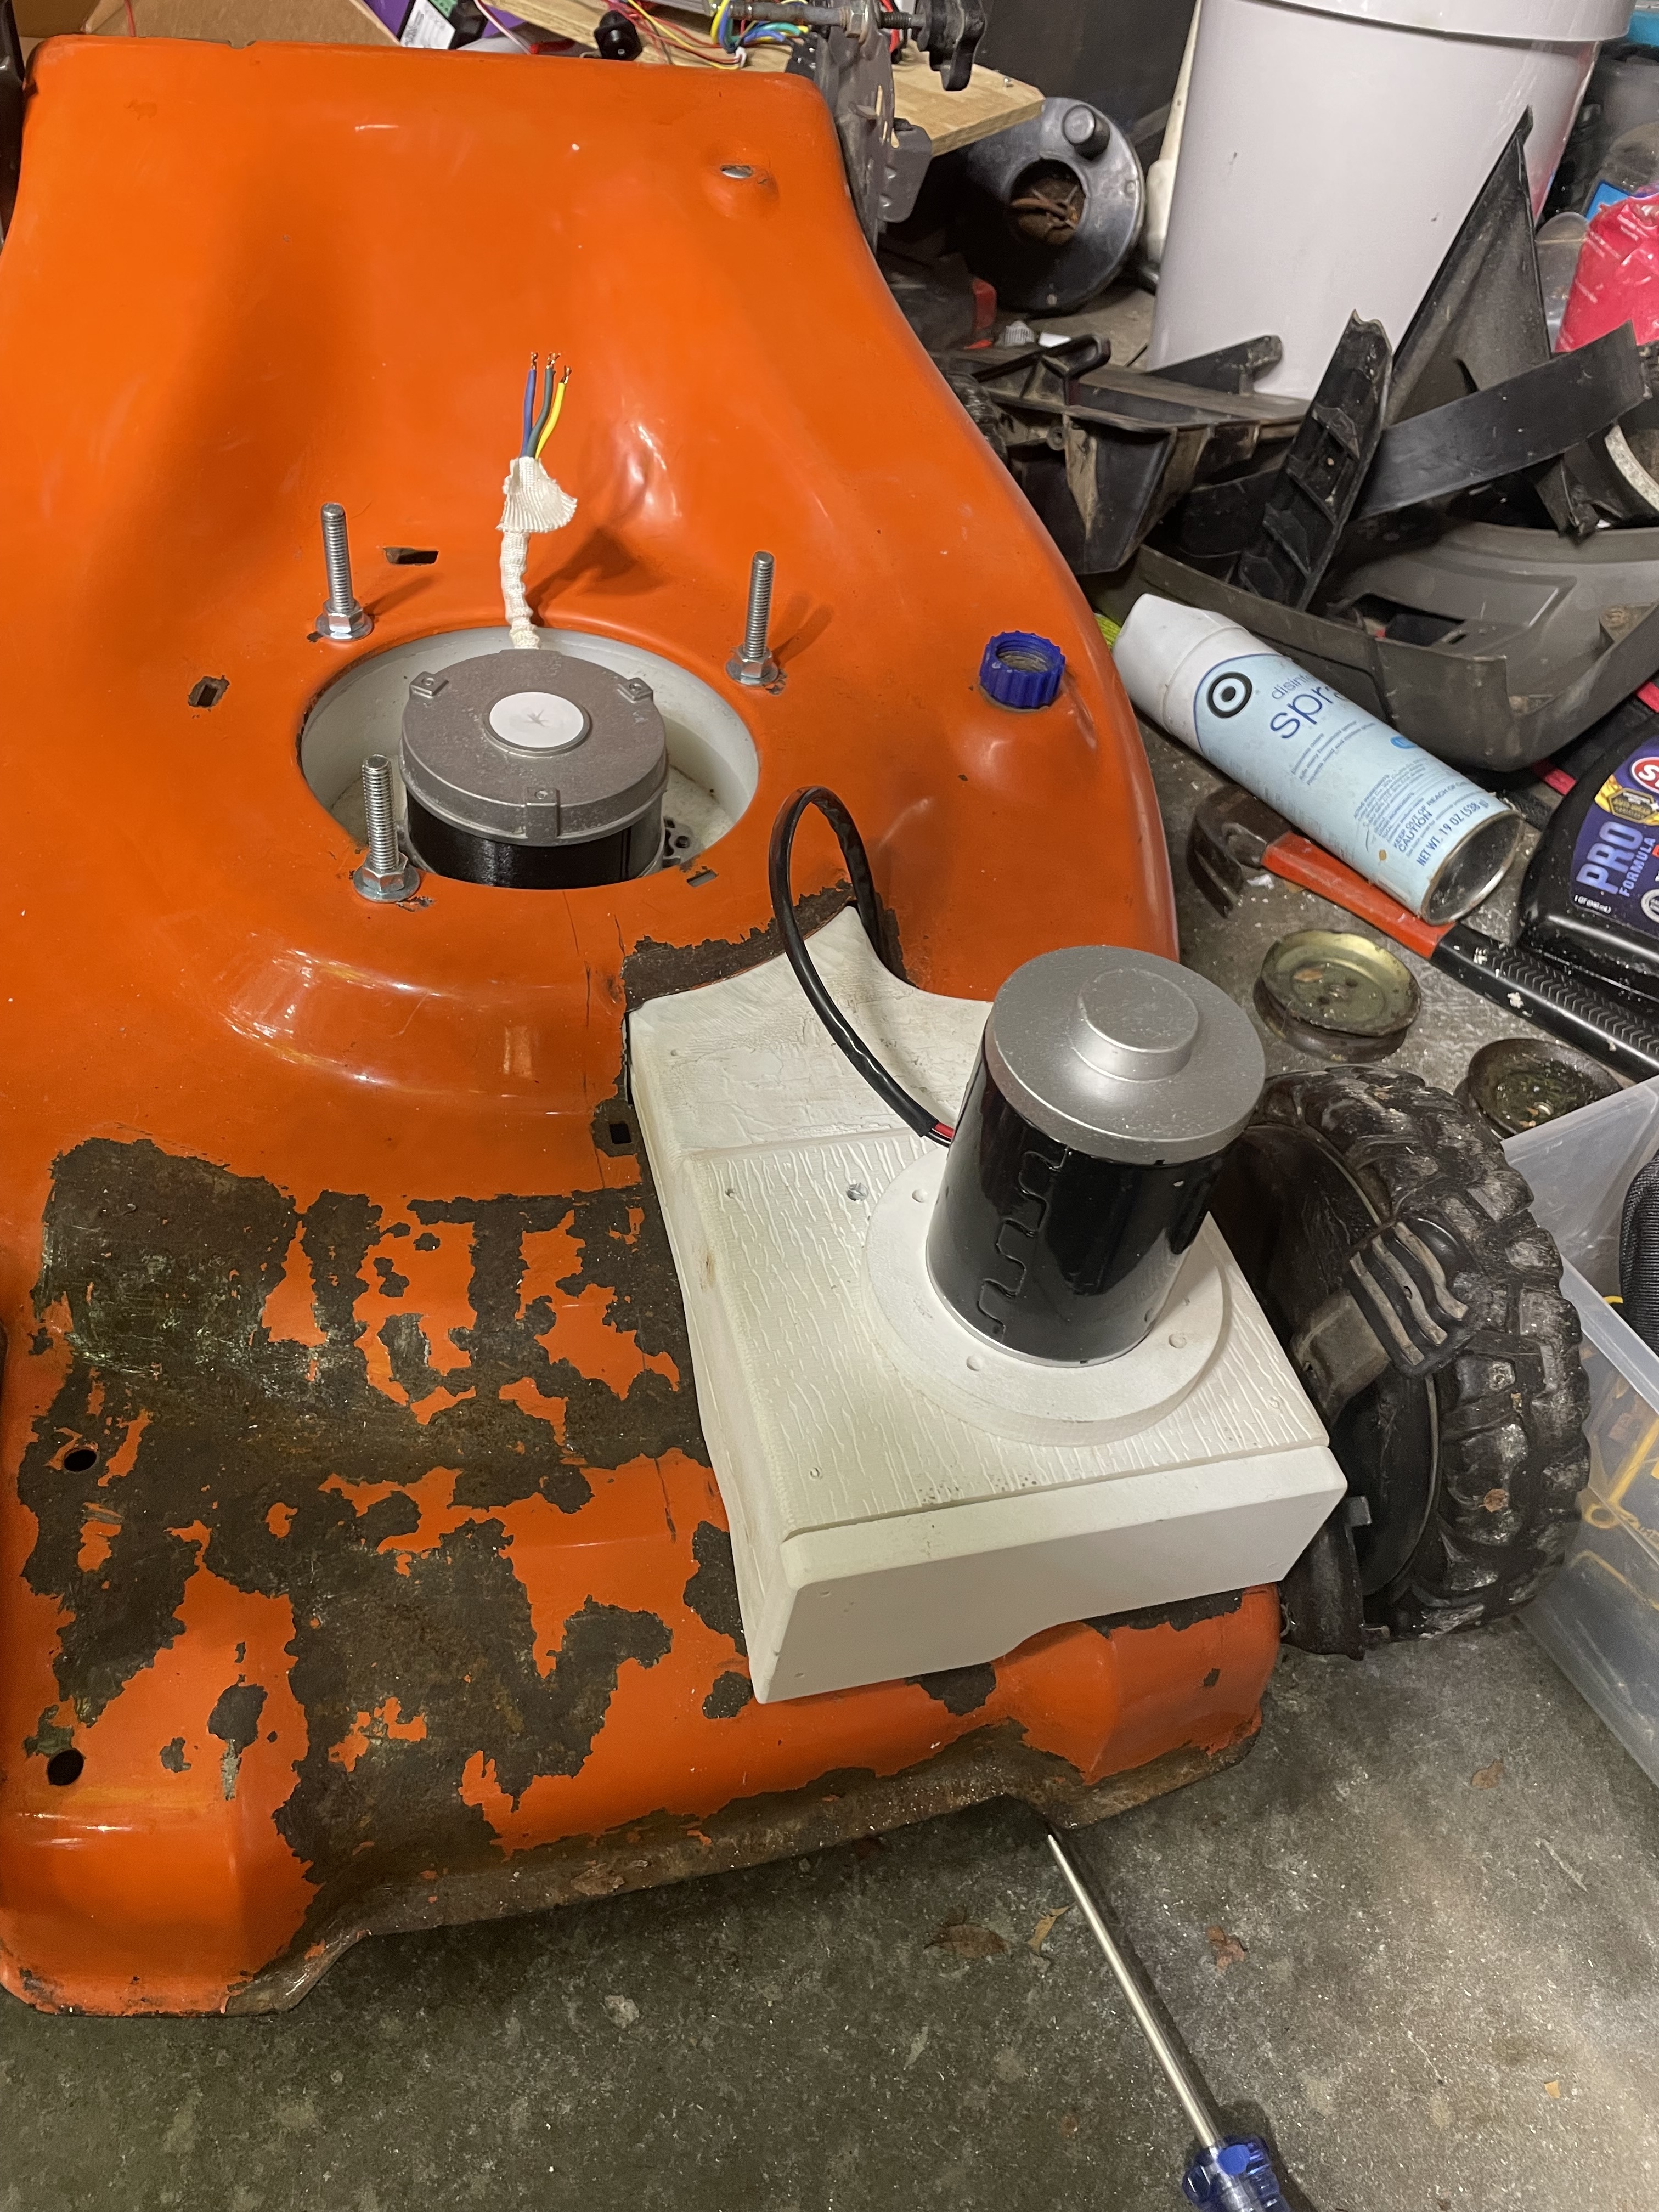
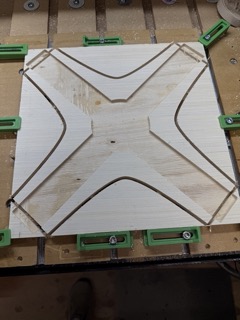
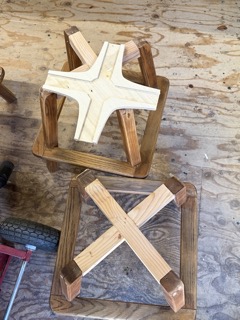
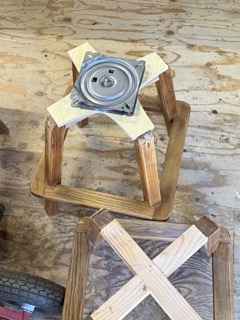
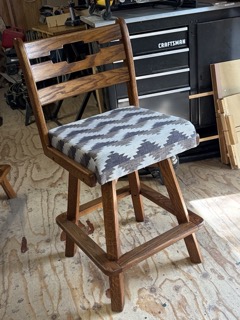
Also, nothing fancy here. I cut a set of reinforcing swivel mounts for a set of bar stools that needed reconstructing.
17 Likes
Looks great! I like the contrast between the two different woods.
Tony, great looking piece! +1. Lots of ways to incorporate that into other things, too.
Do you remember where you bought this alligator file?
1 Like
I recall seeing it on etsy……
1 Like
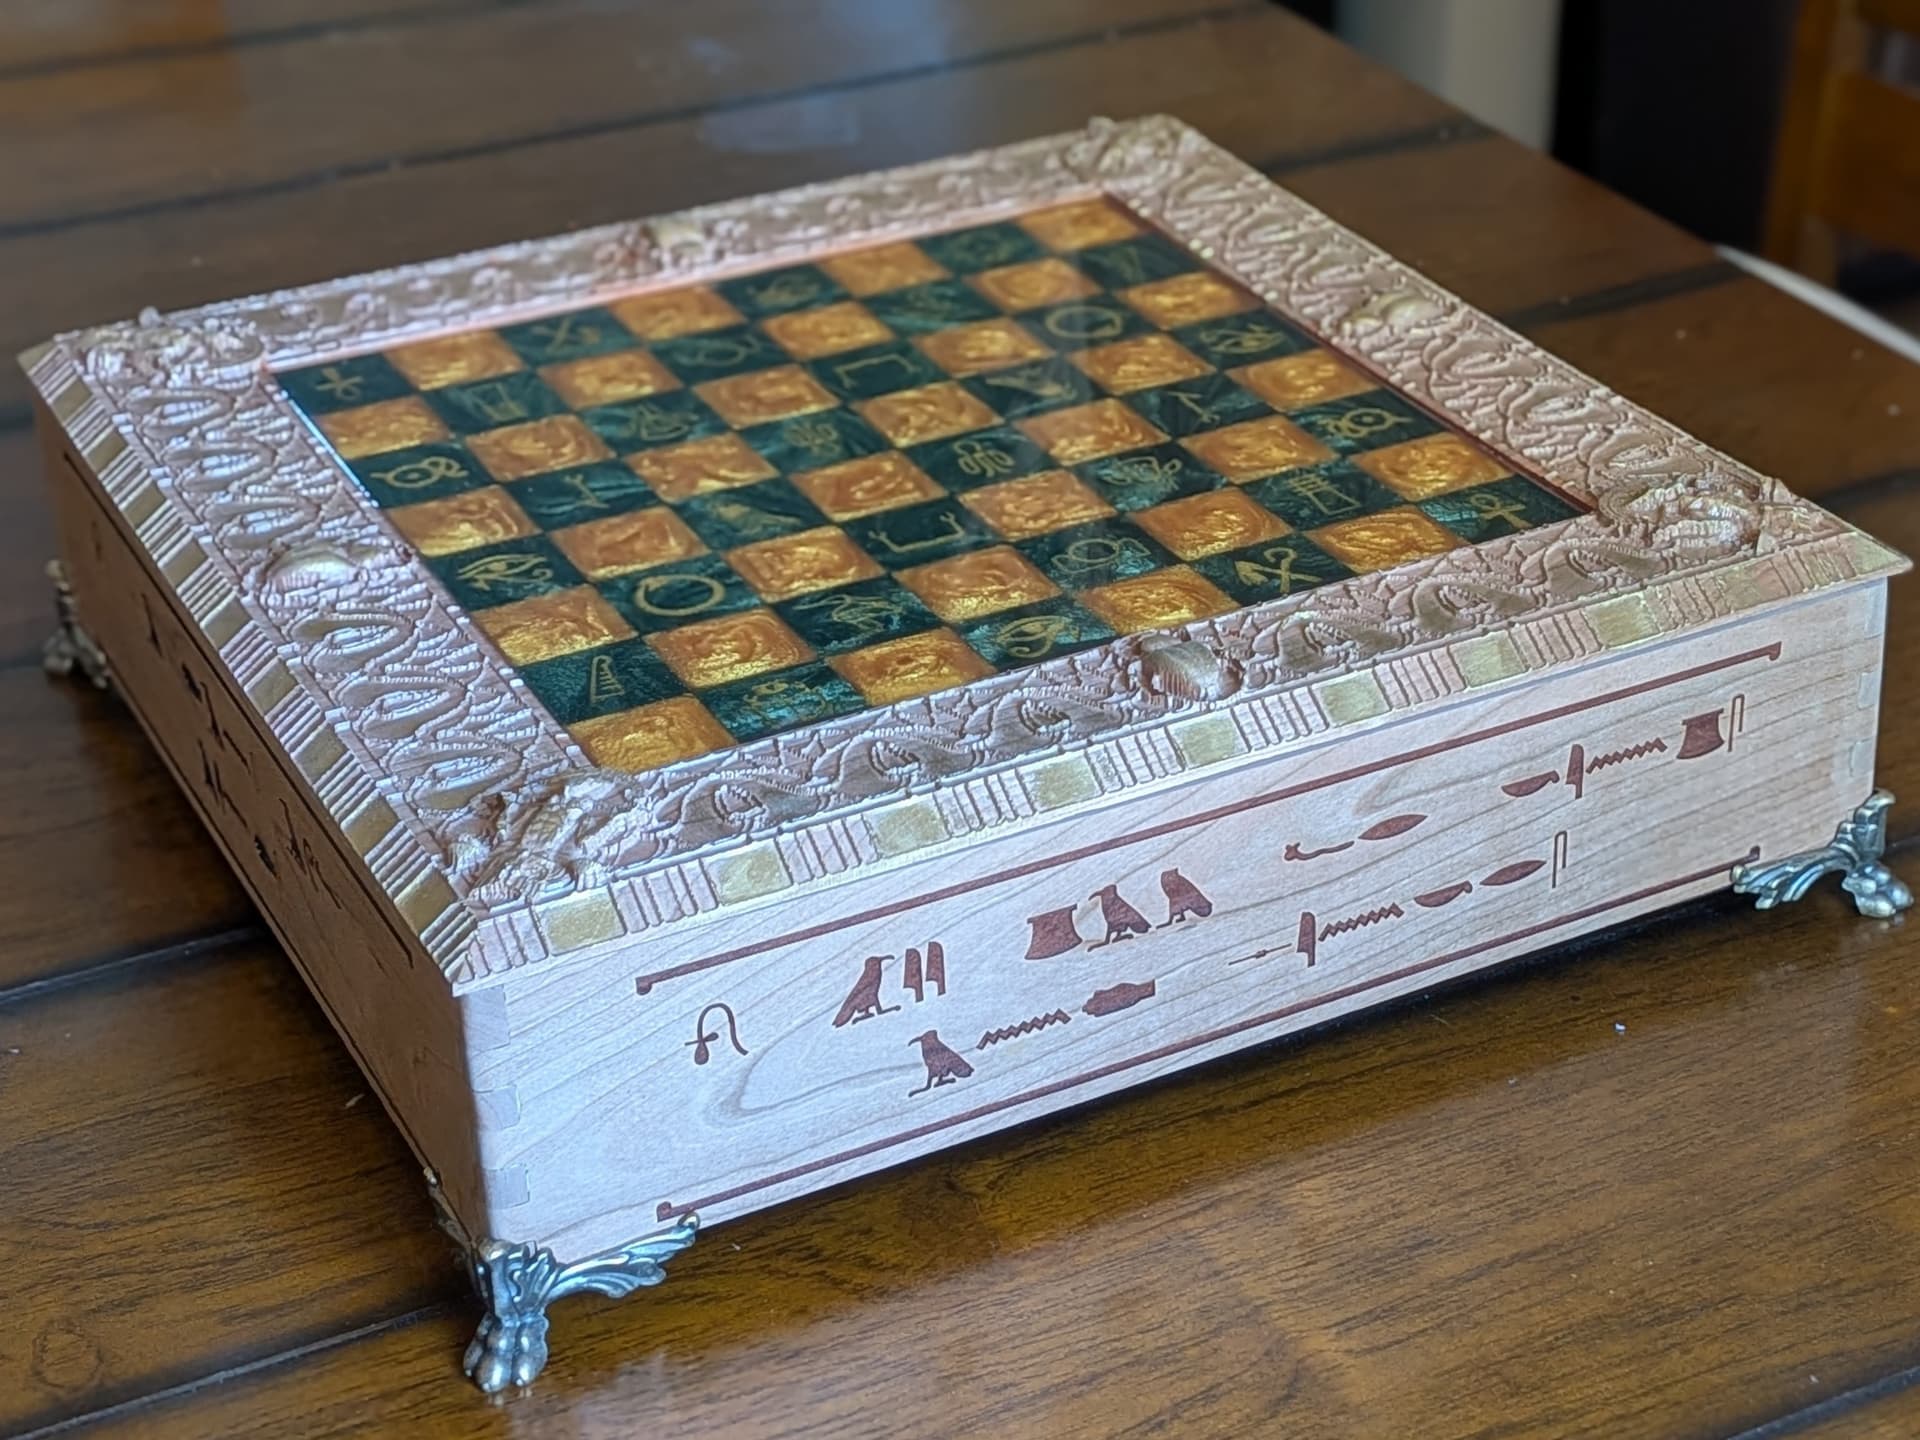
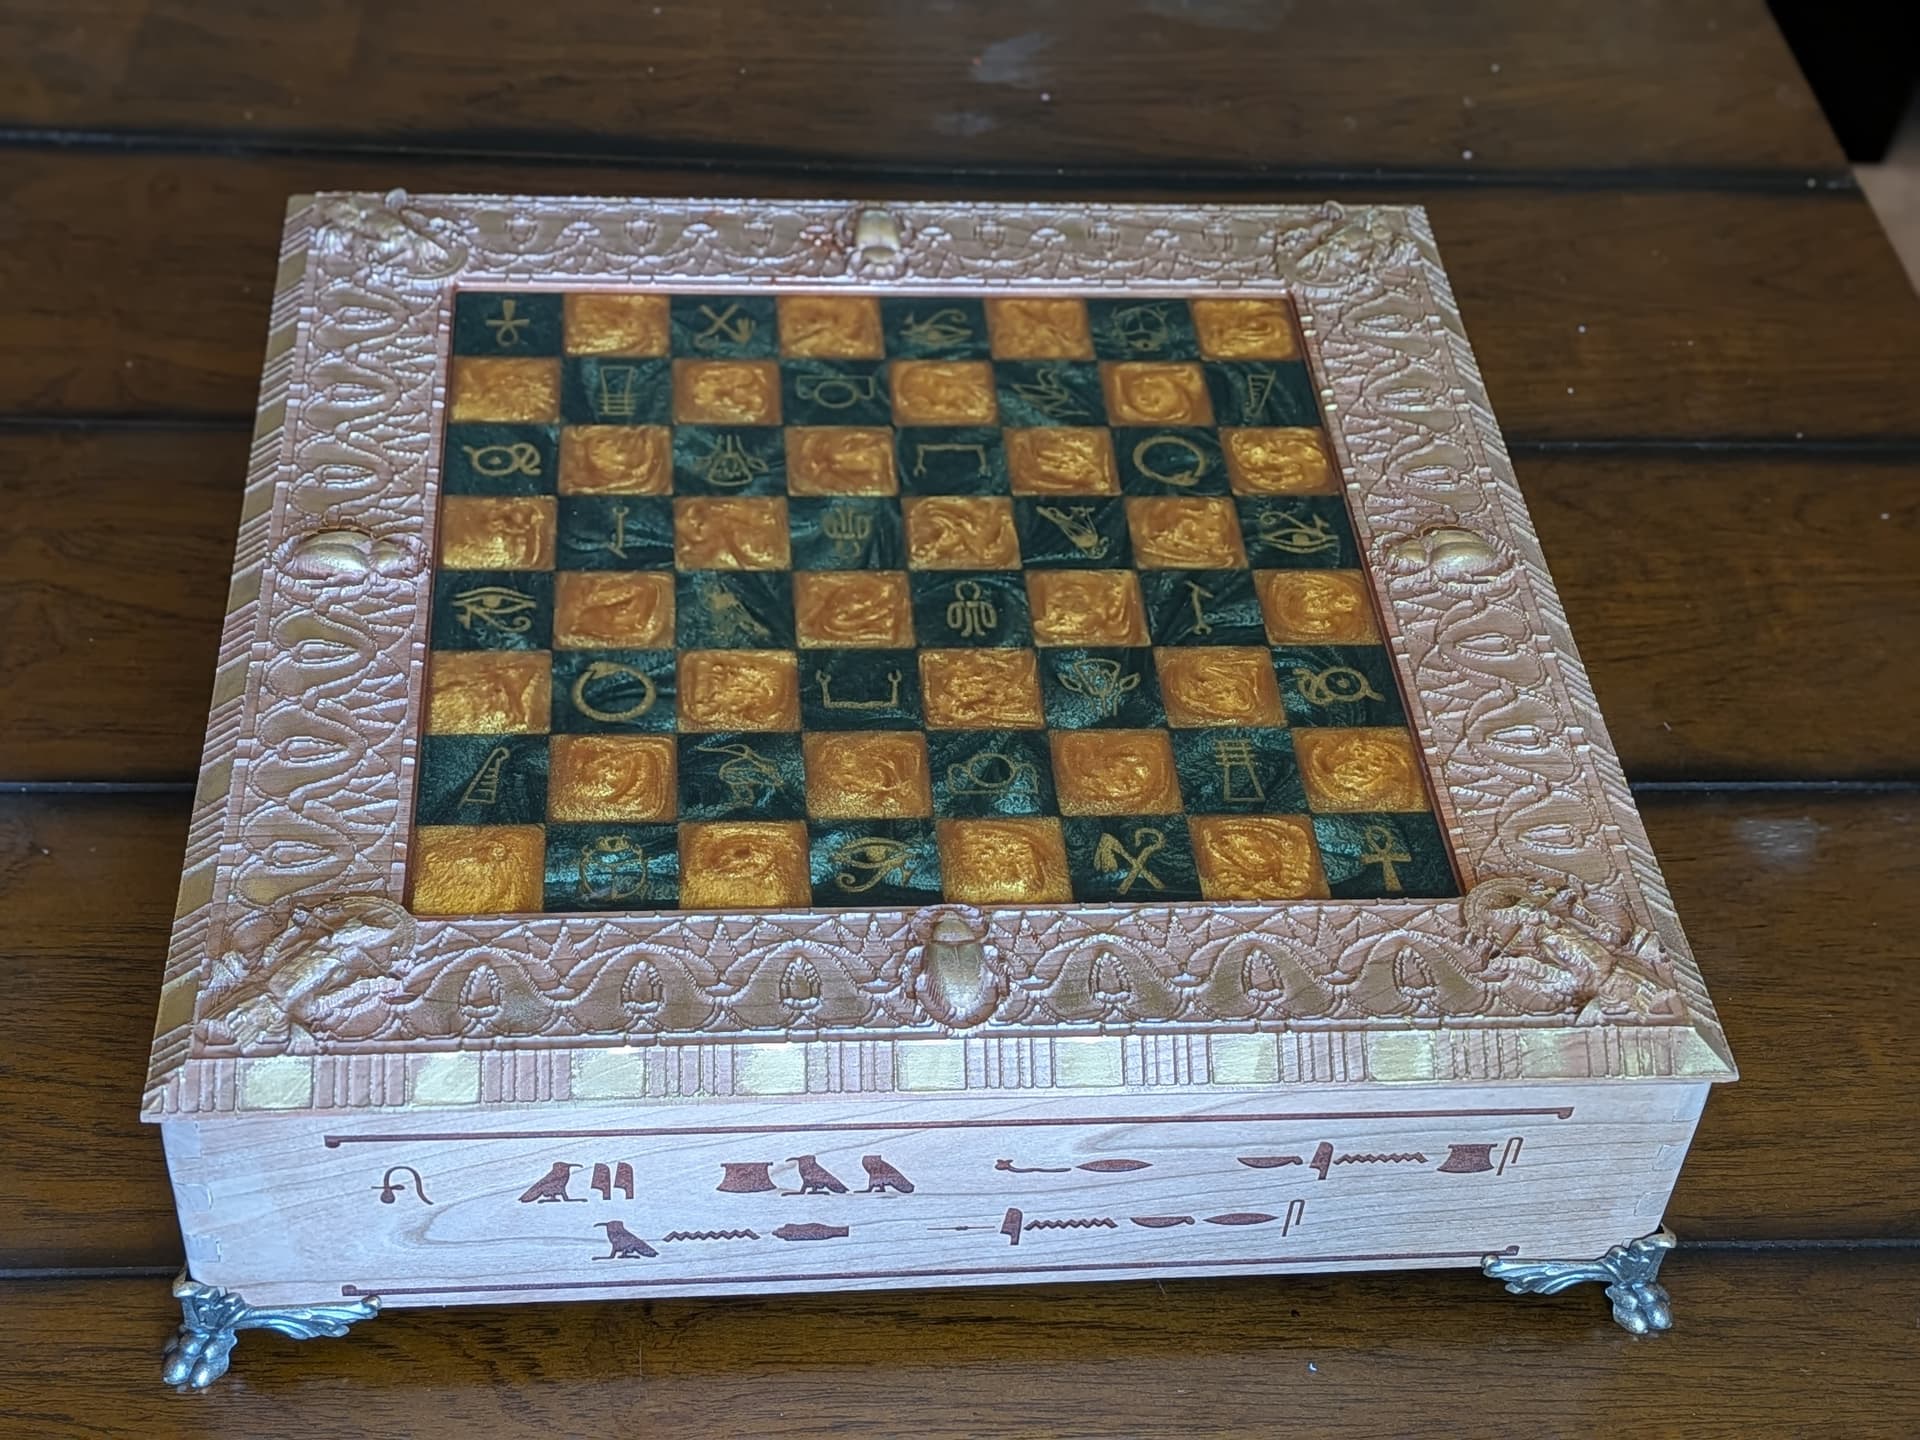
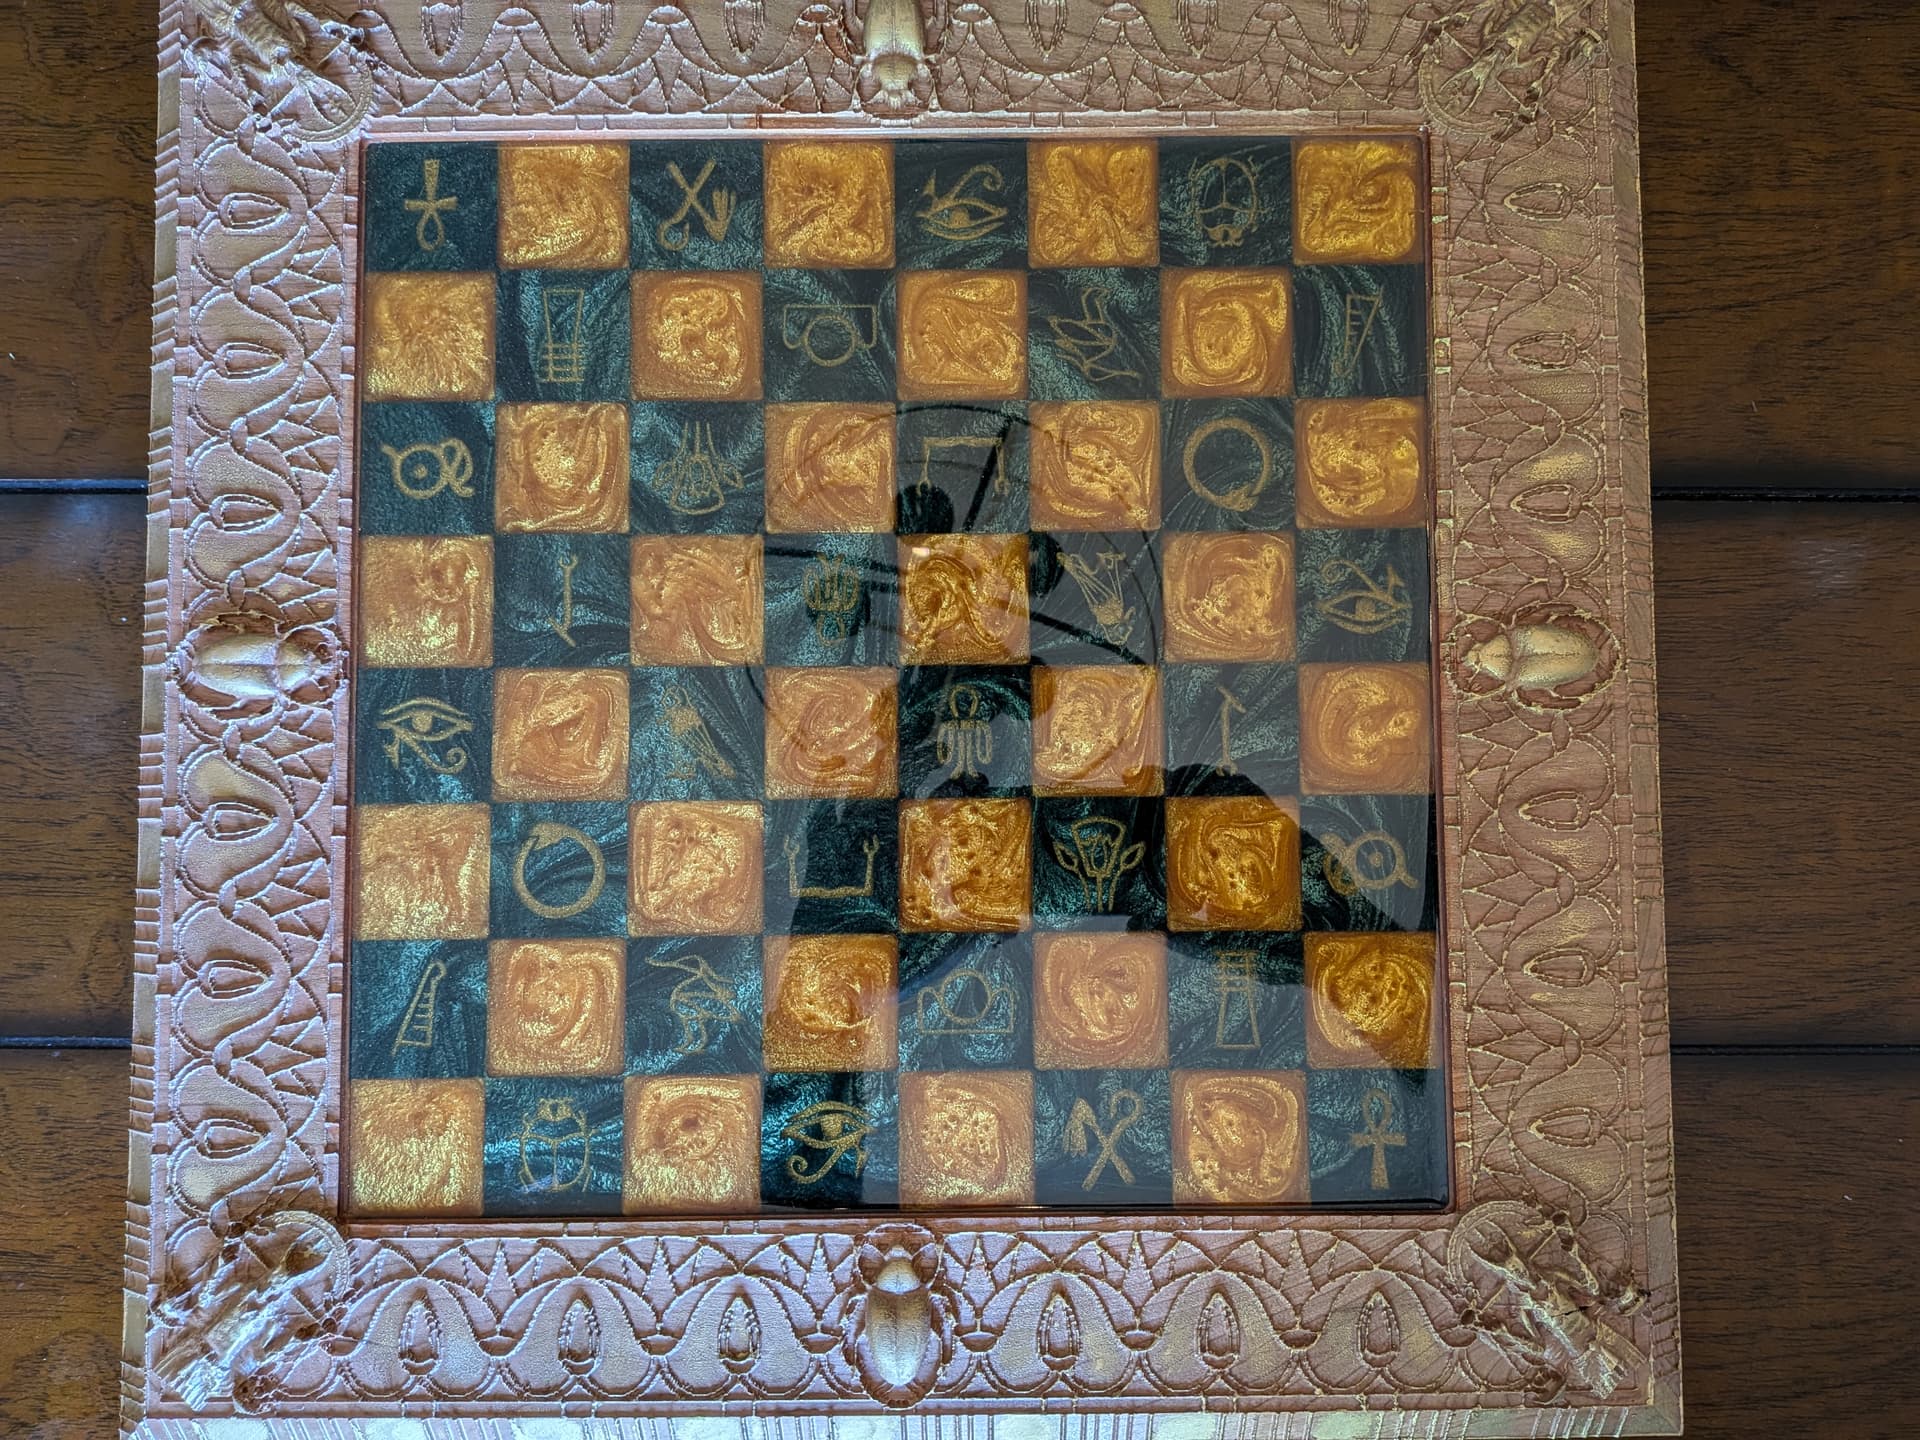
A friend asked if I had ever tried making a chessboard, which I hadn’t. They already had a set with Egyptian-themed pieces, which struck me with some inspiration. This was my first real relief carve and, the first time I had made a box. I used the Shapeoko for the relief carve, the board area, and to cut out the sides of the box itself. Then, I used the laser to engrave the hieroglyphs on the outside, the translations on the inside, and to cut the dividers.


47 Likes
Wow thats impressive! Nicely done
1 Like
This Sir is a fantastic idea I never thought of that! Thank you for the comment.
Thank you i appreciate it. ![]()
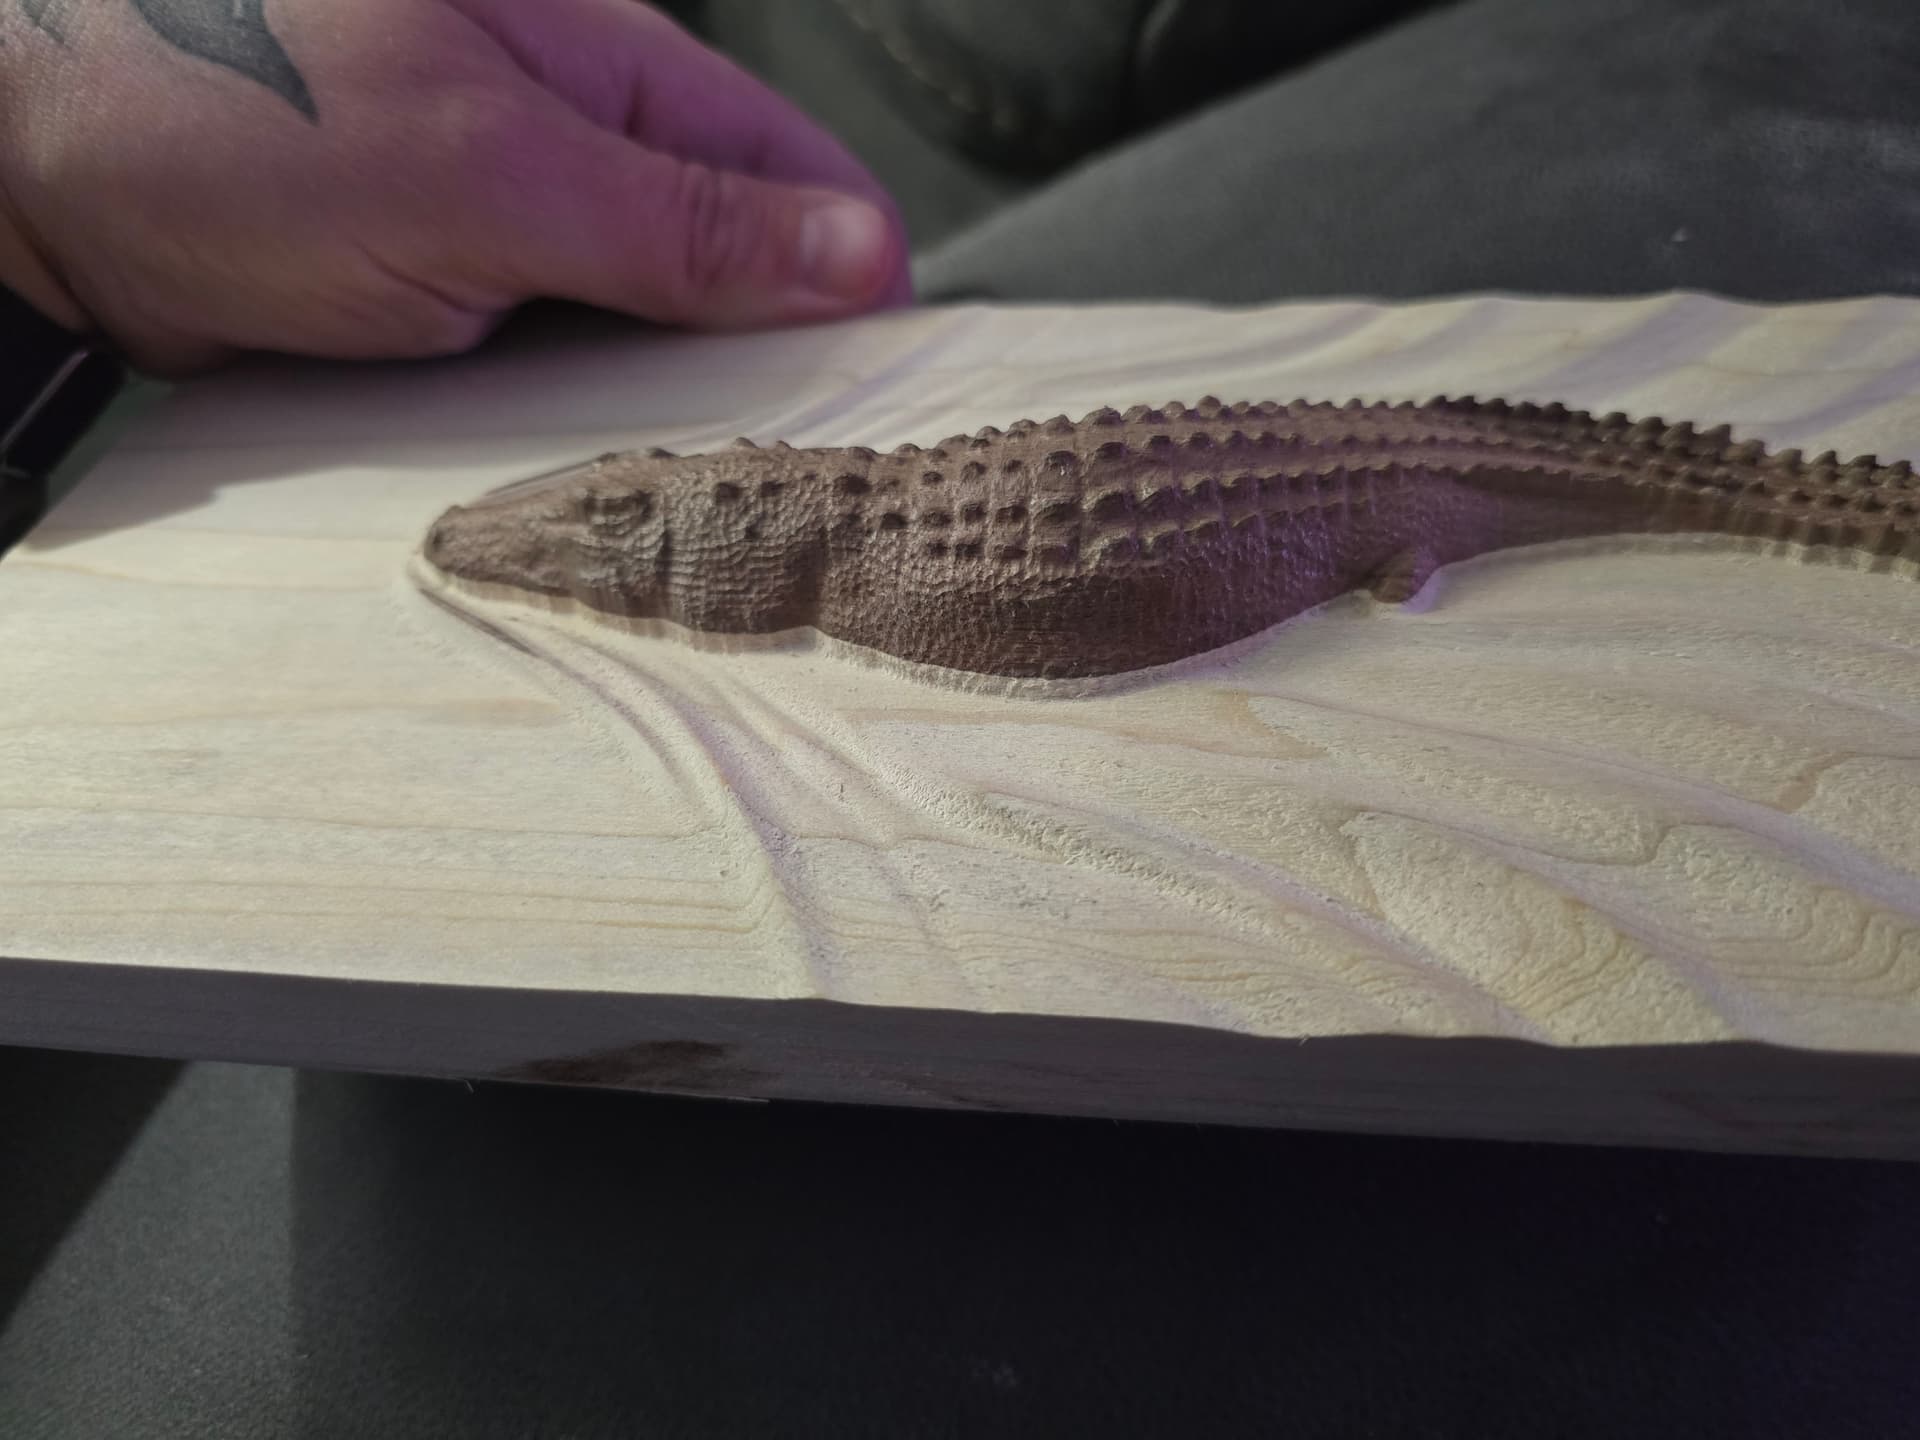
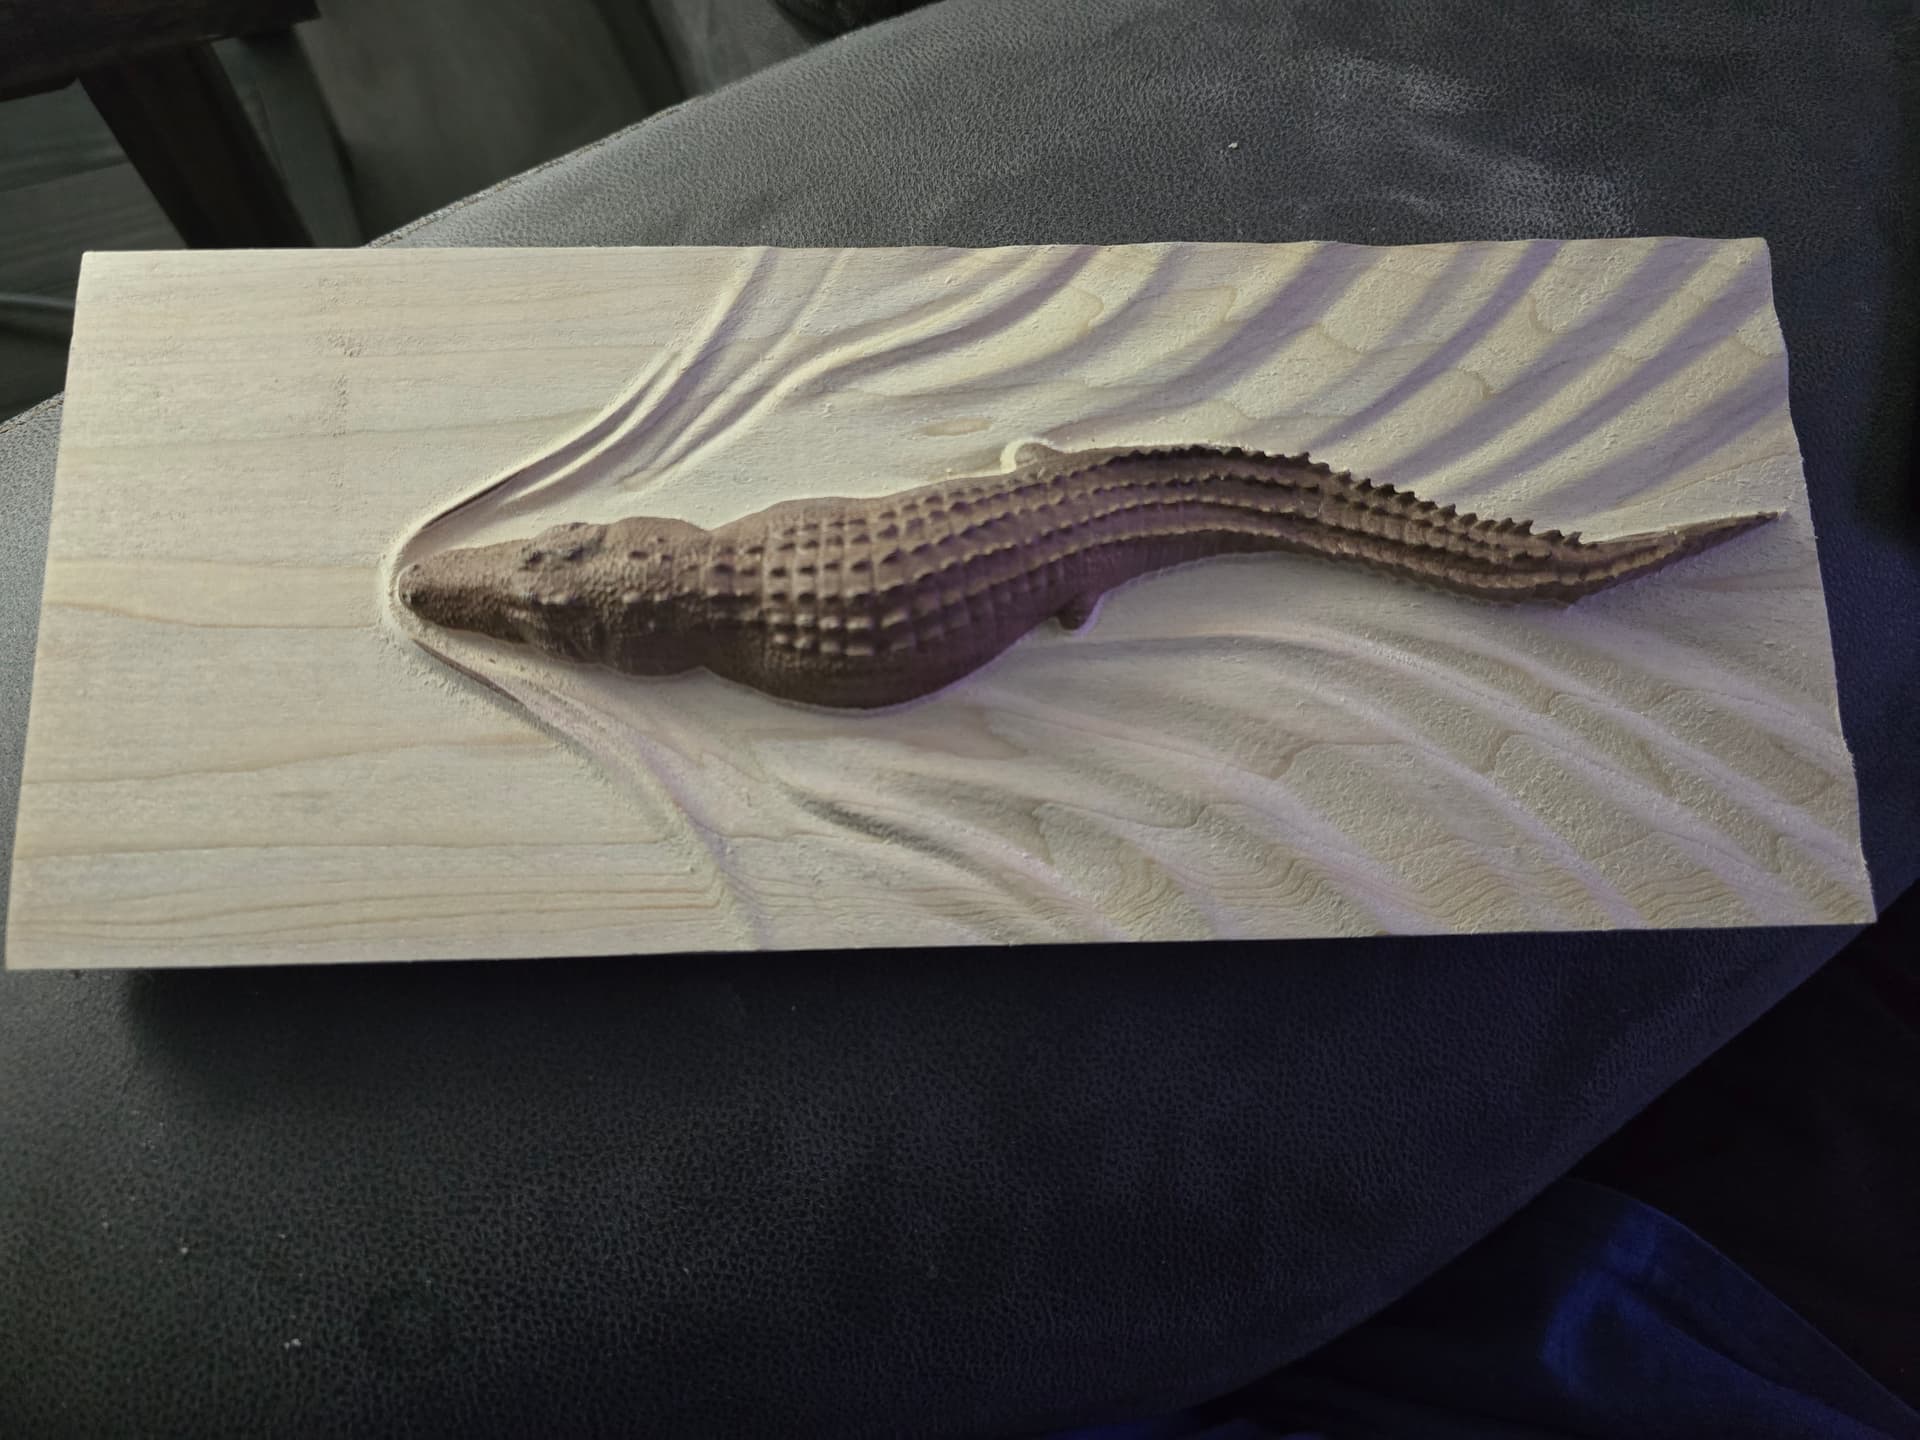
https://www.etsy.com/listing/1411273816/2-3d-stl-model-swimming-crocodile. Here is the file i bought.
1 Like
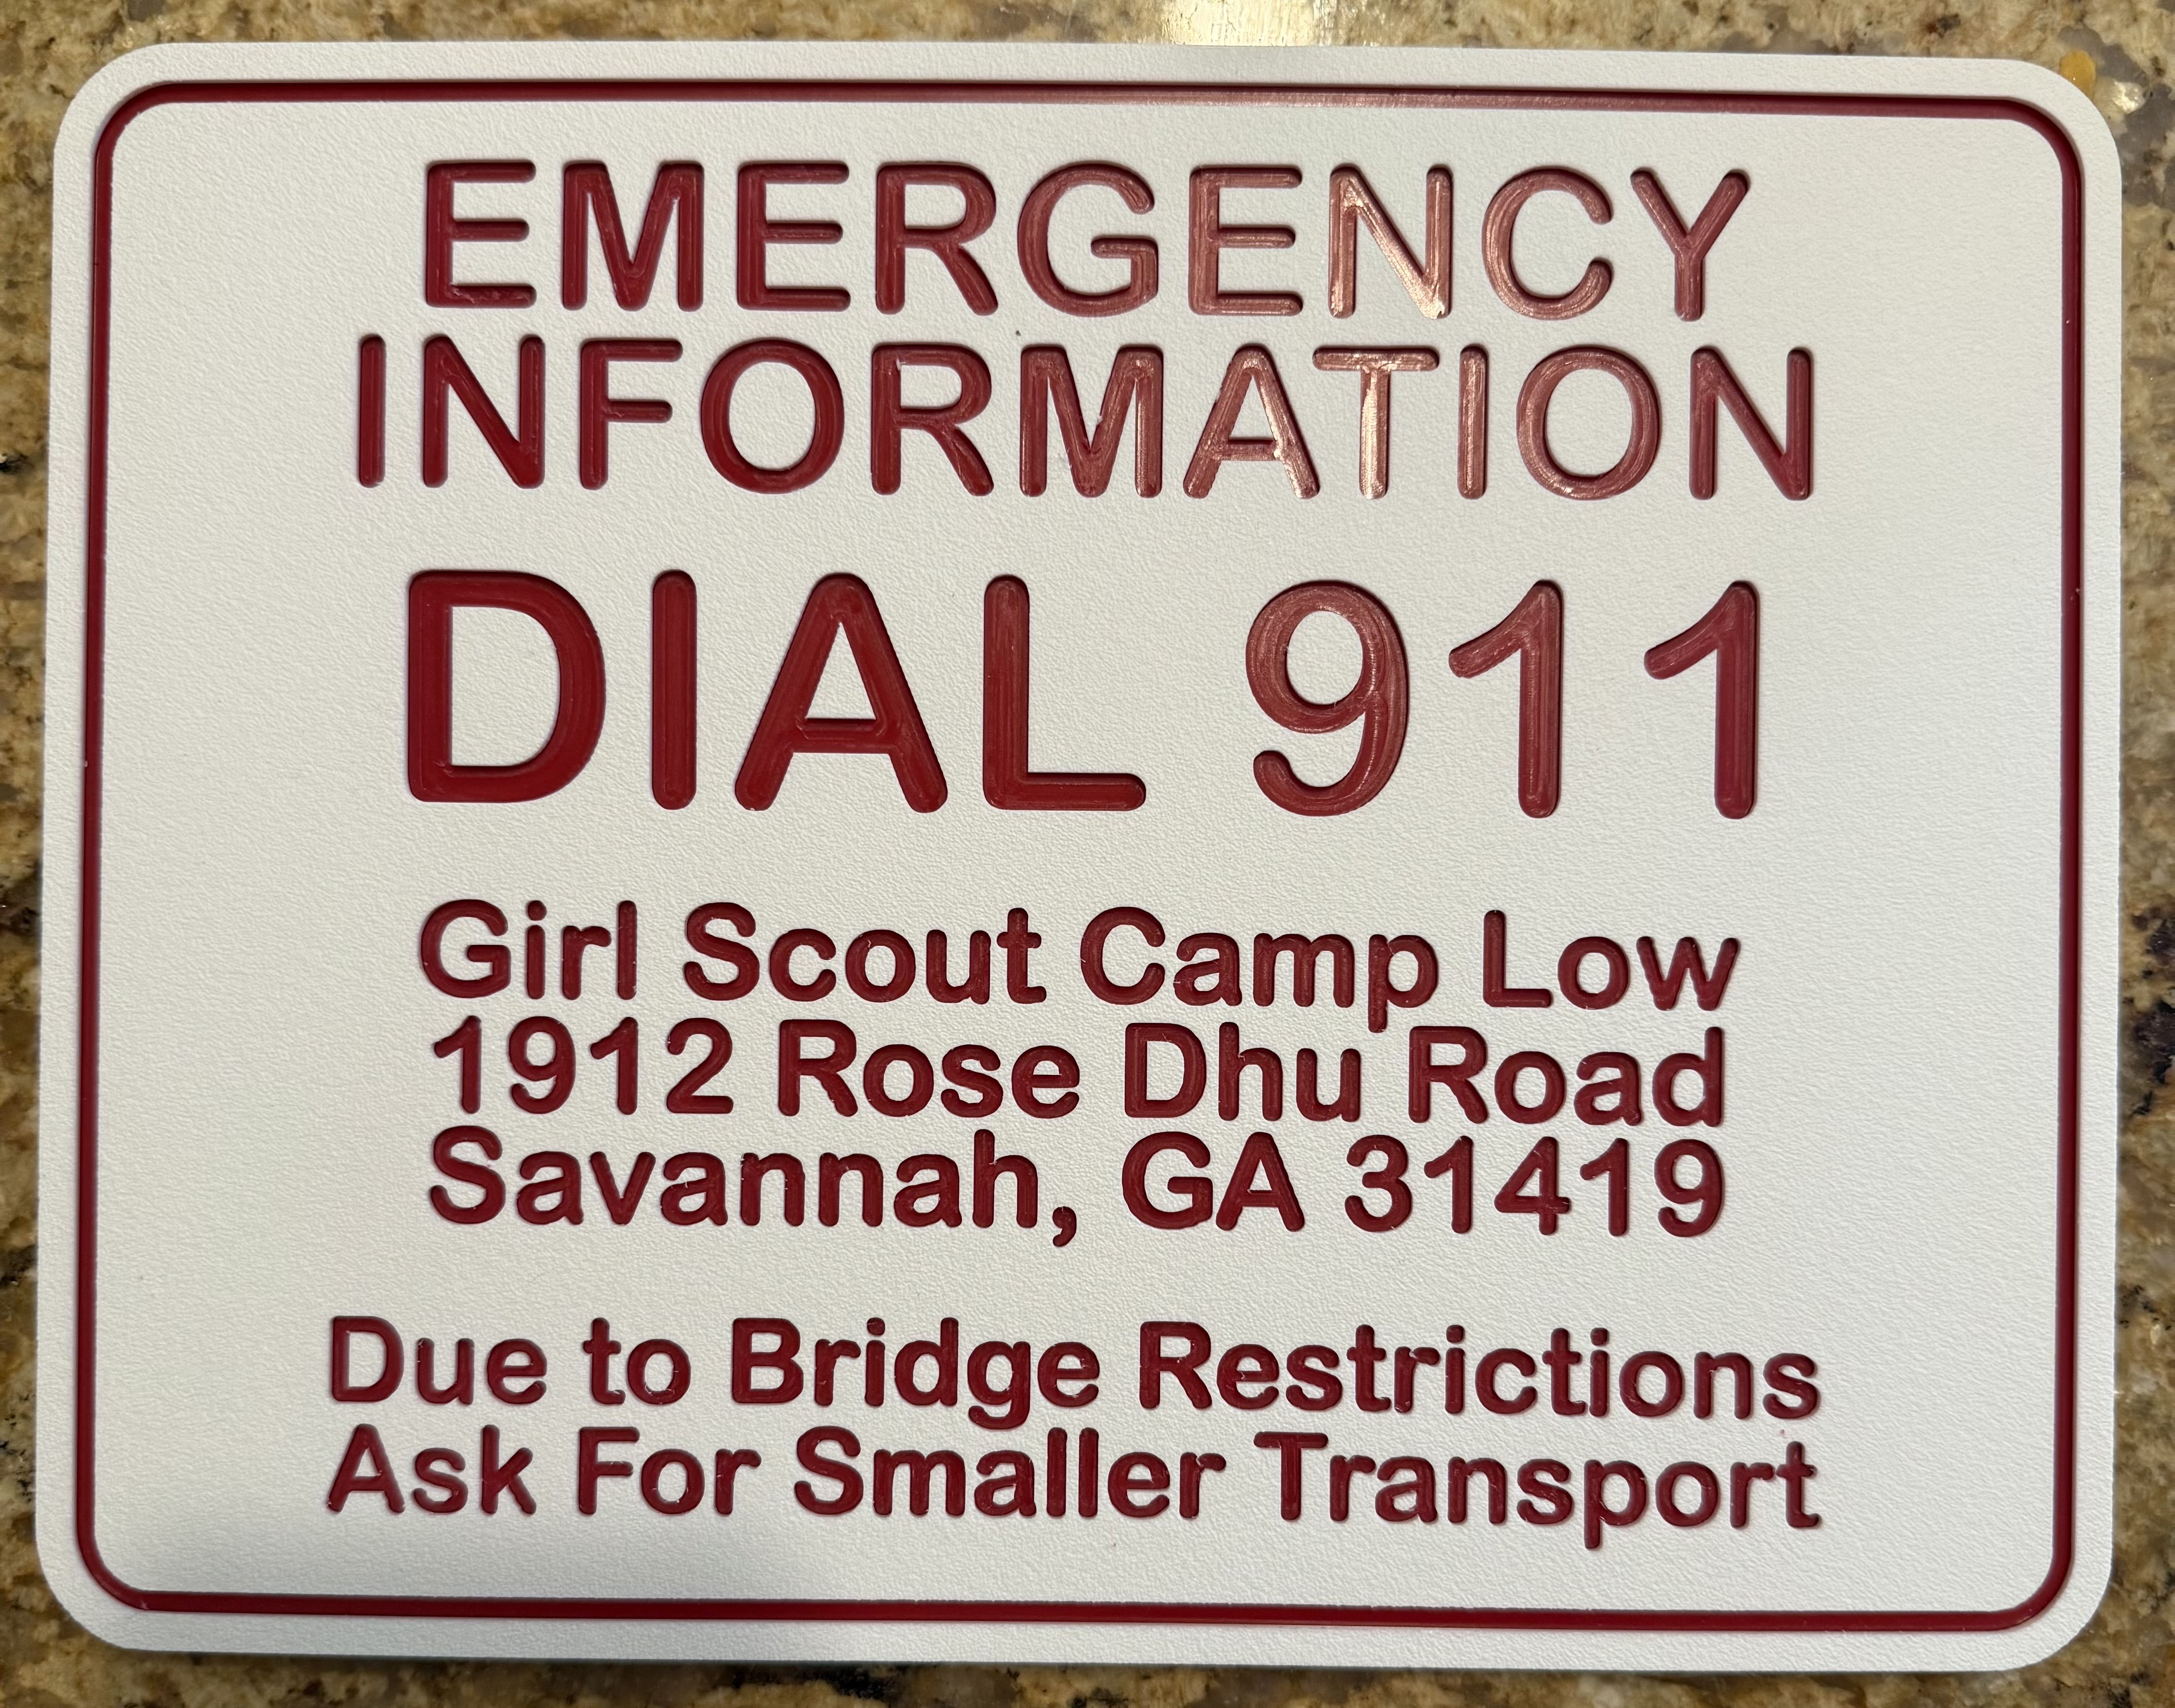
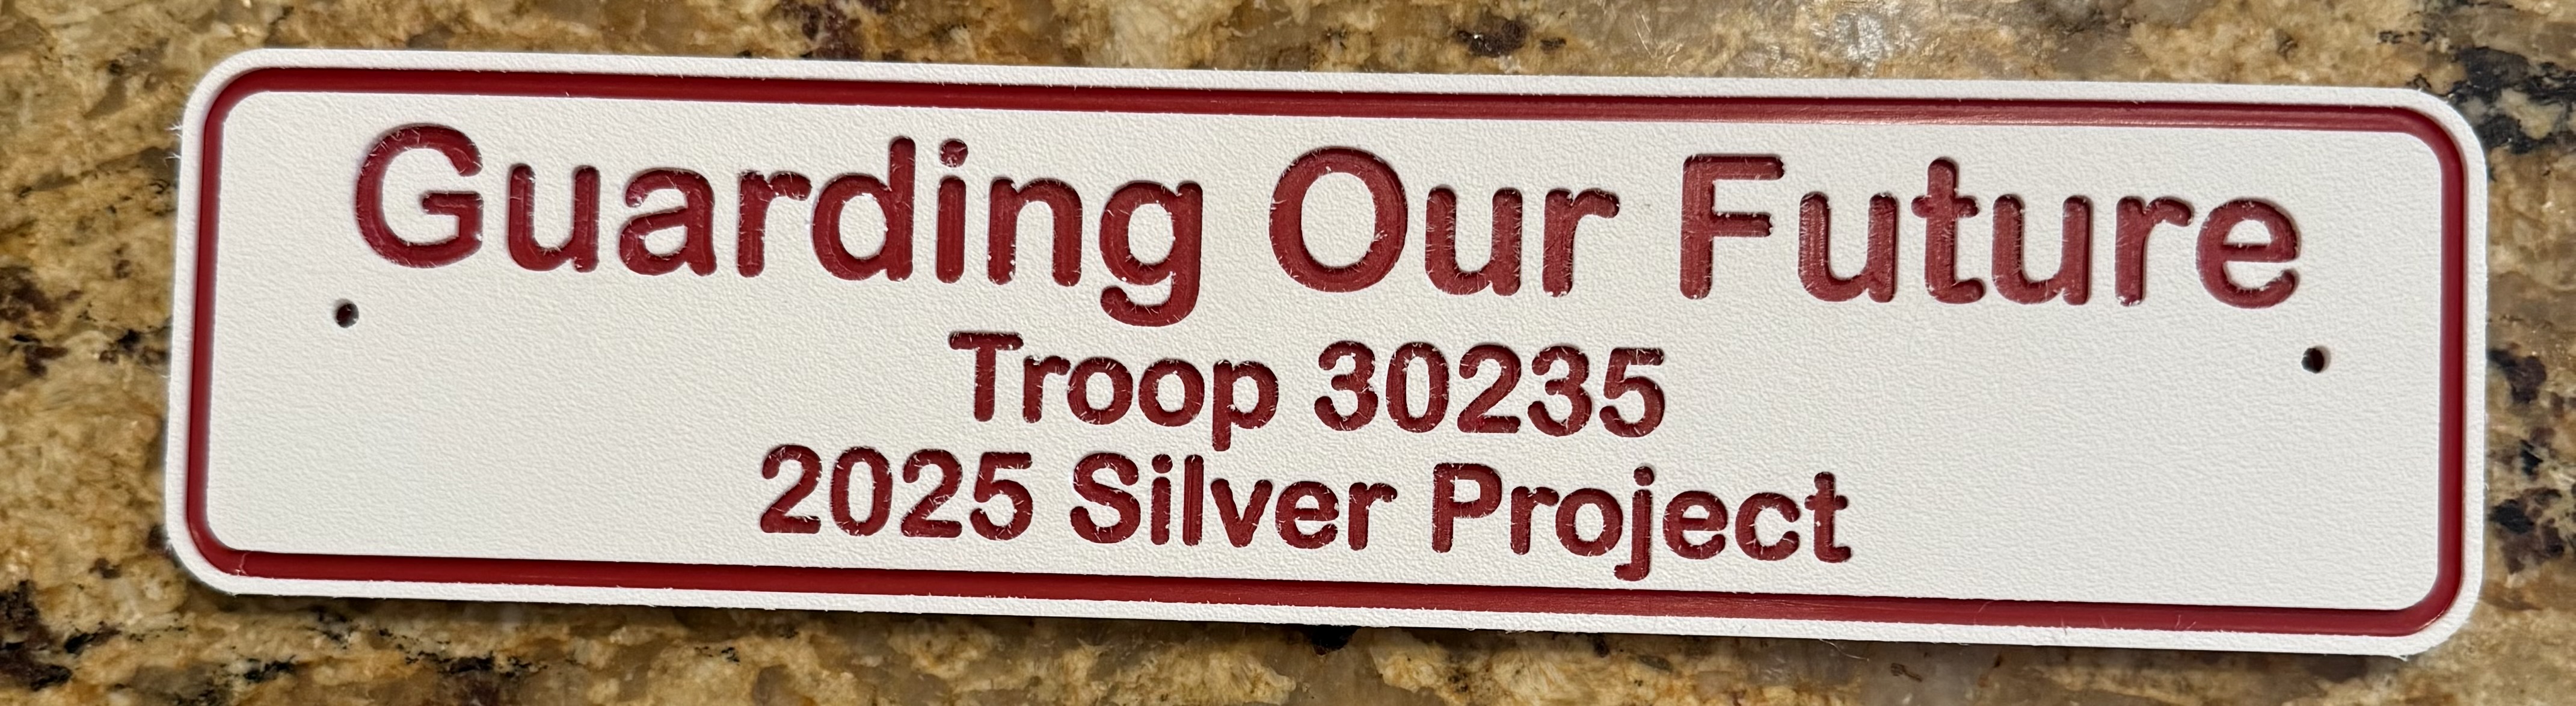
More ColorCore signs for the local Girl Scout camp.
The pool rules one is 2x4 so I had to tile it. The girls came up with the rules, not me.
I spent a lot of time before doing that large one on test piece tweaking parameters to minimize cleanup. I found a combination I liked and then started the big one and it didn’t behave like the test naturally. It cleaned up ok, just took some work.

15 Likes
What bit did you use for the USMC Plaque? I am brand new and when tried to design one for a my buddy who just retired from the USMC. I just got frustrated about bought one haha
Clean work as usual. Very readable.
I love the idea of using the CNC to make useful things, rather than just the usual signs and decorations.
3 Likes
I cannot find that original file but it was an advanced vcarve with a 15 degree vee bit and a #122 1/32" flat end mill. I looked and looked but could not find the original file but here is another one that was for the US Army. The Marine one was epoxy filled and the Army one was just painted.
army_)official_logo.c2d (652 KB)
I do too. In the past I’ve made many brackets, wheels, knobs, drawer slides, handles, that sort of stuff for around the house and shop. Sure, I could’ve found most if not all of that stuff online, but where’s the fun in that.
Last month my neighbor, who tinkers with old square body chevy pickups needed a hand full of little mounting brackets. We drew it up over a couple cold ones in his shop. The next day we cut out exactly what he was needing. Stuff like that is a lot of fun.
2 Likes