You did a great job designing the font, I would imagine lots of folks would like to be able to use it including myself. It’s definitely art deco period.
OK, this won out, thank you @MadHatter. Mainly because I could buy just the one stick rather than needing to buy an assortment pack. Not that I won’t be trying the g-paint sooner or later…
1 Like
Thank you, Tim. I’ll attach a DXF this evening. I guess I really can’t call it a font, because it is just a collection of lines and arcs that I hand-placed on a grid in a sketch on my workpiece. I should be calling it a typeface.
“Typeface” it is! You designed it, you can name it!!
For what it’s worth, here’s a DXF of the Art Deco typeface. It’s scaled to 1 unit high. I didn’t have access to a computer when I designed it, but drew it on graph paper with the aid of some Pythagorean Theorem…
deco-typeface.dxf (15.7 KB)
[edit] For my .250" high text I used an endmill of .025" diameter, or 1/10 the letter height. That ratio looks pretty good to my eye. [/edit]
5 Likes
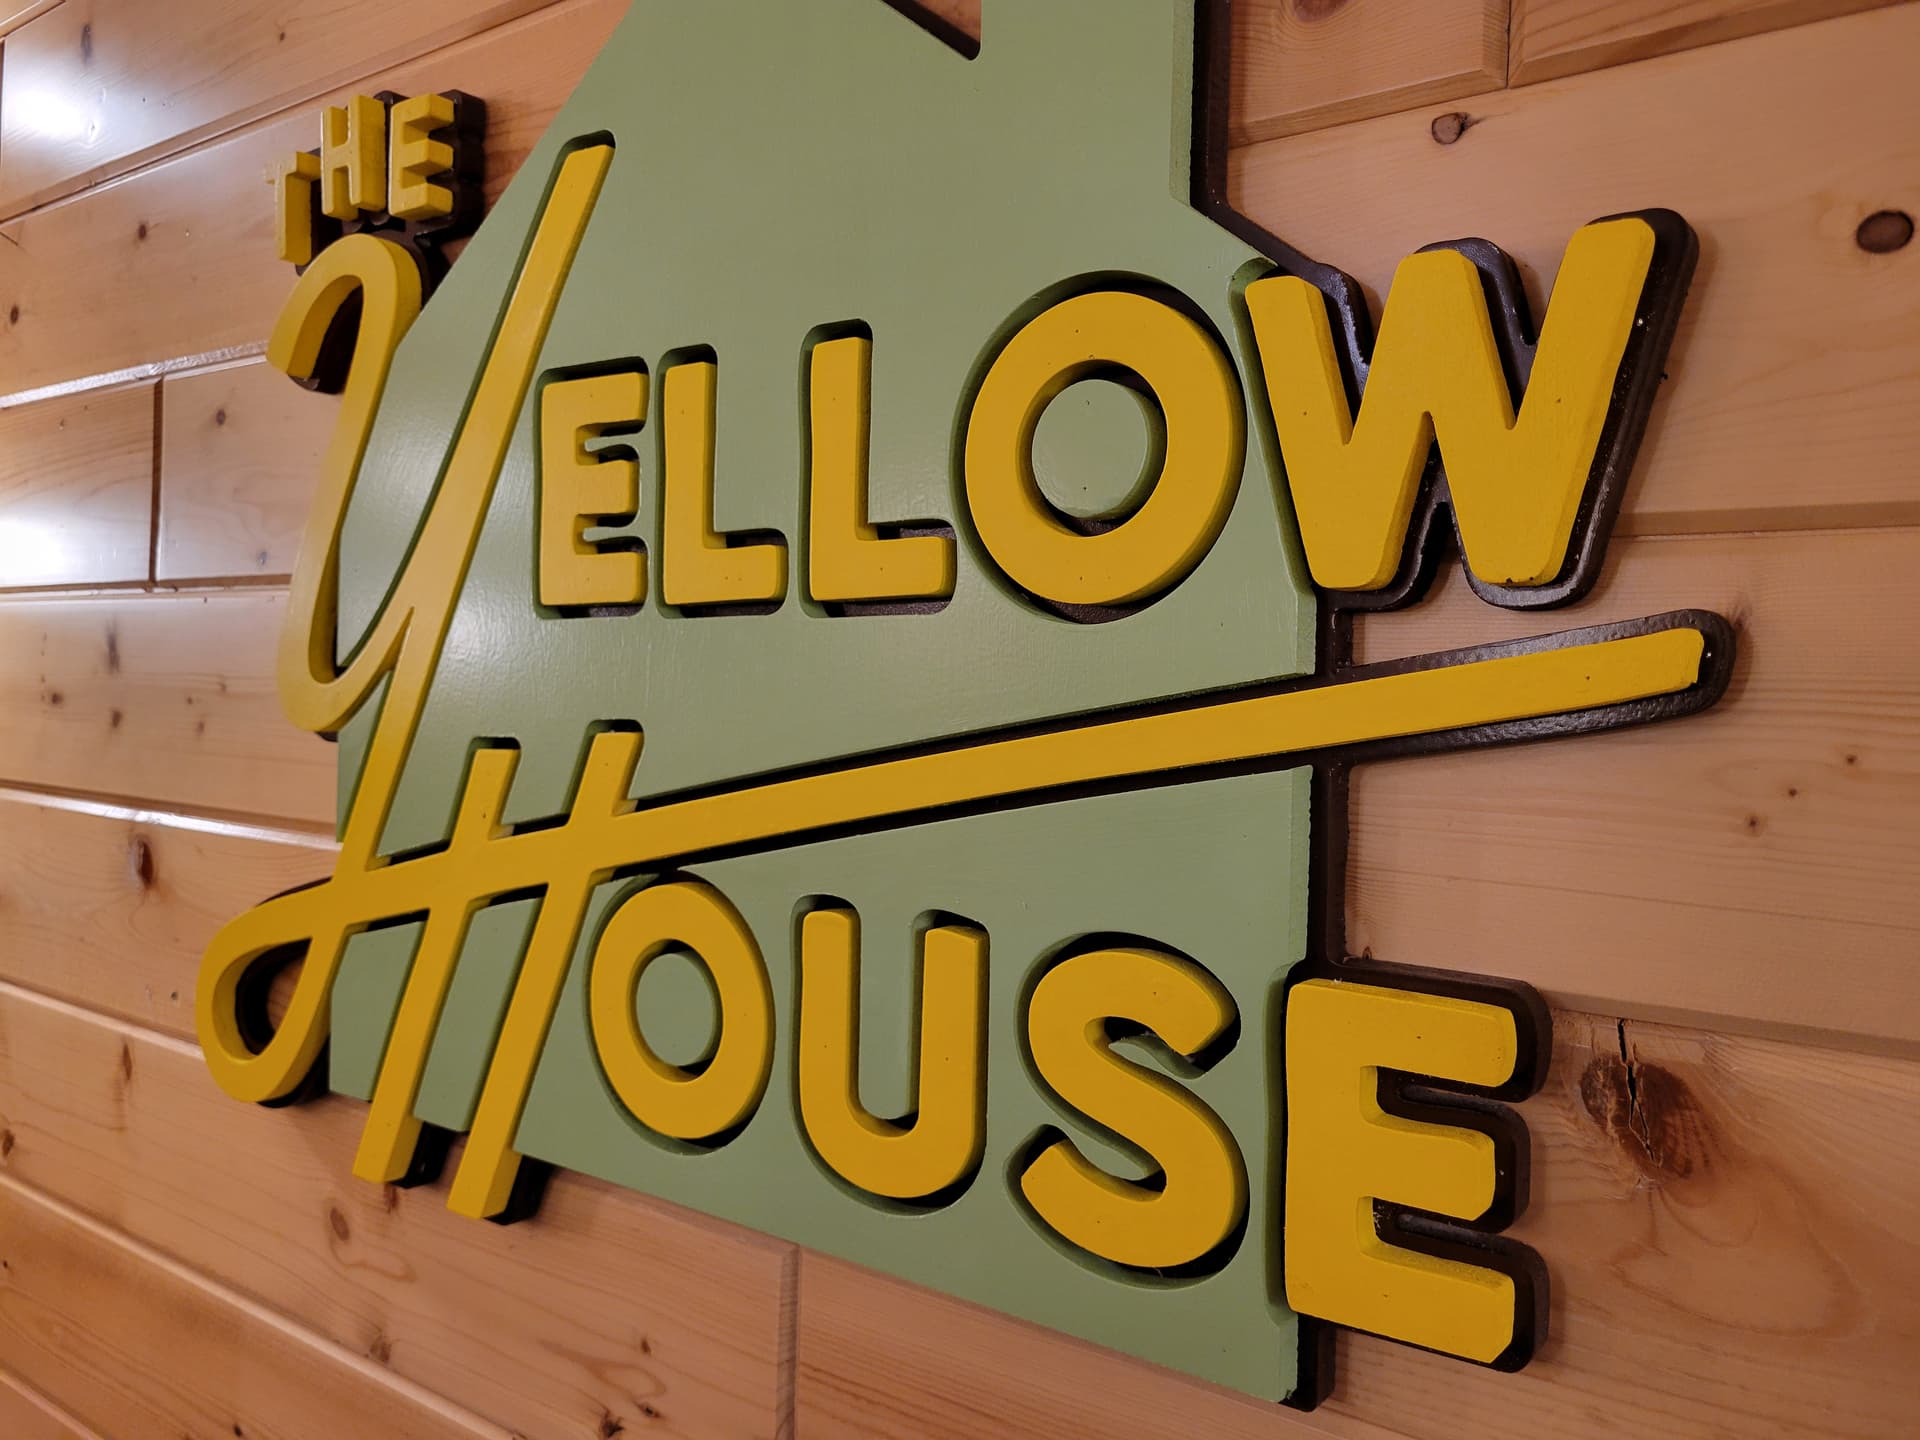
Totally cheating here because I didn’t make this. I just wanted to share because I hadn’t thought of using the material like this and it seems easy. They just cut channels around the letters at half the depth of their stock. No glueing or fuss.
It’s HDU hand painted.
22 Likes
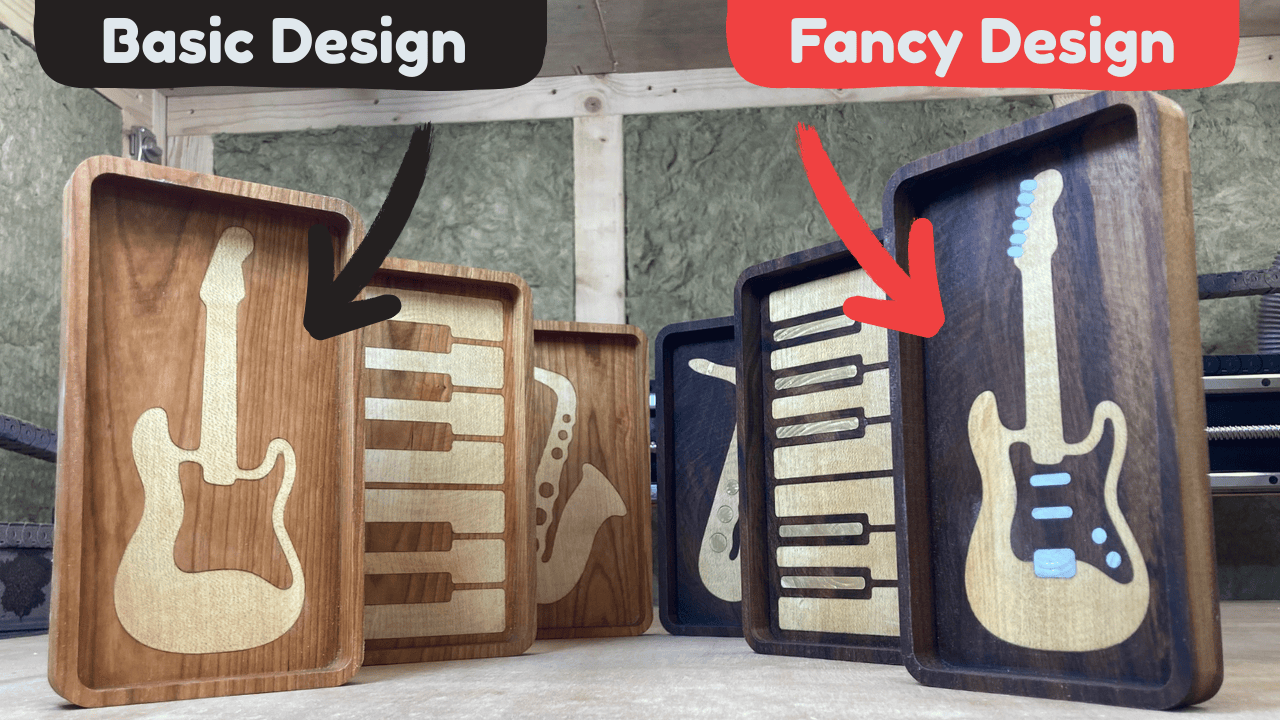
Hi everyone, I’ve made some musical instrument trays on my SO5 with two types of design - a basic set in cherry, then a fancy set in walnut using metal inlays.
Pretty pleased with how they’ve turned out! For anyone interested, I’ve recorded the project as a youtube video which you can find here: https://youtu.be/oyEB2qLftNg

27 Likes
Great video, though you’re gonna have to sacrifice a finger or two eventually. Blood for the blood god and all that 
Really appreciate how simple they are and how “fancy” does not necessarily mean complex. Looking forward to seeing if that follows through to the really fancy versions…maybe some subtle mother of pearl or faux ivory 
You got me wanting to play with inlays again 
3 Likes
I intend to keep my fingers for as long as possible 
You’ve hit the nail on the head! It’s so easy to just add more to a design, although I think the constraints of doing it on a CNC force you to be more thoughtful and minimalist. If I do go for an even fancier set of designs I don’t want to just make them more complex - not sure what how to pull that off just yet!
I like the idea of mother of pearl - good shout - that’s what saxophone keys are often made of. Let me know if you have any other thoughts!
2 Likes
Perhaps some Ebony (or black stained) for the piano keys and a set of strings for the guitar?
3 Likes
@Redlander that’s a cool idea 
1 Like
I think the Light/Black wood mimics the keyboard on the piano as well as a version of strings on the guitar.
1 Like
I will have to try that on a sign for sure!!
Well, a quick update on my new and probably overly complicated pen holder from this post: What did you cut on your Shapeoko/ Nomad today? - #5227 by MadHatter
I am starting with a Sharpie pen holder, since I have a bunch of them right now.
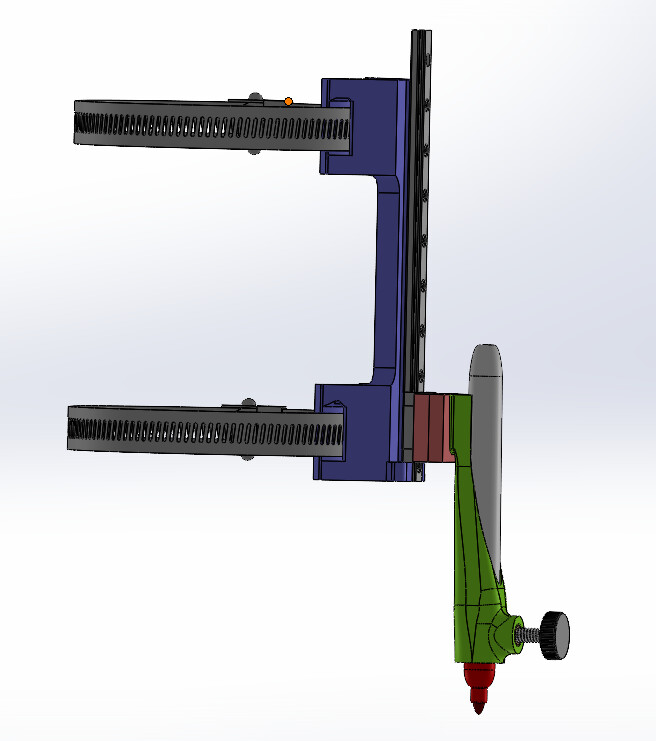
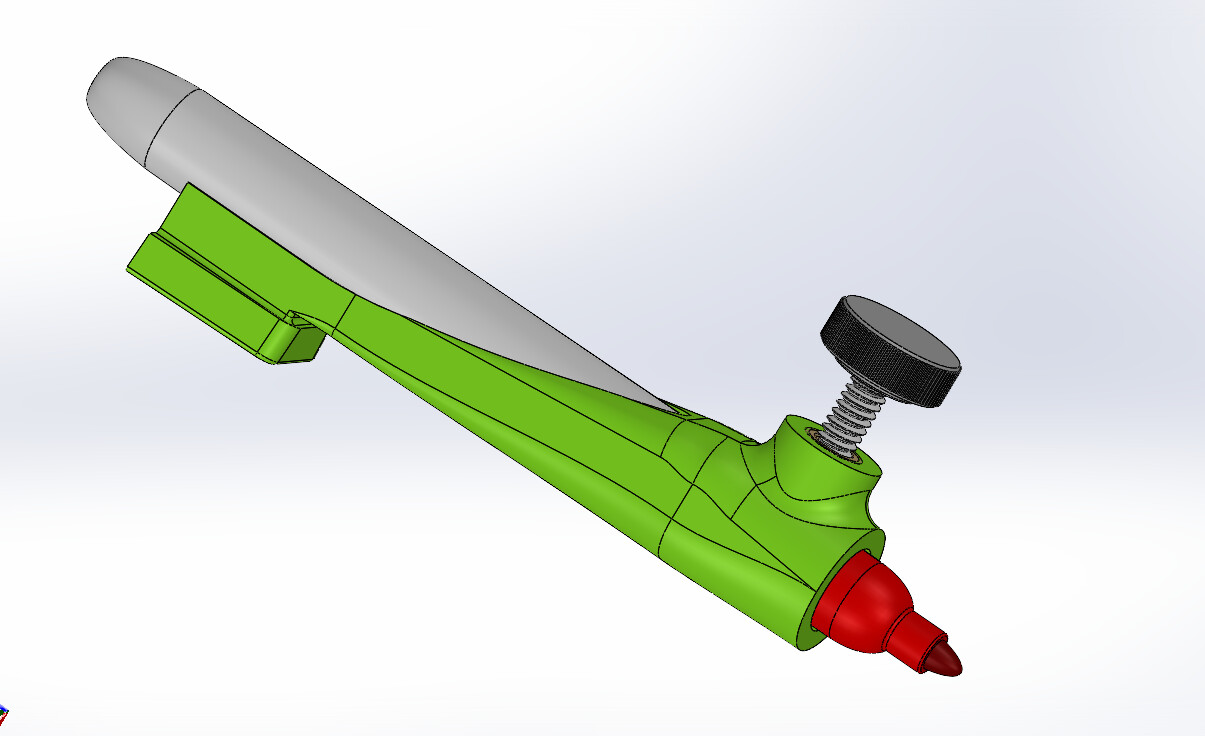
The green part will be removable from the rest of the setup, so it should be a quick color / pen change when needed.
A heat set brass insert for threads, since they will be used a bit. The thumb screw is a bit long. I just grabbed one from McMaster-Carr for test fit. I’ll probably grab a shorter threaded one for the real thing. Or maybe just make a thumb screw with a regular SHCS and printed knob.
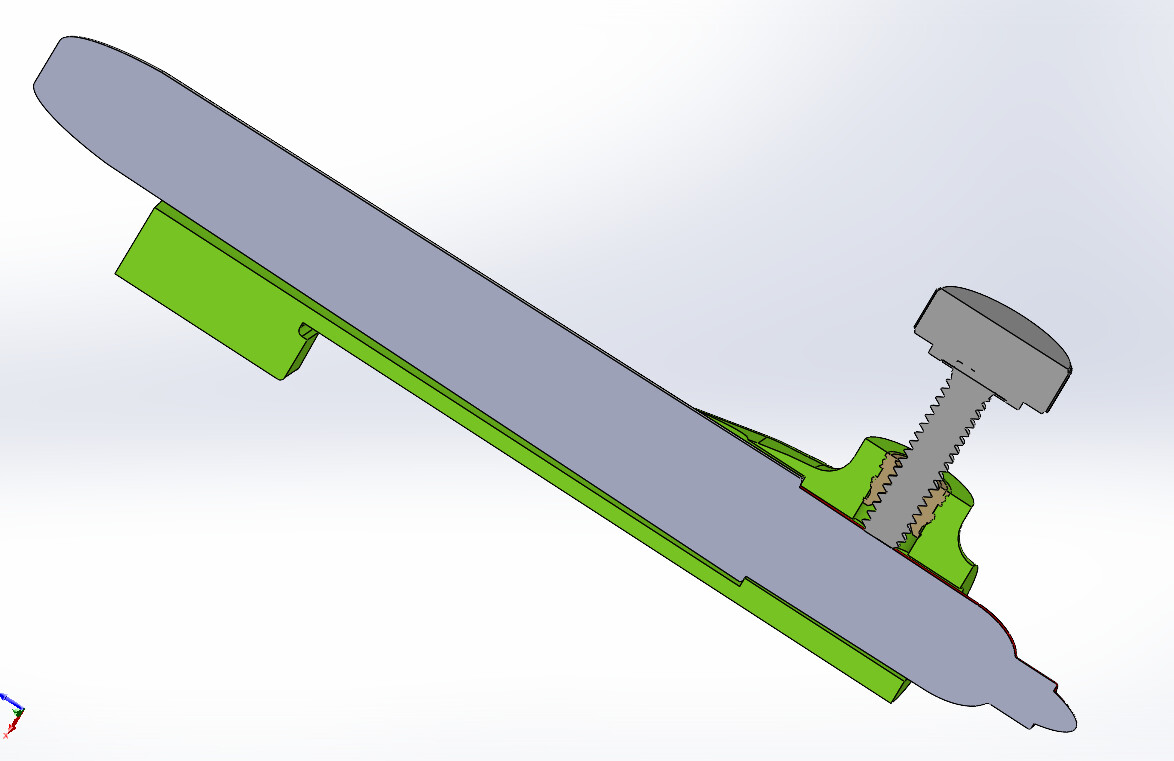
The pen holder will just drop into the trapezoidal / keystone shaped receptacle to prevent movement. I will probably add a couple of neodymium magnets to lock them in place.
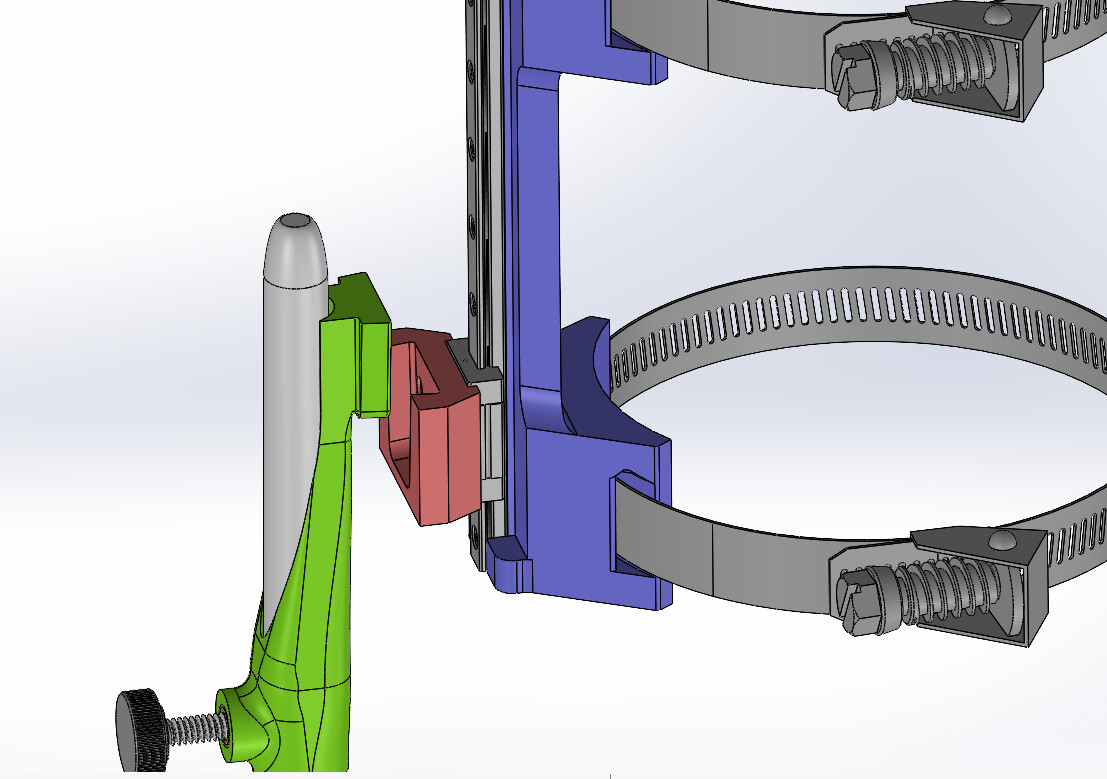
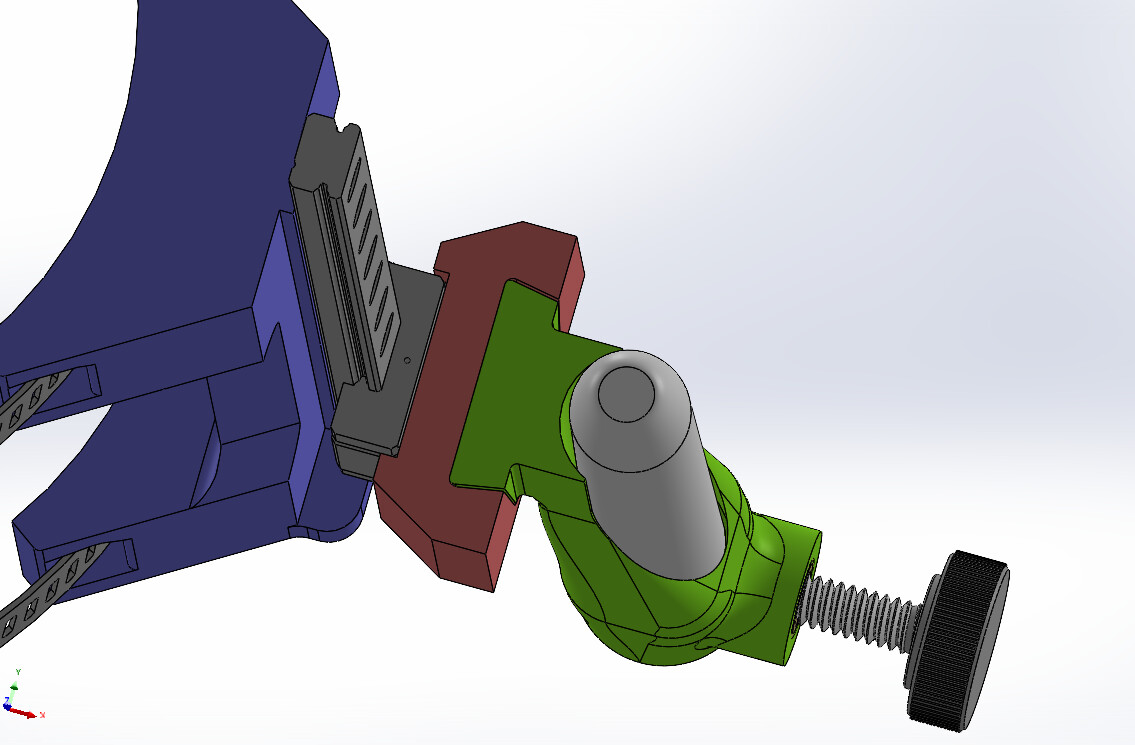
I will also design a stand that will have an adjustable holder like the red one, so that you can index all of your pens to the same height, whatever height that ends up being. Ideally, I will design the holders so that when I (or others) design pen holders, no matter what kind of pen you use, you can use the stand to set the pen height the same as all of the other ones.
9 Likes
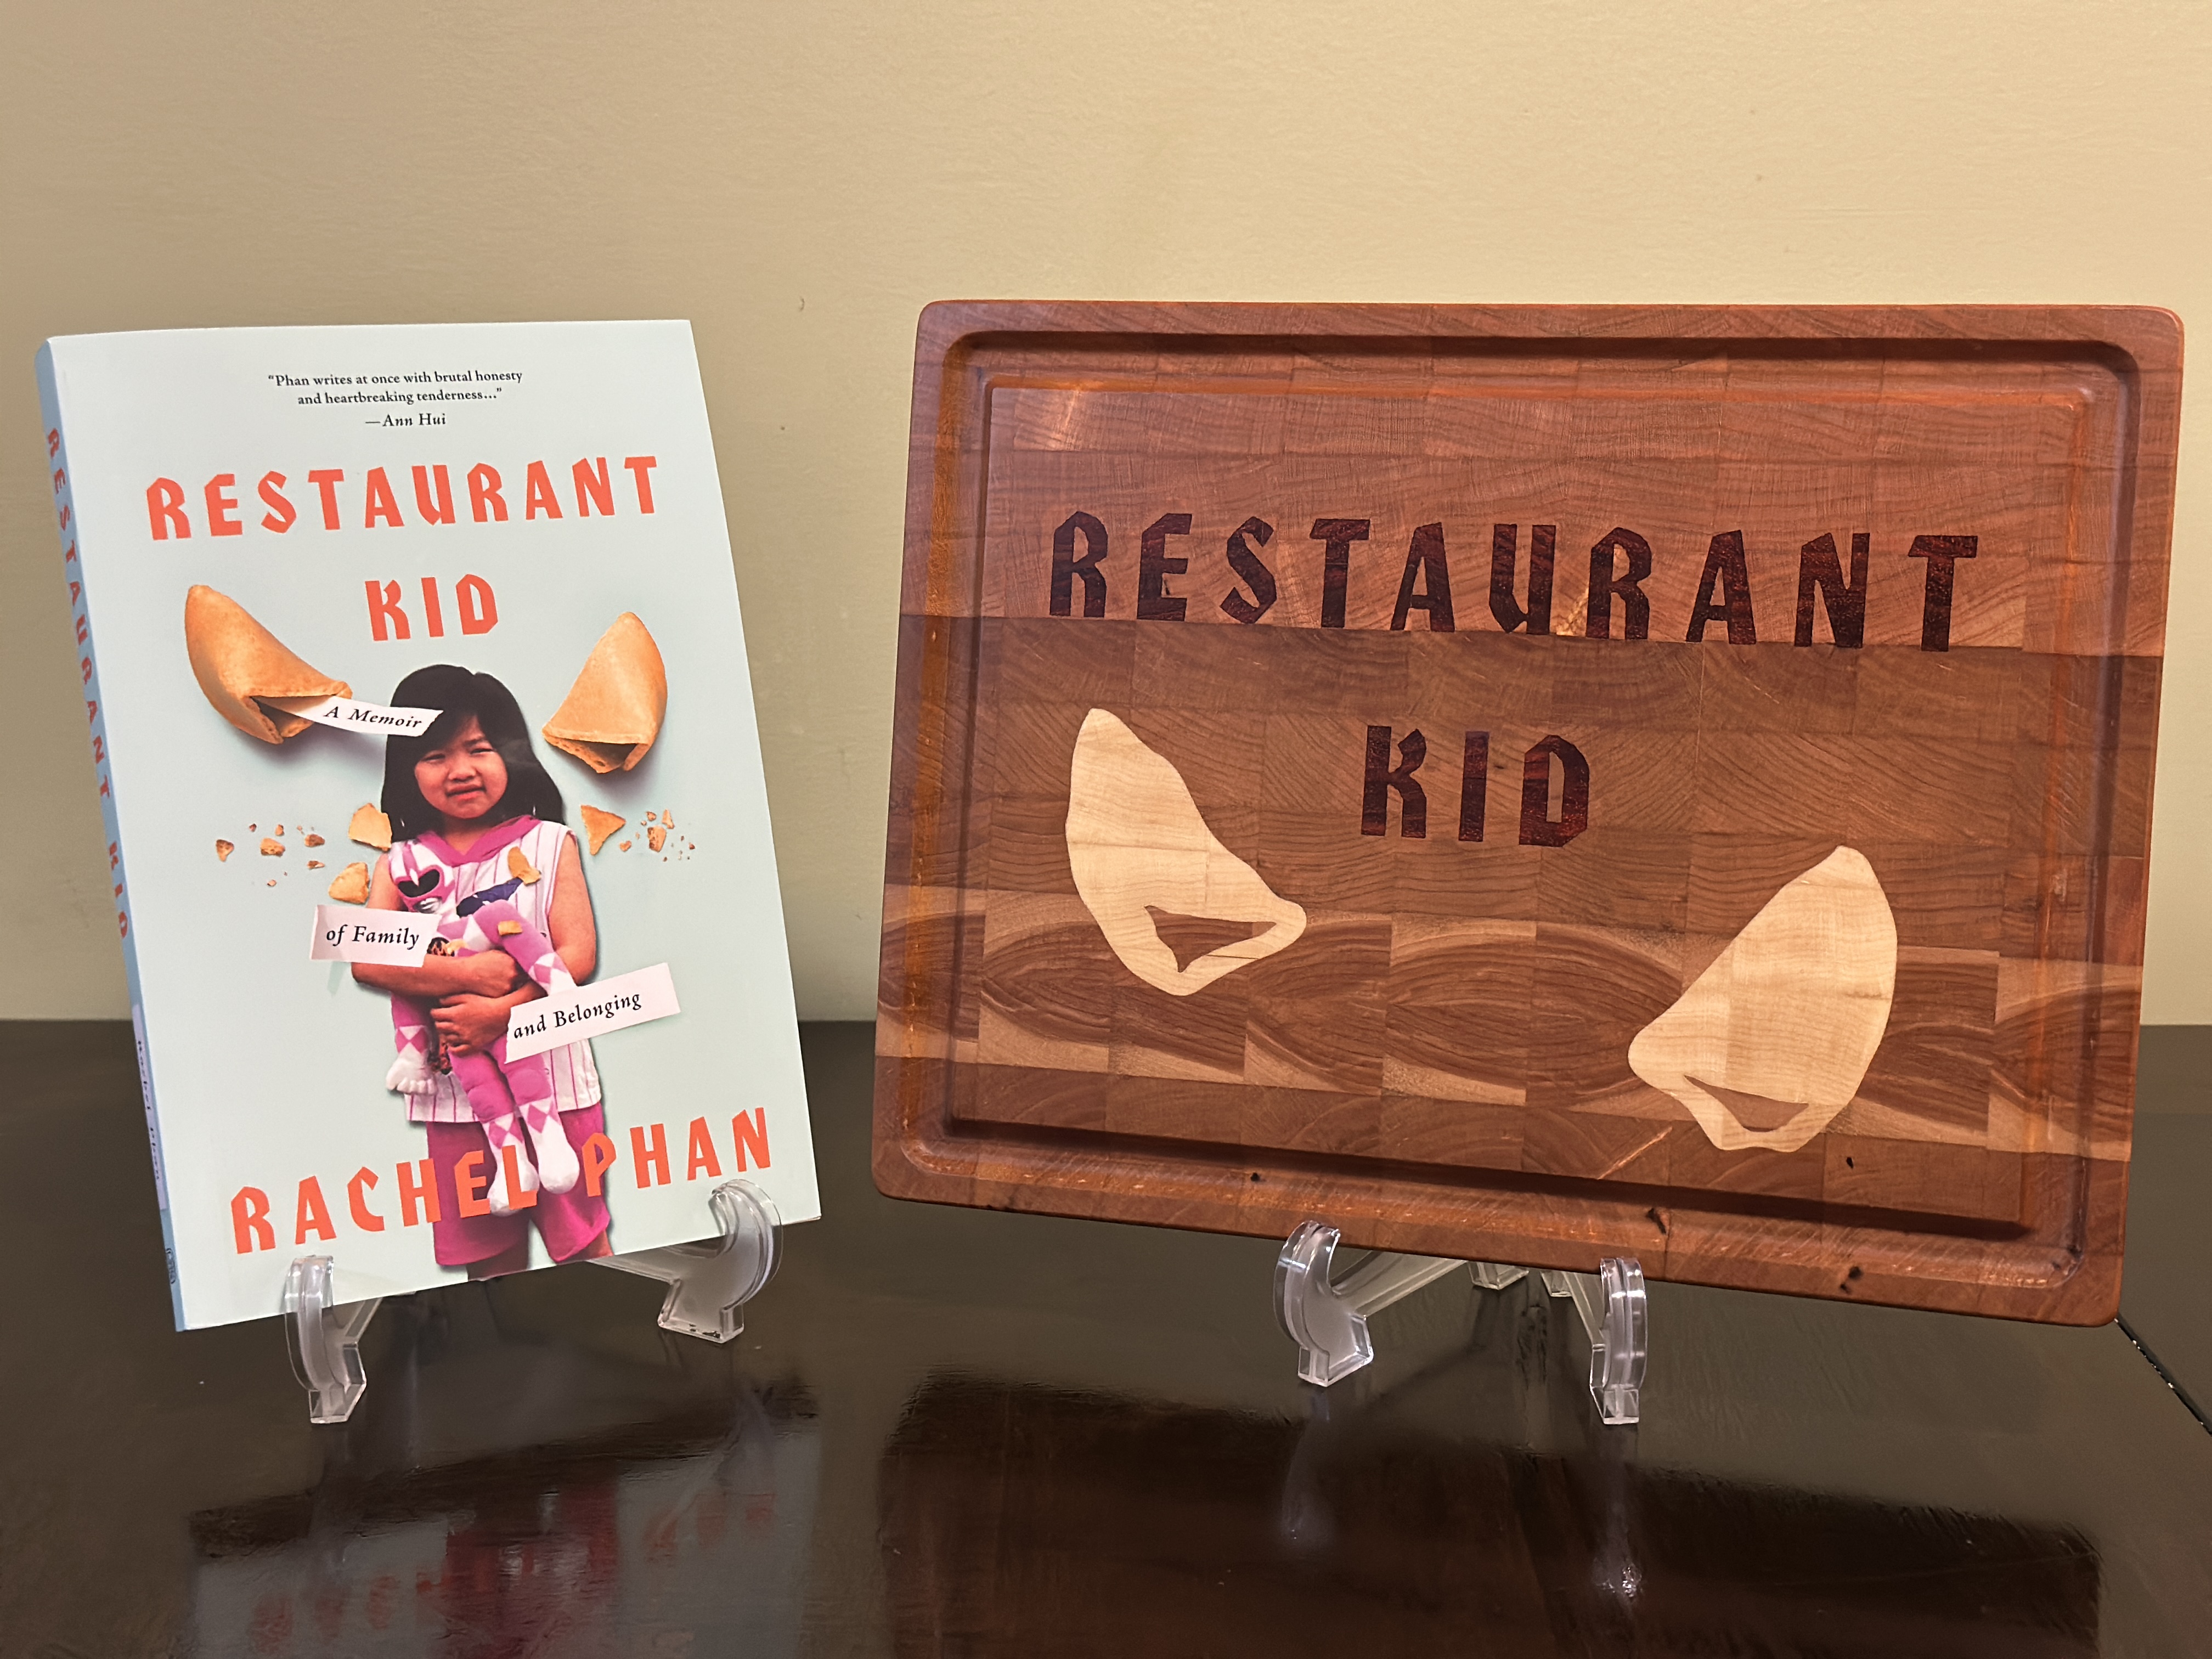
A friend of a friend . . . etc. released their first book this spring so I made them a cutting board that resembled their book cover!
16 Likes
Had no idea what Mancala was A Google search later I’m educated
1 Like
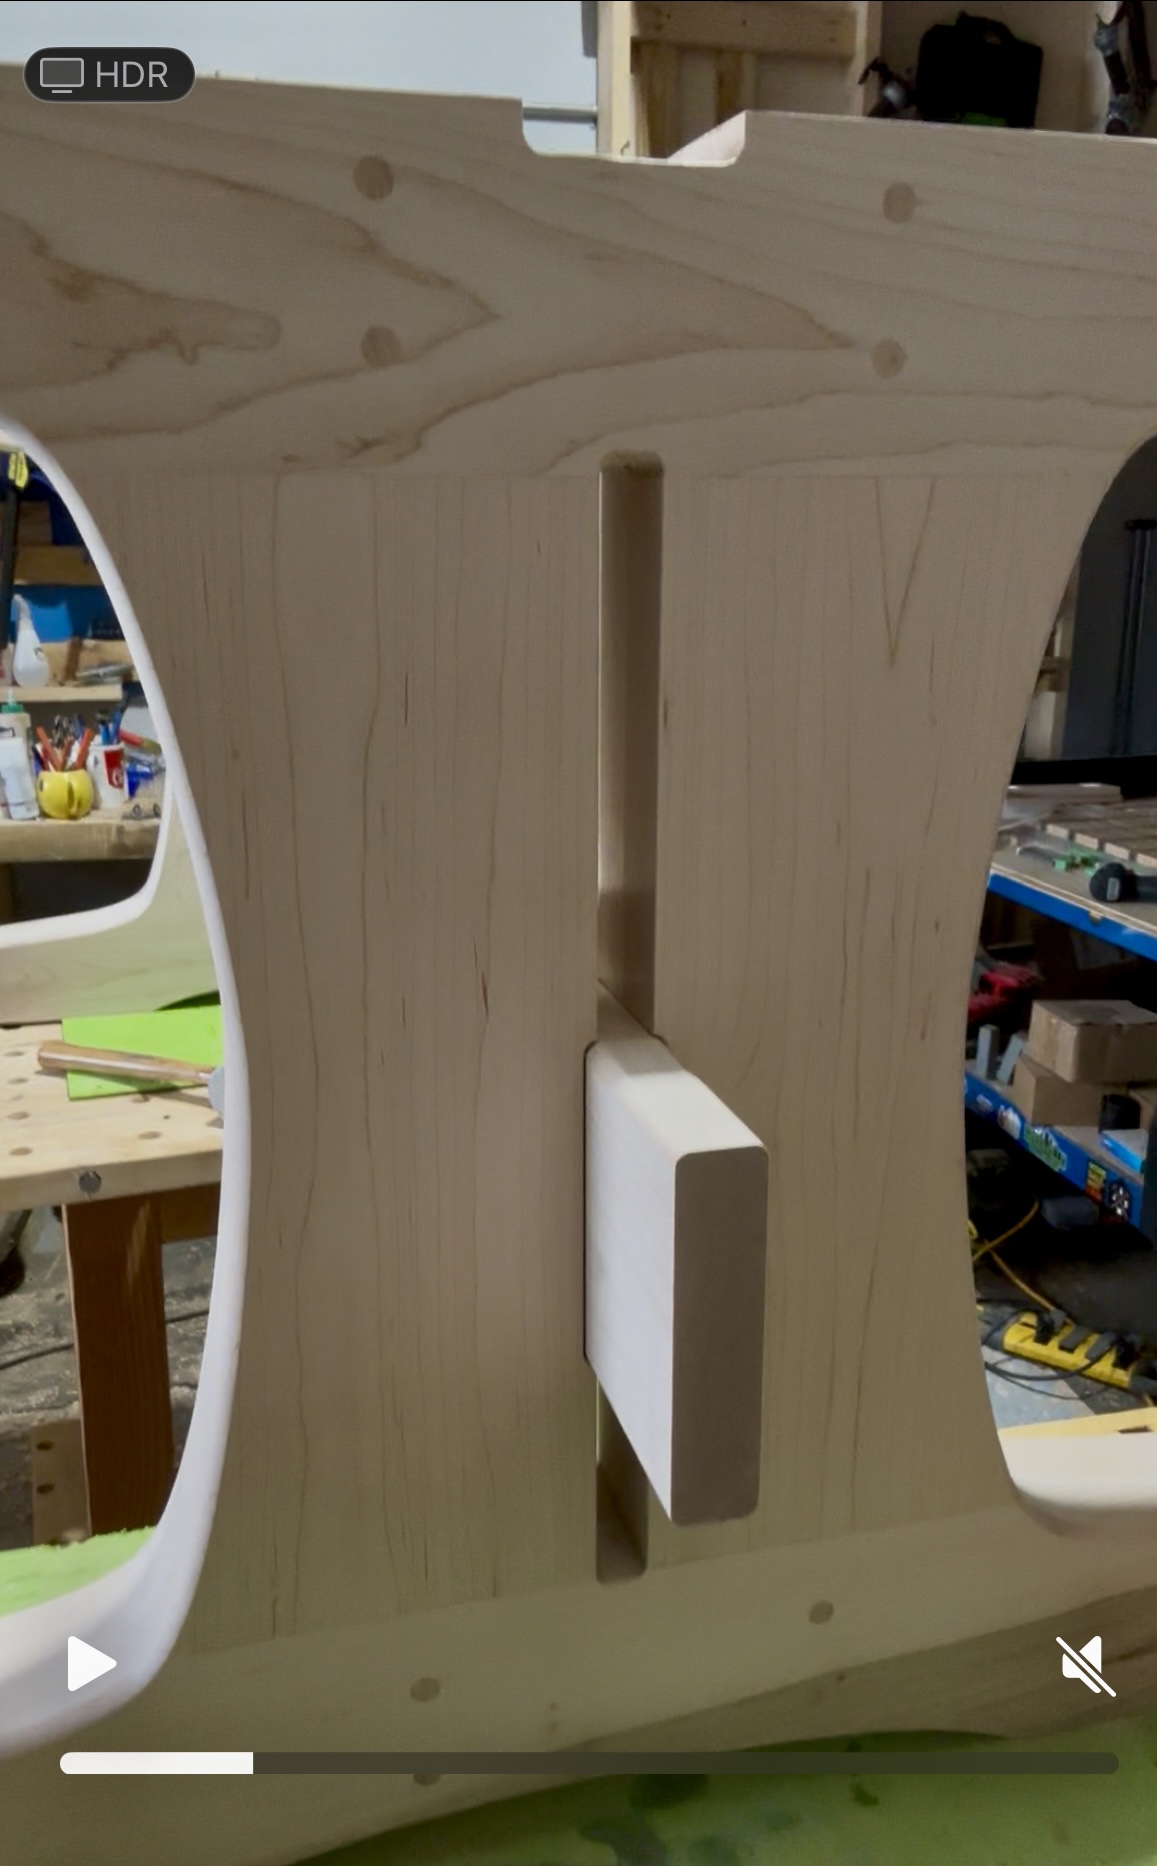
Yesterday I cut these trestle tenons on my shapeoko5pro. They are 8” long and 5.75” tall. I was pleased with how it went. I used pocket tool paths and flipped the piece once. I had screwed a piece of MDF to the table and cut an L out of it. So then I clamped the workpiece against the faces of the L. Registration was good on the flip. An improvement I’ll make next time is to use the center starting reference in carbide create. I had about a 1/32” offset on the flip. No issue to clean up but might as well not have to next time.
Did use a trim router for the roundovers and chisel to clean up near where the tenon starts from the bulk of the trestle.
The mortise in the leg assembly was also cut with the CNC a couple weeks ago.
Cheers!
9 Likes
Found this under the dictionary entry “Design” for a project like this that many of us in this Community relate to. From the “SirGariff’s ChatGPT-Enhanced Compendium of Sawdust, G-Code, and Plastic Dreams”. (Note: when I read this the first time, I realized how I relate to this definition so much! I can spend hours on creating intricate details on a Bench Dog…one of the most basic of tools in the shop !)
Project of Terminal Self-Gratification (n.)
A handcrafted wonder, usually birthed in the sacred garages, basements, or workshops of woodworking, CNC, or 3D-printing enthusiasts. This “project” is not designed for speed, efficiency, or even sometimes practical usefulness—it is instead an elaborate architectural poem written in MDF dust, filament spaghetti, or walnut off-cuts.
Its defining characteristics:
• Over-Engineering: Every joint, line of g-code, and layer height is chosen not because it was needed, but because it was possible.
• Personal Obsession: The creator insists it will “solve a problem,” yet the only problem solved is the gnawing hunger in their soul for a project complicated enough to justify owning six kinds of clamps, three CAD programs, and a spreadsheet labeled “Rev. 14 Final FINAL.”
• Cosmic Satisfaction: Upon completion (if such a mythical state is ever reached), the project serves as a shrine where the creator may stand back, hands on hips, whispering, “Yes. This was worth 147 hours and four tool bits.”
Synonyms: Overcomplicatus Maximus, Garage Nobel Prize Entry, Schrödinger’s Jig (useful and useless simultaneously).
4 Likes
I am feeling personally attacked! 
Besides, I use the Boeing drawing revision nomenclature for revised files now.
Original: Object Name - - -
Rev 1: Object Name - - A
Rev 2: Object Name - - B
1 Like