You did well with the shells. Any top tips for jewellery cutting?
Watched your youtube. Great step by step, dropped a subscribe for ya. looking forward to watching more of your stuff, and the “you” drinking the coffee was hilarious
1 Like
Very cool, my dad would love one, next Christmas, need the time to learn
Very pleased to hear that, thank you! Gotta love having a bit of silly fun in the workshop ![]()
1 Like
I like your earrings. The cat/moon and butterflies have the earring hardware. What are the shells? are they earrings or pendants? I intend on making some jewelry for xmas. Where did you get your earring hardware.
Are these done with a CNC?!!
Yes, he dose a great step by step with it
Honestly, those were all one off “can I do it” pieces.
As I recall the hardware was from Amazon. Maybe - 925 Sterling Silver Plated Earring Hooks 150 PCS/75 Pairs,Ear Wires Fish Hooks,500pcs Hypoallergenic Earring Making kit with Jump Rings and Clear Silicone Earring Backs Stoppers (Silver) Amazon.com
1 Like
Yessir. An HDM to be specific. But I’m confident any Shapeoko could do the same.
1 Like
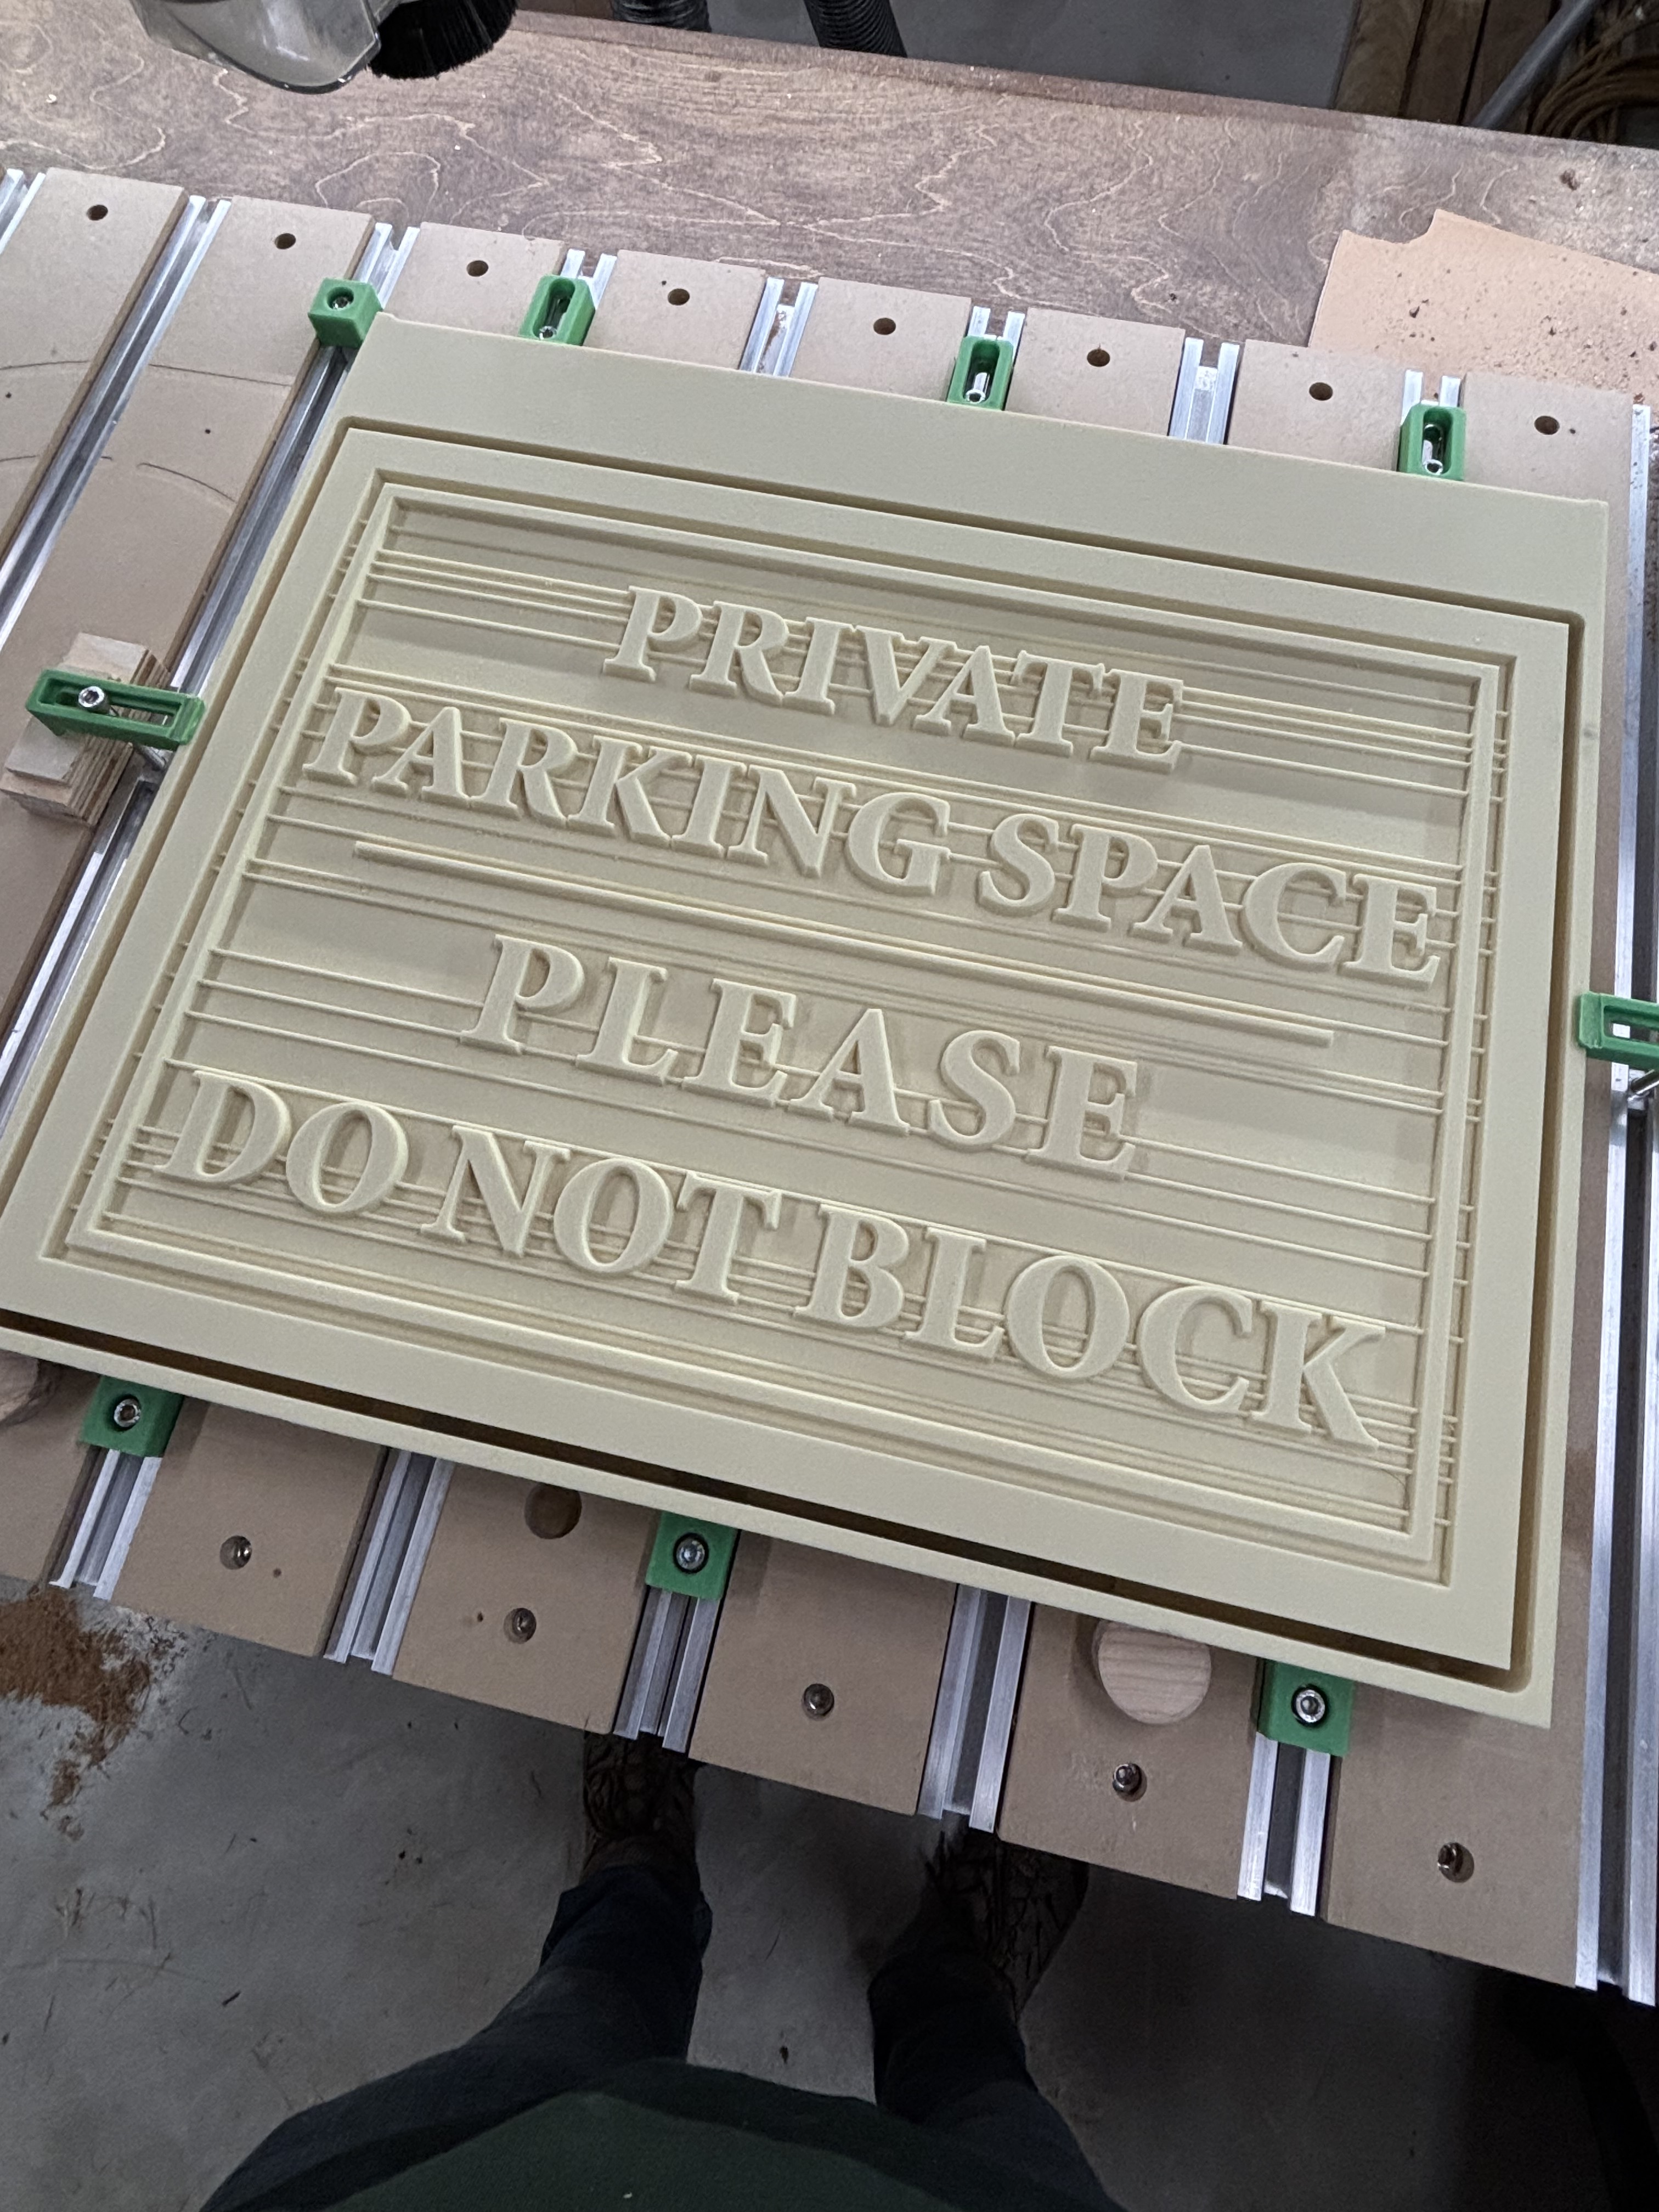
What material is that? It is very clean and well done!
15 pound HDU. Highly dense foam board. Most any sign 2 1/2 or 3d sign you see these days will be made out of this. Cuts like butter (I max out the 5 Pro feed speed and usually can go full depth). We’ve had them in our Club where I work for over 15 years and it doesn’t rot…just doesn’t take a hit from a car very well. We are getting ready to offer the homeowners a “refurbishing” service for their signs…essentially and clean and repaint. The will last another 15 years!
2 Likes
Awesome I have seen other speaking of HDU. I want to try some havent been able to source any locally but to be fair havent searched super hard either. Again looks great!
1 Like
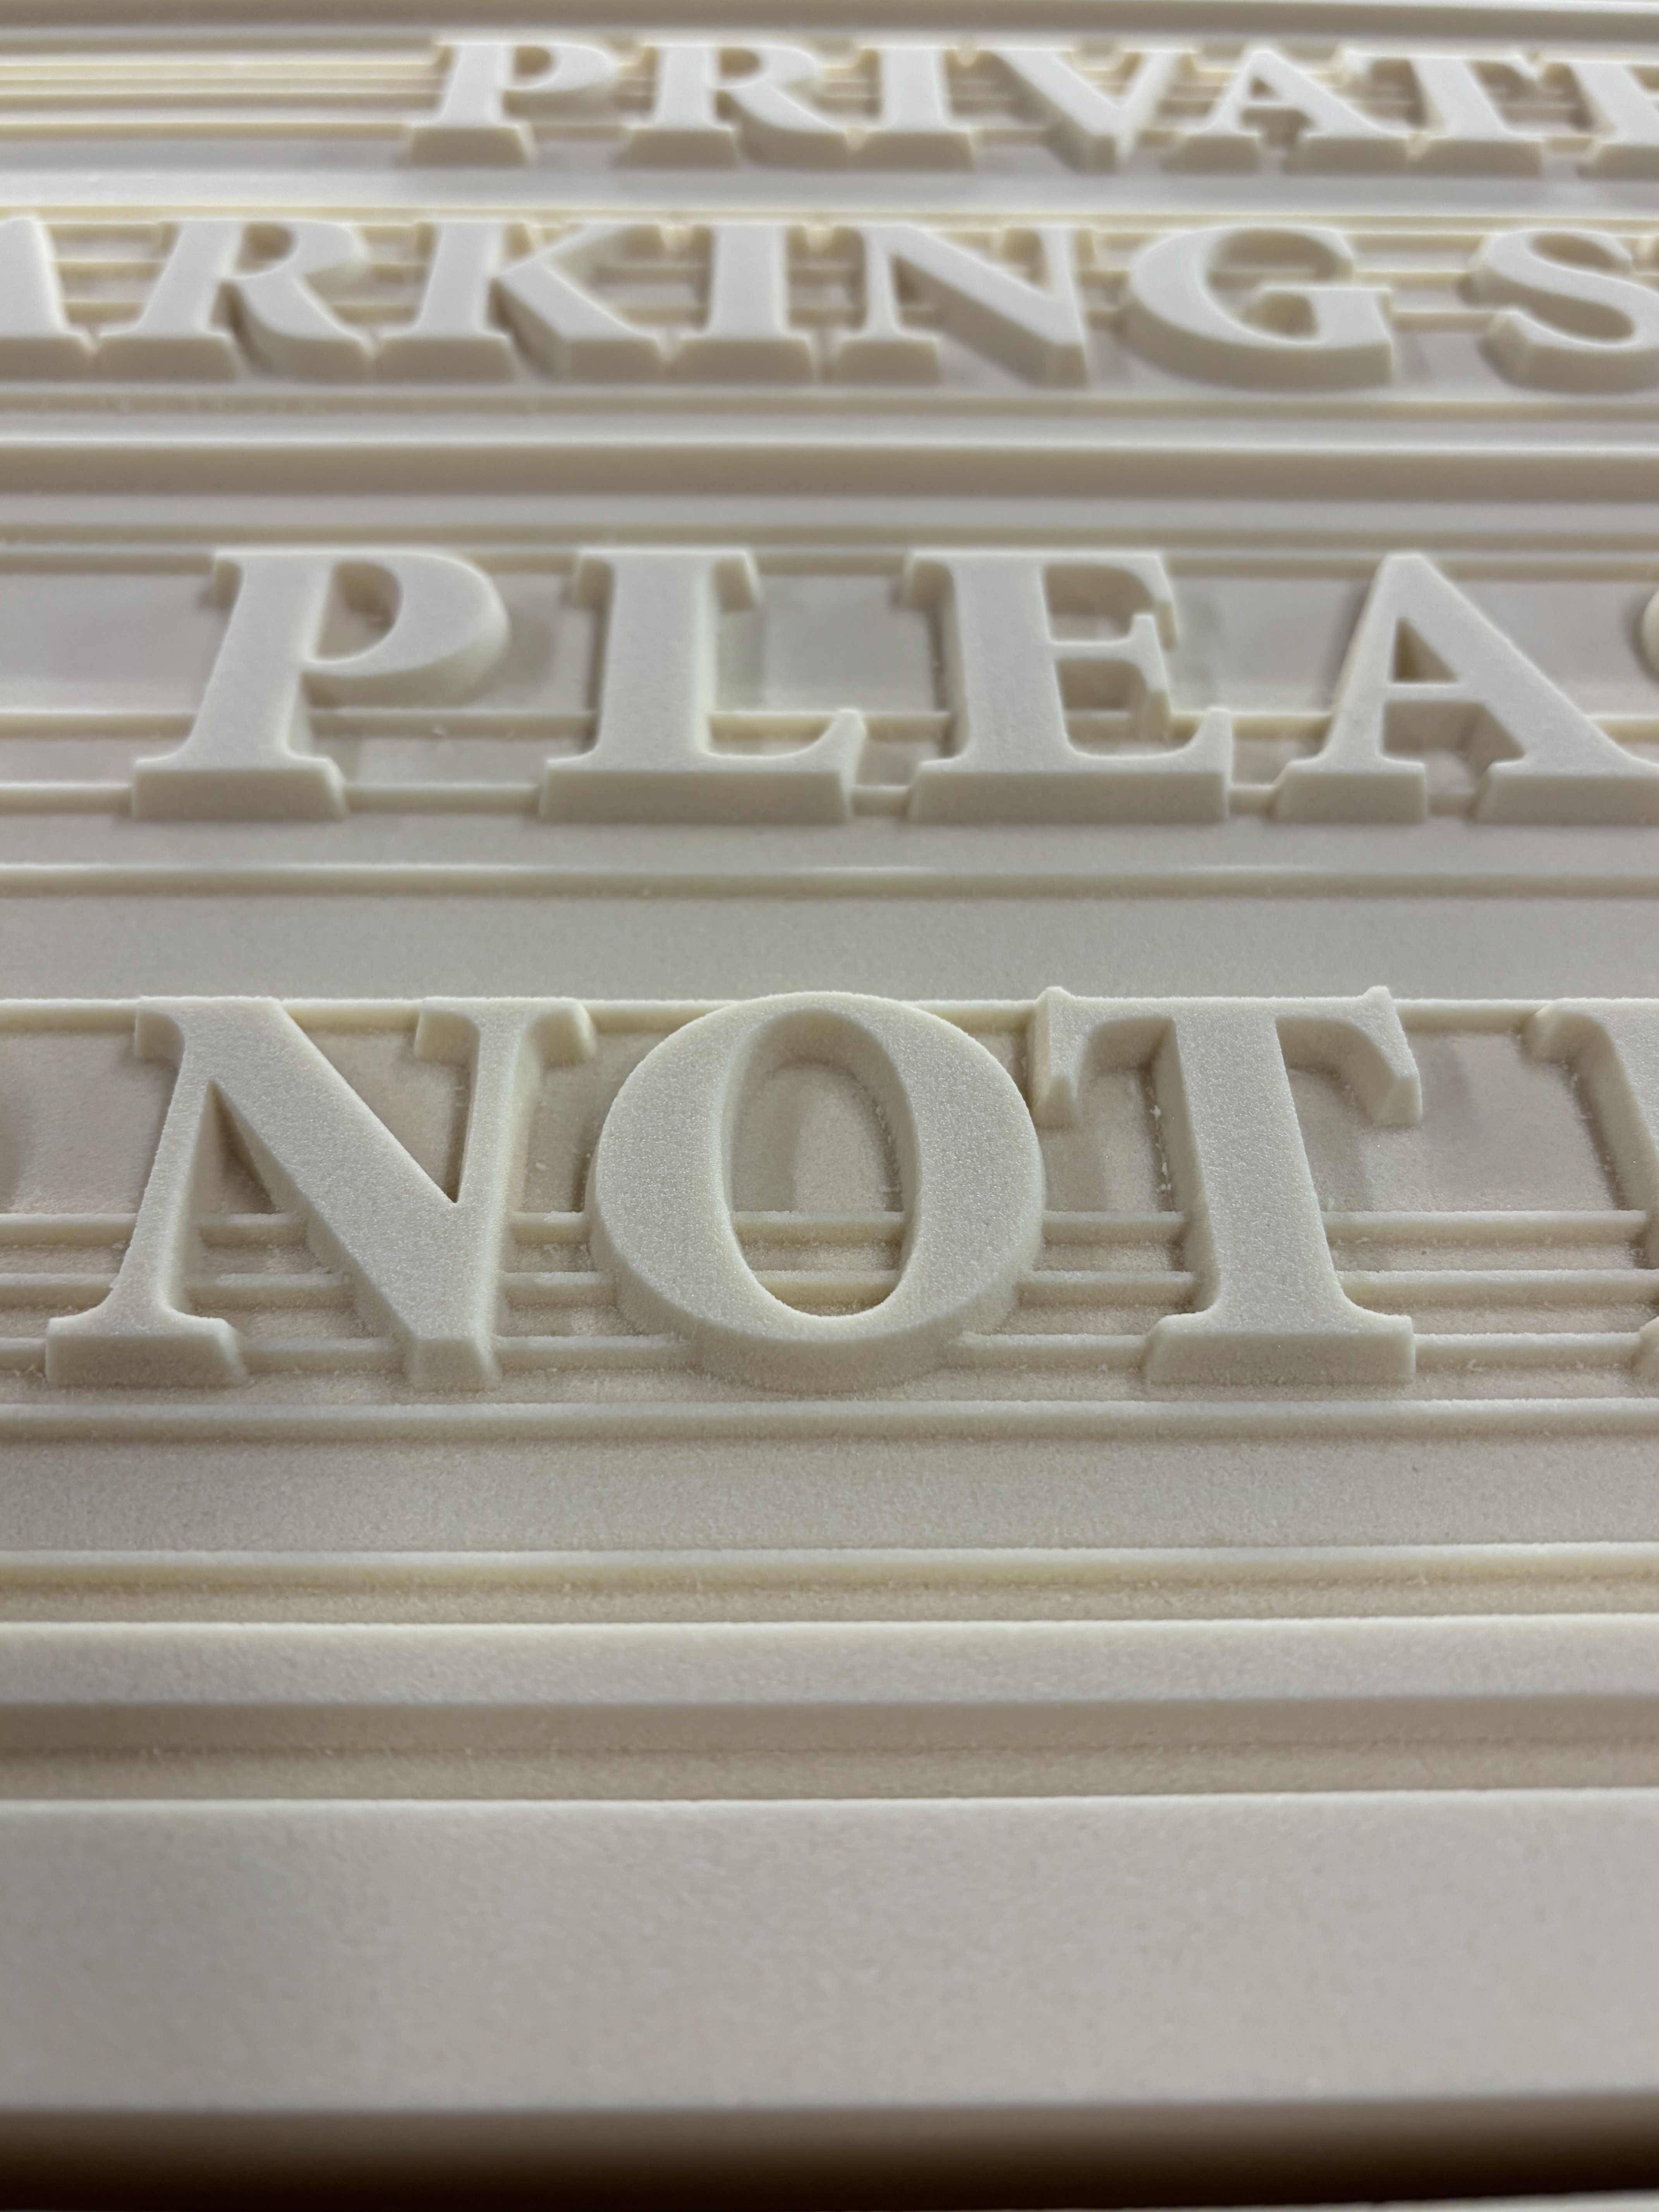
Still amazed how well the HDU machines, really nice and tight dimensions.
Yeah. Someone wanted cedar… at least something that could be used as a durable “on/off” sign that could be thrown in the back of a cart (HDU is NOT that!!).
I HATE Cedar! Stringy, does not carve smoothly, chips. Ugh! A LOT of extra work in wood prep and sanding before we ever get to the painting. Our price was way too low. We are going to charge half again as much for cedar signs in the future.
1 Like
Not sure what the cost is south of the border but here in Canada HDU is pricey. A quick online search found a 4x8x3/4 sheet from a Canadian supplier for $325 Cdn plus shipping…
1 Like
I’m paying about $600 for 4x8x1 1/2"
2 Likes
I recently used a laser engraver at my Makerspace on some acrylic panels for inexpensive edge-lit acrylic bases. These are super-cheap on Amazon - about $6 each. One of my senior developers wanted to give these to her team.
It was quick, and I thought I was ready to send out a dozen. I got home and cleaned off the residue, which also removed the design entirely!
Original laser engraved version:

I had to decide to take a chance on using the laser again, or trying out my new MC Etcher set. My choice was clear ![]()
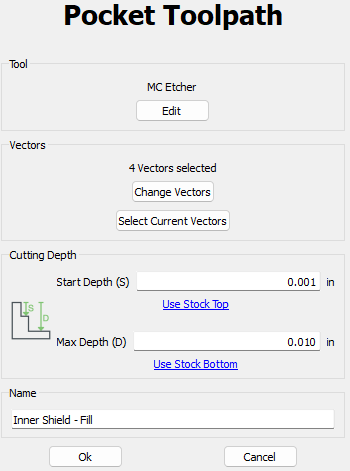
I reviewed prior posts here, I set up pocket toolpaths for my MC Etcher 120 using the settings default settings after selecting the bit from the Hard Plastics > End Mills settings. I used the following for each vector object set:
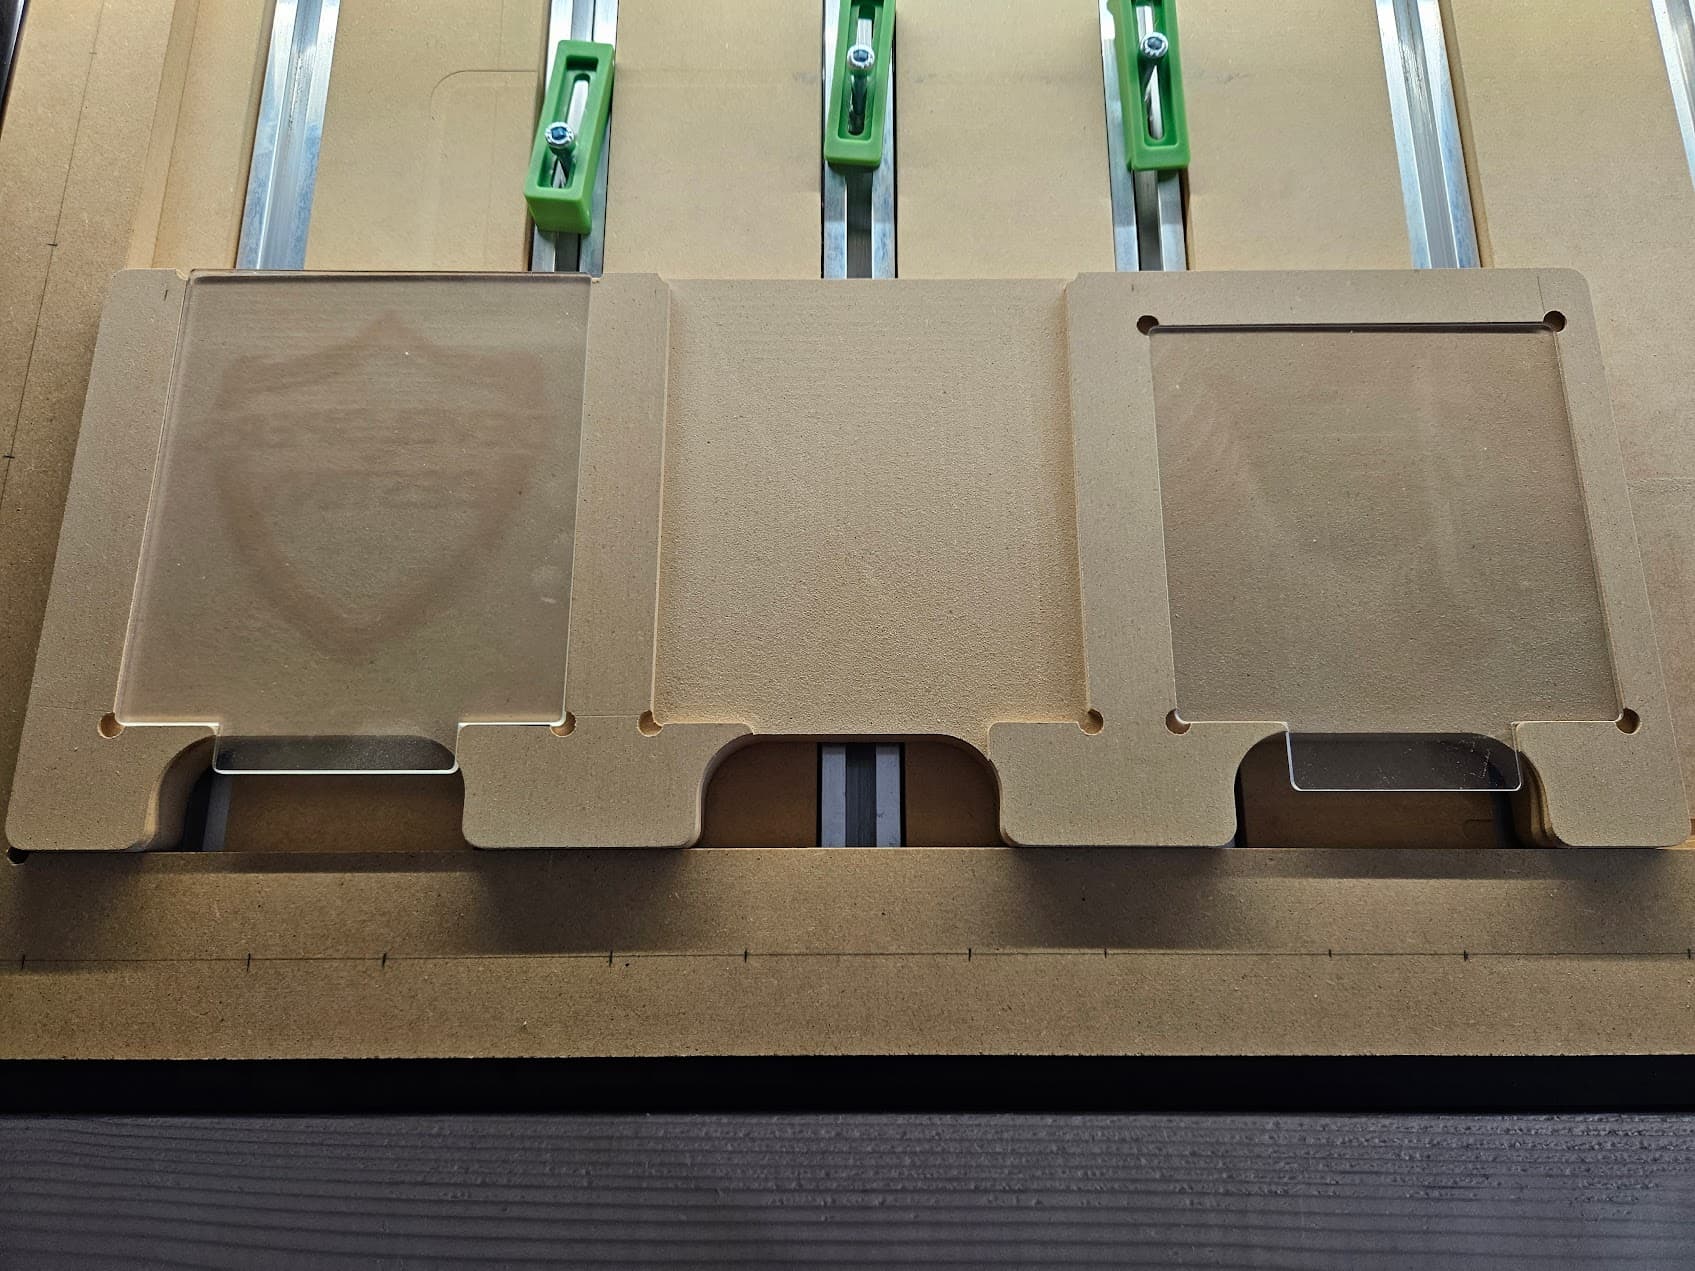
You MUST have a level workbed for acrylic (or any etching). Admittedly, I have not surfaced my workbed since assembly, so the next best thing is to create a reusable jig that is essentially guaranteed to give you the surface you need.
I started with a leftover block of .75" MDF, and made the pockets the exact thickness of the acrylic panels I would be engraving. This ensures that when I set my design at .75" I will accurately hit the top of the acrylic and get consistent pressure across the engraving. The precise fit of the jig prevented side motion, and I simply taped the edges.
Prepared jig, two slots for the ‘better’ 4mm acrylic and one slot for the 2mm acrylic that came with the bases I ordered (I recommend buying the bases and acrylic separately and get the 4mm).
This was my first run with two throwaway acrylic panels. I was extremely pleased with how this was going.
The end result came out FAR BETTER than the original laser version. This was a great first run test and I’m sure to make more use of the jig for this low-cost project.

Quick lessons learned:
- Reduce your retract height. I reduced it to .1 inches from the original .5 inches. There’s a lot of up and down motion with the pockets. Reducing this height will greatly help speed up your process.
- Don’t use Sweepy, but keep a shop vac handy for dust removal. Acrylic is easily scratched, I didn’t want to risk the constant bristle action to cause damage. Yes, you can use the no-brush alternate - but I doubt it would get the bits of the MC Etcher as well as focused motion with the shop vac.
- Stay close to the project, and remove dust regularly. I had no issues with build-up as I kept dust and debris to a minimum. Remember that the spindle is off for etching.
This was really fun, and I’m going to explore many more etching options in the future.
18 Likes
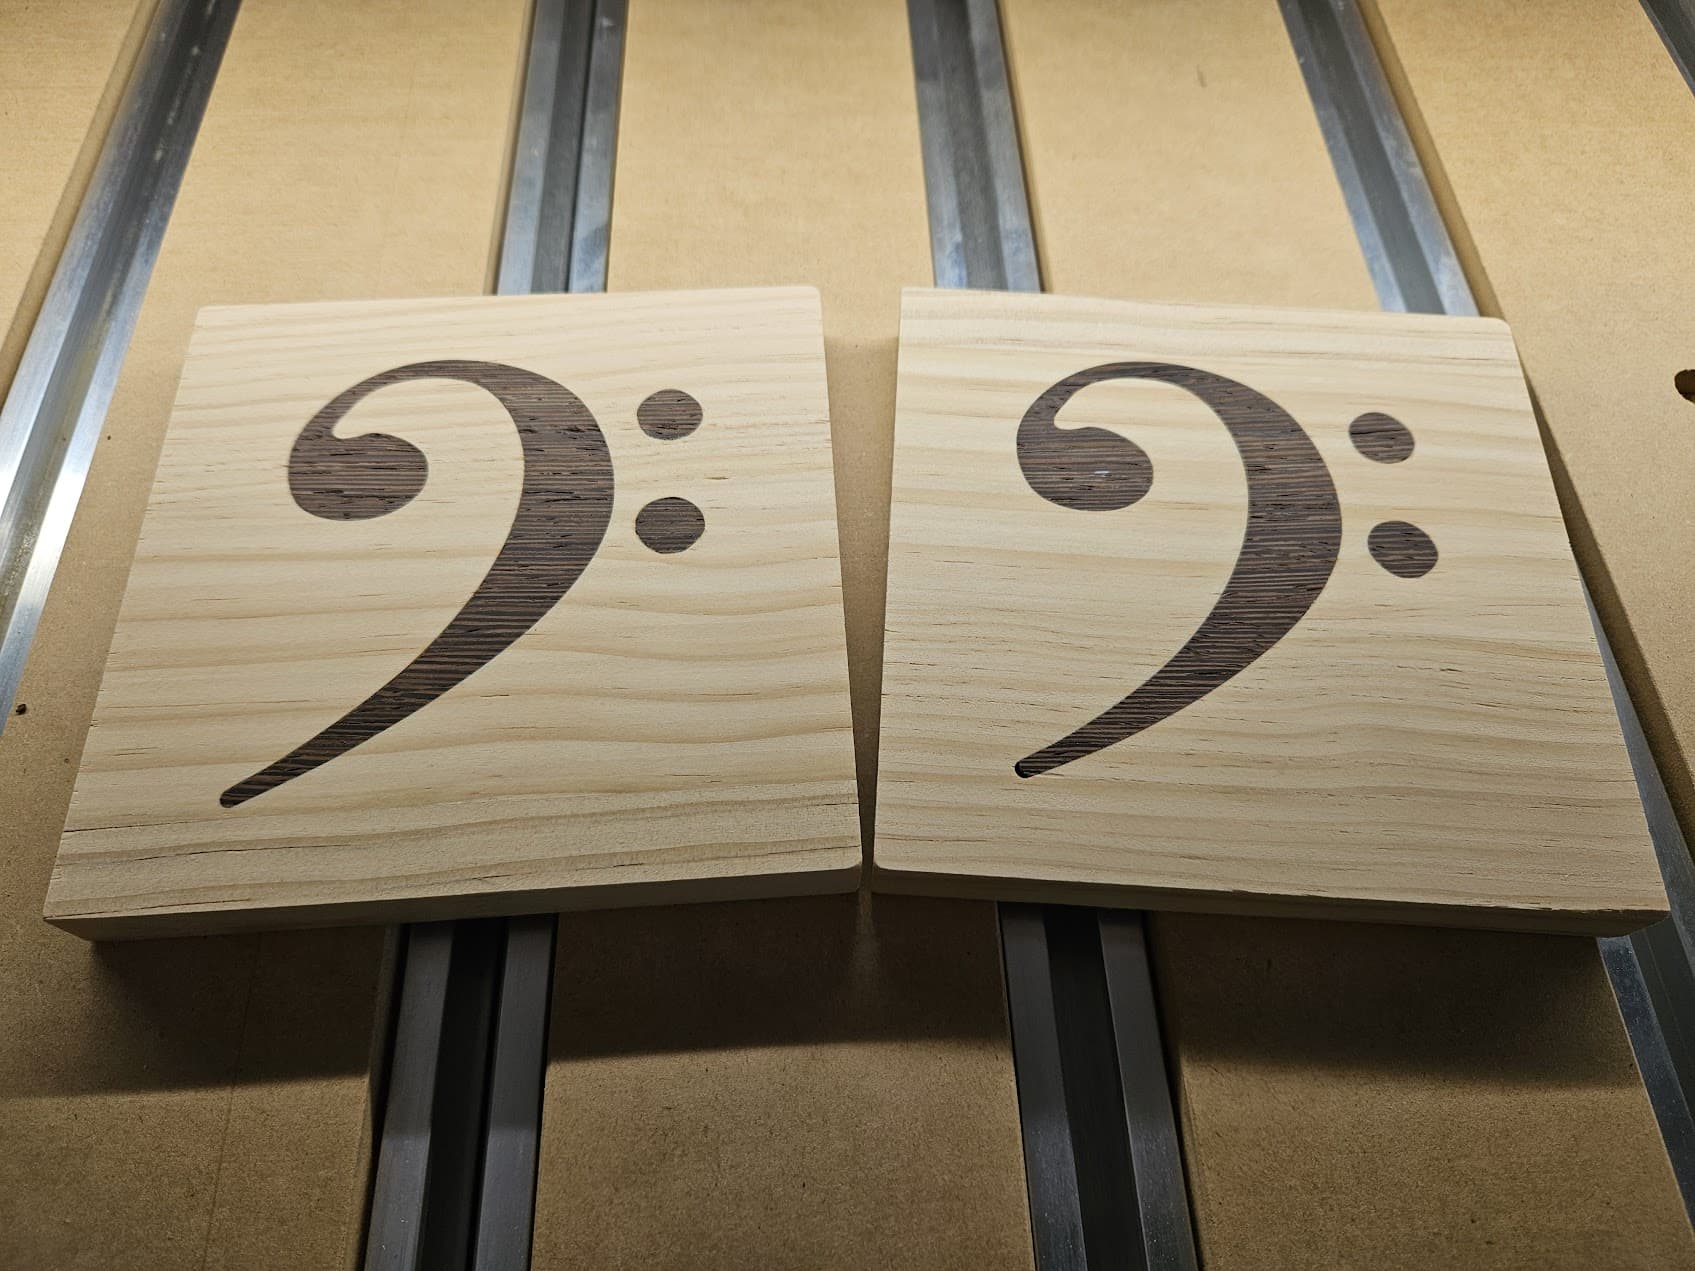
My first inlay!
As a new owner, I’m currently focused on trying out various approaches, bits, and taking the ‘fear’ out of all these fun capabilities.
I started this off with cheap 4" squares that I found at Michael’s for just $1.50 each (bought a bunch) and hardwood samples. I got these from Central Hardwoods in Dallas - they’ll give you 2 on a visit, and charge just $2 each if you want more (they have samples of no less than 40 different species).
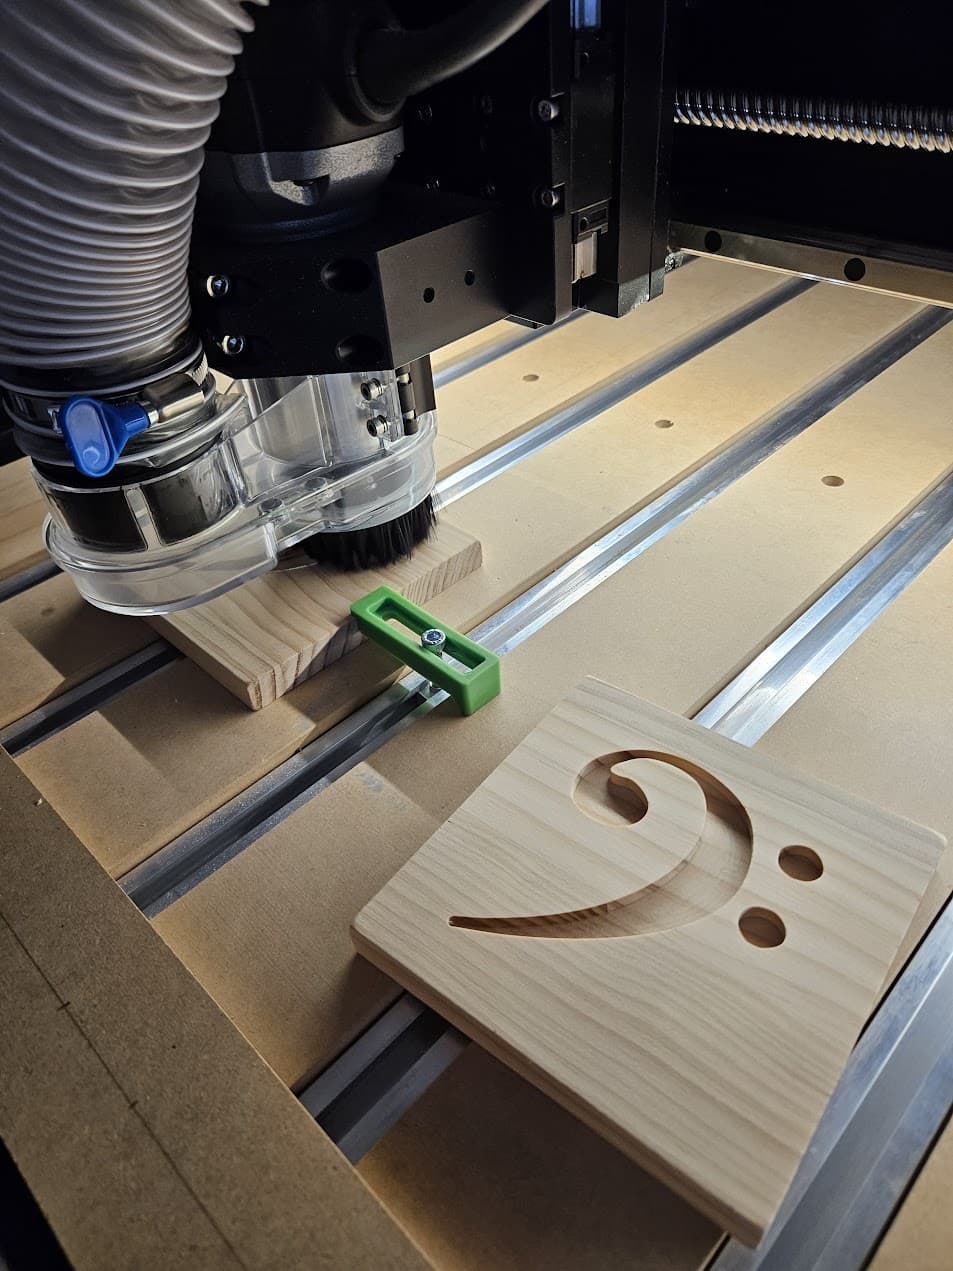
I forget the name of the species, but this was the darkest sample they had and I liked the contrast. It’s super brittle, and did have some chipping. Overall it still came out well.
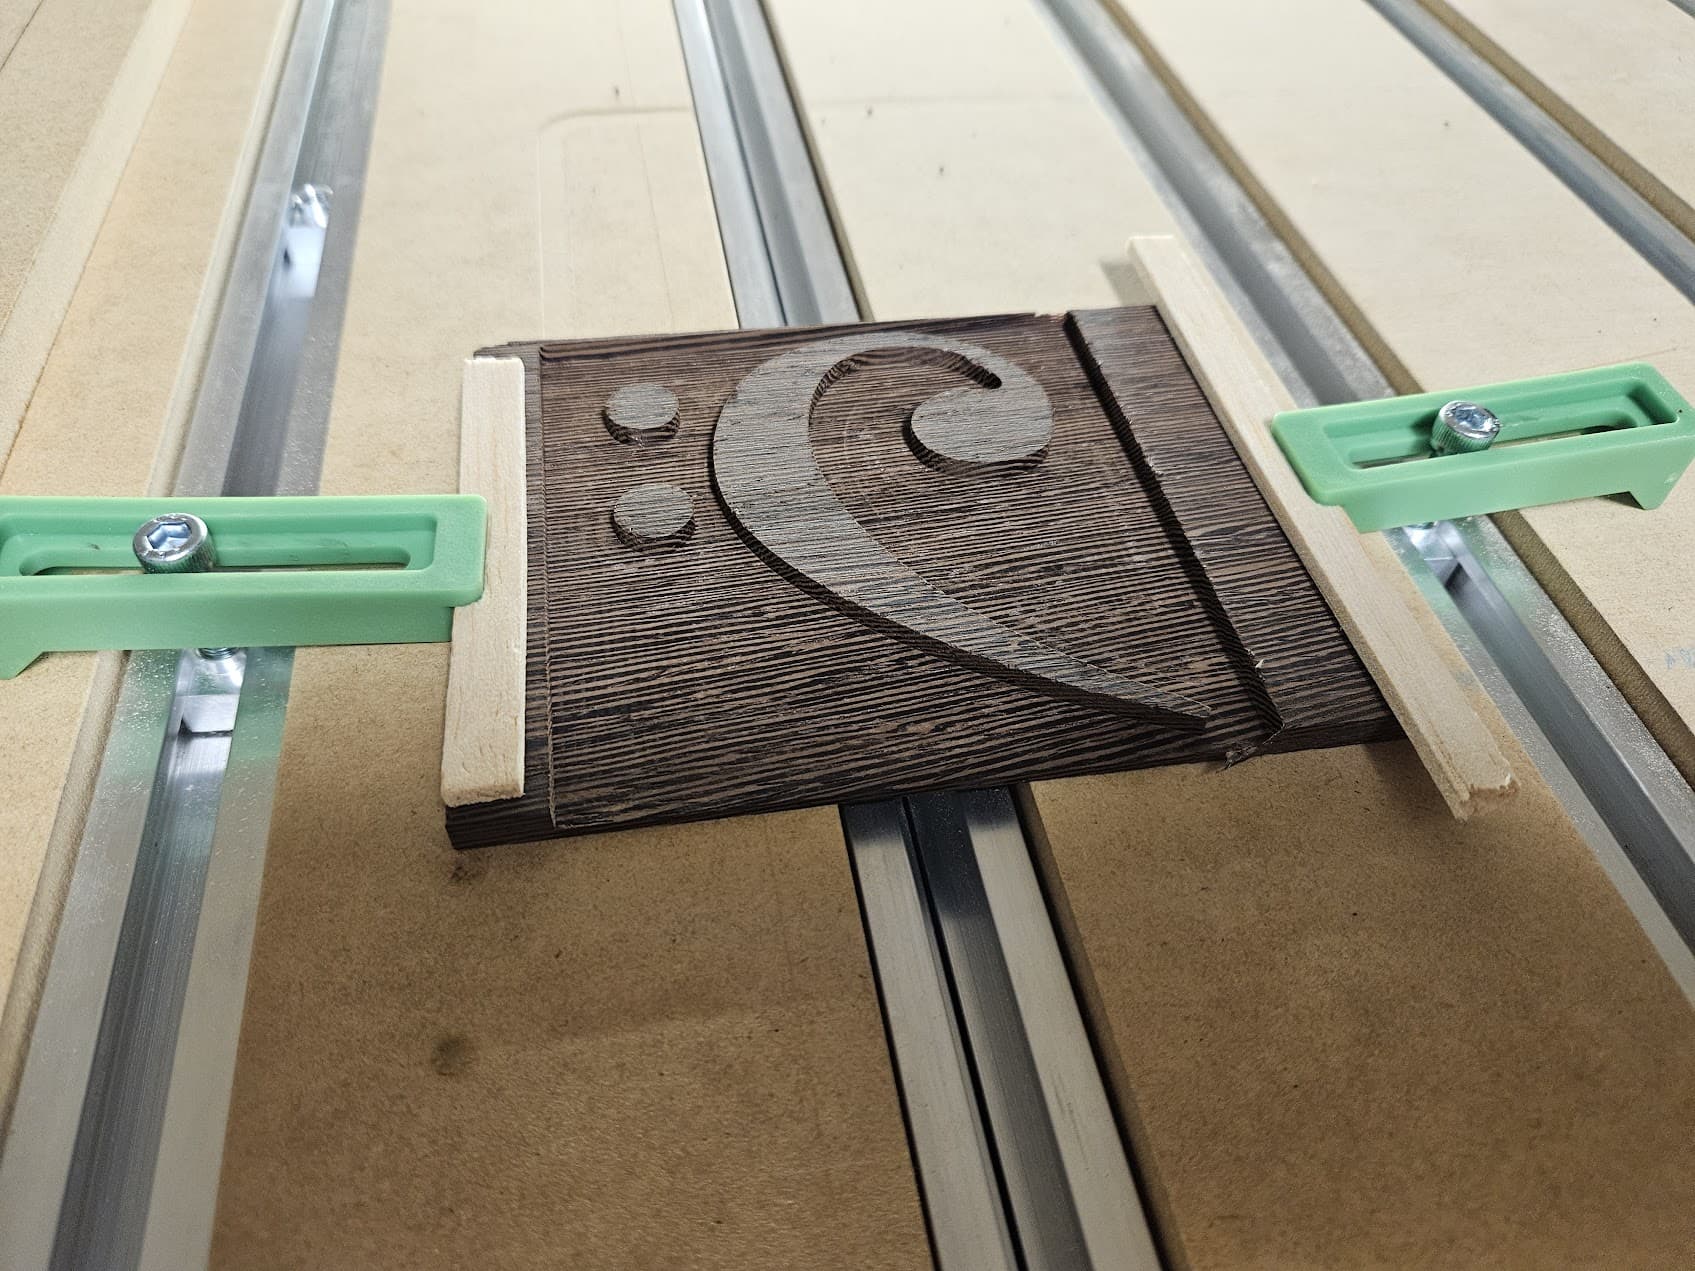
When test fitting, I realized that I’d have to file down the very tip of the bass clef. In the female version, the cutout was limited to the 1/8" bit that was used. In the inlay, it wasn’t restricted so it was a little bit longer. Lesson learned on another thing to consider.
Normally, you’ll have an air gap between the base and the inlay. This was my first run, and the inlay was flush and I knew I’d have to cut into the base a little for a clean result. I’m using a 1/4" end mill here, hadn’t broken out the McFly yet.
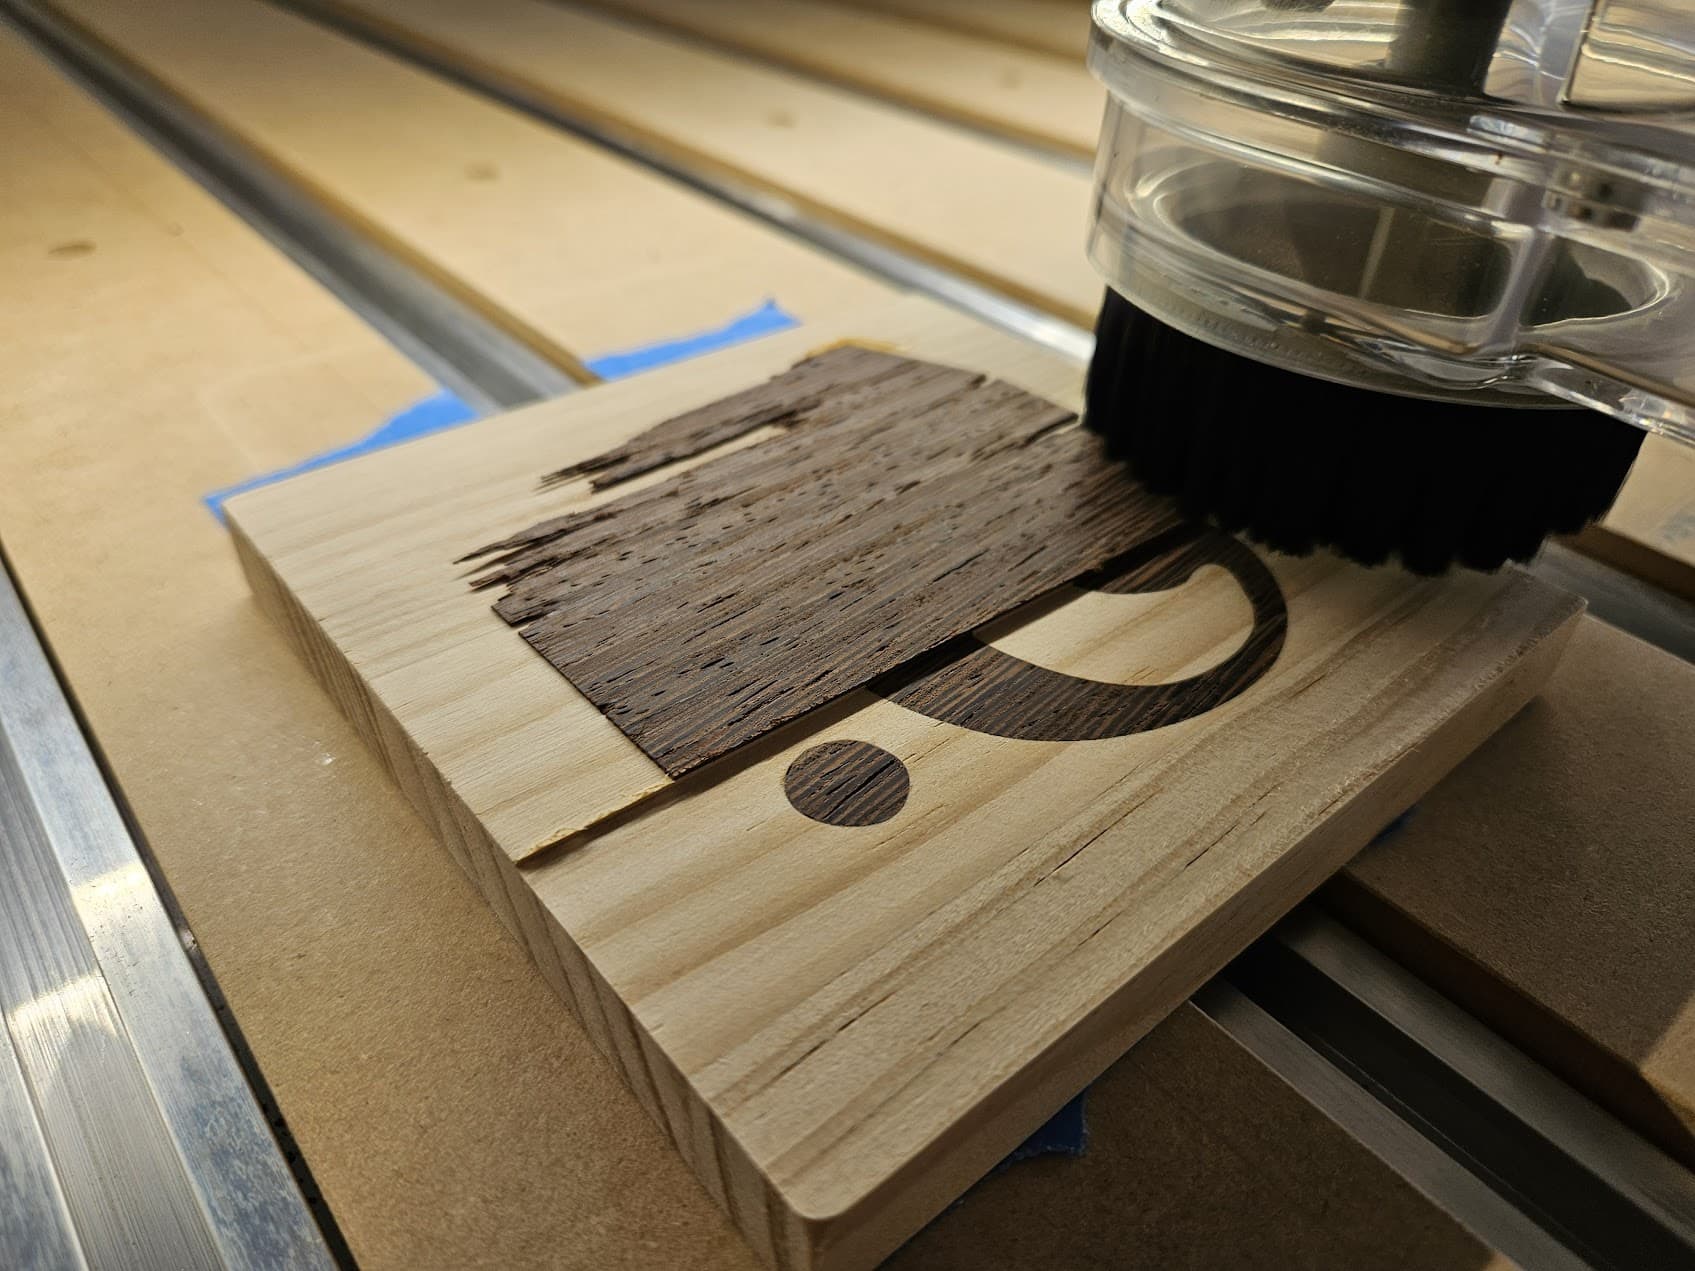
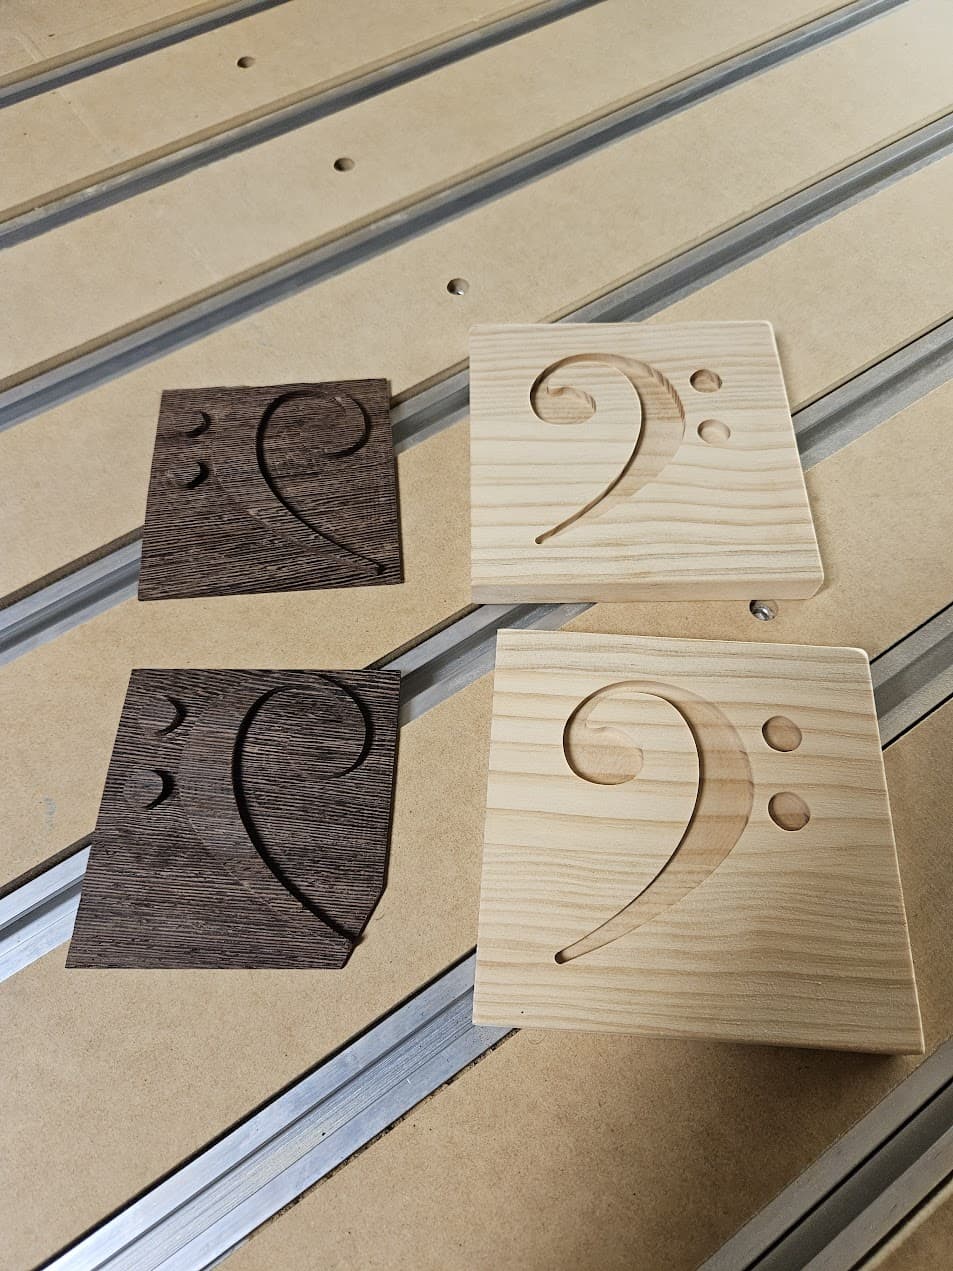
For a first try I’m super pleased with the results.
I know this is SUPER BASIC, but it’s meant as a reminder to all the new owners to just try all you can and get the most you can out of your amazing machine!
20 Likes
First run with McFly! This one had me nervous, and in the end I really had nothing to worry about.
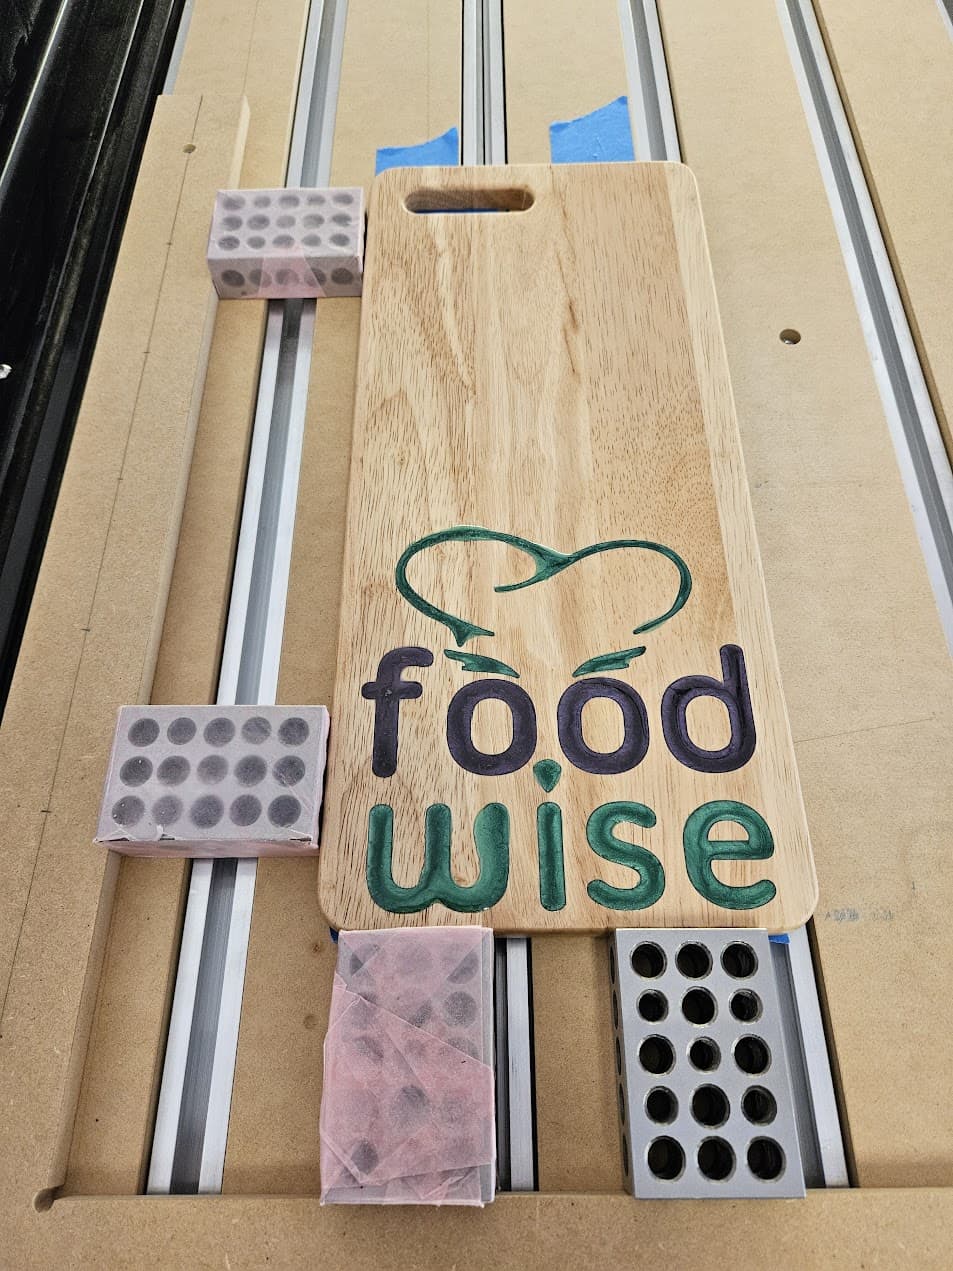
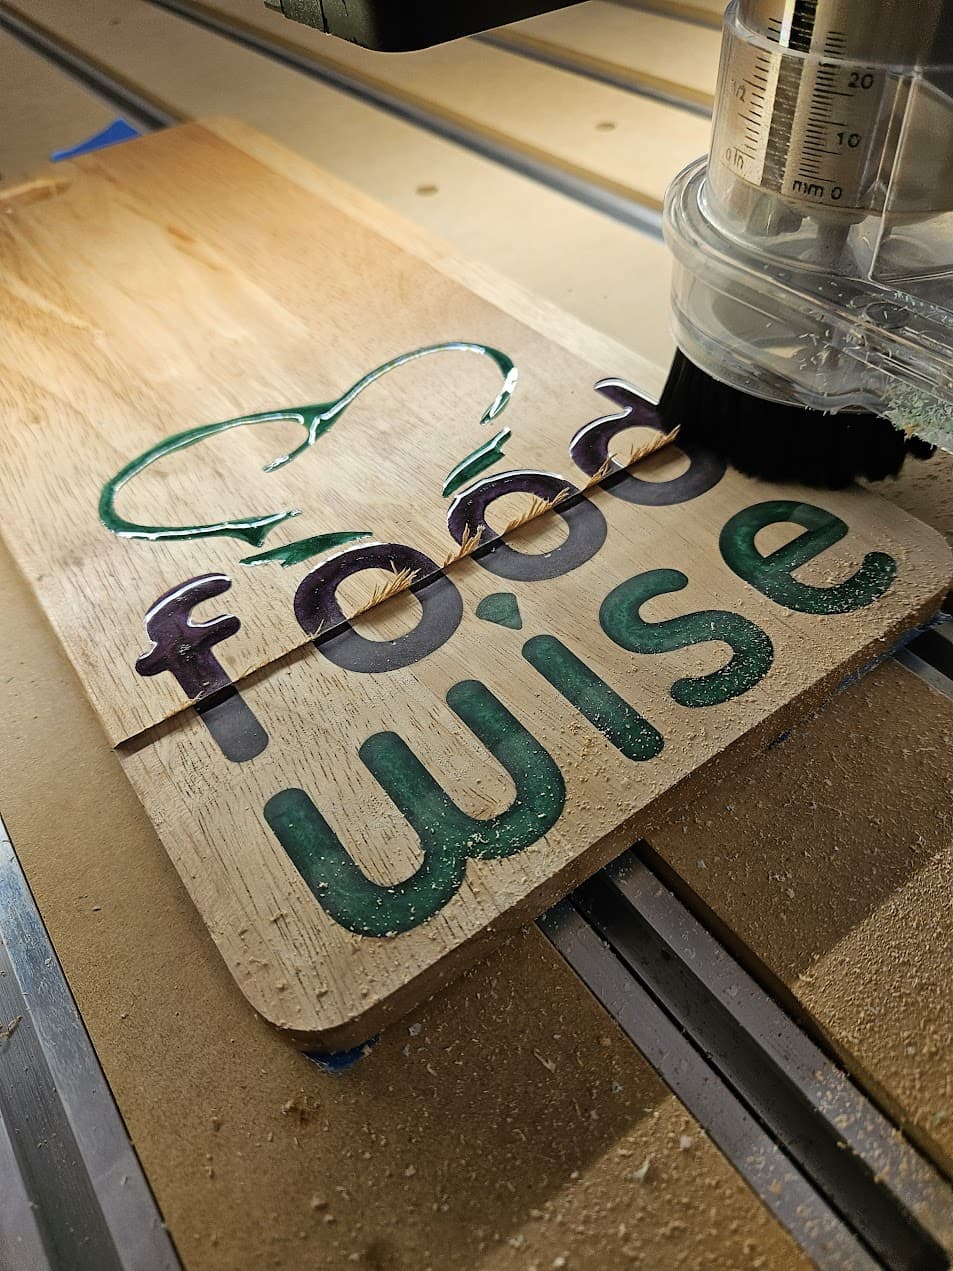
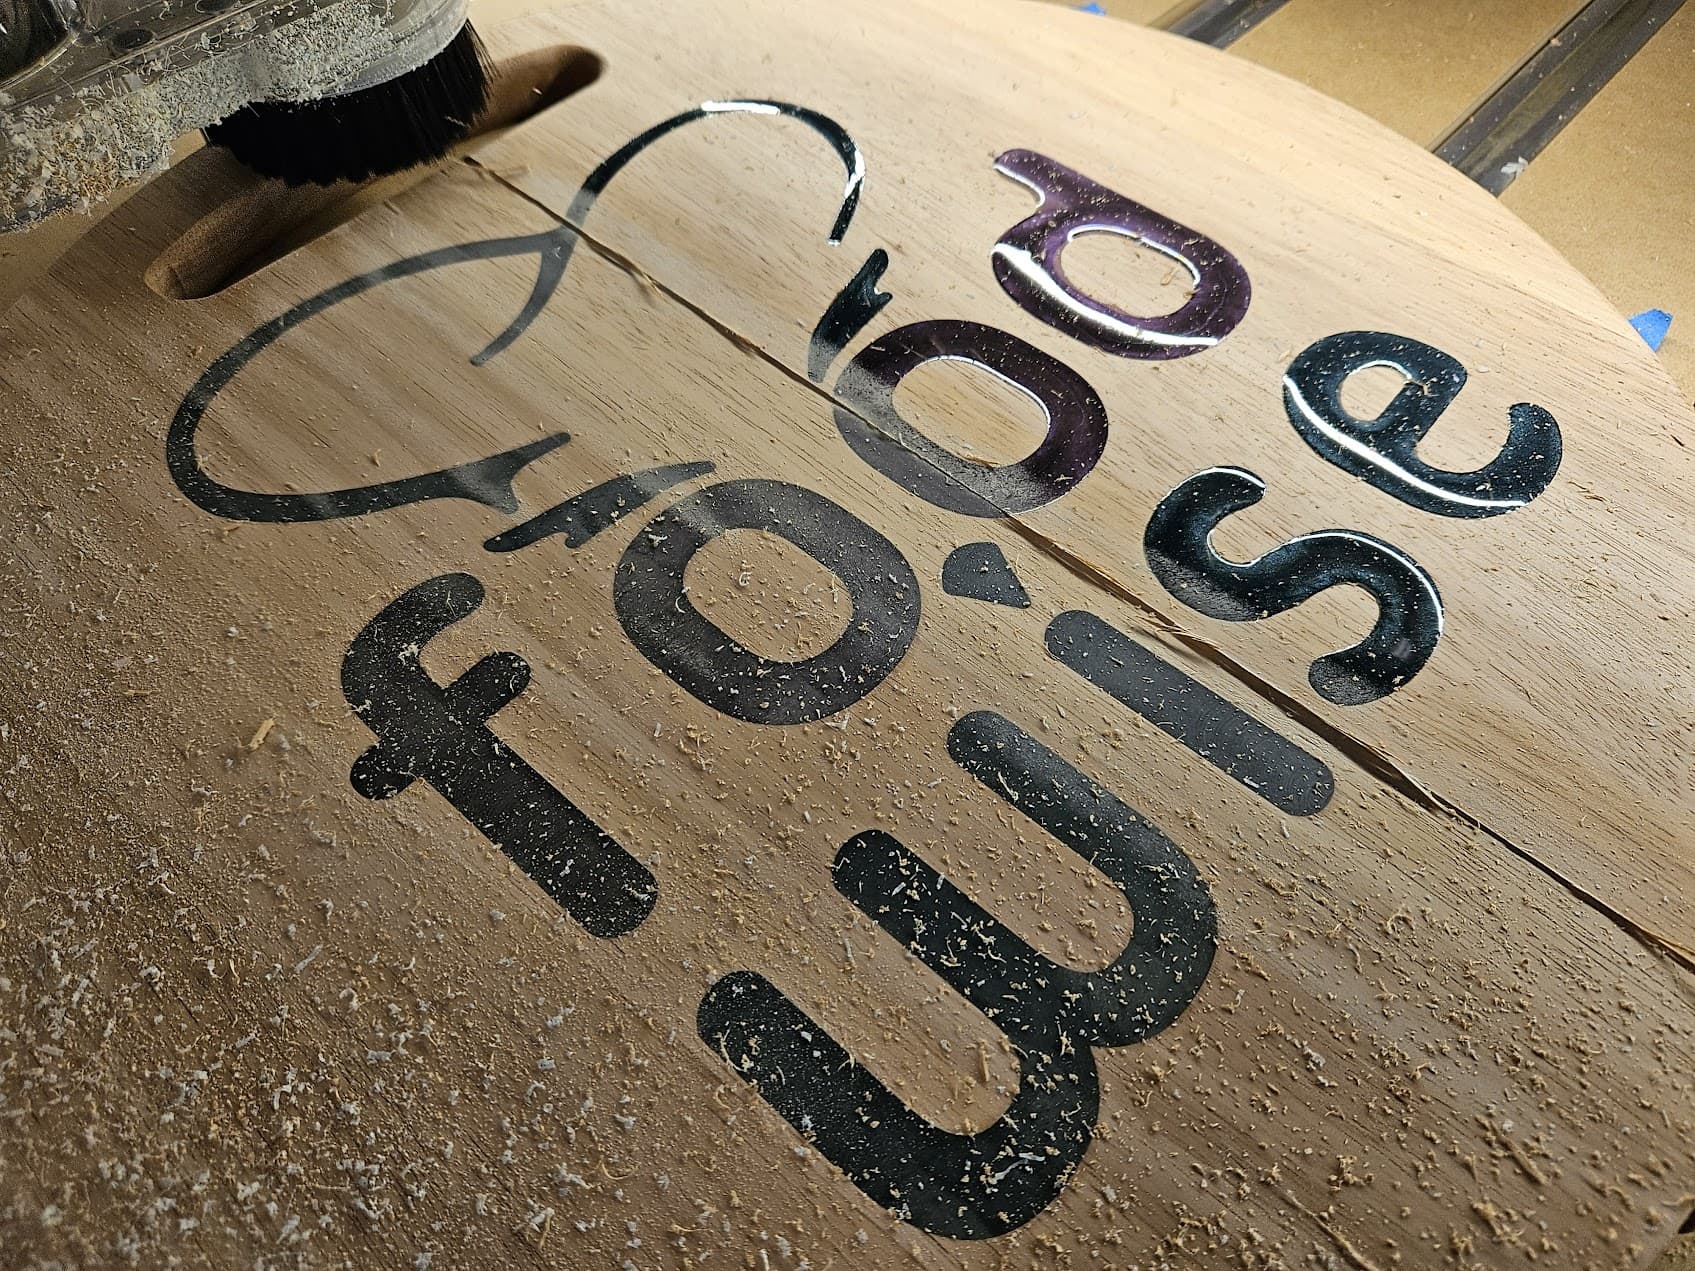
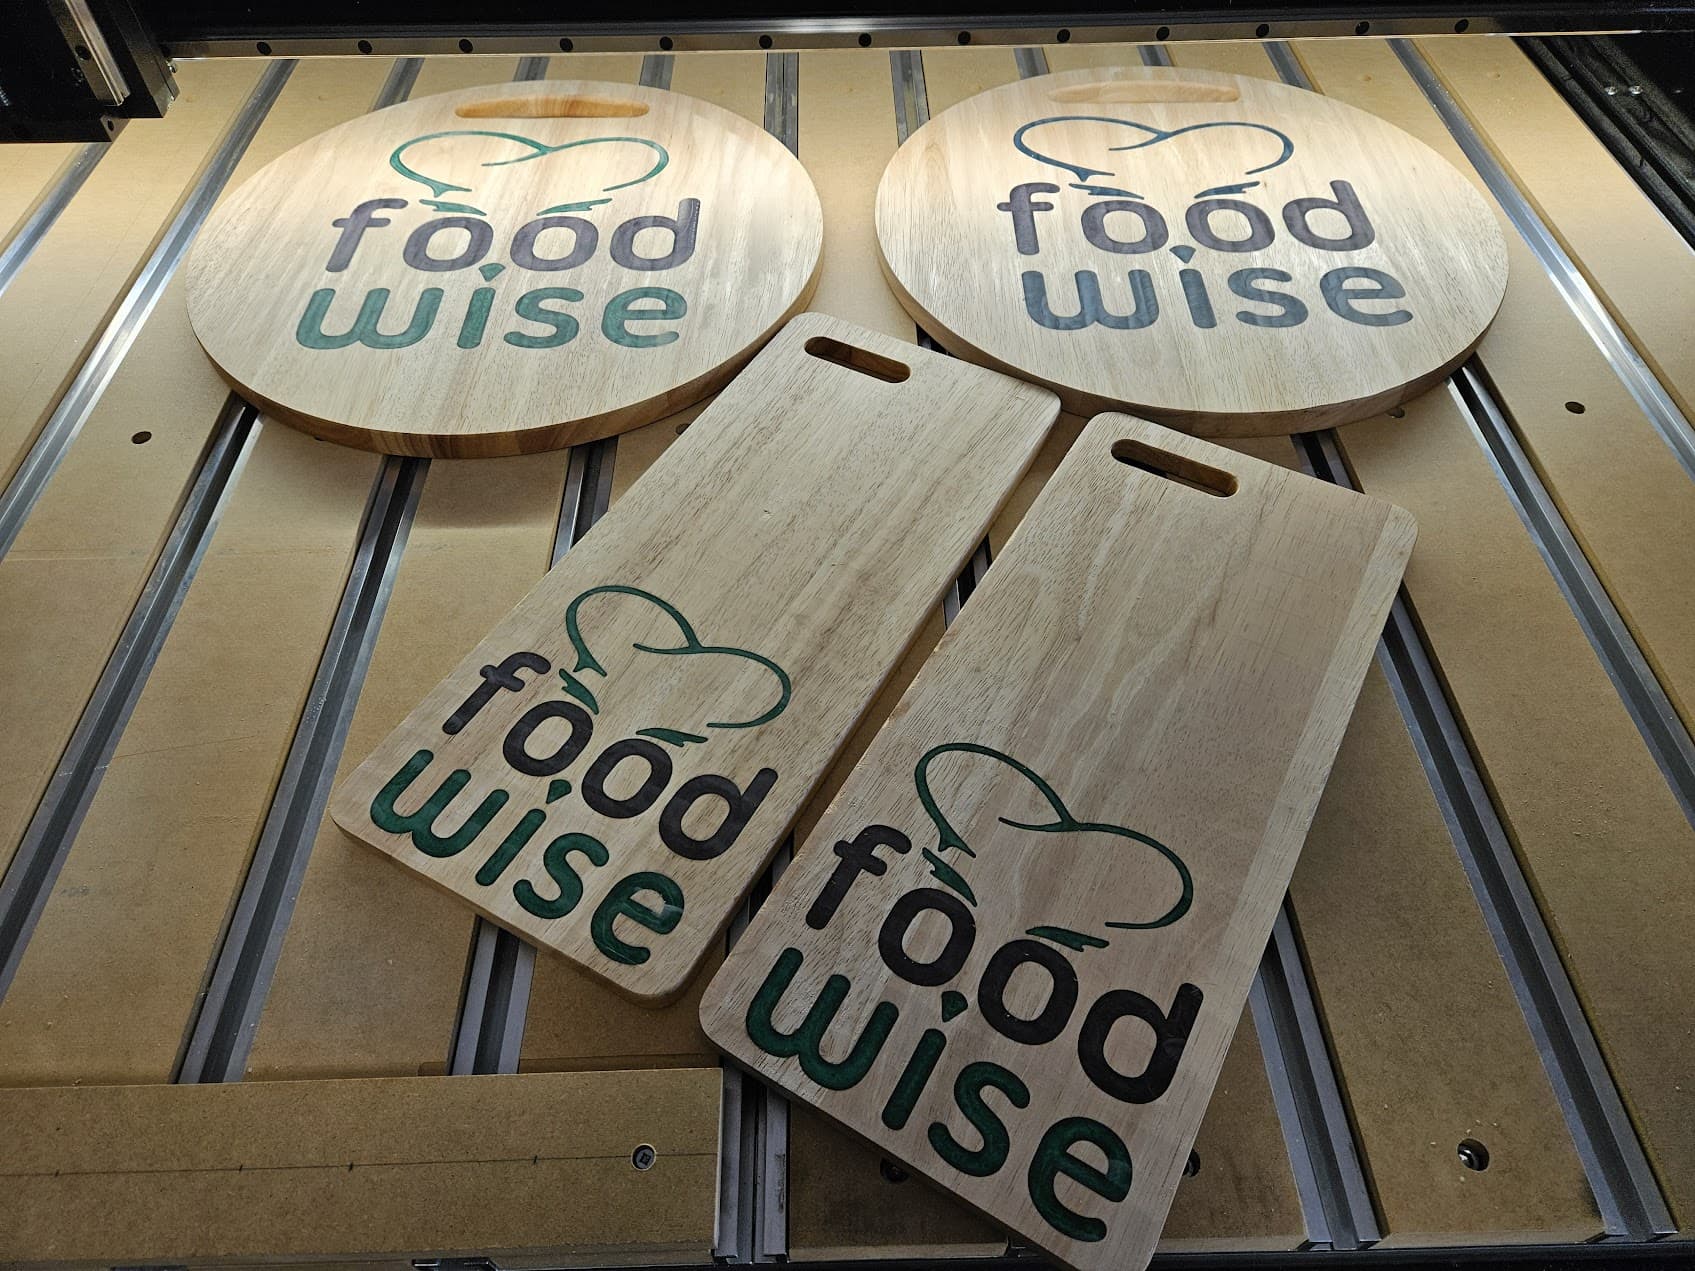
A friend/coworker started a passion project, sharing her family recipes at FoodWise.food.
When she first told me about it, I decided I had to make a logo for her. I really love how it came out, and also wanted to send her a gift that she could also use with her website.
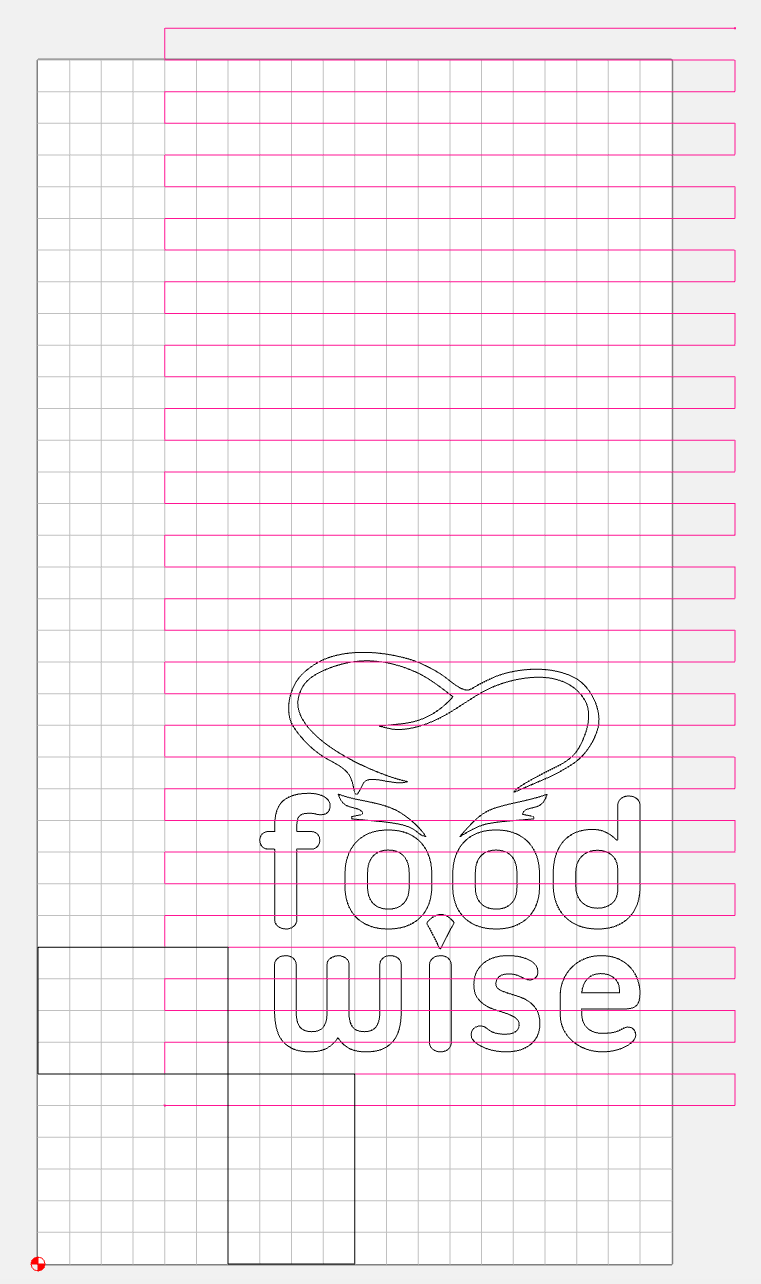
Today was the scary day when I had to shear the top of these cutting boards. When using McFly to surface anything, you should try to have the bit enter from the side, not get lowered directly into the material. For this, and many other projects, I highly recommend using 3-2-1 blocks to step your project away from your fence. This allows you to keep your consistent XY zero and still have that air gap around the workpiece. You use the blocks both in your original design, and when setting up your work area.
Here’s the Carbide Create file, note that the cutting path starts and changes direction outside the workpiece. I put the 3-2-1 blocks visibly in the file for reference. My workpiece is 7" x 16", but the work area here is 10" x 19".
Here’s the same piece on the Shapeoko. I am using the super glue method so the cutter doesn’t hit any clamps. The 3-2-1 blocks make it easy to glue it down exactly in place.
Blocks removed, and McFly went to work.
Next up was the larger version… everything going smoothly.
This was a VERY successful project, and there will be more! Still have to do roundovers, sand smooth, and apply a finish.
22 Likes