Nice work on both projects! Its very satisfying to see the end result on your first inlays when they turn out well.
1 Like
Amazing - love making old new ![]()
You’ve been busy! Nice work.
You can use the sweepy when etching, just set the brushes a tiny bit above the surface.
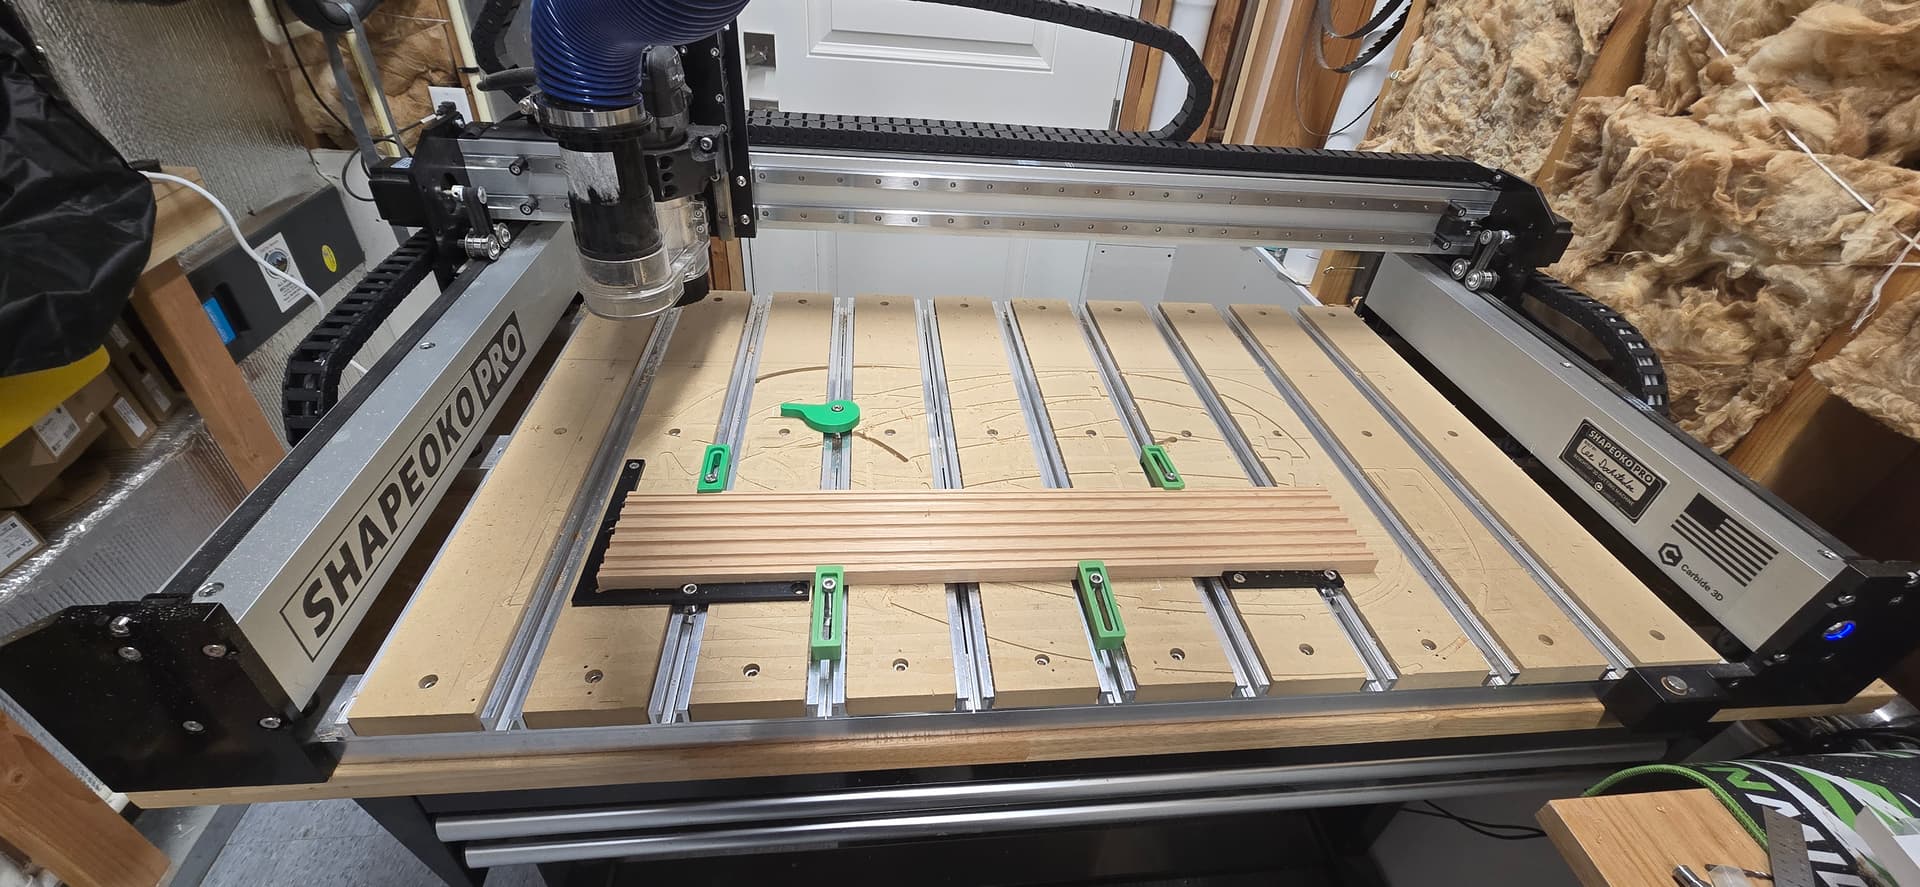
Looks like your surfacing on the first cutting board turned out well. I would recommend cutting with the grain rather than across it whenever possible.
1 Like
What kind of toolpath did you use to take off the top layer? I’ve been pondering trying something similar to flatten cutting boards.
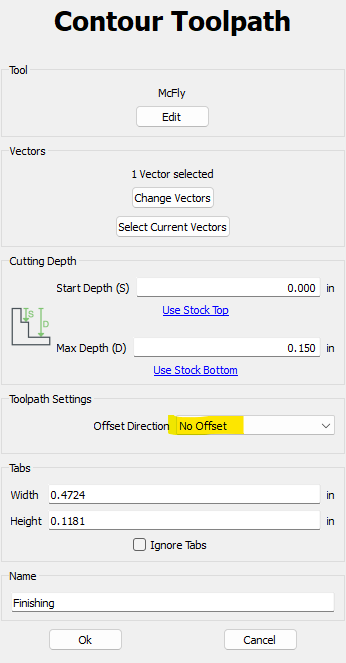
It’s a contour path. I used the same overall method to trim a rough piece of walnut, so we’ll go through my process as an example.
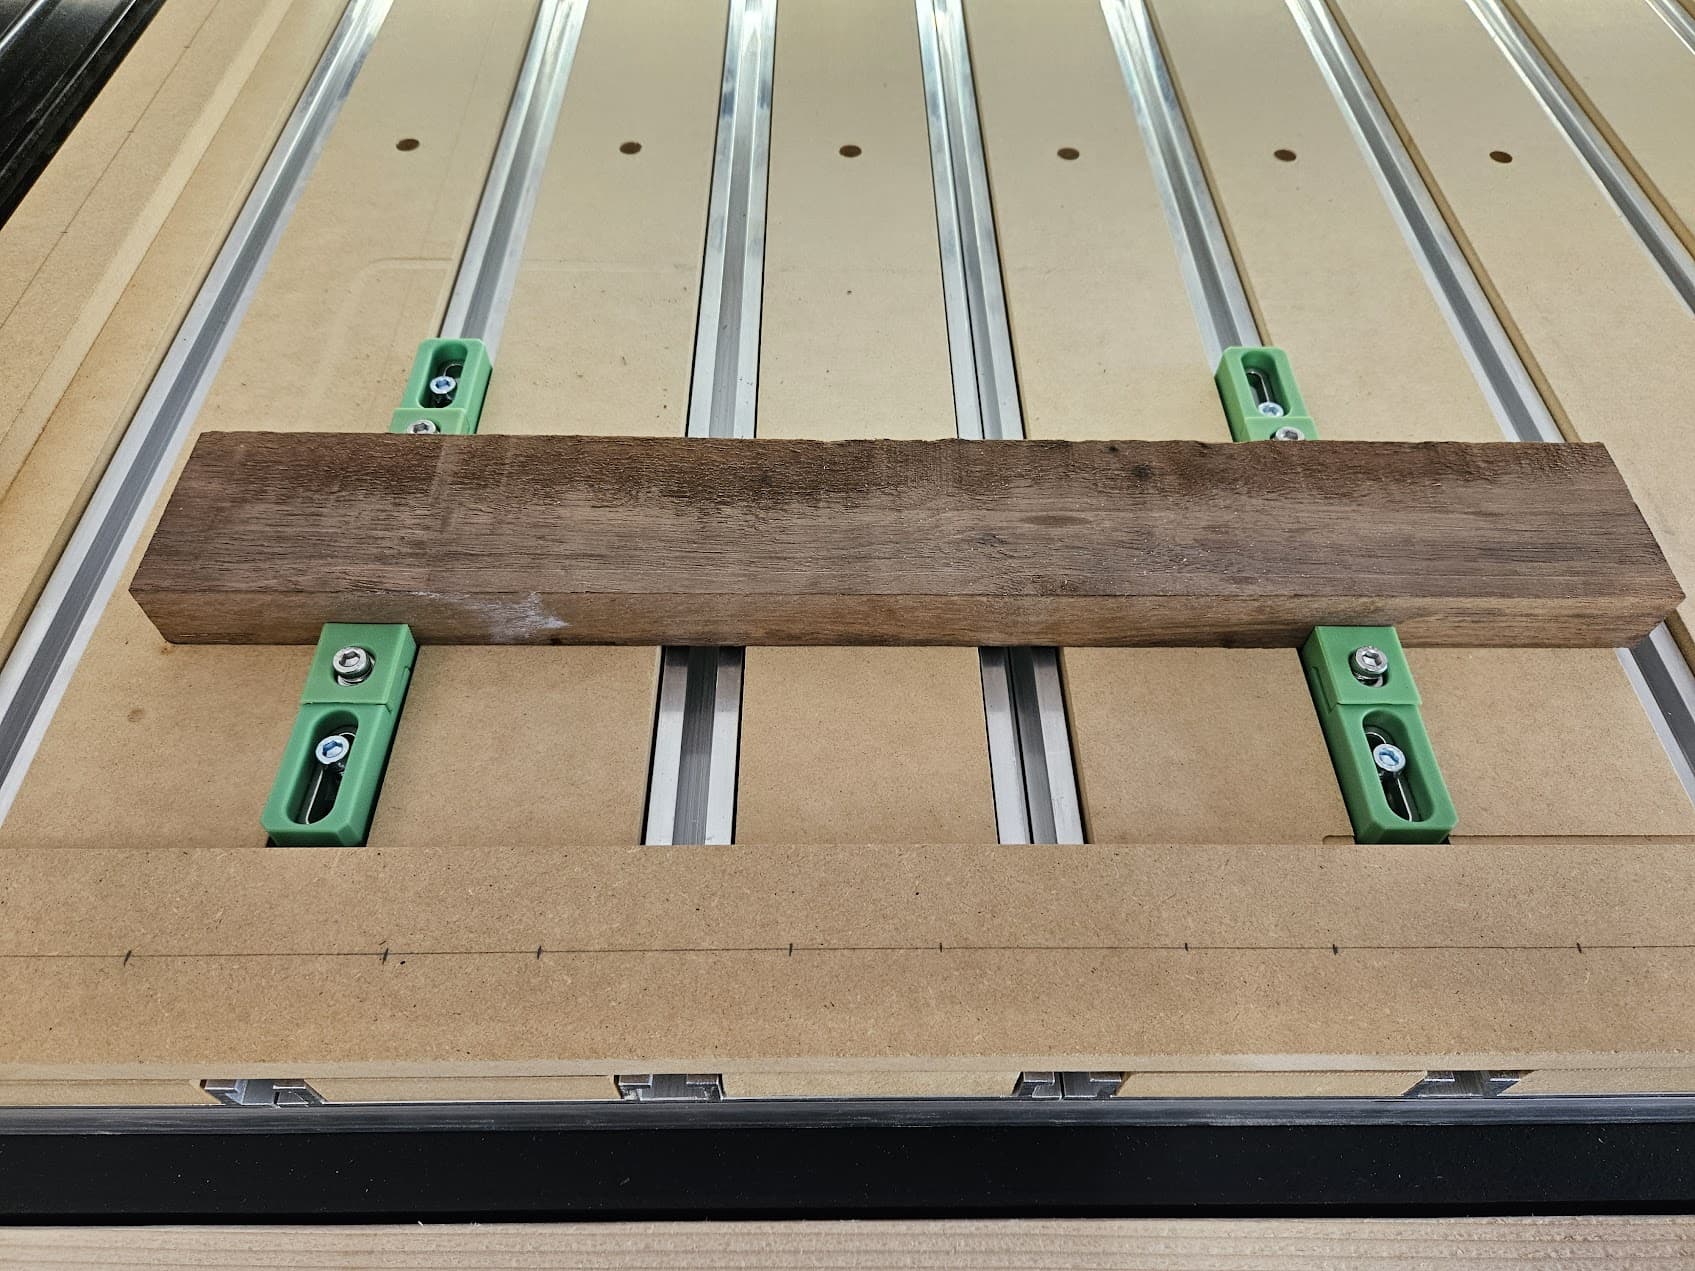
Central Hardwoods in Dallas has a ‘scrap’ bin and boards are just $2, or $3 for walnut. I bought a piece of walnut that was pretty rough, knowing it would serve as a good test for McFly, and also as an inlay for a line of text.
I start by measuring the stock, in this case 18.5" x 2.7". I’m going to use my 3-2-1 blocks to stand if off my fence so that I can rely on my trusted XY origin. This means I set up my Carbide Create file to be 3 inches wider and longer - 21.5" x 5.7". I know that the actual origin of my stock is at 3,3. In the image below, the red arrow is the actual stock origin, and the pink arrow is the start of the contour path.
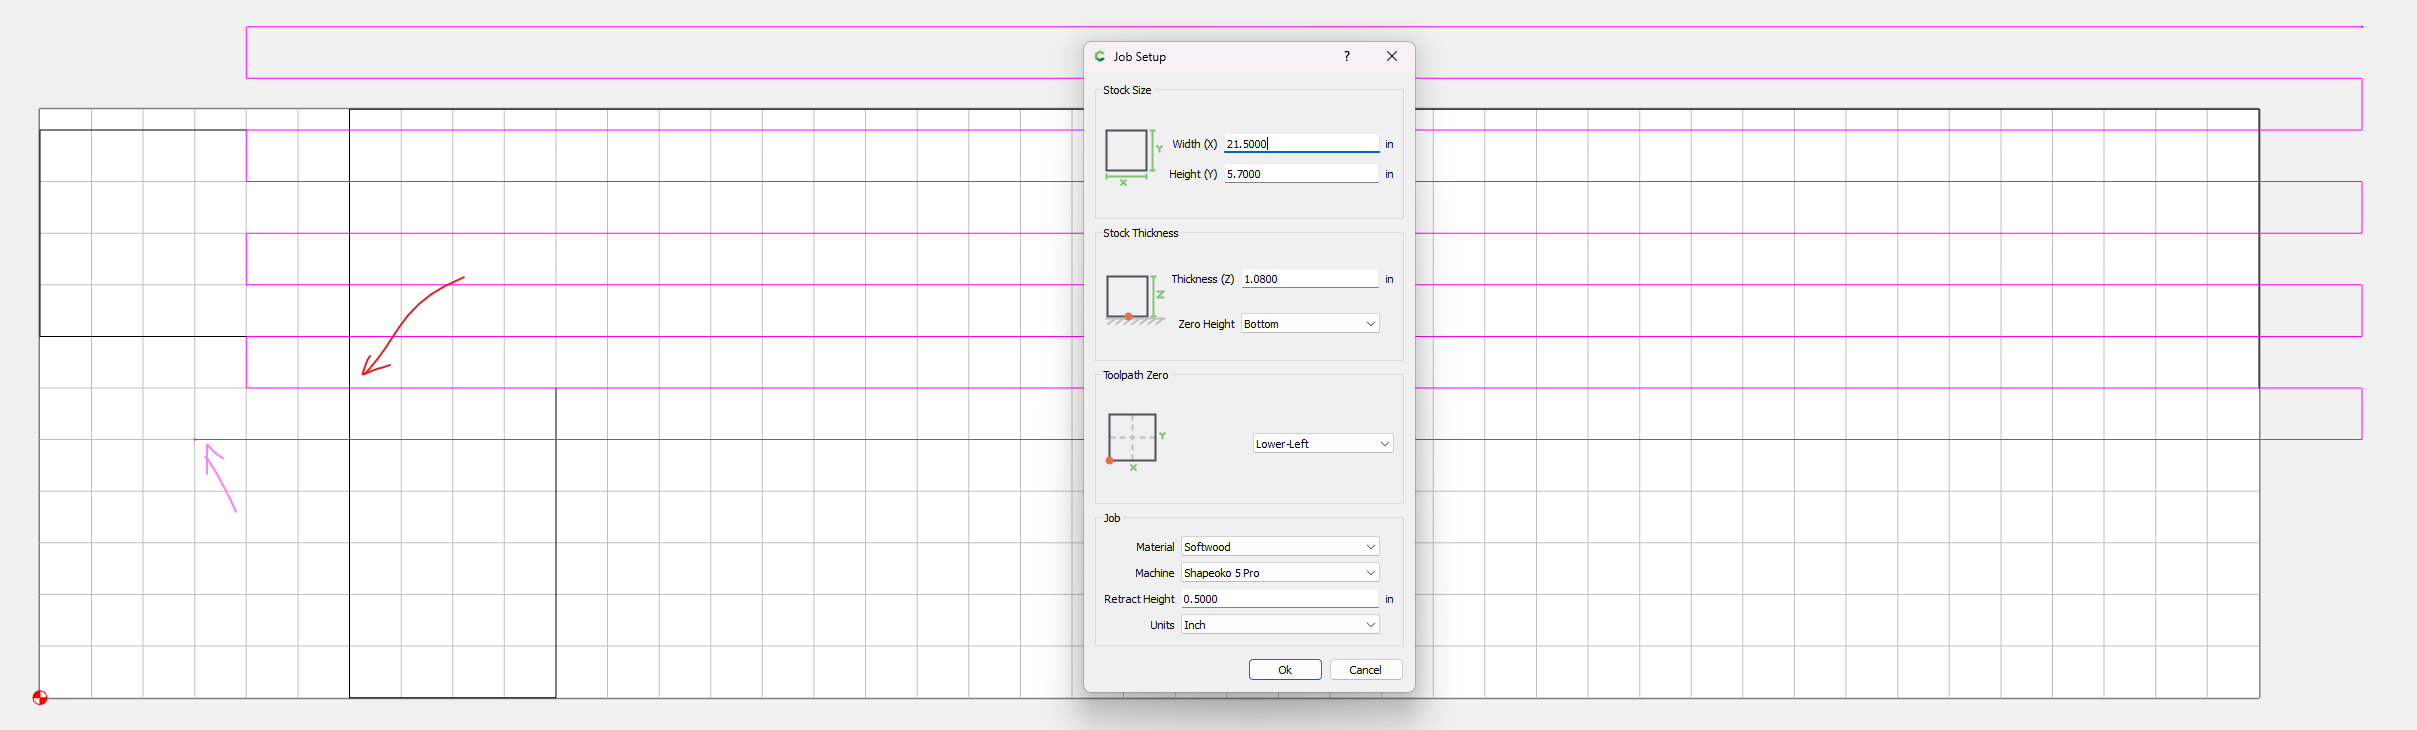
To set the contour path, first consider the bit you’re using. Stepover should be no greater than 50% of the bit diameter (McFly is 1", so .5" stepover max).
Set your grid to match the desired stepover, and using the polyline tool, create a back and forth patter as shown above ensuring that you start, turn, and stop outside the stock dimensions. As @Tod1d noted earlier, this should be done in the same direction as the wood grain. Having the cutter change direction while in contact with the material can give bad results (like burn marks).
Then, set your contour path using that polyline with no offset.
Here’s the walnut after securing it to the wasteboard. No need for super glue method as I’m not going that much off the top, just getting rid of the rough parts.
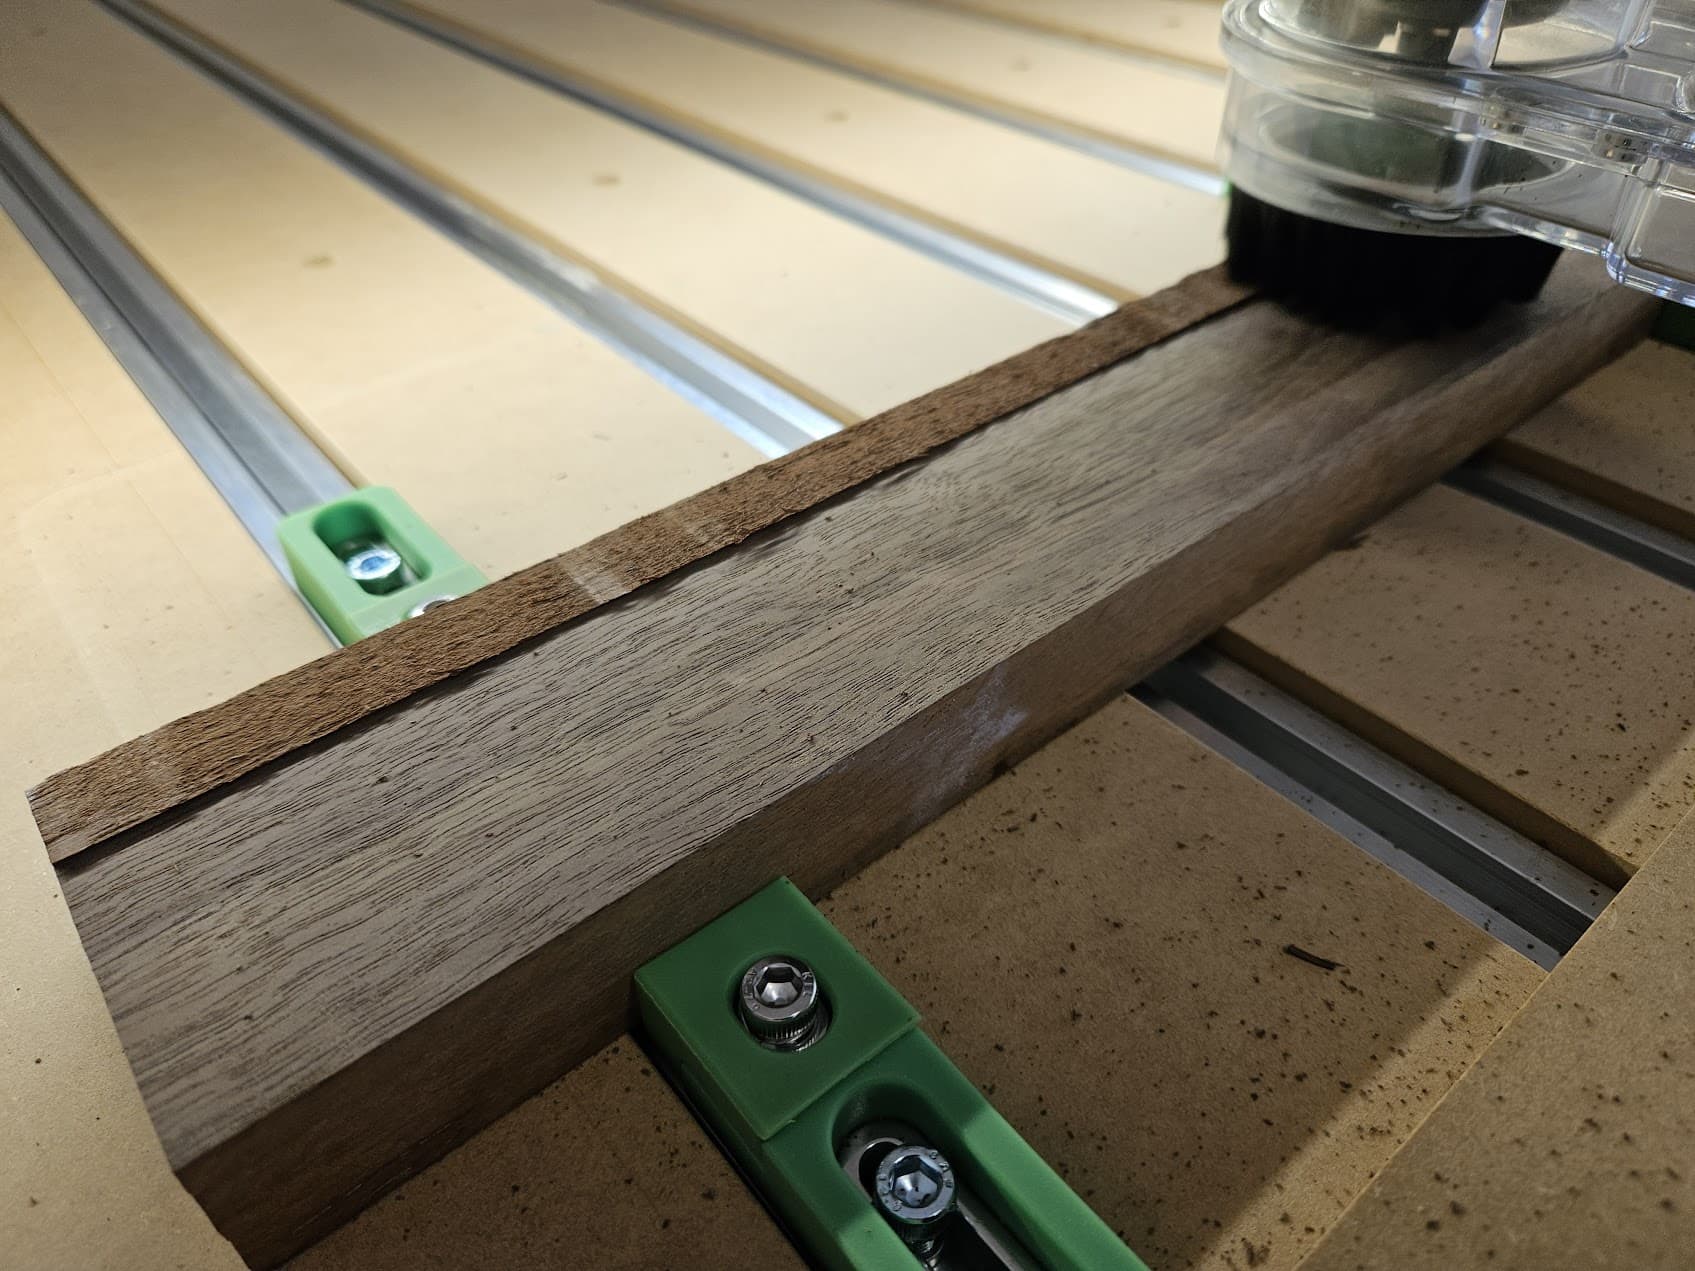
Then let your bit go to work. McFly did a great job of turning this into a nice piece of stock for future use.
Hope this helps, let me know if there are any other questions.
4 Likes
Very good point on the grain direction! I noticed this as I was loading the stock and decided to go for it. When I cut the round boards I did turn them 90 degrees to match the grain. It’s all in the details!
1 Like
For one walkthrough on this see:
1 Like
That’s a great reference, especially when the stock is warped or twisted.
I’ve been raising Mason Bee’s the last few years and was asked to make a couple of Mason Bee houses for a local non-profit arboretum. The build was rather simple but making 30 copies that are exactly the same on both sides was a first for me. I read a few postings on the forum that helped with a repeatable setup fixture. I ended up screwing a guide to one end of the bed and using the jog feature and a 1/4" bit and a piece of paper to align the other end. Instead of trying to make a built in male / female alignment feature like an inlay I simply used 1/8" bamboo BBQ skewers to crazy glue it into a slot milled into the surface. It worked really well. I also used the CC .STL files to 3D print the hold downs. Thanks for the CC contribution!

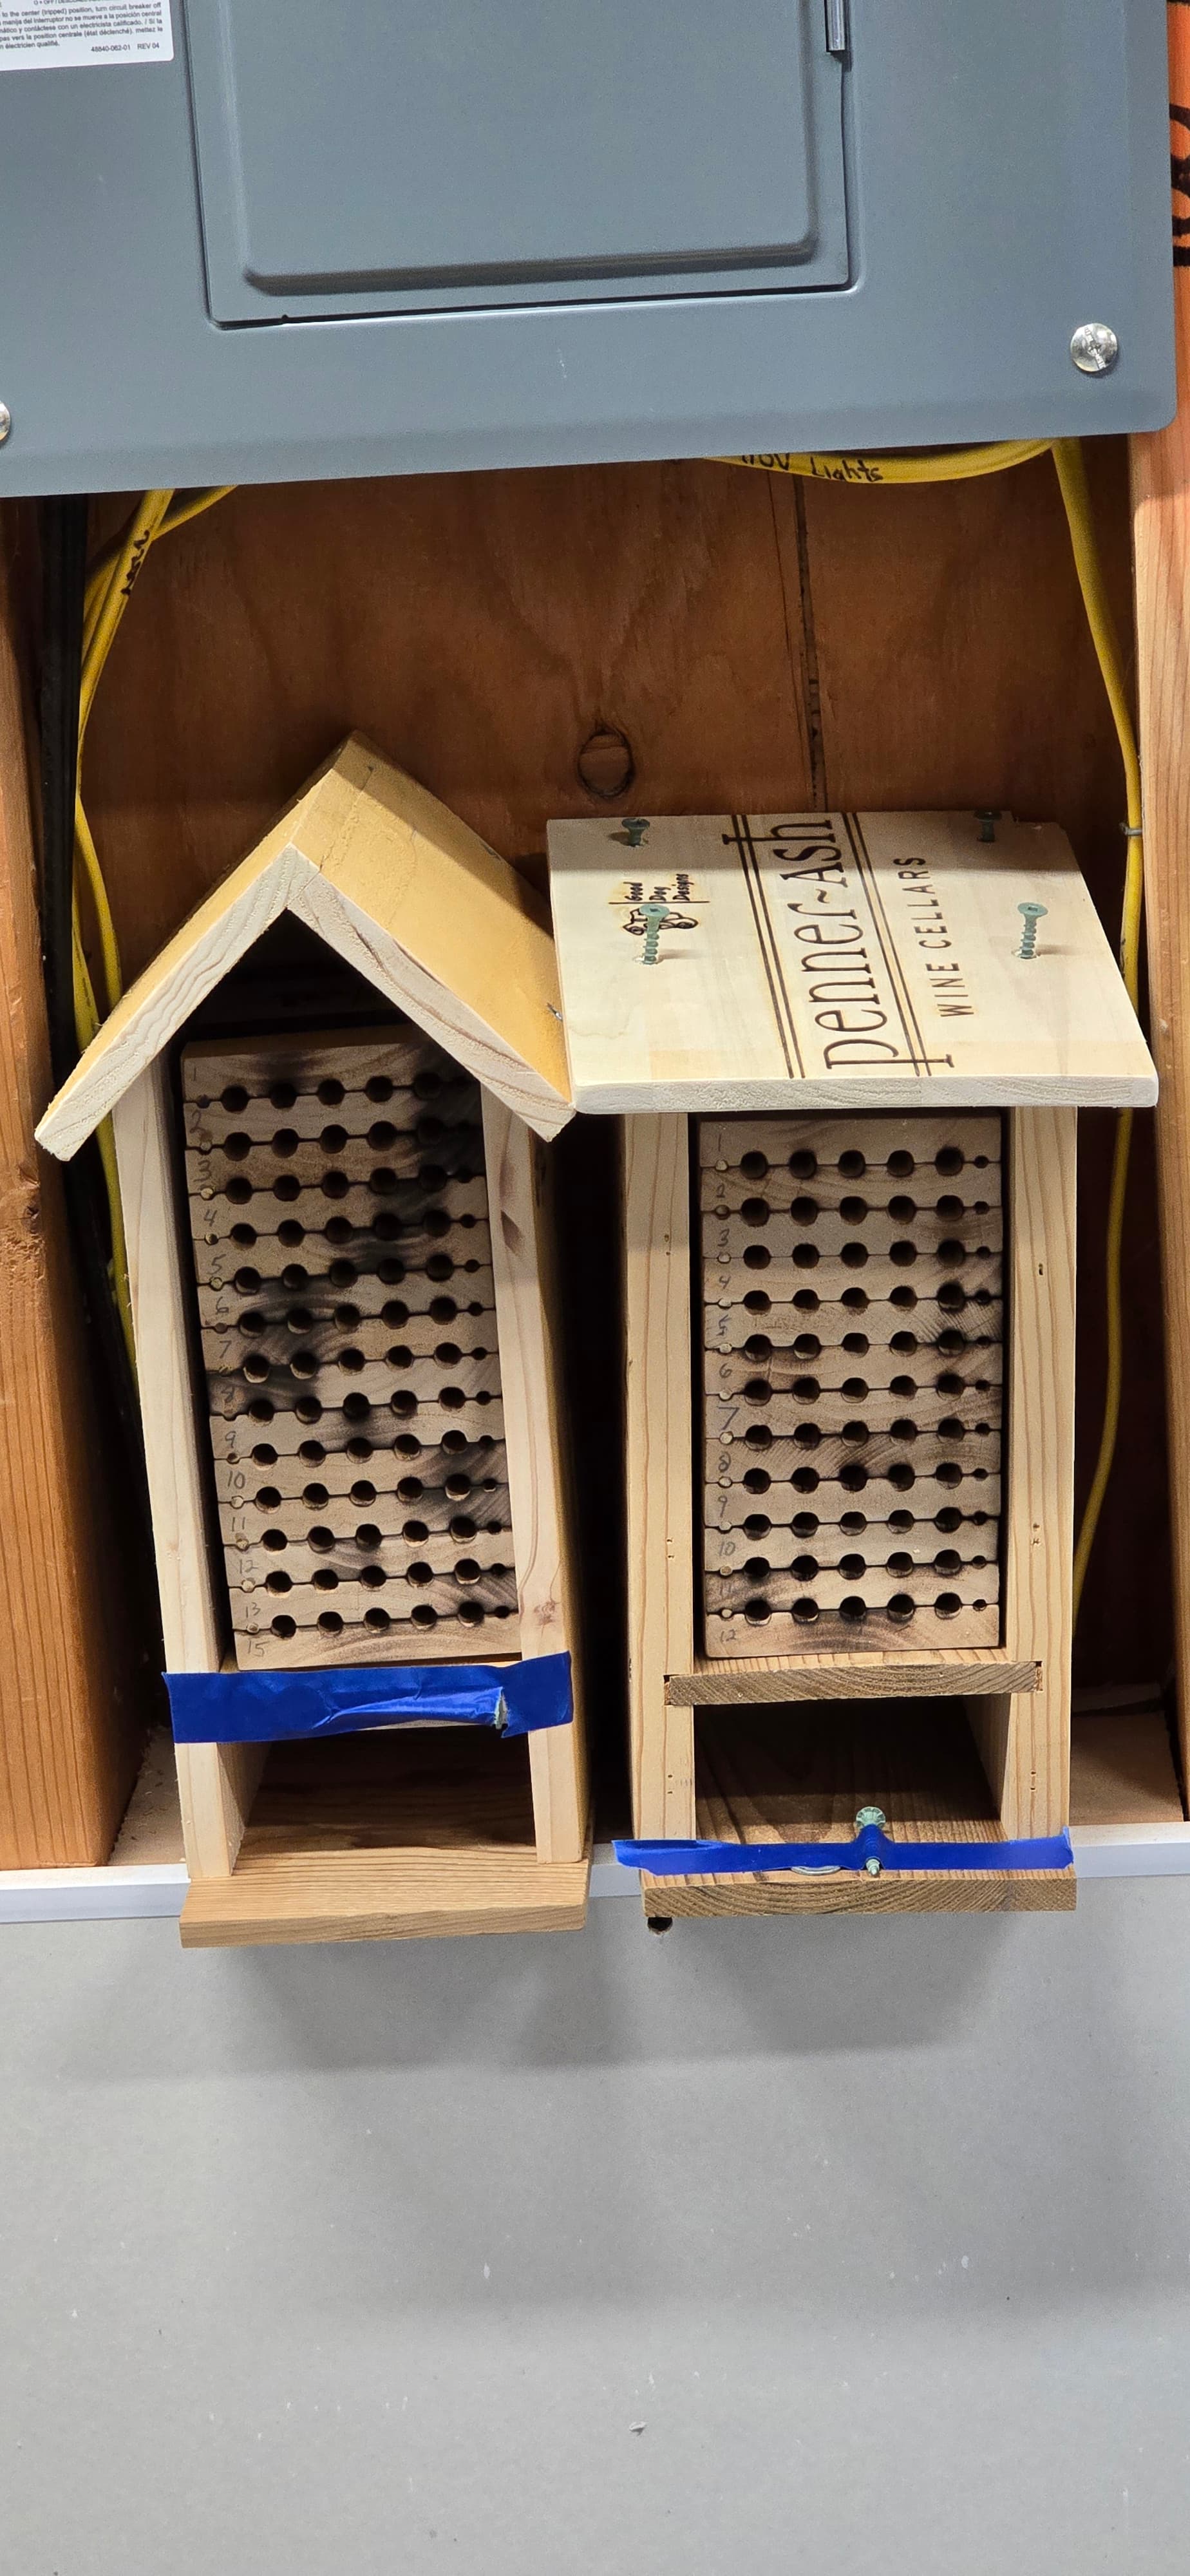
Here are the .c2d files if anyone wants to prepare them for spring. One file starts with the 1/4" bit and one starts with the 1/8" so you can avoid one tool change for every board. The boards are elder and are milled and planed flat to 24" x 3.75" x .625". The houses are cedar picket fence boards.
Bee House skewer final_250 first.c2d (64 KB)
Bee House skewer final_125 first.c2d (64 KB)
Enjoy, Lee
16 Likes
I am finally up and running again and the first one to do was a file created by cnc file designs of a Llama.This is the finished product straight off the machine ,I use European Beech and very surprised there was no stringers or chipping.Thanks so much Charles
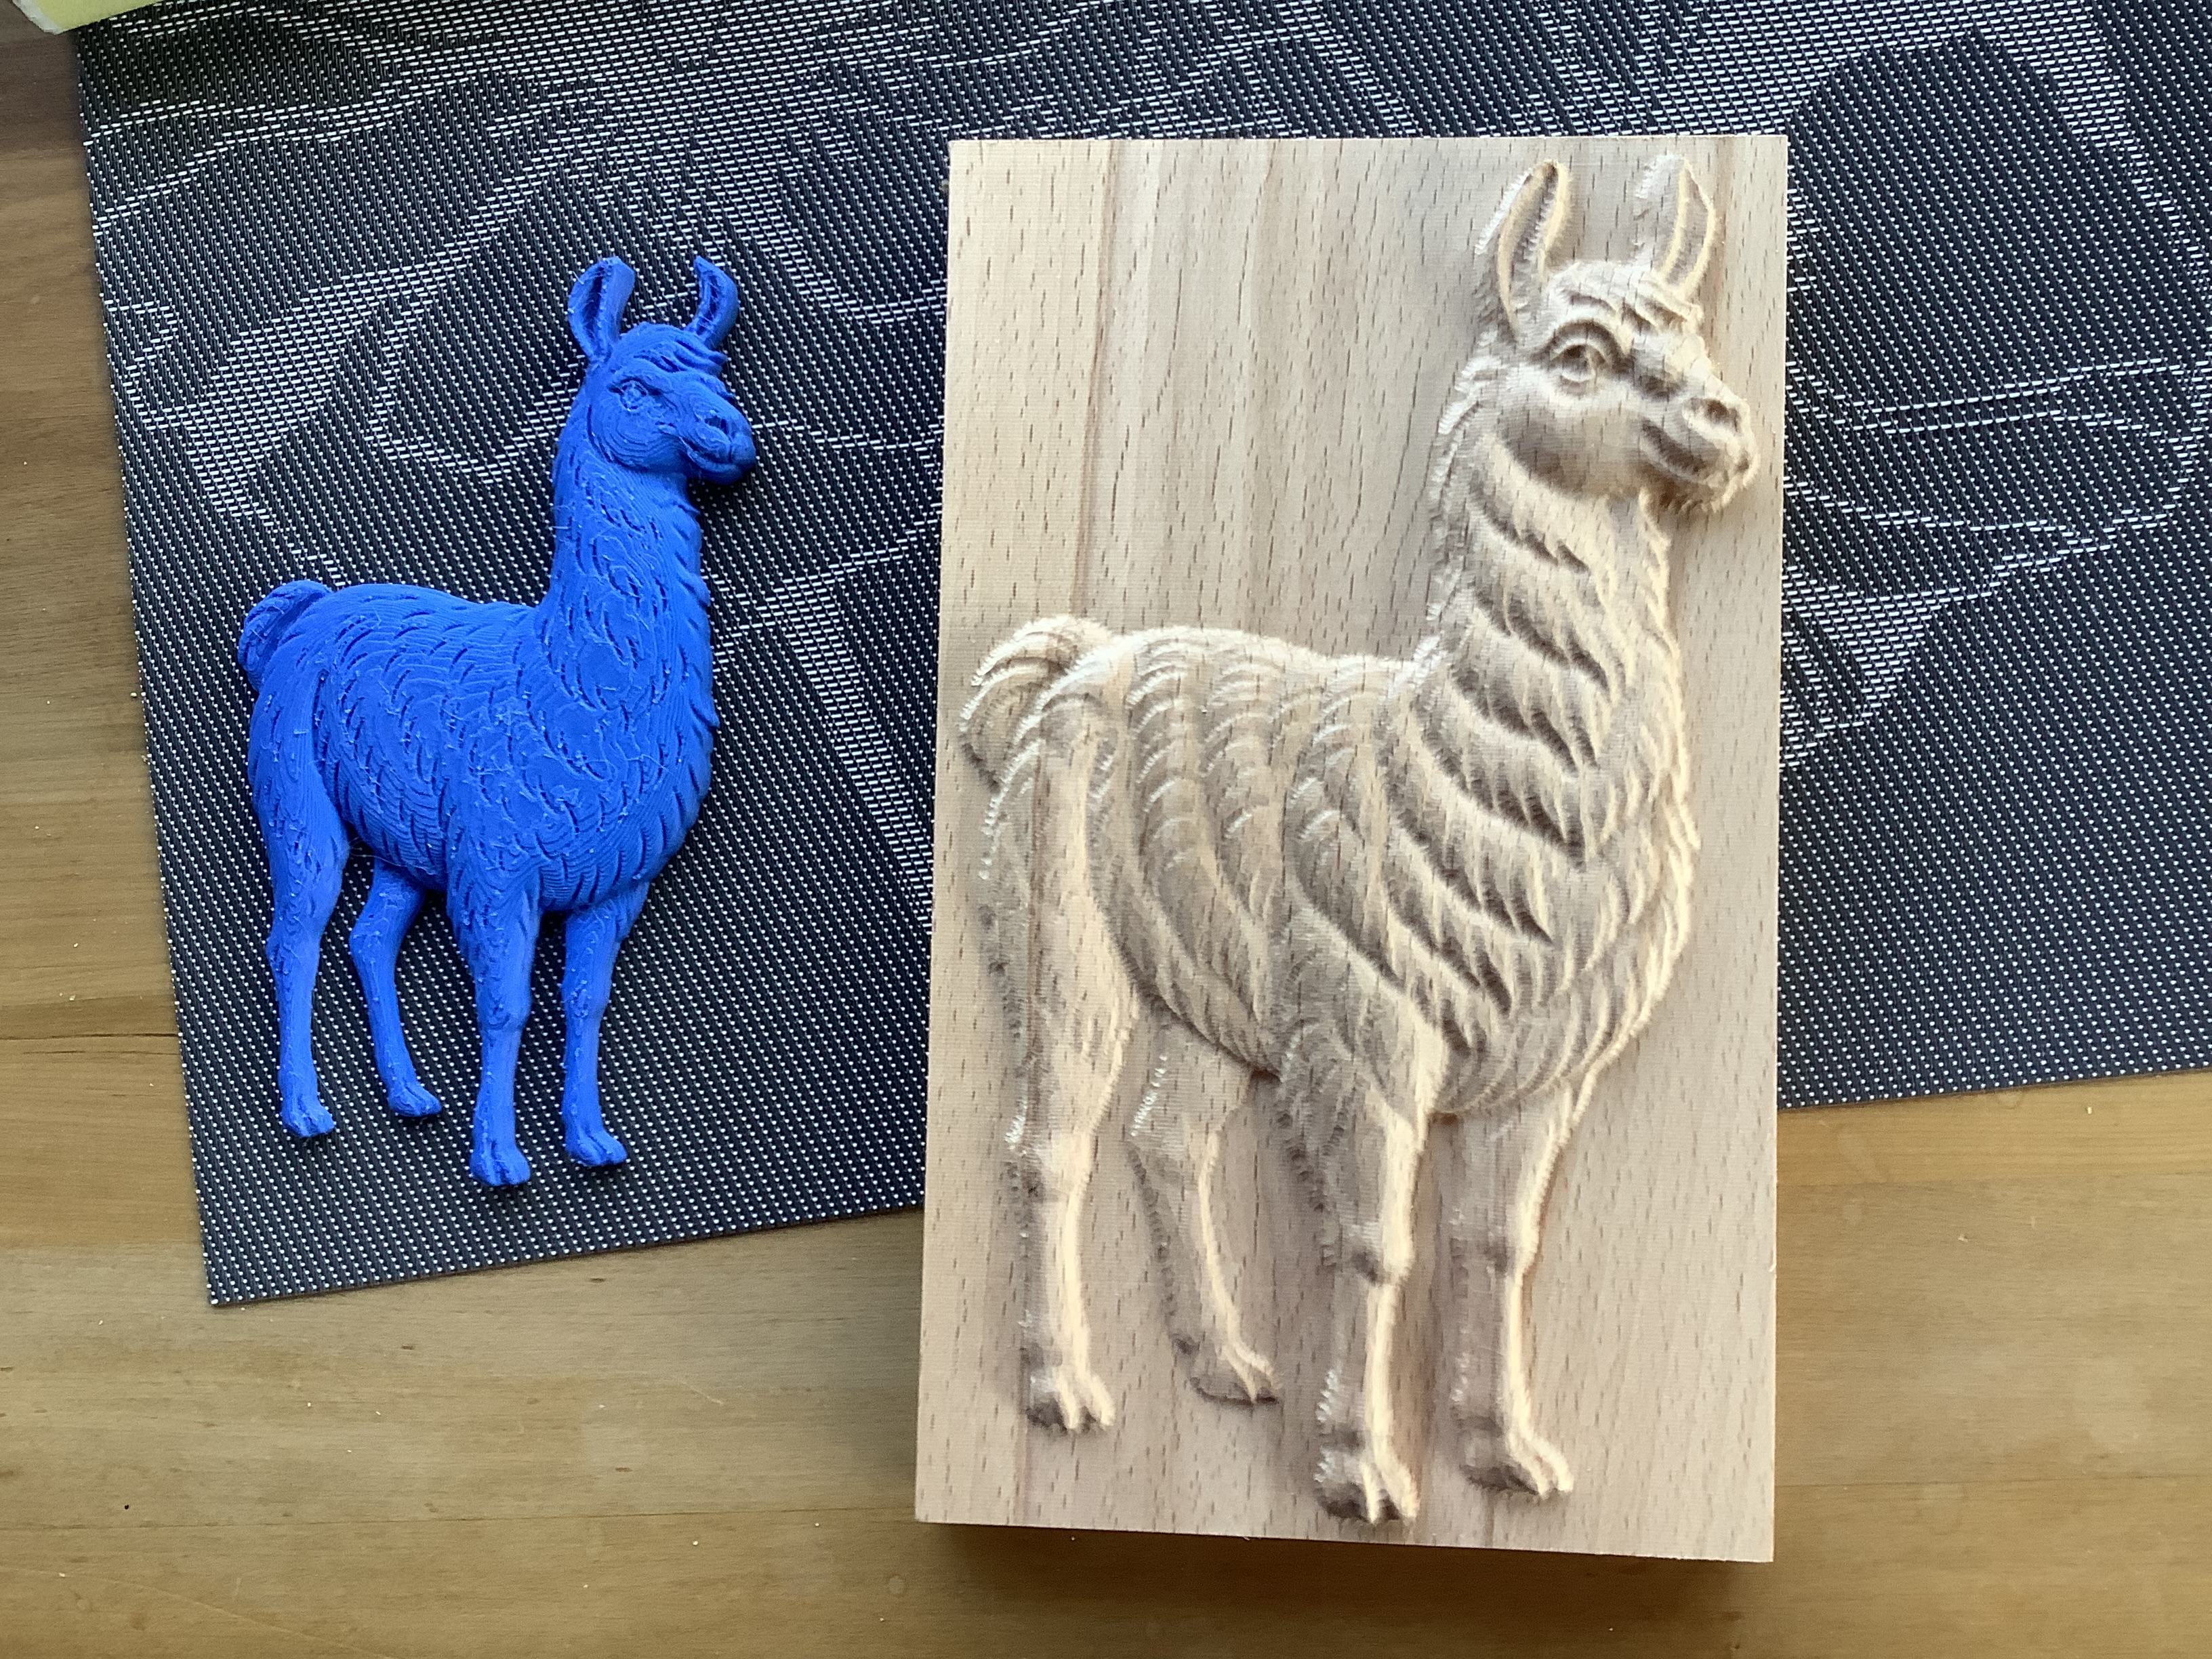
16 Likes
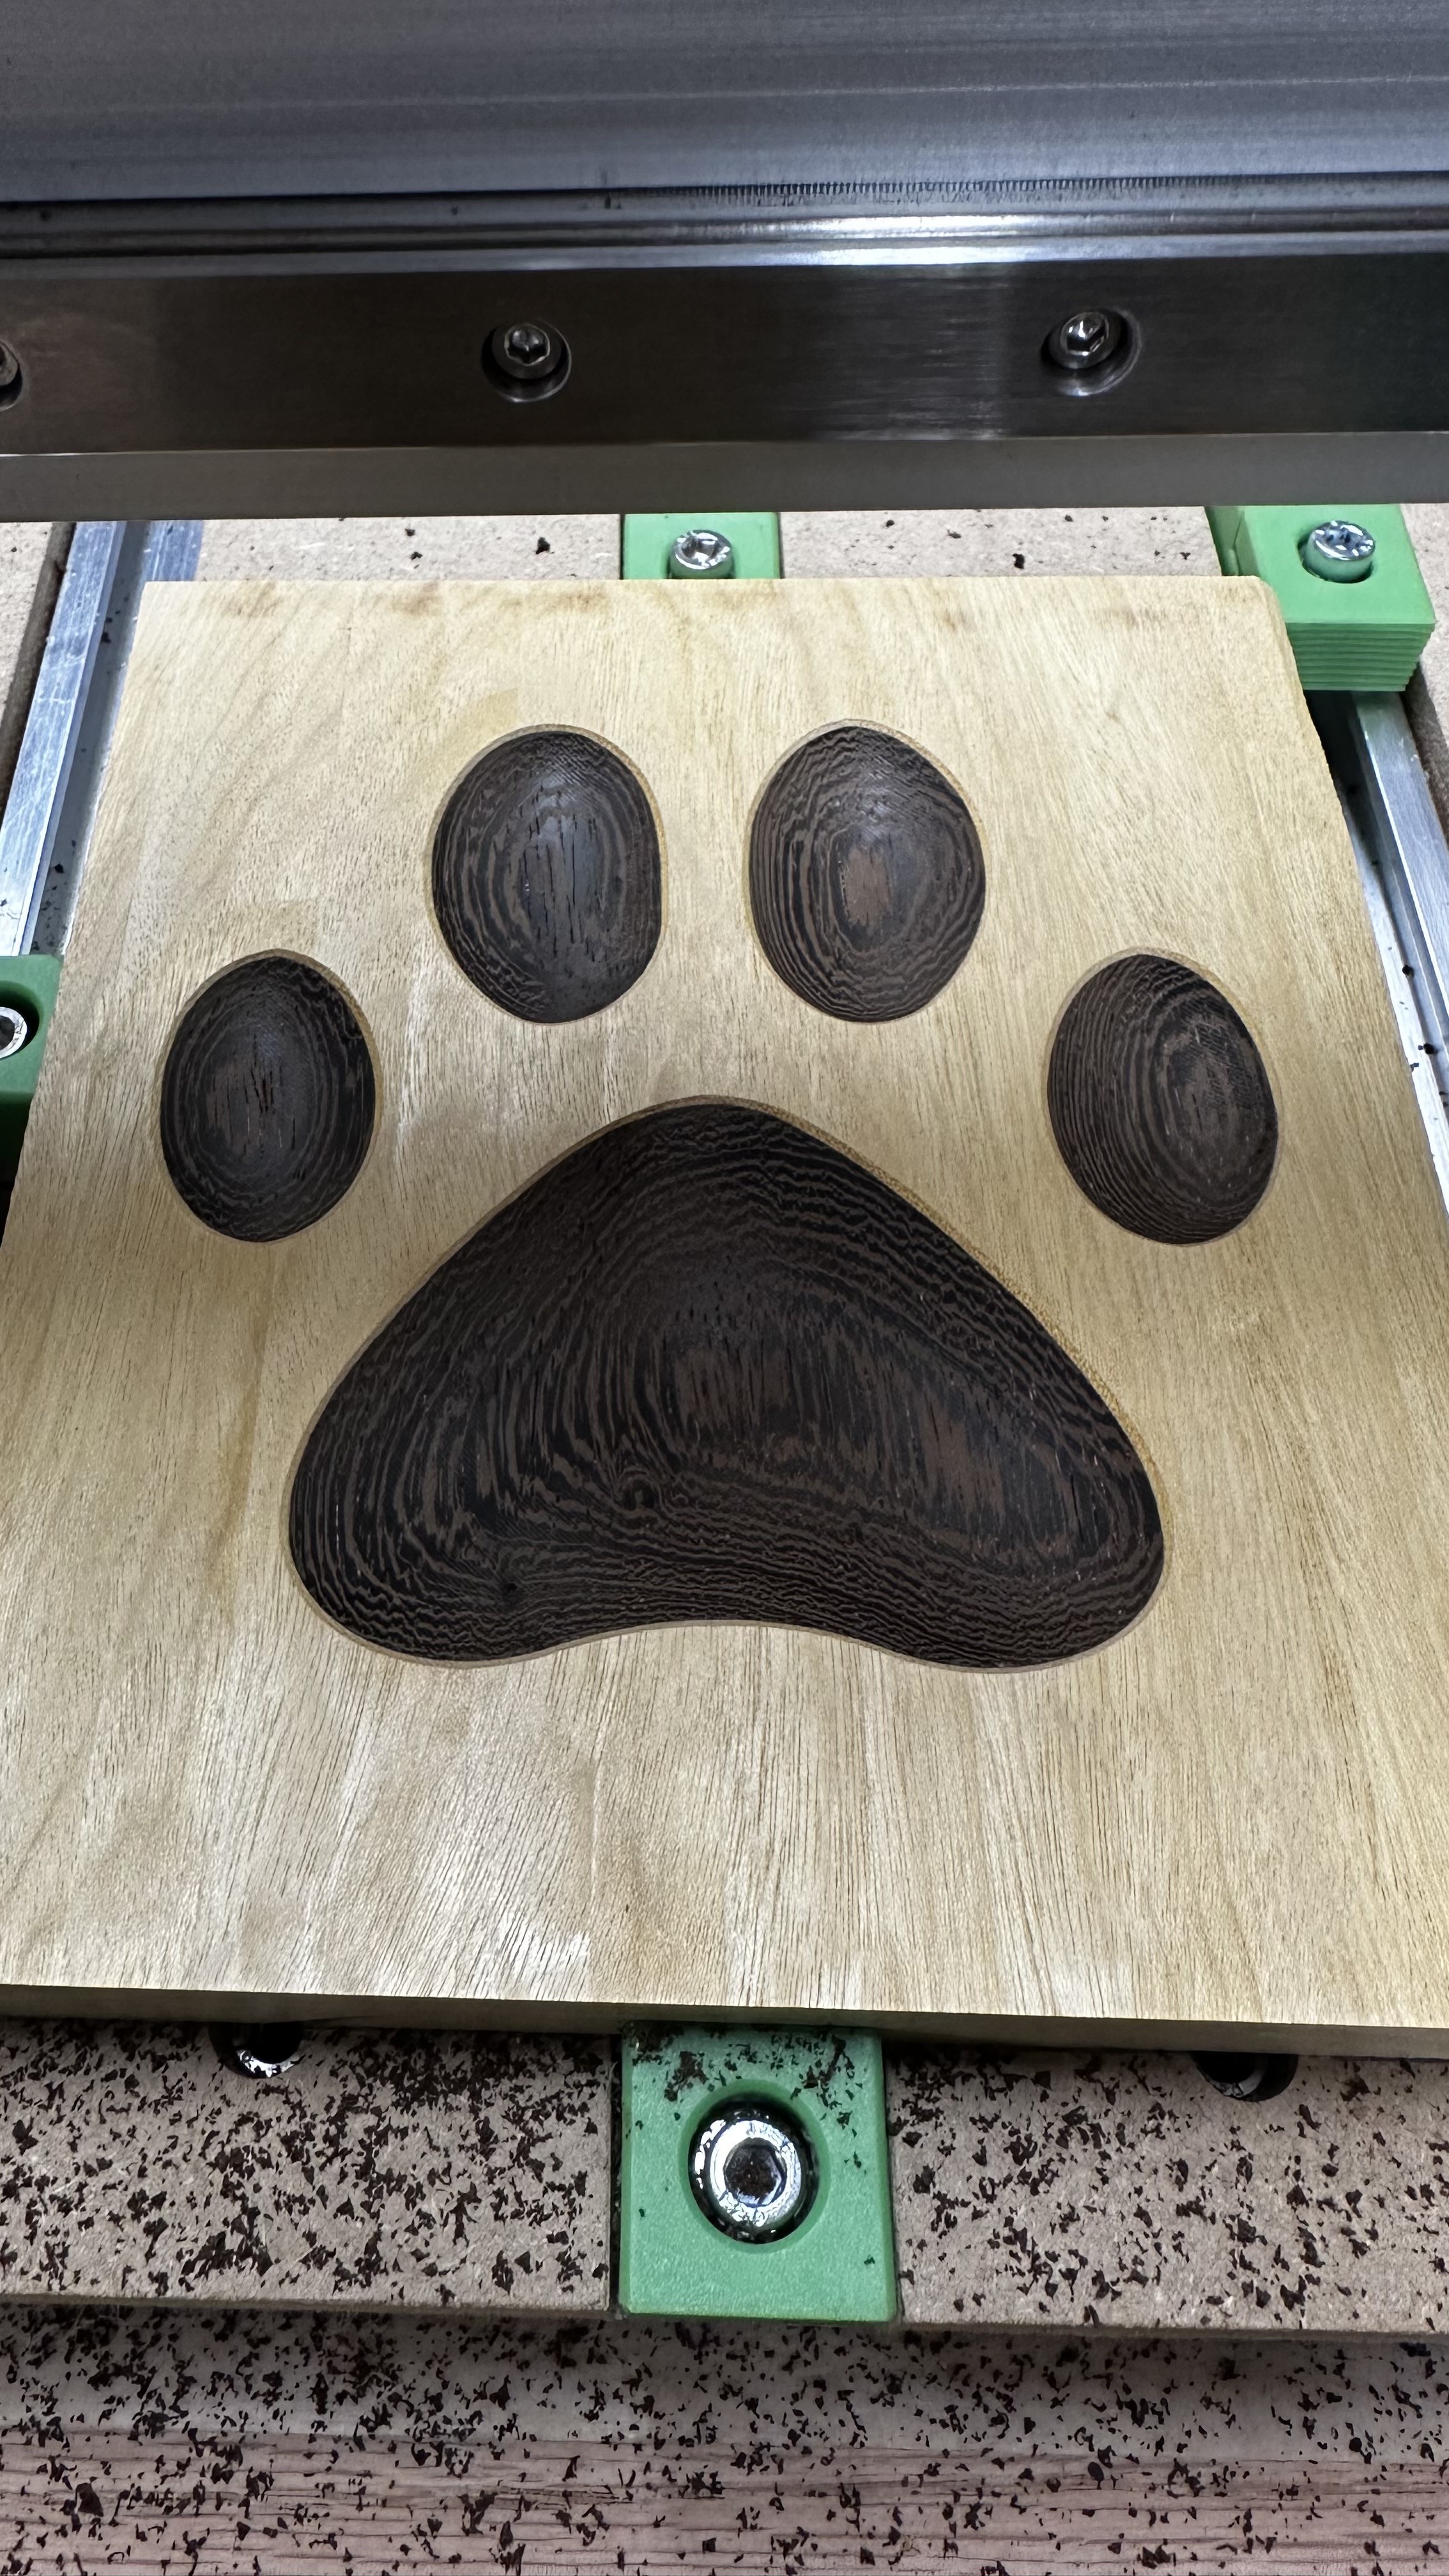
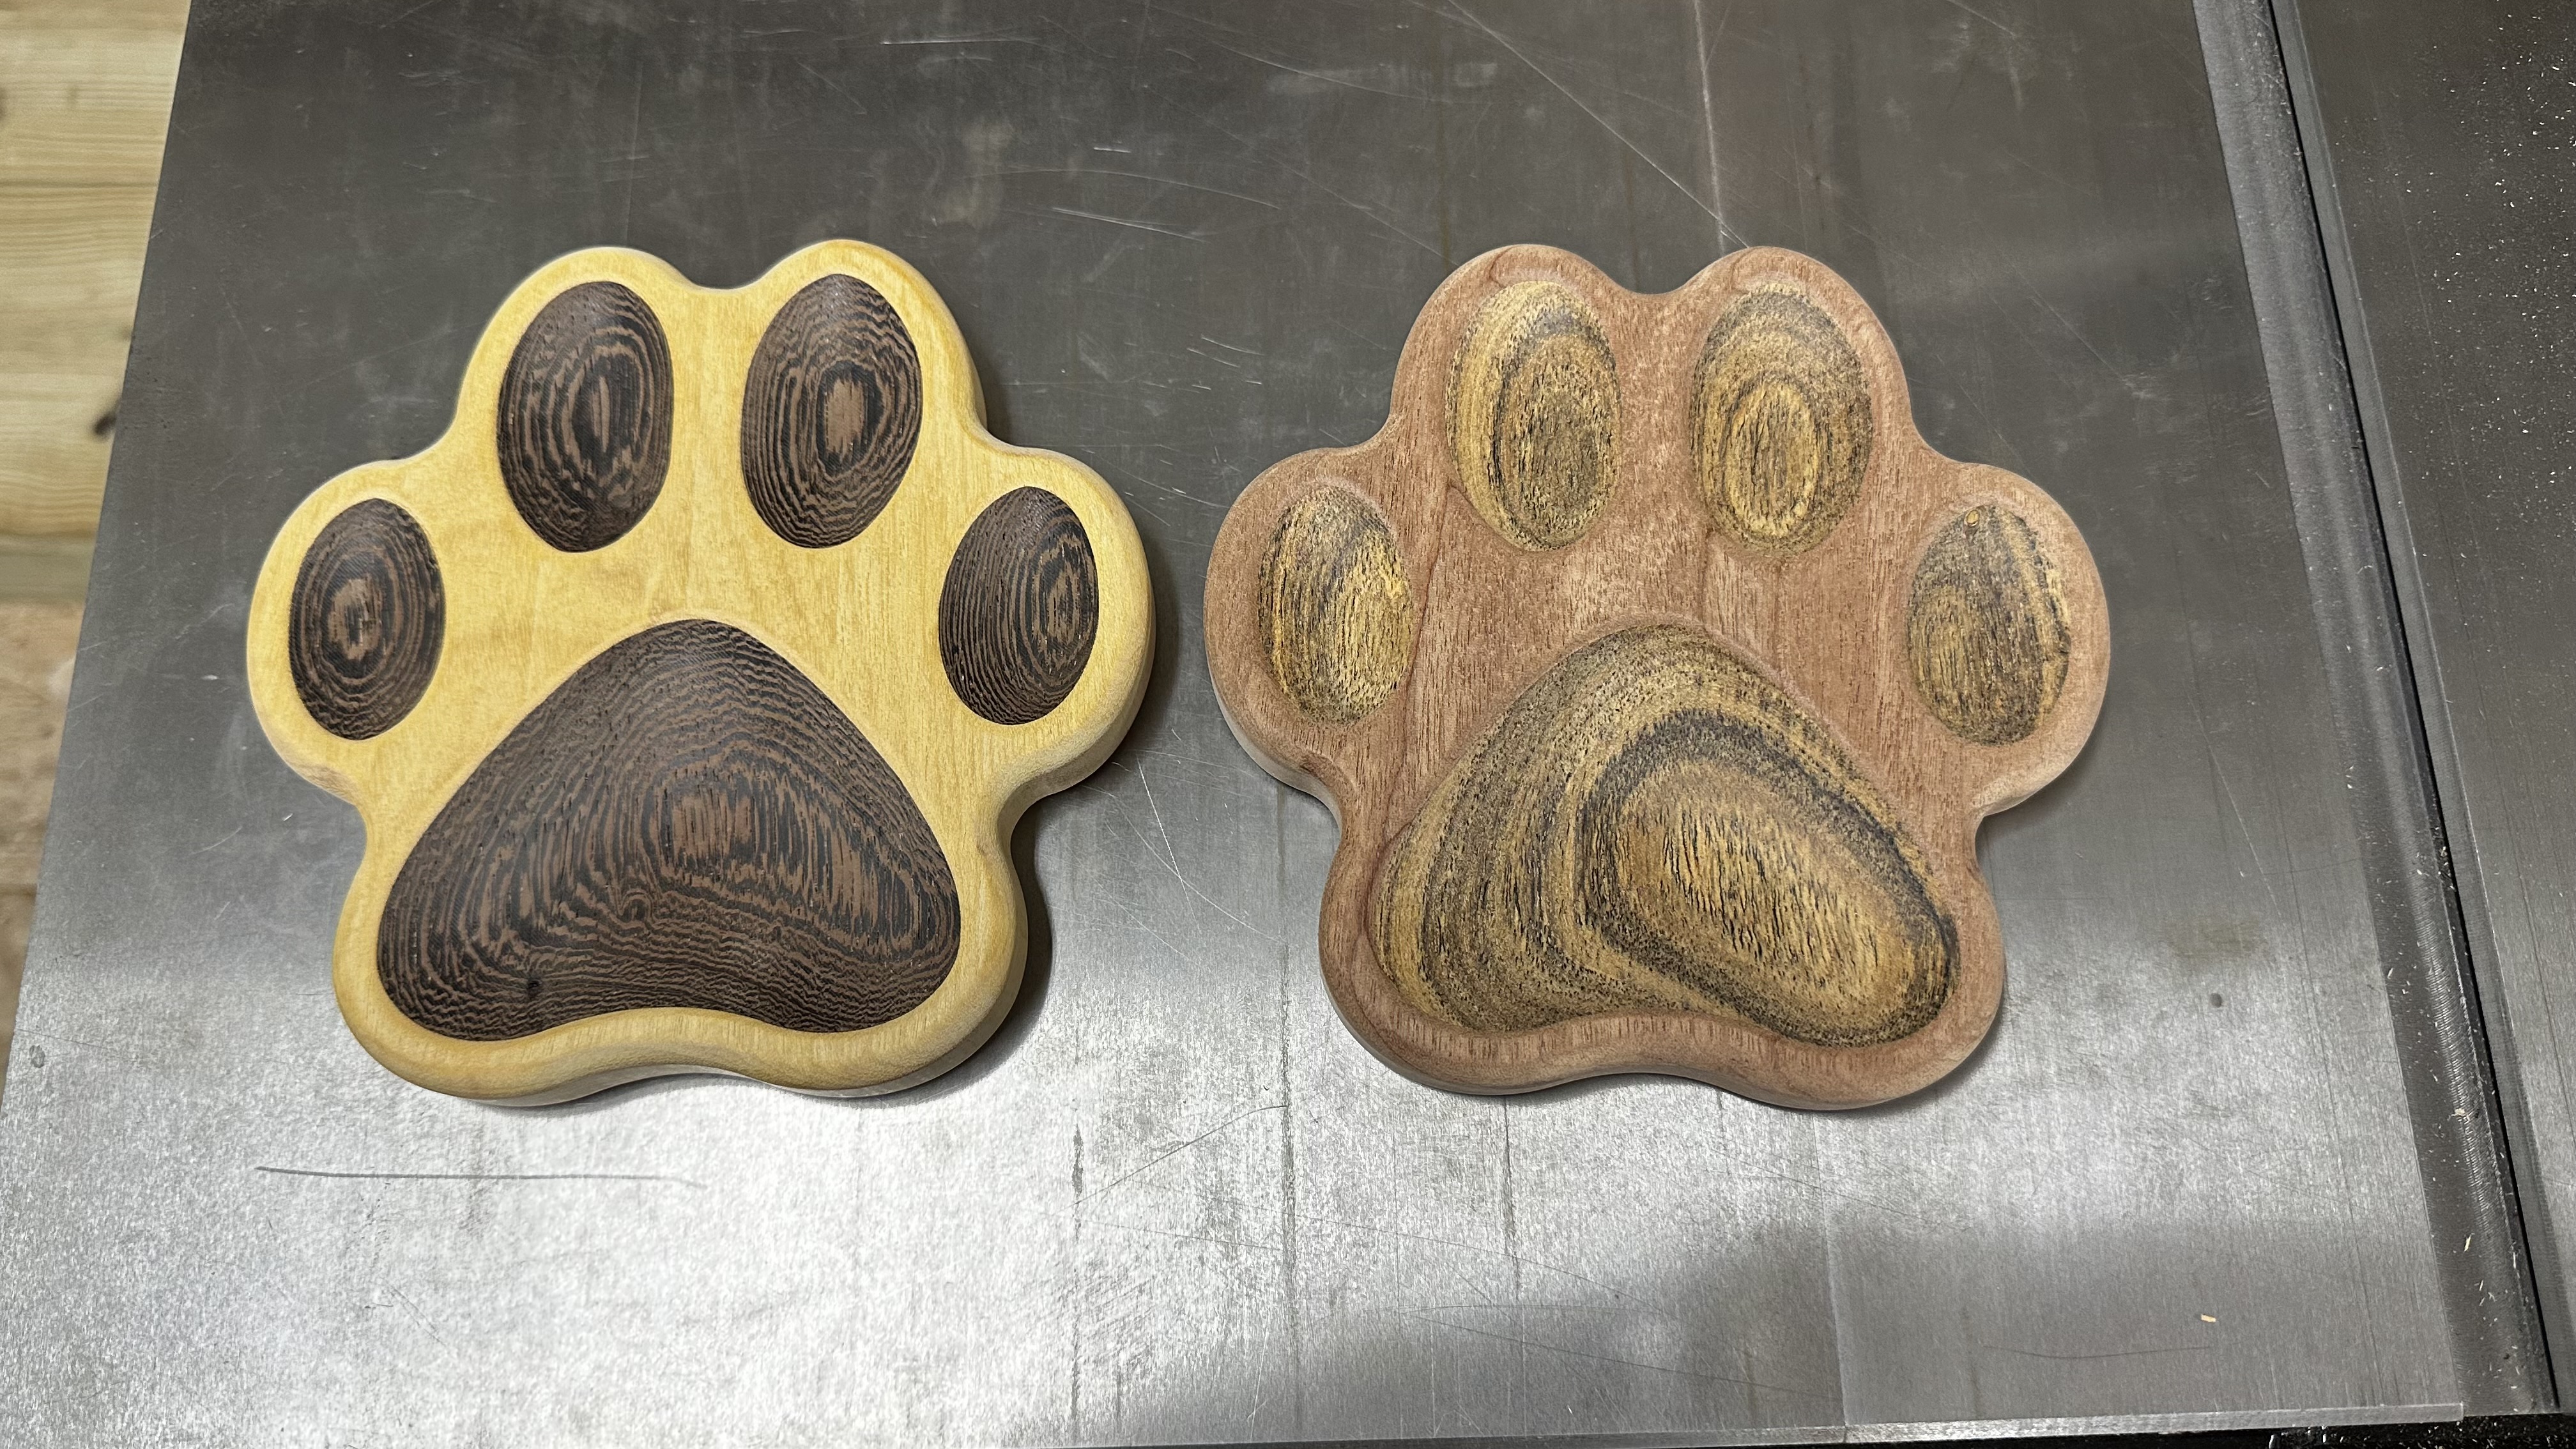
Made these 3d paw prints. This was a multi step process, I had to make pockets and plugs of the two different species of wood, then glue those together, run a facing pass, and come back with a 3d carve for the toe beans before finally cutting it out. Keeping same X Y origination point was super important.
23 Likes
My daughter wanted a prayer bowl for a gift. May not be used for food, but I finished it with wood butter anyways, just in case… Made from a black walnut cookie, so it’s all end grain.

20 Likes
Really great work. I have not tried using epoxy inlays yet. How did the mcfly bit with with that?
1 Like
Was the cookie green or dried? Did you cut both sides with Shapeoko? I see writing on the rim what bit did you use to engrave it? Tell us how you did it please.
Sorry for all the questions but I turn as well as use my CNC so it interests me about “turning” on the cnc.
McFly did well with the epoxy. There are a couple marks that should sand out easily, but overall it looks really good. I’ll post more pics after sanding and polishing.
I will note that the file was set up to go a little deeper, but I stopped it after the first pass as it cleared everything - no need to go over it again. The next time I do this I’ll likely shorten the depth per pass. It was an aggressive cut, but McFly handled it very well.
Thanks, Guy
It started out relatively green, I think it’s from last spring. I dried it for several days in my paint booth, which is just my machine enclosure with a dehydrator head on top.
I did both sides on my shapeoko. I cut the concave bowl first, leaving some stock around the outside to clamp after the flip. I machined 2 1/4" dowel holes through the offal & into the spoilboard for the flip. I engraved the rim & bottom of bowl with a 60° downcut V (Groovy Jenny). I also engraved my logo “1D” in the bottom as a manufacturer’s mark.
I left a 0.100" flange on the bottom rather than cutting through with tabs. I bandsawed the flange & cleaned up the edge on a disk sander. A bunch of hand sanding & some wood butter buffed in with 000 steel wool.
1 Like
First run with bowl bit. Not sure how my sides became uneven so going to have to figure that part out. Pretty happy with first attempt though.
9 Likes


21 Likes
Looks great! Is that green paint or a stain?
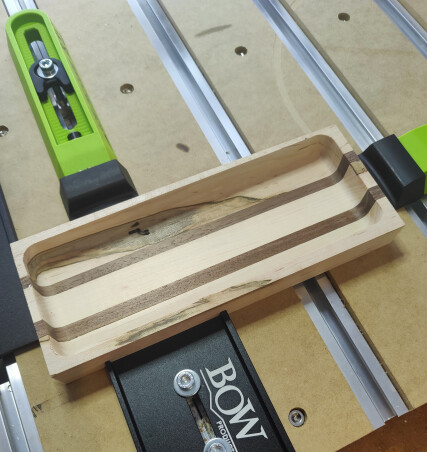
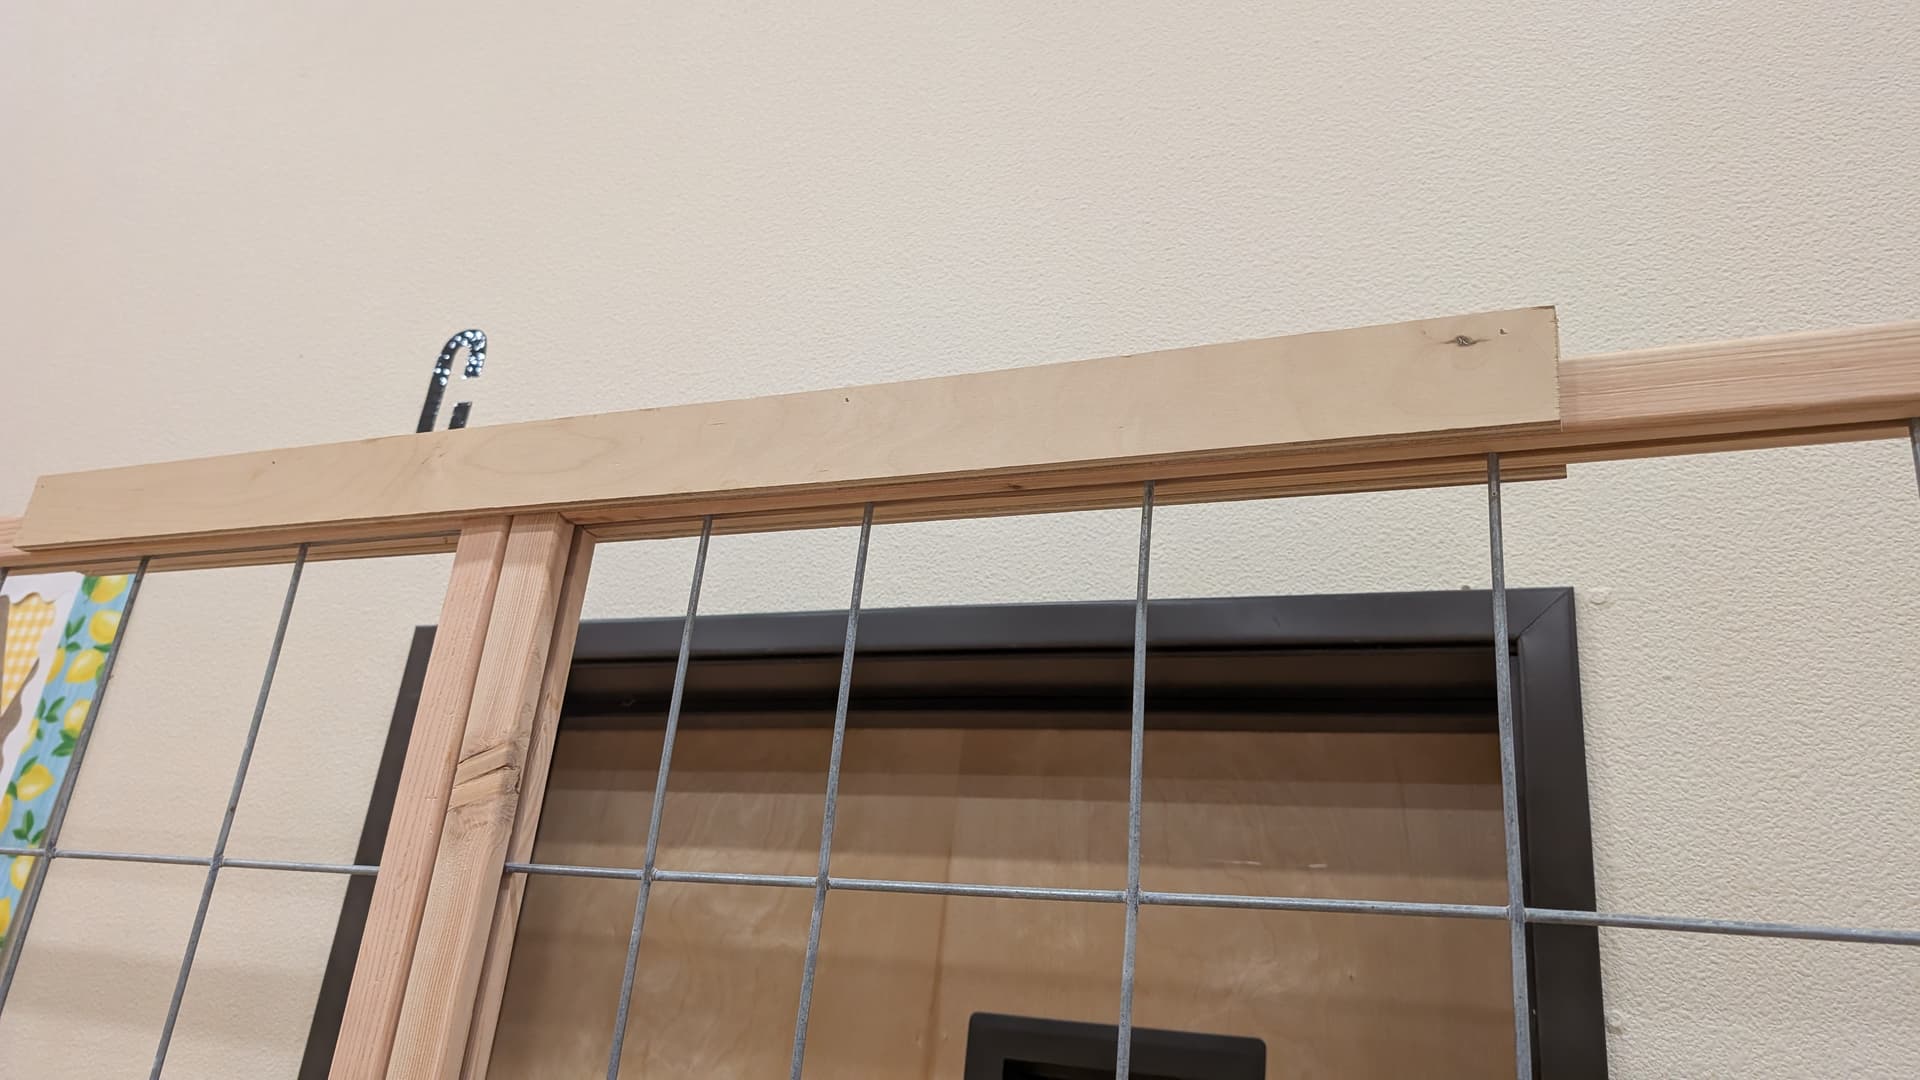
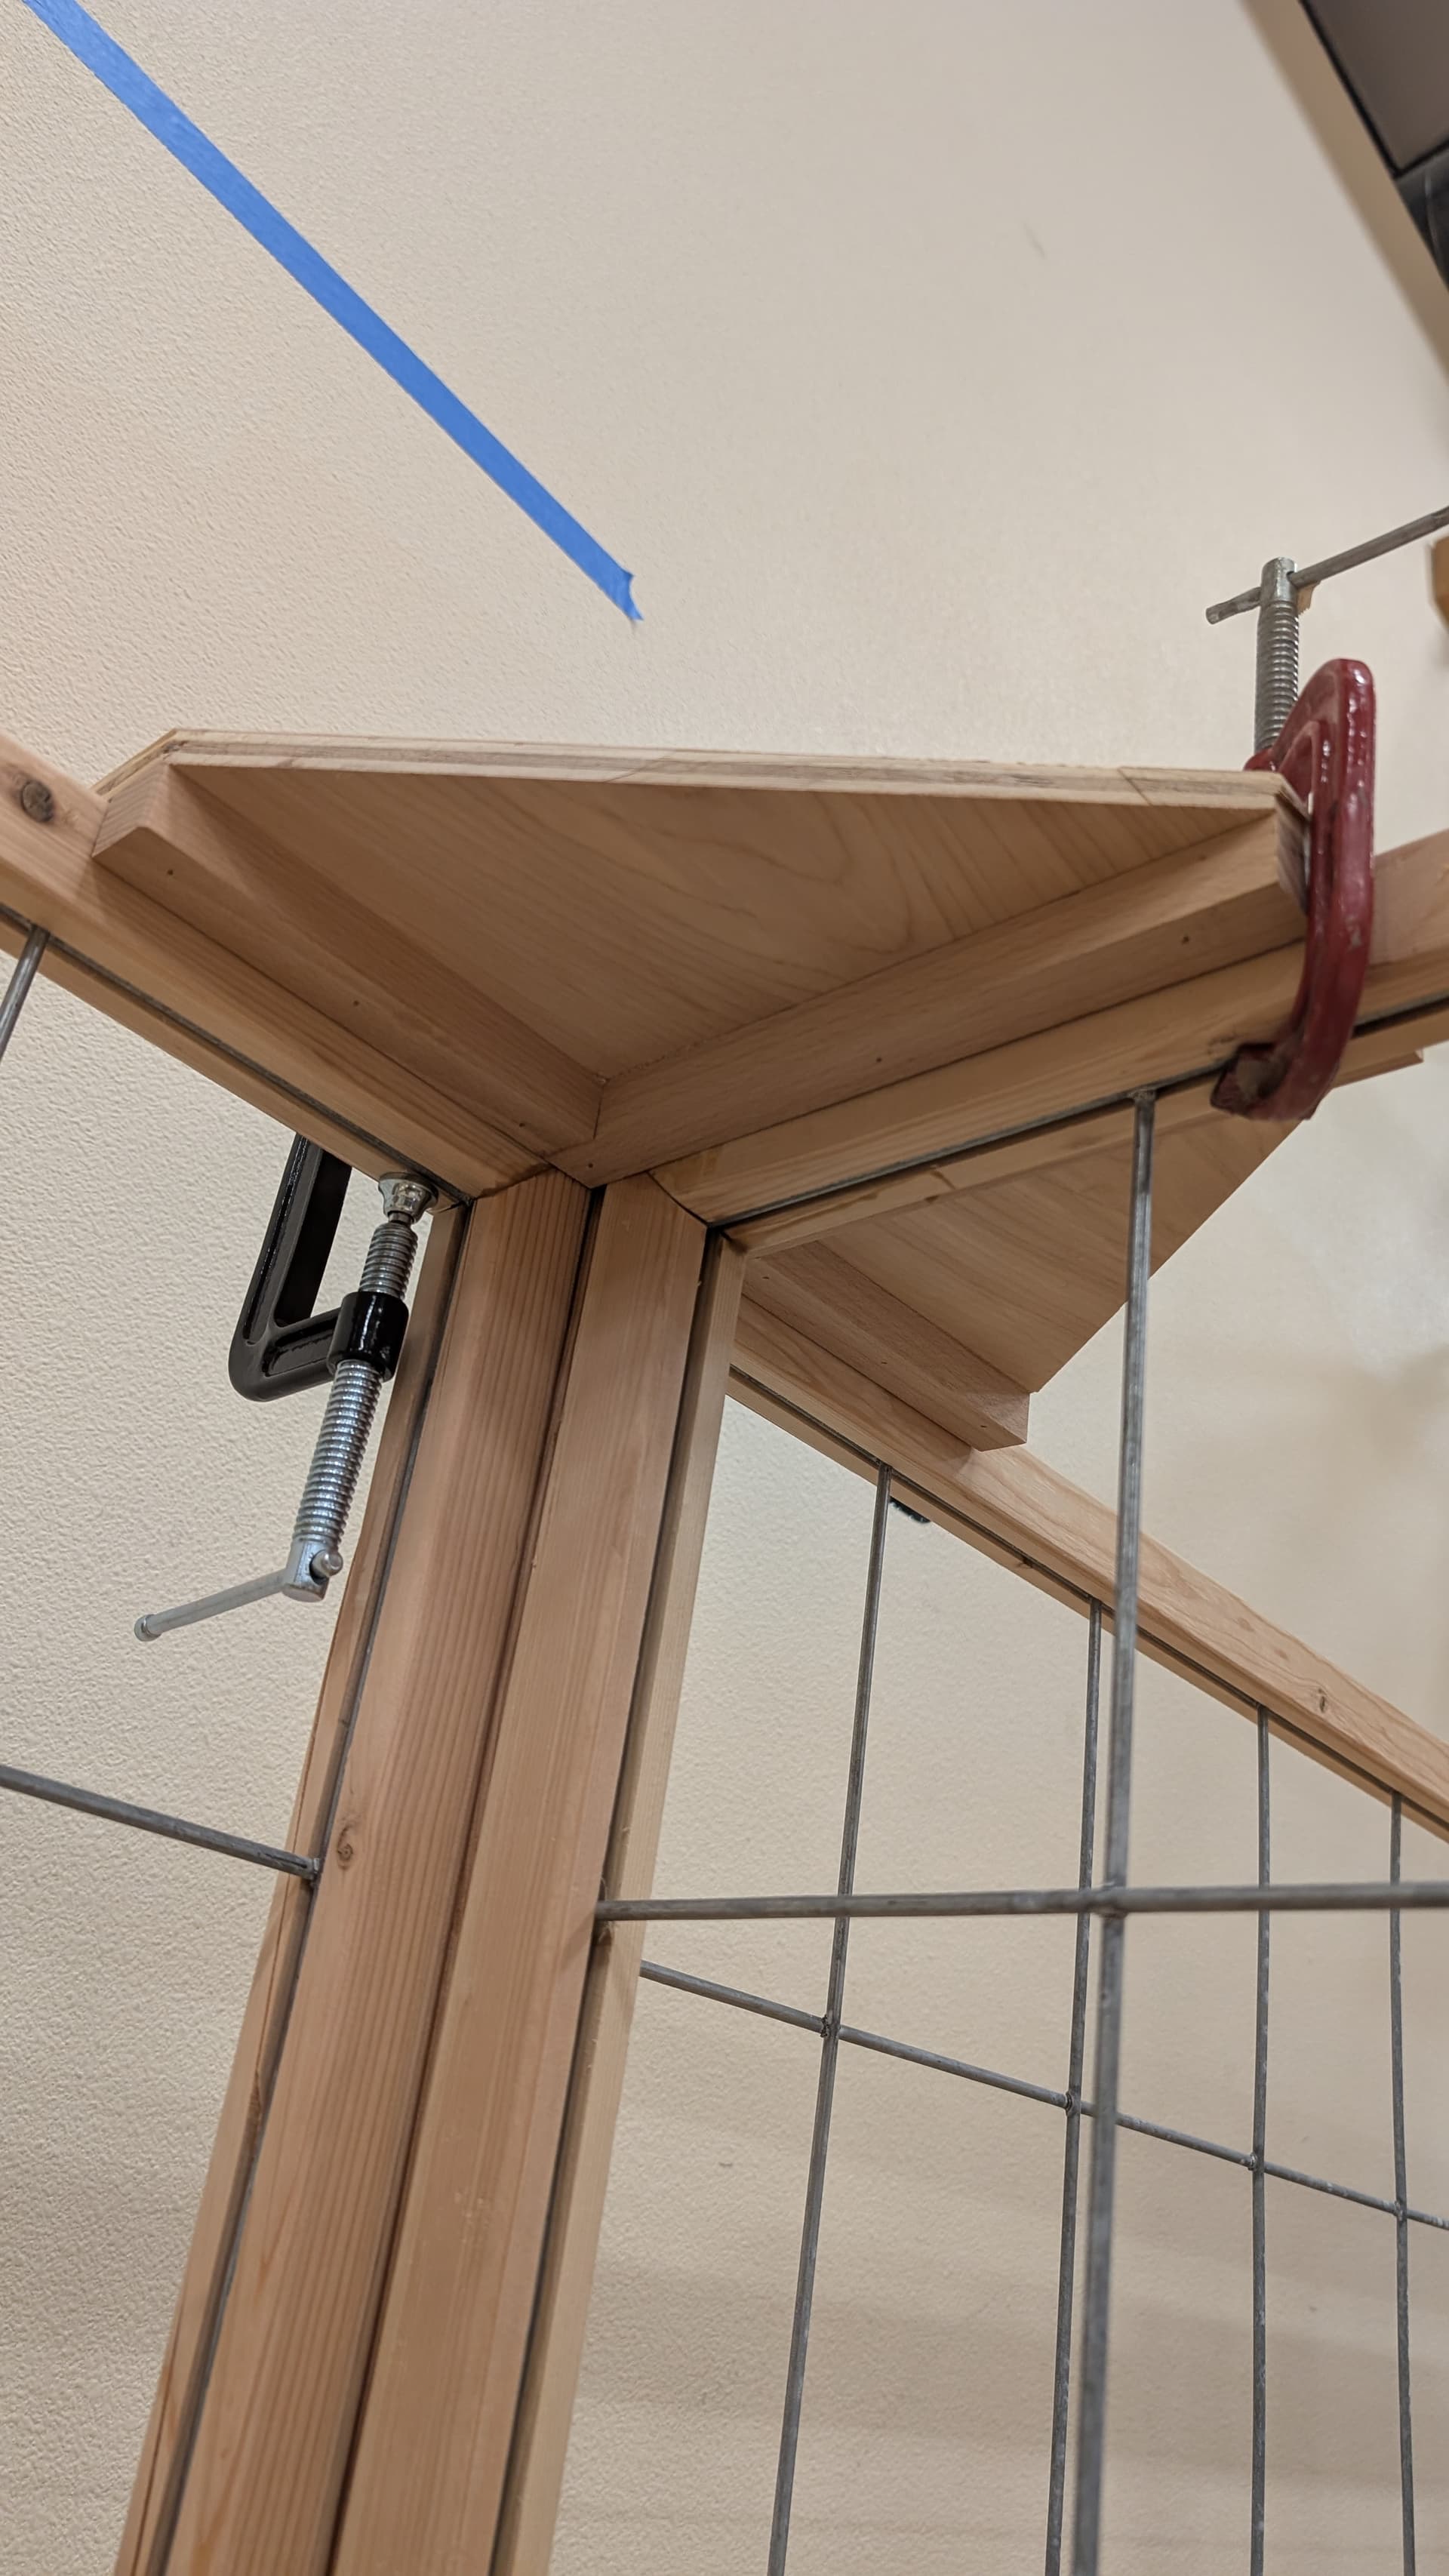
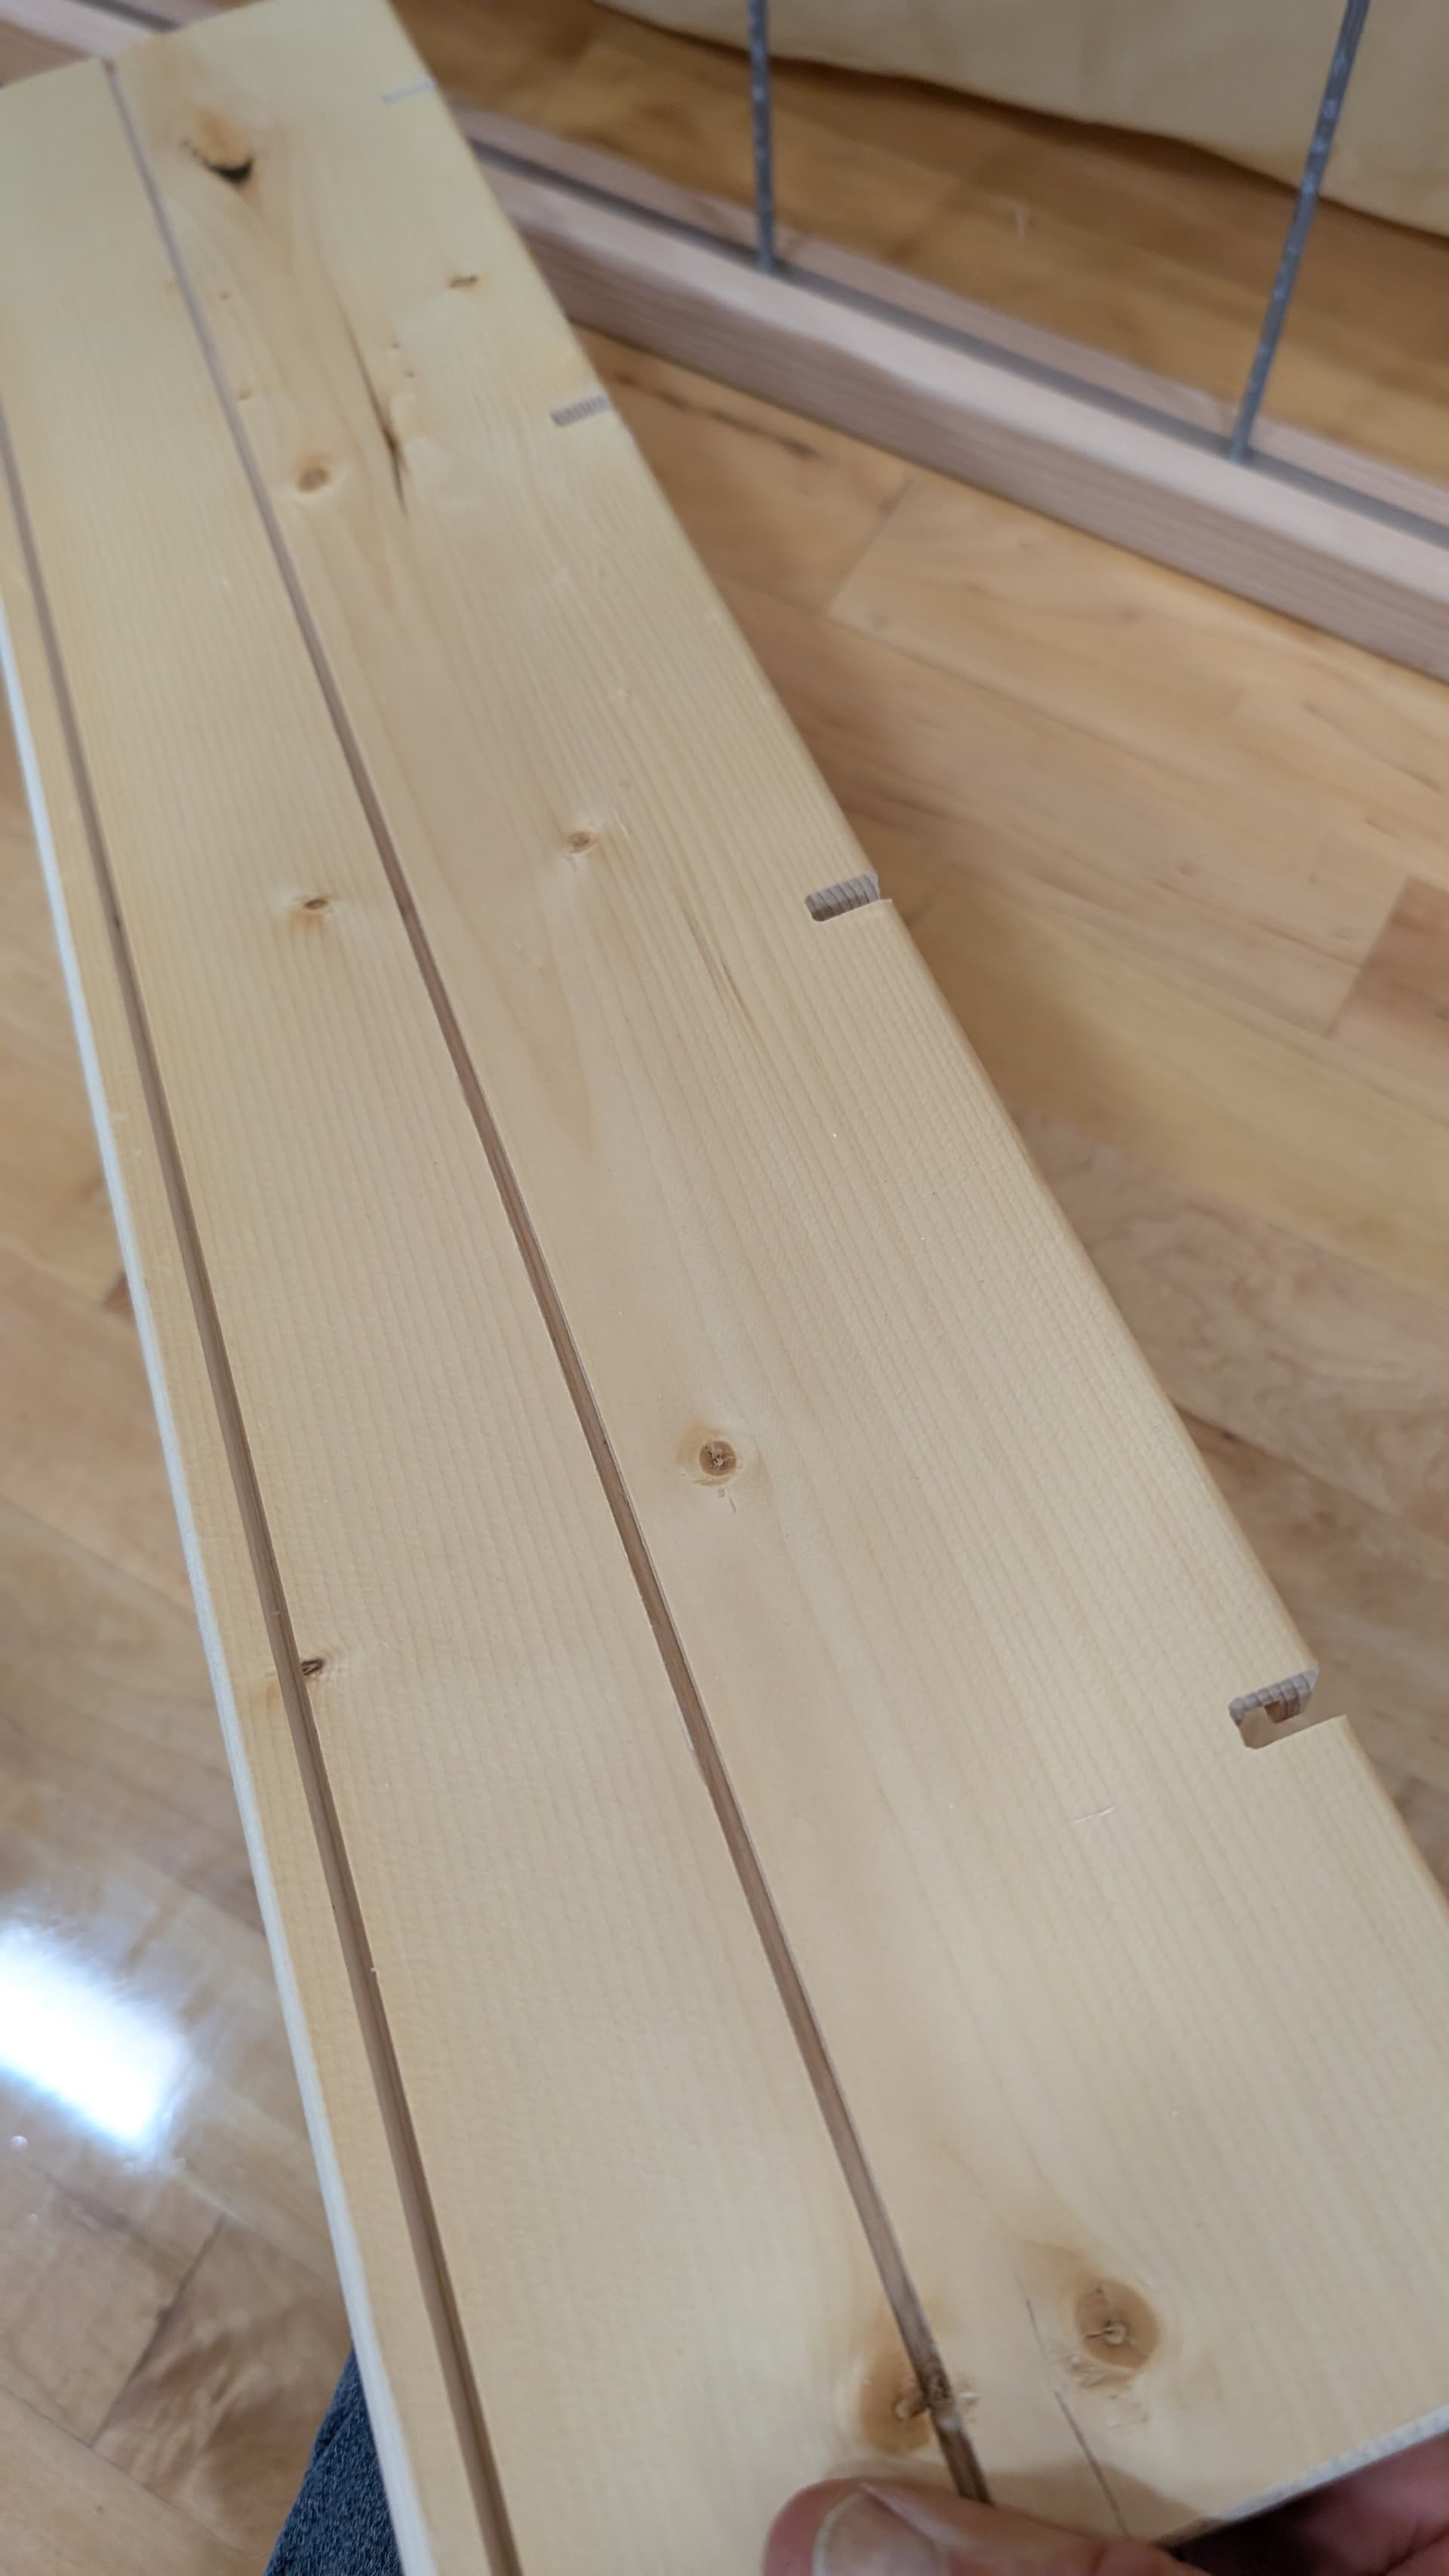
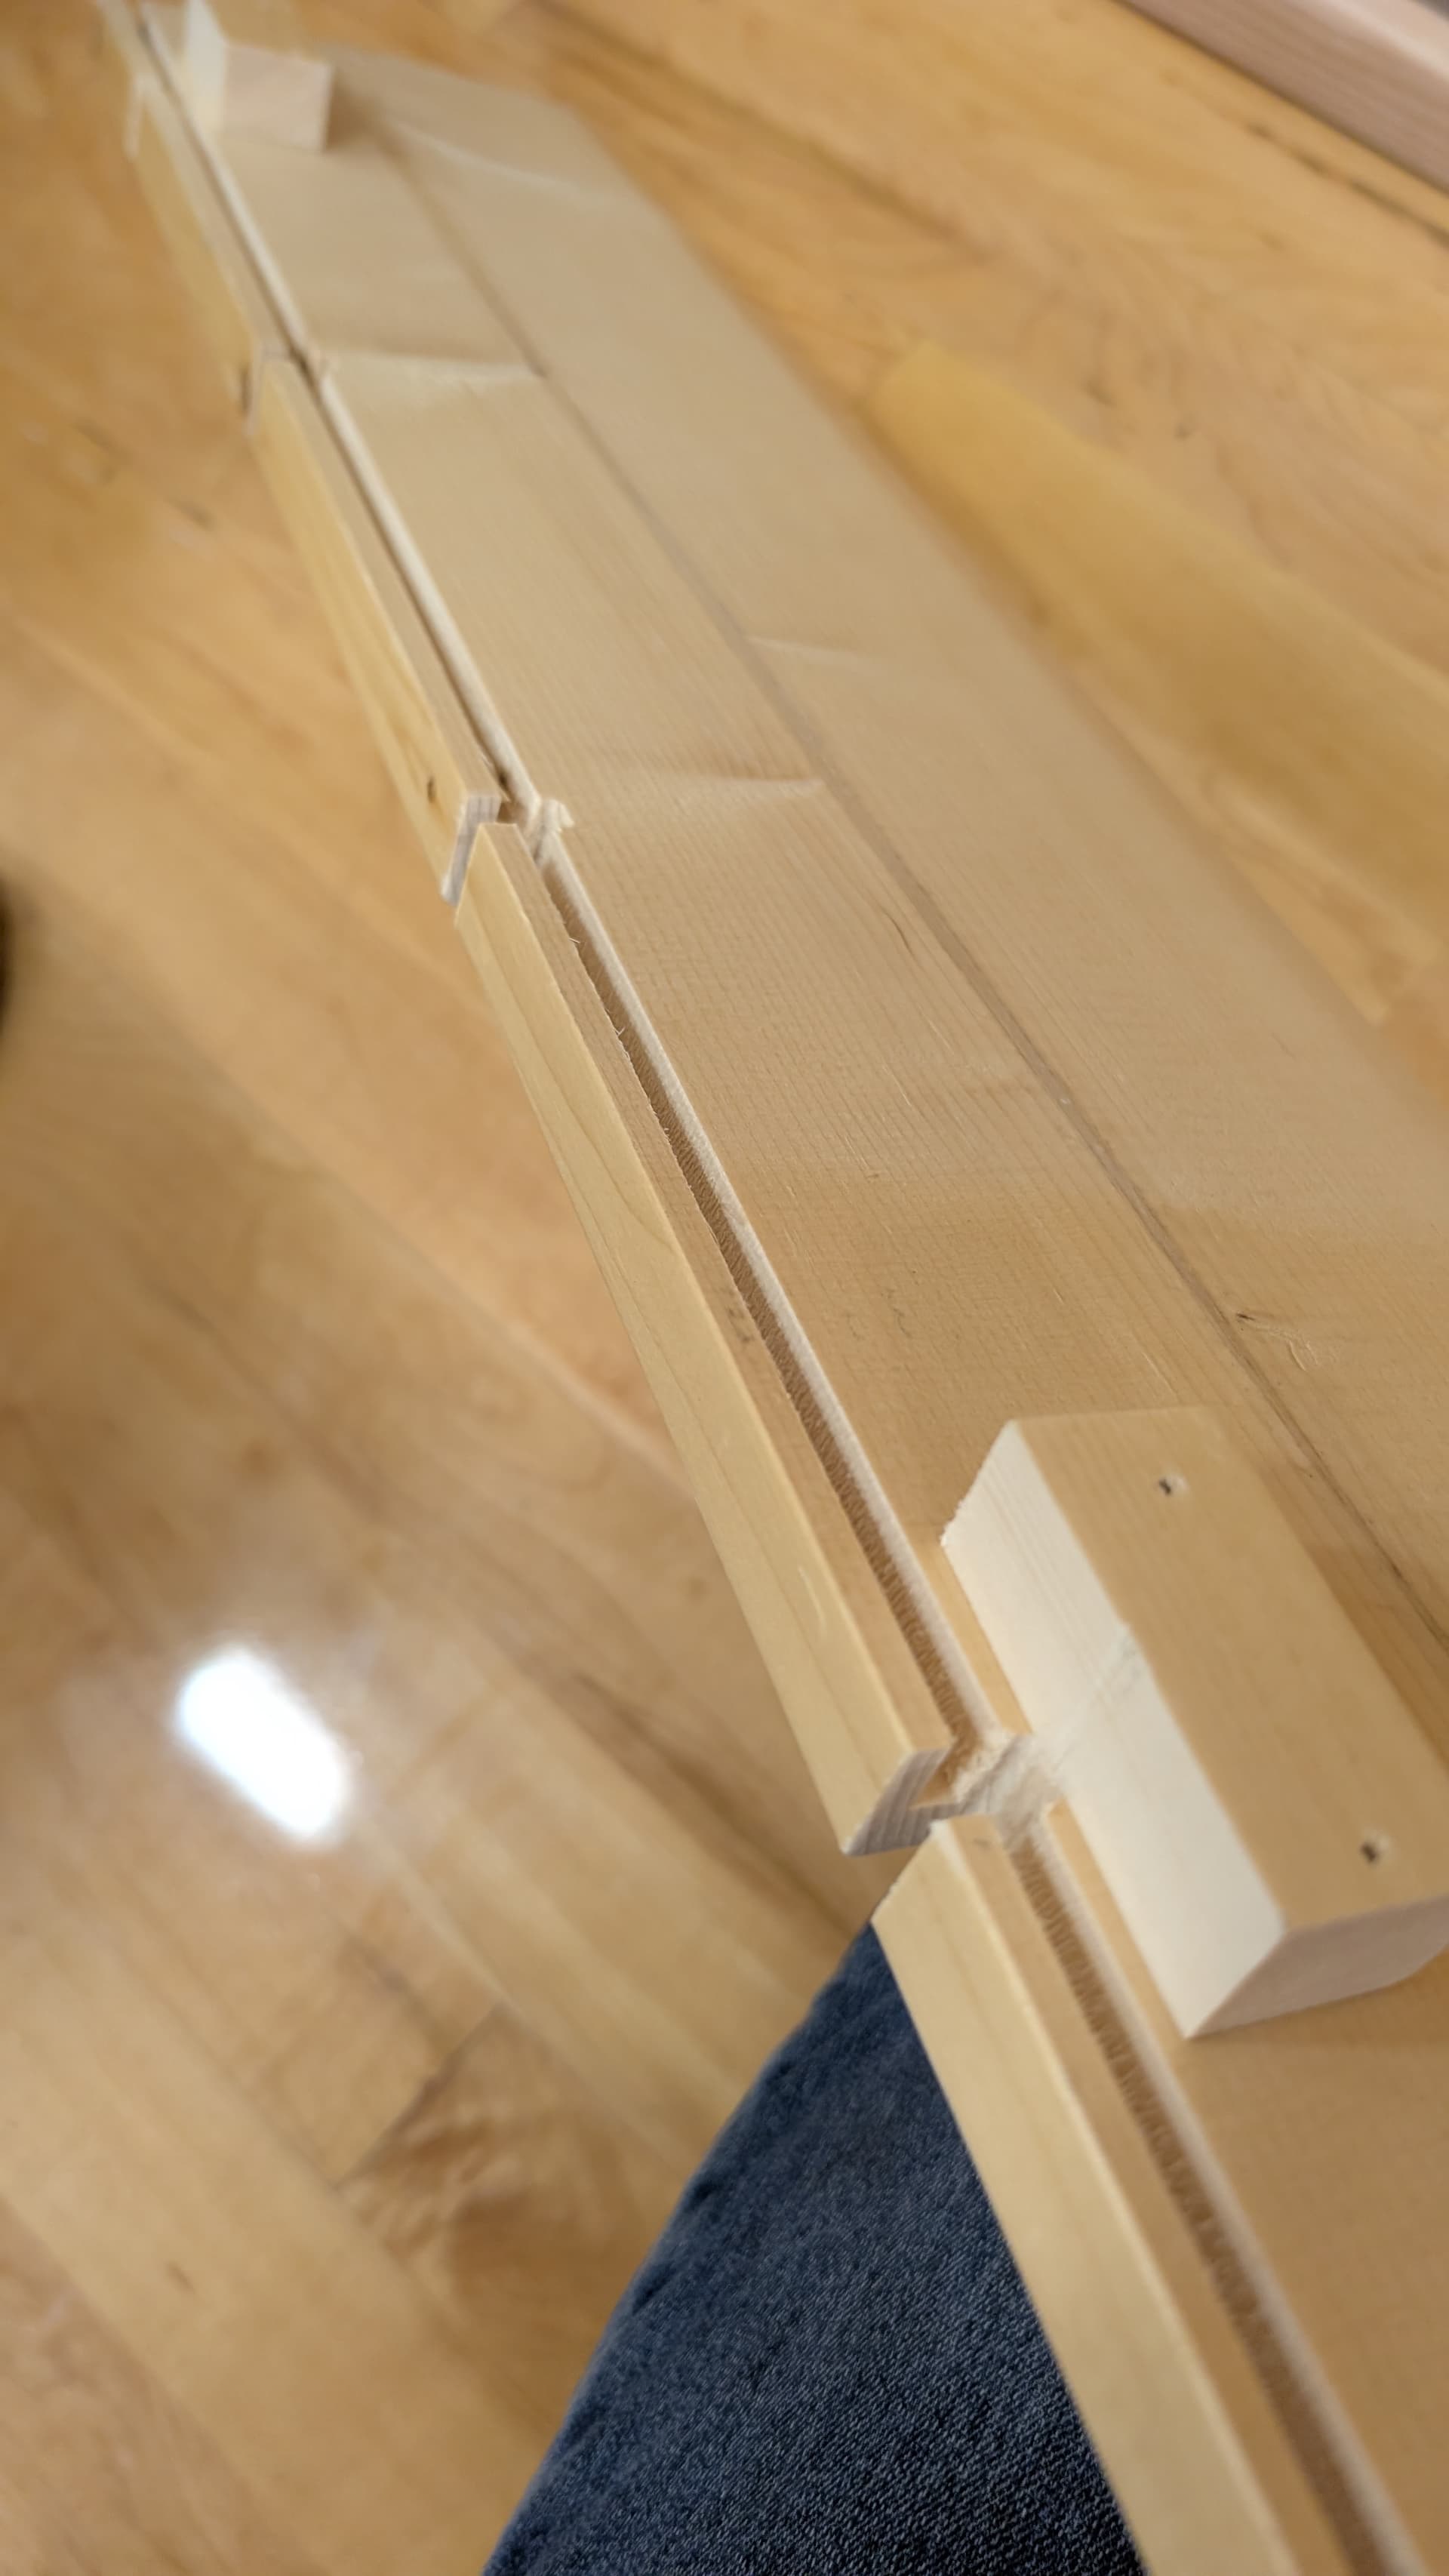
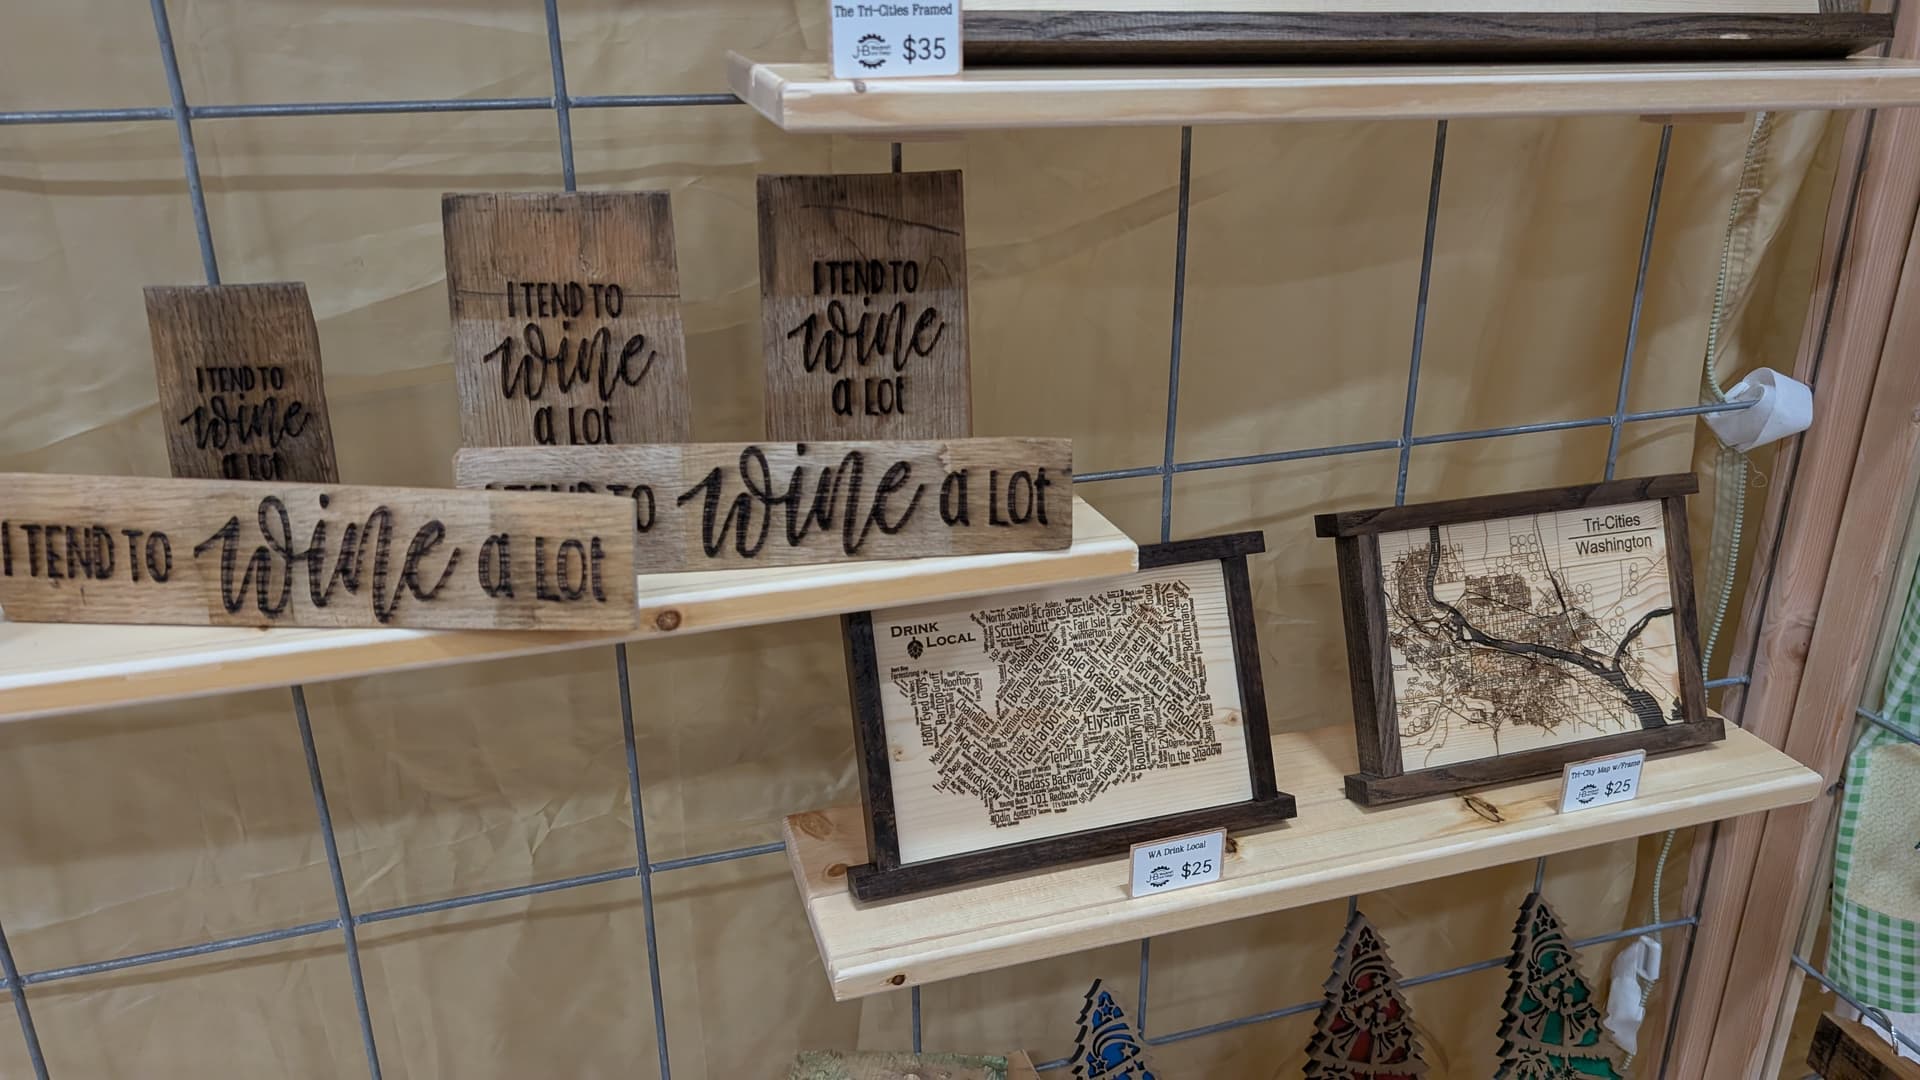
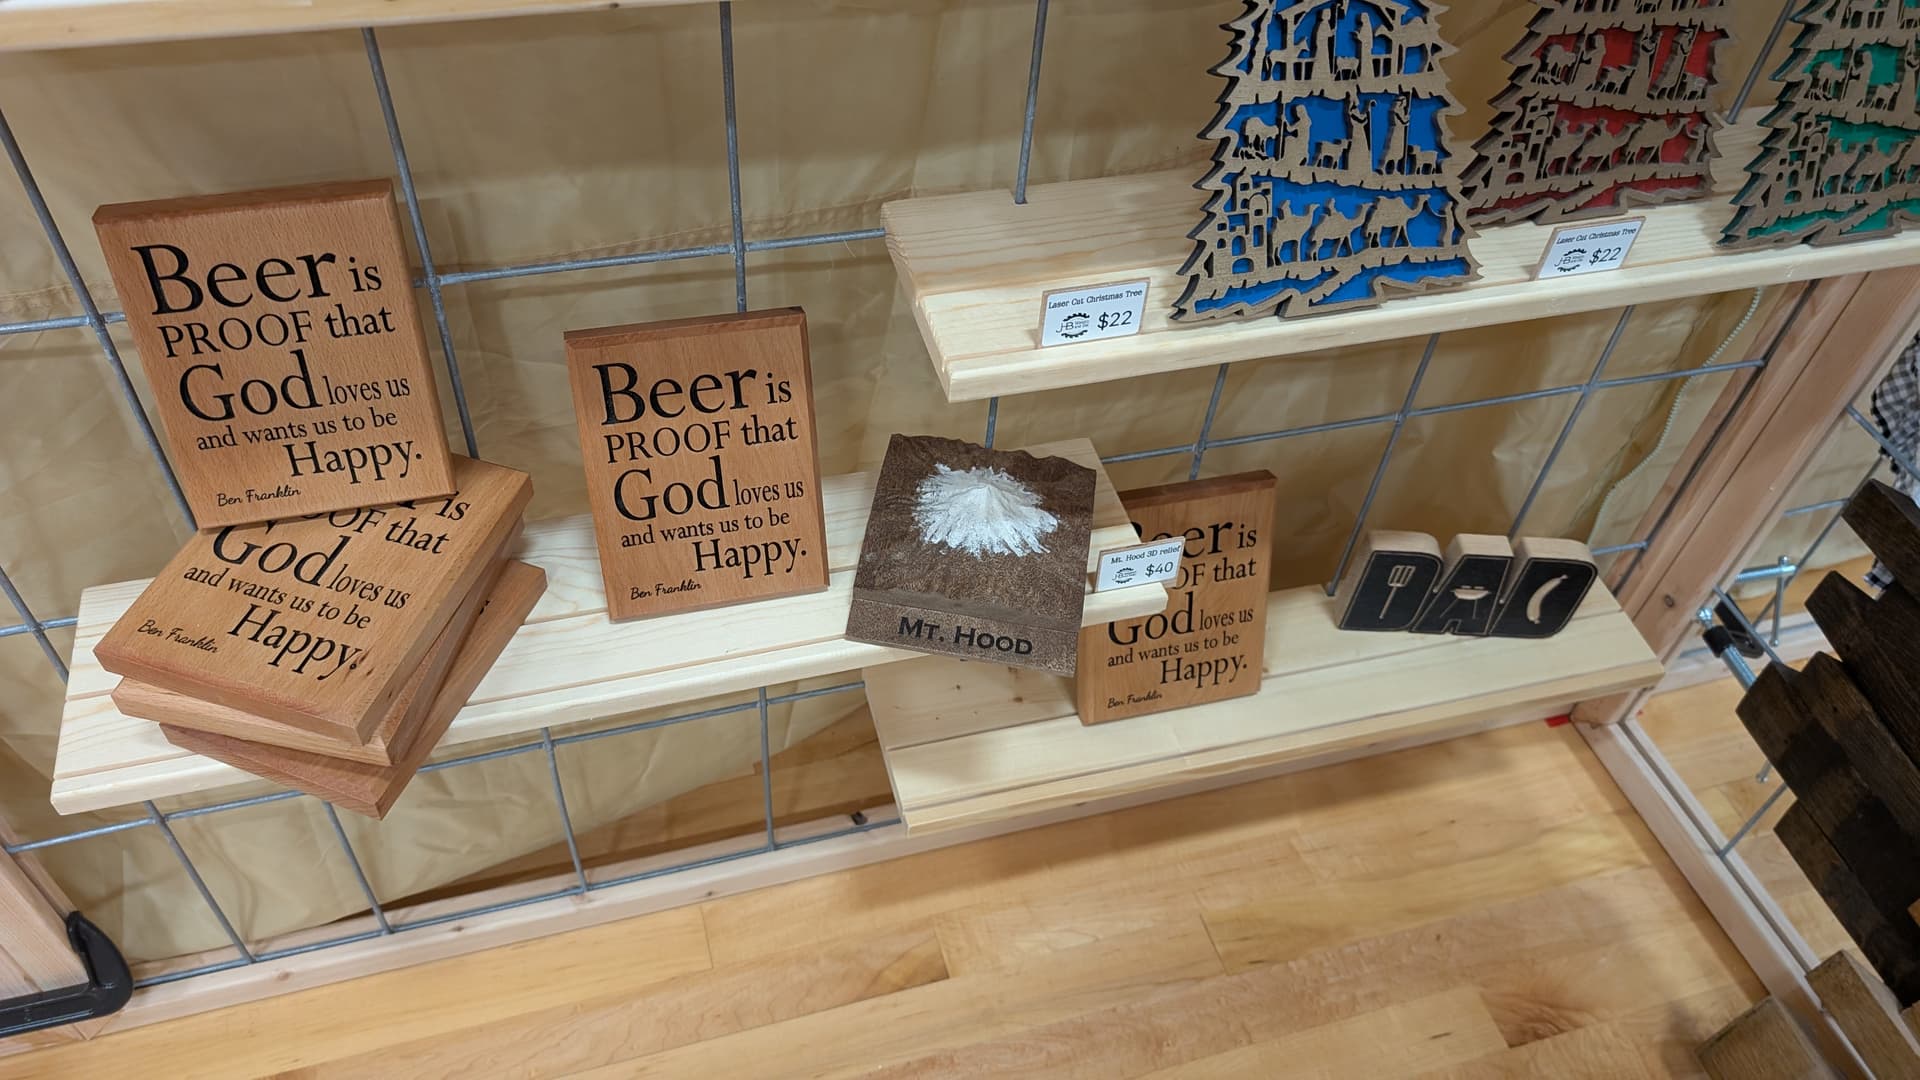
I wanted to share my idea for displaying your projects if you ever are a vendor. I purchased some cattle fencing (about 8 ft x 4 ft at $18 per grid). I framed it in. Made some bases with my Shapeoko so they can be clamped, not screwed; that way the integrity doesn’t diminish over time. I made some top connecting pieces as well. But the thing I was most excited to share is the shelving system, which is very cheap. 2 ft pine board with a groove from end to end for the board to slide down into. Several grooves to accommodate the vertical wires as well. Some small blocks for added support so the shelf doesn’t bend down. 2 minutes on the CNC and you have a shelf. The top of the shelf has 2 grooves to keep leaning projects in place AND it holds my little pieces of wood with pricing on it. It takes a couple of trials to get the calibration correct for the grid you may use, but I was very pleased. I cut the panel to 7 feet so it would fit under my canopy when I use it. $30 per panel. Shelves would most likely be about $2 for a 5.5" deep by 2 ft shelf.
Here is a Vectric file of the shelf:
https://www.dropbox.com/scl/fi/x7650dr545xkv3hekk6jz/2-shelf-for-venting-display.crv3d?rlkey=qkn20ymnmm71u9ickfpqje4gk&dl=0


[/grid]
18 Likes