Are you going to redo it spelling Woodworkers as one word? ![]()
If the Wood Workers is referring to my plaque that is the official name of my wood working club. ![]()
Guy … Did those knots cause any problems during the milling and did you put any shellac down before the milling operations to help keep any knots in place? Thanks.
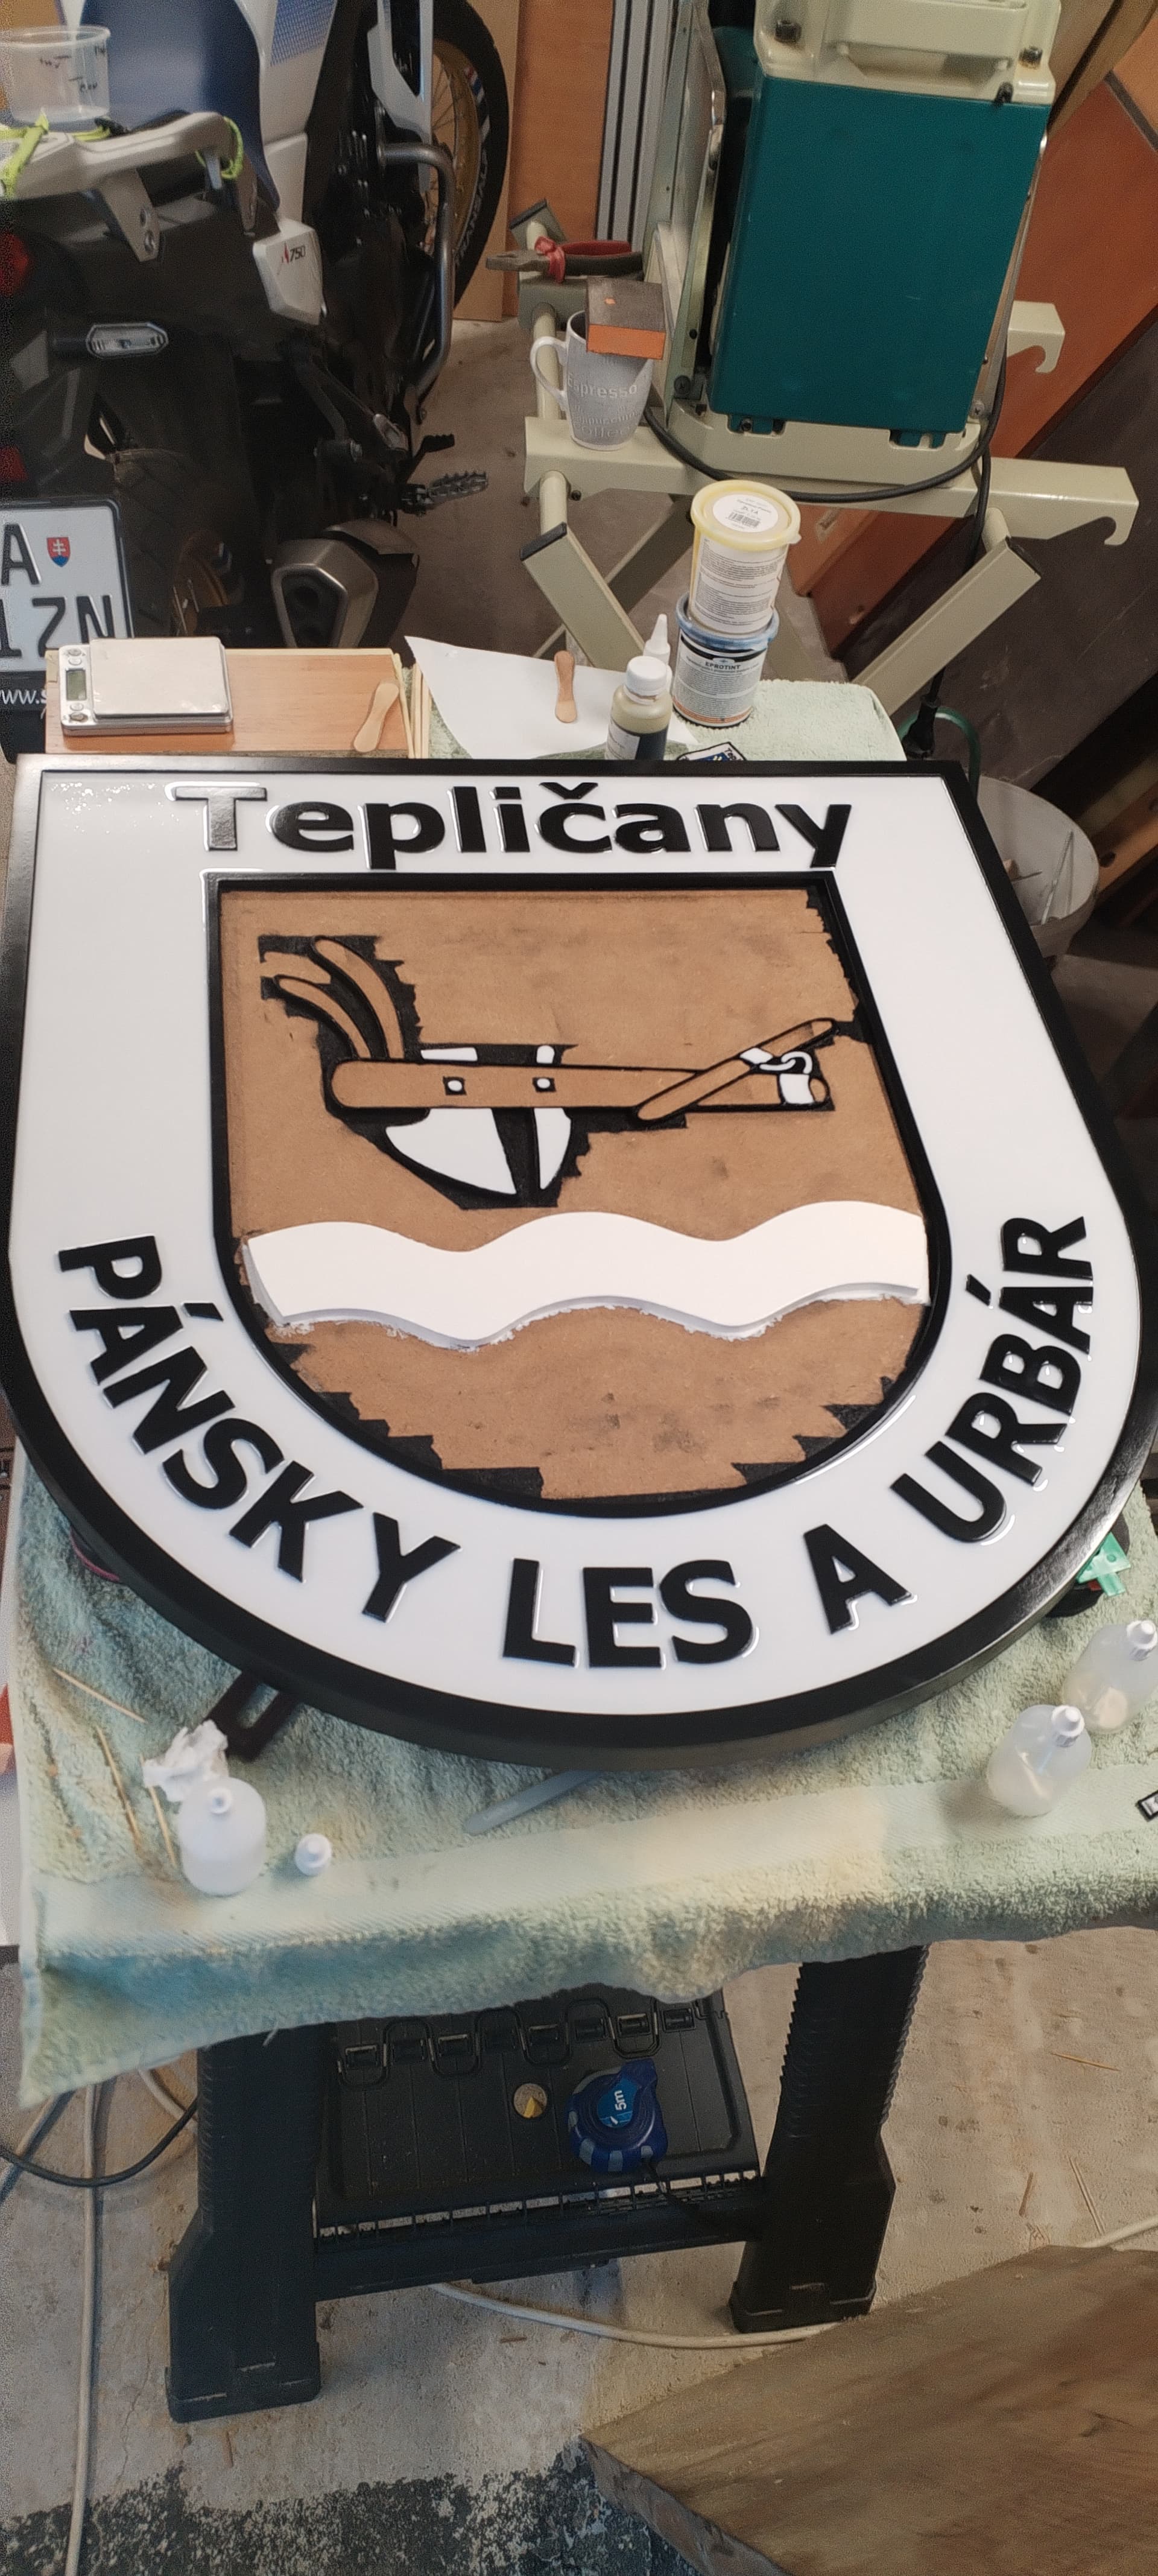
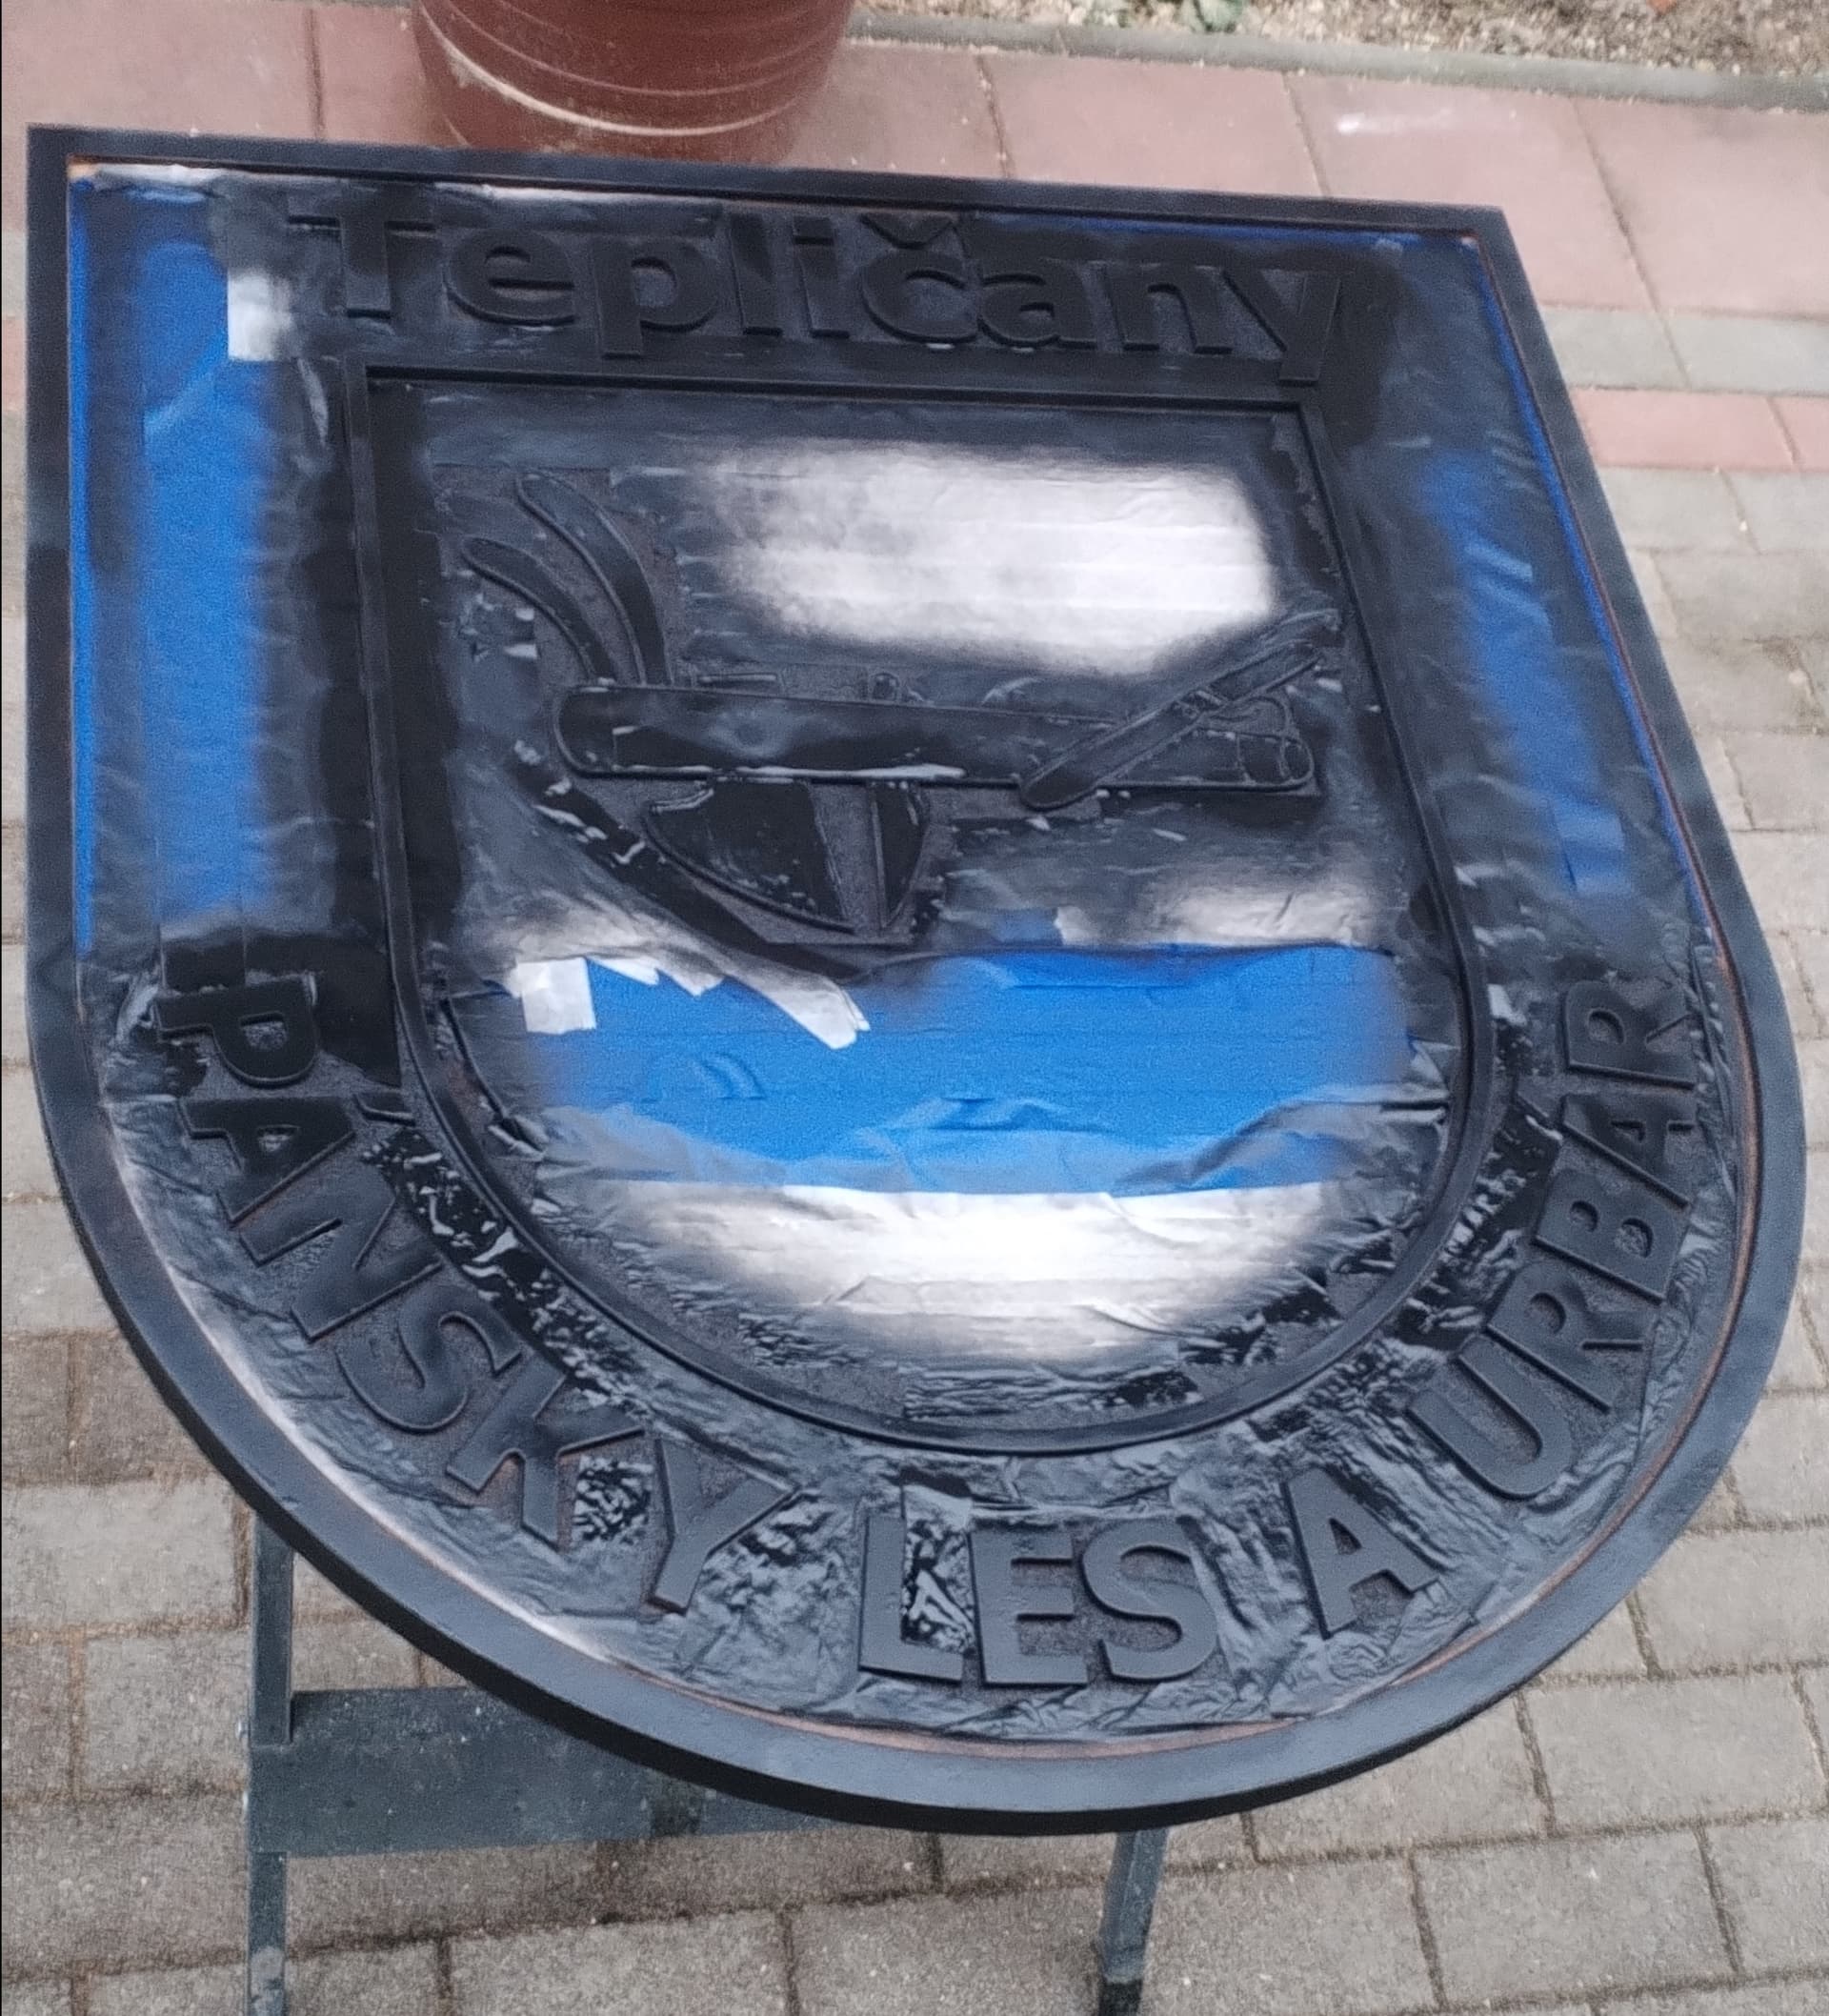
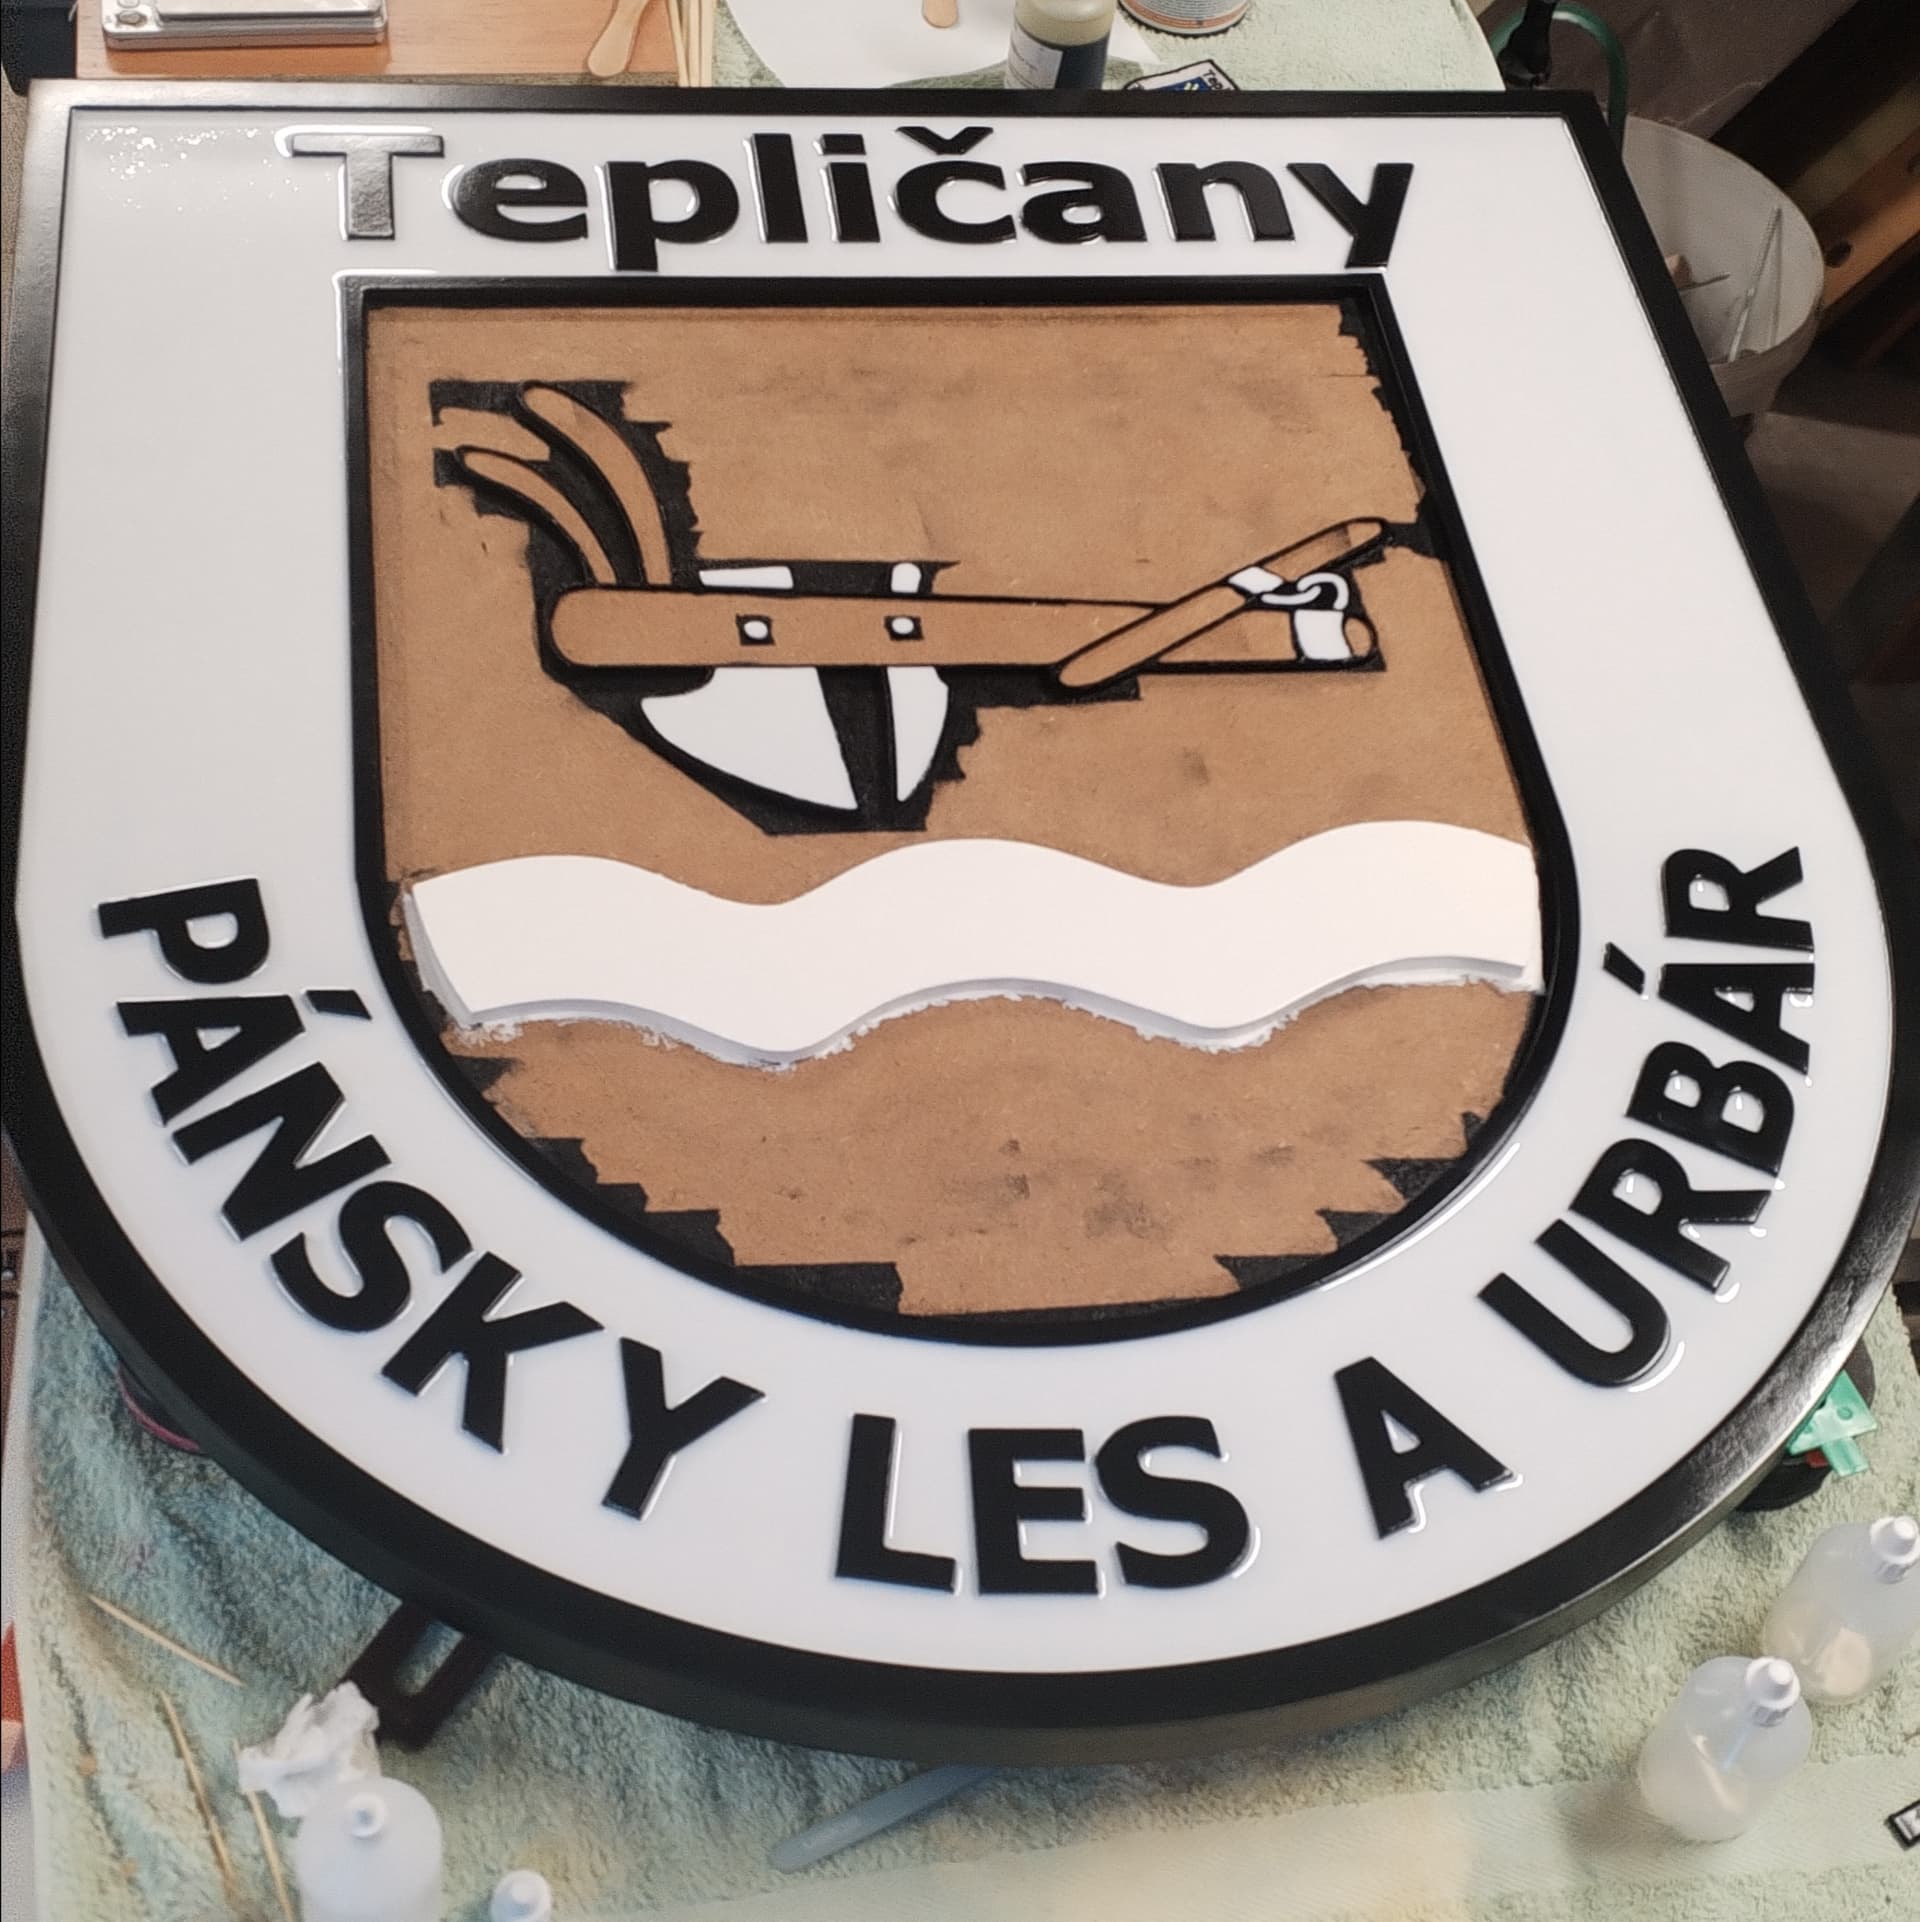
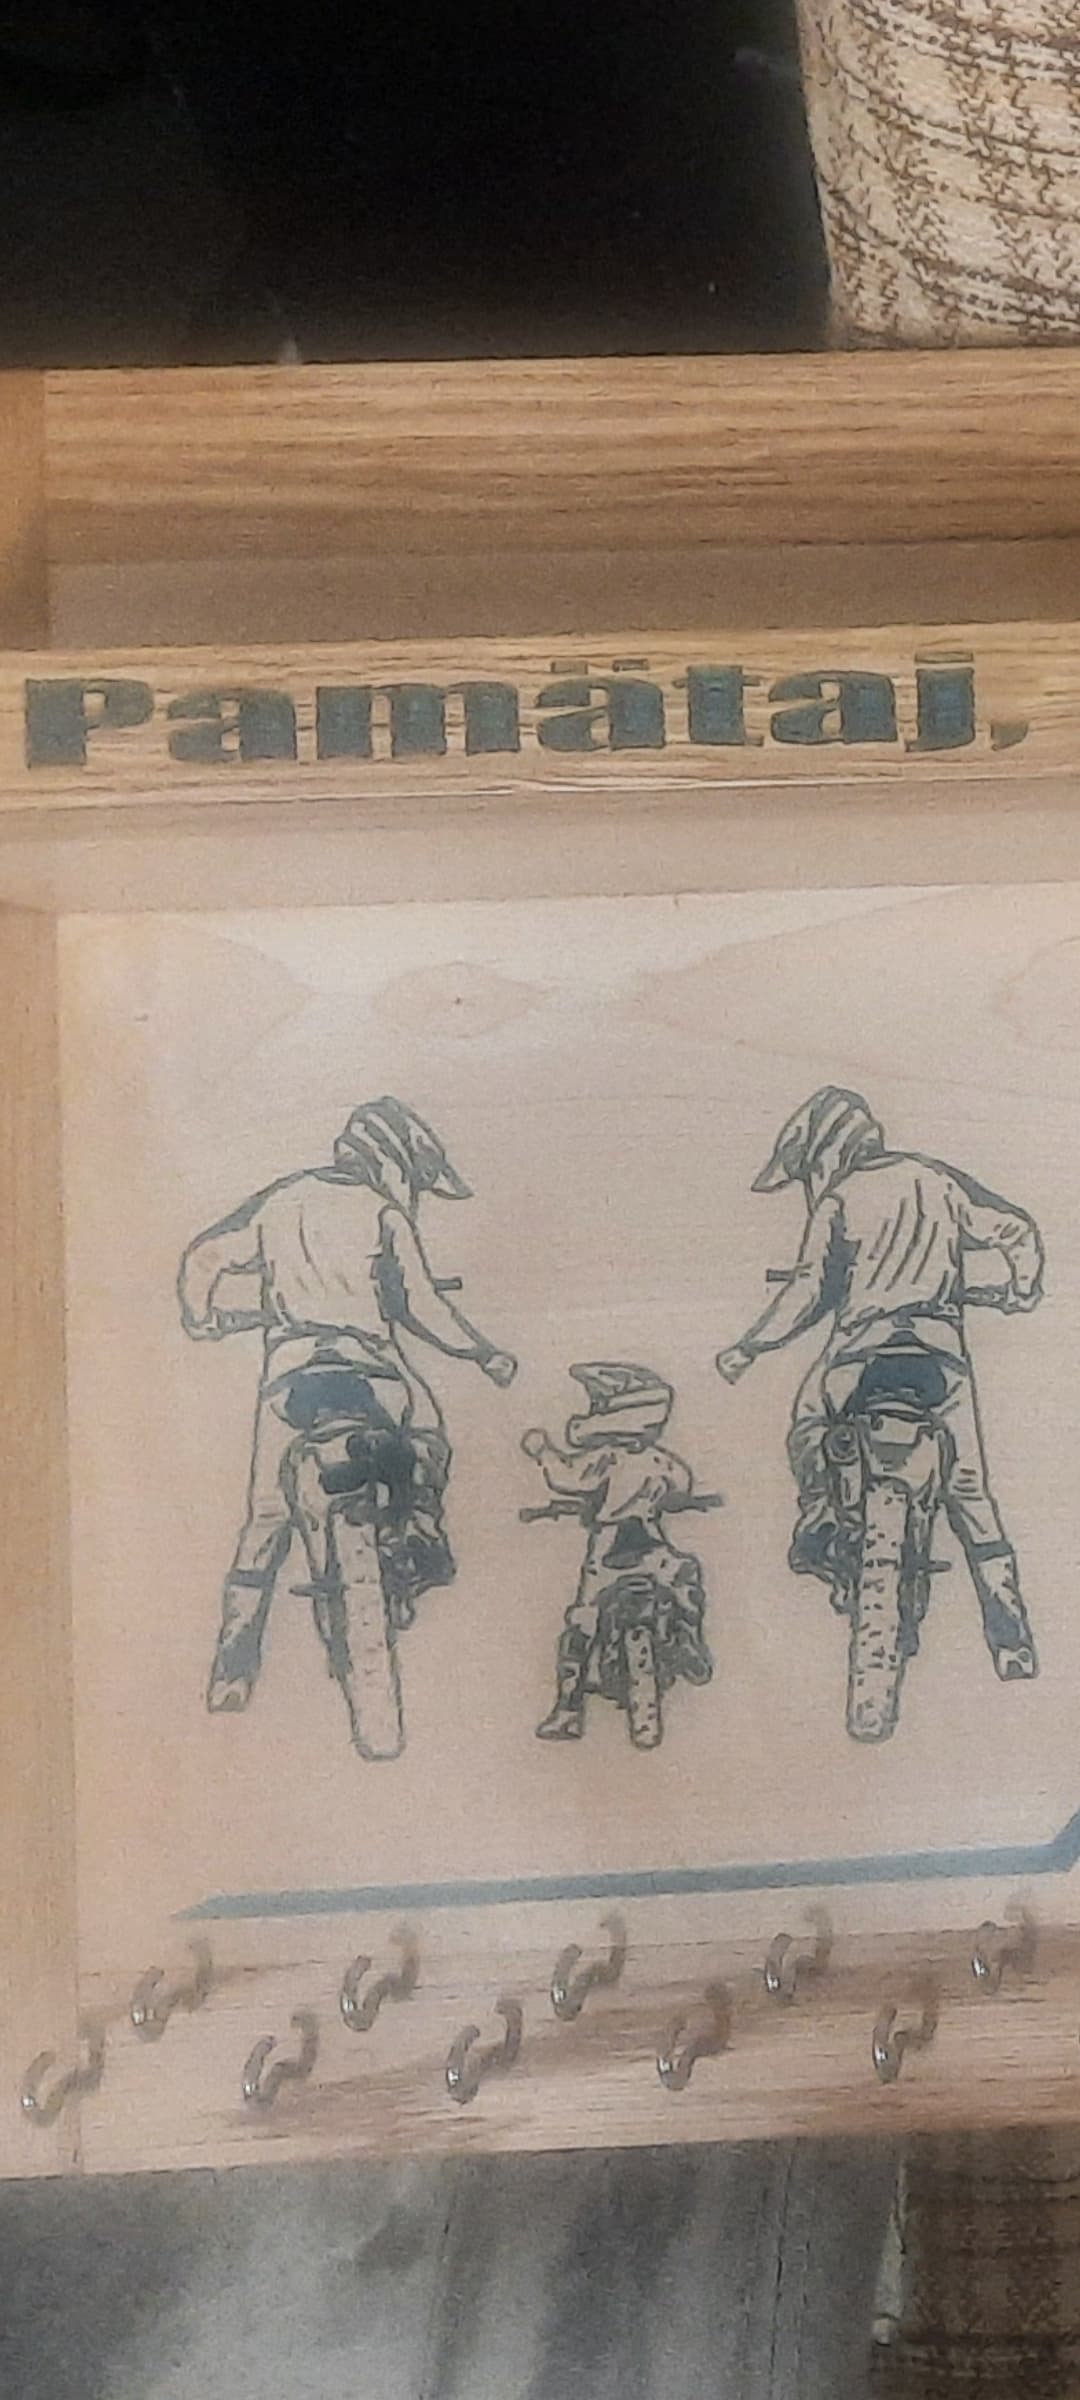
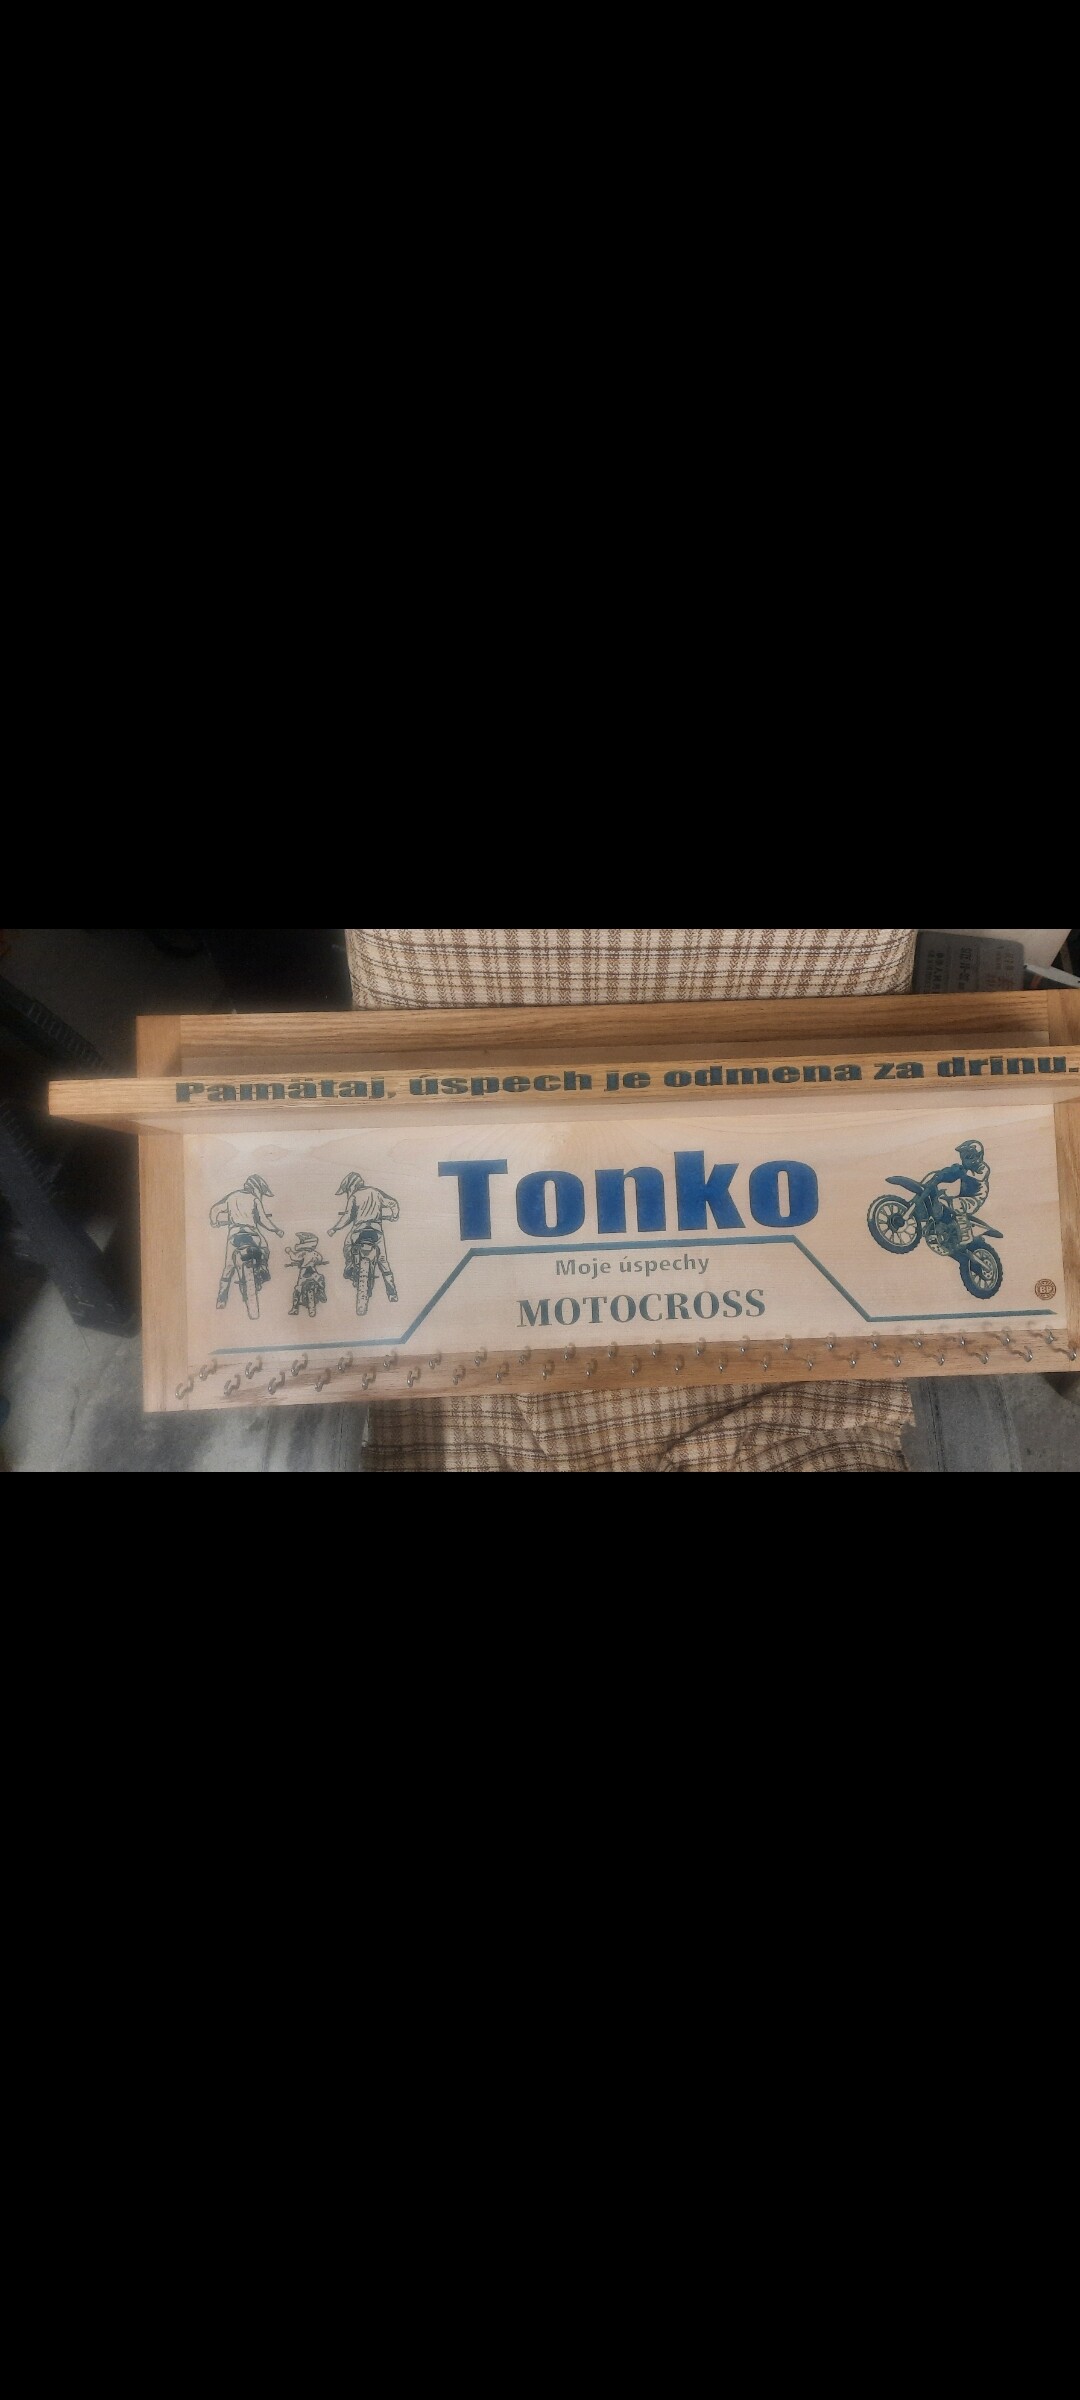
Hi fellow cnc enthusiastics. I just want to share few pieces of work. I will appreciate your opinion.
[/grid]

28 Likes
Firefighter … looks real nice. Some questions:
- On the top one, was that laser engraving or via the CNC on the end grain wood you used? I like that effect.
- On the last one … was that done on MDF? If so, how did you finish it. That paint job looks wonderful!
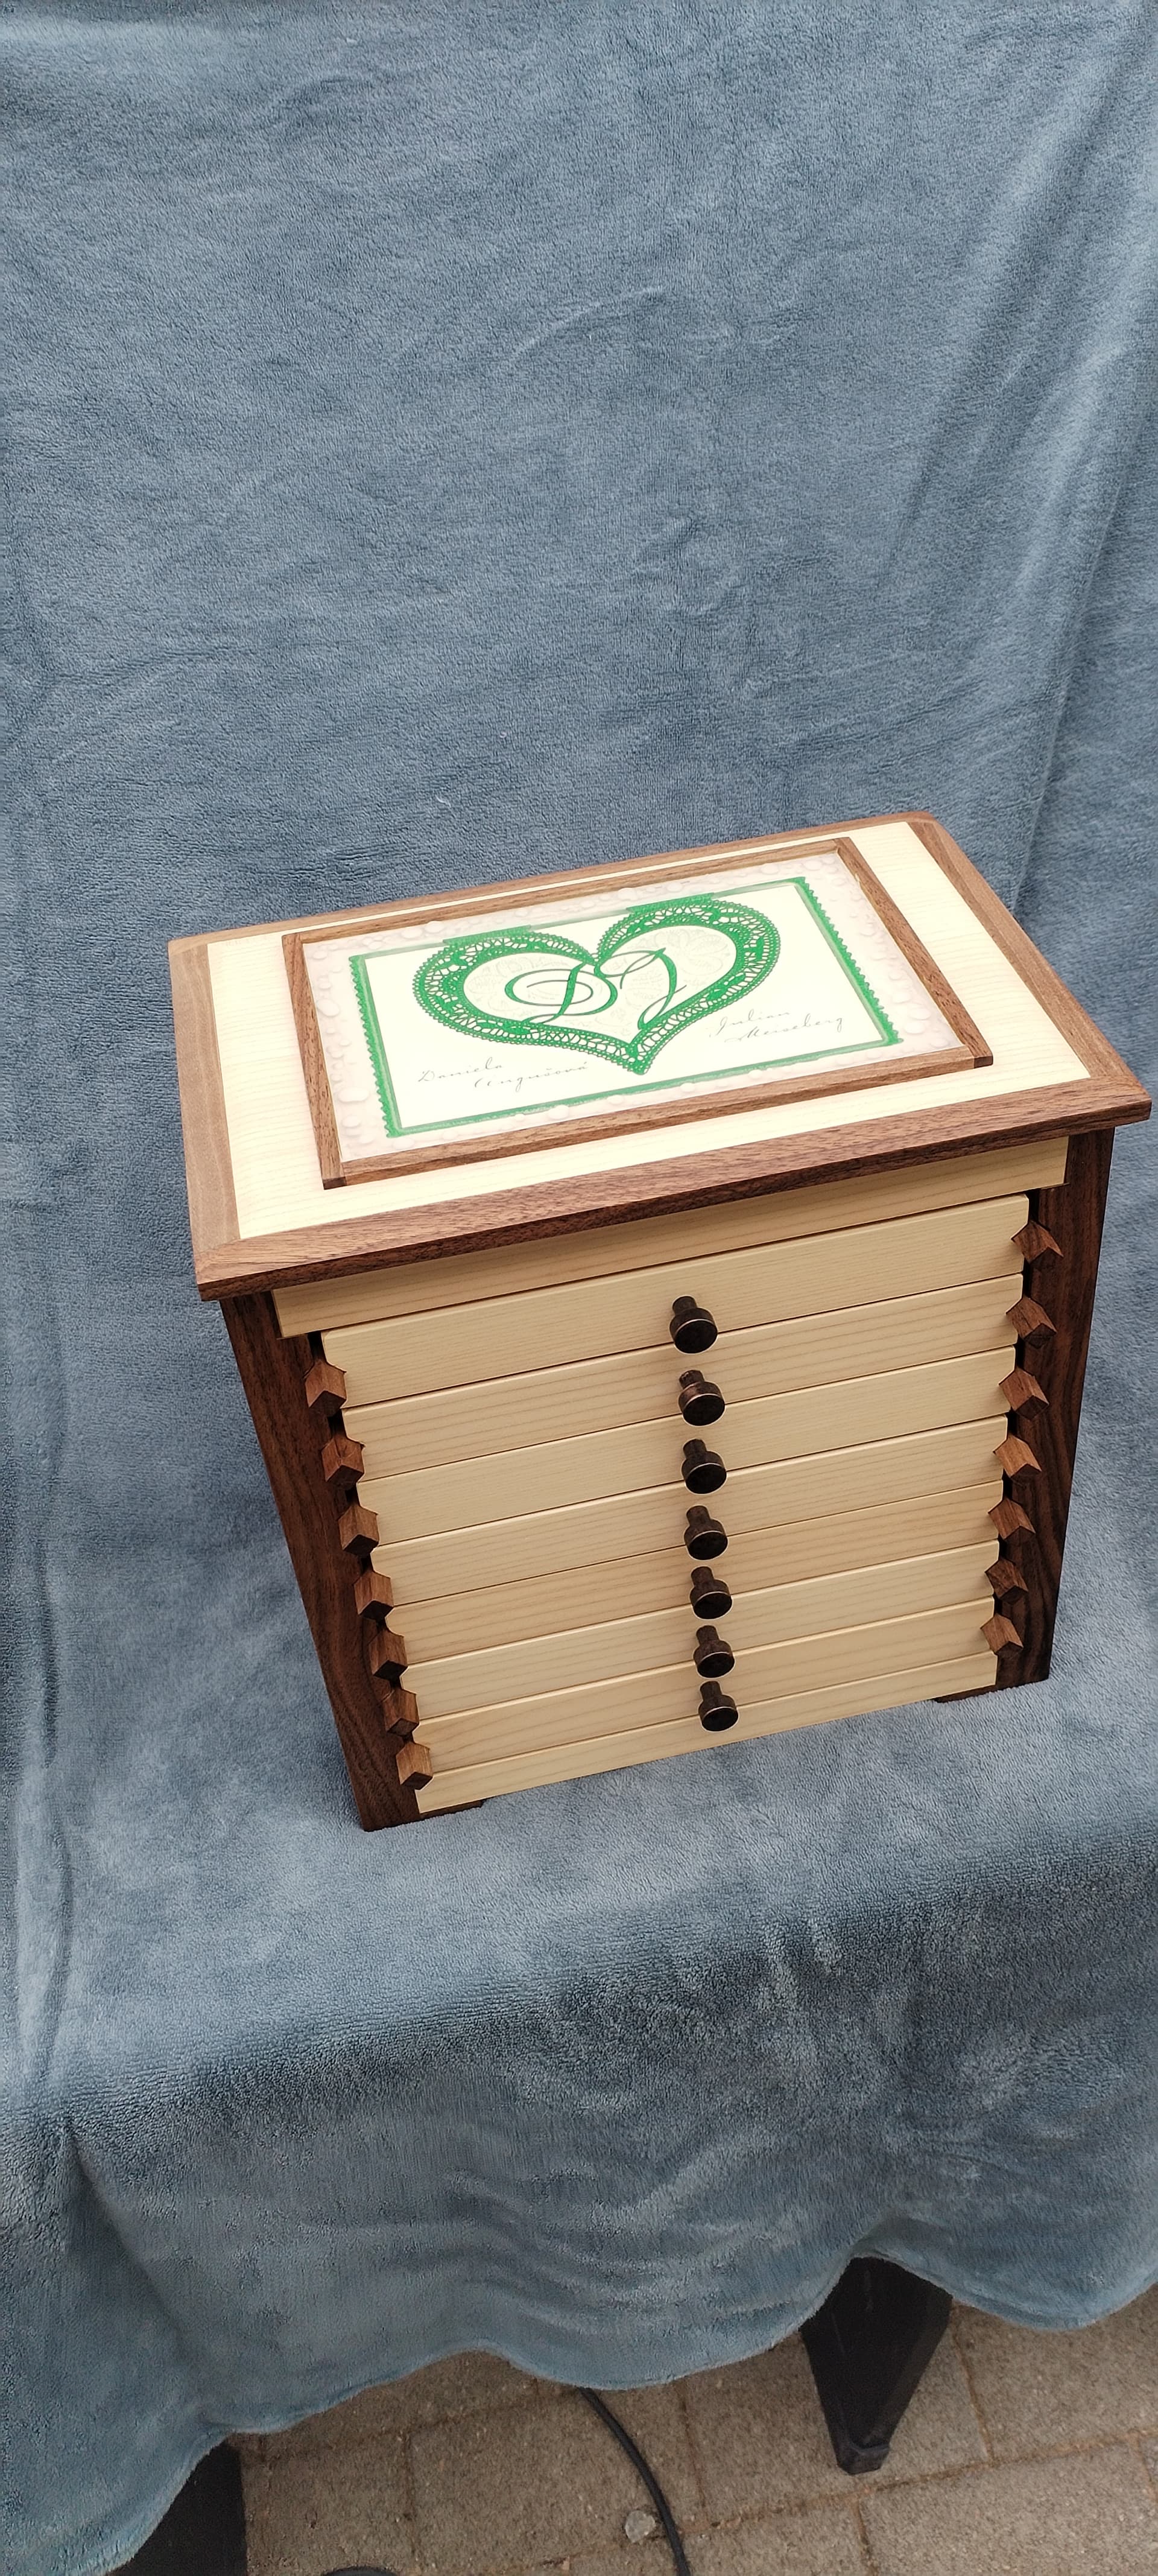
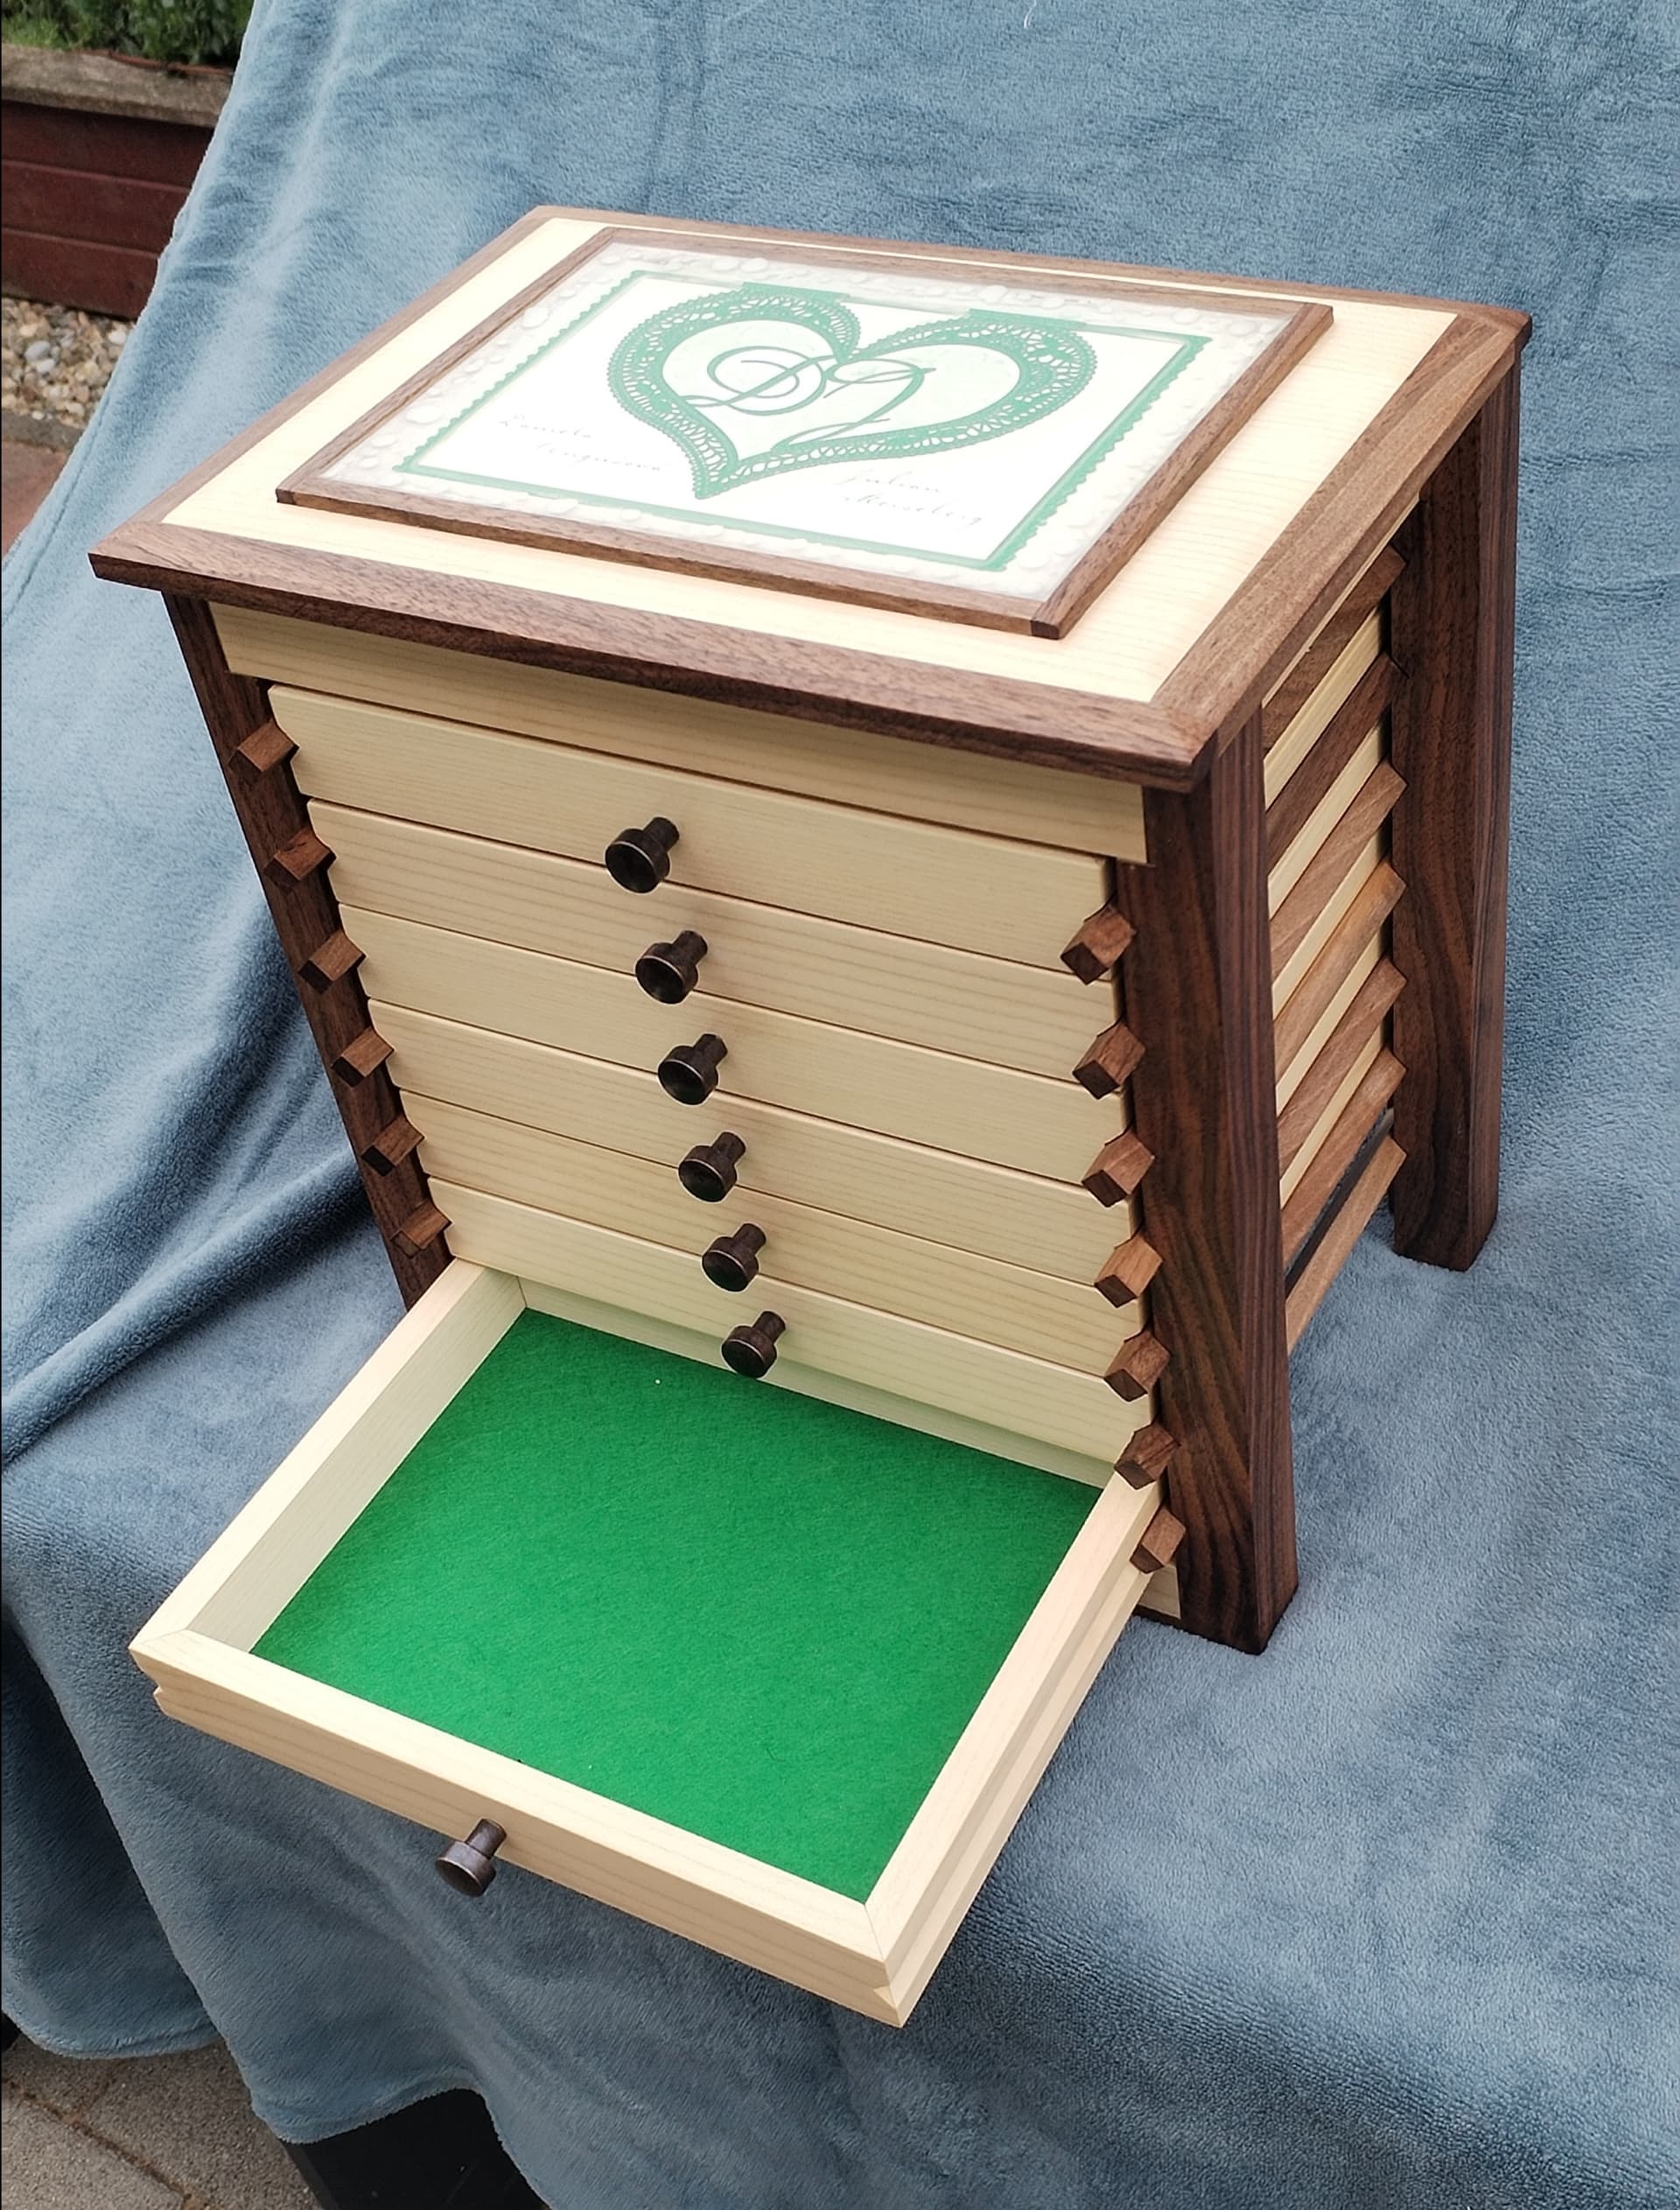
- On the center one … I assume that is a jewelry box? What parts were done on the CNC?
Again … nice work and finishing!
I did not put any shellac on before milling. Milling had no problem with the knots. Knots are 50/50 if they will stay stable or fall out. I have not had any problems with pine but hardwoods are a different story. As the wood dries the knots tend to shrink faster than the surrounding wood and they often fall out and/or become loose.
Thanks
I will try to answer but my english is sucks.
- I used just cnc
- IT was done on MDF. For finish I used partly spray paint + varnish
and partly epoxy resin (blue, yellow,white around letters)
- Main structure by CNC part by part. Drowers on table saw. For top I usually use CNC but not for this one

12 Likes
Thanks to a few folks help from here, I’ve finally managed to finish this project. So, thank you!
JC
31 Likes
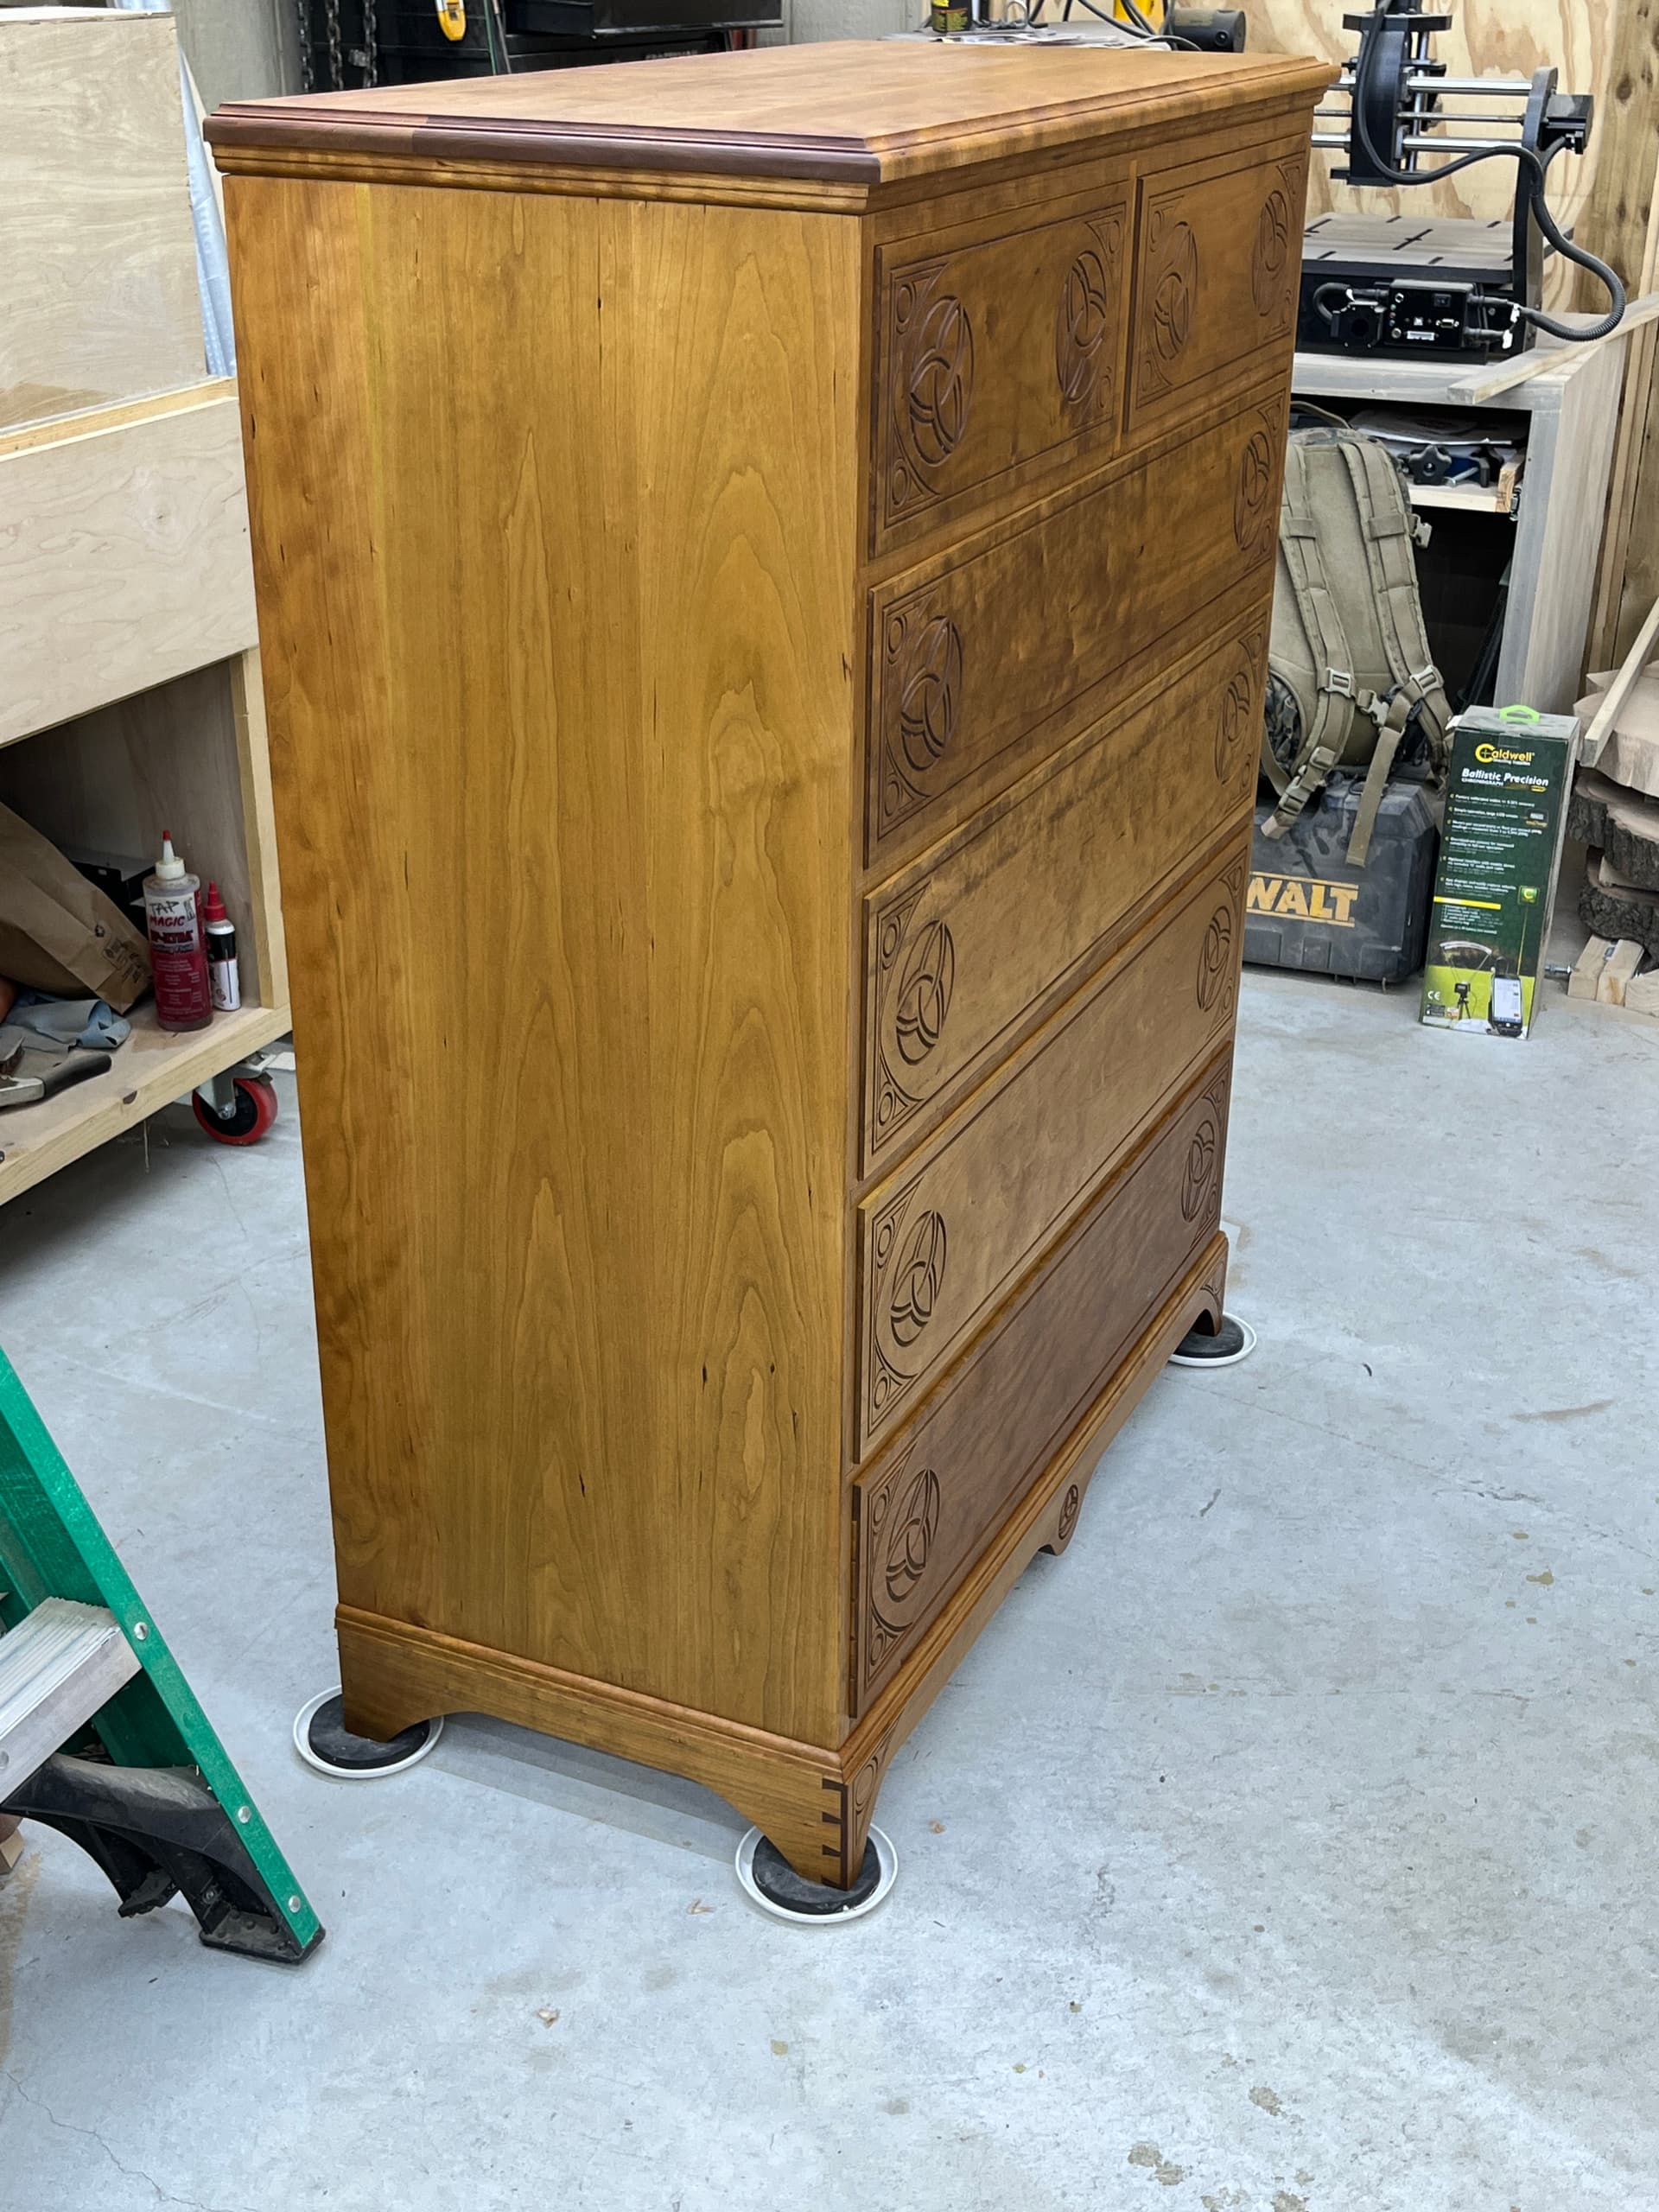
How do you open the drawers? Are they spring loaded or did you add knobs after the pictures. Nice design and dovetails on toe kick.
1 Like
This is the exact kind of thing I would completely forget about ![]()
Very clean work, nice inlays for sure. Good job!
1 Like
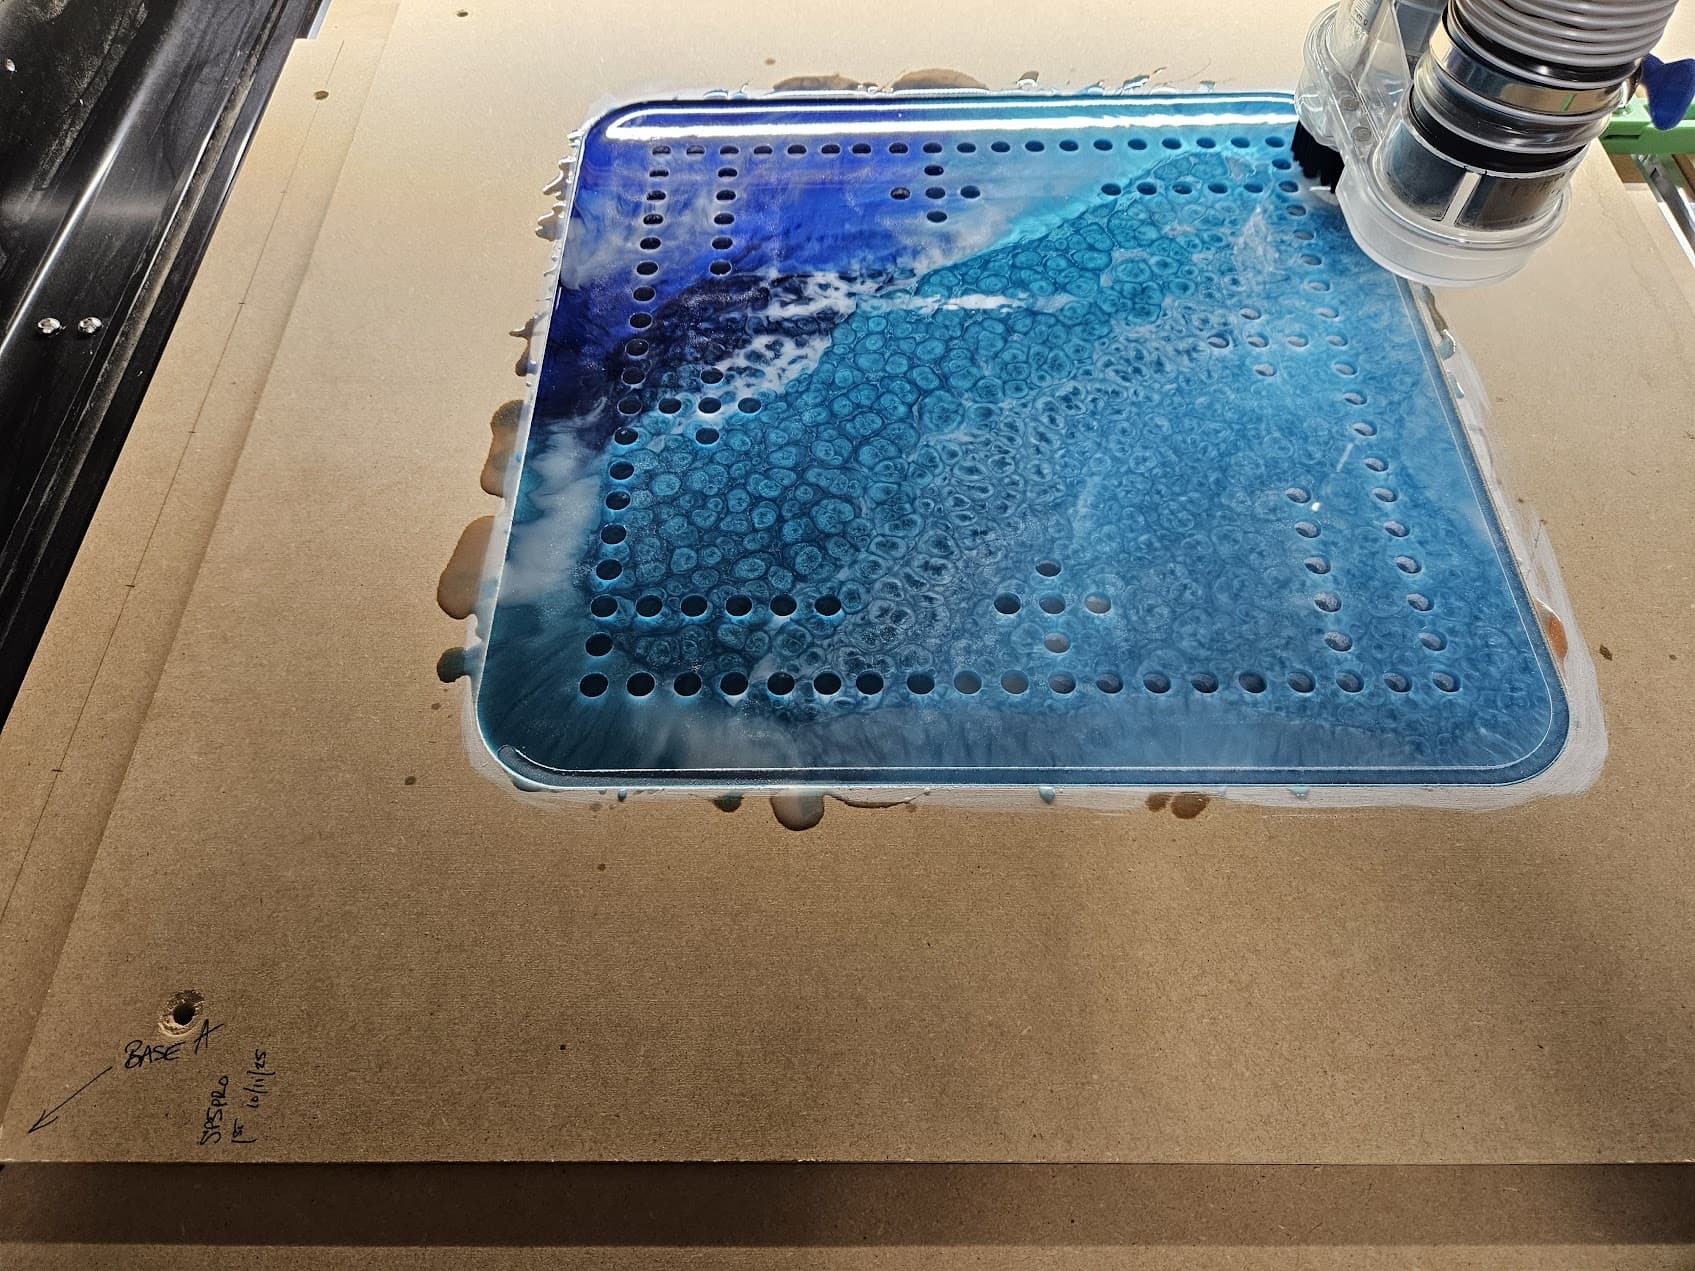
Cut out some epoxy resin game boards tonight. I have done a TON of these and still enjoy making and sharing them. I start with a sheet of MDF and make a board from that sheet. I always mark the origin corner to be matched later after the epoxy is ready. I bolt that to a middle waste board and a bottom support board, then seal the edge with a silicone bead. Will provide more details later if desired. These are fresh off the machine and need to be cleaned up - but wanted to share.
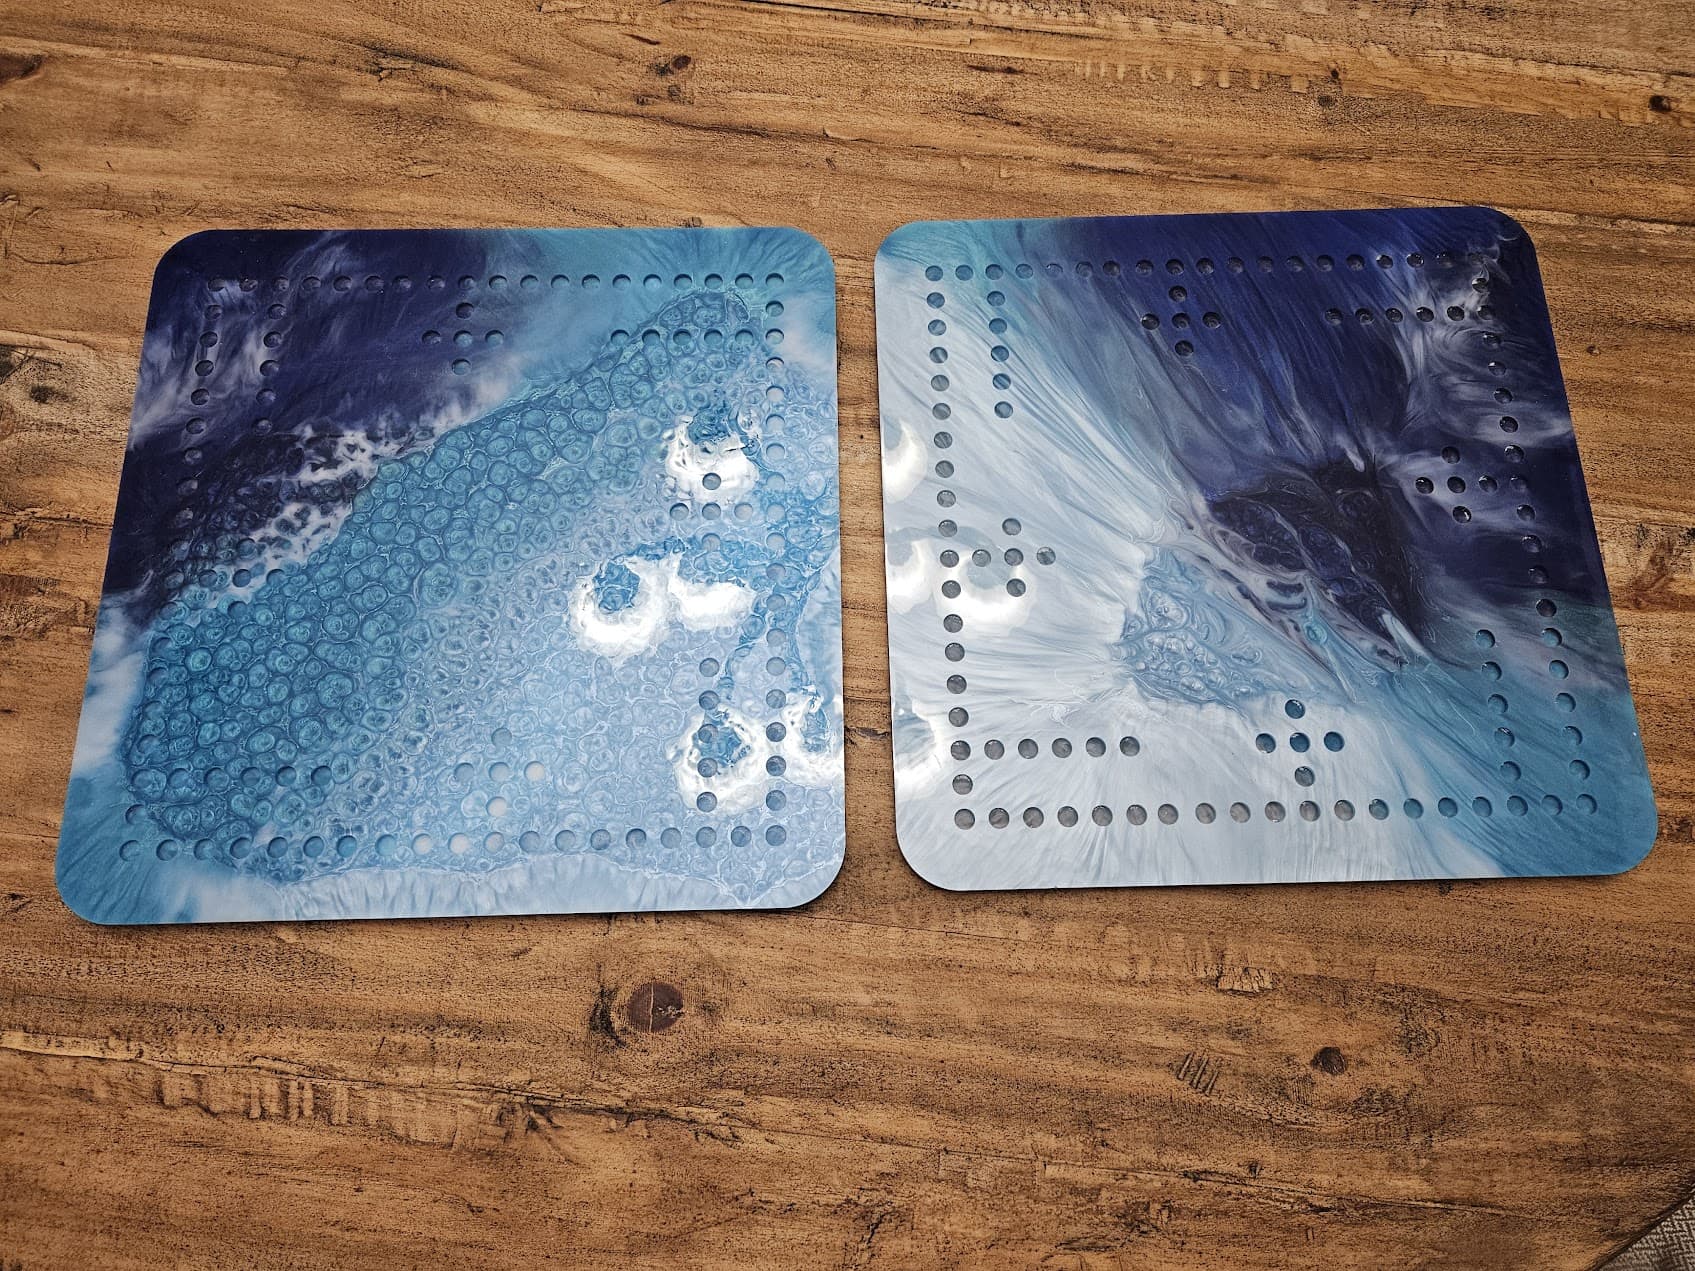
Using the void from an original cut with the origin marked ensures a good cut on the epoxy. Plus, I get a .25" buffer from the bit.
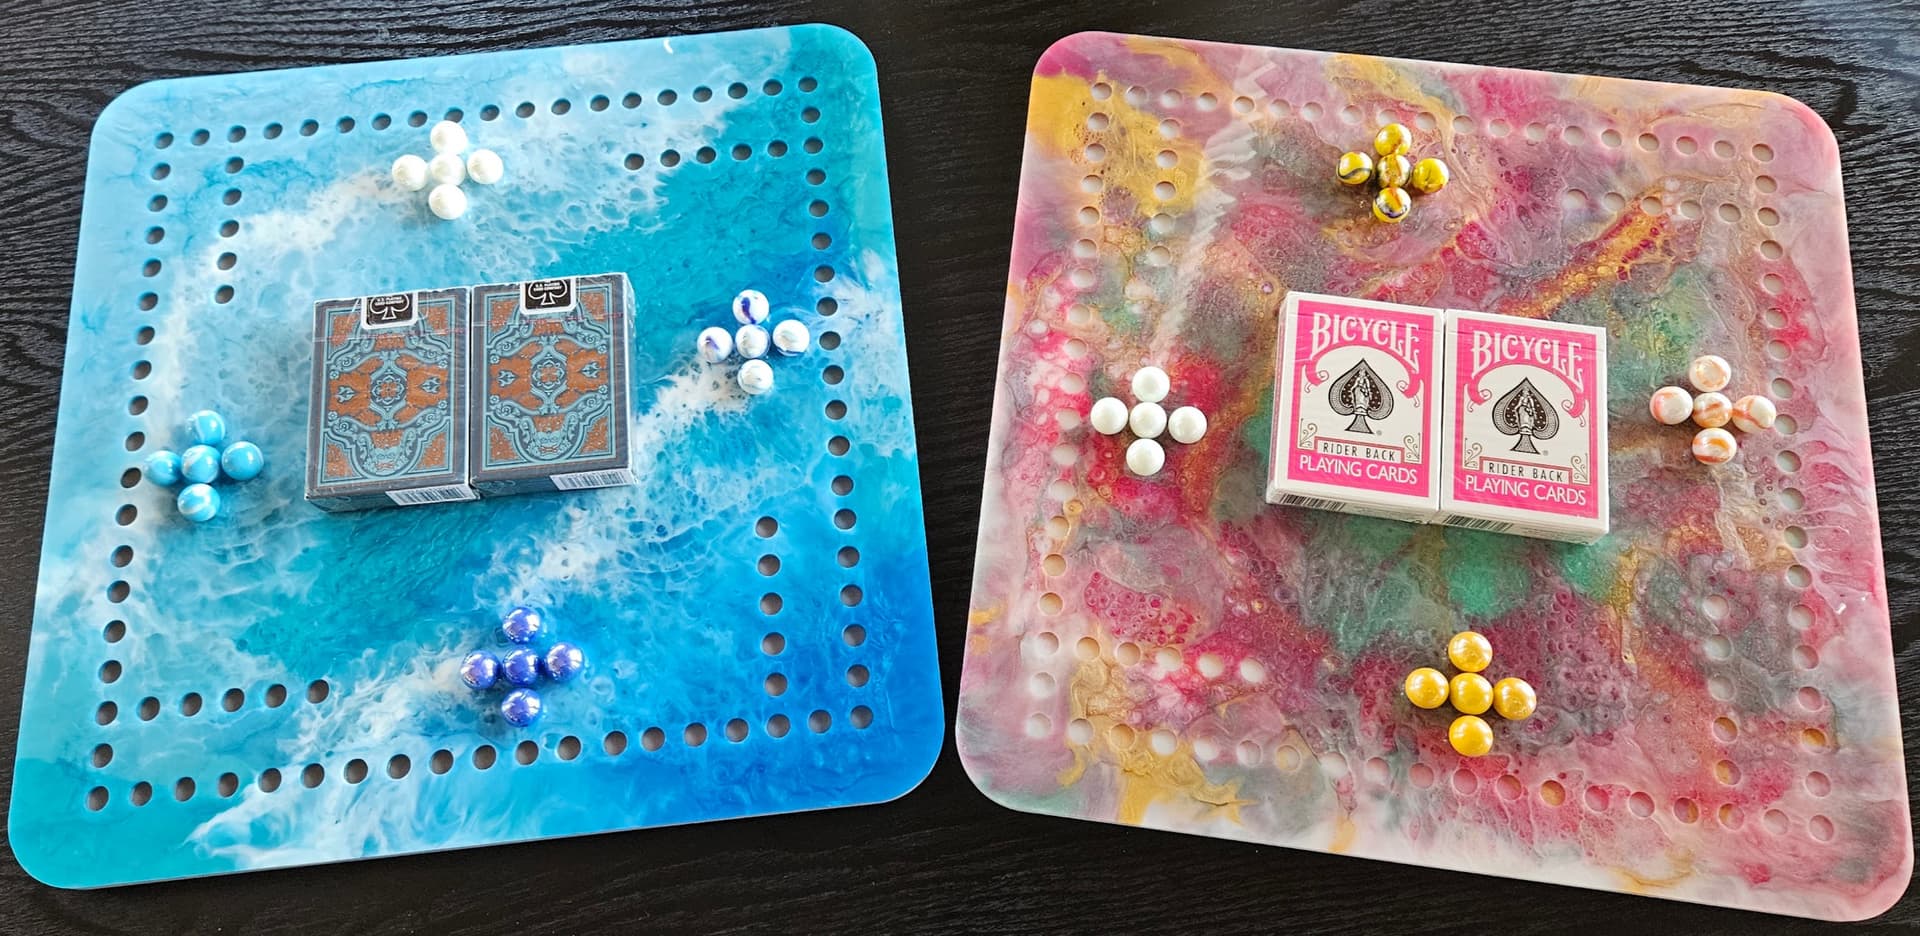
Here’s a couple previous boards, all ready to play.
21 Likes
They look great. What is the game?
Firefighter … no problems with your English … thanks! For the first one, two more questions:
- What font and bit did you use for the text?
- Did you use the CNC on that thin end-grain stock directly (with the actual thin stock) or did you do the letters on a thicker piece and then cut/plane it thinner?
Thanks. George
answer for first question: font
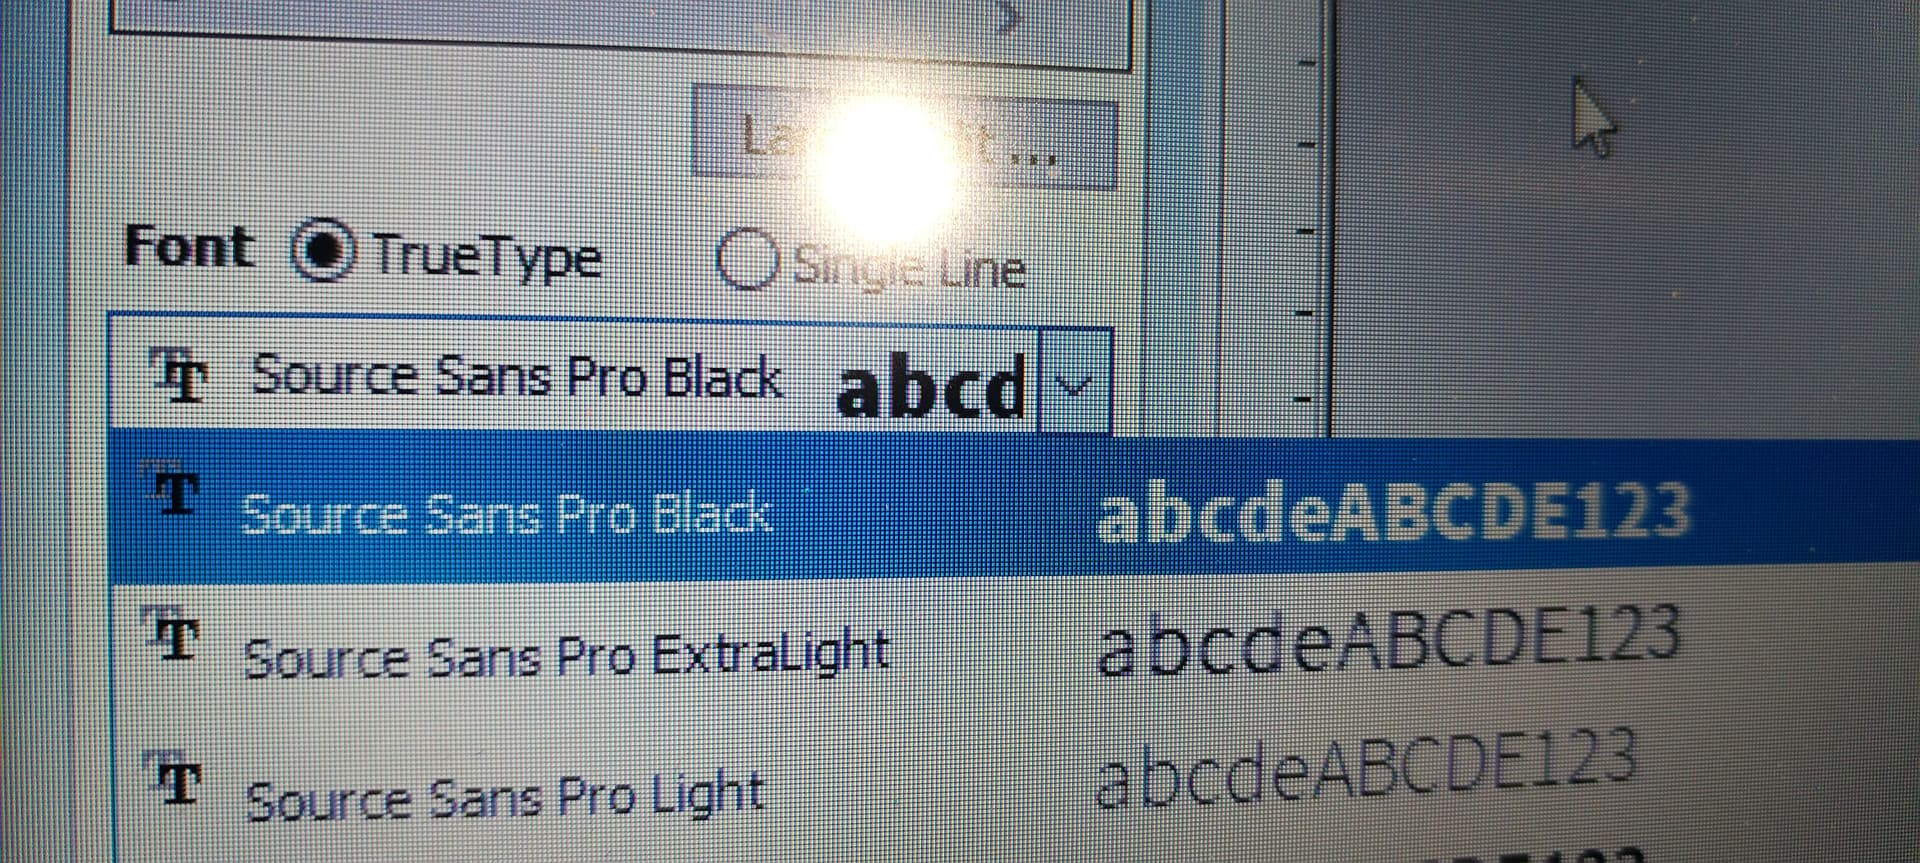
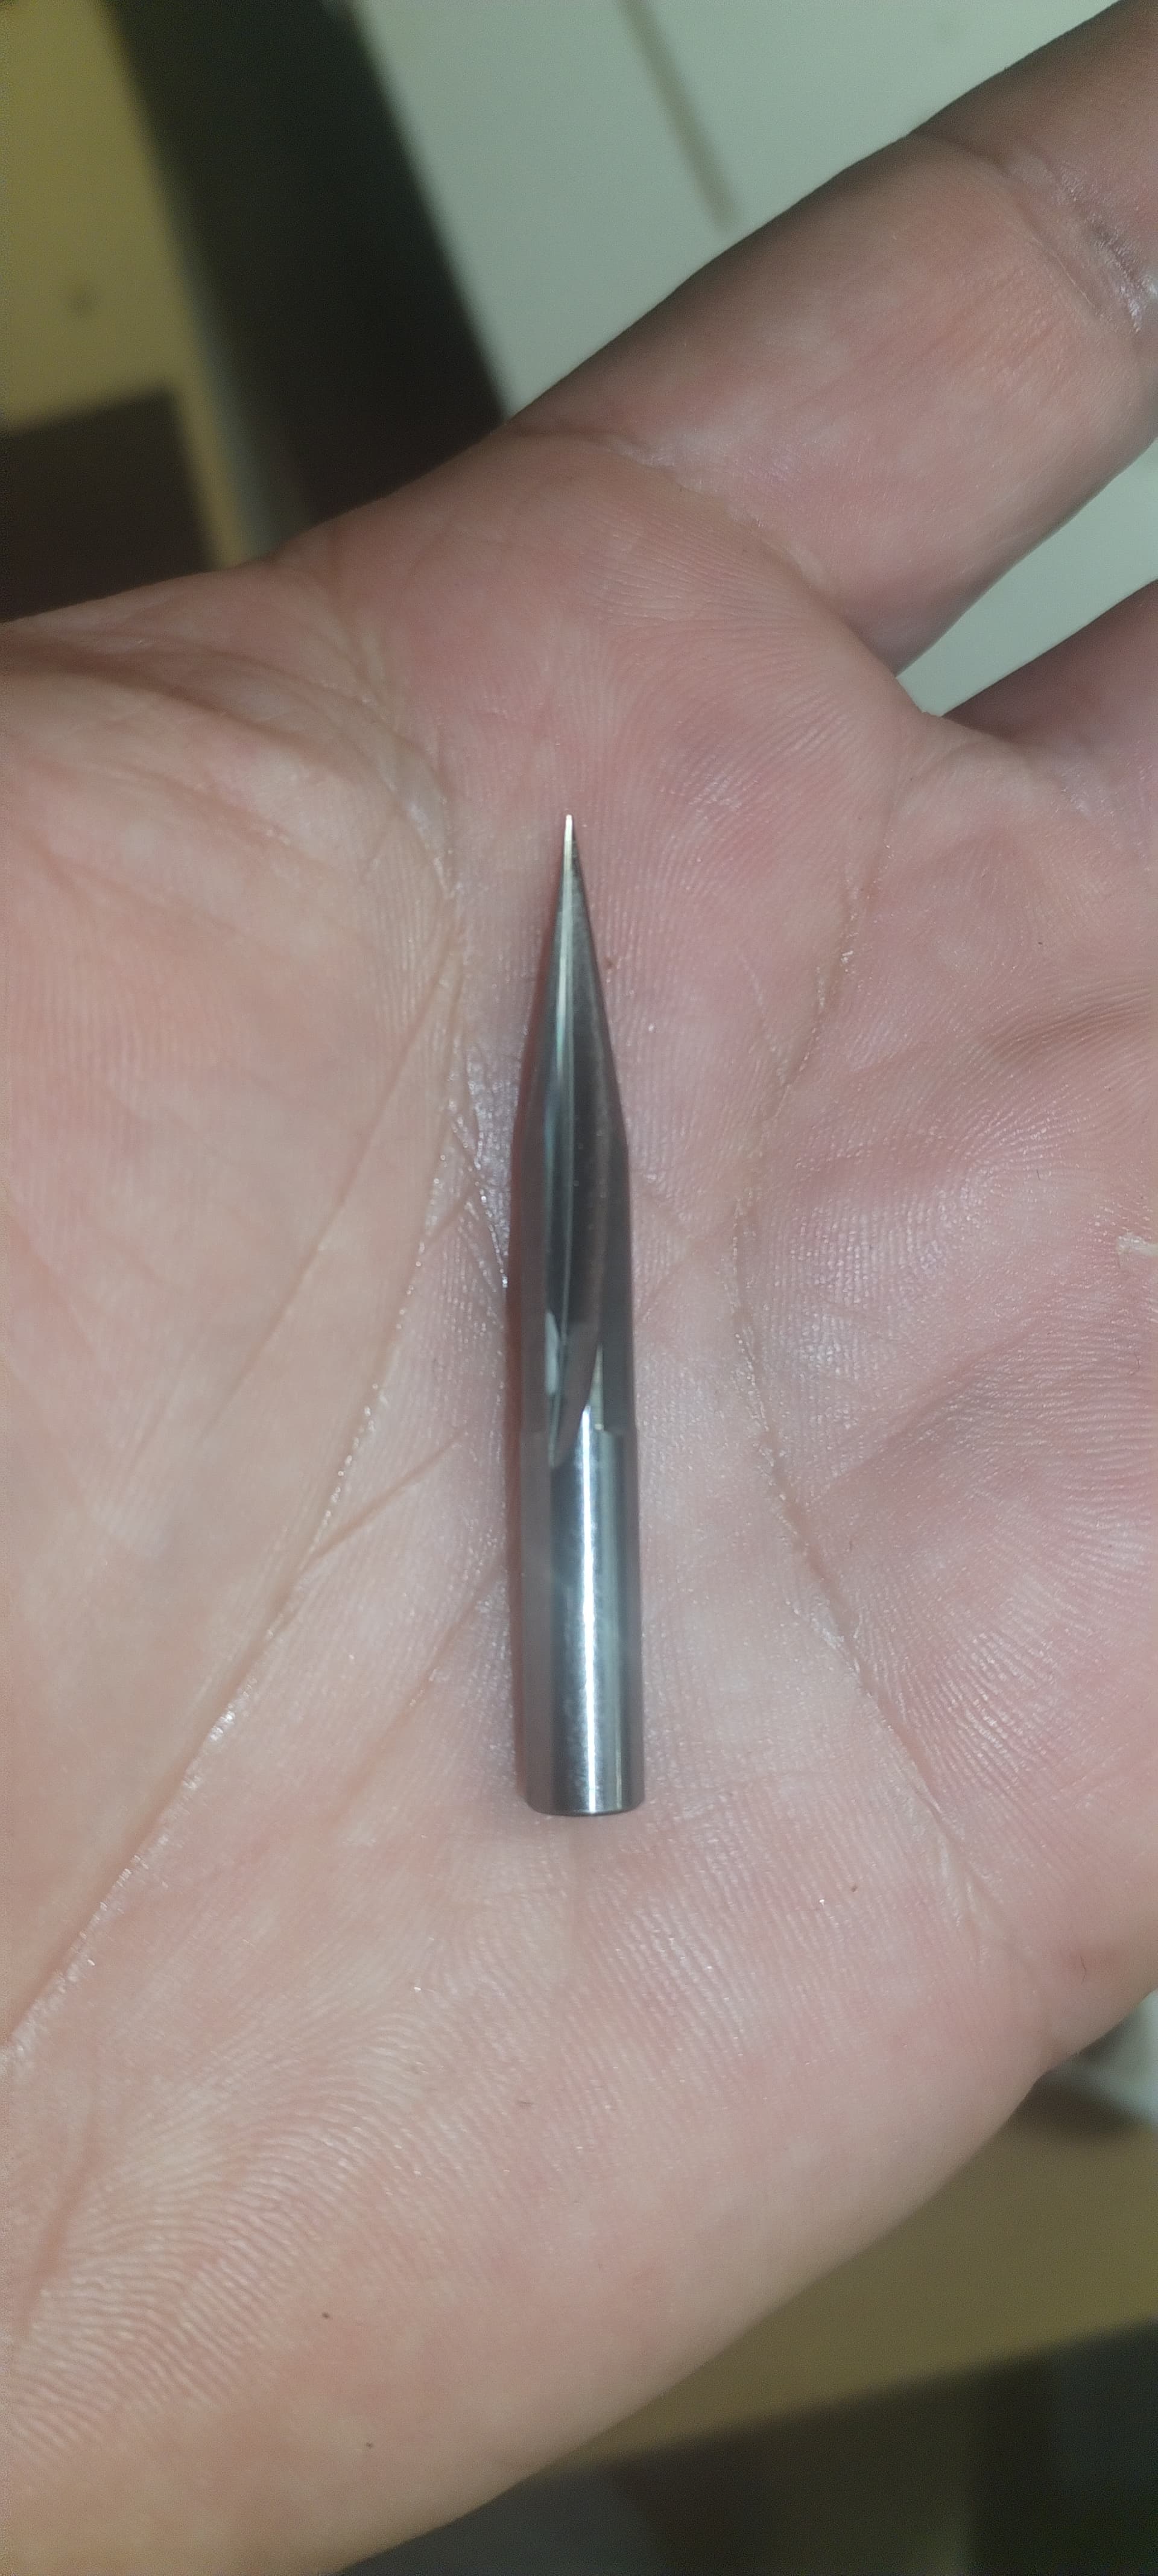
And bit 25 degree with tip 0.3mm
Vcarve/Toolpath: flat depth 2mm but I set pass depth 1mm
with this bit I have done the following
Answer for second question: It is not end-grain but face-grain. Wood which I have used is ash. I hope the translation is correct.
I did letters on wider piece not on thicker one and later after I vcarved letters I cut proper x and y
6 Likes

This came from a former coworker that said the game had been in their family a long time. When first shared, he had a sheet of plywood with holes manually cut with a 3/4" forstner bit. He said it was called “Balls!”. When it came time to make one for my daughter I had to come up with a new name. I was making them in MDF and used a tan texture paint from Home Depot that resembled sand. I was also using colorful marbles and the name “Pebble Beach” stuck.
I keep printable game instructions on my public Google account, feel free to print them out and make your own board!
Balls! rules sheet:
Pebble Beach rules sheet:
Let me know if you want to know more!
2 Likes
Looks like Jokers and Marbles.
I think I’ve heard that name used too. Was all new to me.
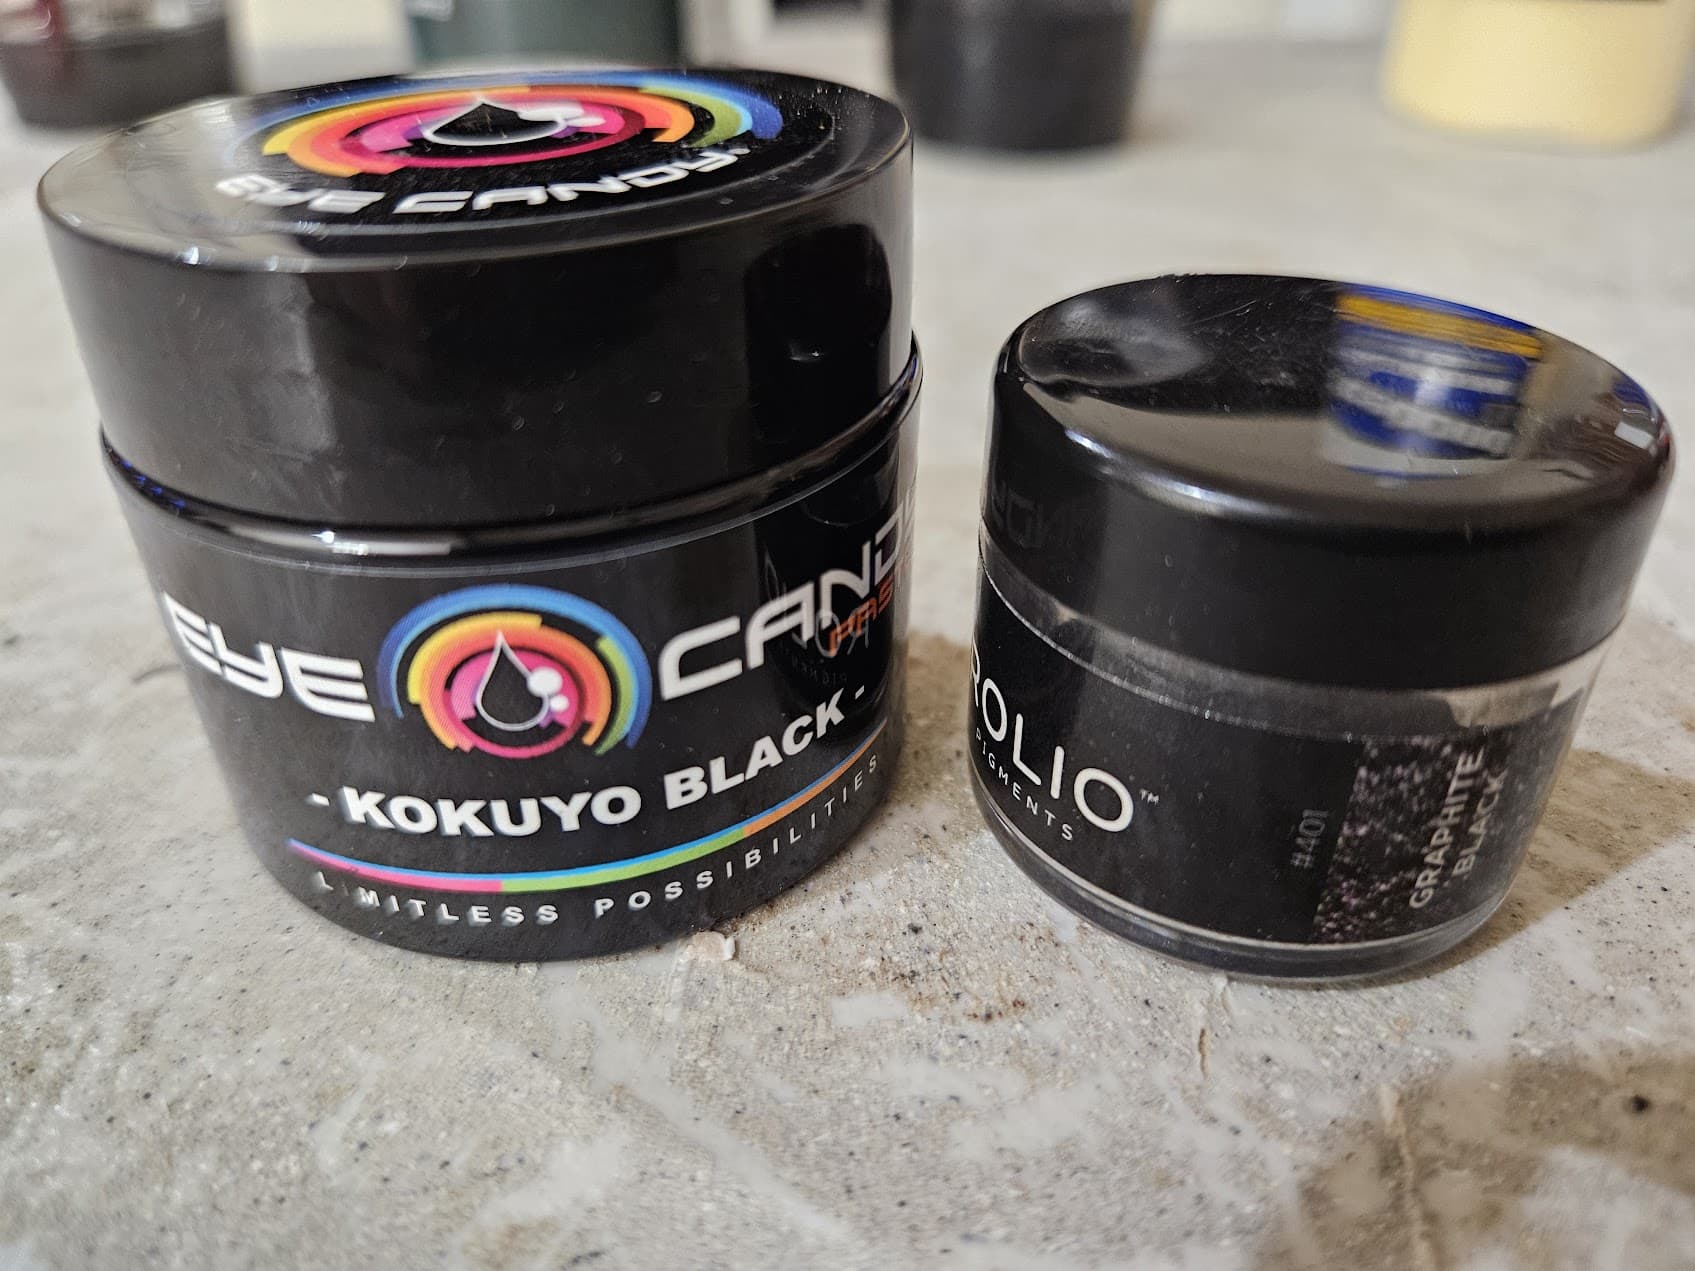
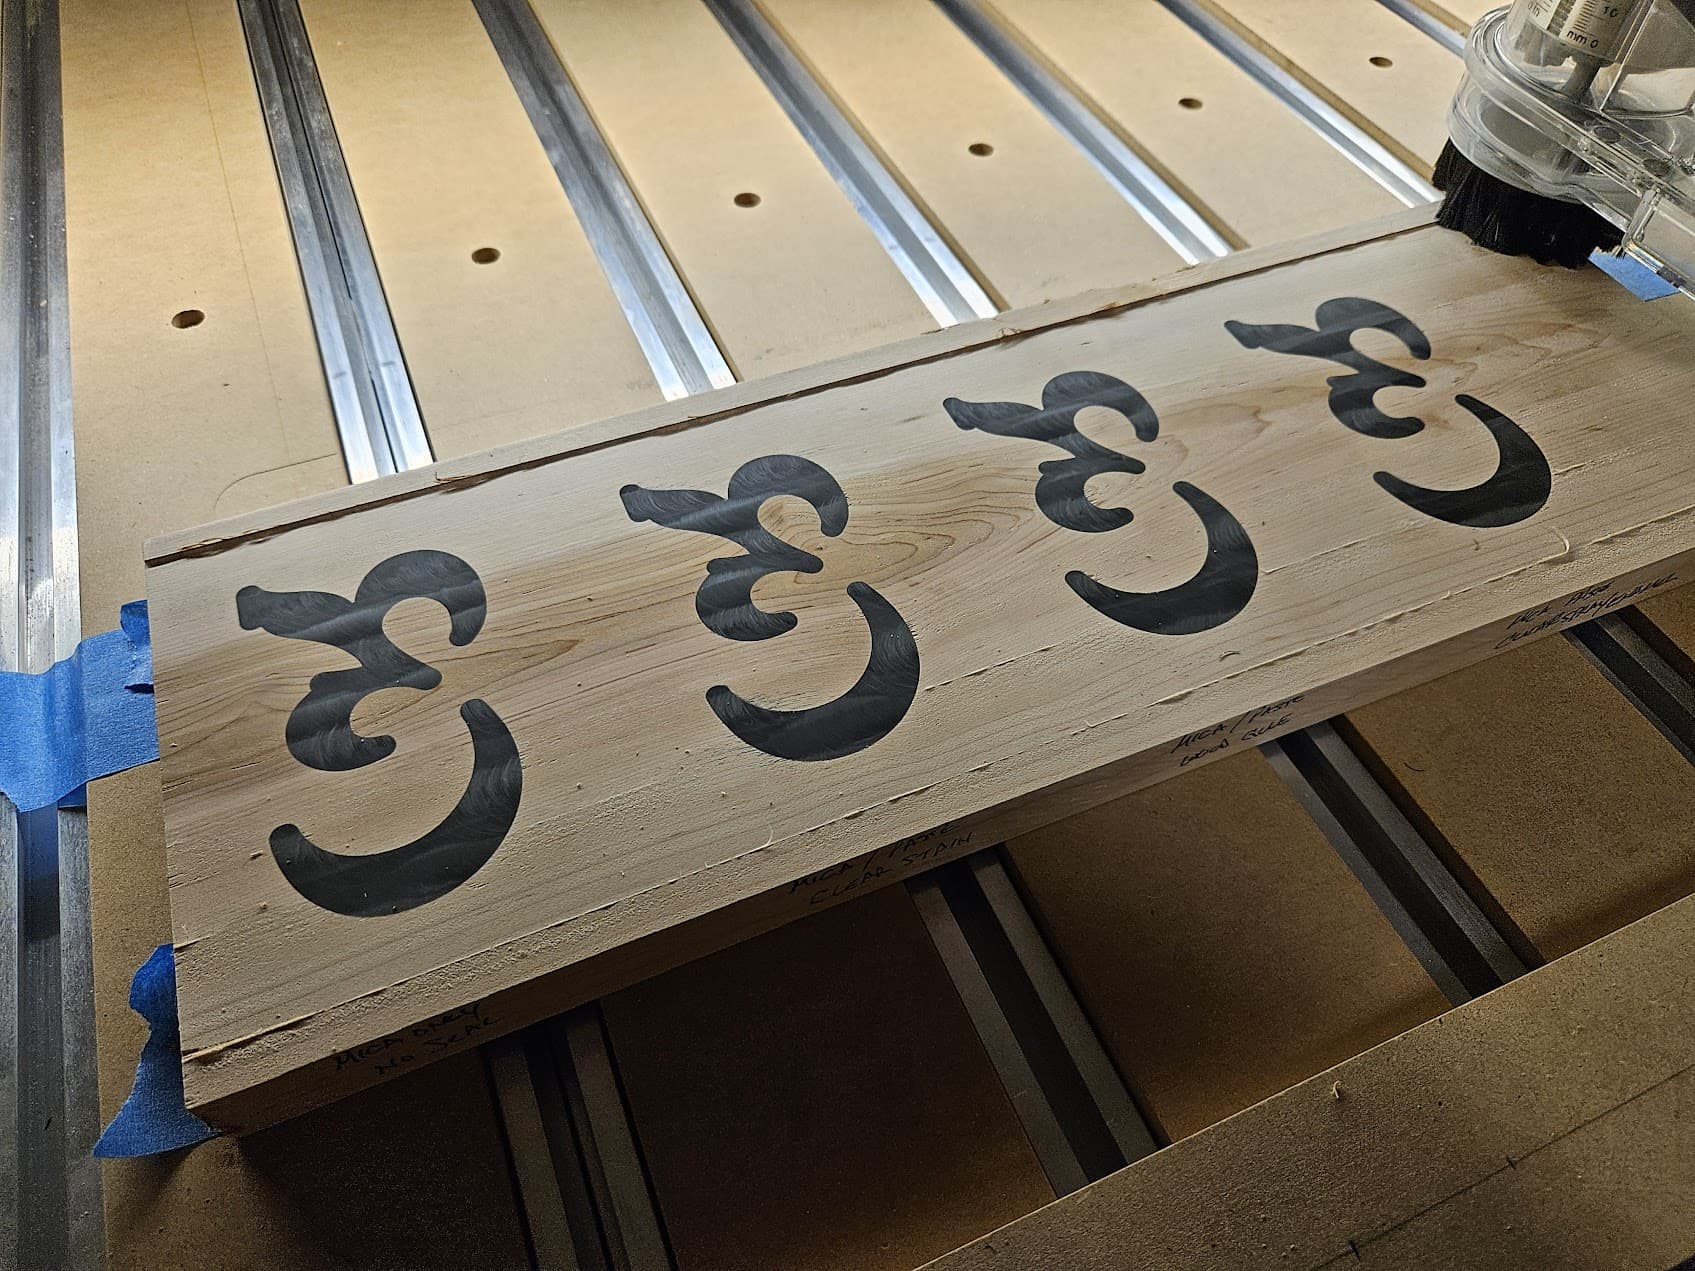
Ok, first I want you all to know I value your input and follow up on your suggestions. In addition to the sealing comment here, when I stopped in at Central Hardwoods the sales guy (who has consistently given good advice and deep knowledge on various wood species) asked how I was dying the epoxy. I used Graphite Black mica powder from Rolio and Kokuyo Black paste from Eye Candy. He suggested skipping the paste, as it likely got into places that the mica powder couldn’t. So, I grabbed a piece of hard white maple (same as the Studio 13 project) and set up four inlays to test out this plus your suggestions.
Here’s the test piece before adding epoxy:
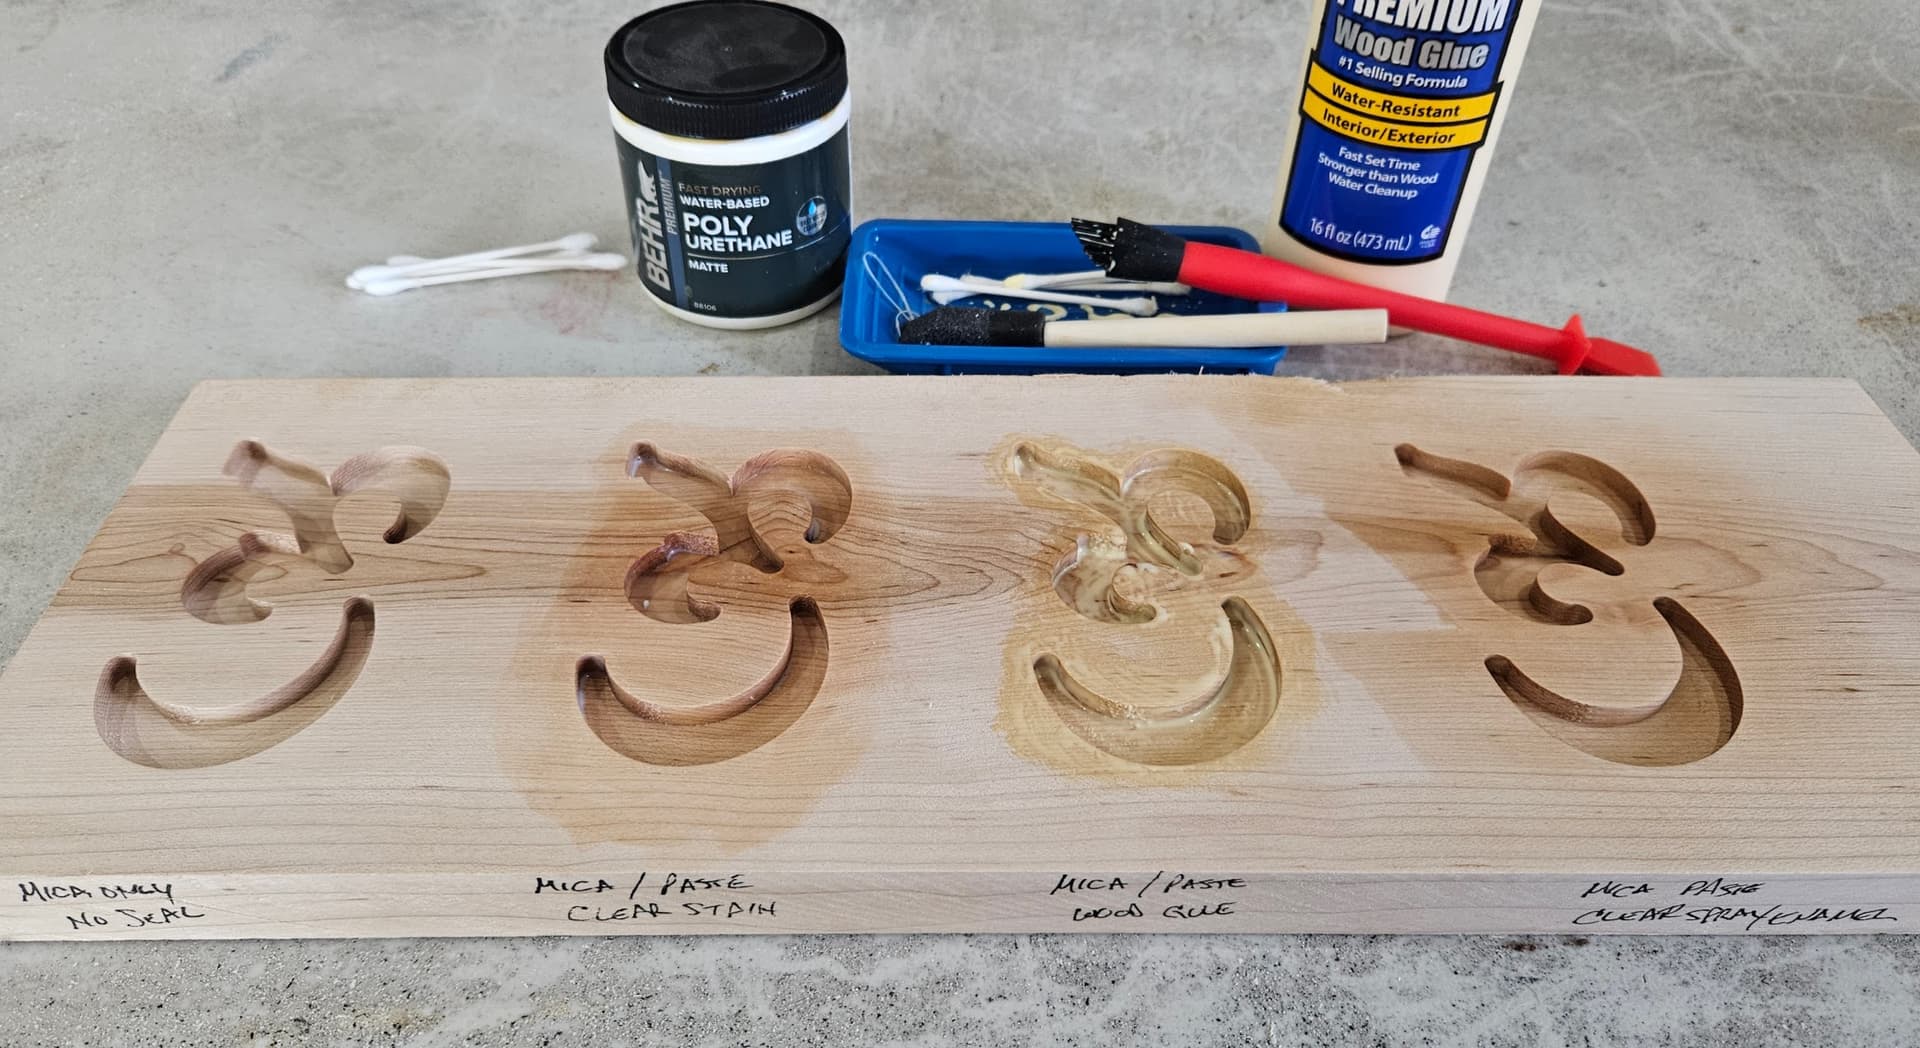
The far left is with no sealant, and epoxy colored with just mica powder.
The rest of the samples contain both colorants.
Left of center is sealed with a matte polyurethane stain.
Right of center is sealed with wood glue.
Far right is sealed with clear spray paint.
Next, I added the epoxy resin and let it fully cure.
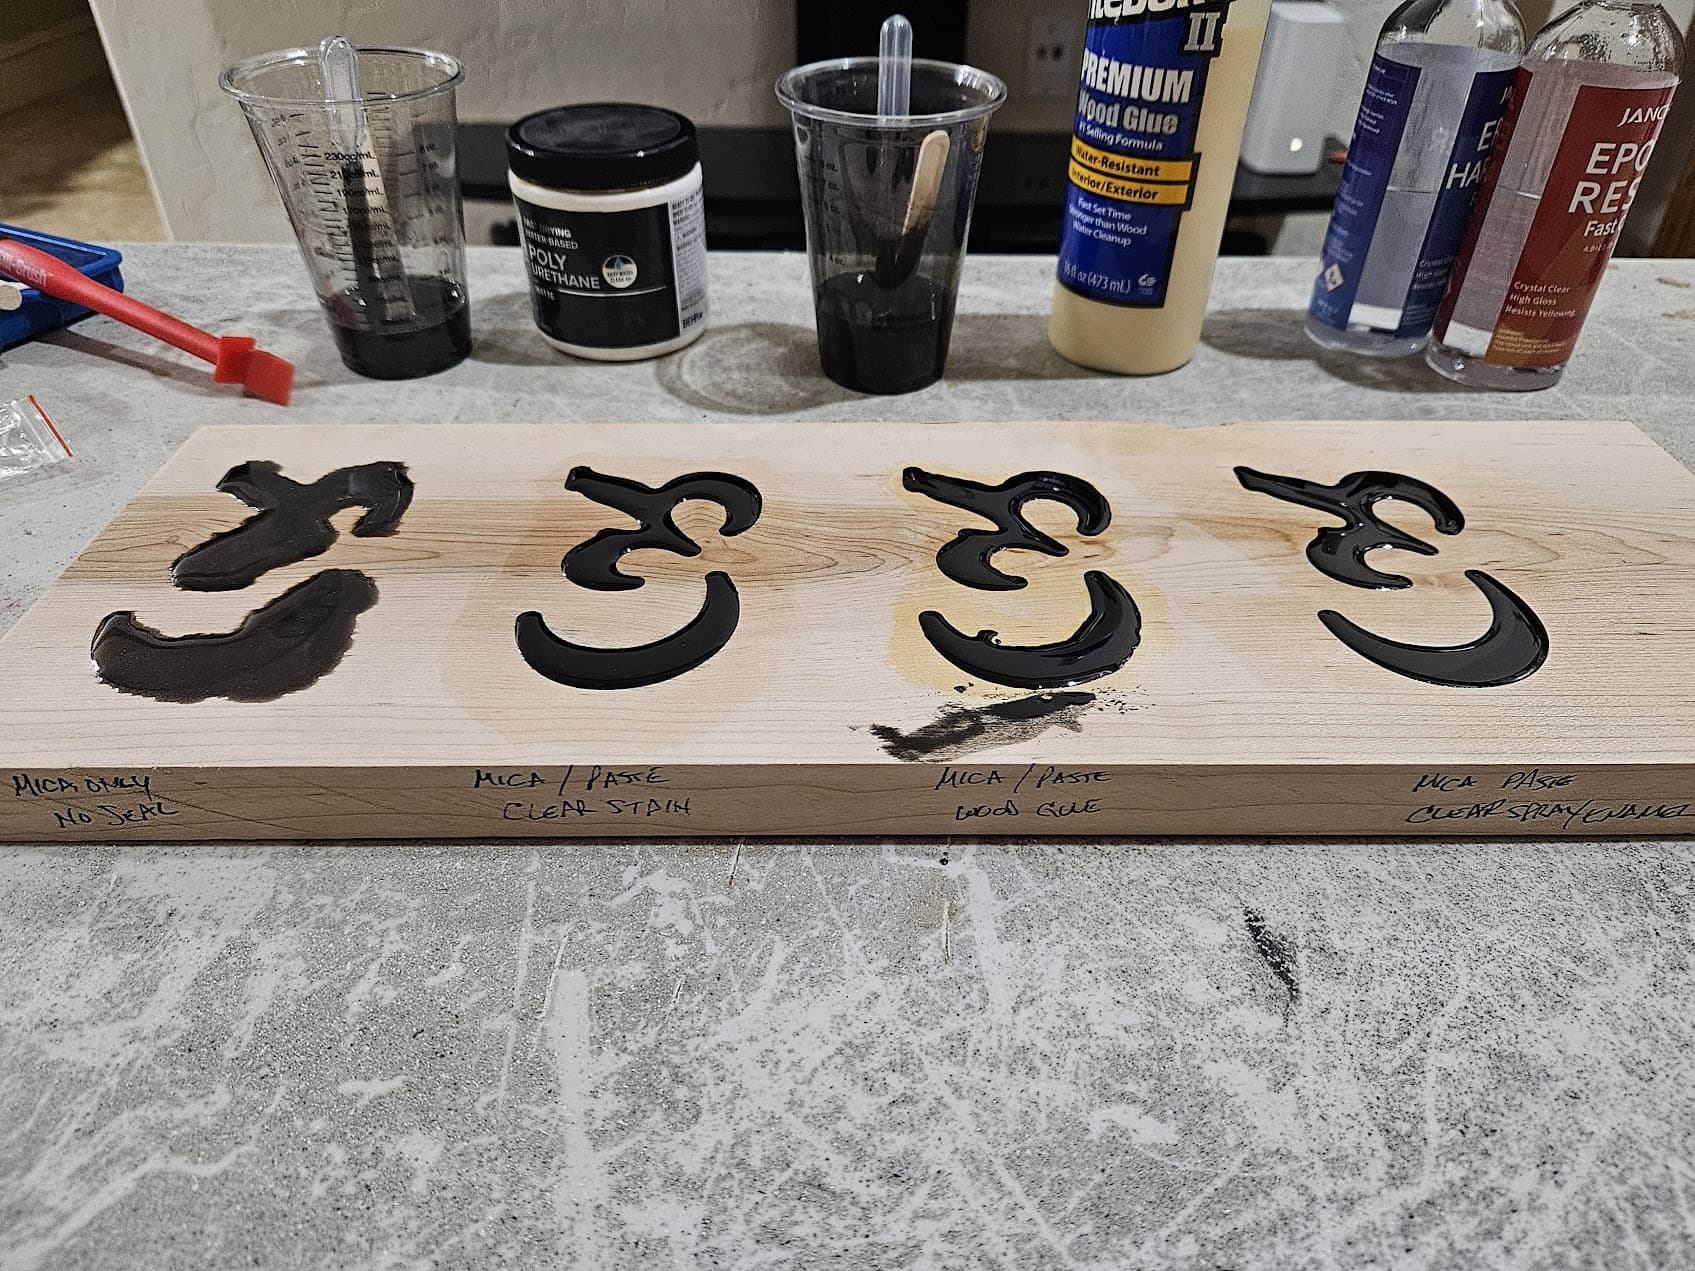
Huge difference in how the mica powder only looked, and I was certain it was going to fail this test.
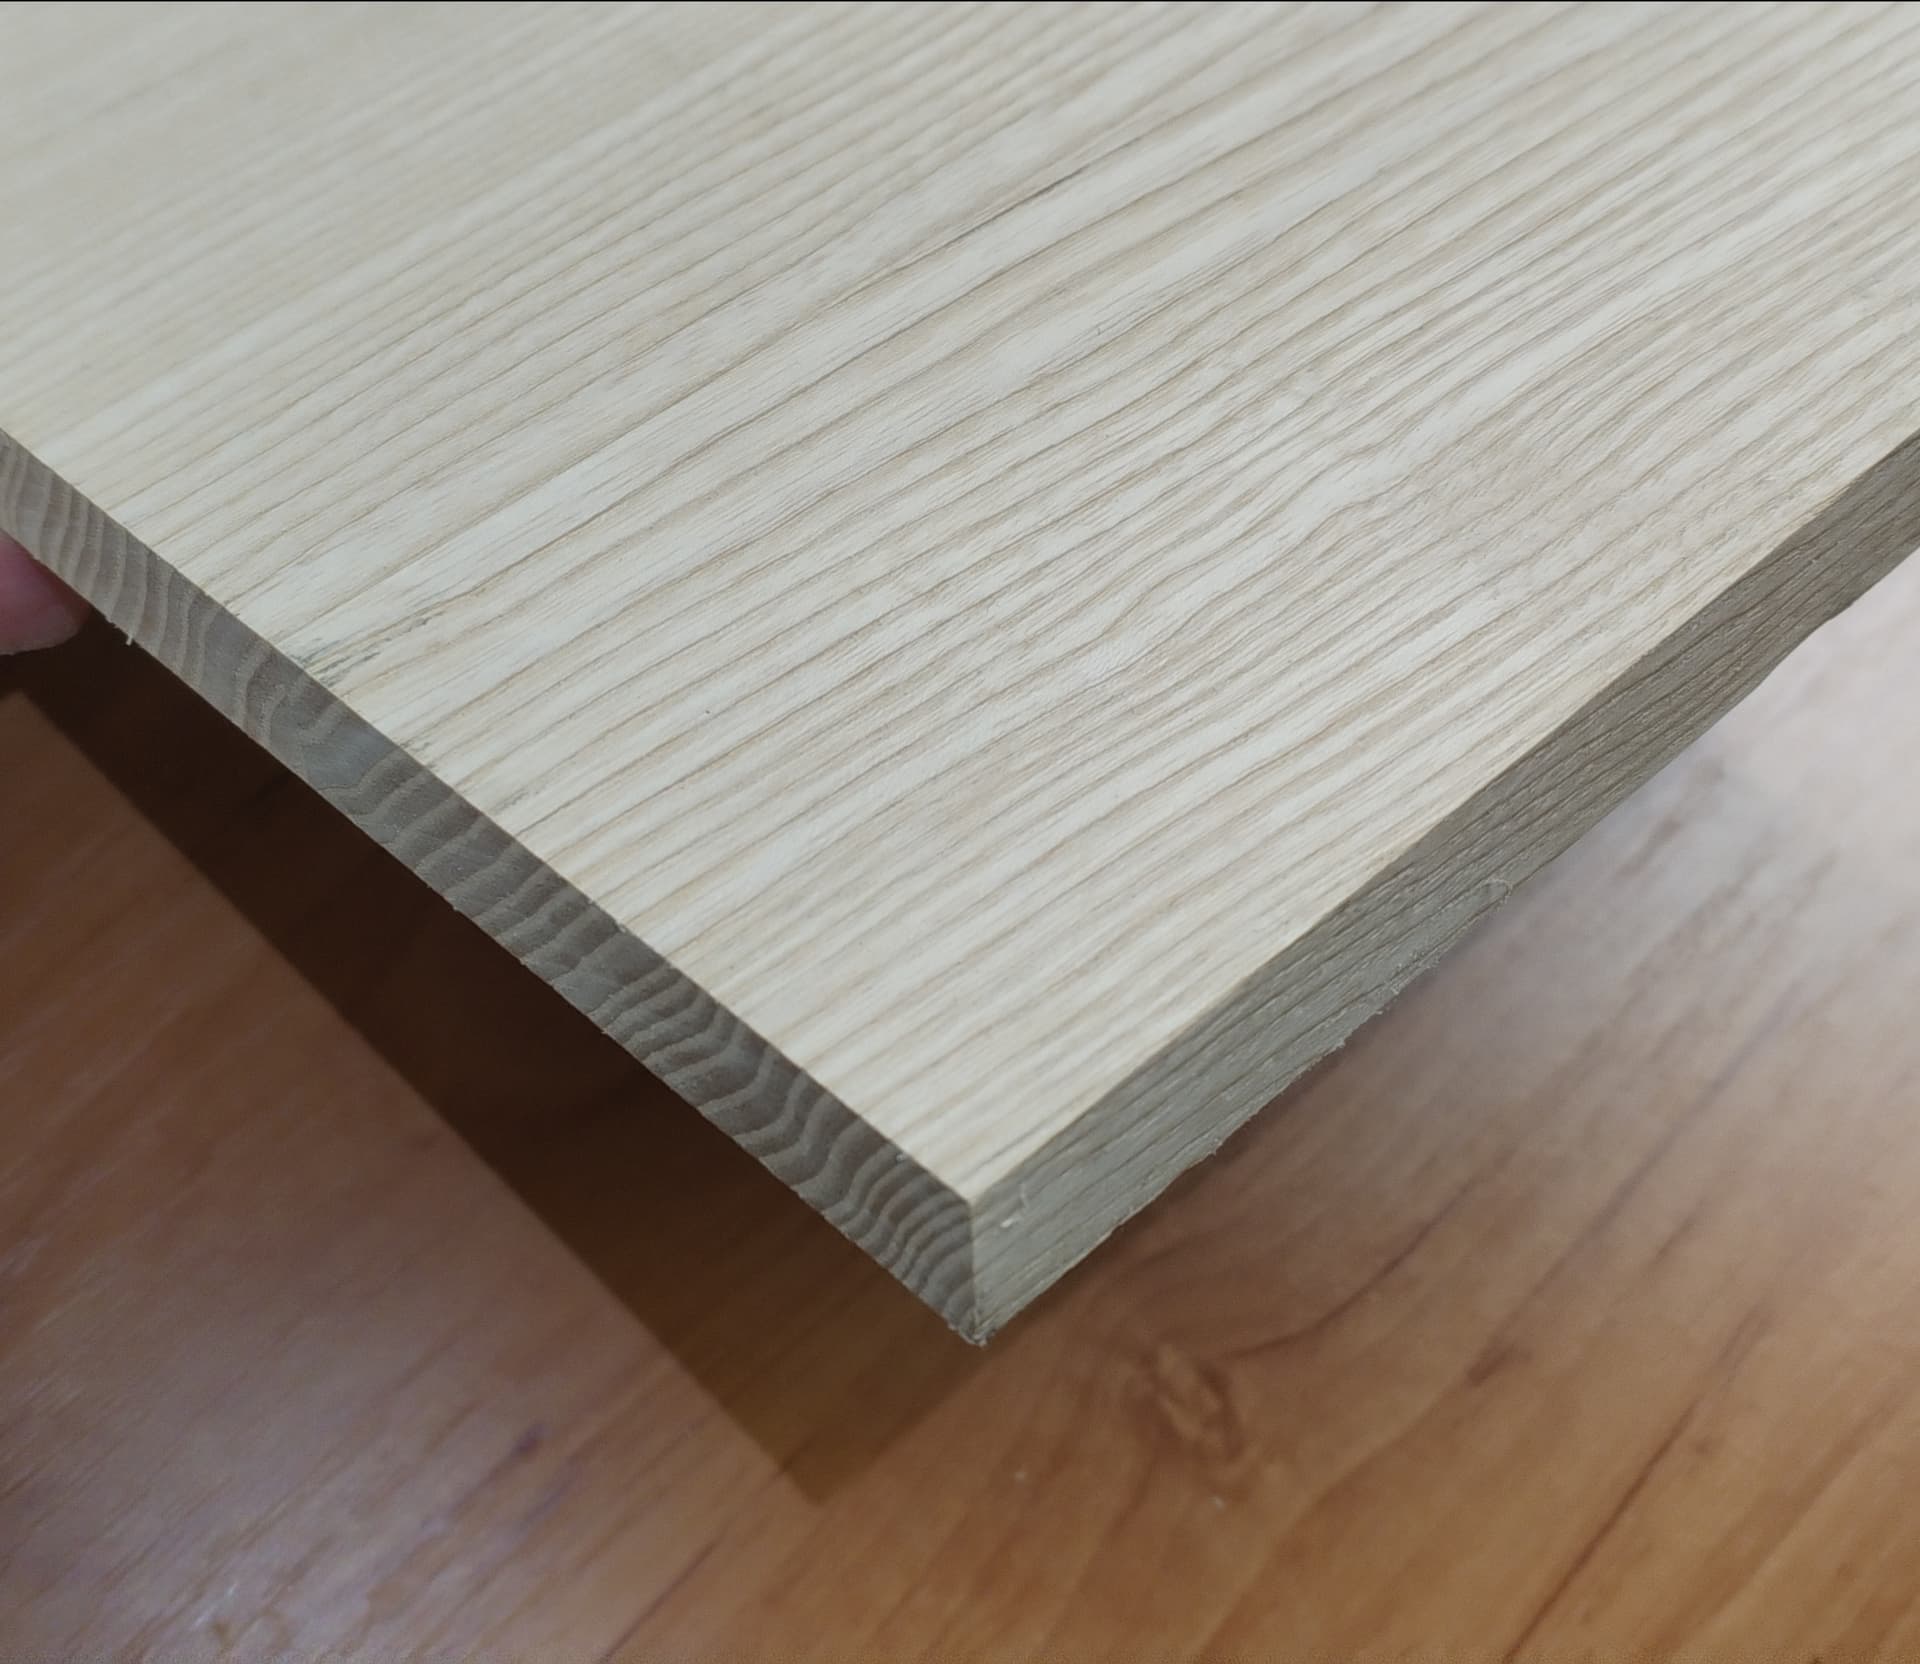
I sheared this stock down the same .15" as the Studio 13 project:
After sanding with 220:
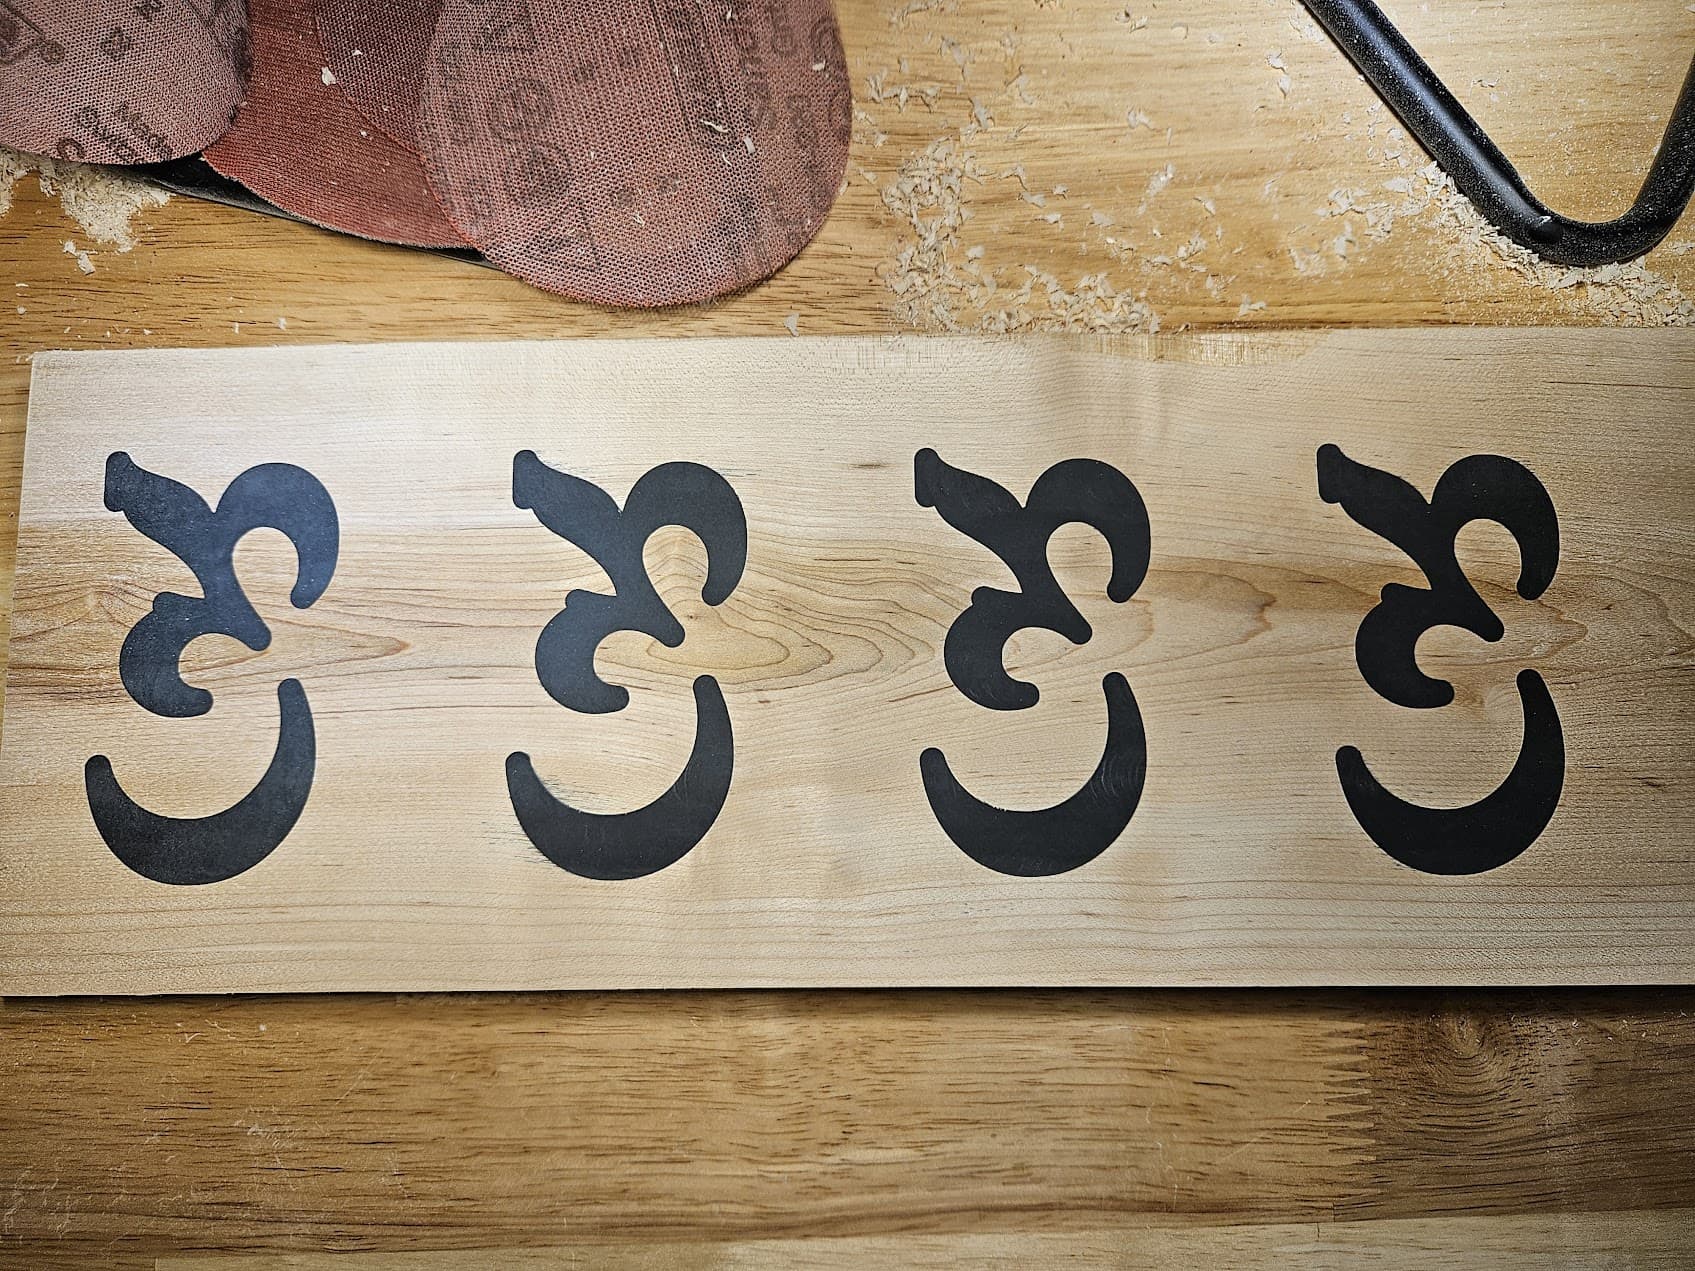
First, I was surprised that the mica powder only held up! Zero bleed.
The only bleed if you look close is on the second one (clear stain), and this is likely just from missing a spot.
Overall, the lesson is always seal your edge when using epoxy resin. Thanks again to all who contributed their thoughts on this one.
14 Likes