I have noticed the dye has easier capillary action than the powder alone. Taught me the lesson of testing the species wood and epoxy concoctions i mix up.
5 Likes
They will have handles that the customer has not chosen yet. Thank you, the case, drawers and base were all hand cut dovetails.
2 Likes
Thank you! The simple v-carve was a tiled operation
Oh wow, that didn’t occur to me! Thanks for pointing that out. The customer drew the pattern by selecting images from 5 gothic cathedral pictures.
Do you machine the MDF off the back so that the board is only epoxy or do you leave it there?
Great question @CullenS
I actually have a process here. I first cut the MDF board (1/2 inch thick) and finish that in primer and texture paint. Then, I use the cutout and another 1/2 inch MDF panel and sandwich a sheet of hardened fiberboard between them. The fiberboard gets covered with clear packing tape as the epoxy won’t adhere to it. I bolt the three layers together for the epoxy part, and run a silicone bead between the top sheet and the taped fiberboard to prevent leaks. I also paint the edge of the MDF to keep floaters out of the epoxy.
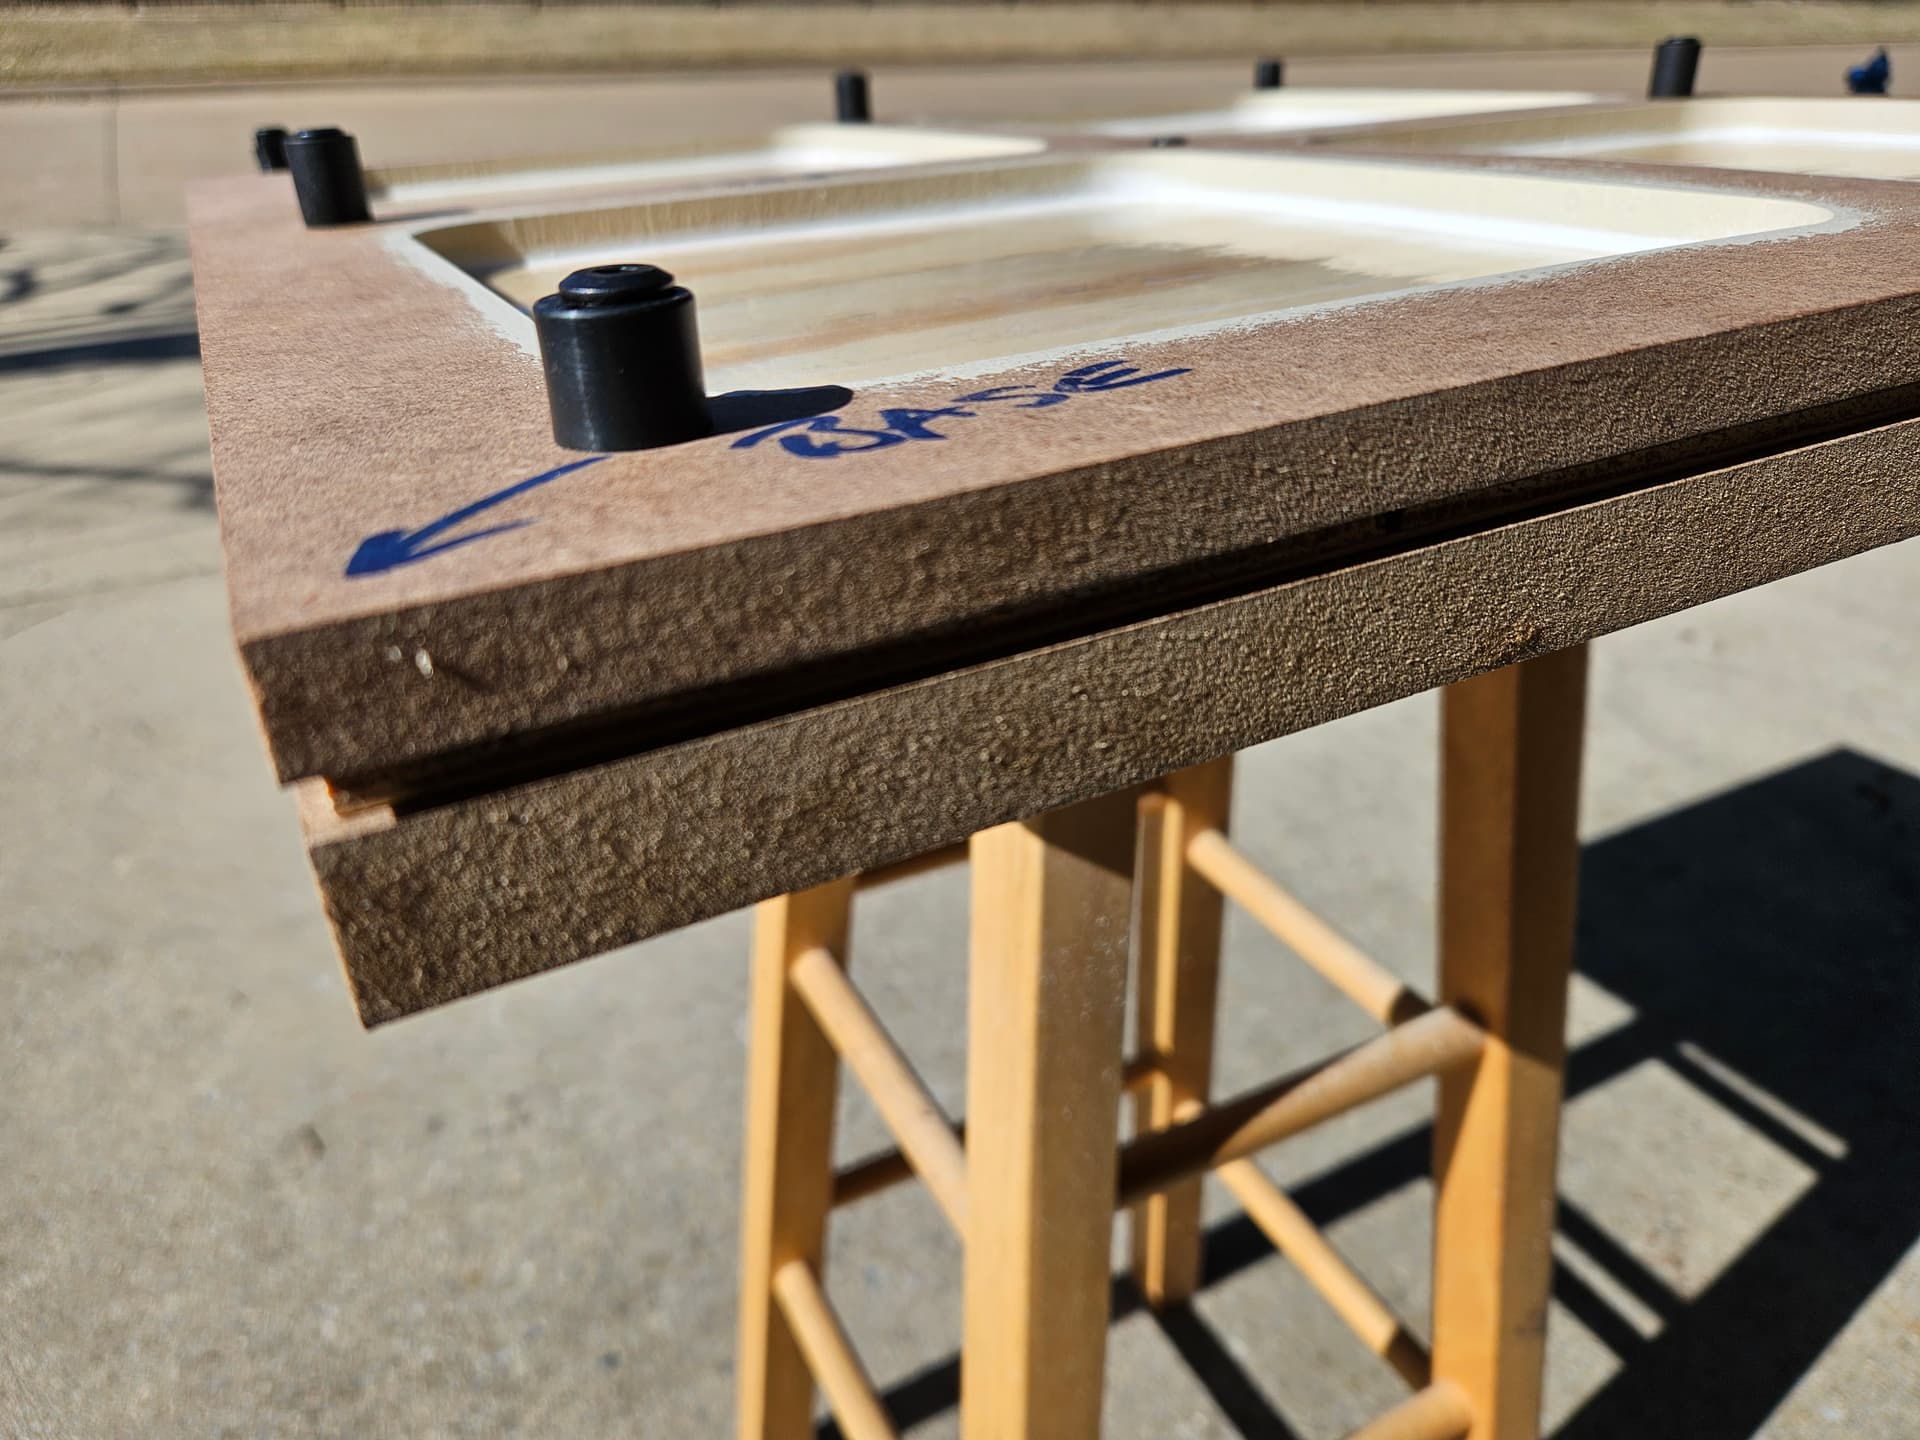
After the epoxy cures, I unbolt the three panels, and the top two are what goes on the Shapeoko to cut out the board. I use a different Carbide Create file for this as it accounts for the new thickness. I cut just into the fiberboard. This allows for easy separation of the epoxy game board and the packing tape.
Here’s the fiberboard afterwards - this is the only throwaway, the other panels can be used many times over to make more boards.
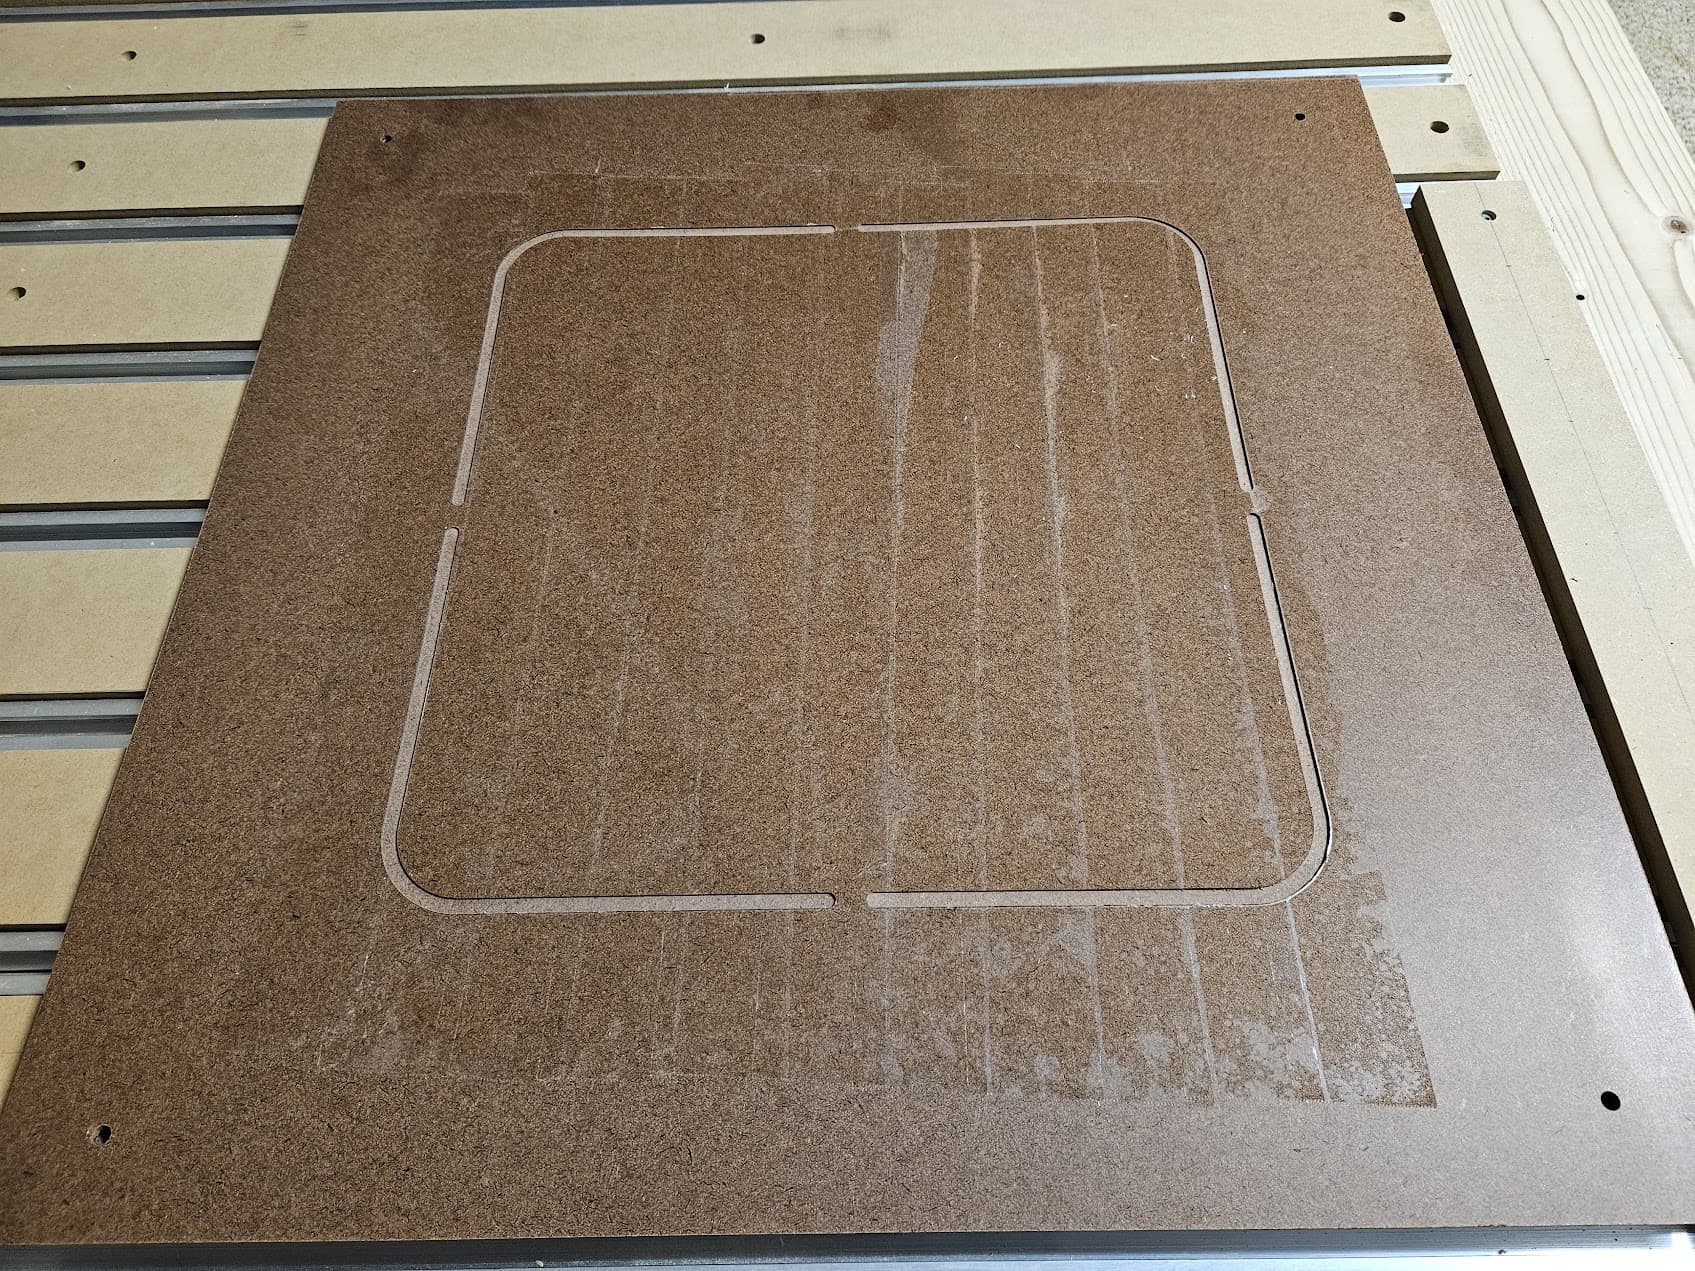
https://www.homedepot.com/p/1-8-in-x-2-ft-x-4-ft-Hardboard-Tempered-7005015/203444173
5 Likes
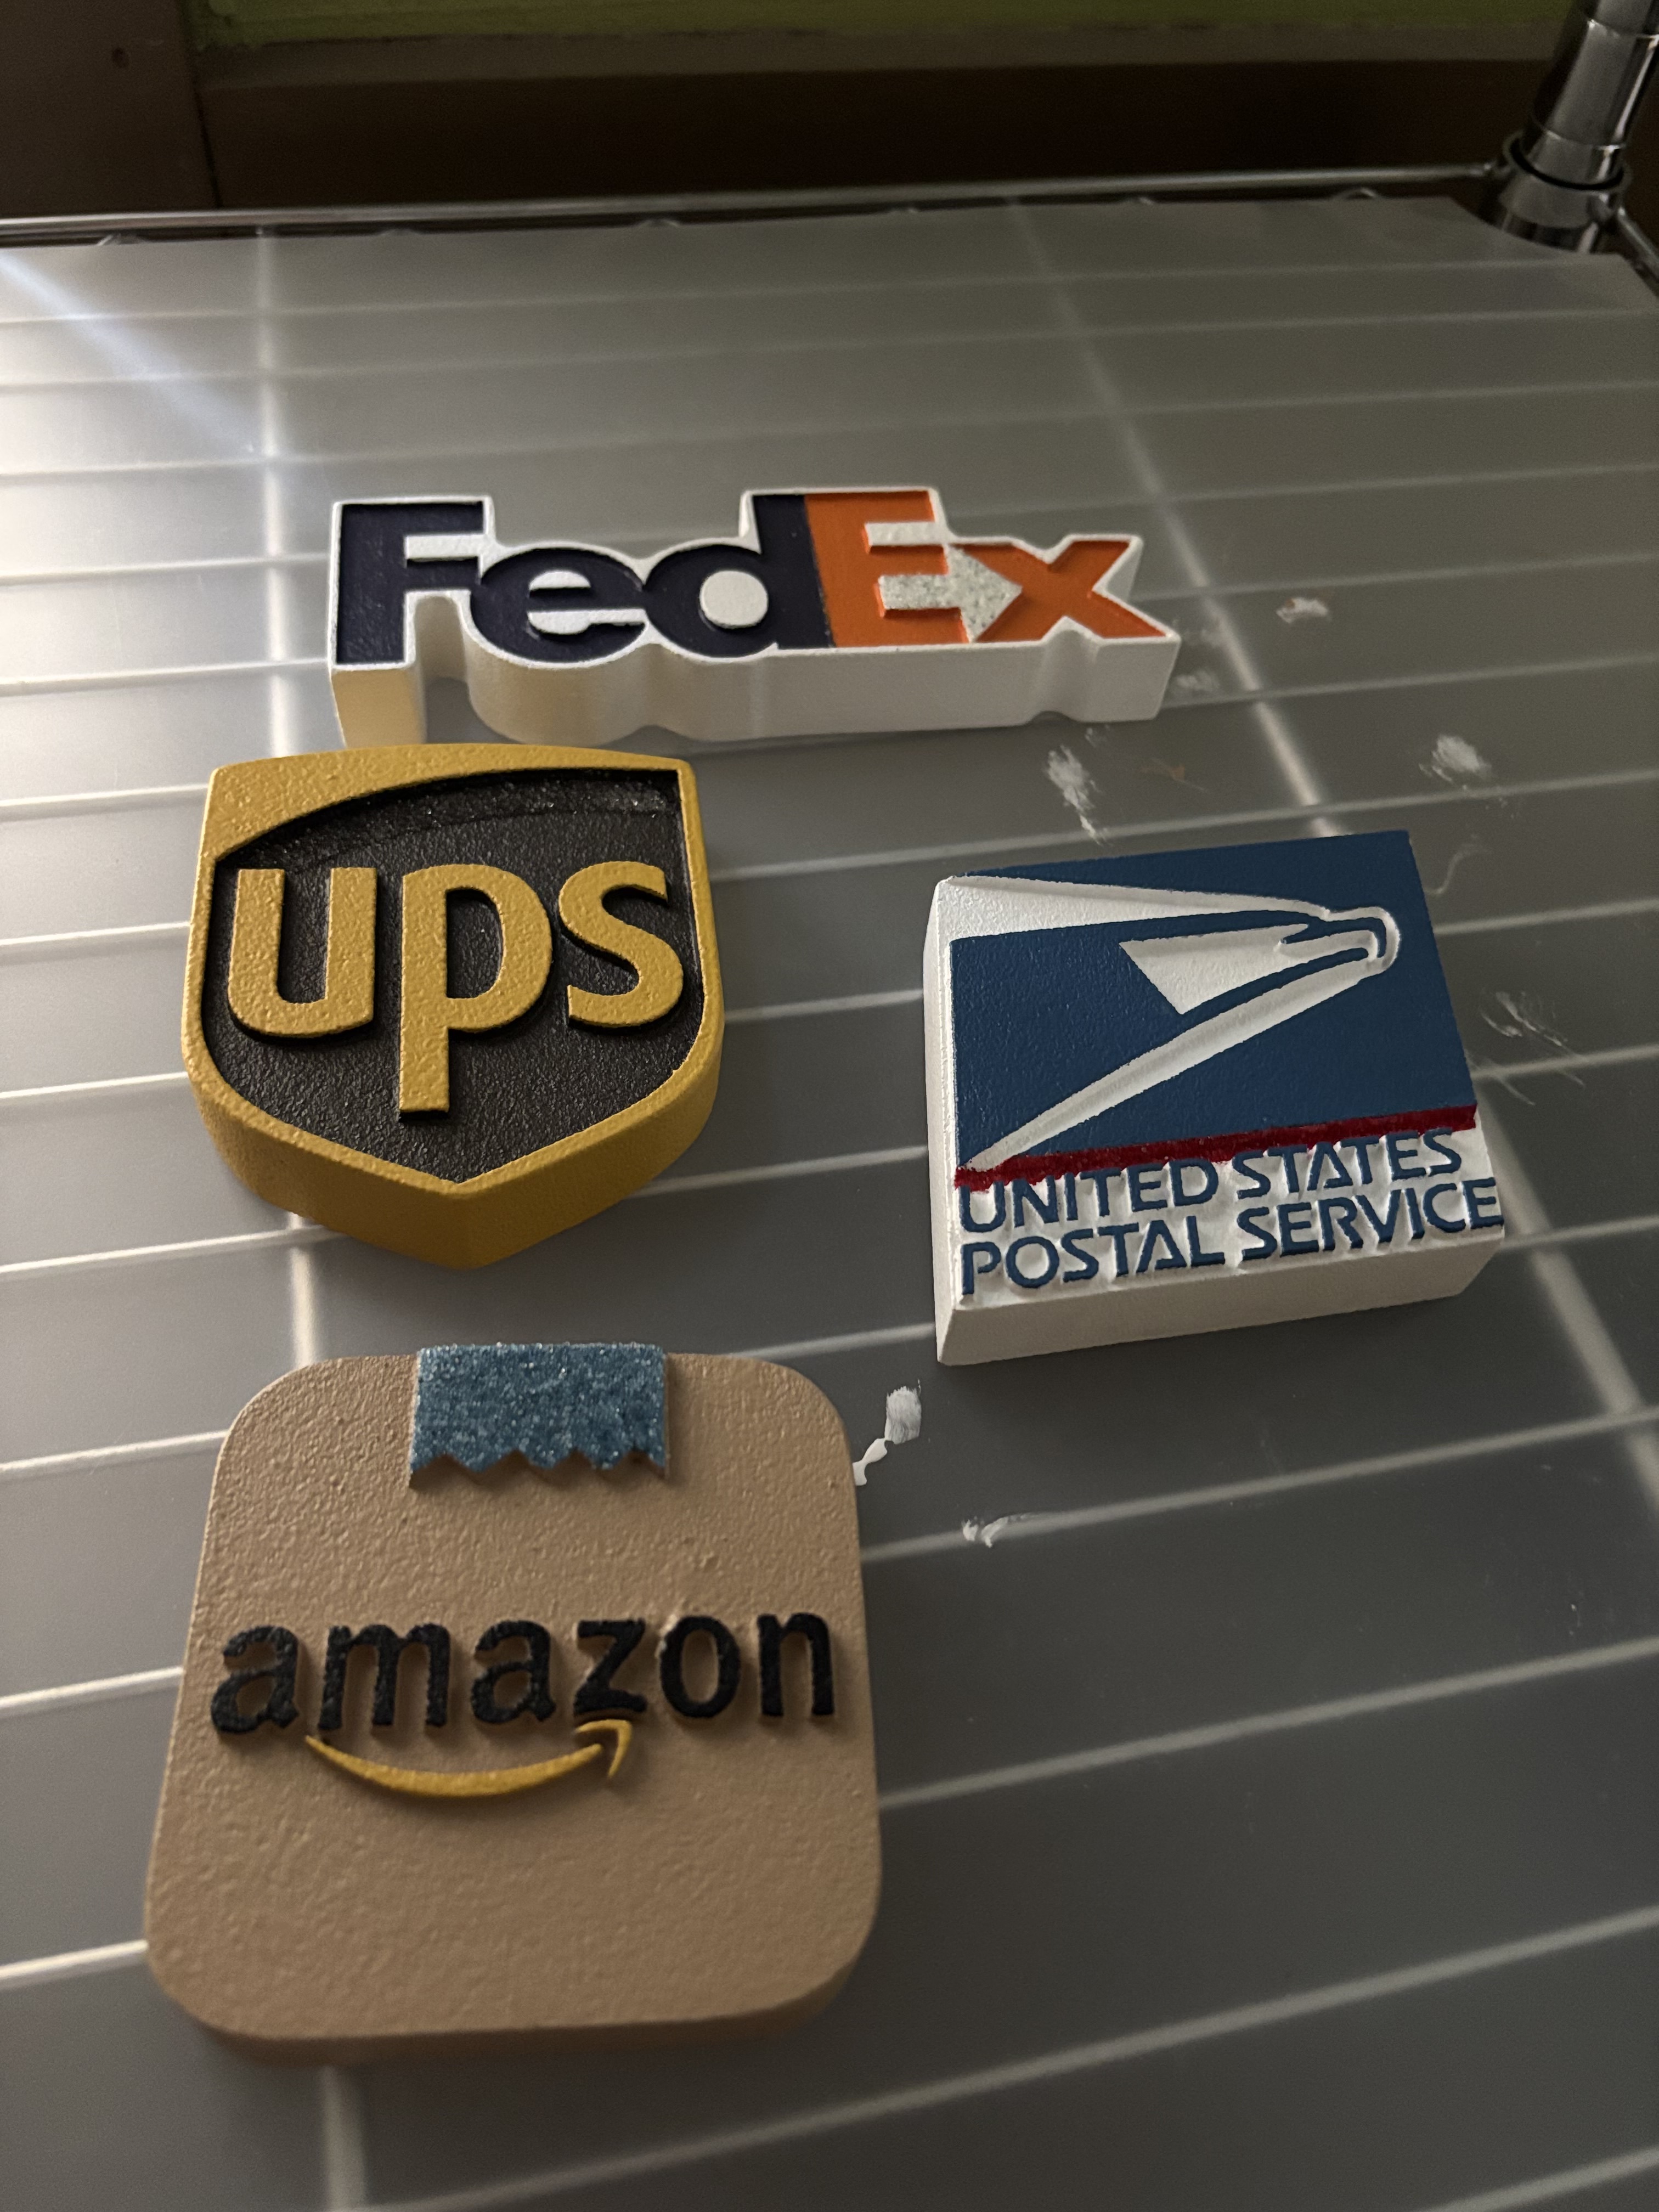
So… we have a 4’ wide bin near the beginning of our driveway for deliveries. My wife said she thought it would be cool if we did up some mini signs so the delivery people know that’s what it was for.
So voila!
Here they are! About 3 1/2 square or so. HDU of course ![]() . Lighting is a little off. Color match is close to perfect! … adult sparkles aka reflective beads… just because.
. Lighting is a little off. Color match is close to perfect! … adult sparkles aka reflective beads… just because.
25 Likes
Ha. People may now think your box is a drop for shipping.
4 Likes
3d model??? or just 2d
Nice and clean. Well done.
I have a well worn path to the house for my wife’s quilting business.
1 Like
Fortunately I live in the boondocks in a 6 house little community so I SHOULD be ok. ![]()
1 Like
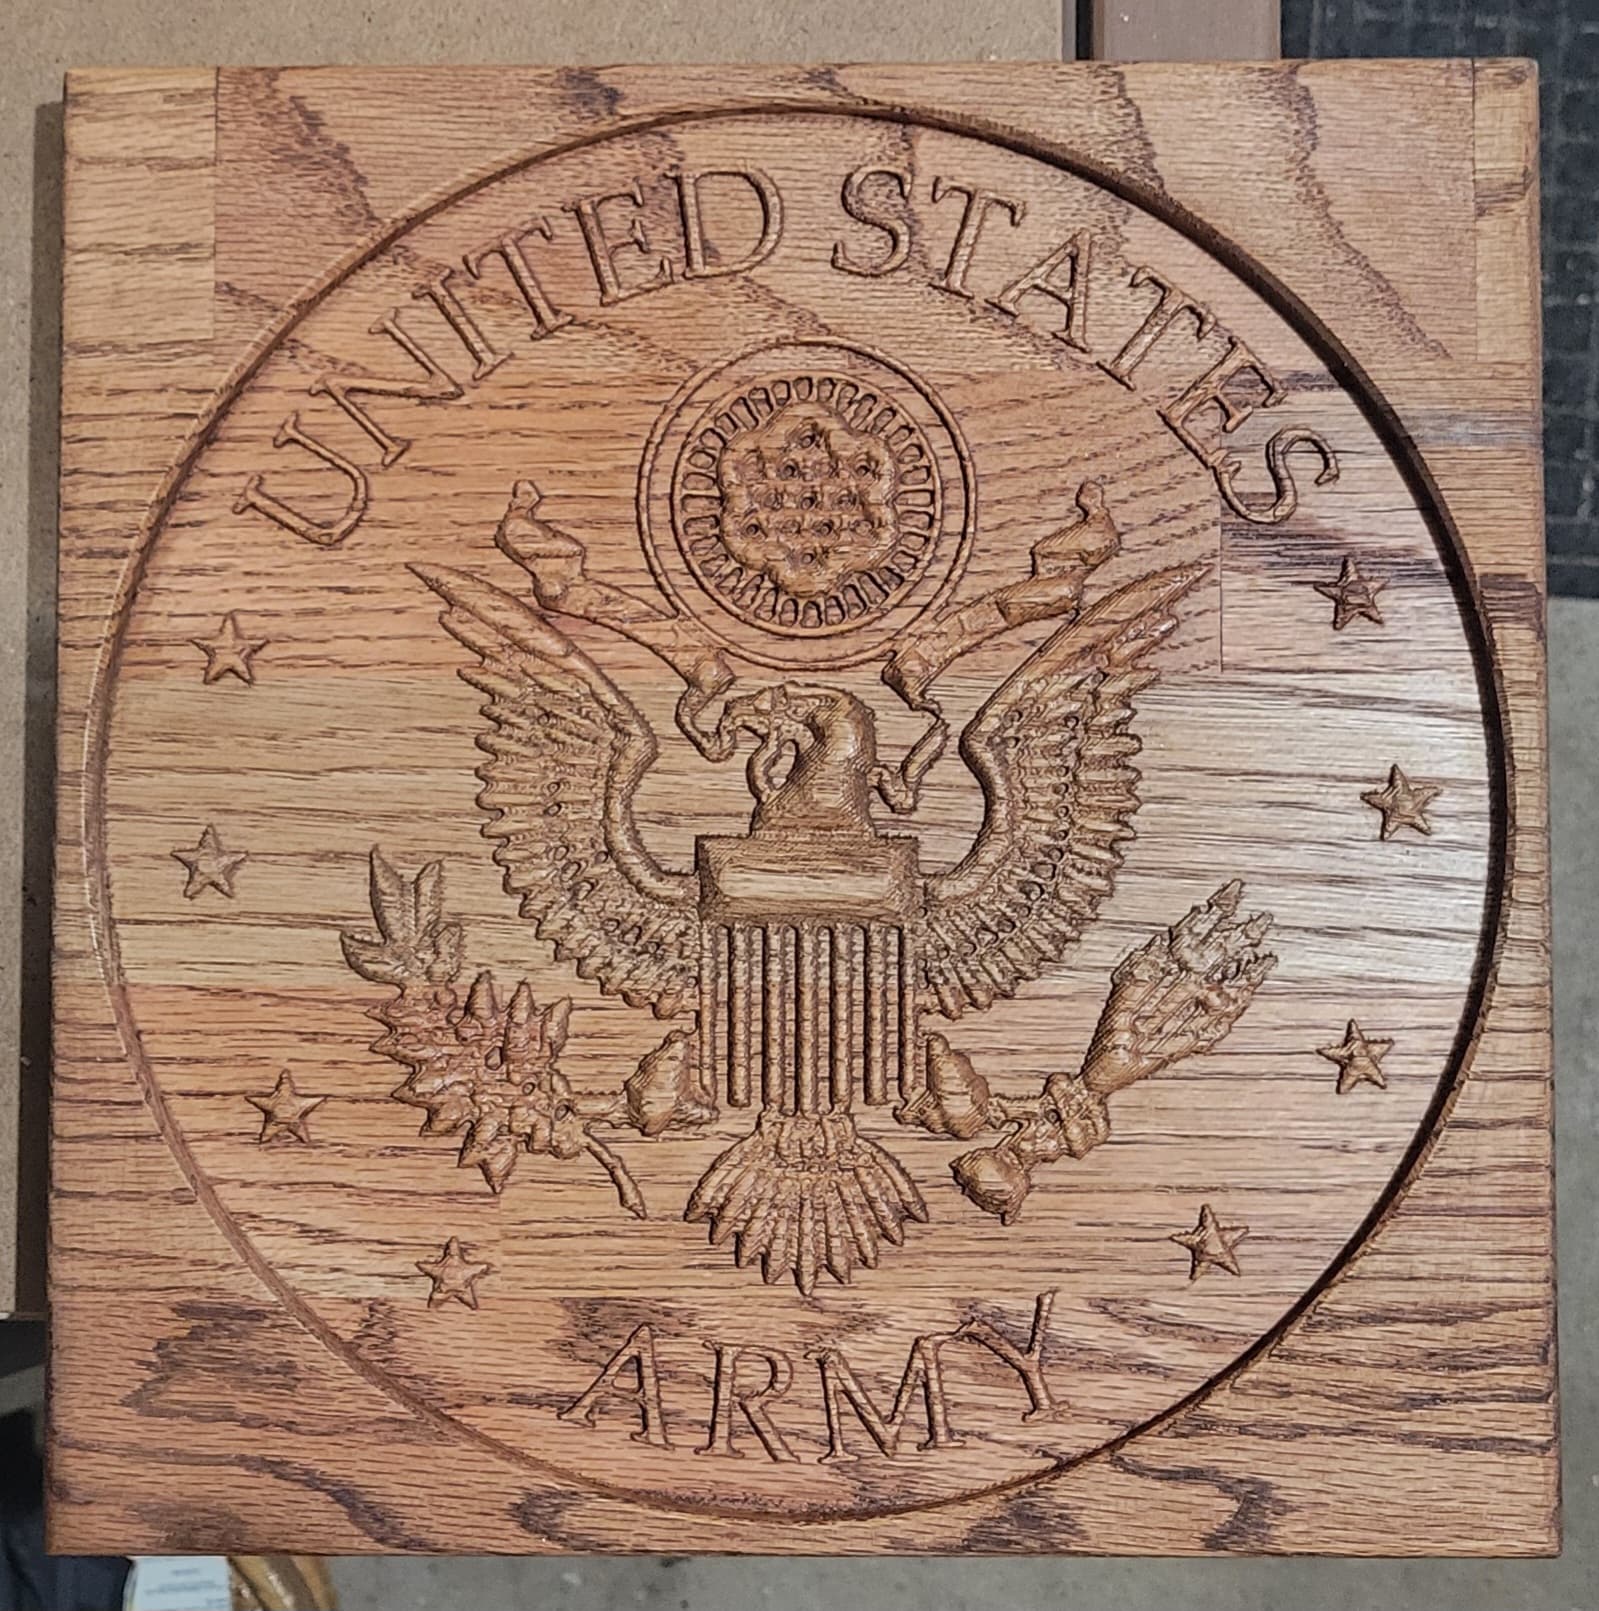
Very awesome! What size are these?
12" Square. I use 1" oak stair treads cut on a Shapeoko 4.
2 Likes
I was trying to figure out what you used. Great idea that!!
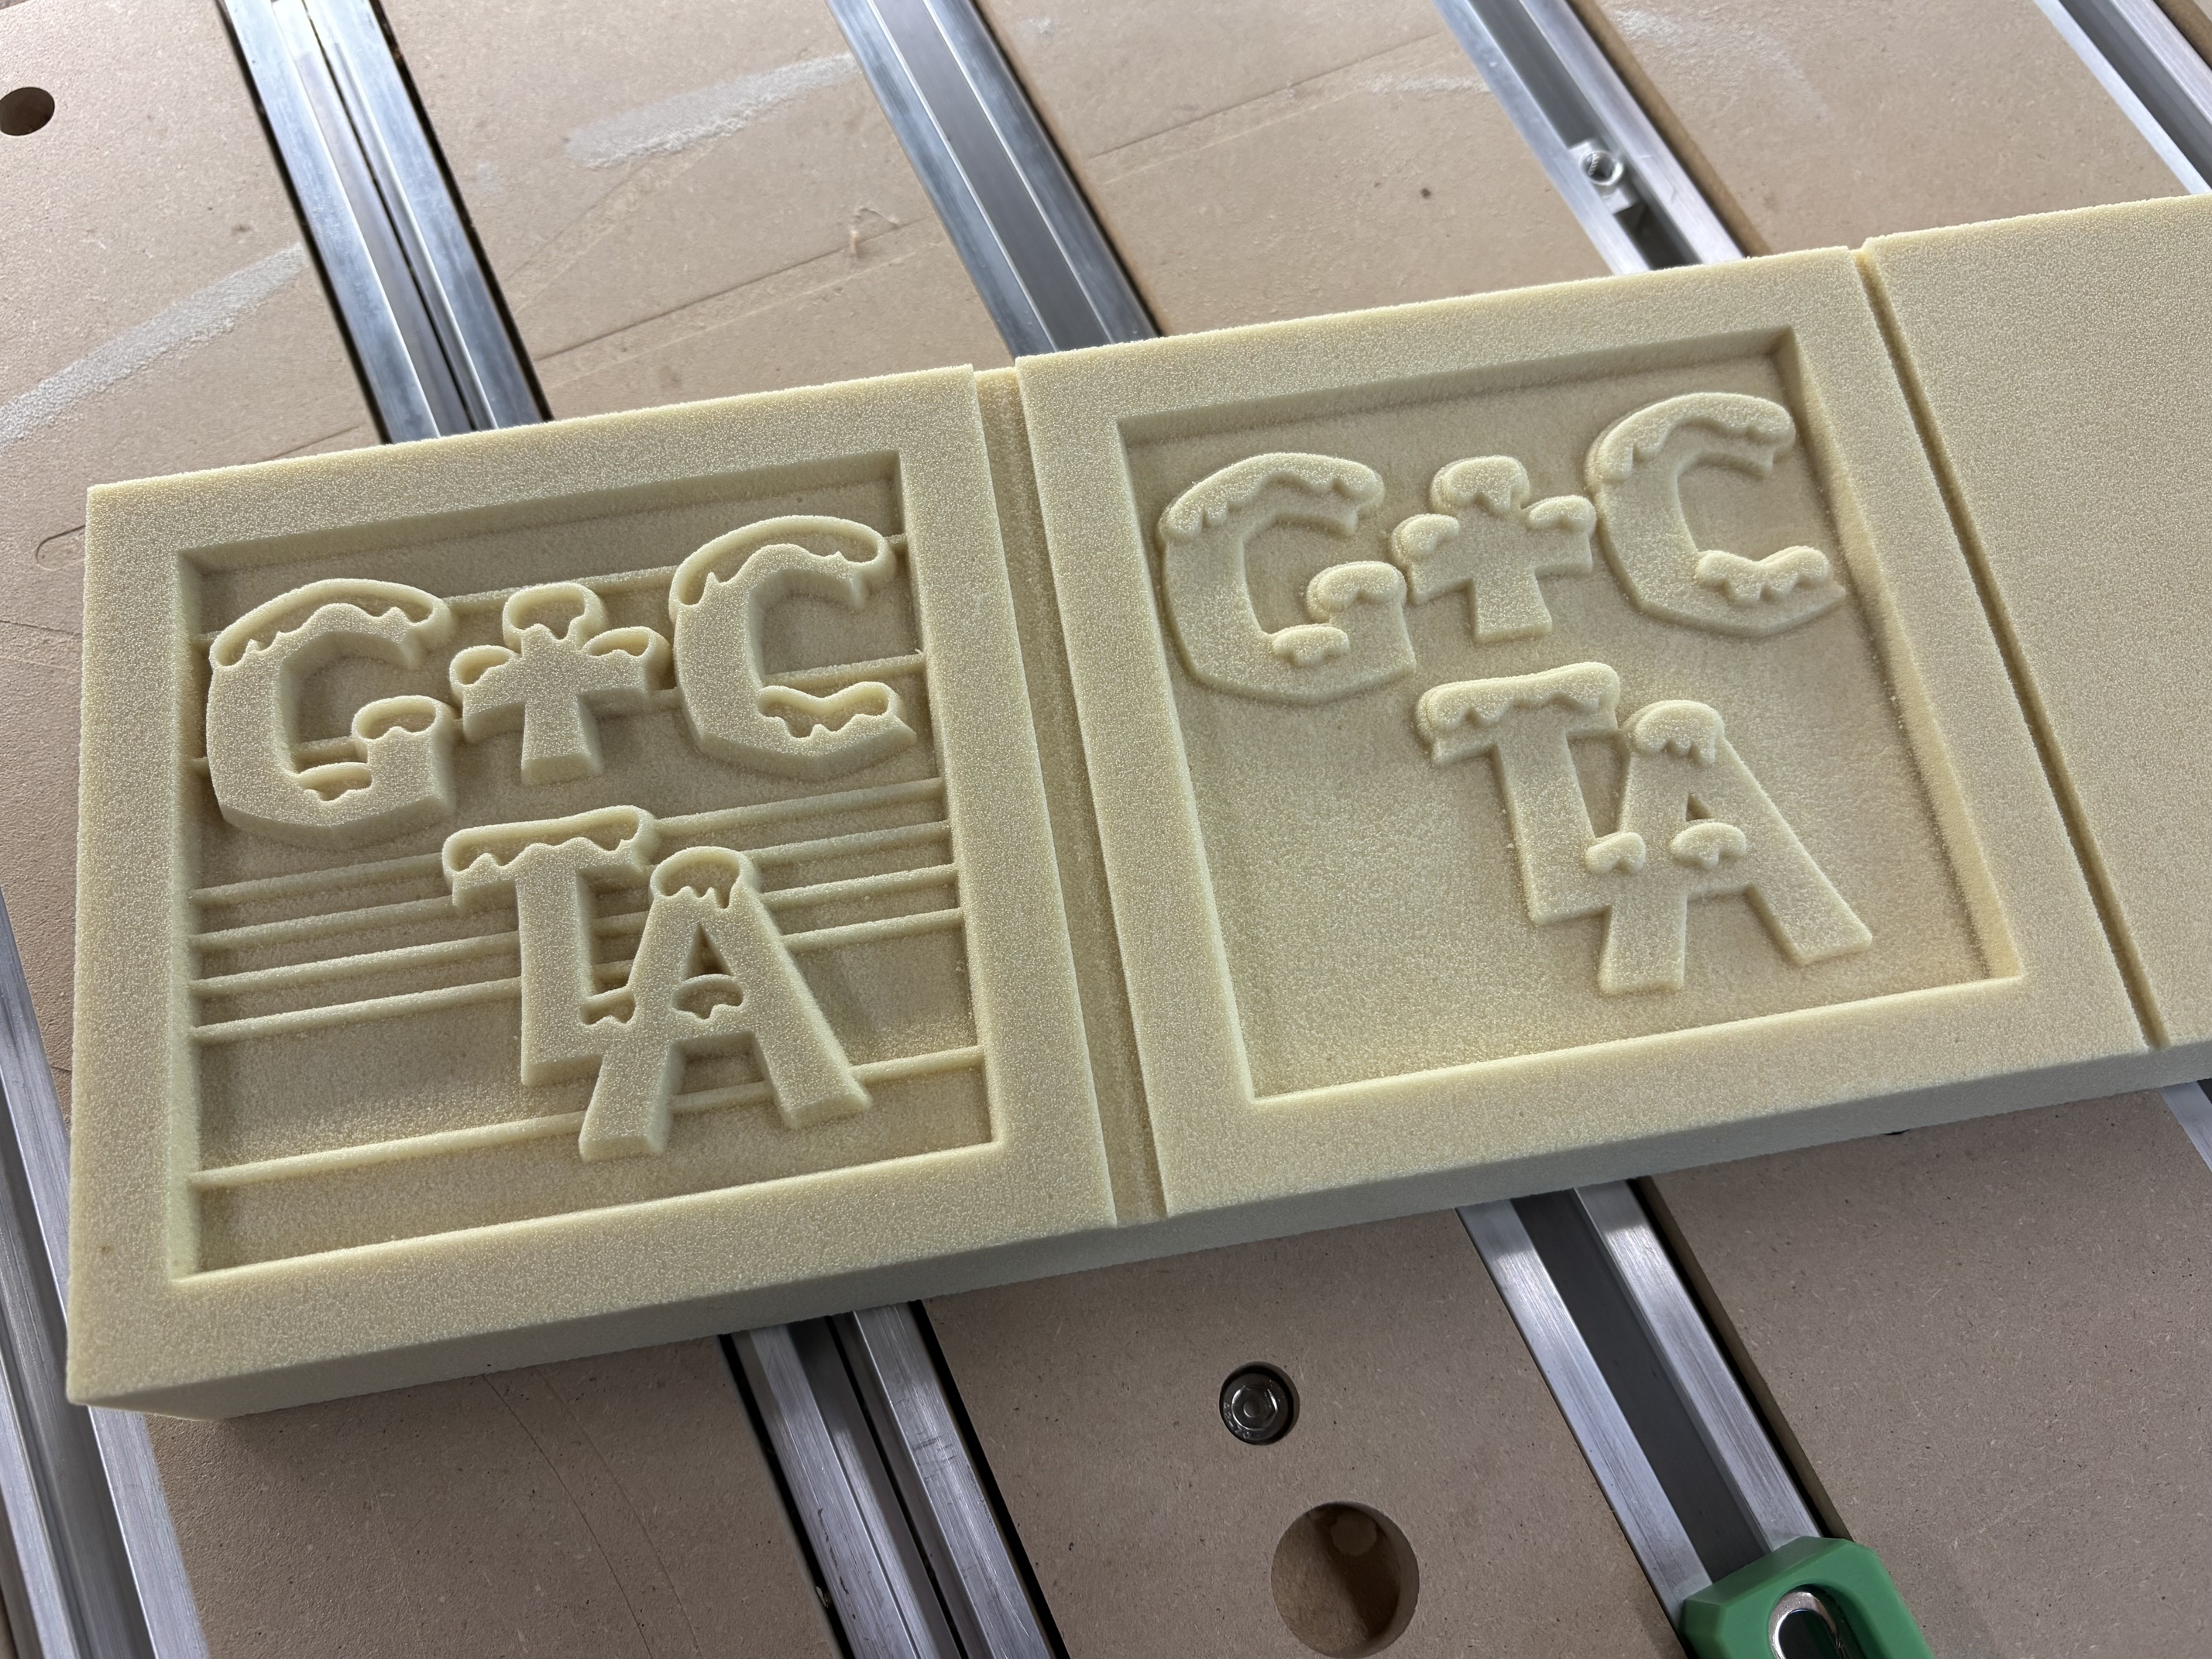
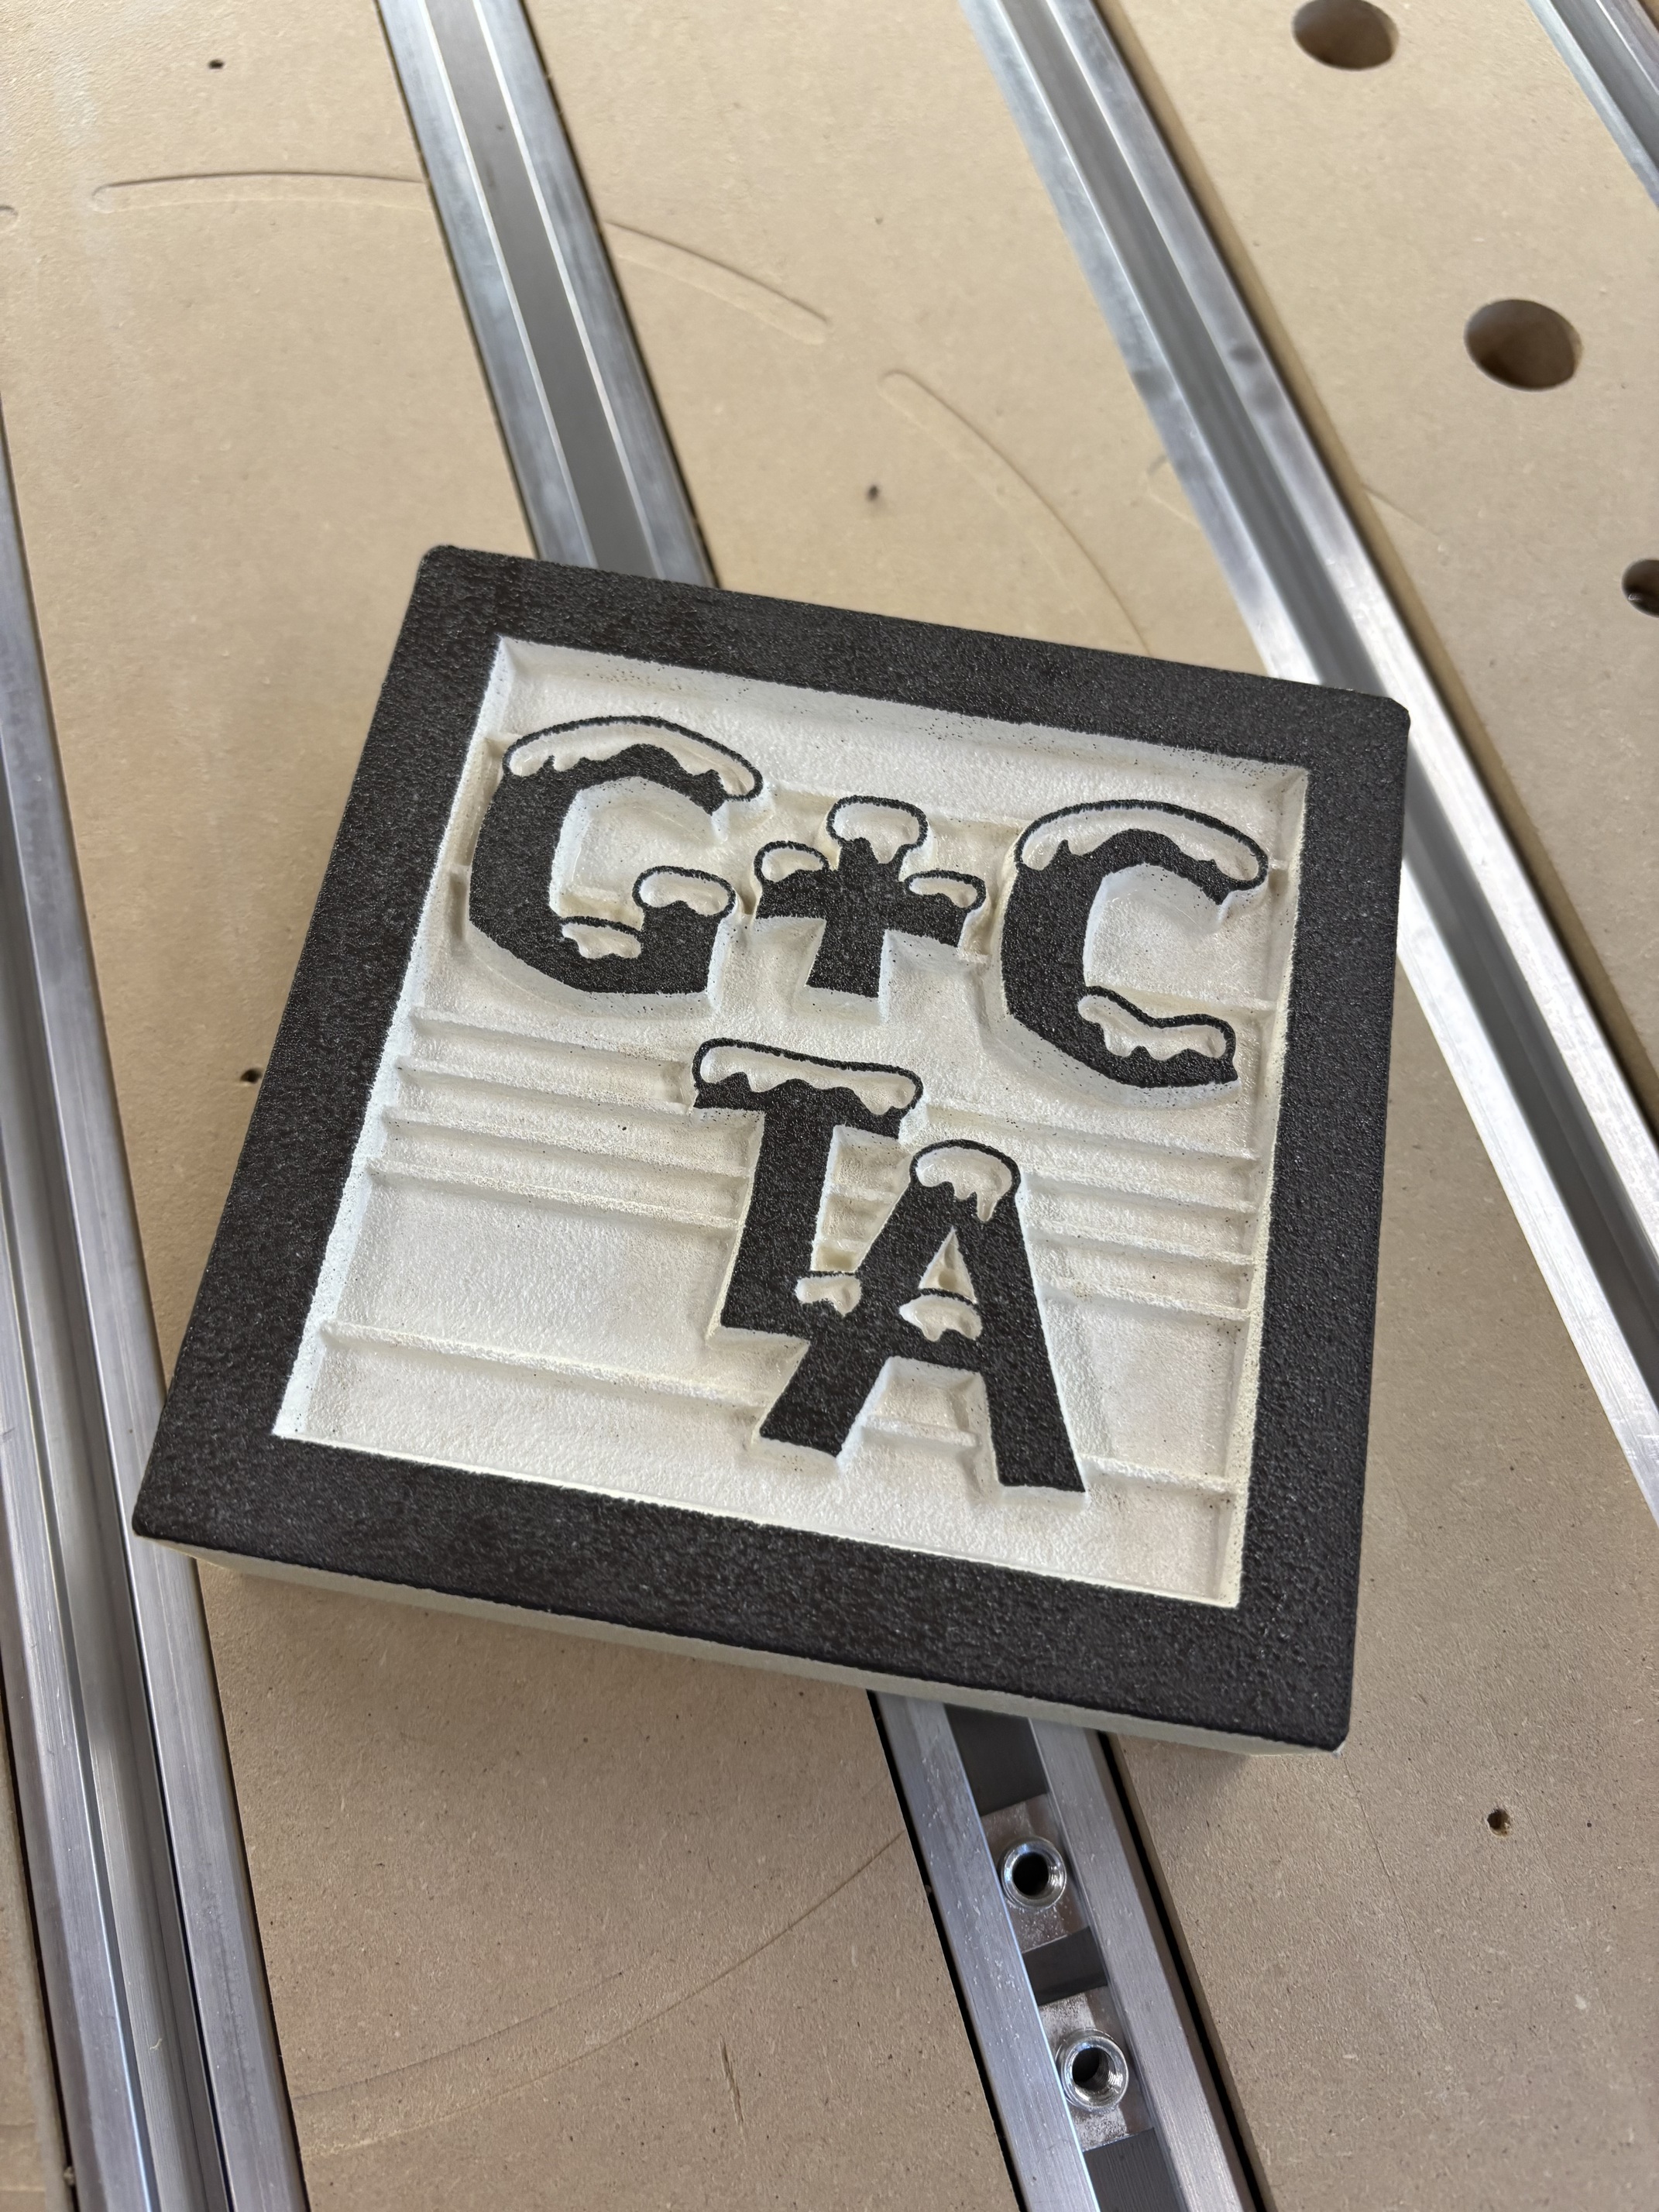
Needed to do some trials for sign design and went back to my junior high years: Gary and Cathy…True Love Always.
The unique thing about this is that the snowy letters are a font. I didn’t have to create them (well the TLA I did but that was easily done by editing the font). If you have Adobe Illustrator, there are so many available fonts to play with!!!
11 Likes
After making the name poles and getting frustrated with the results after 4 flips, I decided to try to make a manual 4th Axis.
I have a Pro 5 with the risers, so the clearance from the MDF to the bottom of the ZAxis mount is 5.3 inches. A 3.5 inch square is 4.97 across corners.
Using those limits, I make a two assembly rig. It mounts to the 4.04 spaced tracks.
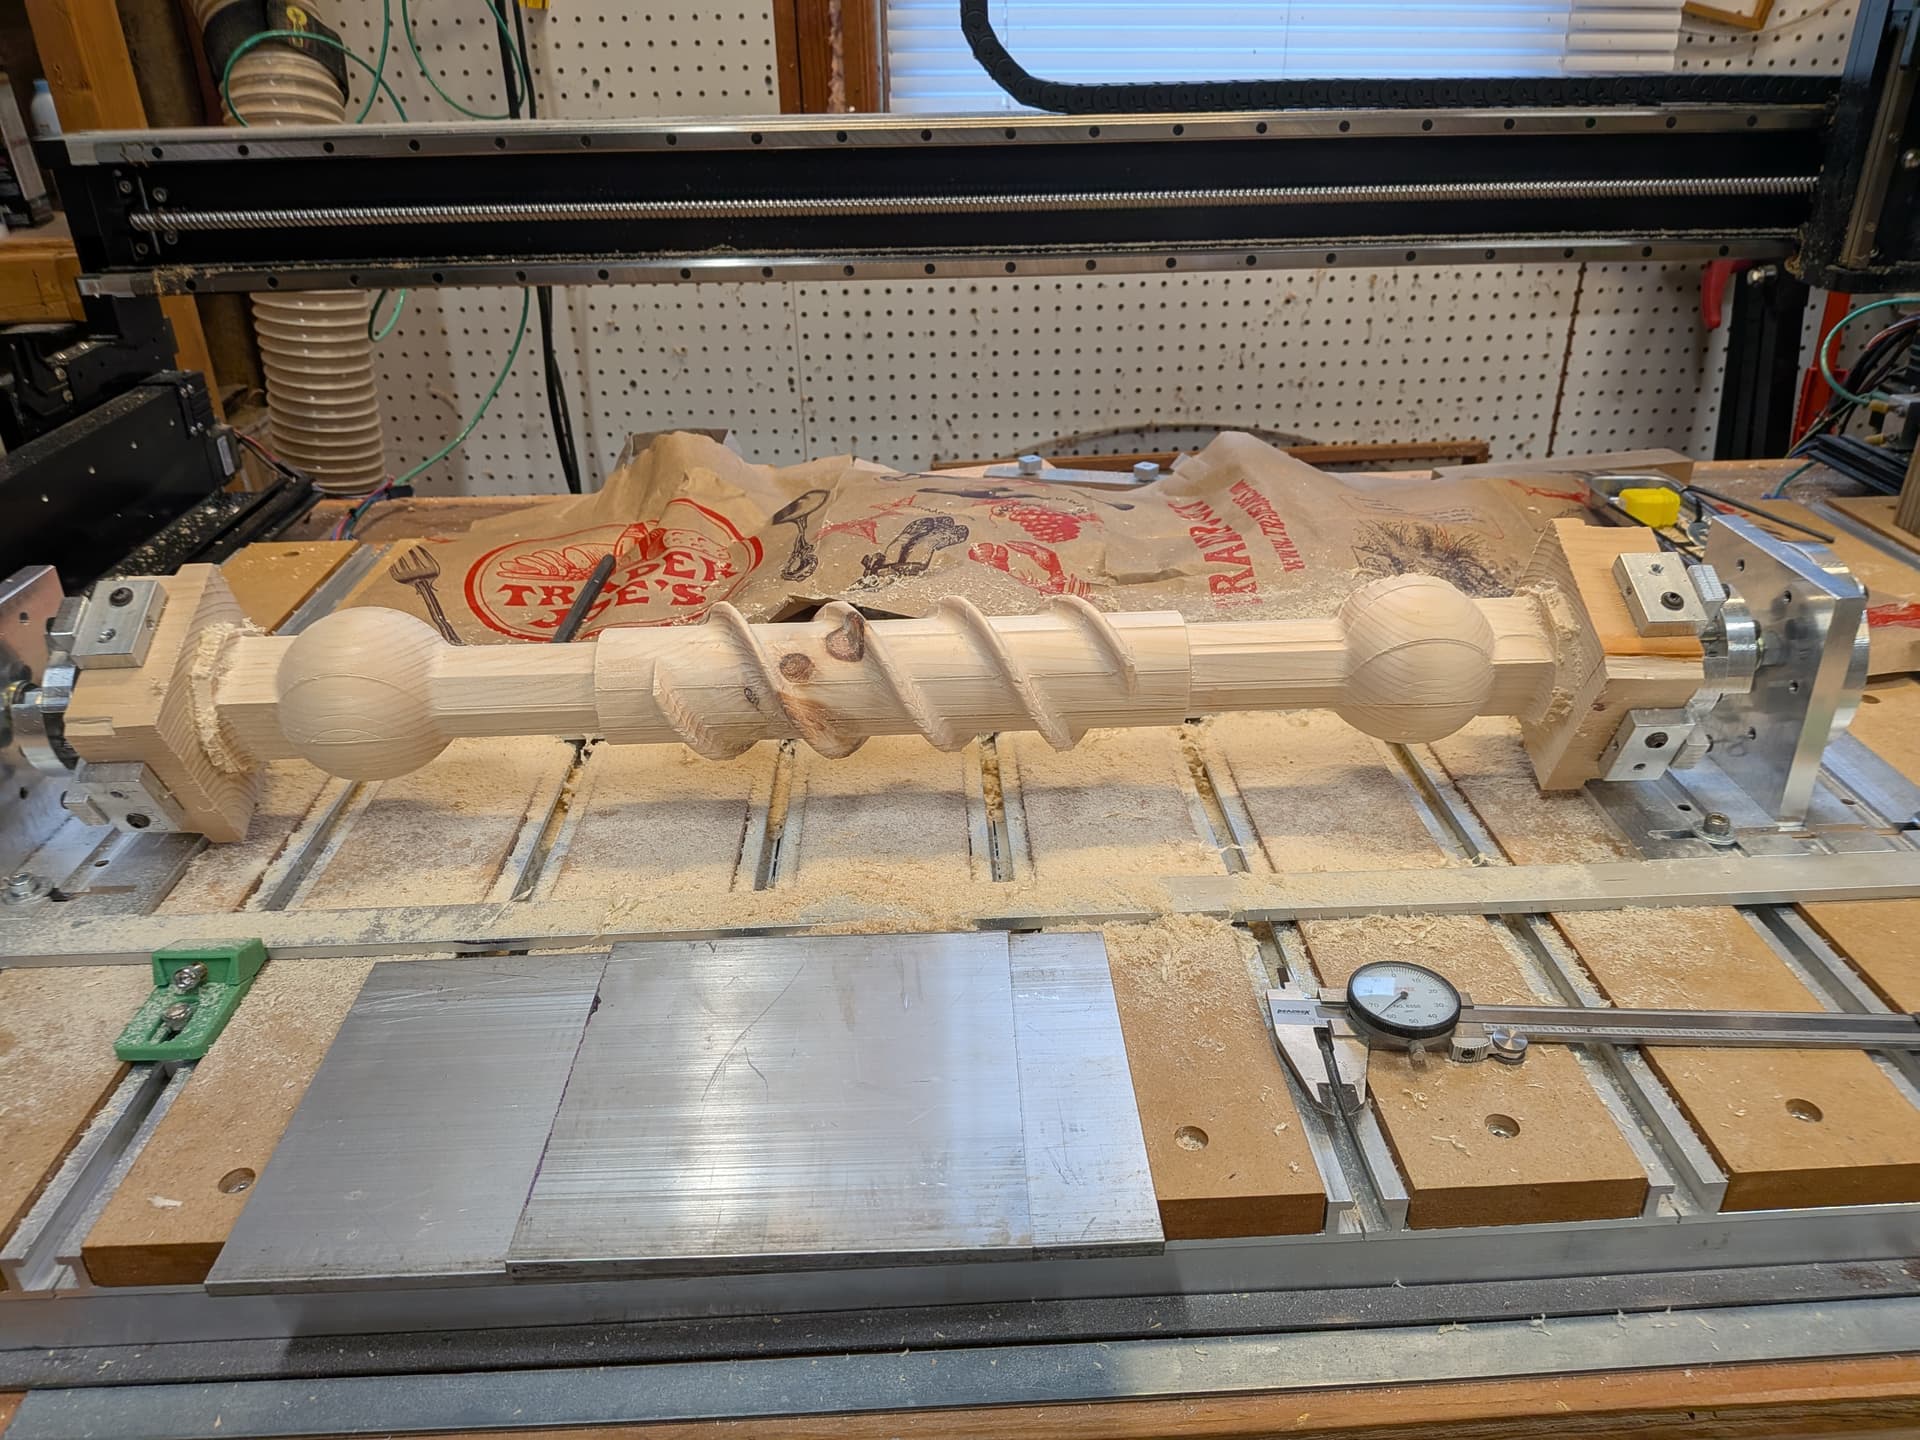
This is working revision 1 so there are issues. Mainly the bottom plate ( I did not face ) and the Vertical mount ( I tried my drill press which did not drill perpendicular very well ). After some adjustments ( blue tape ) I was able to confirm I am in the ballpark, but not good enough as you can see in the picture. I will be remaking the bottom plate first, and try to redrill/tap the Vertical plate. I am sure I will be remaking both.
There are two clamping ranges ( which do not overlap ( duhp ), but a different set of arms will fix that. It indexes at 45 degrees. I can make index plates as needed.
All aluminum was cut using the Pro 5 and single flute bits plus a #201.
This has been a long project, a lot of “paralysis be analysis”, but good lessons.
17 Likes
Ok, here’s the corrected project. The client even got to add a little to the logo with the update.
Cut from a nice panel of Aneigre, and maximized the output to work around a defect - adding the ‘bonus 13’ as I don’t like to waste wood. Larger section is 12" x 18".
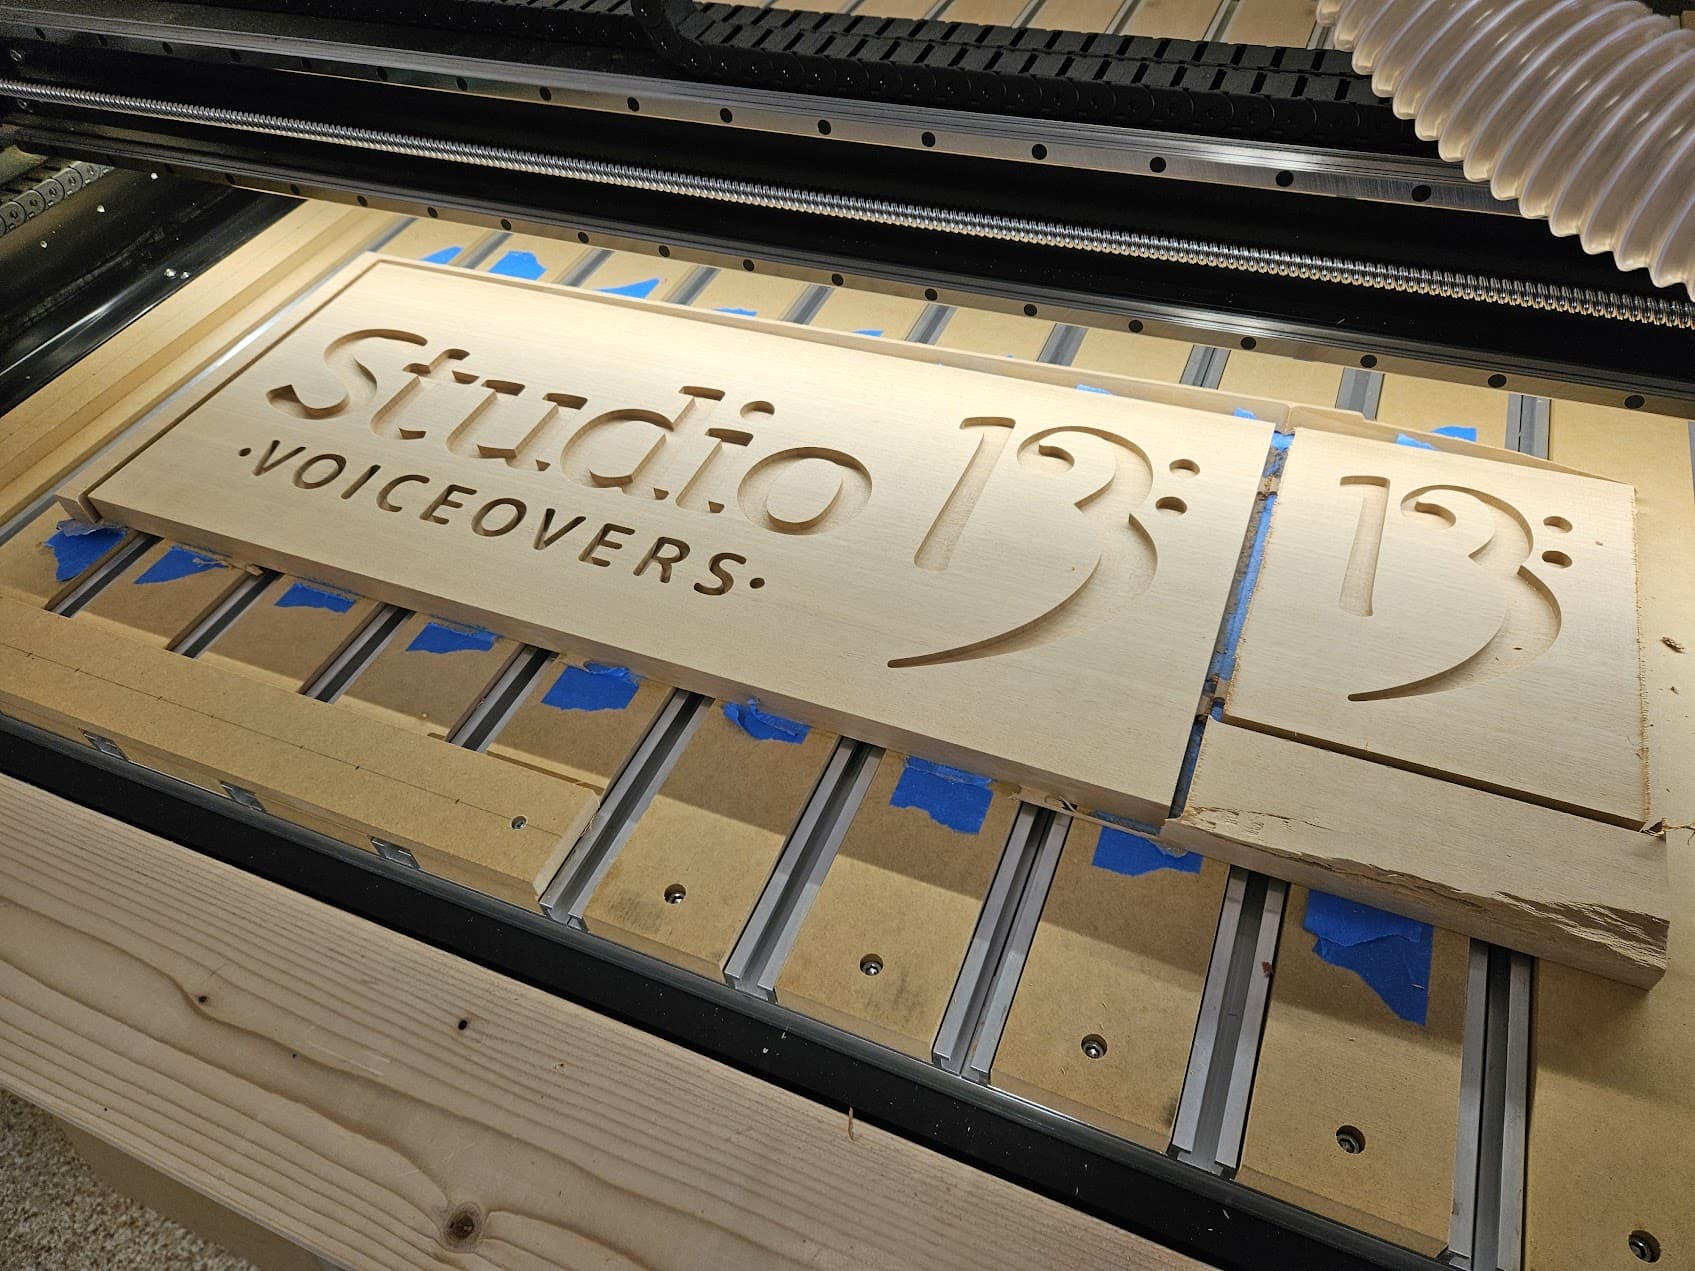
Sealed with clear enamel spray paint, and only used mica powder in the tinting (no paste).
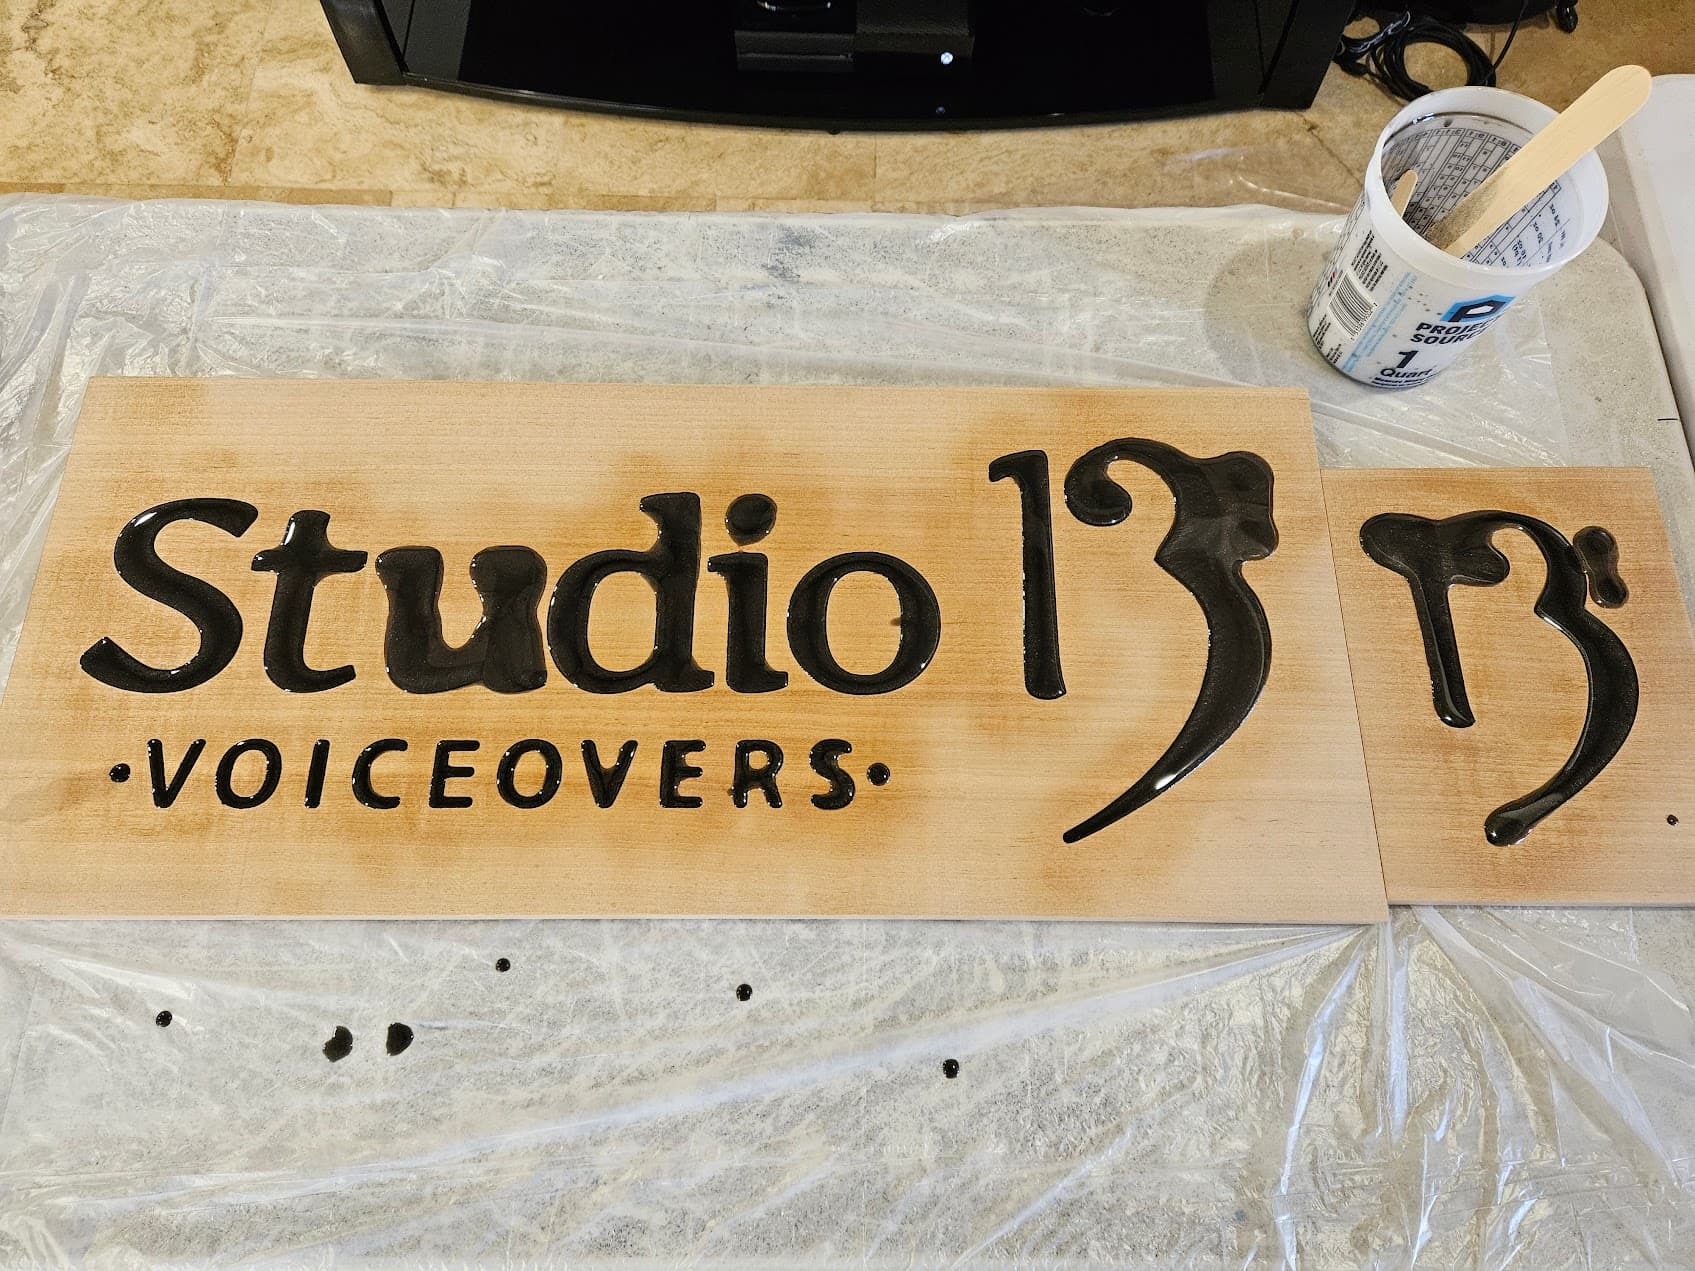
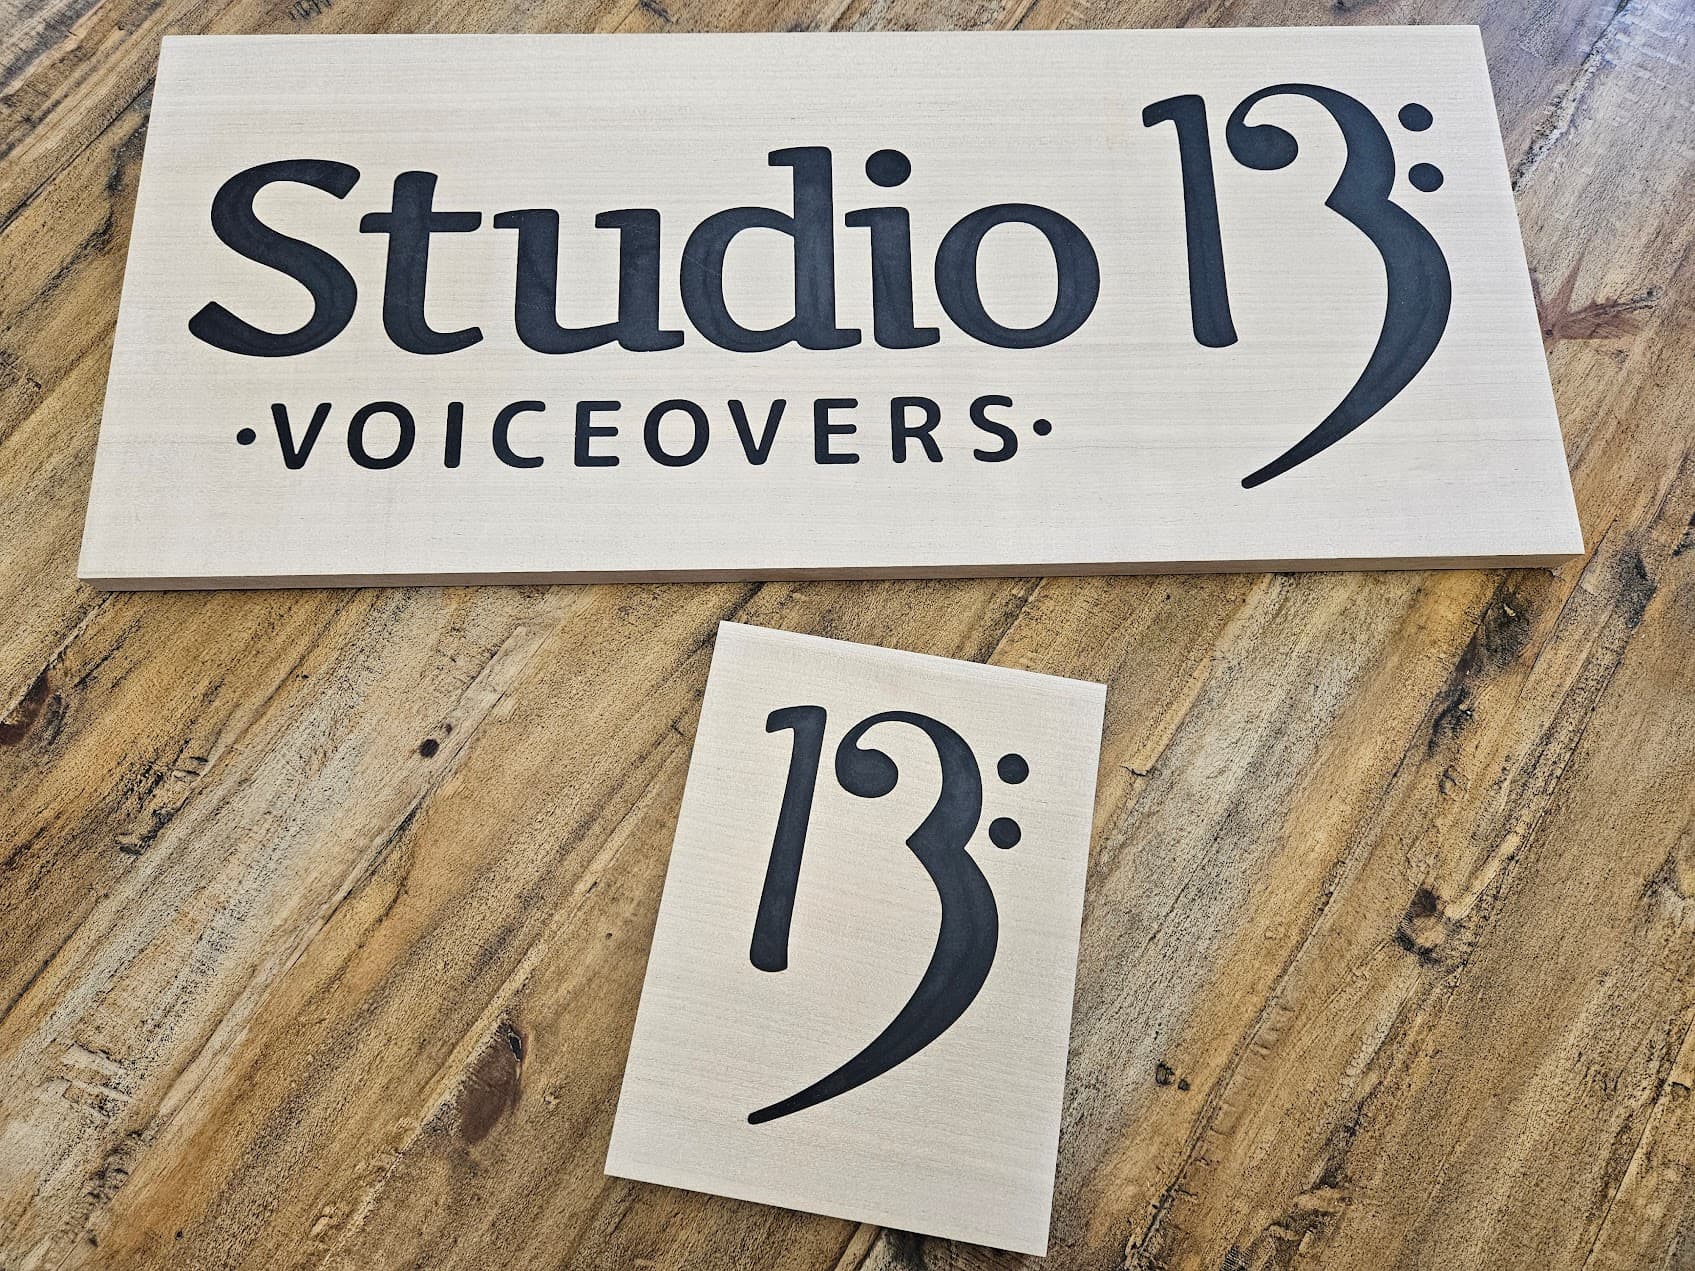
Let McFly do it’s thing…

Sanded to 600 grit, customer wants to do the finishing. No bleed, looks great, and calling this one done. Will definitely be getting more of these wood panels (this was about$20).
22 Likes
The thing about epoxy is it has a steep learning curve. However after get up the steep hill of knowledge it will seem easy. Nice work.
If at first you dont succeed try try again.
However when some people fail they just give up. Never give up. All success is from a history of failure. If the Wright Brothers had given up on their first attempt to fly where would we be today.
2 Likes
I said something similar to the client when the first one failed. “We don’t learn much from our successes” ![]()
2 Likes