Awesome idea and great execution! He’ll be delighted
1 Like
Rich, that brass collar at the bottom of your Z axis screw shaft, is that something you made? What is the functional value to it?
Yes, I made it. It serves one function. Keeps me sane. See it spin soooo close but being retained just seemed so wrong. Right? If ANYONE wants one. Just let me know.
First project. Stayed up way to late assembling last night. Went without a hitch. I am very impressed with fit and finish of Pro XL.
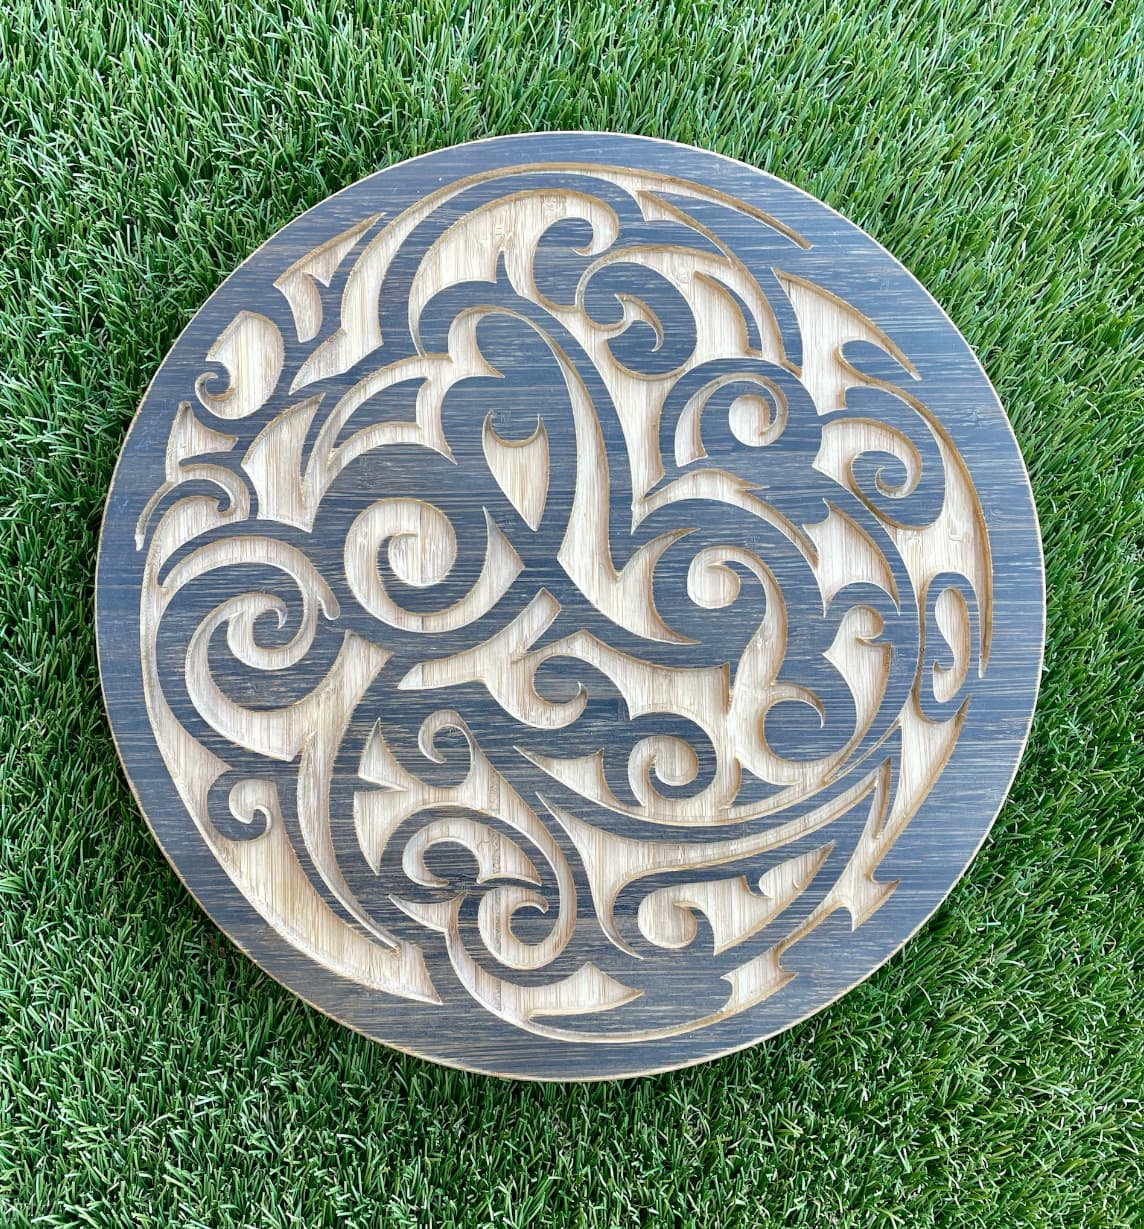
Simple plaque with vcarve and bit change.
I was going to use yhe v bit for the star, but the sim looked funky. Then I realized it was interpreting the contour with the whole radius of the v bit. I was glad to go through a bit change mid project and practise work flow. Love the bit setter and bit zero.
13 Likes
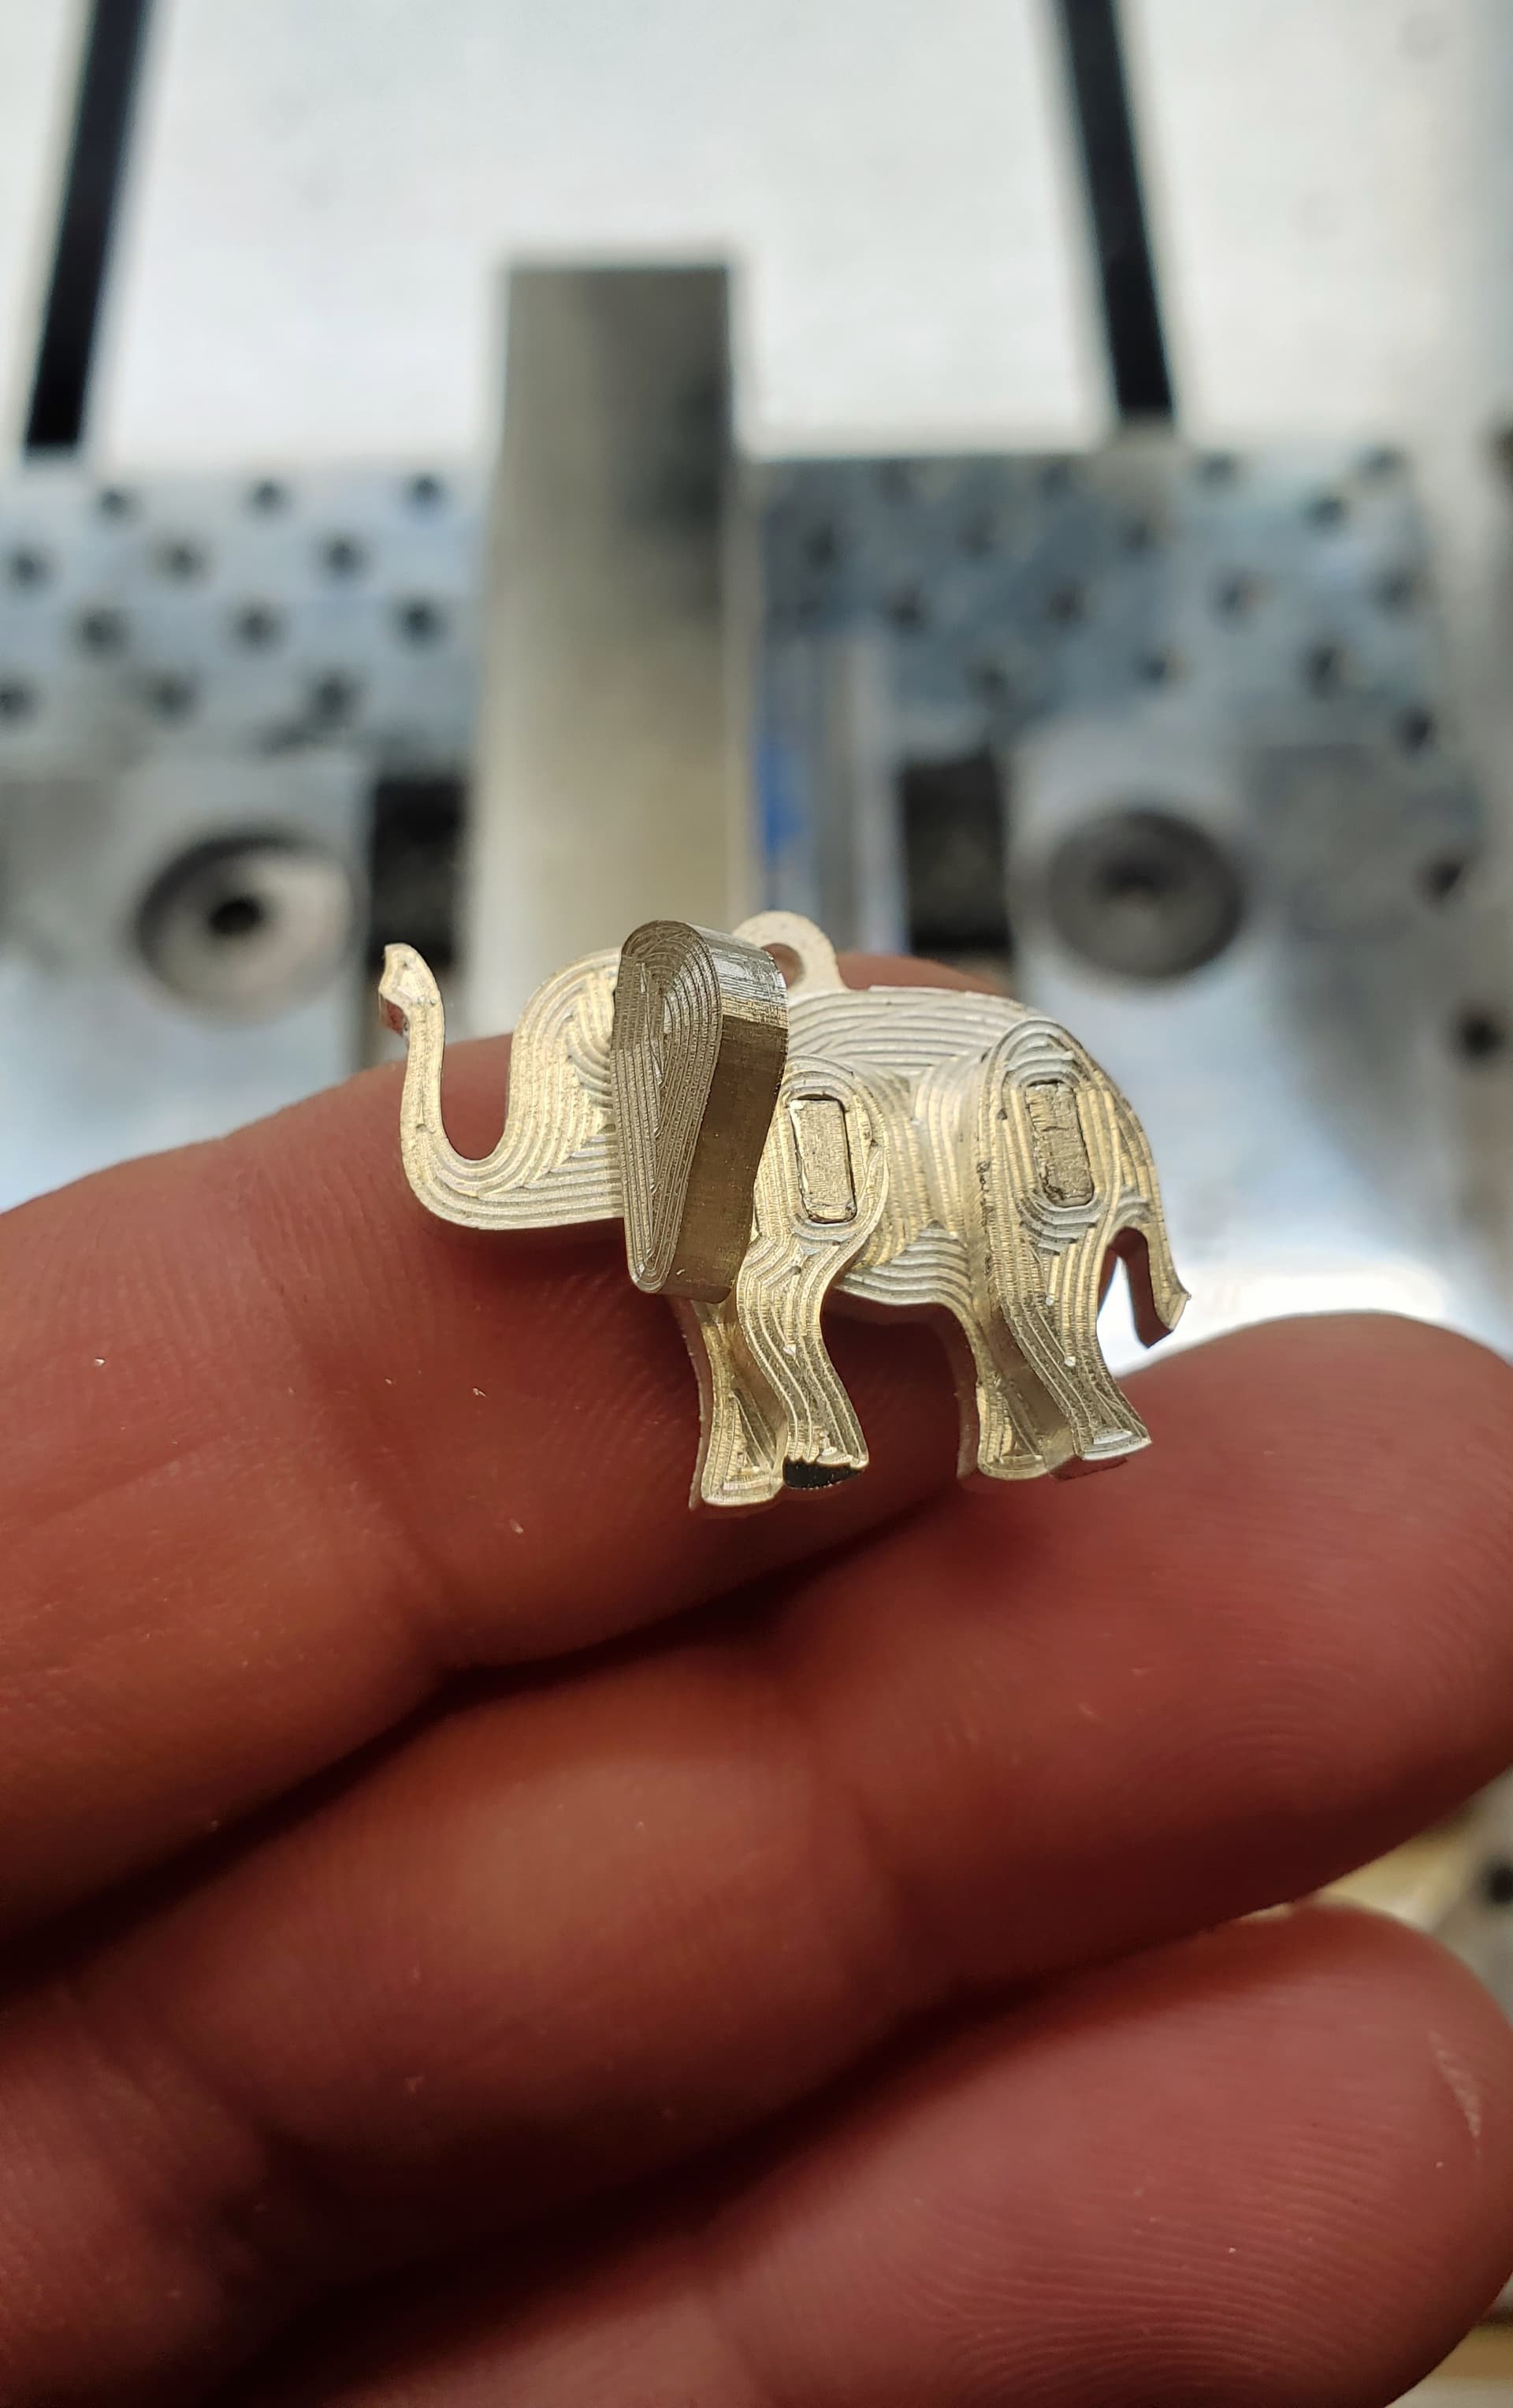
Cut this a week ago but going to try to solder it tonight and finish it by hand soon. Tiffany’s replica in 999 Silver on the Nomad 3. Machined in an apt kitchen, 6 part puzzle.
22 Likes
Impressive work! Quite intricate.
1 Like
Are you going to try to get rid of the tool marks or leave them for the effect?
I think they look cool myself.
1 Like
The scalloping was intentional and I even tweaked the settings so there wouldn’t be contact toolmarks.
They are decently so and it could look nice when polished. Not a bad way to spend $20 in Silver
2 Likes
Been doing some brass testing on the Pro XXL for a ProvenCut customer , mainly to come up with efficient strategies that produce the best surface finishes and contours.
These have very slight curves and stepper resolution (0.001") ended up being the weak link for the cleanest contours. They may have come out a little better with a 3/4 flute instead of the 2L single flute that was used.
Most meaningful changes- $12 = 0.002 (debatable). Tolerances and smoothing in Fusion to limit the points. Pre-boring entry/exit locations for the contour so it could plunge and go, no ramping so axial loading was at a minimum.
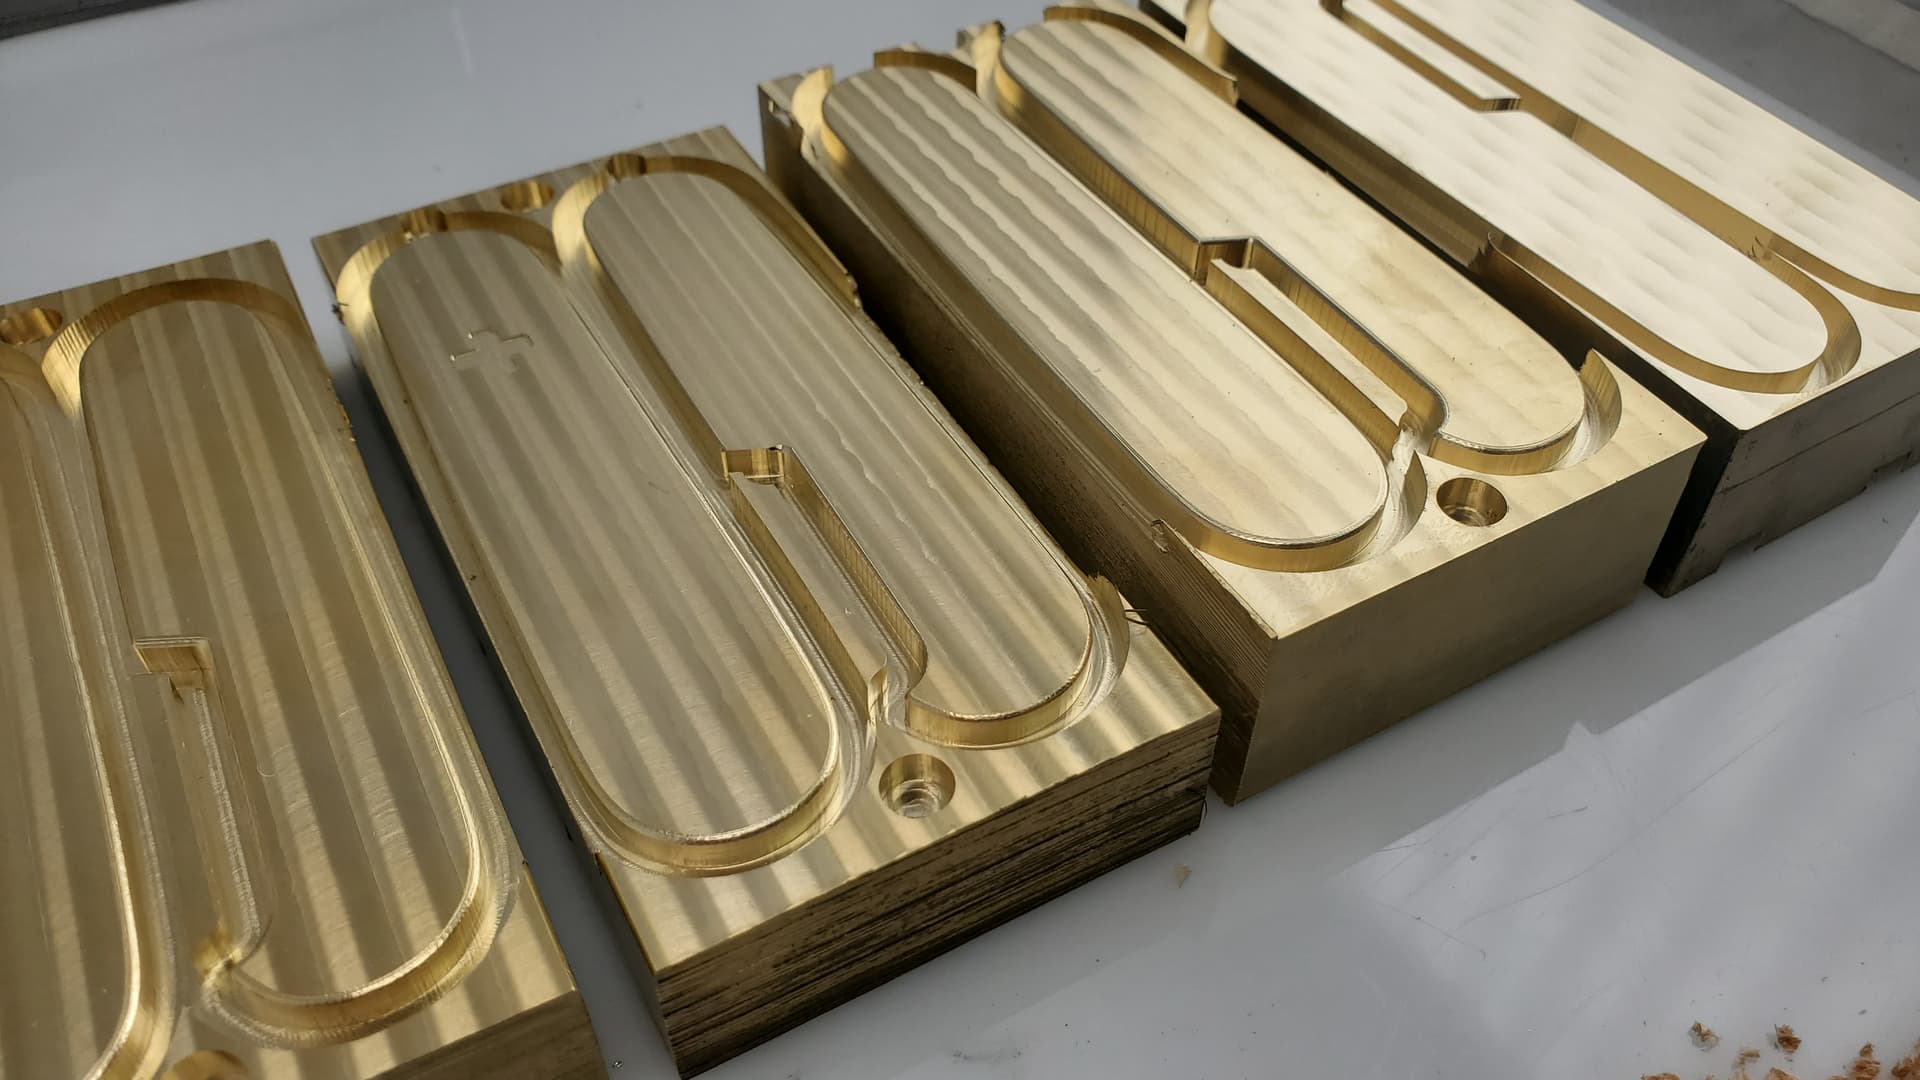
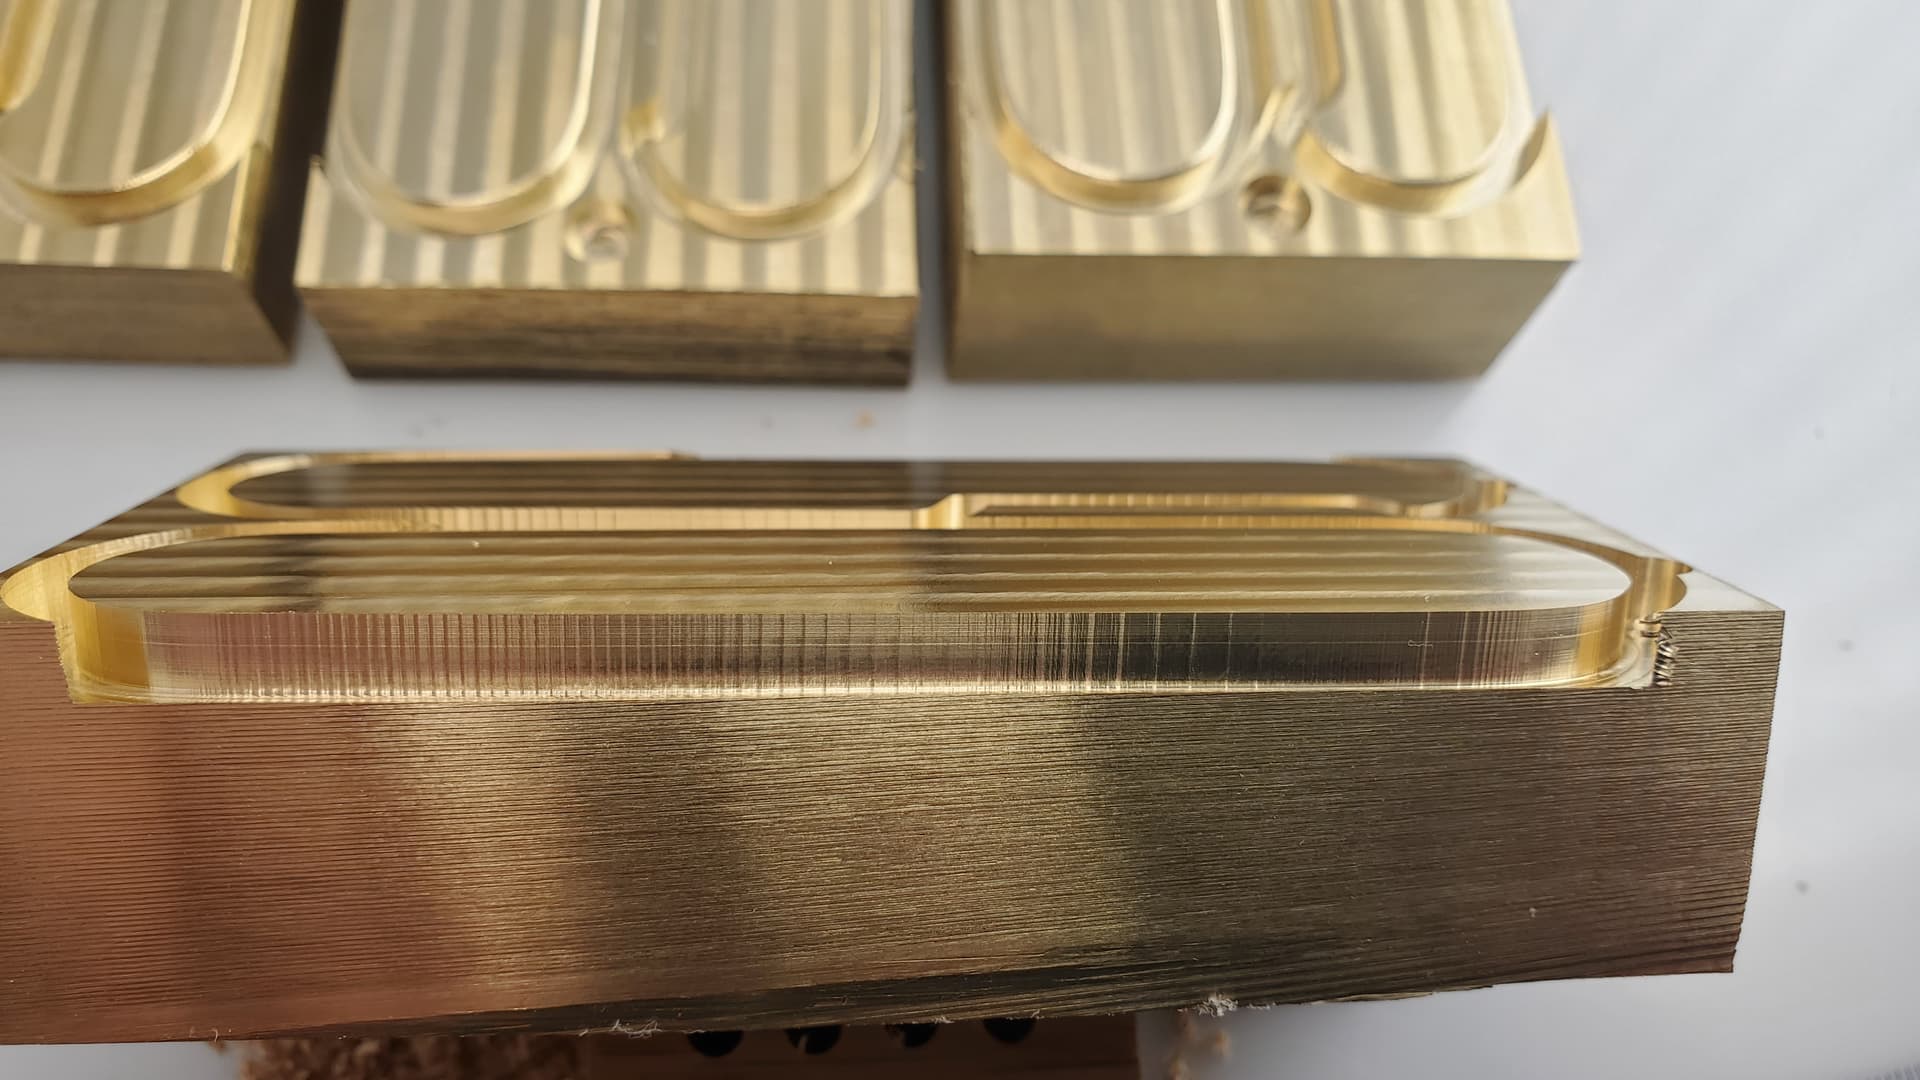
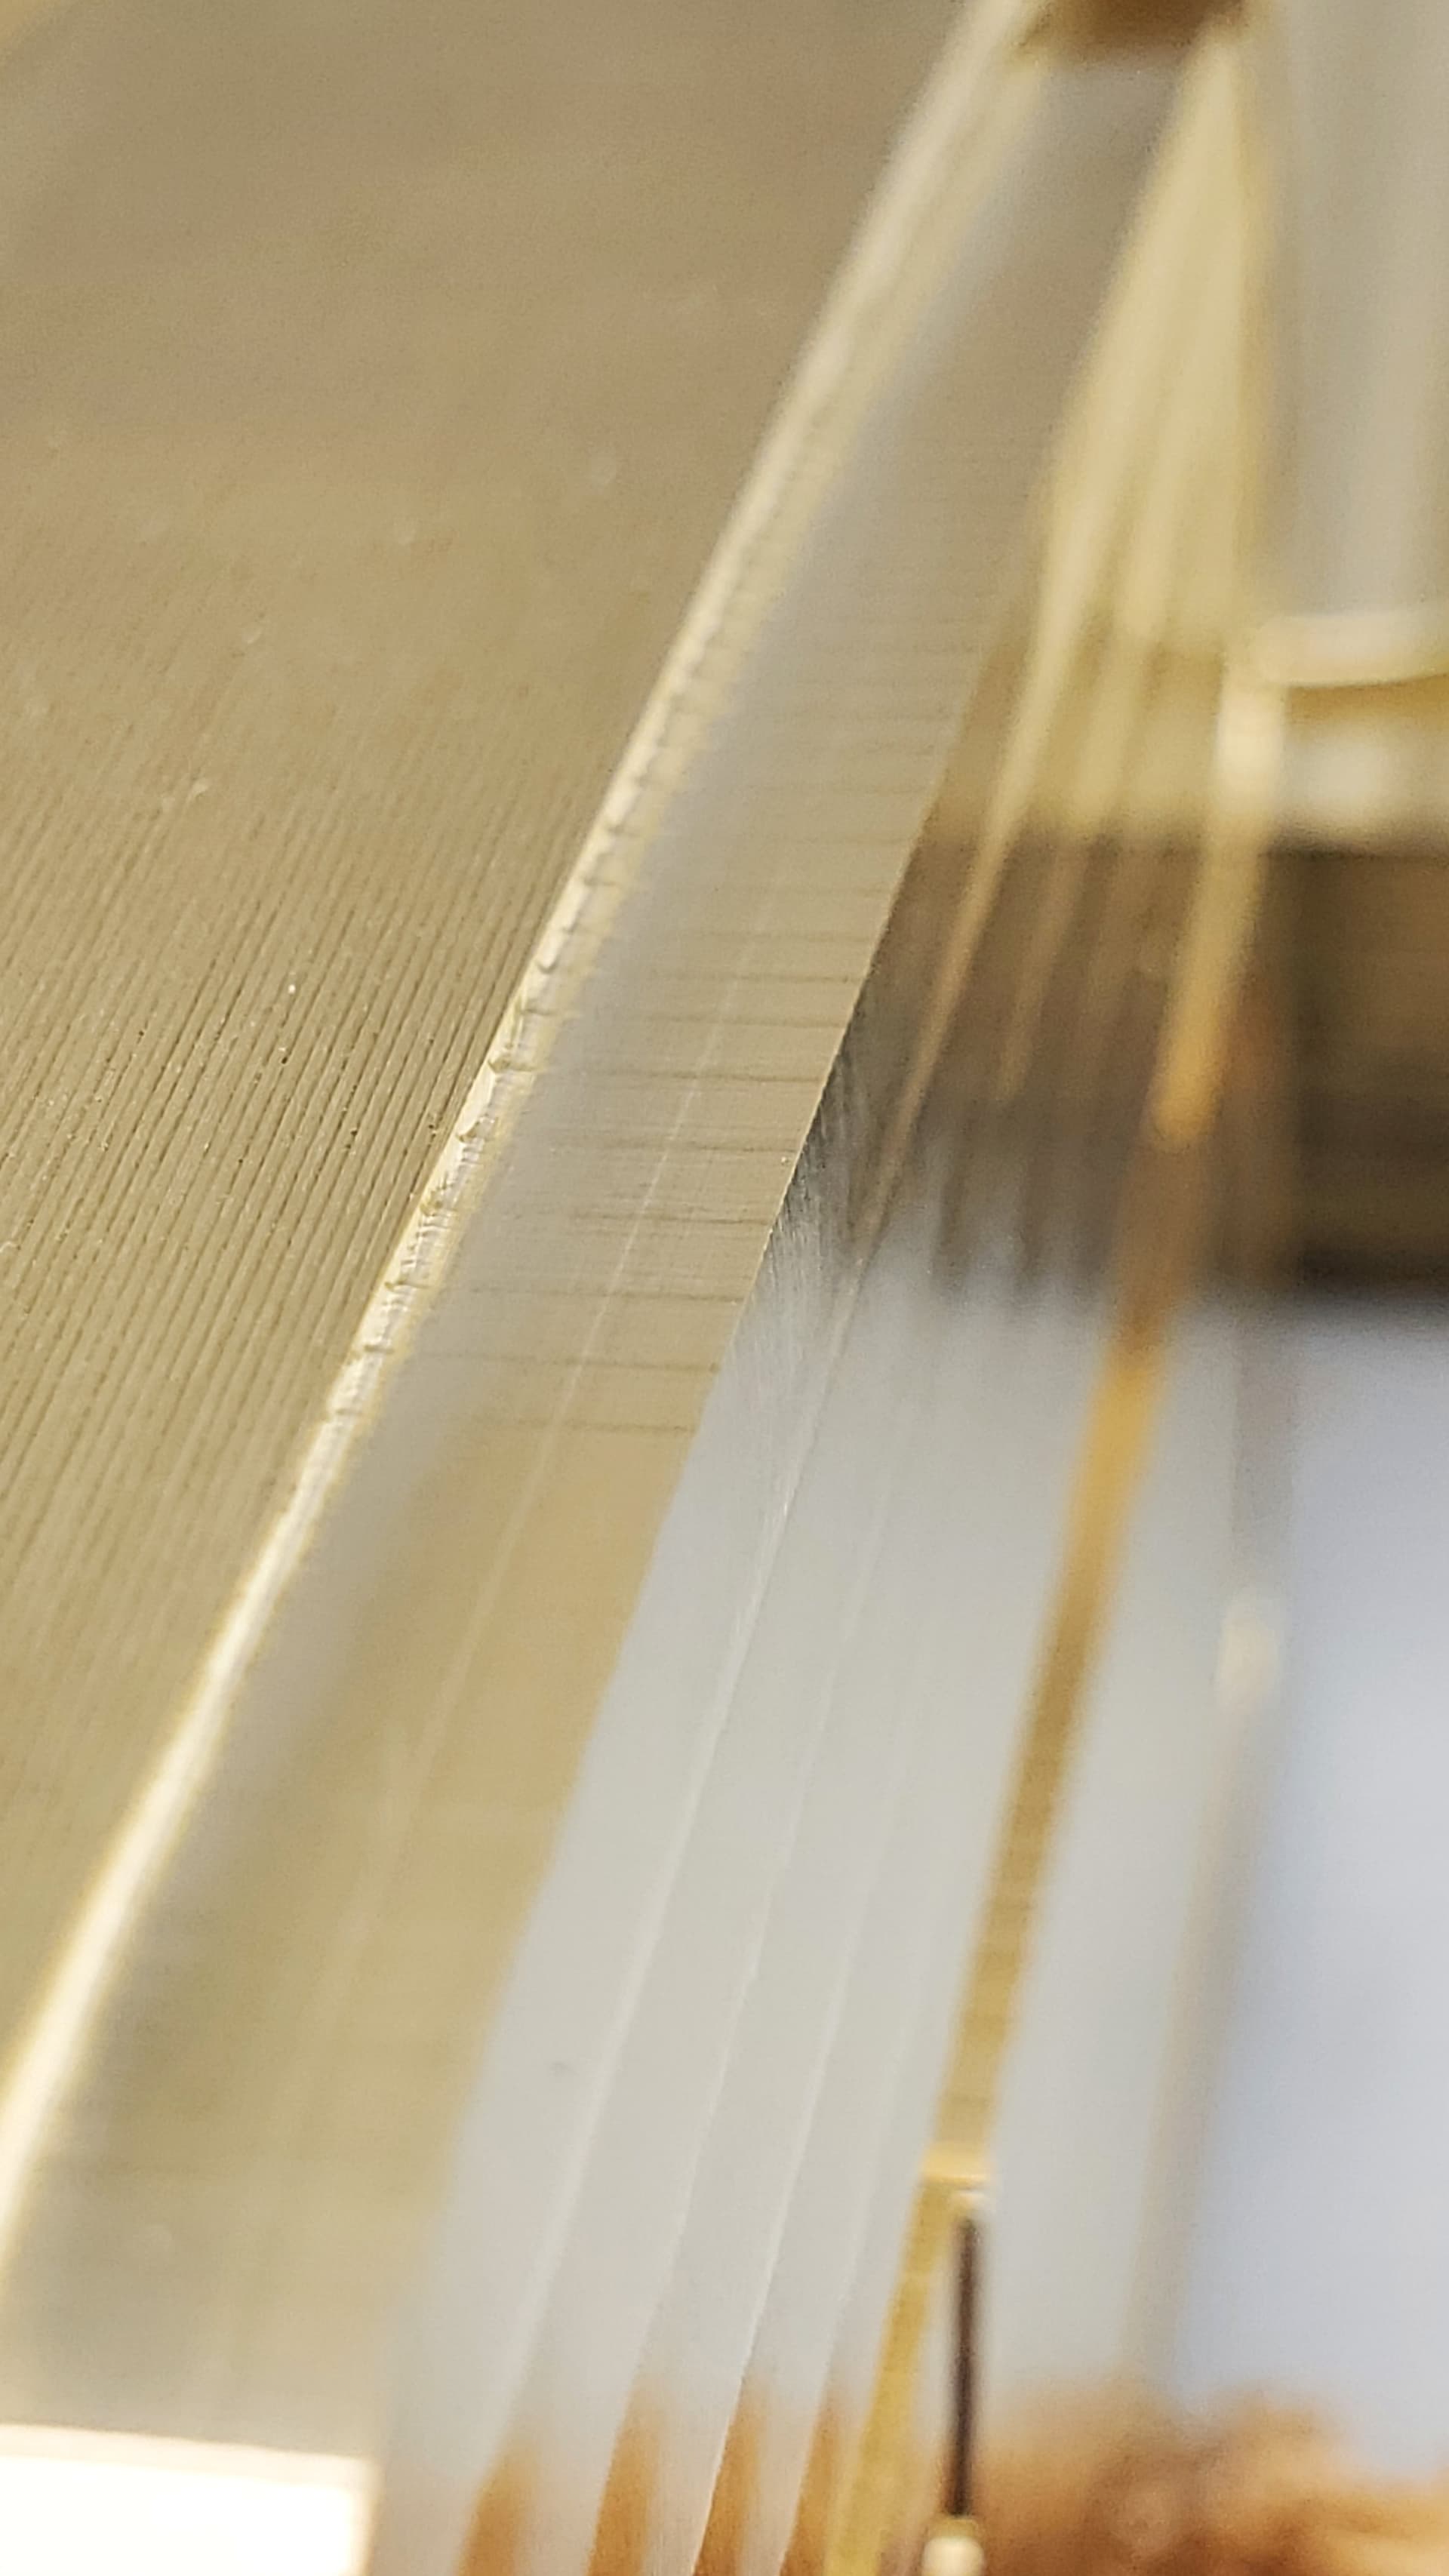
These lines would polish out with a scotch Brite wheel in 2 seconds.
11 Likes
Strange, those lines on the edges look similar to ones that @Julien and others were getting on plastic.
Yup. Same cause too.
3 Likes
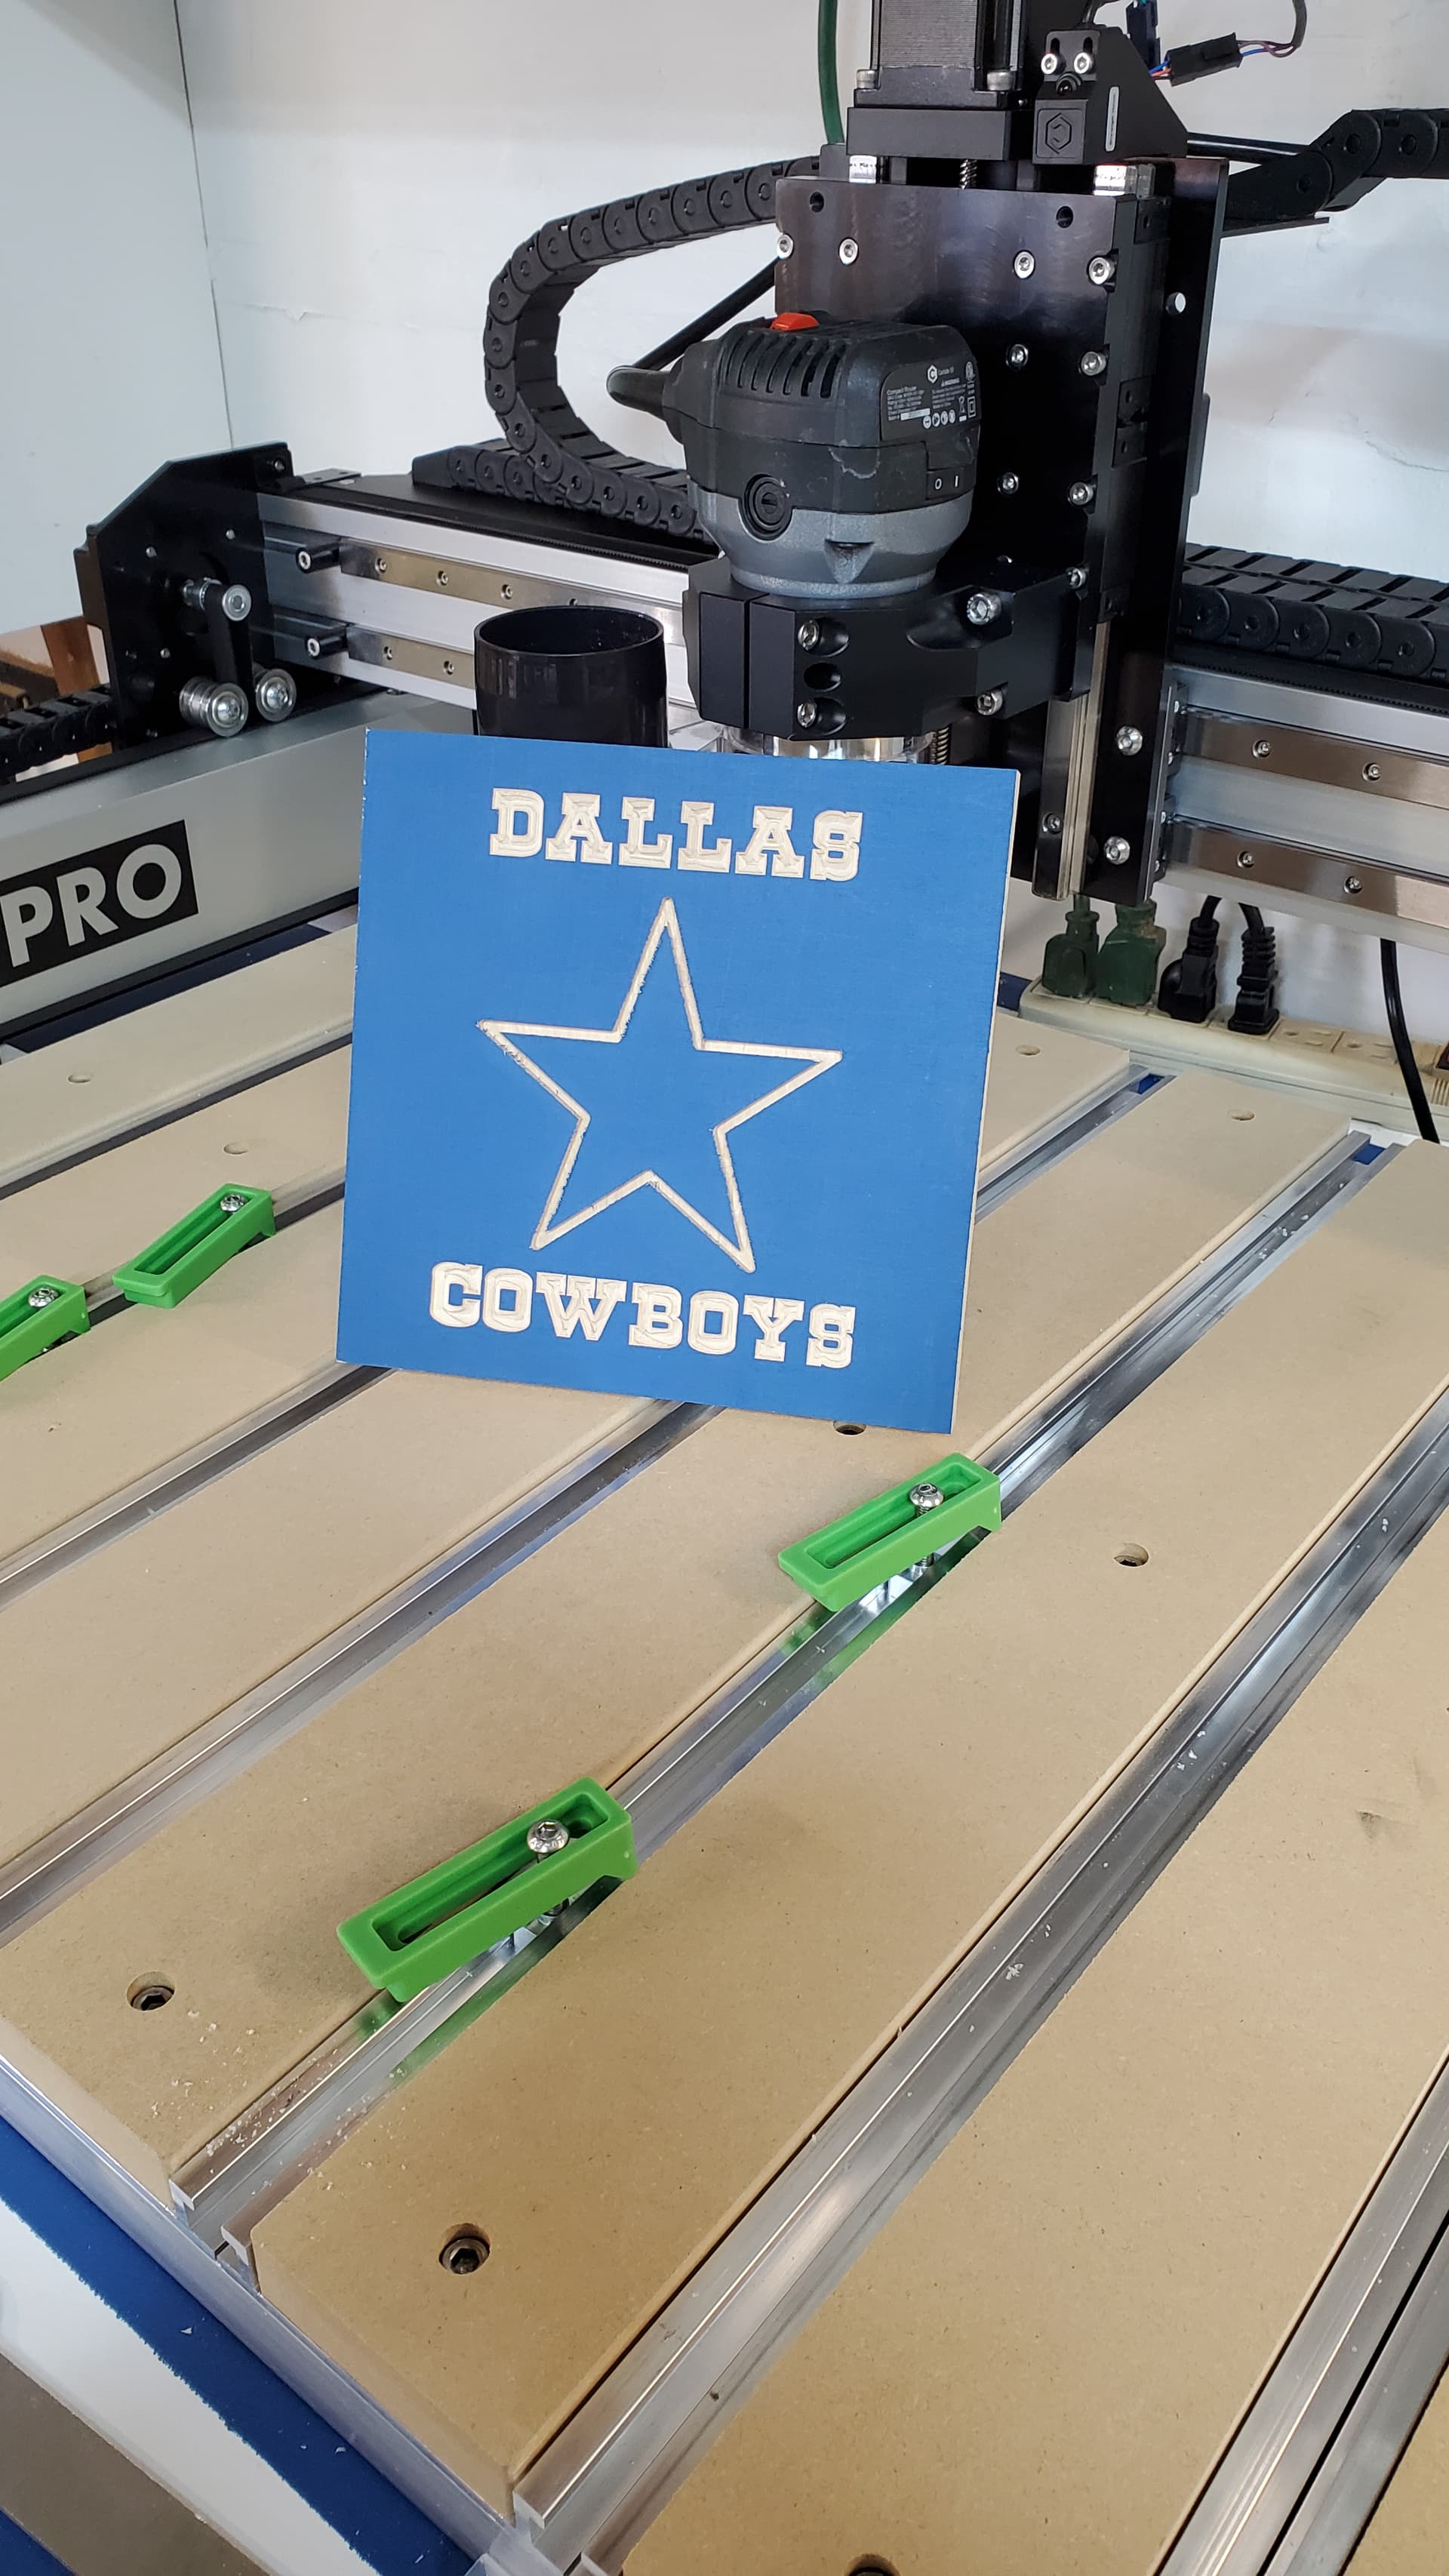
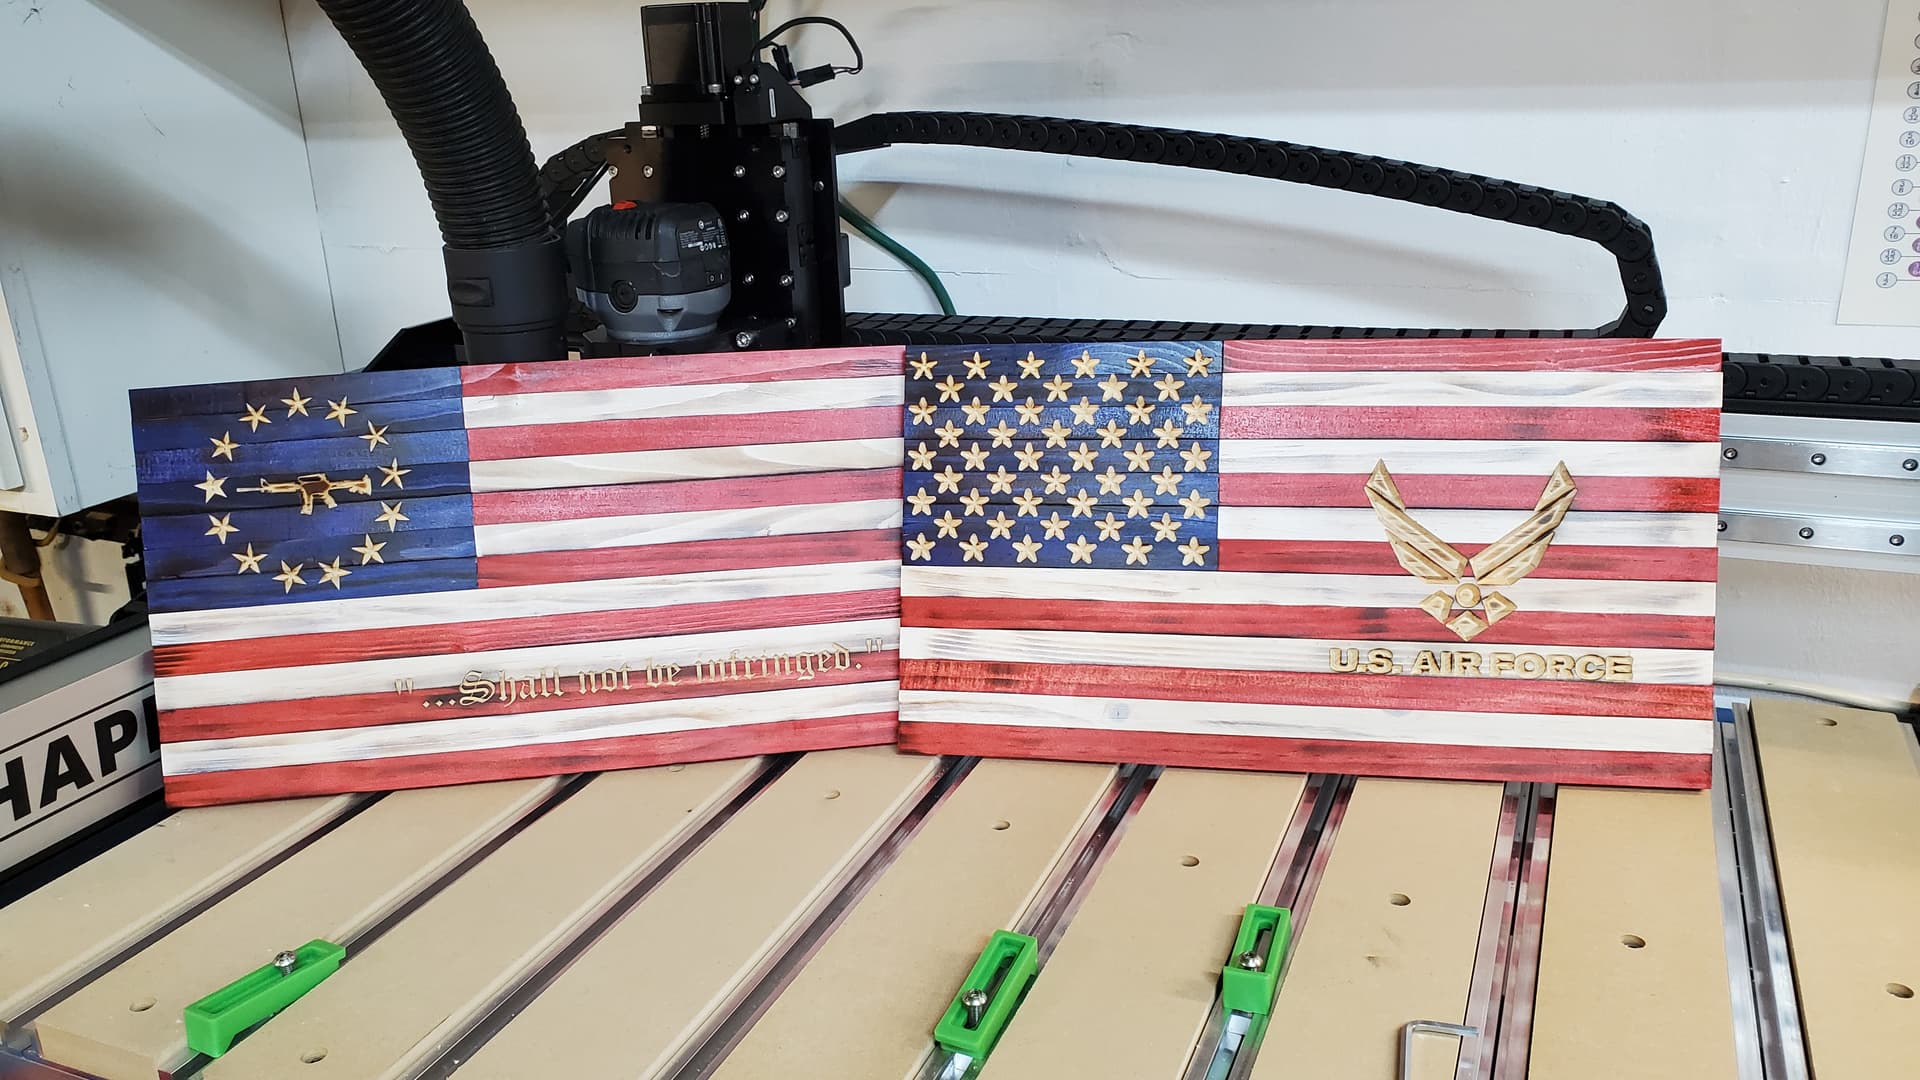
I had some blank flags, so I made some designs to fit. Just learning, but happy so far. Little deep on the 50 star field so I got “chubby” stars unlike the Betsy flag. Try, fail, learn, repeat…
12 Likes
Hey Mark,
What size are you making your signs? My parents want me to make them one. I need a good size to start with.
1 Like
This might help.
AmericanFlagSpecifications2020.ods.pdf (91.6 KB)
4 Likes
That sign was 23.5" by 11". I used a “12in” HD oak board. I also do glue-ups to achieve wider widths, but I wanted to recipe with a quick turn-time. Sizes like that are good on front doors or on a mantle. If you want something with more presence on a wall, you may want to go 32" wide, which is the capacity of XL and XXL Shapeokos.
2 Likes
Mark - I use an advanced vcarve tool path on my flag stars with a 90 v bit. Takes a little longer, but the look is crisp, clean, and professional.
2 Likes
Well today it didn’t actually CUT anything…I used the machine to Bench Test the finished pump for Flow, Check Balls and Leaks…thinking outside the box.
(Spindle was turned OFF, and I used CarbideCreate Drilling routine (and then some cut/paste and etc.) to make it run faster. G0 down and up.) Runs the pump for 1 minute.
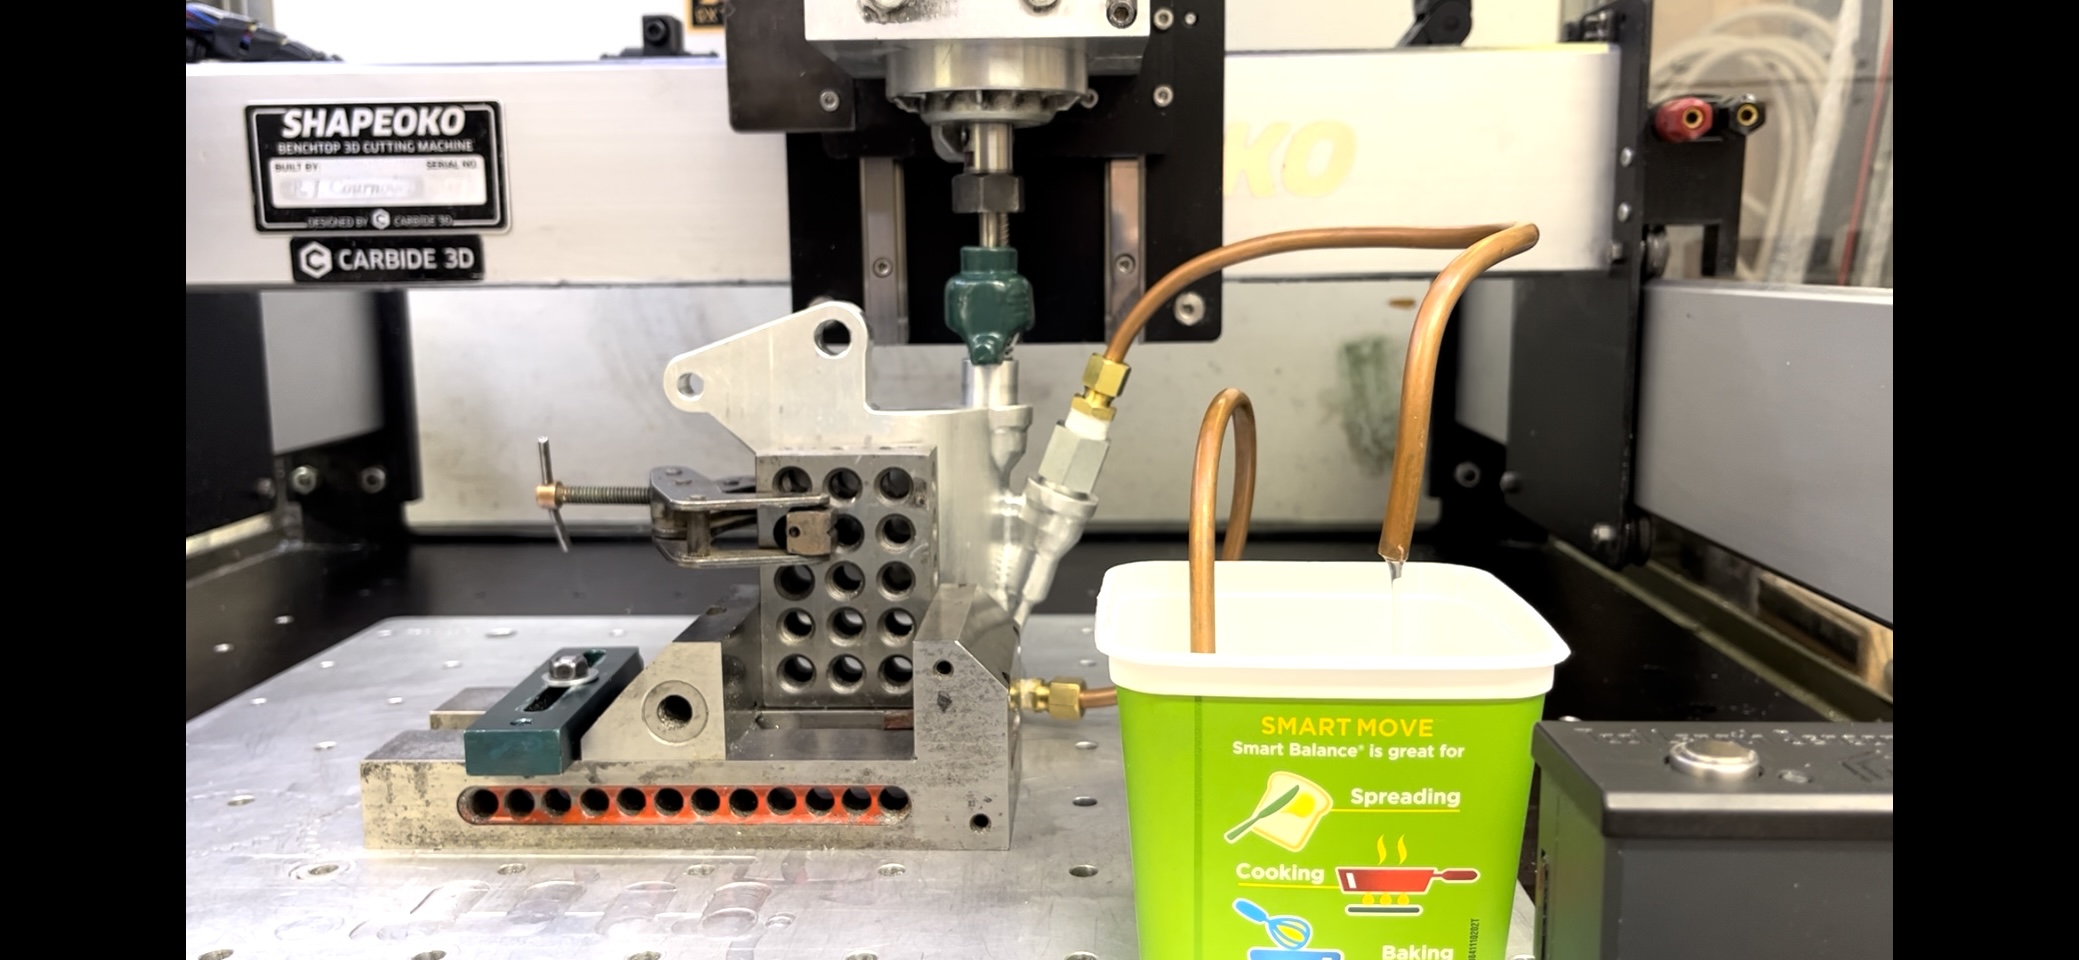
Ref:
16 Likes
The flag on the left was 60 degree with a .15 limit while on the AF one I forgot to limit so was set to stock max. That 60 degree will go deep if left to its own devices. I have been experimenting with the adv. V-carve and like it.
Thank you!