Getting ready to write up a threadmilling thread complete with tips, trick and Fusion 360 CAM secrets.

Getting ready to write up a threadmilling thread complete with tips, trick and Fusion 360 CAM secrets.
Perfect! Just in time for my next step.

First hardwood project; made this from maker’s mark I designed for my brother.
Least I could do, as he bought me the Shapeoko!
Its his $3000 plaque. ![]()
adv. V carve @ 0.200 w/ 60deg v bit.
Flipped and carved a hanger slot. Cool
I am loving this and learning more every day.
I’ve been doing traditional ww for a while and look forward to incorporating the features into larger pieces.
Thanks for watching
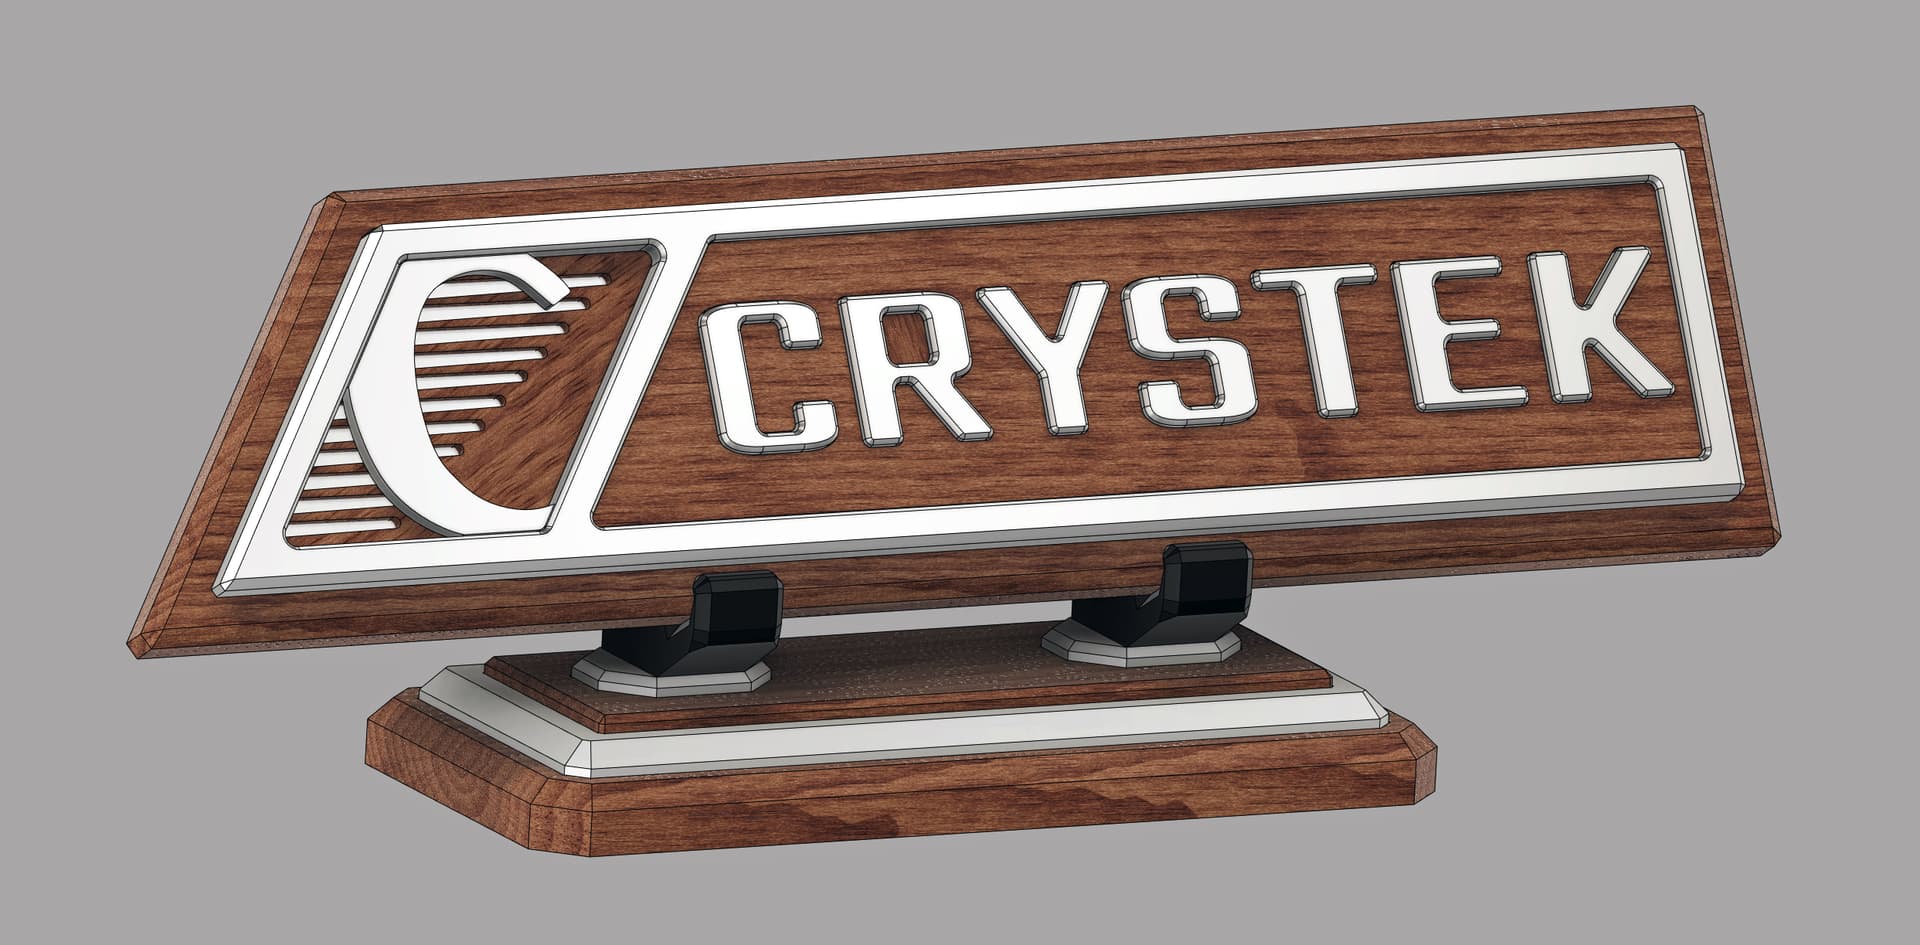
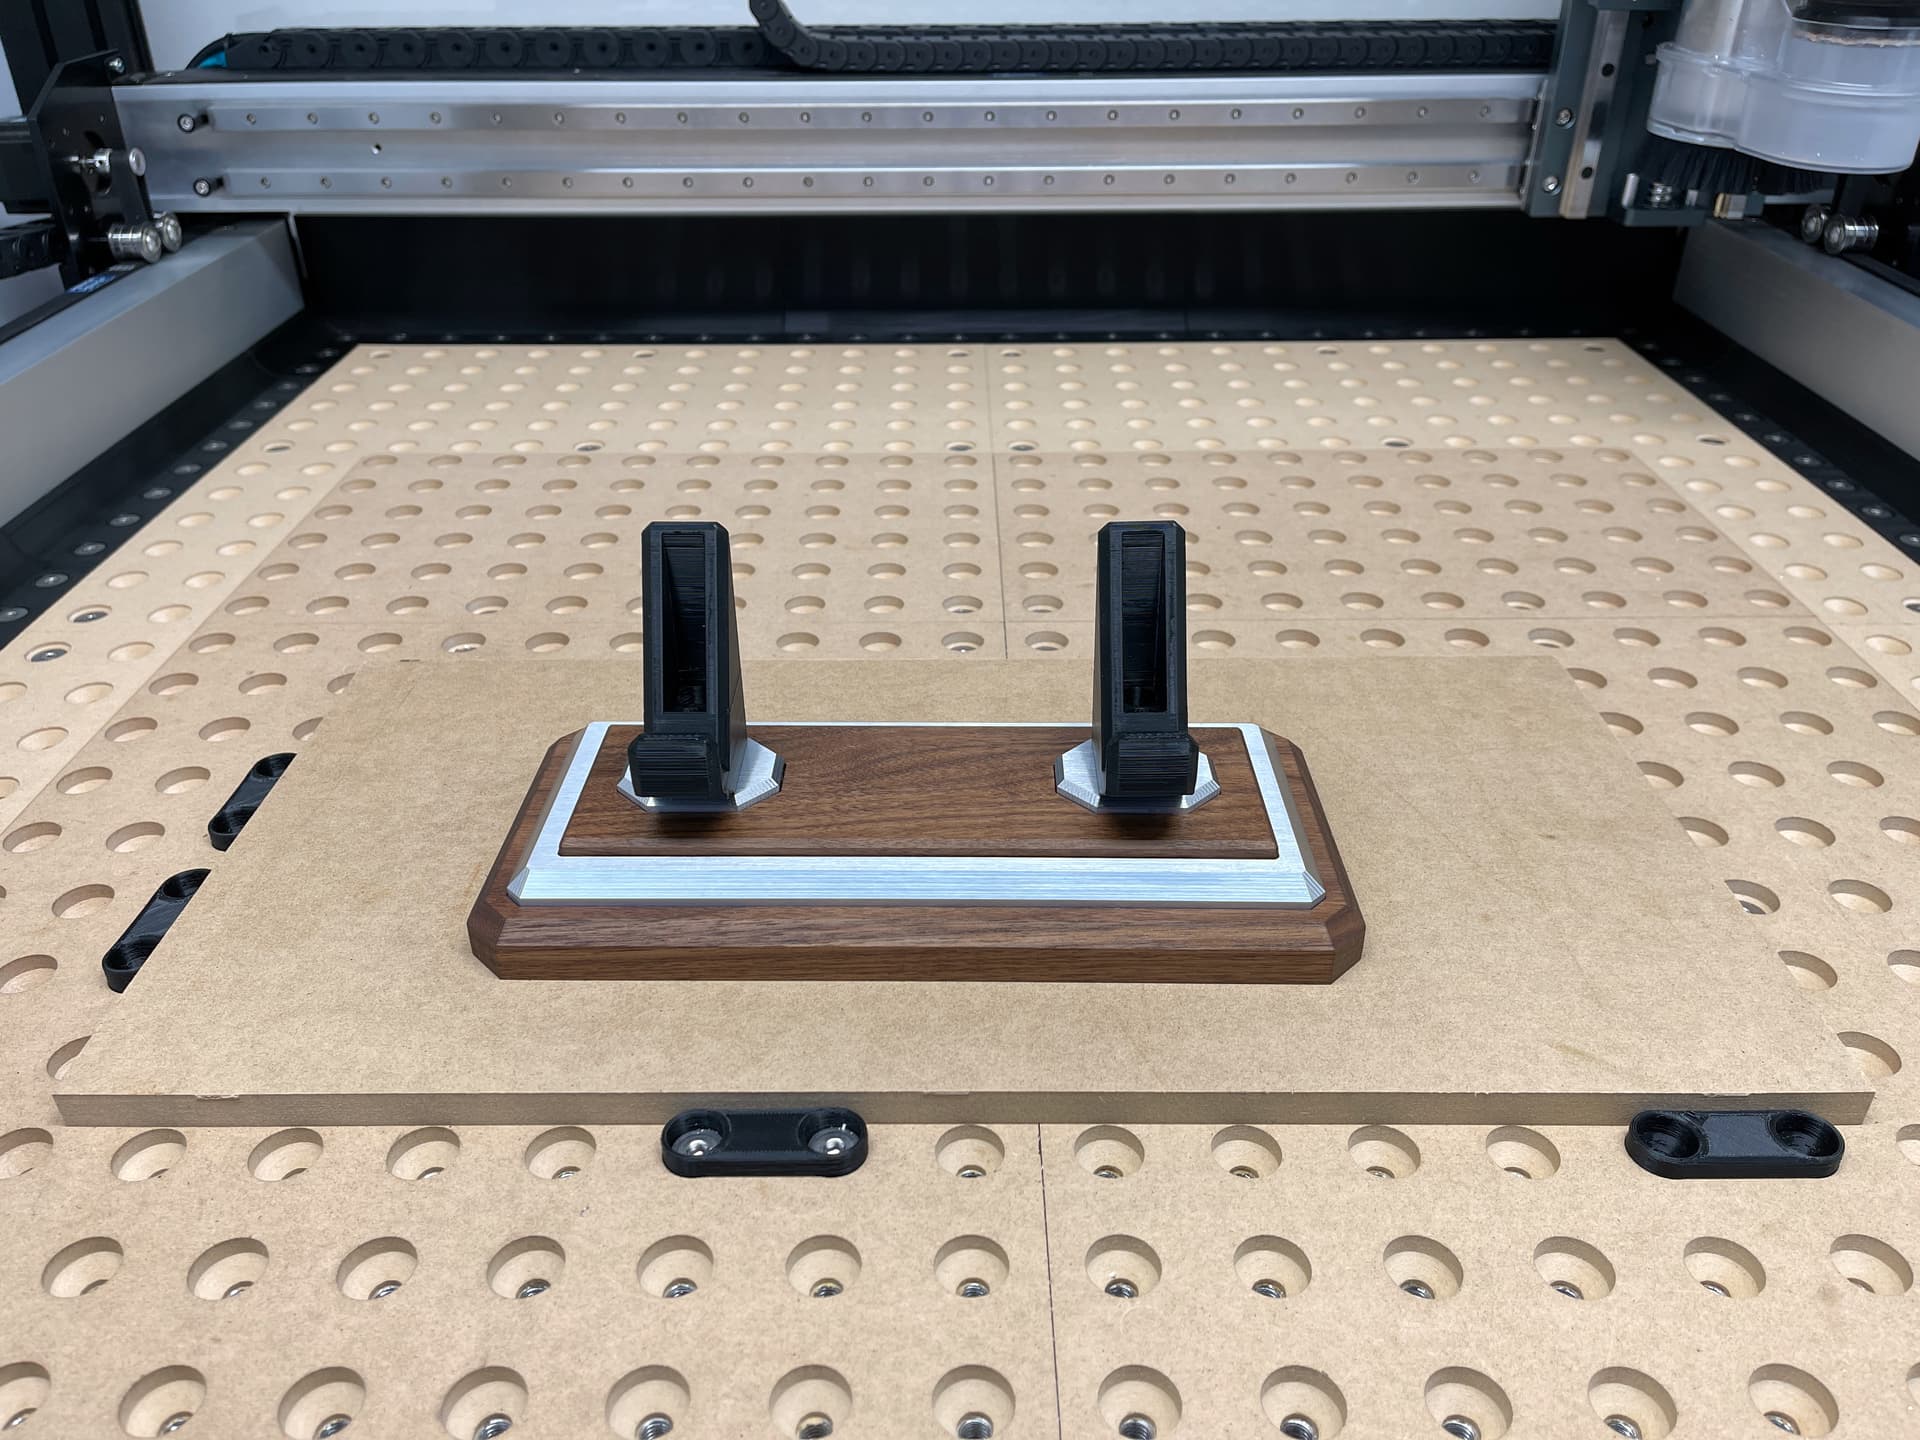
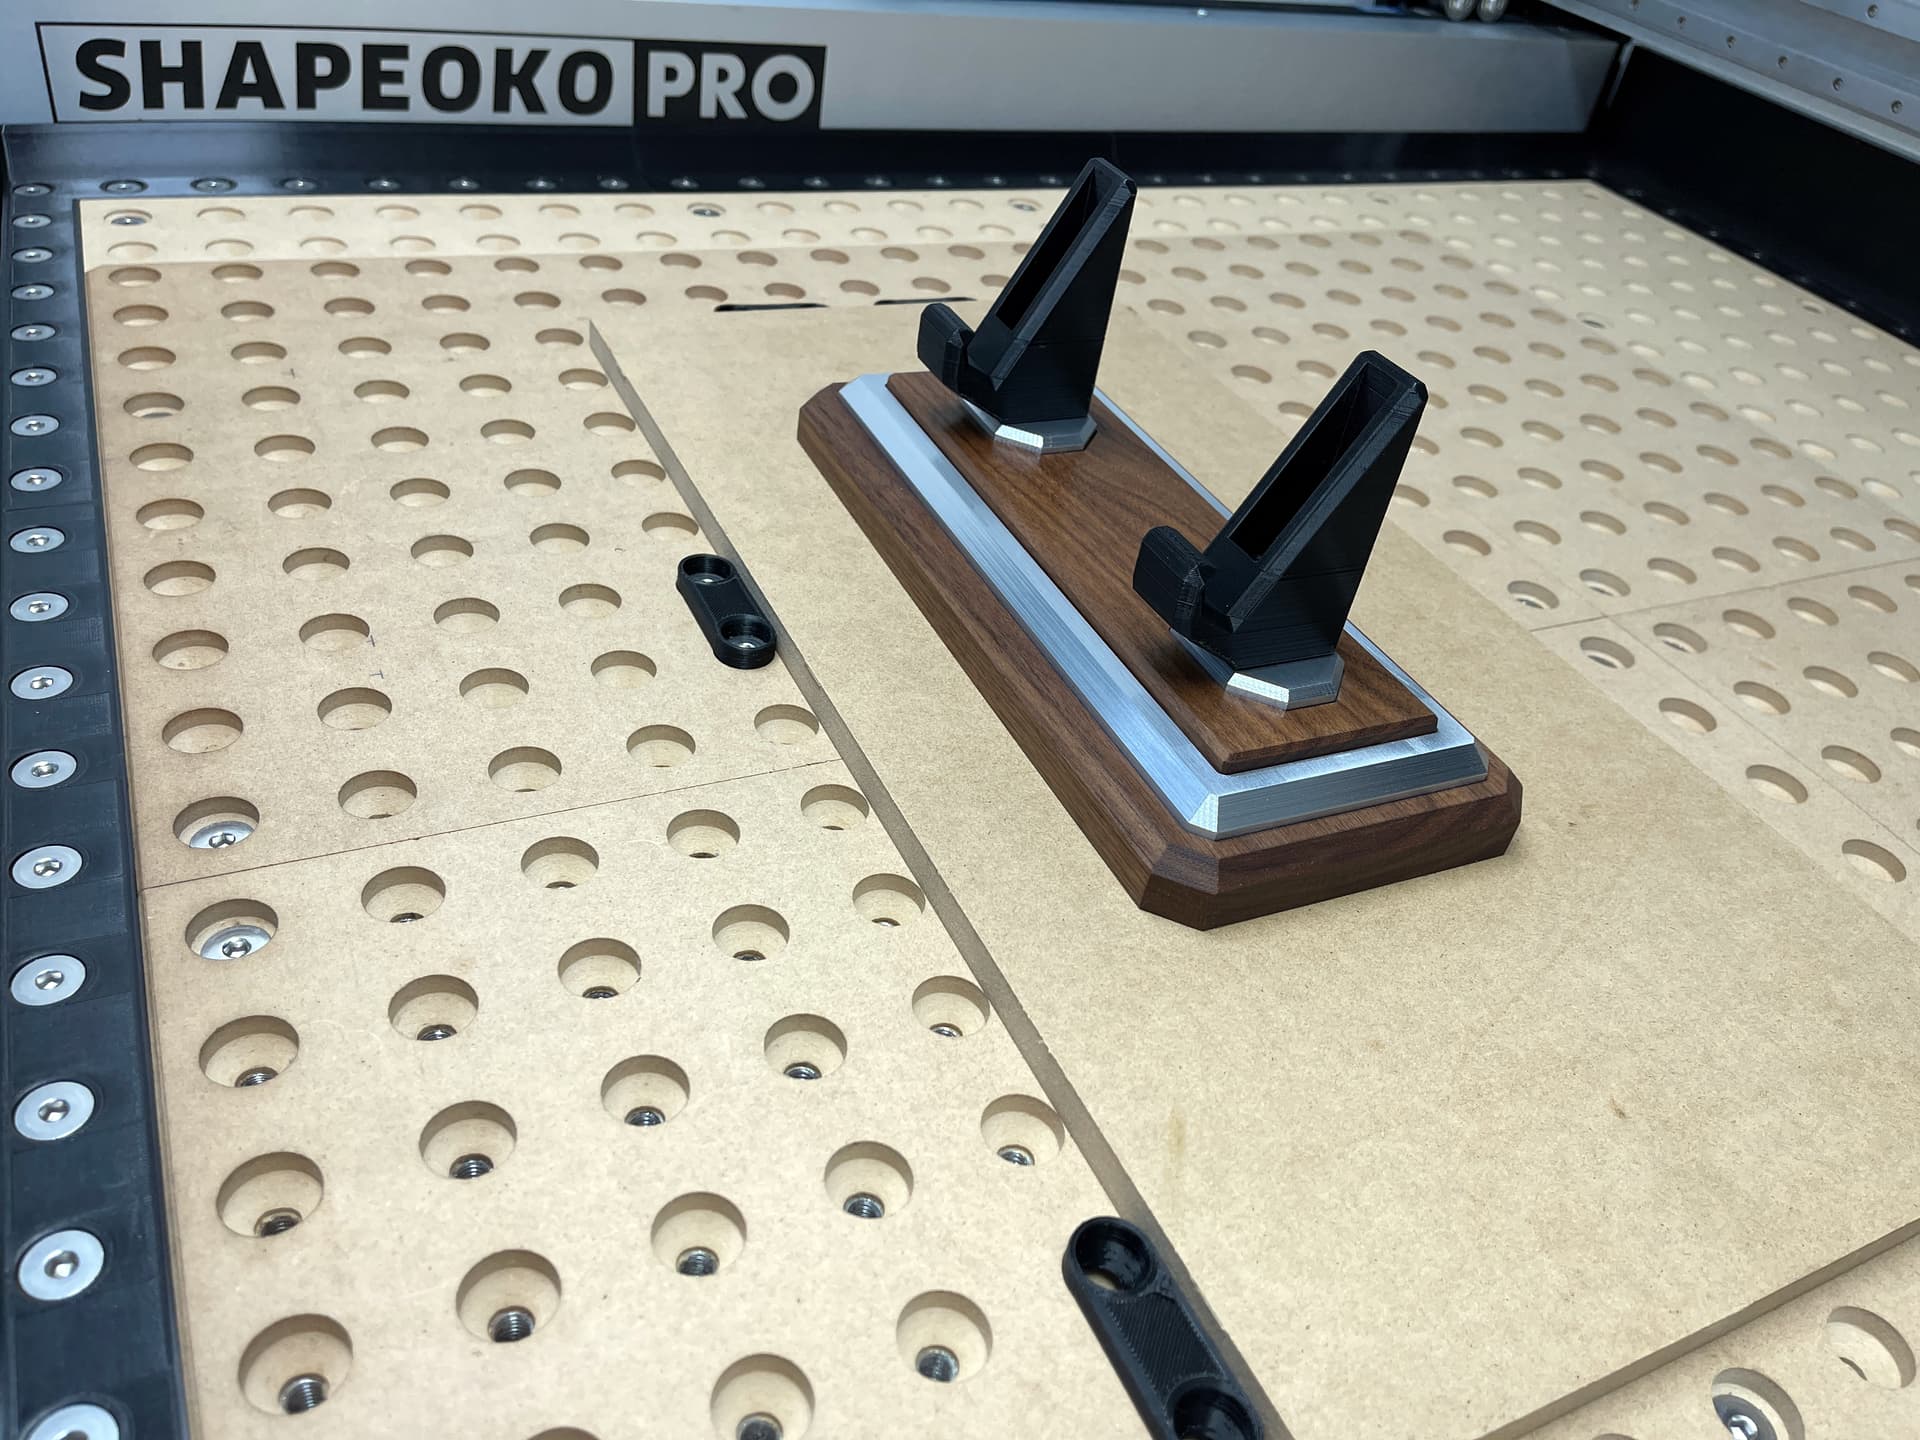
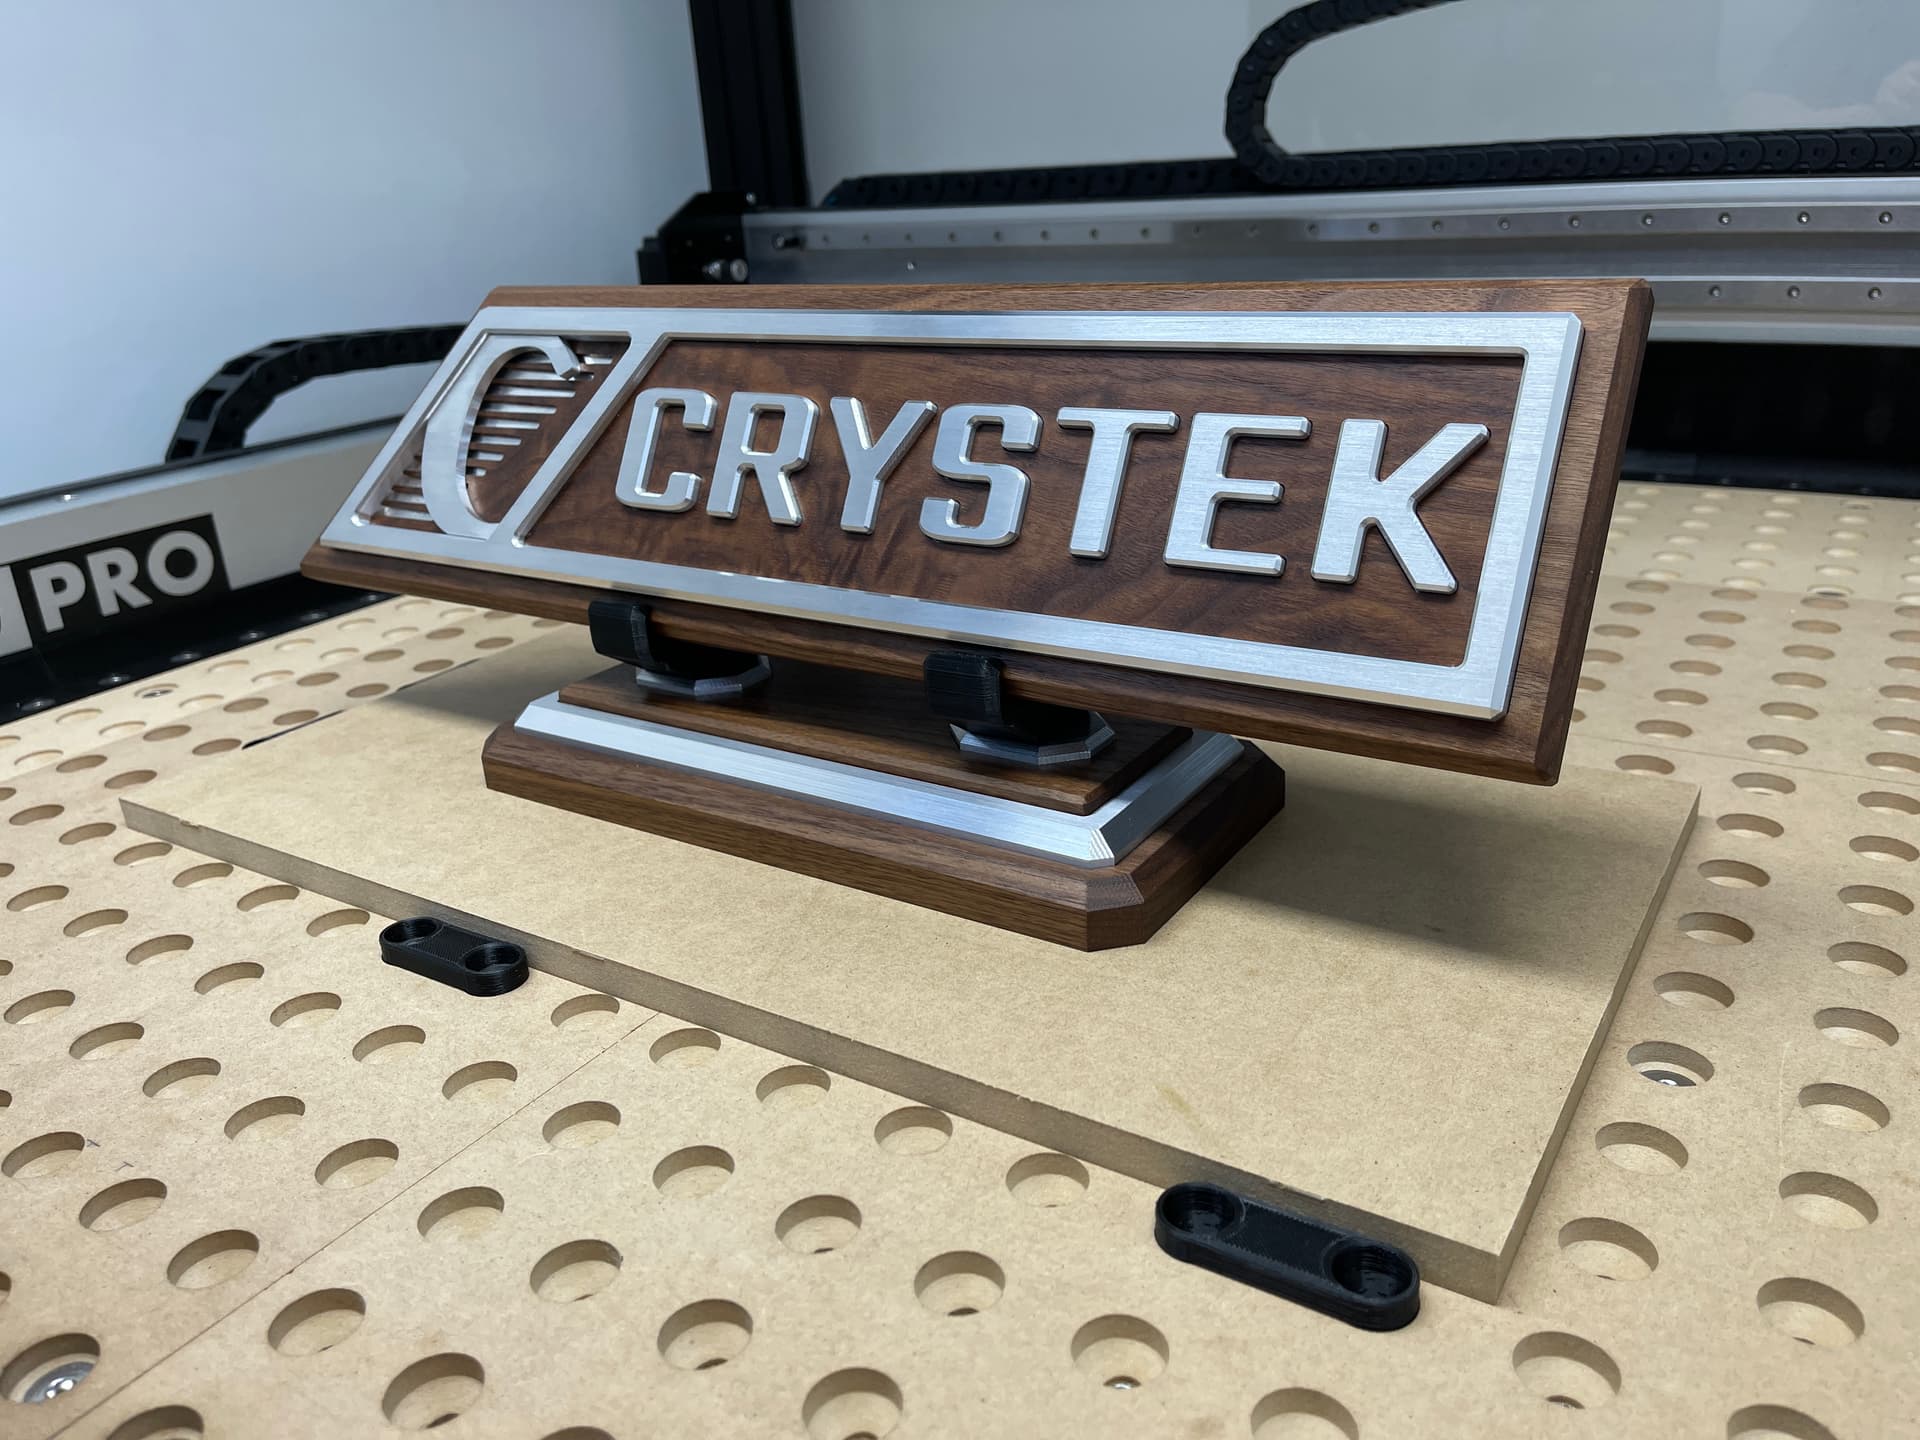
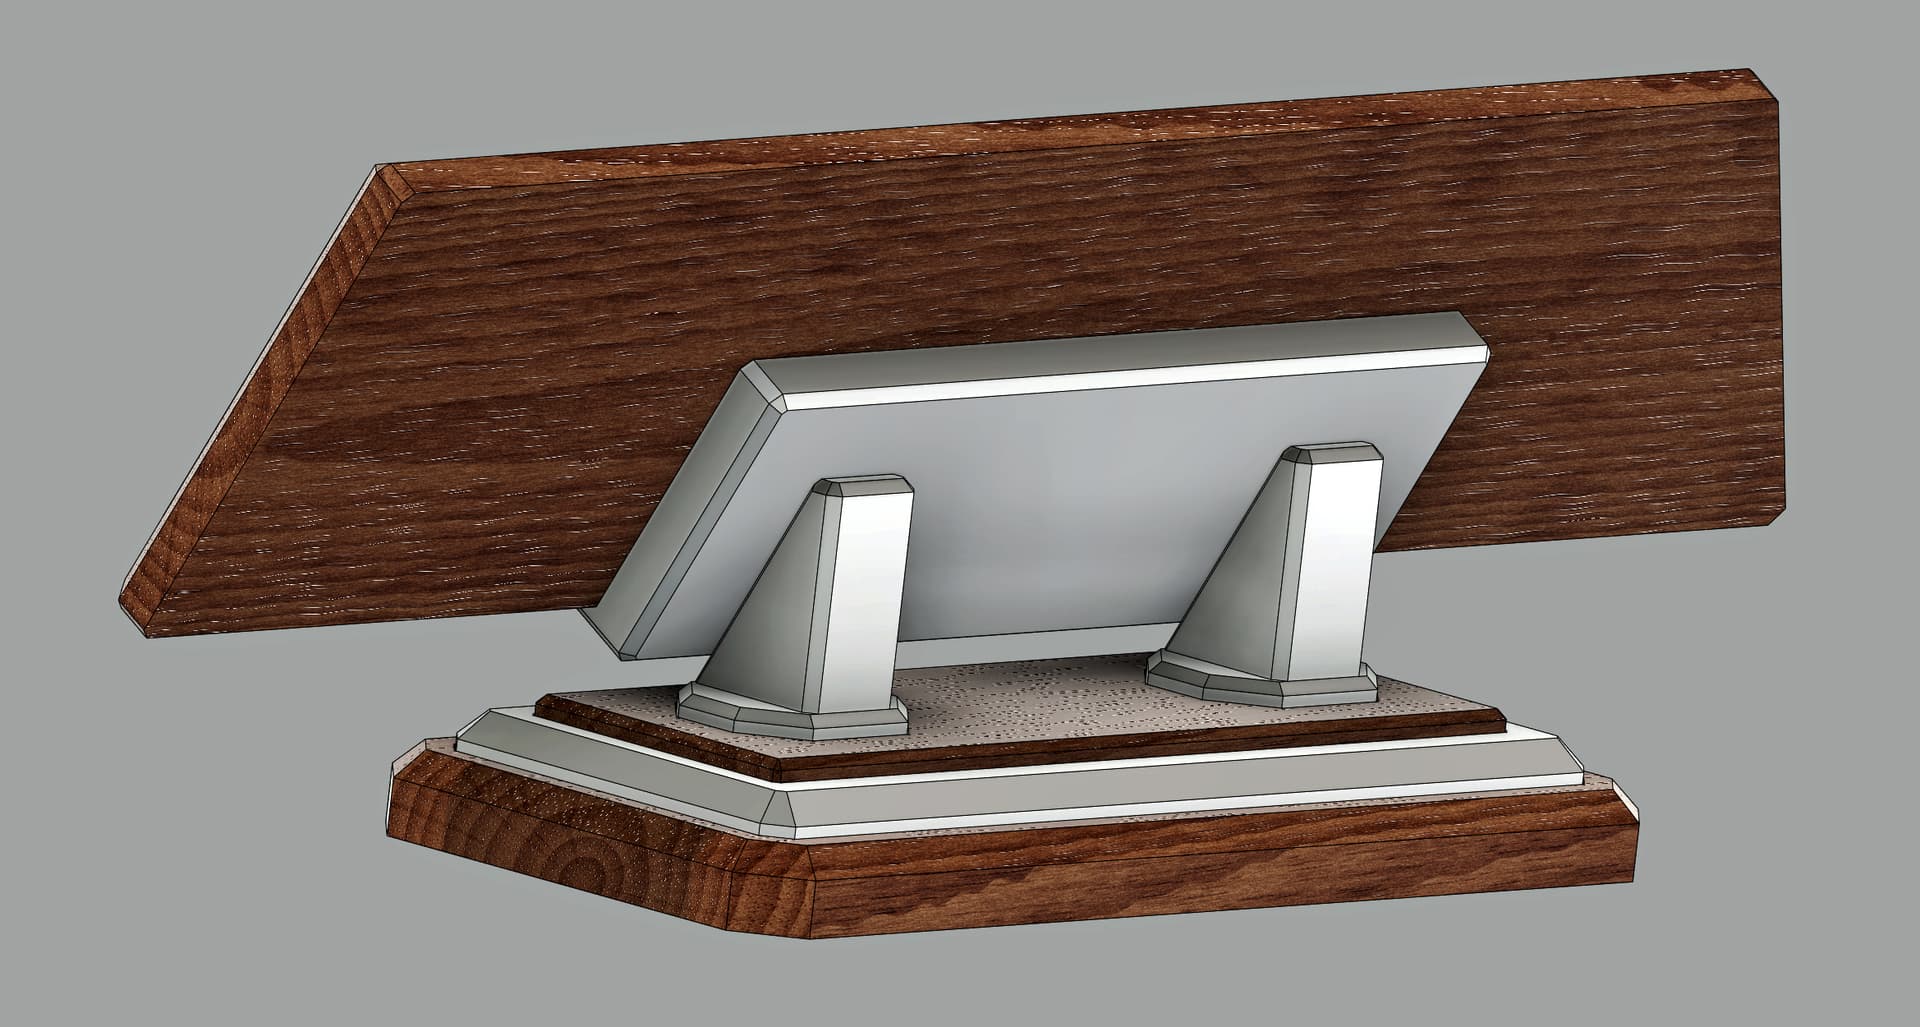
Visiting Crystek again this week, and decided to remake the plaque I had designed a few years ago with a few enhancements/improvements this time, and added a nice heavy base carved out of one inch thick 6061. Always room for improvement, but I think it came out pretty nice!
I was asked to make a little shield with the Boeing Heritage Flight Test Logo for another “Old Timer” retiring from Boeing after 32 years of service. This is the second Ft Logo I have been asked to make for guys retiring. The last one was just a simple 2" circle with the logo. This one is a shield shape with the logo on it.
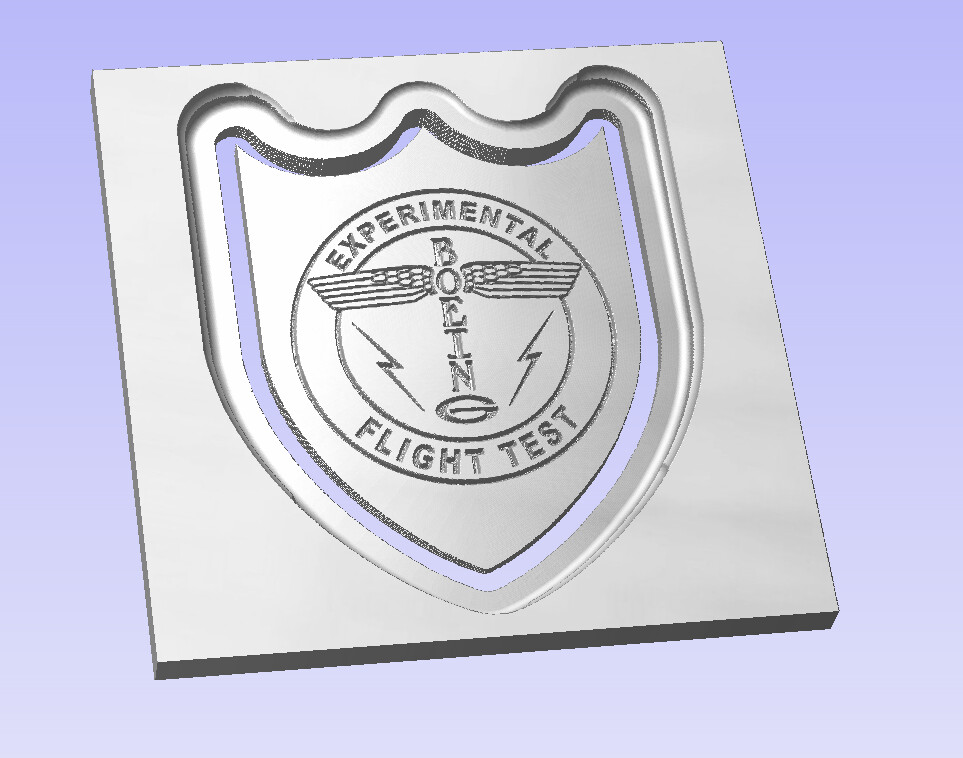
I use Vectric V-Carve Desktop for this kind of design, so I fired it up and played with the clipart and found a shield shape and a dome shape to give the shield some curvature. I ended up with this design:
I am not sure if the option to apply the V-carve to the contour of the shape was present in V10.x, but it is available in V11, which was nice. That allowed the logo to lay on the curved shield shape and still be cut out properly, instead of it being cut on a plane and having it too shallow in some areas and too deep in others.
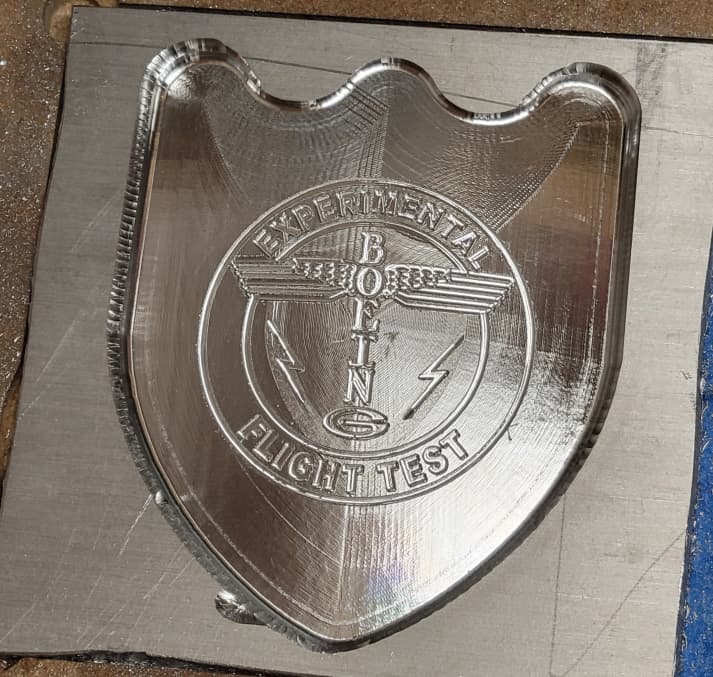
It looked good, so I procrastinated for two weeks, and then decided it was time to go to it, so I went out his morning and cut it out and polished it up.
This just happens to be the first thing I have 3D contoured in aluminum. It is not really a big deal, because I have cut other things in aluminum before, but this happened to be the first 3D contour.
But can you say “Toy Boat” five times, fast?
This is a beautiful piece - but I can’t help feel that it is let down a little by the PLA printed black supports. When you print a lot of PLA you get used to the way it looks and stop seeing how bad it actually does look.
Thank you for the honest opinion Gerry. I hope the president of Crystek does not feel the same way!
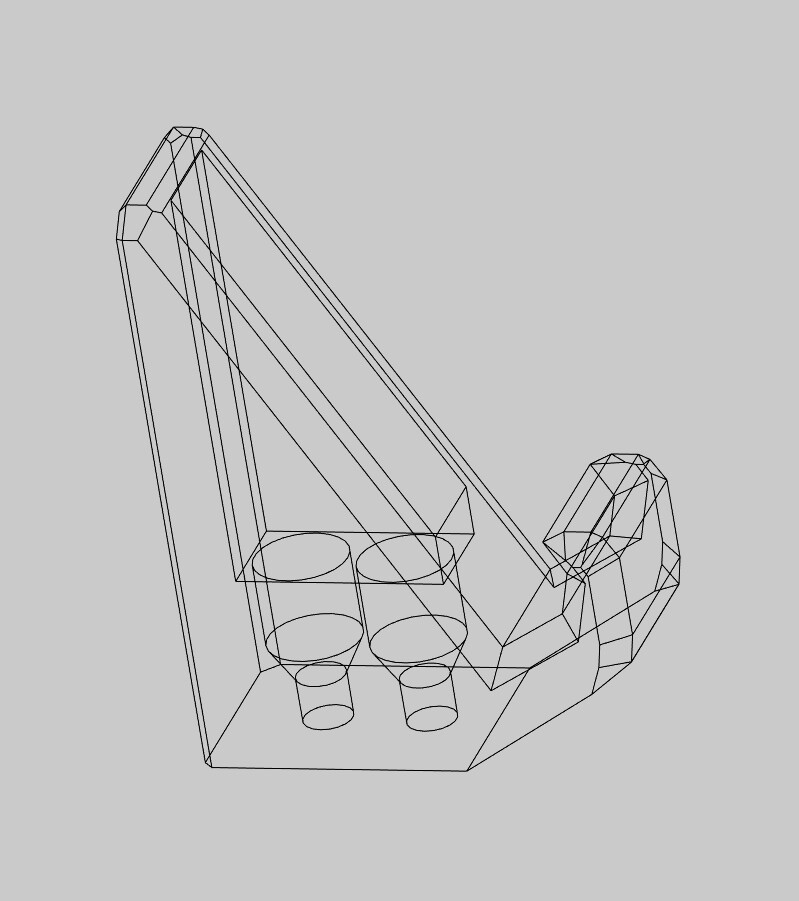
They were going to be very difficult to make out of aluminum or wood, and they would have had to have been 3 sided carves with inside sharp corner filing needed. The bolt holes are countersunk three inches deep, and my countersink is only two inches long, but I could have switched to button head or socket caps.
Mostly I just did not have the time. I started on the design for the base Friday evening, with only one day available for design to completion. The epoxy has just over 24 hours for curing and delivery is tomorrow.
The PLA parts were rough test prints, I am printing solid .1mm versions now, hopefully they will look a little cleaner.
What is hard to see is that they fit the contour of the plaque perfectly, it locks it in in there with a .01 gap.
I will design something else to replace them that is easier to machine, and swap them out next year…
Best of luck with the solid versions of the mounts. Hopefully they will not contrast too much with your spectacular work ![]()
Have you considered a resin print for this part? Perhaps with clear resin to imitate glass?
Thank you very much, I do not have a resin printer *yet but your suggestion has me looking at them again. Was previously scared off of them due to the need for gloves, the fumes, and mess. Also I was waiting for the next gen 4k resolution which I think is available now.
Could probably make a simple 1 piece shelf in the next 16 hours… Considering options…
They are messier but the difference in print quality matches your attention to detail ![]()
If you invest in a washer and UV curer chamber, a lot of the messy bits can be managed.
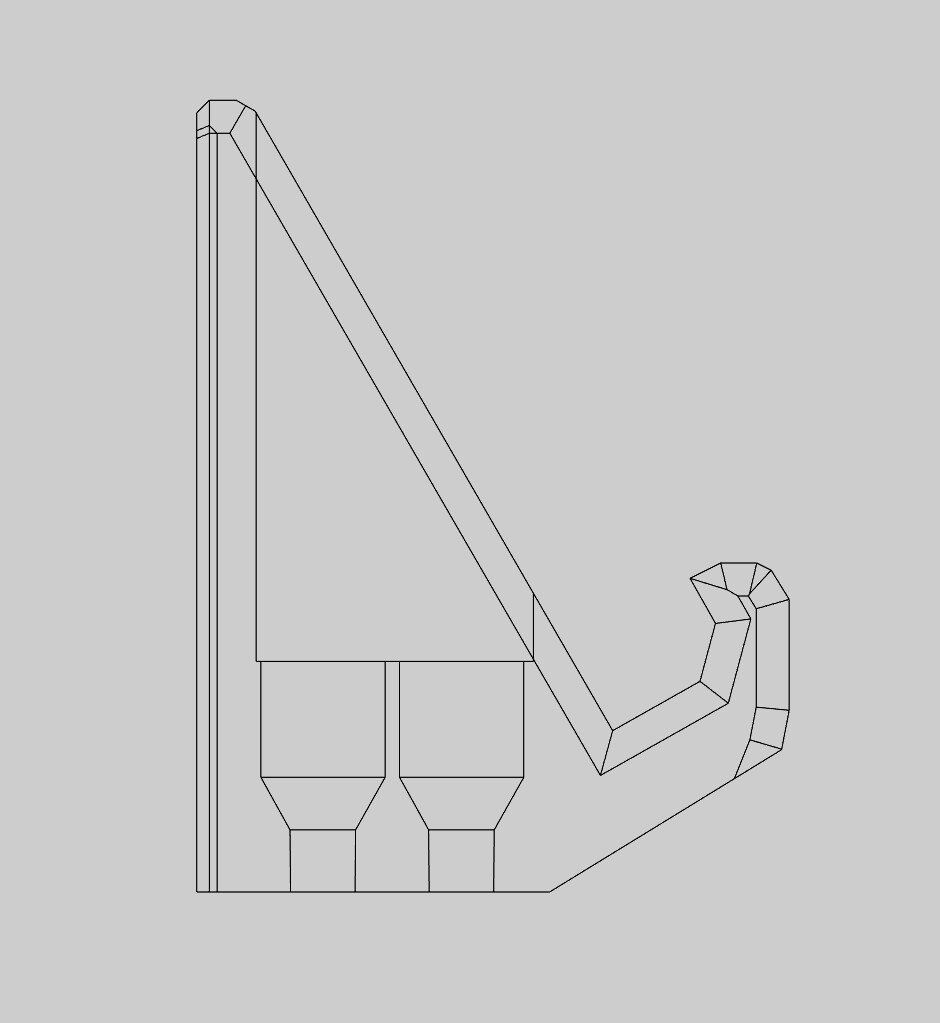
Perhaps an alternative could be the two wedge-shaped mounts without the complex lips, perhaps with elongated bases, with two 20mm magnets embedded on the top of each post and in the back of the sign. Might make it look like it was floating rather than held.
@CNCInspiration Max, I’ve had some success with smoothing ASA prints with Acetone. Prusa has a primer, https://blog.prusaprinters.org/improve-your-3d-prints-with-chemical-smoothing_36268/
You can also use a card scraper followed by find sanding and Xtc epoxy or paint for a very nice finish on 3d prints.

My opinion is that I really like the 3D printed brackets. In your display, you have subtractive machining, and additive machining. You have wood and metal and plastic. You have a little bit of everything. I really like the look.
My personal opinion (and this is just my preference) is pick up some matte finish black PLA. For some reason, the matte finish black PLA really makes the prints pop. I don’t know why exactly, but to me, prints with the matte black PLA look so much better than the prints with regular (shiny) black PLA.
Thank you very much for the suggestions @Griff and @Able, I am kind of blown away at the acetone and card scraping, those prints look really nice!!
Feeling a little better after reading @MadHatter 's opinion, I had too much to do today to redo the brackets. The good news is the fine print versions look a lot smoother, but I have a lot to consider for the next project.
@MadHatter I really like your aluminum Boeing logo, did a great job of surfacing it! Curved surfaces are difficult to make toolpaths for, and it looks really smooth. Can you please tell me what end mill you used for roughing and smoothing?
Thank you!
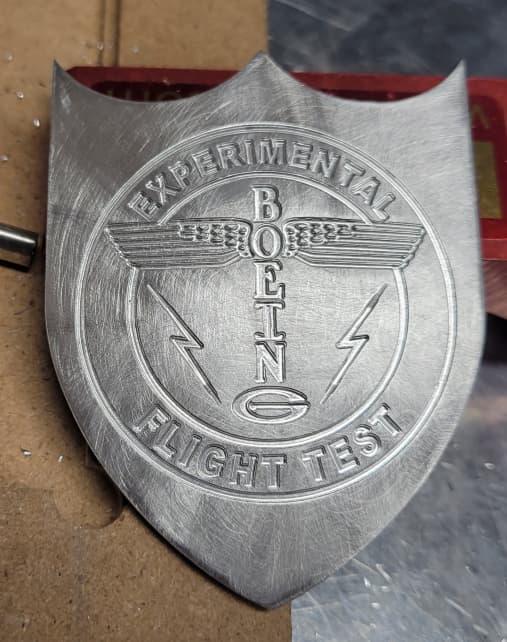
Thanks! Sure, I used a 1/4" 2 flute ball nose end mill for the roughing, and in V-Carve, told it to leave an additional 0.02" machining allowance. 0.02" pass depth, 0.05" stepover.
For the finish pass, a 1/8" 2 flute ball nose end mill, 0.01" stepover, single pass.
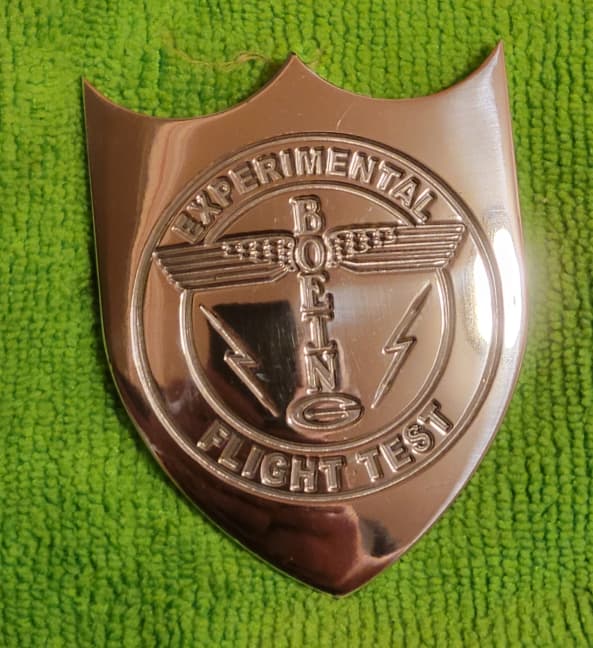
Then I sanded it by hand with some 400 grit, then 600 grit sand paper before buffing it with some buffing compound made for aluminum - whatever that means, but it works well. I have used white, black and tripoli polishing compound on aluminum, and they do their job, but this aluminum polish just seems easier to get where I need to go with aluminum.
Complete side-track since I am talking about buffing.
My biggest issue I have run into when polishing aluminum (because I have only engraved and polished aluminum, no other metal, yet) is that I bought some arbor extenders - LEFT hand and RIGHT hand extenders / adapters for my 8" bench grinder. I was getting this black smearing on the parts, and I couldn’t understand why.
It was taking a long time to get the finish I was looking for. I watched YouTube videos on buffing over and over from different “experts” and they were all saying the same thing using different words. I was trying to do what they did and could not get the results they did. Through trial and error, I figured out what I was doing wrong. I did not have my grinder clamped to the table, since I have to move it every time I want to use it. It is not on a pedestal or hard mounted to a bench. It was just sitting on the bench when I used it.
This caused all of my problems. To buff properly, you need to apply enough pressure that would normally push the non-mounted bench grinder around. I started to clamp it to the grinder to the counter, and lo and behold, the black streaks went away, and the items polished up in just a few minutes, instead of taking 45 minute or more (yeah, it was a long and terrible process).
So, figure out how to fix your grinder or buffer so you can apply the correct amount of pressure to get the results you want.
EDIT:
Yes, I am just liberally spraying 99% Isopropyl alcohol all over it while it is cutting. ![]()
And the engraving has the entire cavity full of IPA as well.
I was having a similar issue when polishing, did not realize it was pressure related. Thank you for the tip and congratulations on the Aluminum work, it looks really nice!
Further too @MadHatter ’s comments. I like this stuff after acetone treatment, 3DXTECH 3DXMax ASA. Beautiful matte black finish. I use ASA almost exclusively for functional parts. Been sour on PLA ever since parts on a quad copter warped after sitting in my car.