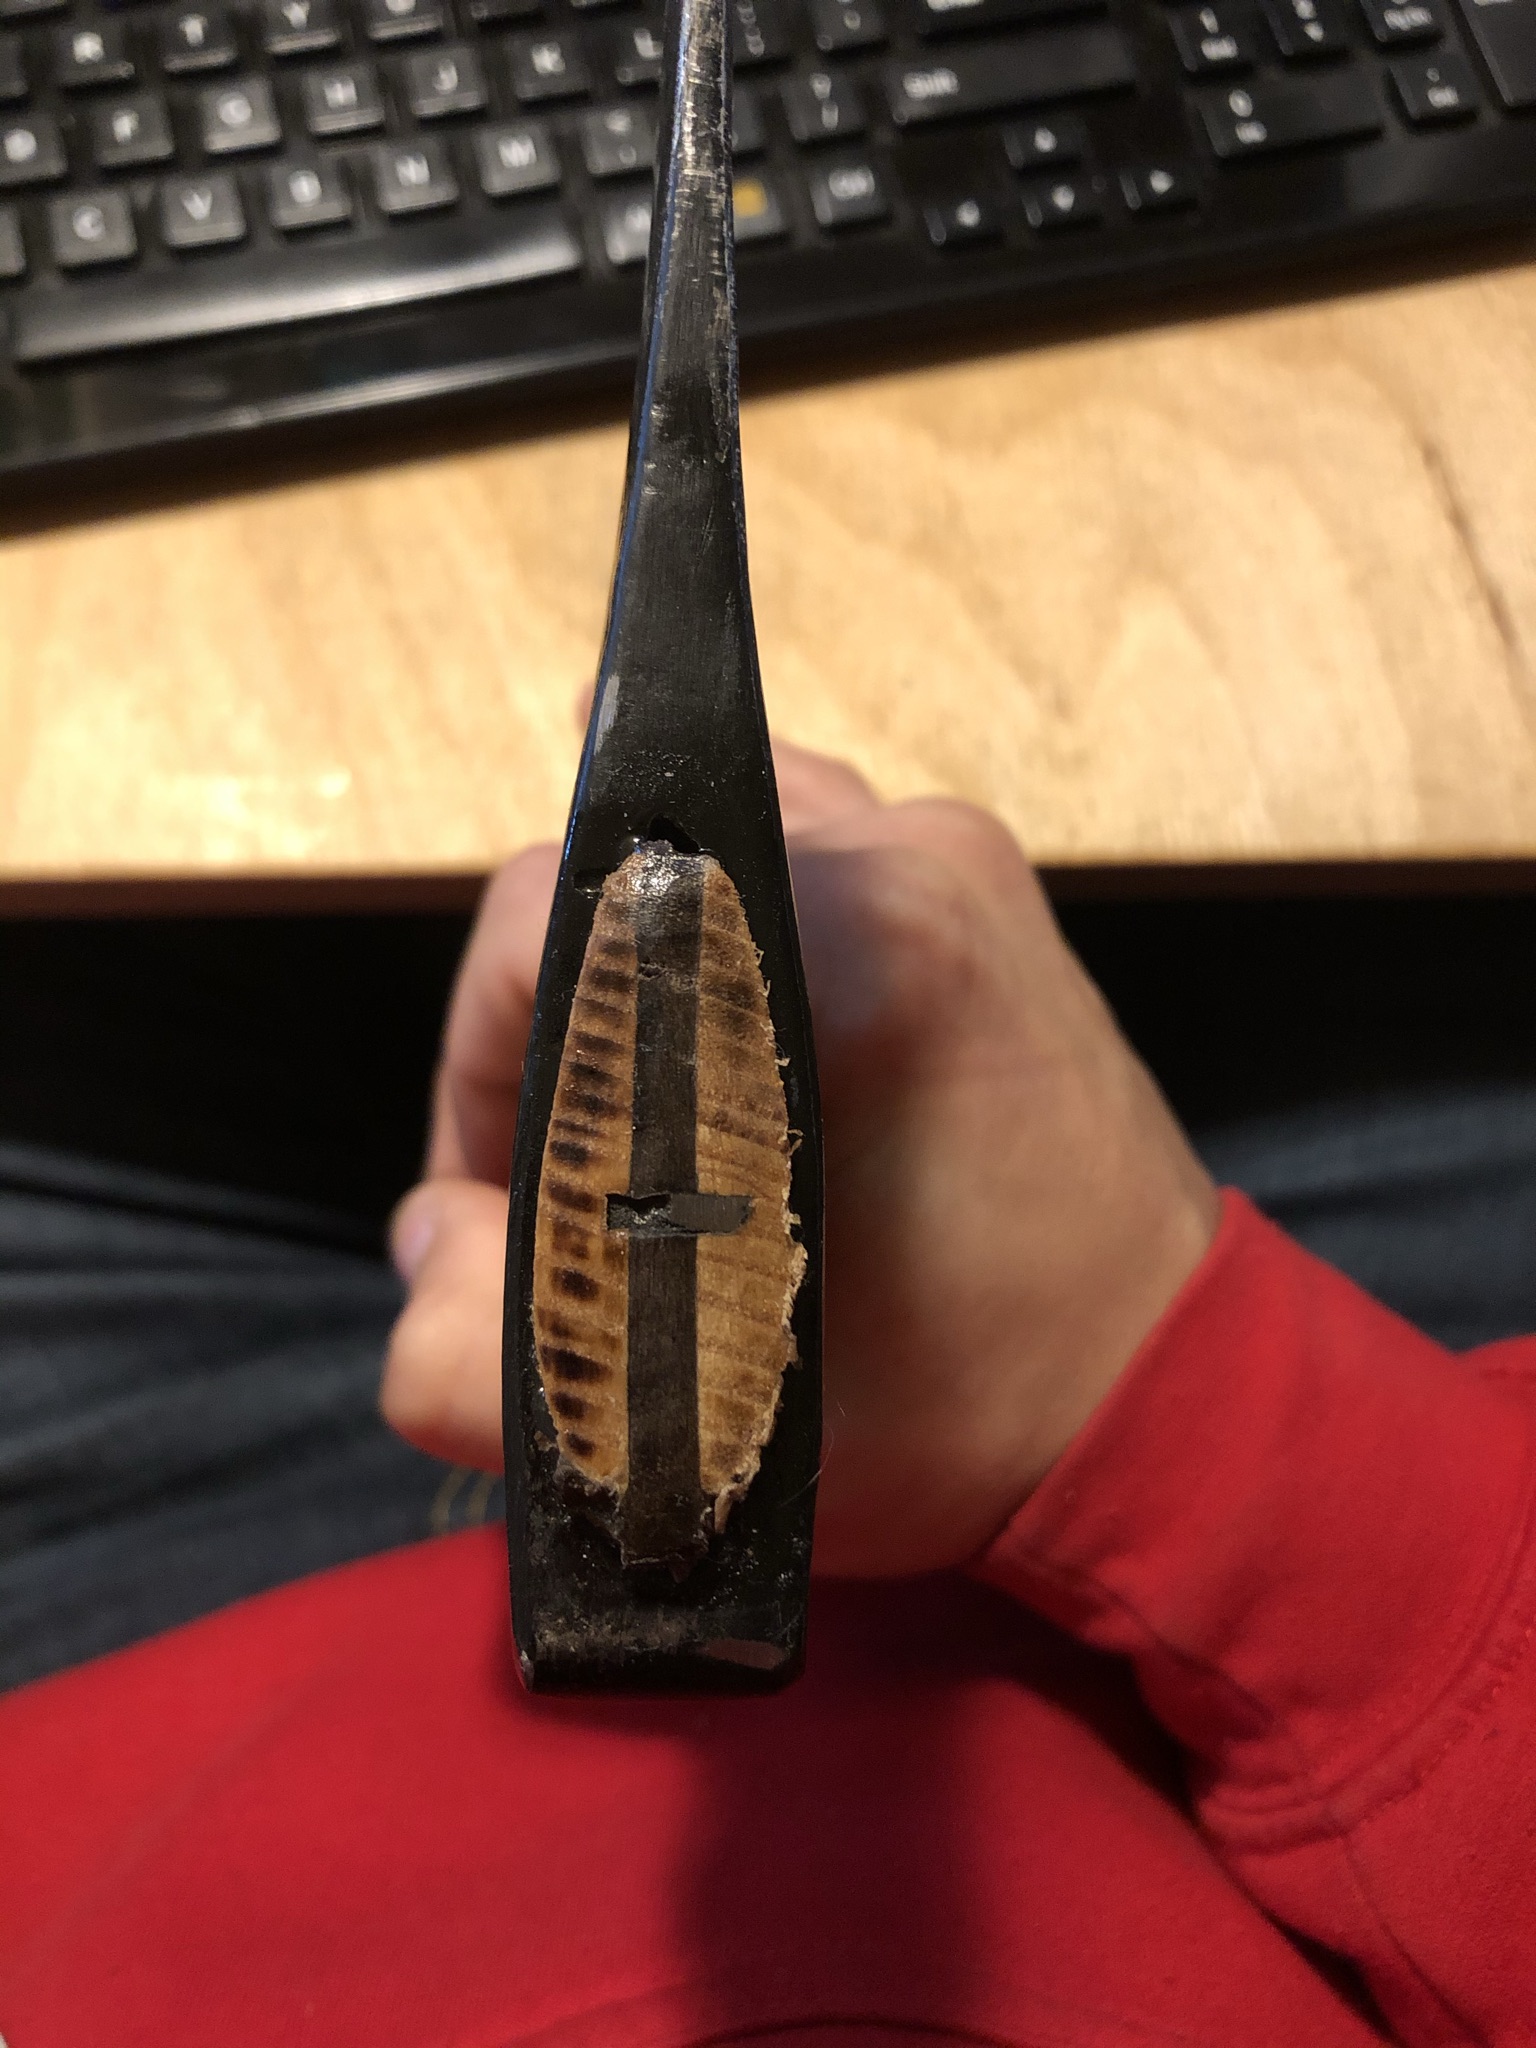
OK so my grain isn’t perfect but it’s pretty good. The best grain orientation for an axe is to run parallel the plane of the blade, as you can see in the pictures below, mine runs perpendicular. The weakest is when the grain run diagonally then it can’t stand up to the impact so well.
I chose to use sapwood, it’s a little more springy than heartwood and has more fibrous cross linking. Don’t use a handle the relies on a boundary between heart and sap wood, the two types respond to stress differently and will likely shear across the interface.
I measured the eye of the axe and added a little extra to pare down during fit up. Cut a relief slot 3/4 the depth of the head, put glue in the relief cut and on the black walnut wedge then drove it home. After an hour or two of glue dry time I filled the bottom of a ziplock with tung oil (all i had) and soaked the head of the completed hatchet overnight for a little extra swell. The metal wedge you see broke of a third of the way in so it’s not really adding much.
If you ever need tips on hanging an axe check out buckin’ billy ray smith on youtube. The man loves his craft.
Finished my branding stamp following this video: https://youtu.be/sso96BuHTj8
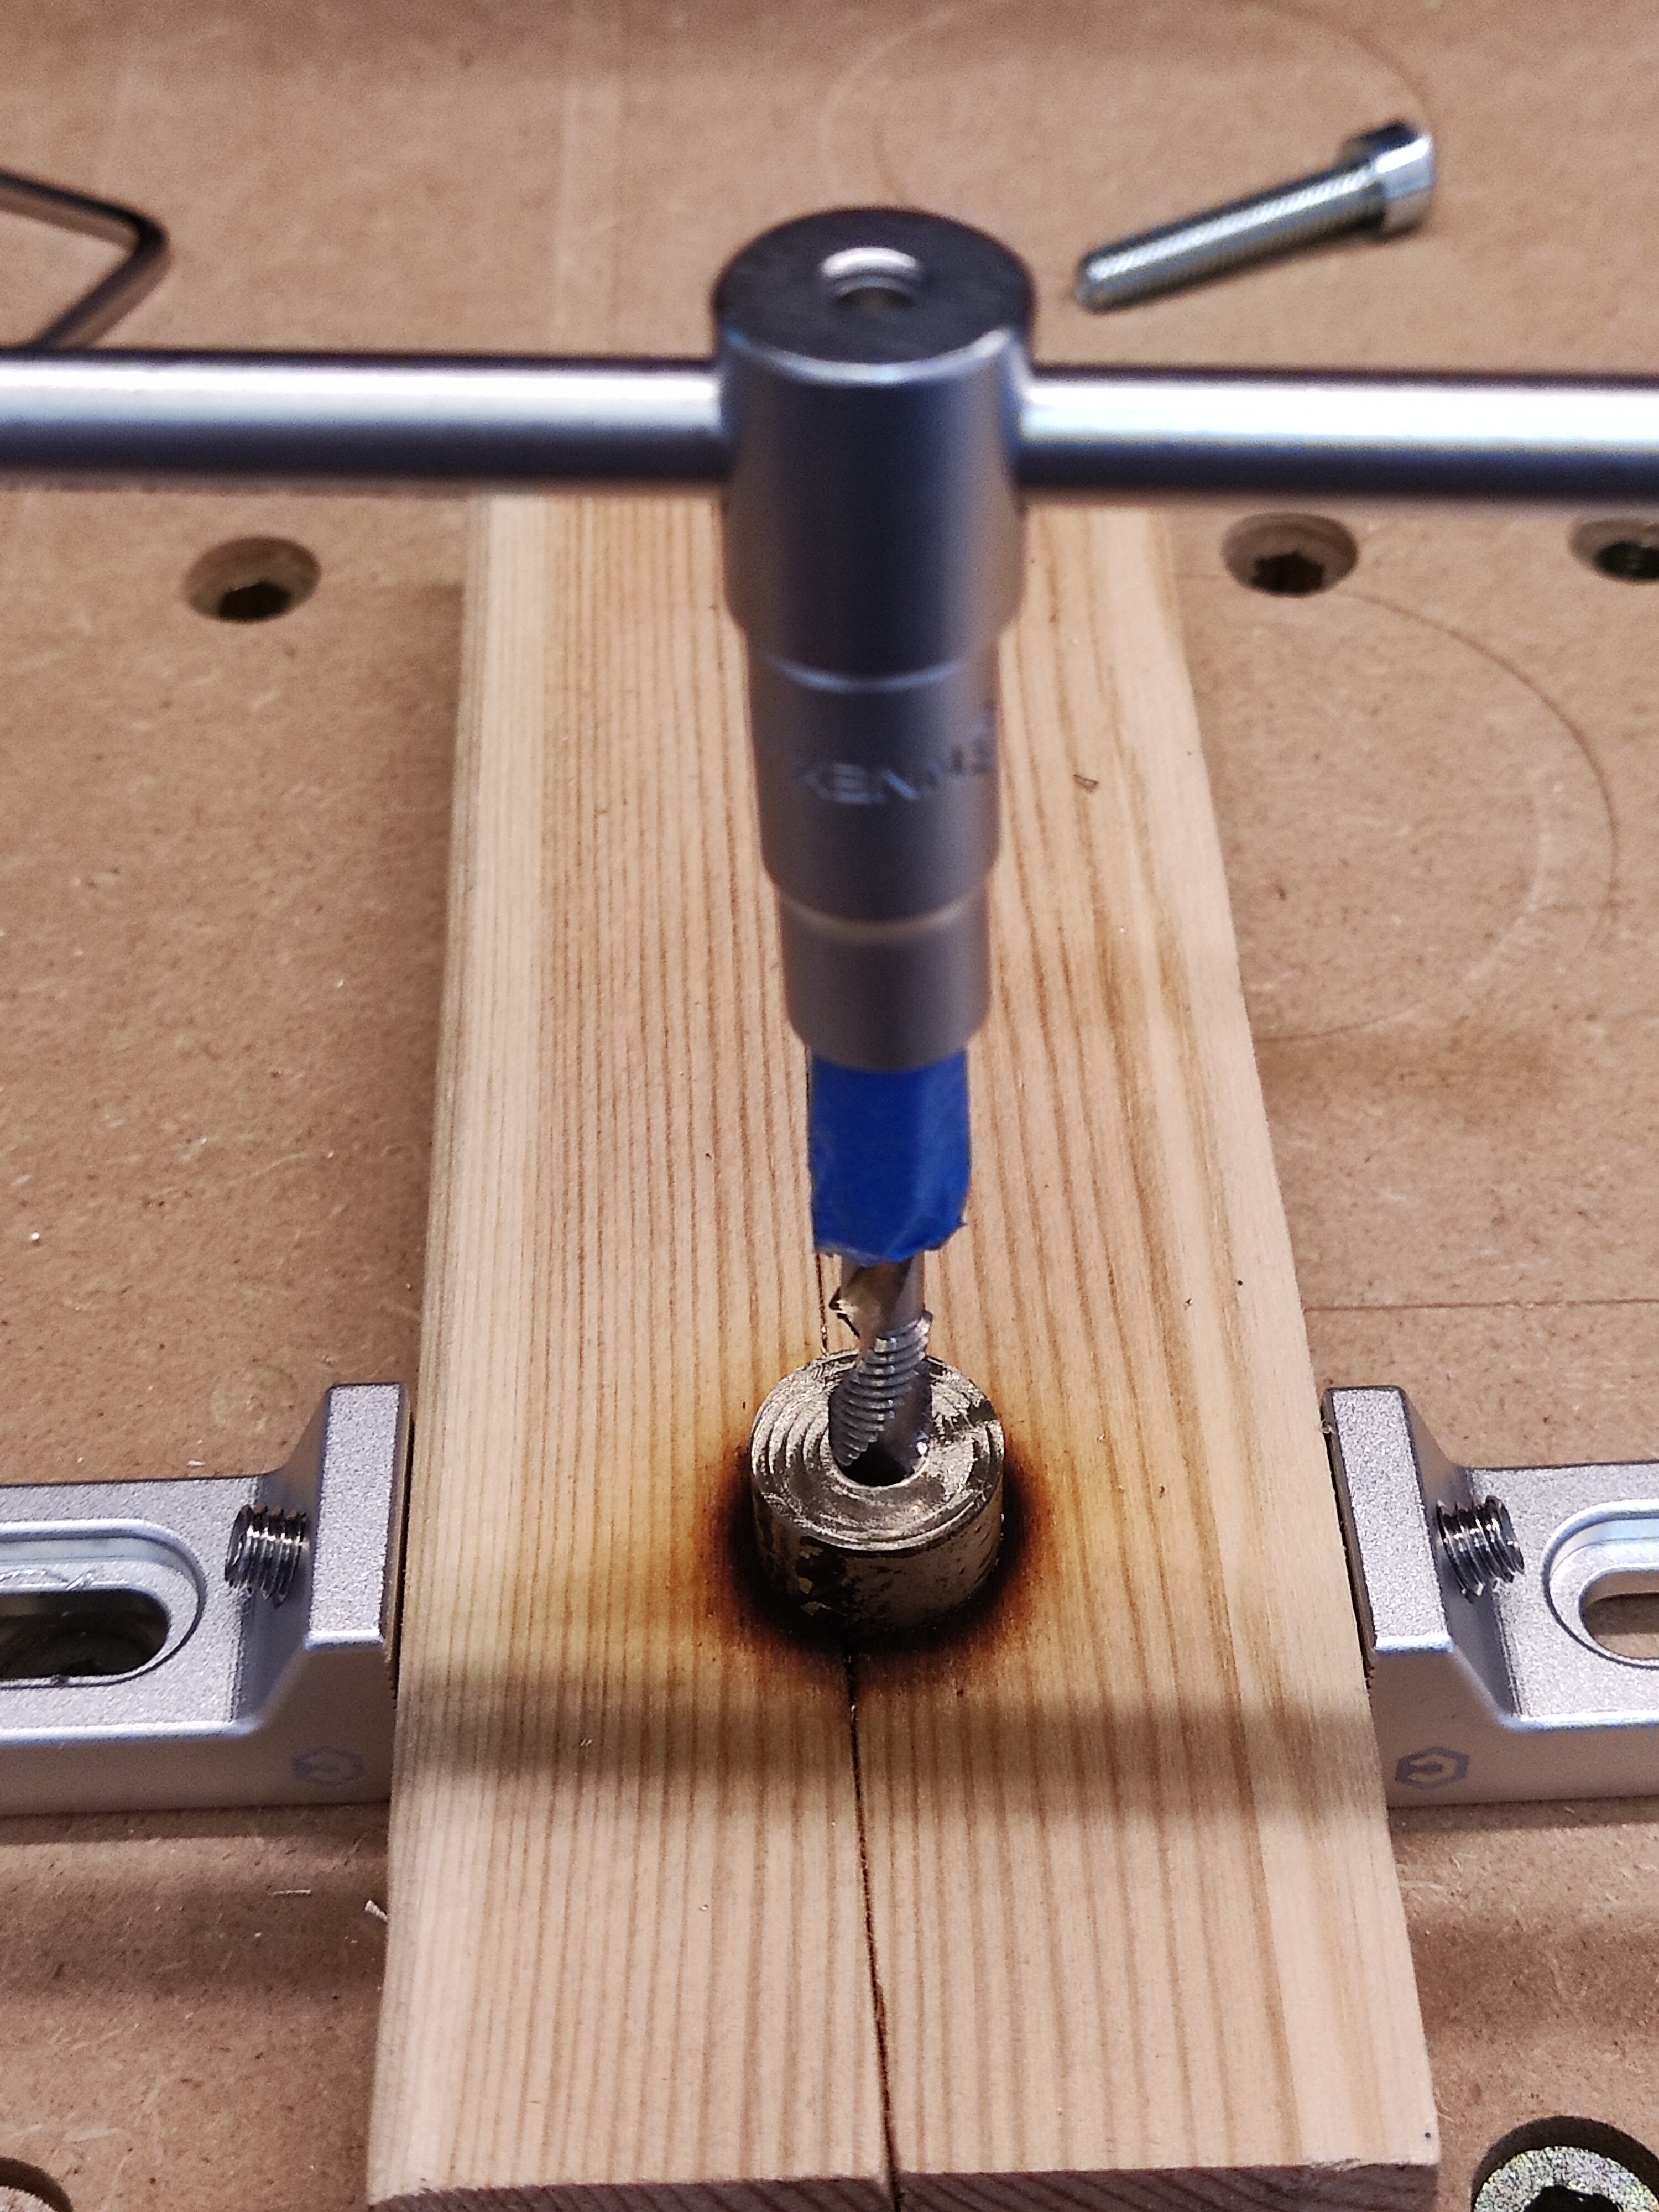
I used the Shapeoko to pre-bore the thread holes perpendicular to the surface, then did the threads manually.
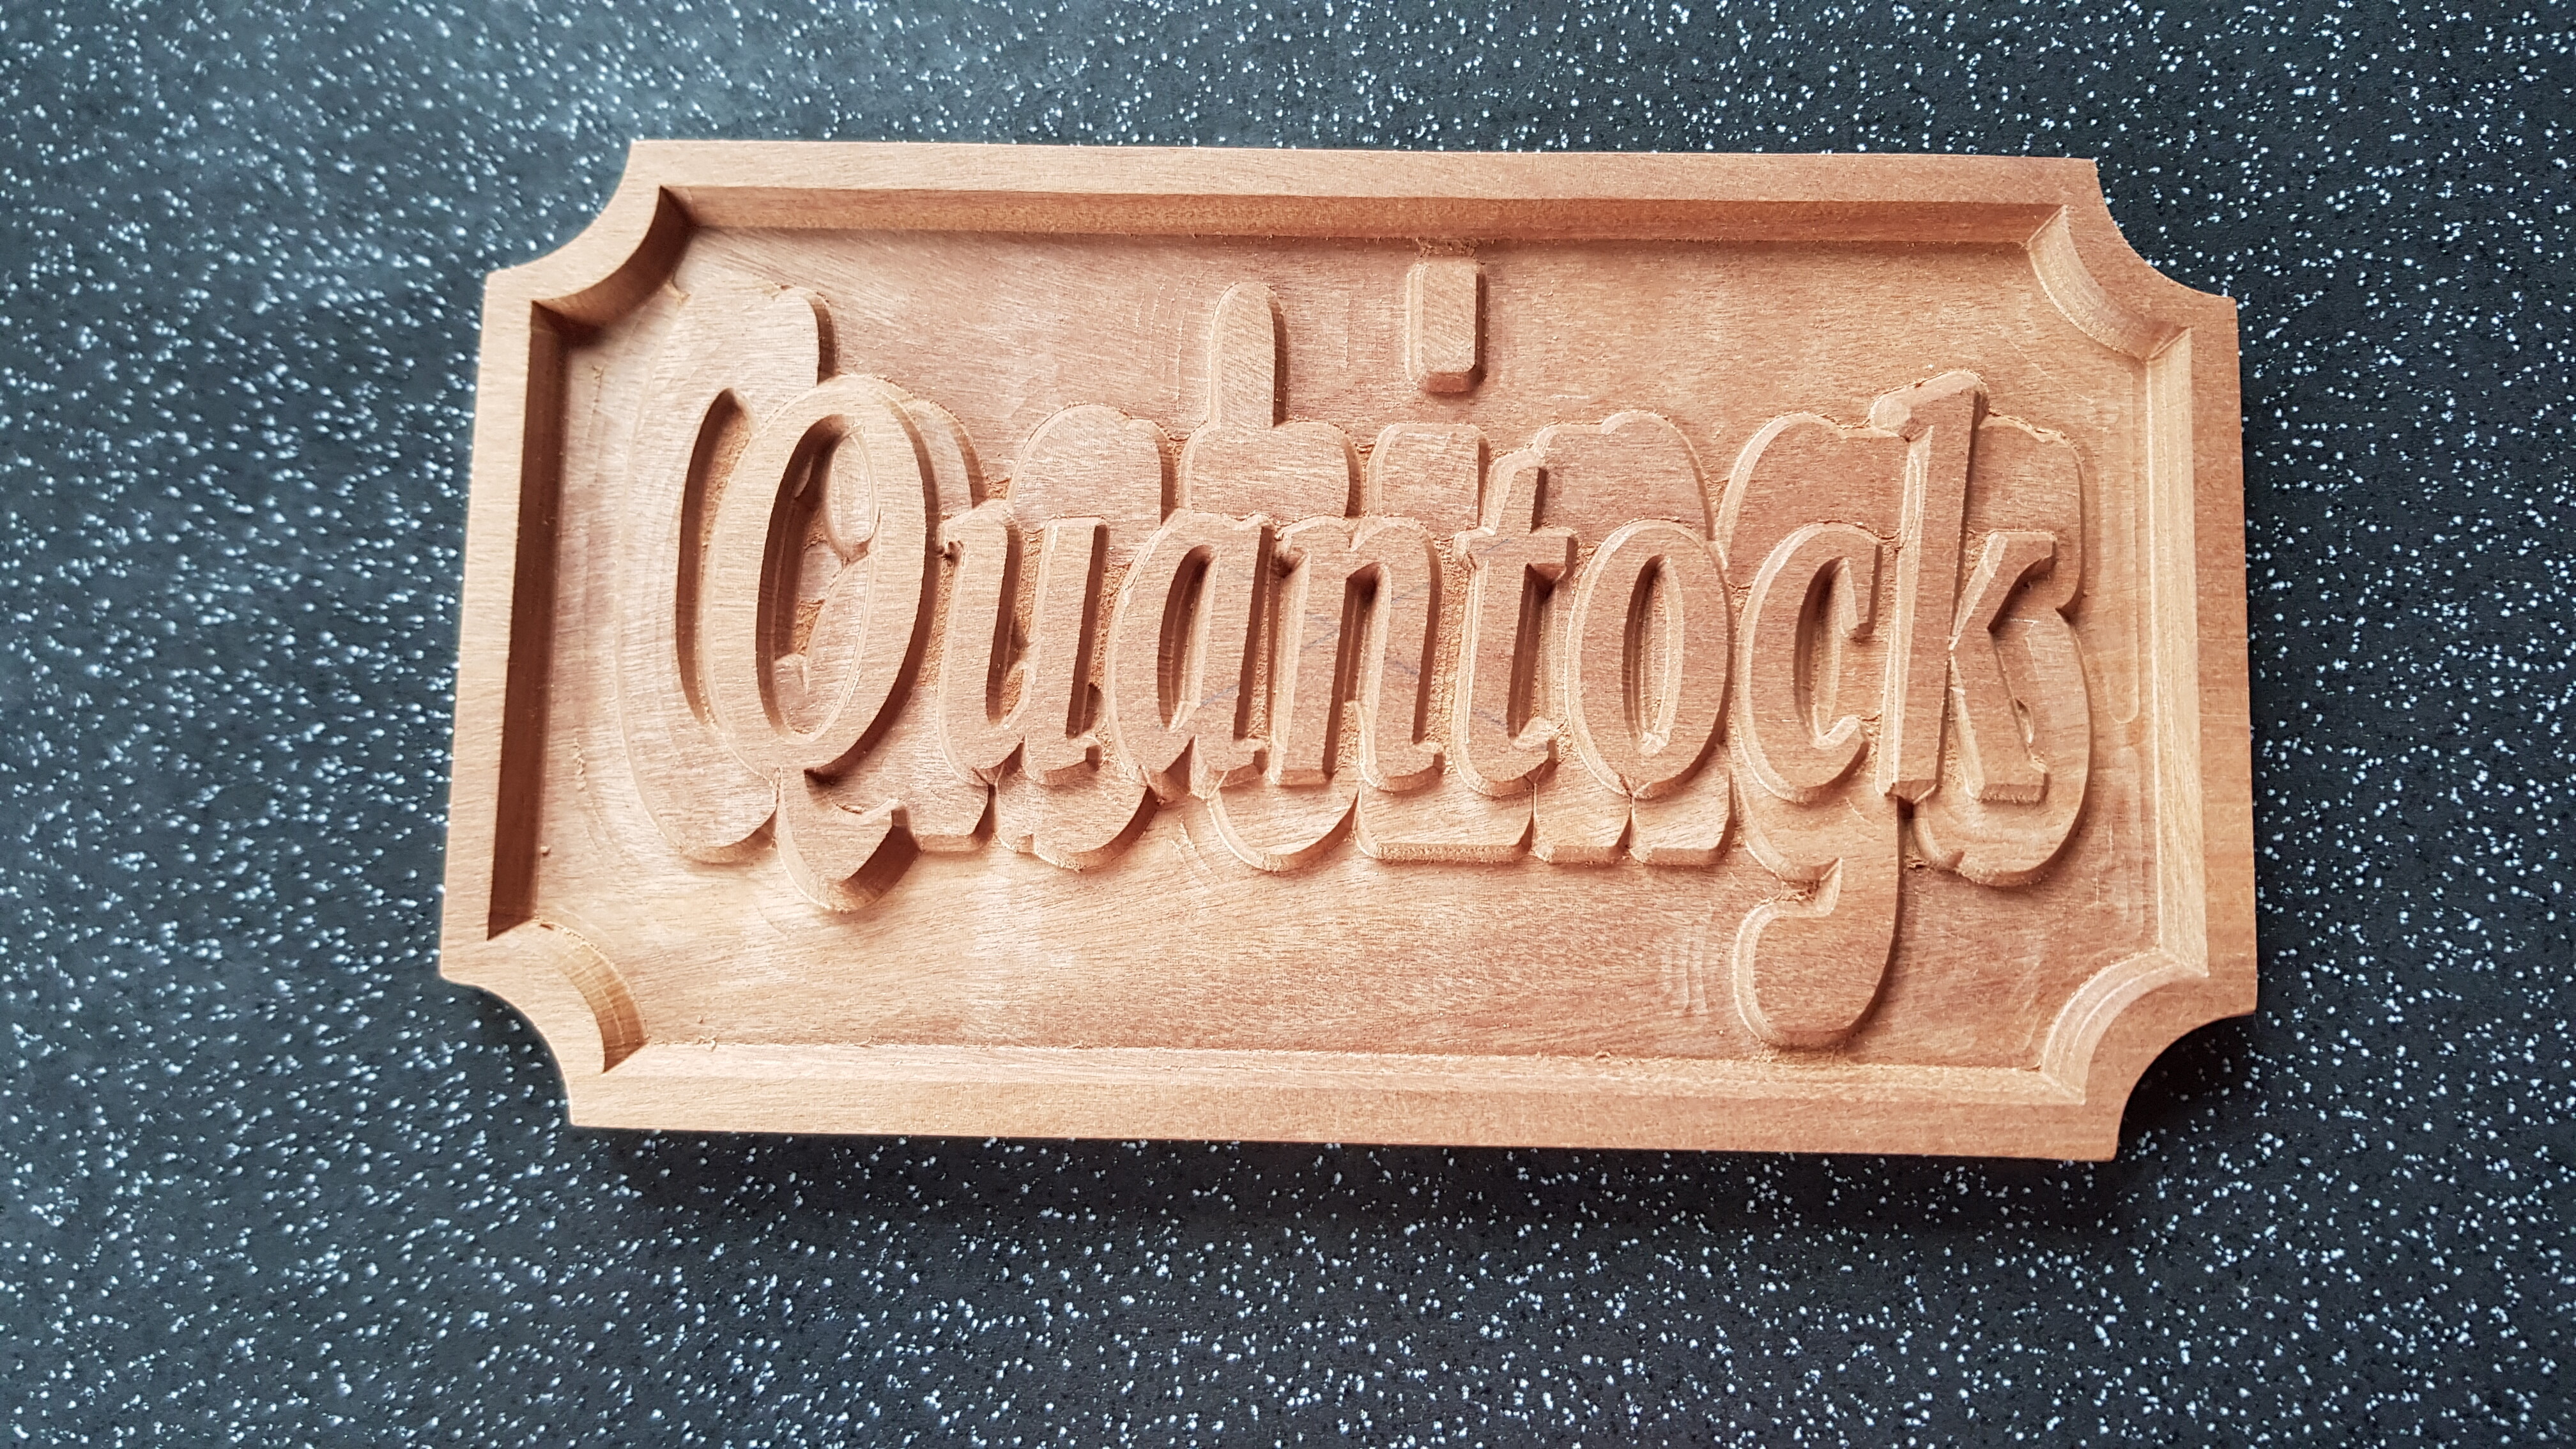
It is about 10" in length, lesson learnt: choose the font type, size and orientation carefully so that the “stacked upon” text can be read! 2nd lesson learnt: if it is to stay as wood, apply finish before cutting (for the top text).
I thought I would see how it looked when cast in brass and the top letters polished and the background patinated. The back text was left as cast, with sand marks.
Thanks Jeff & Graham. Yes it is just a 1/16" flat end mill for the pocketing operation, followed by the 60 degree v-bit. Chris Powell has made a good video of how to design & cut stacked text, the key is in the boolean union operation.
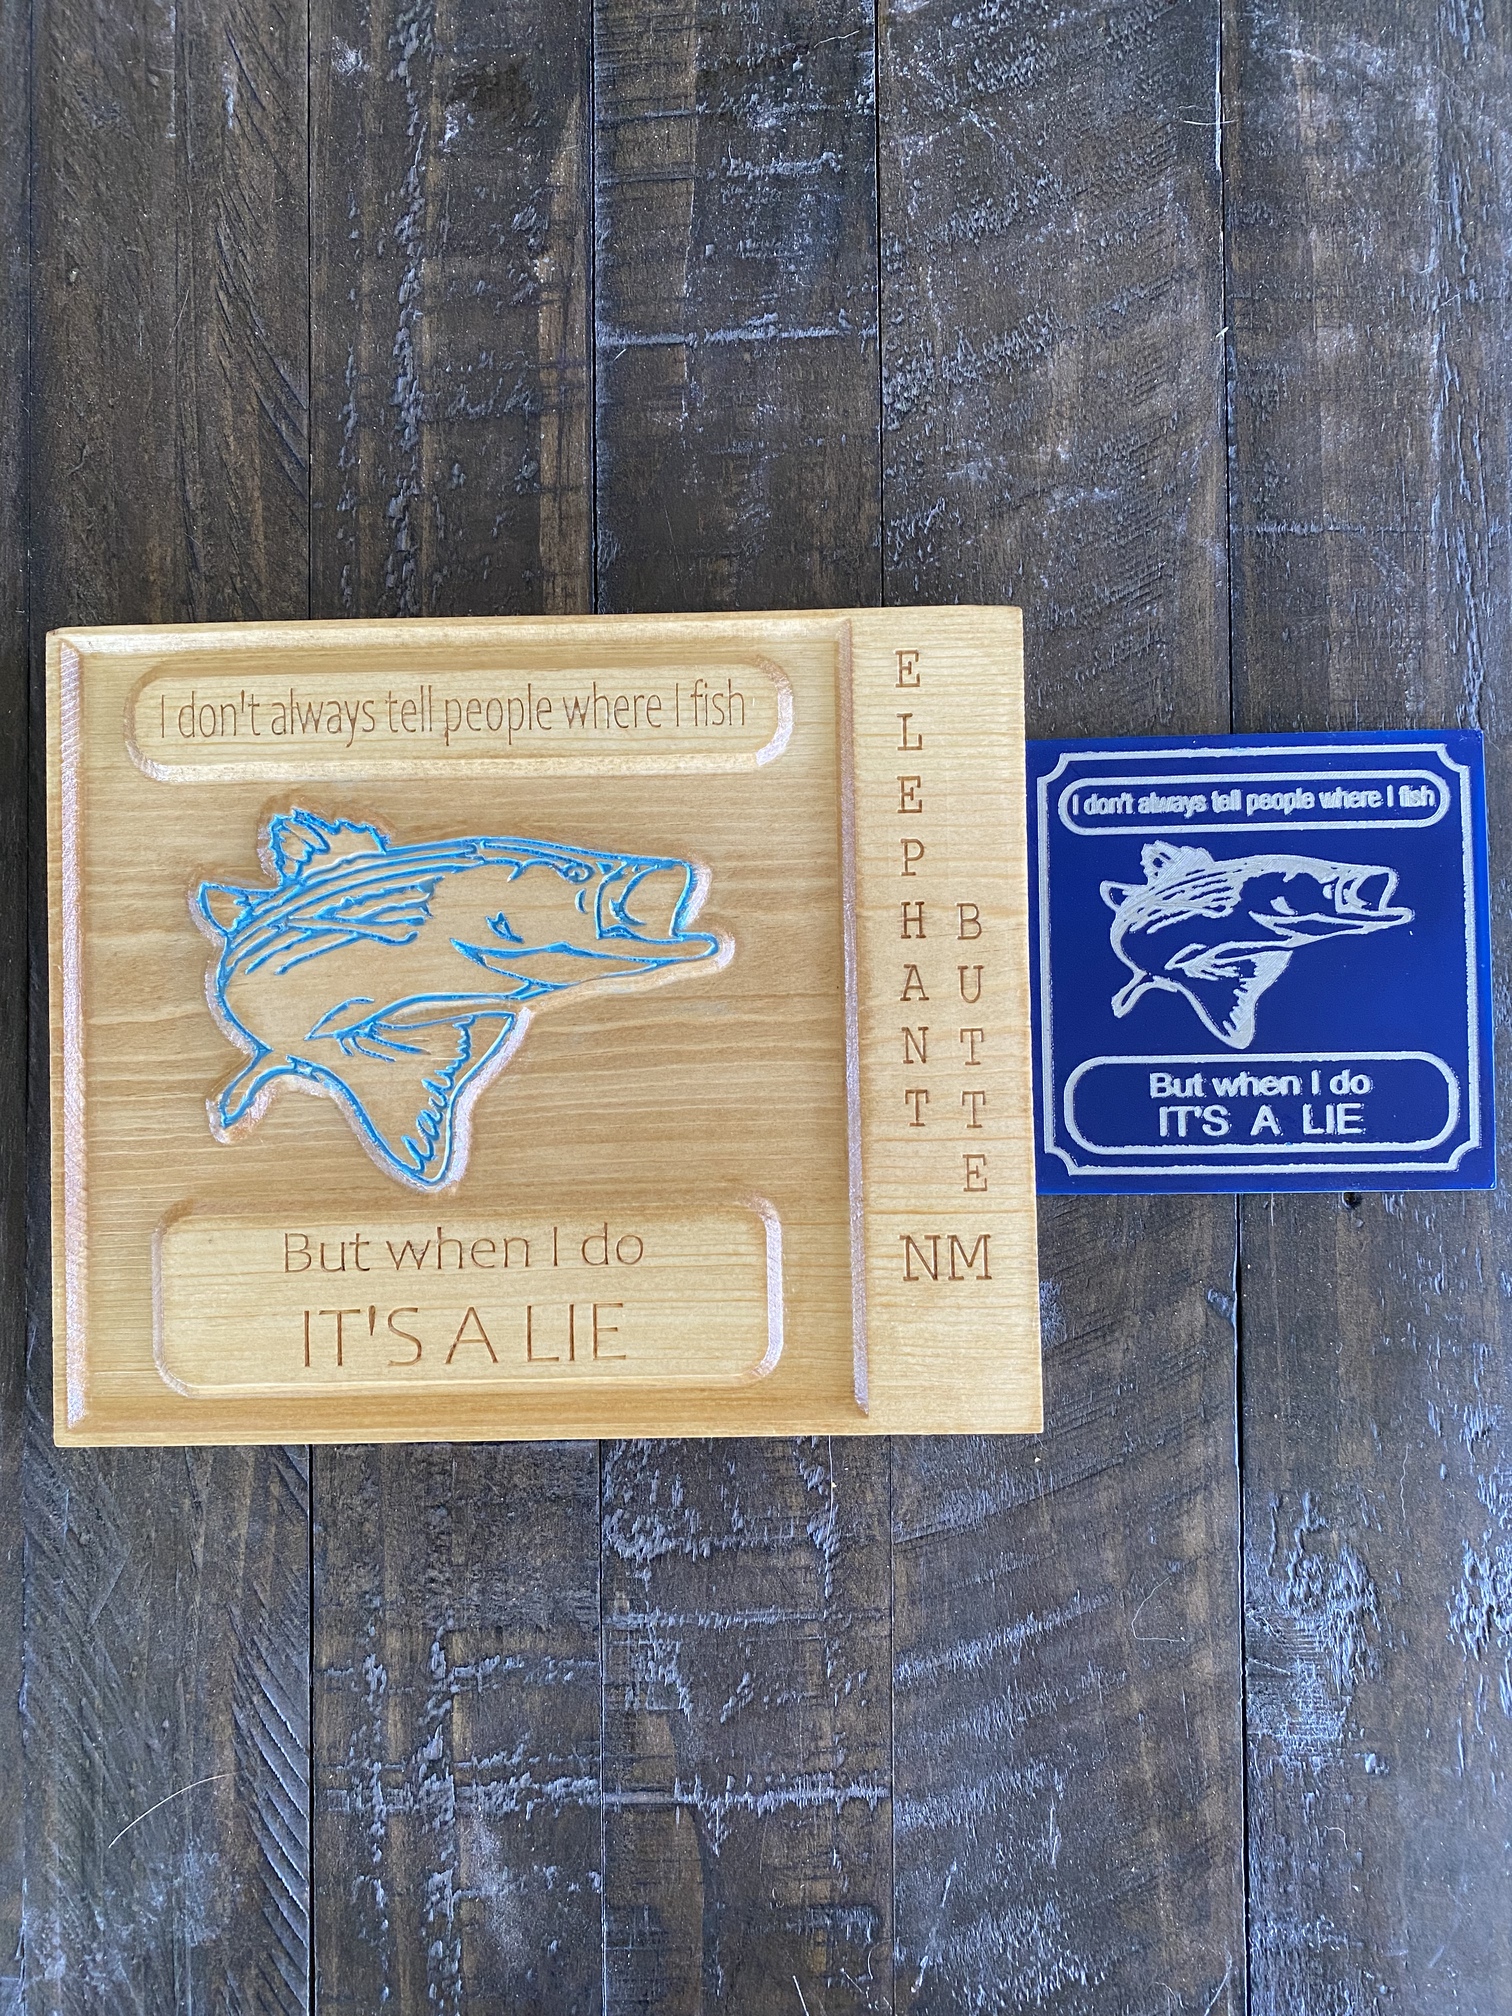
The wood is Danta, left over from a project many years ago. It is BY FAR the nicest wood I have cut on the Shapeoko, no clean up required at all. It cuts like soap, I wish I had more.
Guy, it is not paint but a patination reaction to chemicals. I mixed Copper Nitrate crystals in a little water and applied it whilst heating with a blow lamp. Depending on the concentration (of the liquid & amount of heat applied) different colours can be achieved. Today I patinated a 6" dragon fly I cast at the same time (no cnc involvement) . This was left in a plastic tub of wood chips soaked in ammonia, it came out a lovely mottled blue.
David Marks has a patena process he uses on wood turnings. He gets fantastic results. David Marks has a school and studio in California and has several TV series on woodworking. Look him up for additional inspiration.
There is no cheating. A craftsman uses the tools they have available. The cnc is a great asset but it is not the be all end all. Use any tool available.
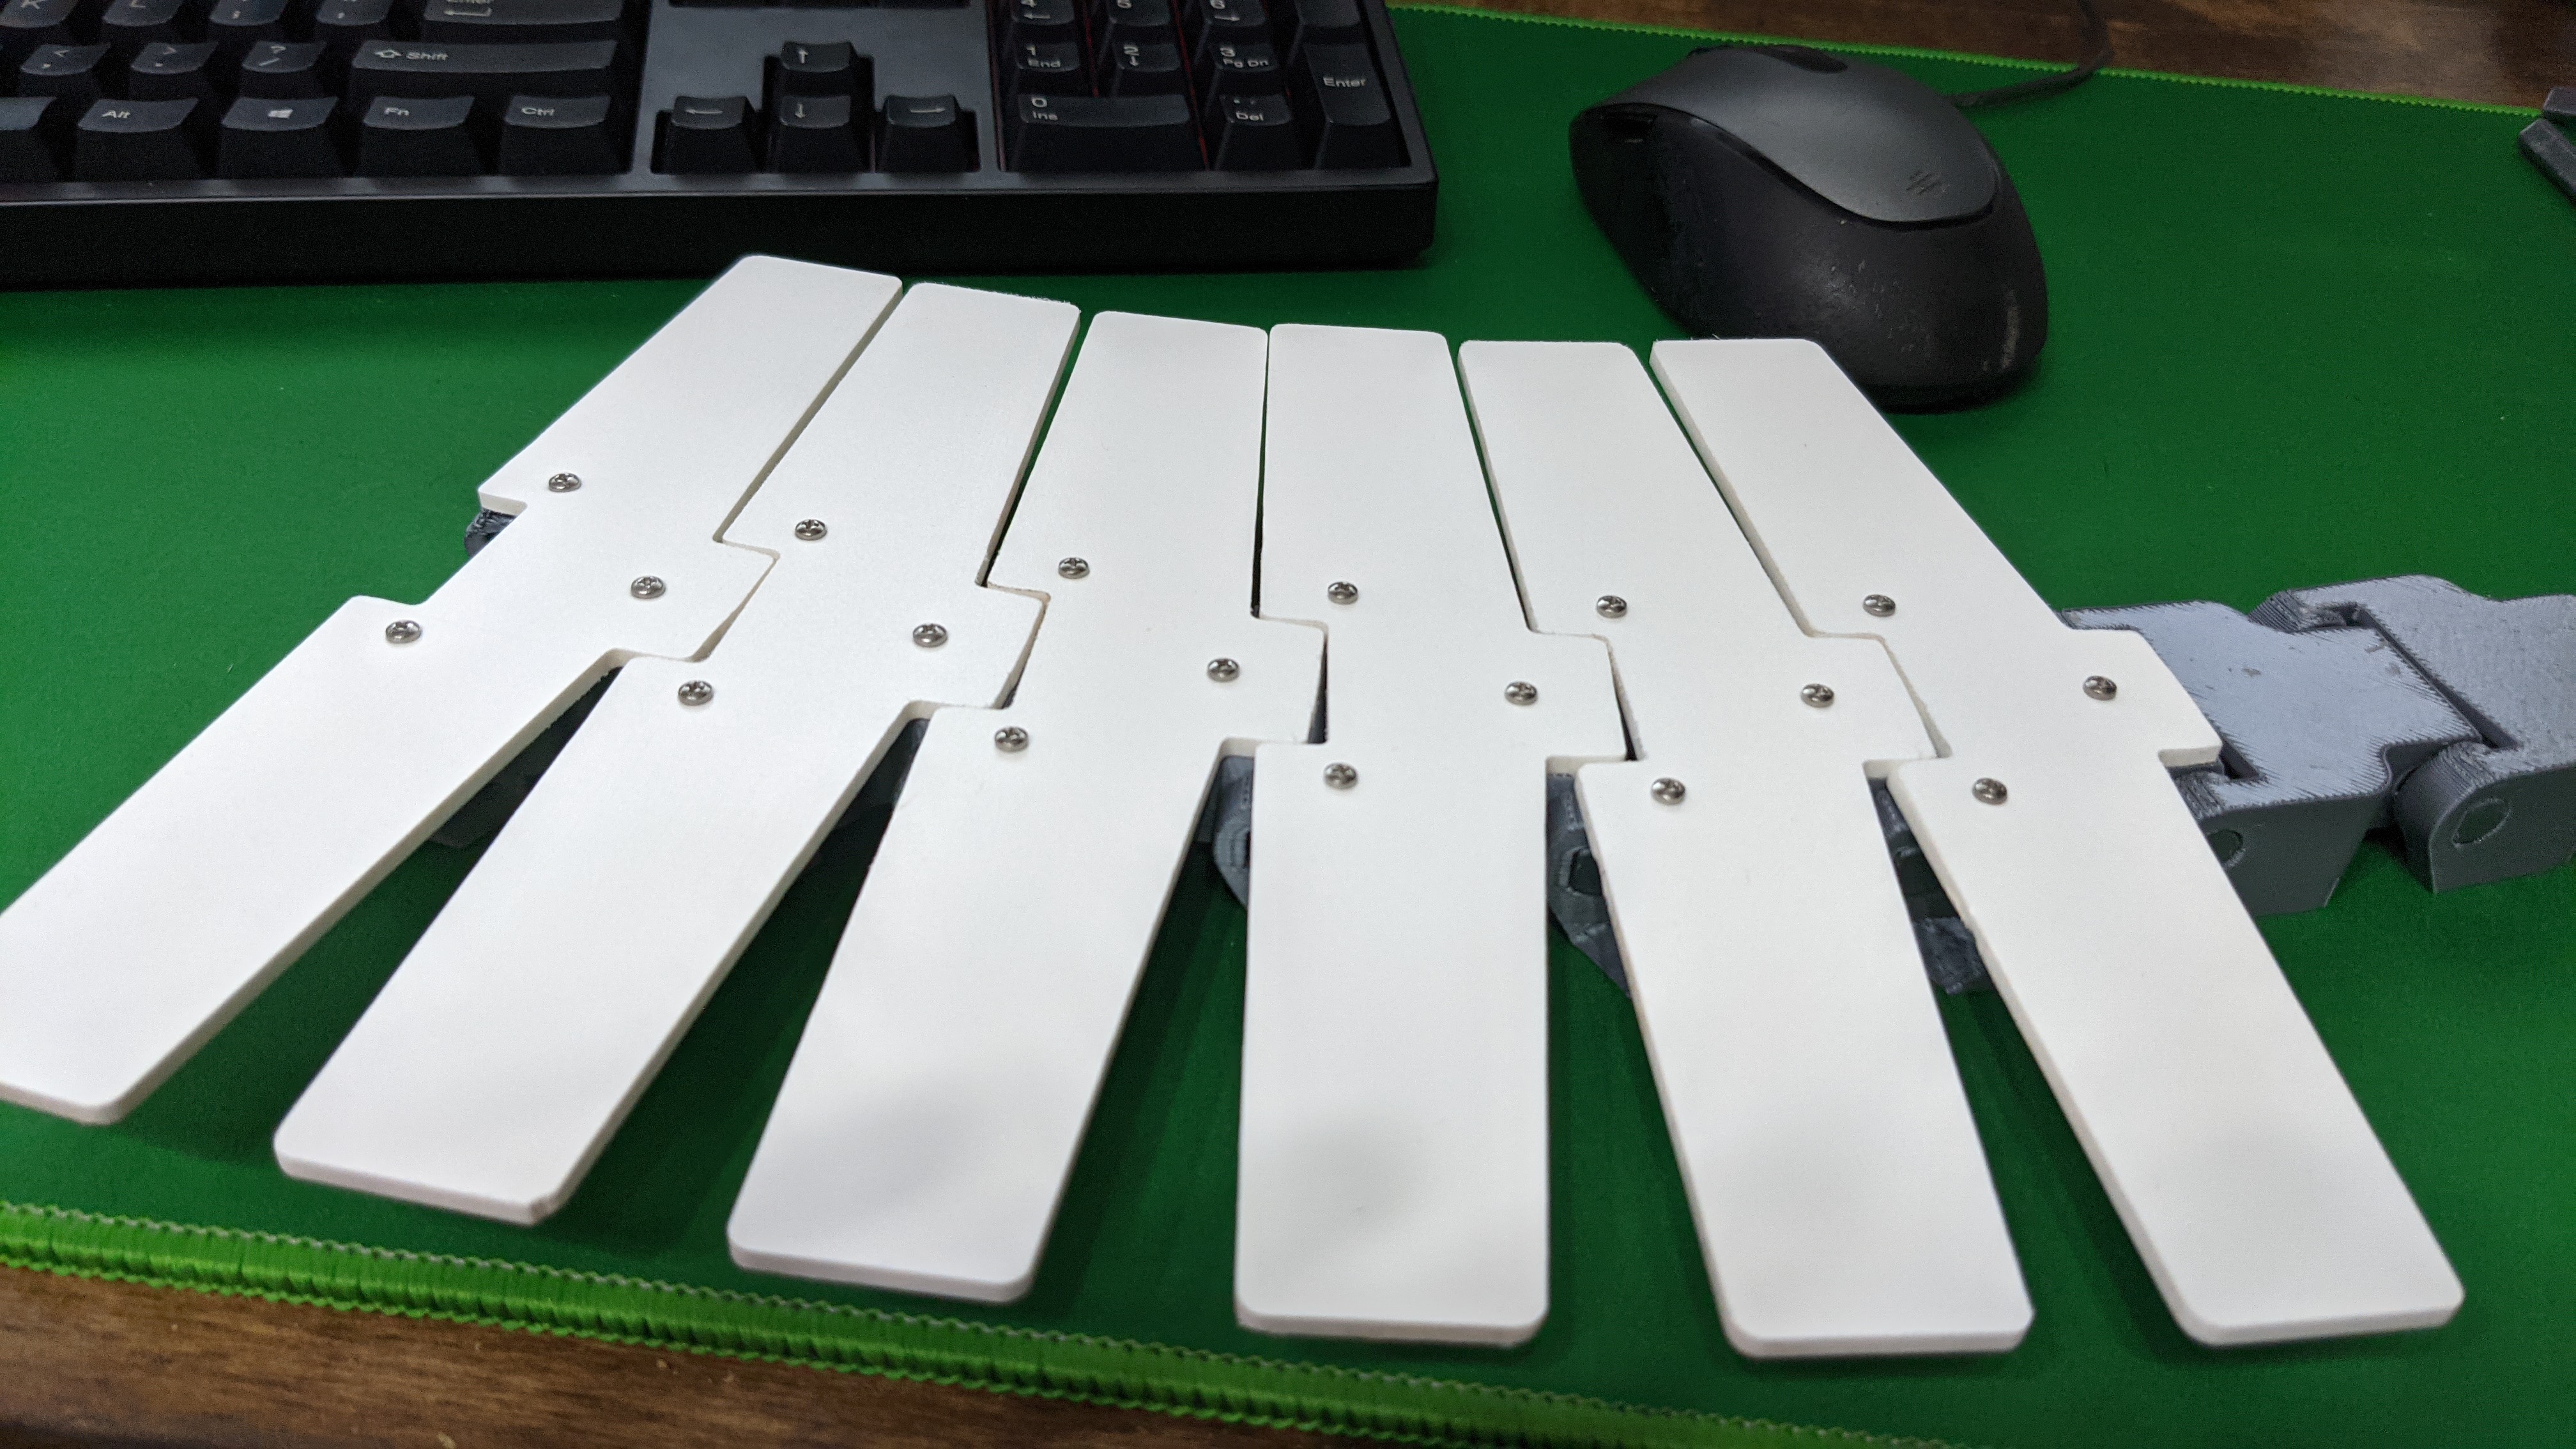
a) Custom PVC slats for a robotic slat conveyor - will go through curves and elevation changes.
Directly printed using UV ink for excessive branding (playing around with another new machine!).
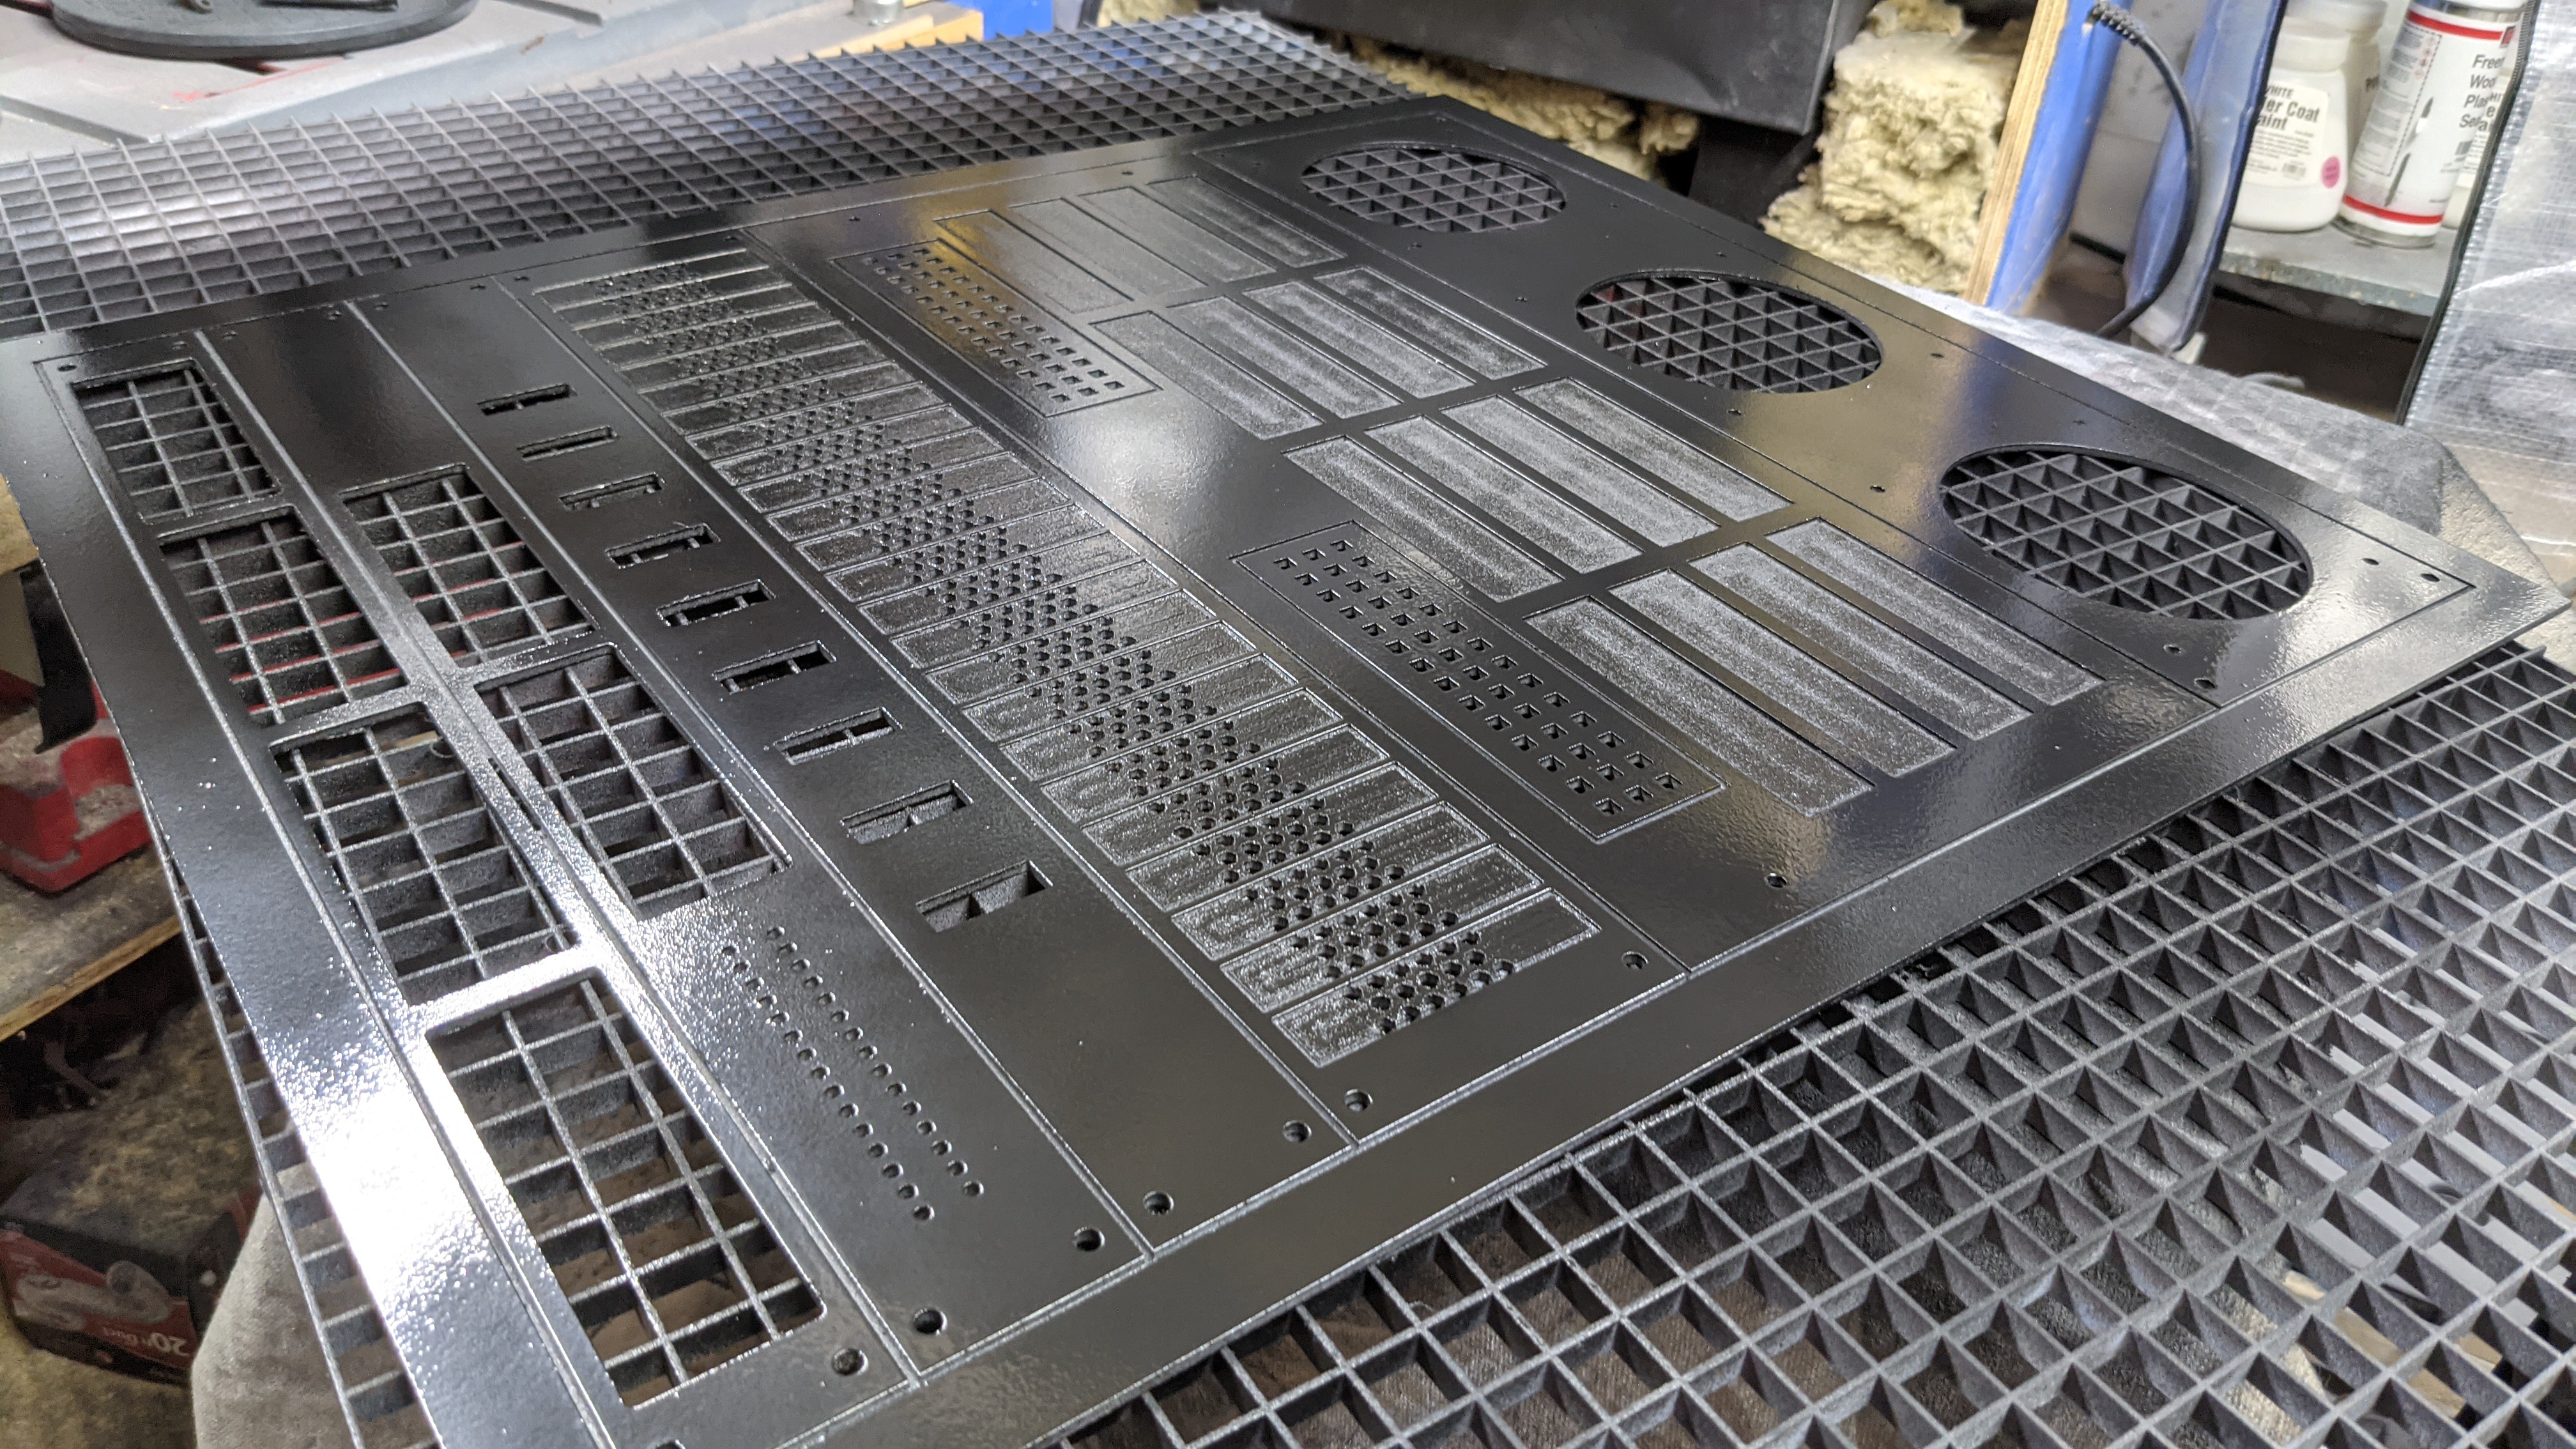
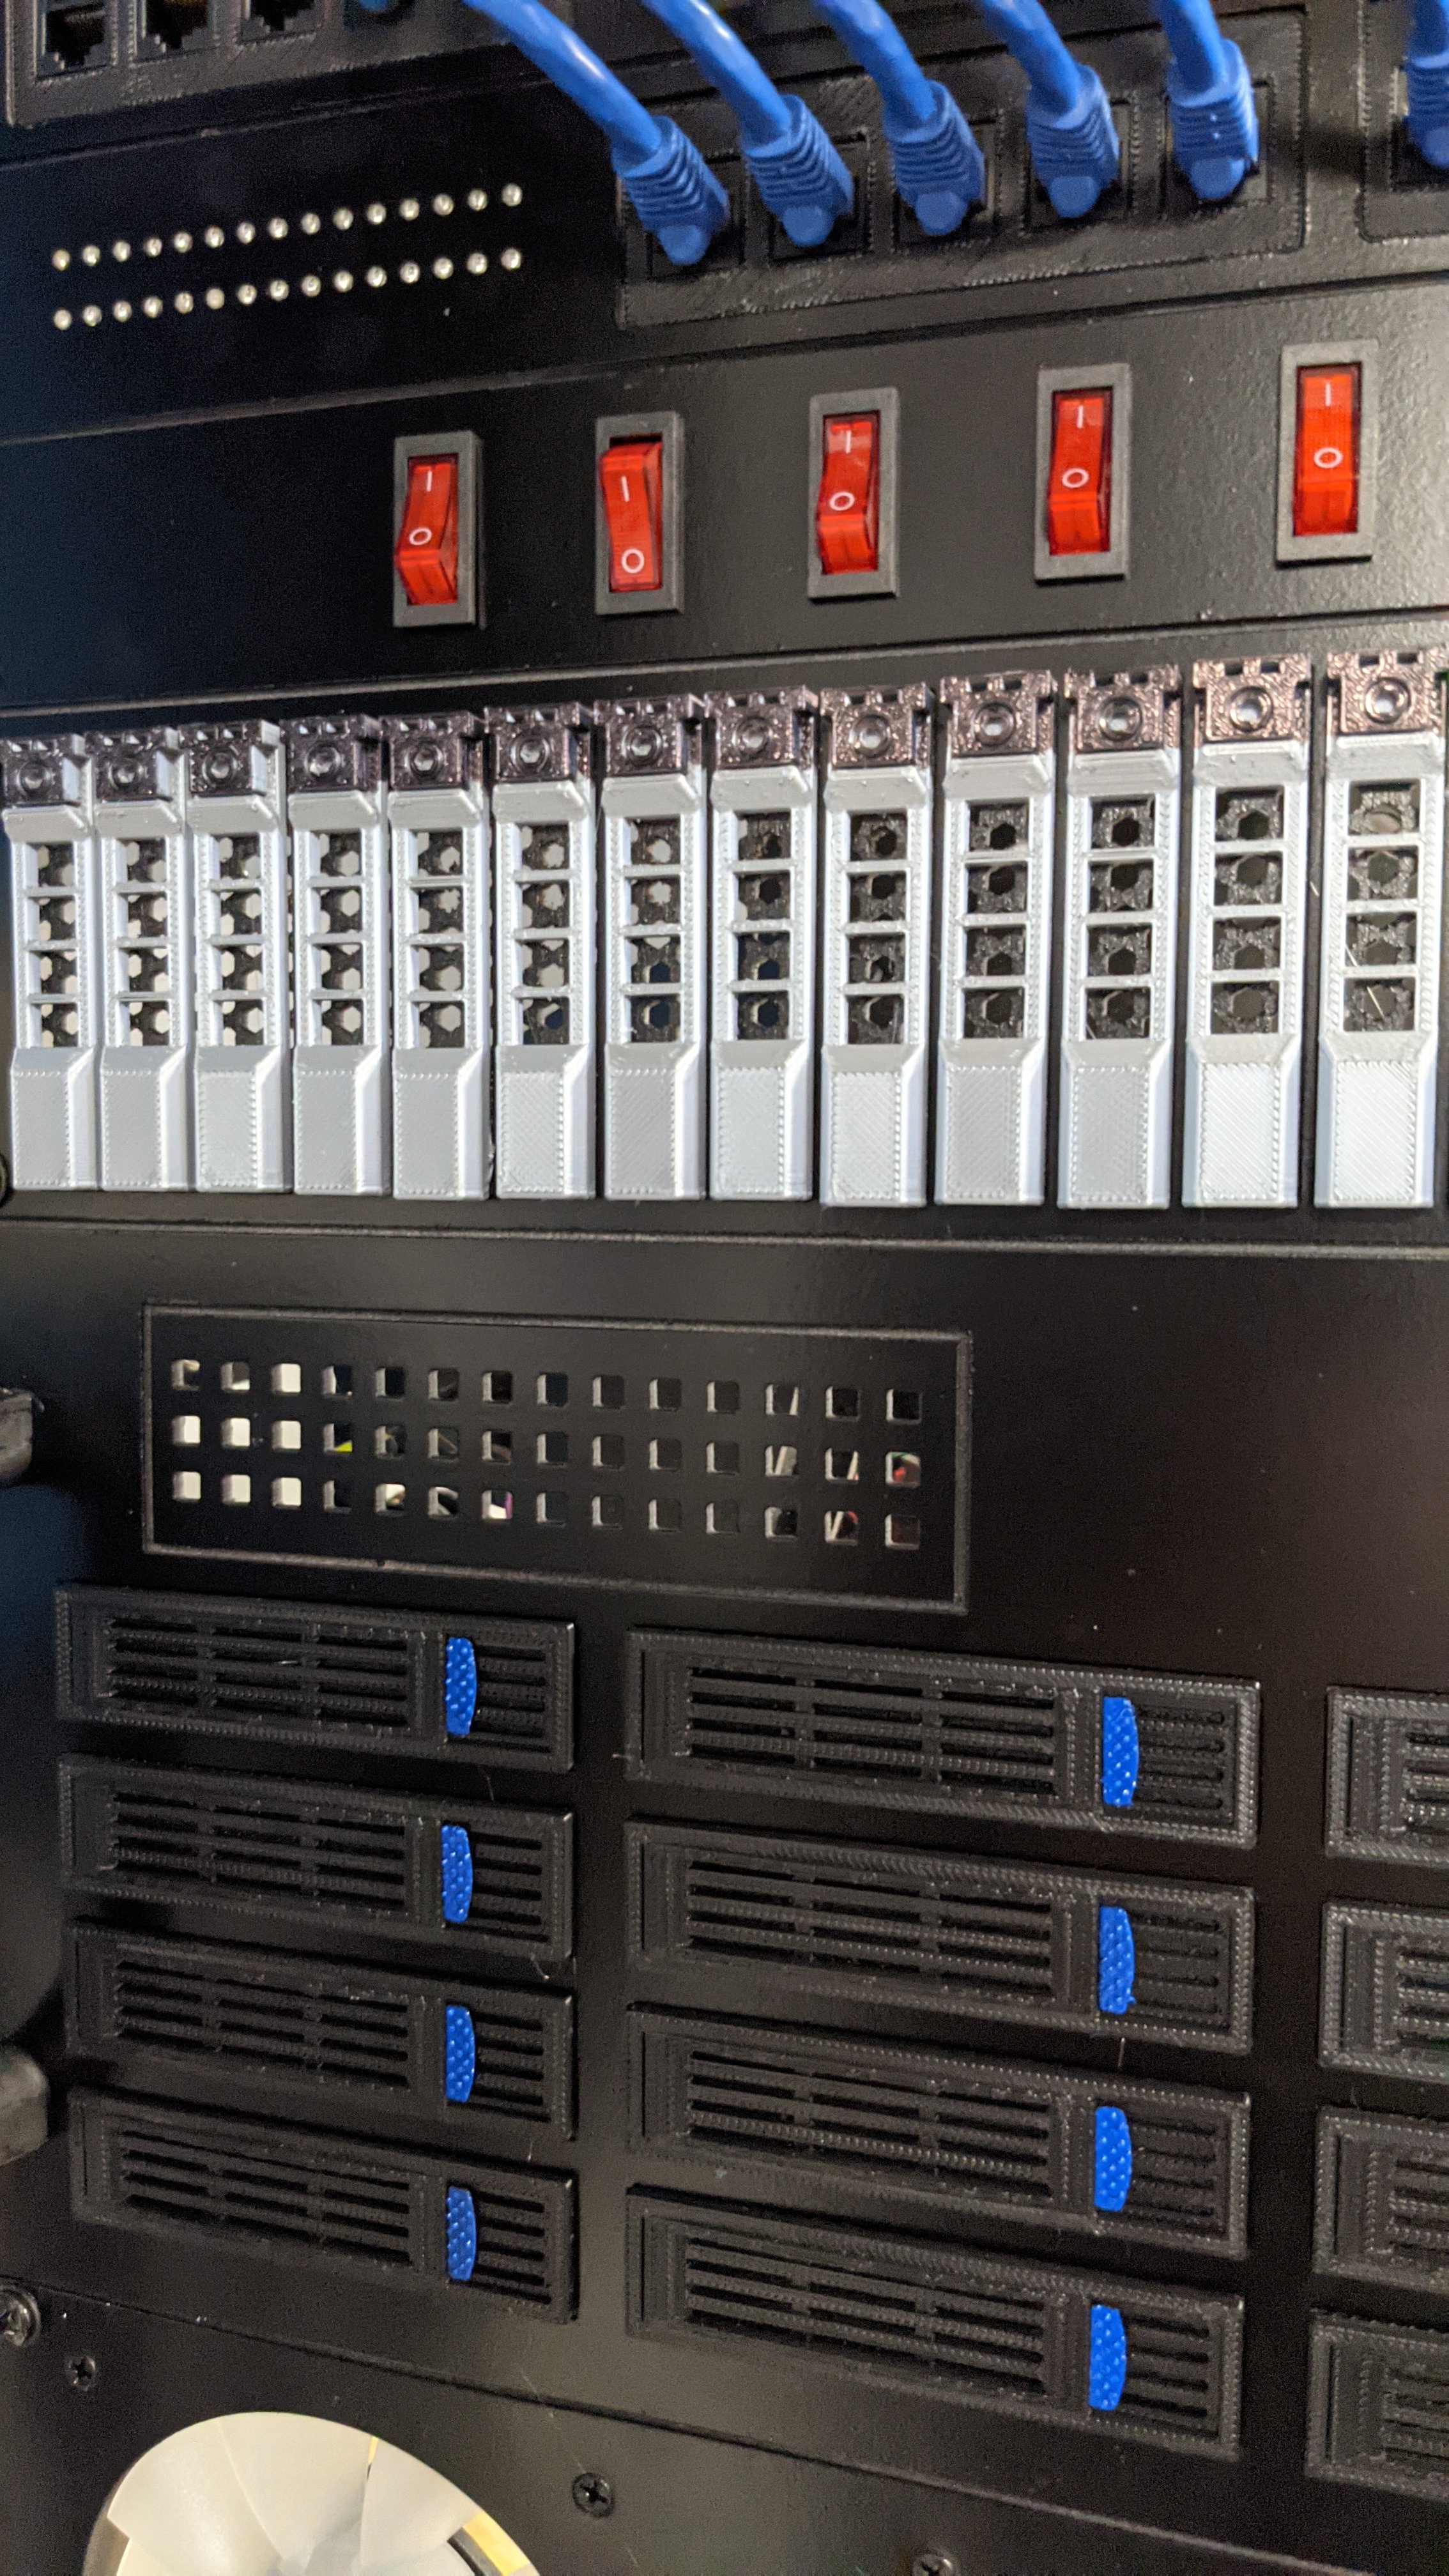
b) Server rack prop, probably deserves its own post at some point. PVC backer, painted, with 3D printed and real parts attached. Activity lights will go blinky blink, and fans light up and spin. All CAM done for this in Carbide Create, which was fun due to the tiny geometries. It handled it just fine, only the human complained
Thanks! I’d like to at some point, but so far just things I want or for informal projects. I modeled this after some specific patch panels, PDU, and storage, so it should look pretty real
That kit looks pretty good. I would like one but I have not cut vinyl and most likely wont. However if I had one I might. Should I or Shouldnt I. What a shinny new toy.