I did find that and will give it a try. Puzzle only took 15 min to cut out and I have 8 grandkids so will be making more puzzles for Xmas presents.
For more on jigsaw puzzles see:
I might steal (leverage) this one for my grandkids (5) too. ![]() Christmas is coming up
Christmas is coming up ![]()
I’ll upload the cc file
link to CC file. customize per your needs.
@MikeG
I just used some glued edge pine board.
Carved it, then spray painted everything black.
Then I par sanded the top surface, and went over it with some white oil pastel.
Then finished with some spray polly.
It doesn’t look like you added any relief between the pieces. (kerf)
Another way to do this would be to ‘lie like hell’ and tell the software you are using a 0.115" tool and then cut it on the machine with your 0.125" tool. This would take an extra 0.005" off of each cut, leaving you with a little kerf to allow the parts to easily slip together.
That’s what I actually did. I use a 2mm end mill but picked 1/16… it seemed to work just fine
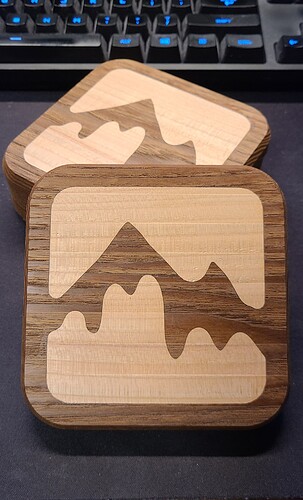
Yes another set of coasters today and very pleased with how the inlay turned out. That said I did notice I really need to tram the spindle. I had removed the aluminum shim when I swapped the router for the spindle and didn’t really bother checking if I needed some adjustments. I was usually surfacing stock front to back and that looked fine however today I surfaced the coasters left to right and saw how off it was. Will have to do the full maintenance routine this upcoming weekend.
How will you finish the wood? Do you put cork or another material underneath. I found sheets of 1’x1’ Cork at Ikea and have been whittling it down little by little. The Ikea cork does not have any adhesive so I use 3M 77 spray adhesive to attach my cork.
I have used PSA velvet in the past but that has gotten too expensive. I looked at the flocking kits but they make a terrible mess.
Nice coasters.
Good looking coasters. Have you thought of adding to the set by reversing the wood types?
With the mountains in maple it would look like a winter scene.
Great suggestion but right now I only have 1" thick boards/stock which means alot of wasted materials on the inlay side as you turn most of it into sawdust. I need to get a bandsaw so I can resaw the 1" materials into thinner pieces for the inlay side. I went with the cherry inlay because I got my hands on some thins stock, pretty sure they were selling with guitar fret boards in mind but it was perfect for this project. Ill be visiting my uncle who has a workshop with all the tools, I’ll have to mill some of my stock while there to do this.
I found a roll of 1/16 cork, was thinking of machining a 1/32 pocket on the underside to know where to apply CA glue to bond the cork. For finish a clear coat of minwax perhaps but havent thought that far out yet.
I’ve had really good results with these cork discs.
No doubt that some of the steely eyed users here will know exactly where this design came from and how it differs from the original.
That is a nice edge.
Ever wished that you hadn’t had that “bright idea”!
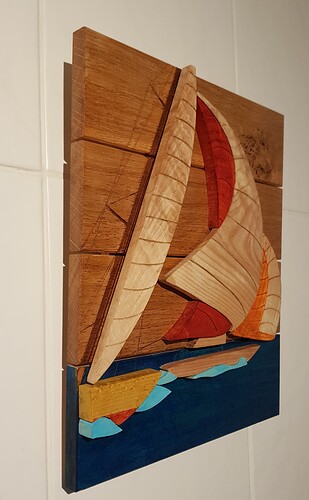
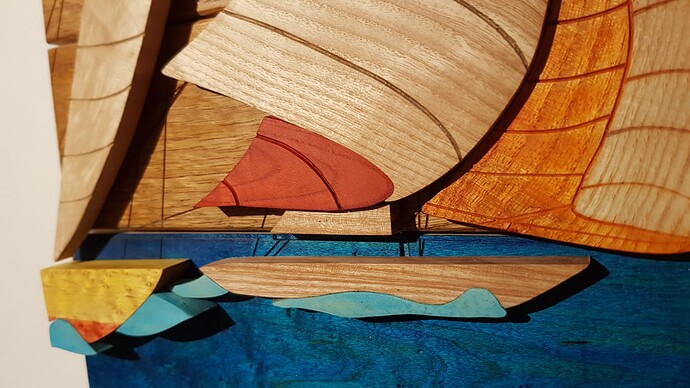
I came across this photo on-line and thought that I could use the highly figured ash that I had re-sawn, for the sails.

Many hours later. and wishing that I had never started this project:
It turned out to be nowhere near as easy as I anticipated. lining up the rigging on the oak mounting was one of the more interesting parts.
And, as always with me I was too keen to start on the next project before I finished this one.
Learnt lots though.
I like that style and the way you managed to give the sails a 3D look. Nice work!
Your project looks good. It reminds of a scroll saw technique called intarsia.
You mean that you didn’t just throw your wood on the table, turn the machine on and wait? ![]()
PS. I’ve actually run into people that thought my work was just that easy to make; “machine made!”
