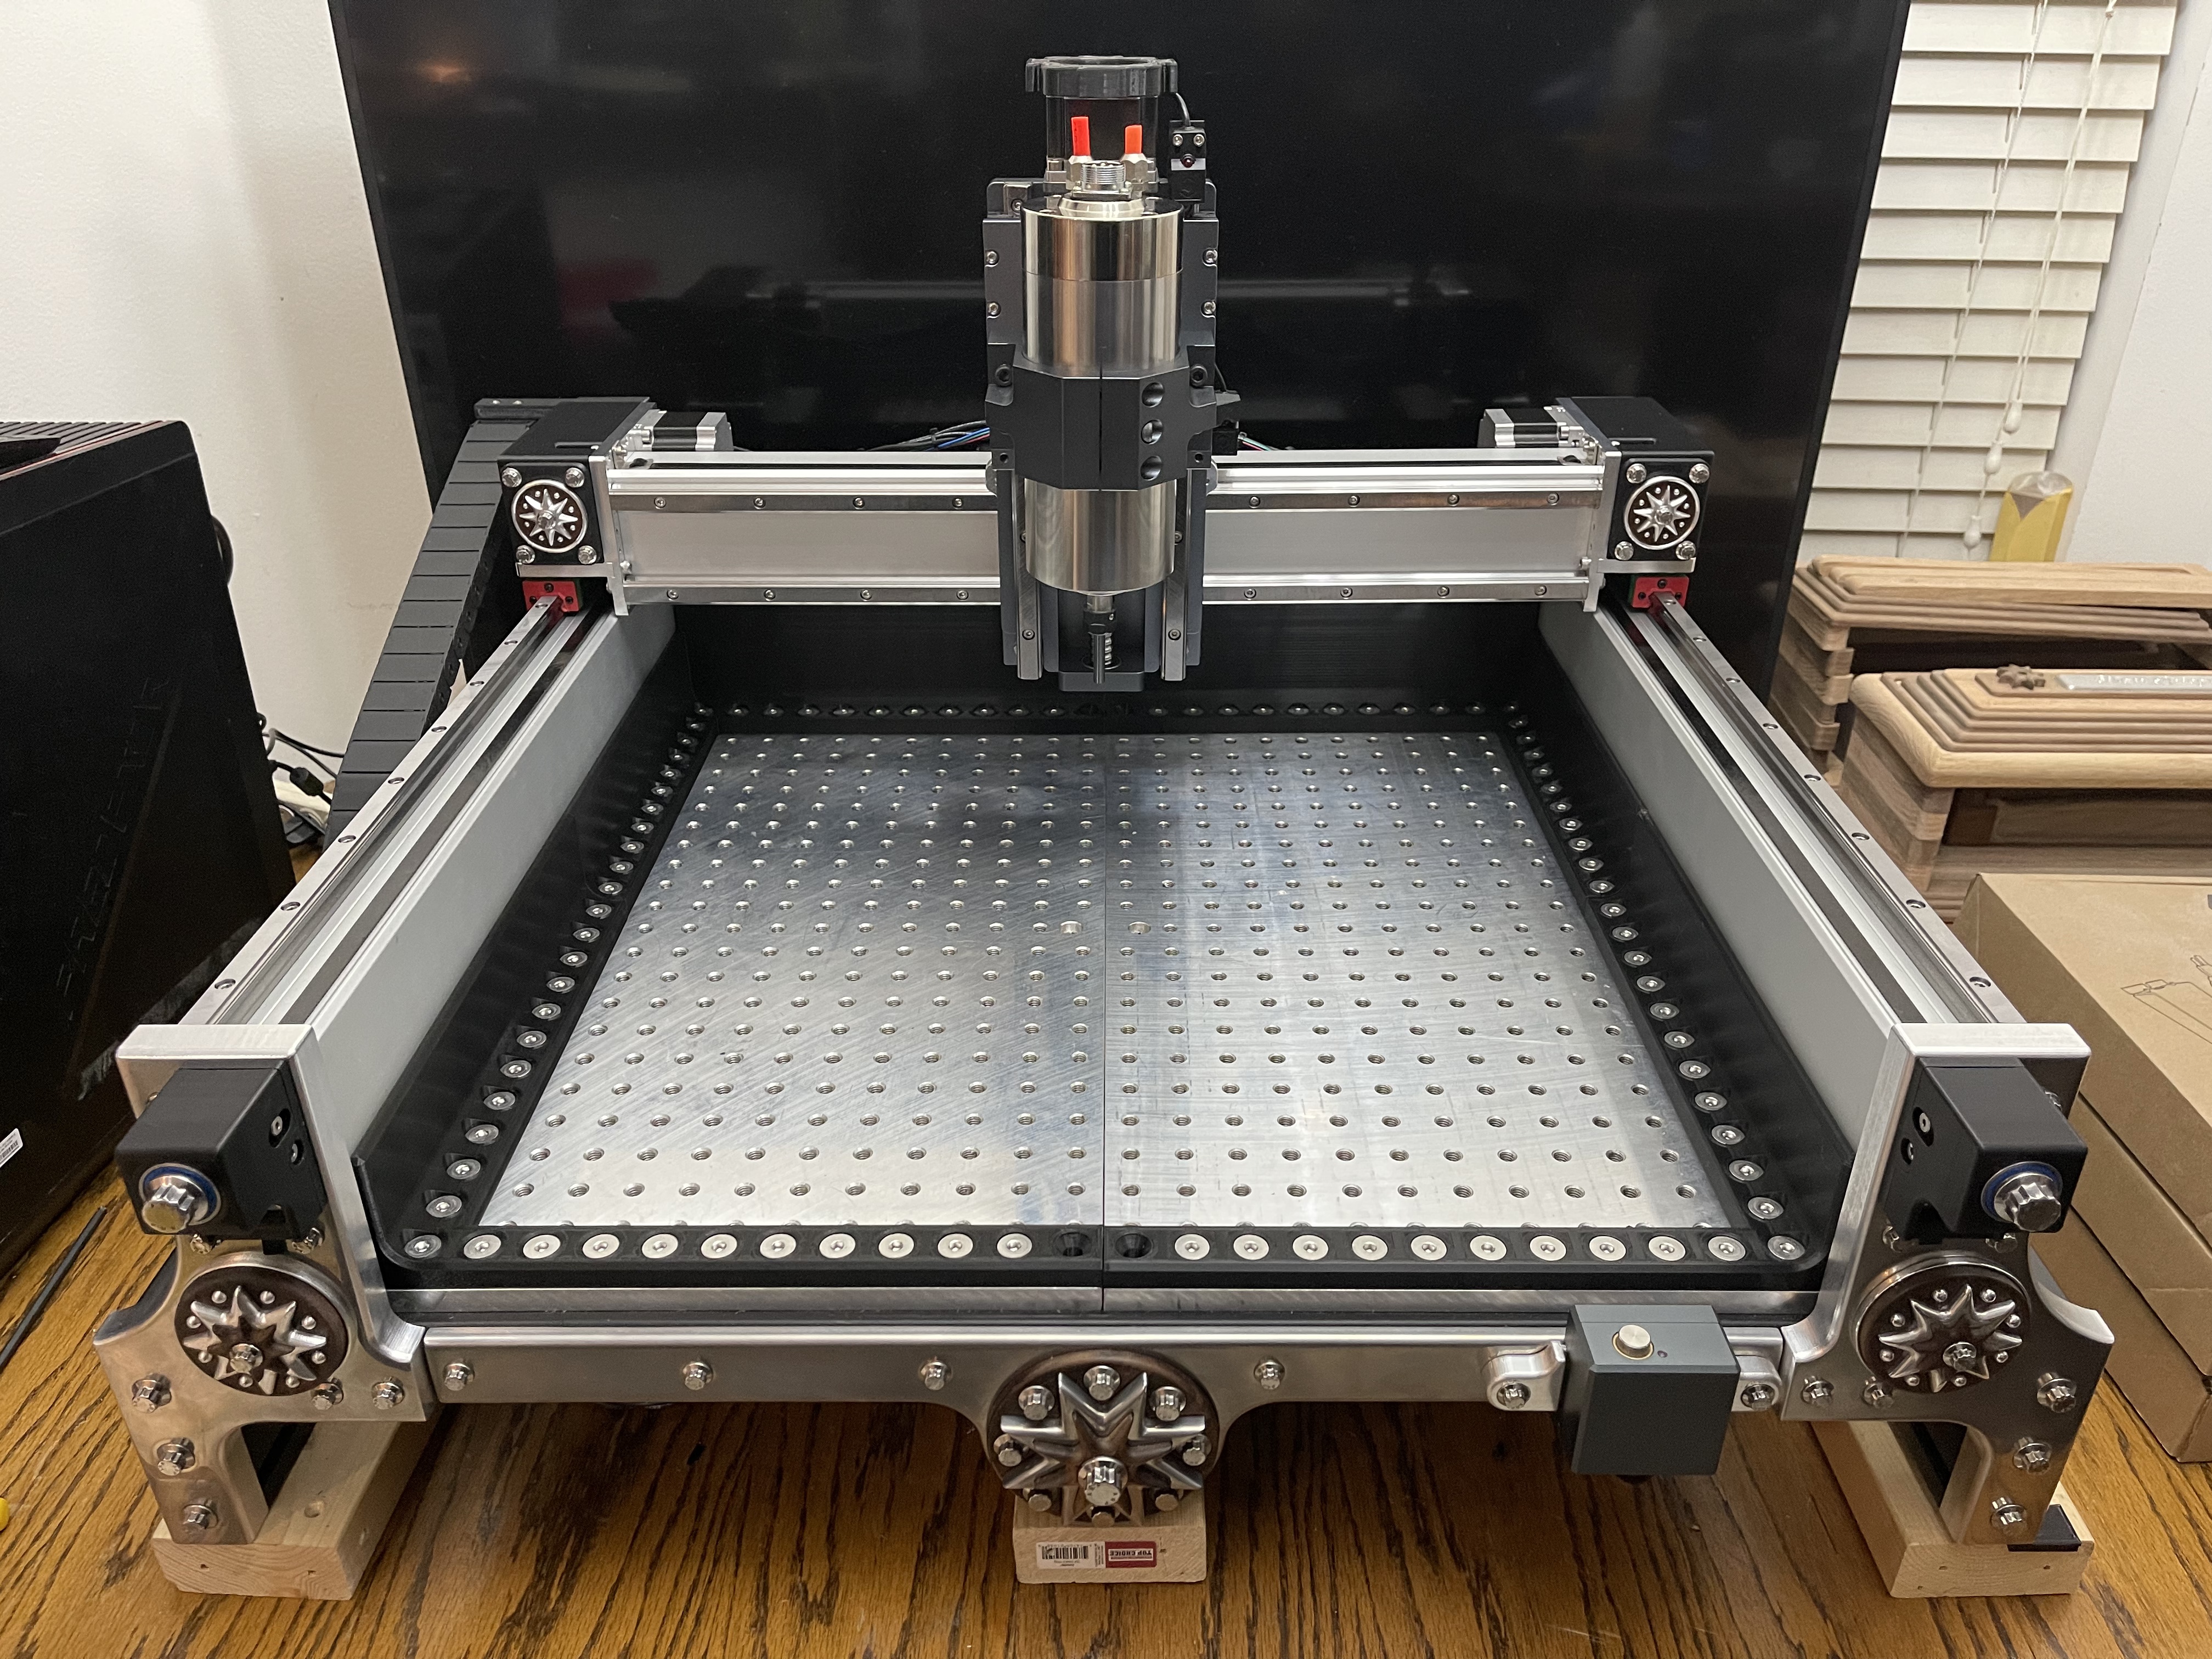
Those are my functional “Vibration Dampeners”. They disperse different sound waves and unwanted vibration forces through the 8 symmetrical outlets on each nexus location. 
2 Likes
Max - your setup is so extraordinary. It motivates me to at least finish my Y-rail install haha.
1 Like
@RoughDraft40 Brian, anything I can do to help let me know.
If you are installing @DanStory rail kit, I designed 3d printed rail clamps to mount the linear rails to the extrusion, perfectly centered to where they need to be so you can punch the pilot holes with confidence.
I can ship you a set if needed. It made my rail installation very easy, as the rails are perfectly located.
4 Likes
I am on the fence about posting this pic here, since I did not cut this with my Shapeoko, but here is the fence I just finished printing to help cut things with my Shapeoko.  These work great to contain chips and dust.
This fits any Standard S3 with an Ohio Diesel spoilboard. If anyone needs a set, 100+ hour print…
11 Likes
Really loving the new Peck DRILLING function in Carbide Create Ver528 (BETA WIN ). Making my life just a little nicer. FYI: A #3 Center Drill = Measures 0.250” dia.
Sweet Setup…Go ahead, you can say it…
10 Likes
Nice… but less glamour shots and more chip shots…
3 Likes
CC version 530 is out for download since 6-1-21.
1 Like
Thanks, but…If it ain’t broke…I get tired of upgrading sometimes…
I understand about constant upgrading. However beta versions can be buggy.
Got started on this project at the beginning of the Pandemic, still got a bunch of parts to design before it is ready to make chips, then I have to somehow lift it up and install it in its enclosure…
Just got to the point where I can show a few pictures!
1 Like
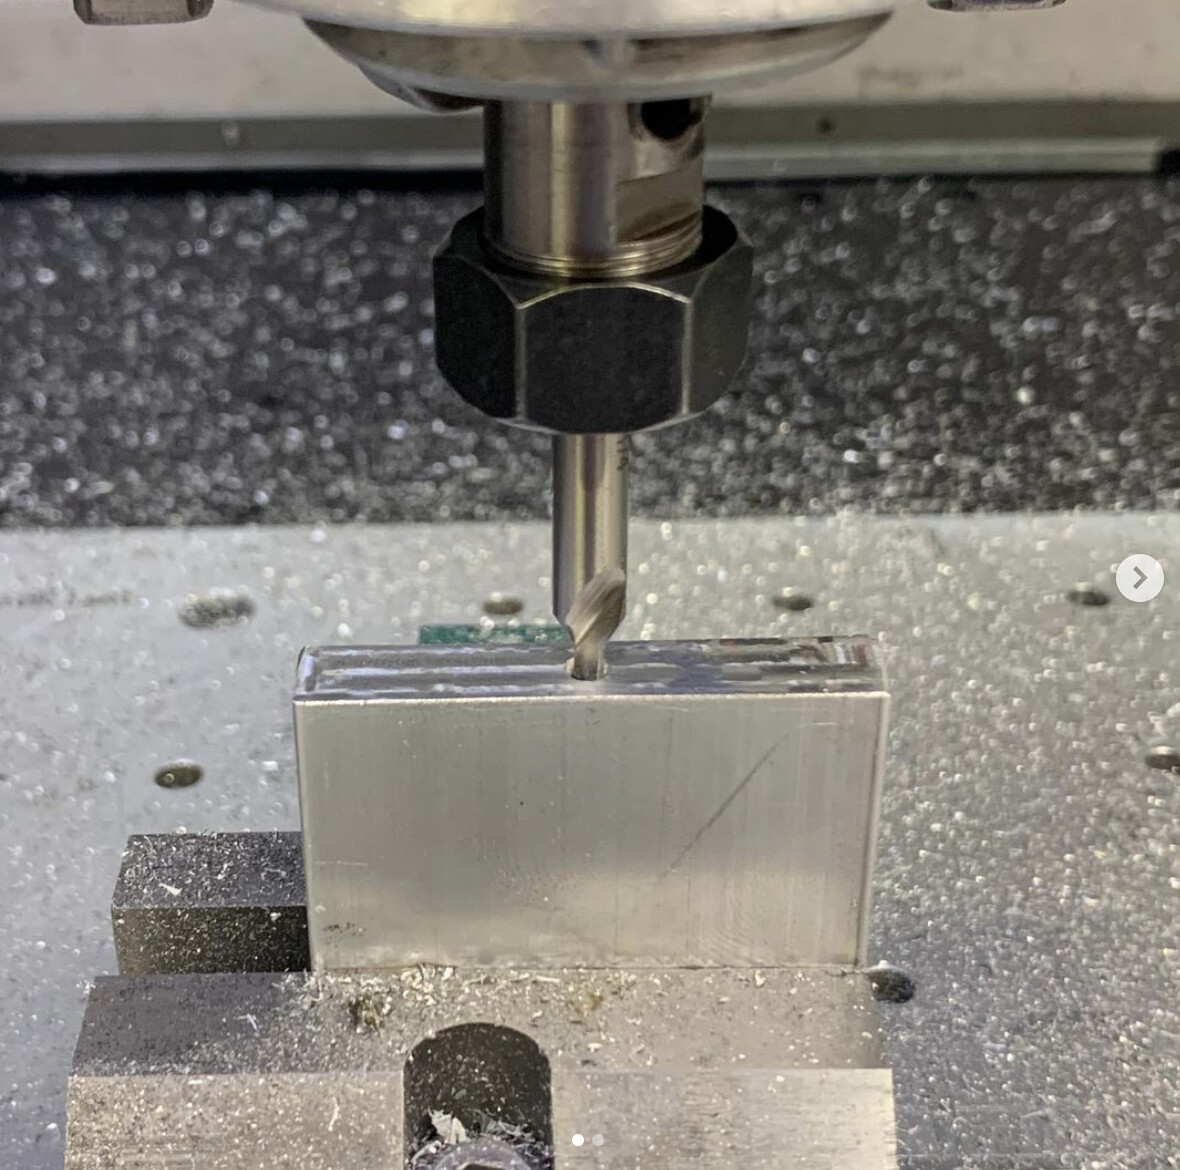
Rich I am not understanding what is going on in that second photo lol.
The point of the second photo was to show where the (center) drilled hole resided in my (4th-Axis) setup (Tailstock). This setup will be used for my two-sided machining (of the 1/5th scale Briggs and Stratton Engine Cover). I’ll post another photo as I proof out the programs.
4 Likes
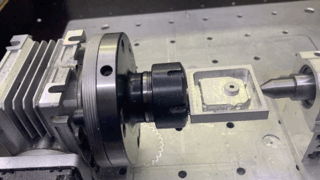
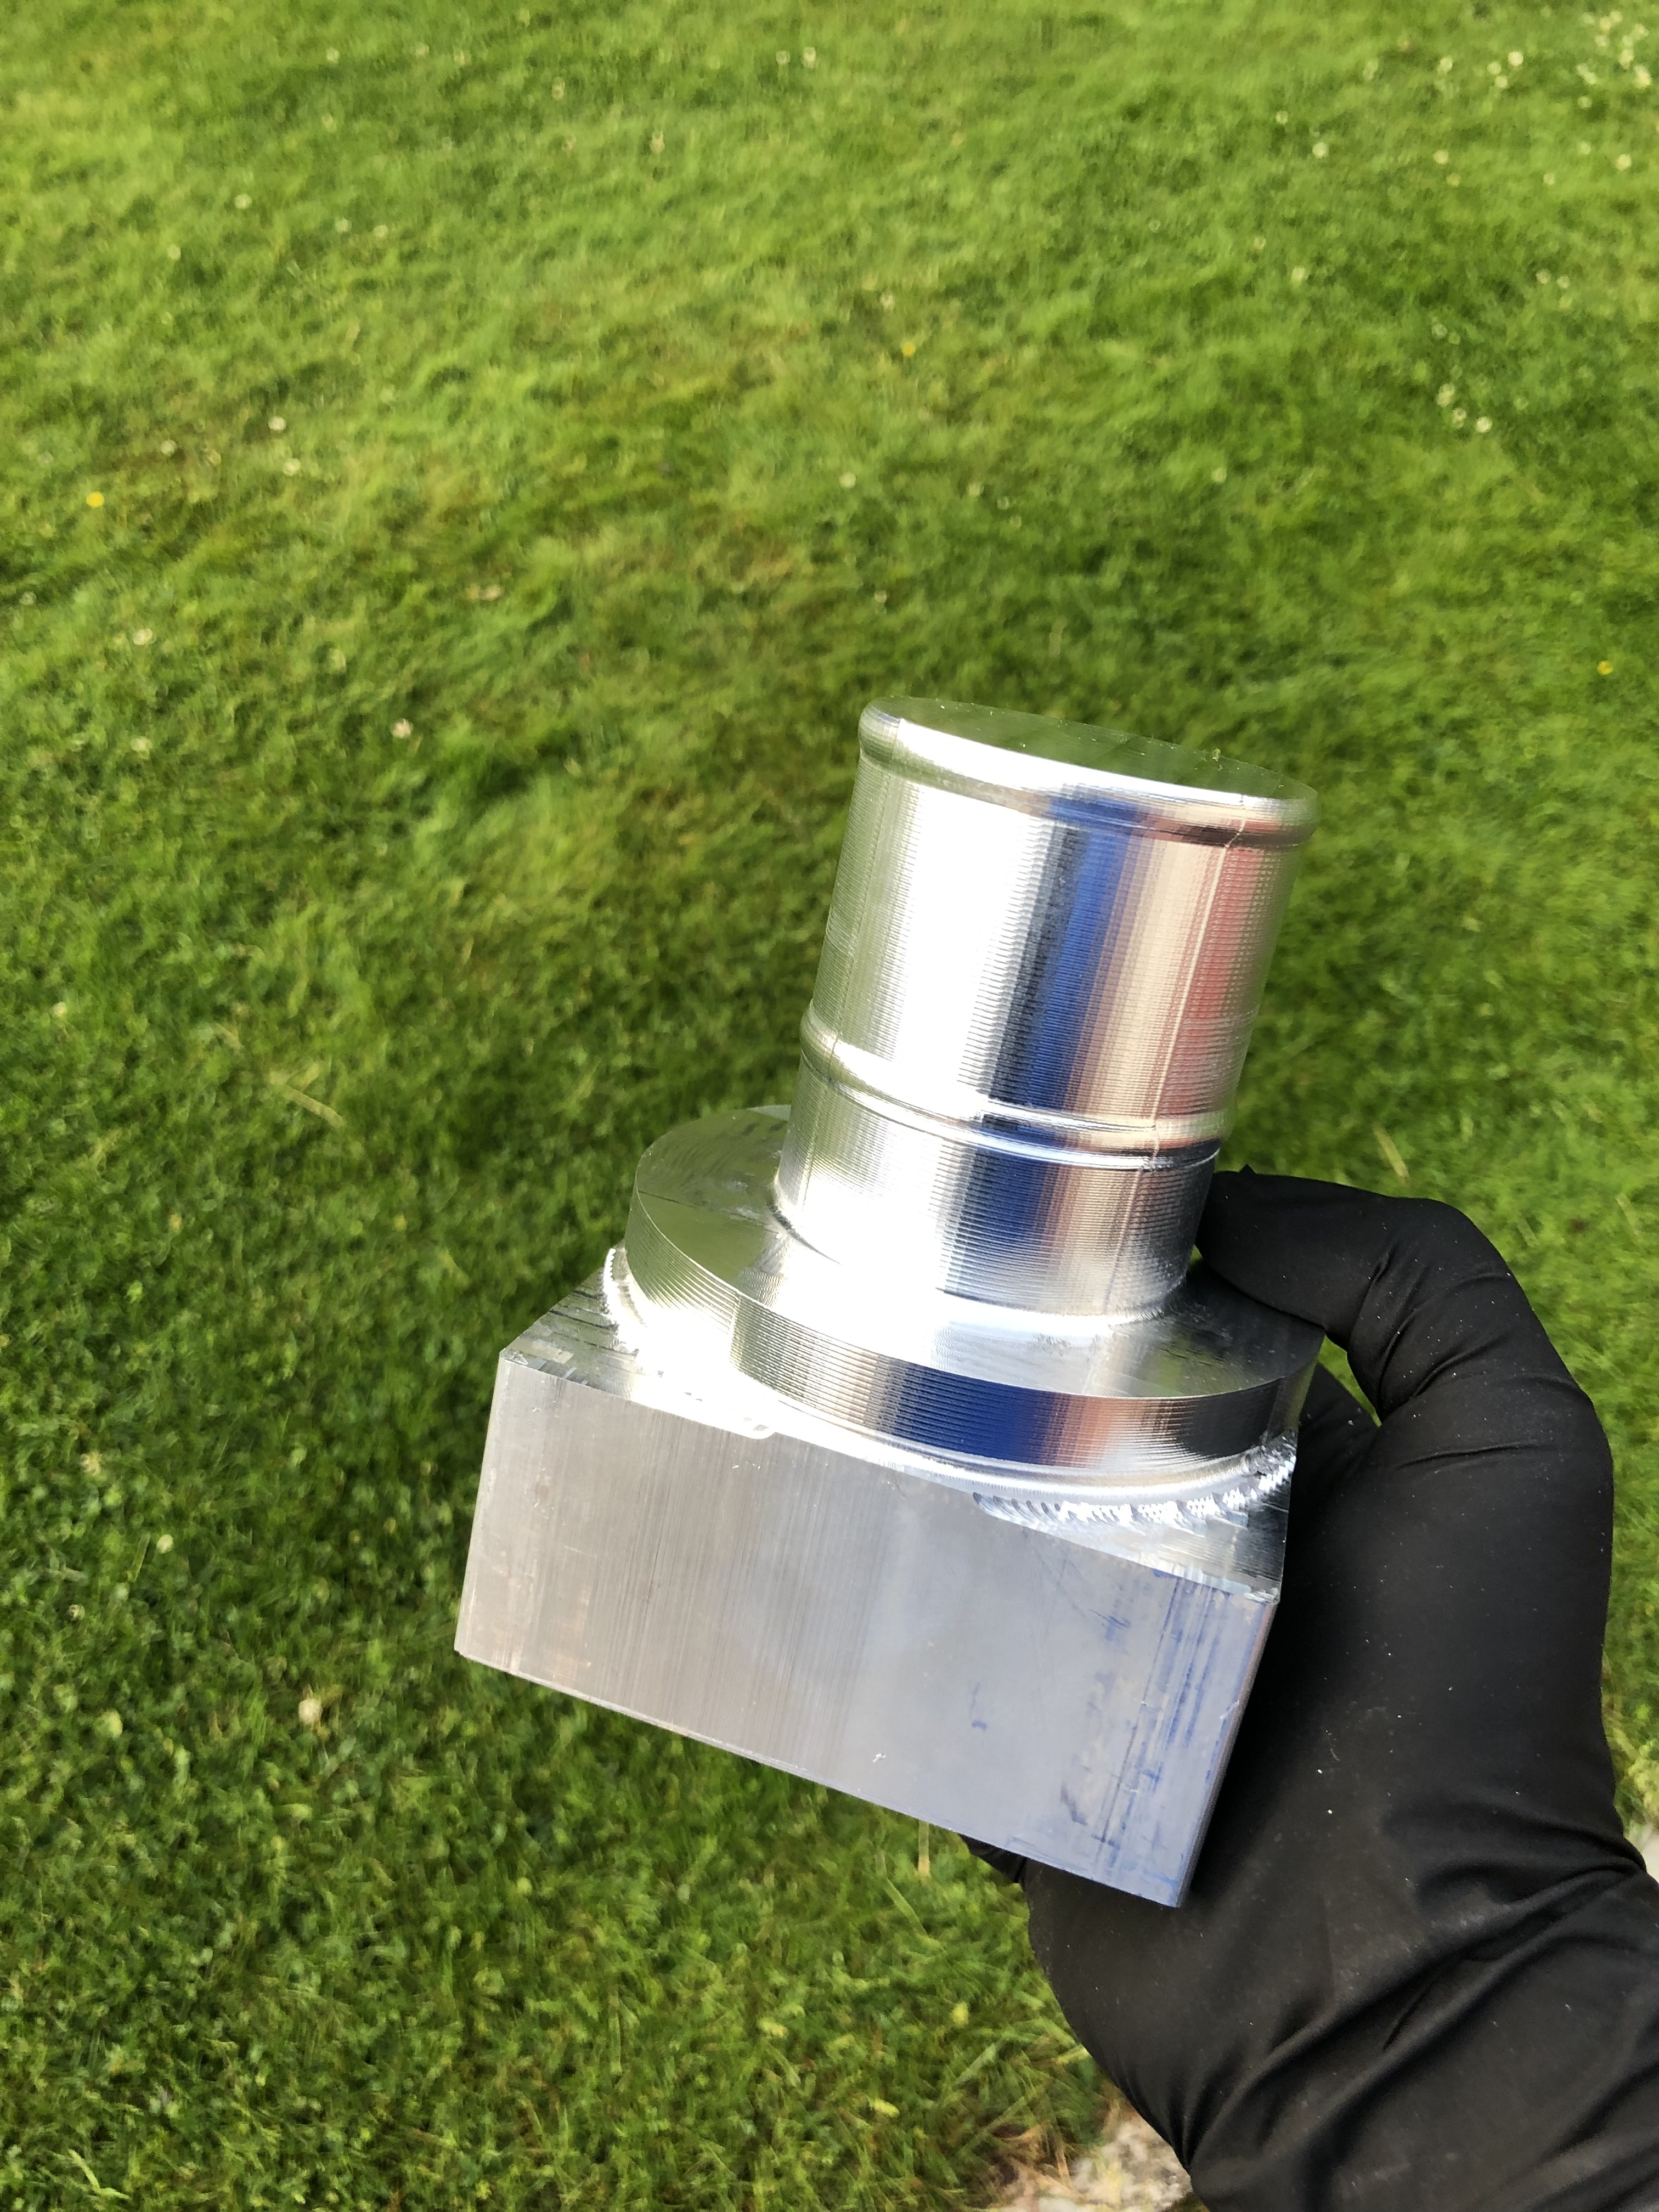
Double Sided Machine. Roughing operation (0.020 over), done.
Just trying to see if I could upload a GIF
15 Likes
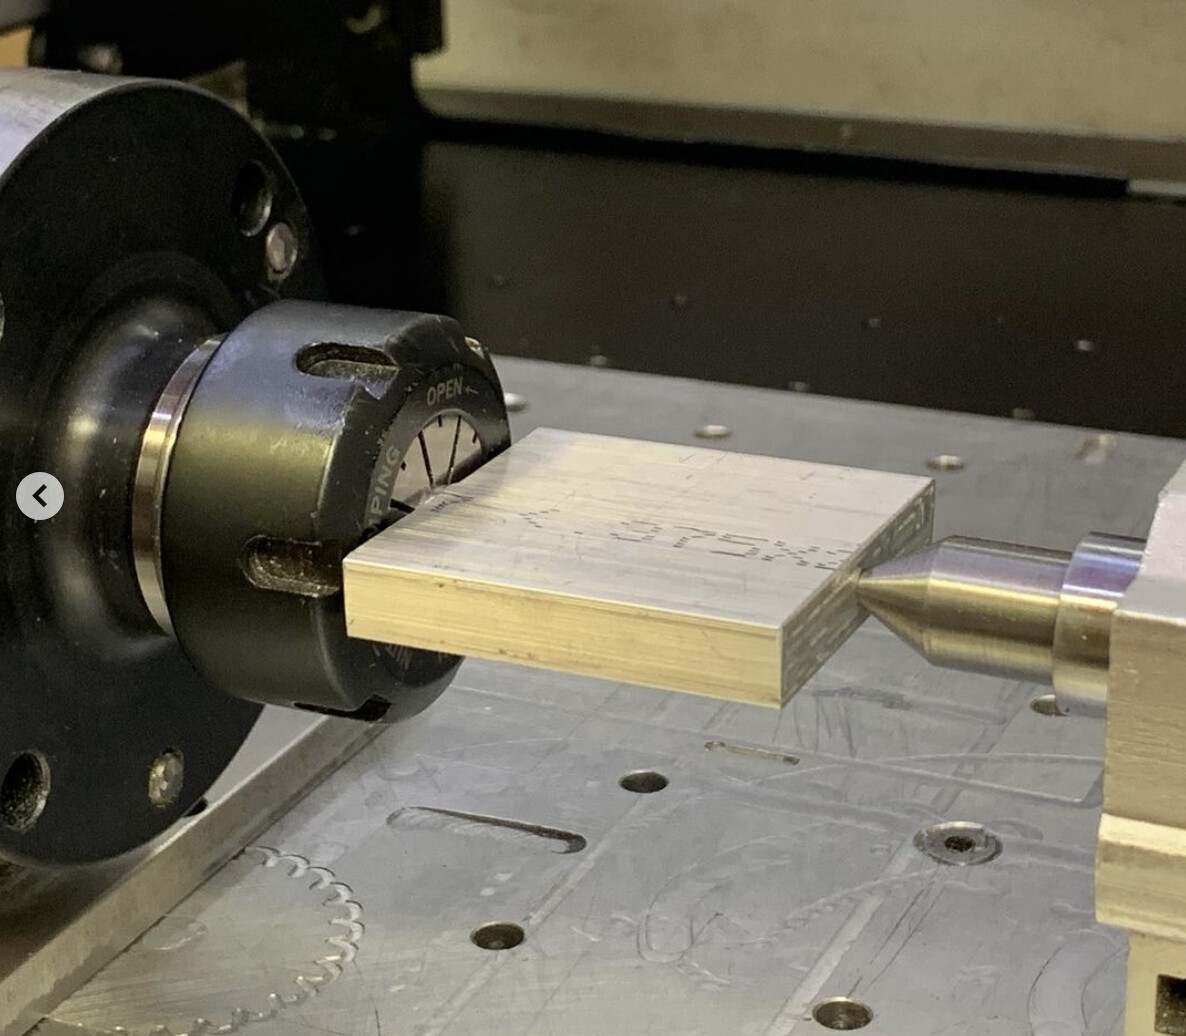
Wow that is really awesome! How is it attached to the collet?
Good question. When I prep the blanks, I face one end, center drill it, flip the part and then mill a 0.375 dia x 0.375 long post. This post is what is in the collet.
FYI I am using 2.0" wide flat bar to allow a small amount of extra material all around to maintain structural integrity of the blank during the 2-sided machining.
5 Likes
And more shots of the boxes or lids in the back right corner please. They look almost as elegant as the Shapeoko!
1 Like
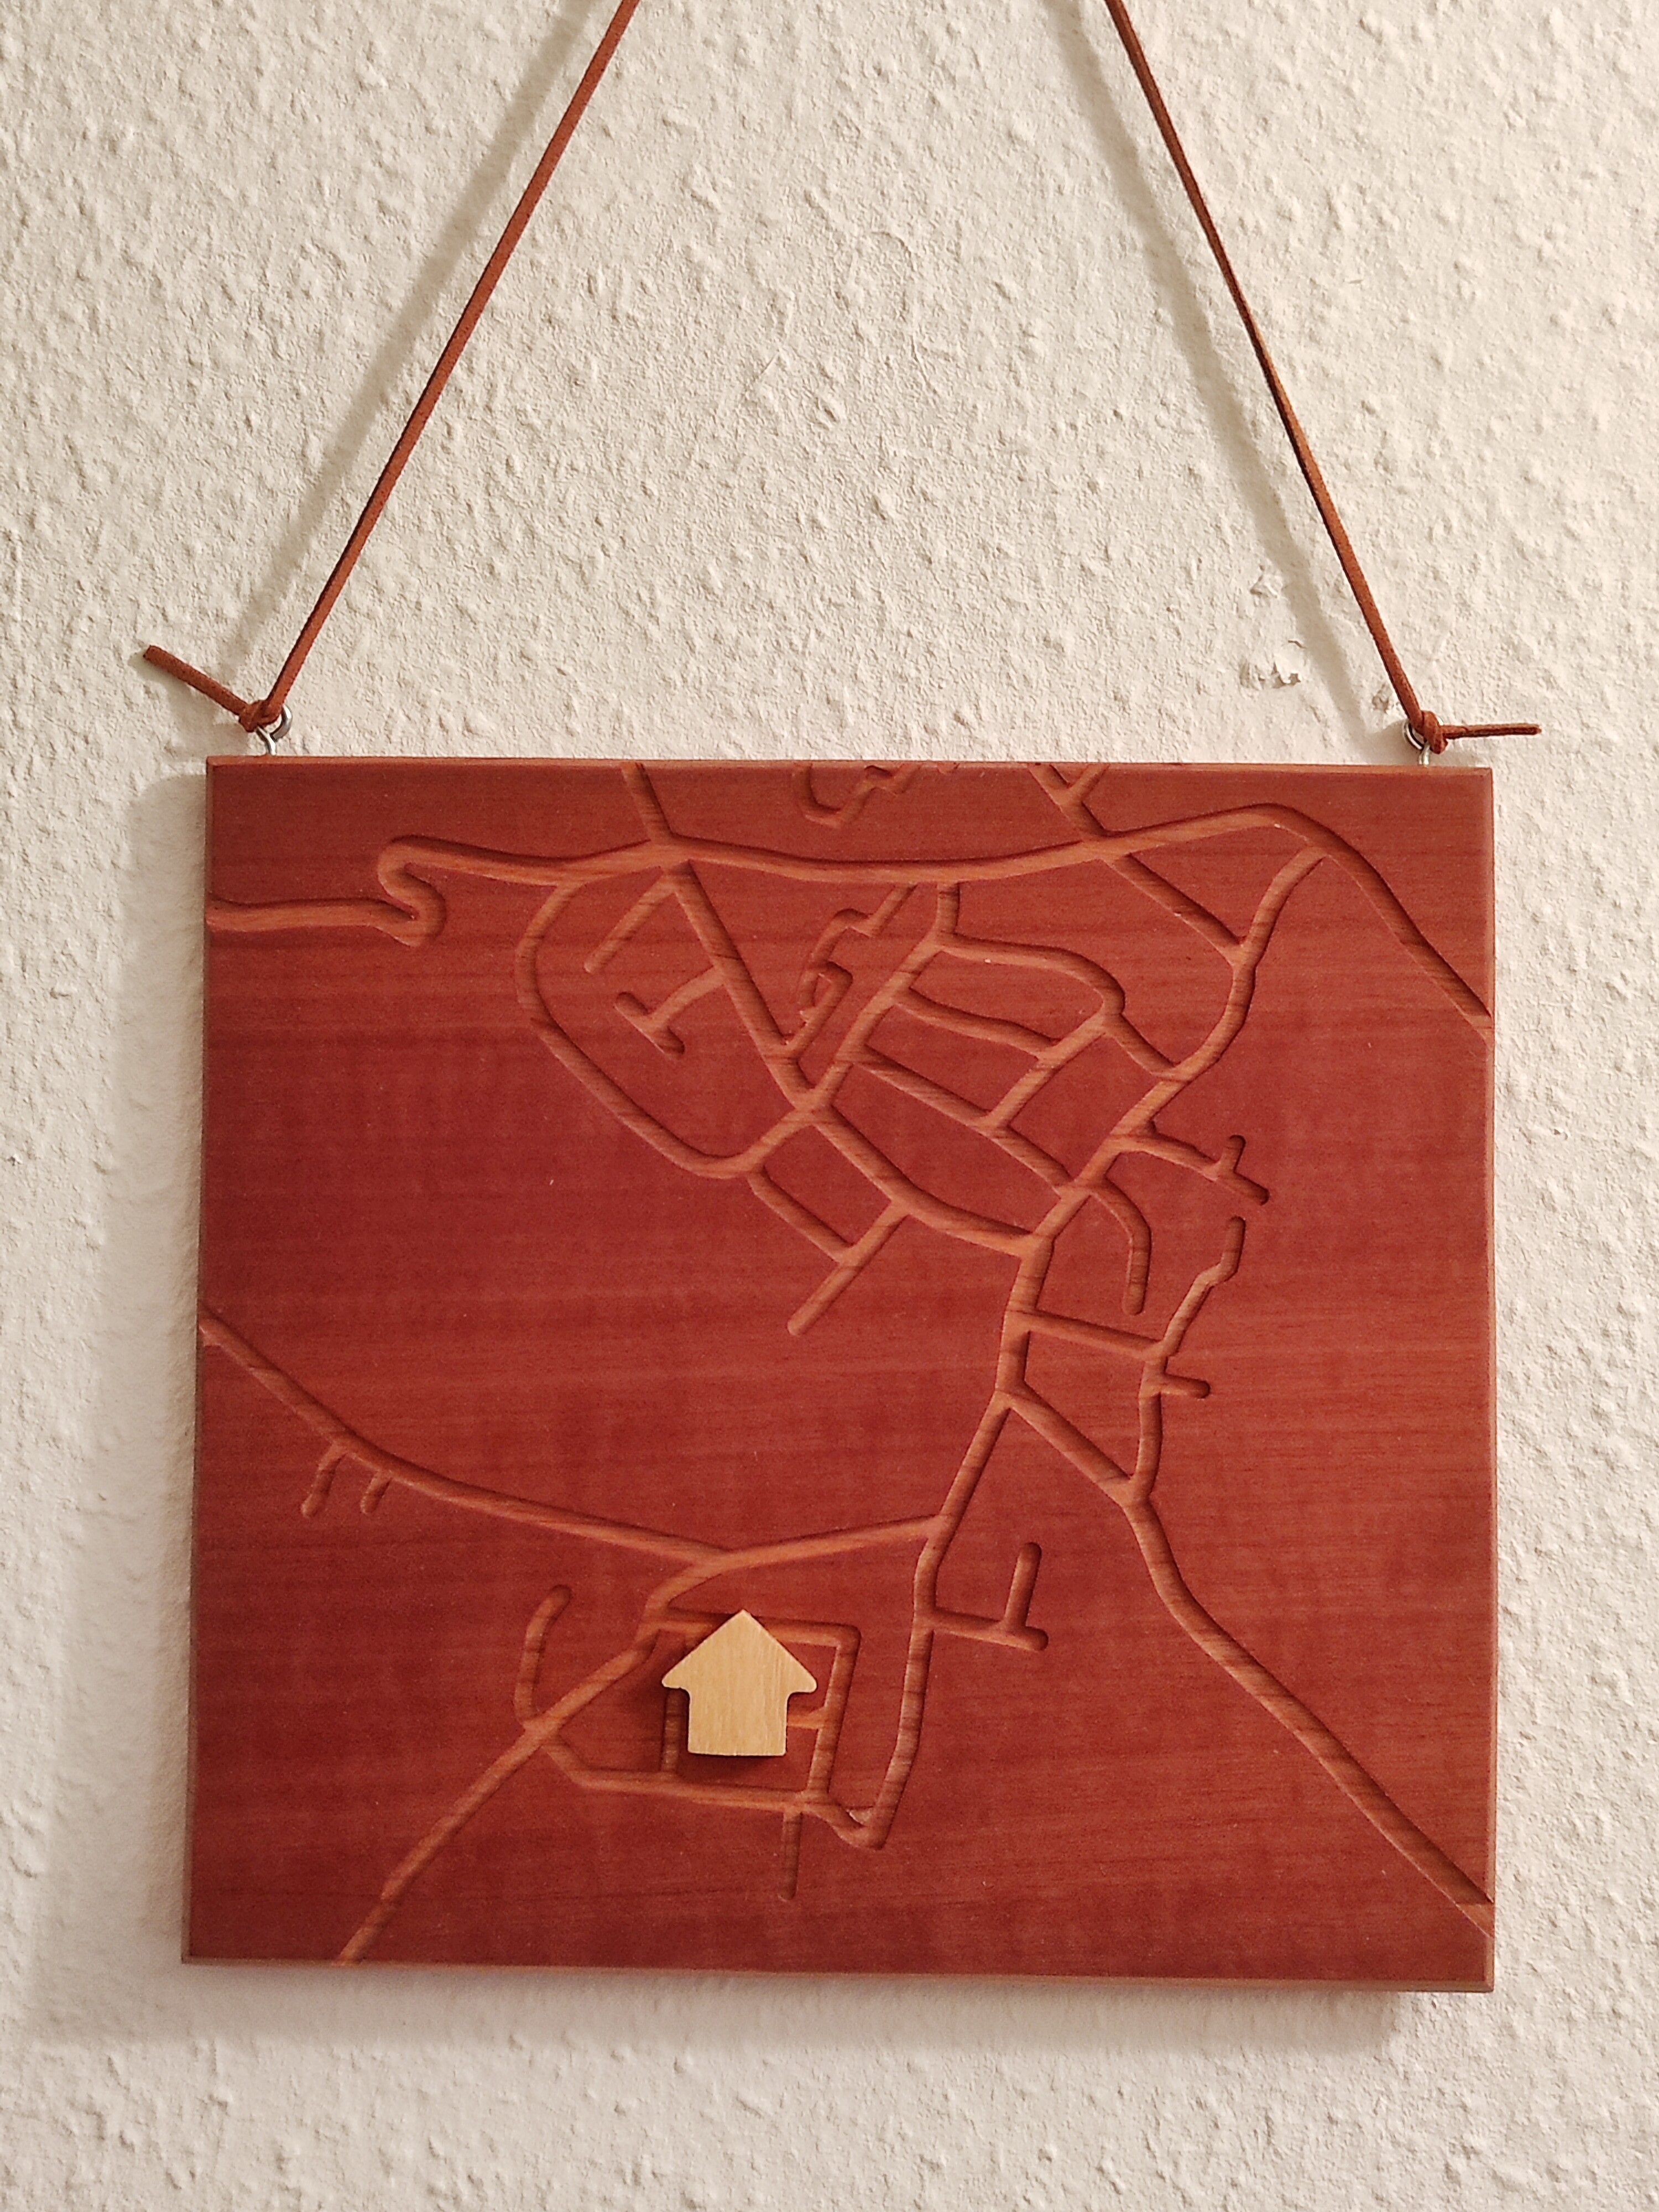
A friend is moving to a new home, so he’s going go get this little gift.
It is mahogany veneer on cherry, the tiny house is robinia.
Took the street network of that little village from openstreetmaps.
13 Likes
16 Likes
@nlichtenberg - that’s fantastic work!
Could you explain how to extract the data and then create gcode?
I went to open street maps and have exported an OSM file - but now I’m scratching my head…
There are some utilities/links for this sort of thing at:
https://wiki.shapeoko.com/index.php/Online_resources#Geography
1 Like