Finished a big logo at work. Gotta get better lighting on it now.
17 Likes
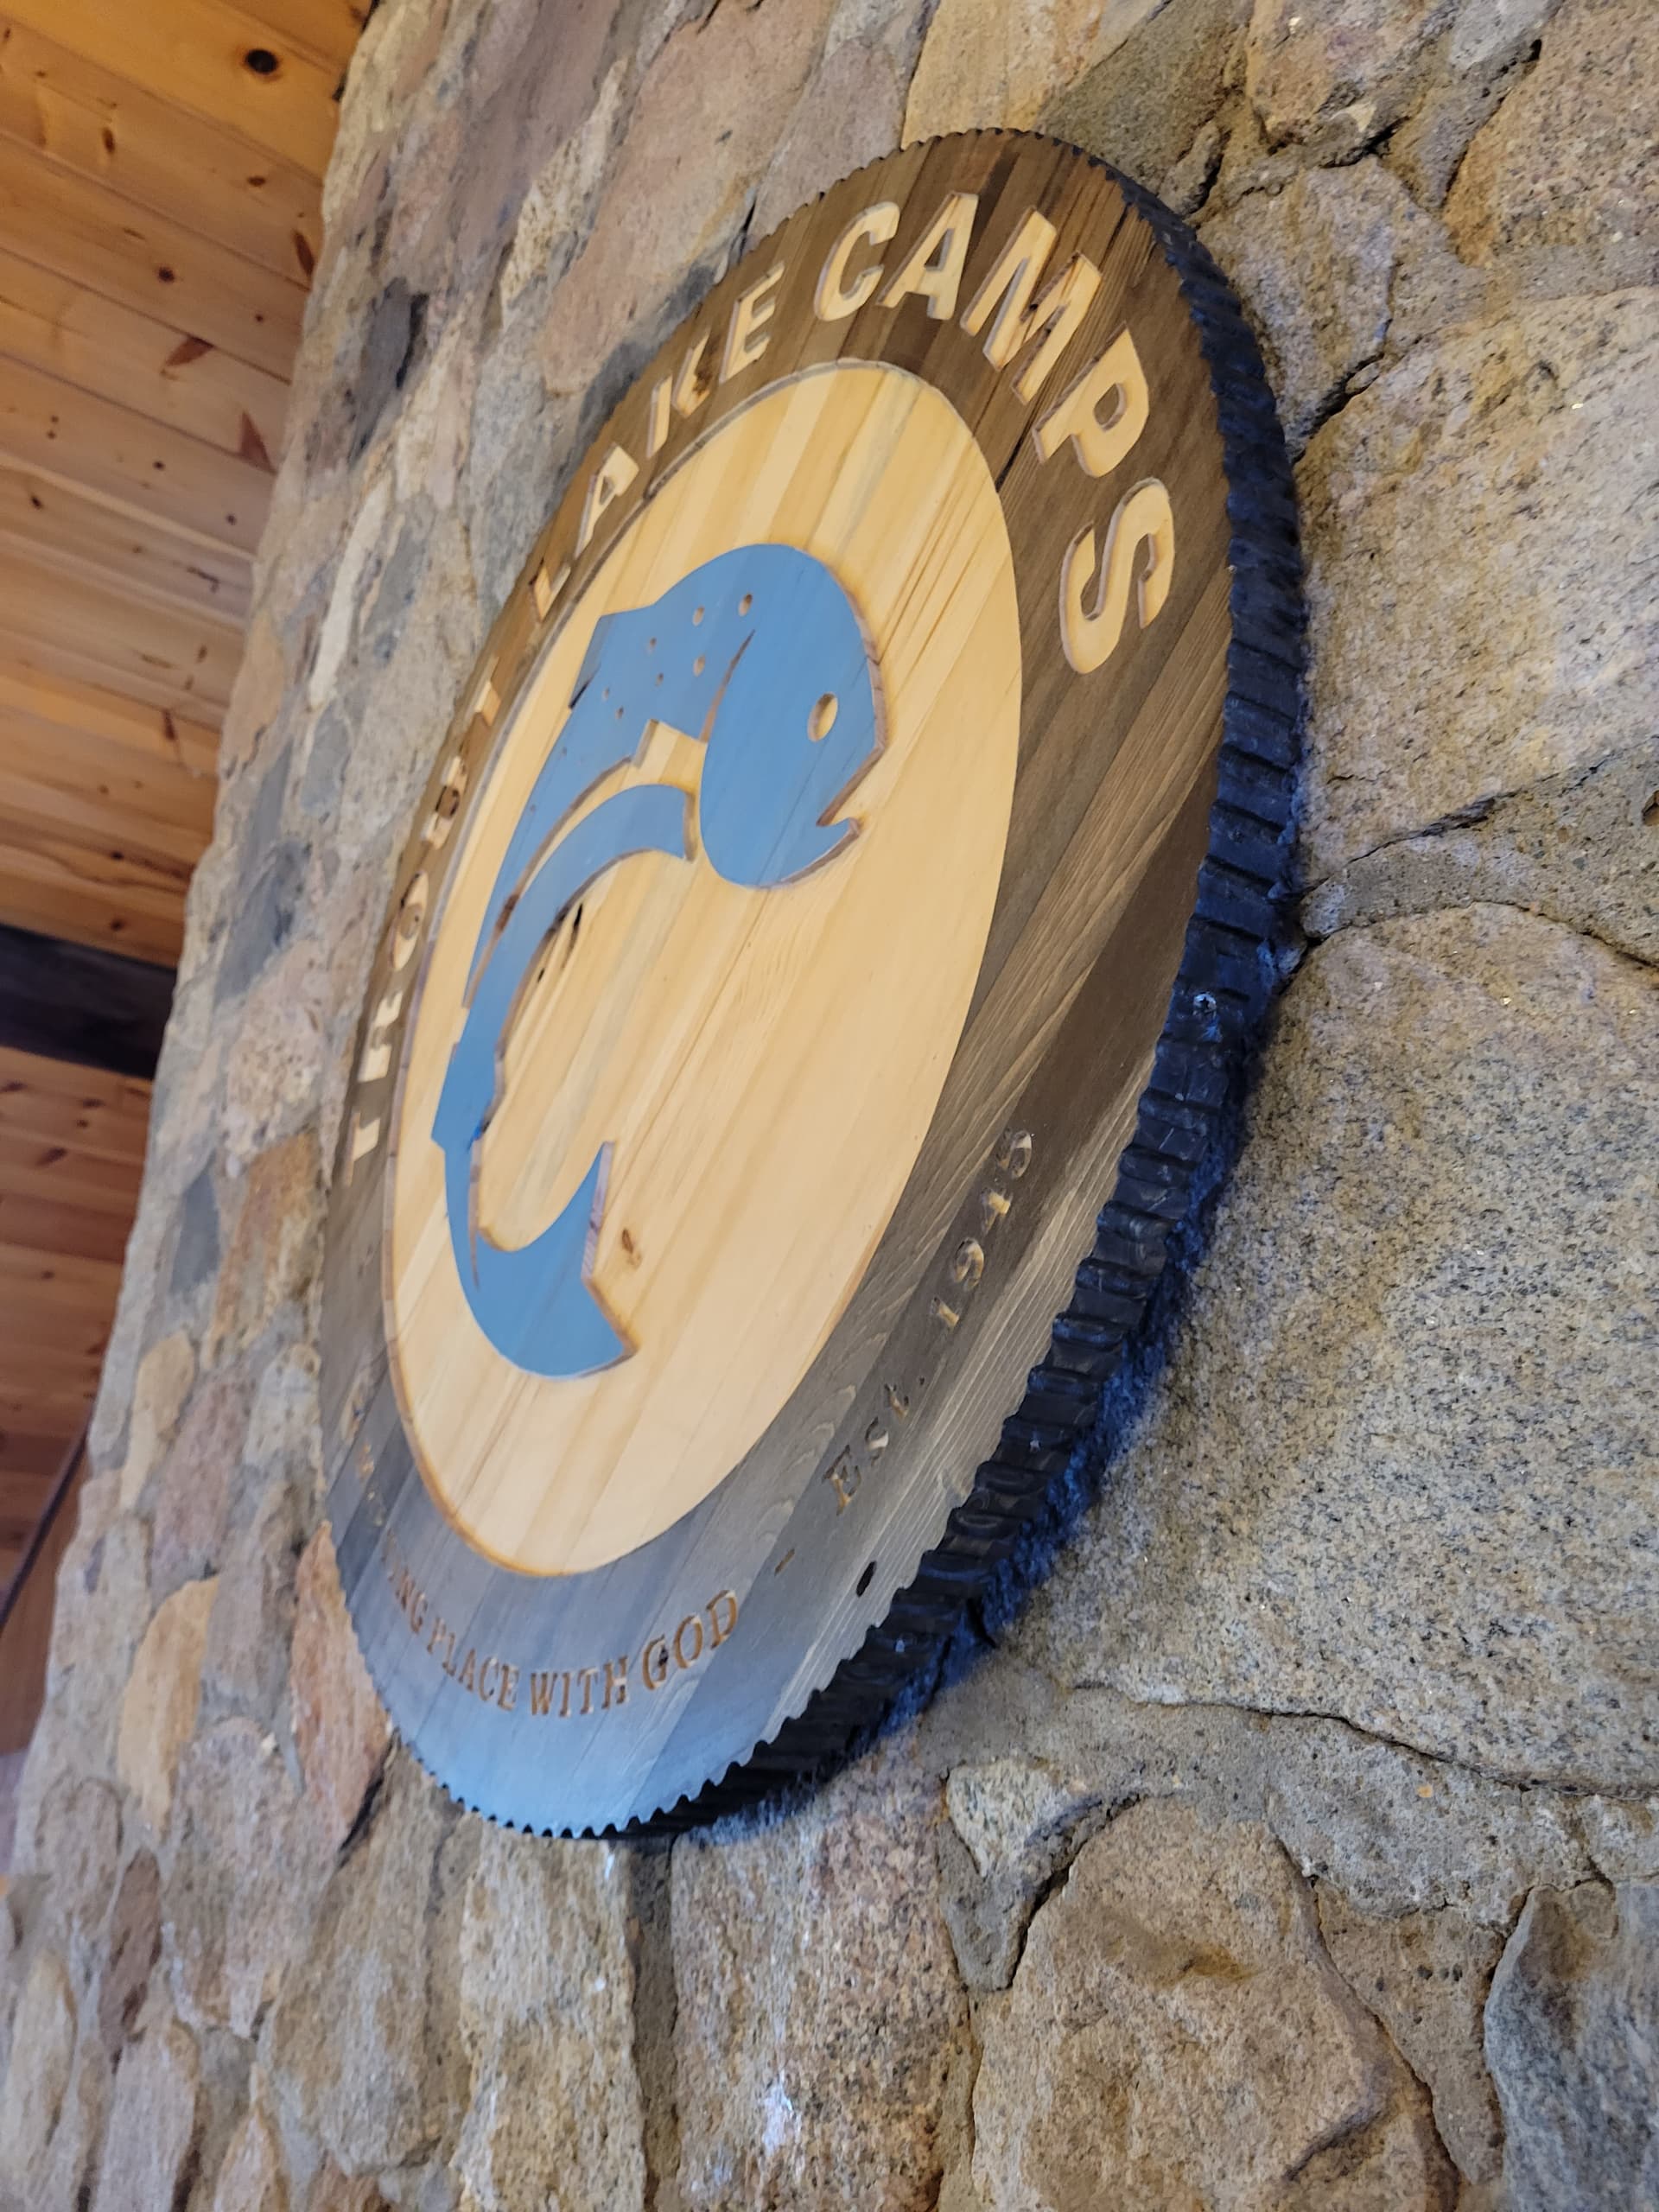
Finished this last week, the last thing I cut on my XXL. It’s 2 sided and was about an 7 hr carve on each side. Did it for a friends Cabin.
Scott

16 Likes
First of four fence hanging planters. Crappy big box dimensional pine board, curious to see how it’ll hold up. Finished with rattle can exterior poly.
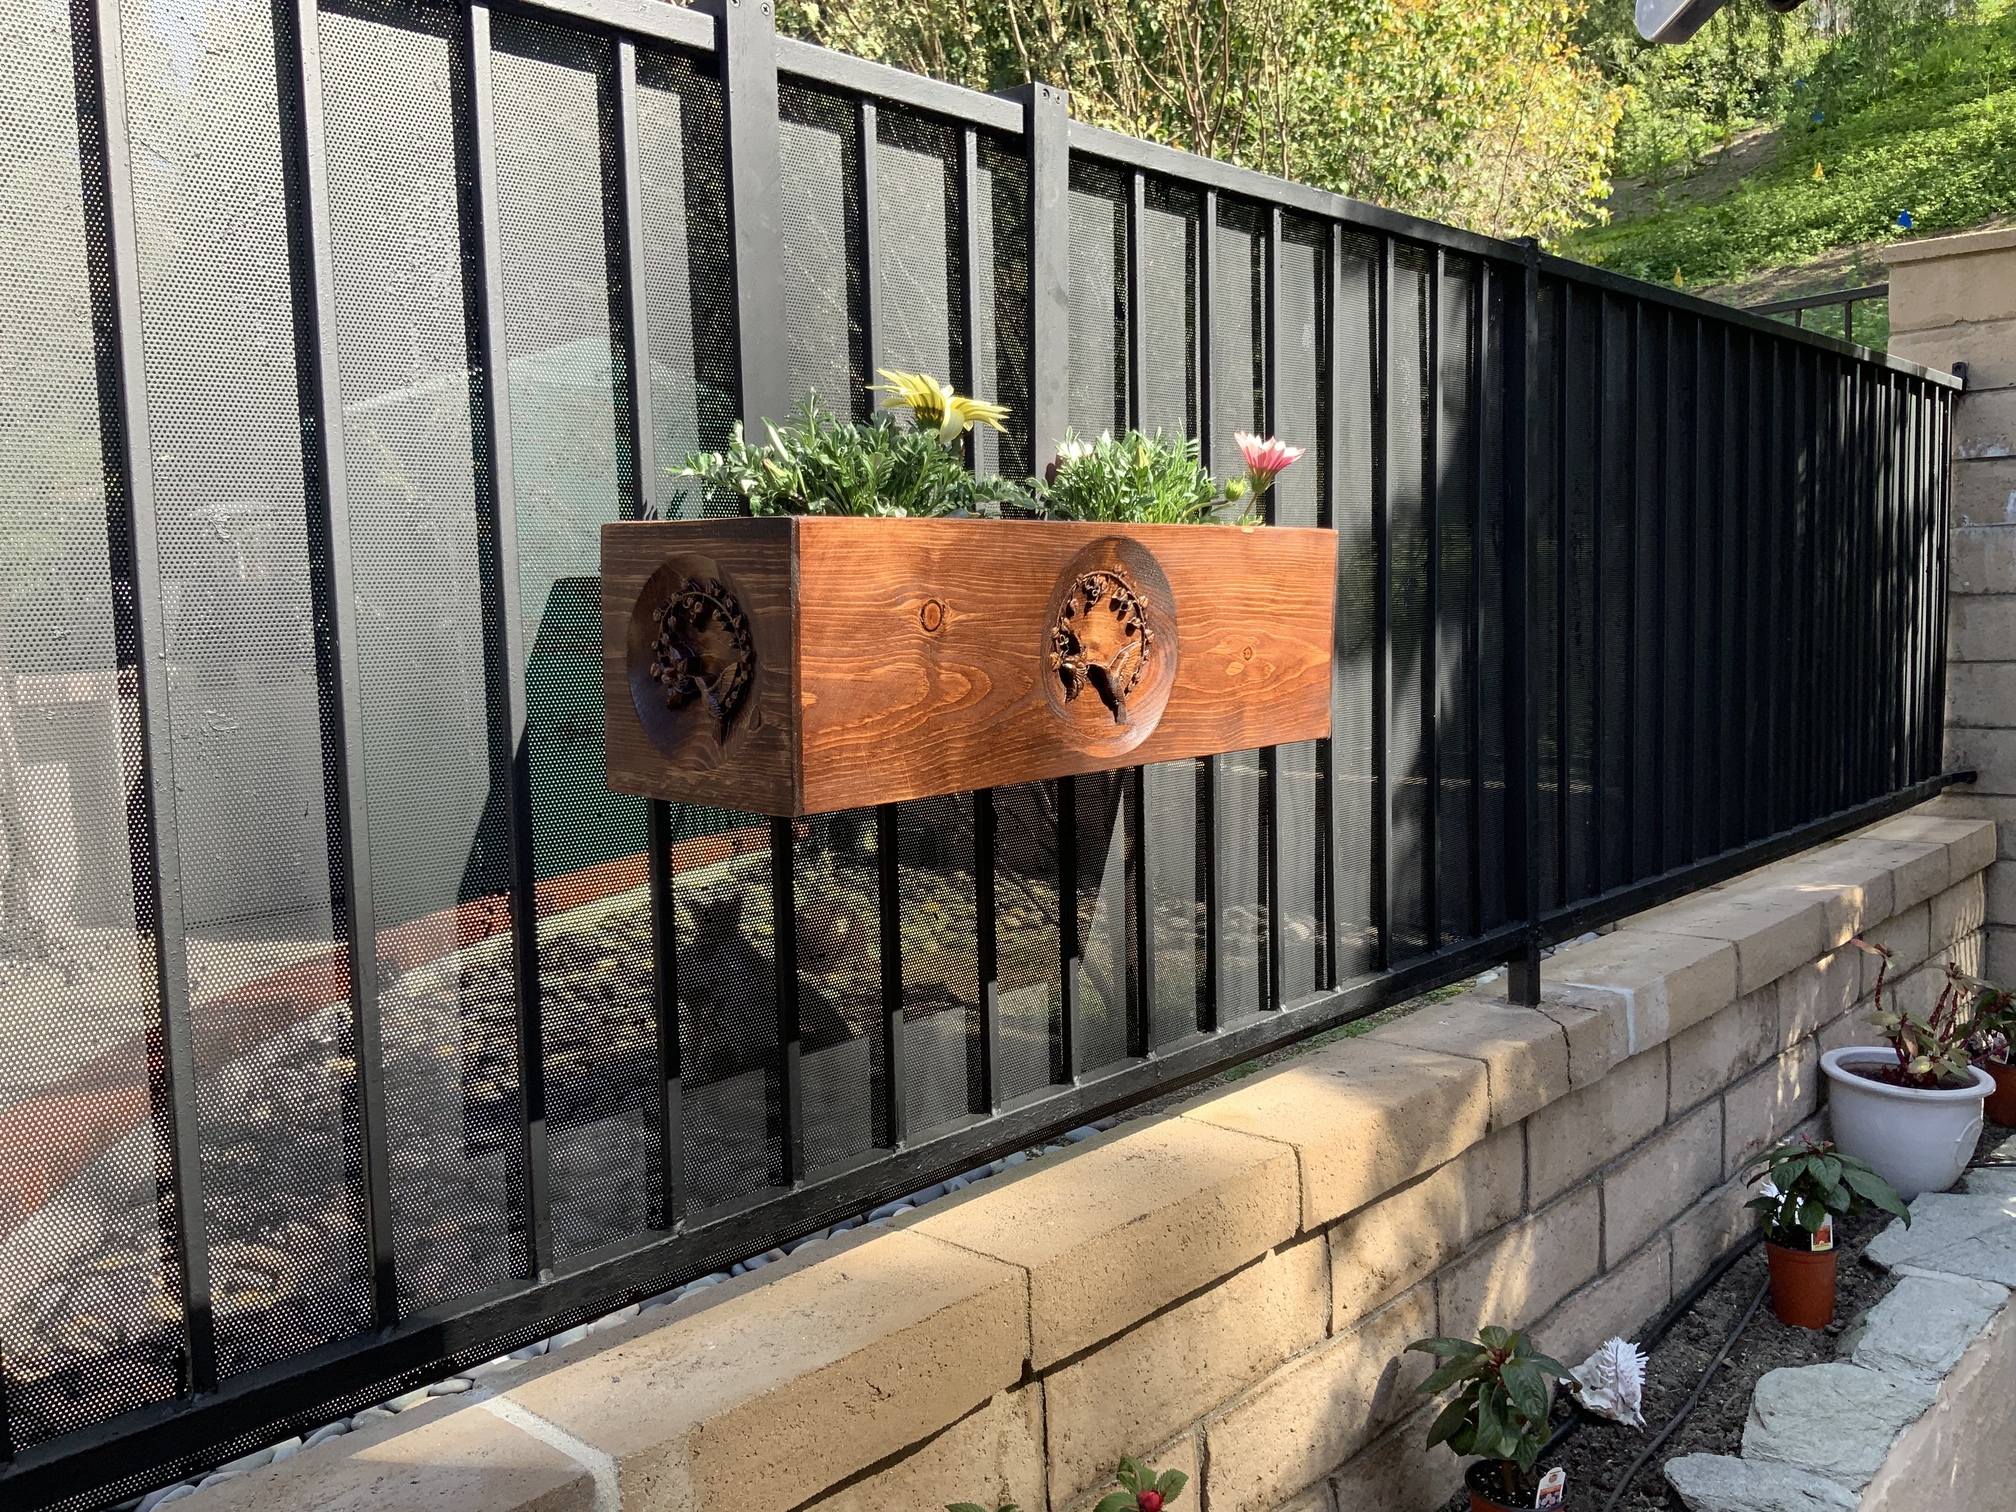
20 Likes
Nice looking. Outside objects are transitory. Even if you used treated it would deteriorate. Looks good and will last a couple of seasons. Eventually you may need to paint it after the finish fails. The finish always fails. I have friends with teak on their sail boats and it is an annual event to scrub it down and reapply marine varnish.
1 Like
By the time that rots, you’ll want a different one, and if you had used the finest wood from China you’d still want a different one. ![]()
2 Likes
Heh heh, reminds of back when I used to believe what you read on the internet was true (not really but you know what I mean…).
“Use this brand marine epoxy and this brand spar varnish for an exterior finish that will last…”
3.6 years later
The unfinished scrap wood planter on top looks better lol.
4 Likes
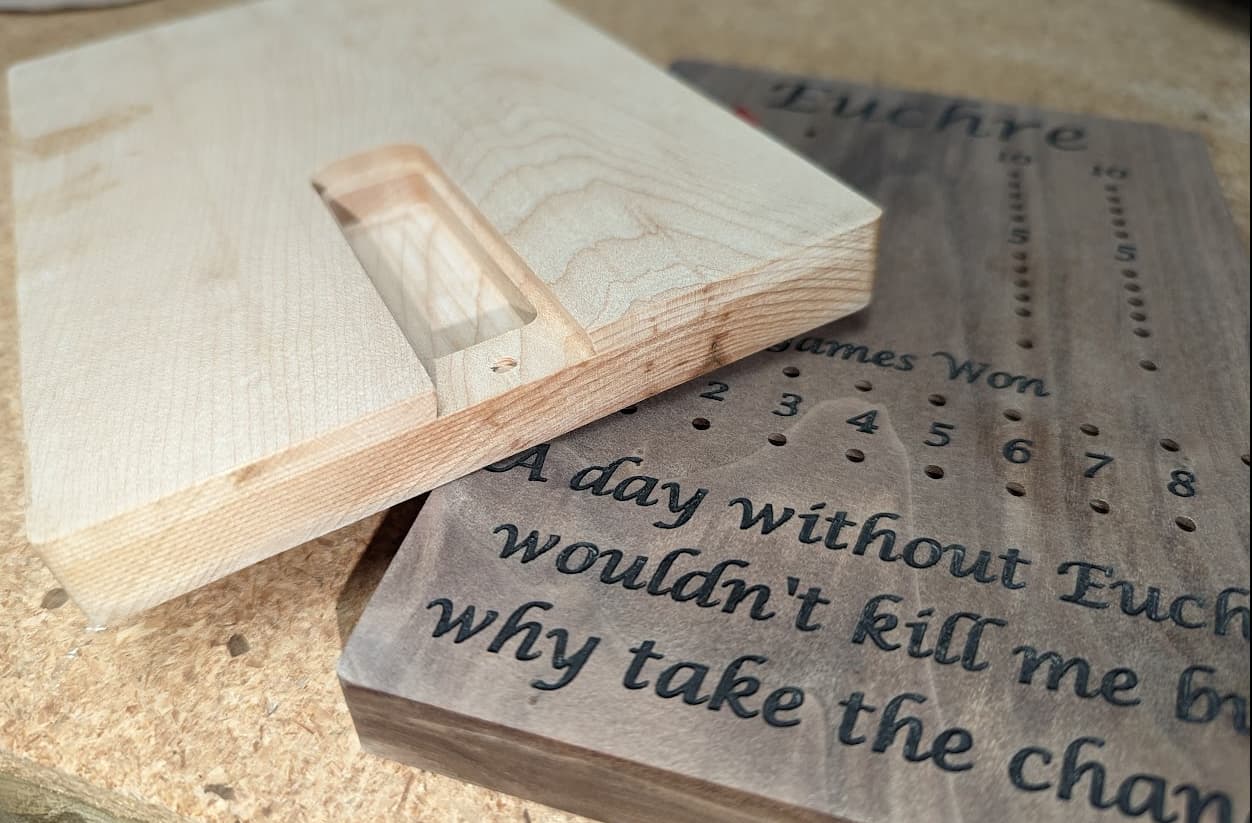
Two Euchre score boards that used my first underside storage for cribbage pegs. Normally I include card and peg storage under a custom topper to the board so this is new for me.
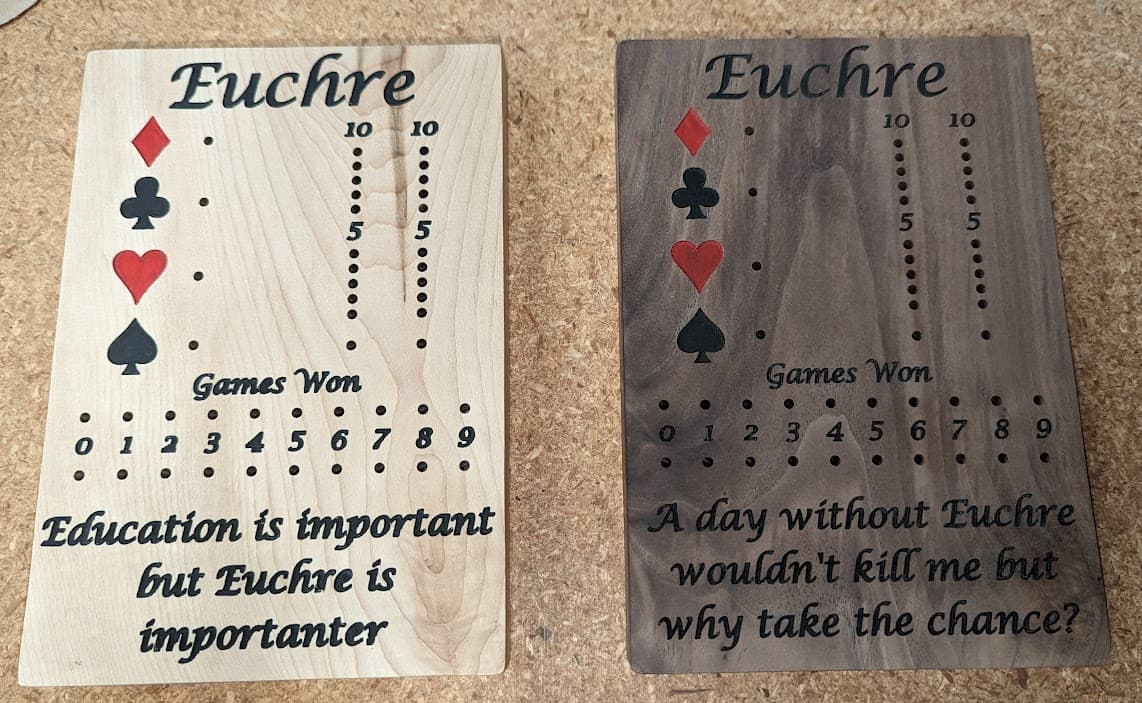
Went with a dovetail bit to get an angled opening and angled door. I thought I could get away without doing the proper math but after a couple tries decided to just do it right and break out the trigonometry to get the exact offsets based on my depth and angle of the dovetail bit for the size of the door. Really should have just done it right the first time. This should open up my options for simpler cribbage boards now that I have it figured out.
13 Likes
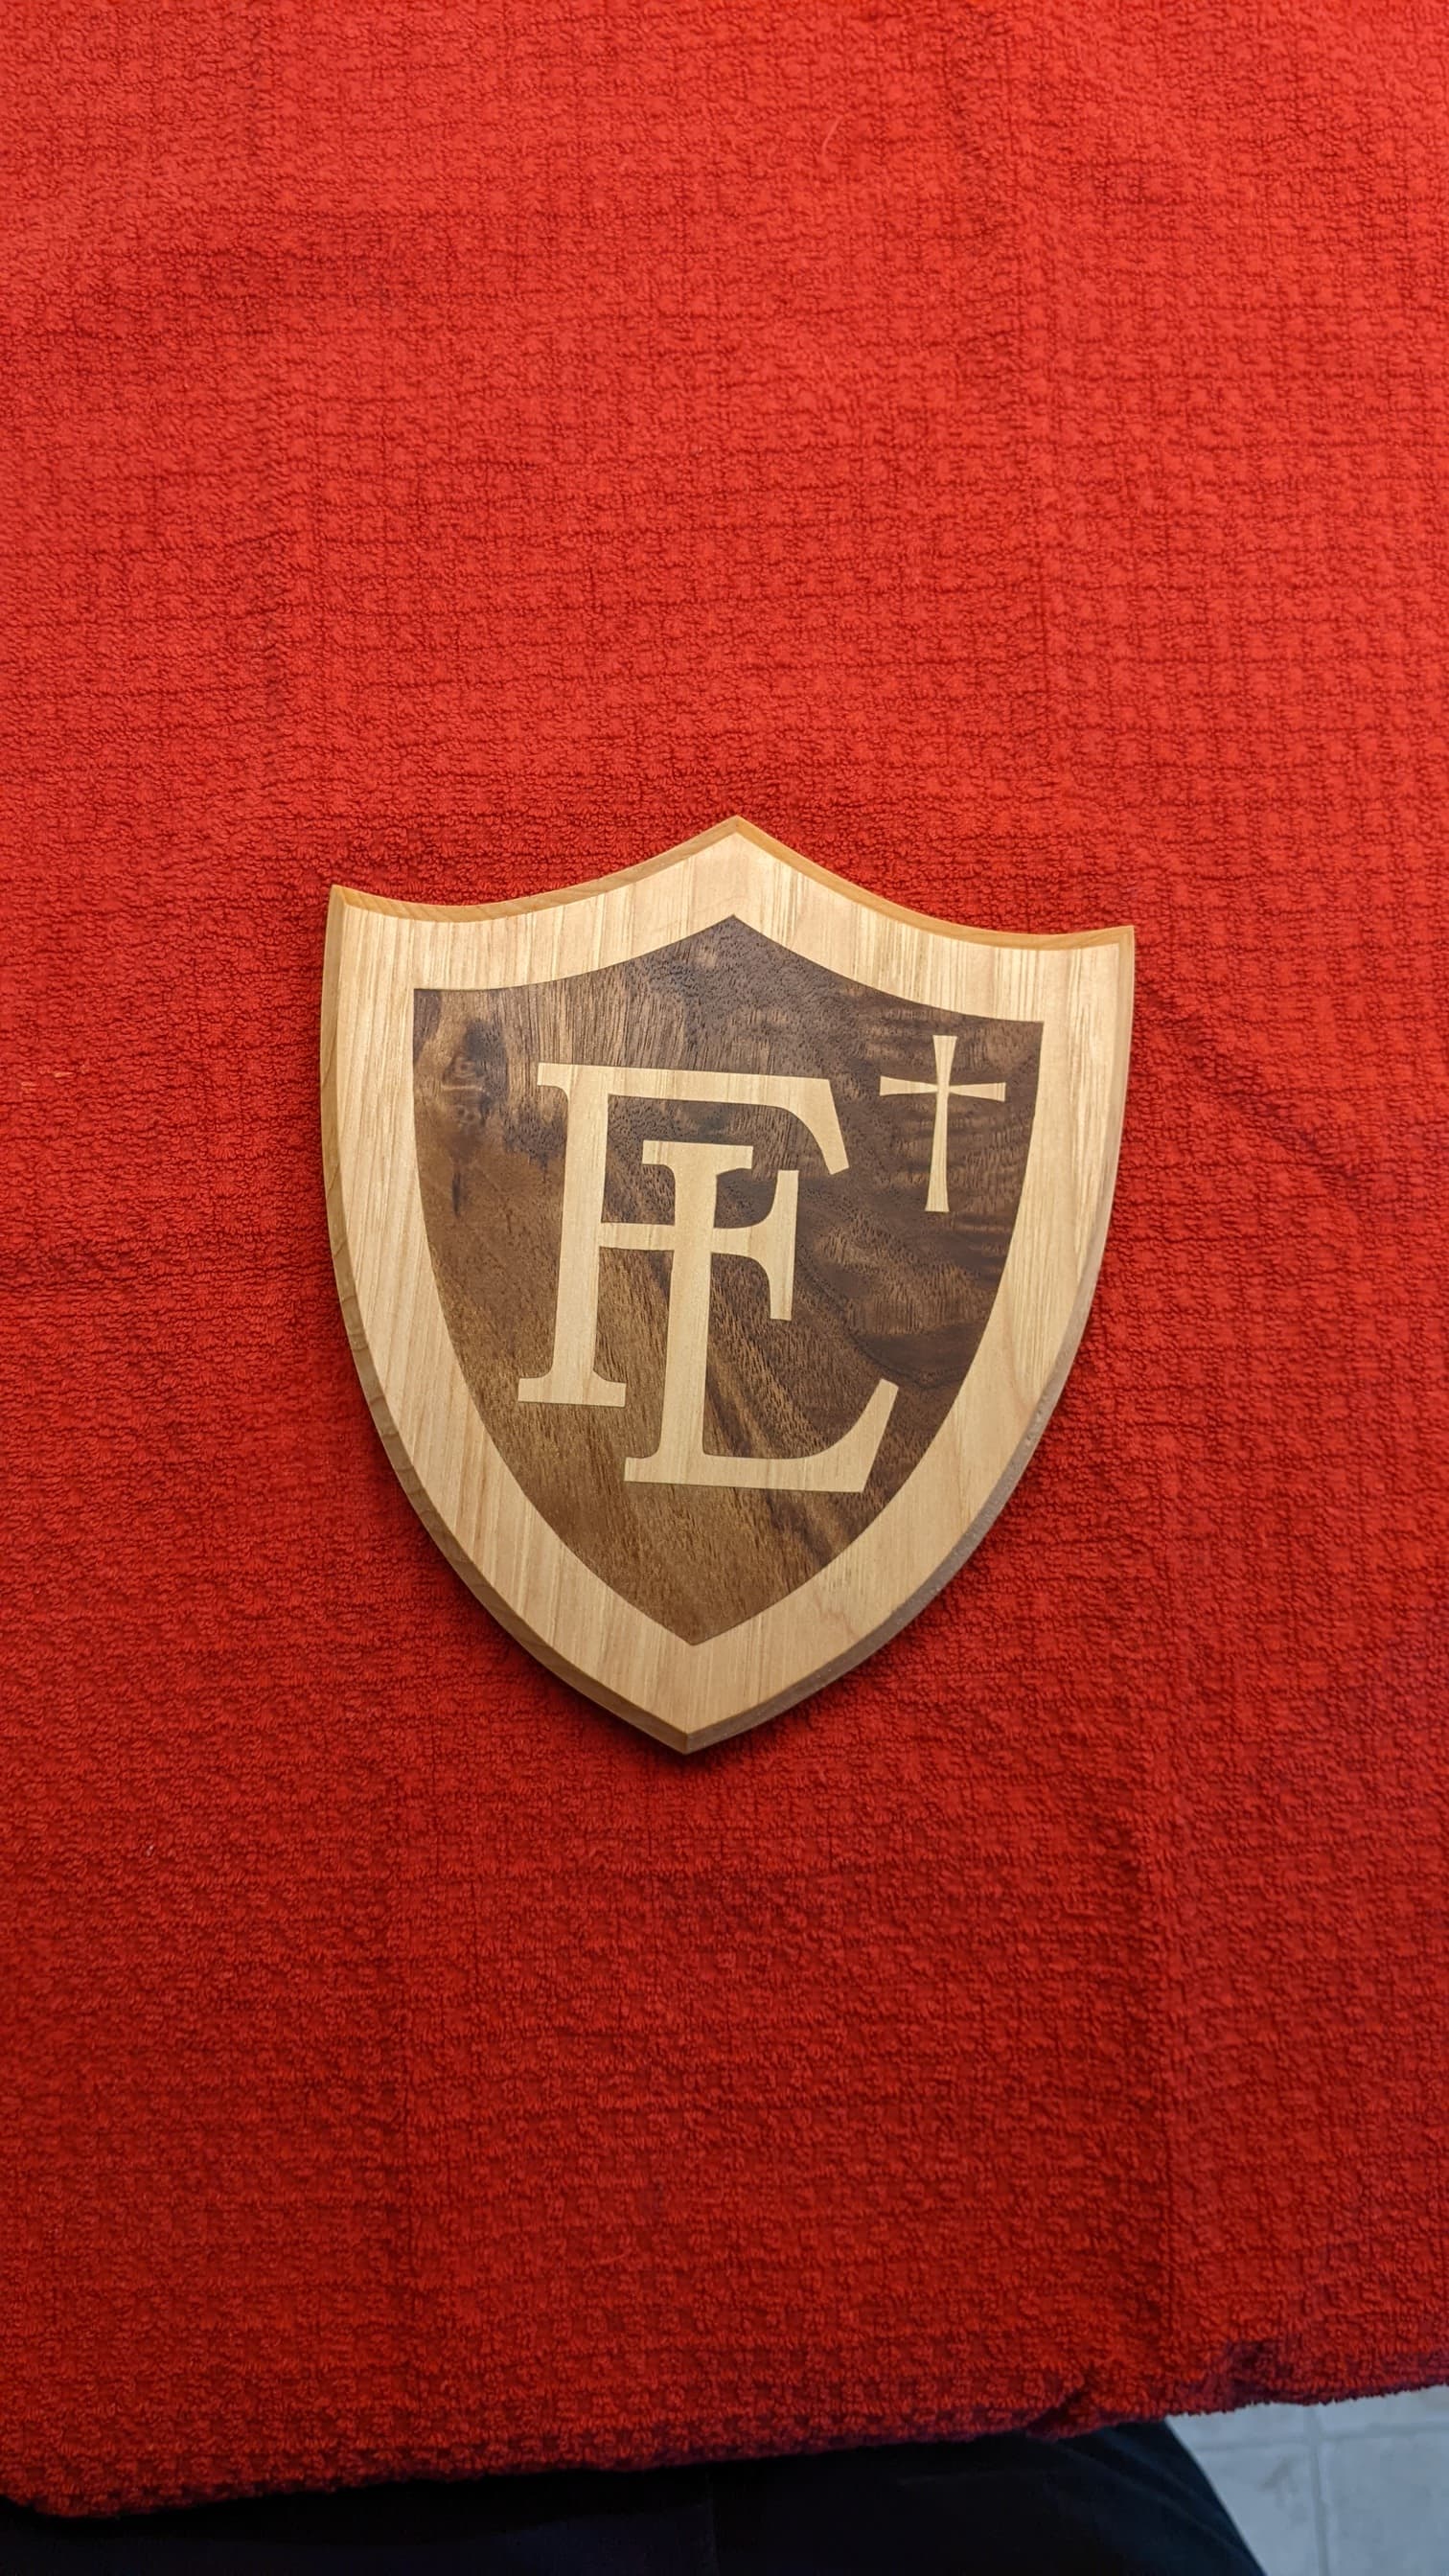
This is my first wood inlay. I was happy with how tight everything fit. This is for my brother who teaches at Faith Lutheran Las Vegas.
10 Likes
Wow.
I really like your work for a beginner. I am new whit CCPro as well and you seem to have master it. This leads me to ask questions in your process if you could.
What software did you use for your Grayscaling and could you provide more details on the import setup and manipulation before the tool path step?
Good Cut. Thanks
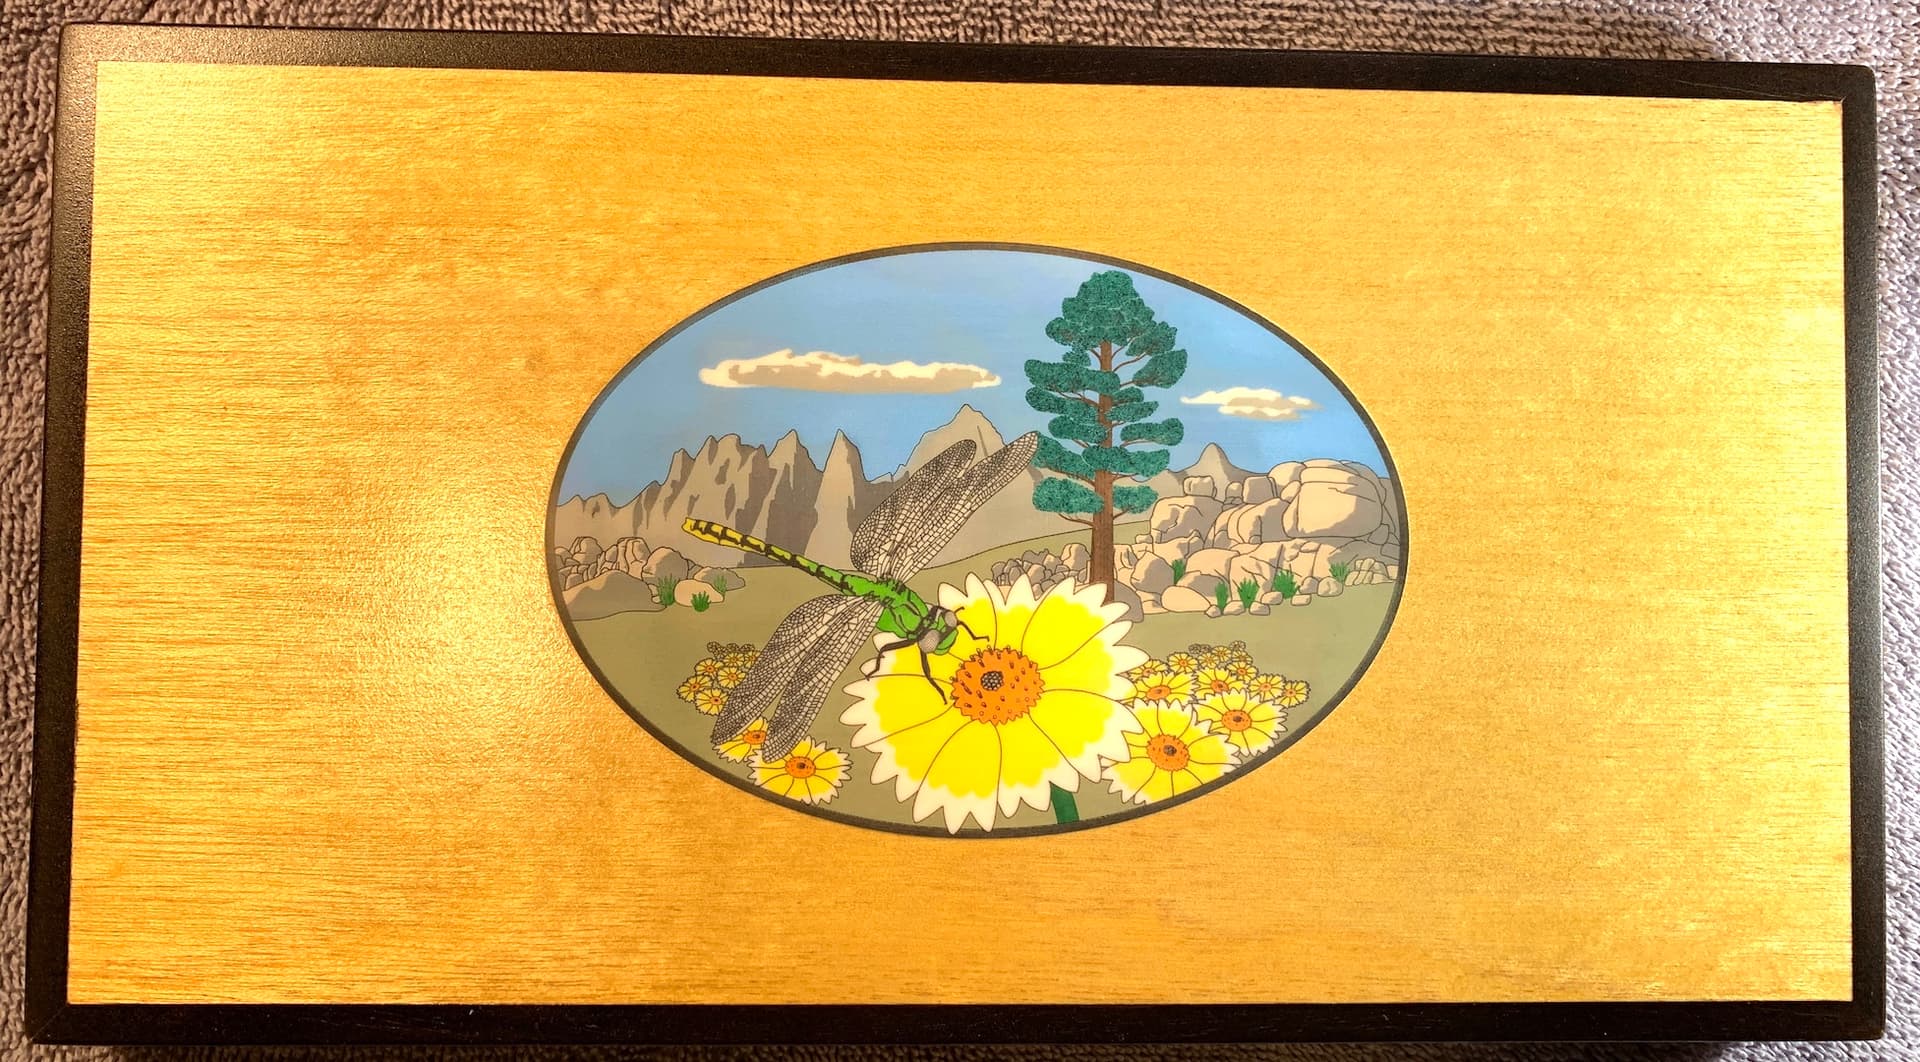
Engraved faux ivory, 30° carbide drag bit. Seven passes each inked with various non-contiguous colors, sanded to remove excess. Still working out the protocol. Amazing repeatability from the Nomad. This piece will be smooth and glossy after final finishing.
25 Likes
Hi @Jean ,
Thanks for the compliment, though I do not deserve it, Carbide Create Pro did the bulk of it on it’s own.
It has been a while since that carving and the computer that file is on has crashed and I have not yet removed the Hard Drive to off load the files.
But, as I remember, it was a simple 2-D graphic I downloaded from Google Images.
I imported it into CCpro, ran it as a “subtractive”, selected rounded, and input the depth (.75"). Simple as that.
I think I was using a 1/4" shank, tapered to 1/16th ball-nose bit. Once it completed, I set it to carve again at full depth with several different angles to clean it up. It was still a bit rough because of the stepover values I used.
So, mostly, it was just an experiment trying to figure the usefulness of that particular bit.
btw, the 1/4 shank tapered to 1/16th ball nose does a very nice job cutting and if the finishing stepover is set to around 0.009" per pass it will leave a very smooth finish. Takes quite a bit of time though.
MC
Aren’t those called helical gears ![]()
I jest
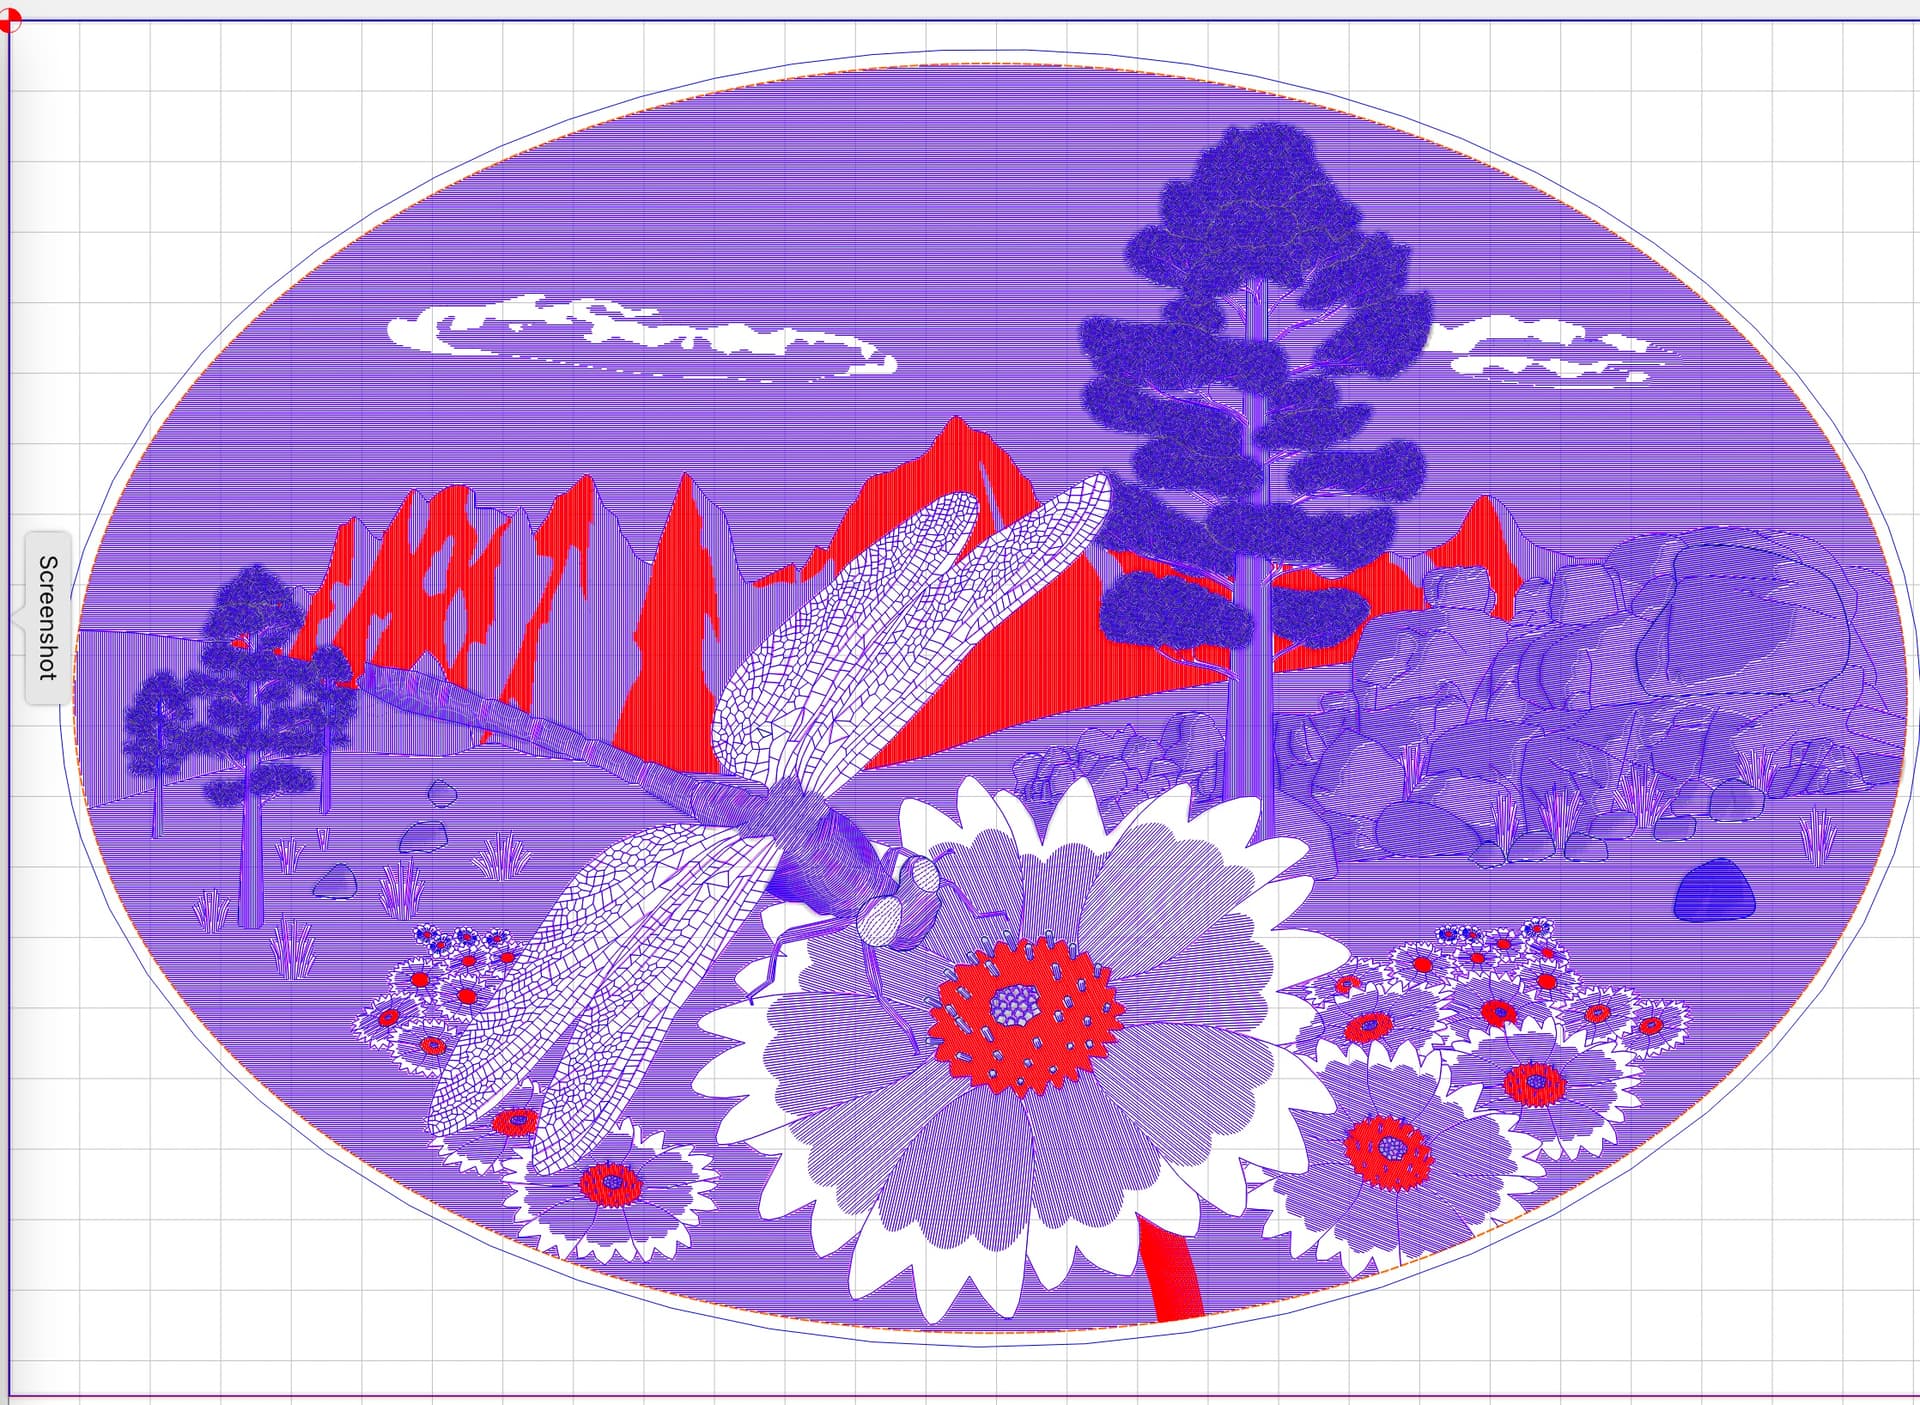
That is beautiful. So is the whole image including the center a drag bit operation. What is the size of the whole thing. It is hard to tell the scale. If it is a drag bit operation did you use a magnification glass to get the colors to separate on the center section? Are you the artist for the center section? Looks a lot like the Rocky Mountains. Again BEAUTIFUL! I wanted to shew the dragon fly away, so real.
2 Likes
Thanks so much. It’s all done with a drag bit in my Nomad, a jewelry box for a niece. All art created by me, in Affinity Designer, with the help of some photos. The solid color areas are parallel lines 0.15 mm apart. The mountain in the background is the East Face of Mt. Whitney with Keeler and Day Needles on the left. (I scaled that East Face when I was much younger.) The dragonfly I also used for a stained glass window, the wing venation is the same. Here’s the tool paths in CC, the currently selected (red) is “pass 3” which grooves the mountain sun areas, the flower center colors and the stem.
9 Likes
That’s amazing. Do you have pictures of the process you did? I love the colors. I’d love to learn how you did that.
3 Likes
This is an entirely new area of milling to me. As I’m quite intrigued I’d like to second the request for more insight. Can you describe how it’s done?
1 Like
Let’s move this into its own Gallery thread, “Dragonfly Tidytip Engraving”. (Tomorrow!)
3 Likes
A little jewelry work for my daughter-in-law

And the fixture with groove for the first link that was braized & I didn’t want to remove it.
Cut with a 1/8" single flute 60° engraver bit. 18000 RPM, 0.002" stepover, 0.001" depth of cut.
I made several passes at 0.001" increments until it looked good. Finish was 0.003" deep.
Tiny drop of Tap-Magic for lube. Should I have saved the gold chips??? ![]()
6 Likes
Ages ago, in a book, I saw an image of a device which was used by jewelers for washing their hands after handling/working w/ precious metals — apparently in a busy shop, it could recover more than an ounce of gold dust each year.
2 Likes
I thought about that too. My brother worked in loss-management for a while & in a machine shop that used precious metals, they captured & filtered the hand-washing water, and saved all the shop rags used to clean up after a job and extracted the finings from everything.
3 Likes