That’s amazing. Do you have pictures of the process you did? I love the colors. I’d love to learn how you did that.
3 Likes
This is an entirely new area of milling to me. As I’m quite intrigued I’d like to second the request for more insight. Can you describe how it’s done?
1 Like
Let’s move this into its own Gallery thread, “Dragonfly Tidytip Engraving”. (Tomorrow!)
3 Likes
A little jewelry work for my daughter-in-law

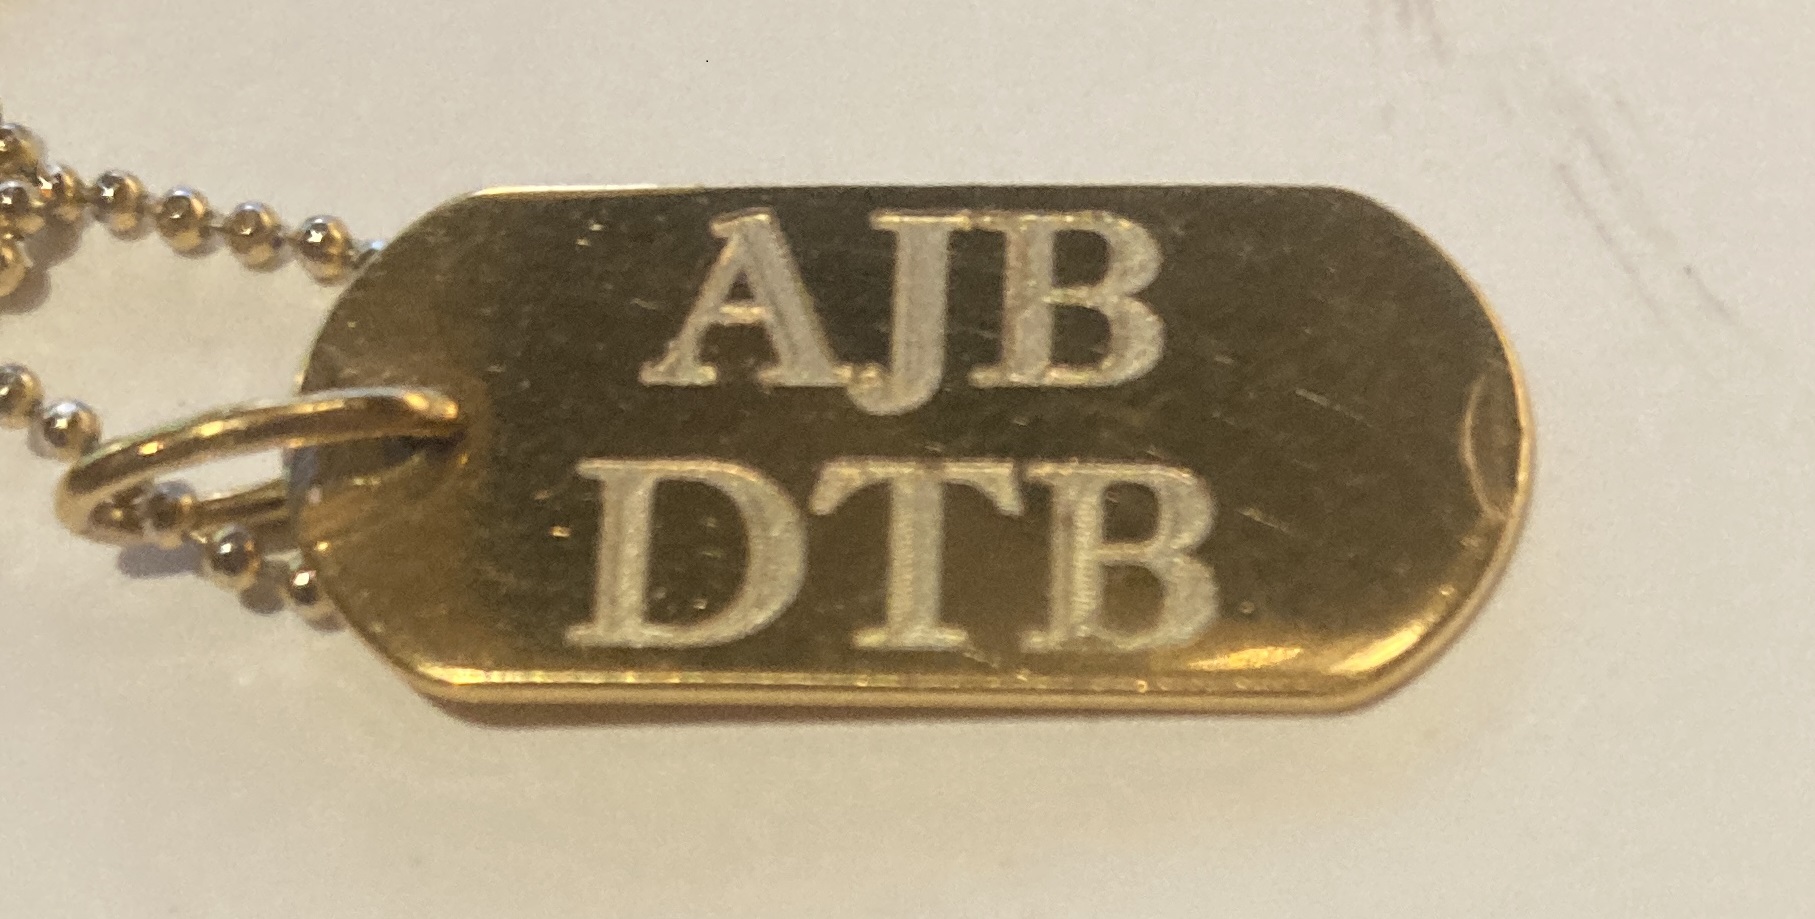
And the fixture with groove for the first link that was braized & I didn’t want to remove it.
Cut with a 1/8" single flute 60° engraver bit. 18000 RPM, 0.002" stepover, 0.001" depth of cut.
I made several passes at 0.001" increments until it looked good. Finish was 0.003" deep.
Tiny drop of Tap-Magic for lube. Should I have saved the gold chips??? ![]()
6 Likes
Ages ago, in a book, I saw an image of a device which was used by jewelers for washing their hands after handling/working w/ precious metals — apparently in a busy shop, it could recover more than an ounce of gold dust each year.
2 Likes
I thought about that too. My brother worked in loss-management for a while & in a machine shop that used precious metals, they captured & filtered the hand-washing water, and saved all the shop rags used to clean up after a job and extracted the finings from everything.
3 Likes
Its quite common in the xray film processing at large steel inspection companies to have a silver-recovery system for the film developing solutions. So common that a friend of mine in the business supplied them “for free” just so he could recover the silver. He had small ingots of silver stuffed all over his house for years!
1 Like
When I worked at Kodak a lot of film processing was done. The chemicals were hazardous waste so there were several people that would remove the chemicals for free. Then they would extract the silver from the old processor chemicals. However there were some that would just dump it down the drain. In later years the waste water company could trace the silver back to the source by the silver trail in the plumbing and fine them. The silver kills the microbes in the sewer plant. Places like county governments processed a lot of film and used a lot of fixer and developer so for the recovery people it was free silver.
So for precious metal it might make sense to save your chips if you do a lot of precious metals but how do you save it. Do you just sweep it up, vac up, so on.
For non-precious metals like alum is it dangerous to use dust extraction for those chips.
My first REAL attempt at doing a large epoxy Job.
So far so good.

I still have 2 colors to go. Yellow and Blue.
Updated.
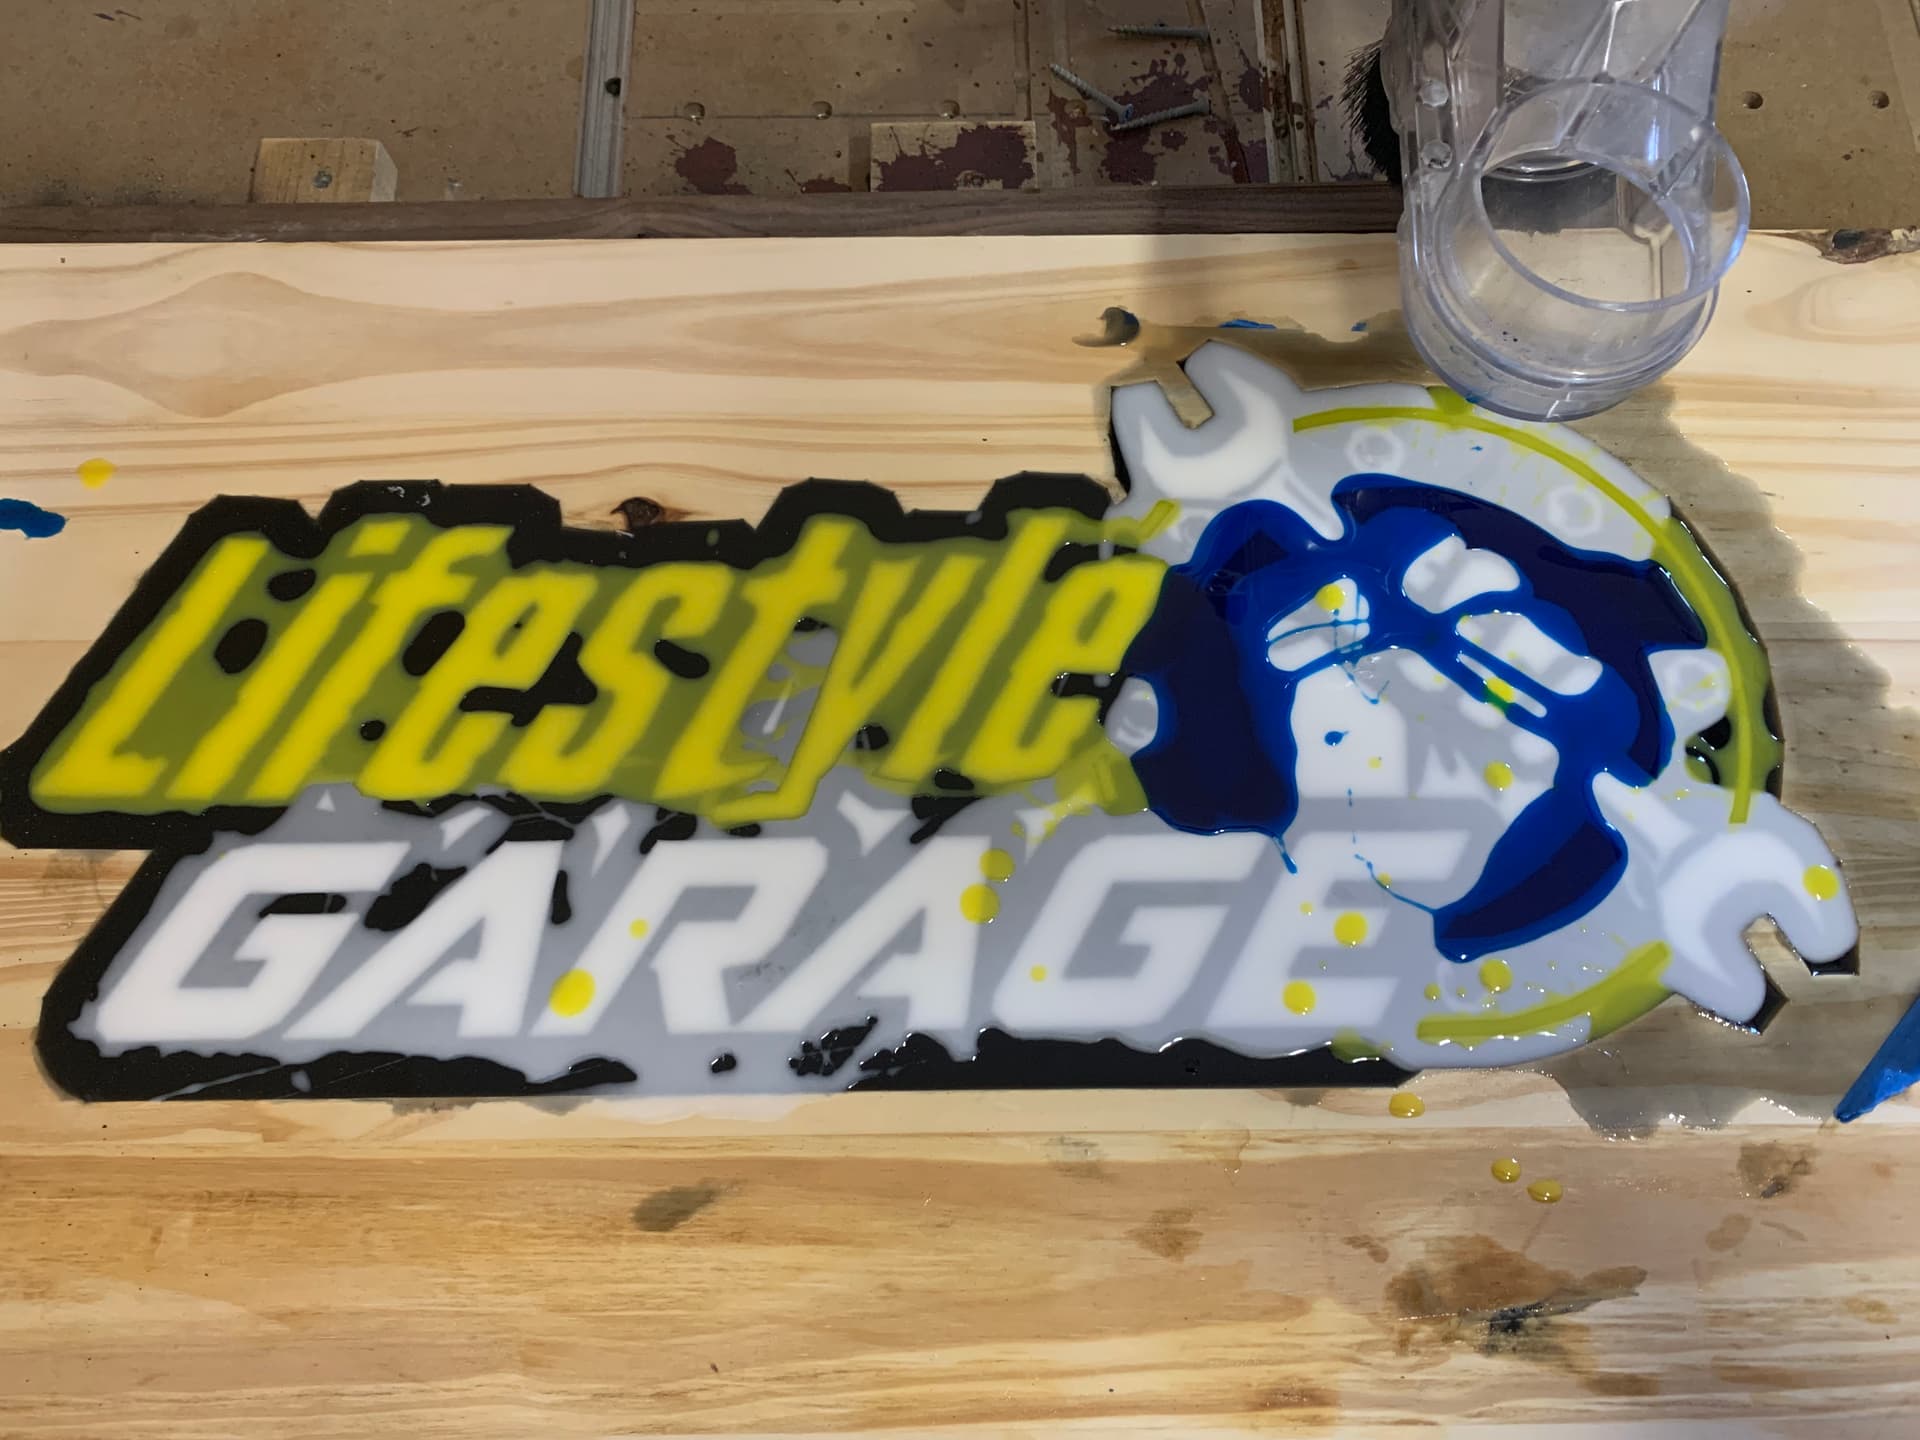
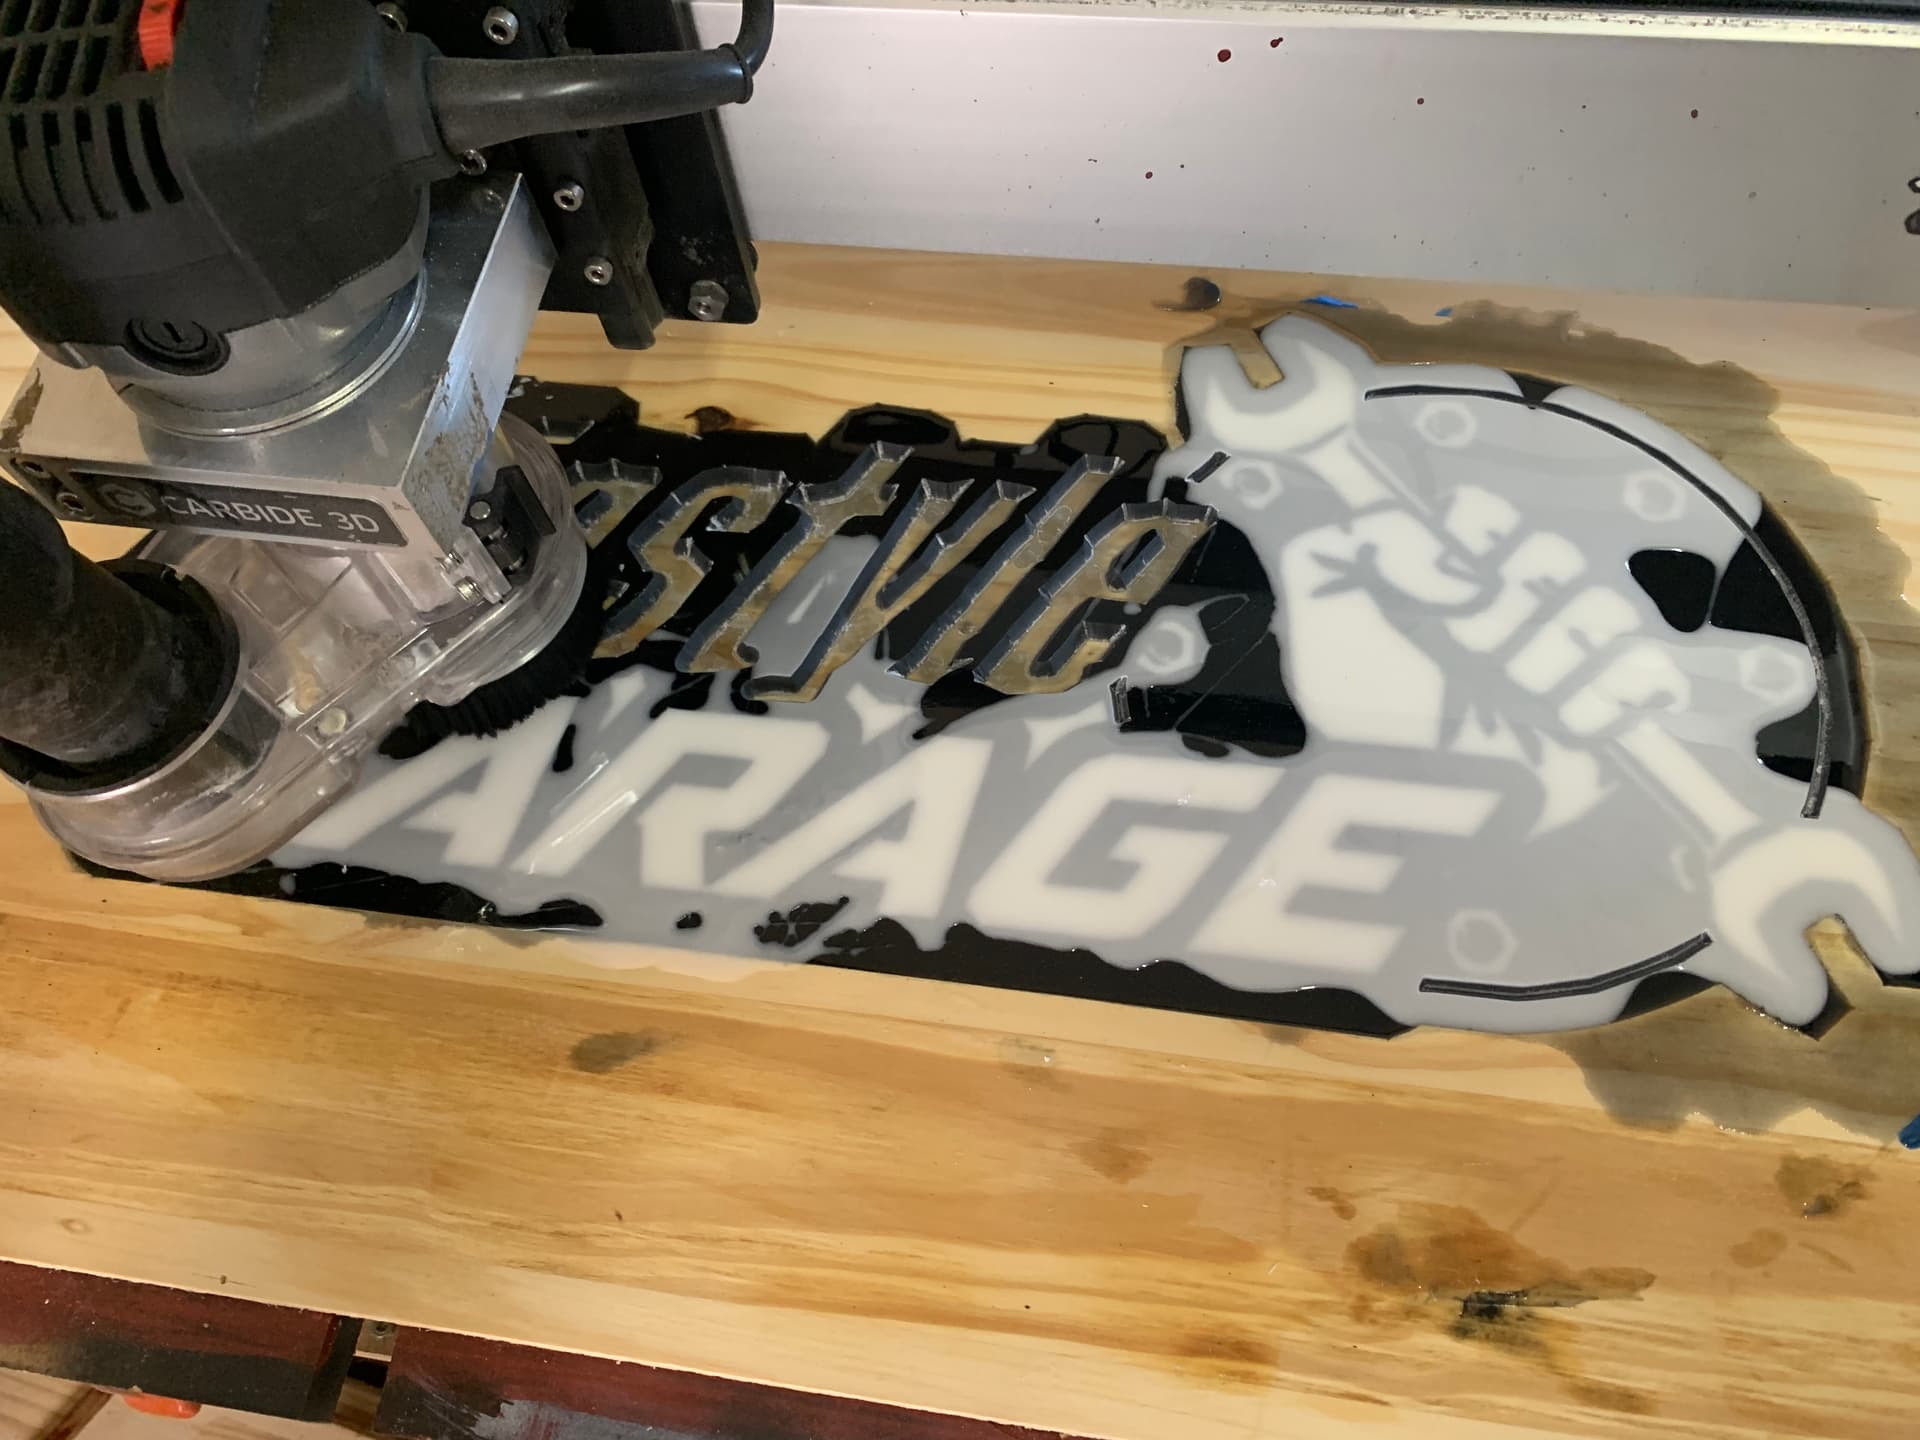
These guys are doing the lift kit, bumpers, winch, etc on my Jeep. I figured I would hook them up with some shop “Art”.
11 Likes
@SDGuy - What are you using to color your epoxy?
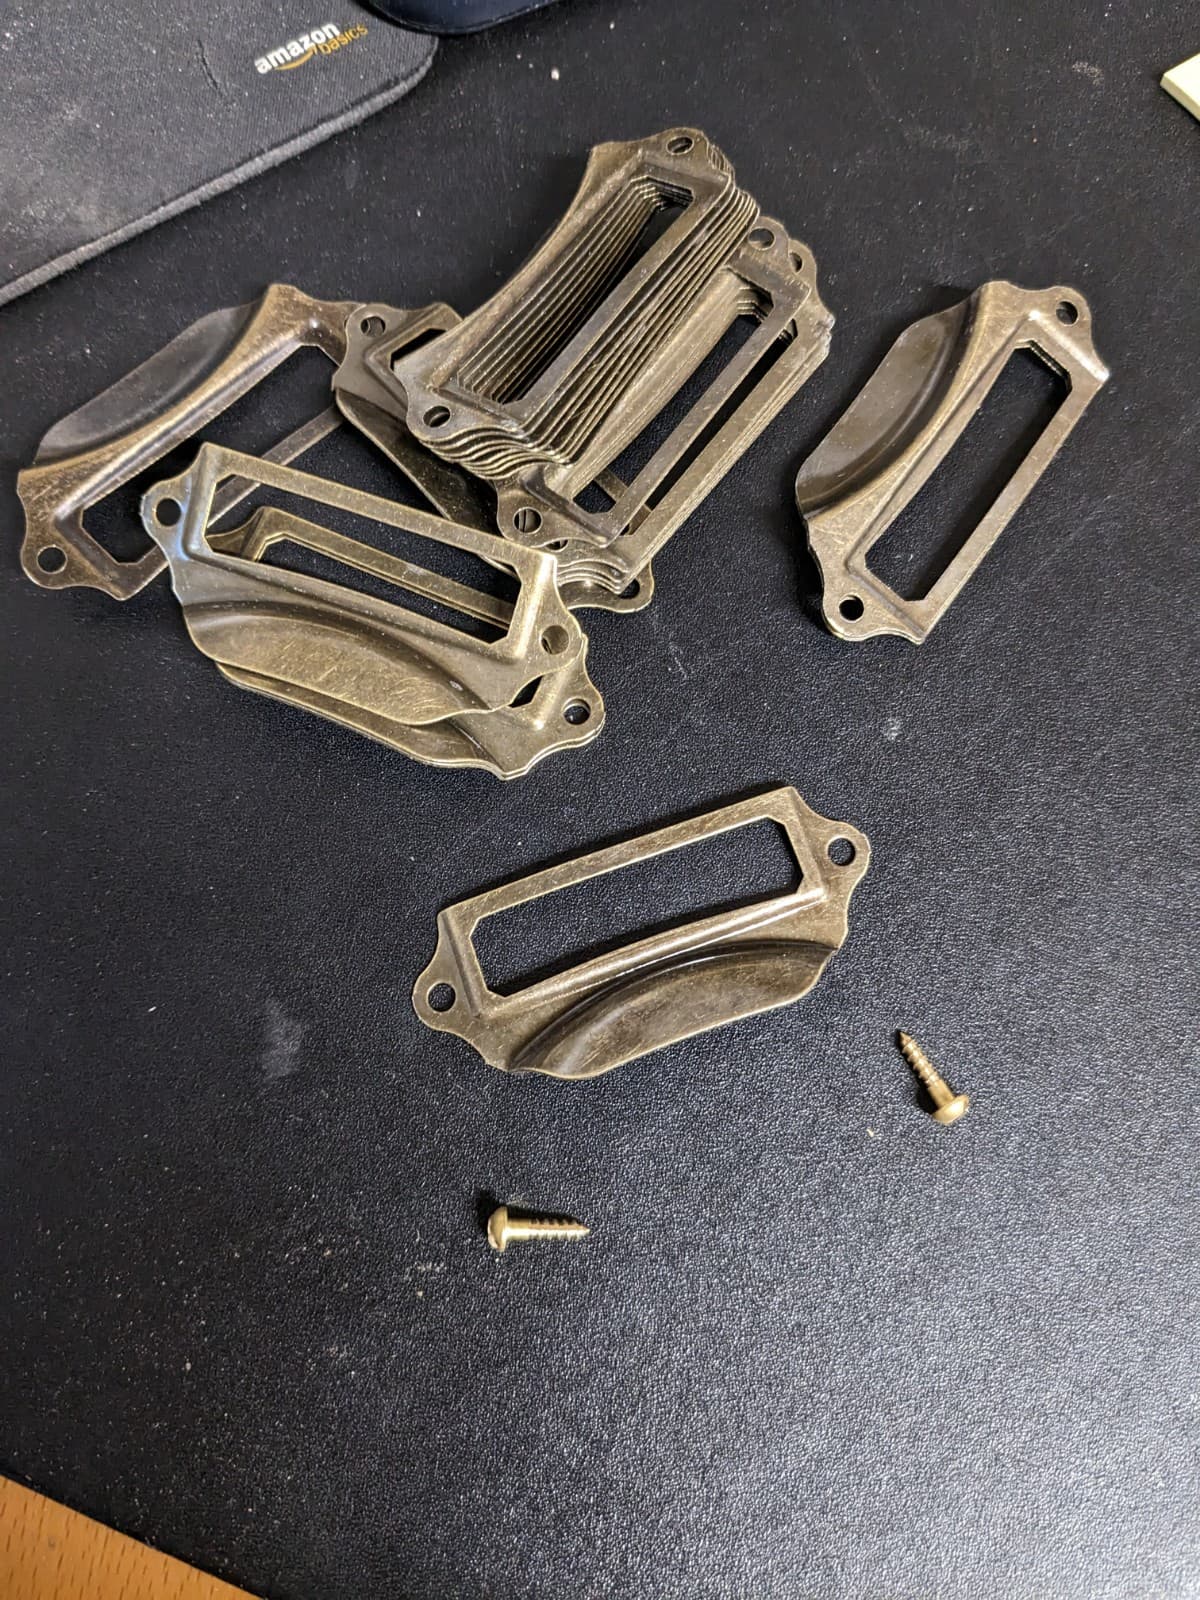
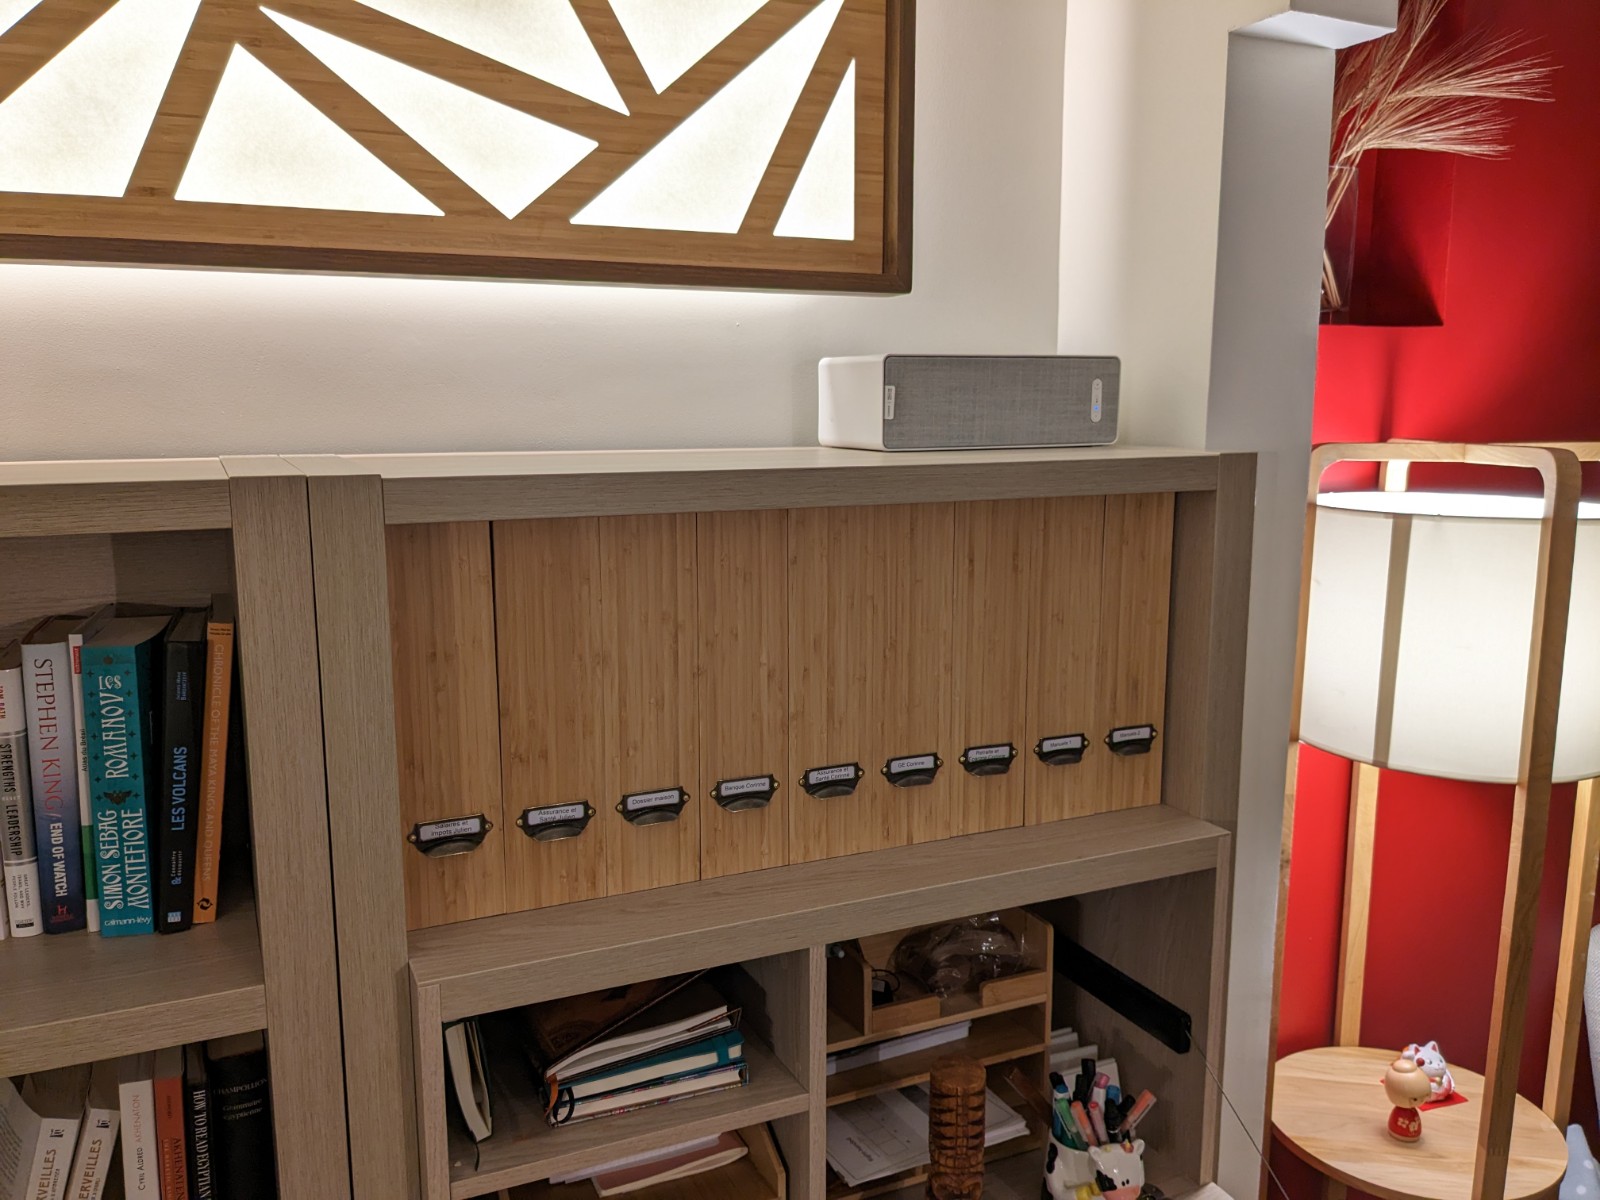
I have been busy cutting boxes with my laser,
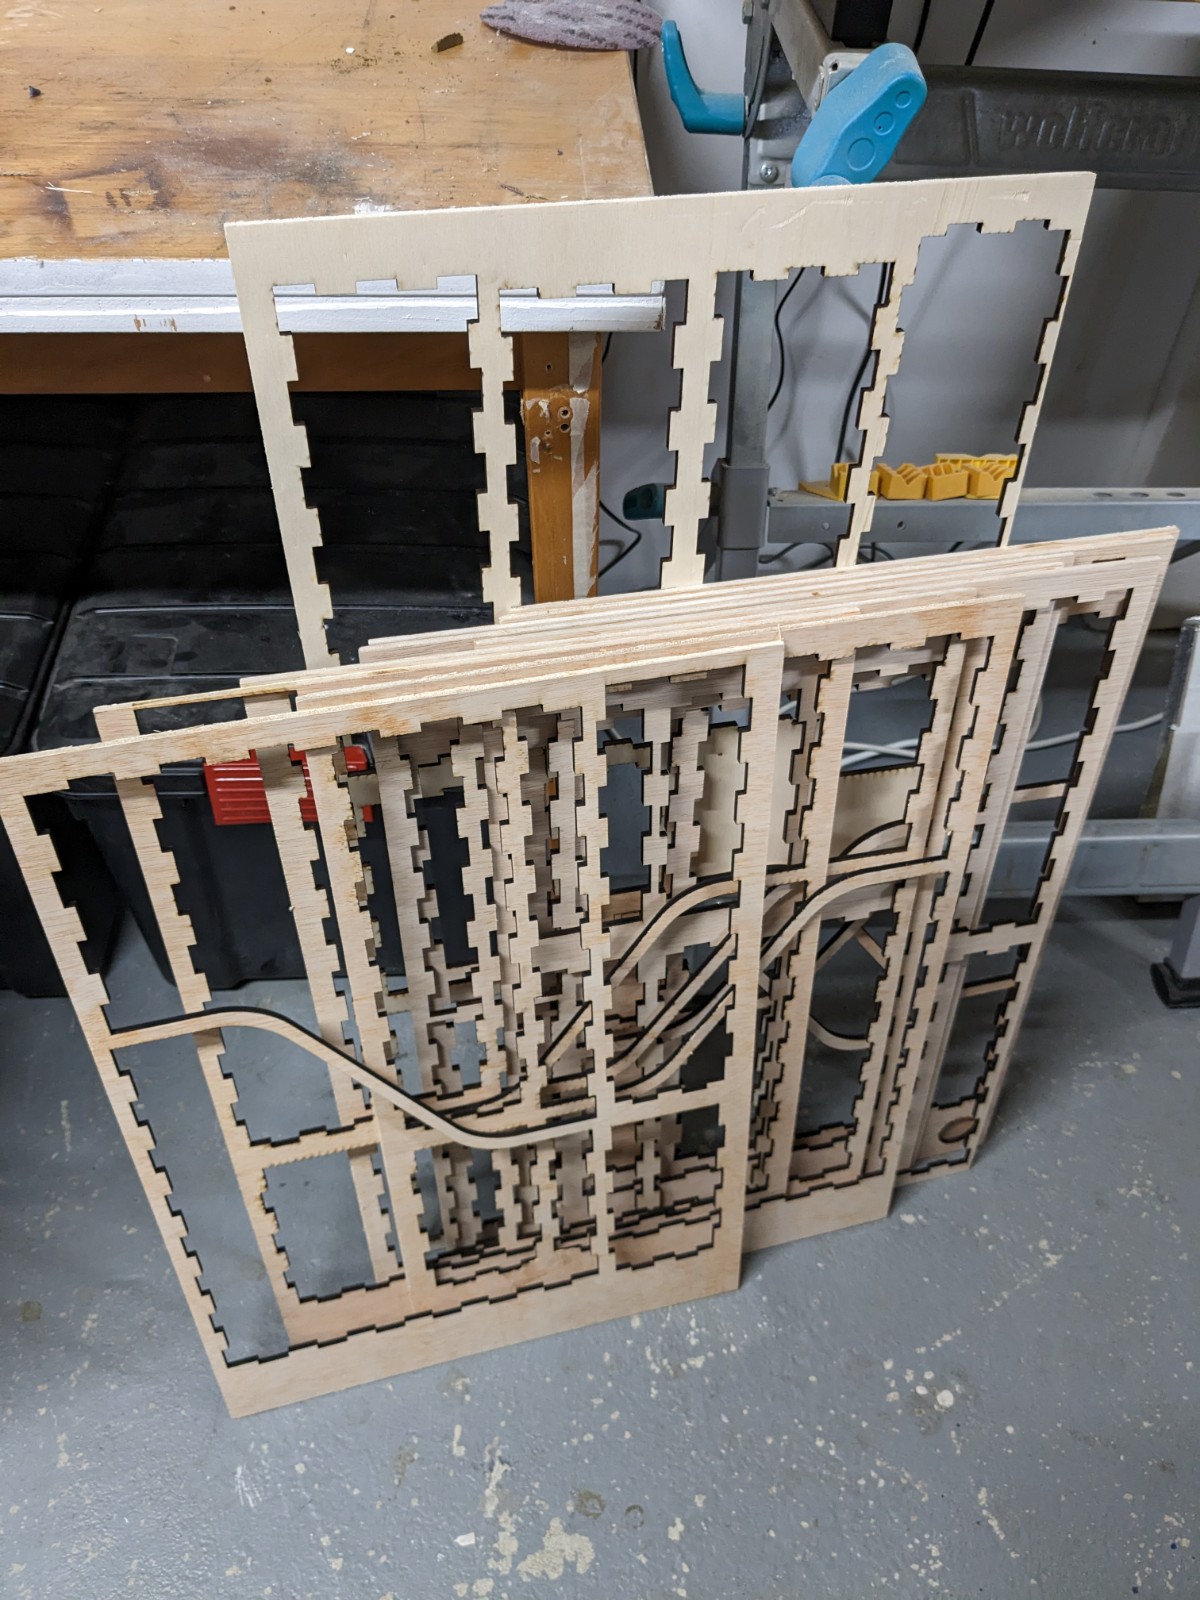
These are meant to replace cardboard file holders that were falling apart
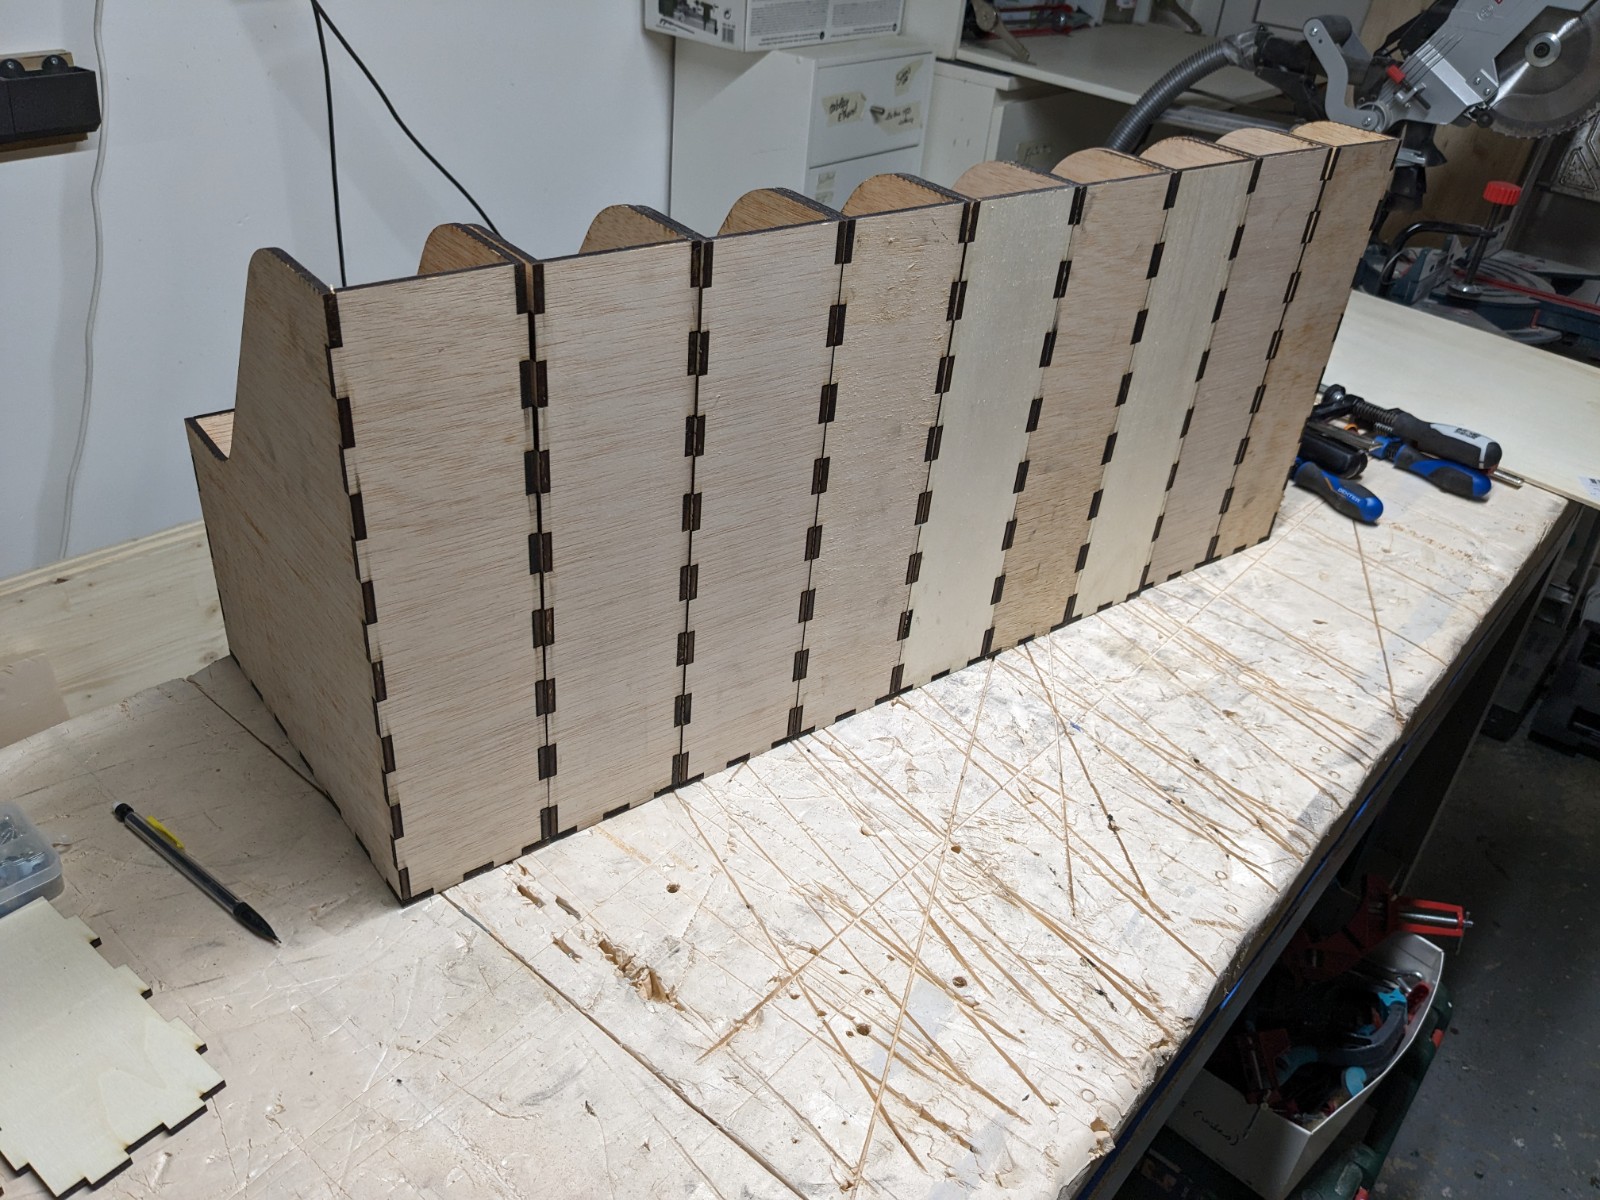
(I later sanded off the burnt edges)

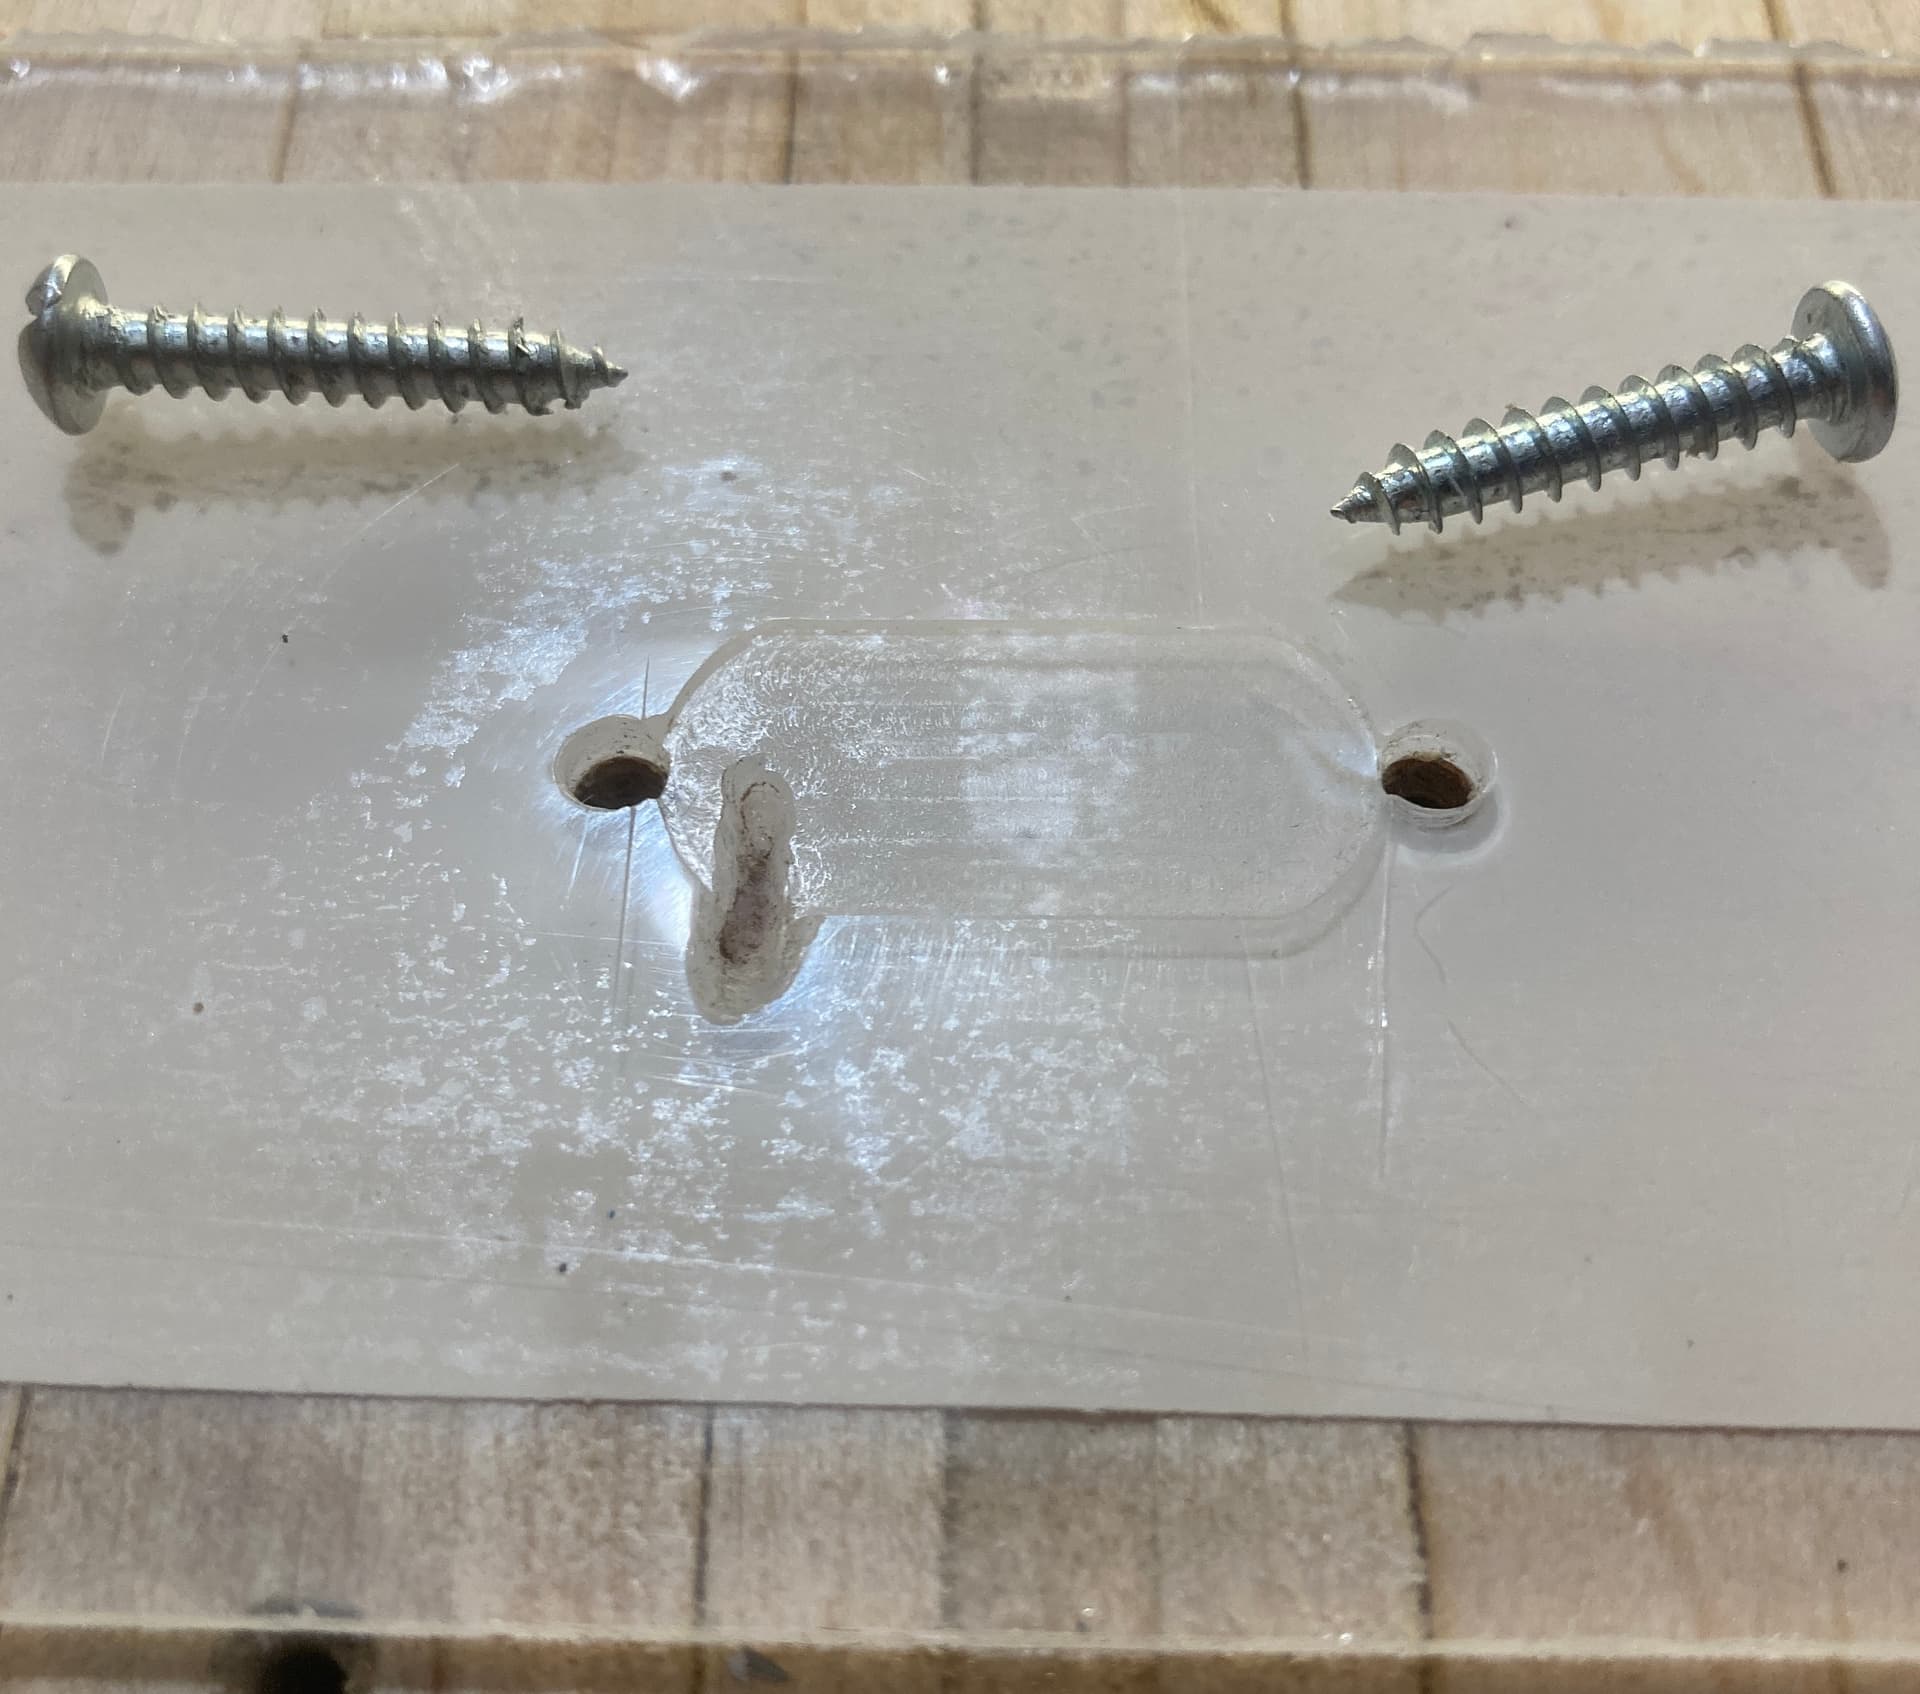
bought a set of tag holders,
and used my Shapeoko to cut 9 front panels out of bamboo,
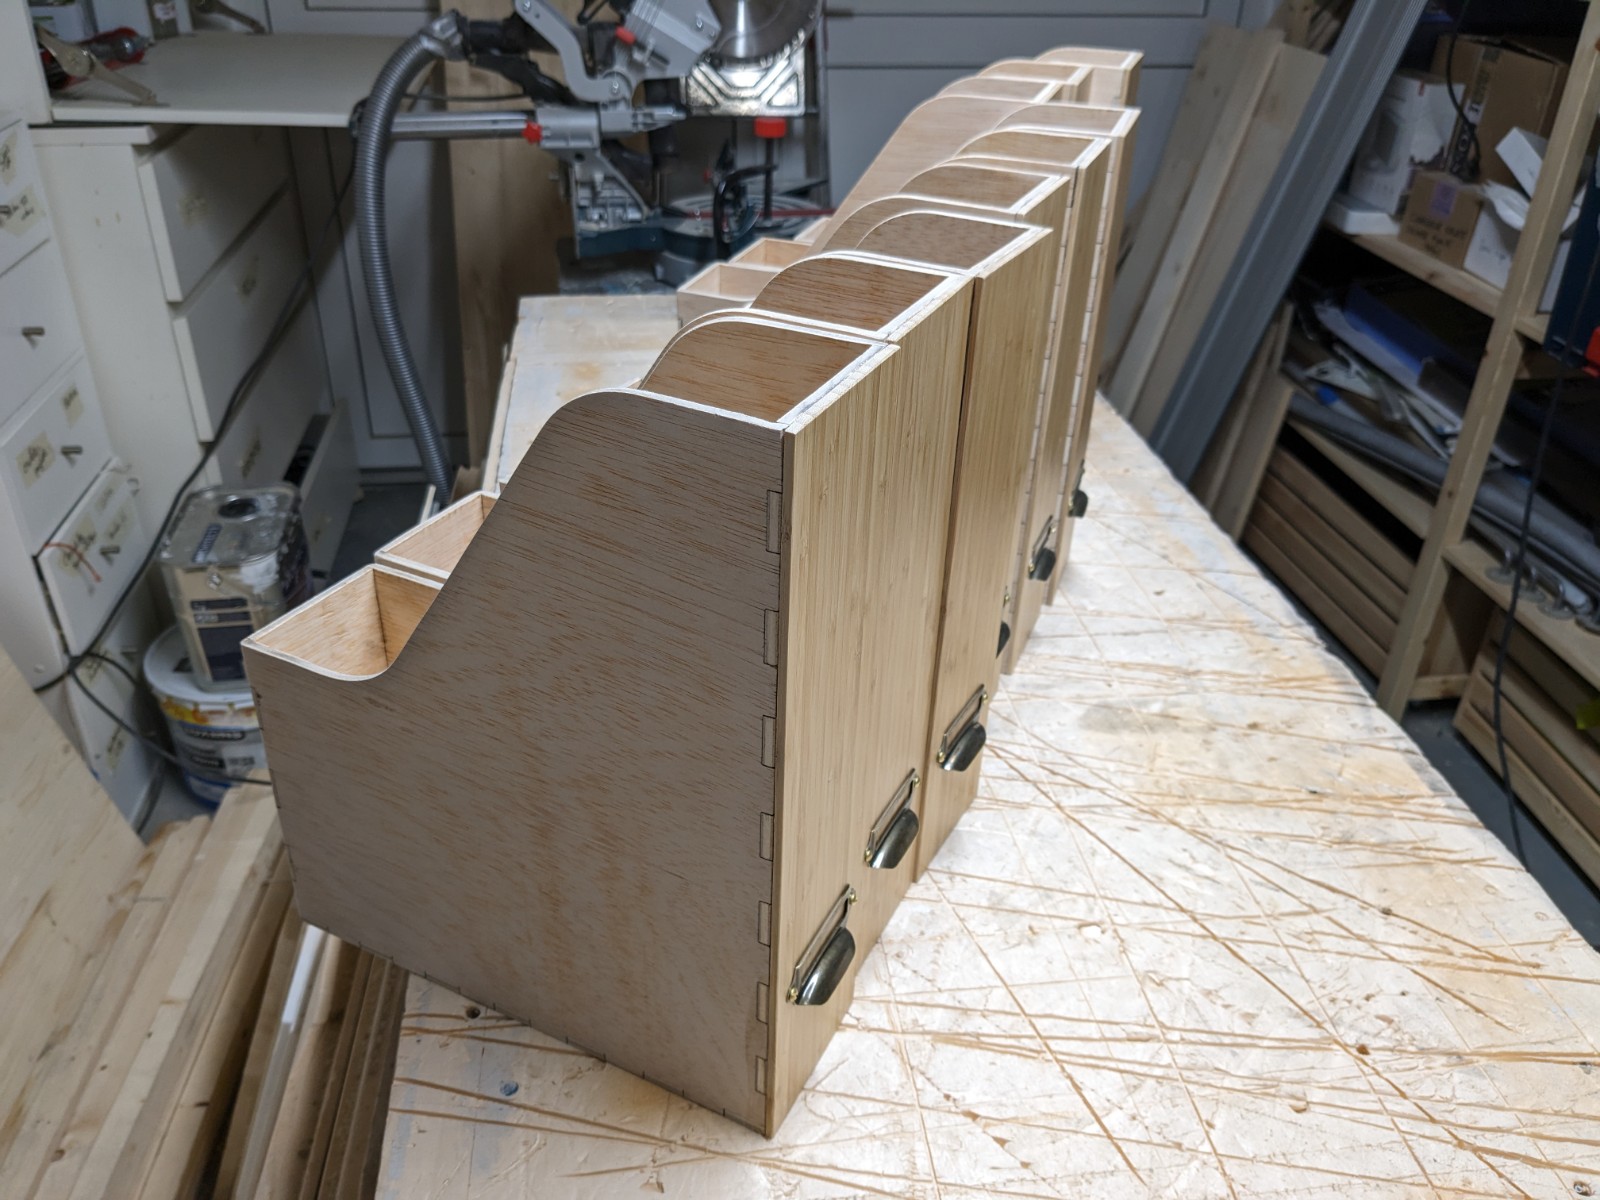
et voilà
44 Likes
Classy, like olden times before plastic and cardboard furniture.
1 Like
MC,
That is good that you were able to accomplish a 3d carve in a few steps. I been trying with little to no success but I won’t give up.
I’ll keep on trying. Thanks for your insight.
Jean
How quaint. Paper file storage. I bet you still write letters, using cursive and sent through the mail!
Sorry Julien, couldn’t resist. Nicely done!
5 Likes
I made an enclosure for my new Atomstack X7 laser.
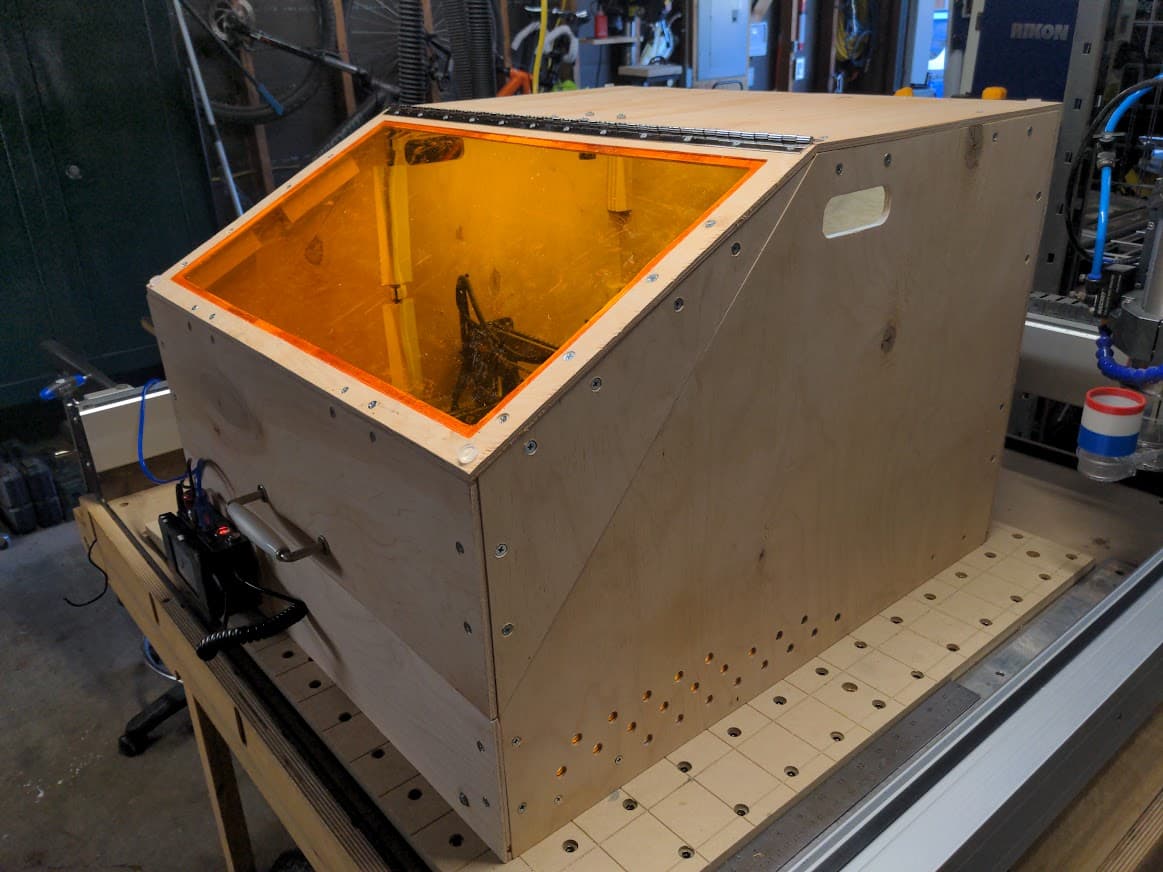
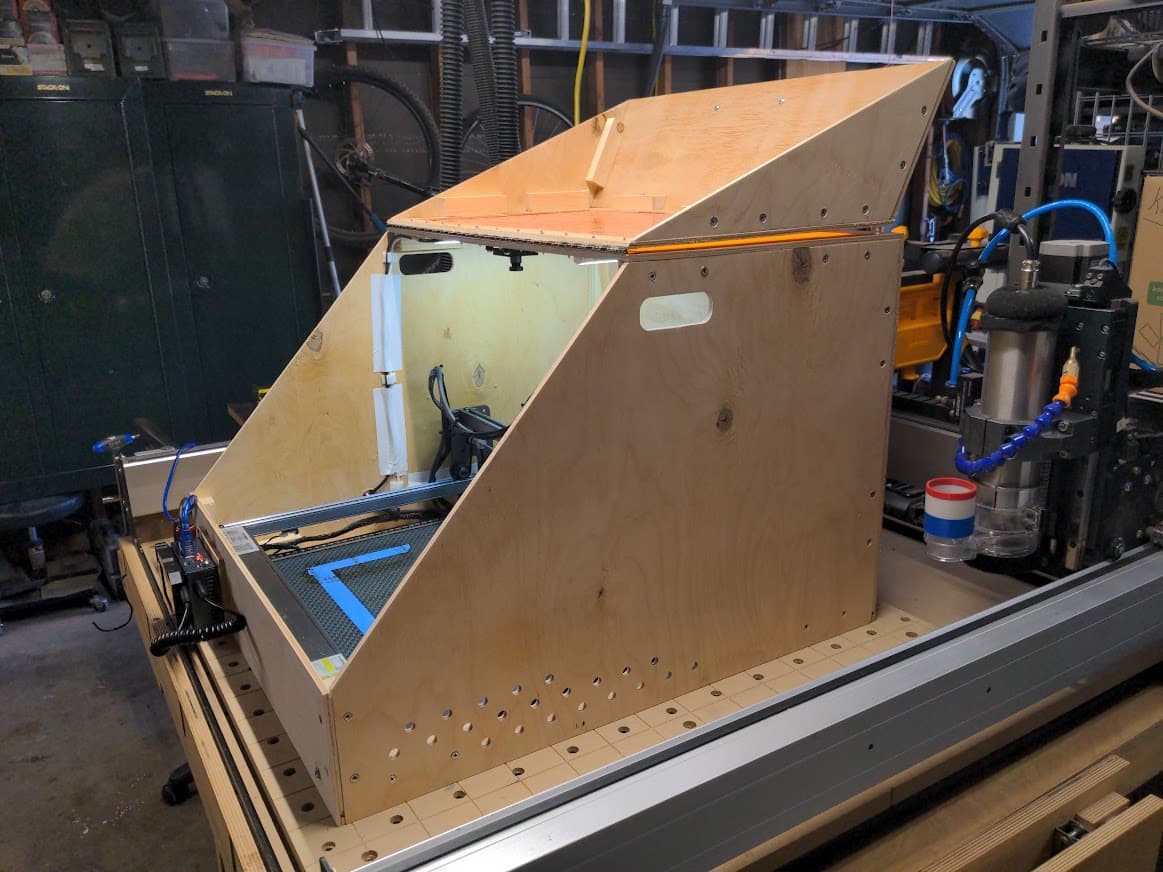
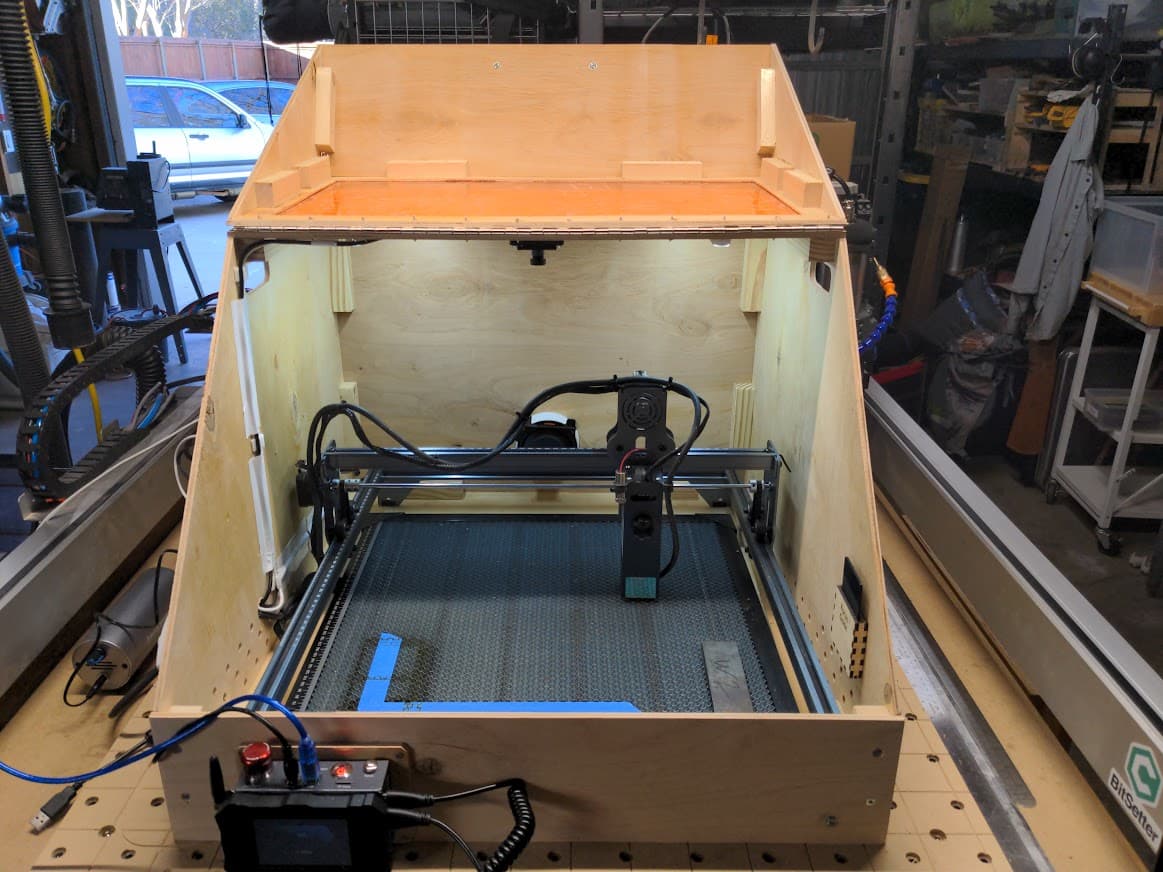
The wood is a really cheap grade 6mm baltic birch I salvaged from machine packing crates years ago. This was my last full sheet, I had about 50 or more originally that were 4’ x 4’ or larger. All the screws are mismatched because I went through and found whatever I could in the thousands of screws I’ve saved to put it together. For the box itself, my only costs were the piano hinge (which I know I have a two foot section from another project somewhere…) and the laser safe plastic from Jtech.
The laser is bolted to the front so it is secure in there. This will help for transportation and with camera positioning for Lightburn (if I can ever get the camera to be recognized by Lightburn in Linux, but that’s for a different forum…). Built in cabinet fan with a quick detach 20’ vent hose. LED lights bars on on the top.
For anyone interested, here is the svg file. It should work for other similar sized lasers. Dimensions were based on allowing full movement of the carriage and getting enough height for the camera to view the bed. The base panel is in a slot in the side/front/rear panels for strength. Everything else I went simple with 1"x1"x4" blocks and screws, you can see in the photos.

12x24 Laser safety panel
Quick disconnect vent
25’ plastic covered dryer vent
Quiet vent fan
LED bar lights
Wide angle camera
3d print file for Cam Case.stl (161.8 KB)
If you decide to use these plans, you should reposition the drill holes on the side panels. Because I had them lined up, when you try to put a screw in from the top and then the side, well… they hit each other ![]() I had to run some in at angle. Also, I chamfered the lid panels on my table saw, set the angle using the lid side piece.
I had to run some in at angle. Also, I chamfered the lid panels on my table saw, set the angle using the lid side piece.
Anyway, this was a quick-and-dirty Shapeoko project, functionality (mostly) over form. It does what I wanted which is contain the smoke and the vent fan pulls it out quite well even though it is a smaller fan.
9 Likes
Made a case for my loaner calculators so that they don’t end up crushed at the bottom of the catalog case I use as a briefcase.

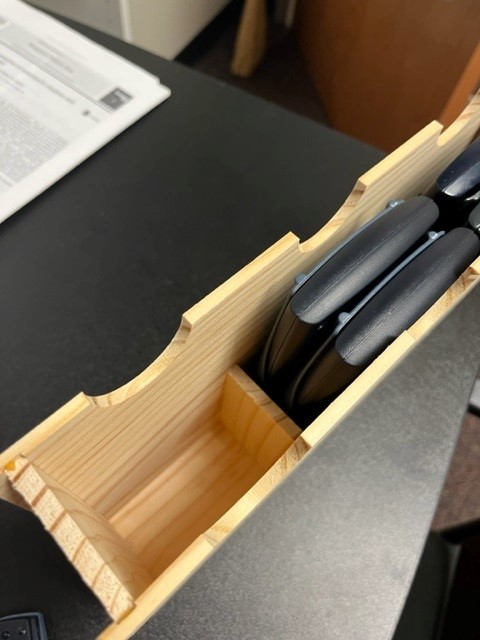
Having a drum sander makes creating these types of incidental boxes easy
I use dados&grooves for the joinery. Dado/groove width is set to match cutout depth. I back sand to separate the parts (look Ma! No tabs ![]() ) I am banking on the boards being thin to minimize crossgrain forces. If it fails for that, I’ll make another and reorient the dividers (and perhaps a slightly different gluing strategy)
) I am banking on the boards being thin to minimize crossgrain forces. If it fails for that, I’ll make another and reorient the dividers (and perhaps a slightly different gluing strategy)
John
12 Likes
Acrylic paint.
I bought a set of small tubes at Michaels.
2 Likes
This came out nice. One hard part was getting the bag/shoes logo off their business card (about 1 inch square) and expanding up to useable size. I tried making this a few months ago but was not yet good enough.
Am now though.

18 Likes
Looks like pine and that is very soft. I dont think you will need to worry about cross grain breakage. Pine is ugly but very forgiving.