aluminum sign for my cousins (2nd) hair studio.

Got creative with the spacers & cut a bunch of 1" chunks of black fuel line ![]()
aluminum sign for my cousins (2nd) hair studio.
Got creative with the spacers & cut a bunch of 1" chunks of black fuel line ![]()
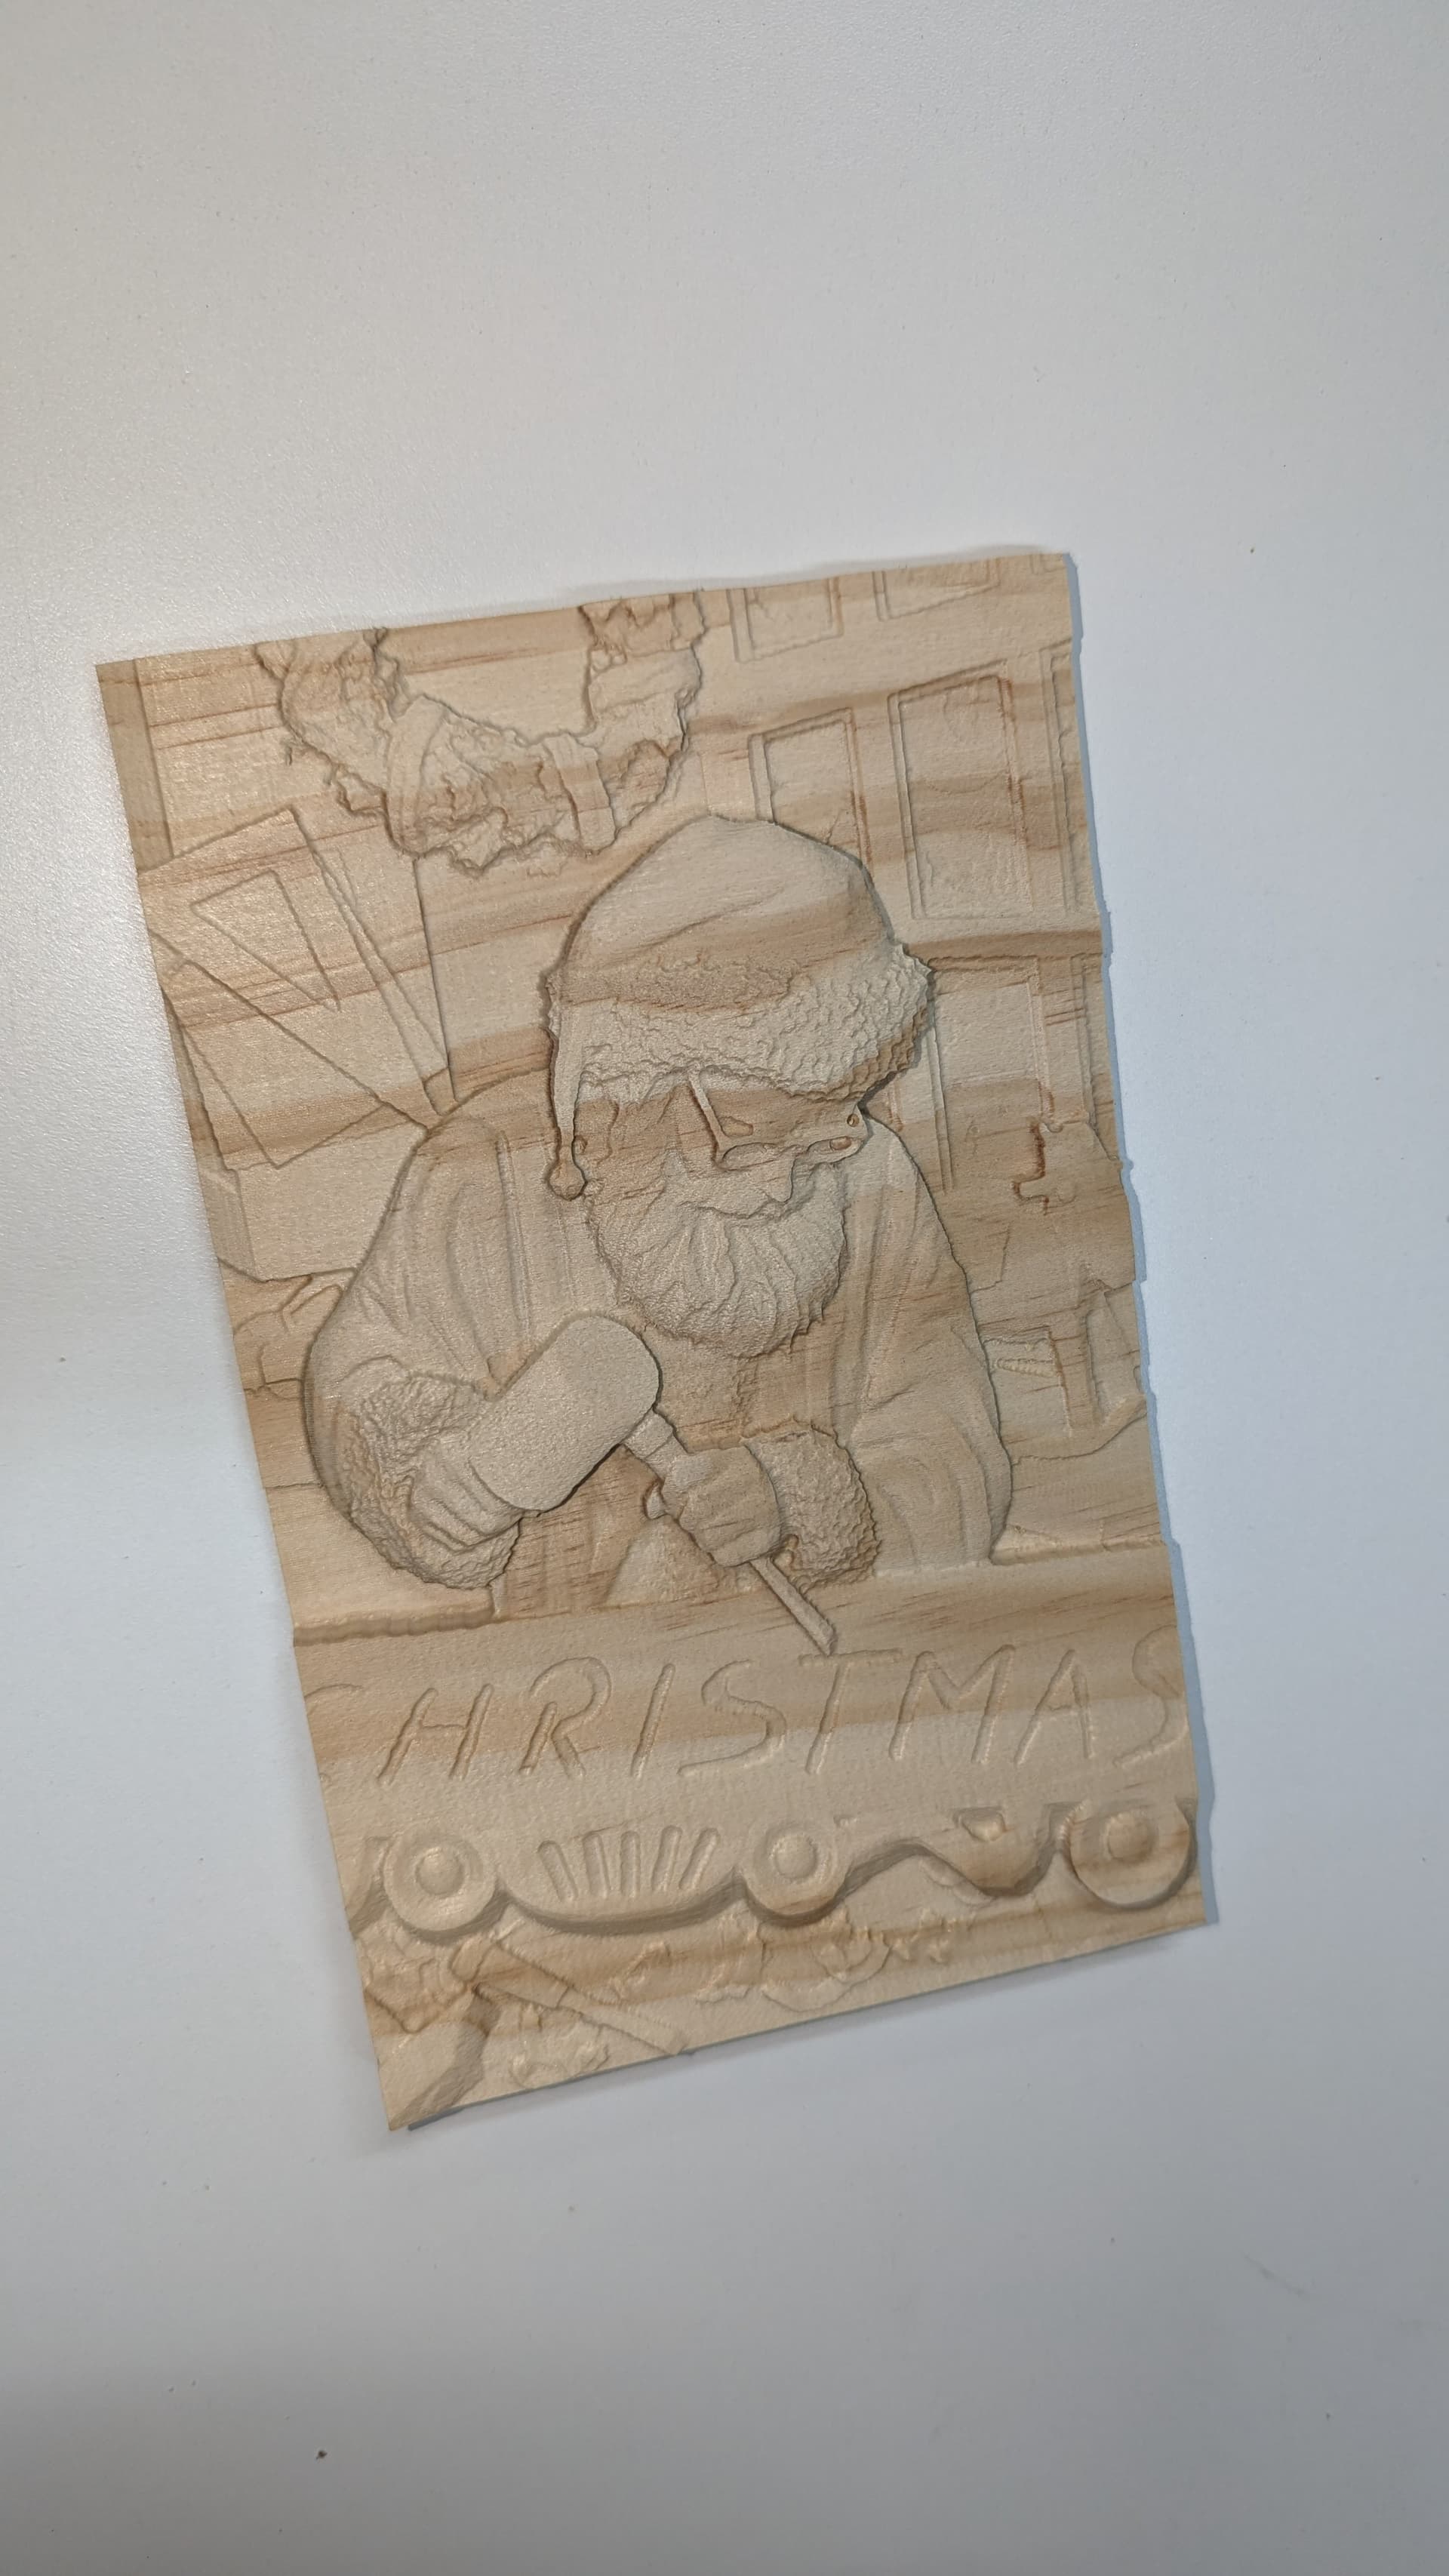
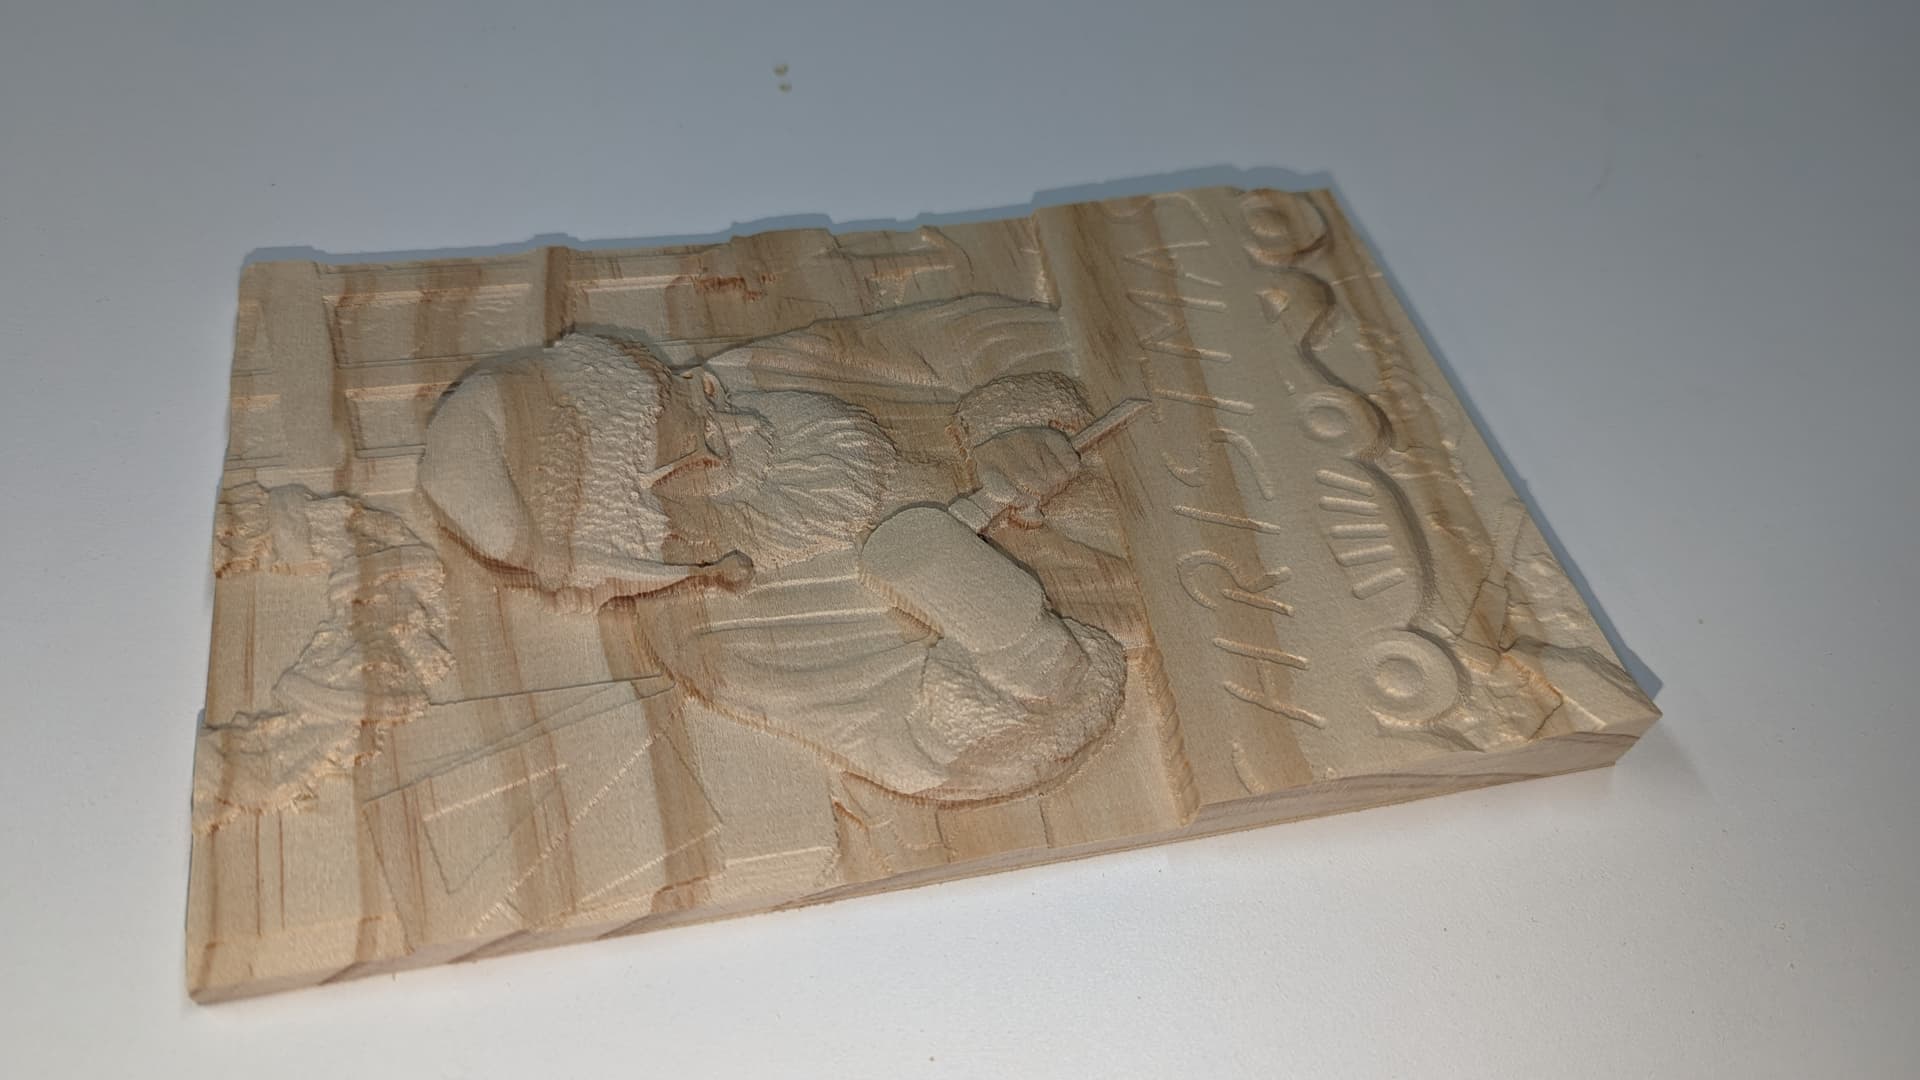
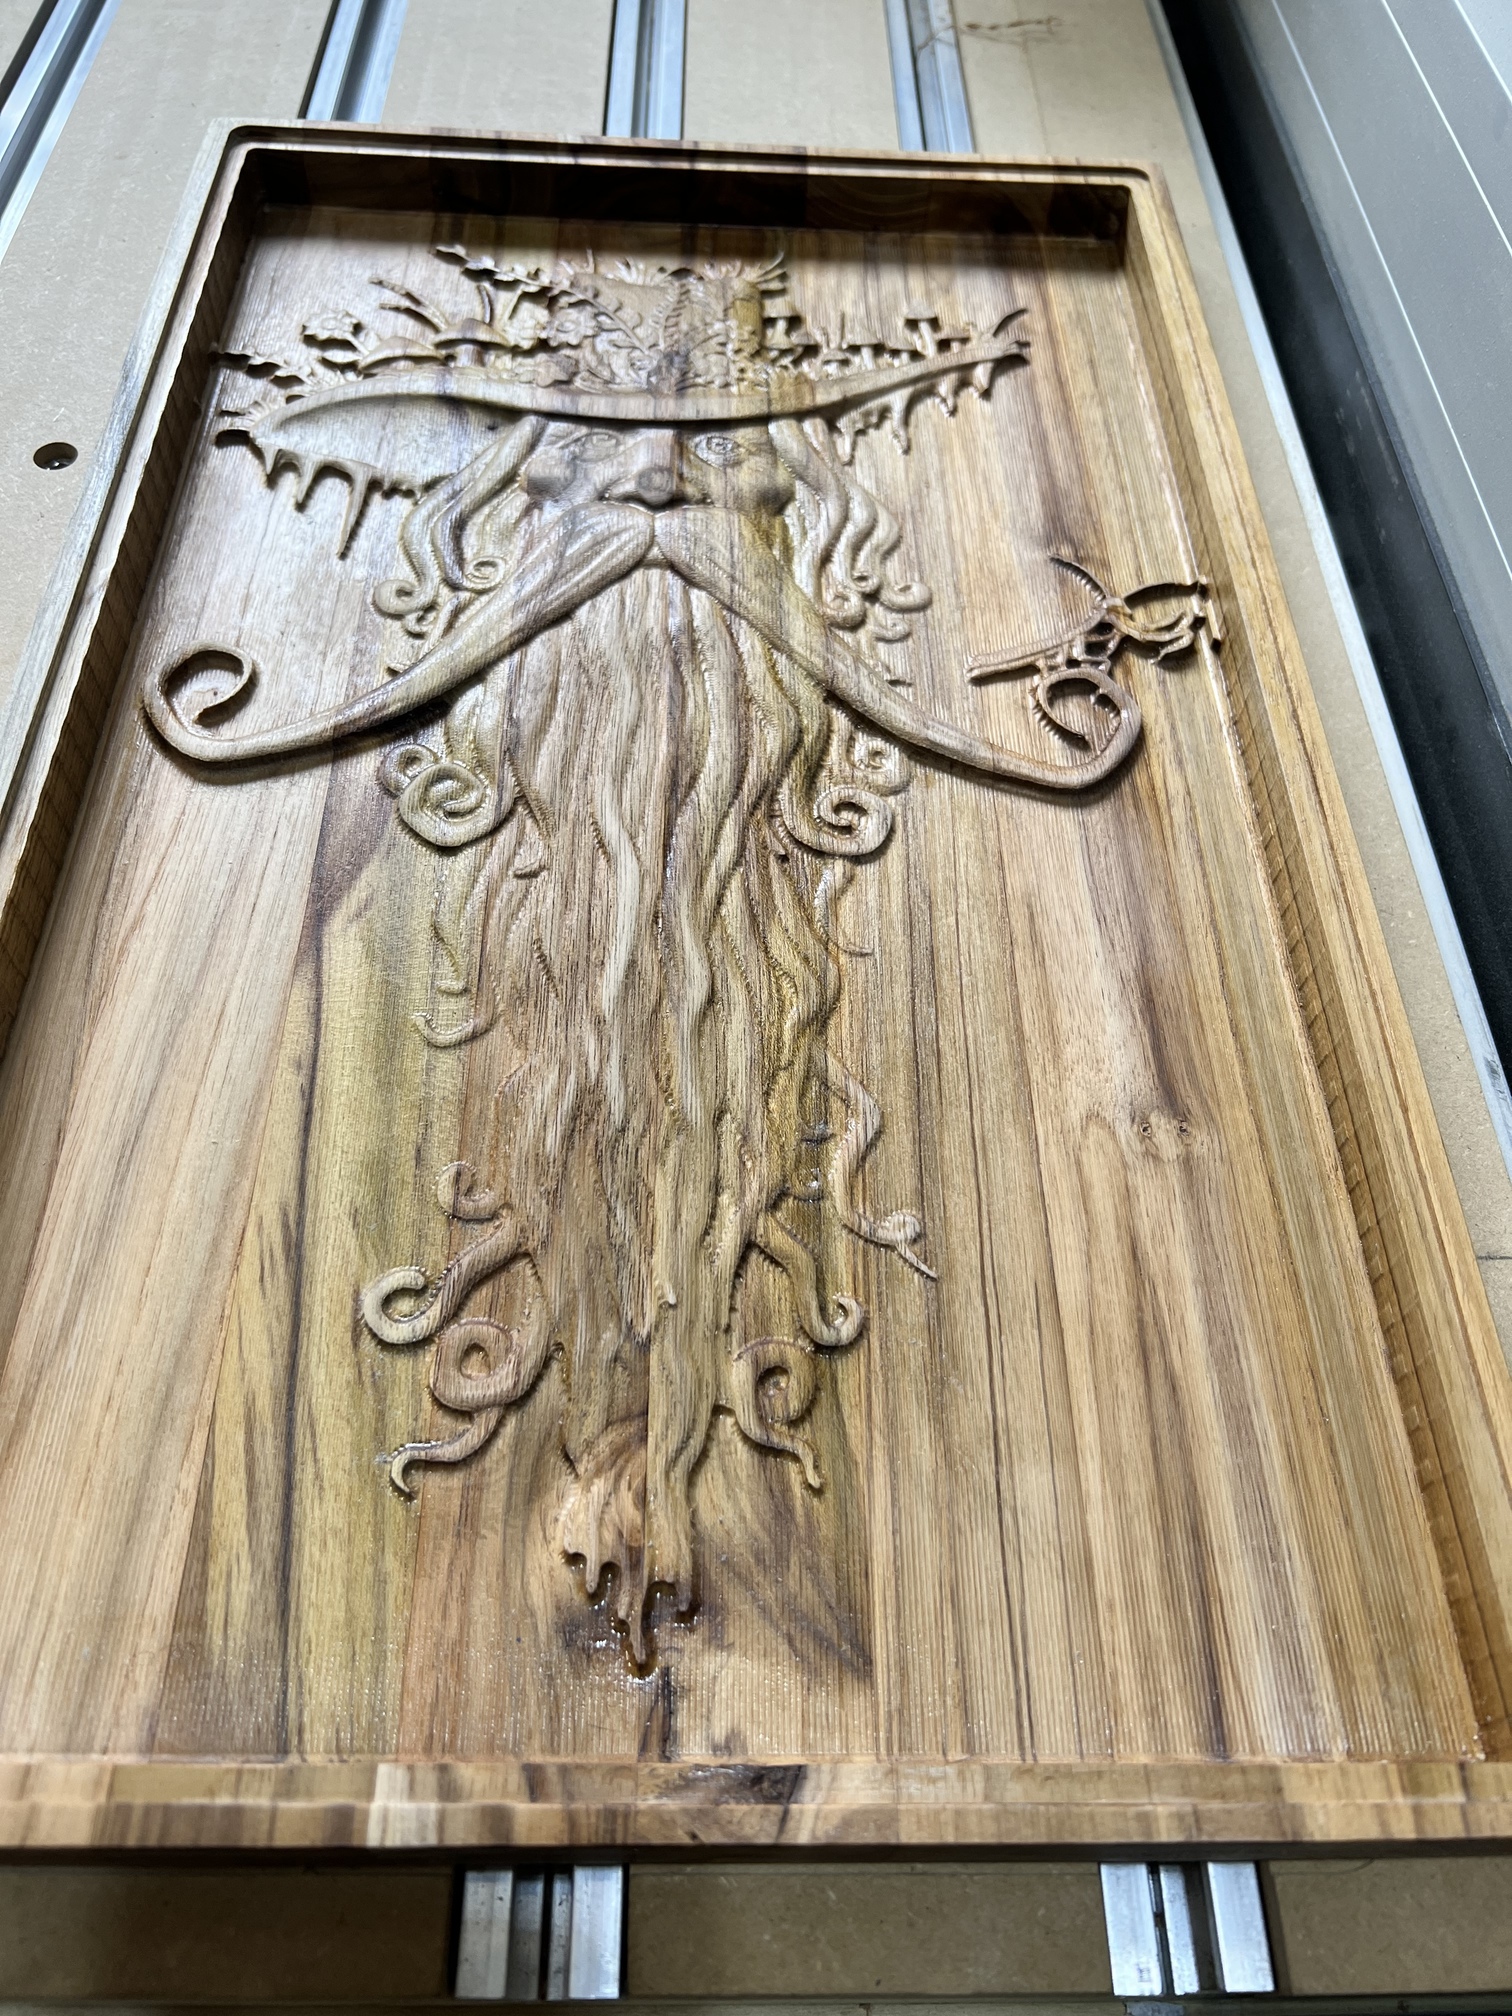
Took another shot at some 3D cutting bought the file off Etsy but this one turned out alot better then I figured it would have it’s 5x8.25 I went smaller for practice but not so small to lose any detail I am very happy with this one
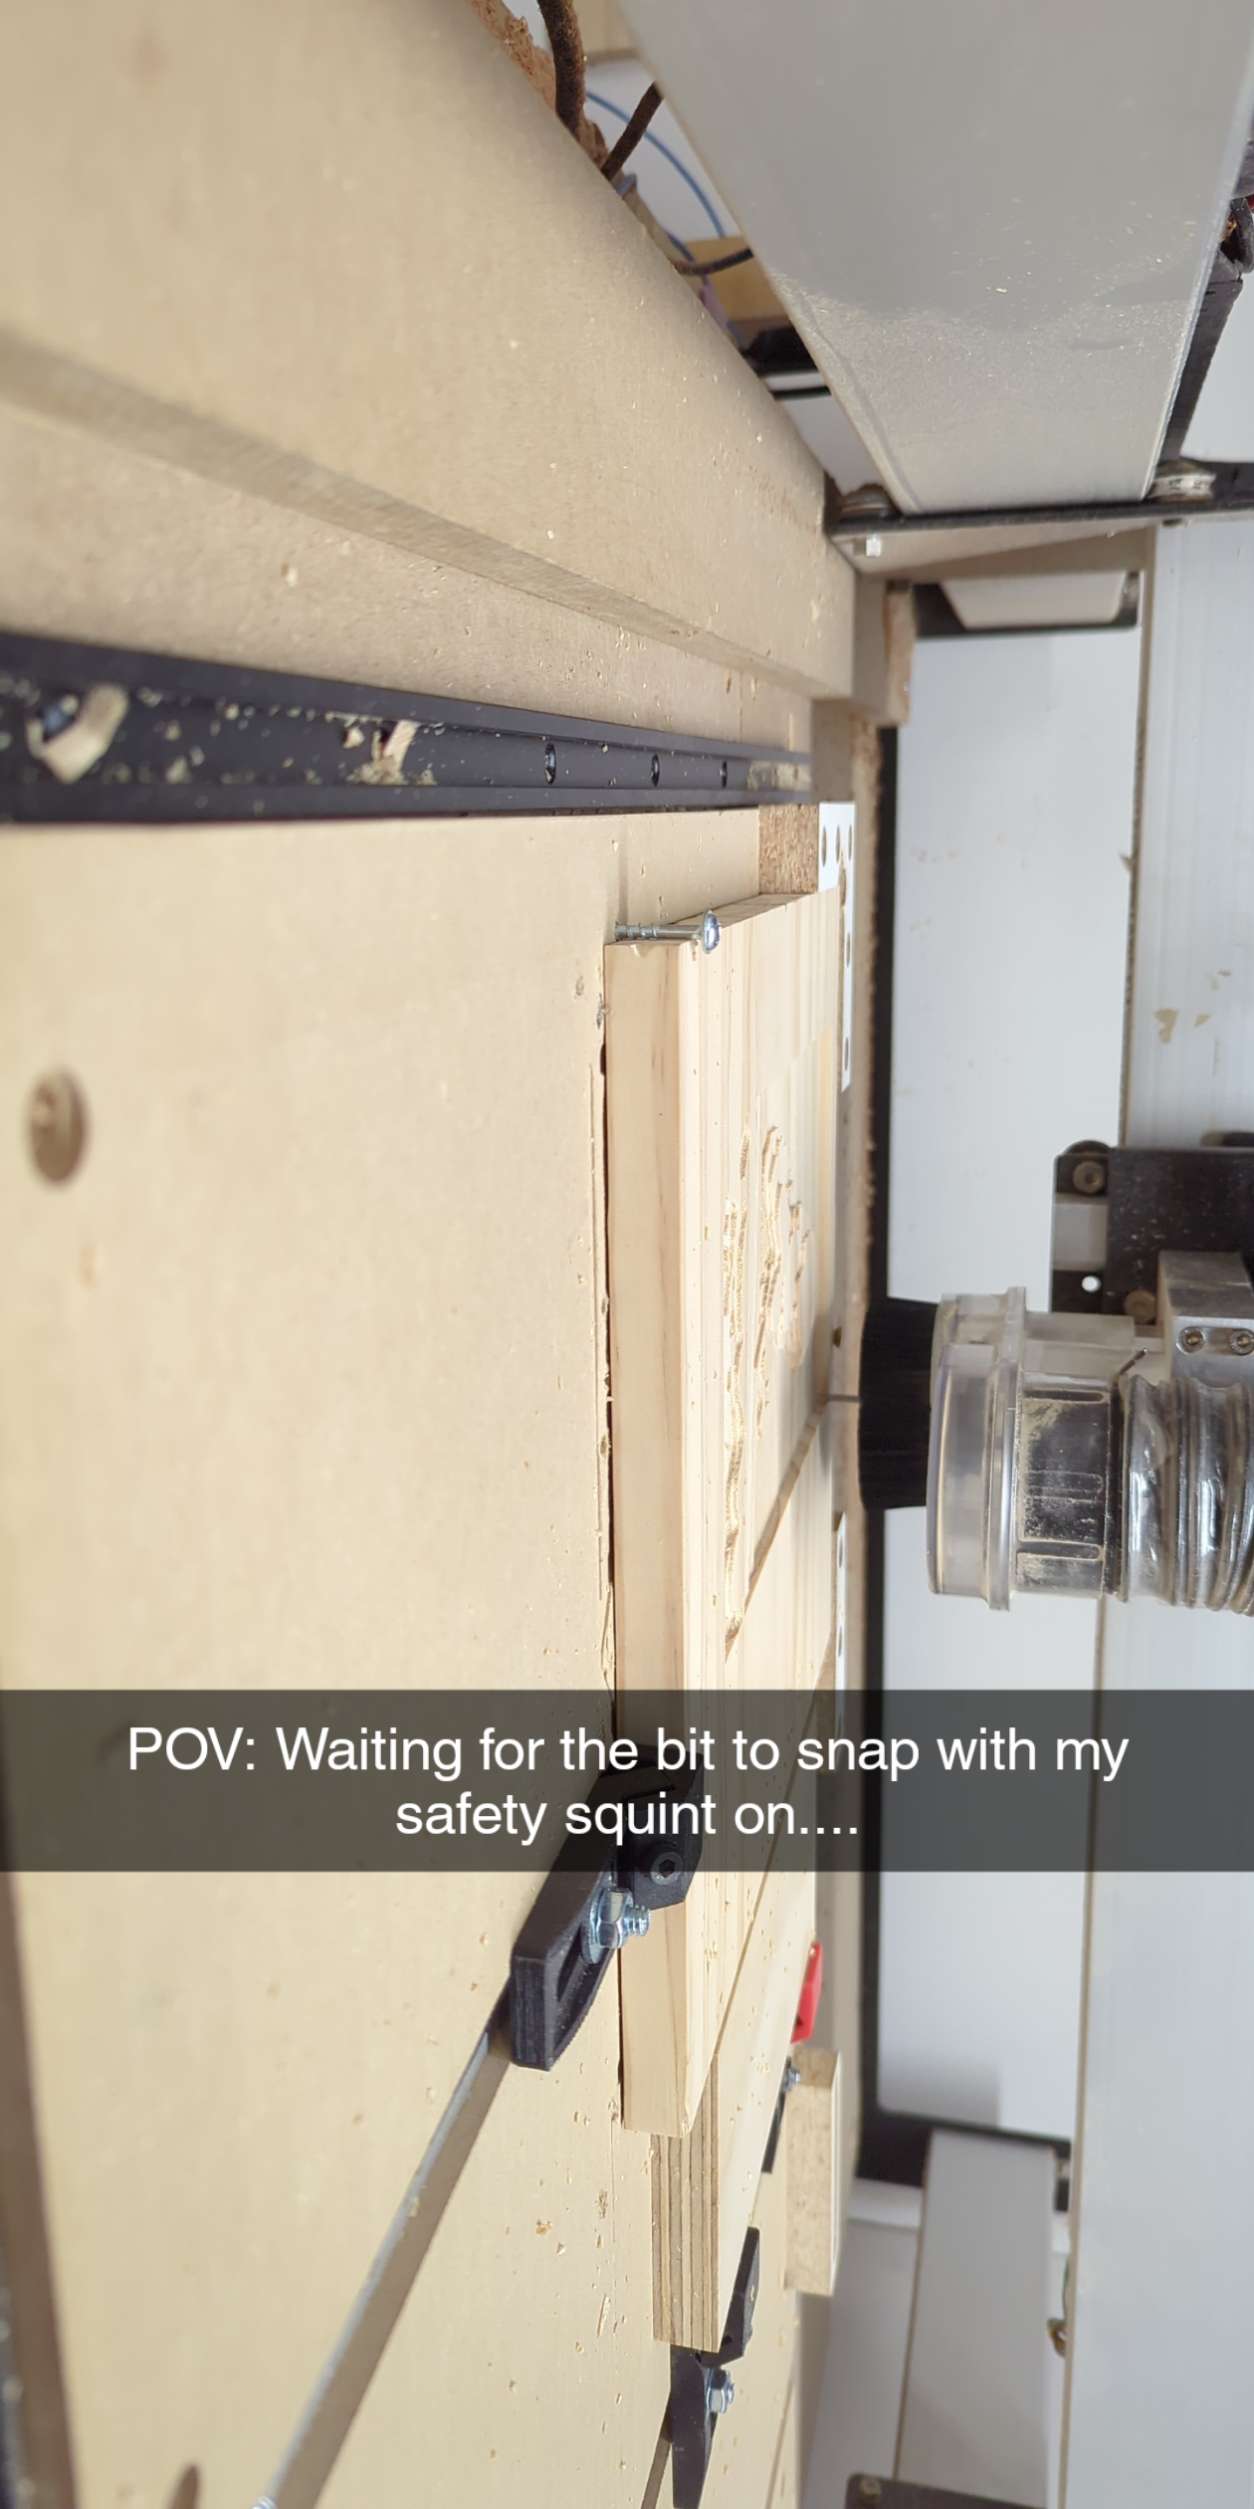
I have a vinyl cutter I should make something for the shapeoko like that lol with my chair that is my exact POV when sitting lol so I do sit with a squint when I feel I’m pushing the bit a little ![]()
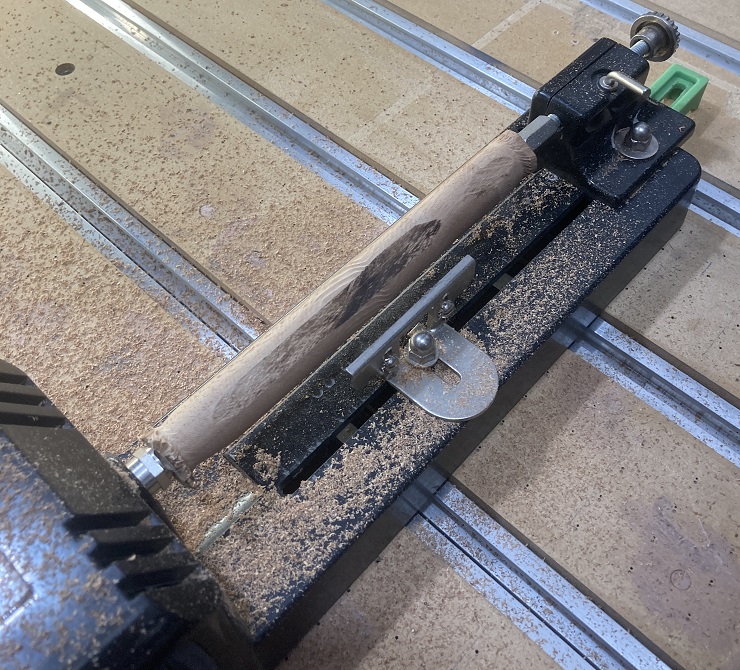
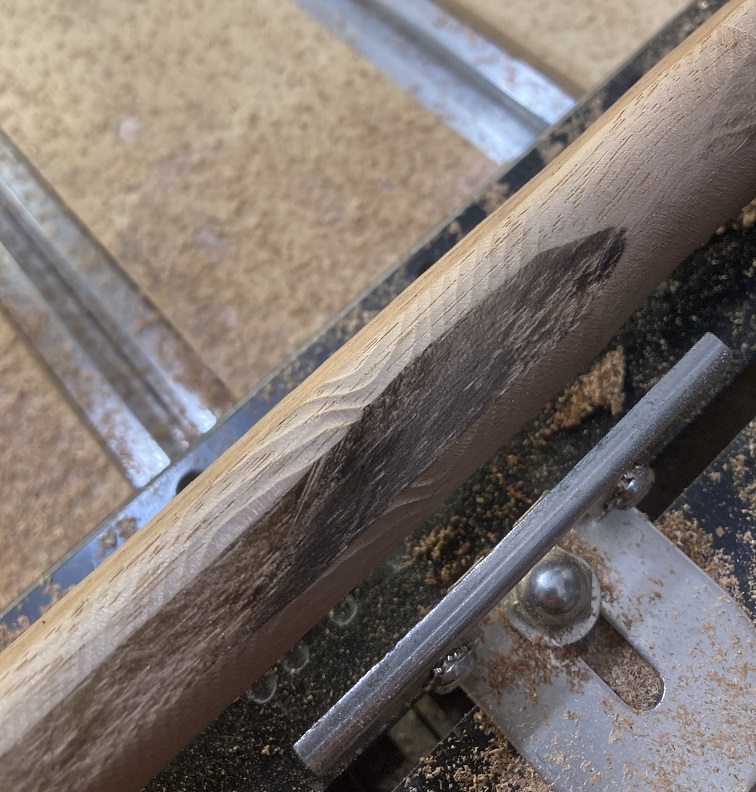
Someone on FB was looking for a turning solution, so I clamped my Dremmel Moto-Lathe to the HDM
Designed up a quick pen barrel & tried it out.
Lathe spins at about 3400 RPM, I ran a 1/4" ball & 1/16" ball at default spindle speeds for hardwood, and had to slow the feedrate down to about 5 IPM (3 IPM for last pass) to get a good cut at 0.050 DPC.
First couple passes had a bit of chatter in the middle of the wood. Dialed it in.
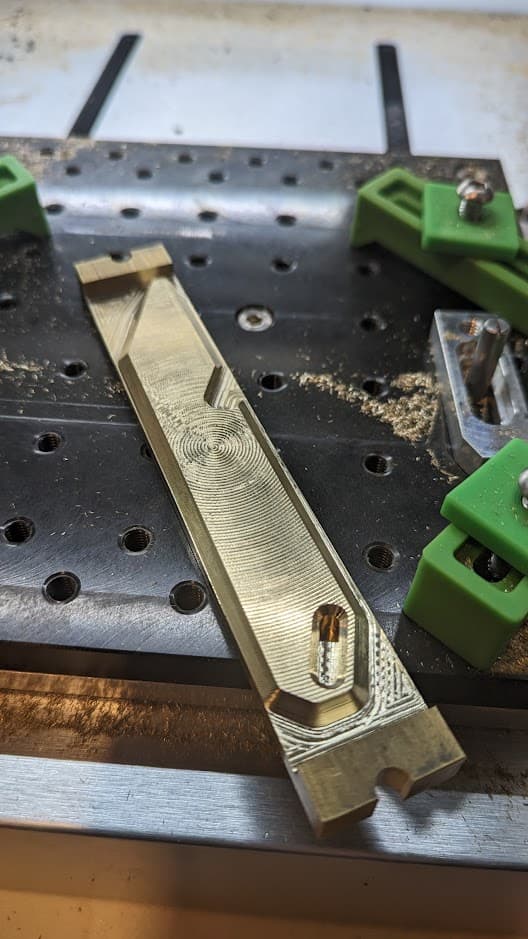
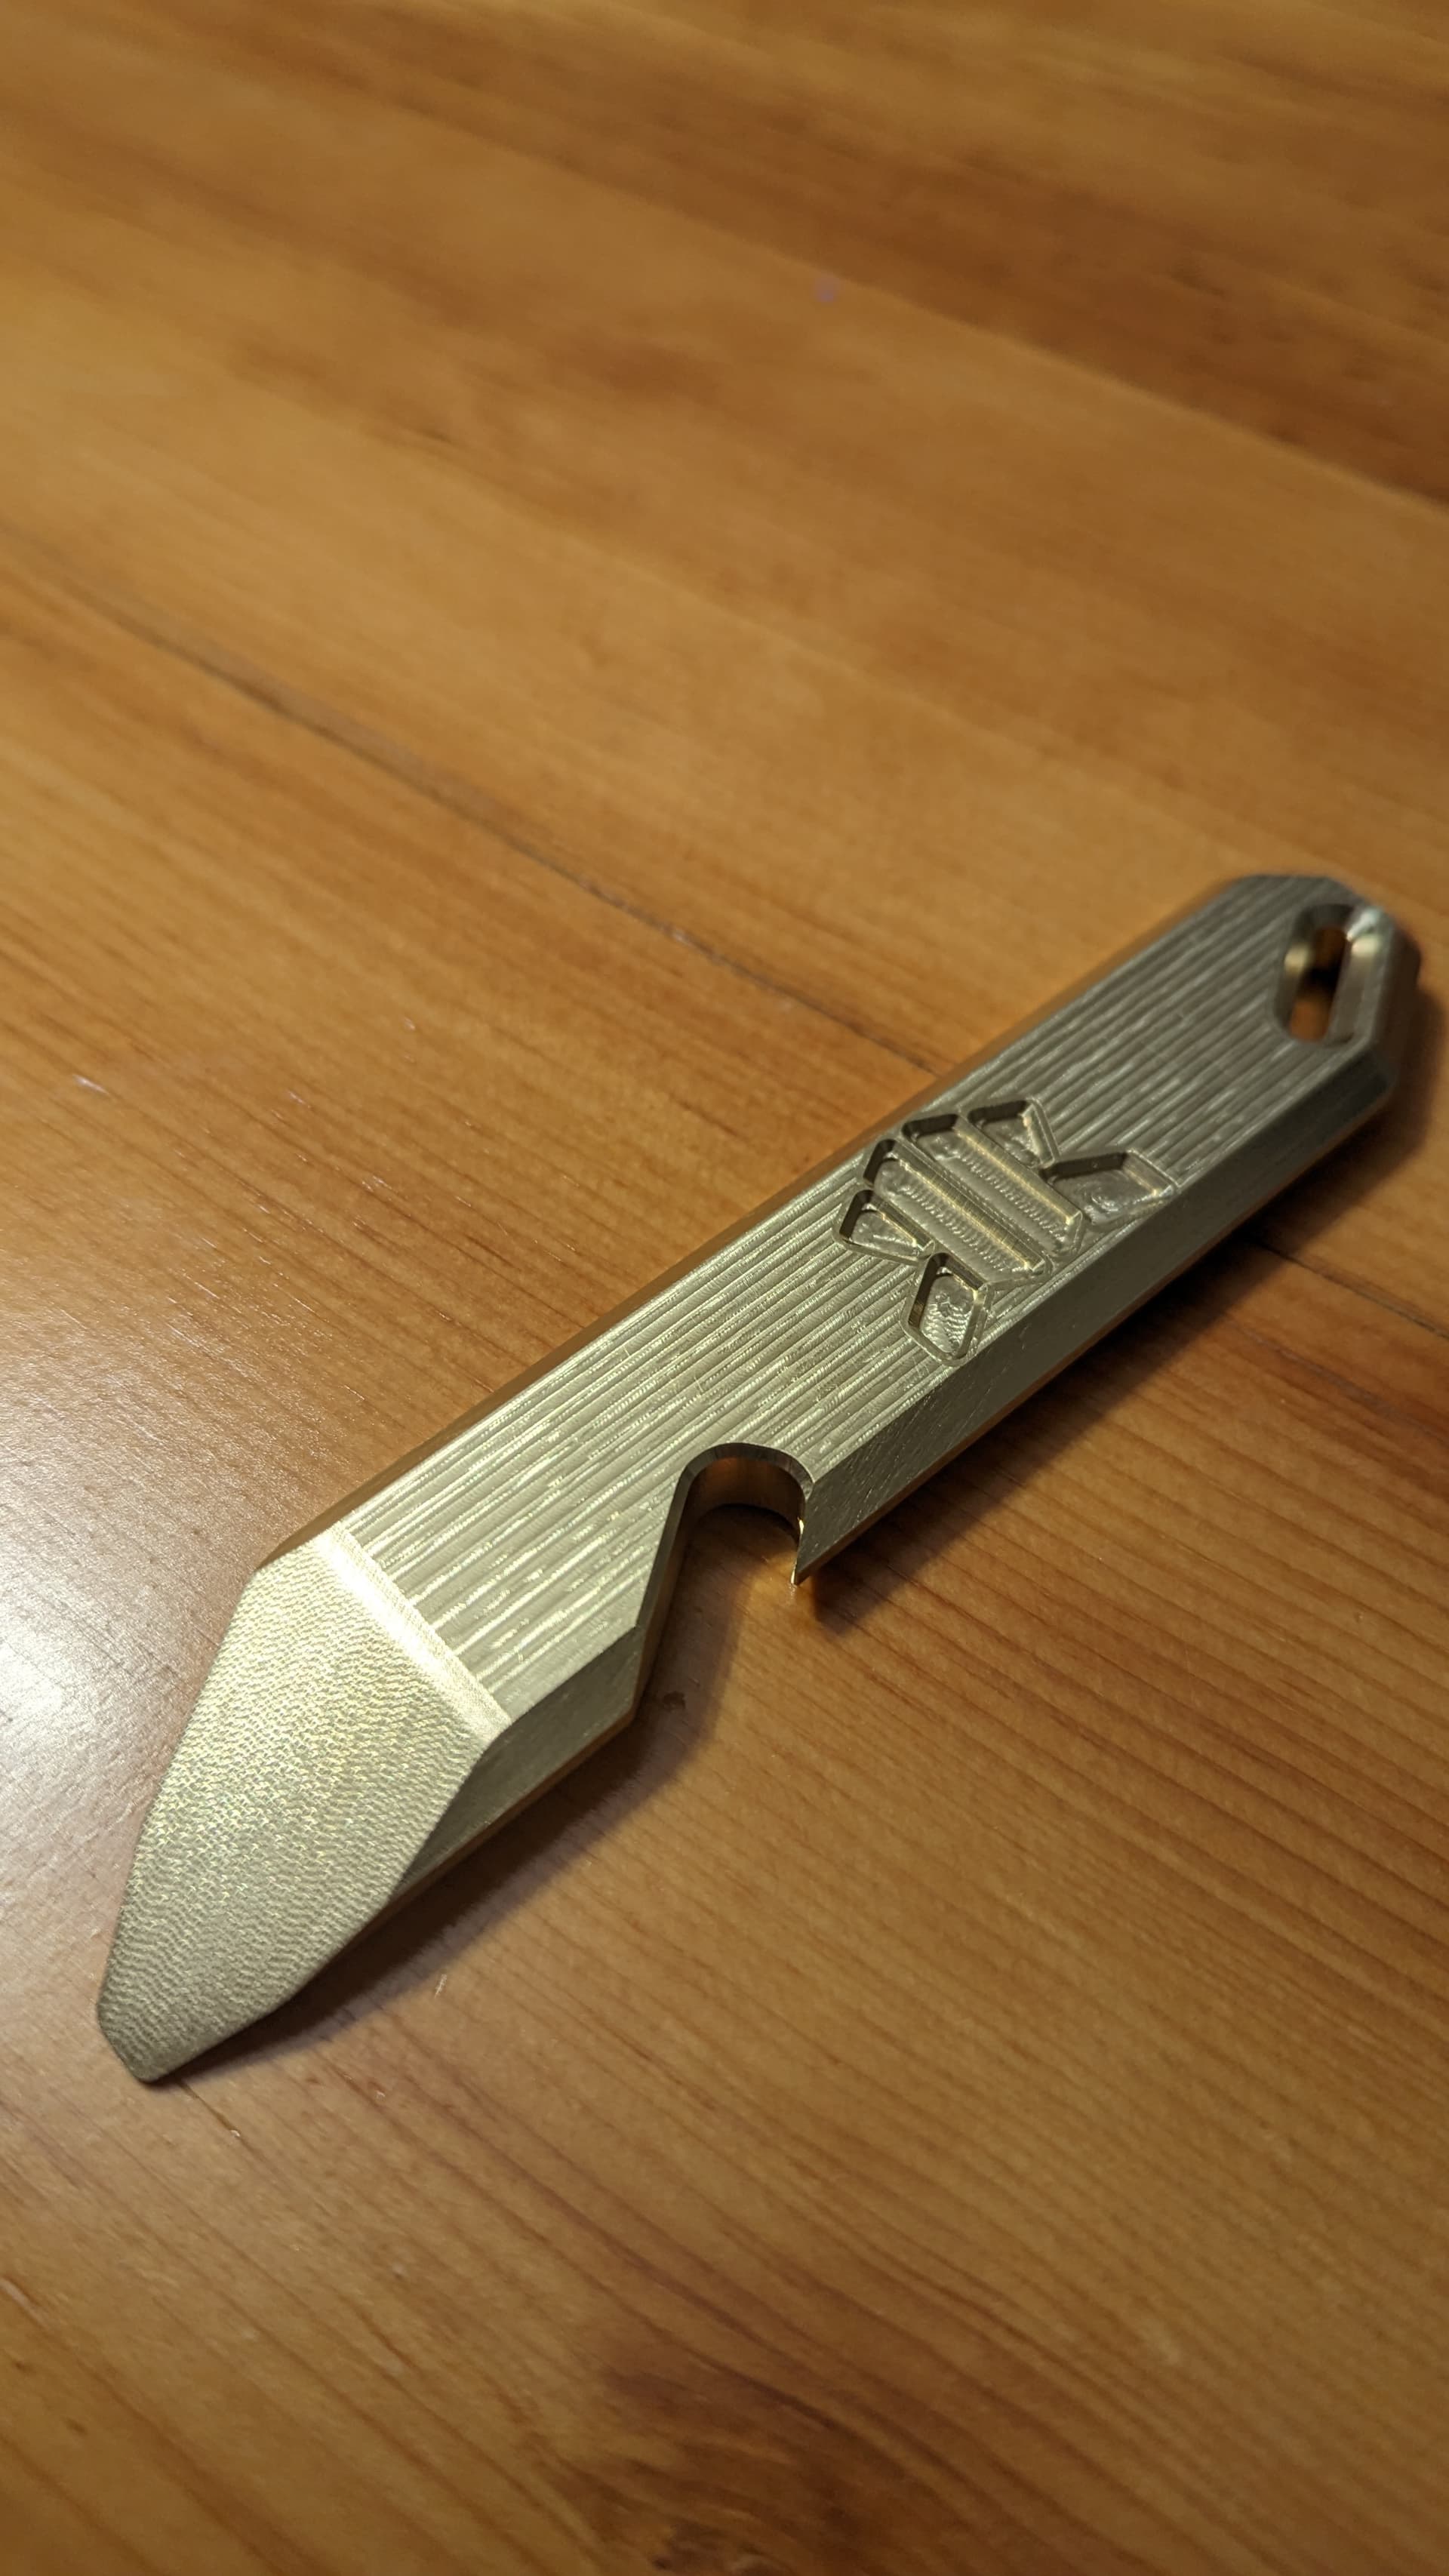
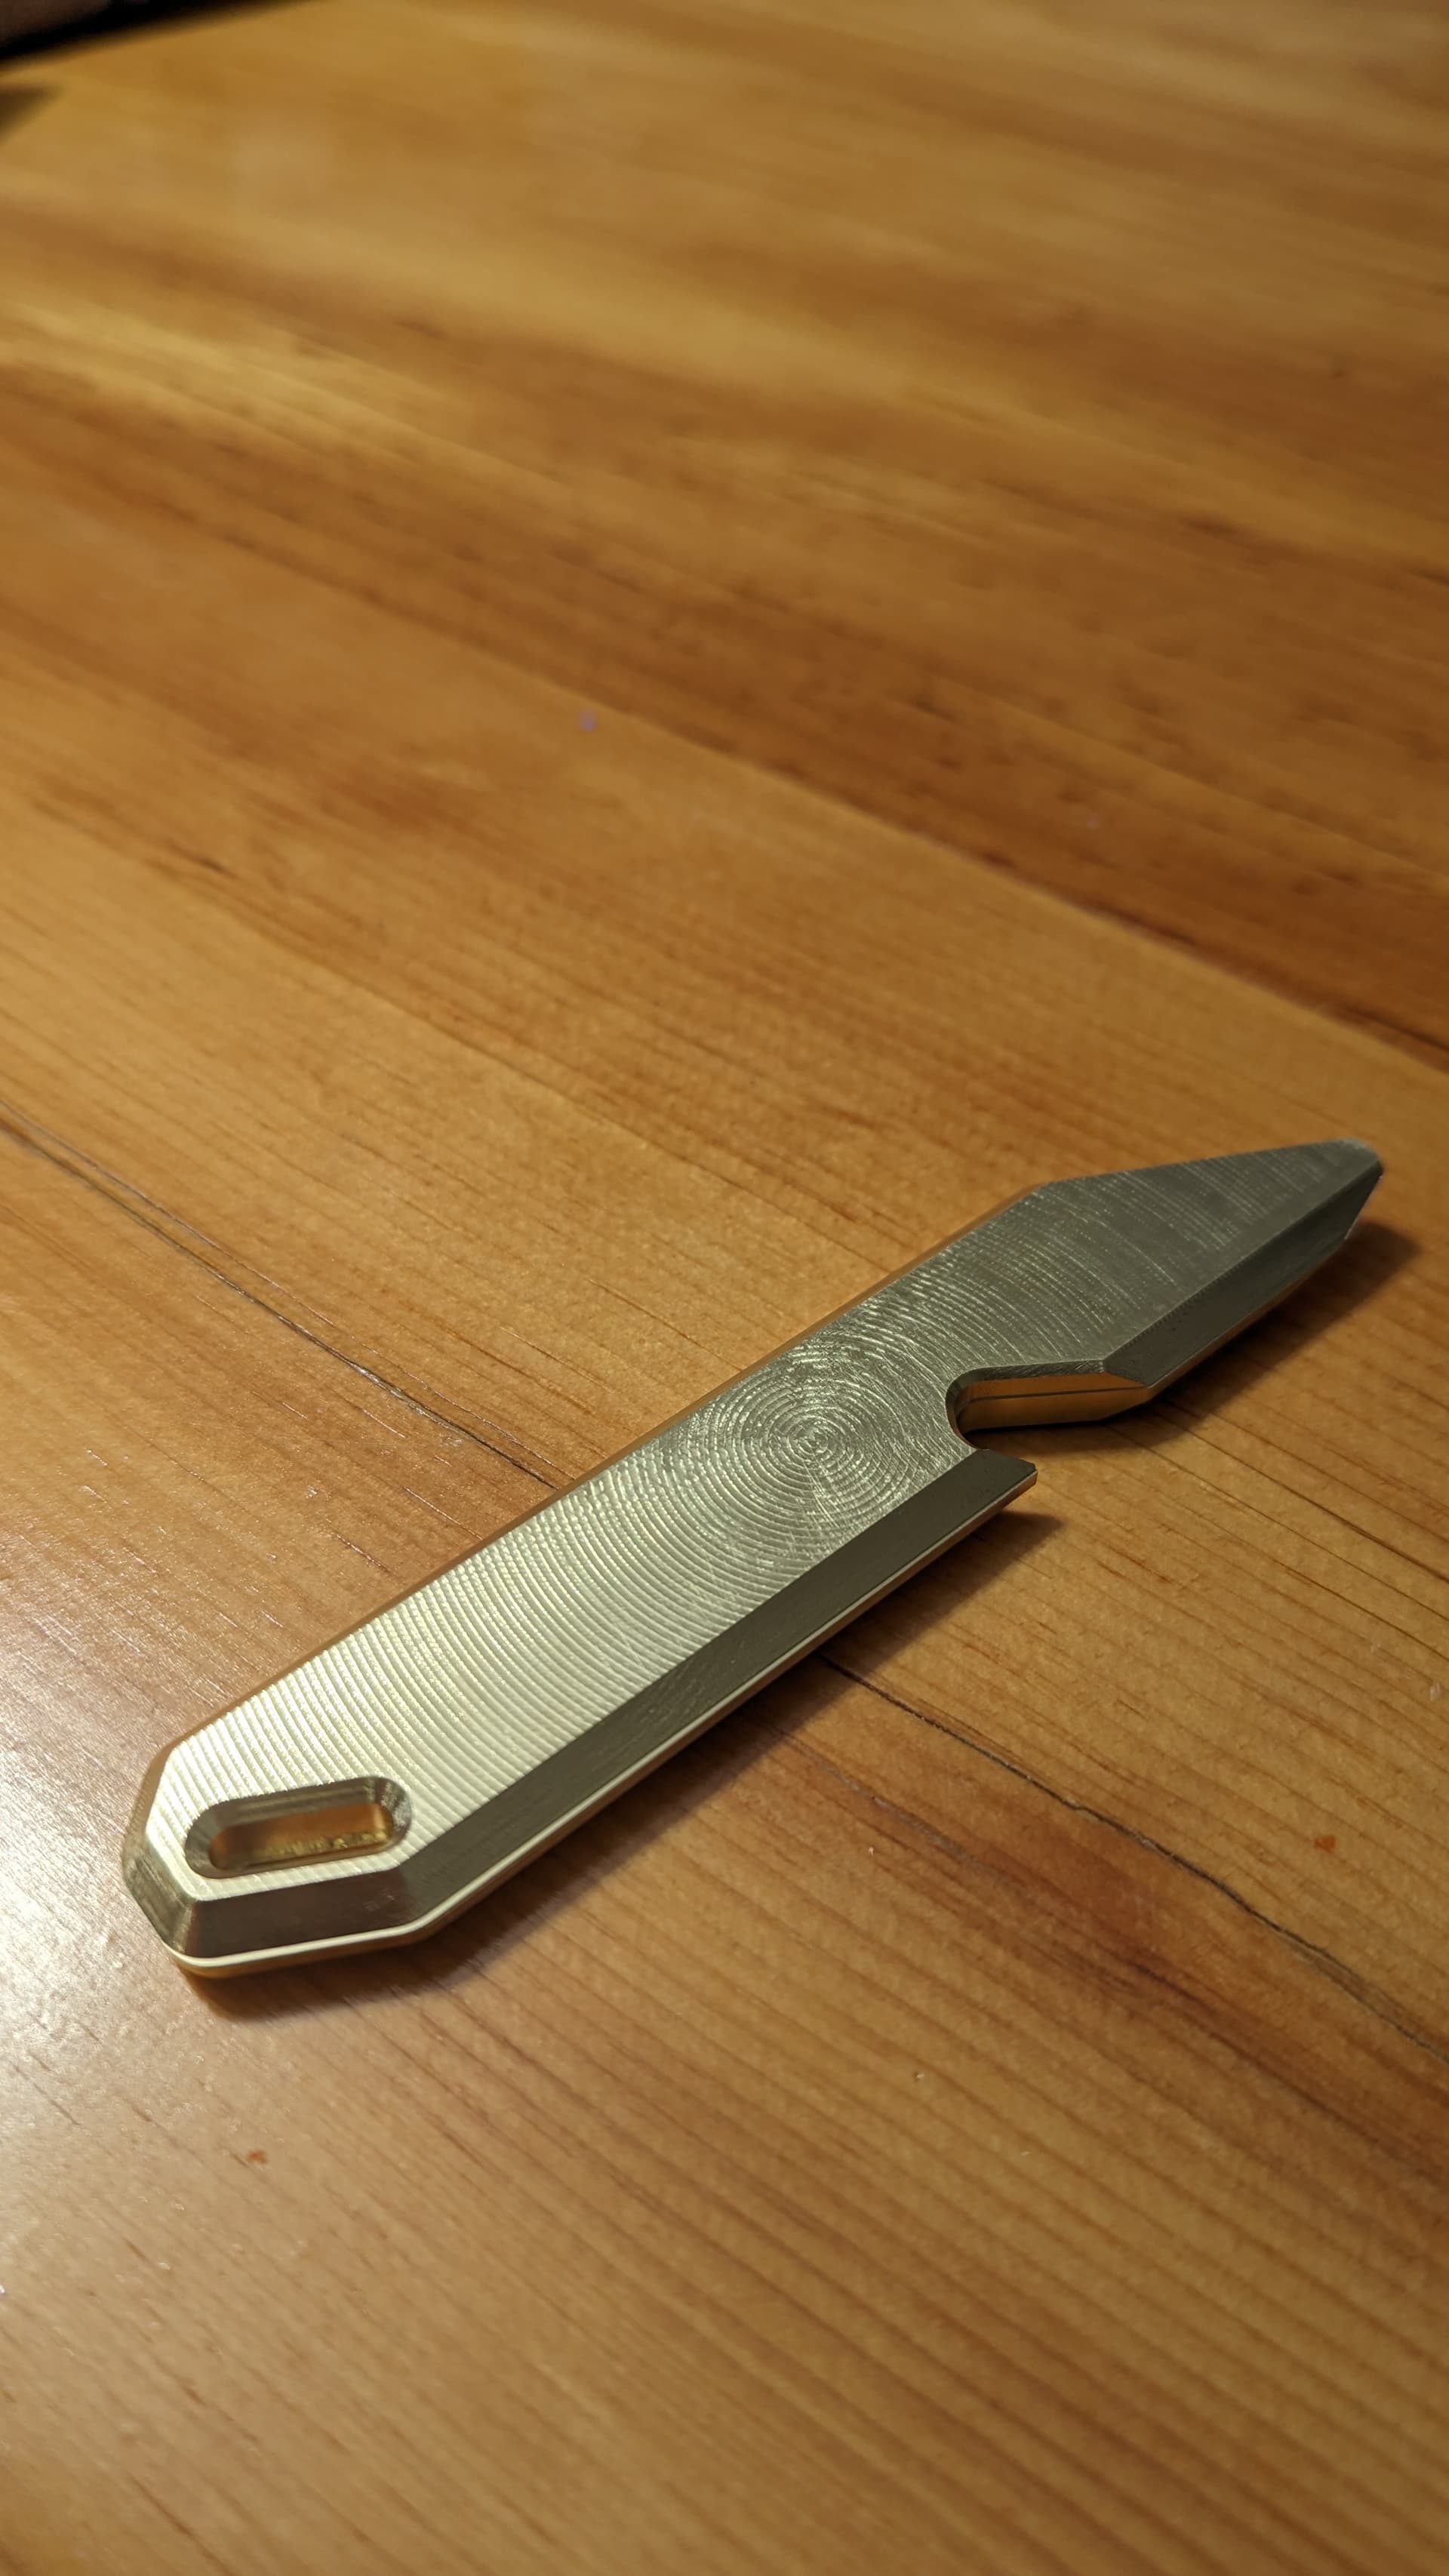
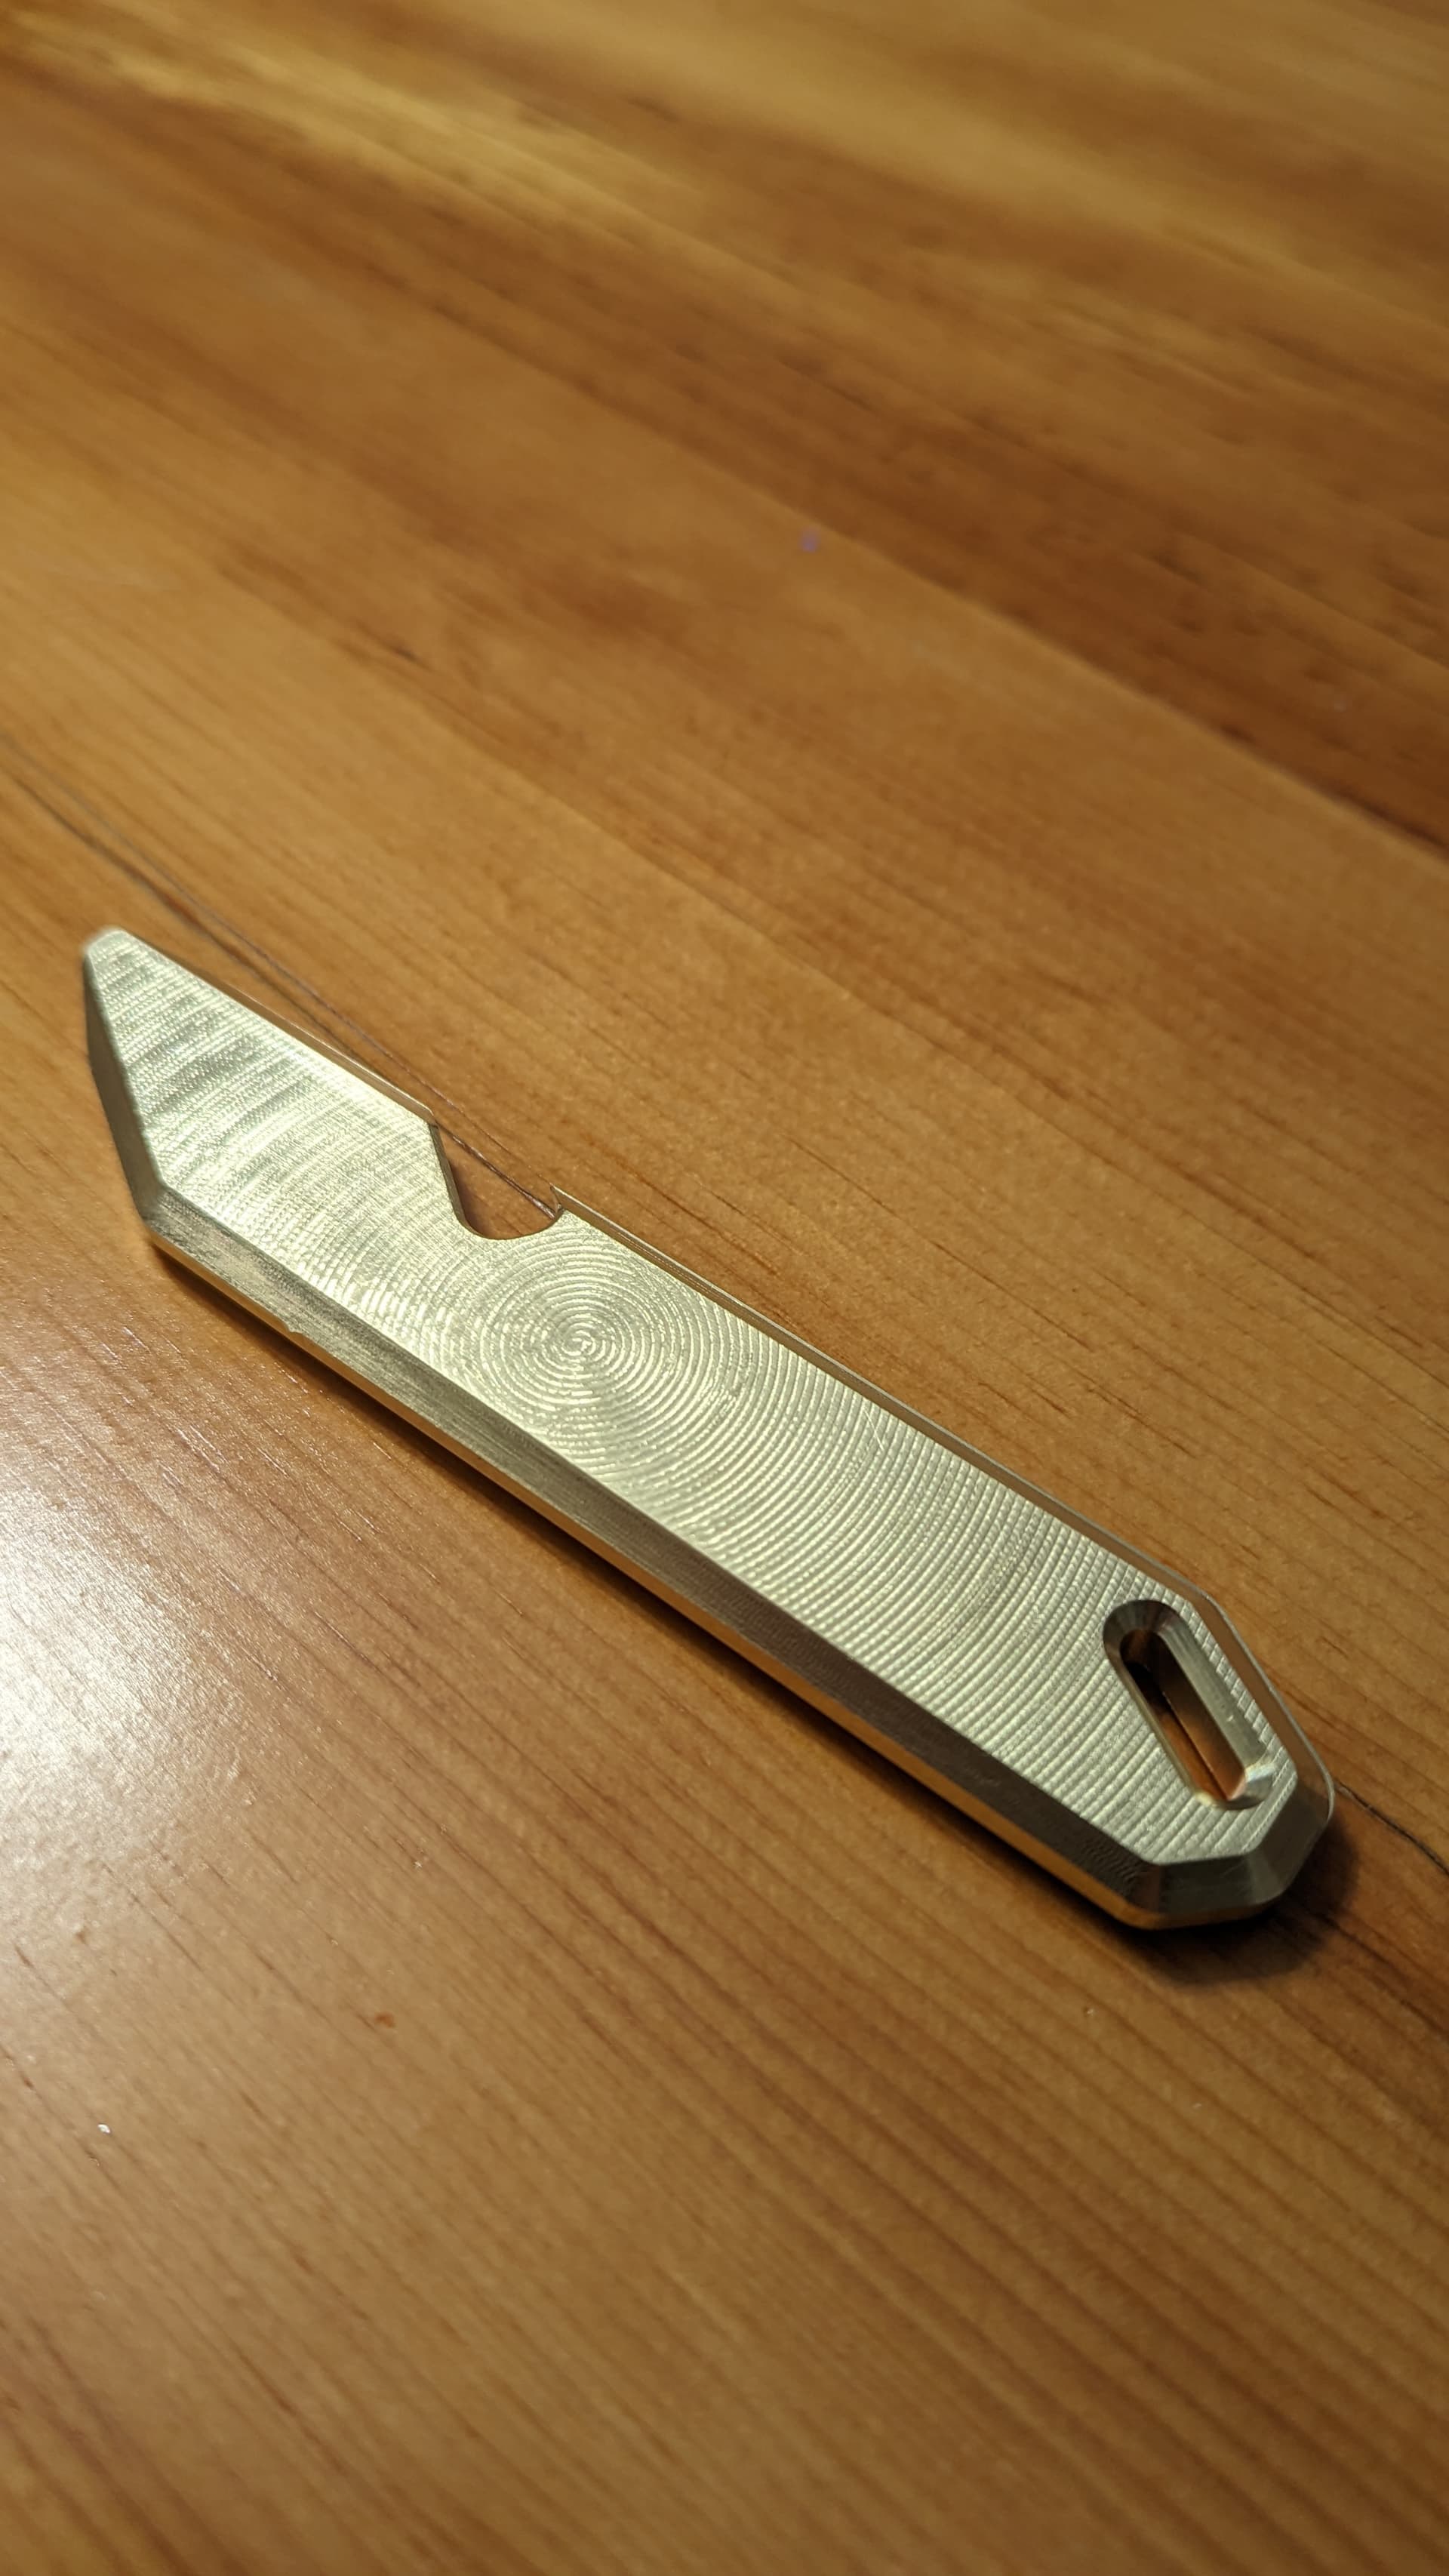
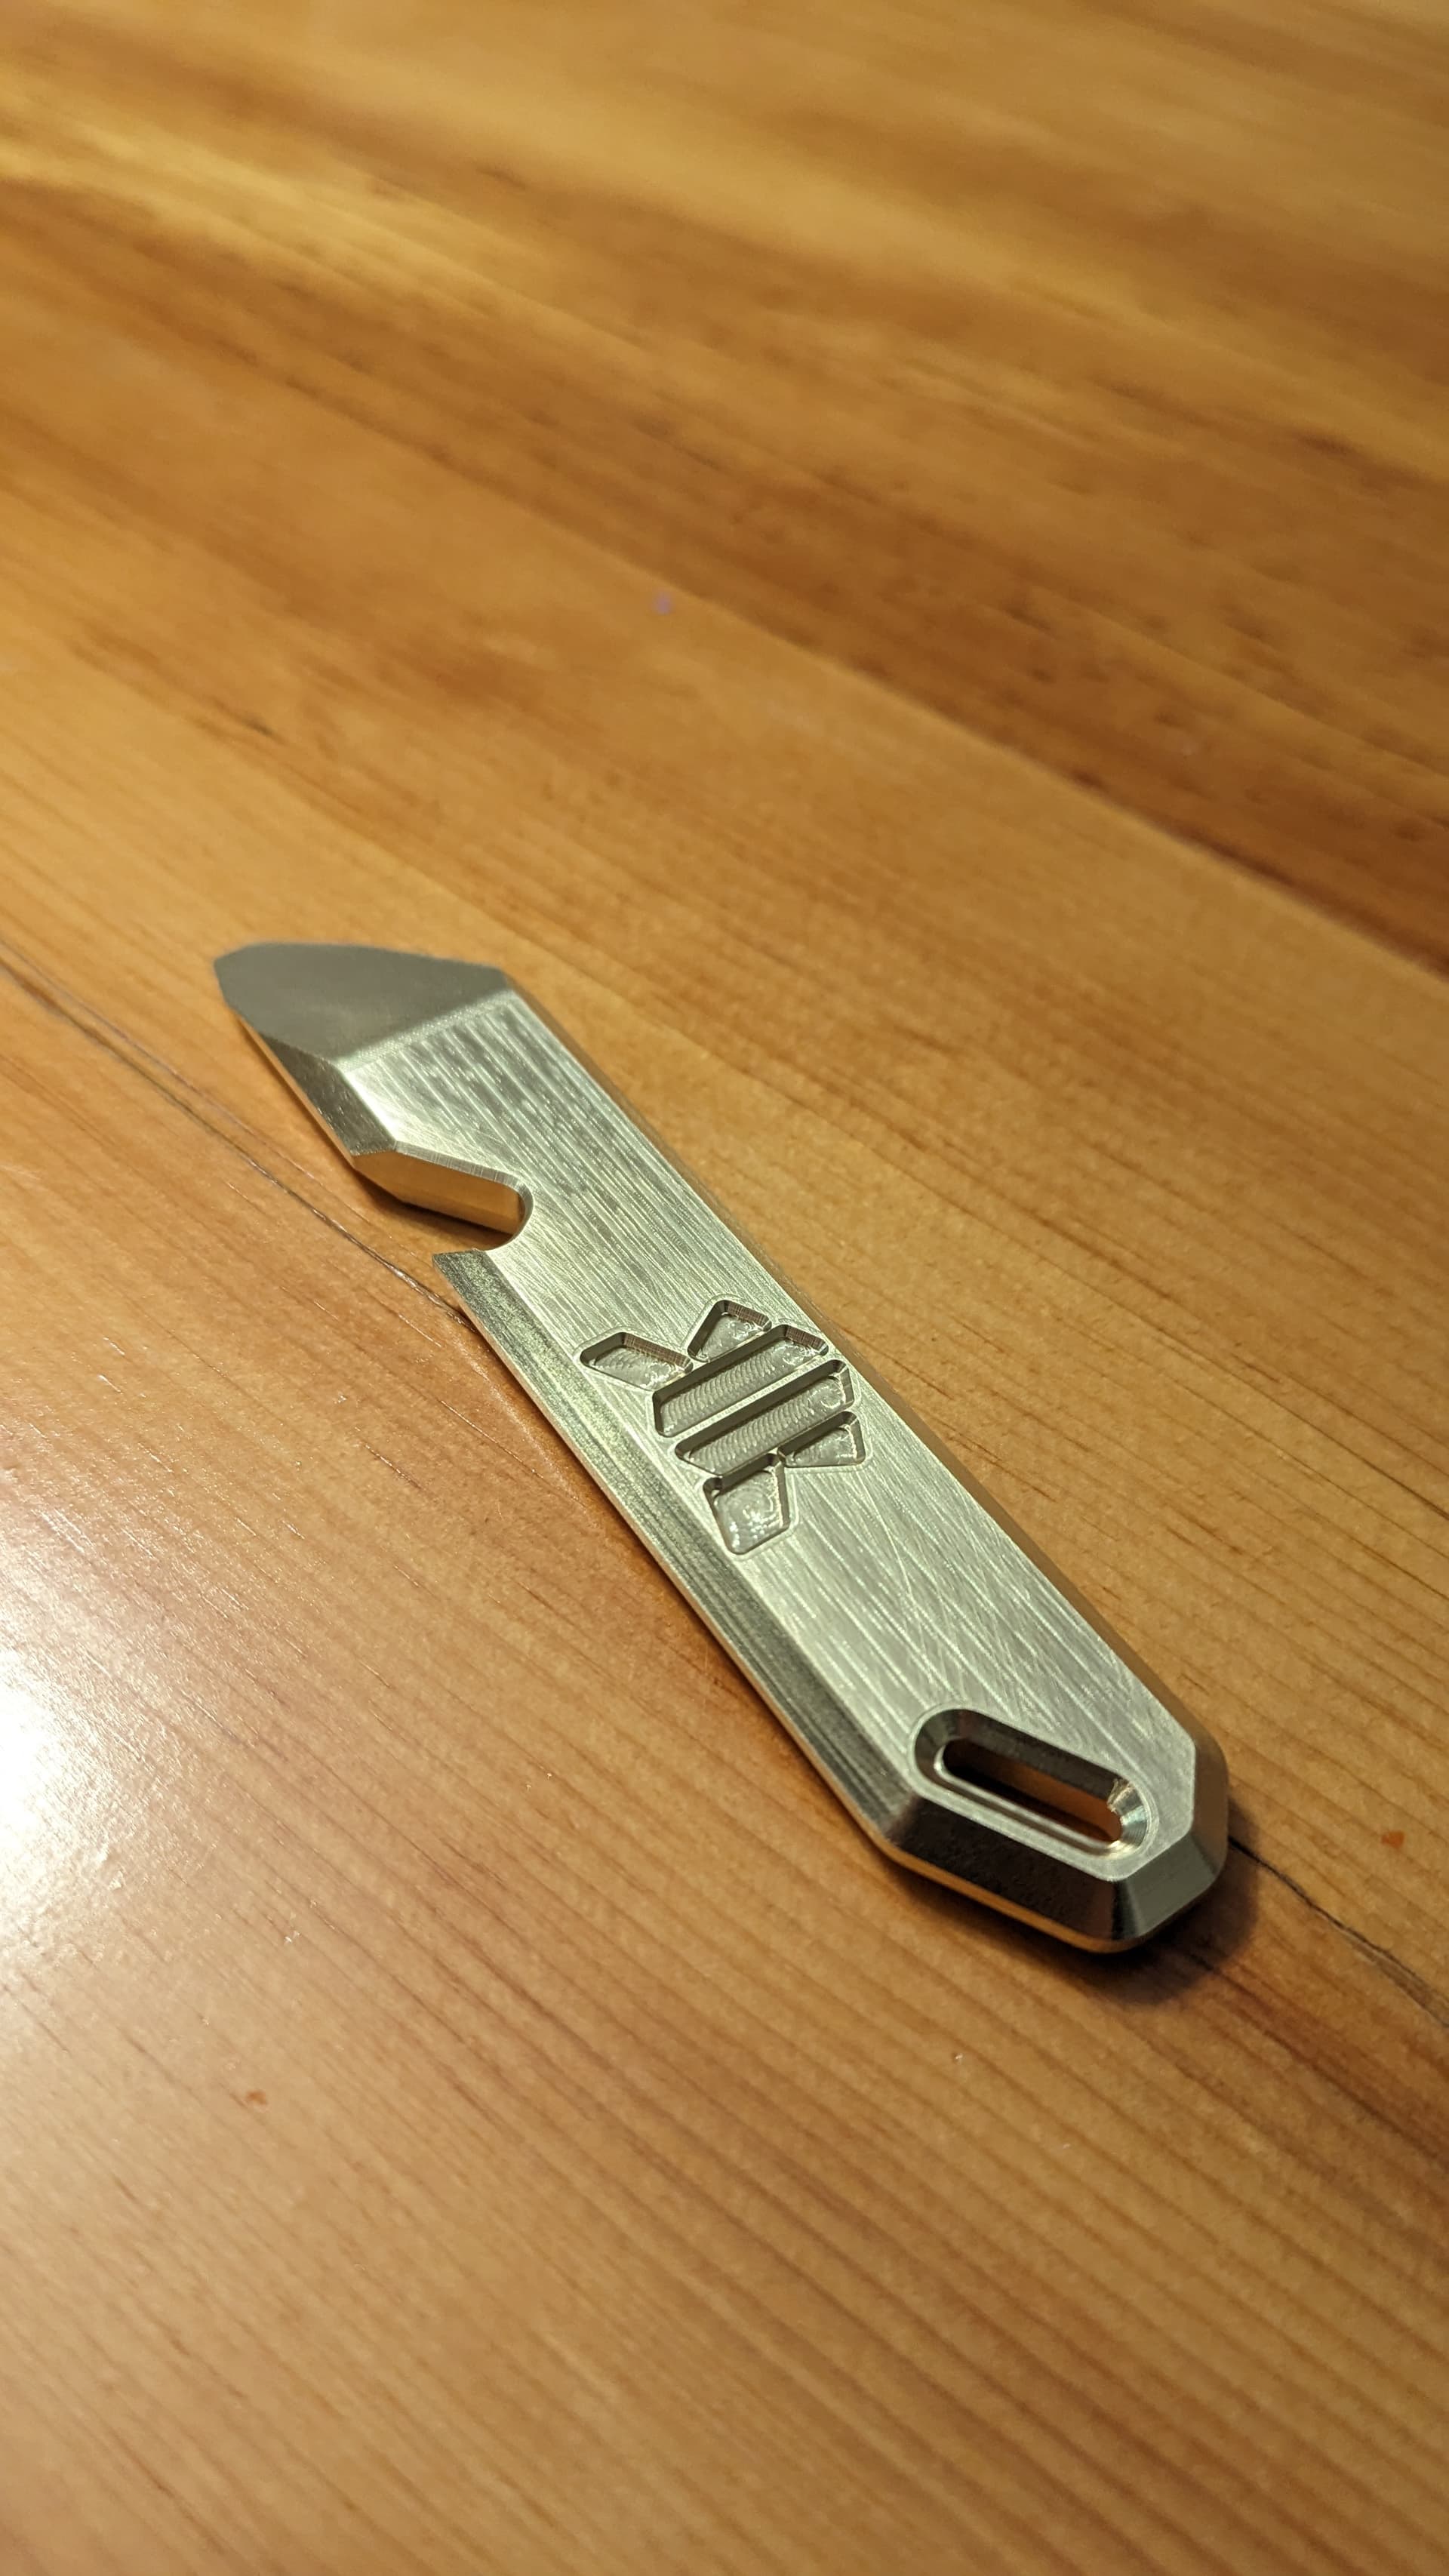
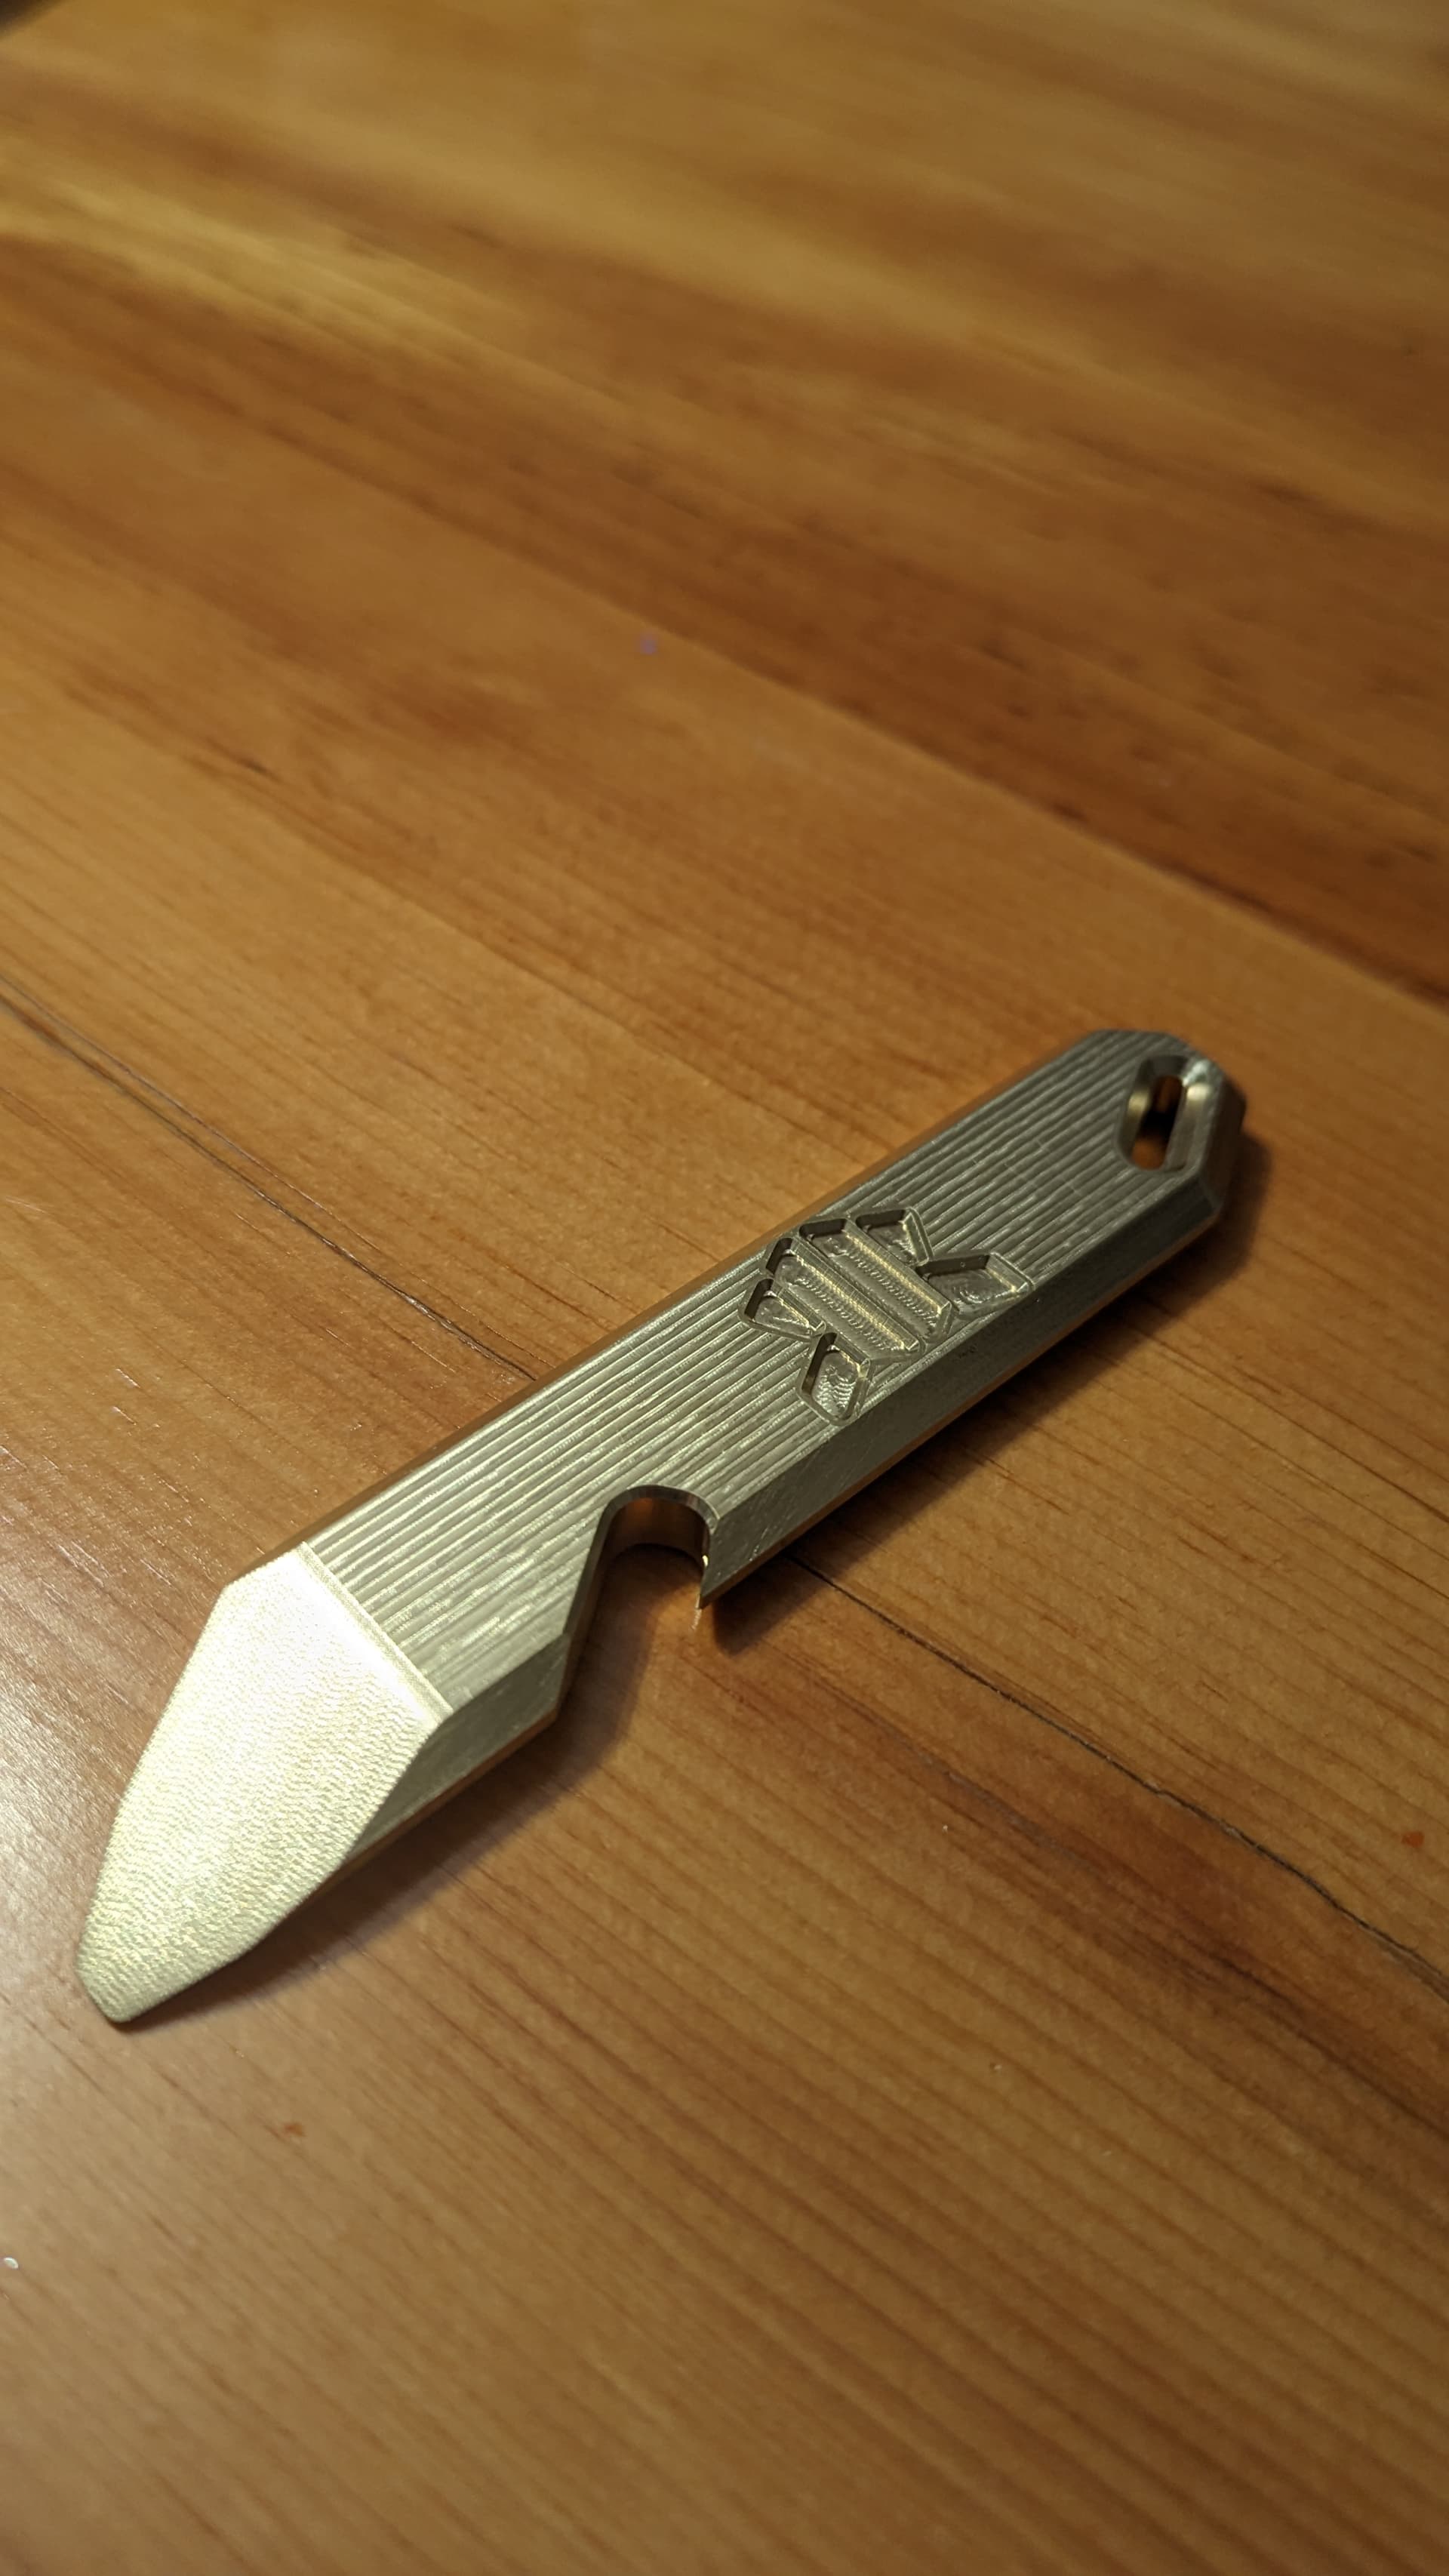
first cuts in brass for a prybar idea i had as a Christmas present for men in the family next year. and women if the want one too.
Really envious of the detail. Using carbide create and I’m not getting nearly the same amount of detail. Down to a 1/8th bit too.
Tip diameter on the tapered ball nose I used is 2mm so about .08”. A bit more than half the size of your 1/8” cutter.
I’d guess that’s the difference?
@Griff It looks like yours is cut deeper which is bringing out more depth in the detail.
@Sawdusteater Don’t know how this works in CC, but in other programs I use, you set the thickness of the stock and depth of the cut, which will impact how much those details show through. Your piece looks really shallow compared to Griff’s.
Because Griff is using a smaller diameter tapered ball mill, CC can generate a toolpath with more depth in the 3D features. .125 diameter versus .04 diameter.
Also, I’m using Vectric V Carve pro. No idea how this compares to CC or CC Pro.
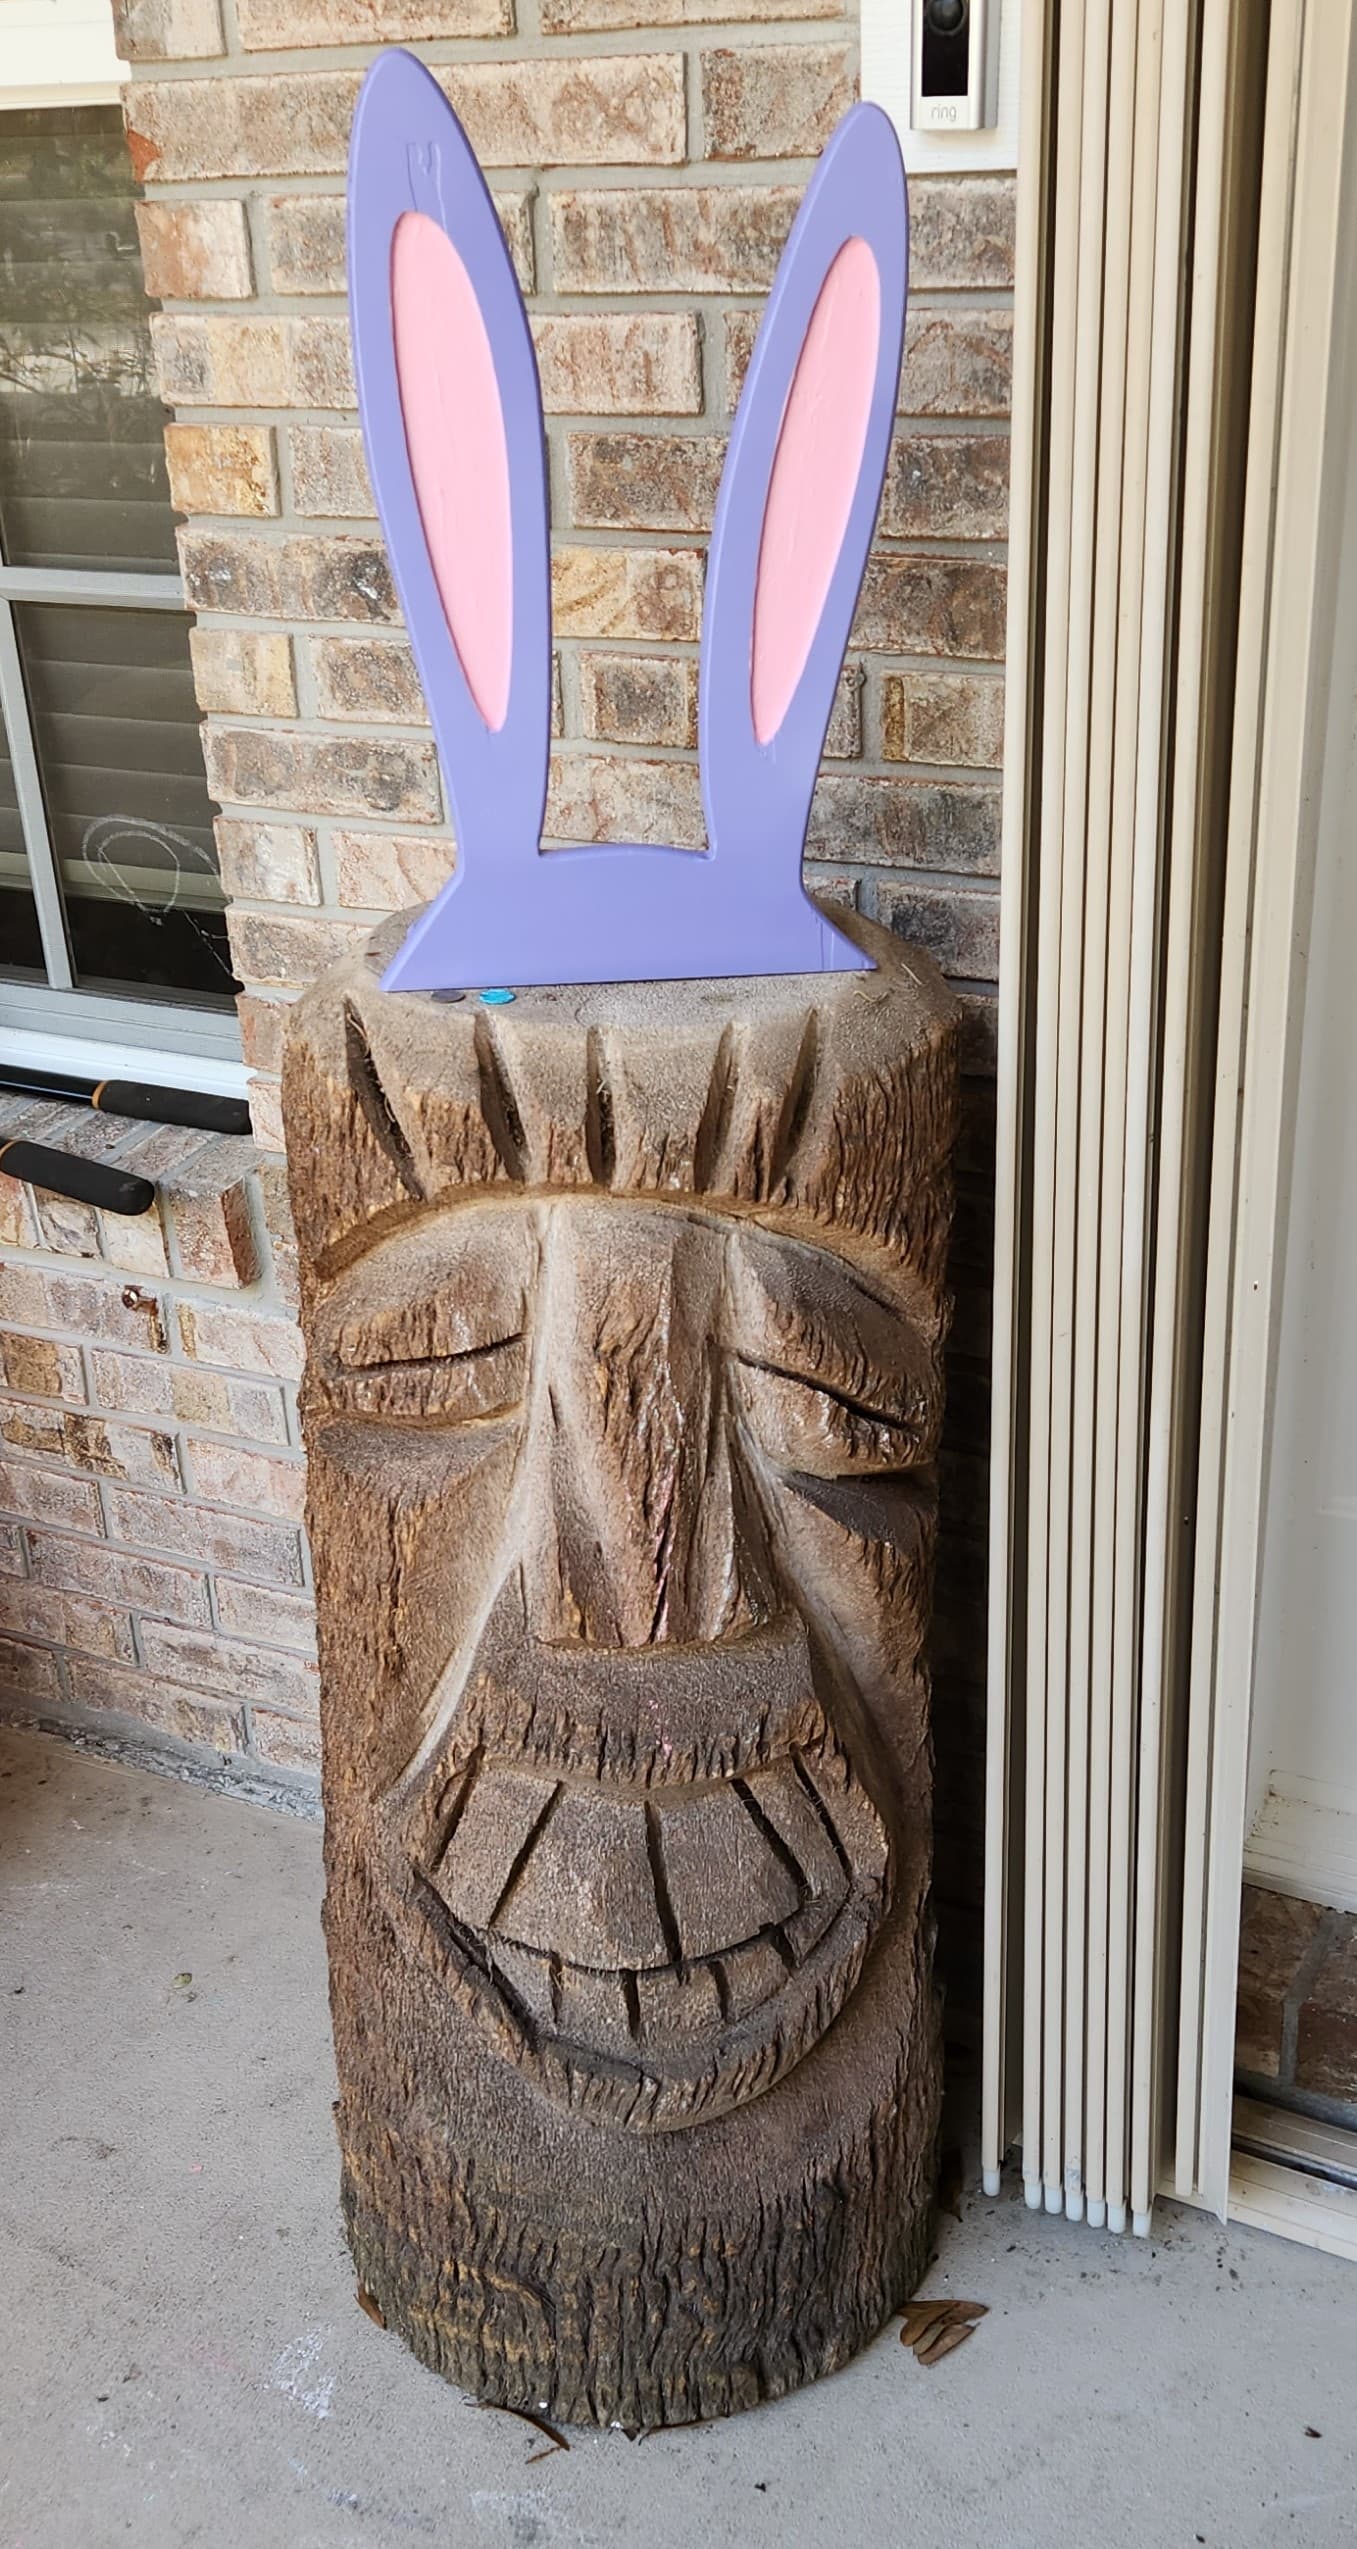
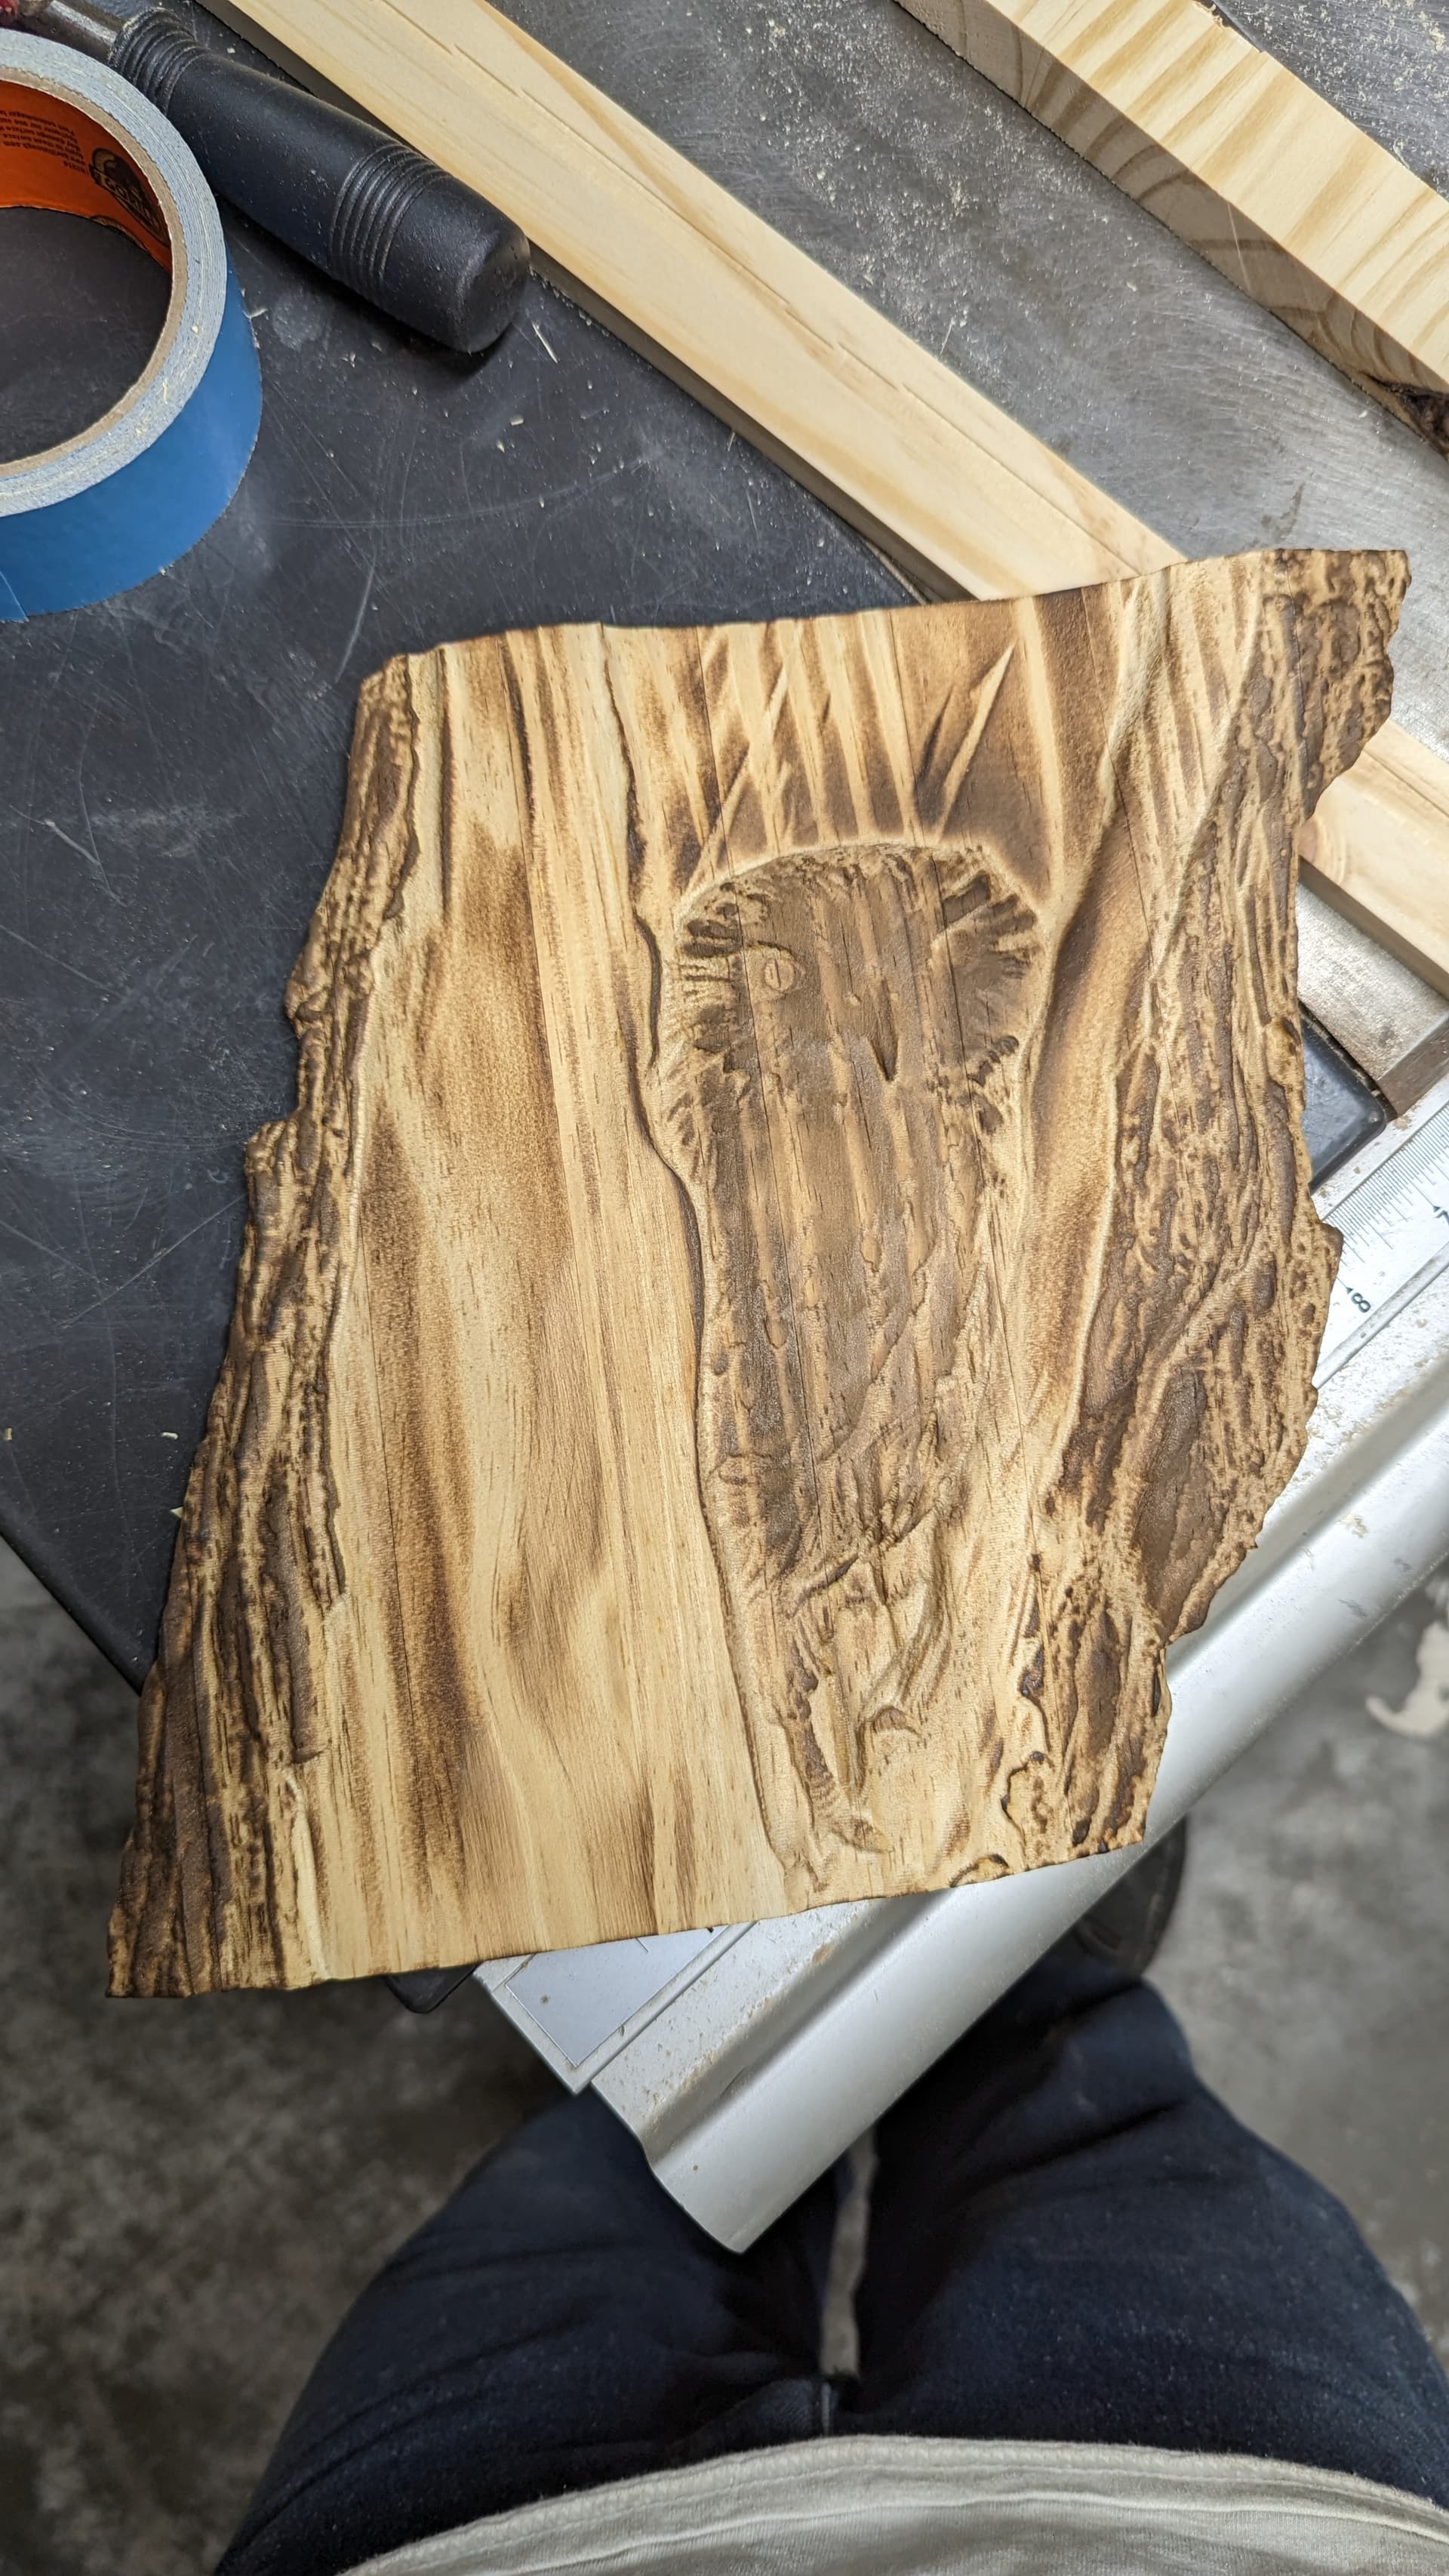
Everything was going good on this one till I pointed the torch at the owl… The wood texture was perfect just had to try it lol turned him dark really fast
I noticed mine was a lot more shallow too. I went back in and made it less. Also added the tapered bit from IDC that I just bought in January into CC Pro. The computer 3d model looks better, Will have to see. With a 10% step over it’s almost a 7 hour carve, (mine was only 3 and some change). Thanks for the feedback.
side a of the prybar. although figuring out how to do side b will be interesting, without the part falling out of the stock. some creative clamping will be in order.
Have you ever tried fixturing wax?
i havent. in this particular case i think fixturing wax would be a giant mess to try and get out of my threaded table. i have a plan so far.
v1 prybar for christmas gifts this coming year. overall a success
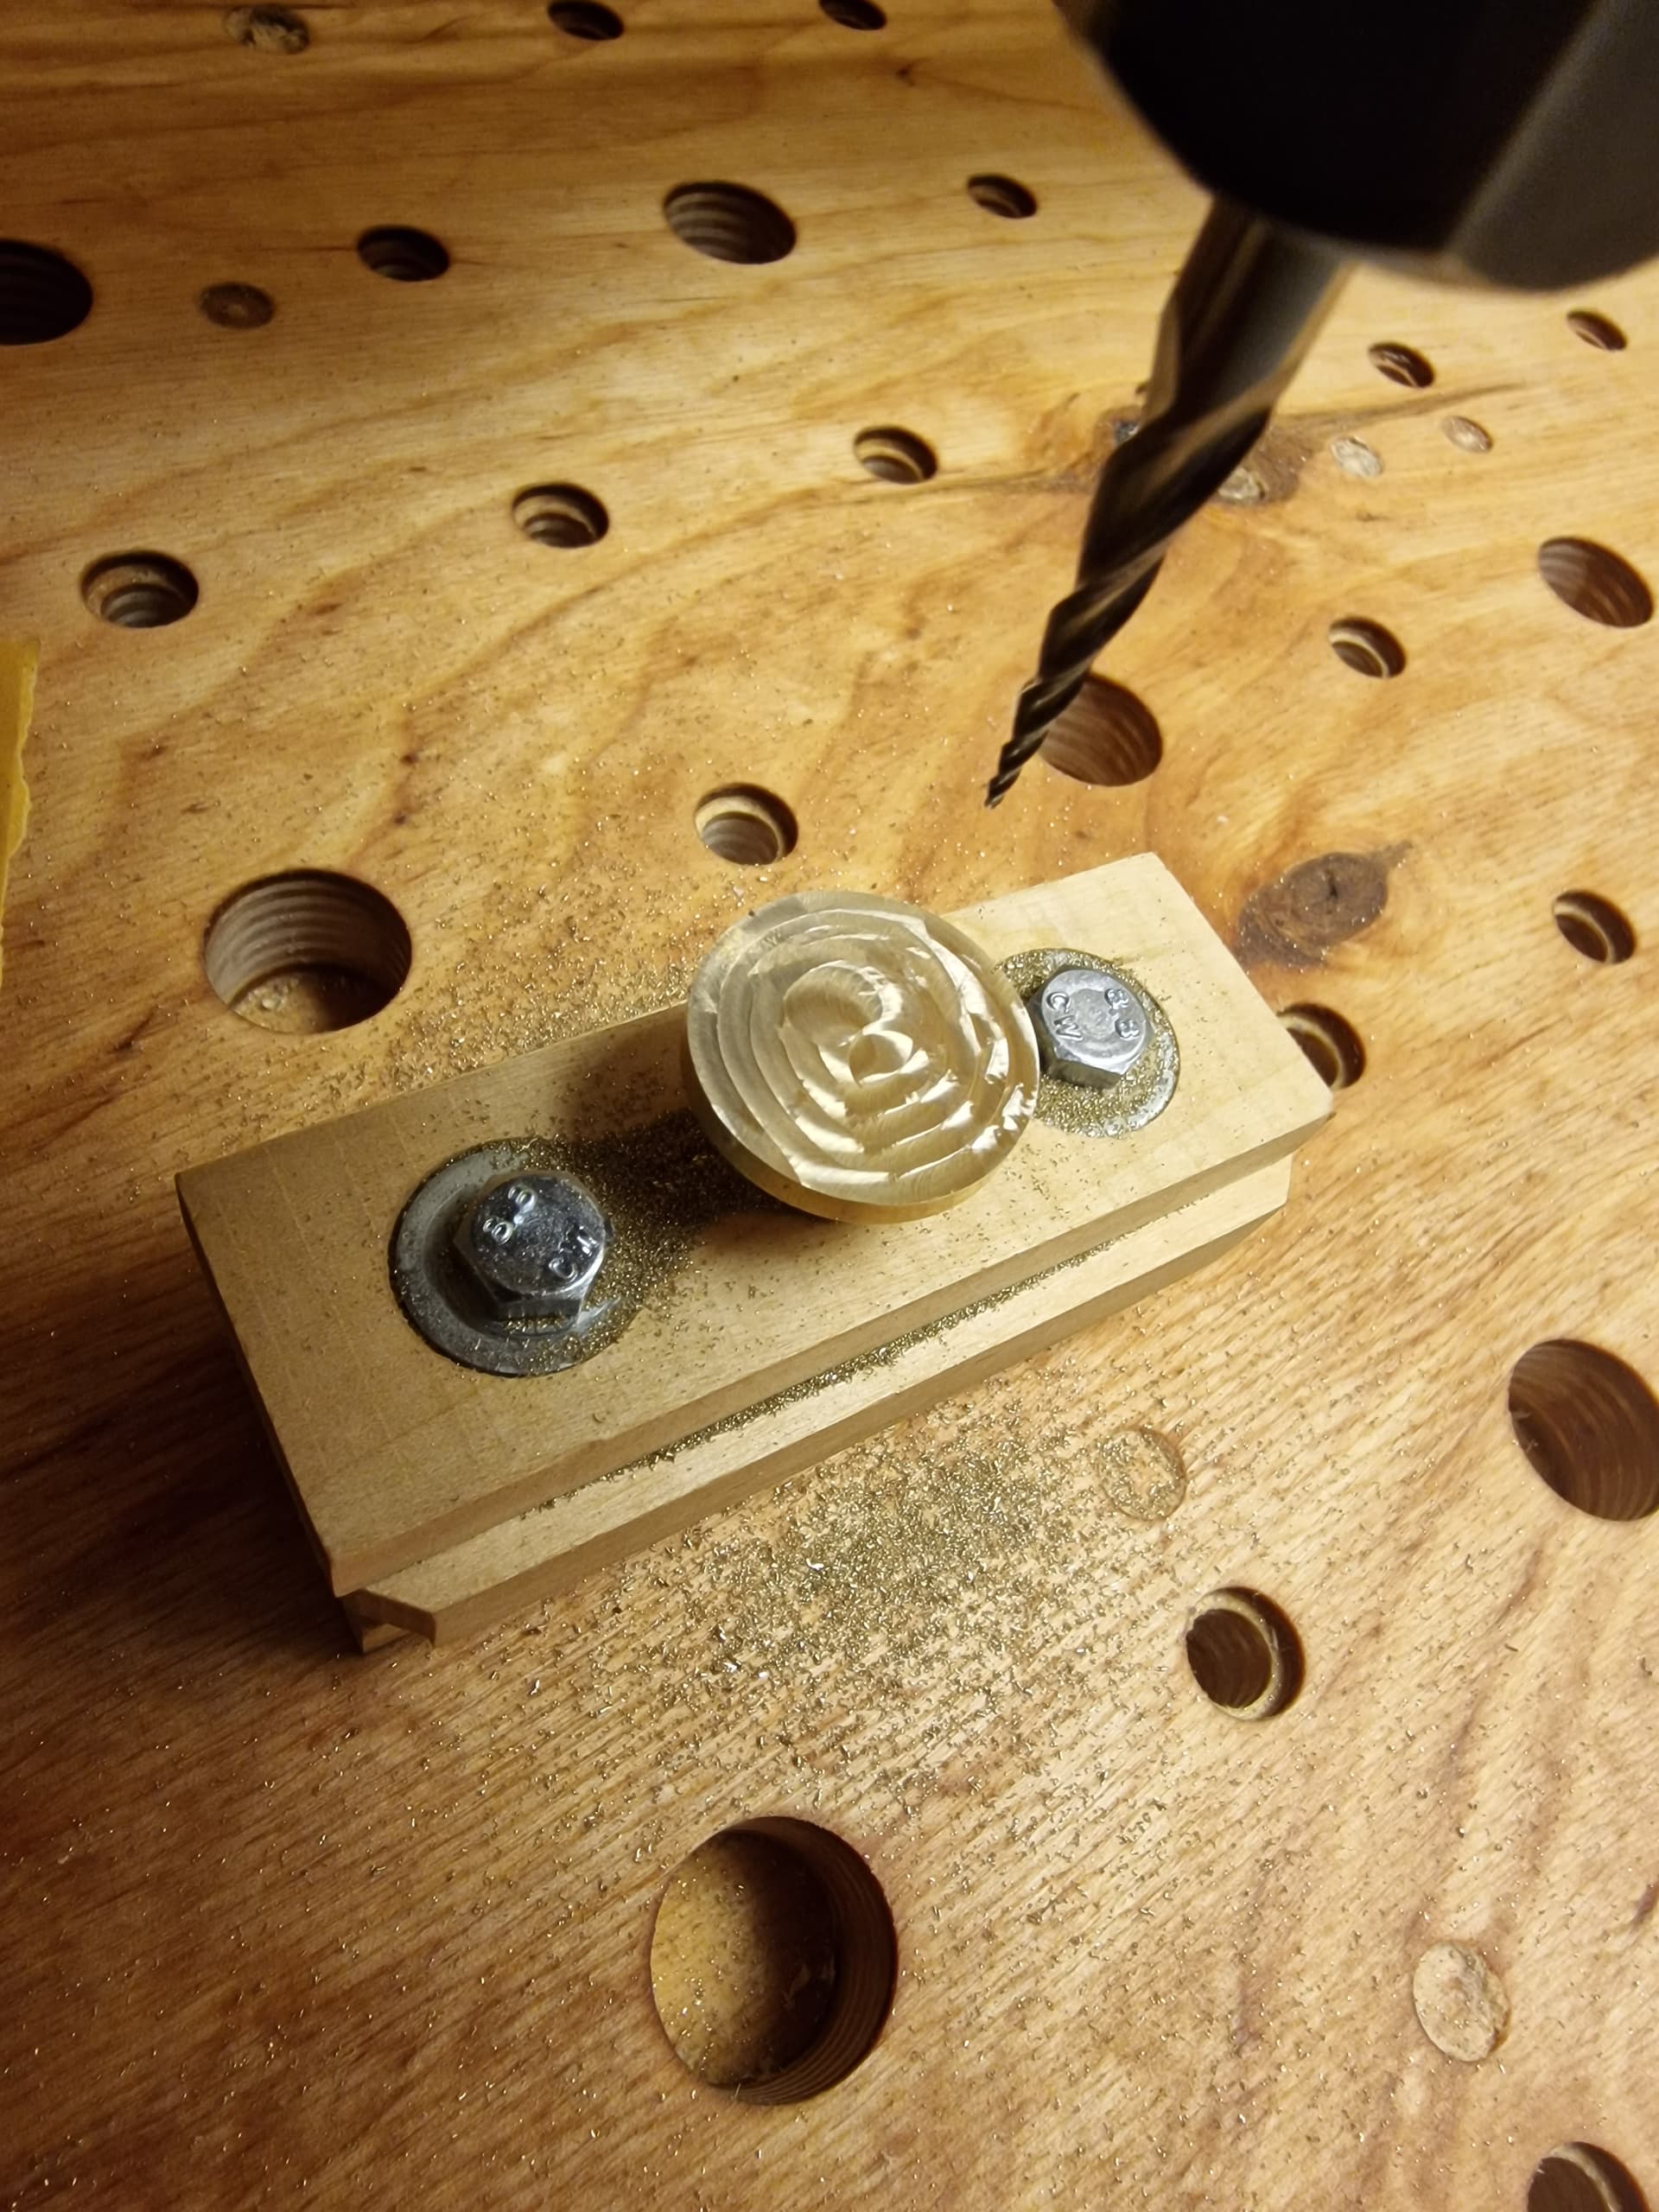
but it seems my threaded table is not completely square to my nomad, as the flip didnt work all that well.
(edit: im actually fairly certain my threaded table is square, but that since i had to move my stock after I bored the pin holes, (and then adjust my x/y zero)
that I didnt actually set my x/y zero in the same axis as the pins, because i used the center of the stock to set my zero, rather than trying to index off the pins. Then when i flipped the stock, my x/y was actually forward of the axis and cutting in the wrong spot
i really wish there was a way to probe things like that in CM.
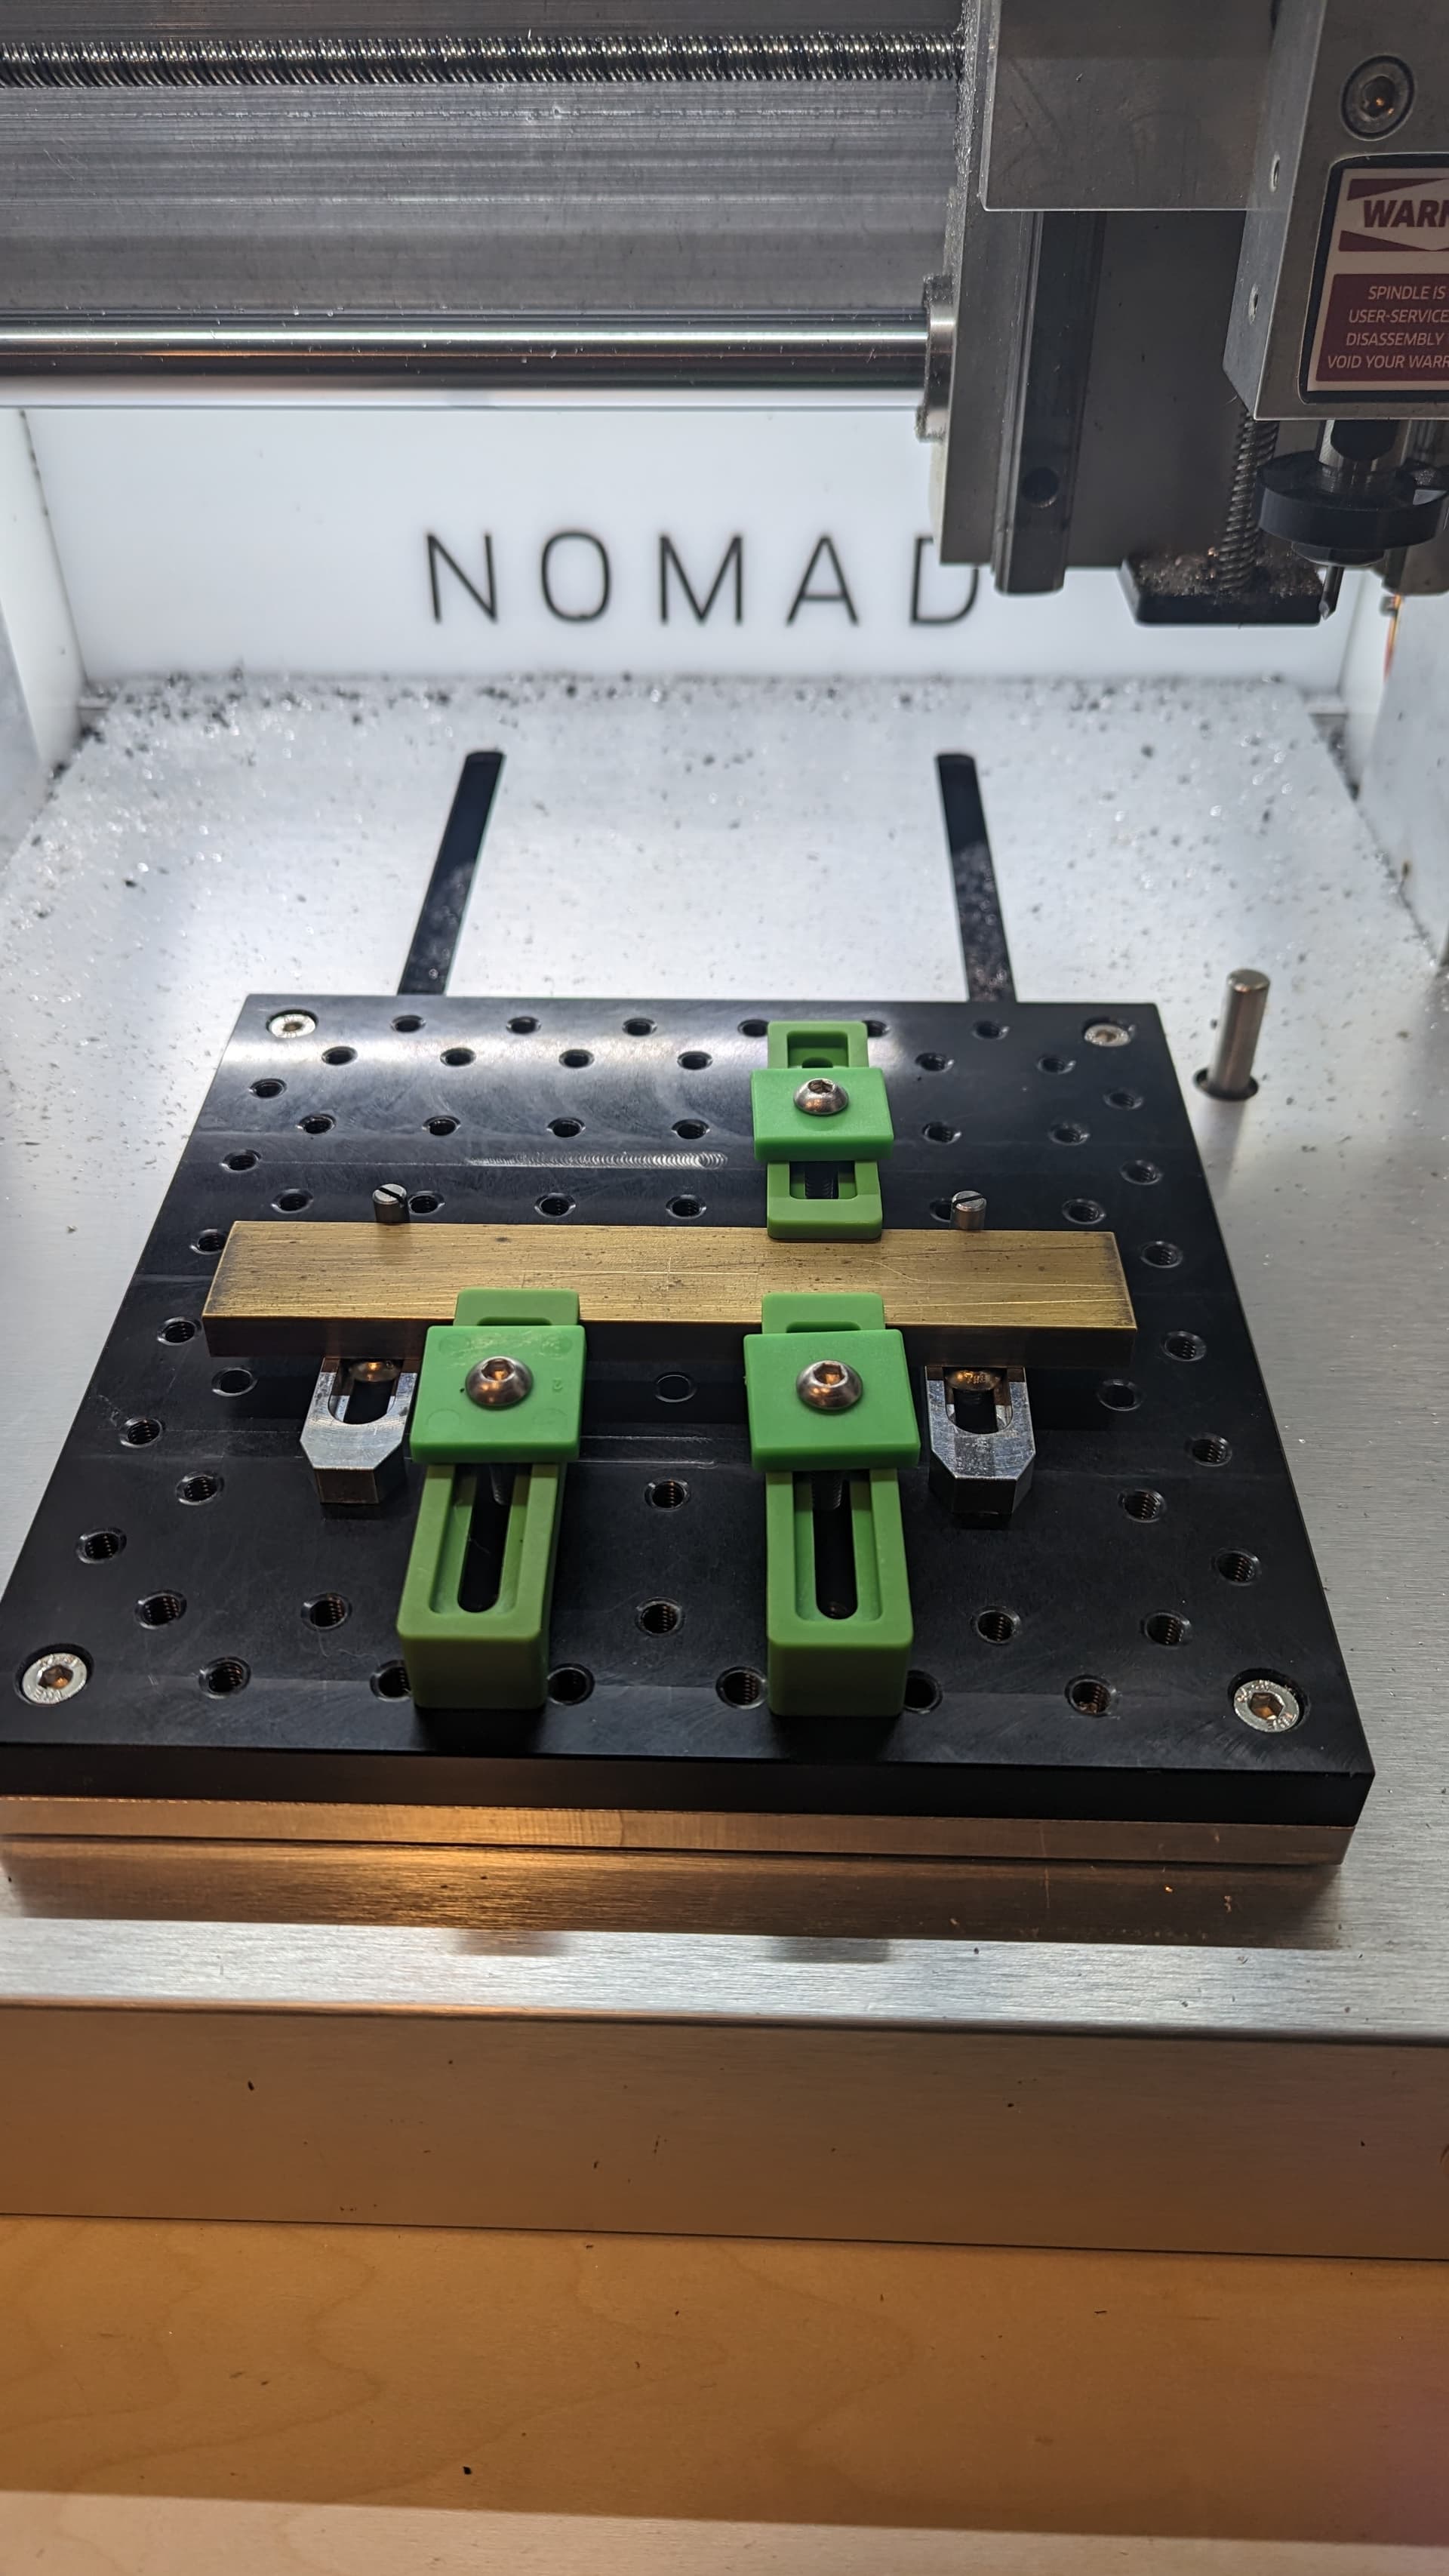
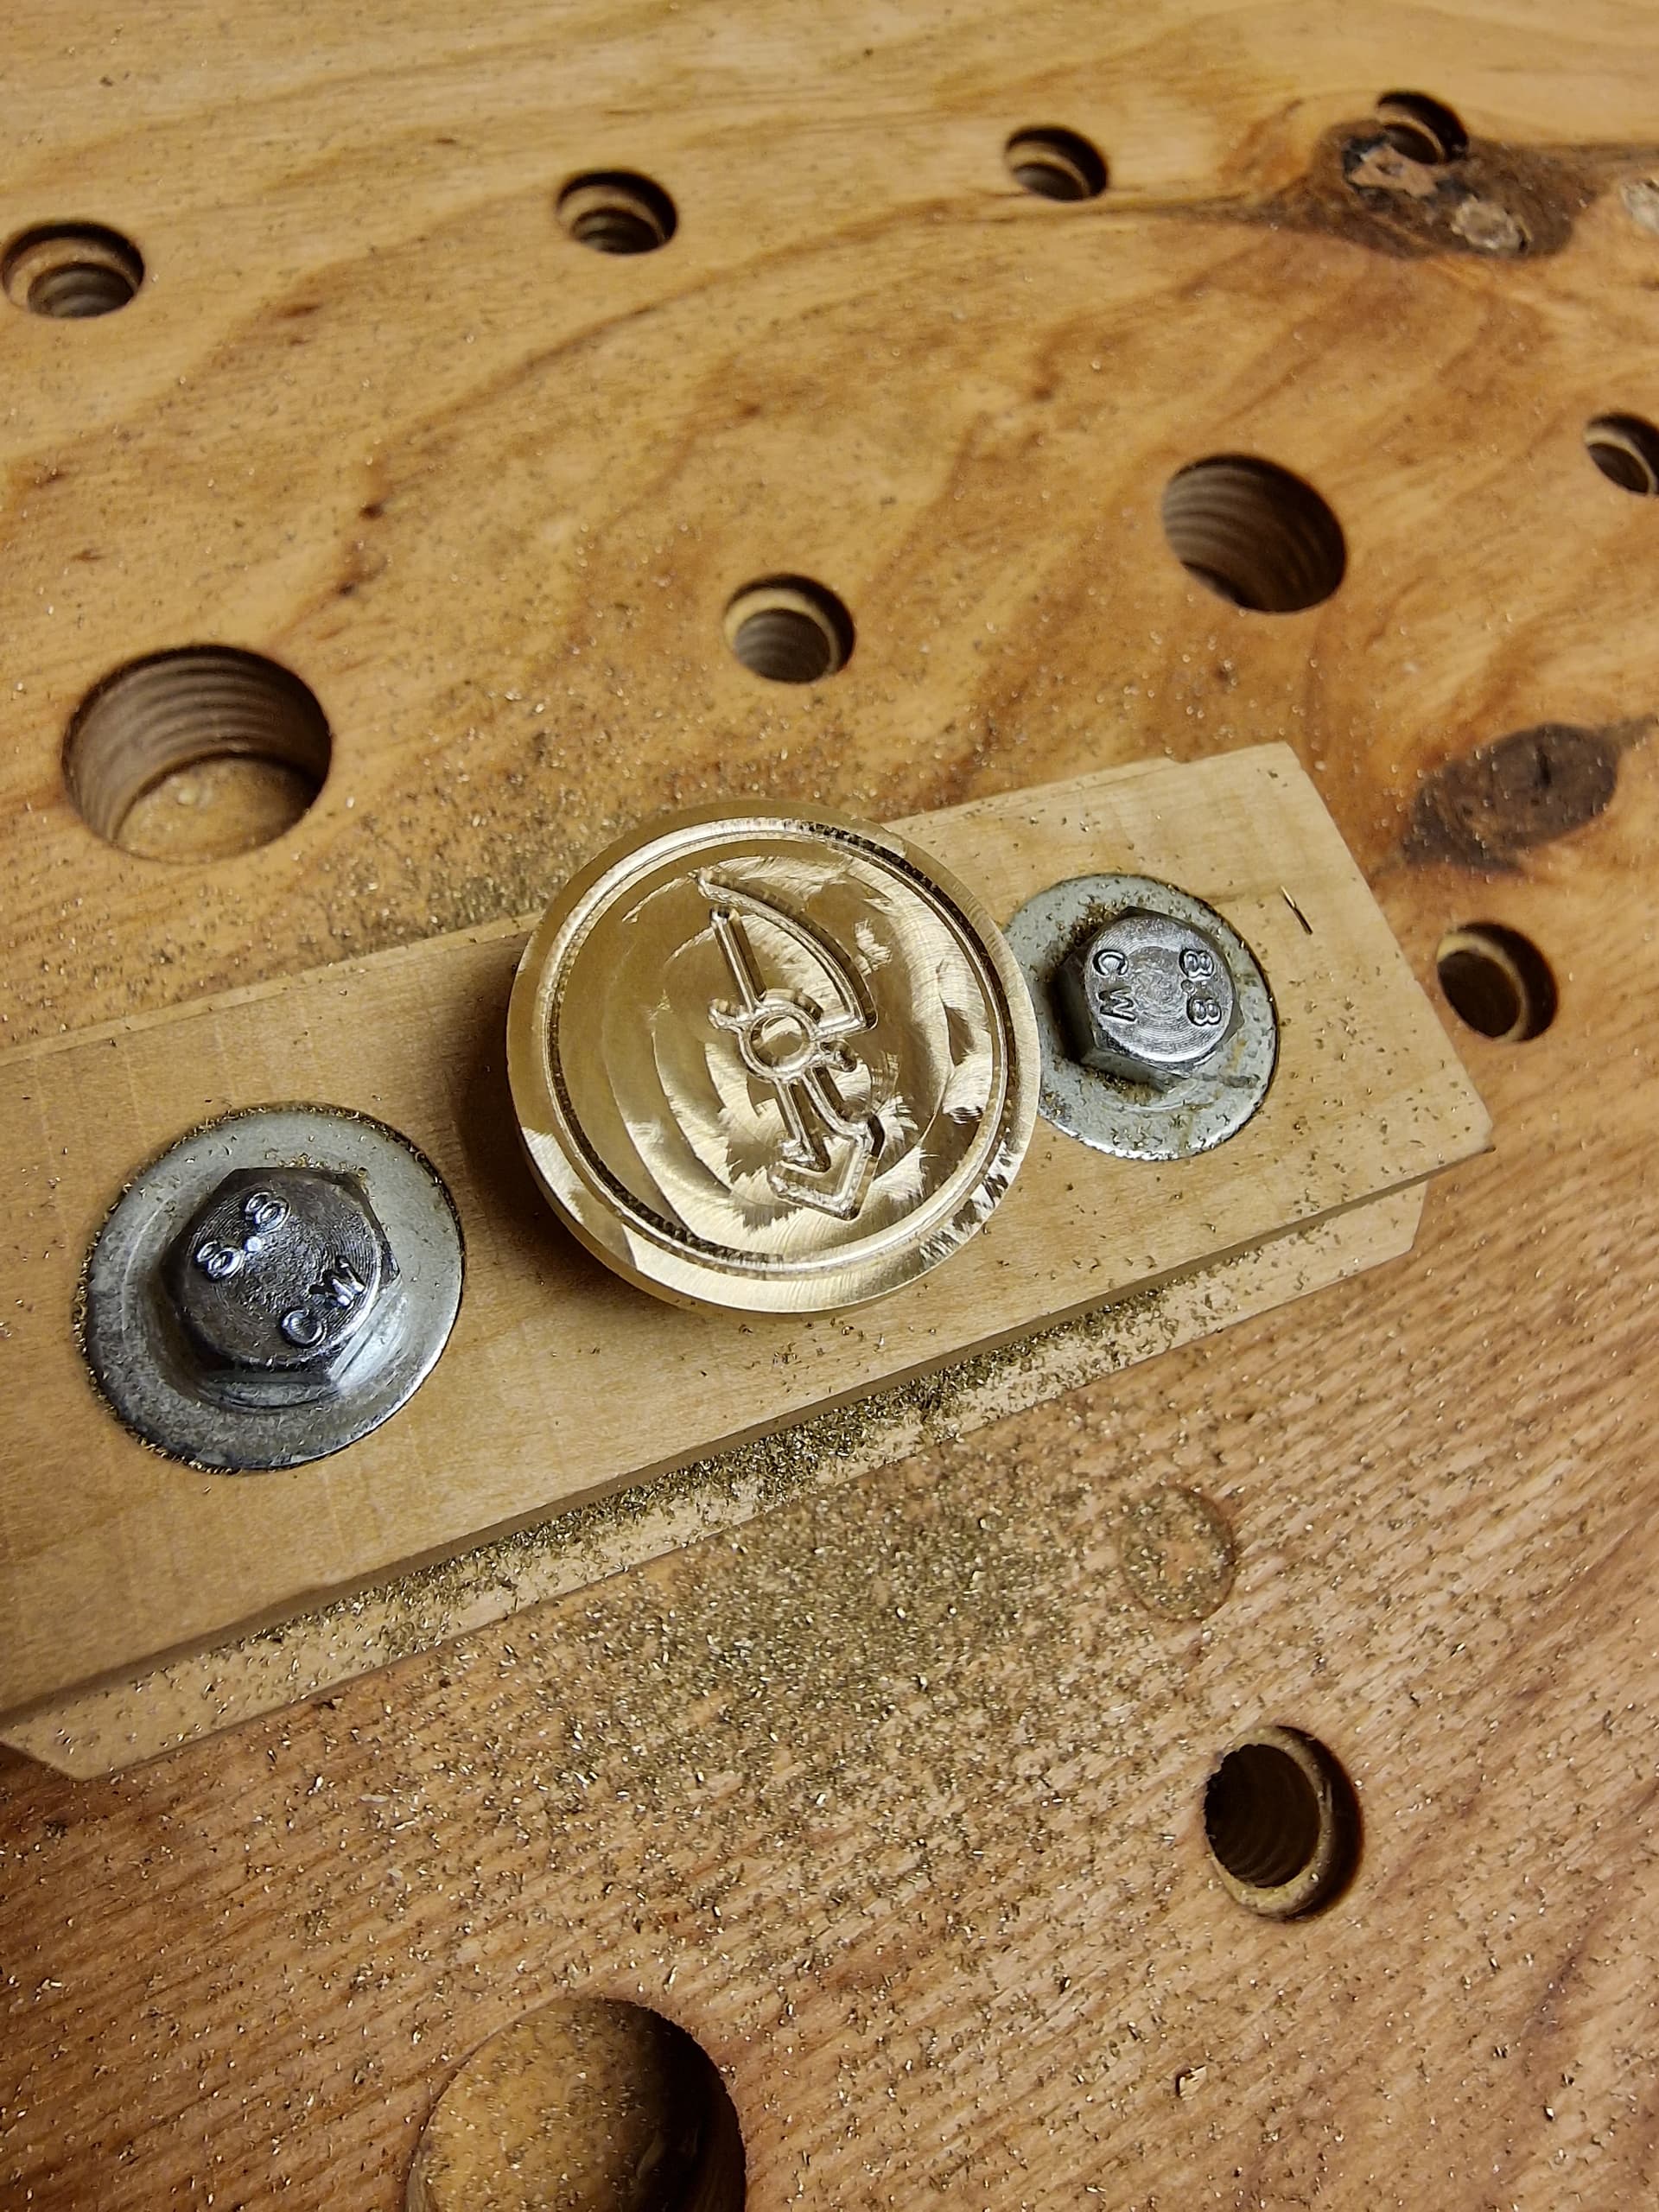
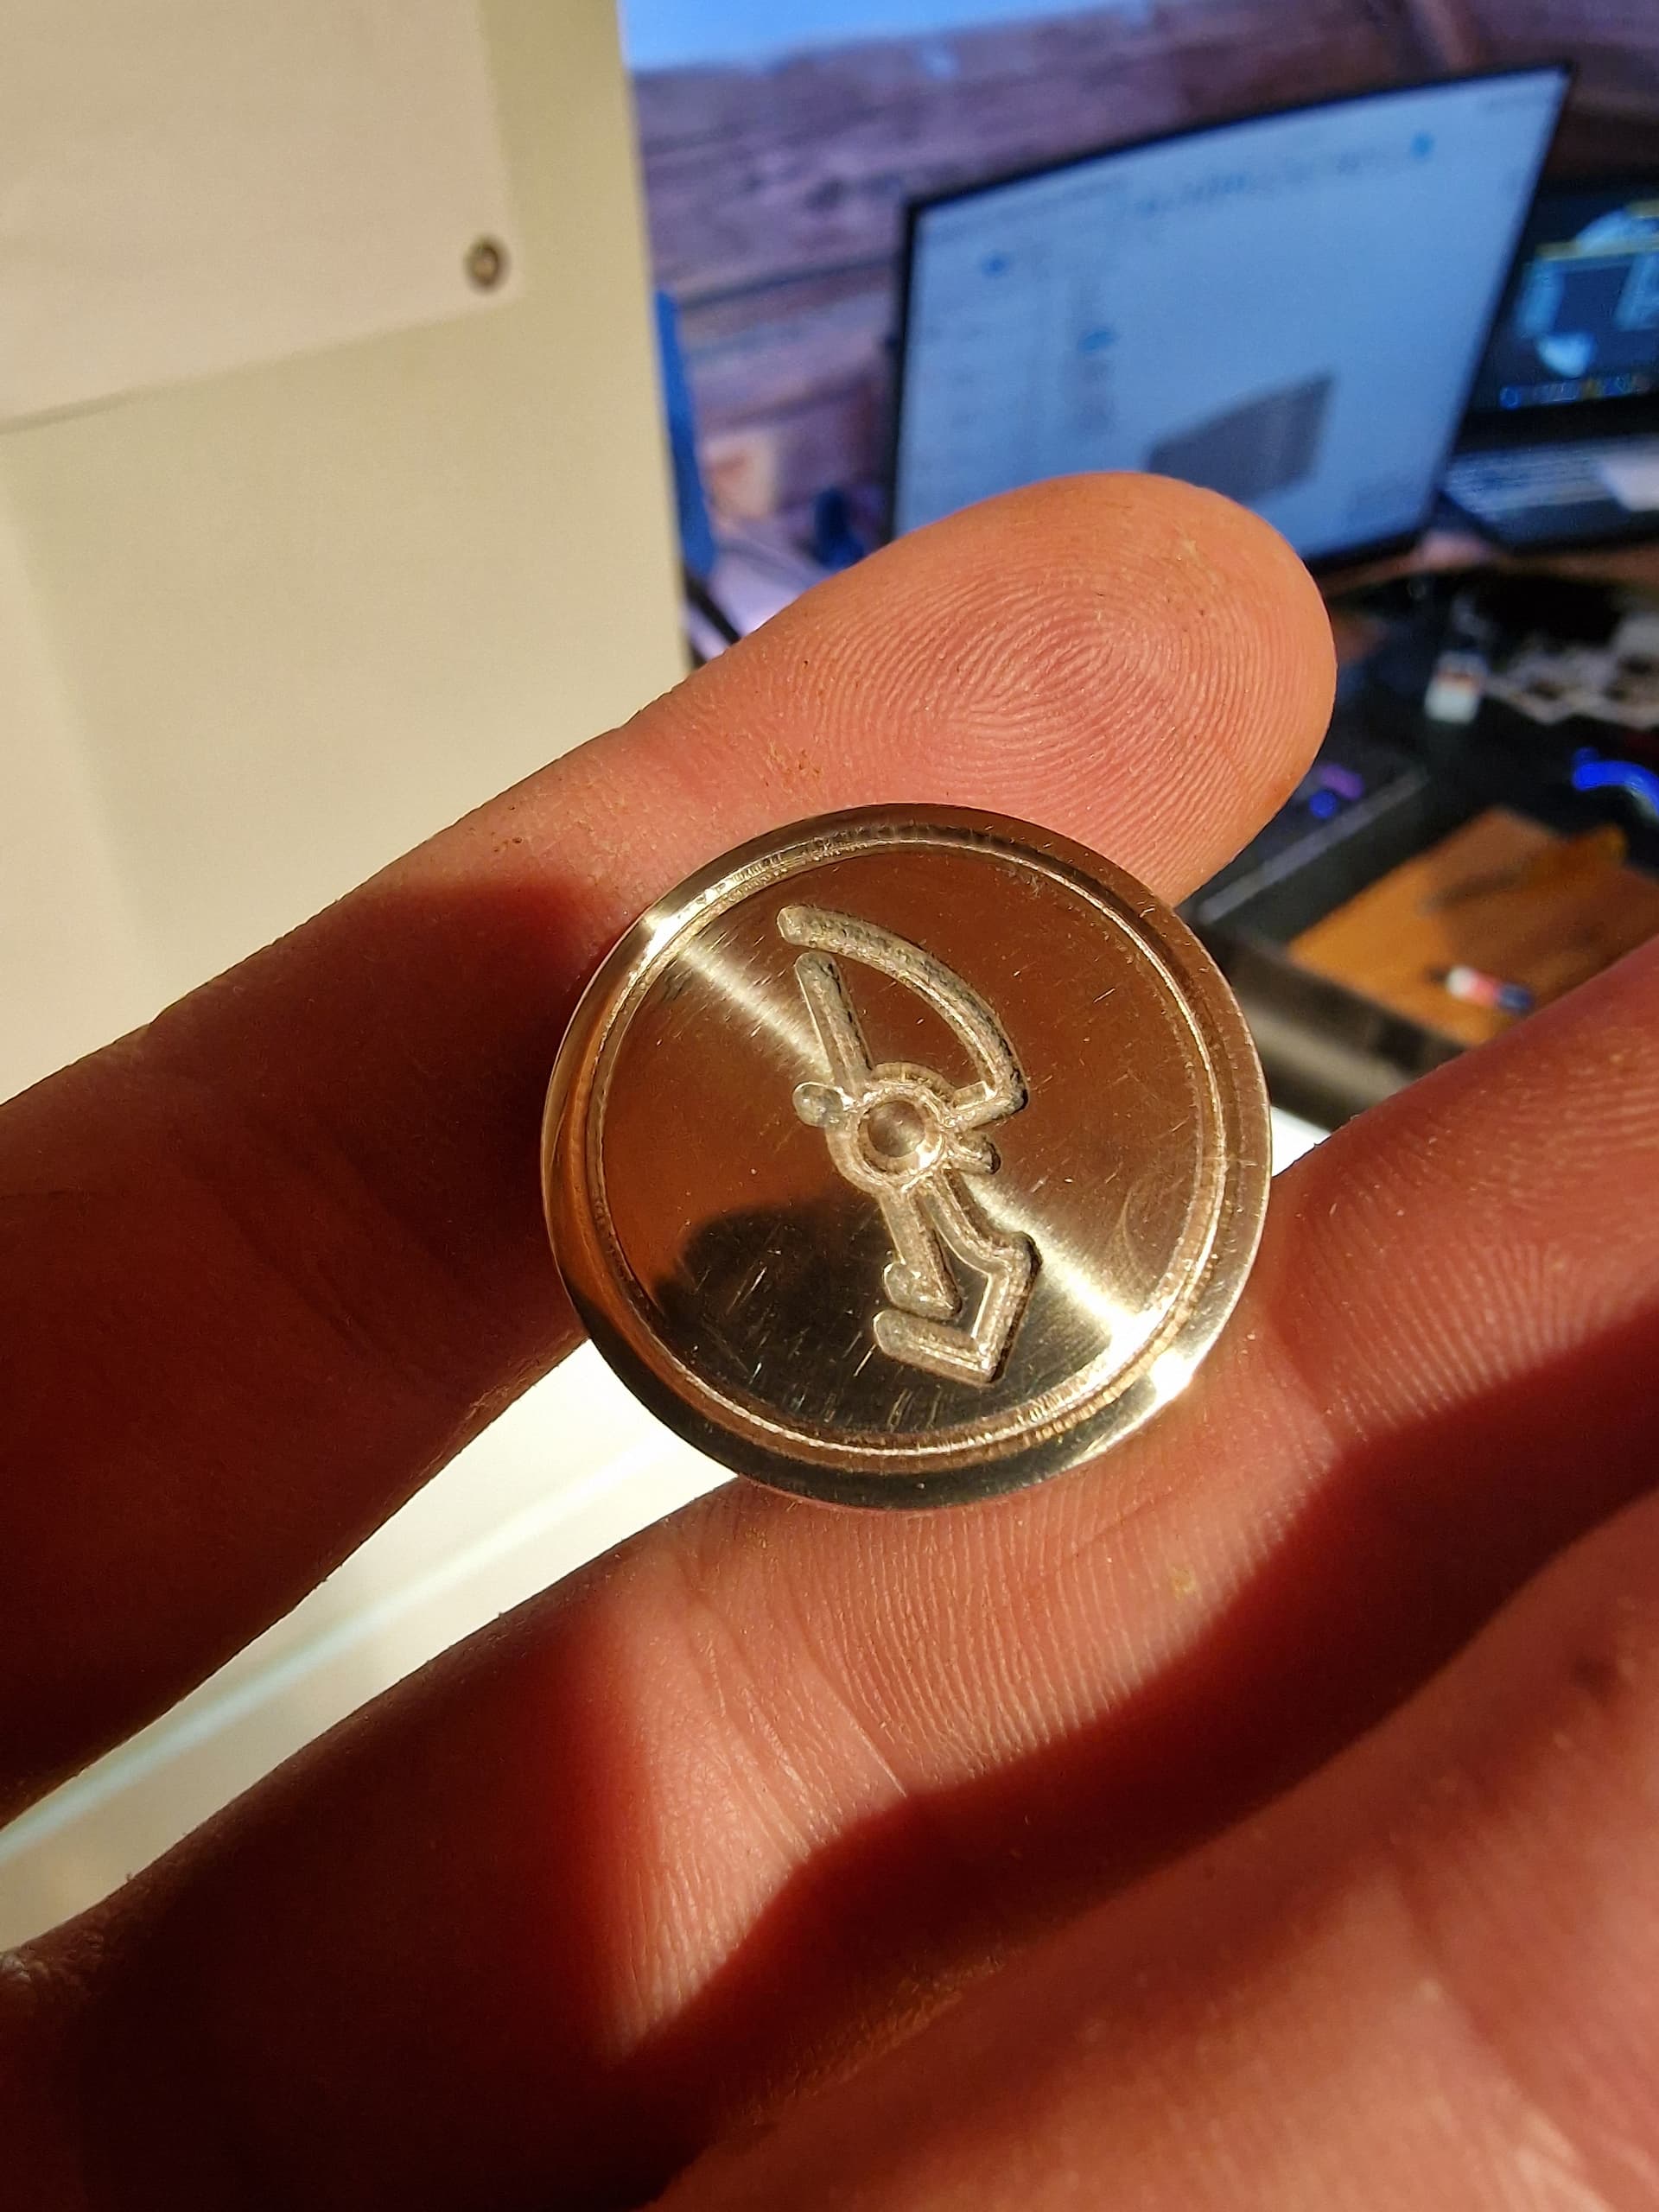
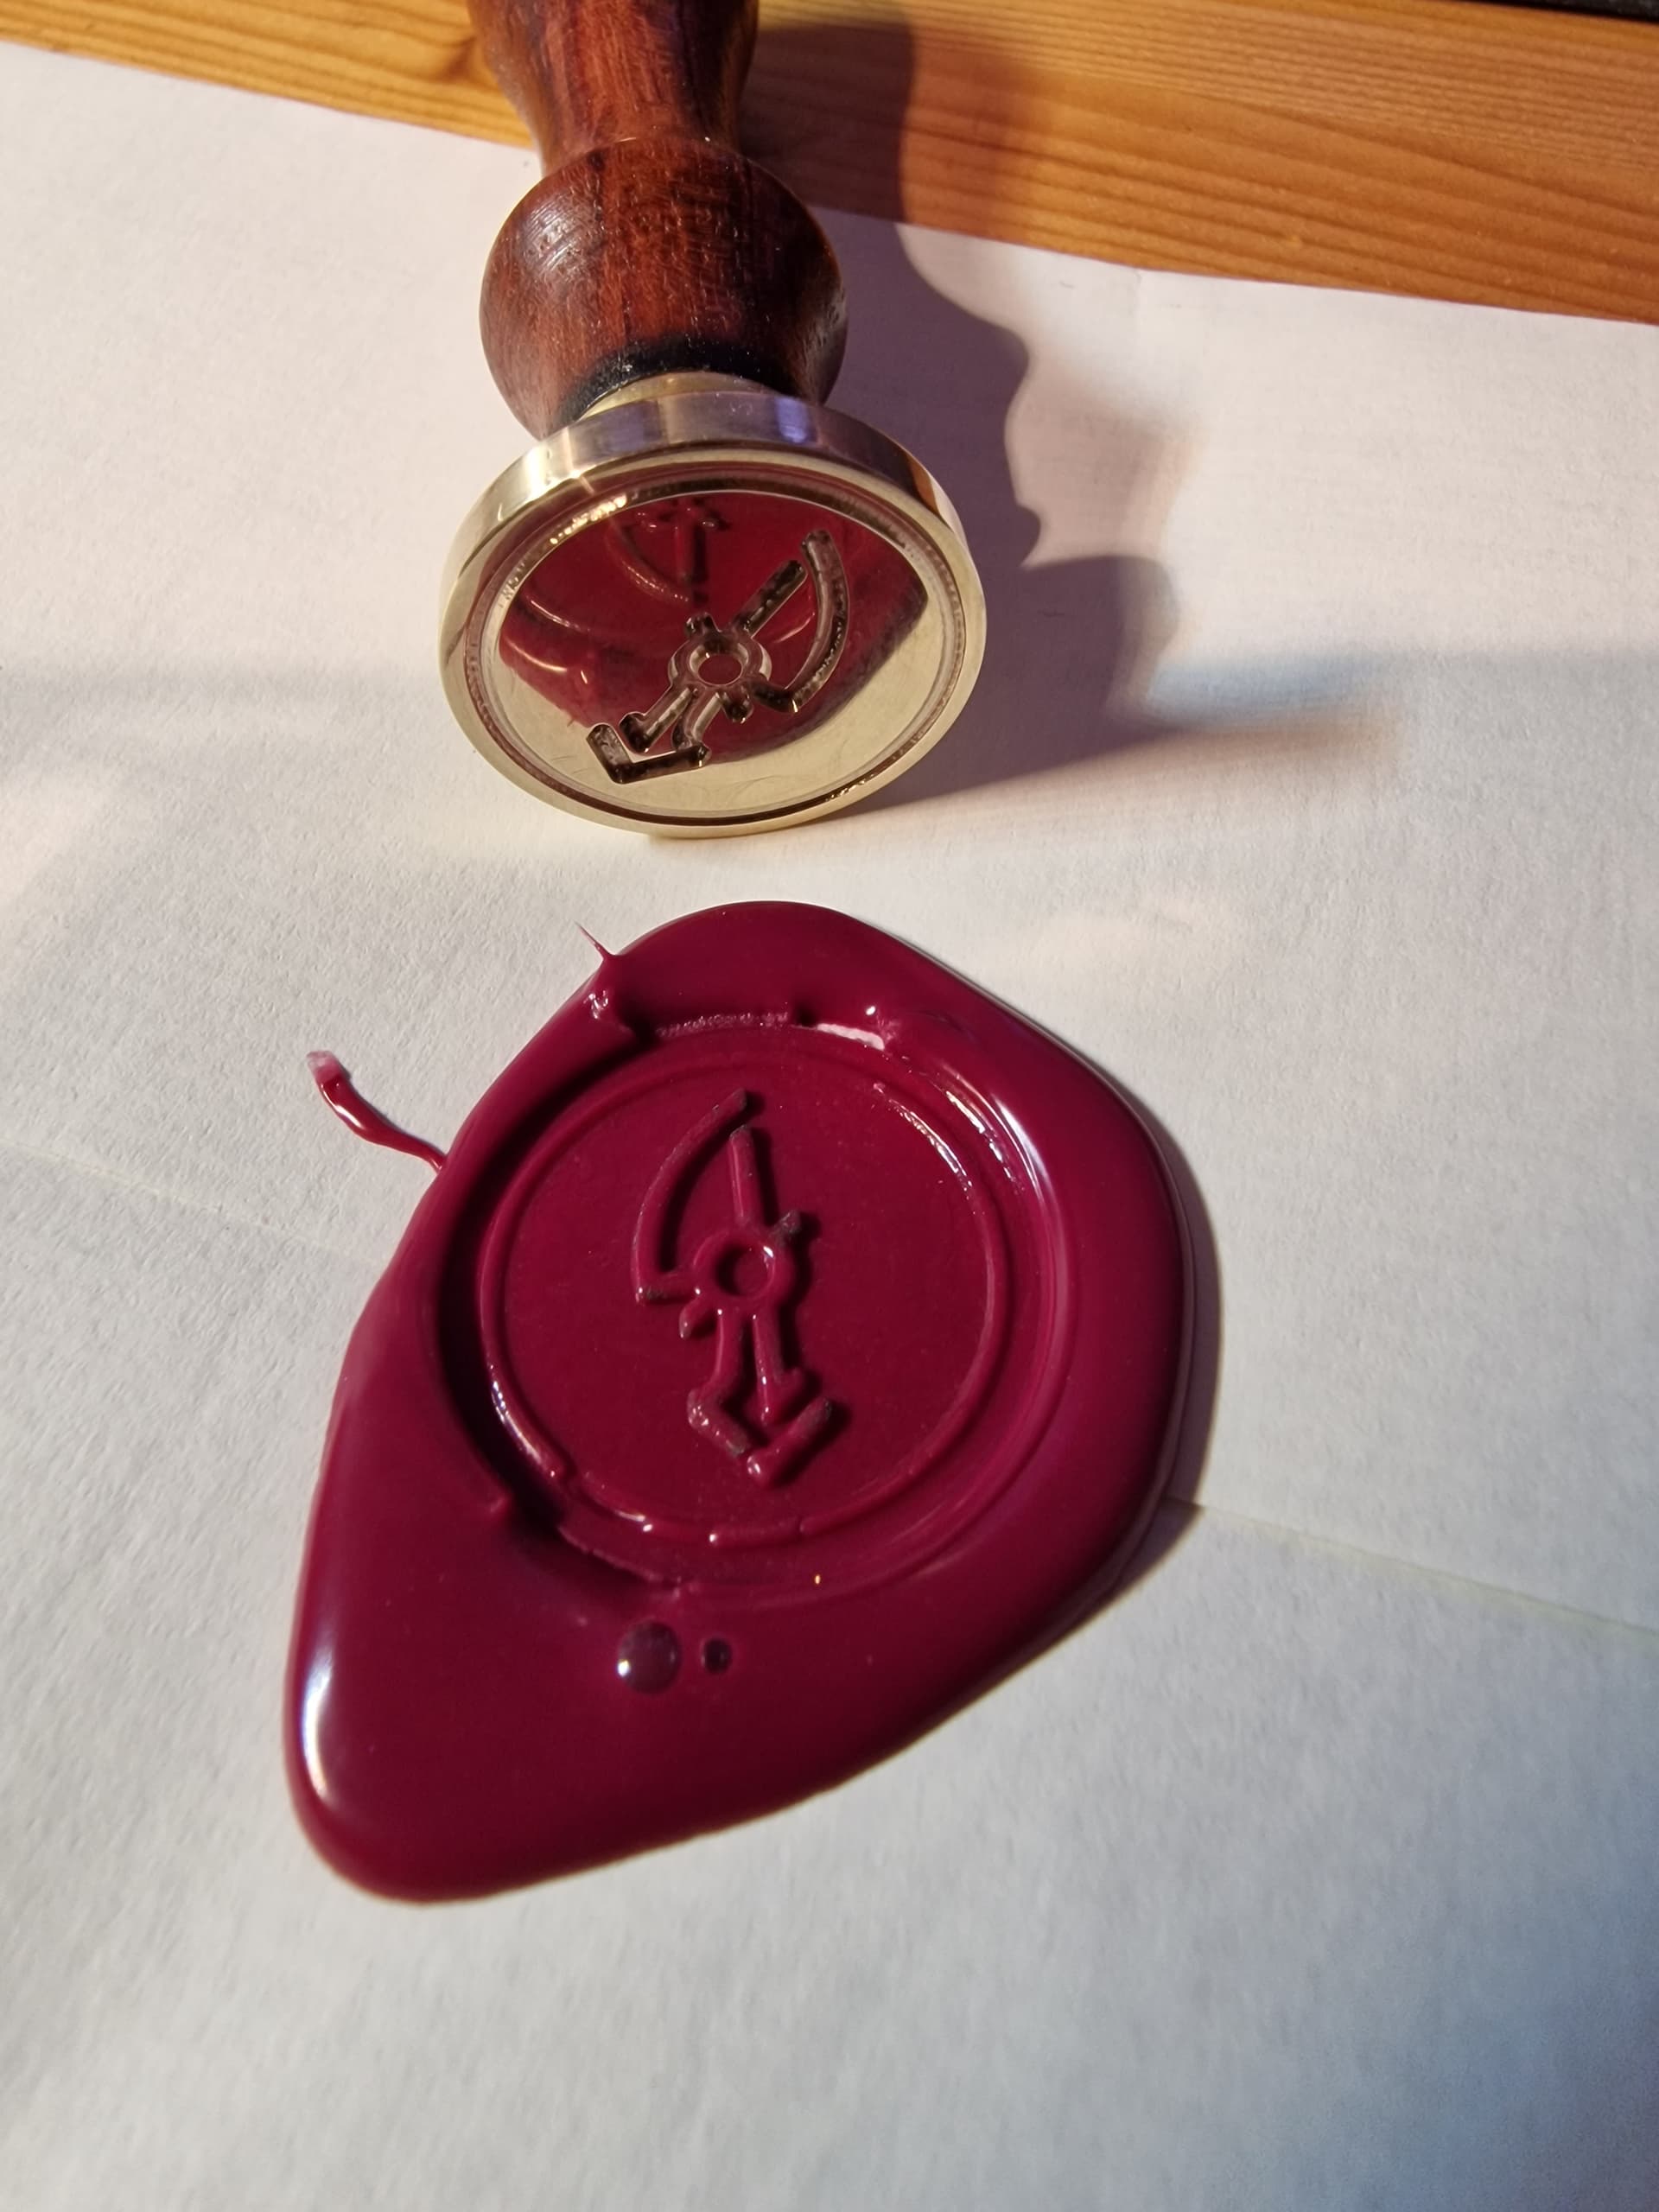
Today i pushed SO3 XXL to do tiny thing and brass. It was so awkward to see so small thing under that machine. Wax seal OD is 24mm and logo inside gavity is 0,9mm.
Quick 1200 grit sanding and polish
Test
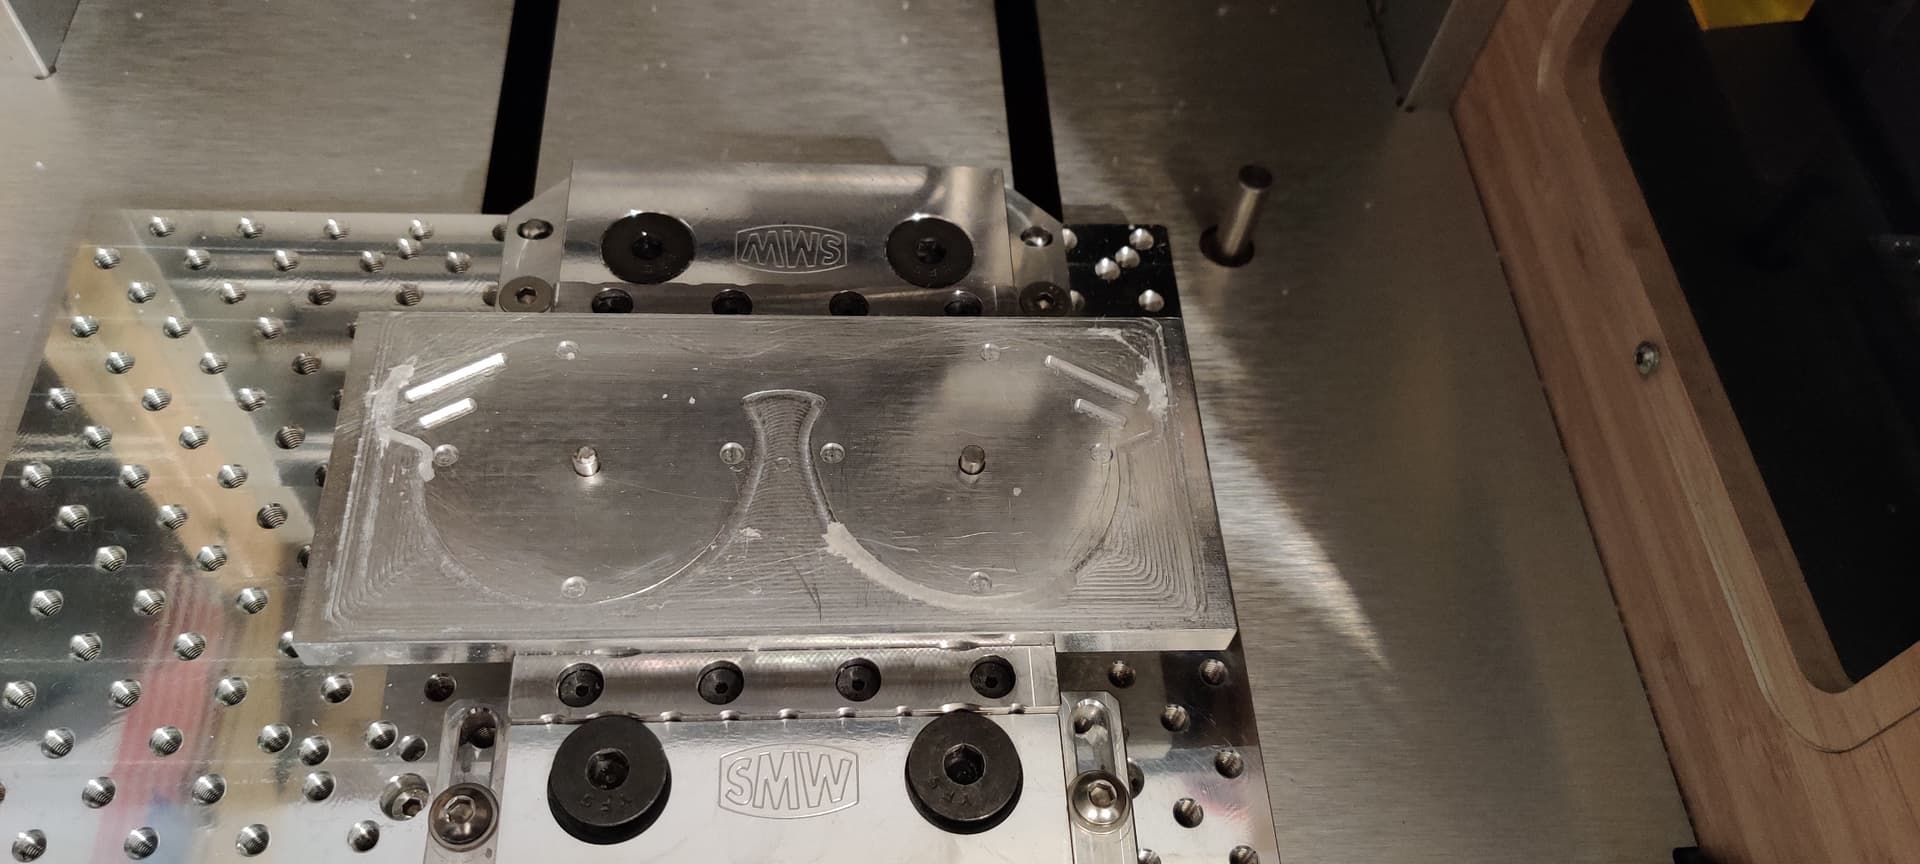
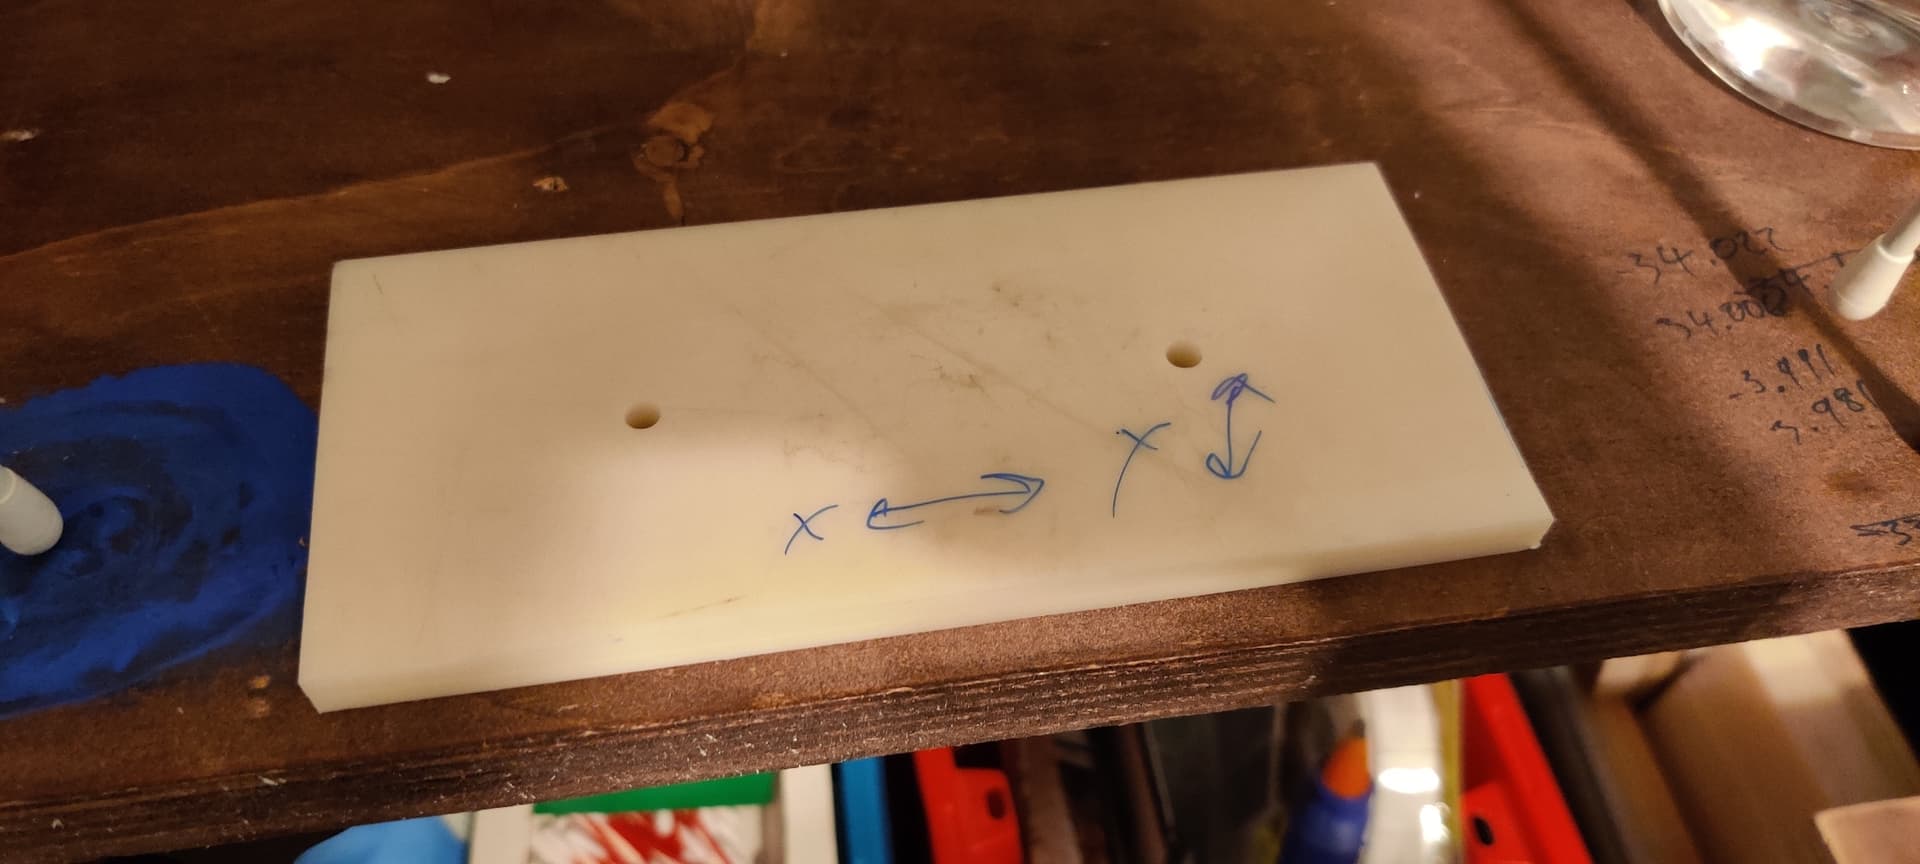
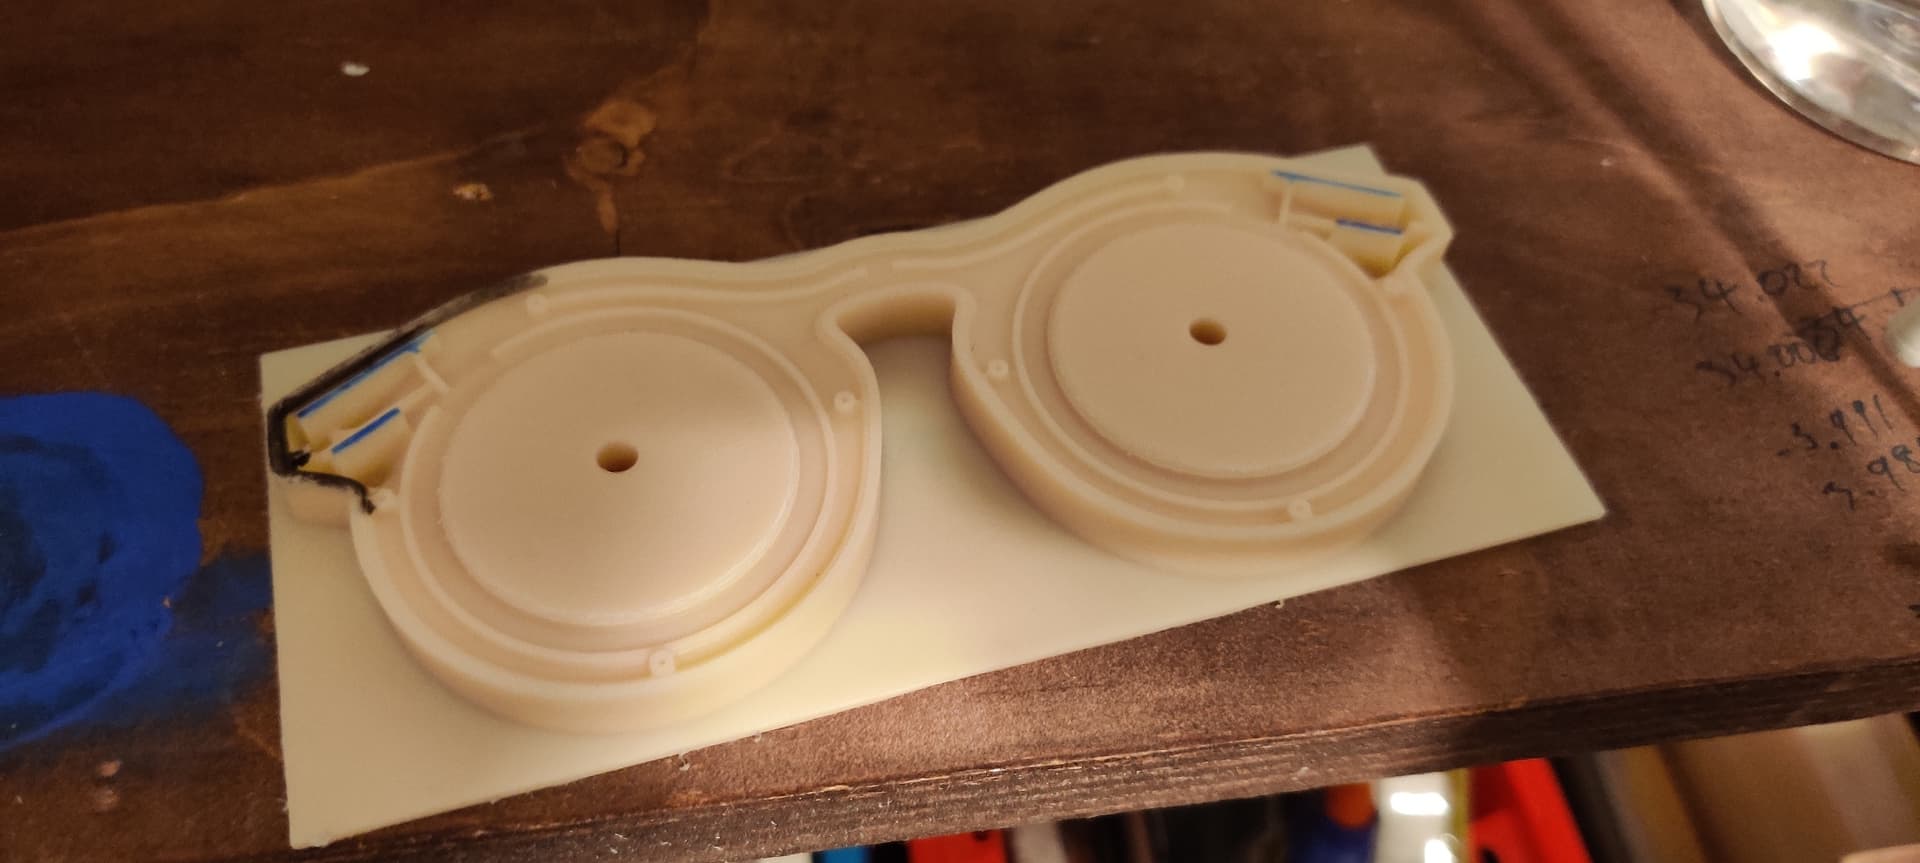
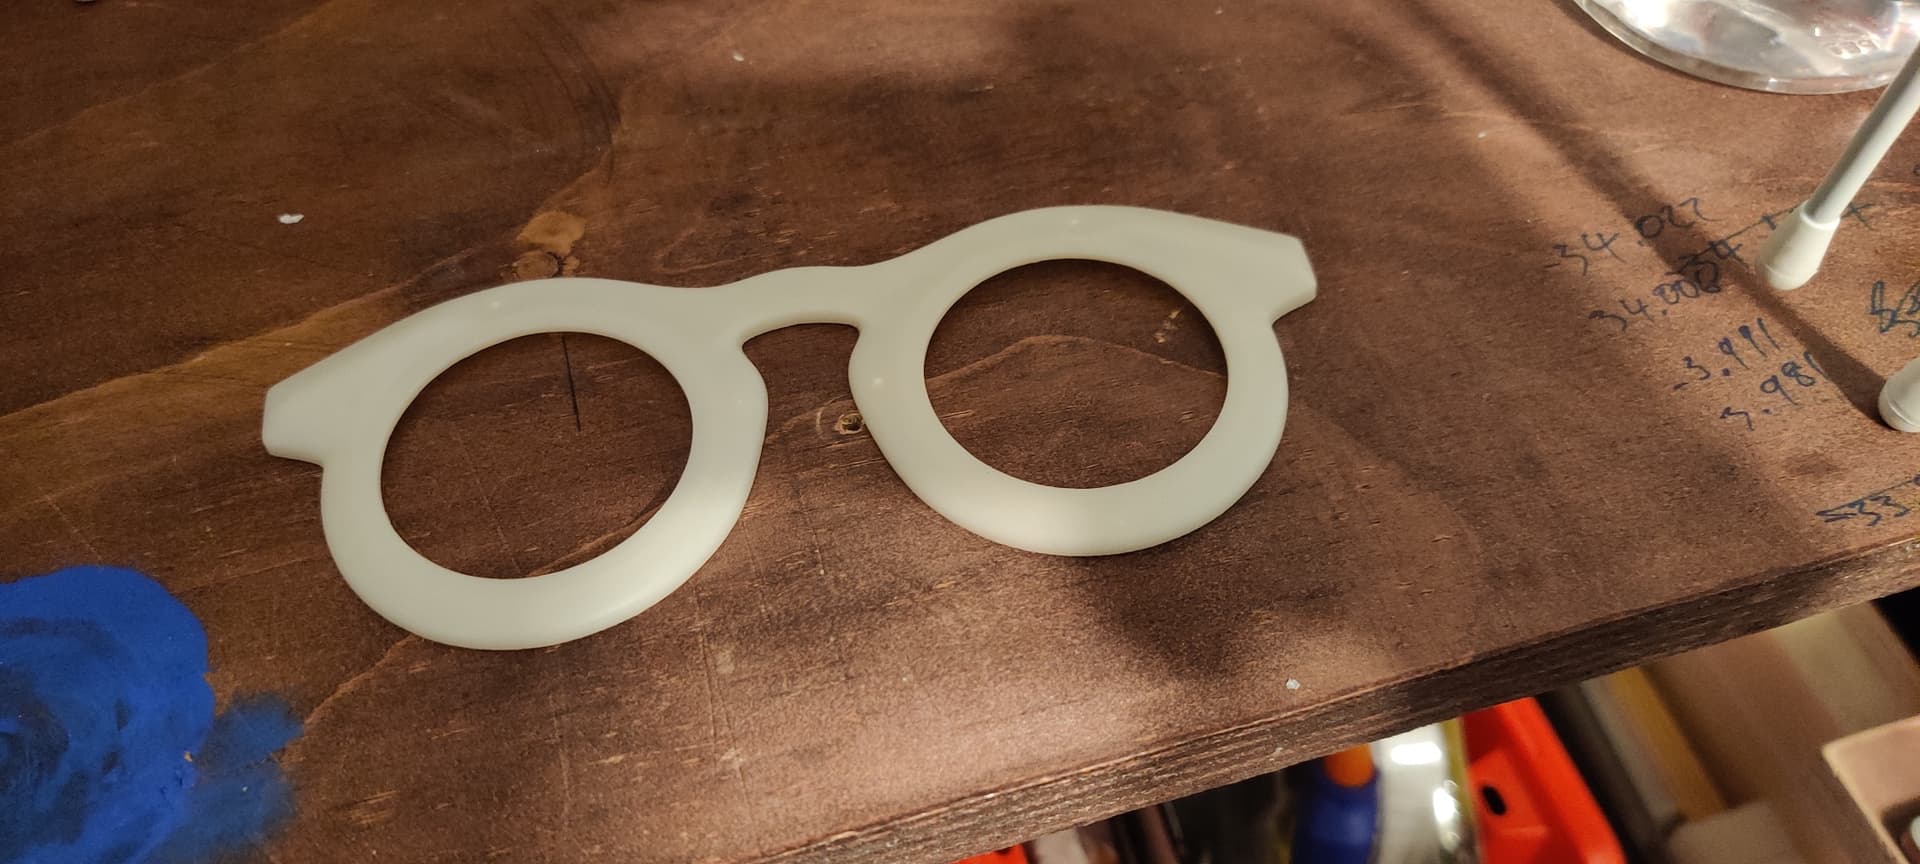
Hi Nomad gang(and shapeoko), this is my progress of prototyping a special glasses part (injection mold driven design) with a flipping fixture I made.
It’s cosmetic so I hold it through the fixture pins where the eyes would be to minimize post processing.
I have to prep the stock by boring with the nomad, but I have to ream with a hand drill because McMaster sells reamers pretty long and it wont fit in the machine.
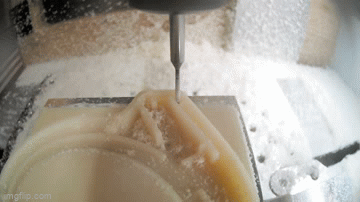
The problem with this method is that I have to breakup my setup to prepare more blanks if I would like to make more, and re-tramming the fixture is annoying and time consuming.
Is using a drill press with a jig to make the locating holes in blanks a long shot?
Thankee