I went to make my first cut ever last night (besides for wasteboard resurfacing) and the z-axis dove into the wasteboard hard (0.75”) for apparently no reason. I recreated the g-code without the holes because they routed fine and it dove into the board AGAIN. Both times it was near the bottom (but not through) the contour cut.
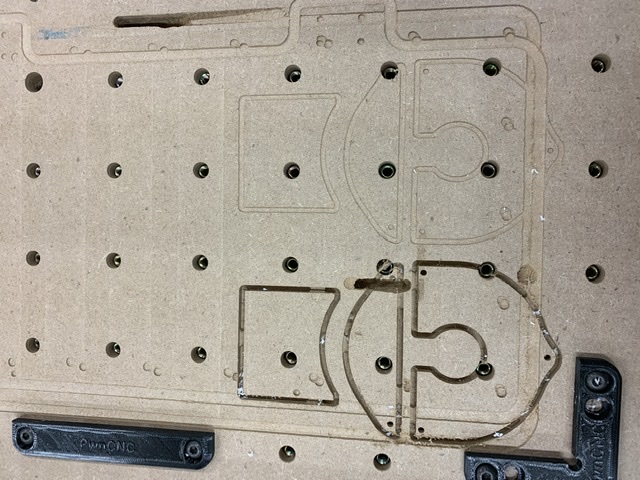
The part is a simple 1/2” thick polycarbonate rectangle 12”x17” with a dozen holes in it.
Any ideas why the machine is diving? File was made in CC and the gcode was run in CM. Both programs are the latest versions.
if using the Probe this may be caused by setting the Probe as for an X/Y/Z probe at a corner, but probing for Z only, see: https://docs.carbide3d.com/assembly/touch-probe/userguide/#probing-xyz (the Probe should be fully on the surface, rather than only the body on the stock and the 3mm lip off the stock)
setting the Z-axis safety/retract height in the CAM program (Job Setup | Machine | Retract Height in Carbide Create) to a value greater than is available above where the machine expects the top of the stock to be, resulting in the machine bottoming out against the top stock, thinking it is too high, then plunging down too far in an effort to travel down as far as that failed effort would allow. Setting the origin to the bottom of the stock/wasteboard surface, while setting the zero to the top of the stock may also cause this problem
a mechanical difficulty — check pulley set screws, Z-axis belt tension
an electronics issue — check the wiring and connectors
Thank you for the quick response. I did some testing today and feel that I was able to eliminate all of your suggestions except for mechanical issues.
Before I ever turned the machine on I read those same documents on origins and probing and used them to initially set up the program. I went back and verified everything just to be sure and all was set as it should be.
The retract height is set to 0.394” (10mm).
Electrically everything looks great.
I even opened the g-code in Notepad and Identified the point where it dove and did not see any program reason why it should have done it.
I really believe that my issue is mechanical. It seems to me that while the router is running in the perimeter router it is chittering and chattering and doesn’t have a consistent routing sound, almost as if the router is deflecting in the pocket and bouncing around off of the walls. It seems to dive exclusively right after rounding a corner. As it comes out of the corner, it starts to vibrate more and more until it is really bouncing around in the routed line and then starts to pull itself down. I checked and re-tightened the eccentrics and the z-belt (slightly more than the instructions call out) just to make sure there was no play coming from the z-axis assembly. I also double checked the stick out on the #201 and pushed it all the way up, then pulled it back down about 1/4” to make sure the collet could tighten.
The router was trammed with a dial indicator and is within 0.002”.
Am I expecting too much to be able to rout 1/2” polycarbonate with a #201 using CC standard feeds and speeds? It seems like the z-axis isn’t up to the task or the router has bad bearings or bad run-out from the factory. I ran out of time today, but tomorrow I will check the bearings and runout with an indicator.
Any other ideas would be appreciated I really want to like this machine, but I have only had it a few weeks and have not been having much luck. I am new to wood routing, but not to CNC. I built my own 5’x10’ CNC plasma table and have been running that for a few years.
Belt tension — the Z-axis should be guitar string tight (but careful not to bend the motor shaft): http://docs.carbide3d.com/assembly/shapeoko/xxl/step-5-belting/ on deep cuts it may help to remove one spring from the Z-axis temporarily, esp. if one hasn’t added a spoilboard on top of the wasteboard — it also helps to install the router as low as possible (installing the Makita adapter upside down will help). Some folks have found it helps to remove bolts which won’t stay tensioned (M4 Z-axis tension bolt, various V wheels with eccentric nuts), apply a thin bead of threadlock along the length of the threads, then reinstalling. See the video at: https://www.youtube.com/watch?v=_lIIb_PdziA Note that the X-axis motor is held in place on standoffs and if those bolts are loose this can cause belt tension issues.
Thanks for the very detailed response. I skimmed it just now and will look it over in detail tomorrow. I will take your advise and basically take the machine apart one bolt at a time and blue Loctite everything.
I did see one thing that has me scratching my head. The standard feed and speed programmed into CC for polycarbonate using a #201 has a router RPM of 10,000, but the ‘Feeds and Speeds’ PDF link that you posted shows that polycarbonate needs to run at 18,000 RPM. That is a significant difference. I was under the assumption that the preprogrammed F&S in CC were tested as well as conservative settings.
Also, the Feeds and Speeds PDF does not have the Carbide router, but I assume that I can use the Makita settings. Is there an updated sheet with the Carbide router settings?
Ok, sounds good, I would have given you more details if it wasn’t working-sounded a bit like an issue I have had. It seems like the only times I’ve had the z axis plunge unexpectedly is when my z axis limit switch wasn’t working, or when I opened a file from someone else in vcarve and the retract height was so high that it hit the limit switch, then lost its bearings and plunged really deep into a part. I’m starting to agree that it sounds mechanical-would have checked the collet like you did first before going further.
Feeds and speeds are a way of determining how often the cutting edge will be presented to the material, and in doing so what forces will be exerted on the machine and the material — there’s a bit of variability there, esp. if one allows for different surface finishes. See:
I did all of the mechanical checks and everything looked good. I did not do a full loctite of the machine yet, but I did try the feed/speed/cut on the PDF and the rout sounded much nicer (no chatter) and I was able to complete two parts without issue. At this point it seems like the issue was with the feed/speed/DOC. Being new, I relied on the CC settings, but they did not work well for me.
Doing through cuts on polycarbonate probably wasn’t the best idea for my first project, but I didn’t want to turn down a paying job.
An experienced operator would have probably stopped when they heard the chattering and reset the feed/speed, but I just kept putting in more material thinking it was play in the machine.
Thanks for all of the help and the very quick responses to my issues.
Now on to figuring out why the probe / Bitsetter doesn’t set the height properly. The top of the part measured with an indicator wasn’t more than 0.010” off, but I had to add 0.055” to get the programs to cut through even though I set the thickness of the material to the exact thickness measured with calipers at multiple locations.
what’s your plunge rate and depth per pass ?
If you want, post your design file here and we could have a look to double-check your settings.
Z axis calibration will help, but I would be surprised if it explained a 0.055" error.
How flat was your stock to begin with, and when the cut did not go all the way through initially, did you notice variations the remaining thickness across the part ?
I calibrated all of the axes with the MDI to command the motor to move 1” while measuring the movement with an indicator. I updated the $100, $101, and $102 variables so that if I tell it to go 1” (25.4mm) it is exact to three decimal places. The z-depth seems to be much better, but I will need to test it further.
I seem to have uncovered another issue. After calibrating the axes, I drew a 5” square in CC and programmed it to cut in polycarbonate so that I could measure the resulting square with calipers to make sure the calibration was good at larger dimensions. The square is not starting/stopping in the same place, but i don’t believe it is due to belt skipping. I found that the y-motor on the left does not lock up, it seems like it is driving when commanded, but when idle I can move it easily back and forth.
Ok… I did a top to bottom loctite of the machine. I loctited and adjusted every v-wheel, eccentric, stepper mount/bolt/standoff, limit switch bracket, z-axis tension bolt and pulley etc… basically everything except for the rail bolts and the leveling feet.
I then re-calibrated every axis with the indicator and the MDI.
The machine is cutting much better now that the left y motor isn’t slipping, but I still can’t figure out what I am doing wrong with the Bitsetter / Probe. No matter what I do it wants to cut too deep. It has to be something that I am doing wrong in the workflow.
I went to cut some 0.120 acrylic and I did the following from a machine/program OFF state.
Put first tool in collet
Turn on machine
Start CM
Initialize machine and let the bit setter measure the Iinstalled tool
Jog the router over to where the zero will be
Put the probe block on top of the part in the corner (lip NOT overhanging the edges)
Probe Z separately
Probe X separately
Probe Y separately
Load program
Run program, program says to install tool, but tool is already in the router from step 1
Router does the Bitsetter routing and goes back to the middle
Program says to turn on router, turn router on
Program starts cutting but cuts all the way through the 0.120 acrylic even though the DOC is supposed to be 0.045
Program makes a three passes and final depth ends up being 0.280.
I feel like I am doing everything right but still can’t figure out why the Bitsetter/Probe doesn’t do what I think it should.
Any insight on what I am doing wrong would be appreciated. Z-axis is already tight, adjusted, and calibrated.
It was 0.012” over so I took 1.000/1.012= 0.988142292490119. The multiply that number by the existing $102 number of 40 so that the new $102=39.52569169960474.
I verified that the $102 number was saved by sending a $$ command and checking the log.
I did some testing today and the same file that dove 0.375” into the wasteboard yesterday cut fine today. Well… not 100% the same, I did remove the tabs from the program, but that was the only change.
I then cut a few other different pieces without issue until the last program.
I had the machine zeroed and verified by doing a rapid move to XY offset and again to Z offset +6mm. I jogged the Z down 6mm and the bit was just barely scratching the surface… perfect! I clicked Z offset+6mm to get the bit away from the part. I then loaded a file and was about to hit RUN when I noticed that the Z now said 37mm but was still at the 6mm height. I zeroed the Z again and ran the program without issue.
Is it necessary to re zero after loading a new program?