Advice on my first real project (jewelry box made from wood)

I’m about to make my first big project on my new Shapeoko and would love some practical advice on how to do it. I’ve had great luck asking in this forum before (Best place to buy cutters in Europe (Denmark), Designing a soundproof'ish enclosure for my new SO3), so I thought I’d ask again. I’ve only just started to dive into CNC’ing, so I’m kind of jumping into the deep end of the pool with this project.

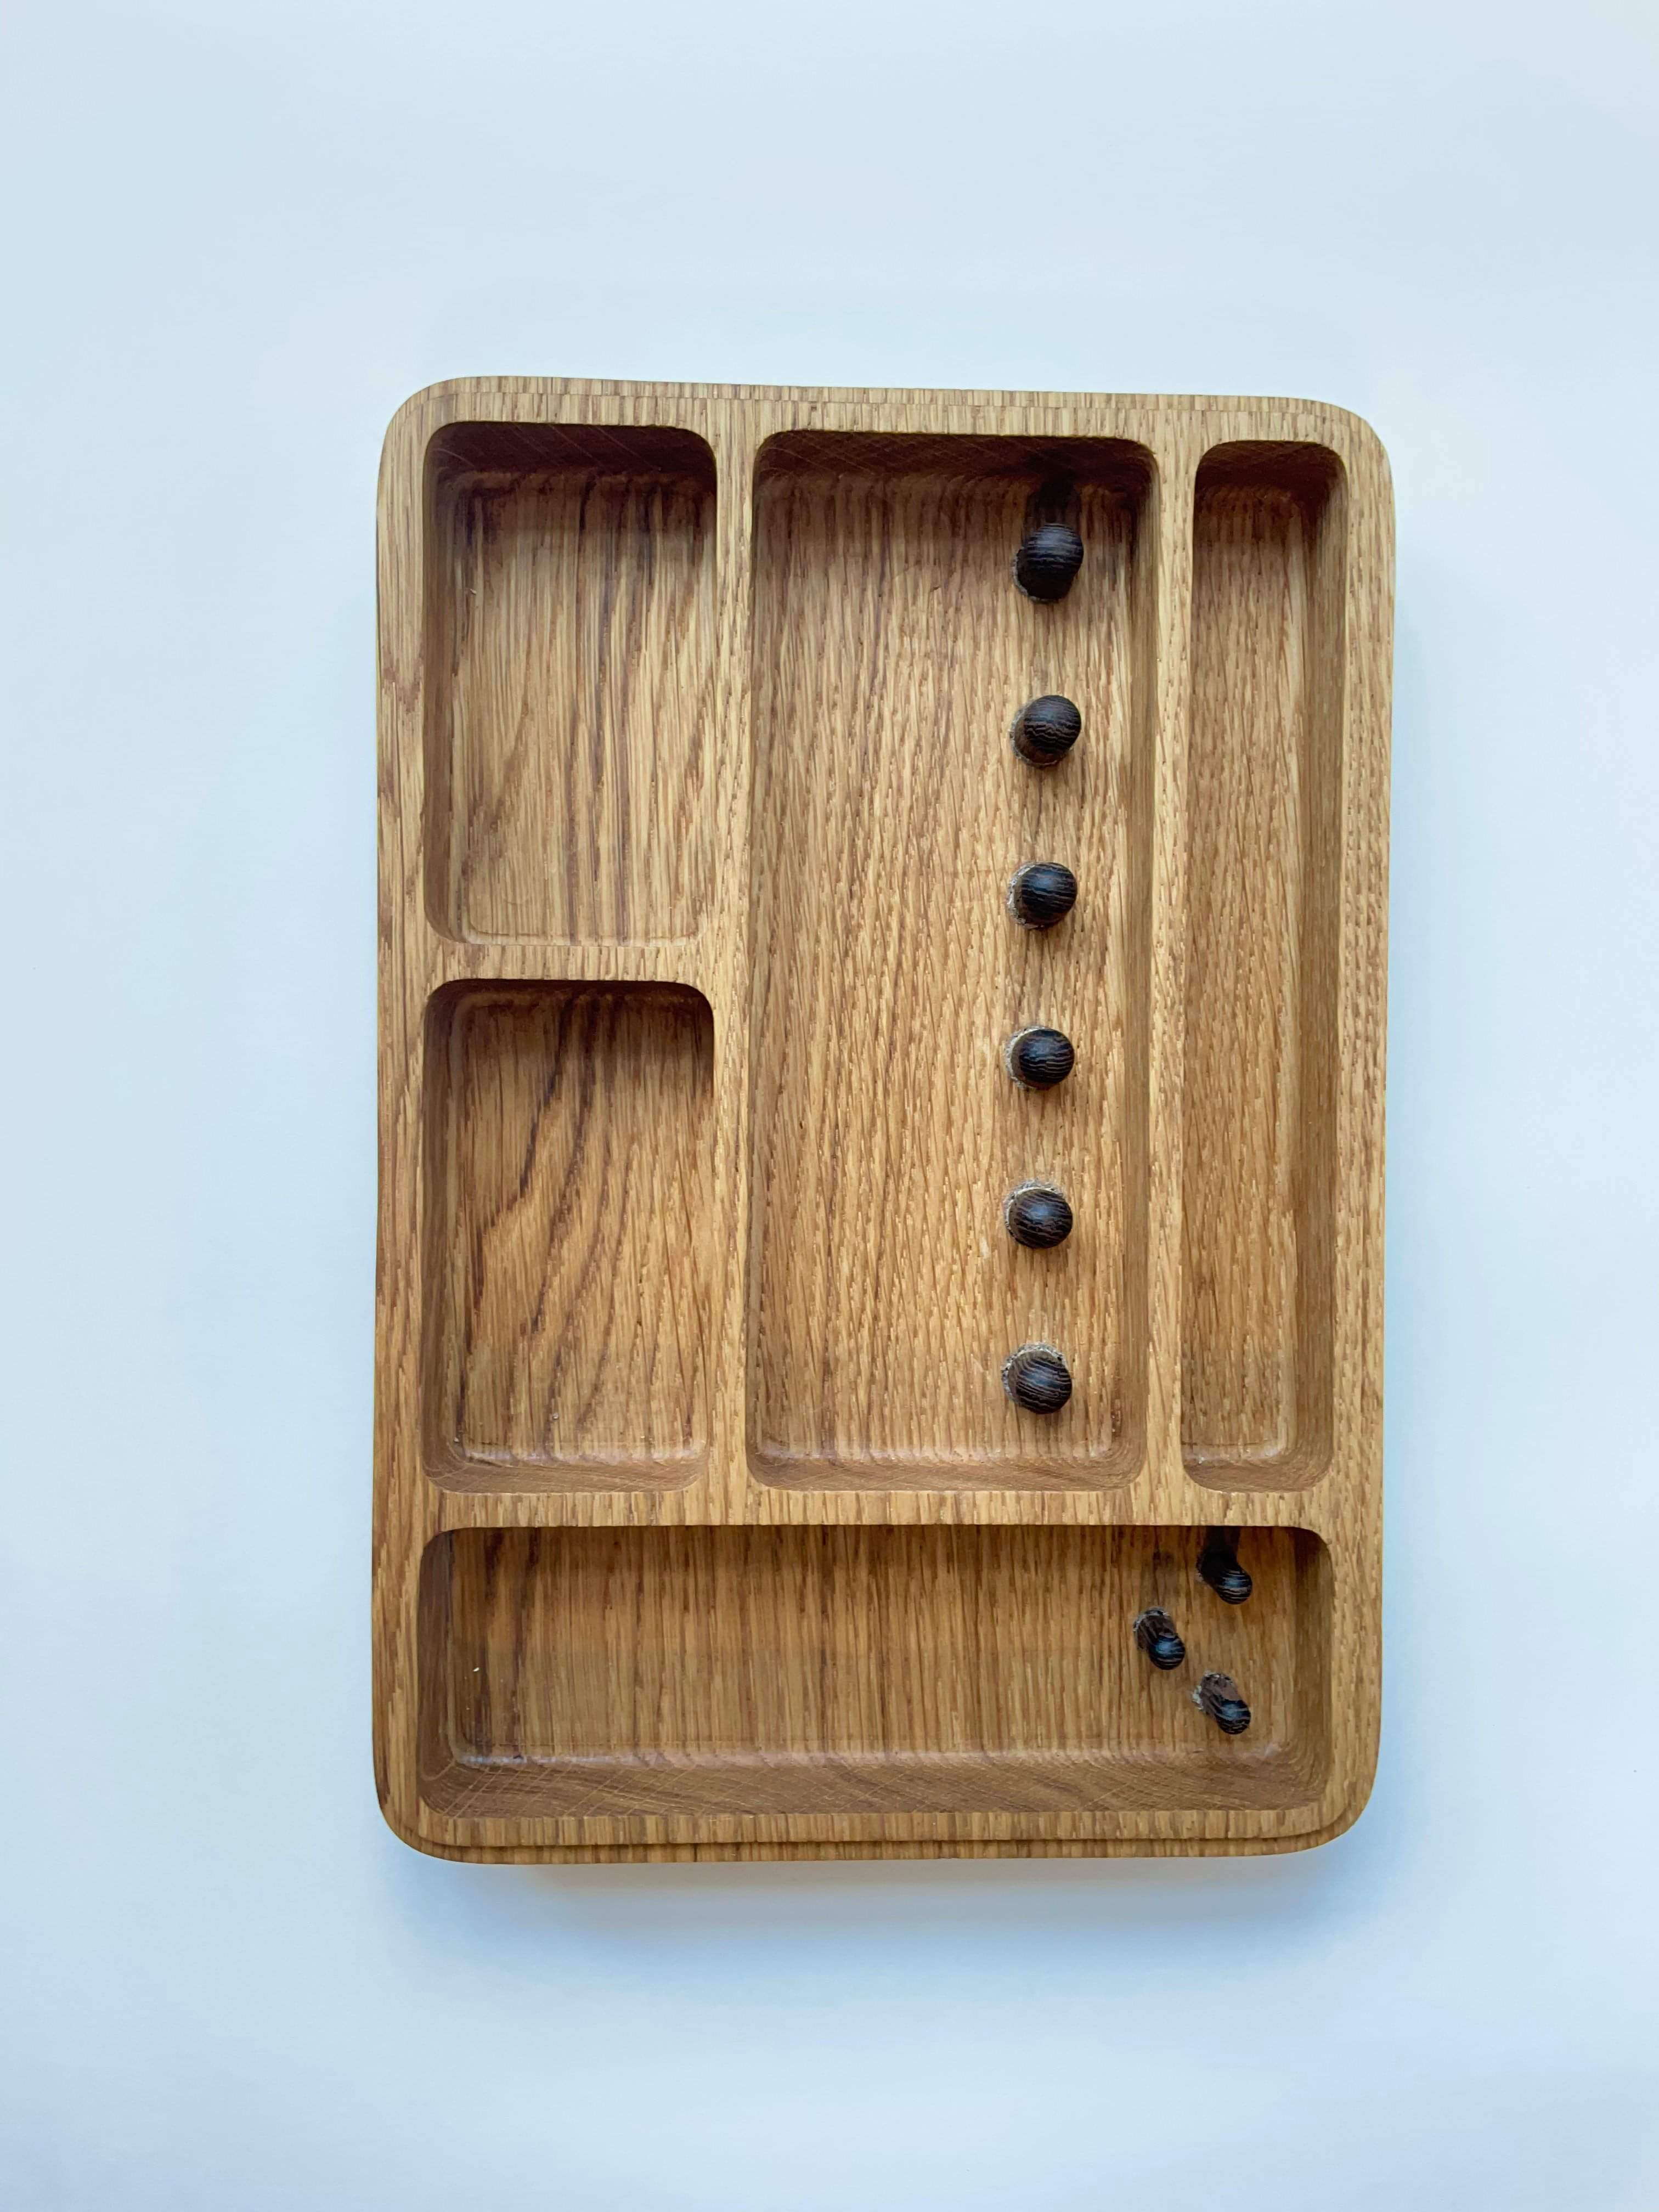
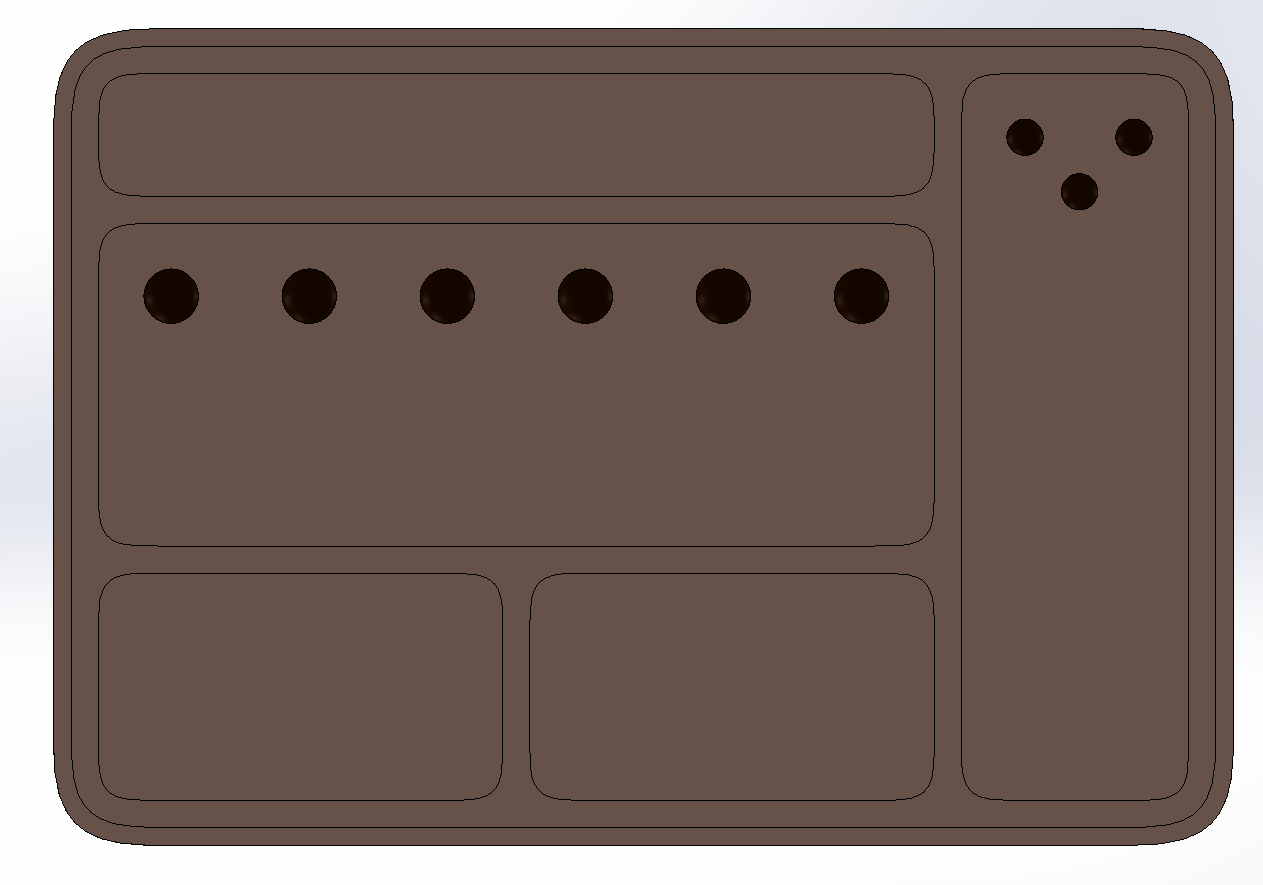
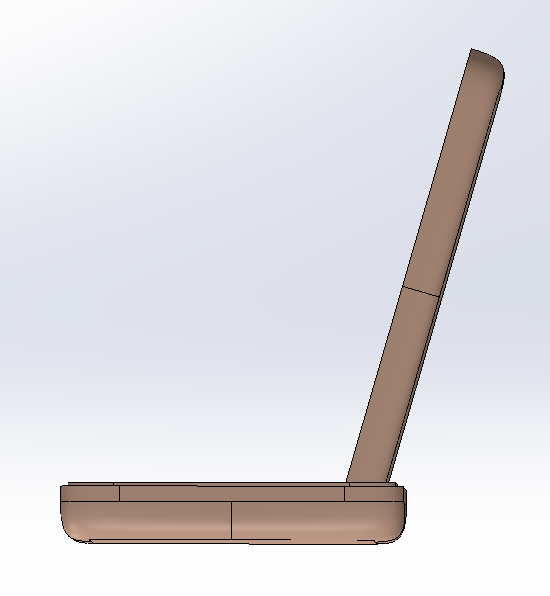
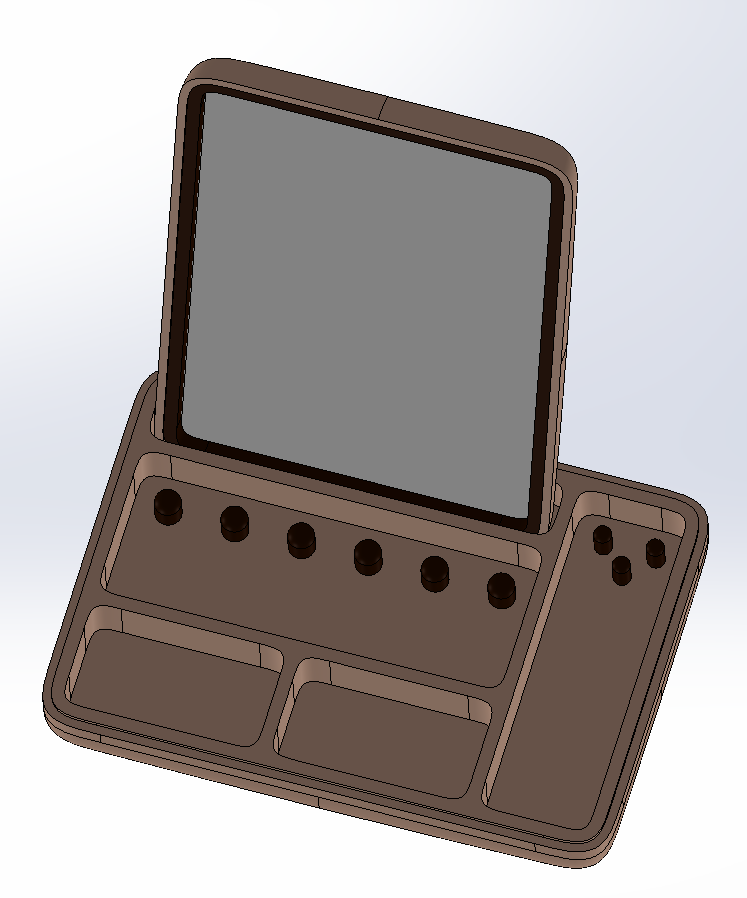
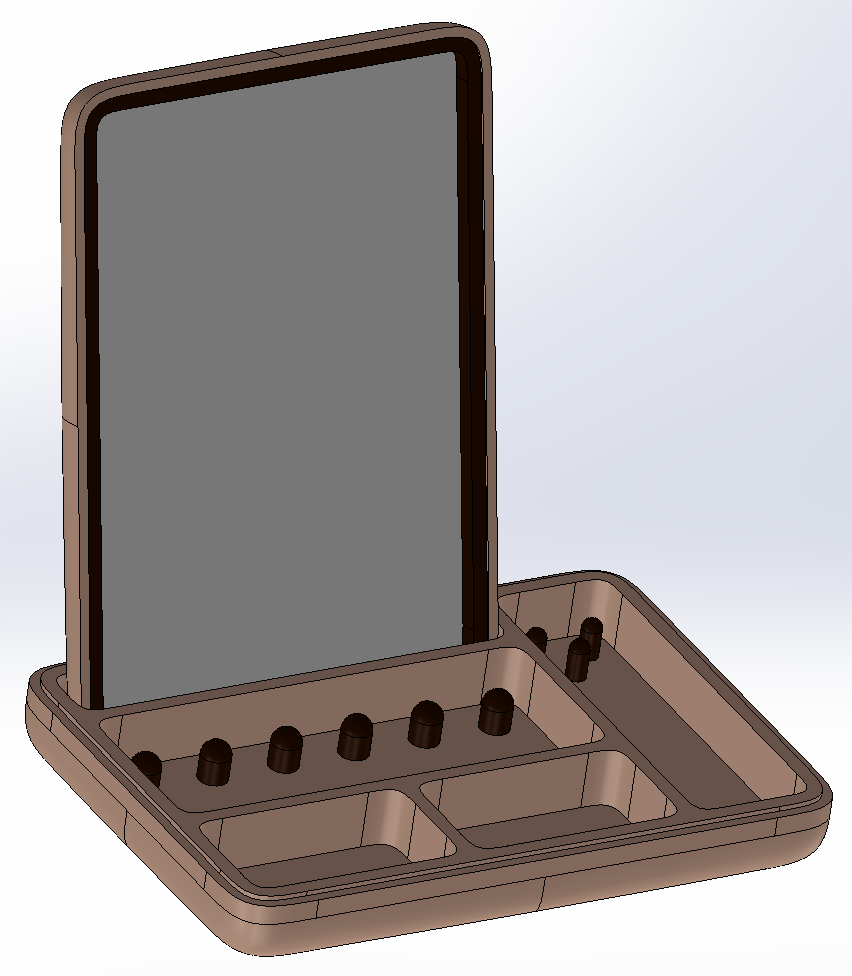
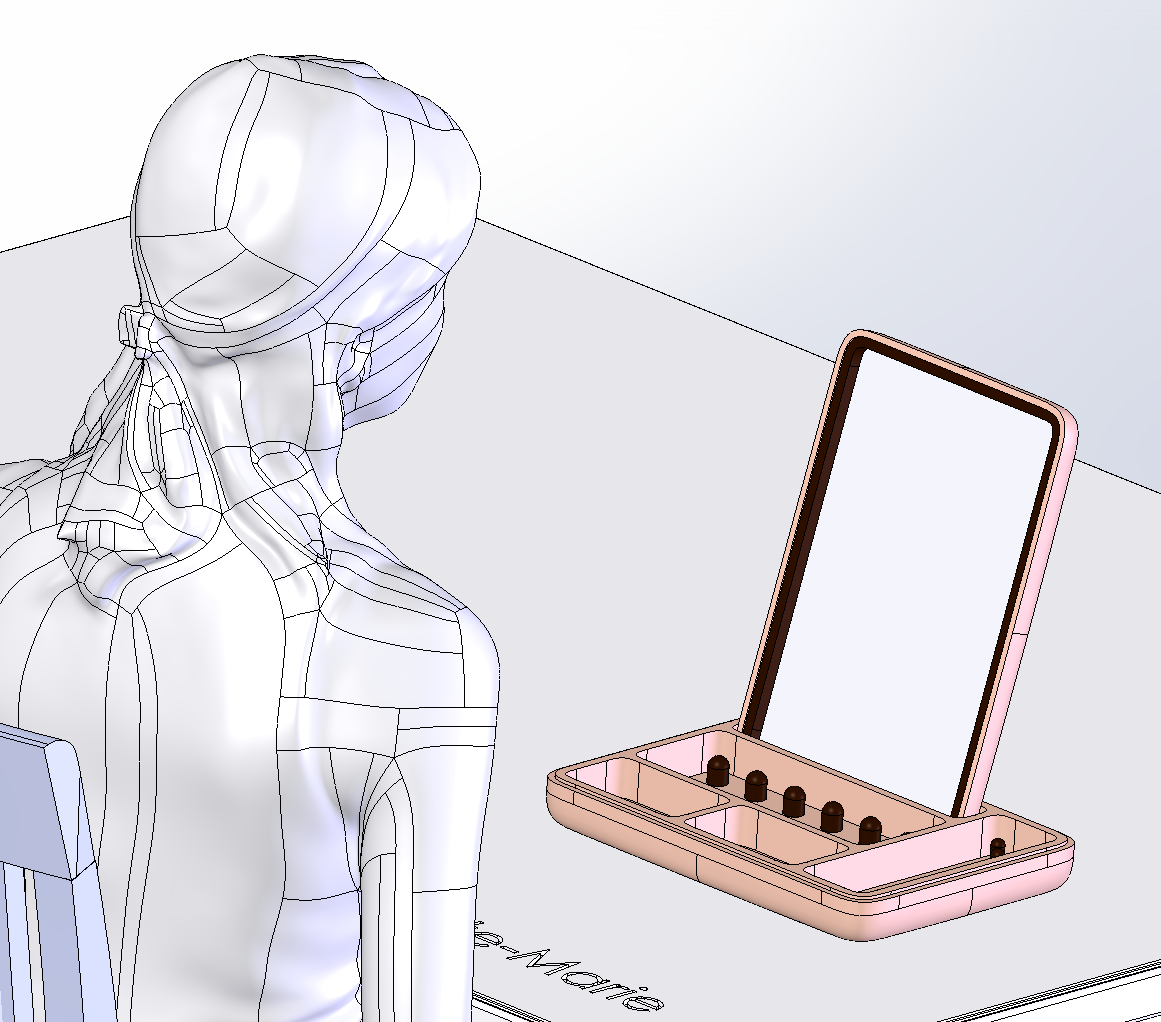
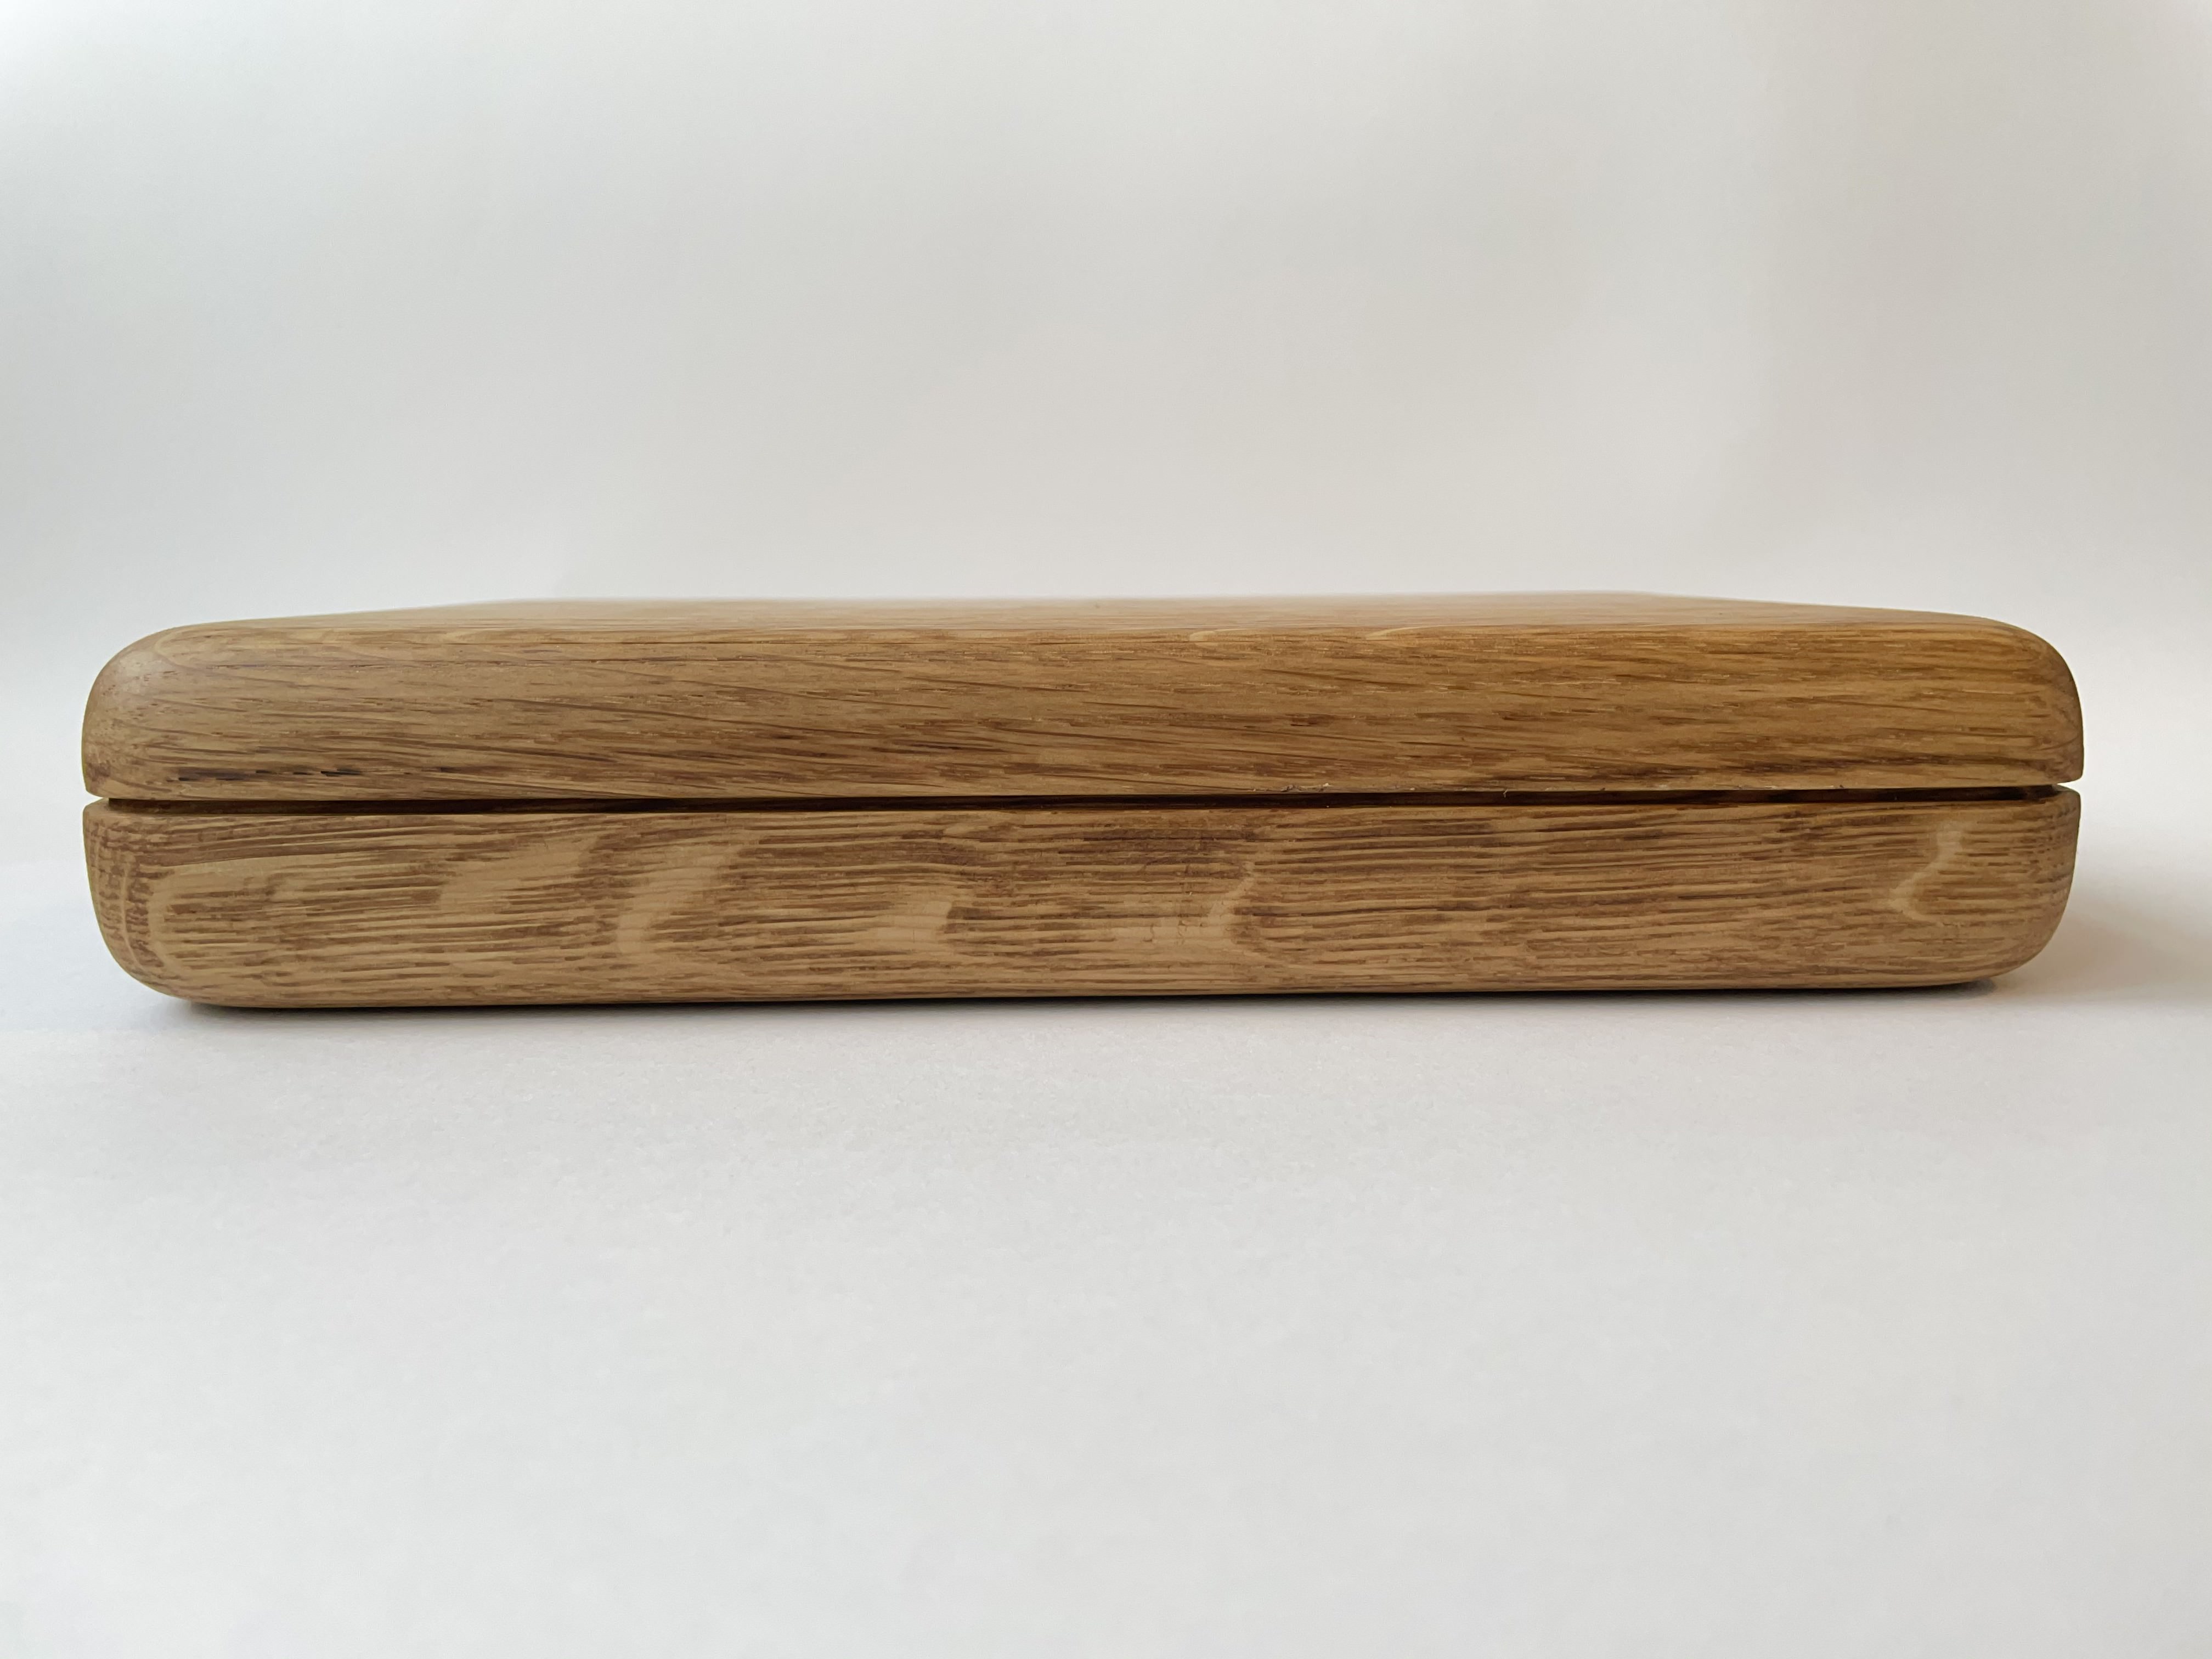
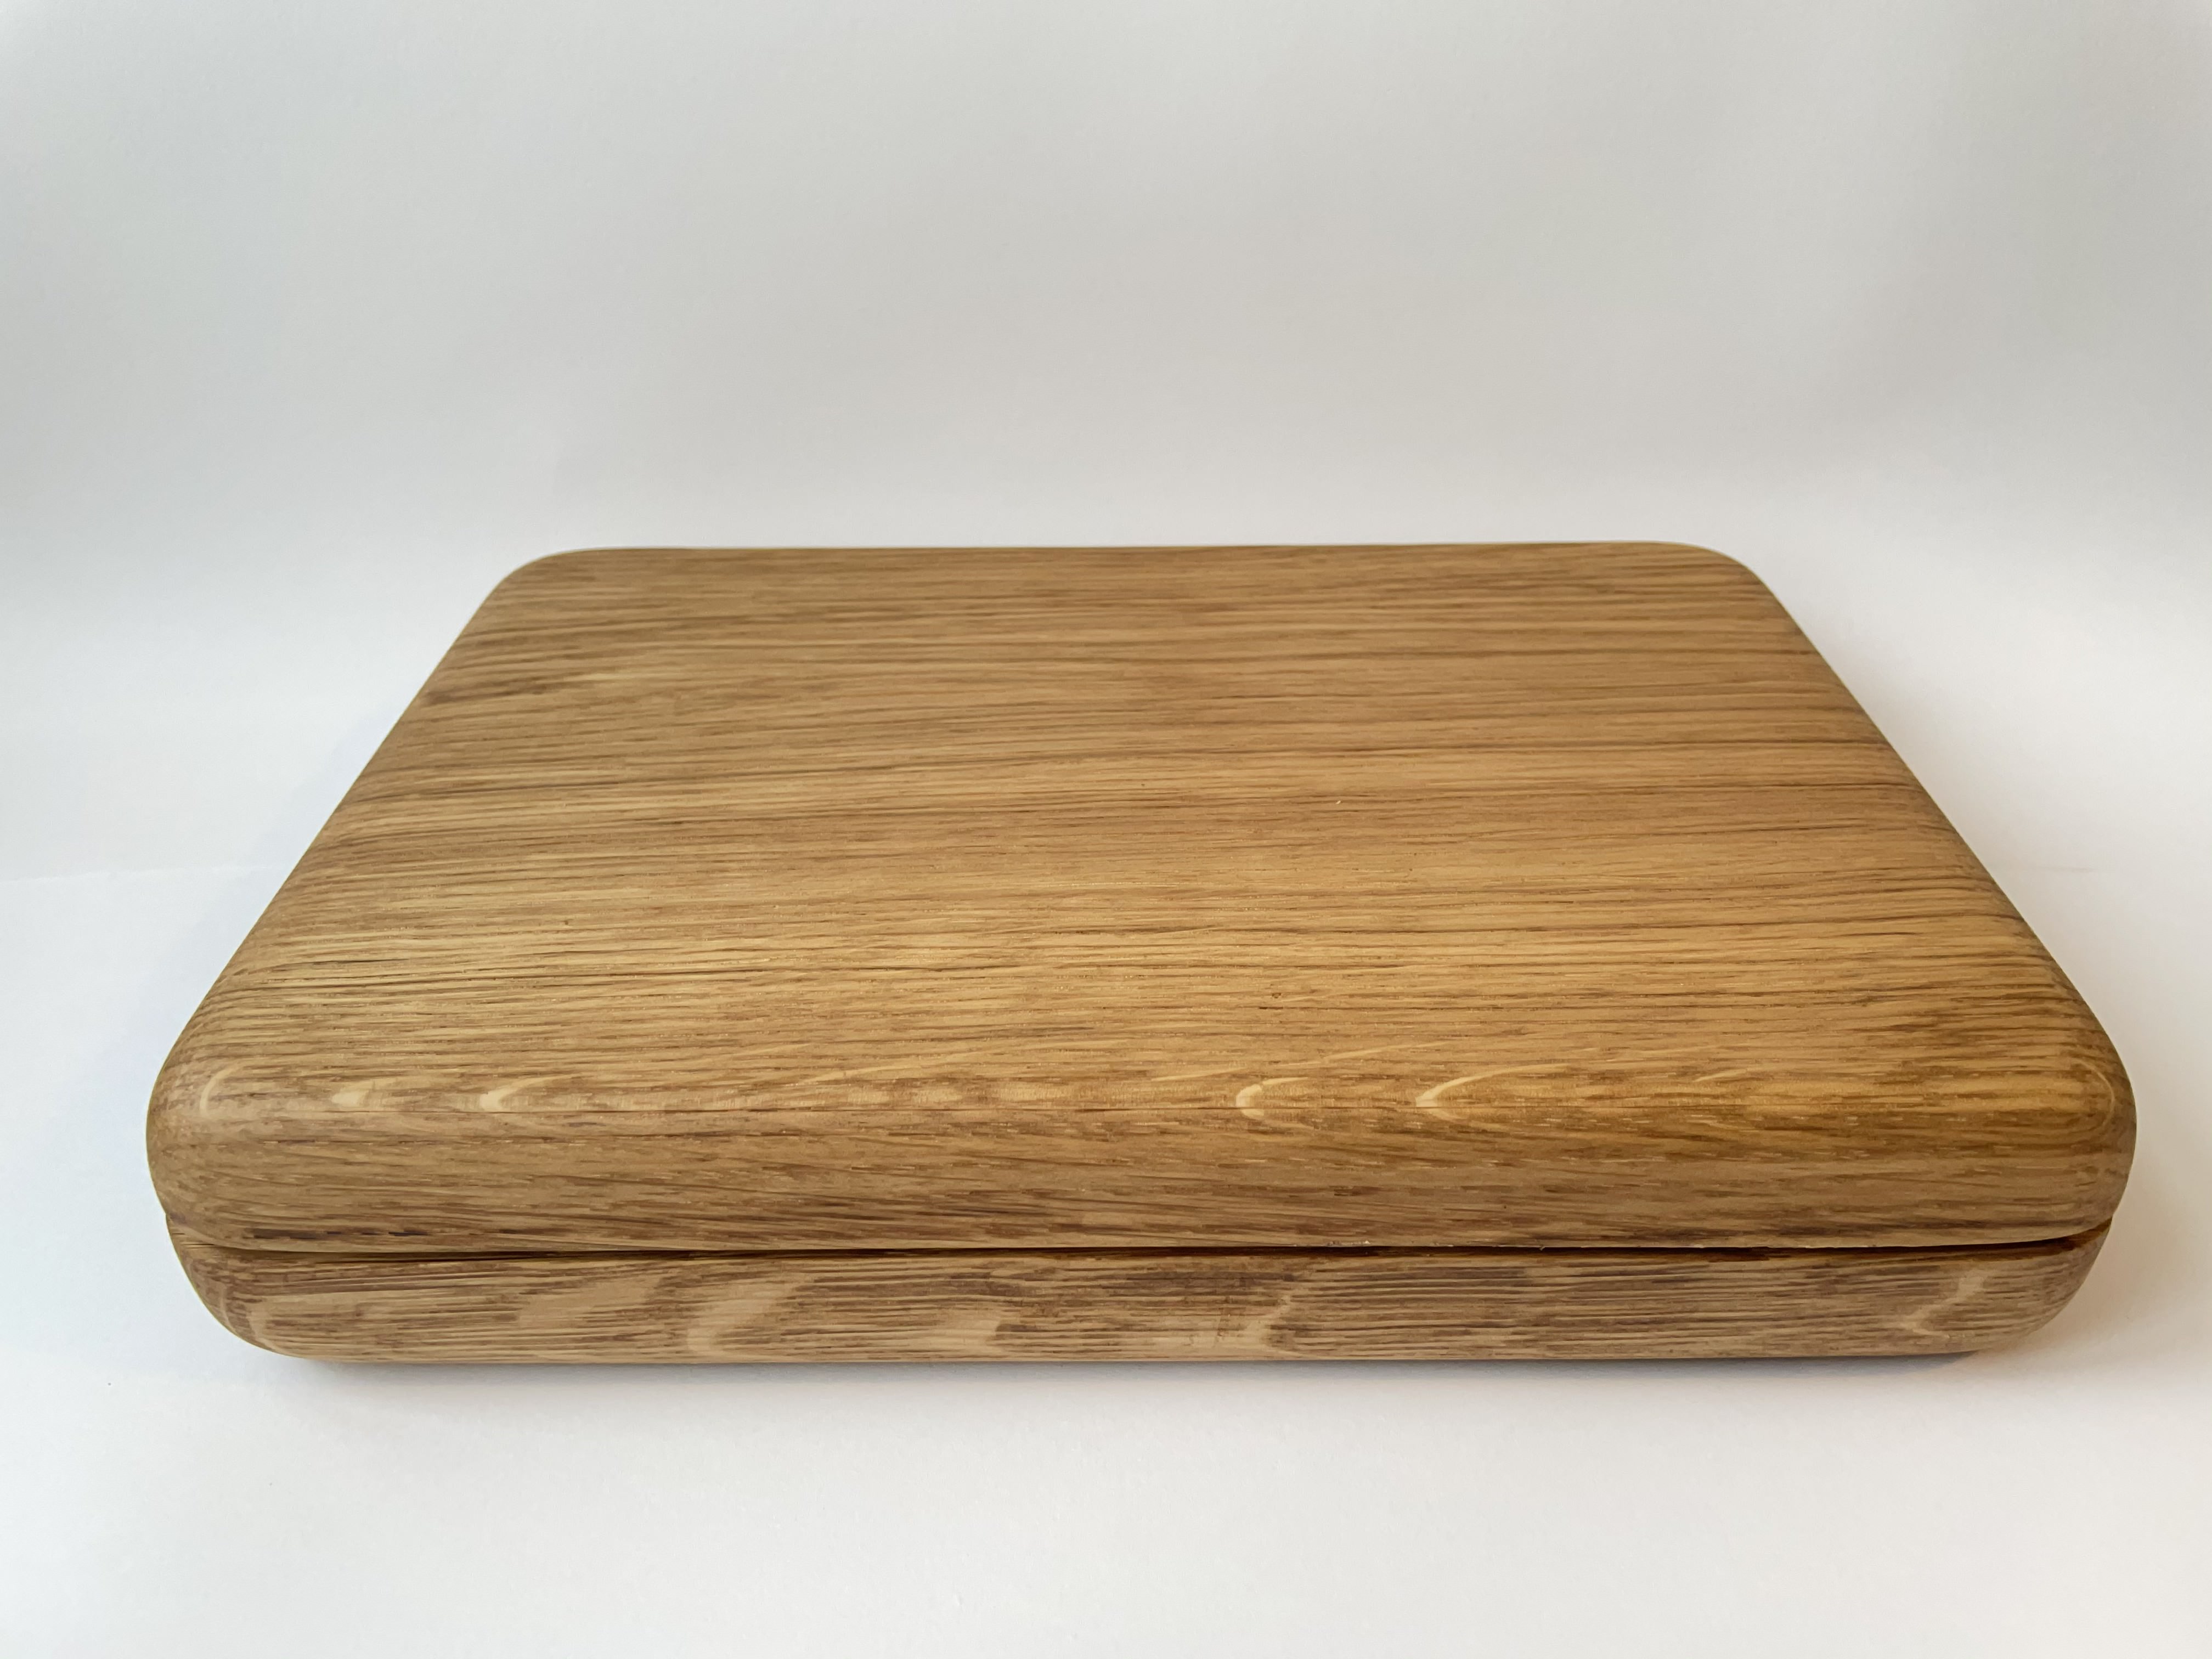
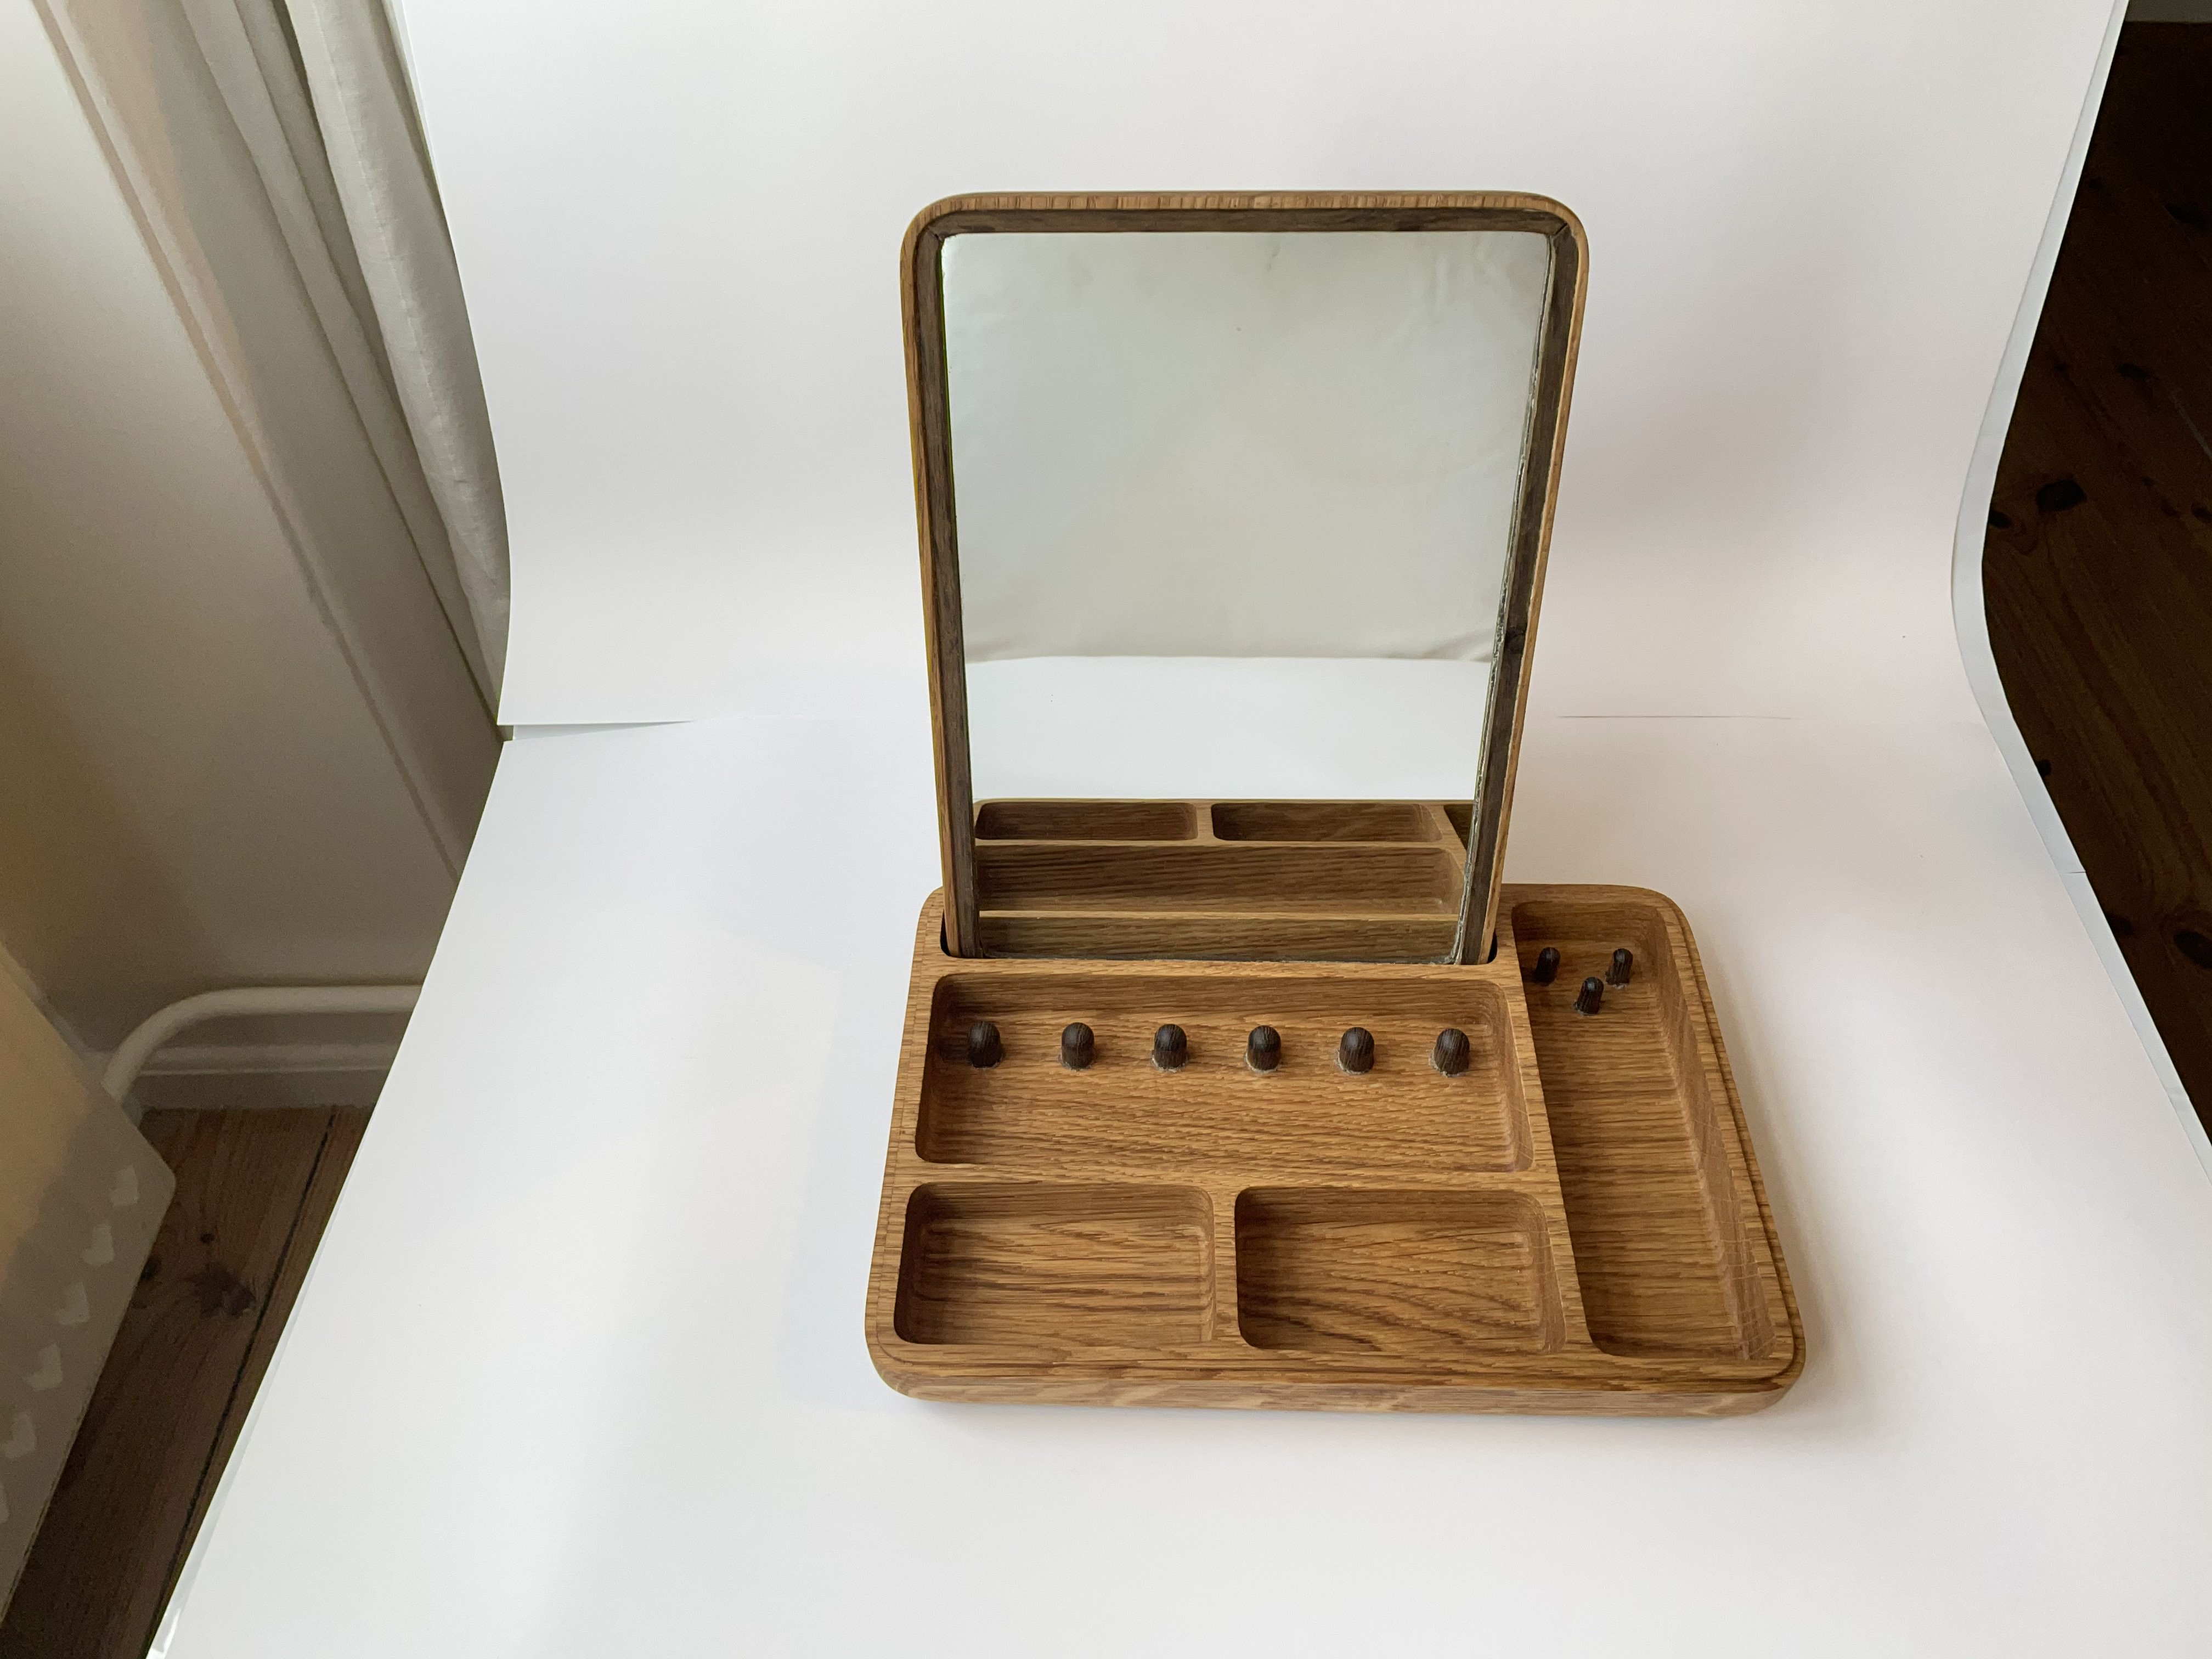
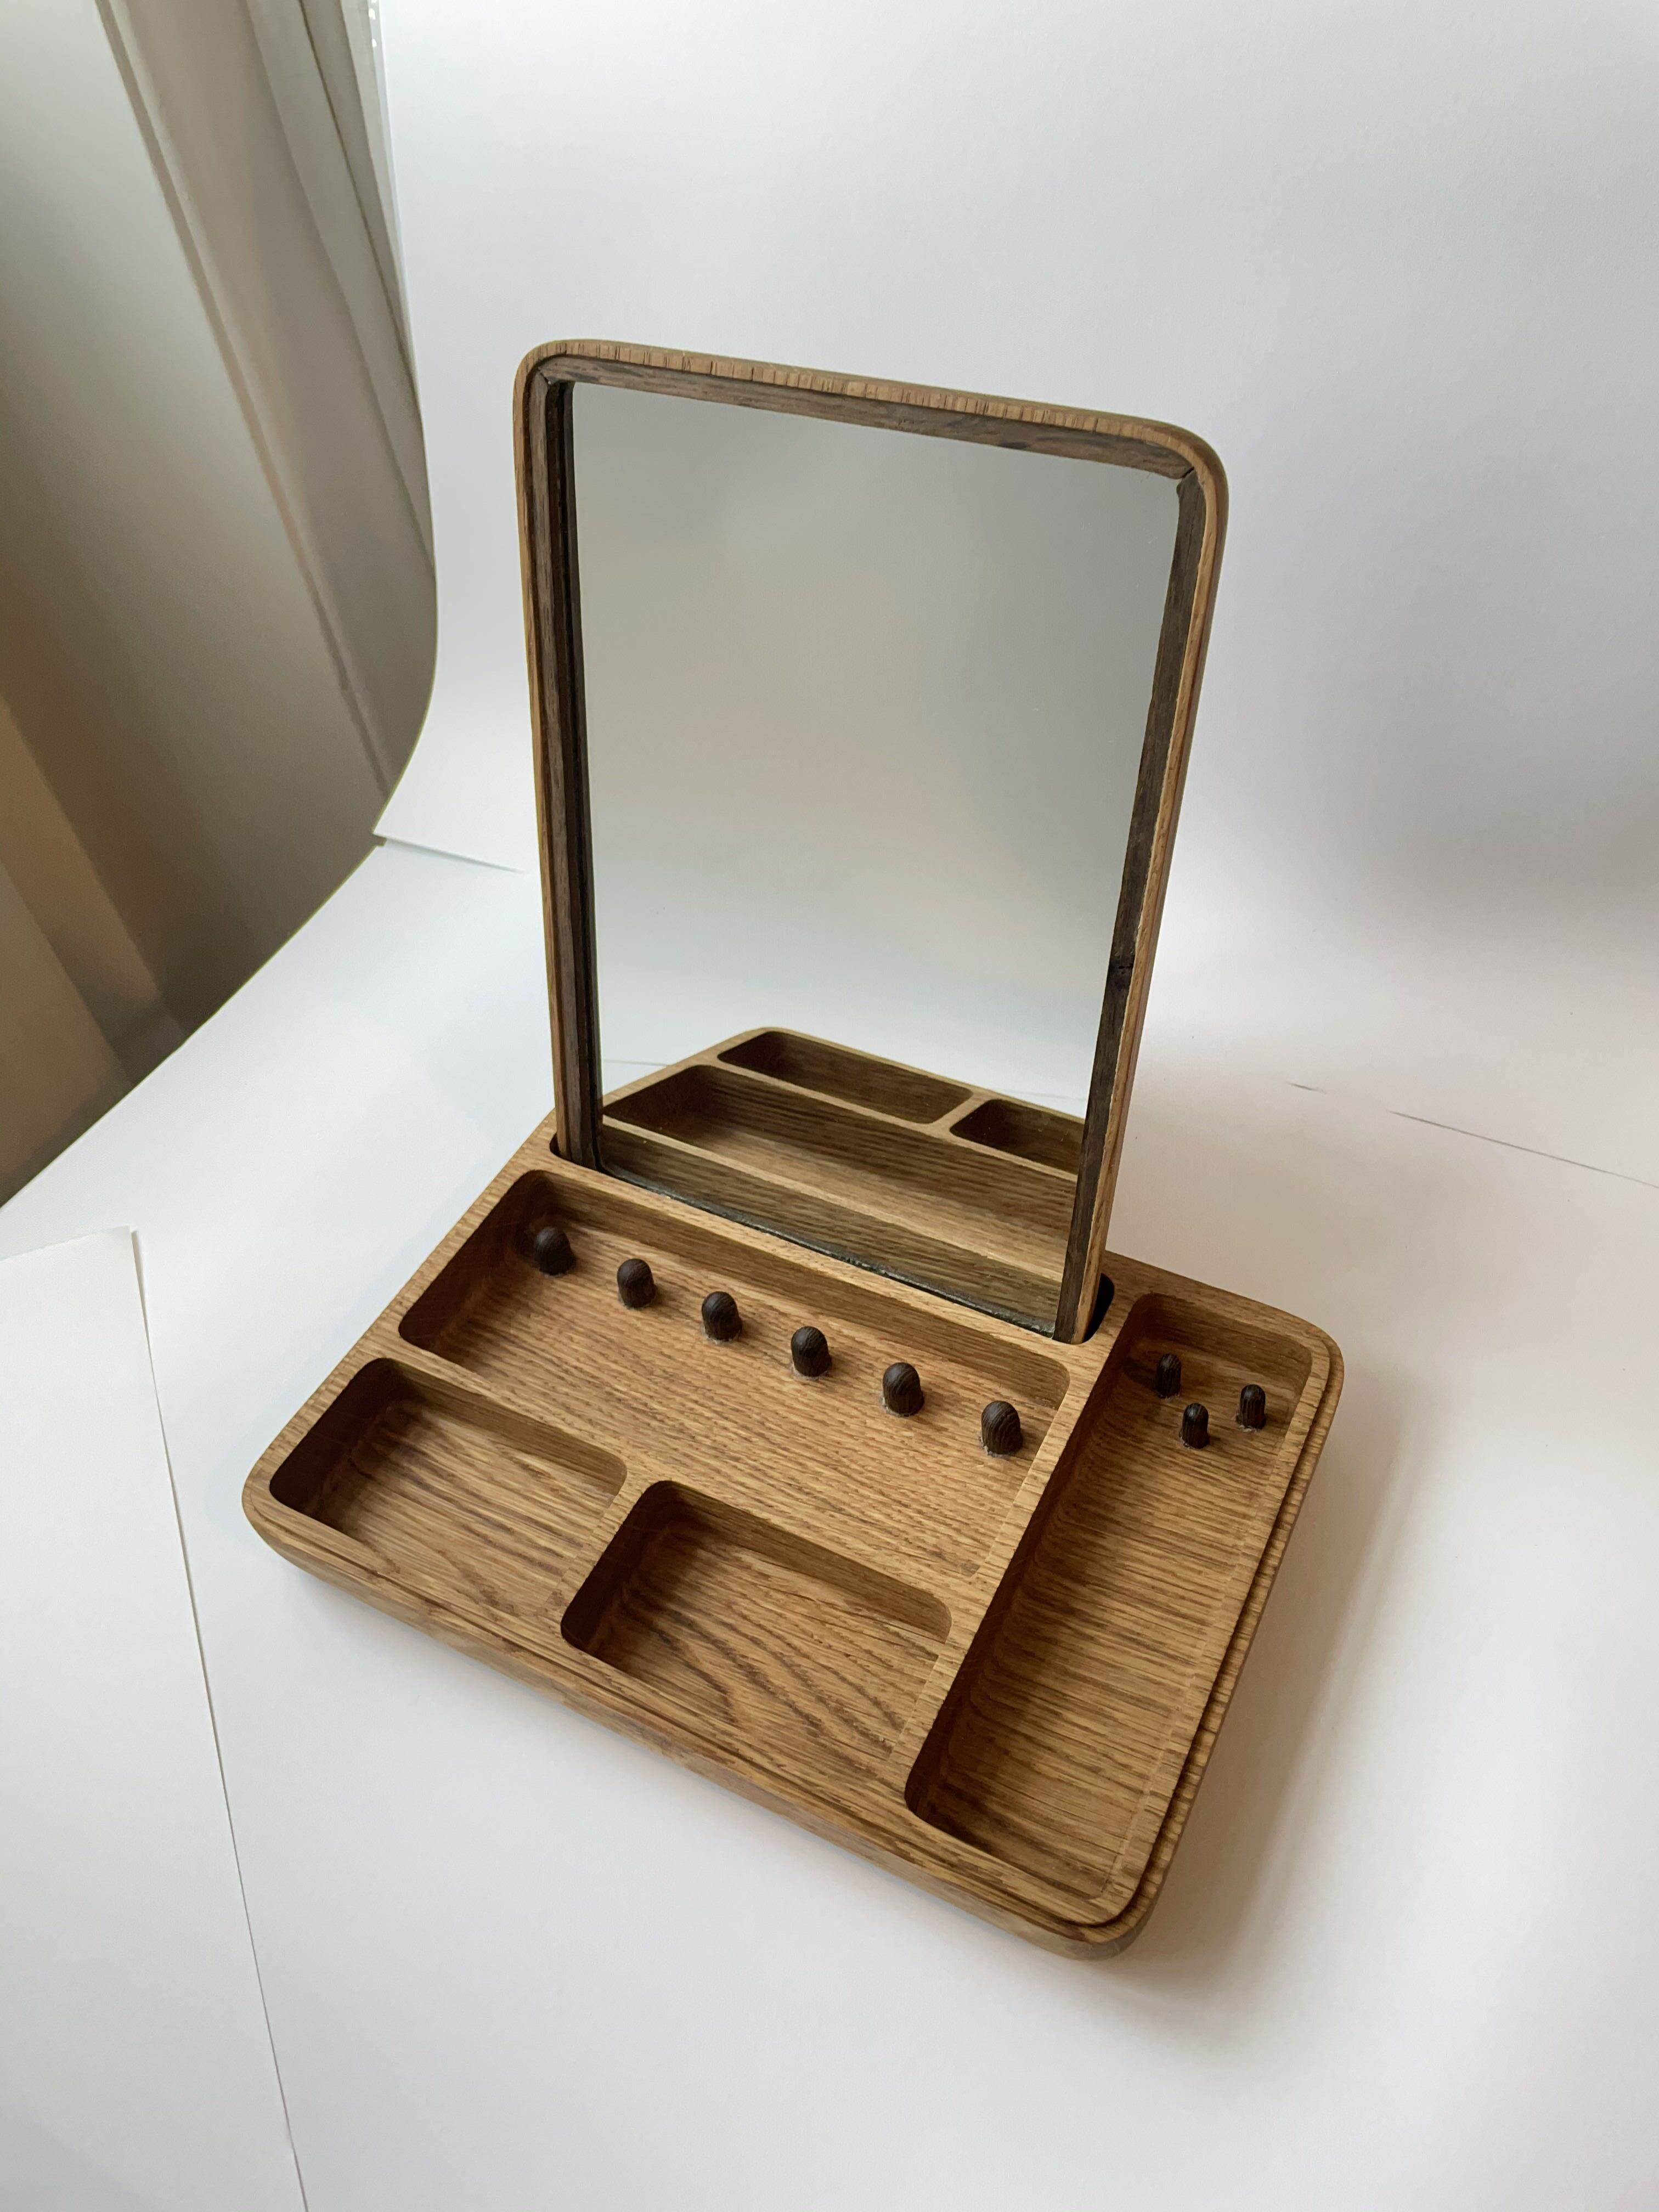
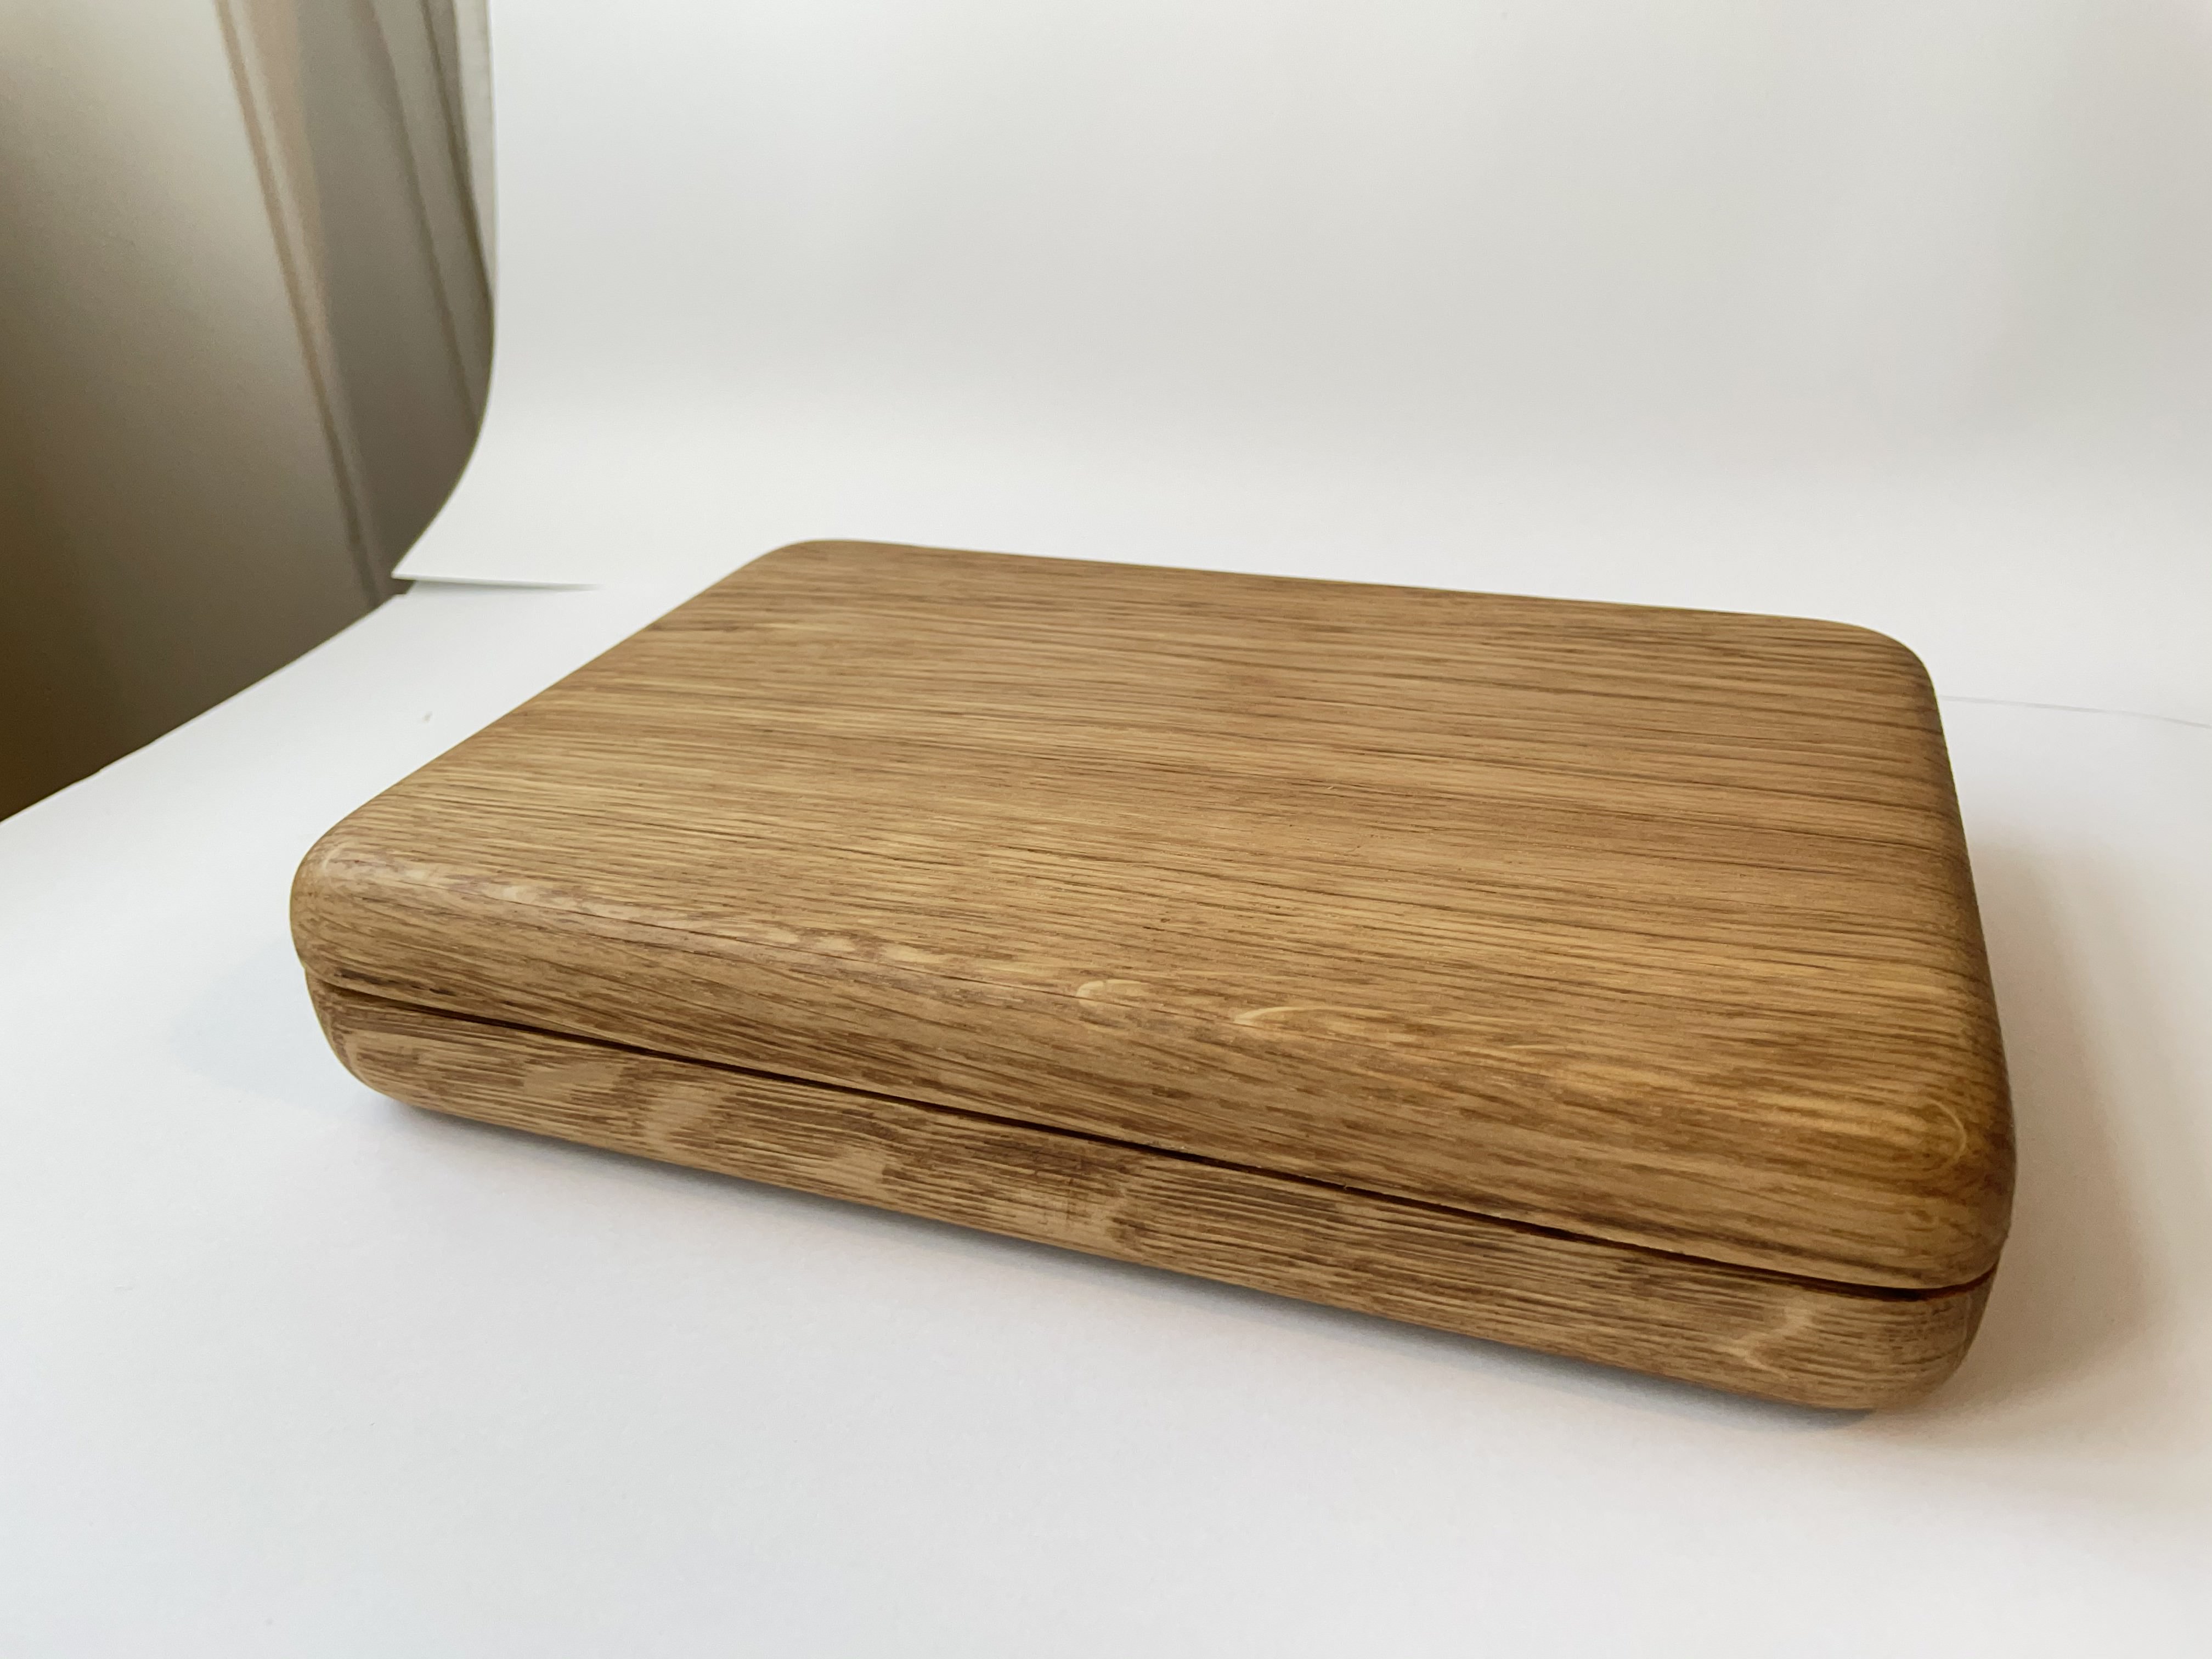
The project I’m planning on doing is a jewelry box made from oak and wenge:


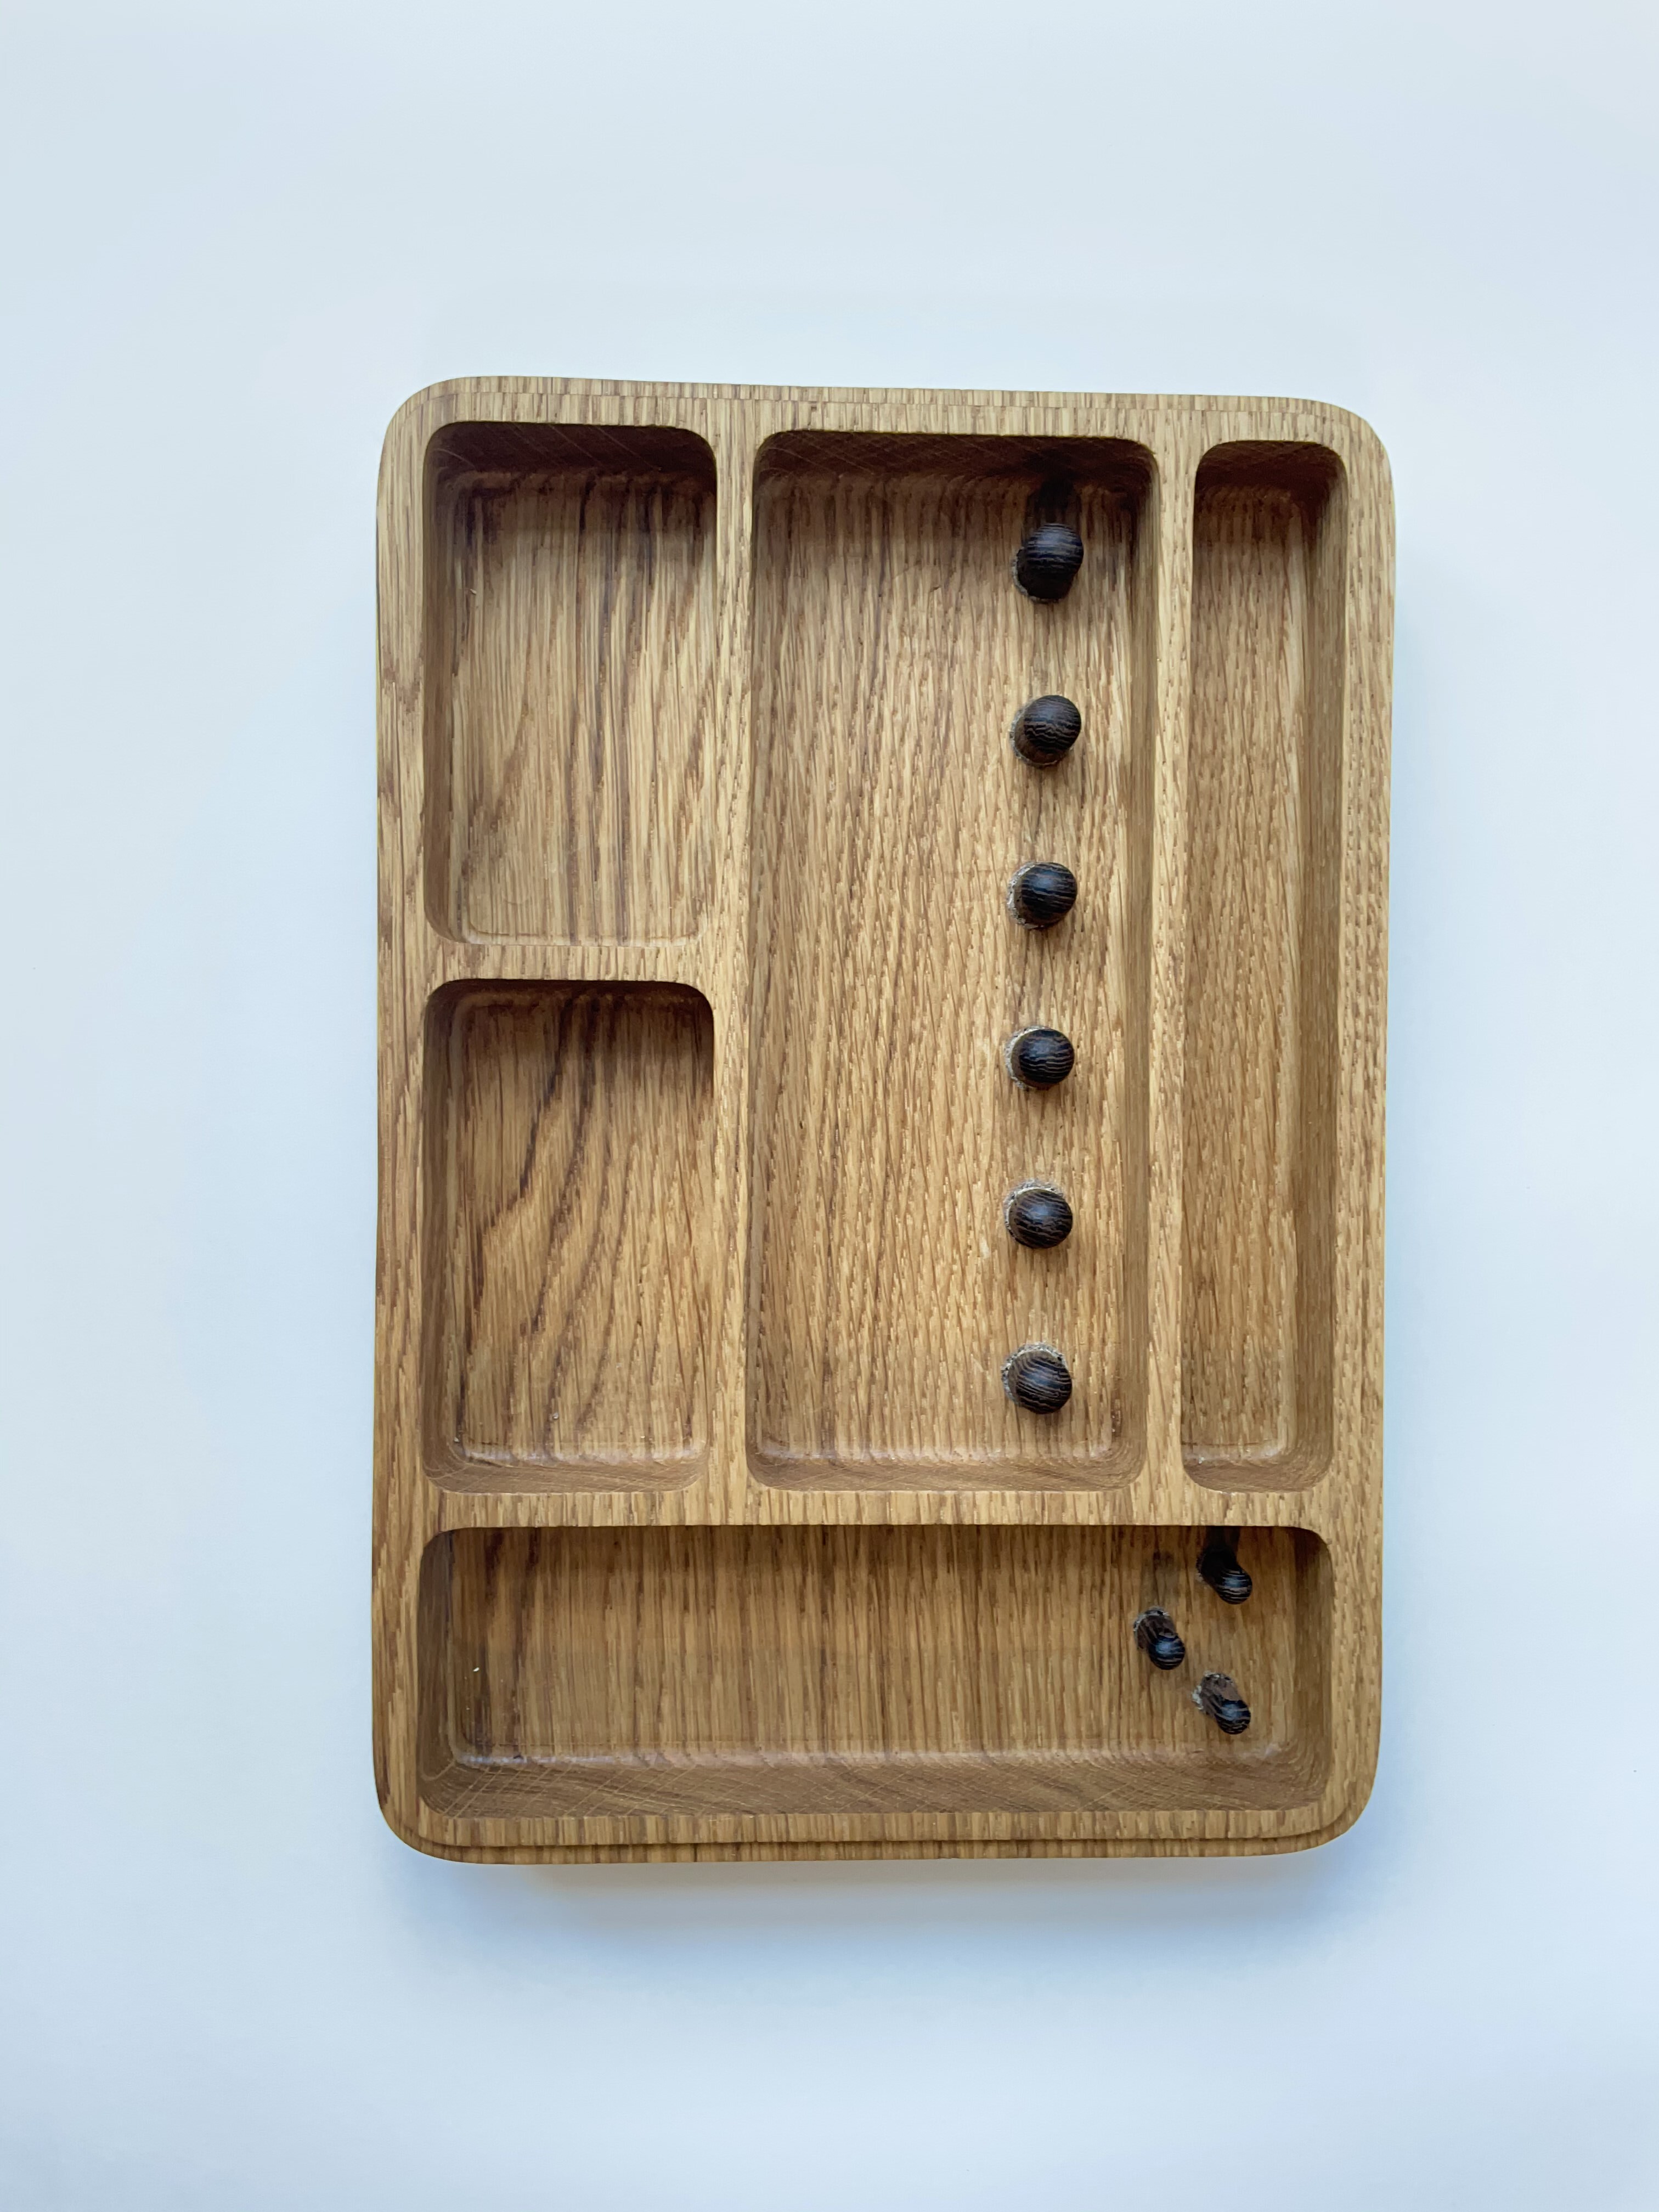
Which kind of endmills would you use for this project and which endmills would you use for which parts? Is it really necessary to use a downcut endmill for the pockets in the wood or can I just sand the bad edges?

I’m making the top and bottom base in oak and the ring-holders in wenge. I’m planning on making a 4mm cut in the base and then glue the holders in the whole. Diameter would you make the hole and the holder? What should the spacing be between them?

The top and bottom need to be cut on both sides. Pockets on the inside and rounded corners on the outside. How would I deal with cutting both sides of a material?

Would you do anything differently in the design to make it easier to produce? Do you foresee any hickups that I haven’t seen? Any other advice or opinions?

5 Likes

That’s the spirit! :slight_smile:
Sounds like a pretty cool project to undertake.

First things first, can you clarify two very important factors:

  • will this be a one-off thing or do you envision making a series of those / small production run
  • what CAM software will you be using.

The advice depends on those two points quite a lot, but in the meantime here are my two cents.

6mm square upcut for roughing, 6mm downcut for cleaning up the top edges, 6mm ballnose for finishing all the round parts/edges.

Given the dimensions and look of that box, I think you would benefit from making all corner radii 1/8" / 3mm or larger, so that you can do it all with a 1/4" / 6mm tool, minimizing the need for tool changes.

I have done these kind of boxes and trays for my wife before, and to make it practical to use it is usually nice to have rounded bottom edges rather than right angle between walls and pocket bottom shown on your model. A 1/8" radius rather than 90° angle will make little things (e.g. earrings) much easier to pick up.

Typically depends on whether you will mass produce those or not. For a one-off thing, you can definitely resort to manual sanding to avoid downcut endmills/tool changes. But when you have >10 of them to do, all of a sudden a lot of manual sanding does not sound like a great plan.

I would aim for larger than 1/4" again for minimizing tool changes, and for ring holders it makes sense anyway. Speaking of, for ring holders I would make them conical, not cylindrical, such that they accommodate a variety of ring sizes, and the rings don’t “fall” at the bottom but sit nicely halfway through on the cone.

Check out the many forum threads about two-sided machining. But basically that requires using locating pins/dowels for flipping the part while keeping precise alignment. I would do the side with pockets first, leave material all around the piece, with dowels there outside the perimeters, then flip the part and do the cutout and roundover.

You could (should) cut MDF prototypes to iron out the basic CAD/CAM mistakes, and then prototype in wood to home on the right tolerances for the parts to be inserted that need a tight fit.

Definitely update that thread with your progress, it should be quite interesting!

4 Likes

White side makes a bowl bit which is nice to make the bottom of pockets rounded… a bit specialists endmill, but if you going to make these sorts of pockets more … very nice for that.

Also on up/down cut… down cut is my default nowadays… nicer cut and easier on the work holding

1 Like

Thanks a lot for the advice :slight_smile:.

I’m planning on using Fusion 360 as the CAM software. I’m used to using Solidworks as my CAD software, but it’s not good for CAD from what I understand. I’ve looked through some of the introduction videos for Fusion 360 but haven’t found a super good step-by-step guide for a basic project. If you have any suggestions, let me know!

I’m just planning on doing a one-off of this one.

Good advice. I’ll stick to radii of 6mm and above. Good advice on the radii in the pockets. I think I’ll implement that. Would you make a chamfer along the edges as well?

Do I need to use a downcut endmill to clean the top? I’m planning on doing a pass along the top of the box, since I’m not sure my material is exactly 30mm all over.

I see what you mean. I’ll consider that. I think I might keep them cylindrical though, so rings can be stacked on top of each other.

I’ll look more into this. I was planning on creating a test in plywood. From what I’ve read on the forum, MDF is very messy and can be a bit of a fire hasard? I guess it wouldn’t matter for this project?

2 Likes

I started there, and it was invaluable to master the basics. Then learn by doing / searching for how to do something specific

Good point: either that if you aim for an angled edge (and it introduces a tool change) or, and this is probably easier for a one-off with rounded look everywhere, just sand off the sharp edges manually, easy enough.

You could do it all with a downcut as @fenrus said. I like to use upcuts for roughing just because I can push them harder/deeper, but that is debatable.

Disclaimer: I hate MDF with a passion.
Messy, definitely, and don’t breath it, it’s nasty and dangerous. But a good dust collection should take care of that. Its only quality is that it’s cheap
Plywood is…special, I would recommend doing prototypes in some kind of tight-grain hardwood.

2 Likes
  1. Have you got advice from the recipient yet? Is this even useful to them?
  2. Are you sure you are ready to do this as a “first” project? Ever made a box before?
  3. I wouldn’t waste my time doing this as a two-sided project if all the other side needs is the edges rounded over. That’s better done with a stand-alone router.

Advice from the recipient?

No, but it sounds like a fun project. If you have any advice on how to do it, let me know.

The rounding on the edges are “squircles” (the special roundings on iPhones and MacBooks). I’d like to try my hands on making a 2-sided project.

2 Likes

I did a simpler file of a similar design which is posted to:

and was written up in:

(which is only of interest if you like obscure typesetting technologies and technological minutiae)

but you may find the use of multiple toolpaths for roughing and finishing passes of interest.

A design which uses both ball-nosed and square endmills to get a rounding effect is shown in:

and on the basis of doing it I endorse @fenrus’s suggestion of a hybrid rounding/flat-bottom endmill such as is used for bowls — I’ve had one in my shopping cart for a while now and will buy it once the holidays are over. Note that it can’t be entered into certain CAM tools, so the preview won’t quite be right (you could have two sets of file paths, one for previewing done with a smaller ball-nosed and square endmills) and one for the actual cutting as a work-around.

1 Like

In addition to @WillAdams tutorials, @45rpm John Clark has a three-part series on YouTube that could be really useful for learning the basics of box making on the ShapeOko:
Box Making with ShapeOko

The project looks good. I would make one suggestion, make less little compartments. The small compartments are hard to get jewelry out and wastes a lot of space. The side and main compartment are good bit the small pockets will be hard to retrieve objects out.

1 Like

Thanks for all the suggestions. I finally finished the box and holy moly did I learn a lot! :slight_smile:

It’s definitely got some production errors, but I generally like the result:

What do you think?

10 Likes

Lovely and elegant!

I’ll have to make one for my mother-in-law (since she lost some jewelry while traveling a while back).

I wish MY first real project looked like this…great job.
Now you have to tell us all the details about which endmills and toolpaths and feeds and speeds you ended up using!

@holgersindbaek It looks great. I like the hingeless design for the lid - very clever!

How did the Wenge CNC? I’ve used it on a number of traditional woodworking projects and love the way it sands out…but it does tend to splinter (and they seem to hurt a lot more than your normal splinters!). I’d be interested if you used any special speeds for the Wenge itself.

Thanks @WillAdams!

Thanks @Julien! I wish I wouldn’t have taken some pictures in the process. I almost didn’t make it, since the first try of each part broke. For feeds and speeds I basically just used the feeds and speeds for pine from the Shapeoko cheat sheet. I did this because I started off by making a test of the top part in pine. I basically just kept the same program from Fusion 360 and turned down the feed percentage in Carbide Motion. Definitely not the best way to accomplish things, but for a newbie that needed to get something done fast, it seemed to work ok.

It requires you to sit and watch the machine ALL the time when it’s running. But I think I would have had to do that anyway since it’s my first project.

For the big rounded corners on the box (which I made as squircles and not fully rounded corners), the rounded corners in the pocket of the box and the rounding of the “buttons” made from wenge, I used a 6mm rounded cutter (https://www.cncfraises.fr/carbures-2-dents-hemispherique/121-fc2ds600.html).

For making all the pockets I used a 2 flute straight cutter (https://www.cncfraises.fr/carbure-helicoidale-2-dents-queue-6-00/67-fc2dh600.html). I think it might be beneficial to use a downcut endmill the next time. I don’t know if there’s a quicker way to cuts such deep pockets? That part of the program definitely took the longest time.

I used the same endmill to face off the surface. I think using a proper facing endmill might be better to use next time.

For cutting the rest of the wenge, I used a 1/8" 2 flute straight cutter (https://www.cncfraises.fr/fraises-carbures-helicoidales-2-dents/127-fraise-2-dents-317-mm-carbure-helicoidale-xl.html). That seemed to work time.

Thanks @GJM! The wenge was surprisingly easy to cut. The buttons are cut with the grains pointing upwards and that actually worked better than the mirror frame where the wenge was cut with the grains pointing along the Shapeoko. I can highly recommend cutting wenge with the grains pointing upwards. The finish it has coming straight from the machine is really nice and the grains look great when cut with a radius.

One thing that I’d like to improve on (I think I’ll end up making a couple more) is to make the buttons threaded instead of using glue. I see that CNCFraises have threaded cutters (https://www.cncfraises.fr/236-fraises-a-fileter) that seem to work on wood as well. With those I guess I would be able to make M8 threads in the box:

I’m not sure how I would be able to make M8 threads in the wenge button. Any suggestions @Julien? When I search the community, the issue of making nuts and bolts in wood seem to only have come up once (Making wooden bolts and nuts?) and it didn’t seem like a good solution have been found.

4 Likes

I’m not @Julien (I can only aspire to greatness…), but just get a tap set for wood. They’re cheap and you can easily make the threads…

2 Likes

@GJM That would probably work as well. I didn’t even consider that.

Maybe it would be possible to assemble it using dowels instead? I might still need to use some glue with the dowels though?

Downcut endmills are great…to avoid tearout on the top edges, but I don’t think you can push them as far as upcut endmills due to lower chip evacuation capabilities. My usage for them is to run a single contour finishing pass in a pocket roughed with an upcut, to get perfect walls and edges. But to them their own!

In wood I now tend to use deep adaptive clearing with low width of cut and high feedrate, rather than a lot of shallow passes. There is no right or wrong answer but it did reduce my cutting times significantly for large pockets and it “feels” right to use a large part of the cutting length rather than just the last 2mm all the time.

I’m with @GJM on the threading, for the female part I would just use a manual tap (both the the hole, and the buttons). CNCing the hole is quite doabled (I have a set of thread milling tools I need to try someday), but milling the threads on the buttons sounds like a lot of care and effort for something that can be done easily by hand.

Thanks for the feedback :slightly_smiling_face:.

I see what you mean with the the down cut endmills. I’ll might use those the next time I do pockets like that.

I also tried making deeper cuts in the pockets, but it felt like it put a lot of pressure on the wood. I’ll give it another shot though. Would it be faster to do with an 8mm cutter? What about a facing cutter?

One error that I forgot to mention and that I don’t really understand how happened is the following… the wall is 1mm thinner on one side than the other:

On the right side the wall is 1mm thicker than the left side. I’ve checked Fusion 360 and it doesn’t seem to be an error in the program. I’ve also used metal dowels (or whatever you call them) to turn the part, so I don’t think the placement of the item has changed either.

Do you guys have any idea of what could have happened?

Dowels would work…The real question is whether you want to be able to remove the pegs. If you don’t want to remove them, then gluing them into place is way to go…why go through the effort of screws if you don’t need to?

1 Like