As always, lots of good information here. Apologies if it’s already been mentioned, but how are you tightening down the collet nut? Using two wrenches, presumably? I find you have to cinch the collet nut down pretty hard, and those wrenches (at least for the Makita router) are short.
I find putting both wrenches in my hand and squeezing my hand shut applies more torque than when I have a wrench in either hand. I’m less likely to wind up pushing sideways on the router. Using the same technique to loosen the collet nut means I have the other hand free to stabilize the tool, and it’s less likely to loosen suddenly, sending my knuckles into something sharp.
I have not investigated or measured a torque spec for this, but it might be worth looking into.
Thanks a lot for the in-depth analysis and sorry for the late reply. I think I’ve come to the conclusion that you’re right and that I’m simply putting too much pressure on my Shapeoko.
I’ve made a new program where I’m putting less pressure on the machine by not making such a deep cut and by cutting parallel along with the wood. I’m making a test cut as I’m writing this. Let’s see if it’ll work .
Just out of curiosity, if I wanted to speed up this whole process on my Shapeoko, what could I do? If could probably optimize the program, but that would probably only decrease the time 20% or so. If I upgraded to a spindle, would I be able to decrease the machining time a lot?
Fun as deep adaptive clearing might be (I’m guilty of over-using it), it seems like a few folks have come to the conclusion that shallow depth and large WOC tends to work better on a Shapeoko.
Slotting makes me cringe (compared to the sweet sweet sound of adaptive clearing a channel), but in some cases, it may be more efficient to just run a contour cut blazing fast and at low depth per pass.
What about 30k RPM, 3000mm/min (~120 ipm), and 2mm per pass ? What does Fusion say the cutting time will be then ?
It will be interesting to see how that comes out and whether the adaptive clear leaves a less wobbly wall finish.
I suspect what was happening before was deflection of the machine due to cutting forces, it would be interesting to see & hear the cut.
Well first, do you really need to cut away all that material with the Shapeoko?
Are you creating a flat plate with attached ridge so all that material in the middle really needs to be cut away?
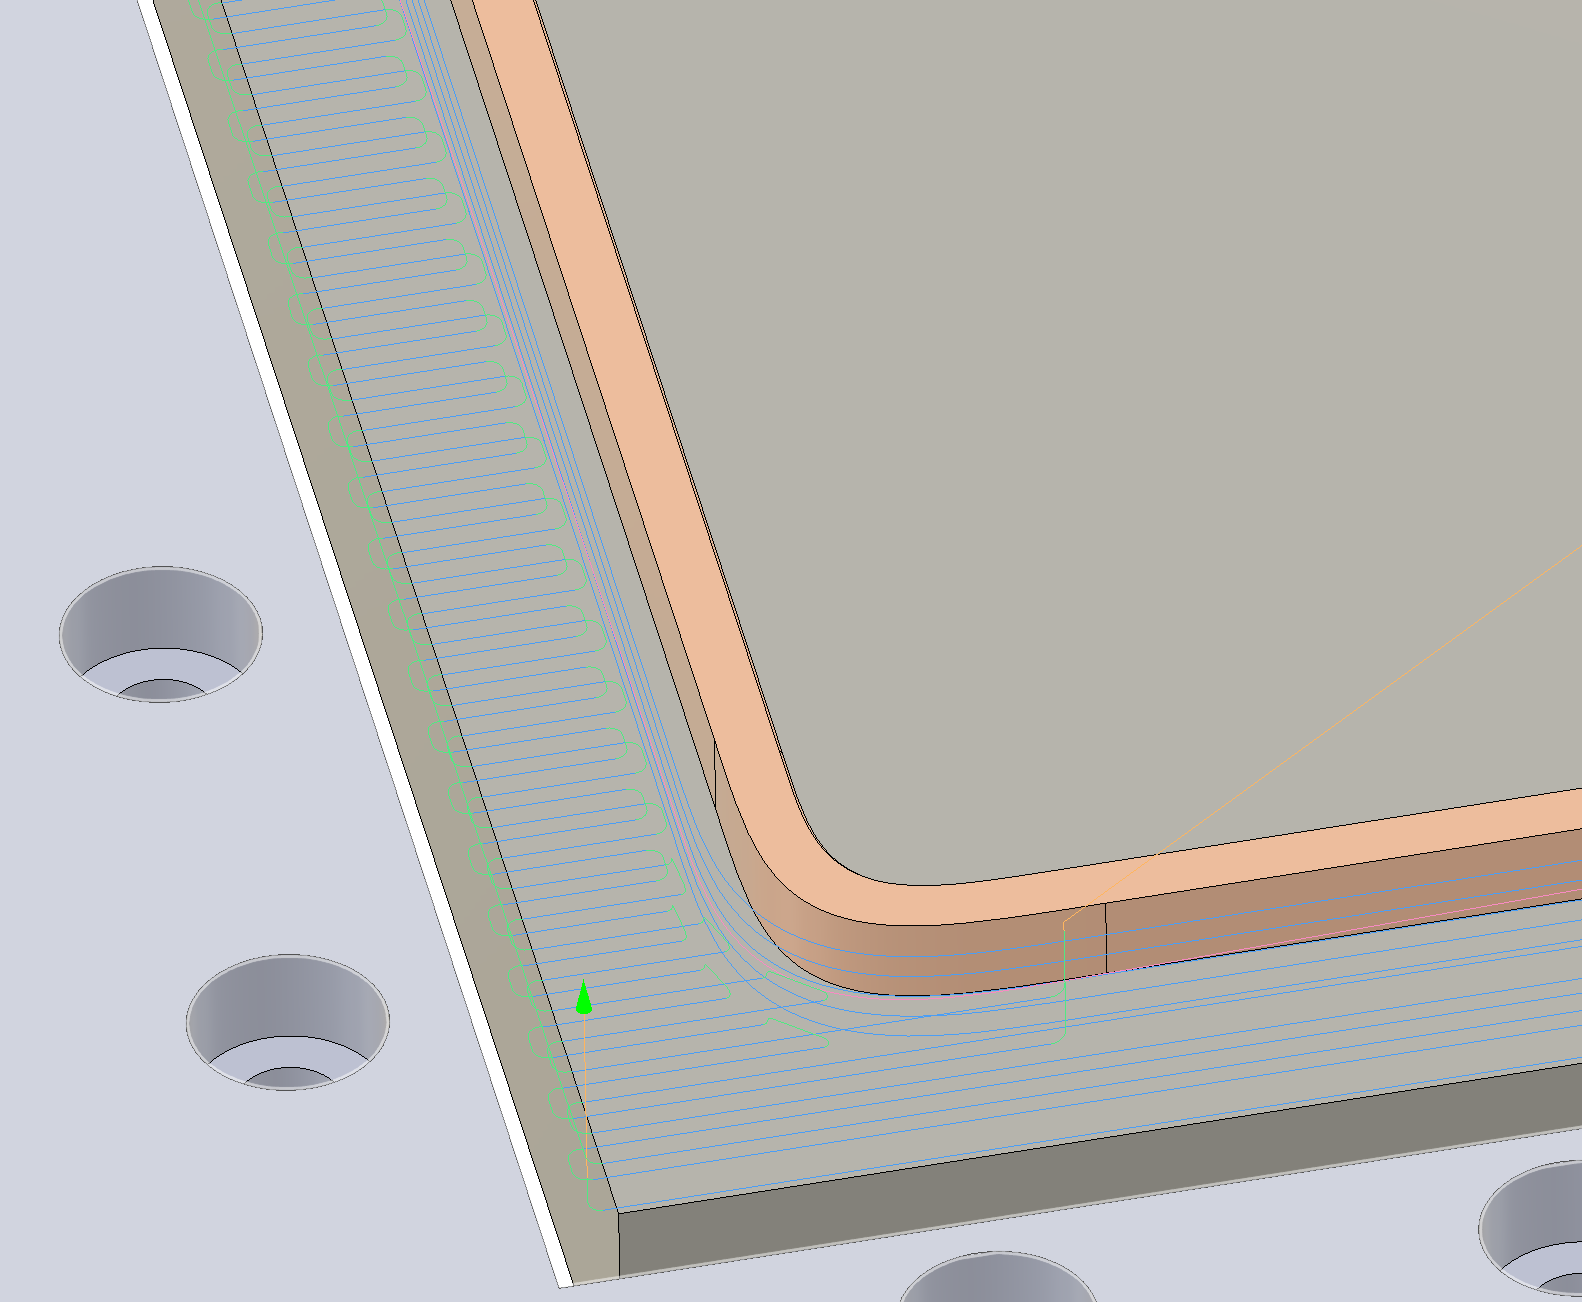
Around the outside it might be faster to run round in a continuous contour cut with stepover as that would be constantly moving not stopping and reversing as the adaptive clear does.
I would probably run an 8-12mm cutter in my spindle and make fast clearing passes at 4-6mm depth depending on how the wood took the cutting and keeping the Shapeoko out of the vibrating wobbly resonant deflection modes, I described how some of these happen a while ago
The upgrade to a spindle is really not about cutting speed though, the Shapeoko is mostly limited by machine rigidity not spindle power.
I would definitely go over the machine and ensure that I had no slack or wobble in the V wheels and that my belt tensions were all in the zone
That’s kind of what I’ve changed it to . First I’m doing a contour (with almost the exact settings you’ve just mentioned) and then I’m making a parallel run at 4-5mm depth:
What you state here isn’t necessarily true. It may be level to the ground, that doesn’t mean it’s equidistant from the axis. The only part that matters is the axis, I think you’ll find that if the wasteboard really is level, the X extrusion isn’t. “level” is a really loaded word. Exactly how the 3.8mm is measured makes a ig difference in what you can glean from that information. The 3.8mm is measured at exactly the same point as where the cut was started, or at the end of the cut? At the home position? Using an electric probe, or best guess using the sheet-of-paper method (which is surprisingly accurate) on a had metal bock, gauge blocks, a machinist 6" ruler, a caliper? Belts were adjusted when you assembled, so the CM DRO is a close match to reality?
You haven’t mentioned the router sliding up in the mount, is it? Can you prove it?
Does the toolpath run continuously from the left to the right? That would prove without a doubt that this isn’t losing steps, nor is the endmill slipping in the collet - if it’s cutting in both directions, it would still be level, but would show gouges such that the last CORNER would be higher than the others.
The slots in the collect are clearly packed with sawdust. Those slots are critical to grip on the endmill. Clean them out. A metal shim works great, or a pick. Can’t have too many pick’s around.
Don’t use the endmill to measure things - take it out of the router. Now use the base of the router (preferably a dial indicator stuck to the mount…but assuming you don’t have one) to measure between the baseboard at the 4 extents with the z-height the same on CM. Obviously, clean the board, find a spot that’s not been cut up, etc. Use a set of metal shims if you don’t have a dial indicator. I suspect you will find that the wasteboard isn’t flat, or isn’t square to the router in one axis. There’s a bit of an art to this measurement, but you’ll get the hang of it. Fine adjustment of the X axis can be messed up by adjusting the tension of the bottom wheels of the Y carriages. ~ .25" or so from left to right (left lower, right higher), which will likely require adjusting the rail where it’s attached to the left and right carriages. You can make the whole machine square in all directions with just a machinist level and machinist square (not a carpenters square or carpenters level unless you have proven both tools are accurate- if you don’t know how to prove those two tools are accurate, it’s not hard, but not necessarily obvious, just don’t do it), but it’s very time consuming and tediously repetitive.
The picture showing the chatter clearly shows there is mechanical free play in the system - carriages, wheels, could be almost anywhere, needs a close going over all the mechanical parts.
Yes, likely chatter, speed is too low , travel is too fast, tool dull or maybe a down cut bit is being used instead of an up cut bit that would clear the chips faster, down cut may be clogging the bits performance.
 .
.