Enough with the trivets already

…but I bought a stack of blanks and I need to use them.

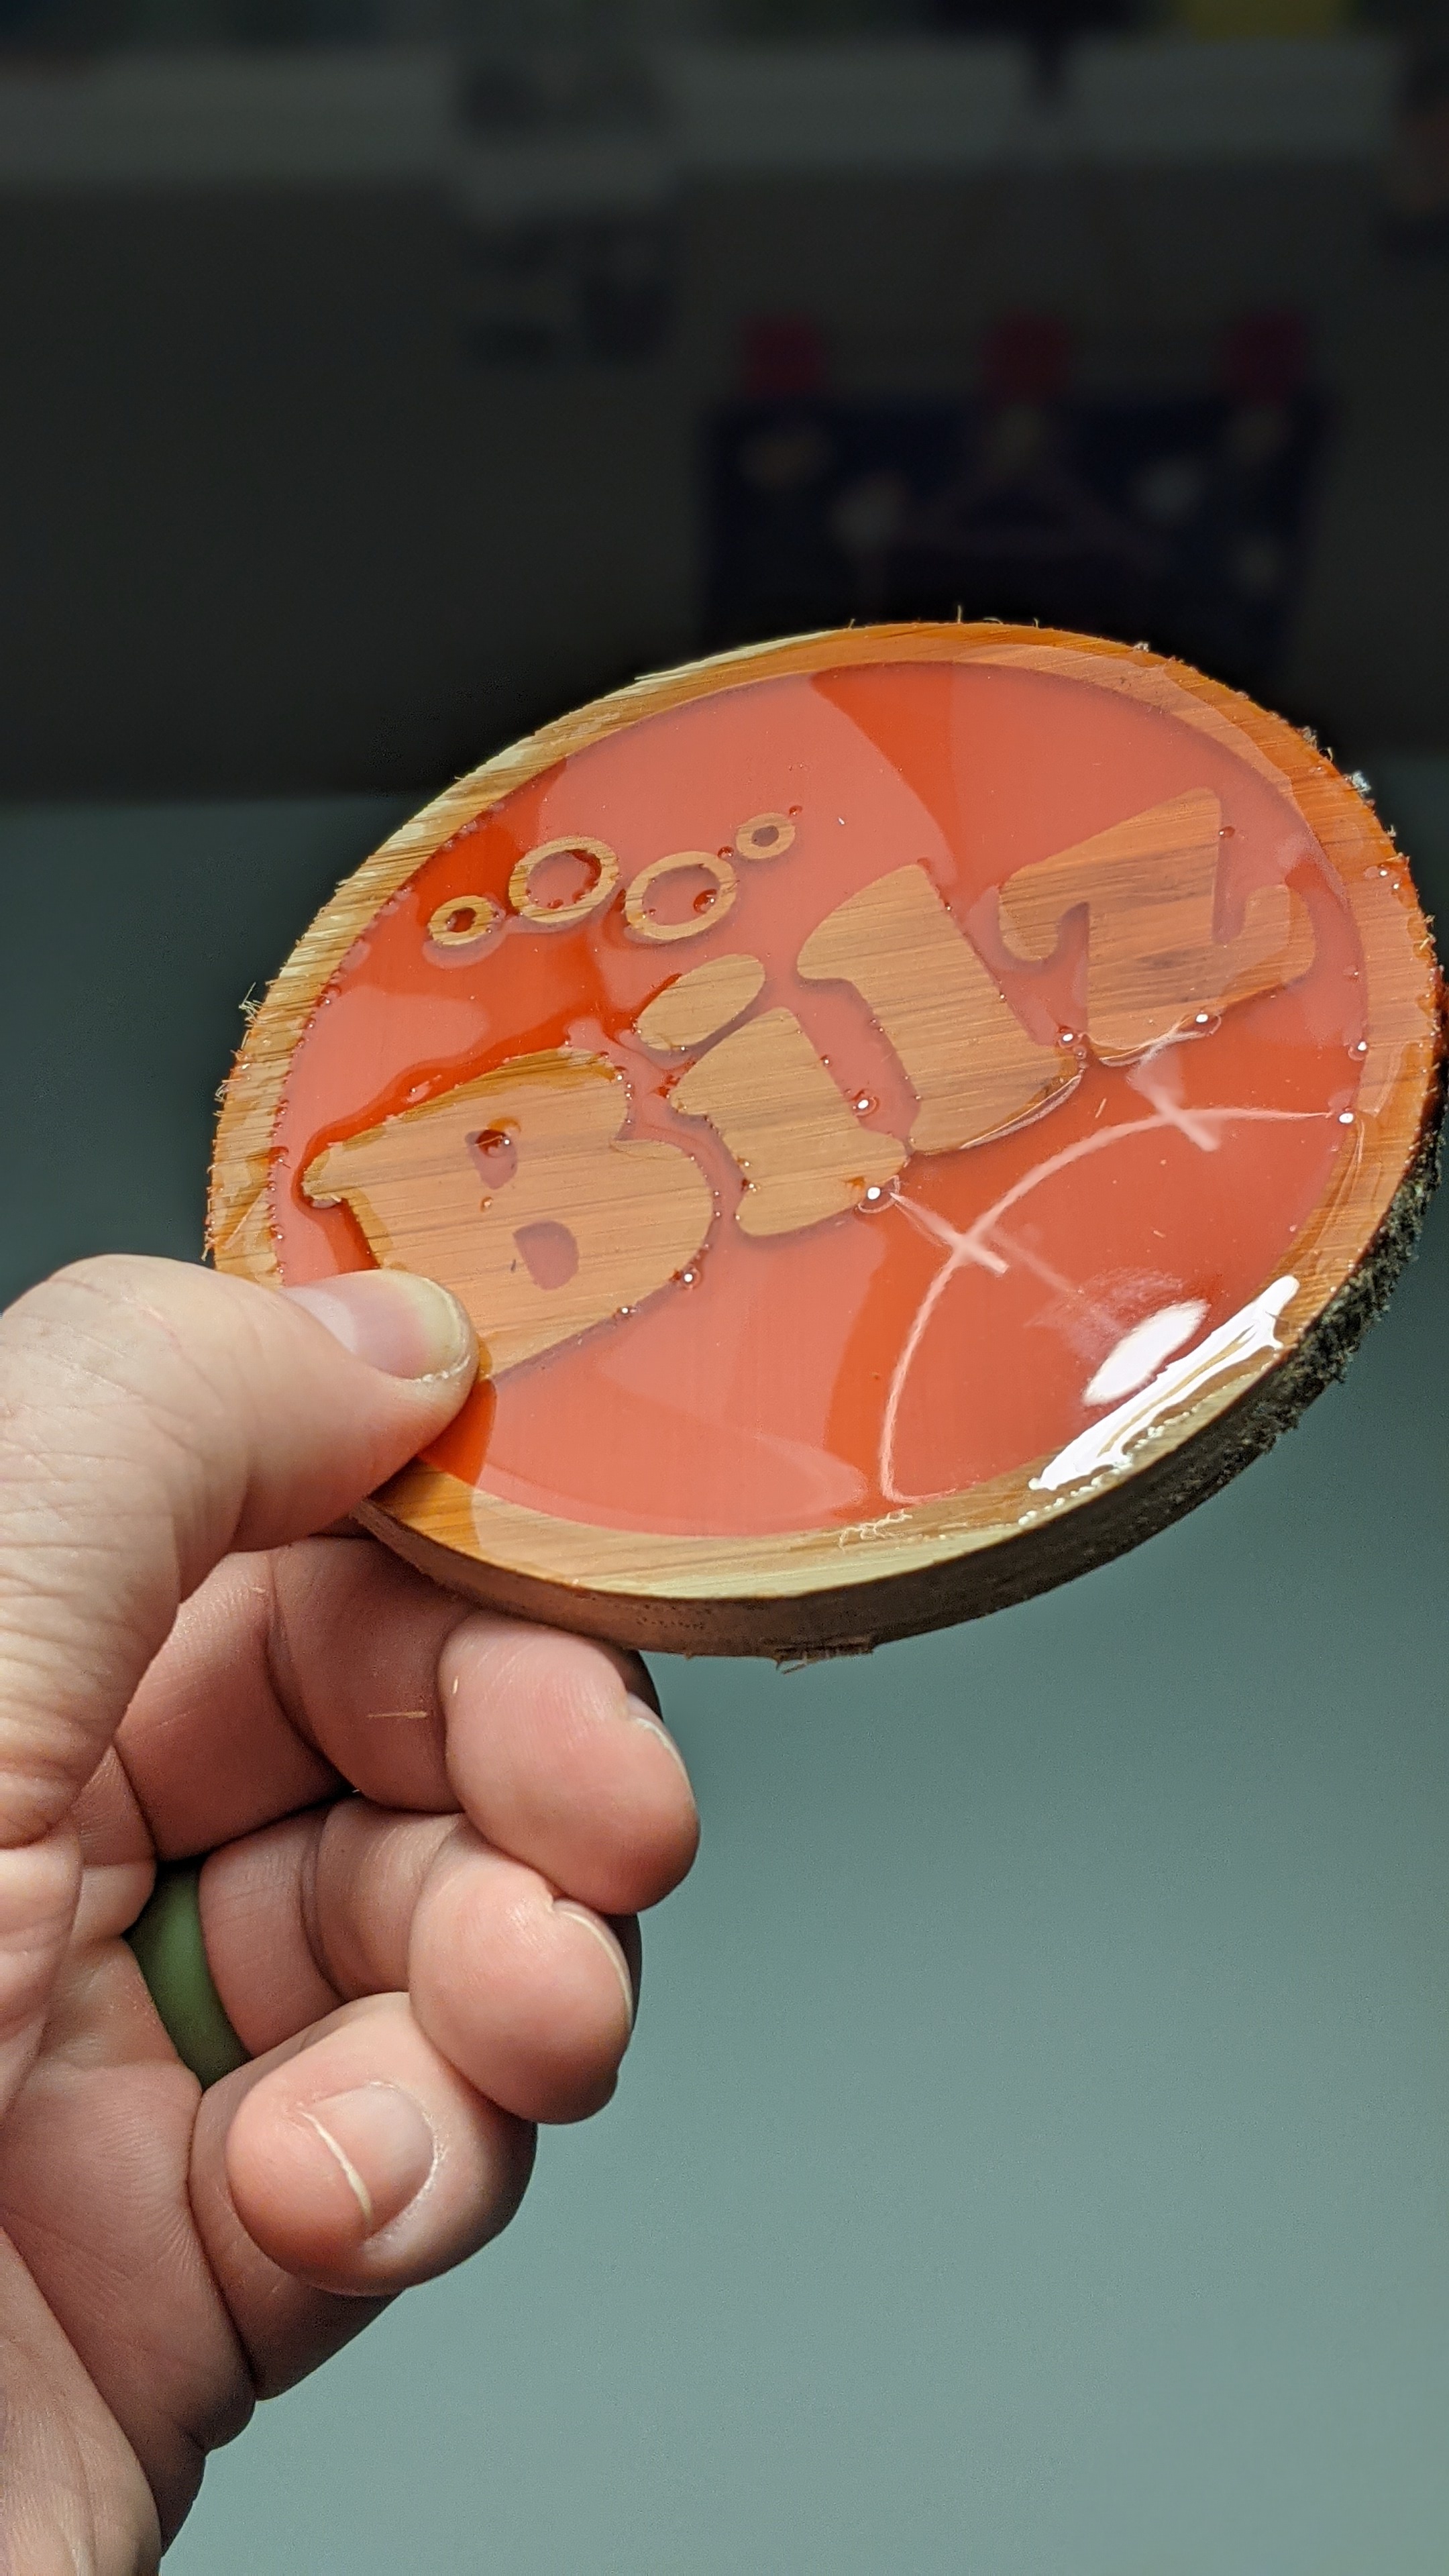
Also, I was inspired by @fenrus’s two-color epoxy so I figured I would try three colors (spoiler alert: I messed up the amount of dye and ended up with two of the three colors looking exactly the same :man_facepalming:)

Also, I can’t get enough of using my 25° single flute vbit.

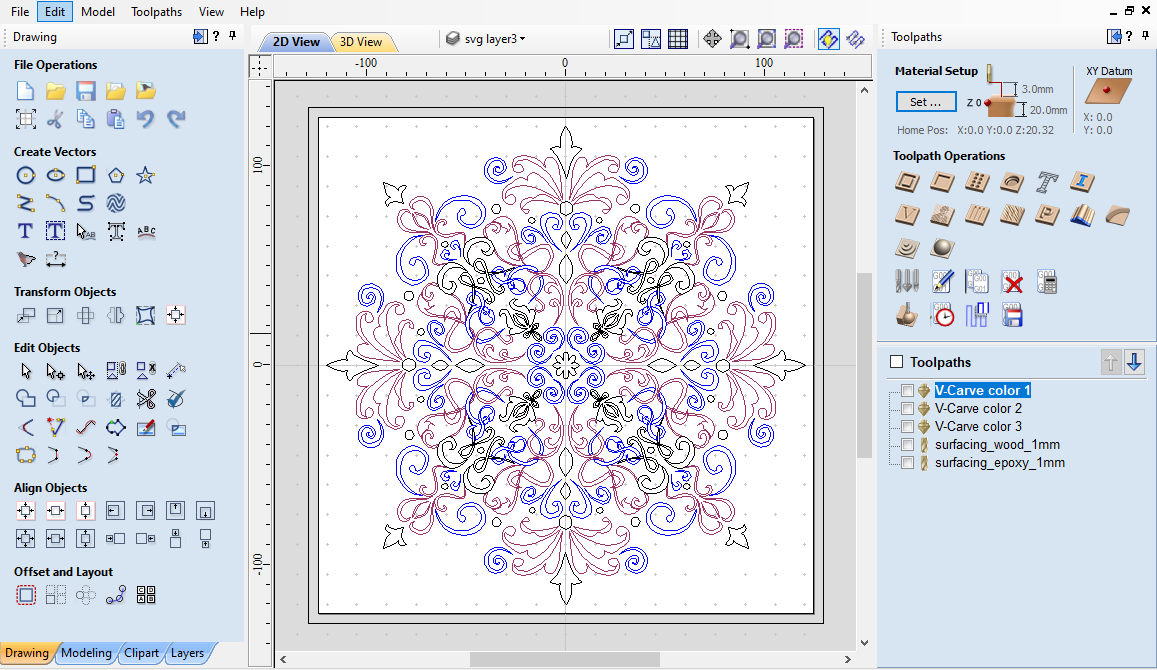
So I started from a vector design (Etsy to the rescue again) and imported it in VCarve, which has a nice option for using Layers in the design, and assigning one display color to each layer, which turned out to be very convenient to “preview” what the final piece could look like:

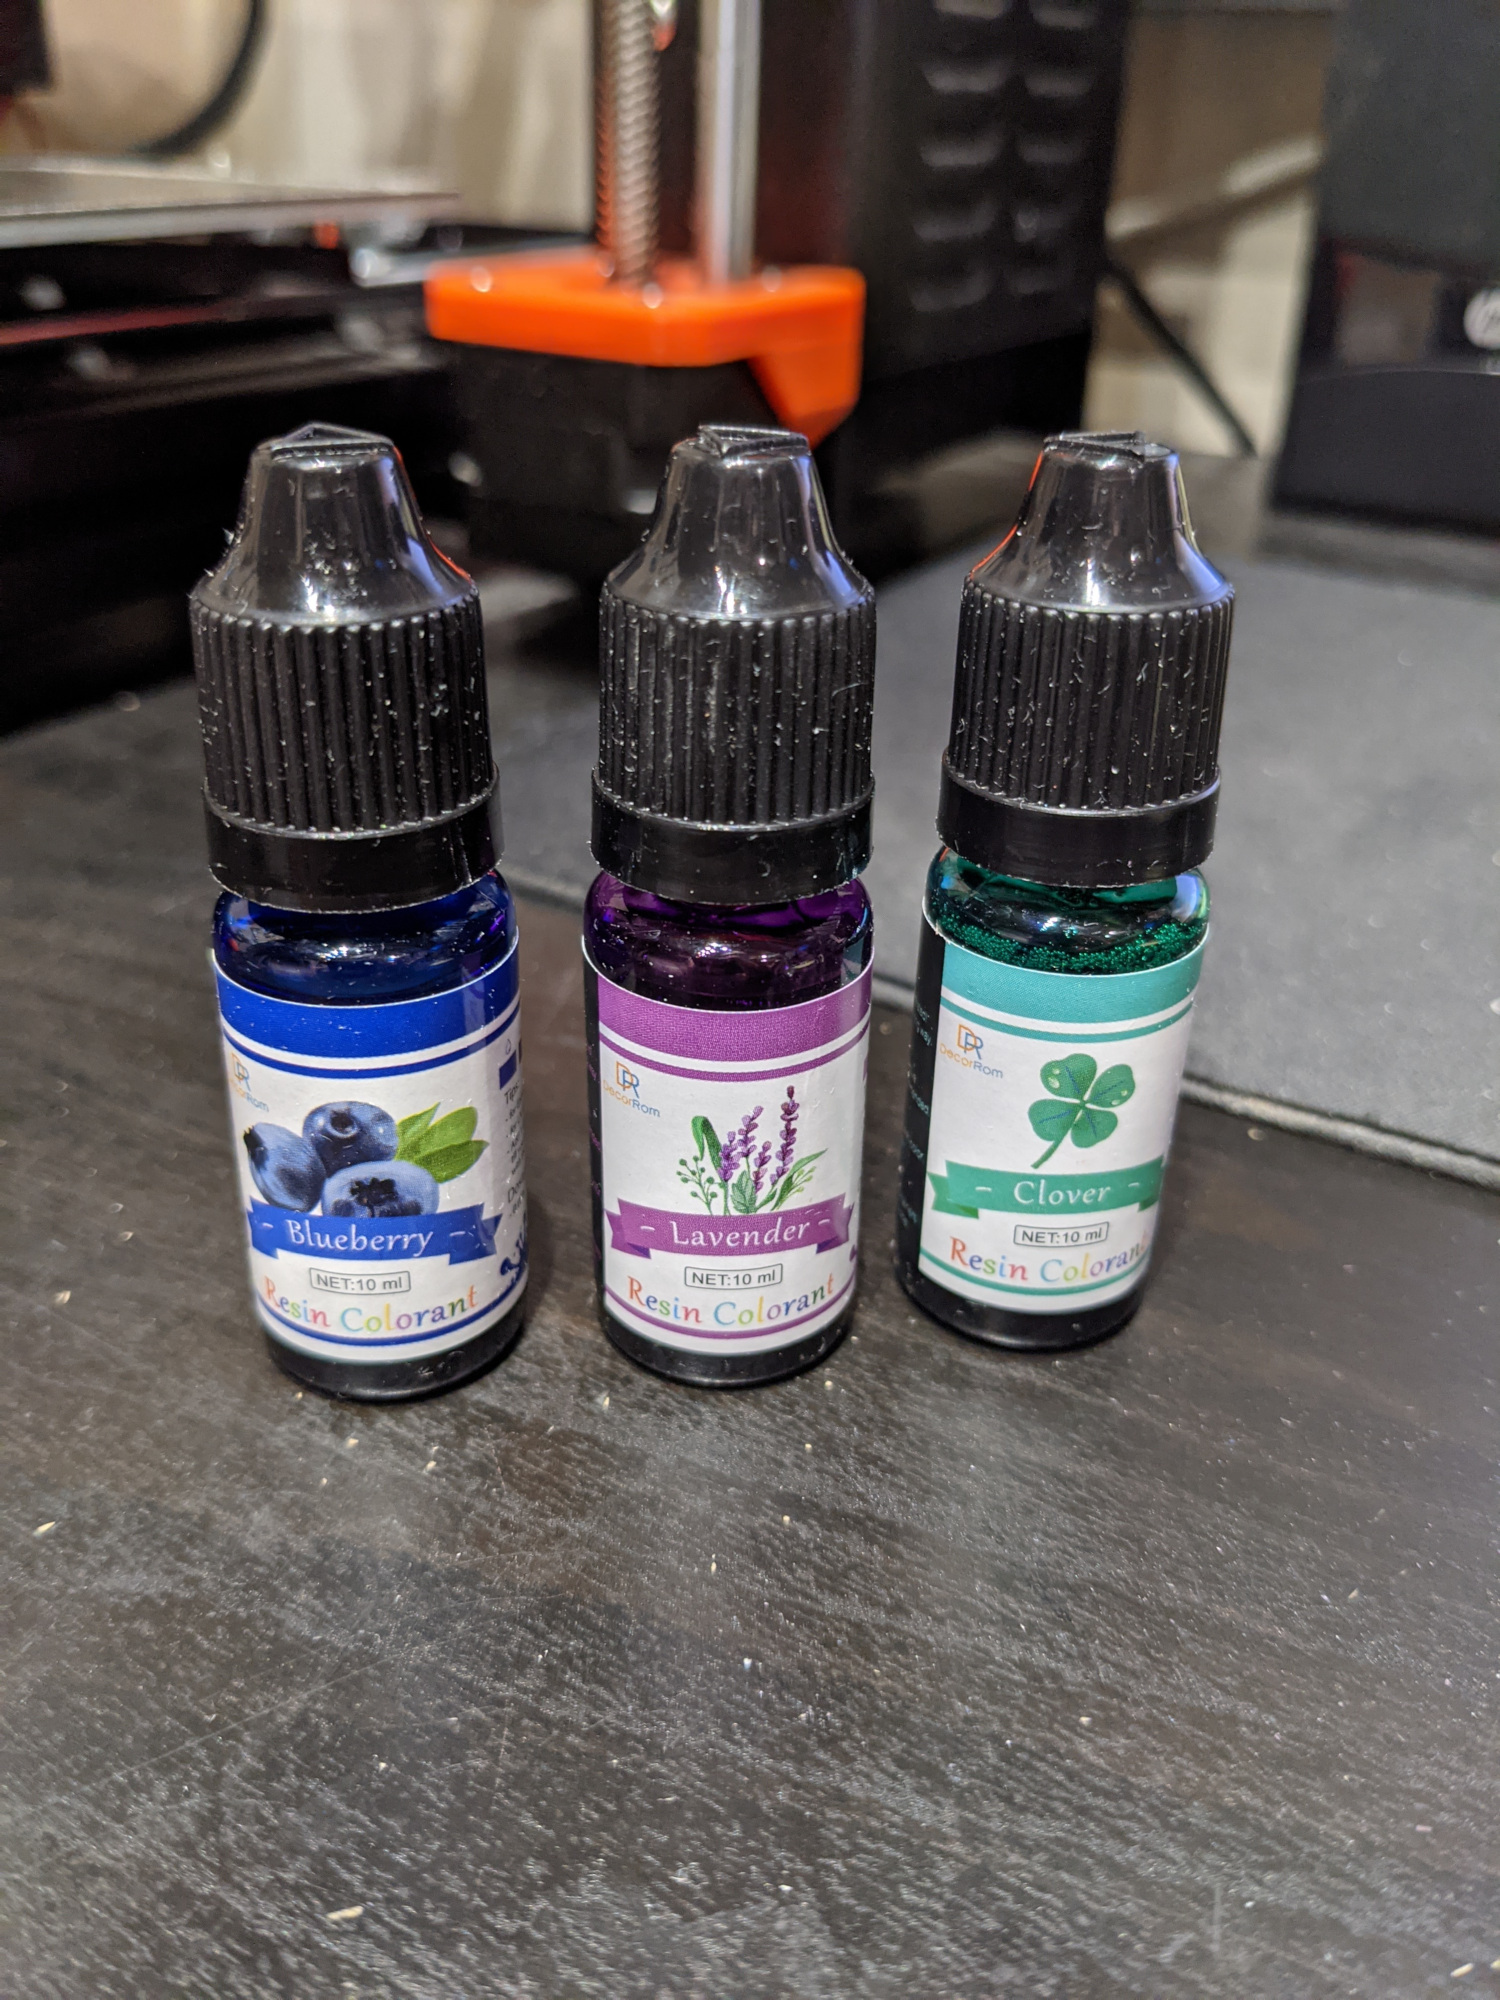
I picked three colors from the box’o’dyes

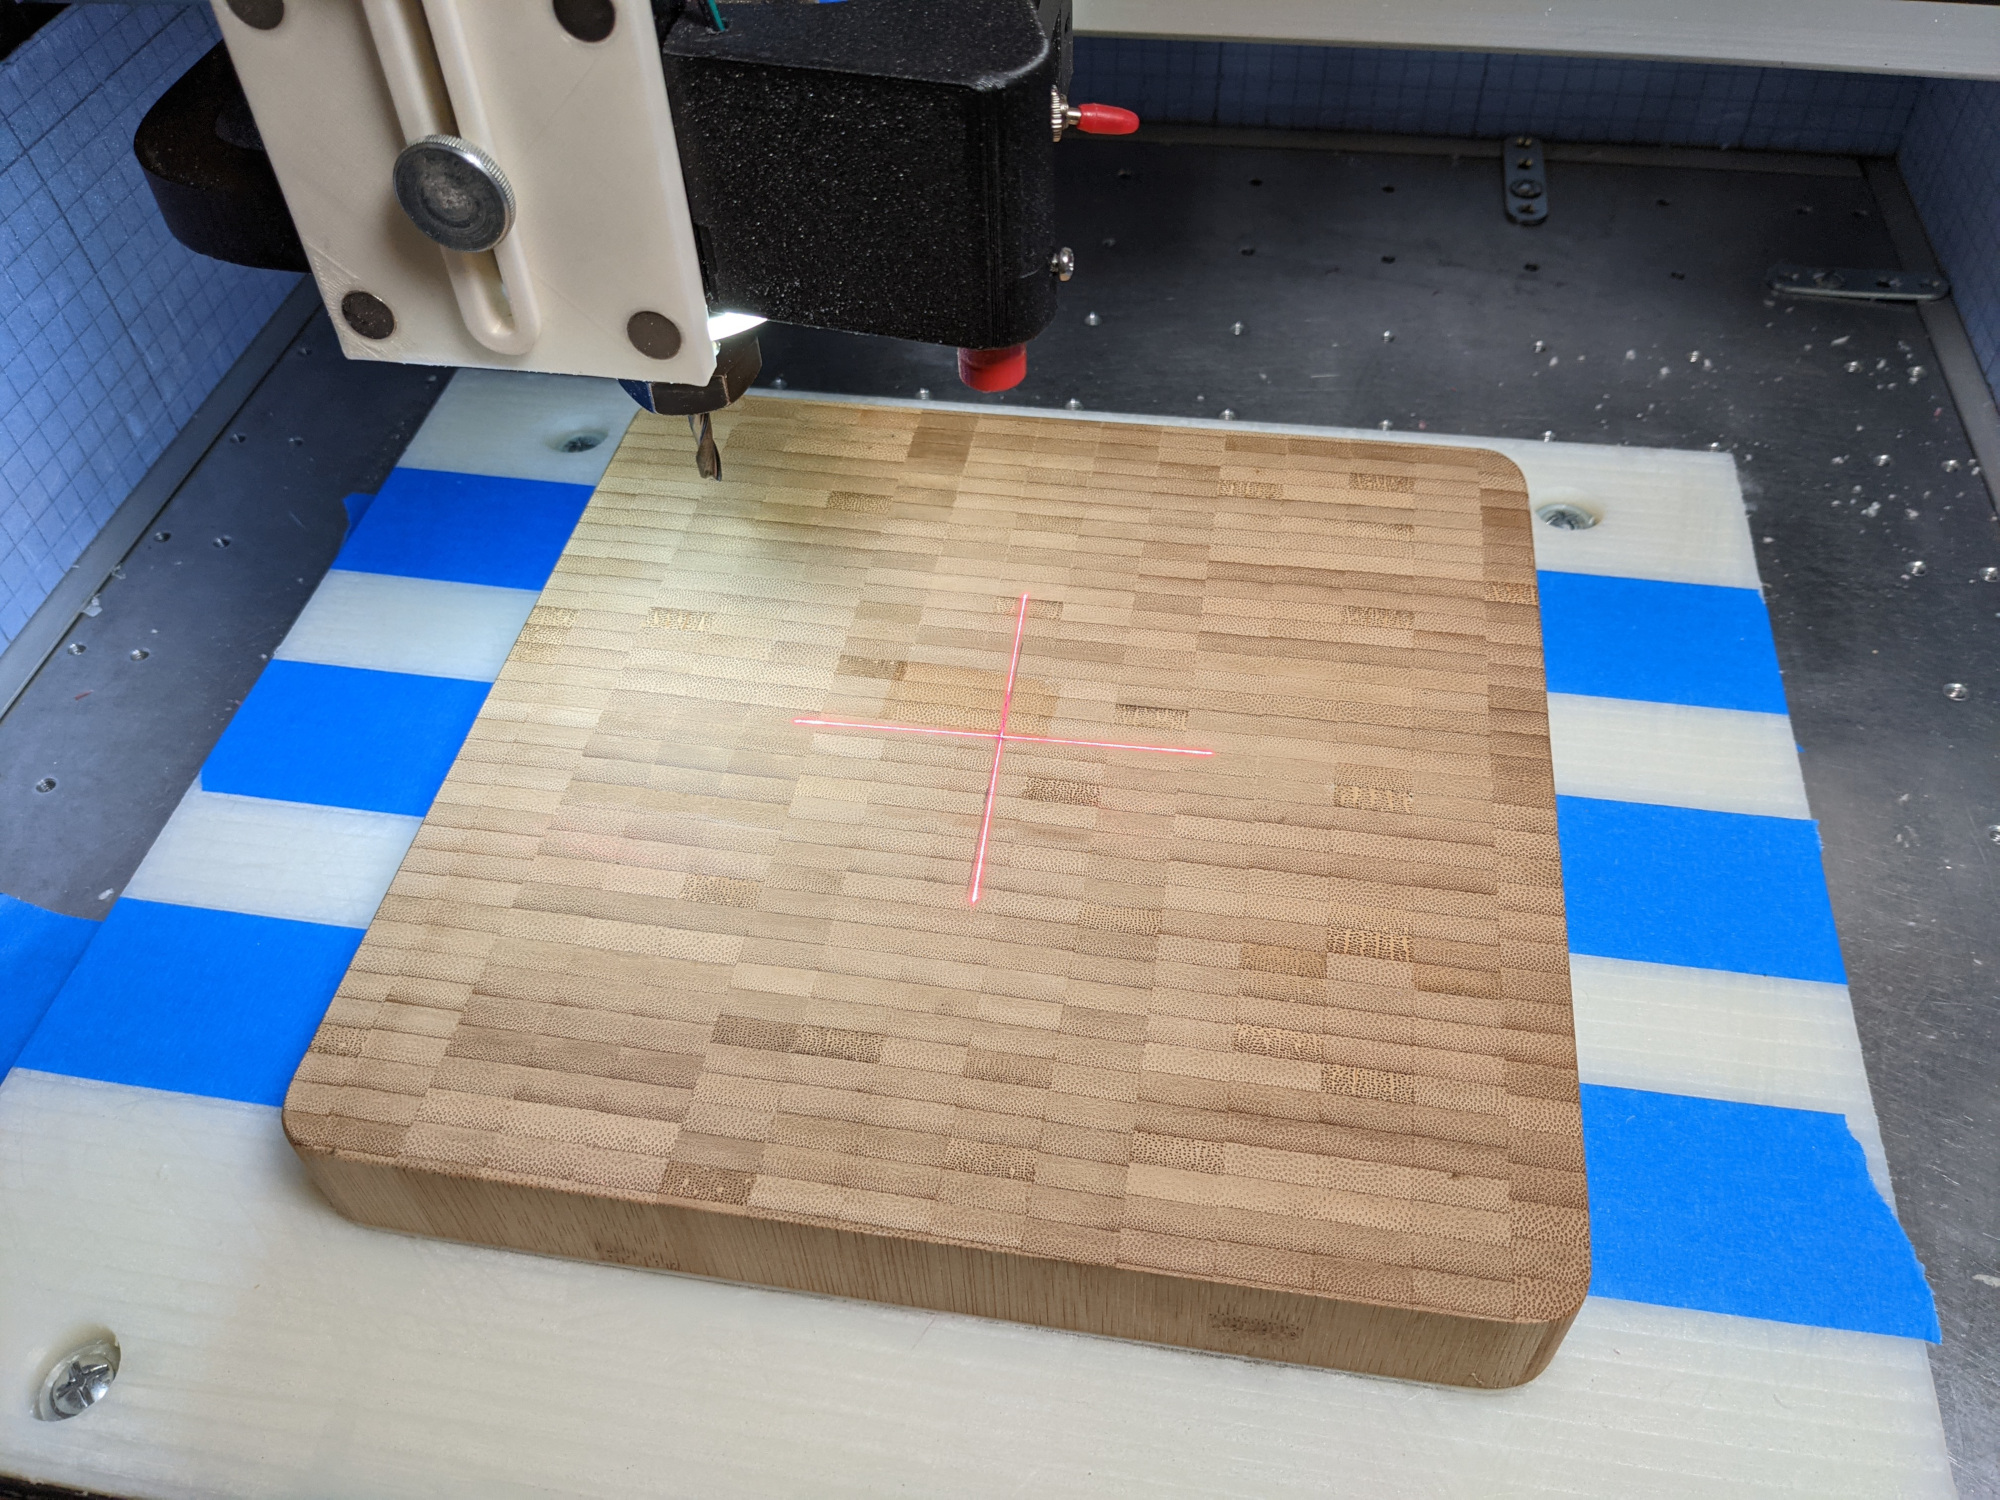
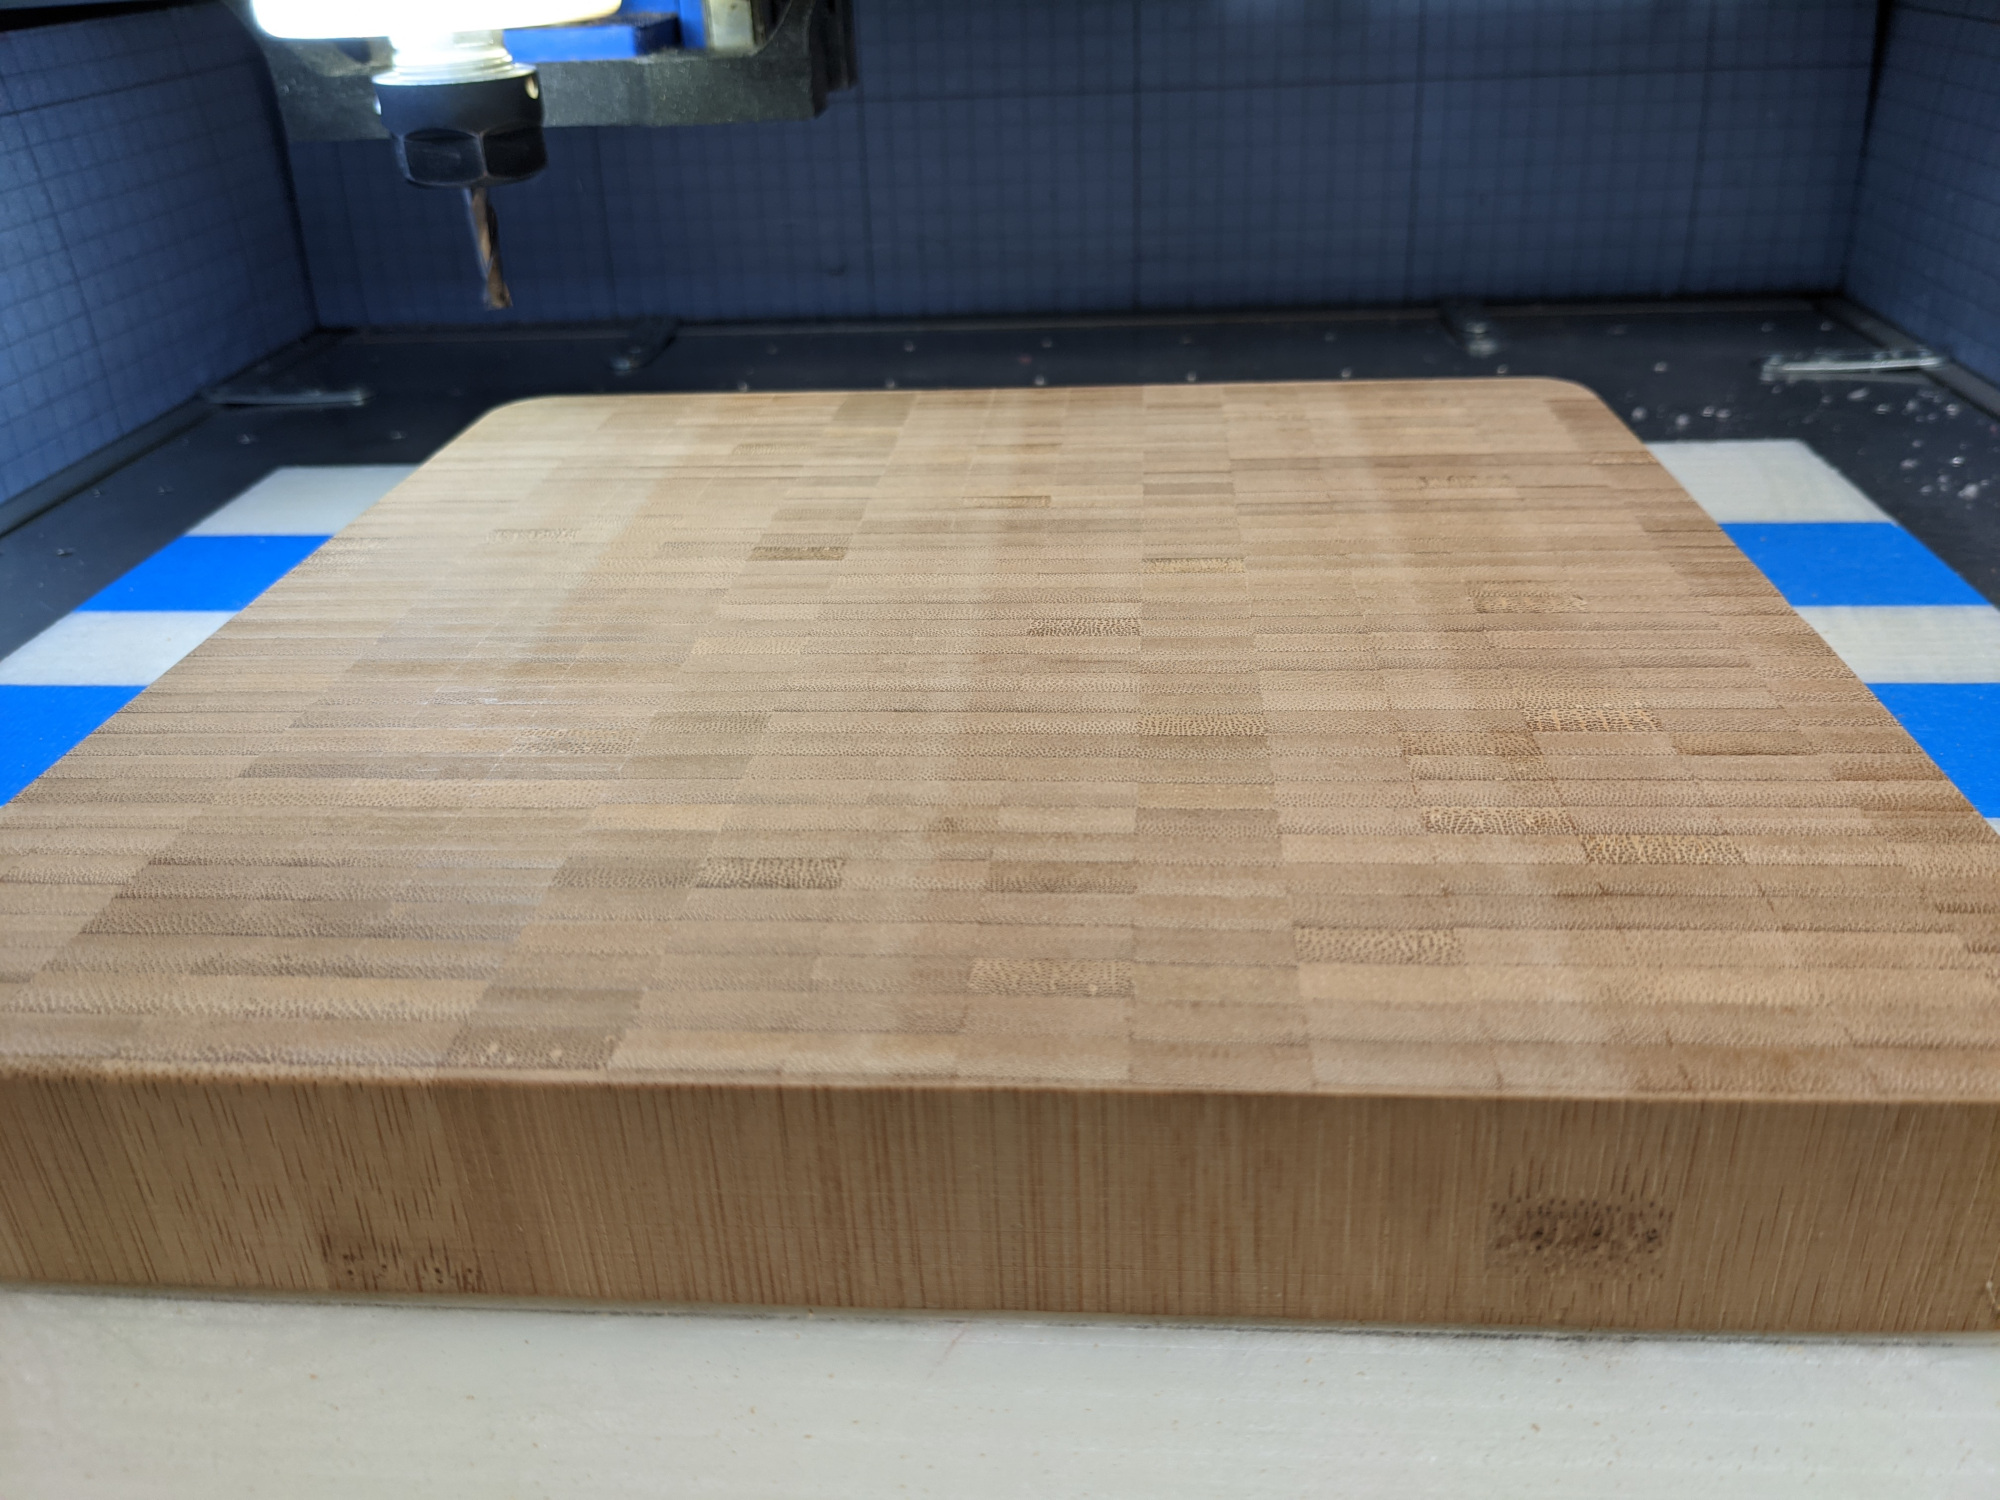
and installed the blank (well, the perfectly good 25$ trivet from Habitat I was about to mill for fun). By the way, after a few days of use it seems like the laser cross-hair for X/Y zeroing is convenient enough that it will stay on my machine

I surfaced ~0.5mm off the top of the blank,

and proceeded with the first v-carve op:

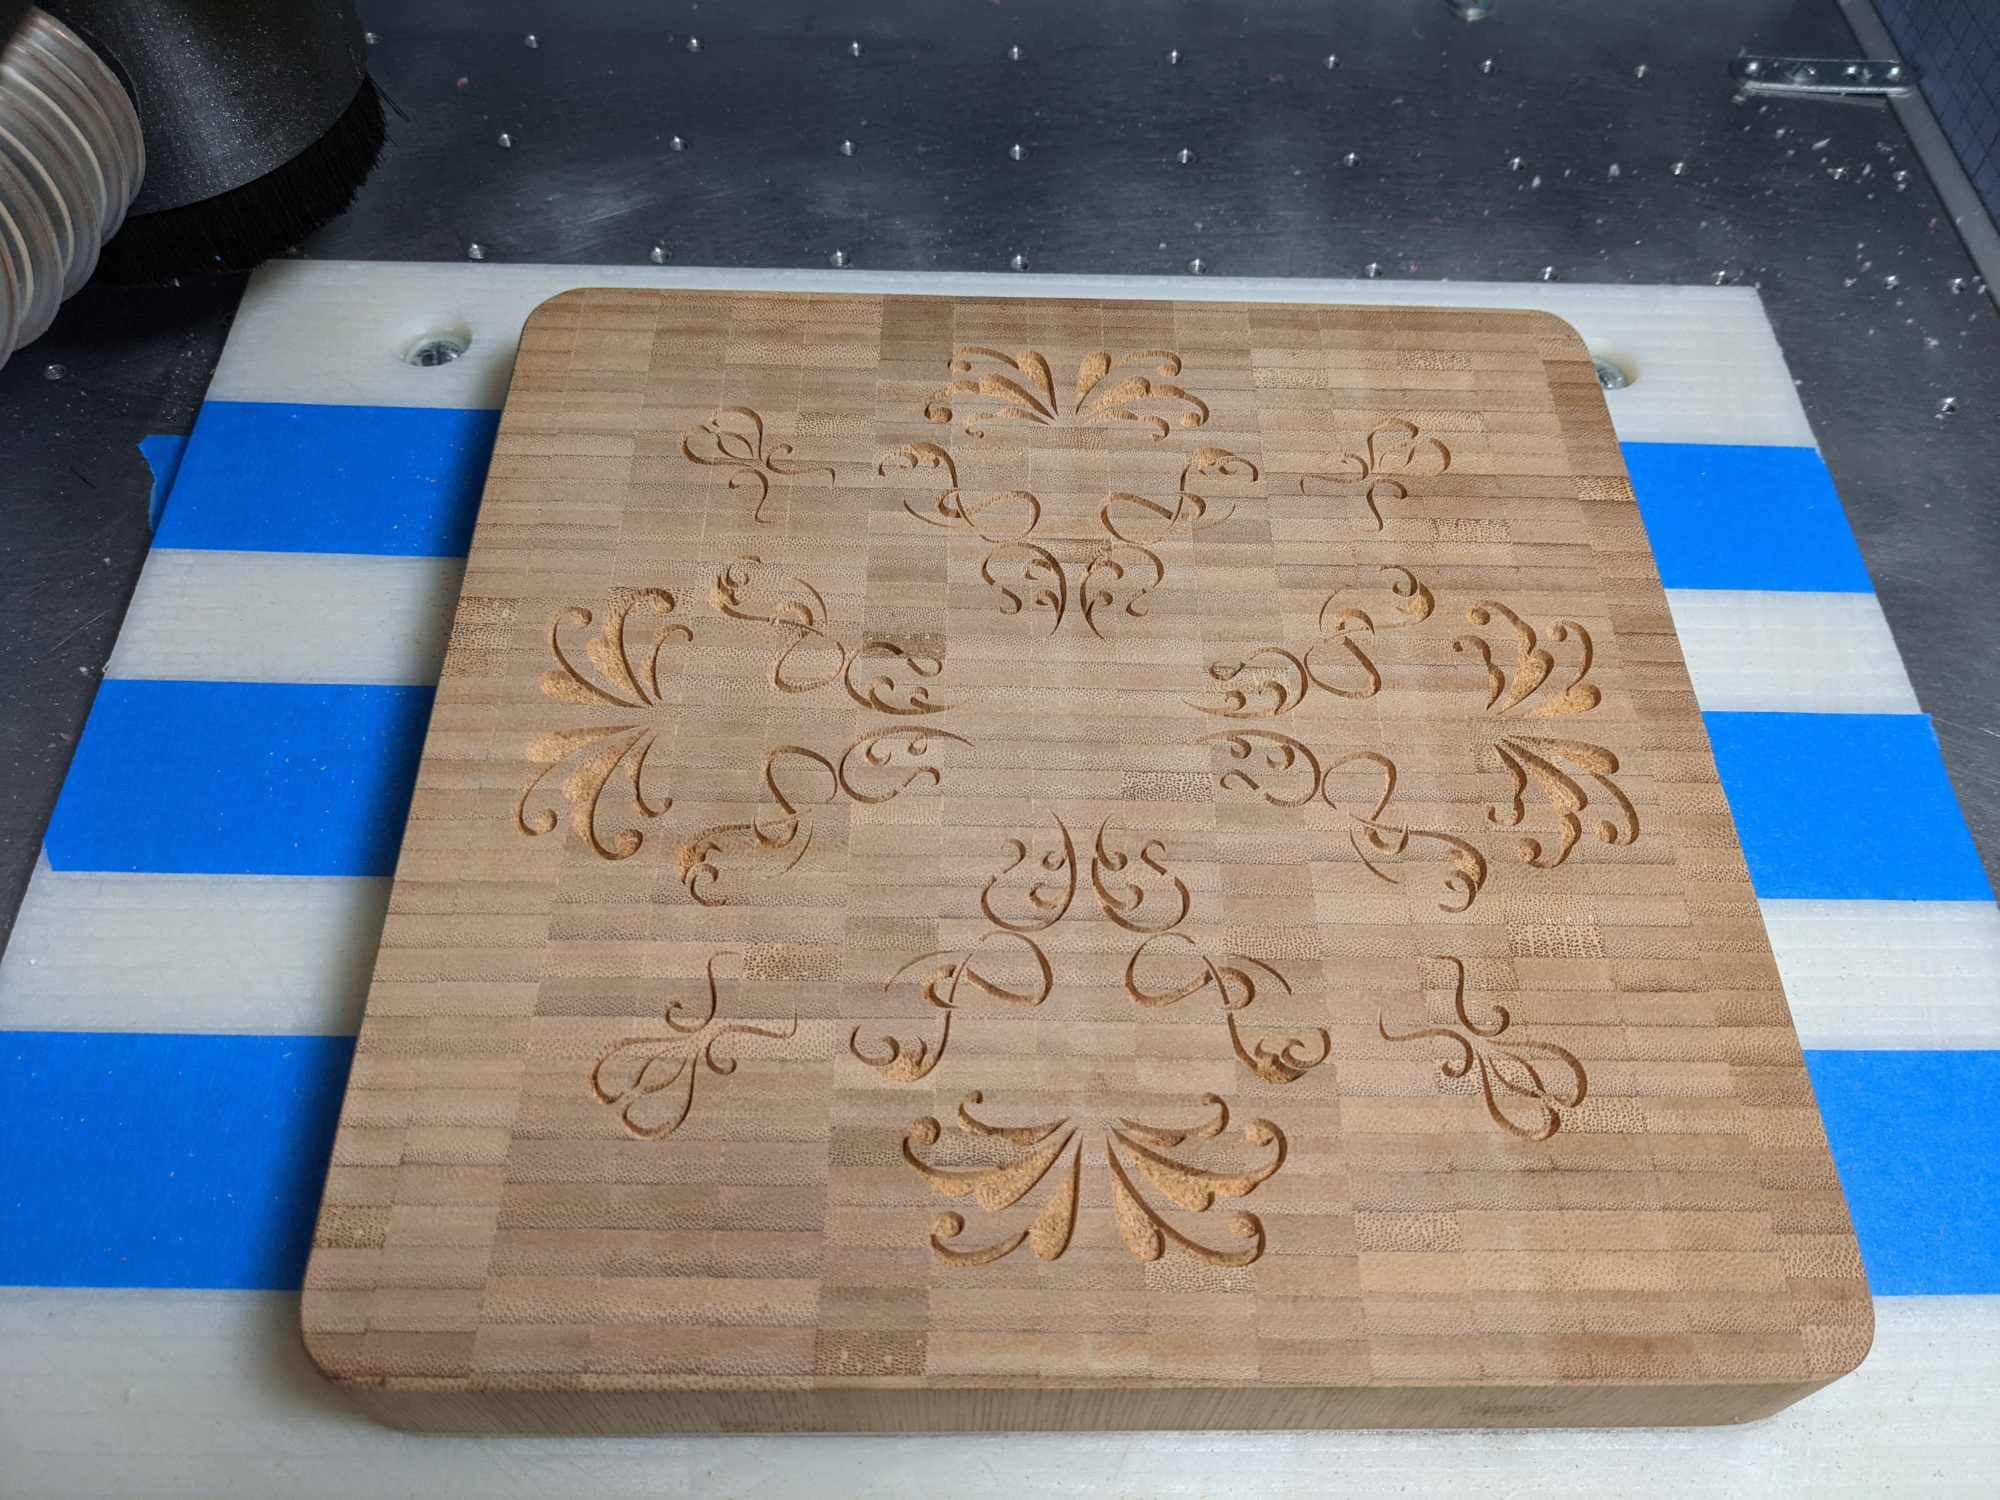
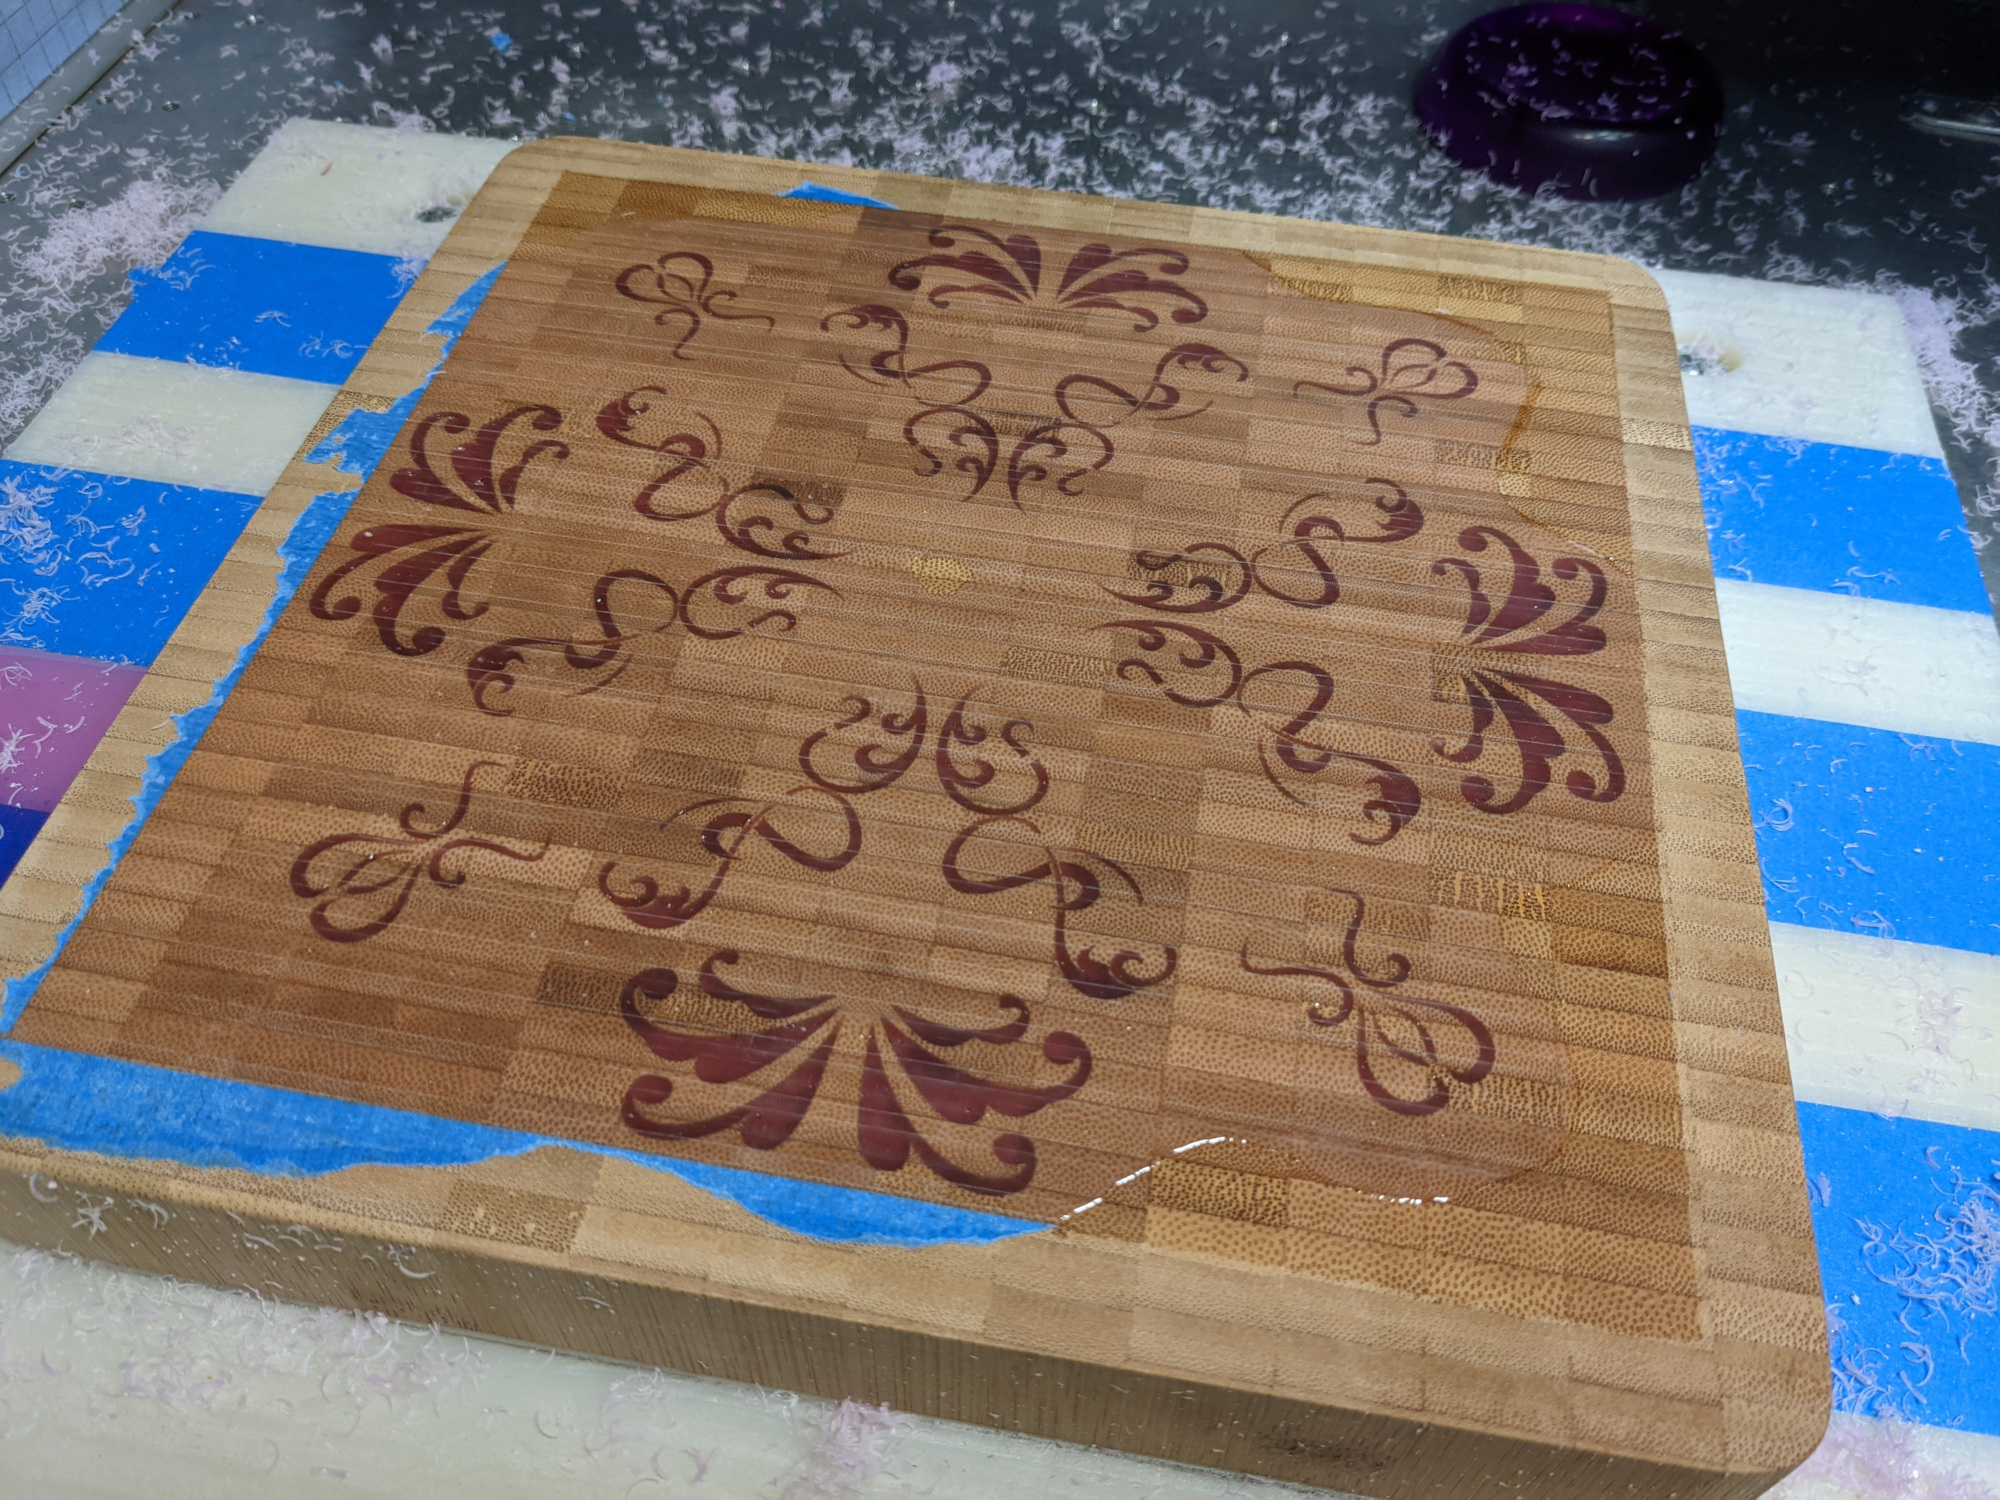
Sealed the bamboo with clear epoxy, let it dry, and poured the first color:

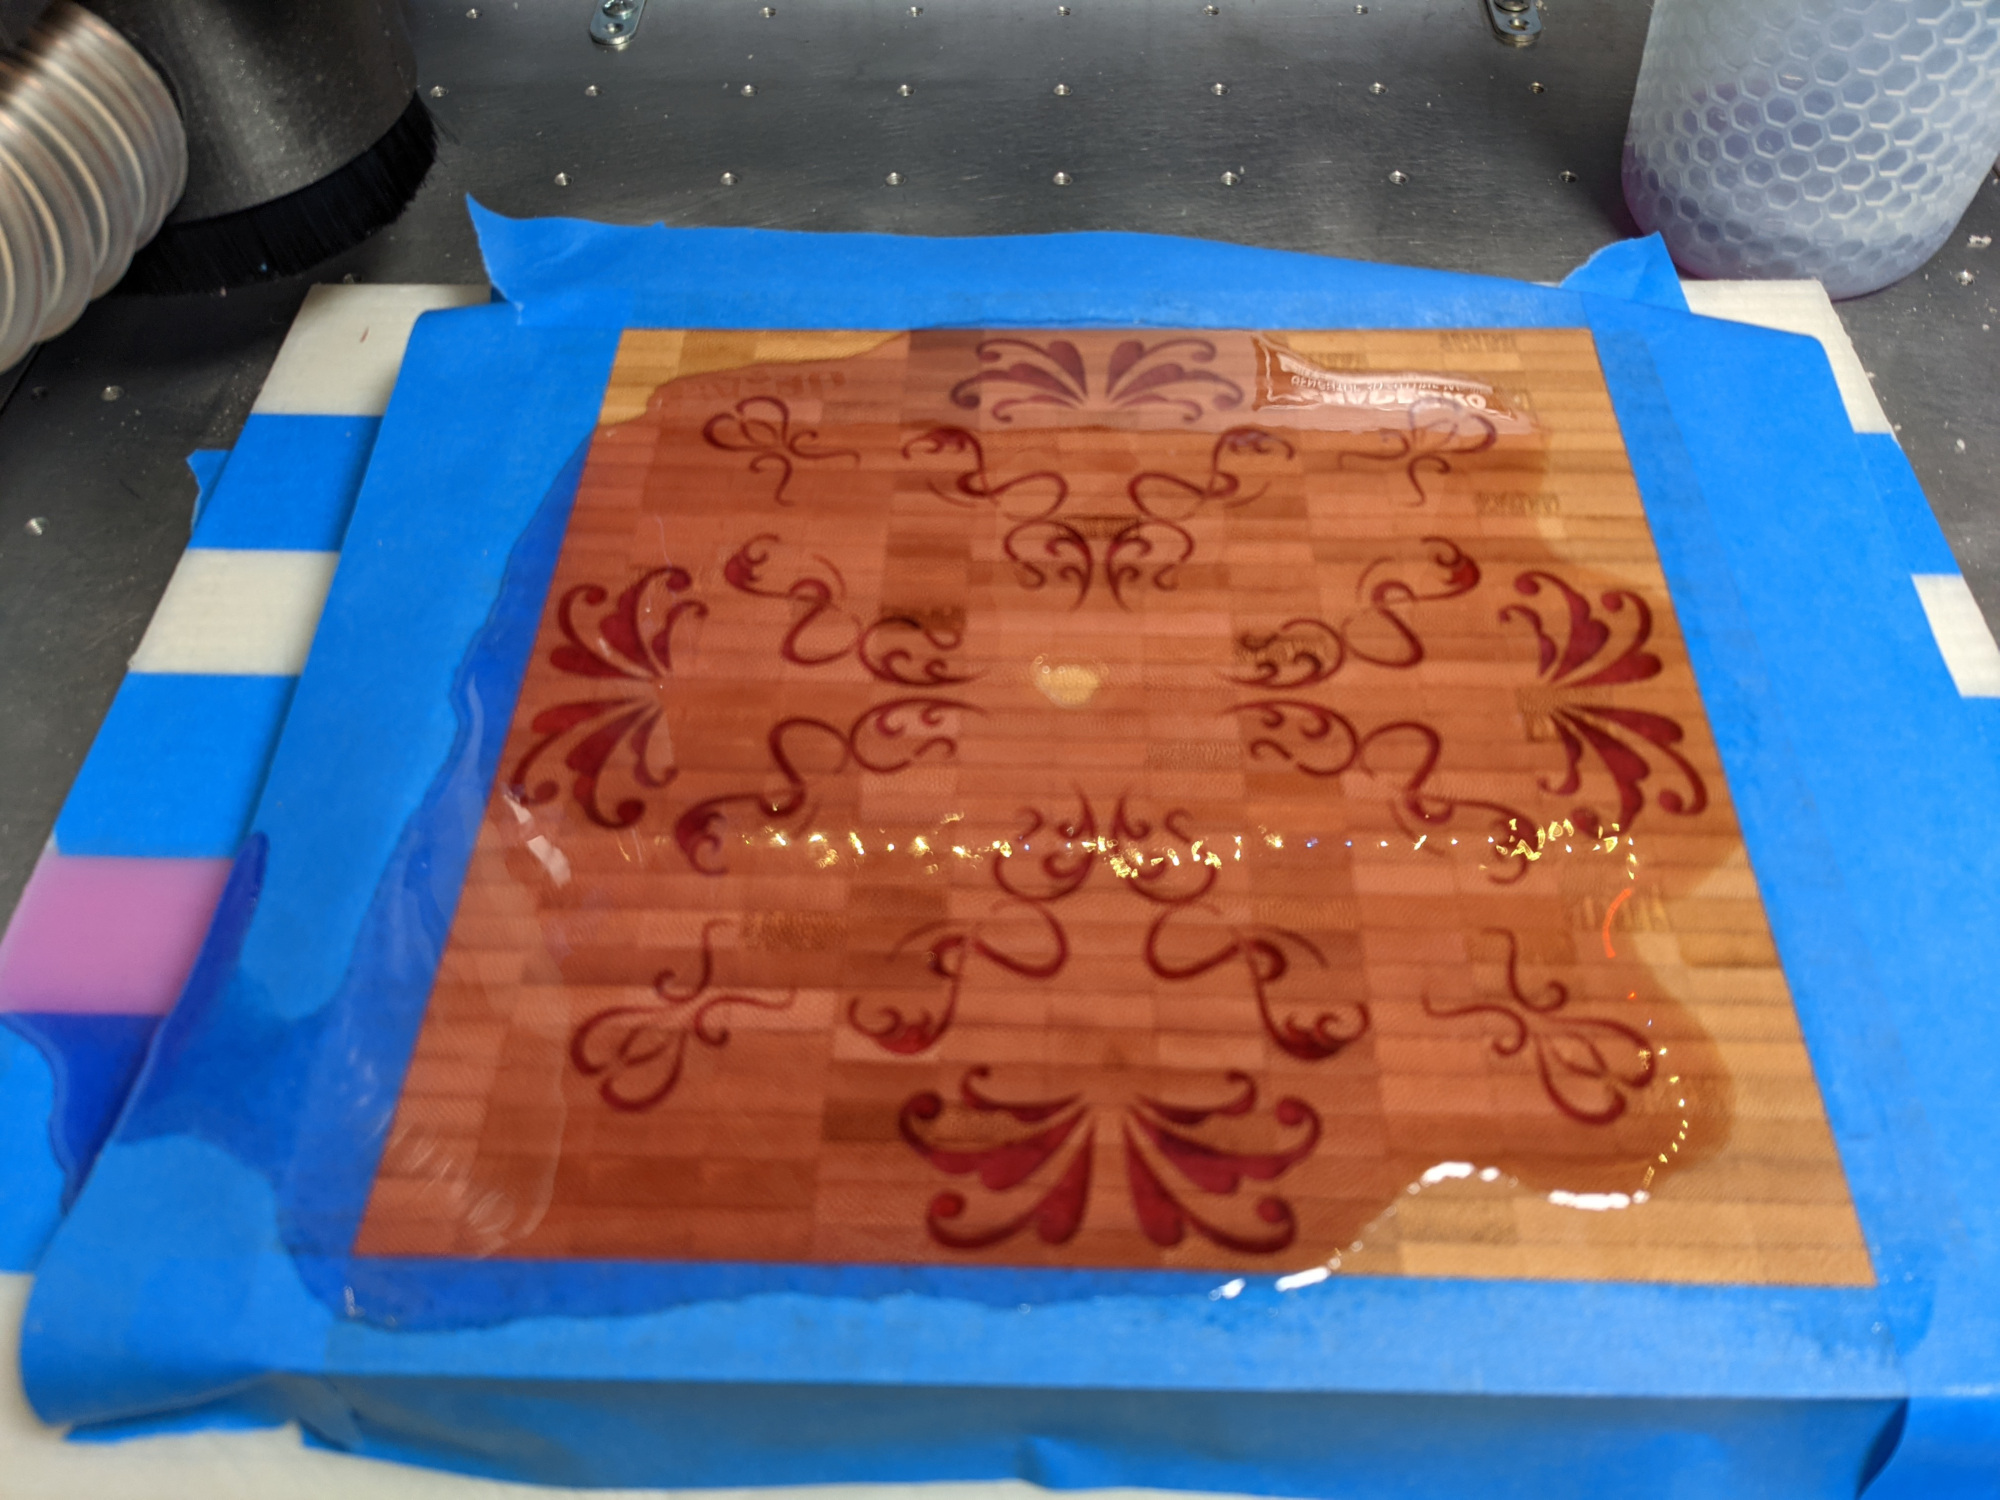
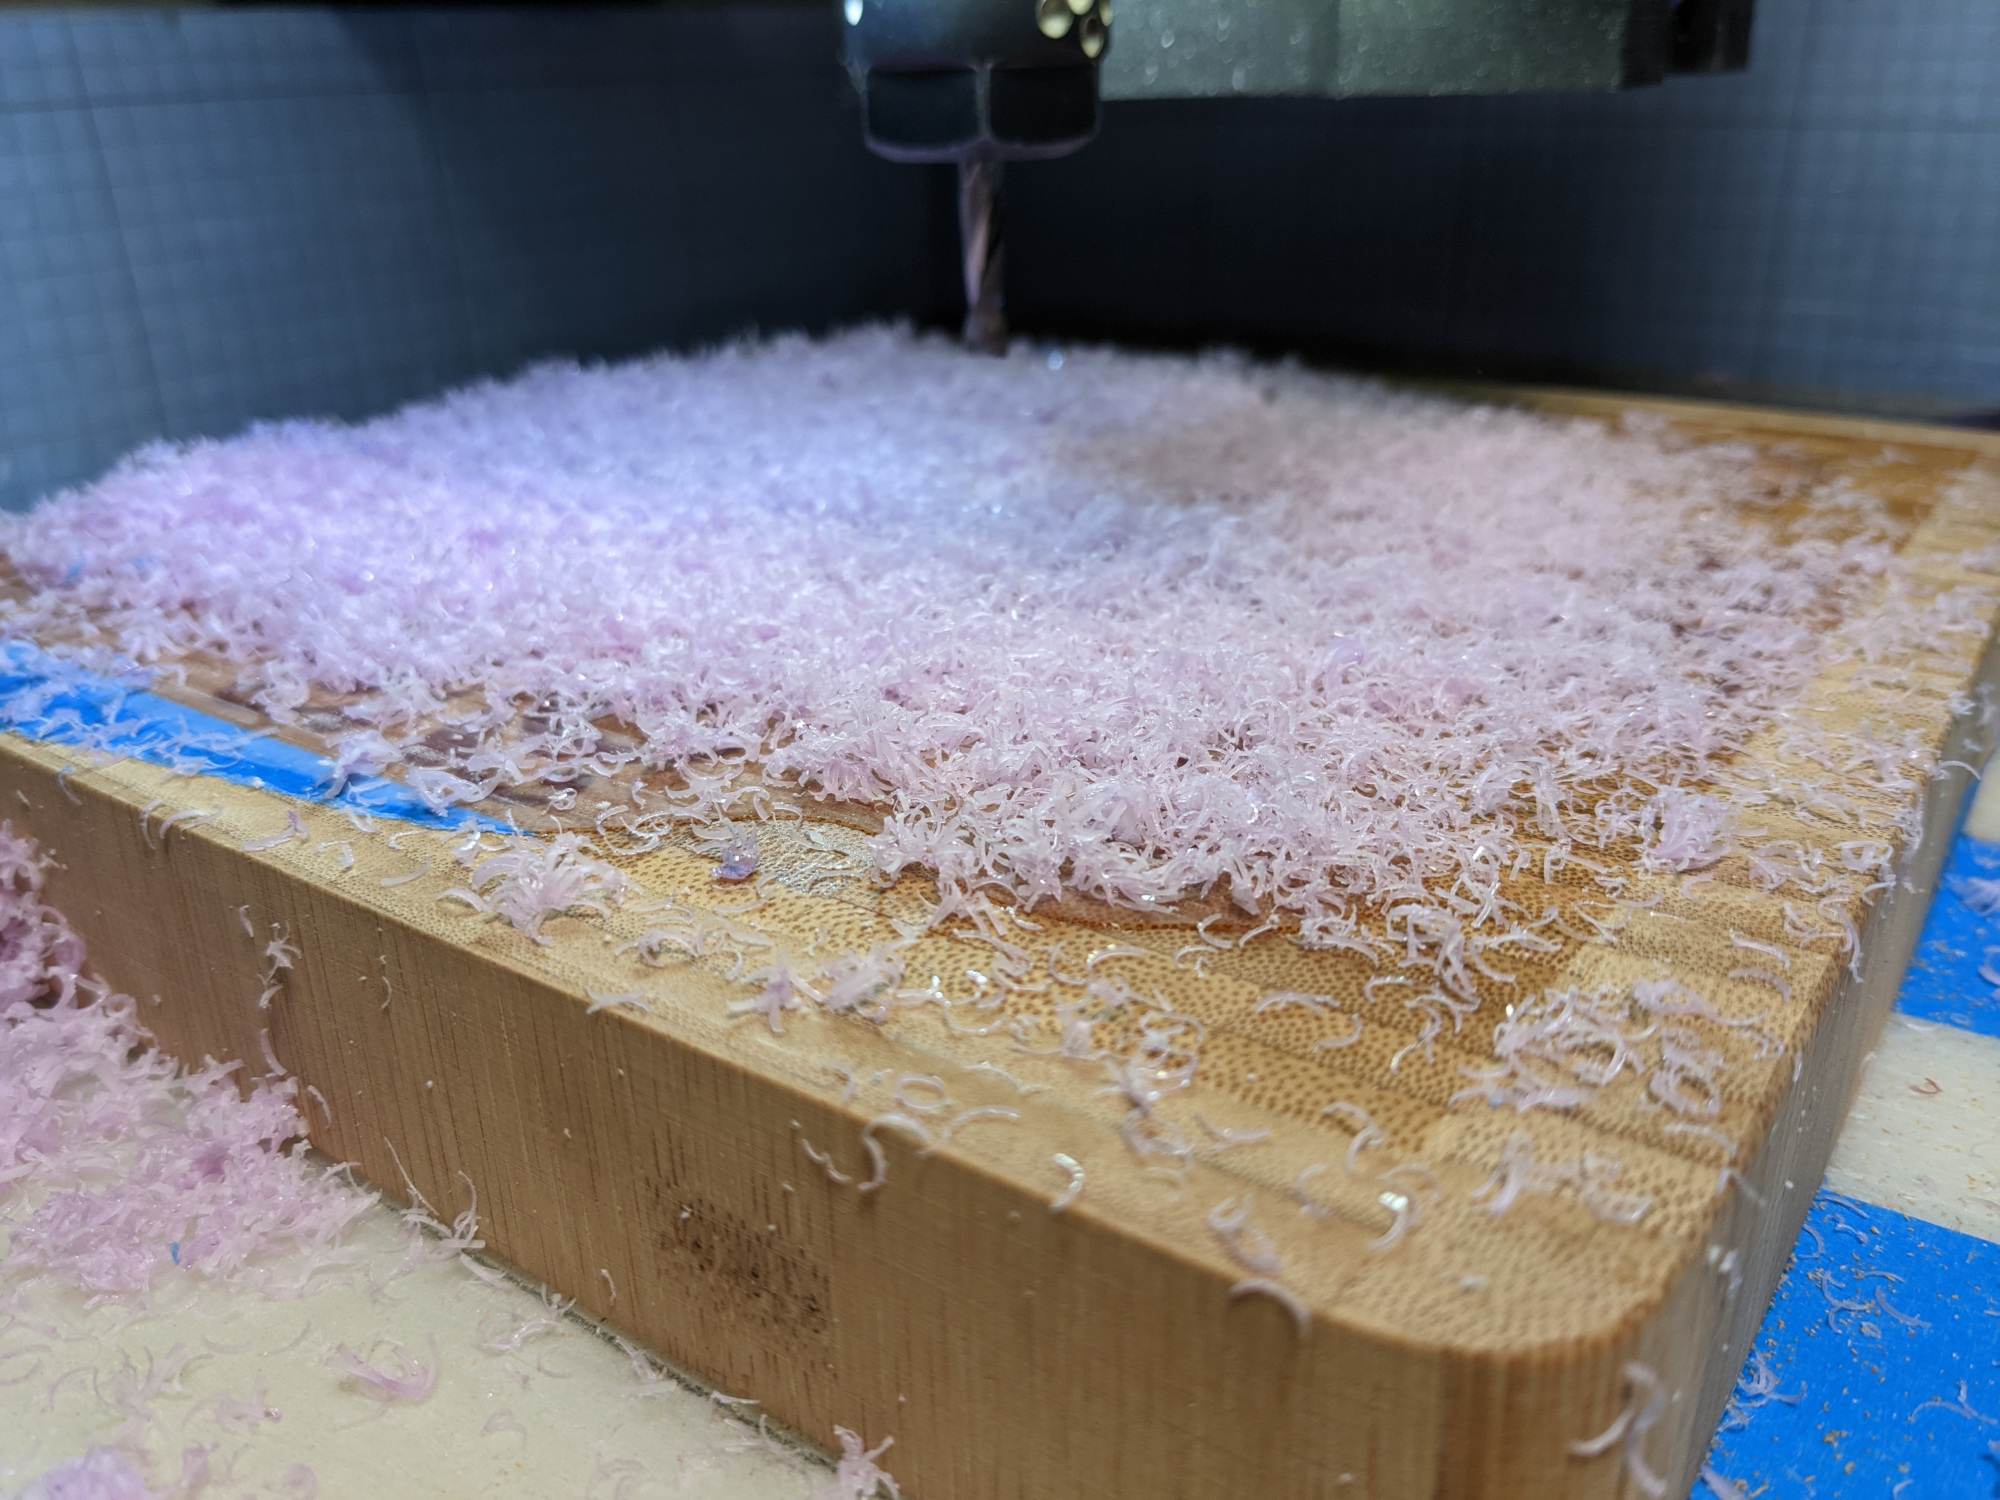
This below is what happens when one is impatient and does not let the epoxy fully cure: chips that are bordeline stringy

Good enough, I left about 0.2mm of epoxy before running v-carve #2,

then poured color #2,

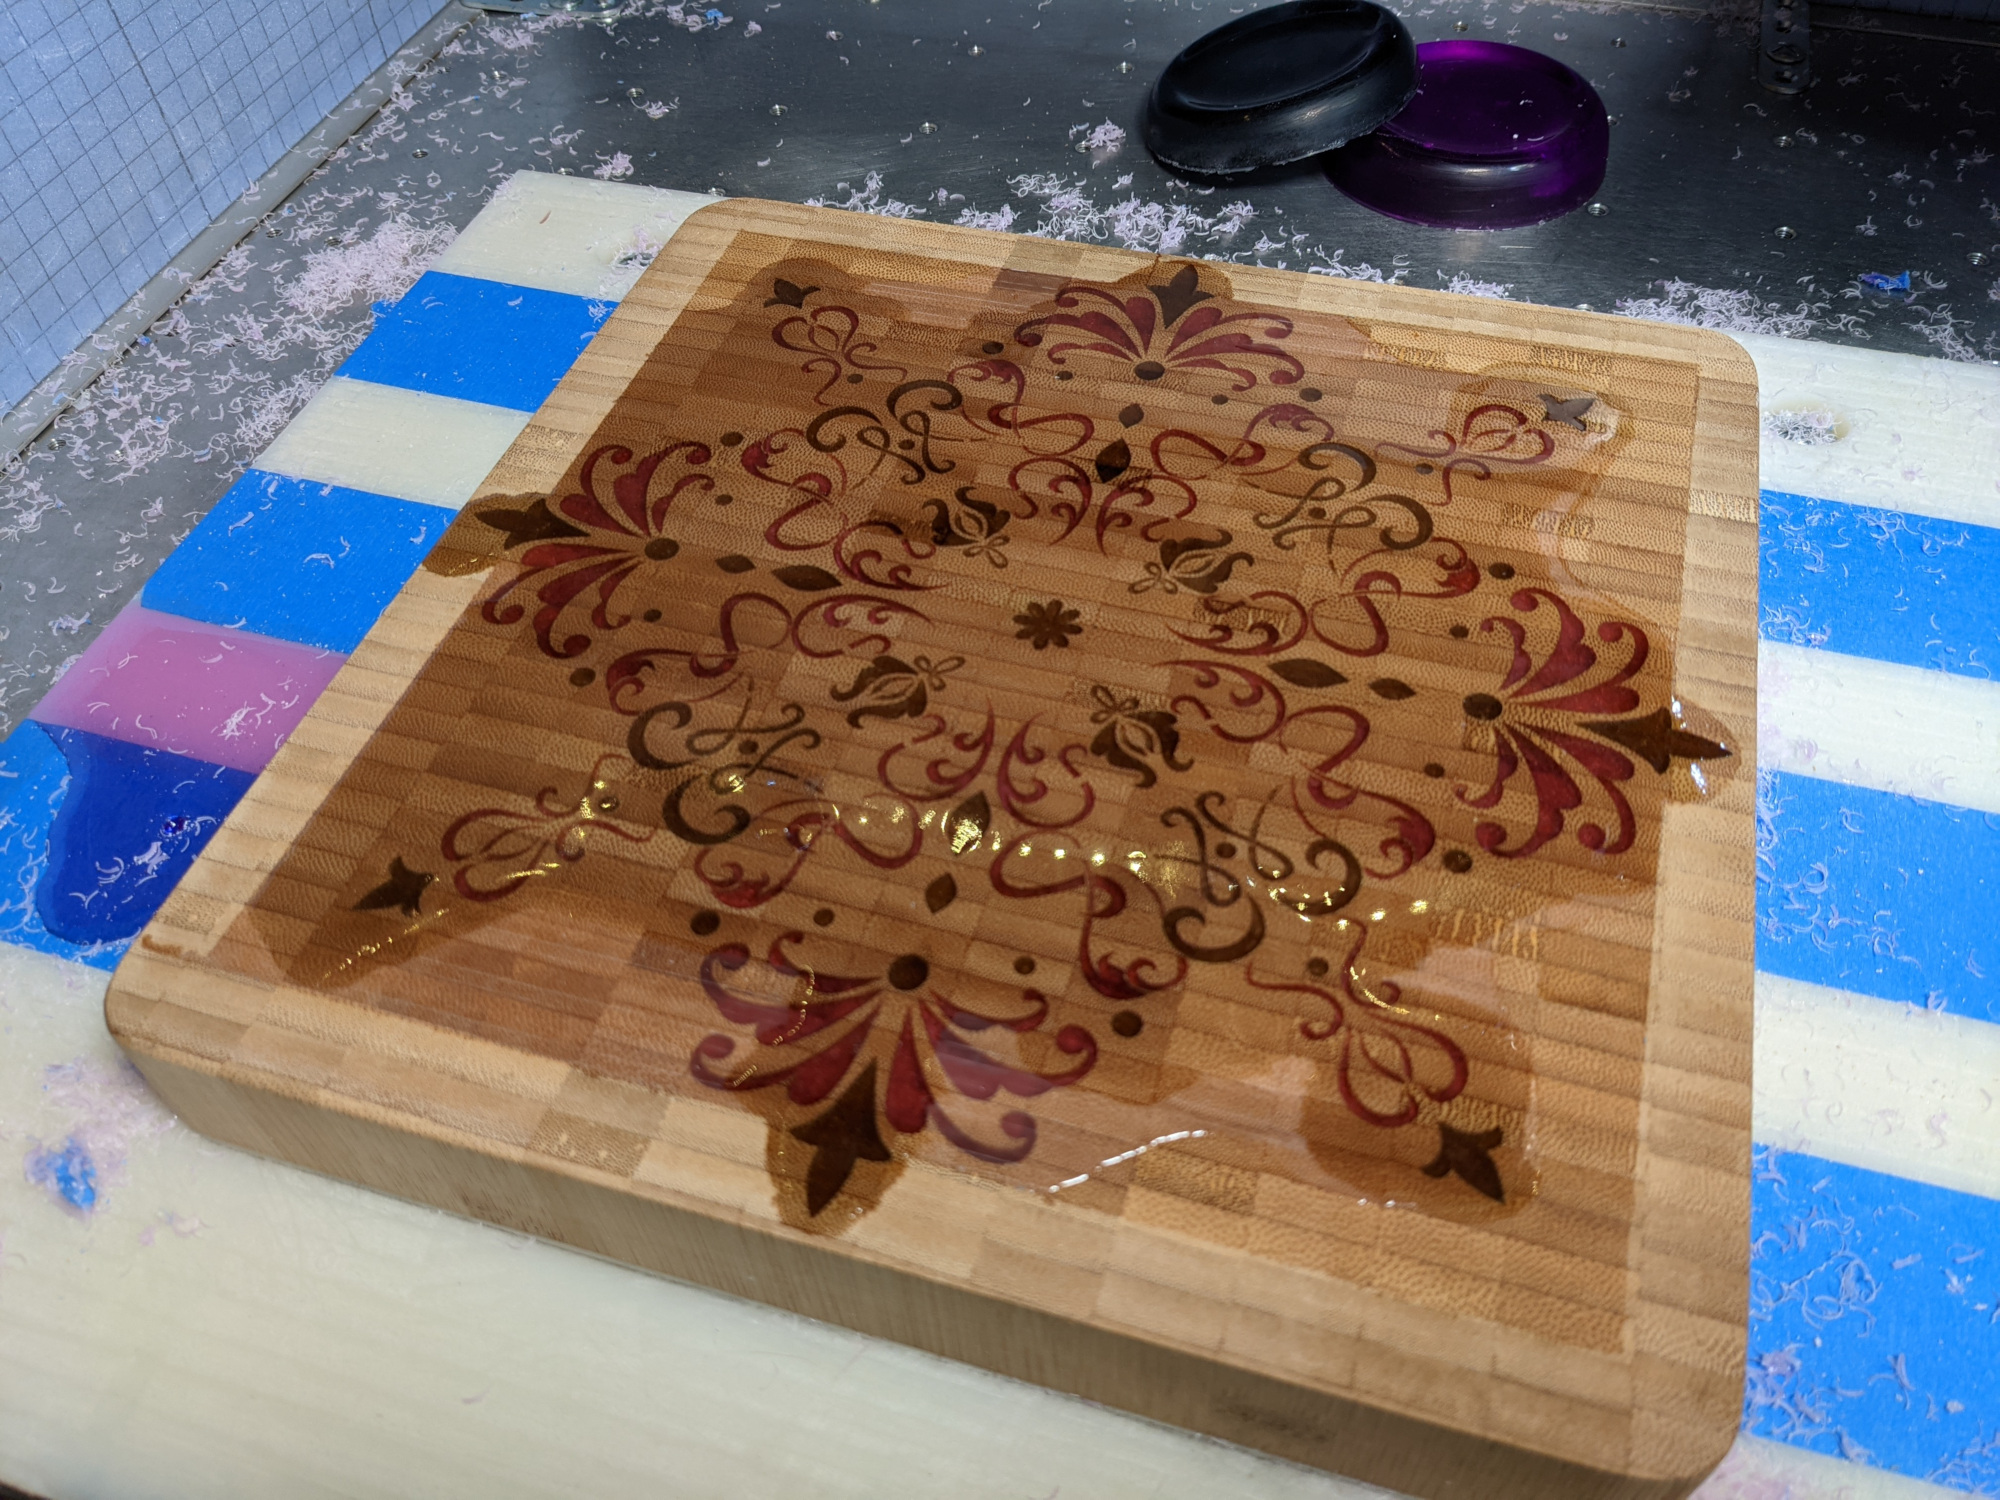
and surfaced that again,

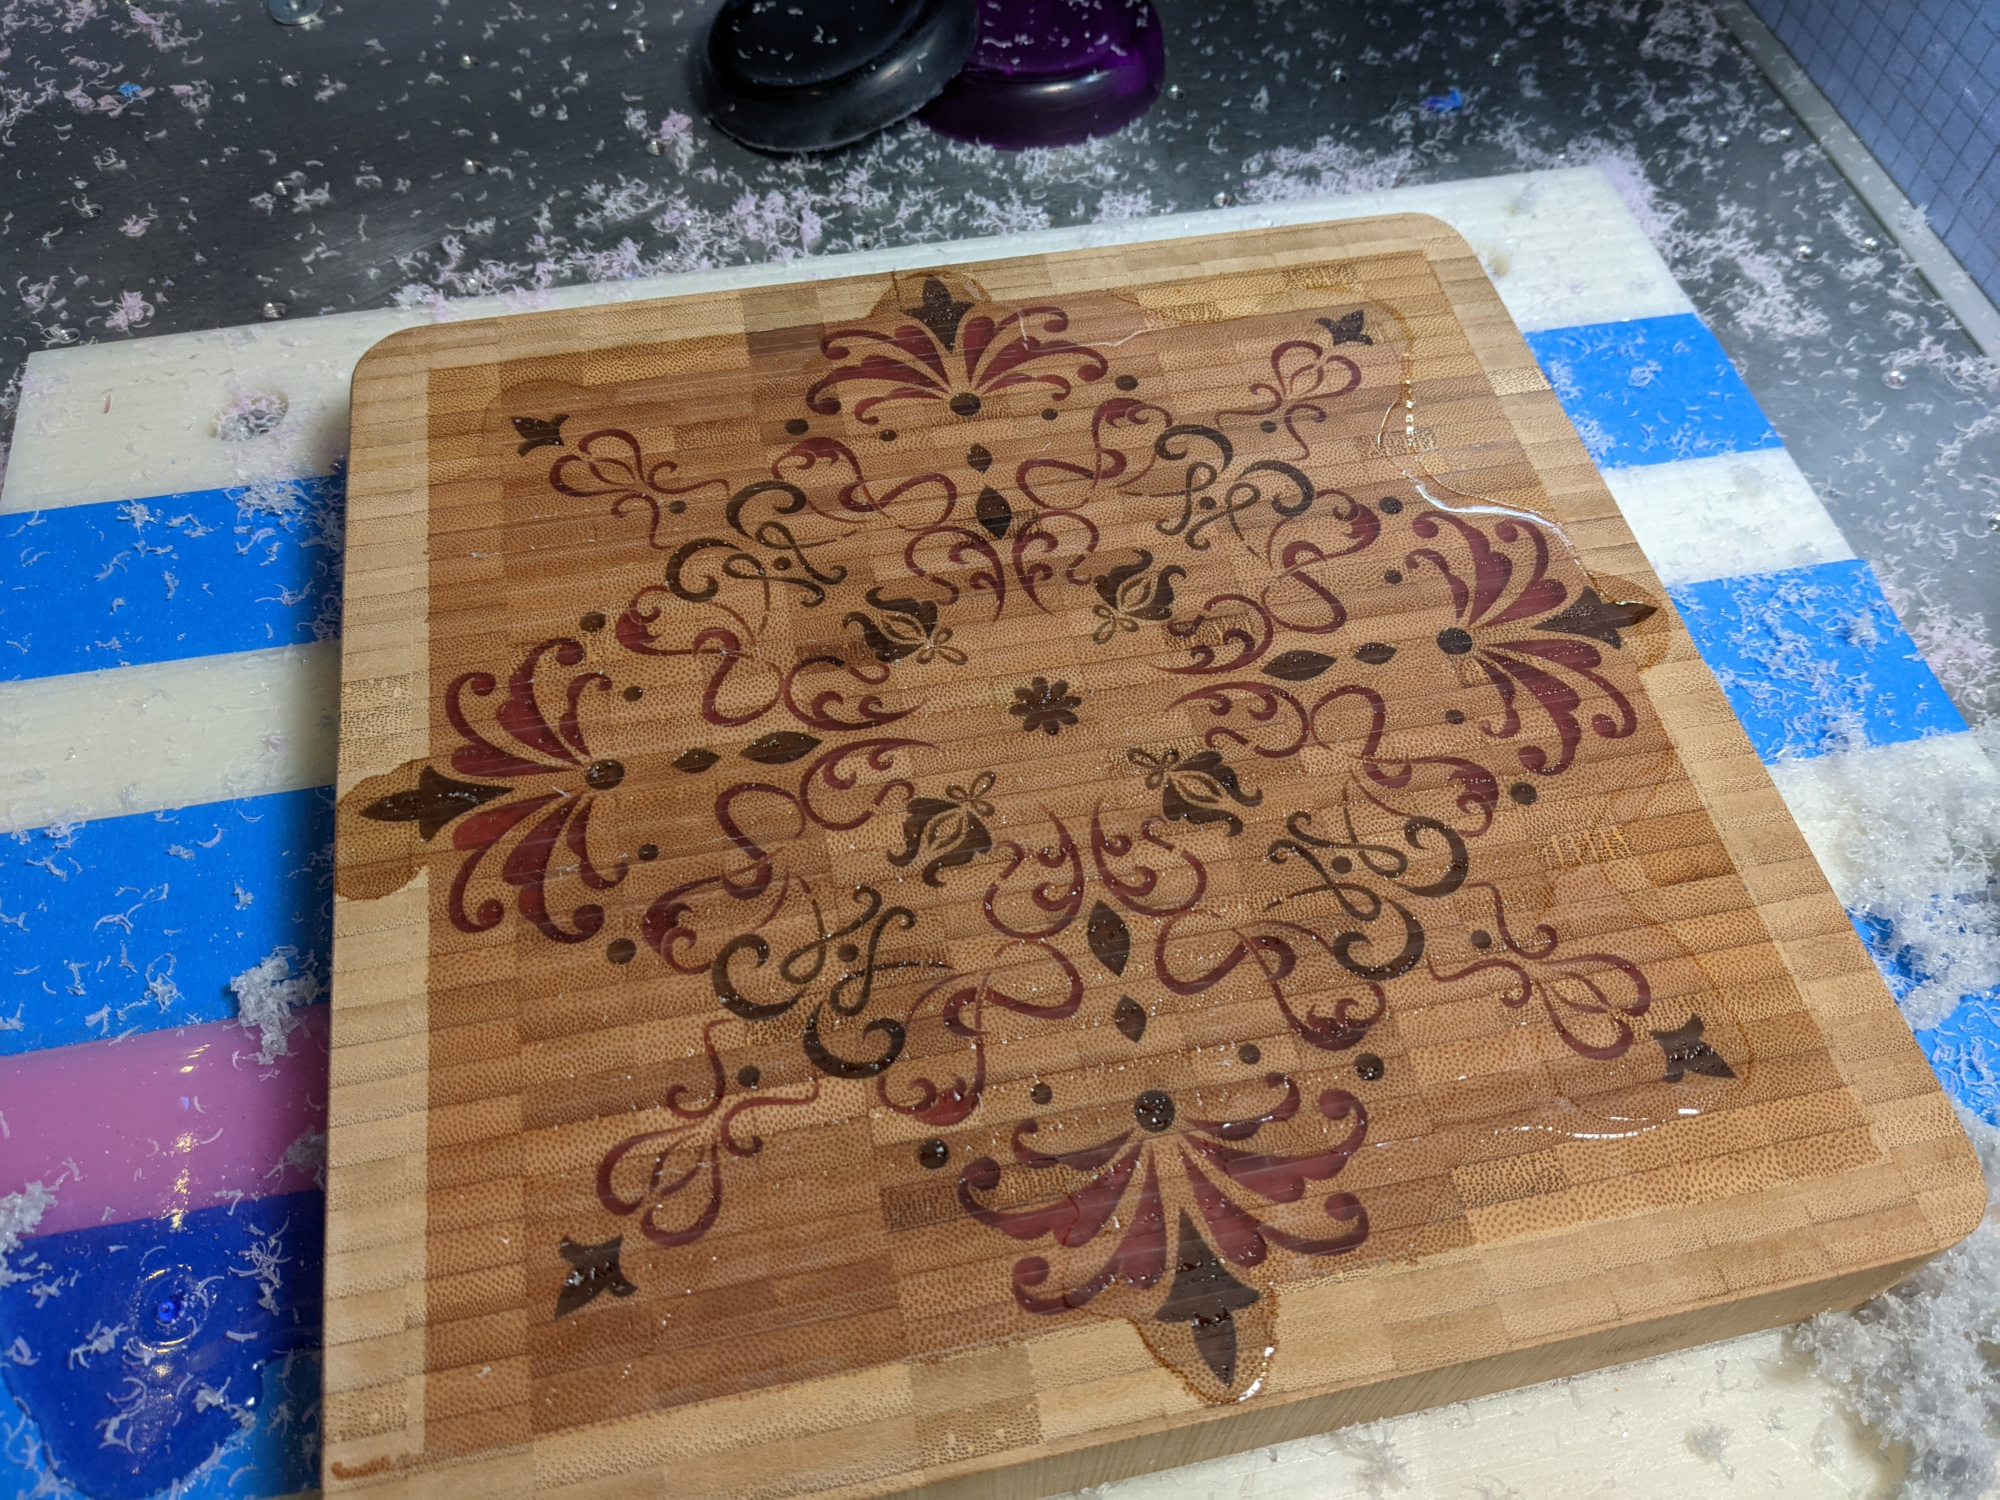
before running v-carve #3:

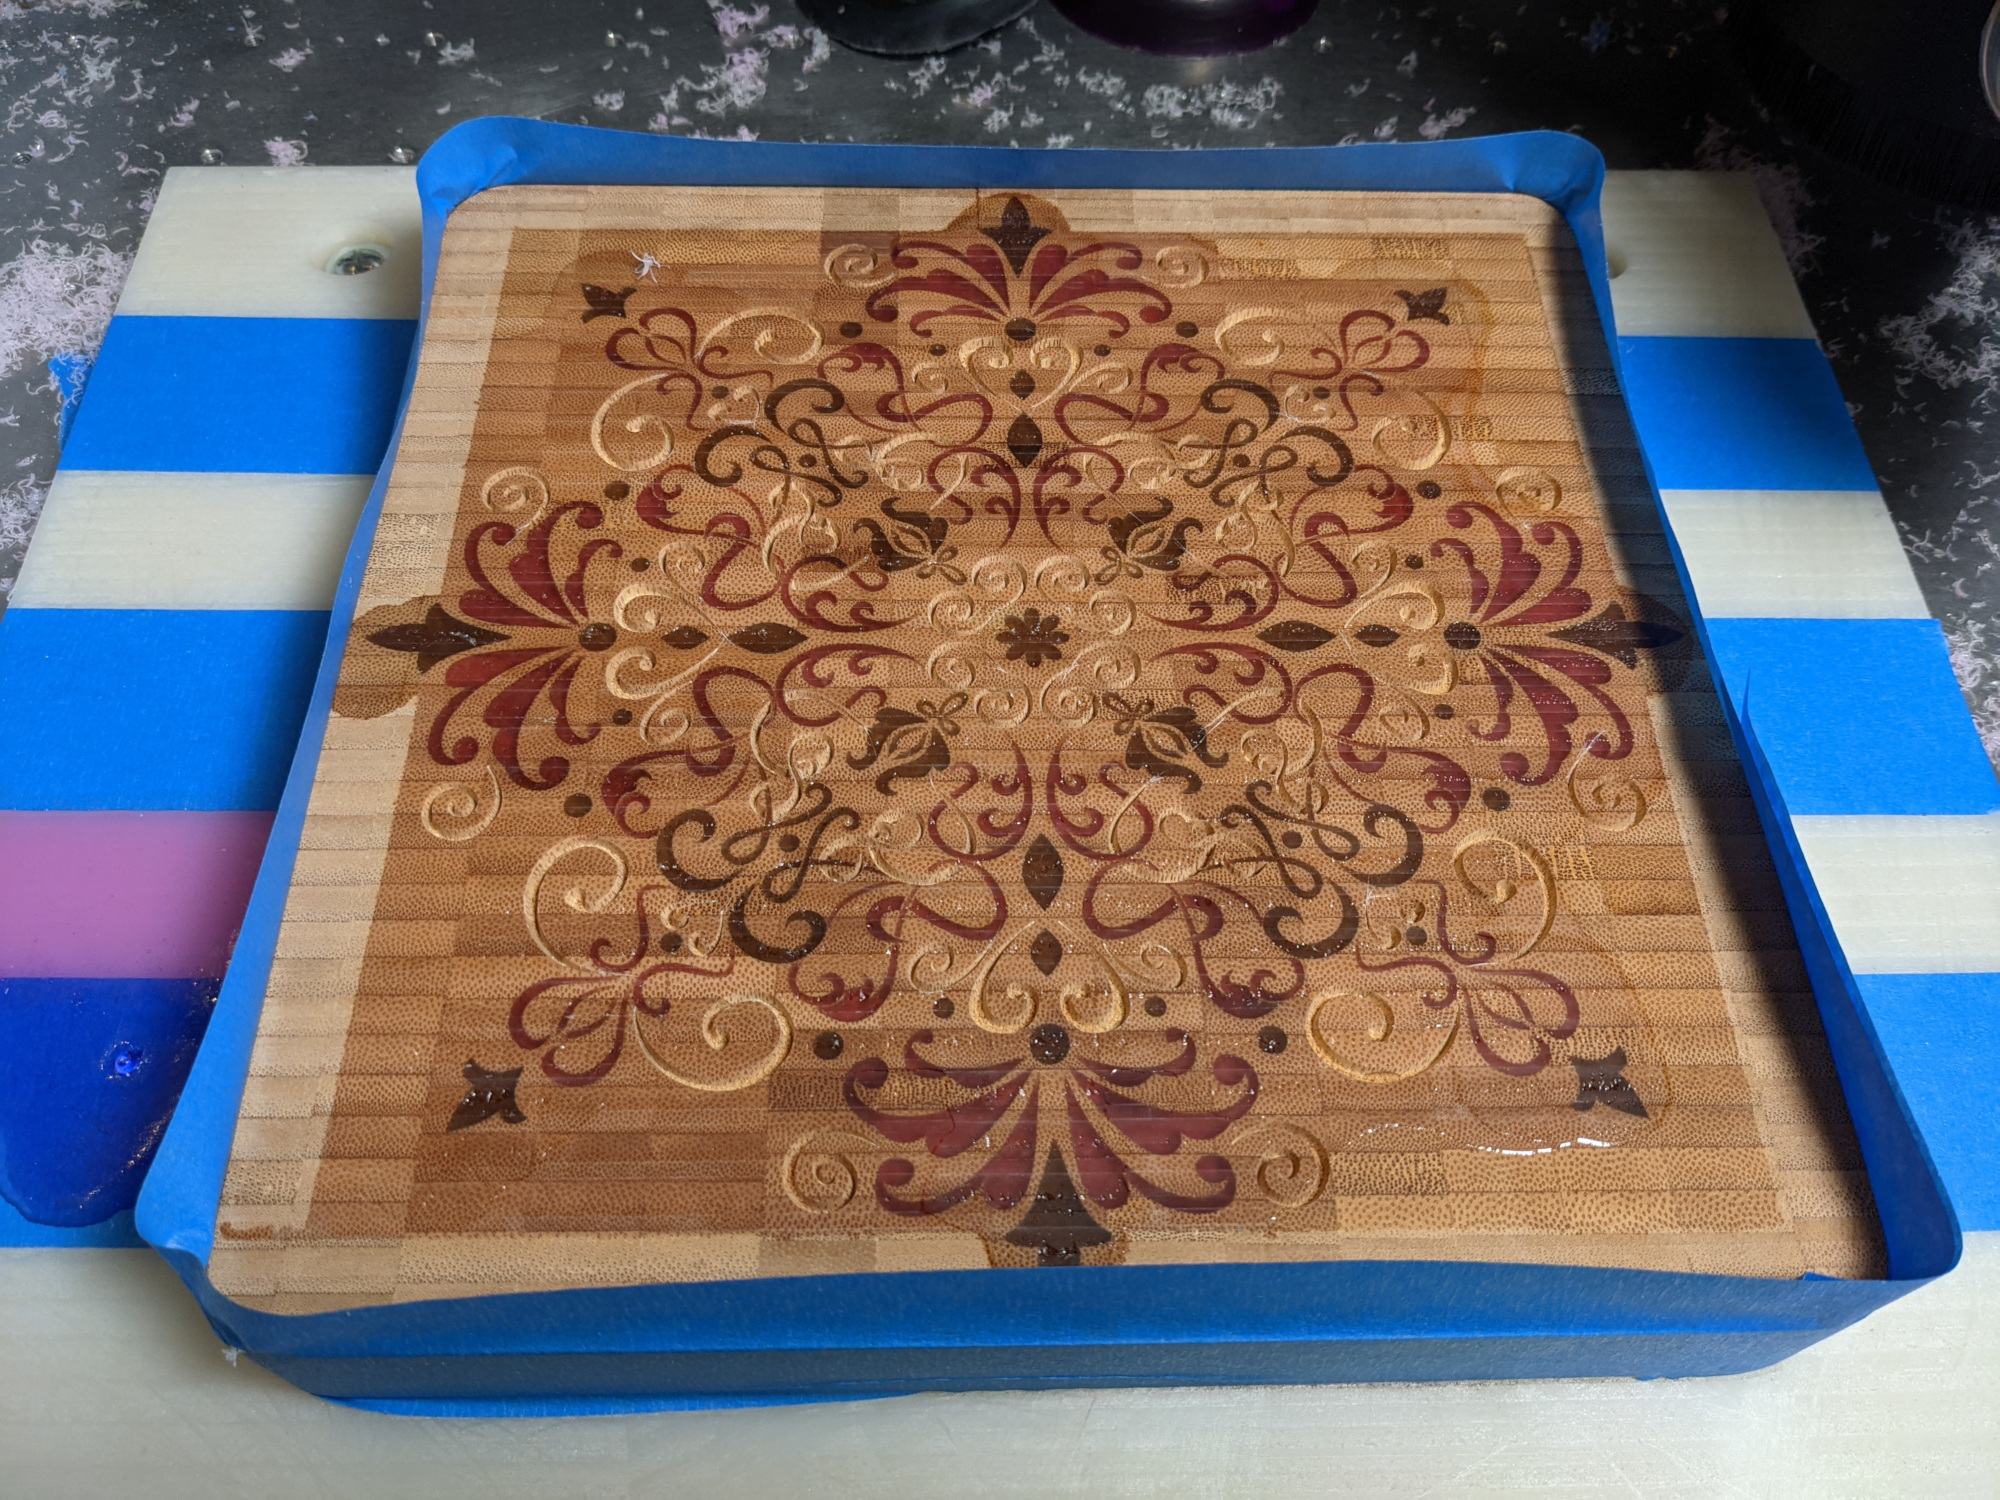
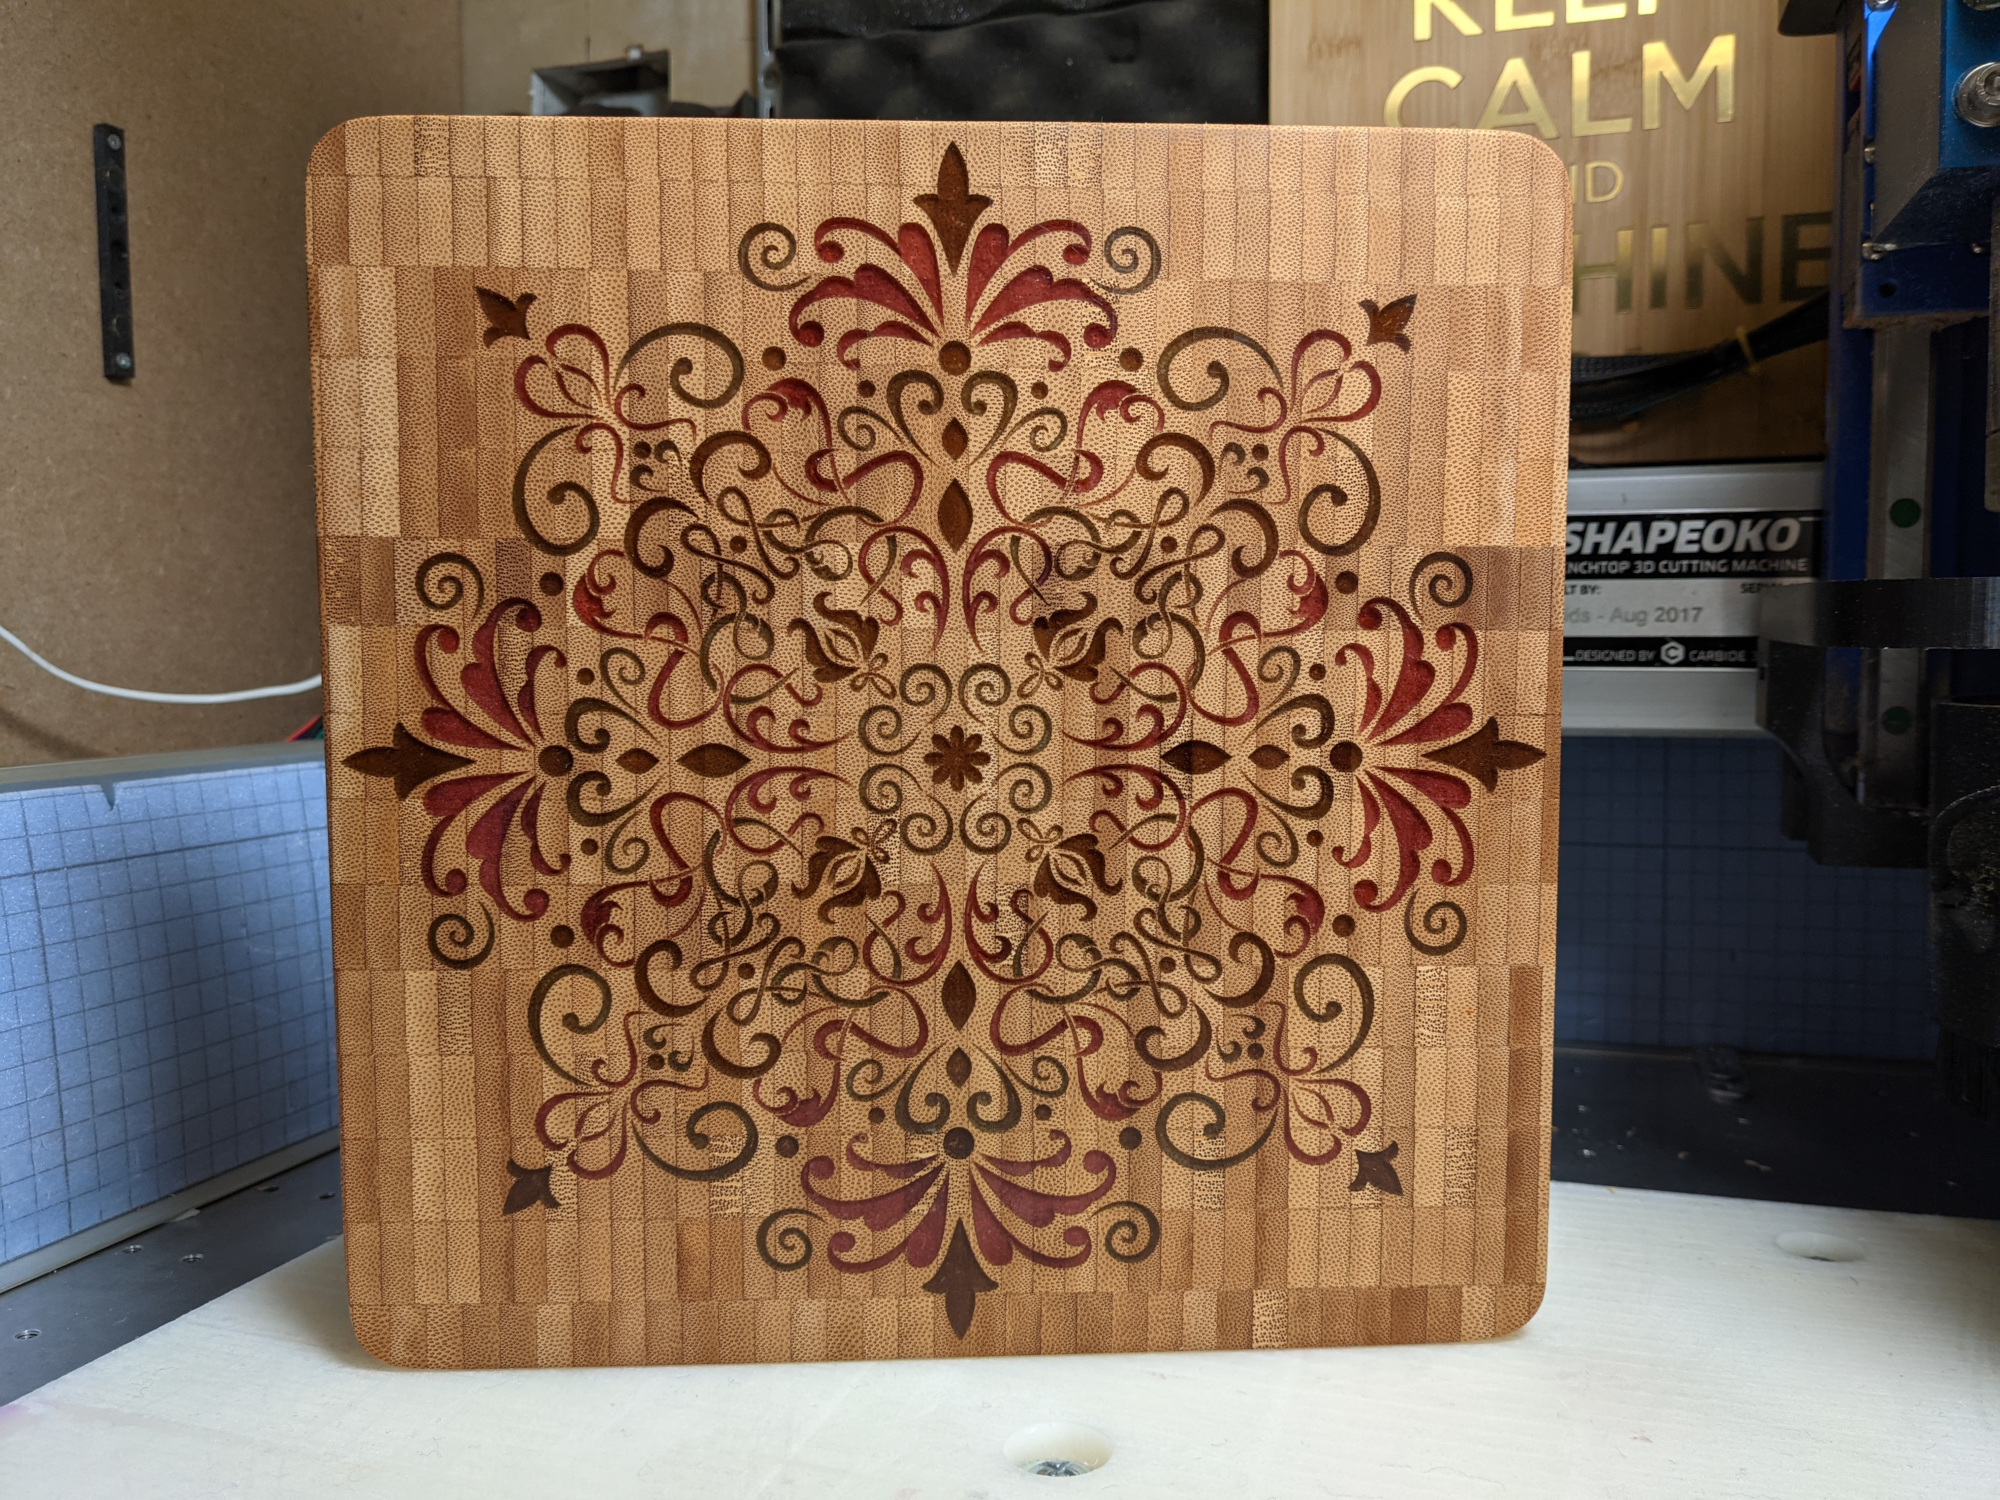
and proceeding with the final pour, which I later surfaced removing epoxy down to bamboo surface level.

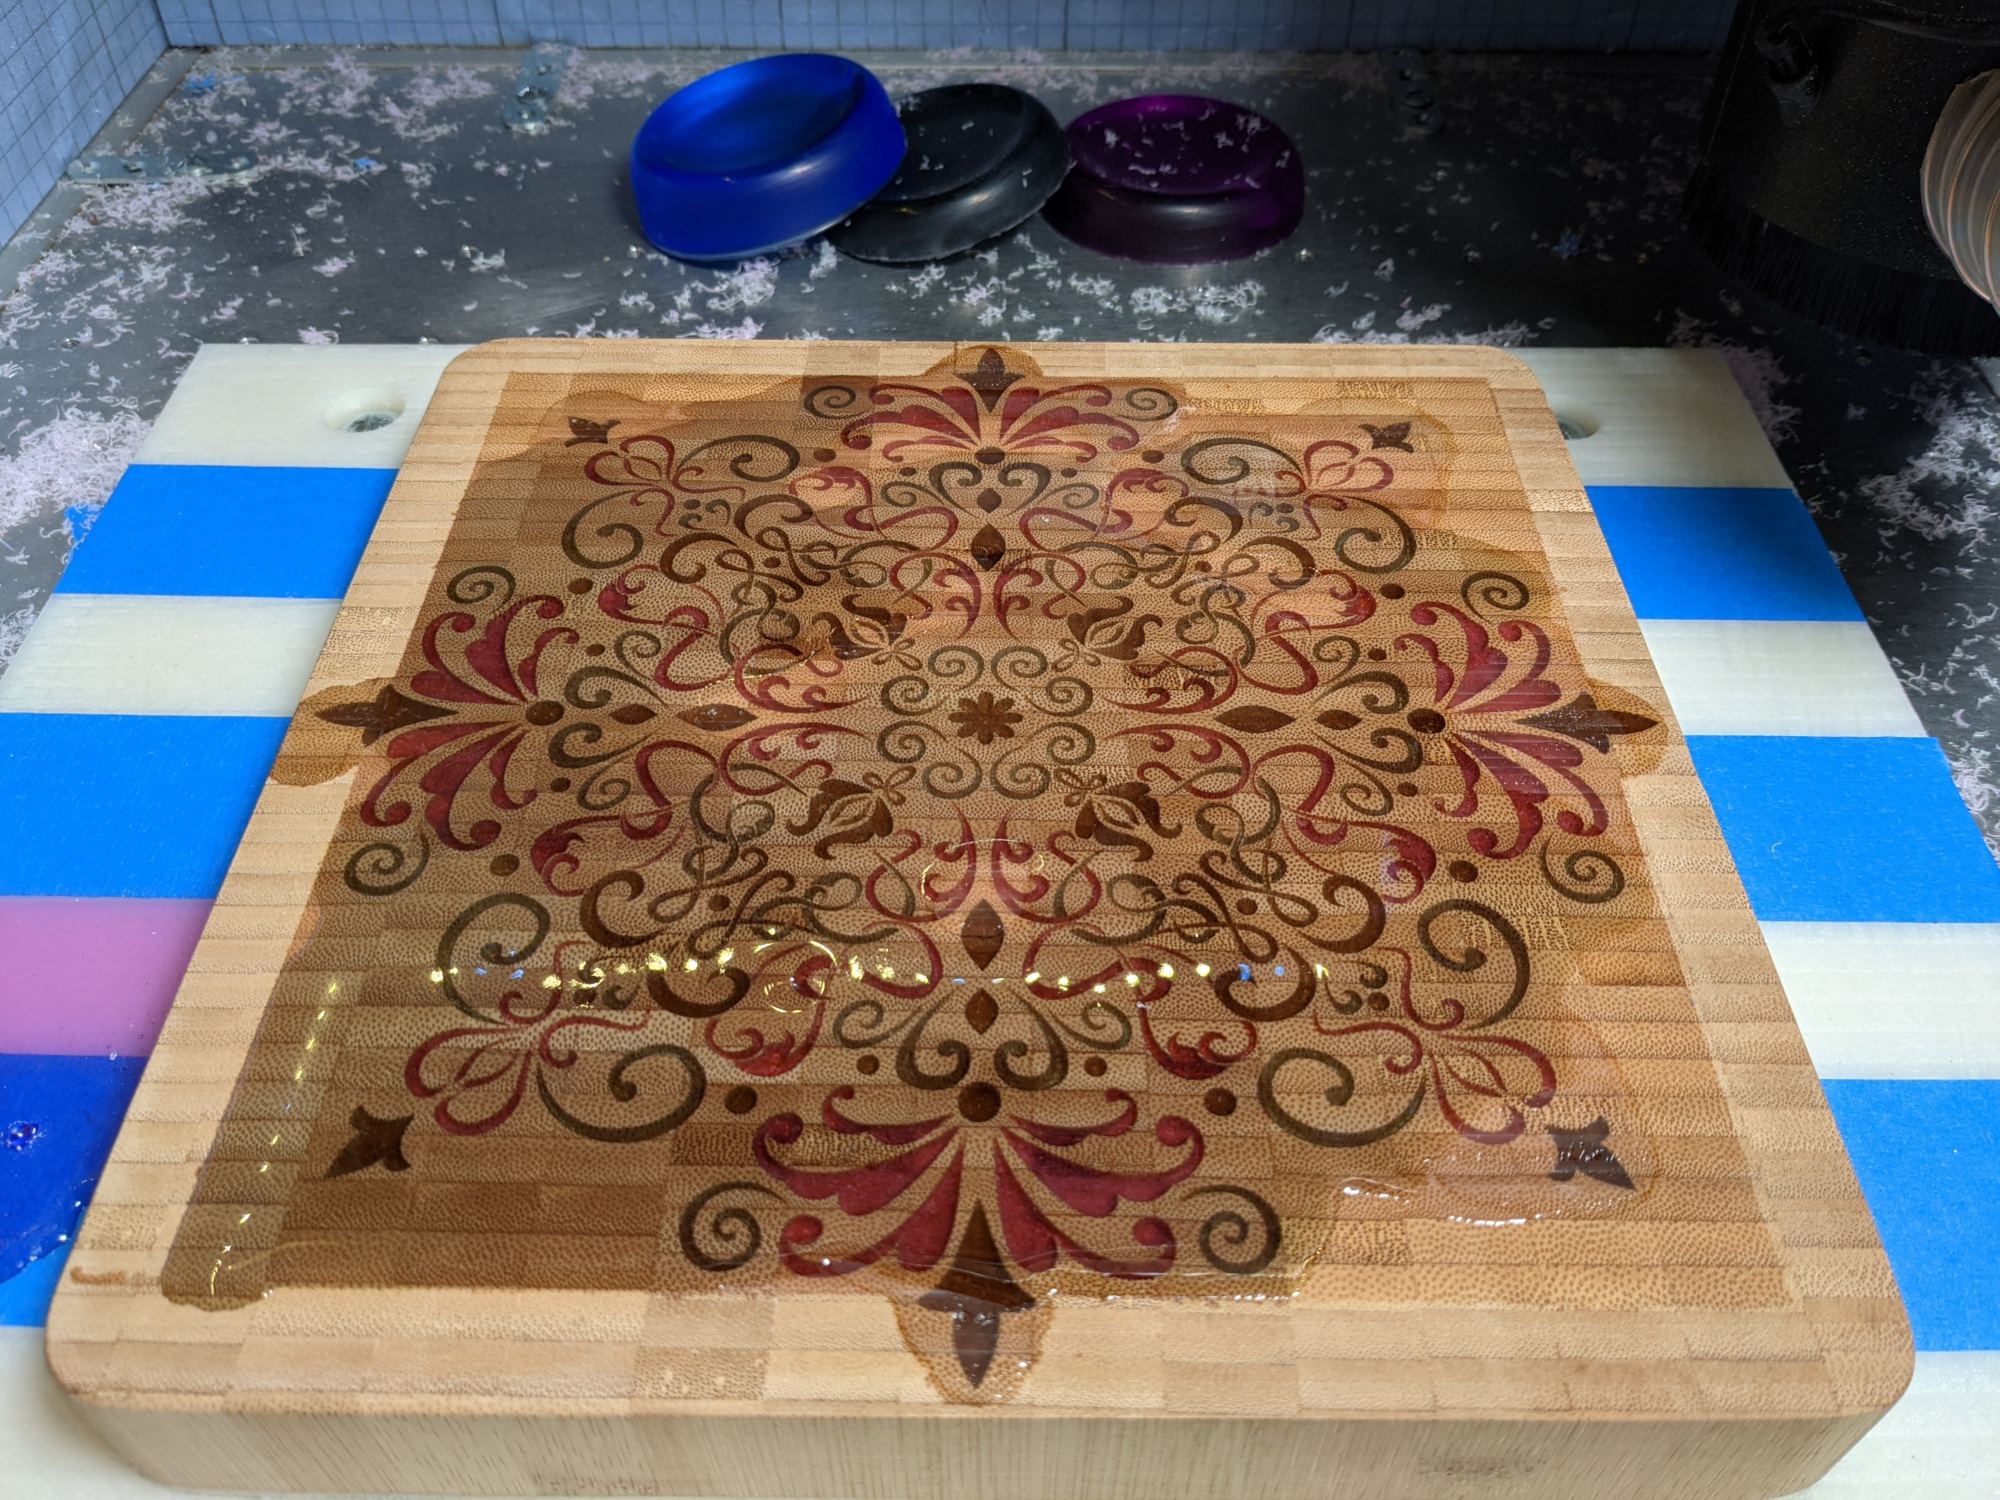
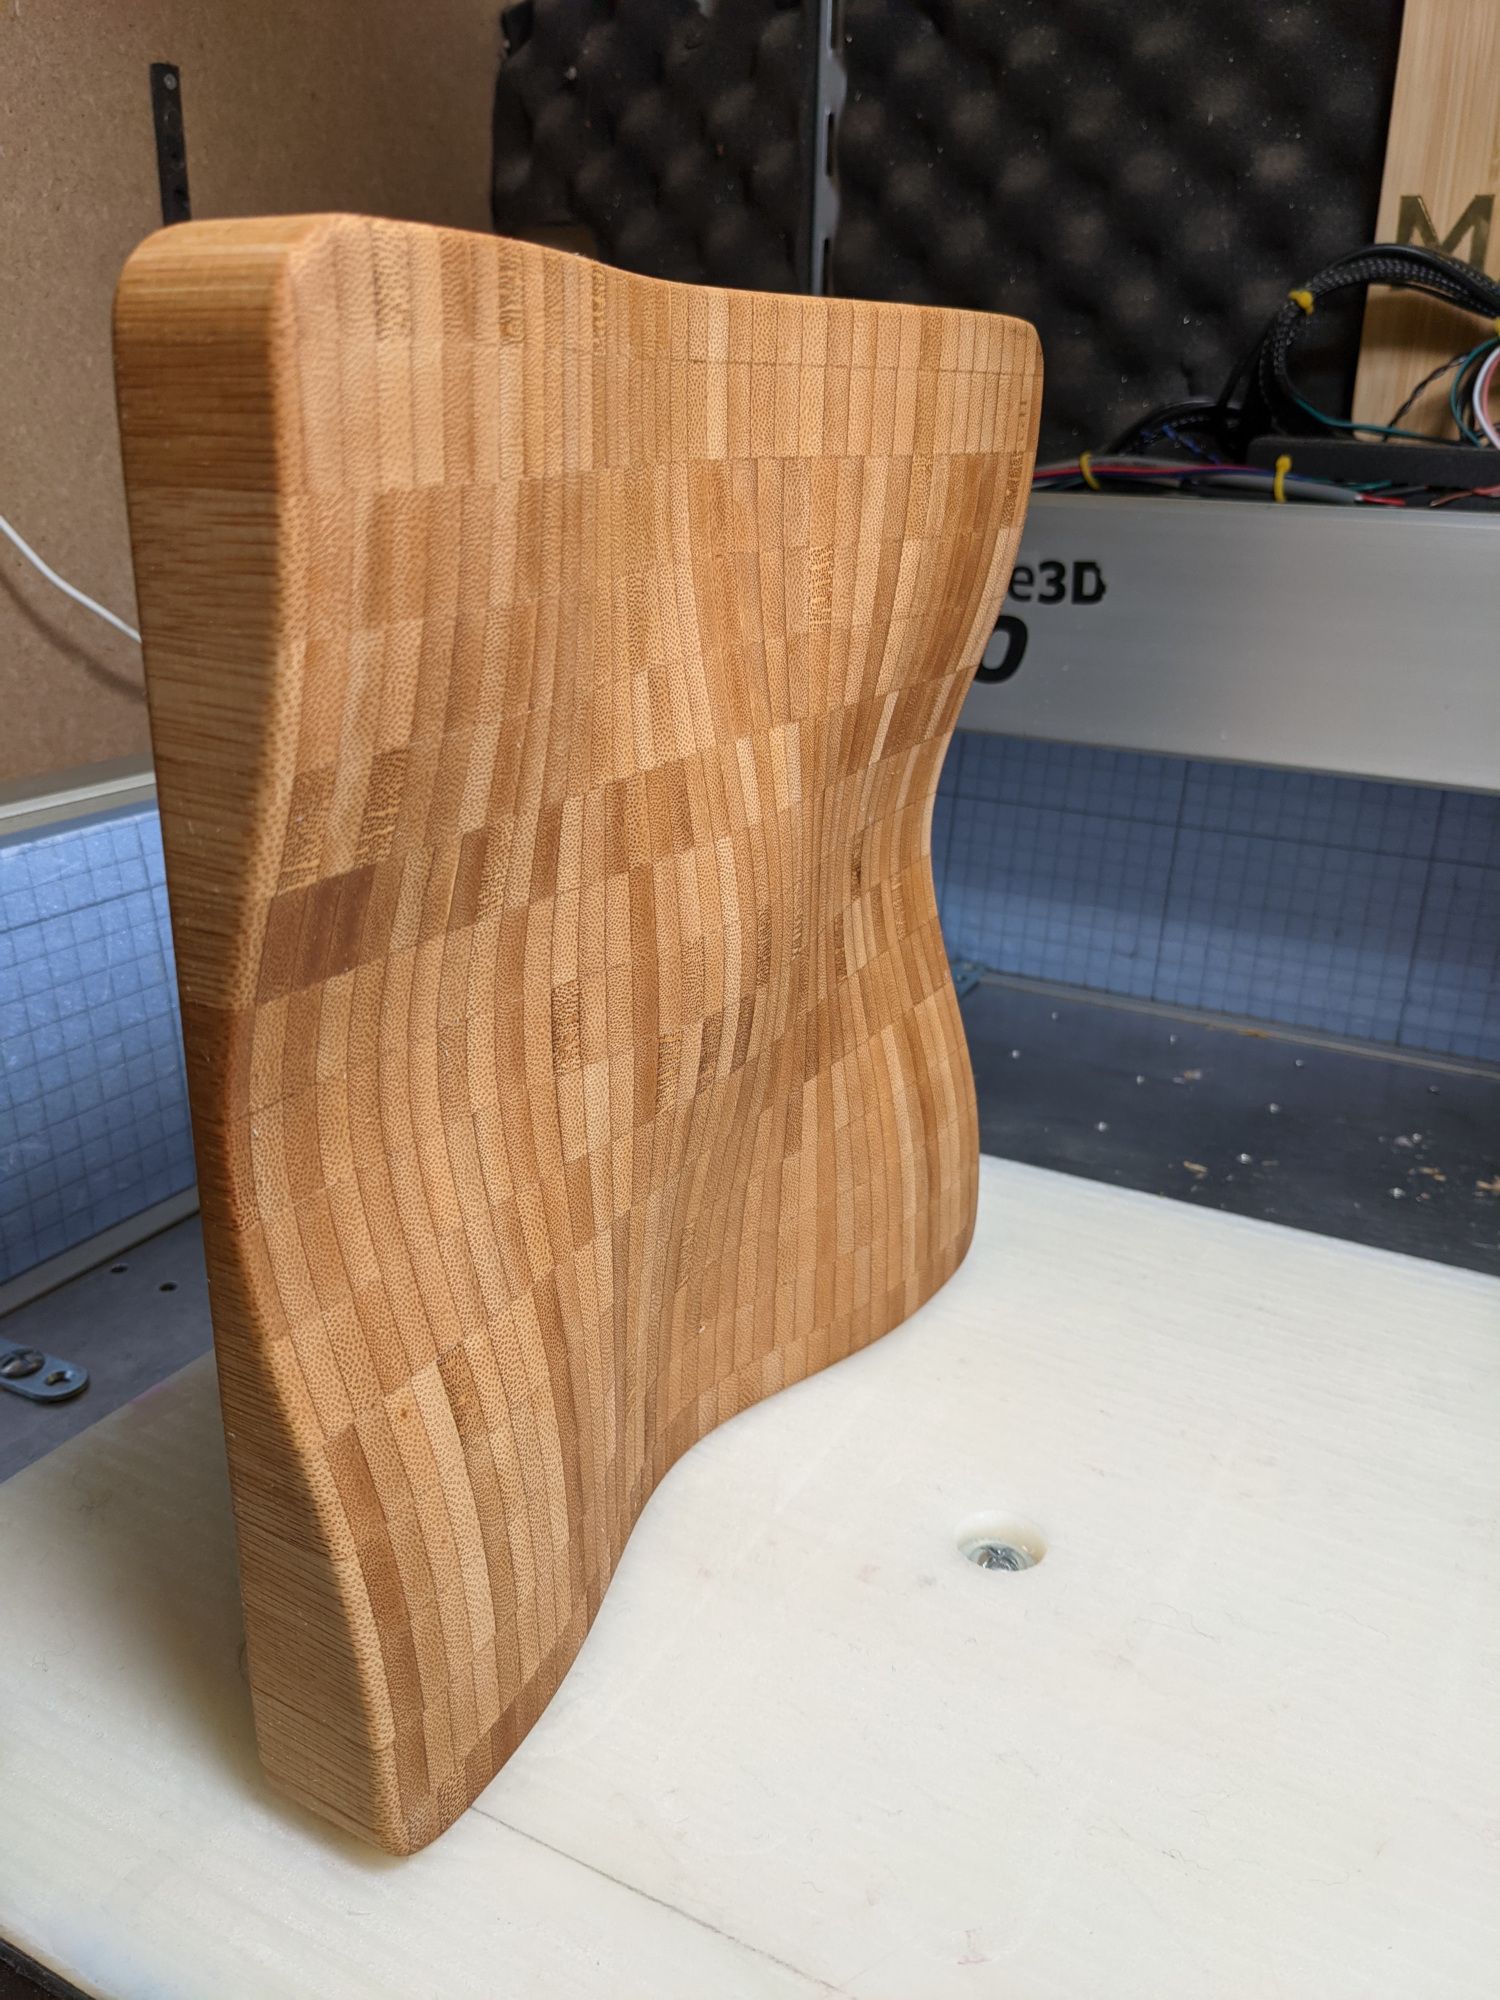
One thing I did not like from my previous trivets using the same blank, is that it’s too HEAVY. I decided to remove some of the material from the bottom.

Fired up Fusion and drew a box a little larger than the trivet dimensions,

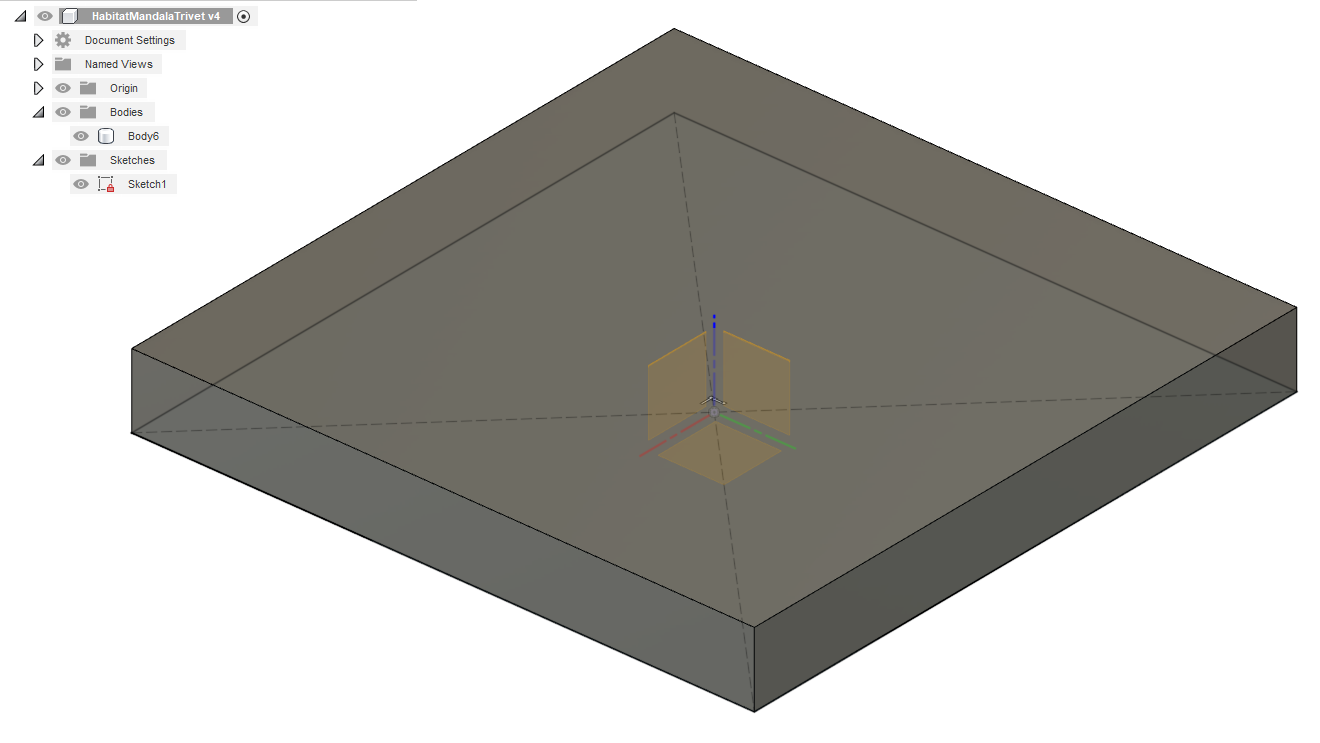
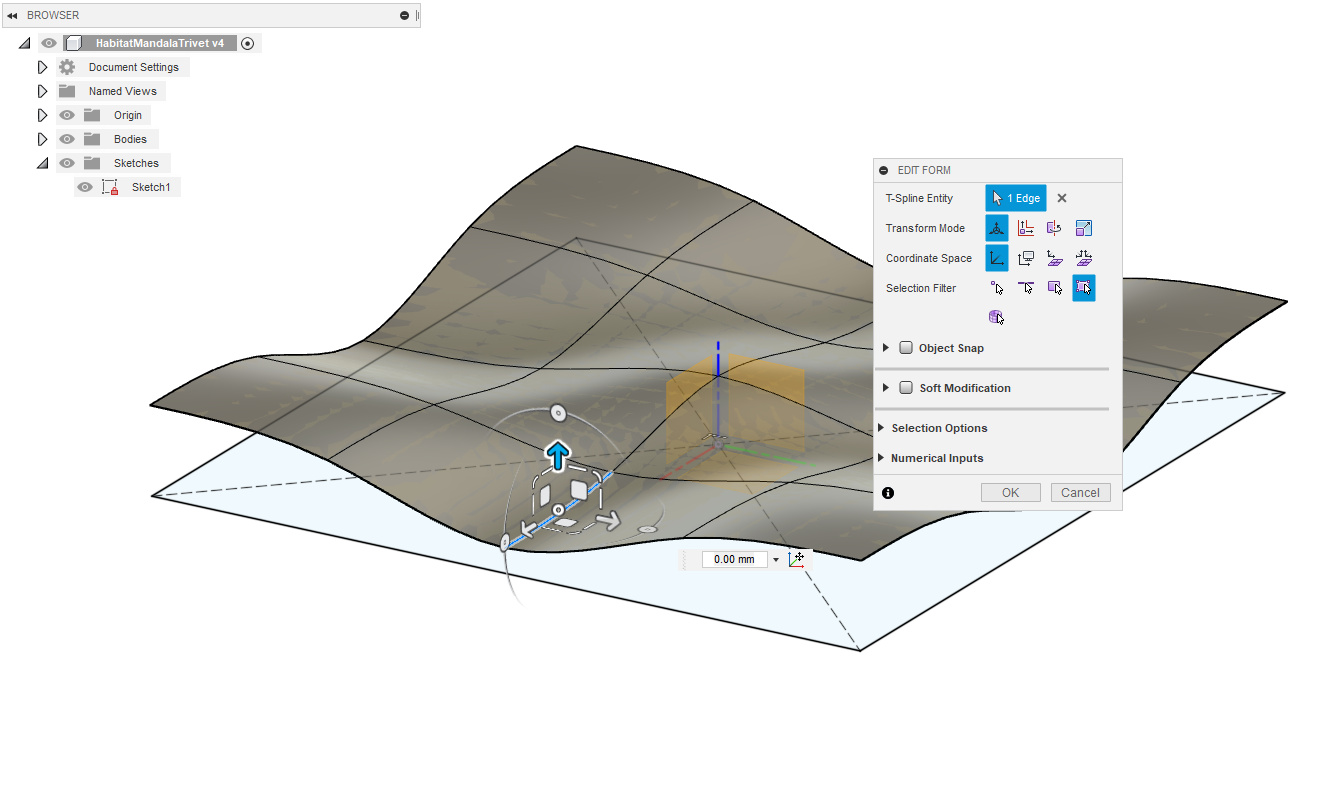
Then created a plane Form, and used the “Edit Form” to push on four of the edges, to create a wavy surface:

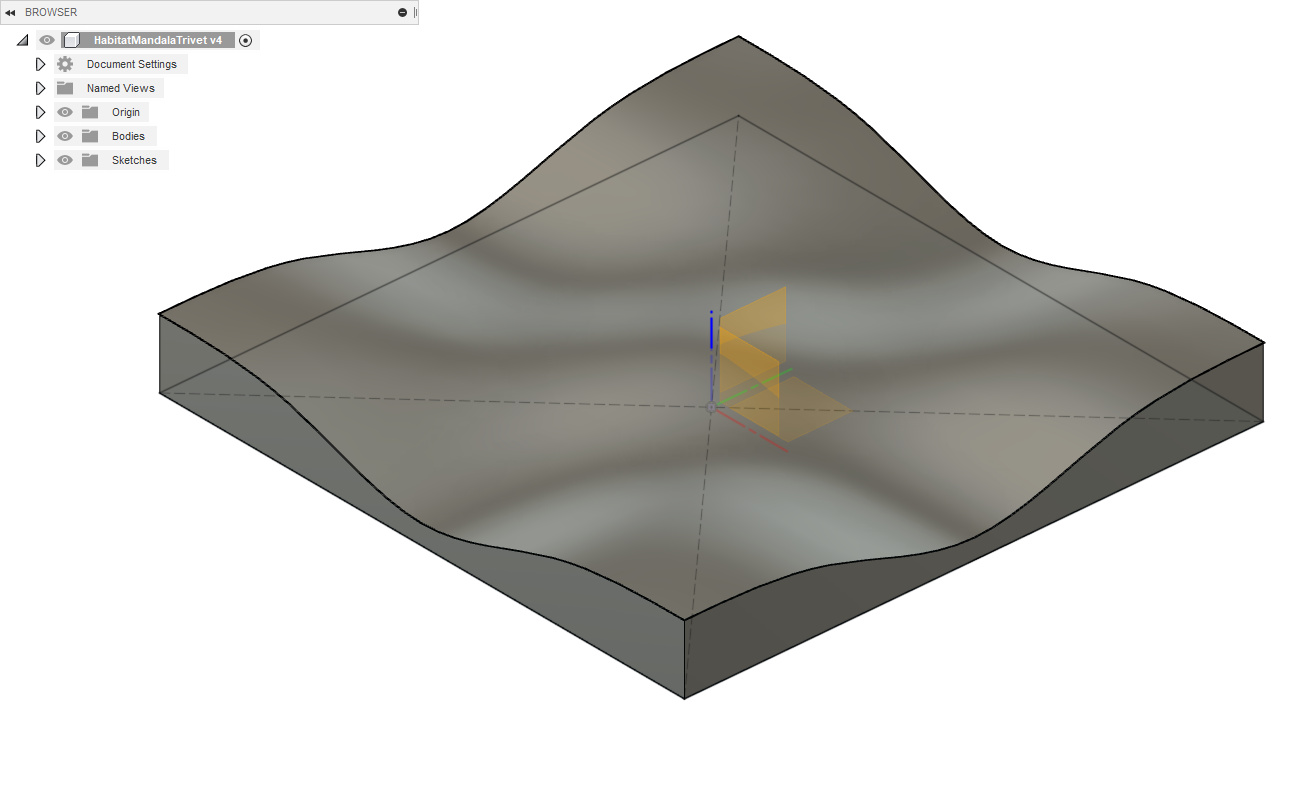
Then used the (awesome!) Boundary Fill feature to intersect the box with the surface,

to get to the final shape:

I created a 3d (adaptive) roughing toolpath for a 6mm square endmill, 24k RPM, 120ipm, 0.8mm optimal load

followed by a morphed spiral finishing toolpath using a 1/4" ballnose endmill (Carbide3D’s #202), 0.5mm stepover

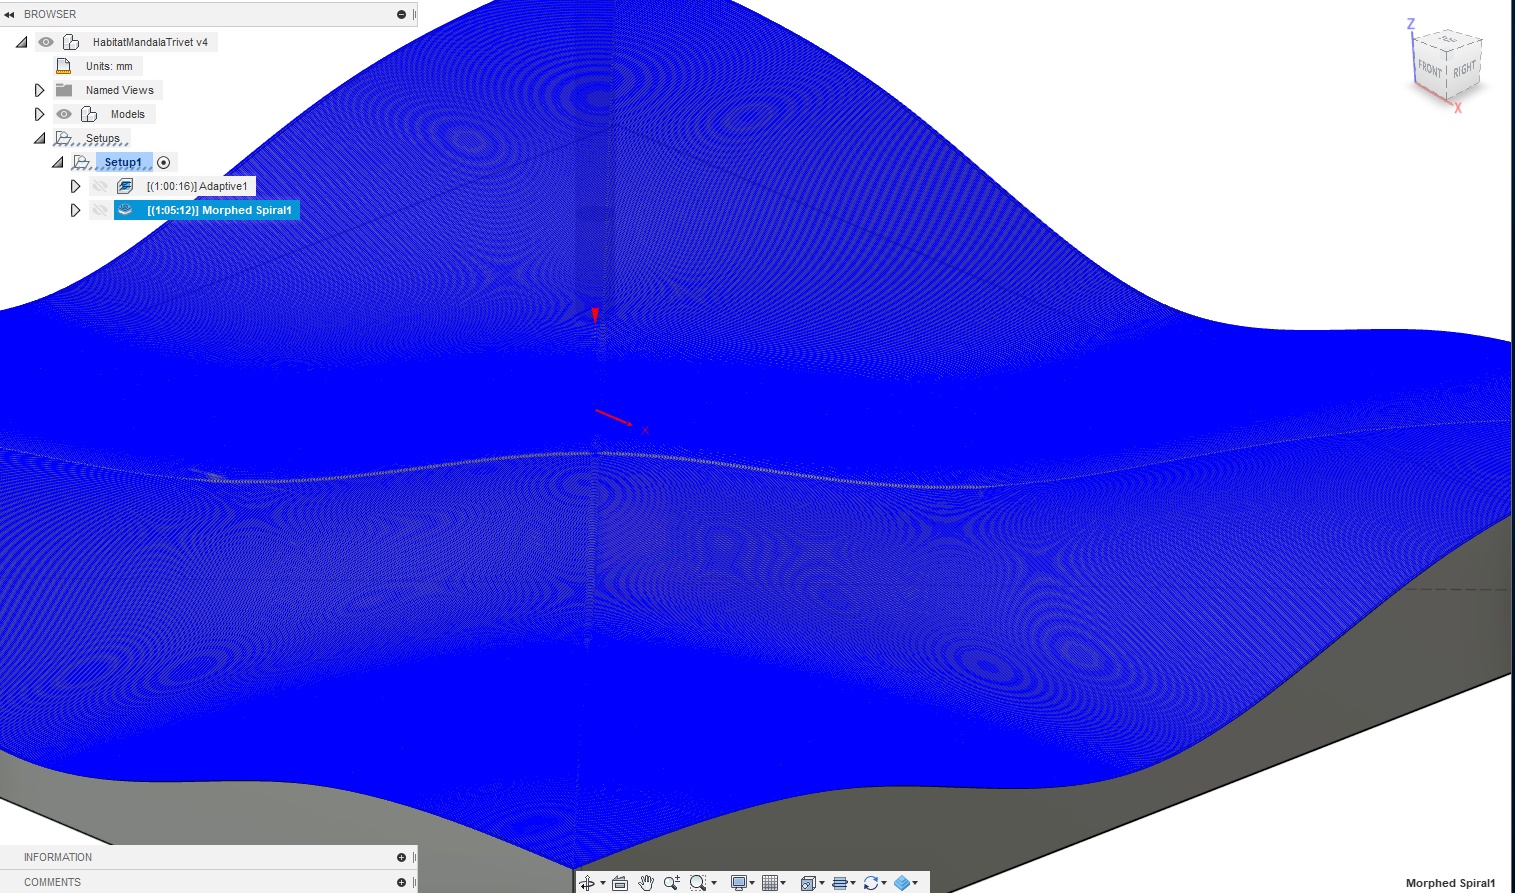
(funky Moiré effects in that rendering!)

Roughing ran fine,

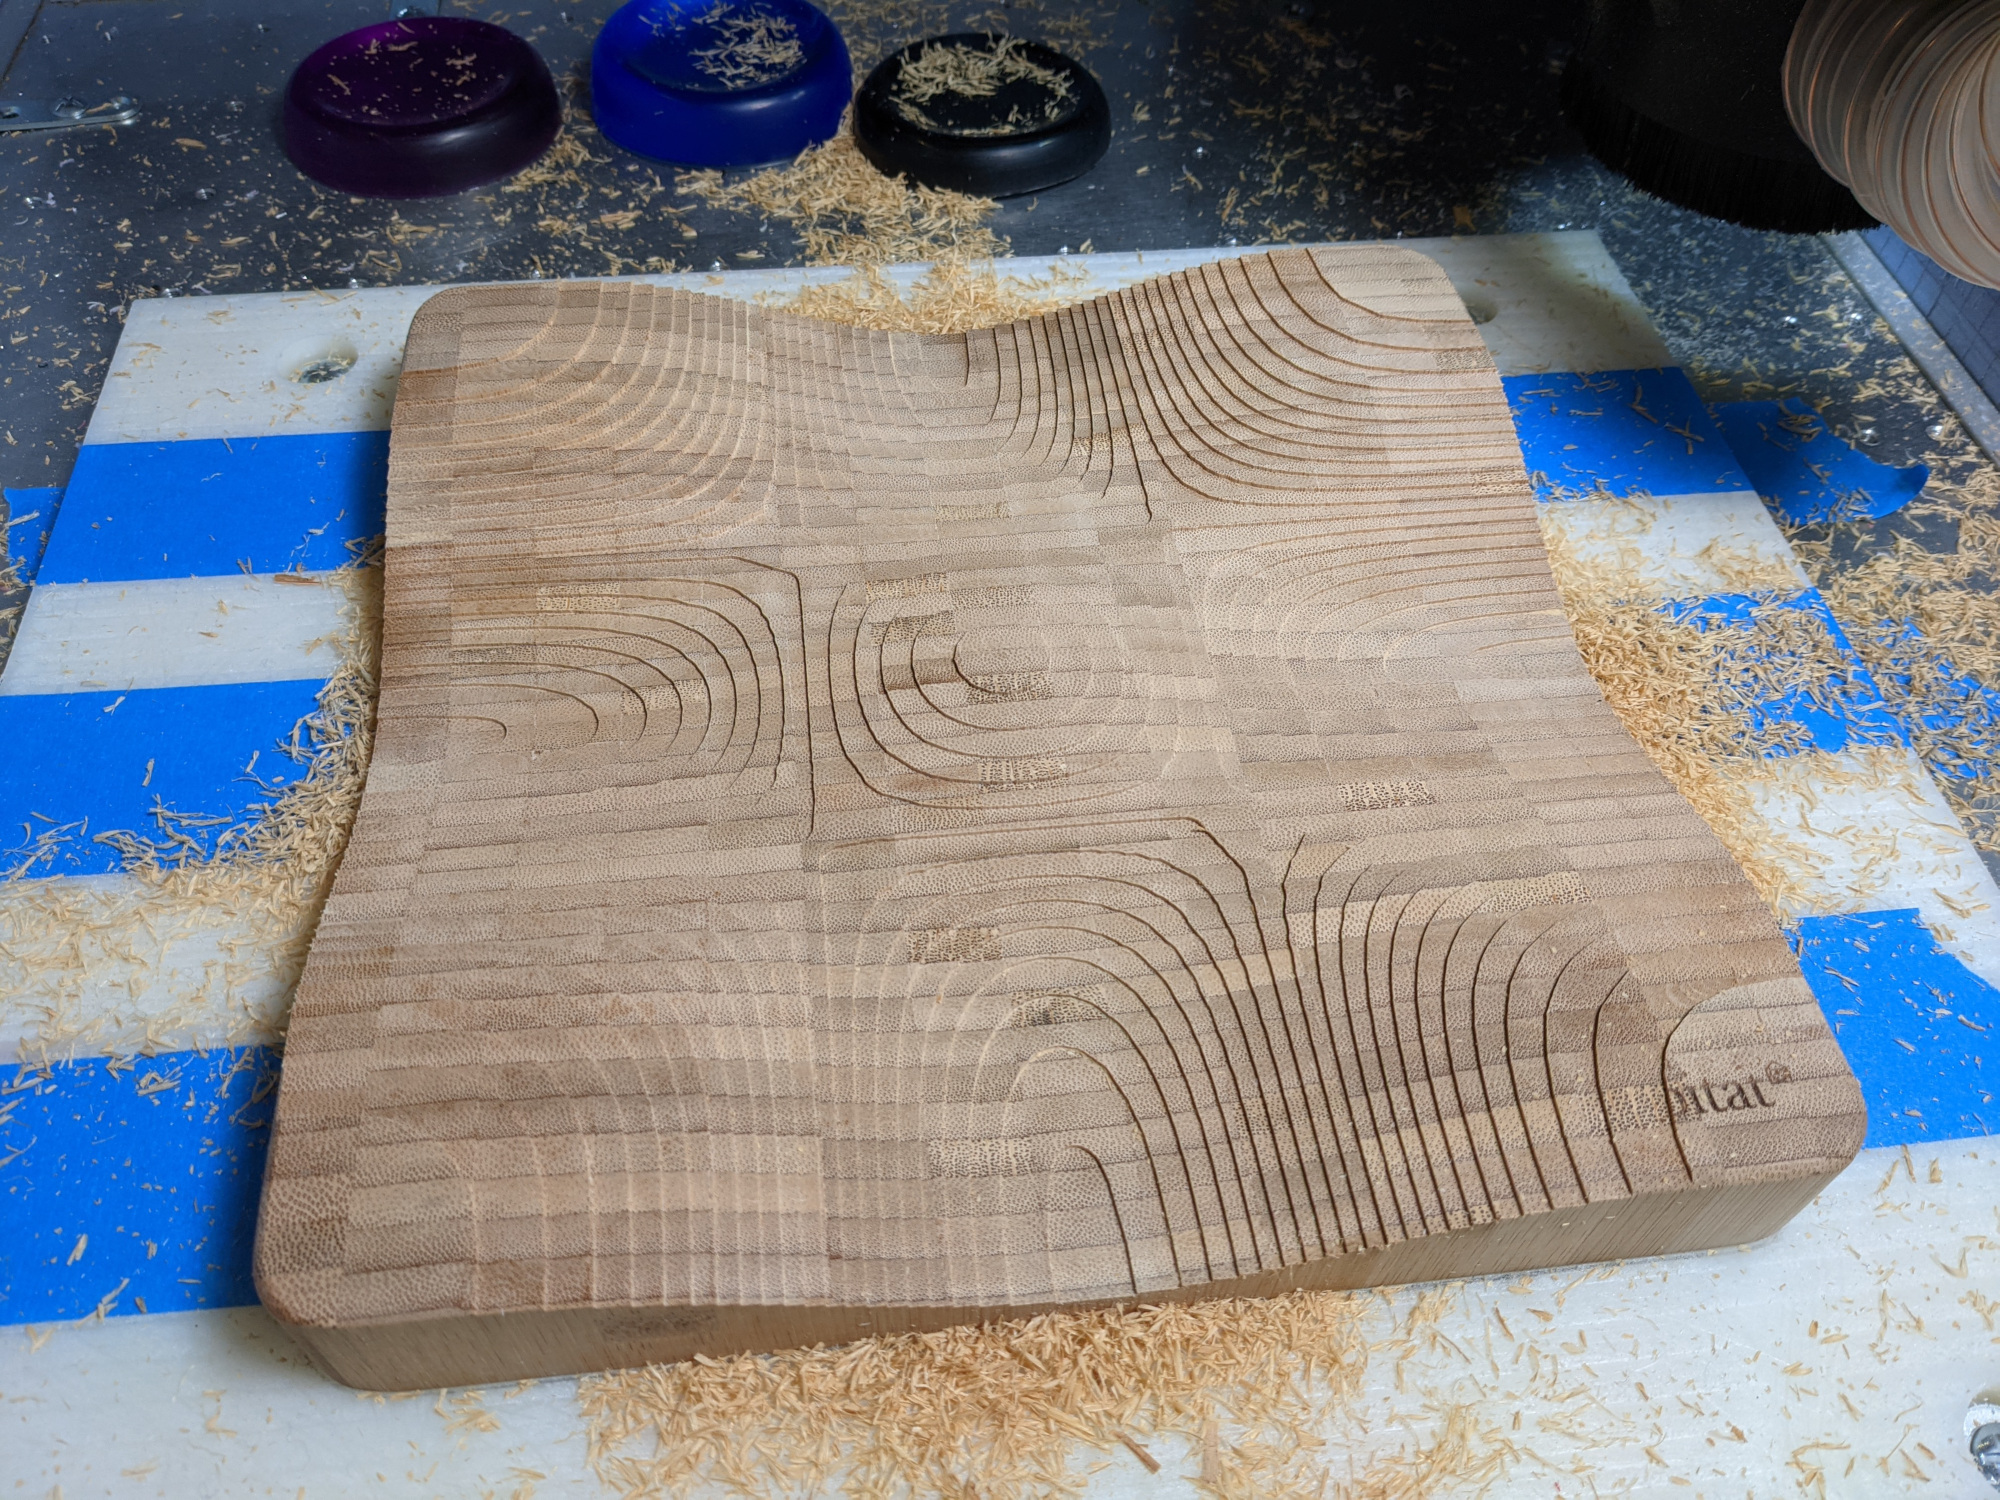
and finishing as well (I could have bumped feedrate significantly)

A little manual sanding brought the surface to a nice smooth finish,

Et voilà:

So, multi-color epoxy inlays are easy and fun, but…this NEEDS to be background project done in parallel with something else, because the multiple curing times add up to almost a week to complete the project.

I can’t even promise this will be my last trivet, I have three more of these blanks looking at me from the back of the garage.

28 Likes

Wow that is incredible very nice job! I have to learn and utilize this technique.

2 Likes

Awesome, both you and @fenrus are real inspirations!

2 Likes

Nice!

Yes very important to let the epoxy cure that it’s hard enough; a 2nd design I did I got that also sightly wrong (the temperature had dropped so curing went slower) and not only do you get strings, the cut is not nearly as clean as well in small details
(this is for where the 2nd color cuts into the first epoxy; in your case you managed to keep them disjoint so all you get is long strings…)

1 Like

Awesome work as usual Julien!! Really cool - looks simple enough for even this guy to do, so I’m definitely going to keep this in mind!

1 Like

Now to play devils advocate…

You should use aluminum chips with epoxy to fill deep patterns with a dark background. 6mm end mill, 5mm WOC, 1mm DOC, 24k 1200-1800 feed makes great little partially curled chips that catch the light beautifully. Maybe an aluminum inlay with a chip border. You can also mix powdered brass or copper that goes great with epoxy inlays.

1 Like

This did cross my mind. I can’t remember which thread it was, but we did discuss that option before.
I wonder how much the cutter would suffer from cutting through a mix of plastics and metal chips, have you tried it ?

I have a little girl (6yo). There are plenty of varieties of glitter that are designed to capture light, and the endmills don’t care about them. I’ll see if I can find the “coaster” I made her. Unicorn filled with translucent pink epoxy with little transparent glitter squares (about 5x5mm) that give a holographic effect.
(I never knew that my loud, chip making robot would make such things! :man_shrugging:)

3 Likes

Hey @Julien (or anyone else that has an opinion),
What’s the technique for getting the gloss back on the epoxy after you machine and then sand it. I get that I could put a thin coat of clear on top, but then it’s on the wood again.
Thoughts?

epoxy works (but runs the risk of hitting the wood indeed)

I’ve had good luck with sending all the way to 3000 grit, and then either using poly or … wax.

I am wondering and planning to test using my heatgun to see if I can “melt” the last bit into smoothness

2 Likes

Same here, I don’t want to go with clear epoxy coating so I just sand up to 3000 grit (wet sanding from 1000 grit up)

1 Like

So I wet sand up to 3500, and it is as smooth as glass, but it doesn’t have that “wet”, glossy look. When I’ve used an oil on that, the it’ll look a little better but definitely won’t get glossy.
Here’s a couple of test pieces.
No top coat, sanded to 3500:

Cured epoxy still needs to machined:

I’d like the epoxy to retain the inlay look/feel, but get that ultra gloss look you can get when you topcoat with epoxy. Possible?
I’ll try the melting today.

2 Likes

Heat gun did not work. Released some fumes, but never “melted” or even softened. I was hoping for an effect like that shrink window cling plastic, but nothing.
I may just try a very thin coat of clear. That would completely change the look if one wanted that separate wood/epoxy look though.

2 Likes

I’m curious to see if someone will come up with a trick to achieve that.
Here’s a crazy convoluted idea

  • pour an epoxy disc, larger than required so that the center area is flat with uniform thickness. Still glossy at this point.
  • do a profile cut to final “epoxy disc inserted in wood base” dimension
  • cut bottom wooden base with circular pocket, insert glossy epoxy disc.
  • V-carve the female part of the “Bilz” letters inlay in the epoxy
  • V-carve the male part of the “Bilz” letters in wood
  • insert letter inlays

But it sounds like Mission: Impossible to

  • not scratch the glossy epoxy surface in the process
  • get a clean vcarve in epoxy
  • get perfectly sized inlays to end up with flush wood/epoxy surface, since sanding afterwards is not an option. Well, on could sand each male inlay, do a fit test, and sanding again until it fits perfectly

That would have to be the most time-consuming and error-prone process ever (in other words, a nice challenge).

Now someone will probably come up with “I just [do that neat trick that takes 30 seconds]:slight_smile:

1 Like

Try a polishing compound and an orbital polisher… like those used to buff cars

2 Likes

I wonder if the gel-coat technique might work? It is used in fibreglass kayaks, large panels etc. In my mind, to do this as an inlay, you would have to prepare the ‘mother piece’ to have a level and perfectly flat top level, fill with epoxy, then lay a piece of glass on top and invert the assembly so gravity causes the glass surface to be the defining surface.

Might work if the piece can be prepared totally flat?

1 Like

Epoxy is the “easy way” to do an inlay!

Luckily, I think I have a machine that can flatten things, but I’d have to avoid getting anything on the wood.

That may have to be my next try.

Thanks guys!

Sorry for hijacking the thread, @Julien. Just make another trivet and it’ll get back on track.

2 Likes

So you would like the wood to be unfinished or at least not glossy like the epoxy, correct?
If a finish on the wood is okay, sanding with 320 and then a coat of clear poly has worked very well, at least for me, but does show on the wood.

1 Like

I was thinking more along the lines of a carving deep enough the chips sit in the bottom and do not get re-cut at all.

1 Like

Right! That makes sense, and this is what will happen anyway since those heavy chips will want to drop at the bottom of the epoxy while it cures. Allright, if I do ANOTHER trivet to test this, that will be on you :slight_smile:

1 Like