Yes. The requirement of loading a driver/utility was a bit of discouraging friction, and the official C3D Jog Pendant being plug-and-play and it having the perfect minimum set of features:
only two speeds to cycle through
incremental fine control w/ the wheel
ability to switch which axis is being worked with precluding hitting the wrong button and breaking a tool
makes it absolutely perfect (well, once I made a modification make it less slippery because I obviously can’t use anything in its stock state…)
Cool. I like it. The outline mod is subtle but I’m sure very effective.
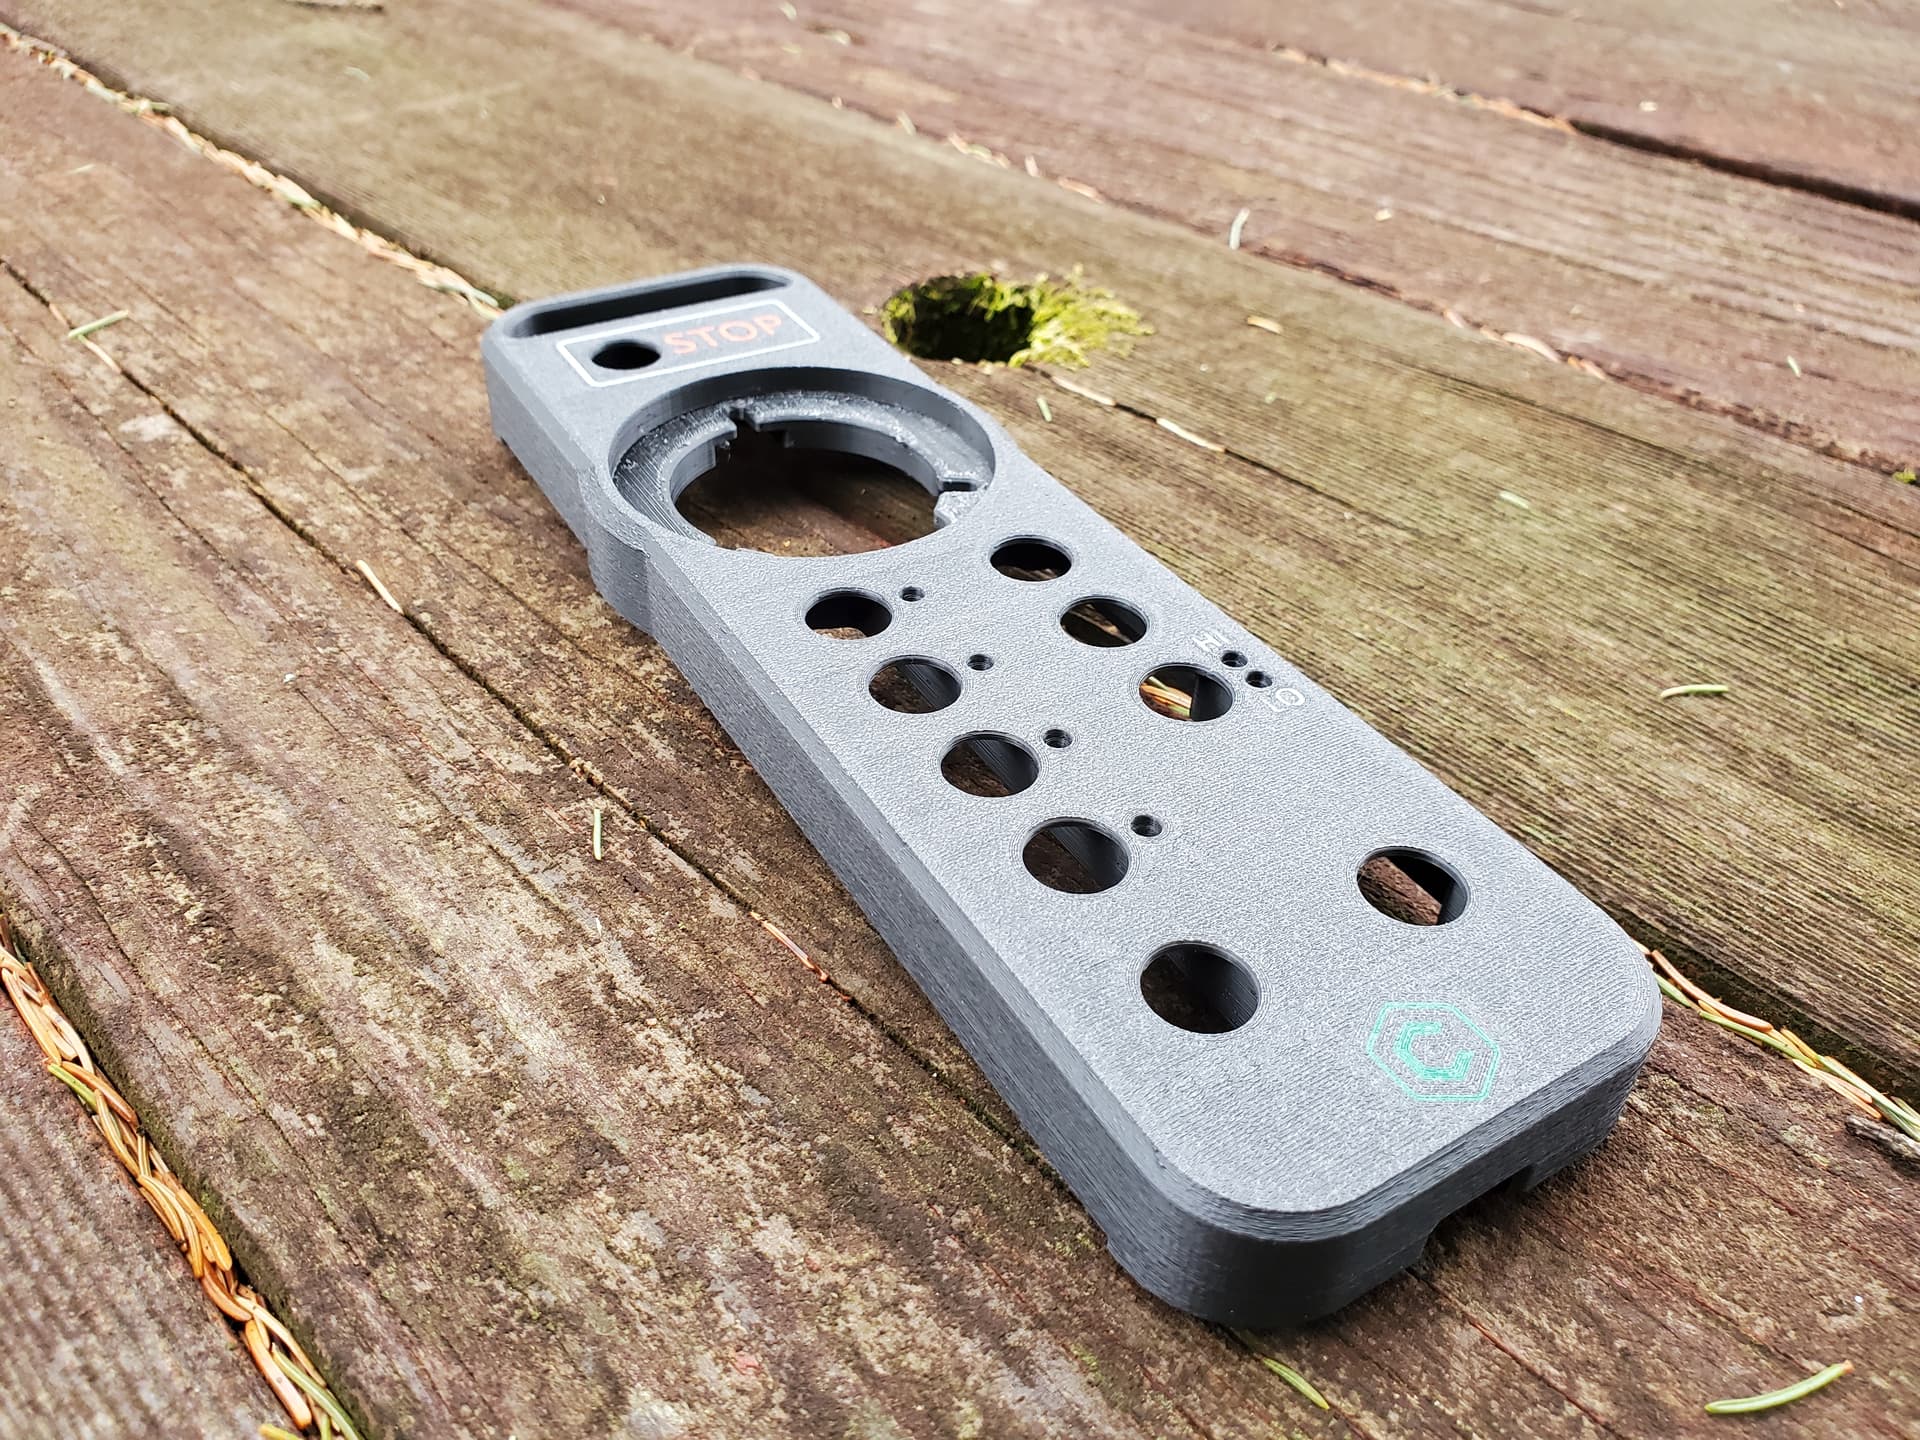
I thought requesting/suggesting the embedded graphics would be gratuitous. I’ve been using embedded text lately for test fixtures here at work. With the text recess already made in the part, it’s no problem to re-use its sketch and extrude-boss the text back up to the surface but not merge it. Then in the slicer split into objects and assign the filament to each. As long as the text is on the build plate, it is nice and flush…
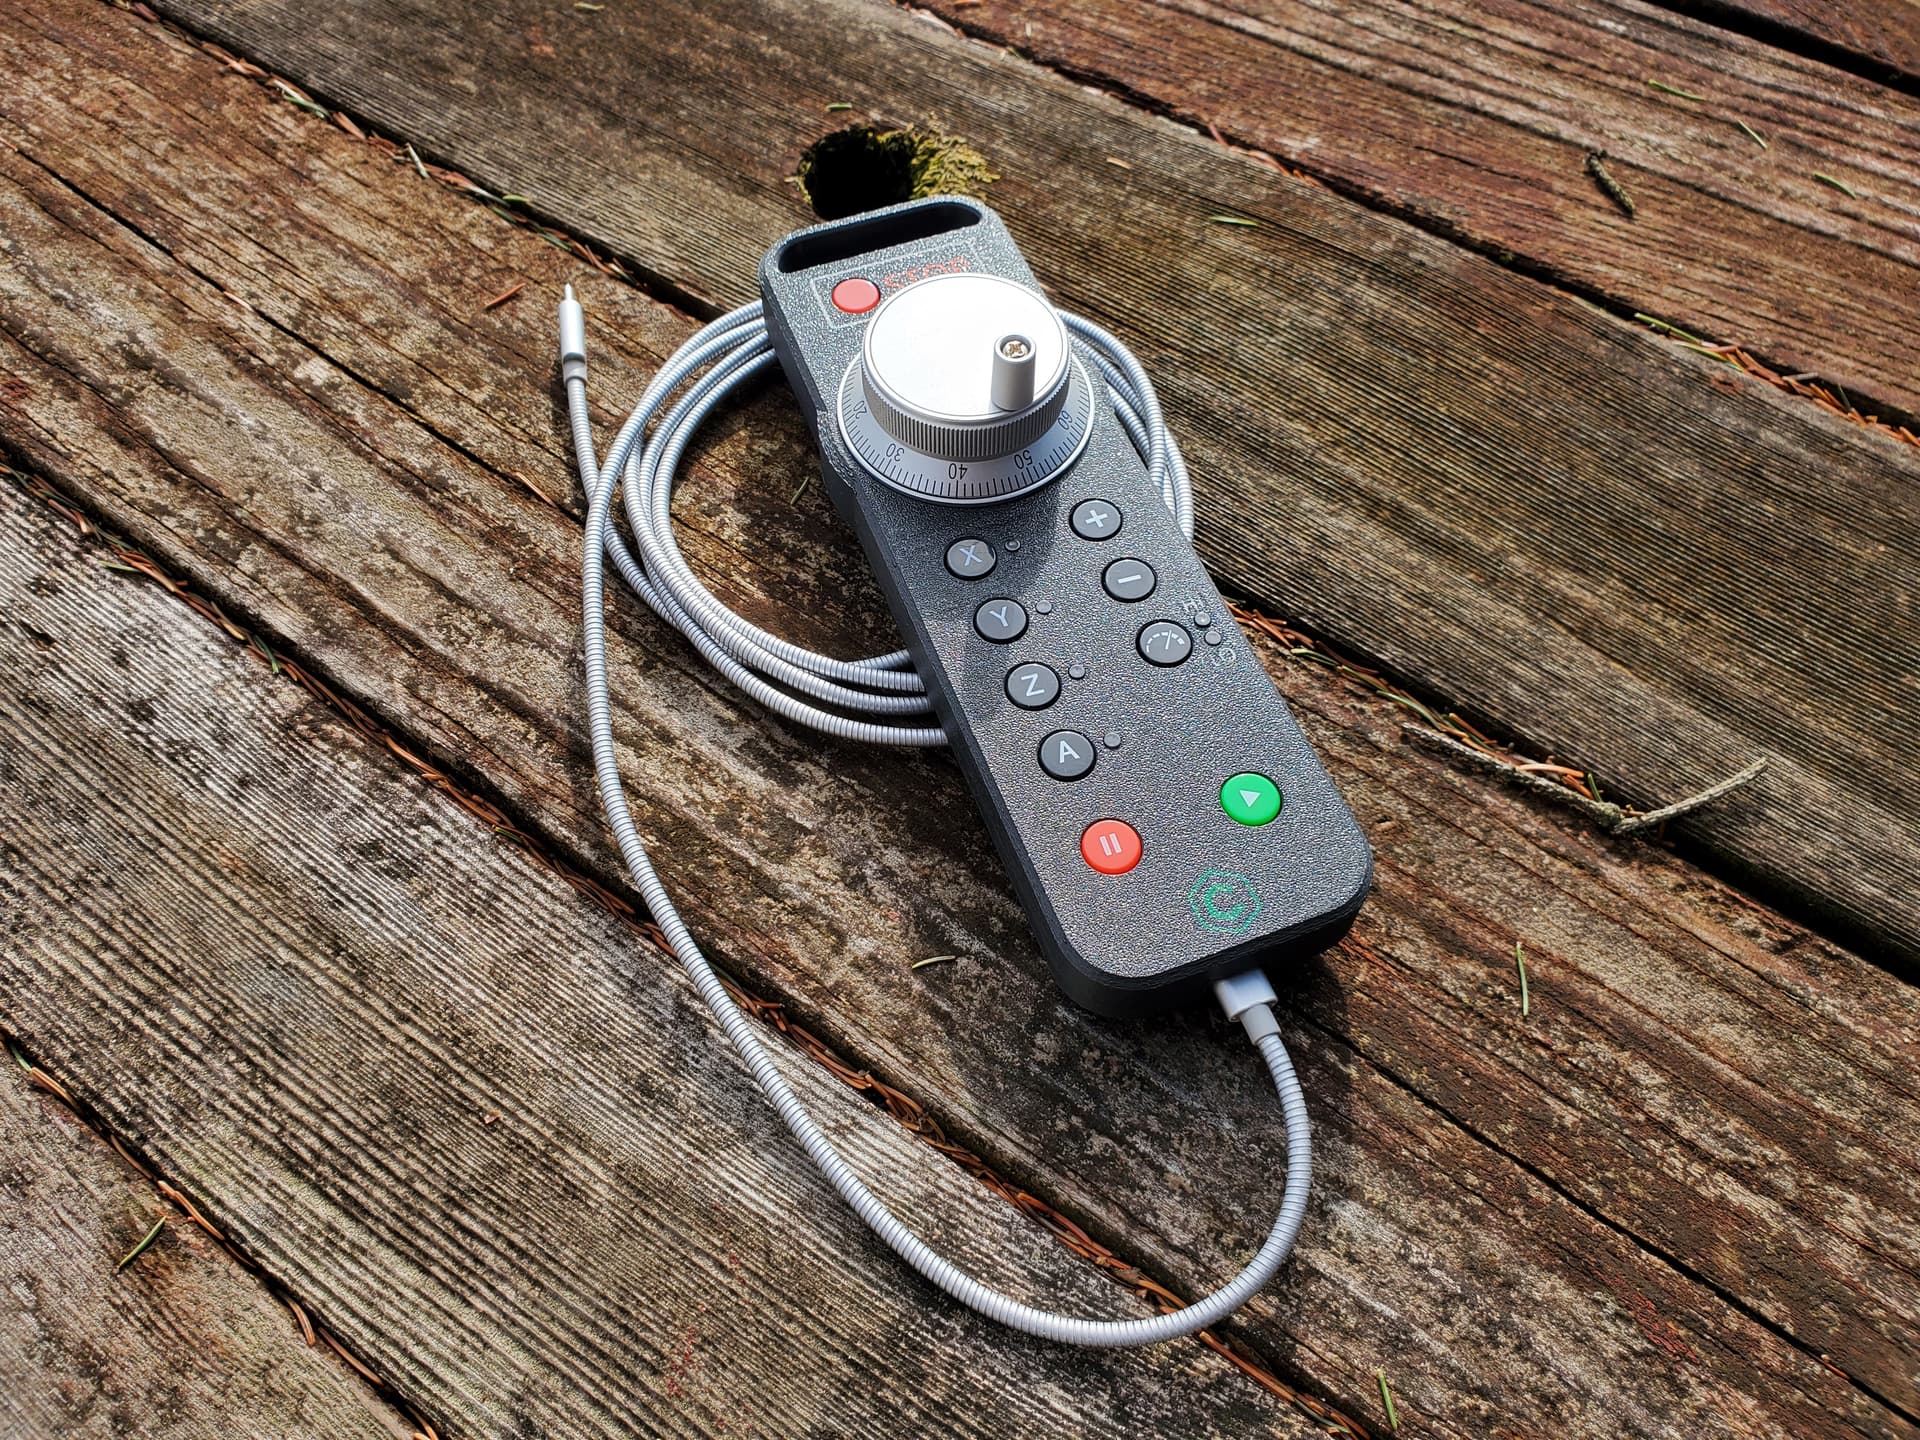
I got the pendant in the mail today! Aside from it being 2x bigger than I expected, it looks and feels real nice!
I have a multimaterial printer (prusa XL) and Im thinking itd be nice to reprint the bottom shell with a mix of a rigid plastic and TPU so its easier to grip. So any models you can share that we can rework would be really great.
I got my pendant today also and used it on a small job tonight. Kudos to Rob and company! I got to try the pause and resume buttons when I realized that I had forgotten to install the chip fan after I loaded the tool. It was on the way from the bitsetter to the beginning of the cut so convenient place to pause and install the fan.
I did notice that the jog wheel in HI mode can overrun the clicks (i.e. the clicks are buffered so can keep feeding after I stop turning the wheel…) so I need to be restrained in using it. On the other hand I wish slow continuous jog was somewhat slower (leadscrew Nomad application) so I wasn’t tempted to spin the jog wheel in HI mode… LO mode does seem to be single motor steps, just like I had my Tormach set up with the ShuttleXpress in the “olden days”…
The tactile response of both the buttons and jog wheel are excellent. Nice firm feel and no accidental presses.
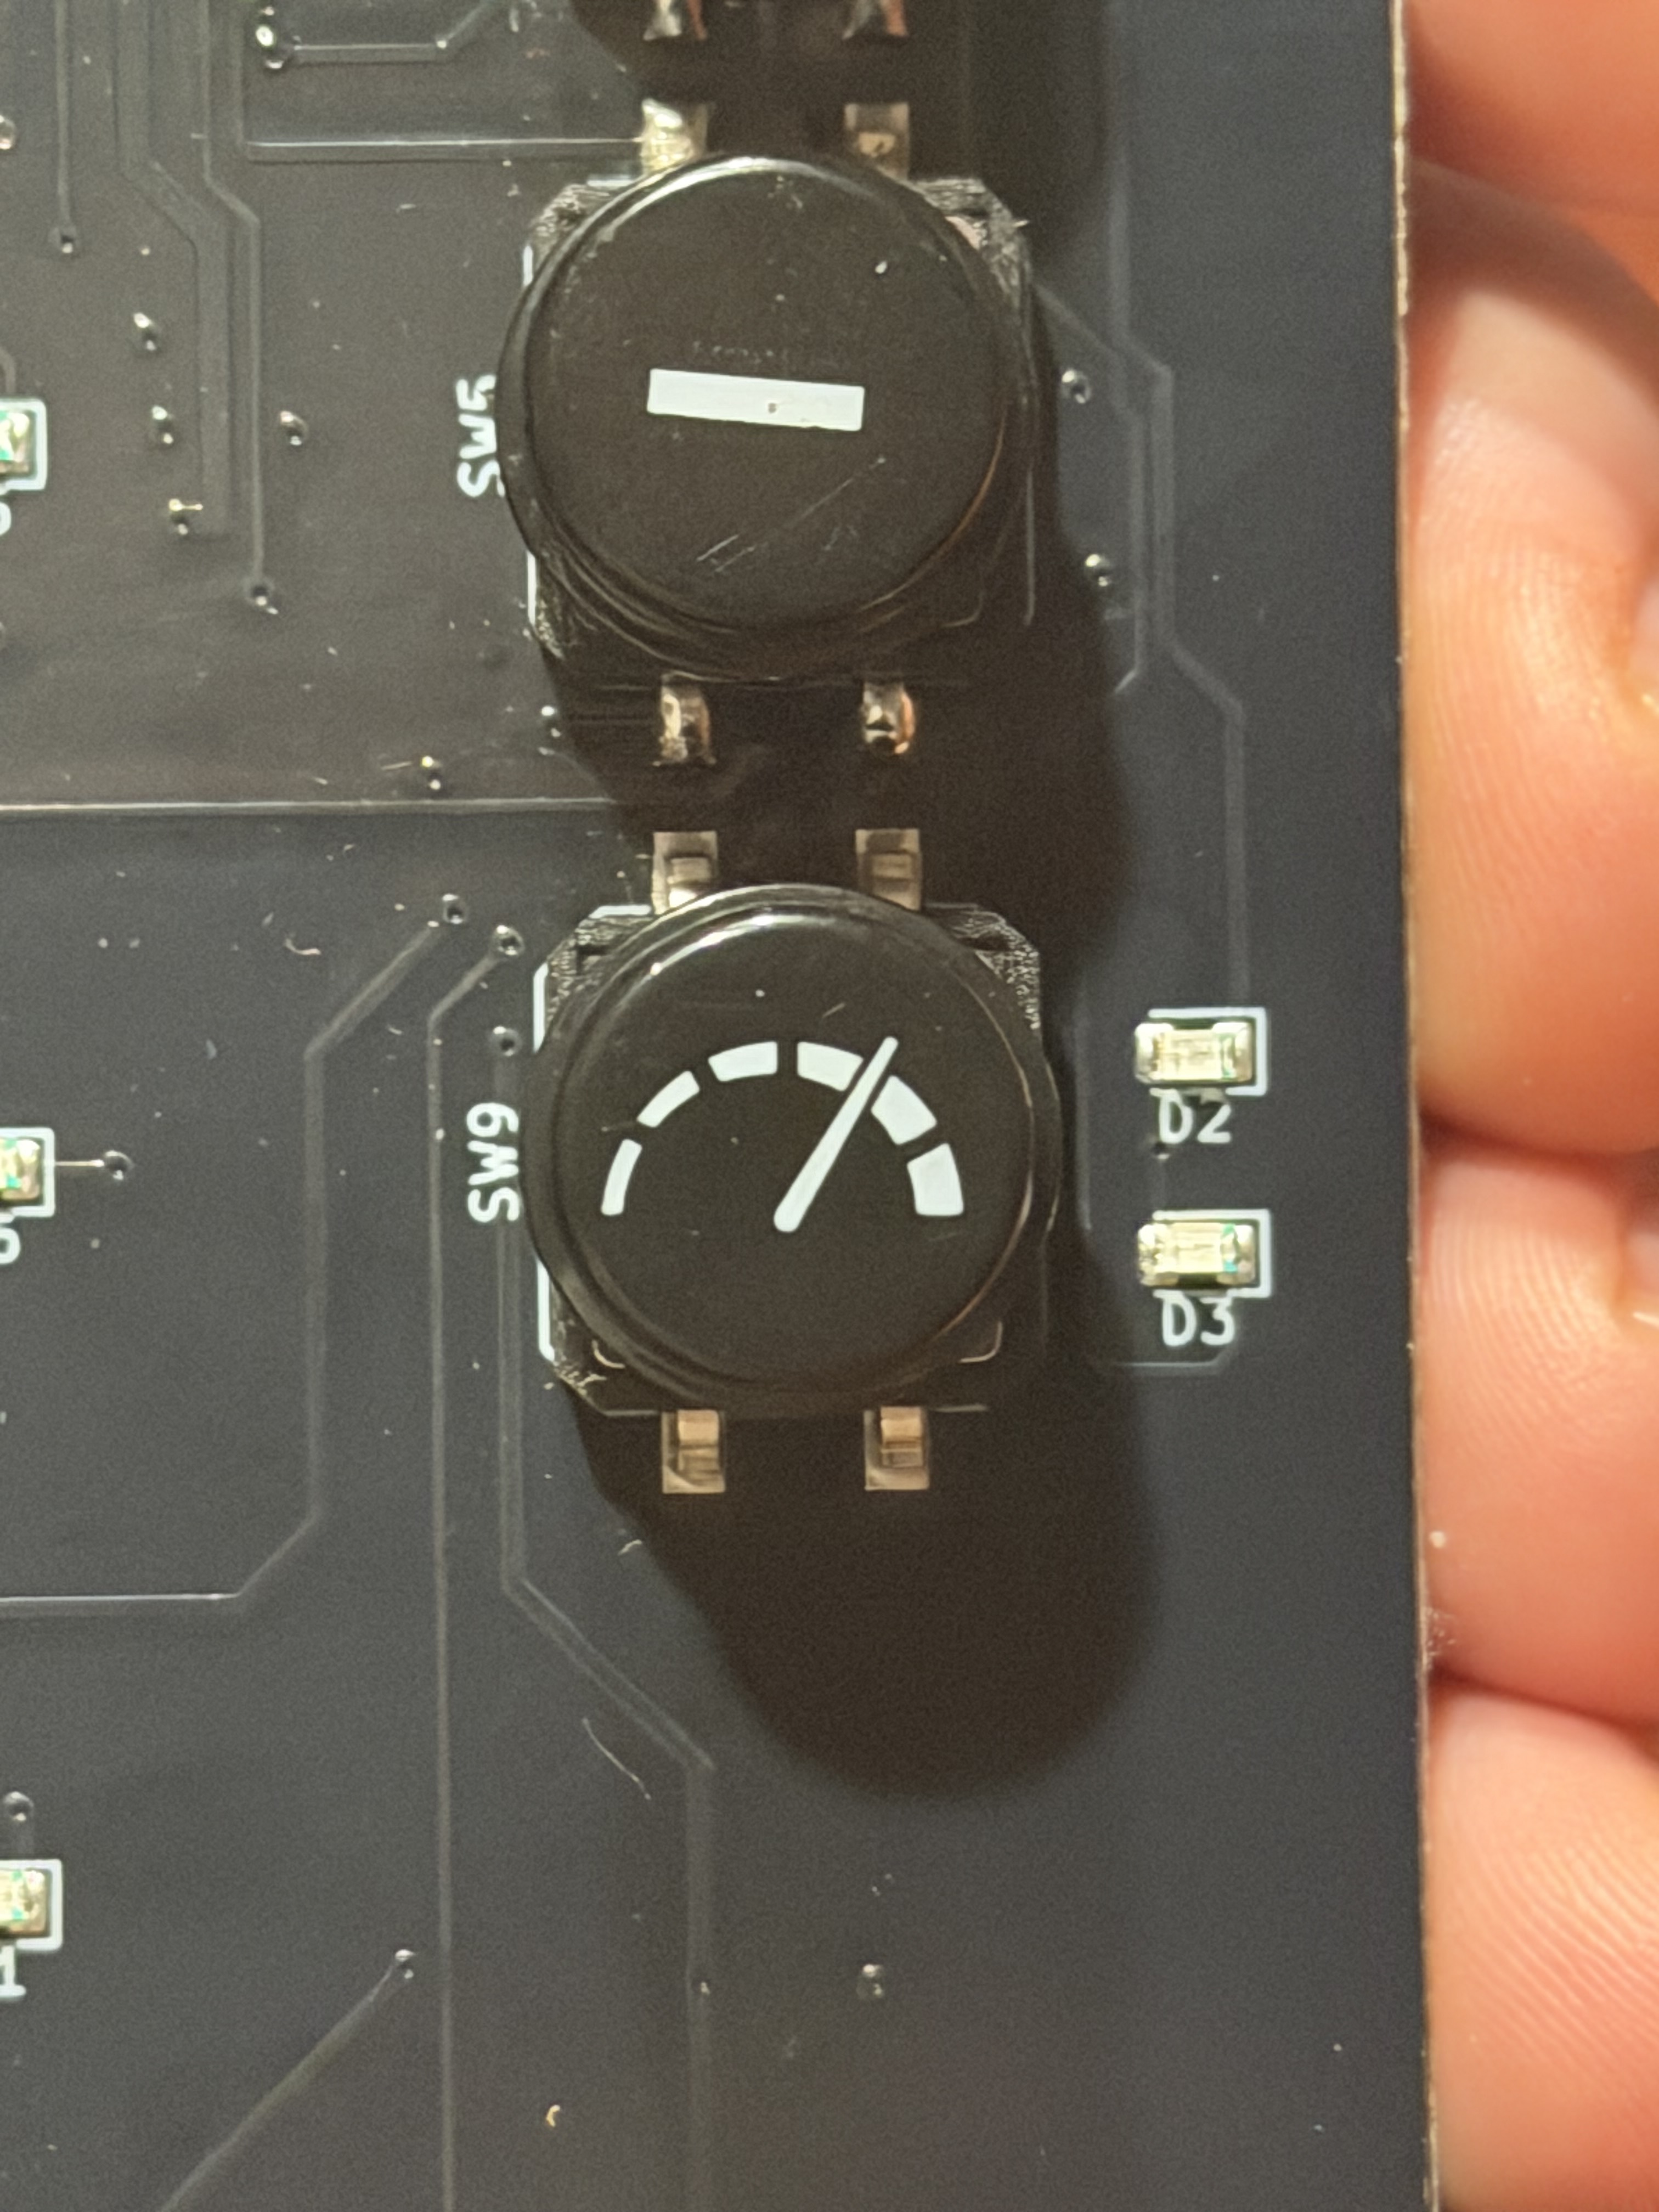
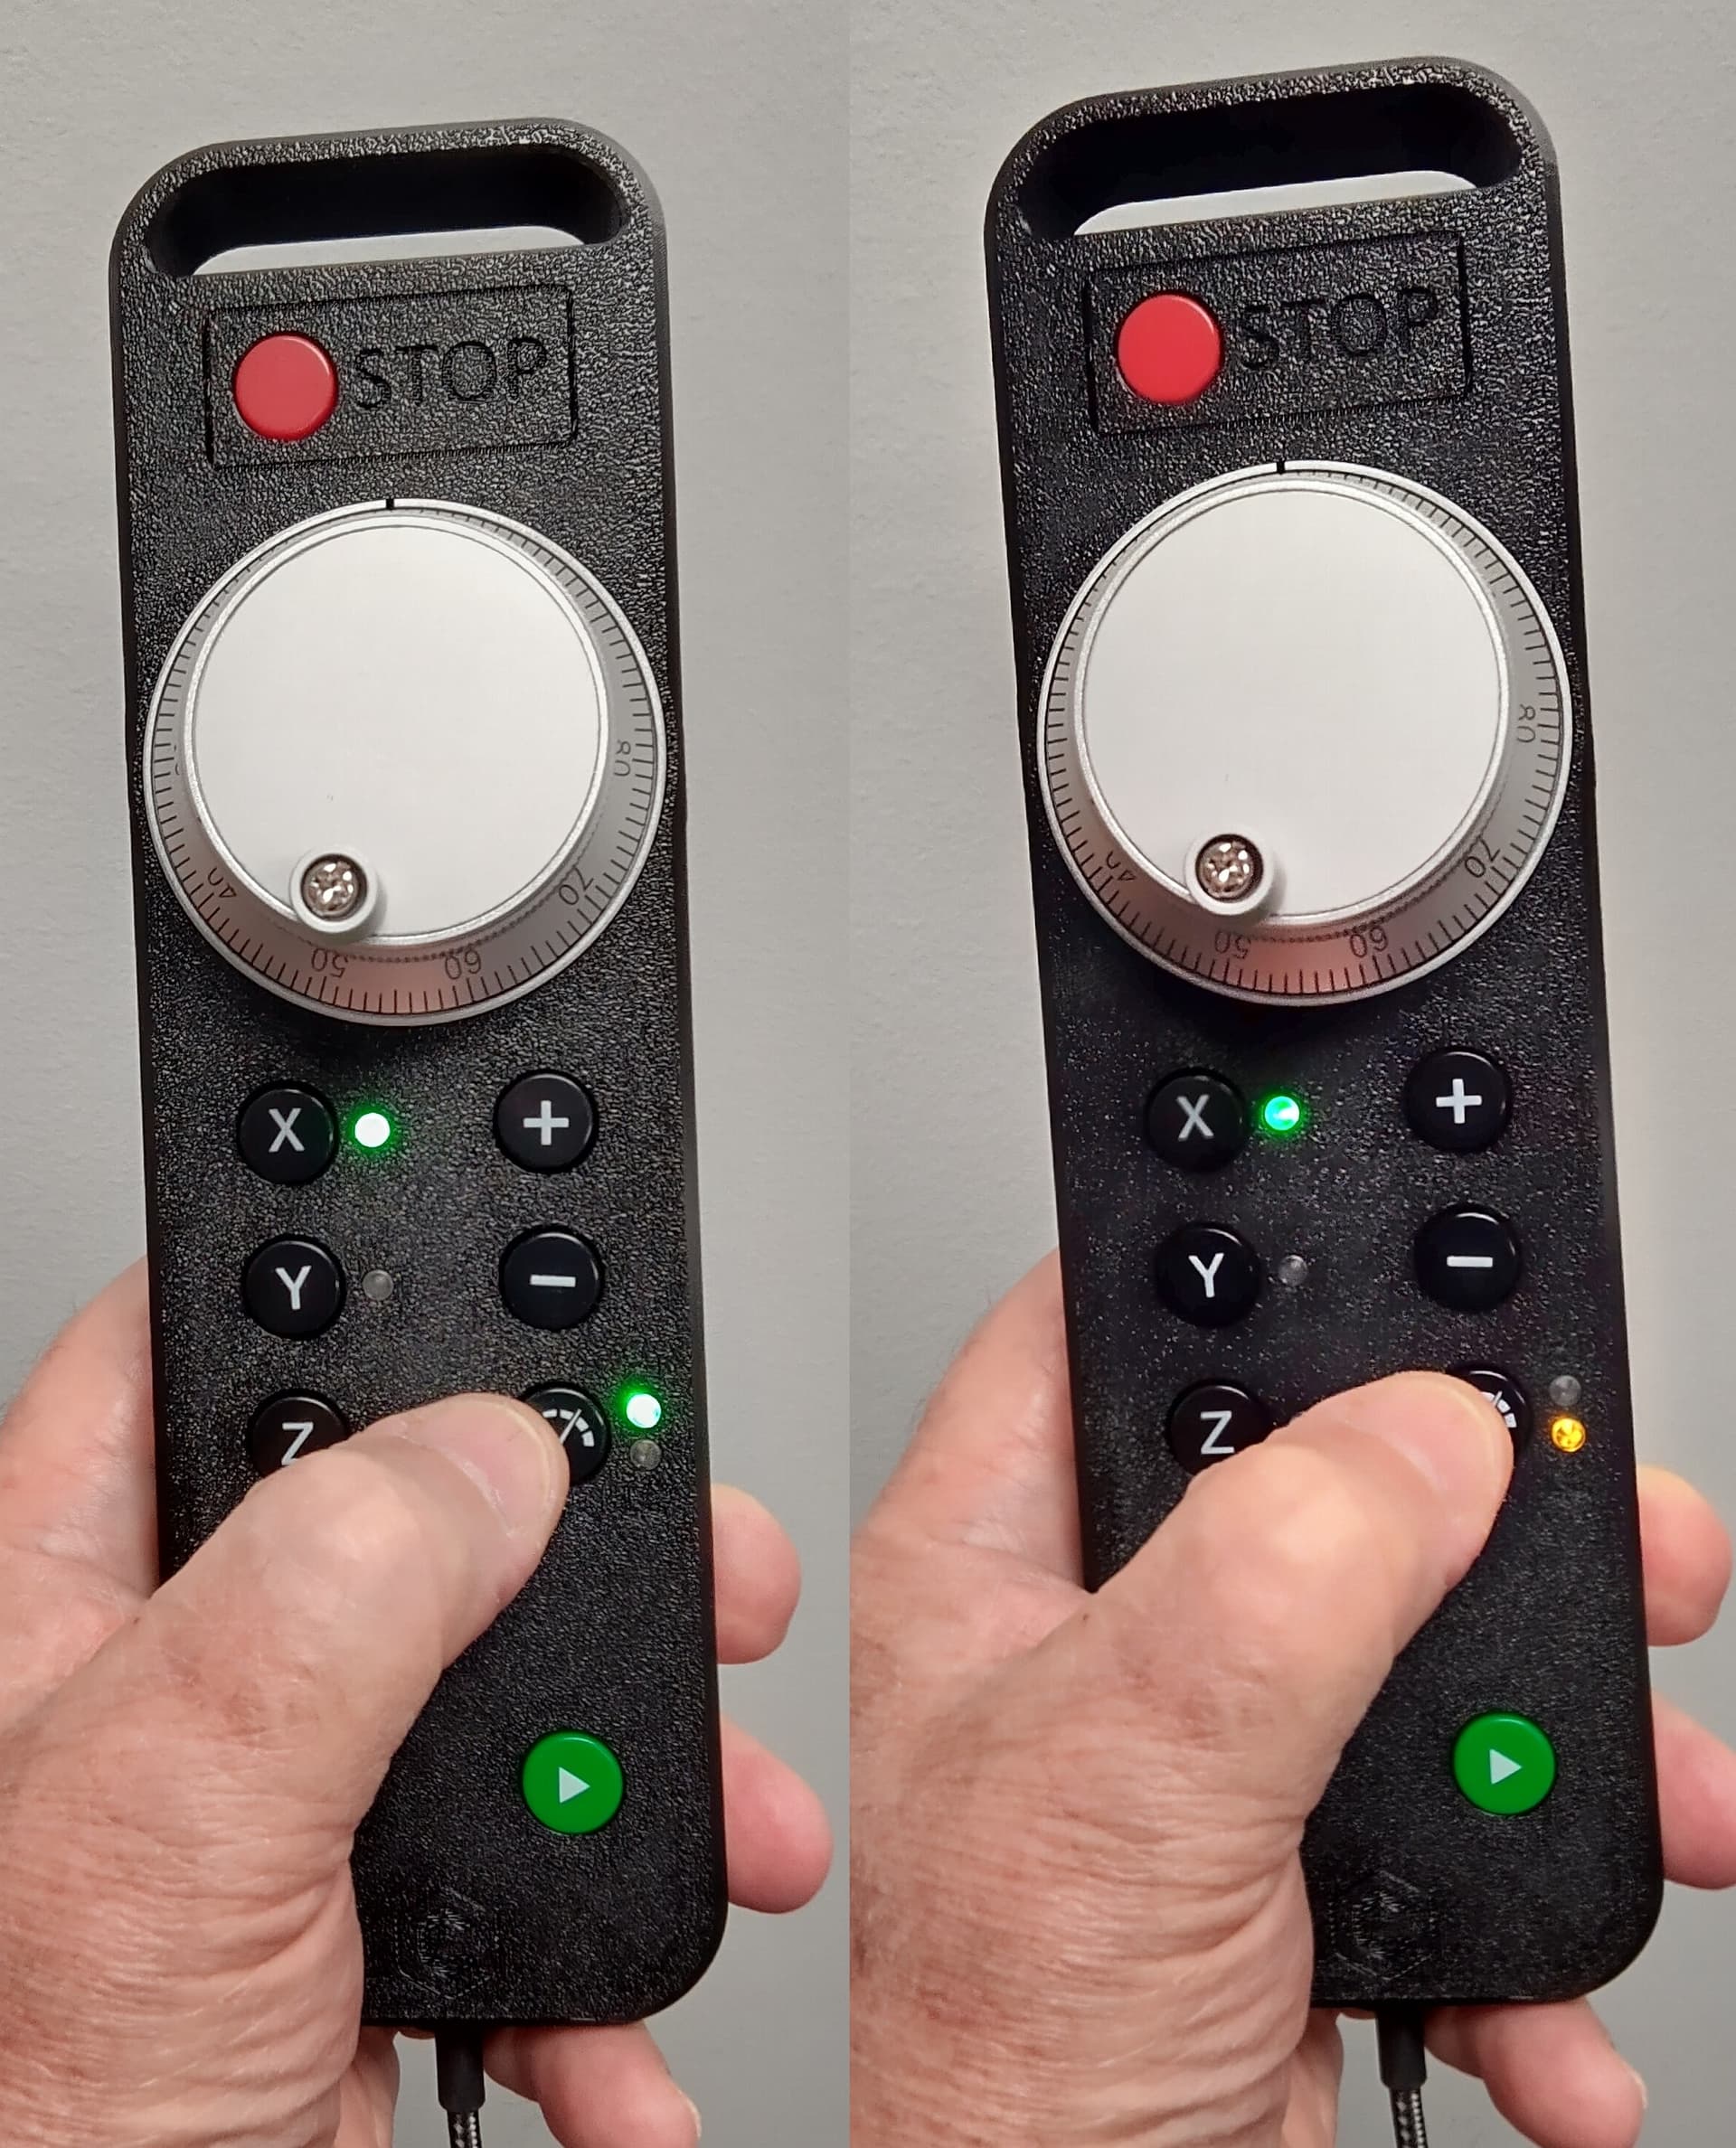
I am really tempted though to void the warranty and install an orange LED for LOW. I always end up toggling the jog speed button a couple of times to watch whether the top or bottom LED is lit; otherwise I need to bring the pendant right close to my face to verify.
Maybe easier to just put a dob of acrylic paint or nail polish on the light pipe instead…or just replace the light pipe entirely with a colored piece. It’s just press fit in the case
Good cautionary message and suggestion, Tyler. It would be interesting to see what a little slice of transparent red acrylic rod would do…
In my own case, the company I work for makes instrumentation for the semiconductor industry and we have an SMT rework technician who did the LED swap (I was trained on SMT rework ages ago, but my certificate ran out a couple of decades ago…) The amber is a little less bright than the green (not delving into bias resistors, I’m thinking the HI and LOW LED’s share one…) but more than adequately visible even under our industrial lighting (will especially be in my apartment environment…) and instantly recognizable.
[EDIT] According to the electronics tech, the brightness difference is due to the original green LED being an 0805 size (.080" x .050" nominal) and the replacement amber being a slightly smaller 0603 (.060" x .030" nominal) and nothing to do with the drive circuit…
and yeah first and most immediate feedback, the LEDs used to represent HI and LO speeds are too close to each other and the identical color for them to be useful at a glance. i covered up the LO with some kapton tape and its 100x more useful now.