I’ve asked a local laser-cut jobbing shop to quote for making some of the brackets and adjustment arms (Stainless 304) to see what sort of price ‘just buying some’ would come out at. Volume pricing is a different topic, but that realistically means someone setting up supply, or Carbide doing so as an option for those who are comfortable cutting/filing the appropriate slot in the ShapeOKO frames - maybe their own revision too to the frames ex-factory to support either option.
1 Like
Thank you for putting the files here! Great job!!
And did you ever hear back from the laser cut shop on price?
@downrazor11 Quote has come back, about $9 per frame (cut and folded), and $1.50 per ‘arm’. This leaves two ground pins at say $50c, HDPE cam say $1, two screws and nuts, say $1. All in about $15 in out of pocket costs. I would have to order 12 sets to get this price.
Not that I am looking to make a business out of this, but just looking at this if someone were to make these up… $15 plus labour likely to reach about $30 in all. Plus whatever profit is sought. So a set of 3 clamps would be about $60 plus profit.
6 Likes
So, after trying to help @TX_diy with his belt tensioning woes, I thought I’d revisit this. (sidenote: is belt tension THAT important?)
I am building (so slowly…thanks corona) an SO3 for my classroom. I had Y plates made that have a slot where the belts could exit.
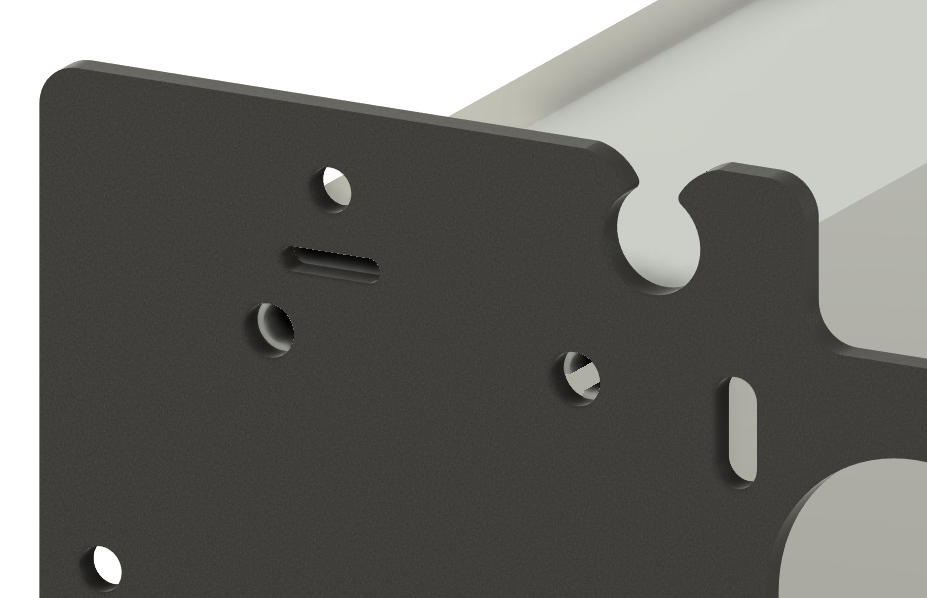
I stayed up way too late last night (inspiration hits me when everyone else is asleep) and here’s what I came up with.
First, the base which is attached using the existing M5 tensioning clamp hole and one of the M6 extrusion mount holes.
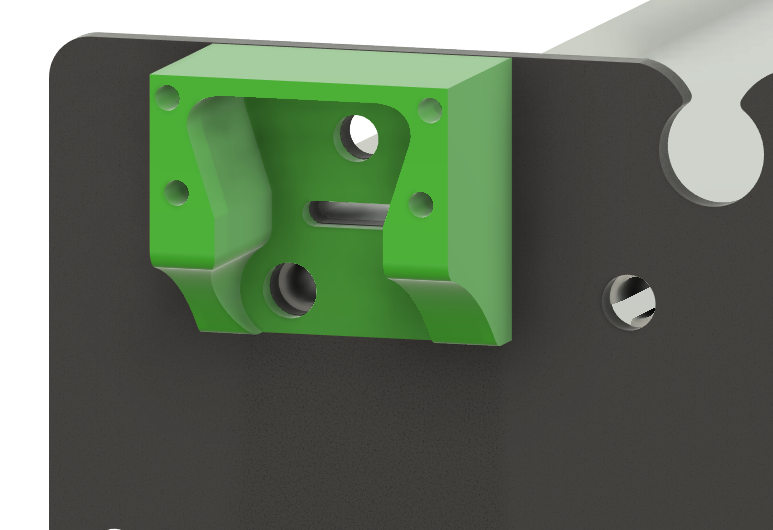
Inside the base track will ride the tensioner clamp.
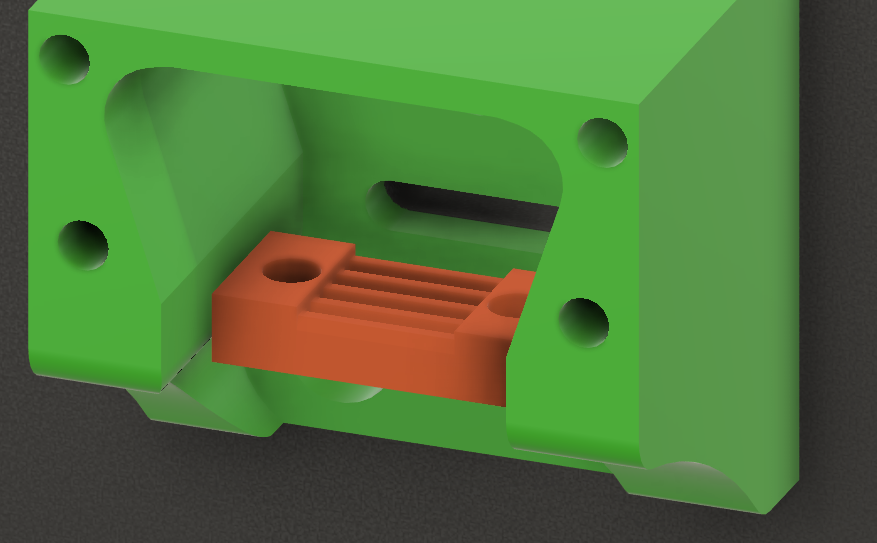
The belt will be clamped with M3 screws and this little thing holds the belt extremely well.
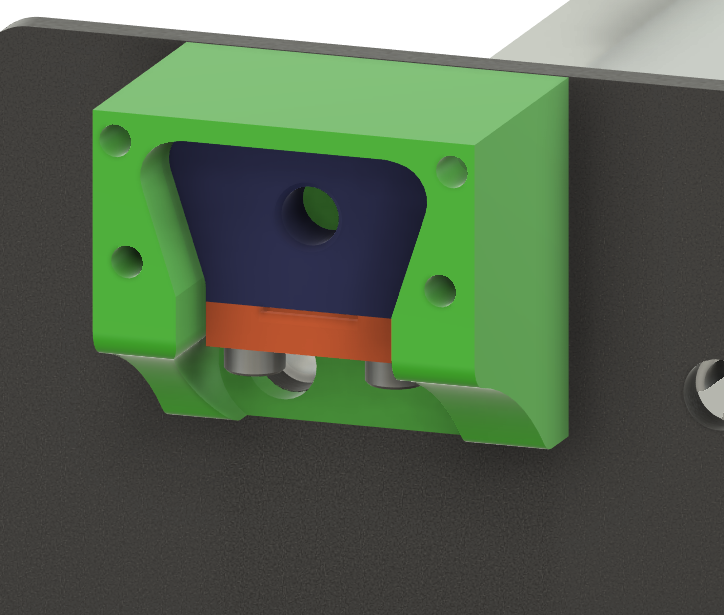
The clamp has captive nuts for the M3s, and an M5 nut on the back for tensioning.

Finally, a cap covers it all. To tension the belt, all you need to do is turn an M5 screw through the cap to pull the sliding clamp.

My prototype works really well.
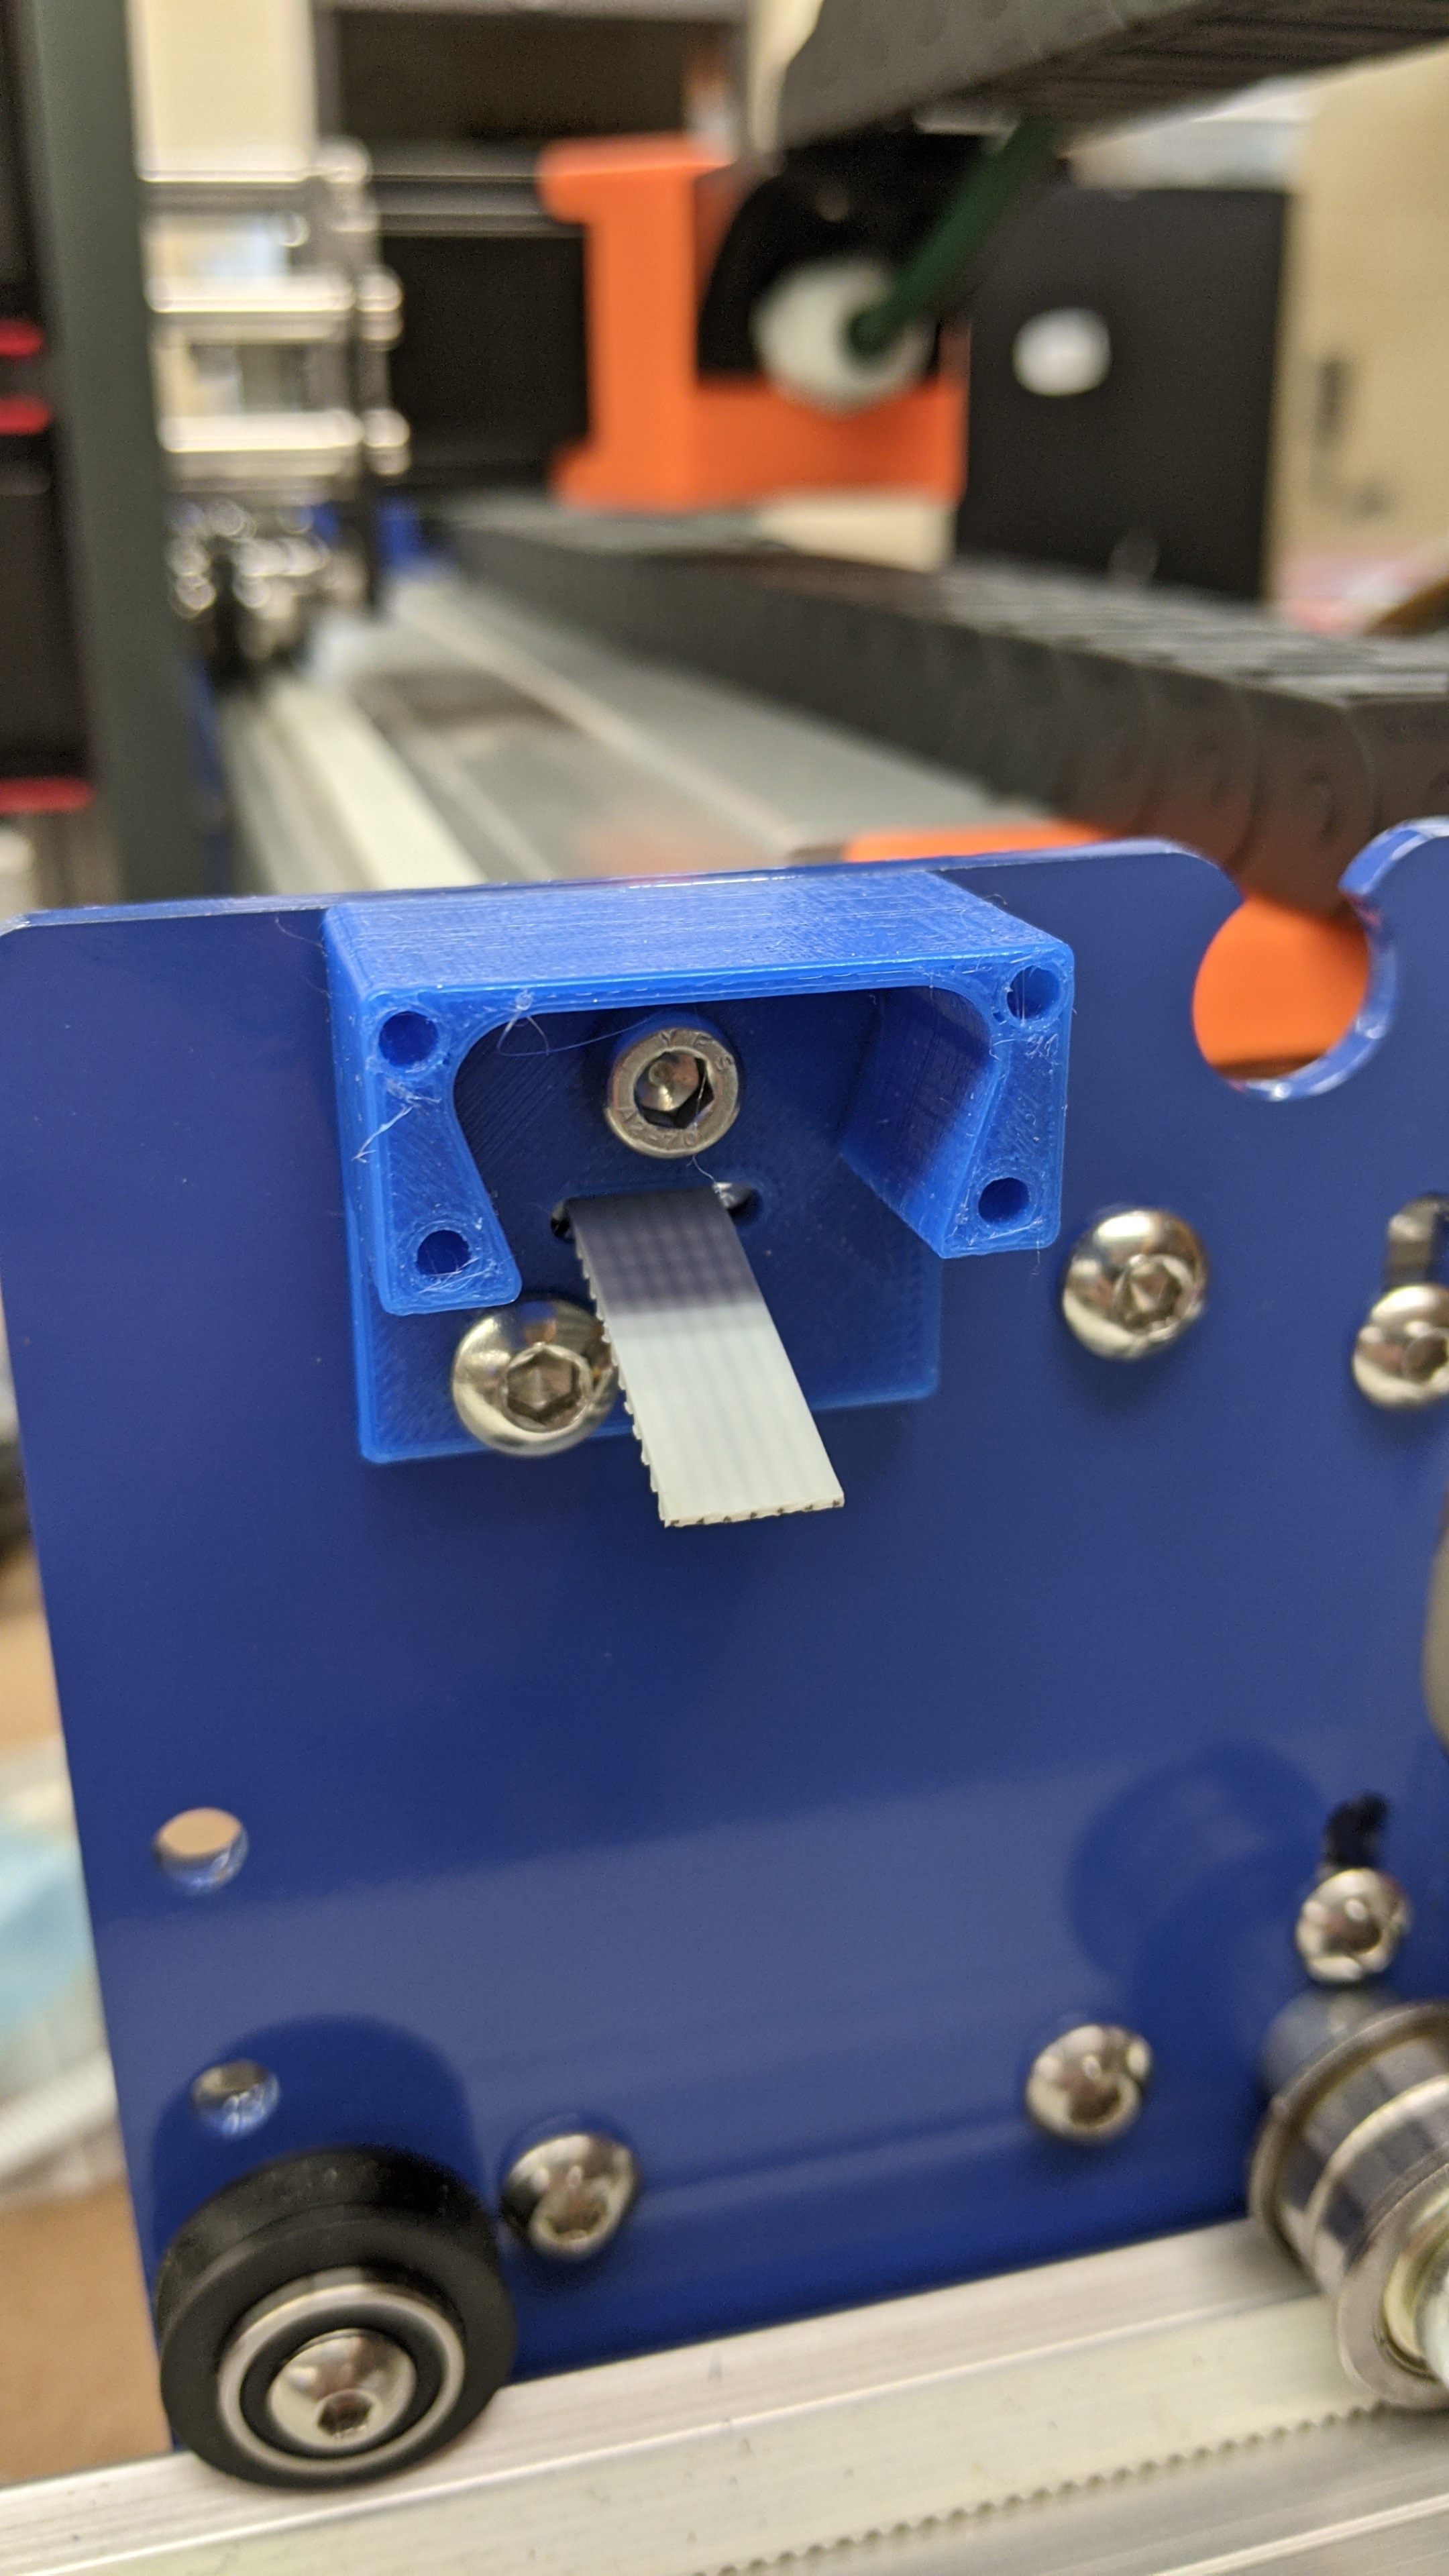

Unfortunately, this method involves making a slot for your belt. Otherwise, it’s a pretty simple mod.
Thoughts?
12 Likes
I drew something similar on a sketch pad today for the Shapeoko Pro, albeit with a different look, but with the same approach for tightening the belt 
I’d have to actually model it in Fusion to explain it and the hardware approach/bits.
2 Likes
Too bad there’s no slot in the plates. Seems like it’d take a bit more work to do that on a Pro.
1 Like
A jig would be needed to make a crude slot mortiser.
@neilferreri Threw together my rough concept model quickly
It uses M5 ‘dog’ point set screws for tensioning that locate into the existing endplates (modification required for that as well as the slot for the belt)


3 Likes
I like the fact that this design does not bend the belt. A fairly straightforward approach and simple.
3 Likes
I think the slot is terrific and should be standard.
After reading about the calibration of the tension and recommended forces, I got to thinking that on the outside of the slot there should be a pully wheel so that the protruding belt can be attached to a weight so that the tension can be made pretty much the same on both sides.
The weight would hang freely, at a specific tension, until you clamped the belt using a similar clamp to the one above (but vertical, after the pulley).
A hastily sketched sketch to elucidate:

6 Likes
1 ton might be a tad too much though 
5 Likes
The only way to be sure something is done is to overdo it … I’m sure I read that somewhere
3 Likes
The logistics would probably outweigh the benefits, but it might be worth looking into providing an exchange programme, slotted for unslotted end plates, if these can be obtained separately?
Over-engineering is the death of the first iteration. Always. ![]()
1 Like
Is there also a mechanical measuring tool that would enable a user to set the exact amount of belt tension.
This would minimise the variability that exists between builds. which is the other issue that I see with belt installation and maintenance.
There are belt tension meters, but the price is hard to justify for a single machine.
My solution was to use a spring-loaded luggage scale and the weight of the machine, but that was better suited to the old sliding motor mounts.
There’s a good post here which notes using pencils to lift up the belts, then checking them using a phone app, this one I think:
3 Likes
You could use an inch lb. torque wrench with the idea I posted.
2 Likes
Neil, your latest iteration is looking really good. Your previous version is working well on my machine, thank you. And, as TX_diy noted, a slot mortiser would be useful.
2 Likes
Overkill is underrated!
3 Likes
Anybody want to machine and test my idea? Or do FEA on it.