Just wanted to share a project I have been working on. I recently bought an inexpensive tool box specifically for my CNC equipment from Costco. Nothing fancy. Just a metal three drawer number with a carrying handle. I wanted to include an organizer for my endmills, collets, and various hold down clamps. My old organized did not fit and was made of wood. Not that there is anything wrong with wood, but I wanted something that would actually grip my tools a bit better. During my last move my endmills came out of their compartments and one actually got chipped. I decided a foam organizer would be great as I could make the walls slightly narrower than the tools and it would hold onto the them.
Now I wanted to do this project on a budget, I wanted to use my existing endmills, and I wanted the foam to grip the tools really well. This ruled out Kaizen as I am not made of money. This ruled out the lower density foams used for things like upholstery as they wouldn’t grip well. After some searching EVA foam seemed like the best option, but I could not find it in thicknesses greater than 10mm. I already had some 10mm EVA foam mats from Harbor Freight laying around so I figured I would give those a try and hope for the best.
And so began my experiments. First thing I did was watch Winston Moy’s video’s on machining foams:

and

These videos were a great place to start, but he only used foam cutting endmills in the EVA foam. I cannot justify paying for expensive endmills for a hopefully one time project.
During my experiments with different endmills I tried multiple RPMs, feed rates, DOC, stepovers, etc. Like Winston I found that you want your cutters going FAST. Both in RPM and in feed rate. I ended up running my spindle at 30k RPM. With the mods I made to my spindle electronics, it could technically go even faster but the bearings start getting annoyed with me. I ended up with a feed rate of 4000mm per minute. For depth of cut I settled on 3mm. More than that and the foam was turning into noodles. For stepover I found that 2mm gave the best results. More than that and the foam would not get fully cut. There would end up being a big chunk in the center of the pocket that on occasion ripped free.
Now I have a #201 endmill from Carbide3D which Winston used in the first video. While it worked, like Winston says it left a very ragged top edge. The floor of the pocket did not look very good either. Mind you this is literally the oldest endmill I own as it came with my Shapeoko 3. It is very possible that the floor finish was a result of the tool not being as sharp as it could be.
I also tried several other endmills like a brand new single flute endmill from Amana. It left a decent floor finish but also tore the top edge of the foam.
Next I tried a SpeTool two flute upcut endmill I got from Amazon:
This one had been used a few times, but is still very sharp. This one left a great floor finish, but again the top edge was torn to bits.
The last endmill I tried was a brand new Freud two flute downcutting endmill. I purchased mine at the Woodcraft near me a little while ago, but I found it on Amazon:
This one gave an amazing top edge cut, but the floor finish was quite fuzzy. I am pretty sure that the down cutting was compressing foam while it cut rather than trying to pull it up.
Ultimately I settled on using the 2 flute downcutting endmill for most of the pocket. I would then machine the last 0.5mm with the 2 flute upcutting endmill. I used the same settings on both:
30,000 RPM
4000mm/m Feed Rate
3mm Depth of Cut
2mm Stepover
This gave a great floor finish, decent wall finish, and great top edge.
Once I finished my experiments I needed to get some more floor mats to actually make the tool holders so I took a trip to Harbor Freight. While there I found these:
https://www.harborfreight.com/foam-kneeling-pad-56572.html
1.5 inch thick hunks of EVA foam. Much better for tool holders. They do include the piece of foam they cut out for a handle. I just super glued it back into the foam.
I just finish machining the first half of the top storage area. Here are the results:
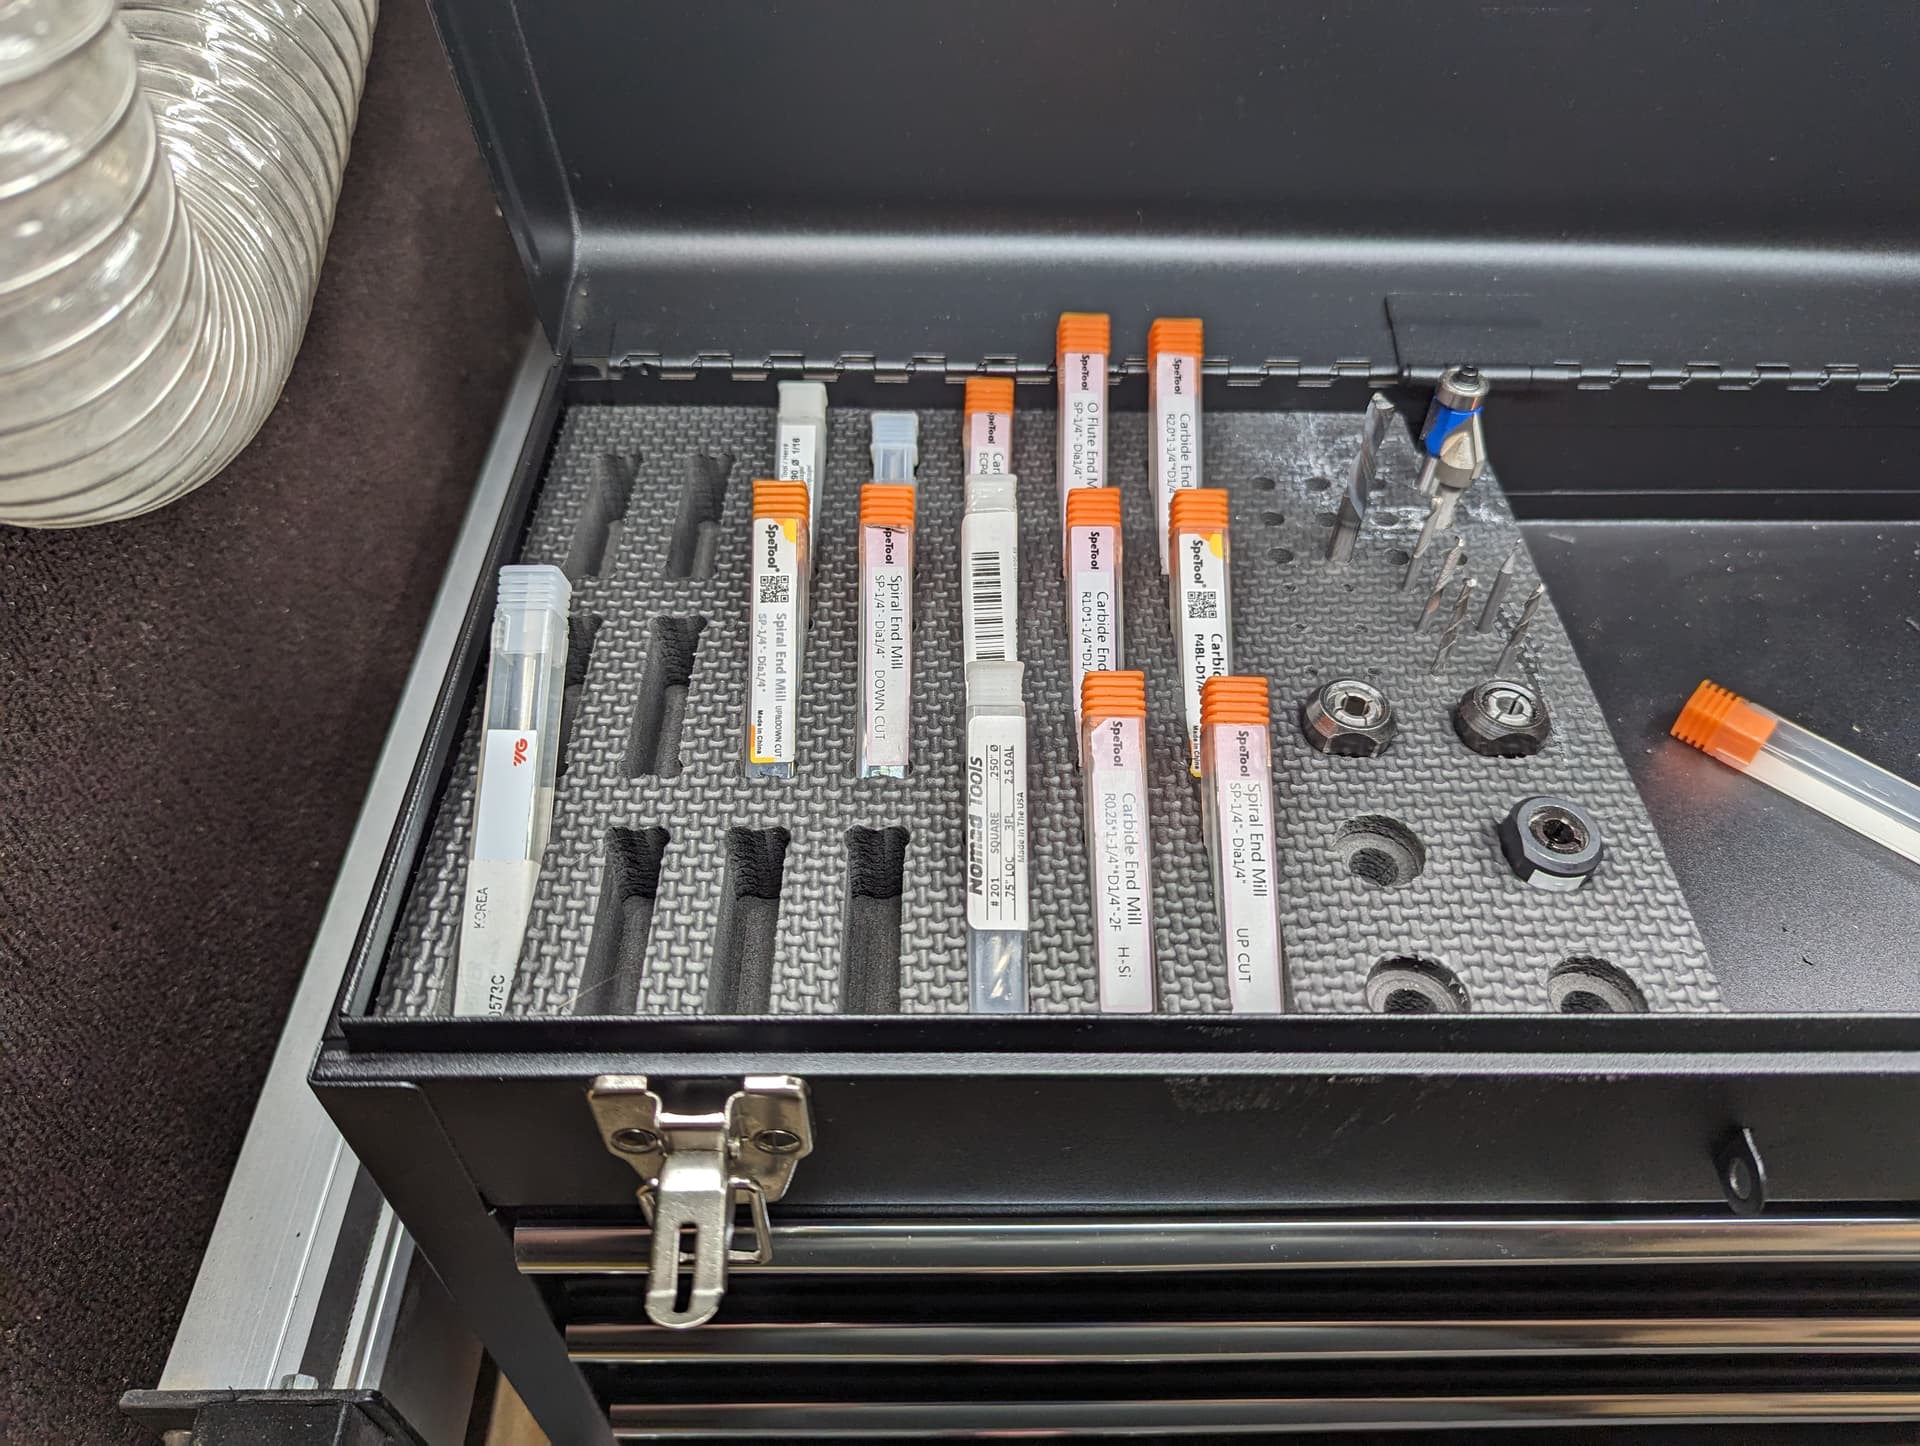
The white in the top right is the residue from the super glue I used. I am debating on putting a layer of spray paint over the top to hide that, but it would be purely cosmetic.
EDIT: One thing I forgot to mention. I used blue painters tap and CA glue to hold down the foam. The knee pads have that textured finish on both sides so I really had to rub the tape into the surface to get full adhesion there. I used thick CA glue to help bond the two strips of tape down to each other.