One observation, since I haven’t had enough coffee to come up with anything better…
If it were a tramming issue, I’d expect the problem to manifest only on whichever directions the spindle was tilted towards… but it seems the same in all directions (this is one reason I did different orientations of the shapes, also to see if it was specific to an X/Y direction).
Going to check my set screws on the stepper motors today and see if anything is loose.
V-carve pocket - yes, but using VCarve pro’s VCarve toolpath option, which I guess is a little different than a true pocket toolpath with a v-carve bit.
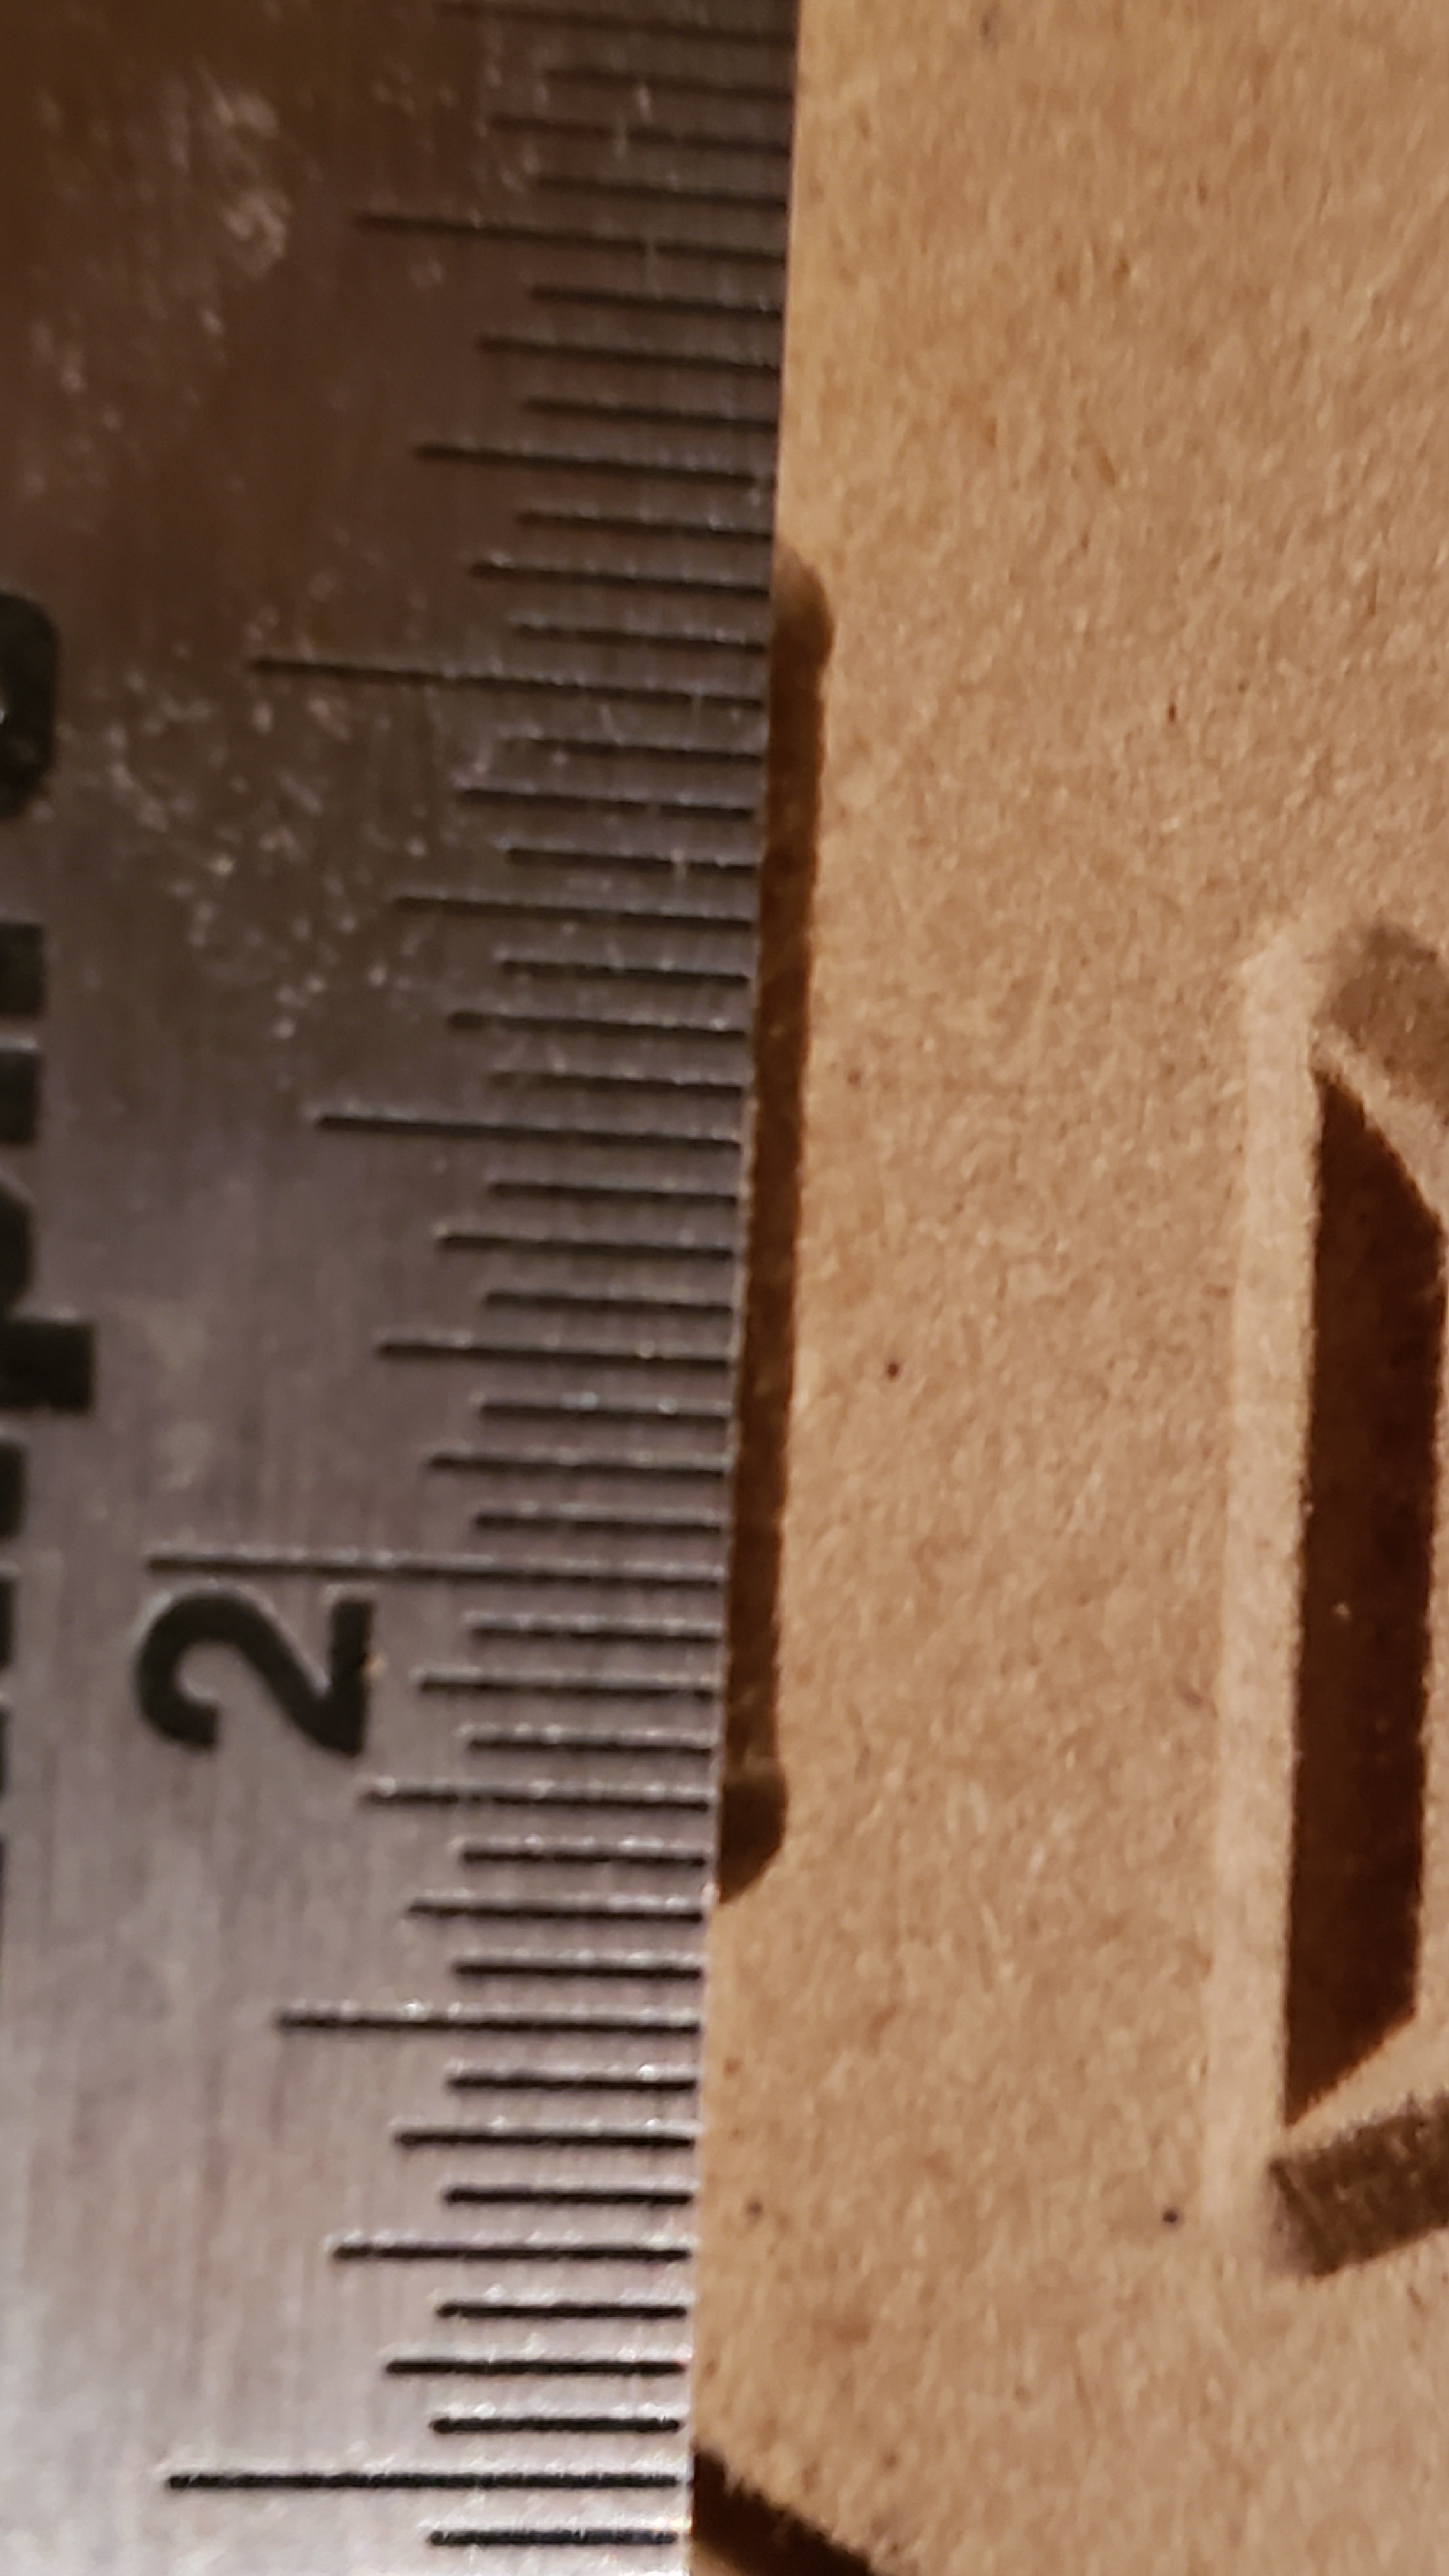
Here is a simple profile toolpath, same 90d .25 inch v bit as the last post - .1" pass depth so it did two passes to get .125" depth (which matches the flat-depth of the top row of vectors from the other tests).
Looks good to me.
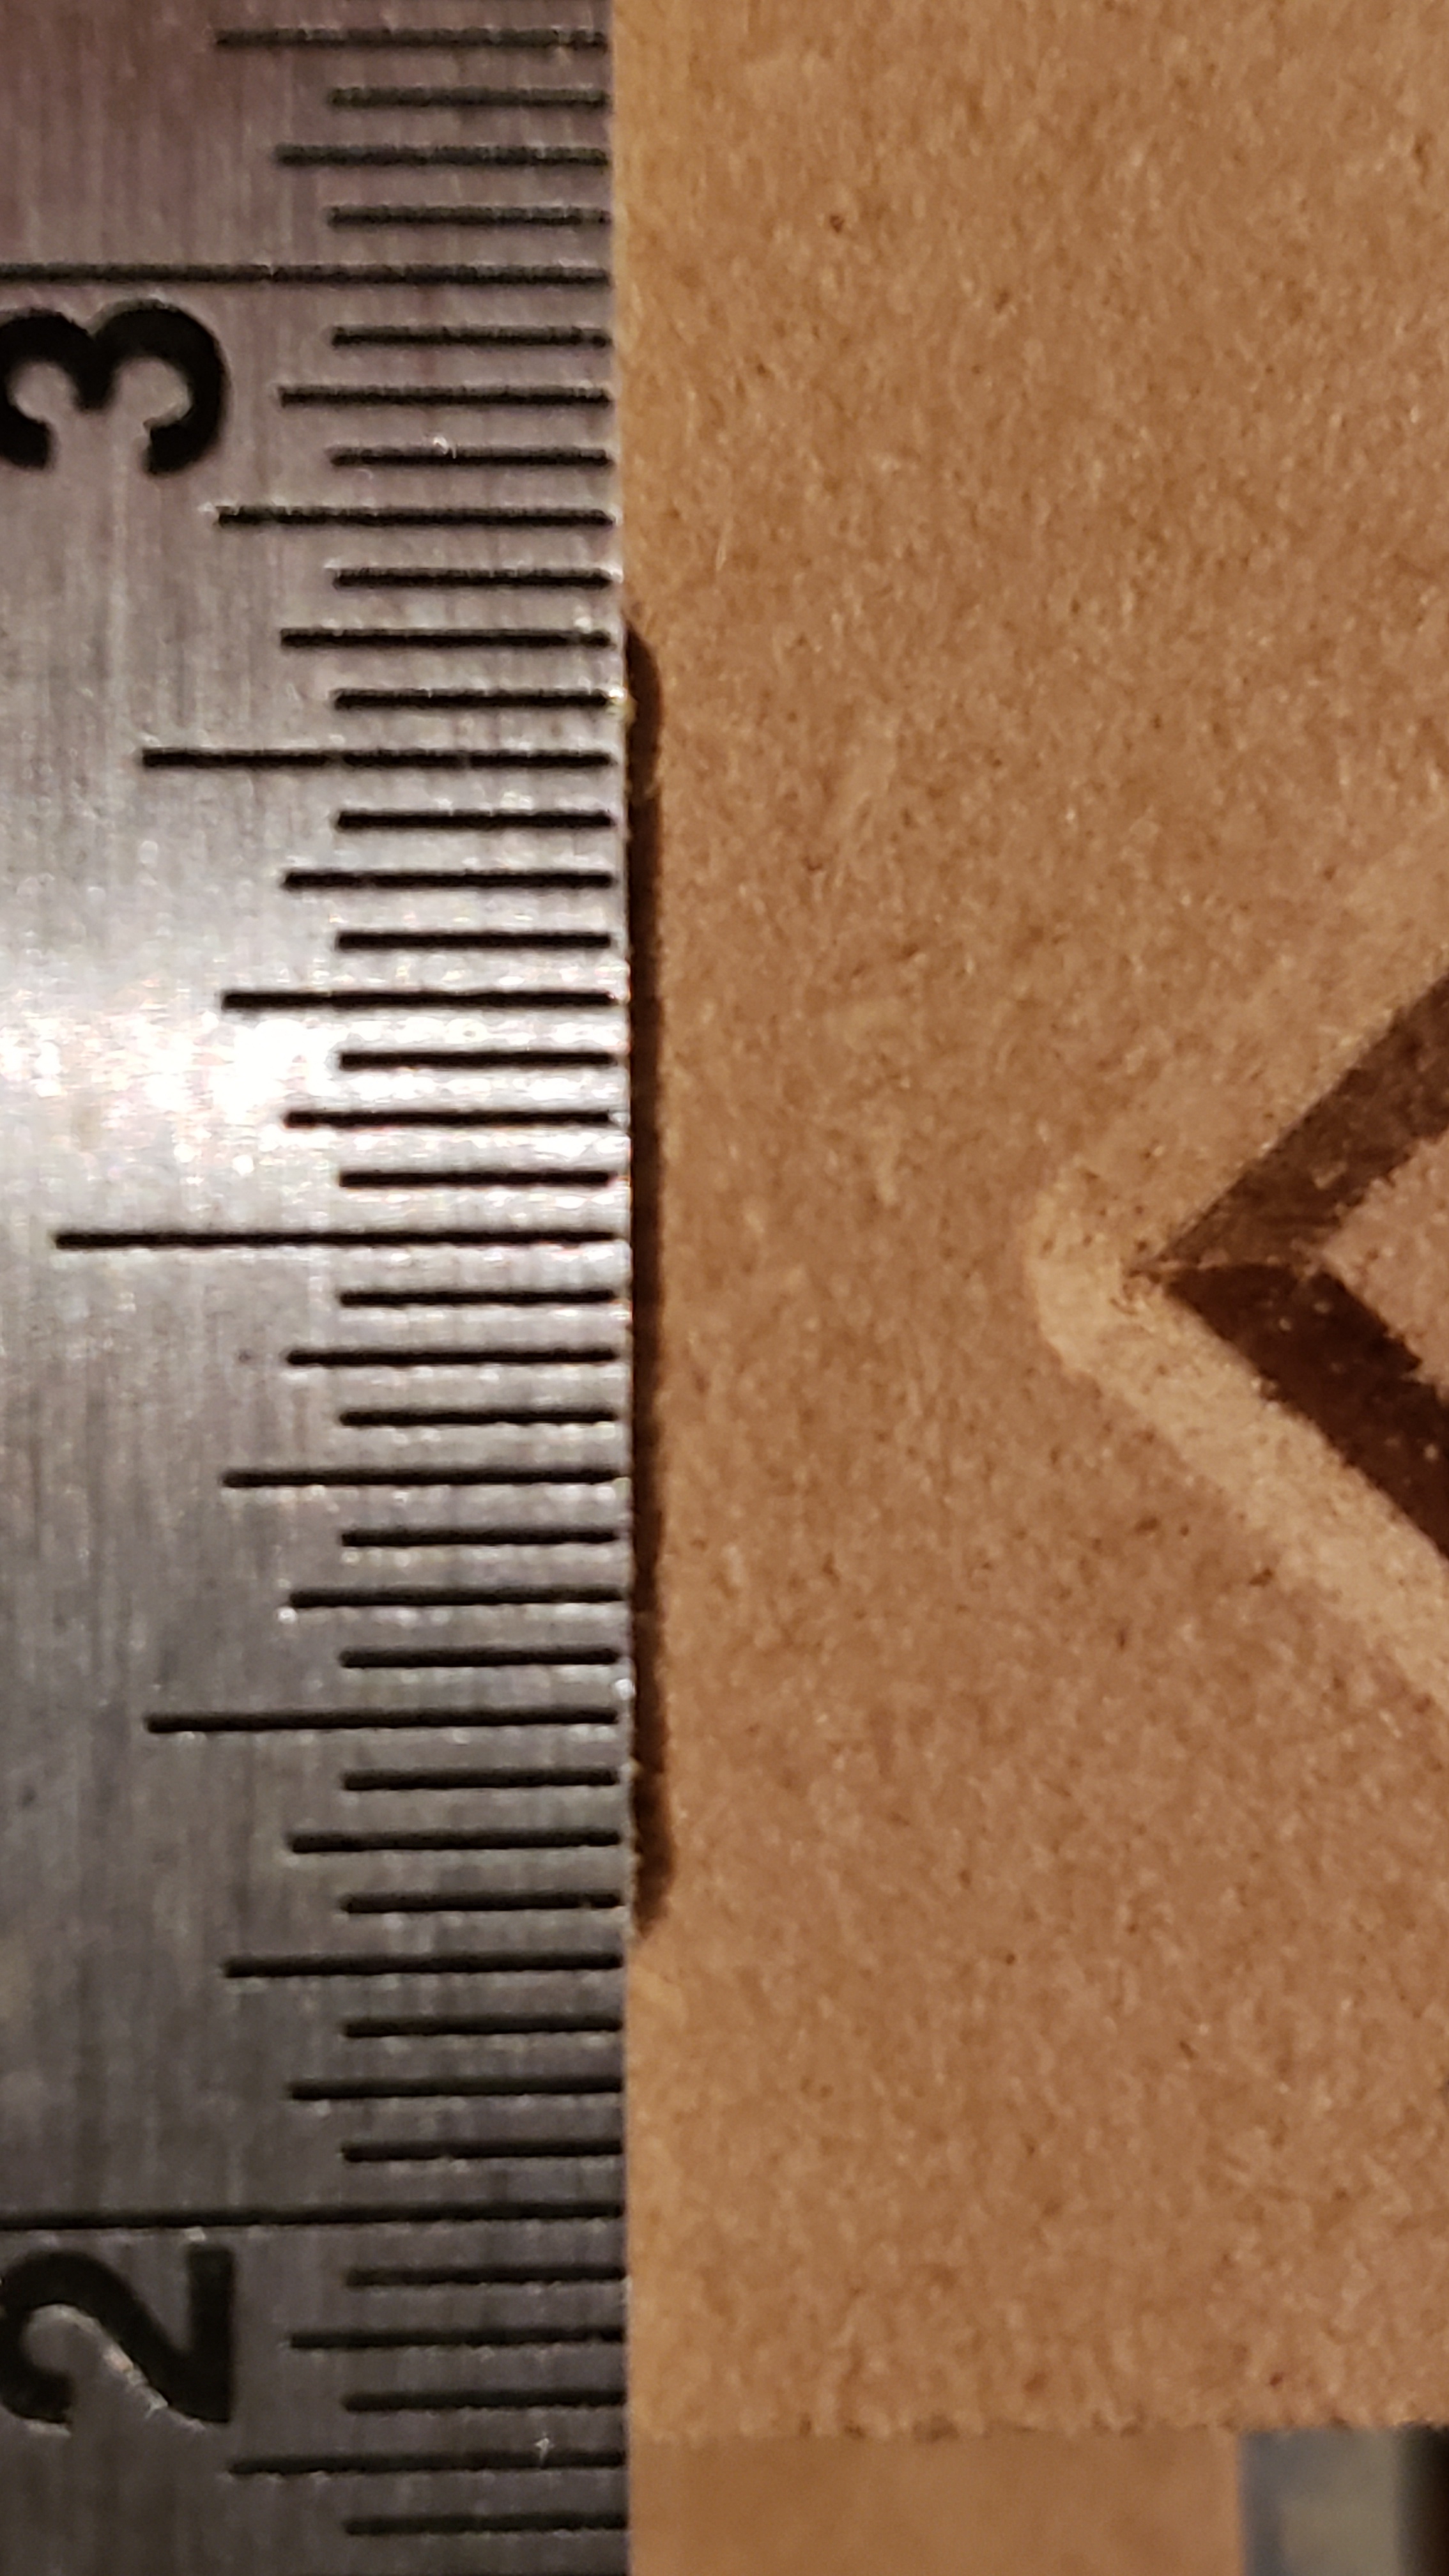
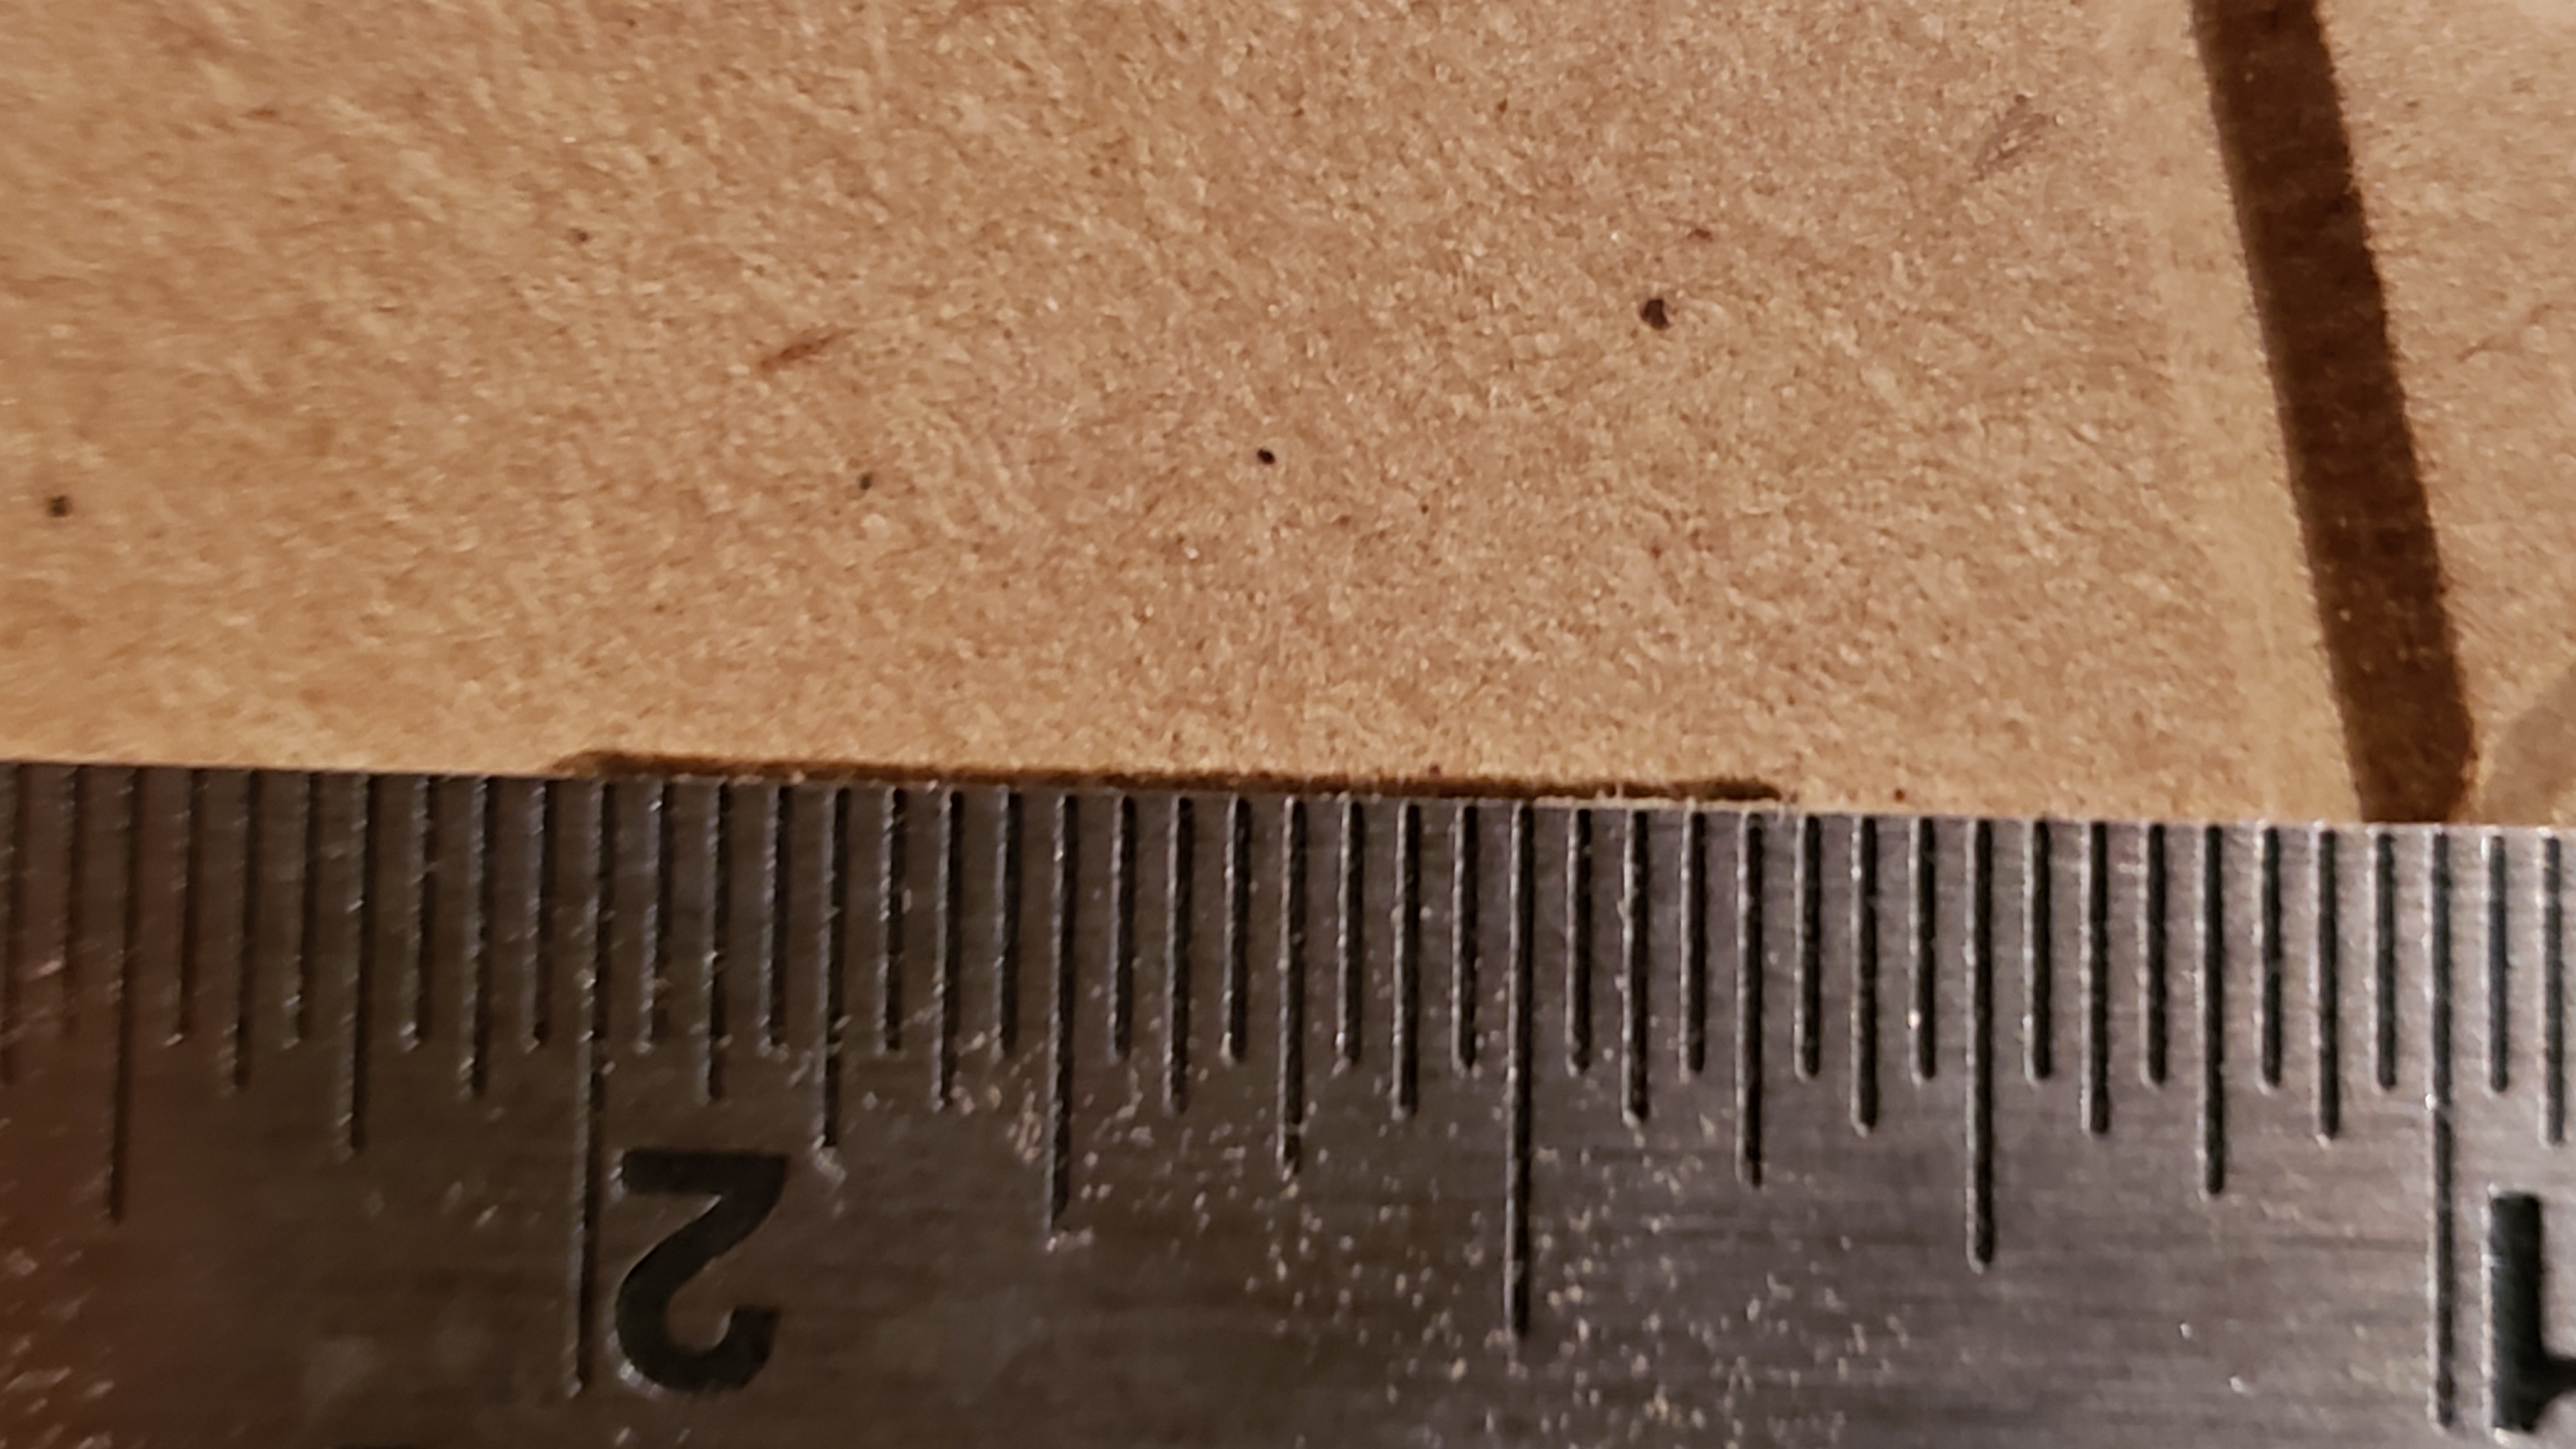
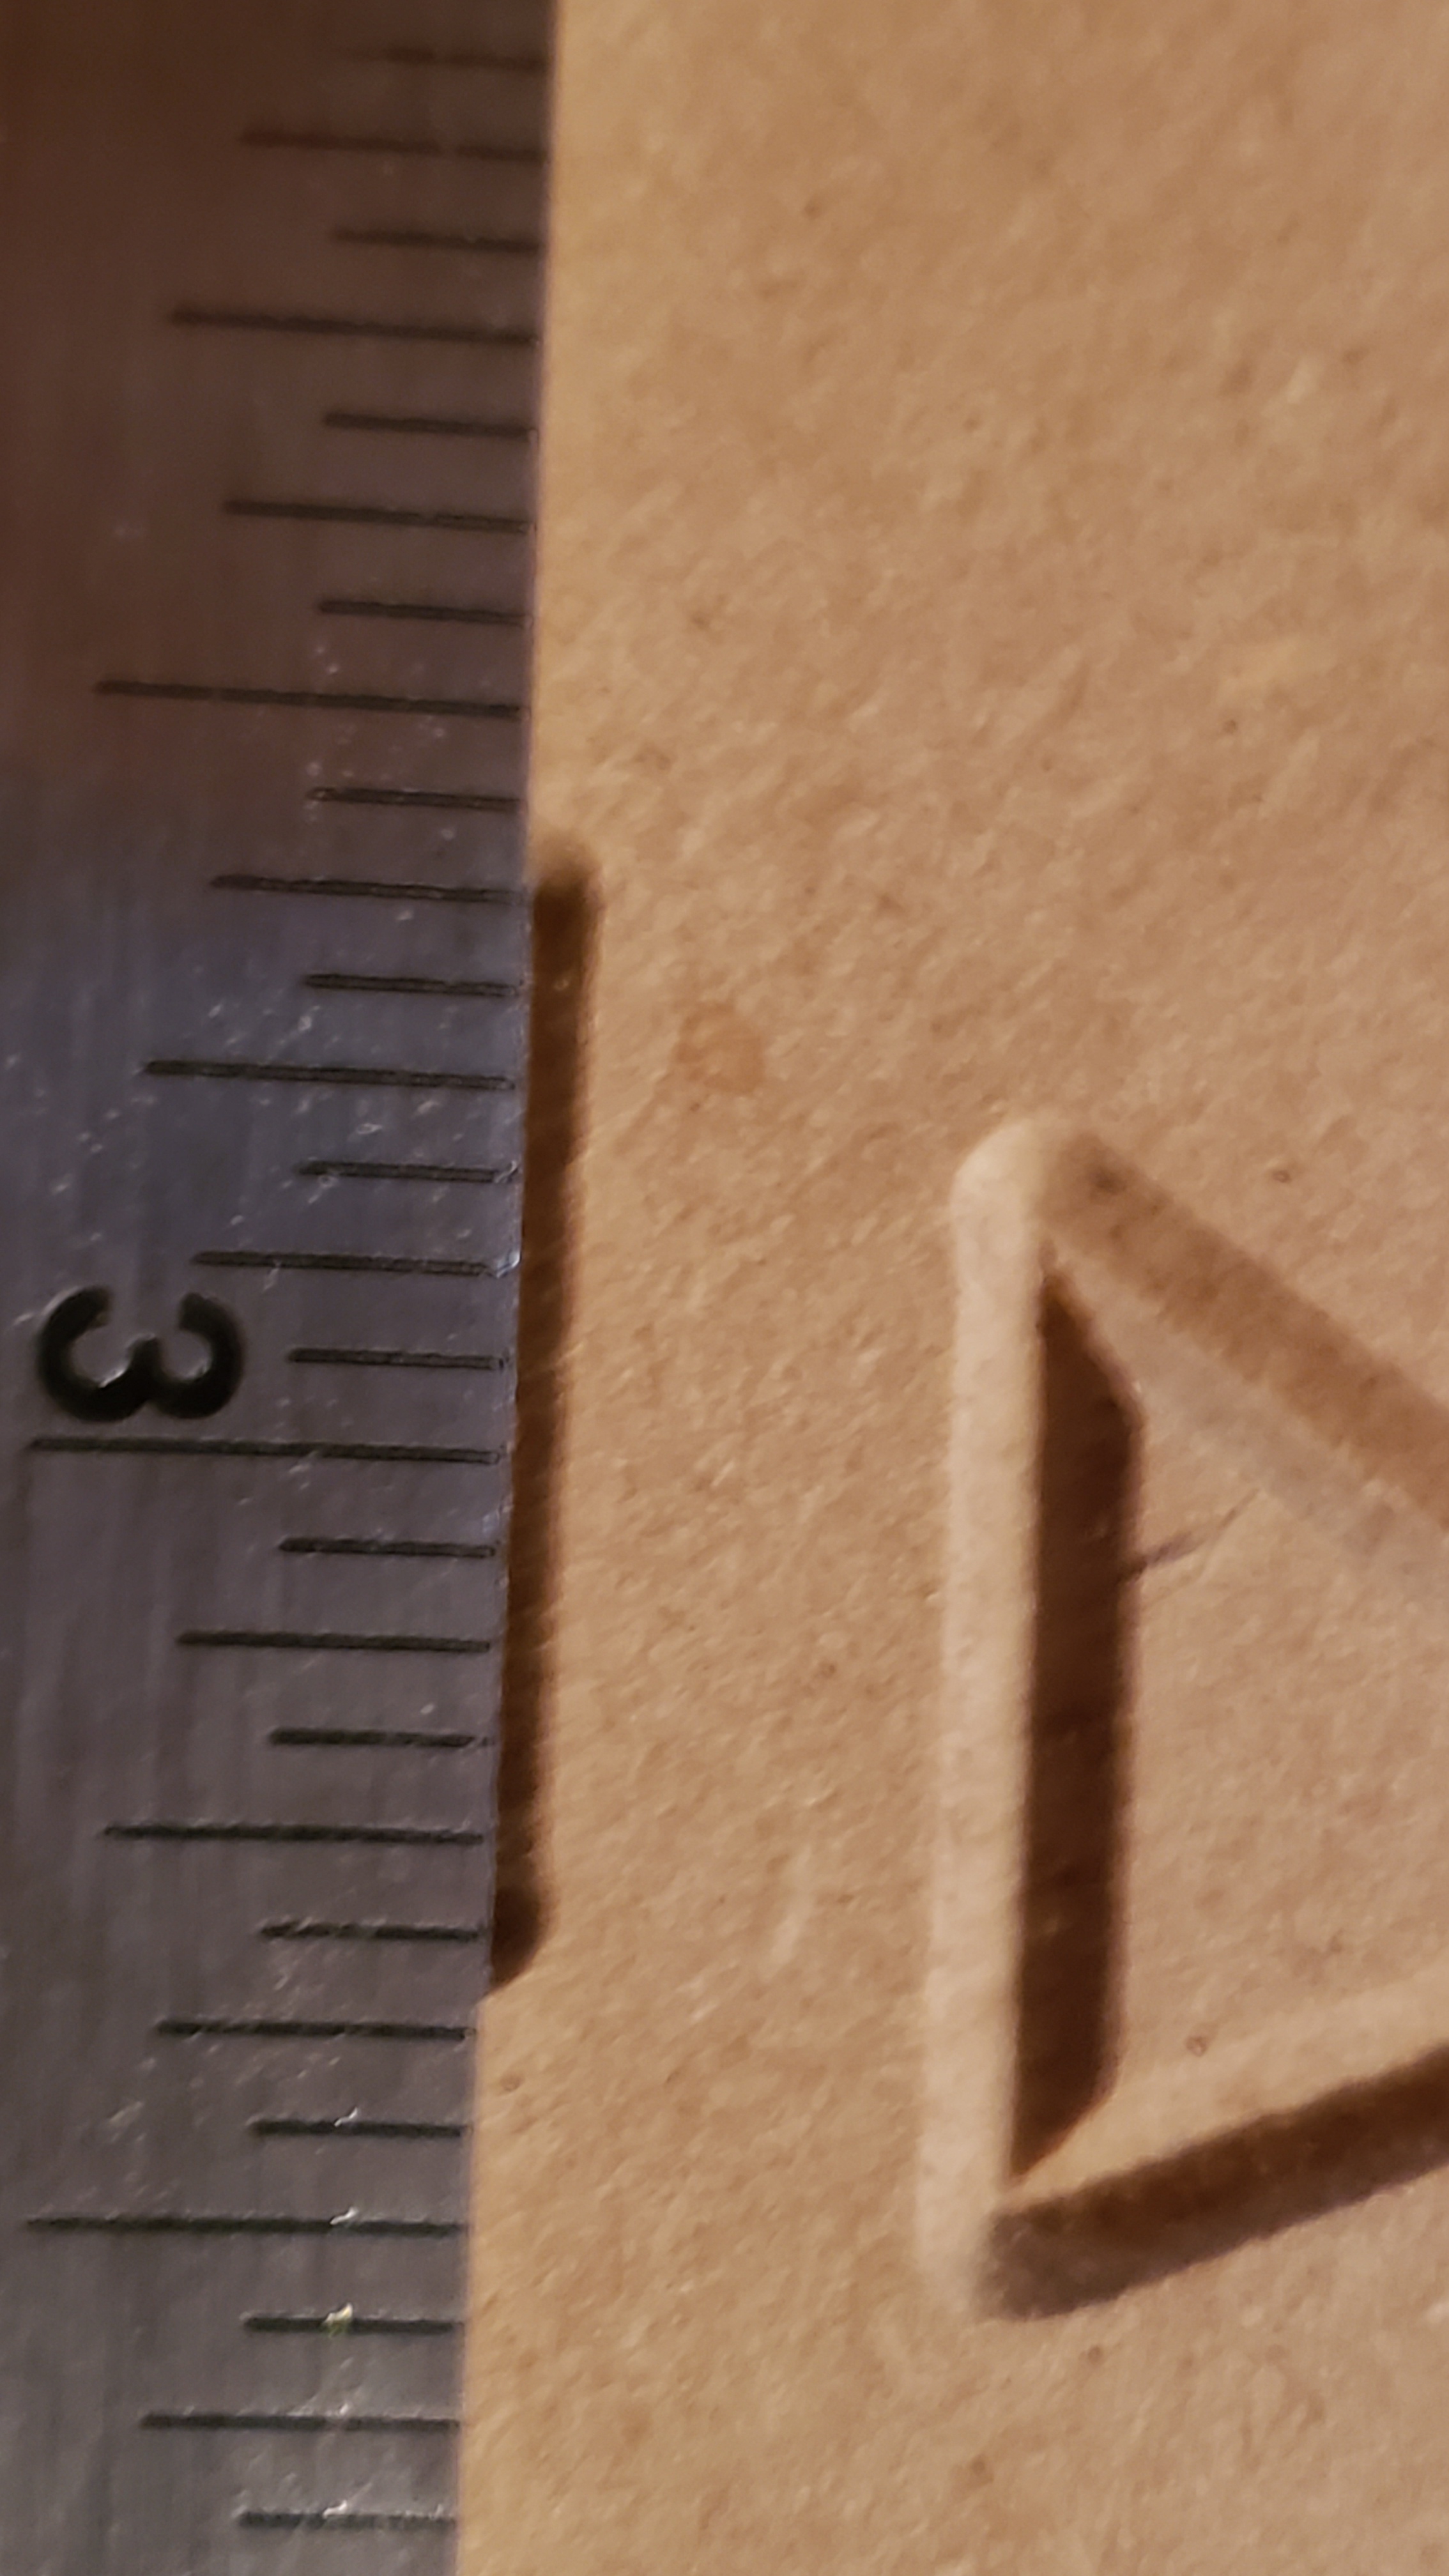
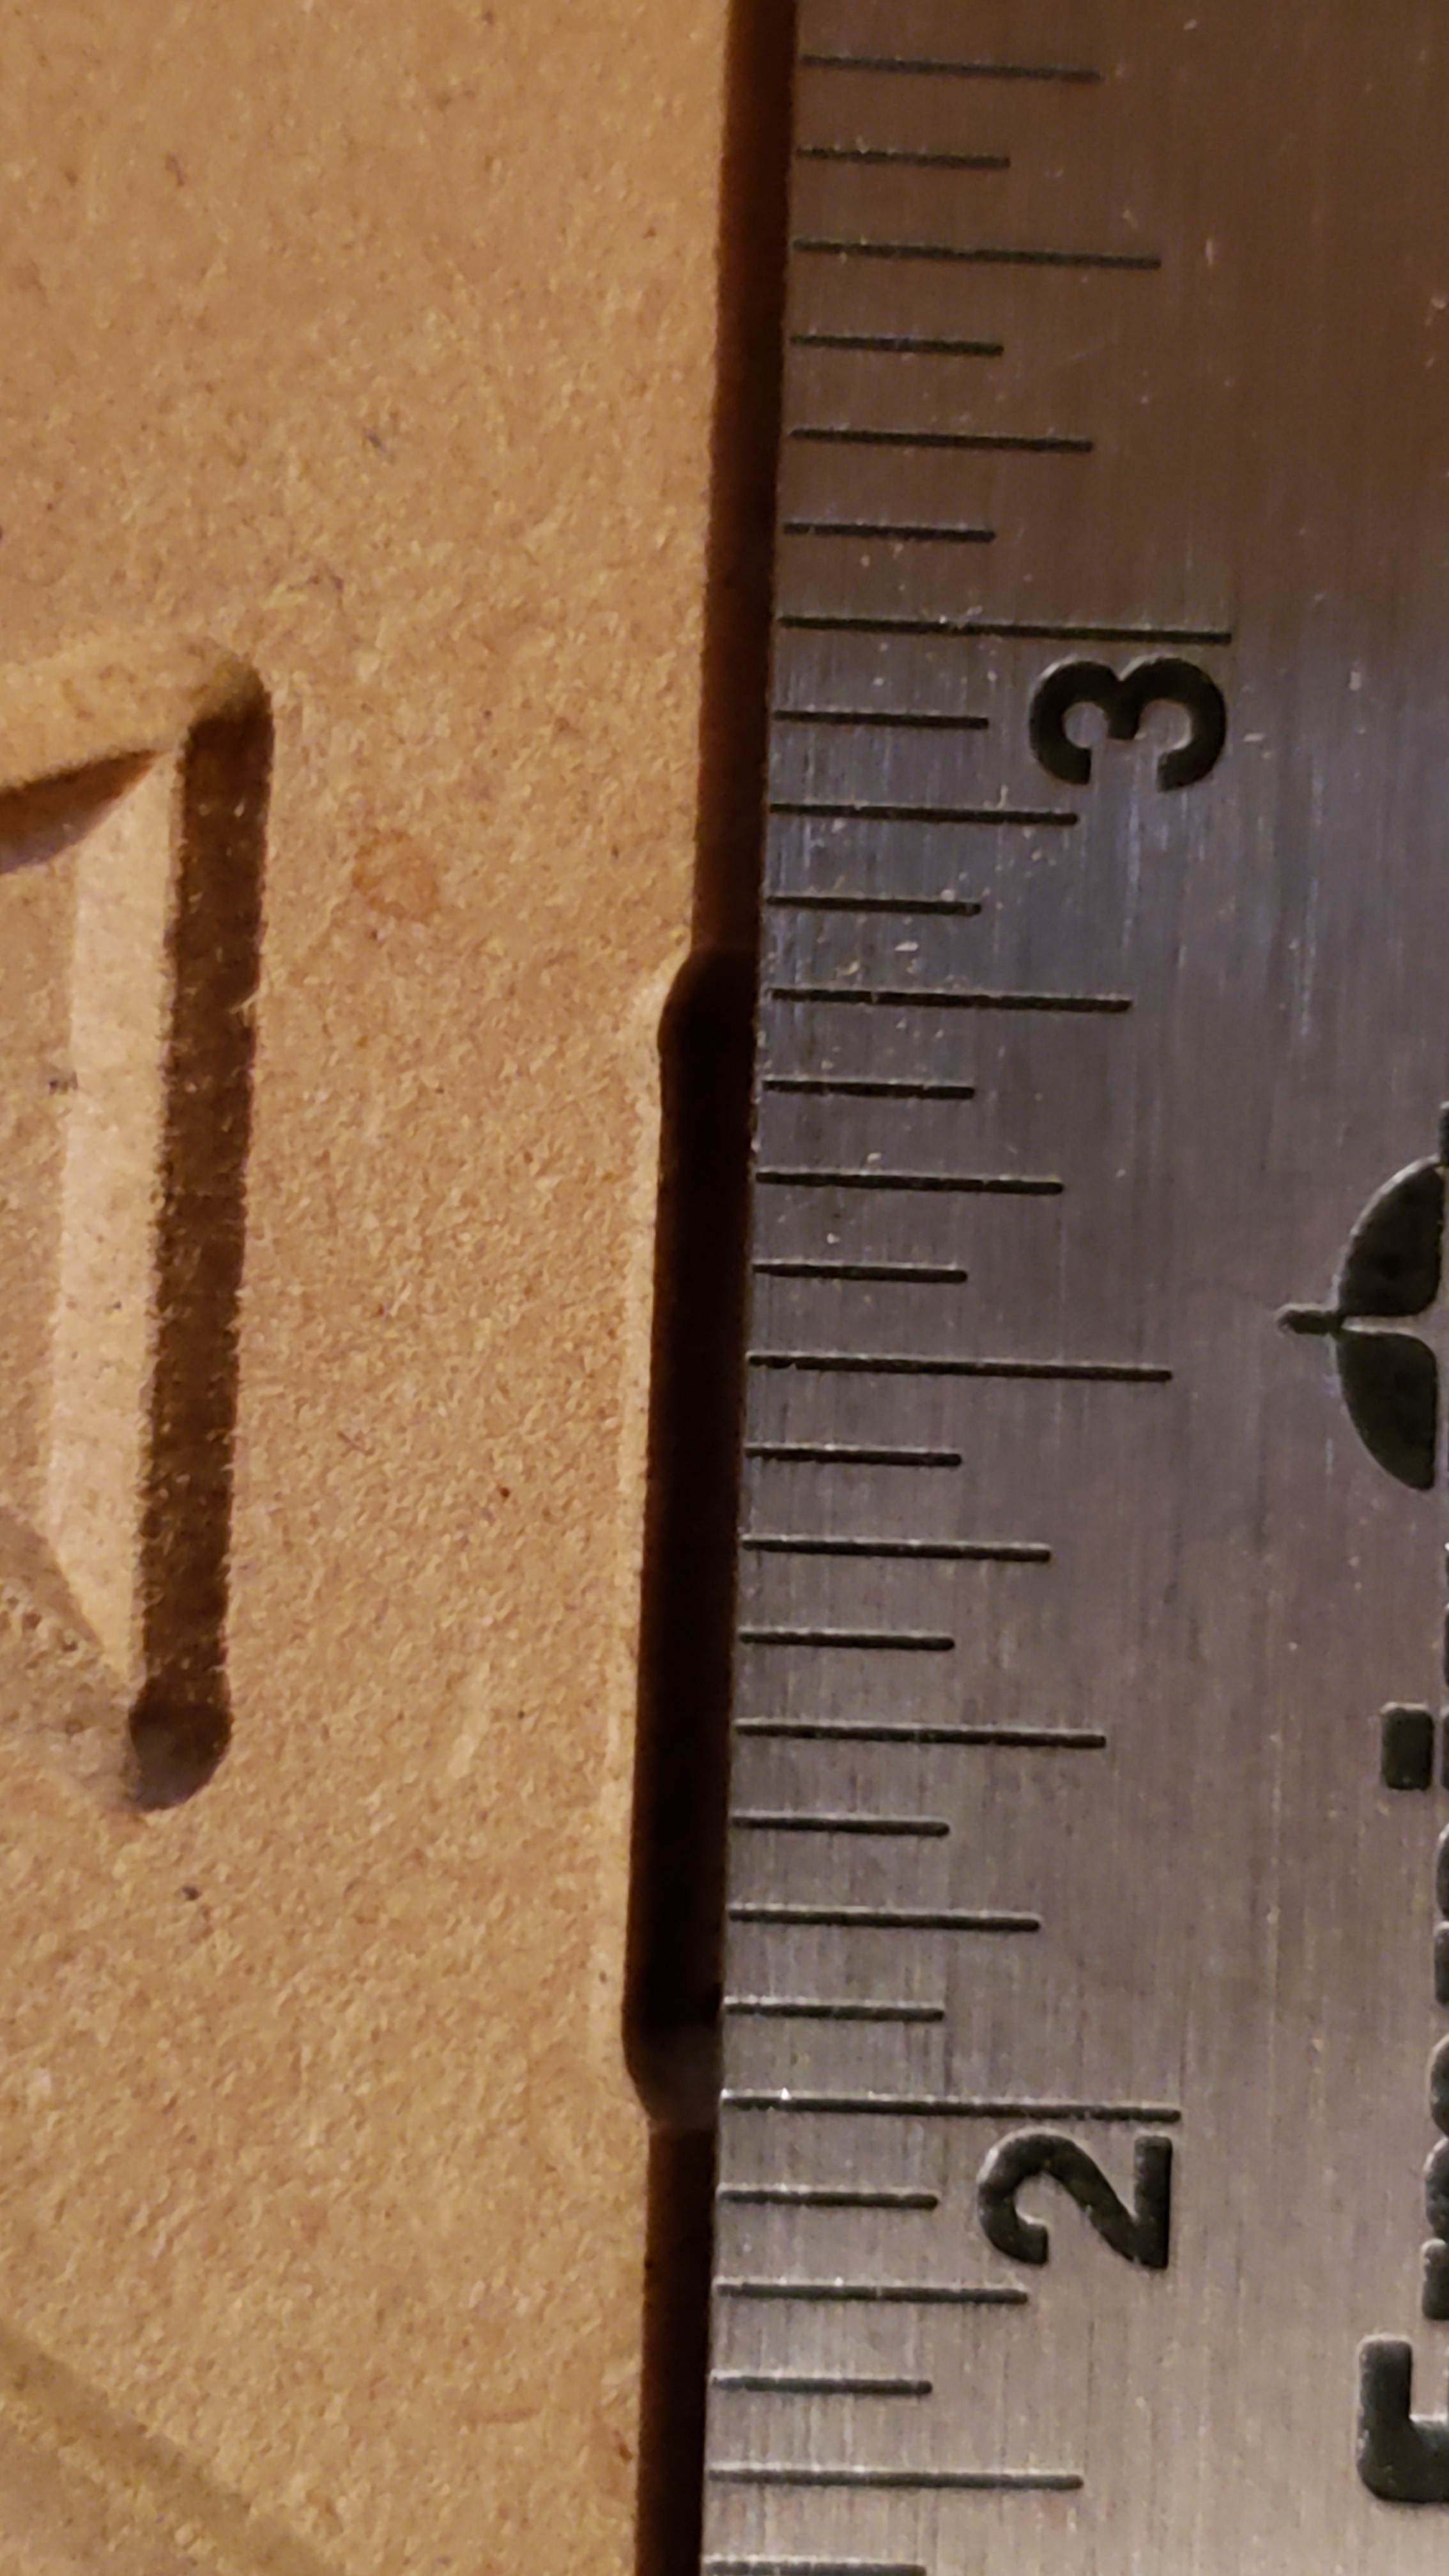
And a comparison with a ruler edge:
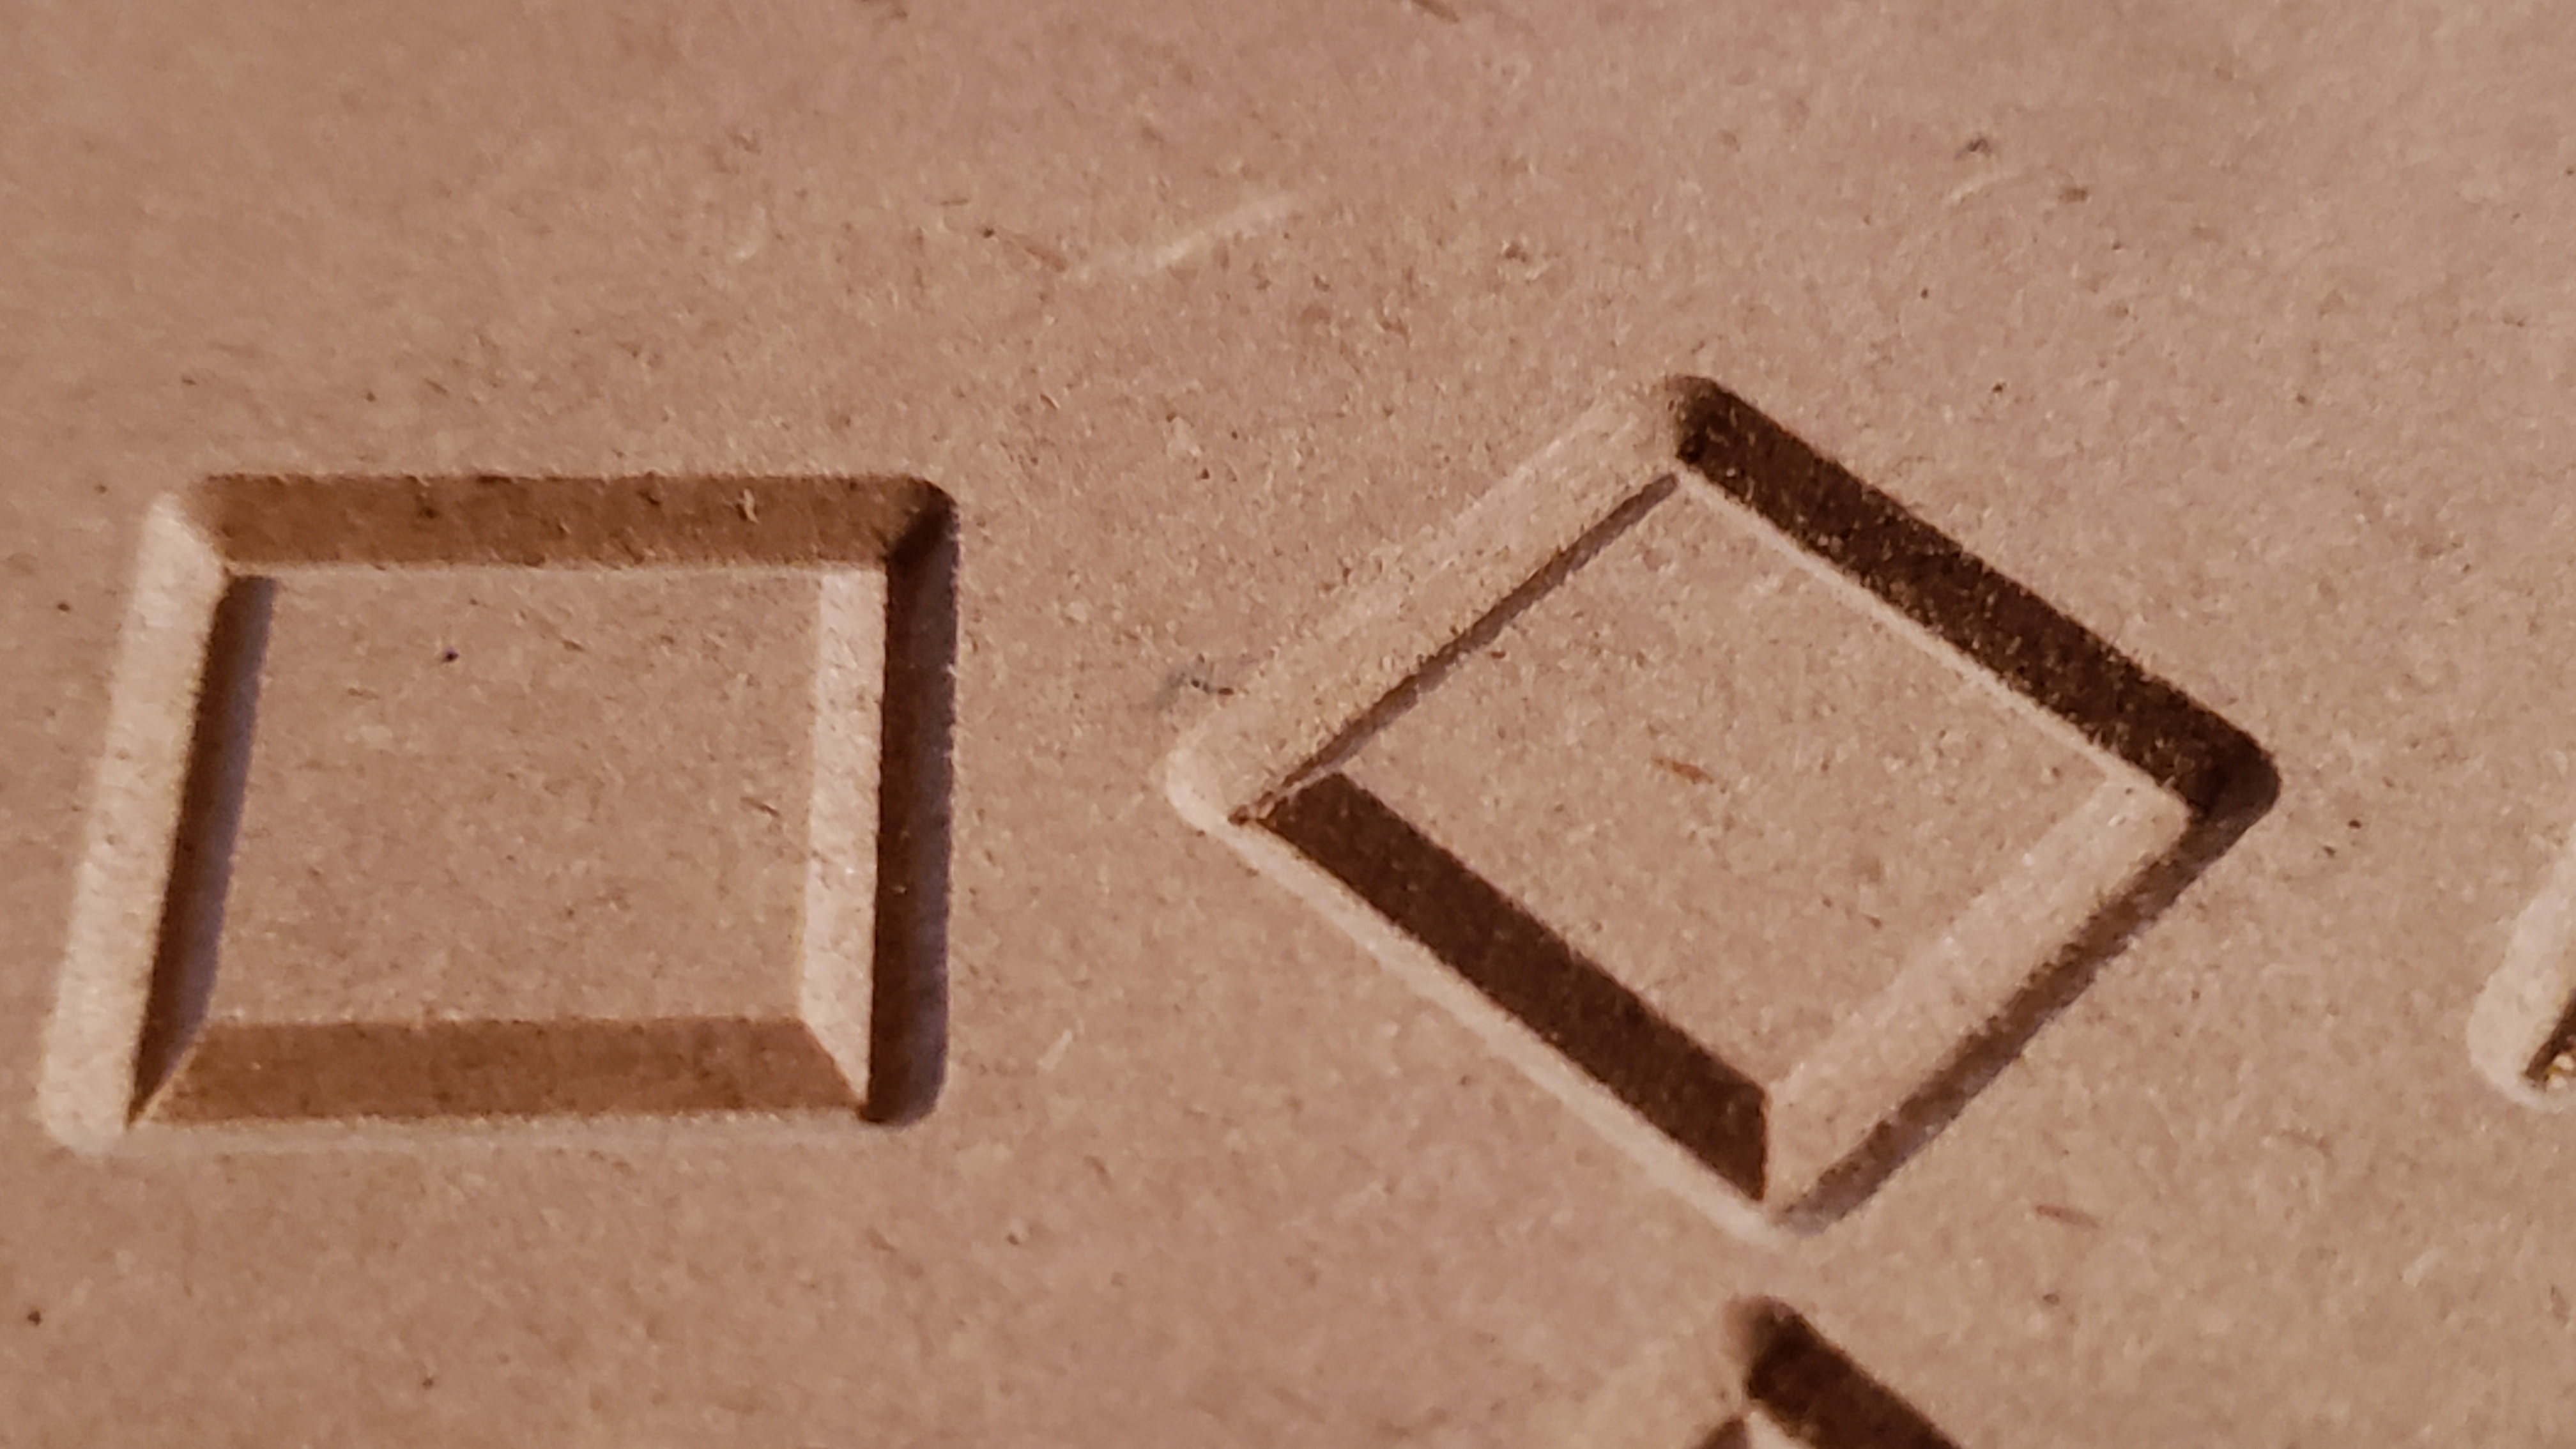
Profile:
V-Carve (from my previous post):
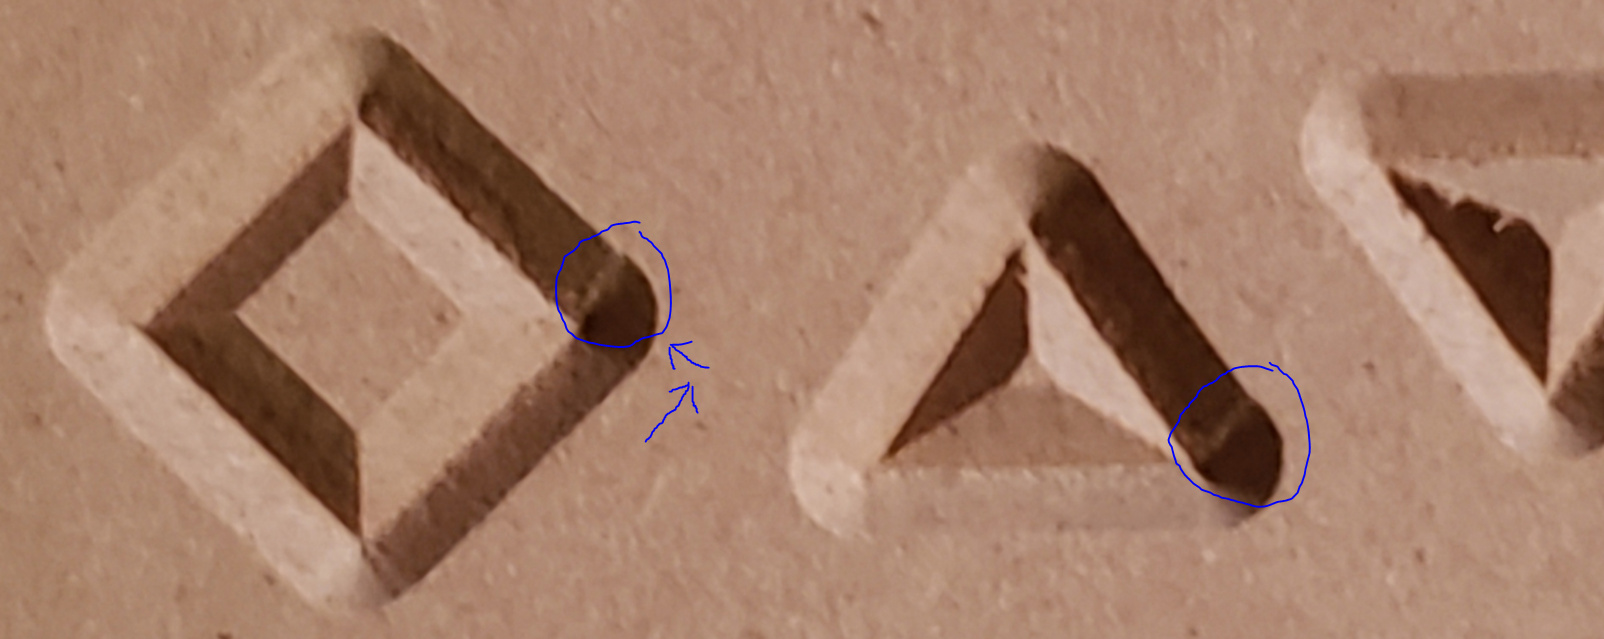
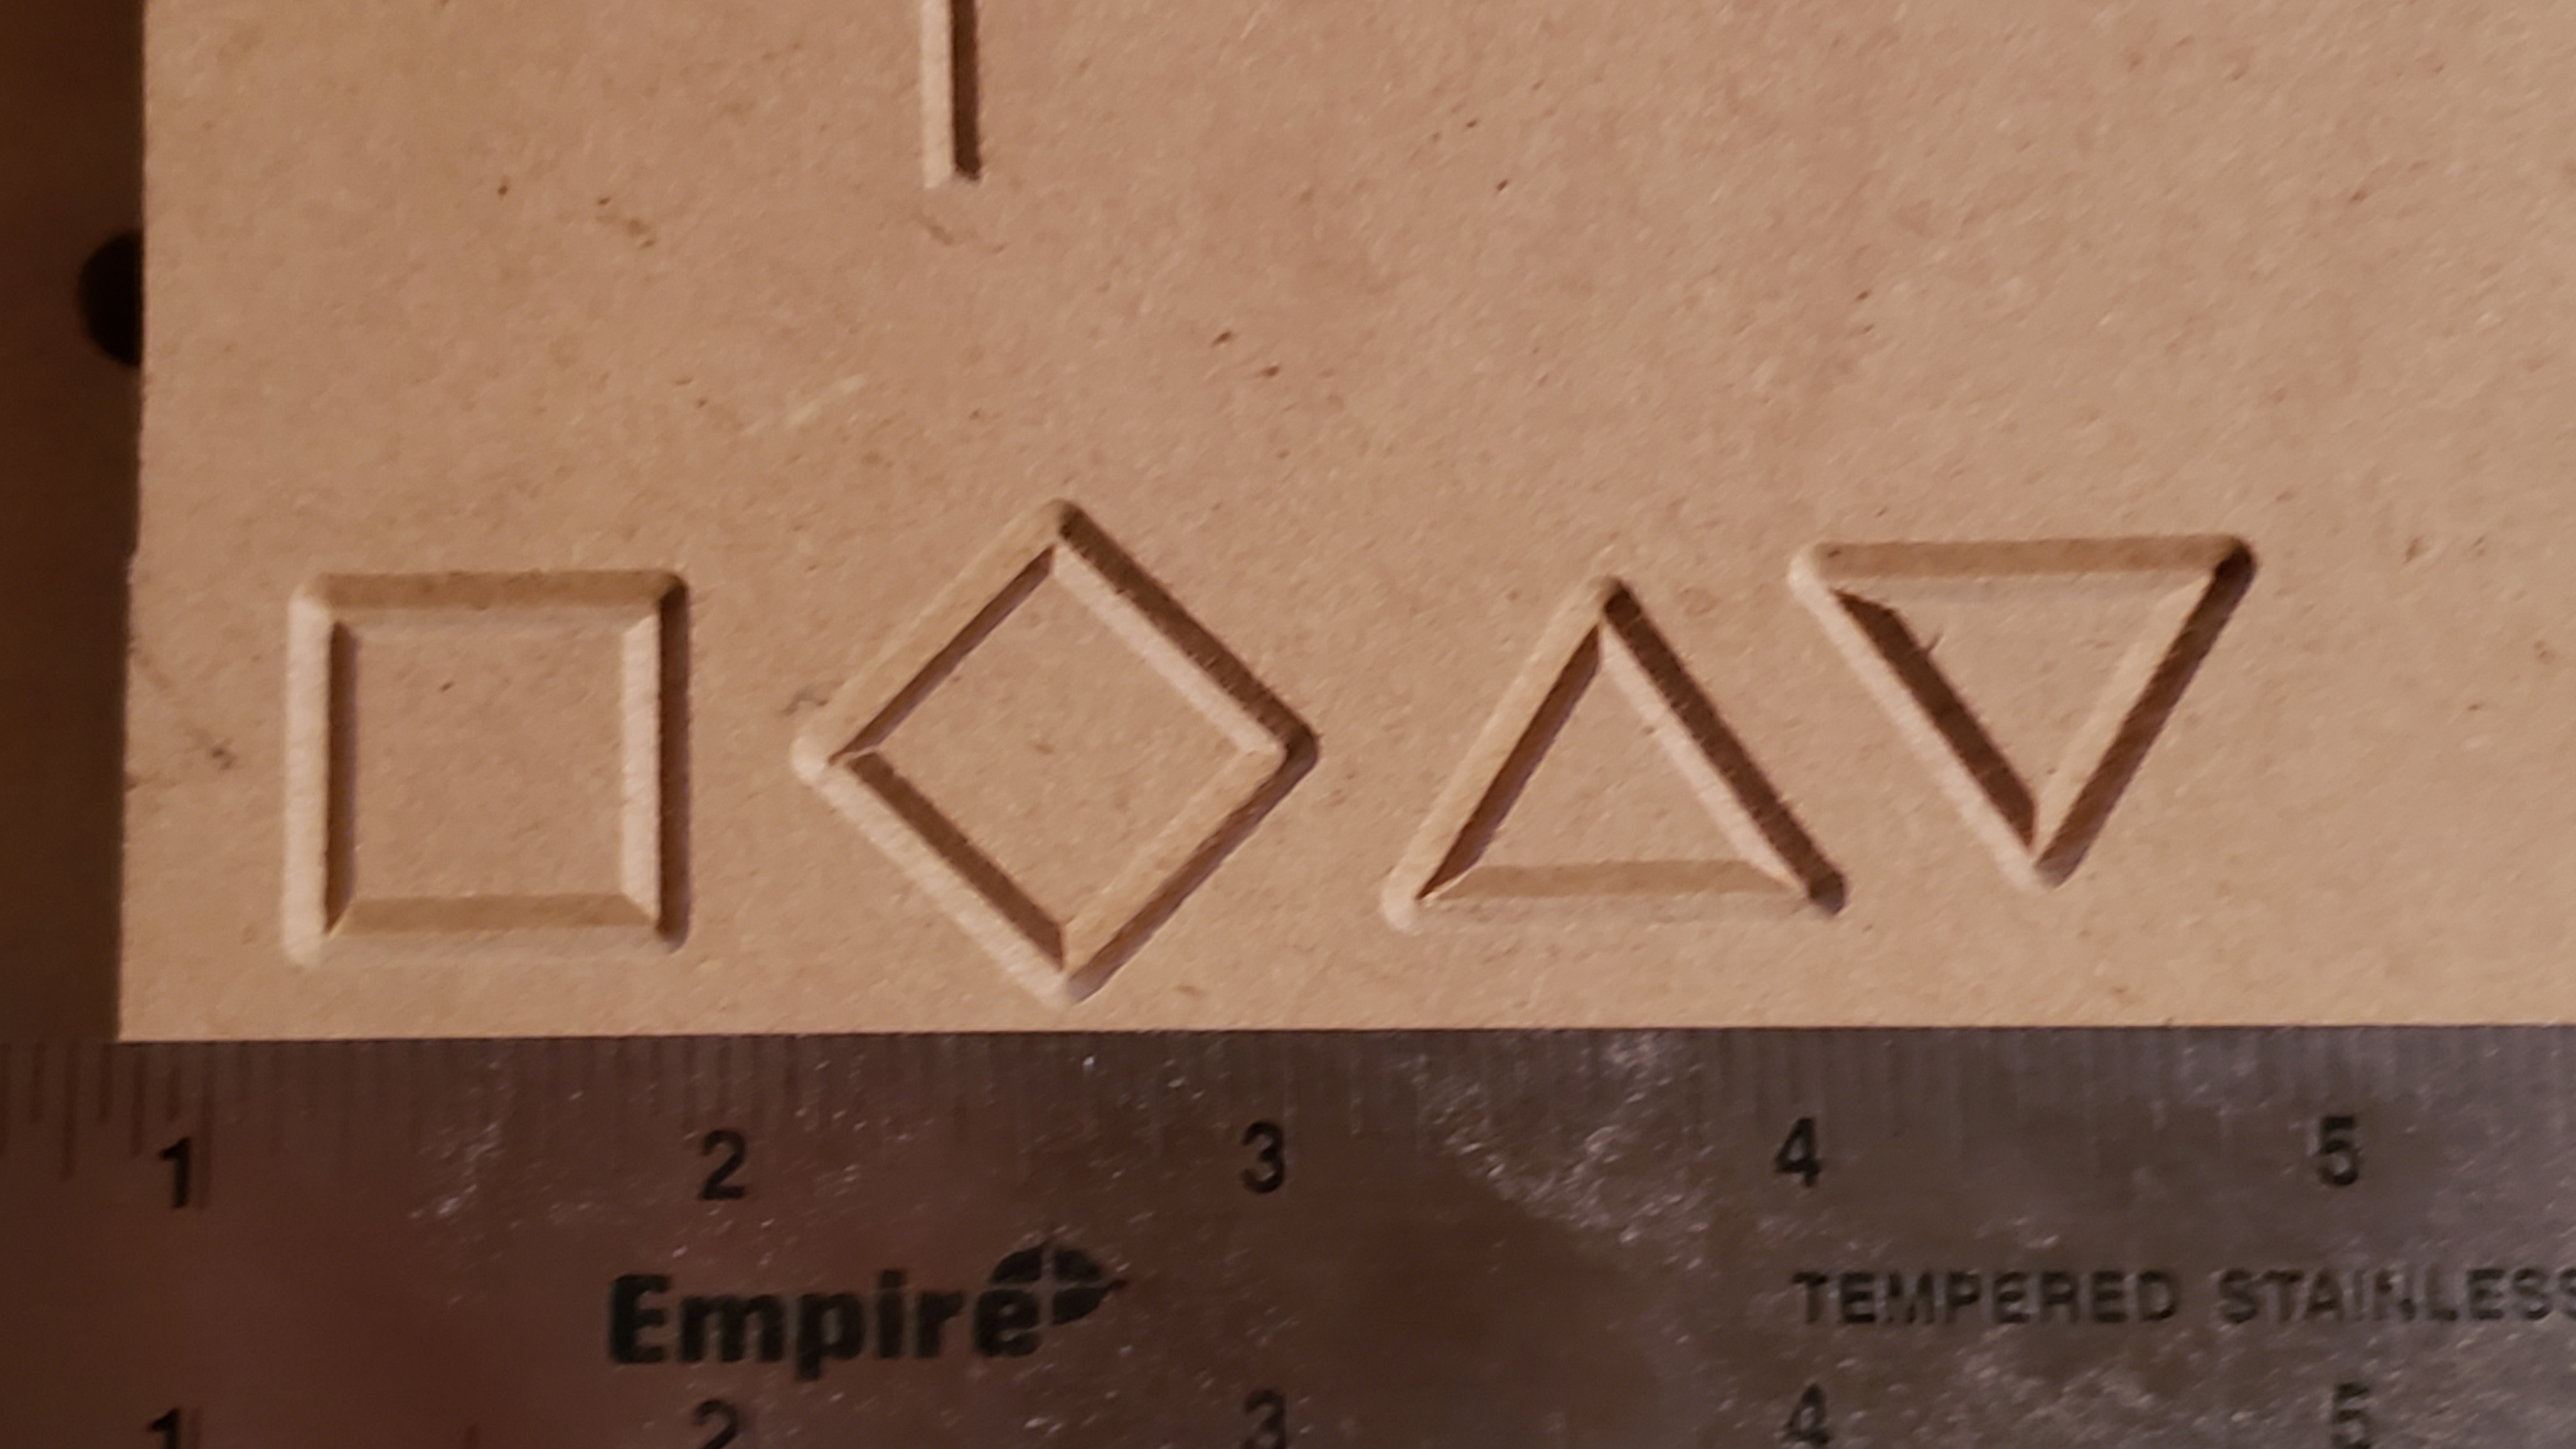
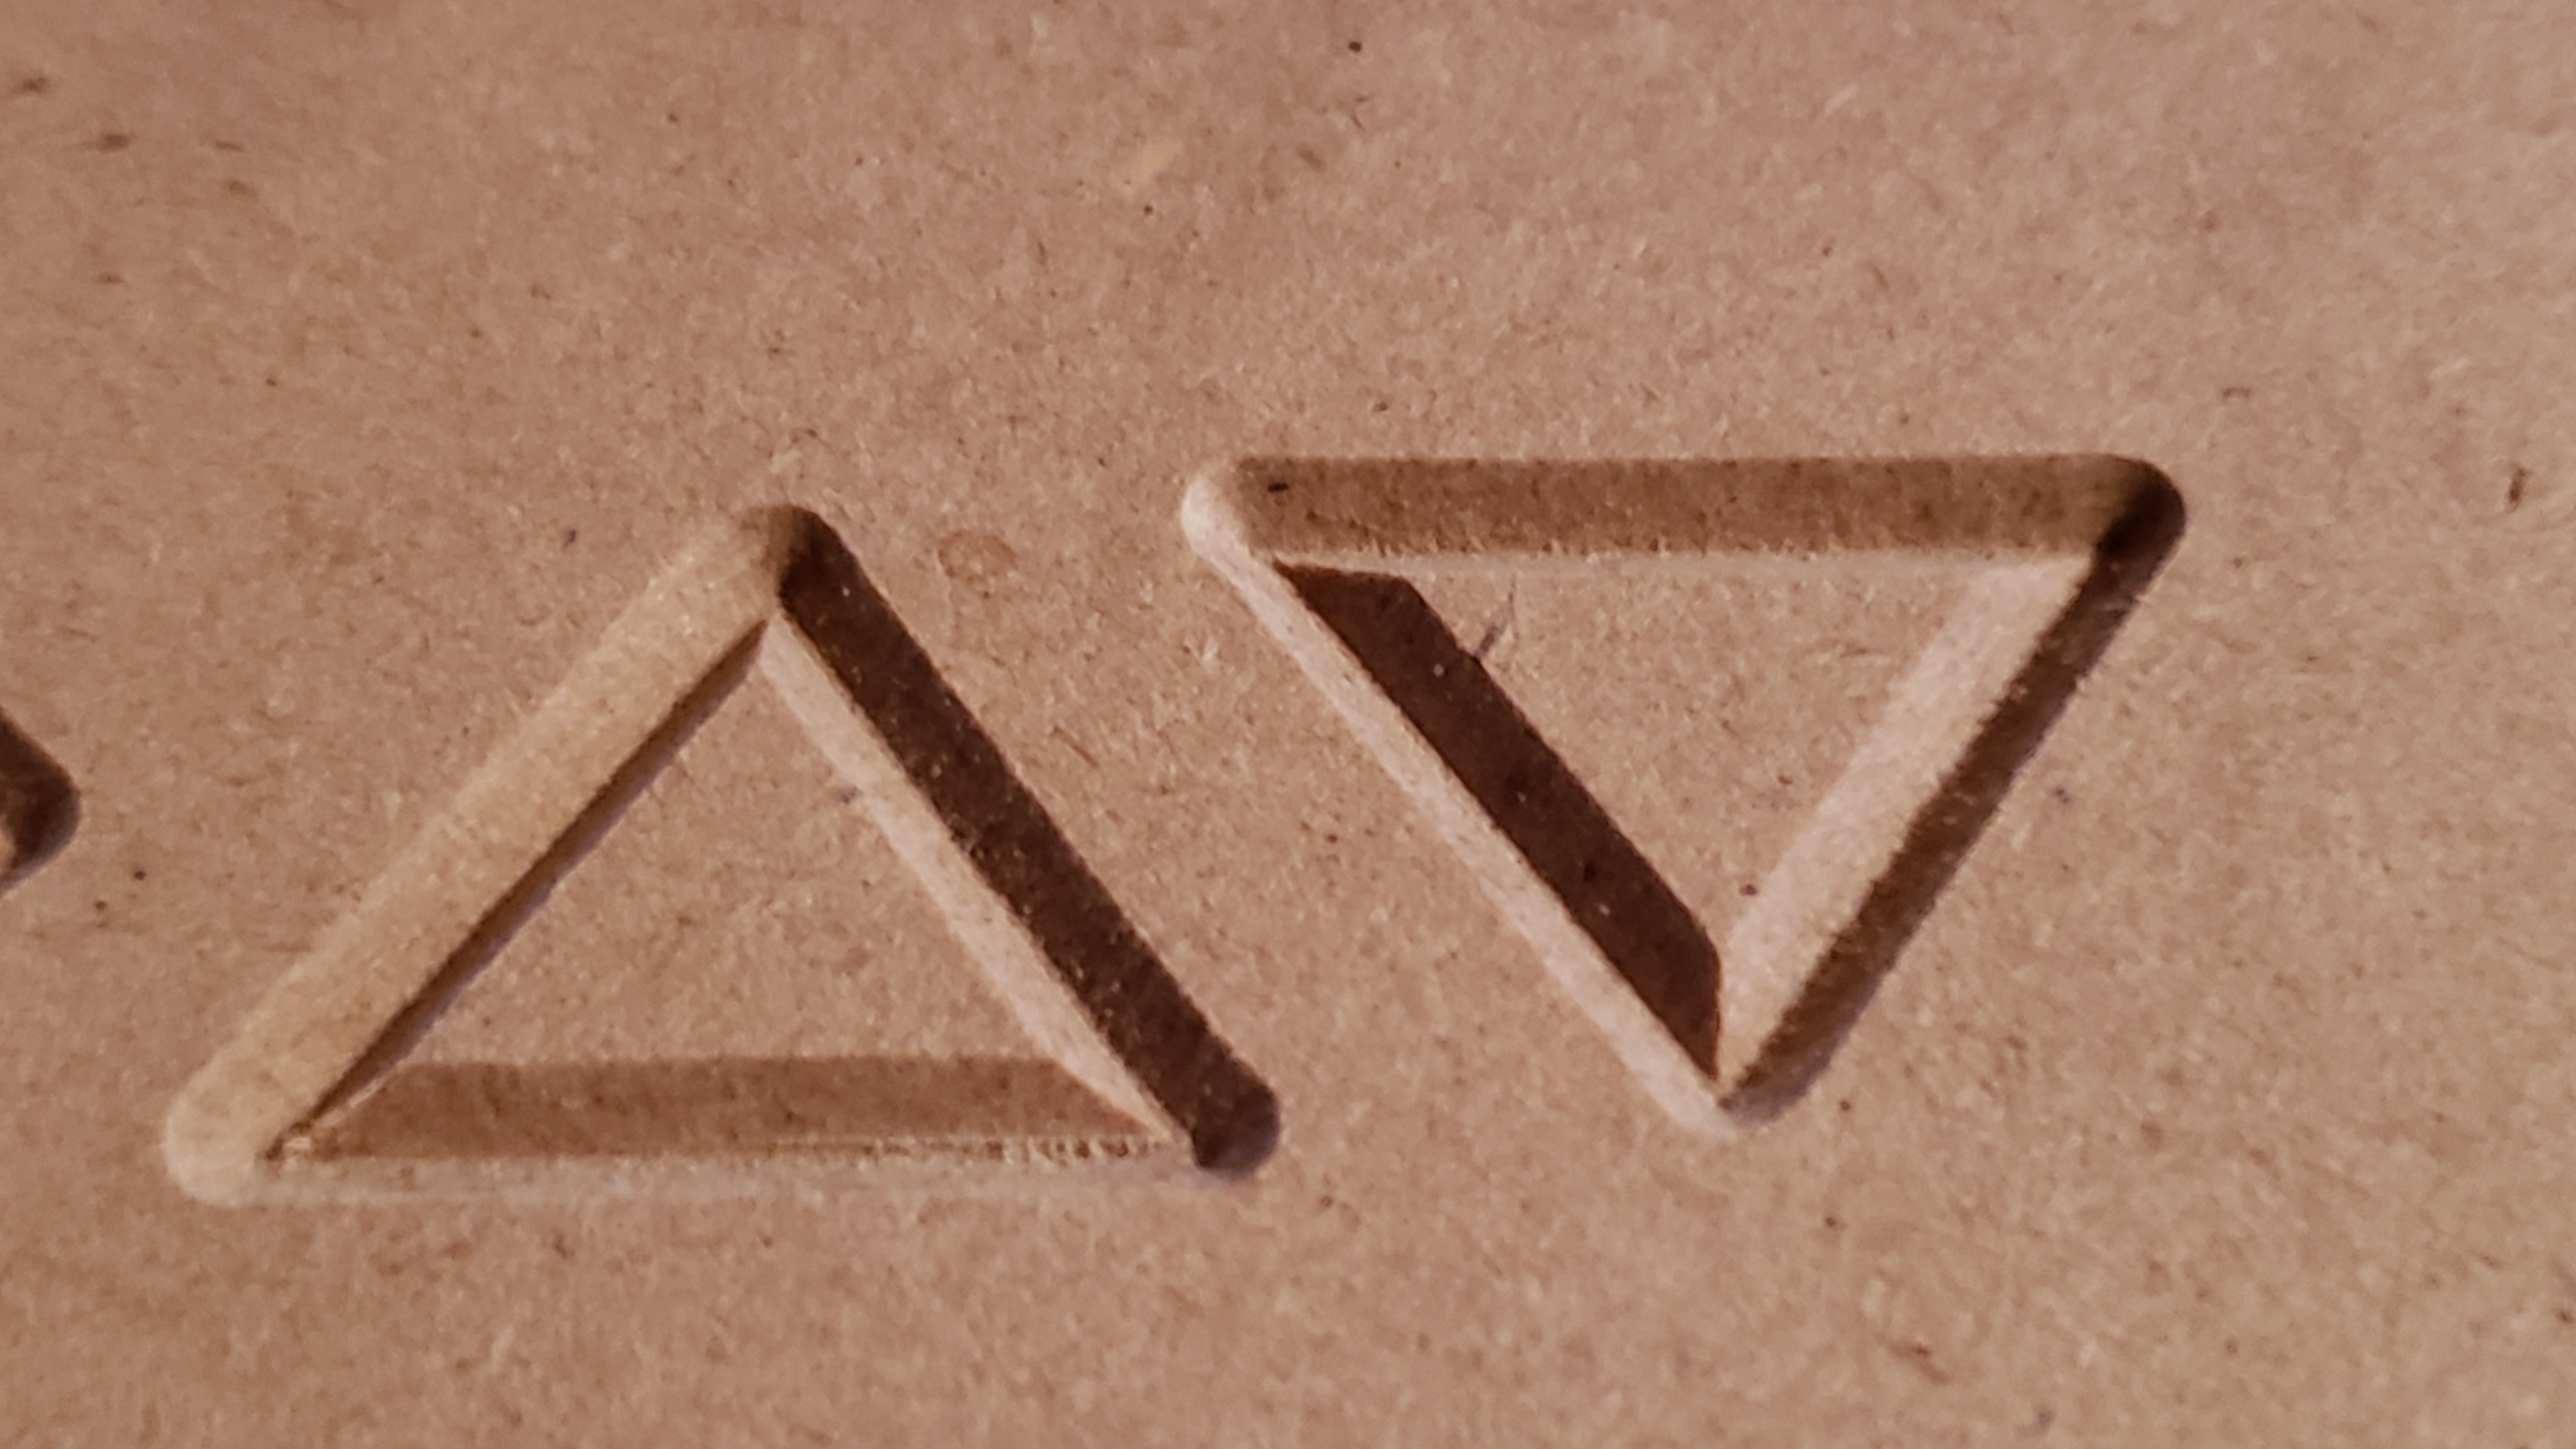
Interestingly, now that I look closer, I do see a slight issue in the first photo… but only on when it’s travelling in a certain direction. Maybe it’s the shadow highlighting it, but it does seem to show up on the surface as well.
I thought maybe those corners lined up with the start points of the cut, but not exactly. The blue circle on the left most shape is the start point for that shape, but for the triangle it’s the top corner, not the circled one.
That last picture has me thinking, if this could be a deflection-related issue. Are the areas you circled in blue the points where the tool plunges in the material for those profile cuts ?
When cutting a square profile, if tool deflection is large due to the various cutting parameters, you can easily get a small bump right where the tool started to move after completing the plunge to cut depth.
What is the stickout length of your V-bit in your collet ? Maybe try with the Vbit pushed as far as possible into the collet and compare.
As @julien said, deflection due to stickout could be an issue, it should go as deep as possible to fit both the collet and minimum required for the cut. Maybe a 3 pass would also help.
The plunge point matches up on the square, but not the triangle. On the triangle, it’s the top point.
The v bit in this case is 1.5" tip to butt, and I had it in the collet roughly 1", so about a quarter inch of exposed shank and the rest is cutting surface. Is that really so shallow for deflection to occur, on MDF of all things? This is at 40ipm feed, 15ipm plunge.
I’ve already done a ton of tests slowing down the feed rate and pass depths with pictures in this thread - not really excited to do more unless it’s something novel.
Yeah I agree that a 1/4" stickout on a 1/4" shank is too little to produce any significant deflection, and that your tests at reduced speed would have shown an improvement already. I was just asking as a double-check, to get the ideas flowing until we get to the aha moment and someone puts their finger on the root cause.
Does the issue also happen if your limit cut depth to a single pass (e.g. at 0.063")? I re-read the whole thread quickly and unless I missed it, we have not established whether the issue persists when the tool never leaves/re-enters the material?
If the issue does not appear with a single pass, then we should focus on something messing with the Z offset between the first and second pass? (backlash on Z ?)
I believe the profile cut is the only example of that at the moment… it only uses Z at the start/plunge point. And the slight issue that I see in that test didn’t show up exclusively on that corner.
All the other tests, the issue occurs with the Z axis moving on a linear inclined slope to sharpen the corners - either in concert with X, Y, or both depending on the orientation of the shape… Whew, took a while to wordsmith that, hehe.
While you are at it, can you do the “Zero-level consistency” test that @DanOlson suggested earlier ?
I see you did tighten the Z-belt, but what about zeroing, jogging up, and then jogging back down to check whether zero is still perfectly at the same level ?
OK, did the z zero consistency test. Did it just until the paper was difficult to move under the bit, just a couple .01mm steps down after it started to scratch the paper. Zeroed Z, jogged it all the way up, then back down. jogged up and down a couple times to be sure, felt the same each time.
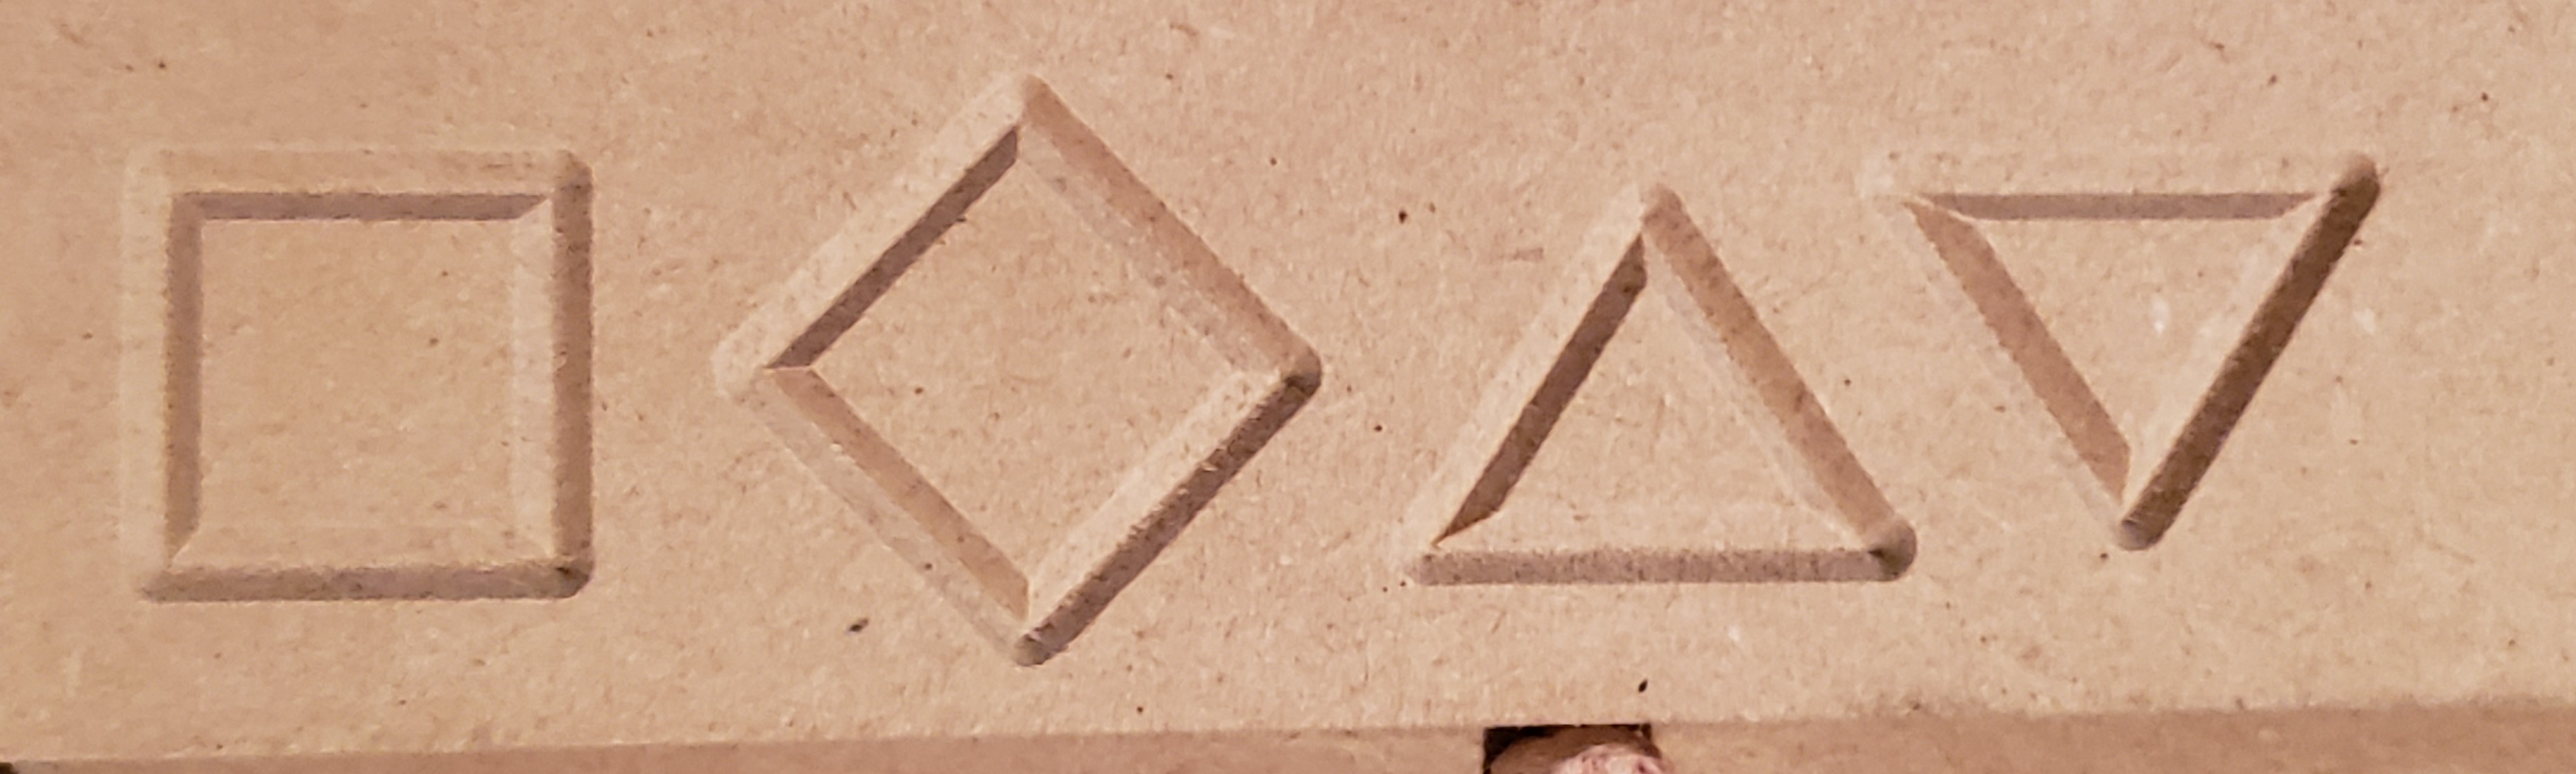
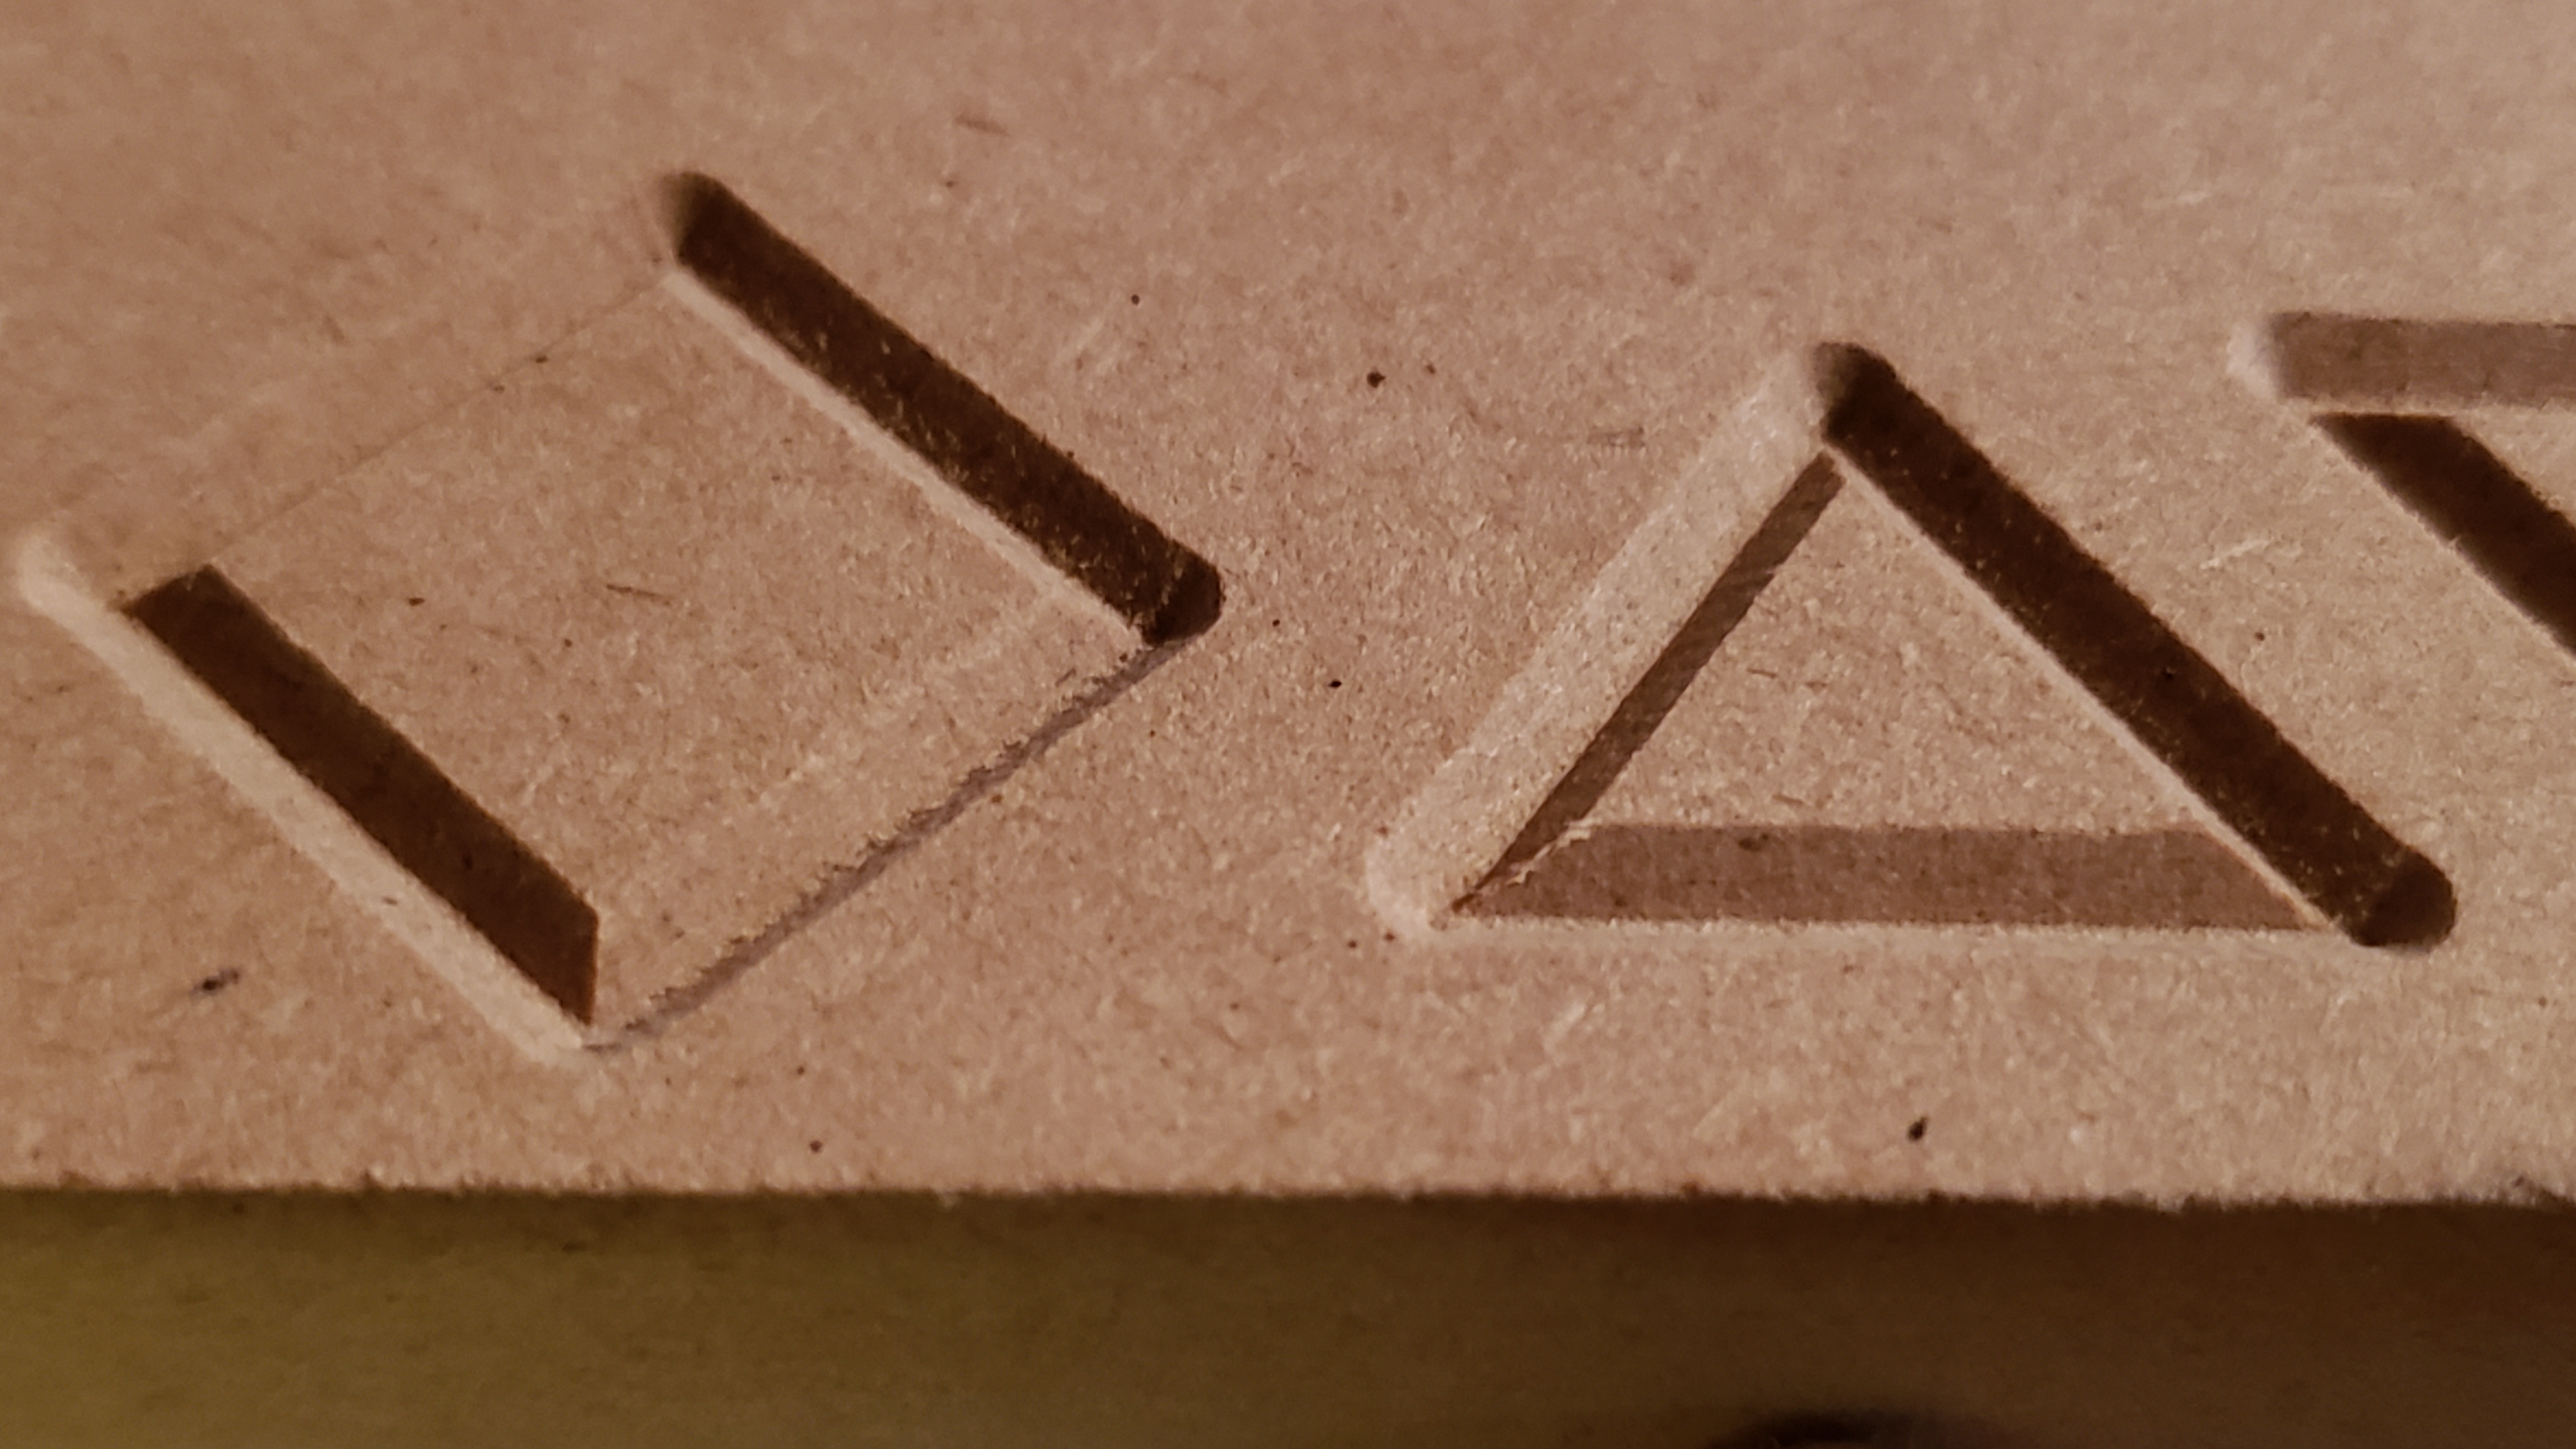
Here’s the single pass cut, .063 depth. close ups in order are shapes 1, 2 and 3… right side of square, NE side of diamond, and NE side of the triangle.
I’m curious about the g-code for this last attempt. It almost looks like the plunged in the corner then lifted the z axis a little bit then moved to the next corner. I would think that the z depth should be constant for this last test.
Please take a look here in the Google Drive folder.
Just about every test should have a gcode file, pardon my terrible numbering. I didn’t save the .crv each time, however.
This latest cut was 104. I did move the vectors around within the project in the last version, to make it easier to offset x/y and fit them on scraps of MDF, but their size/spacing didn’t change.
So in that last run it looks like the depth is subtly different in EACH corner, and we have already established that your zero is fine and your Z-belt also (but there might still be a little bit of play in the Z plate itself and /or wheels ?)
Anyway this got me thinking about how speed is zero in those corners, and how you could probably try @themillertree’s suggestion to use lower accels ?
i.e. change $120/$121/$122 from 10.0 to say 5.0
At this point in this mysterious case, every dark alley is worth investigating
Deflection is more than angular from the bit sticking out - it’s also belts and gantry. That we see exaggerated movement in the corner cleanout movements, which are the last movements, and the ones that have the least material engagement, suggests to me that gantry/belt deflection might be in play. I may just regard MDF as more formidable than most. Someone asked earlier, but have we tried running the same program twice?
Also. Silly question. What is the diameter of the cutter, at its widest? I look at this picture and think “that looks like what a 1/4” diameter cutter would do":
These past couple cuts have been done with a .25" 90 degree v bit, and yes it’s pretty plain to see what’s happening in that pic, however I’m expecting smooth consistent faces and a consistent surface shape, not the same deviation in every single corner.
I’ve run several of these toolpaths multiple times, and the results are pretty consistent.
So I reduced those to 5, and wow, it’s like the machine is doing ballet now! Haha. In any case, ran the same single pass profile, and it doesn’t look like anything changed. The square looks great, diamond and triangle still show at least one corner looking off.
Maybe a Z issue in the plunge could account for where these line up with the start points, but it’s also occurring on other corners of the toolpath where there is no Z movement at all… so it’s like X or Y cut slightly further than expected.
FYI - prior to these last two profile cuts, I checked tightness of all the stepper motor set screws, and they were fine. I also moved the table the machine is on so I could brace it up against a beam in my garage - hopefully reducing shake during some of the more rapid movements.