I recently purchased a Shapeoko XL and I tried my first cut on Maple with a 5.5 mm 4 flute bit.
The cut in the air works as expected.
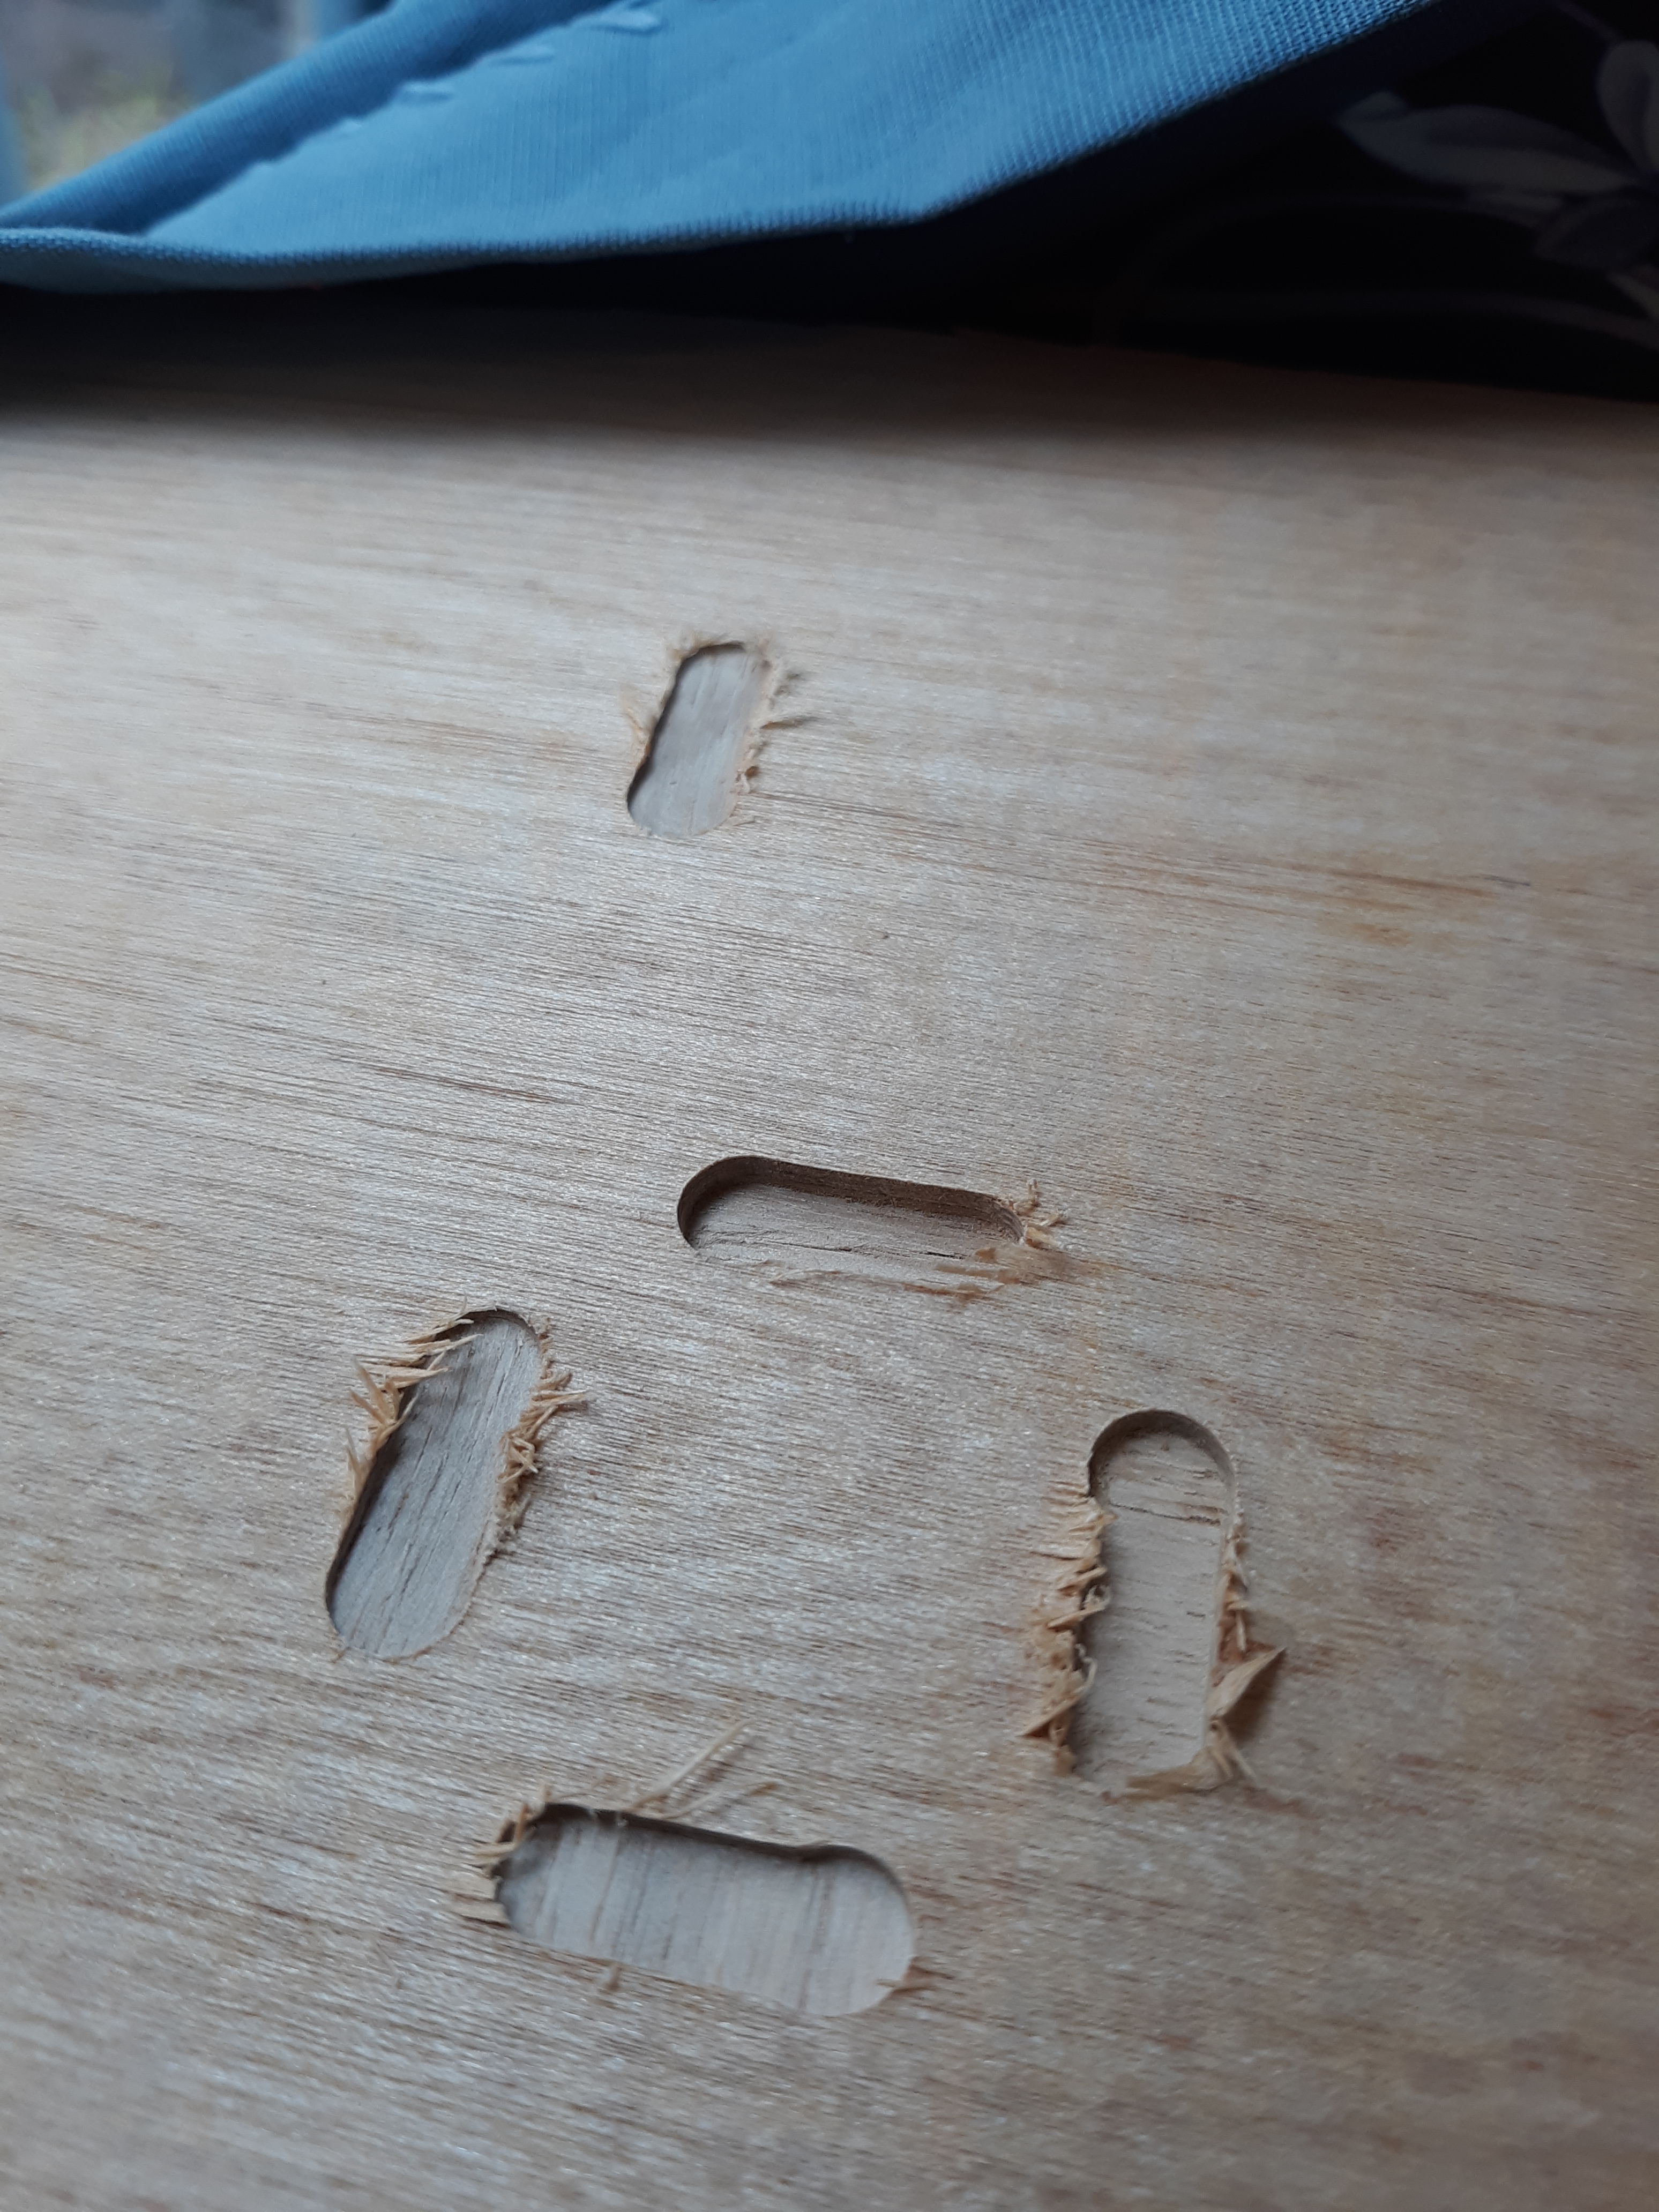
But when it hit the wood, it started going bad real quick. The cut is suppose to surface the wood only 1 mm, but the cut kept going deeper in the Z-axis 2mm, 3mm, then just went off path on the X Axis.
I am going through troubleshooting, and wanted to tighten my set screws. But I found 1 screw on the x-axis that won’t engage with the hex key.
I am planning to buy these heavier-duty screws, https://www.mcmaster.com/93705A814 but I don’t expect them to help if I can’t remove a current one.
I can’t remember what size the set screw thread is on the pulleys, but if it’s M3, this ought to work for you:
A regular screw extractor set with a small enough extractor might also work, depending on how deep the set screw is in the pulley.
Also, if you really want to replace the set screws with socket head screws like in the link you provided, you might want to consider alloy screws rather than stainless because they are much stronger.
The pulley set screws are standard M3 set screws, ~4.75mm o.a.l. — folks replace them with M3 SHCS or a suitable length, (8–10mm works well).
If you can’t budge the screw to tighten/loosen, and it’s holding securely, I’d leave it (let sleeping dogs lie and all that — the difference between good and better is not nearly so well defined as between bad and worse).
If it’s really a problem, contact us at support@carbide3d.com and we’ll send you a replacement pulley w/ set screws which you can replace.
Yeah, I recommend you just talk to Carbide3D. I’m not sure why you would jump to buying some ones that you don’t know will work versus just talking to them and they ship you some ones that will work. Trust that Carbide3D will support their products 100% and that Will knows how to make things magically appear on your doorstep in 2 days.
Its hard to know if it’s loose if I can’t engage it.
I did troubleshoot other issues, but haven’t had any joy yet. I found my Z had some slop, fixed it, but I still seem to have Z issues. My third cut the Z seems to be skipping cause it got more and more shallow. I wonder if my Z belts are too tight?
Each of these pockets are suppose to be 2.75mm…(trying on plywood now)
From my experience, a belt is almost never too tight.
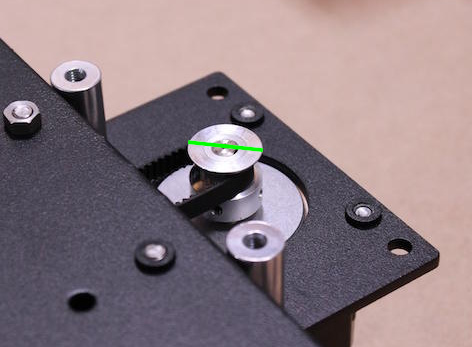
You may want to try and draw a line (with a black marker or white paint or whatever) across the shaft & pulley, like so:
then repeat the cut where you are losing depth at each pass, and check if the line on the pulley/shaft is not aligned anymore (then you’ll know for sure that the shaft is slipping)
Another possible (but less likely) explanation could be that the endmill is slipping in the router collet ?
Re-reading your initial post I see you were using a 5.5mm bit (I had no idea this diameter existed), sorry for asking but what is the size of the shank and did you use an appropriate collet size matching that exactly ?
Belt tension — the Z-axis should be guitar string tight (but careful not to bend the motor shaft): http://docs.carbide3d.com/assembly/shapeoko/xxl/step-5-belting/ on deep cuts it may help to remove one spring from the Z-axis temporarily, esp. if one hasn’t added a spoilboard on top of the wasteboard — it also helps to install the router as low as possible (installing the Makita adapter upside down will help). Some folks have found it helps to remove bolts which won’t stay tensioned (M4 Z-axis tension bolt, various V wheels with eccentric nuts), apply a thin bead of threadlock along the length of the threads, then reinstalling. See the video at: https://www.youtube.com/watch?v=_lIIb_PdziA Note that the X-axis motor is held in place on standoffs and if those bolts are loose this can cause belt tension issues.
It is also important to be sure that the collet is correctly tightened, the endmill fits correctly and doesn’t slip, and the router is mounted securely in the mount, and that the mount doesn’t shift. Note than endmill pullout can happen gradually, especially when profiling against tall walls.[4]
I had similar problems with my Z pulley set screw. I pulled out the pulley, drilled out the set screw and put a larger one (4mm) in place but you can use a cap screw as they will not interfere and are easier to torque since the hex head is larger.
Something that caught me out early on was I had the router set too high in the mount, and thr z axis was actually travelling too far down and skipping - just confirm that at the lowest point the bottom set of v wheels aren’t going past the bottom of thr extrusion they travel on