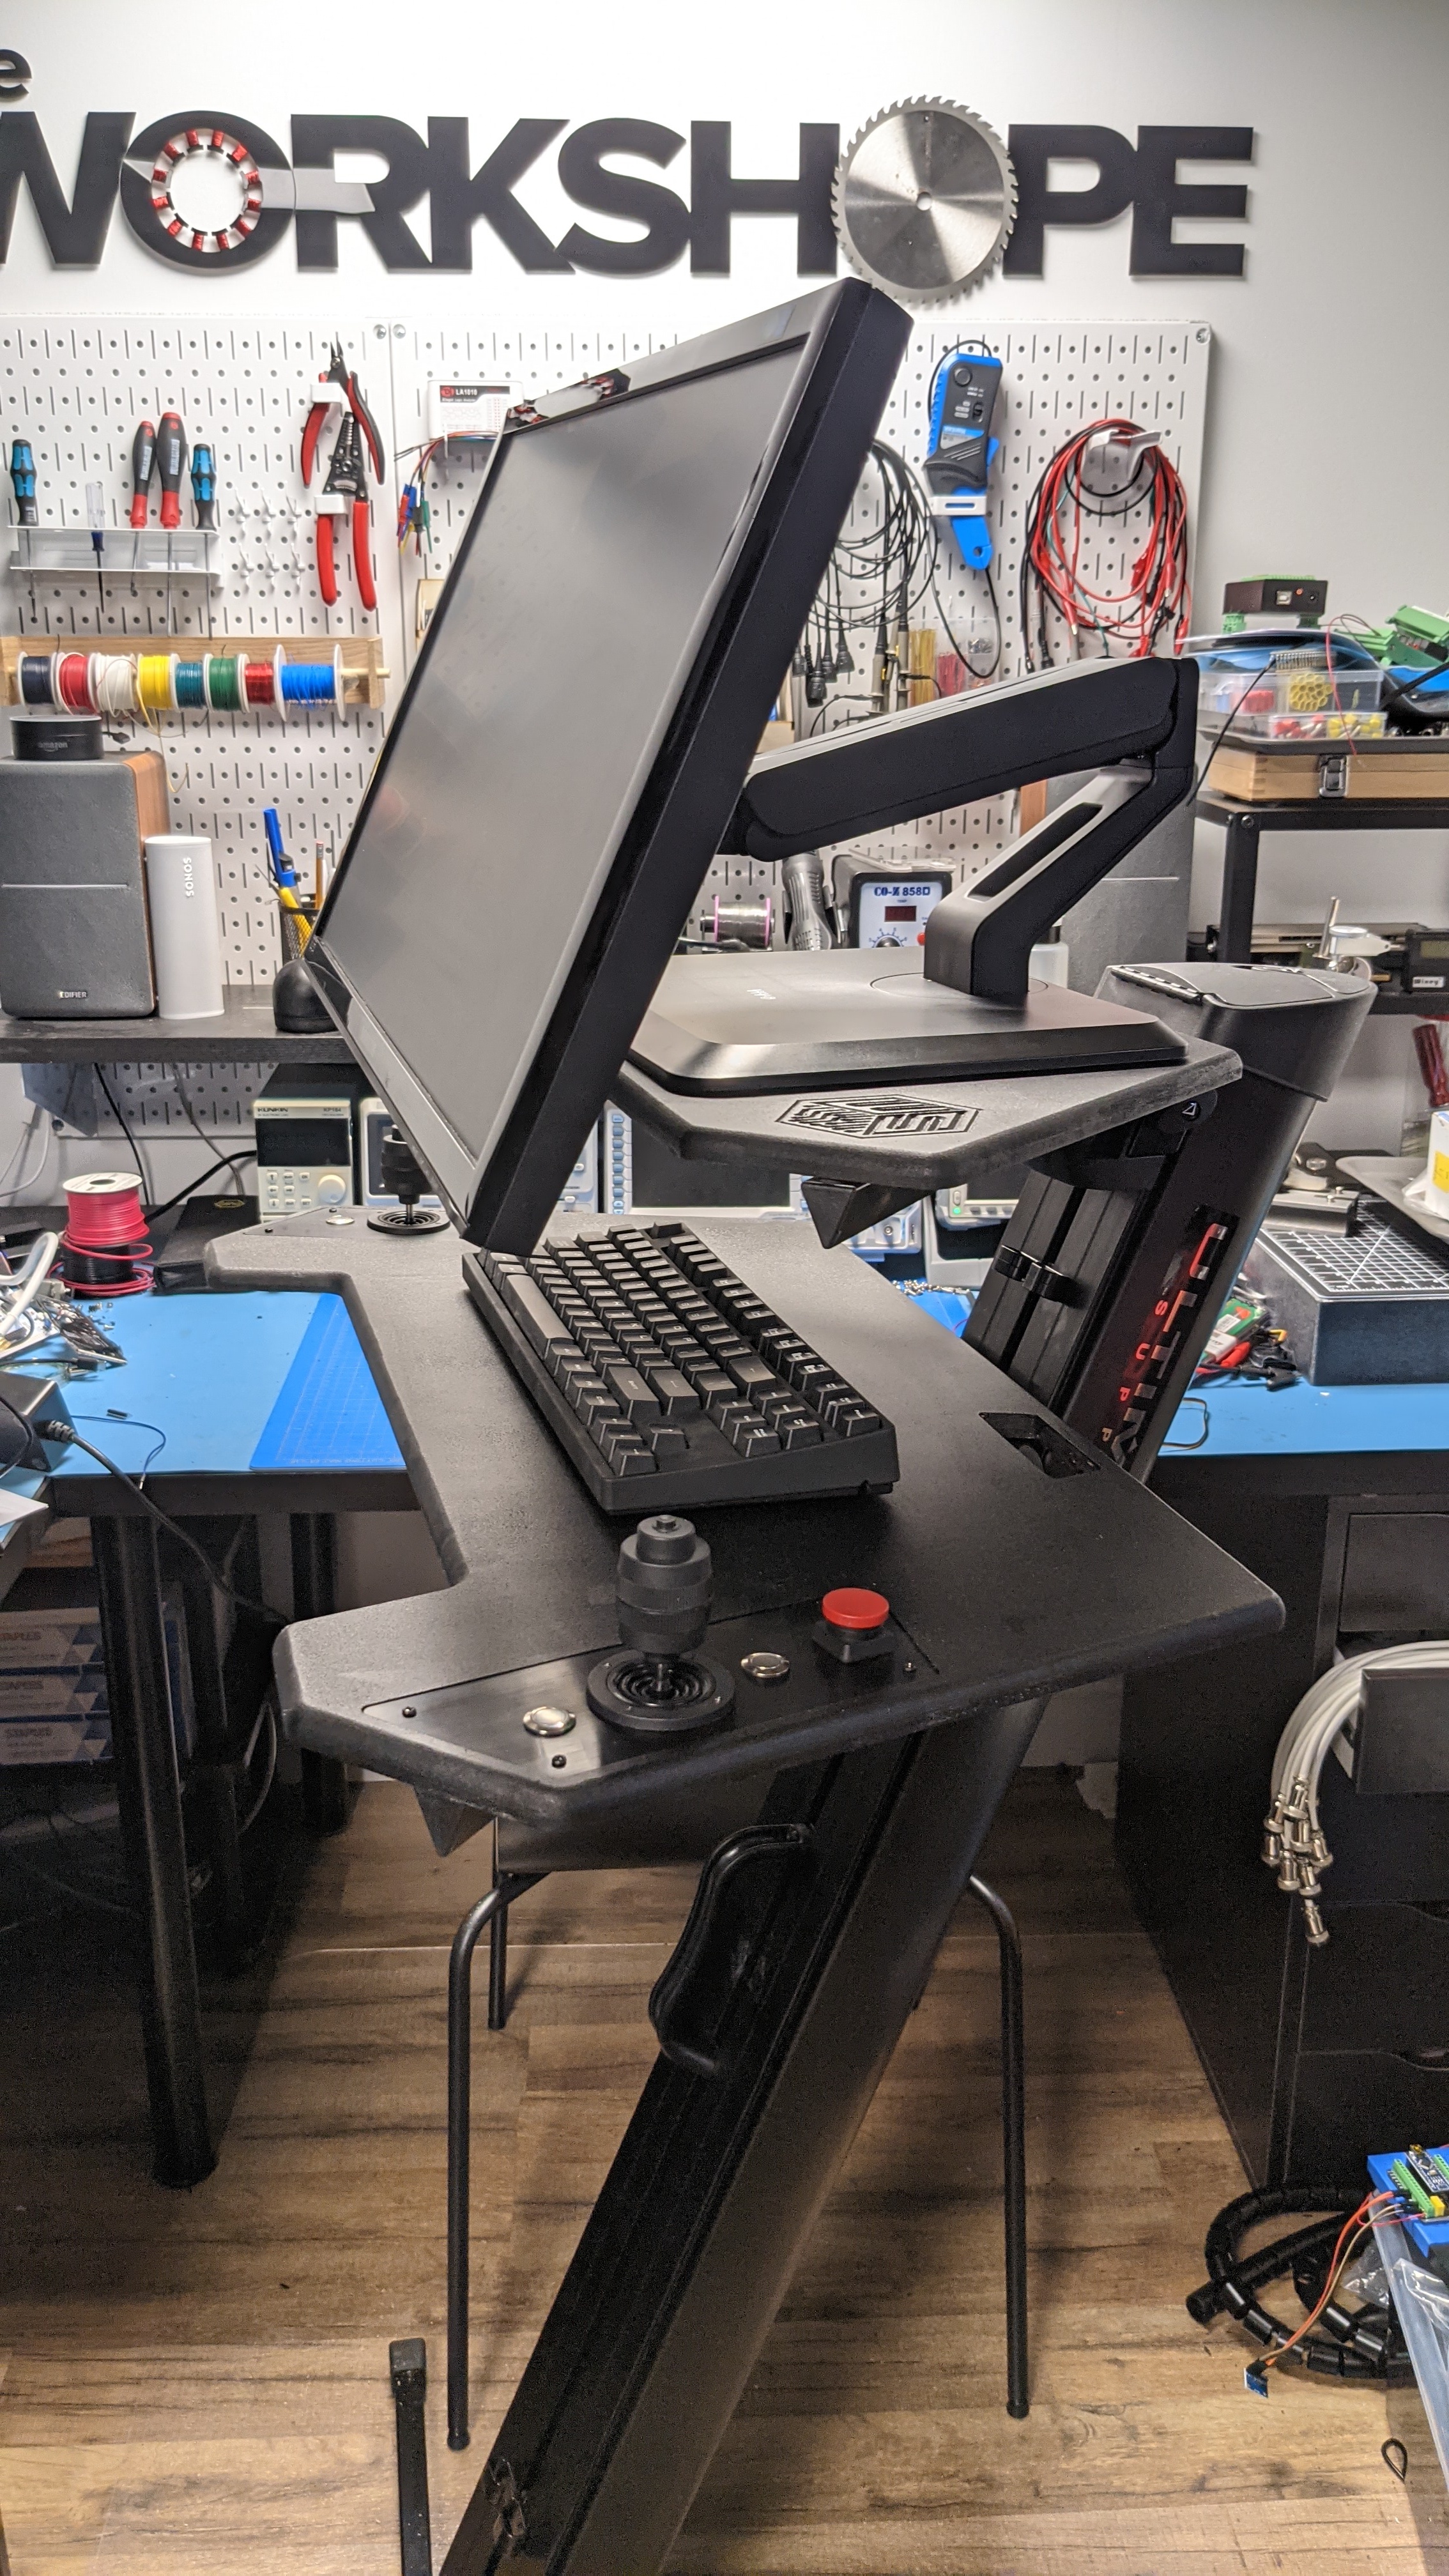
In the past year I have been testing more mobile robotics platforms, and have to juggle a laptop, joystick controllers, cables, and other hazards. After trying not to trip on cables or throw out my back for the umpteeth time, I decided to make something better.
While watching a recent Adam Savage - Tested video I saw a sweet computer station, which turns out to be a musician’s keyboard stand. It’s all aluminum construction, easy to break down and setup, and has a sweet look (MOST important). I found a used one and got it shipped post haste.
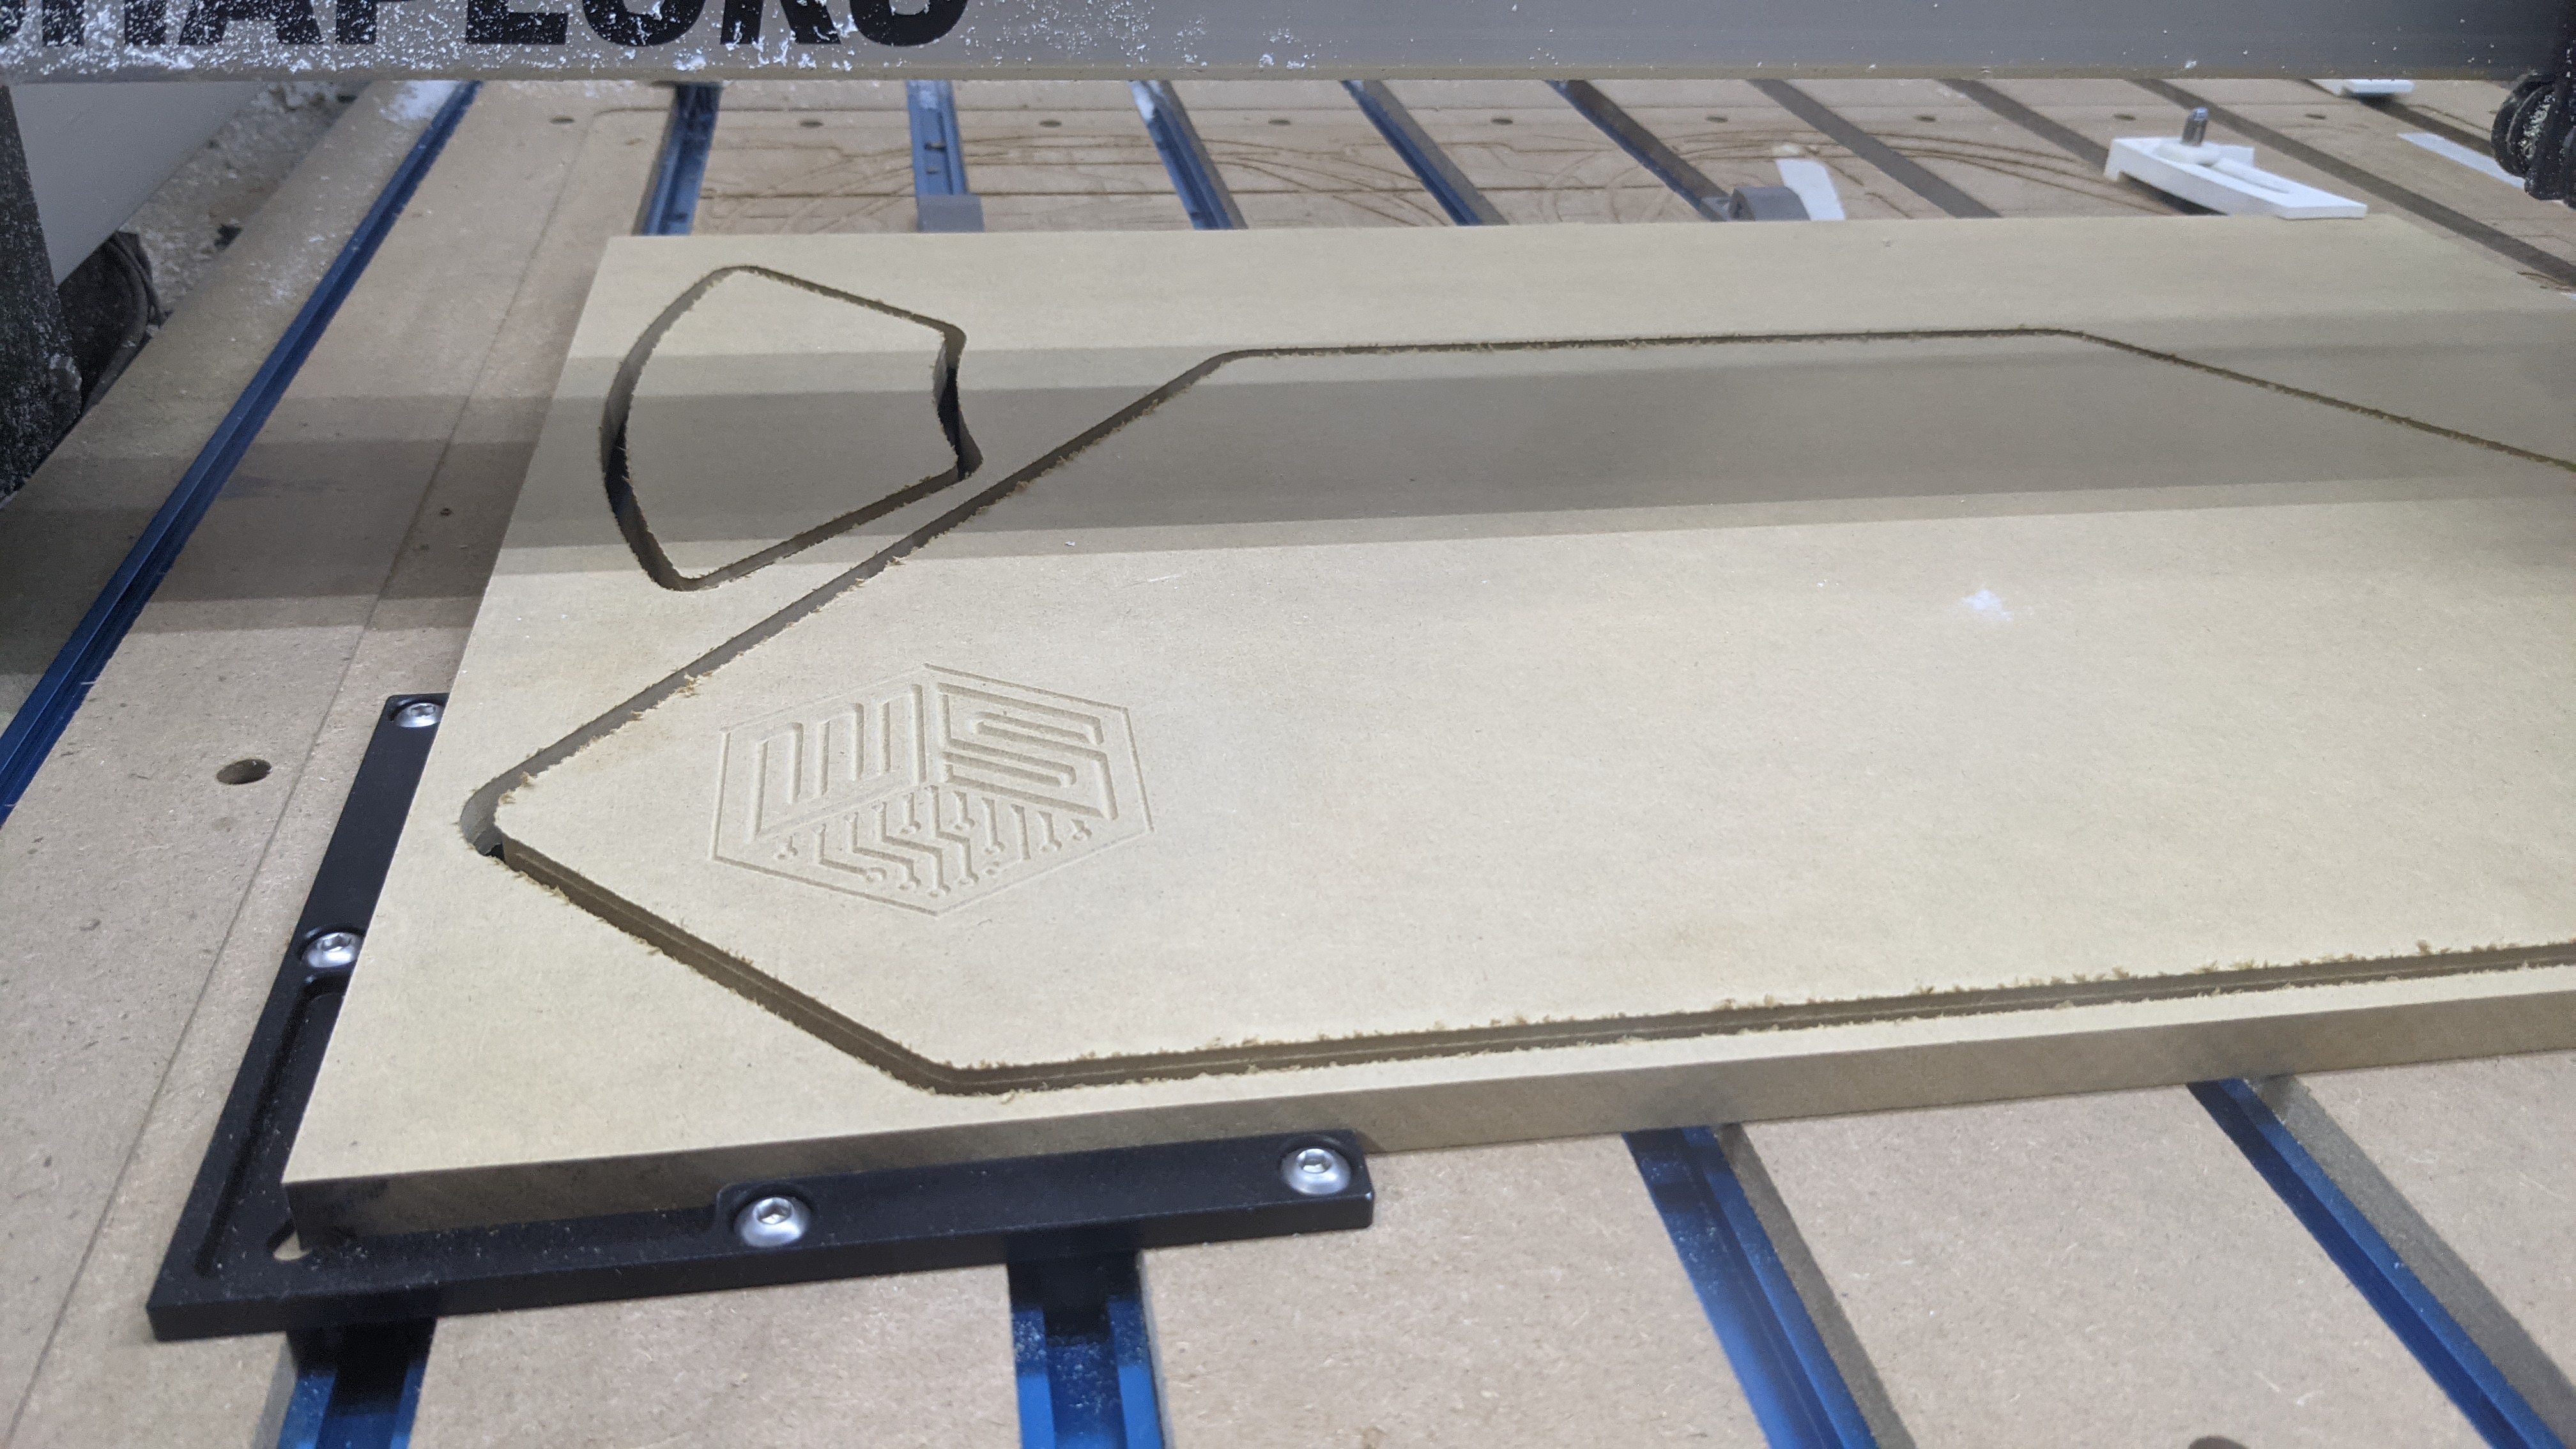
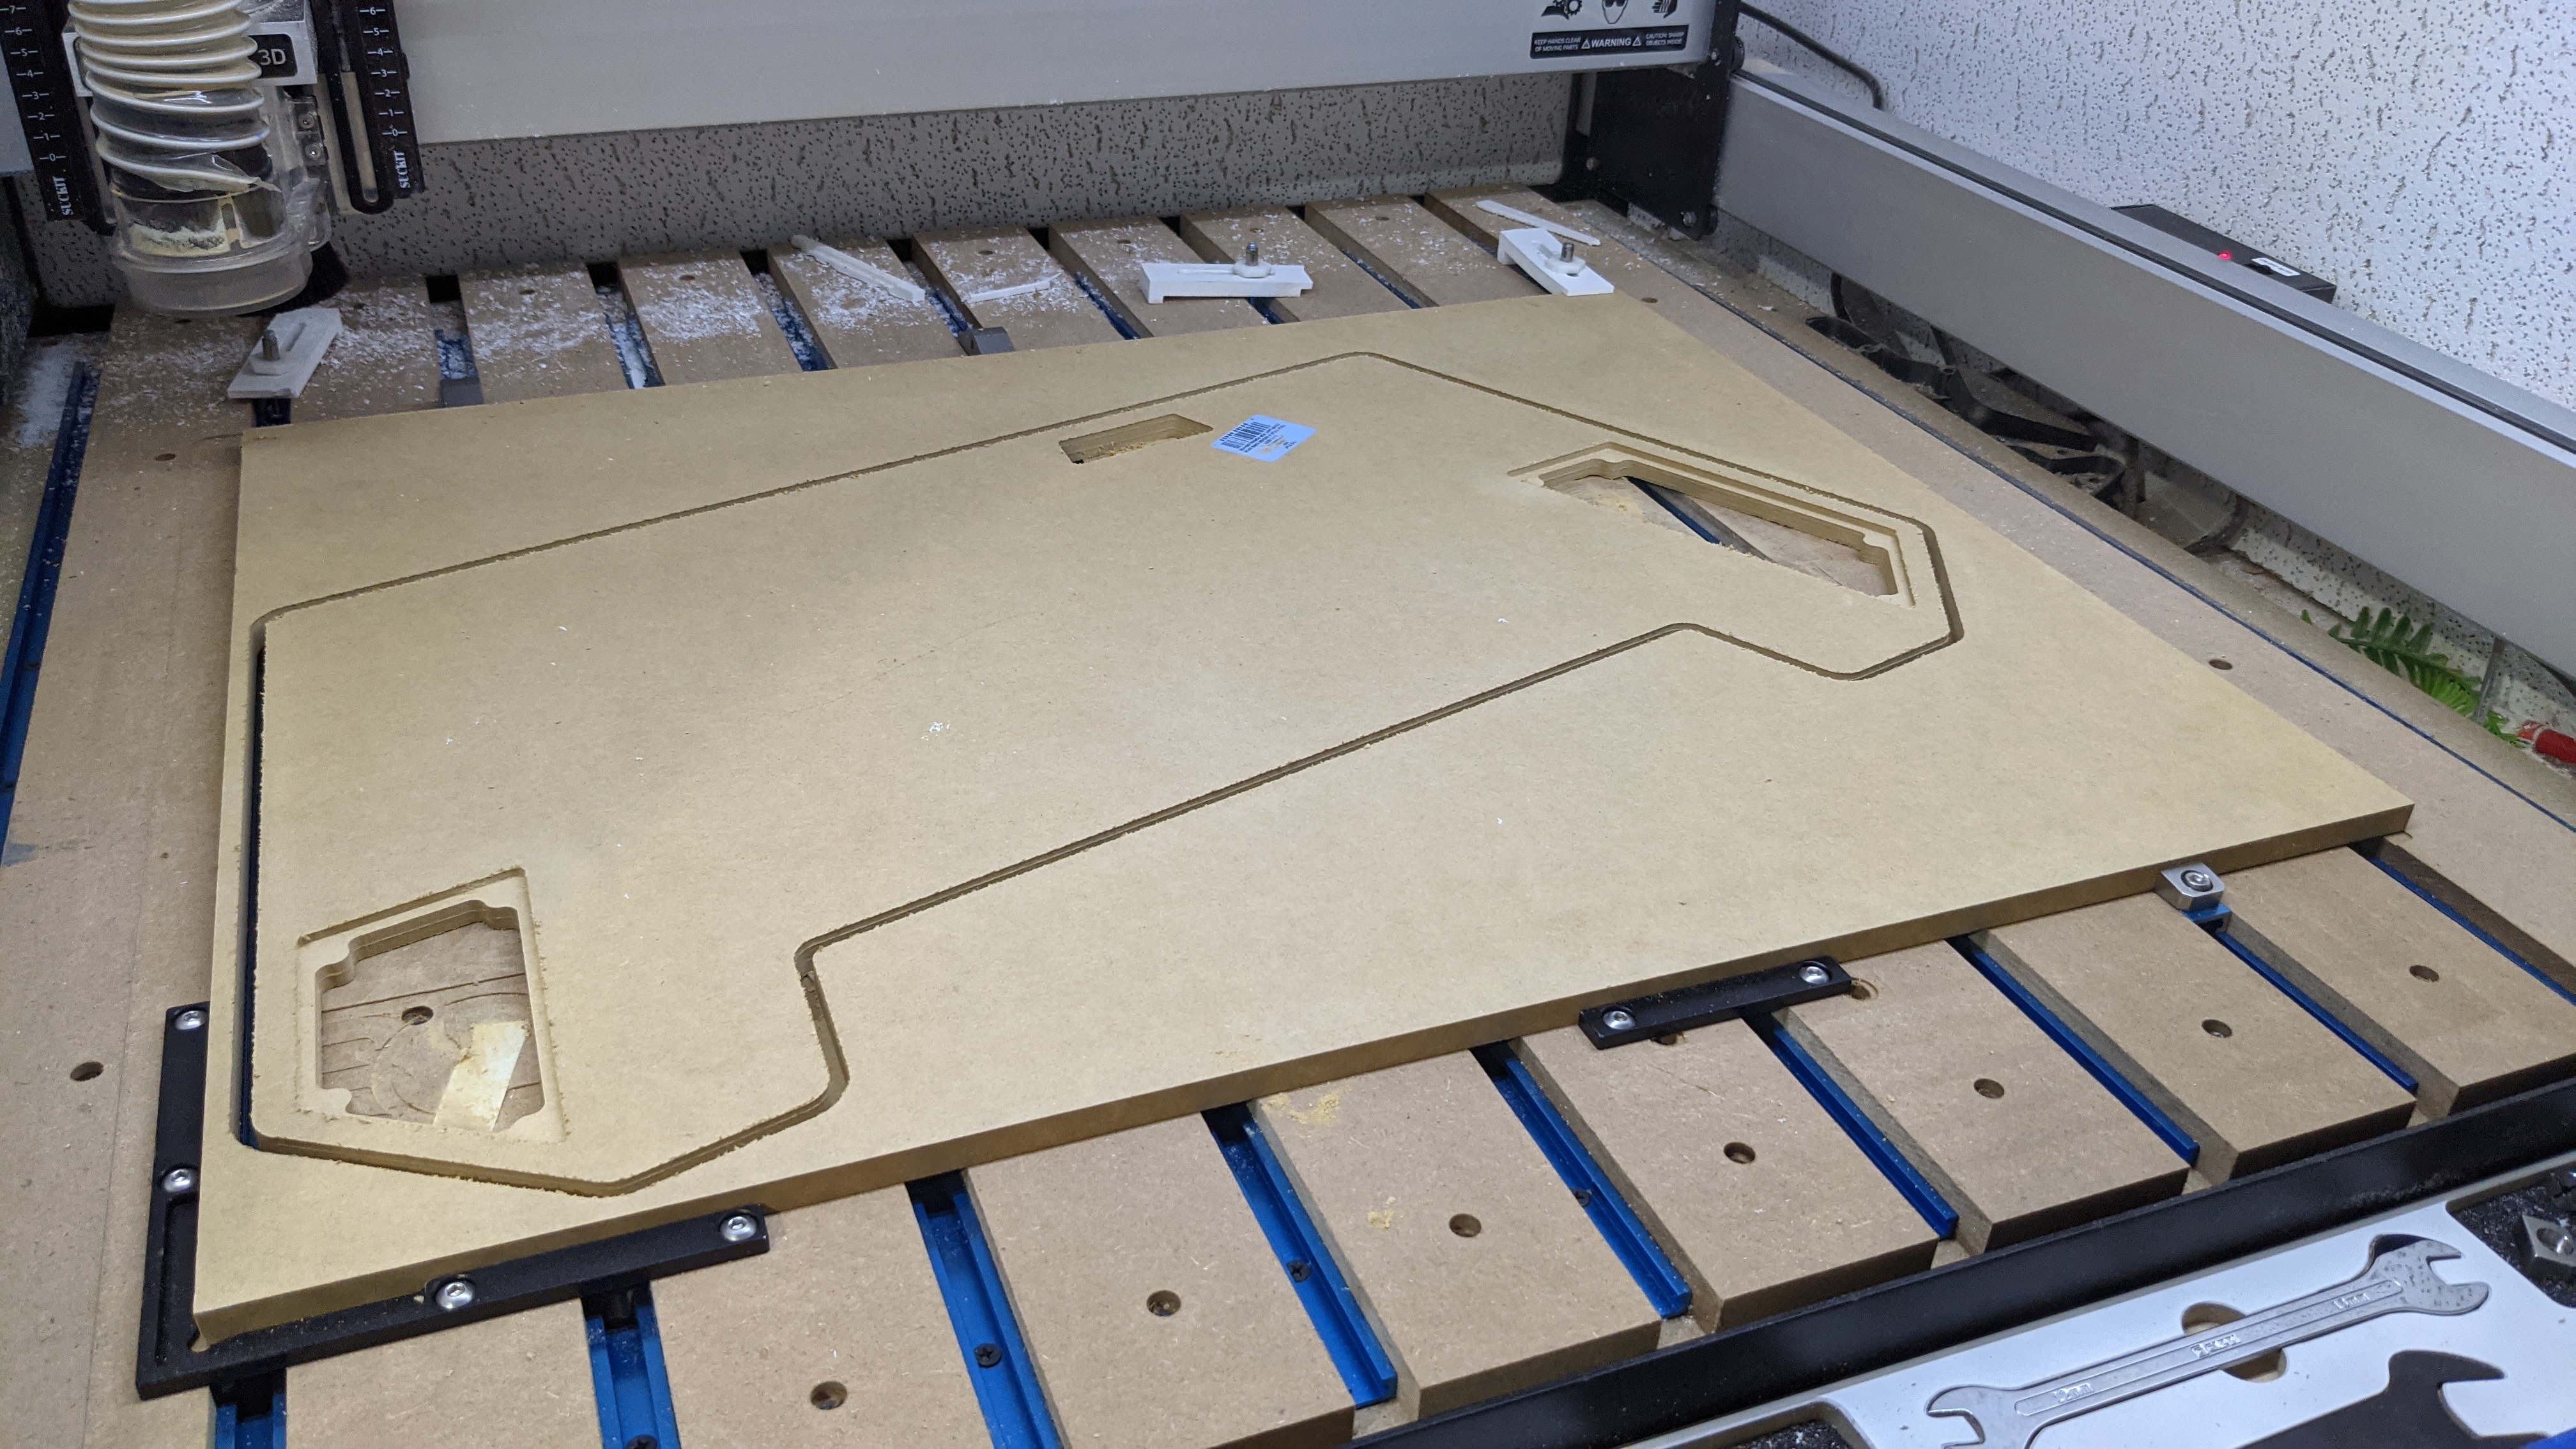
Once it arrived I templated the shelf brackets by tracing them onto scrap 1/8" plywood, modeled in SolidWorks (though for simple geometry like this any CAD program should suffice), and designed a decent shape for the shelf. Next I printed the design on paper 1:1 to test fit, then ran through CC for CAM. 20-30 minutes later I had the first shelf.
The top shelf will primarily hold a monitor, though if history is a teacher it will slowly collect a few trinkets throughout any given project.
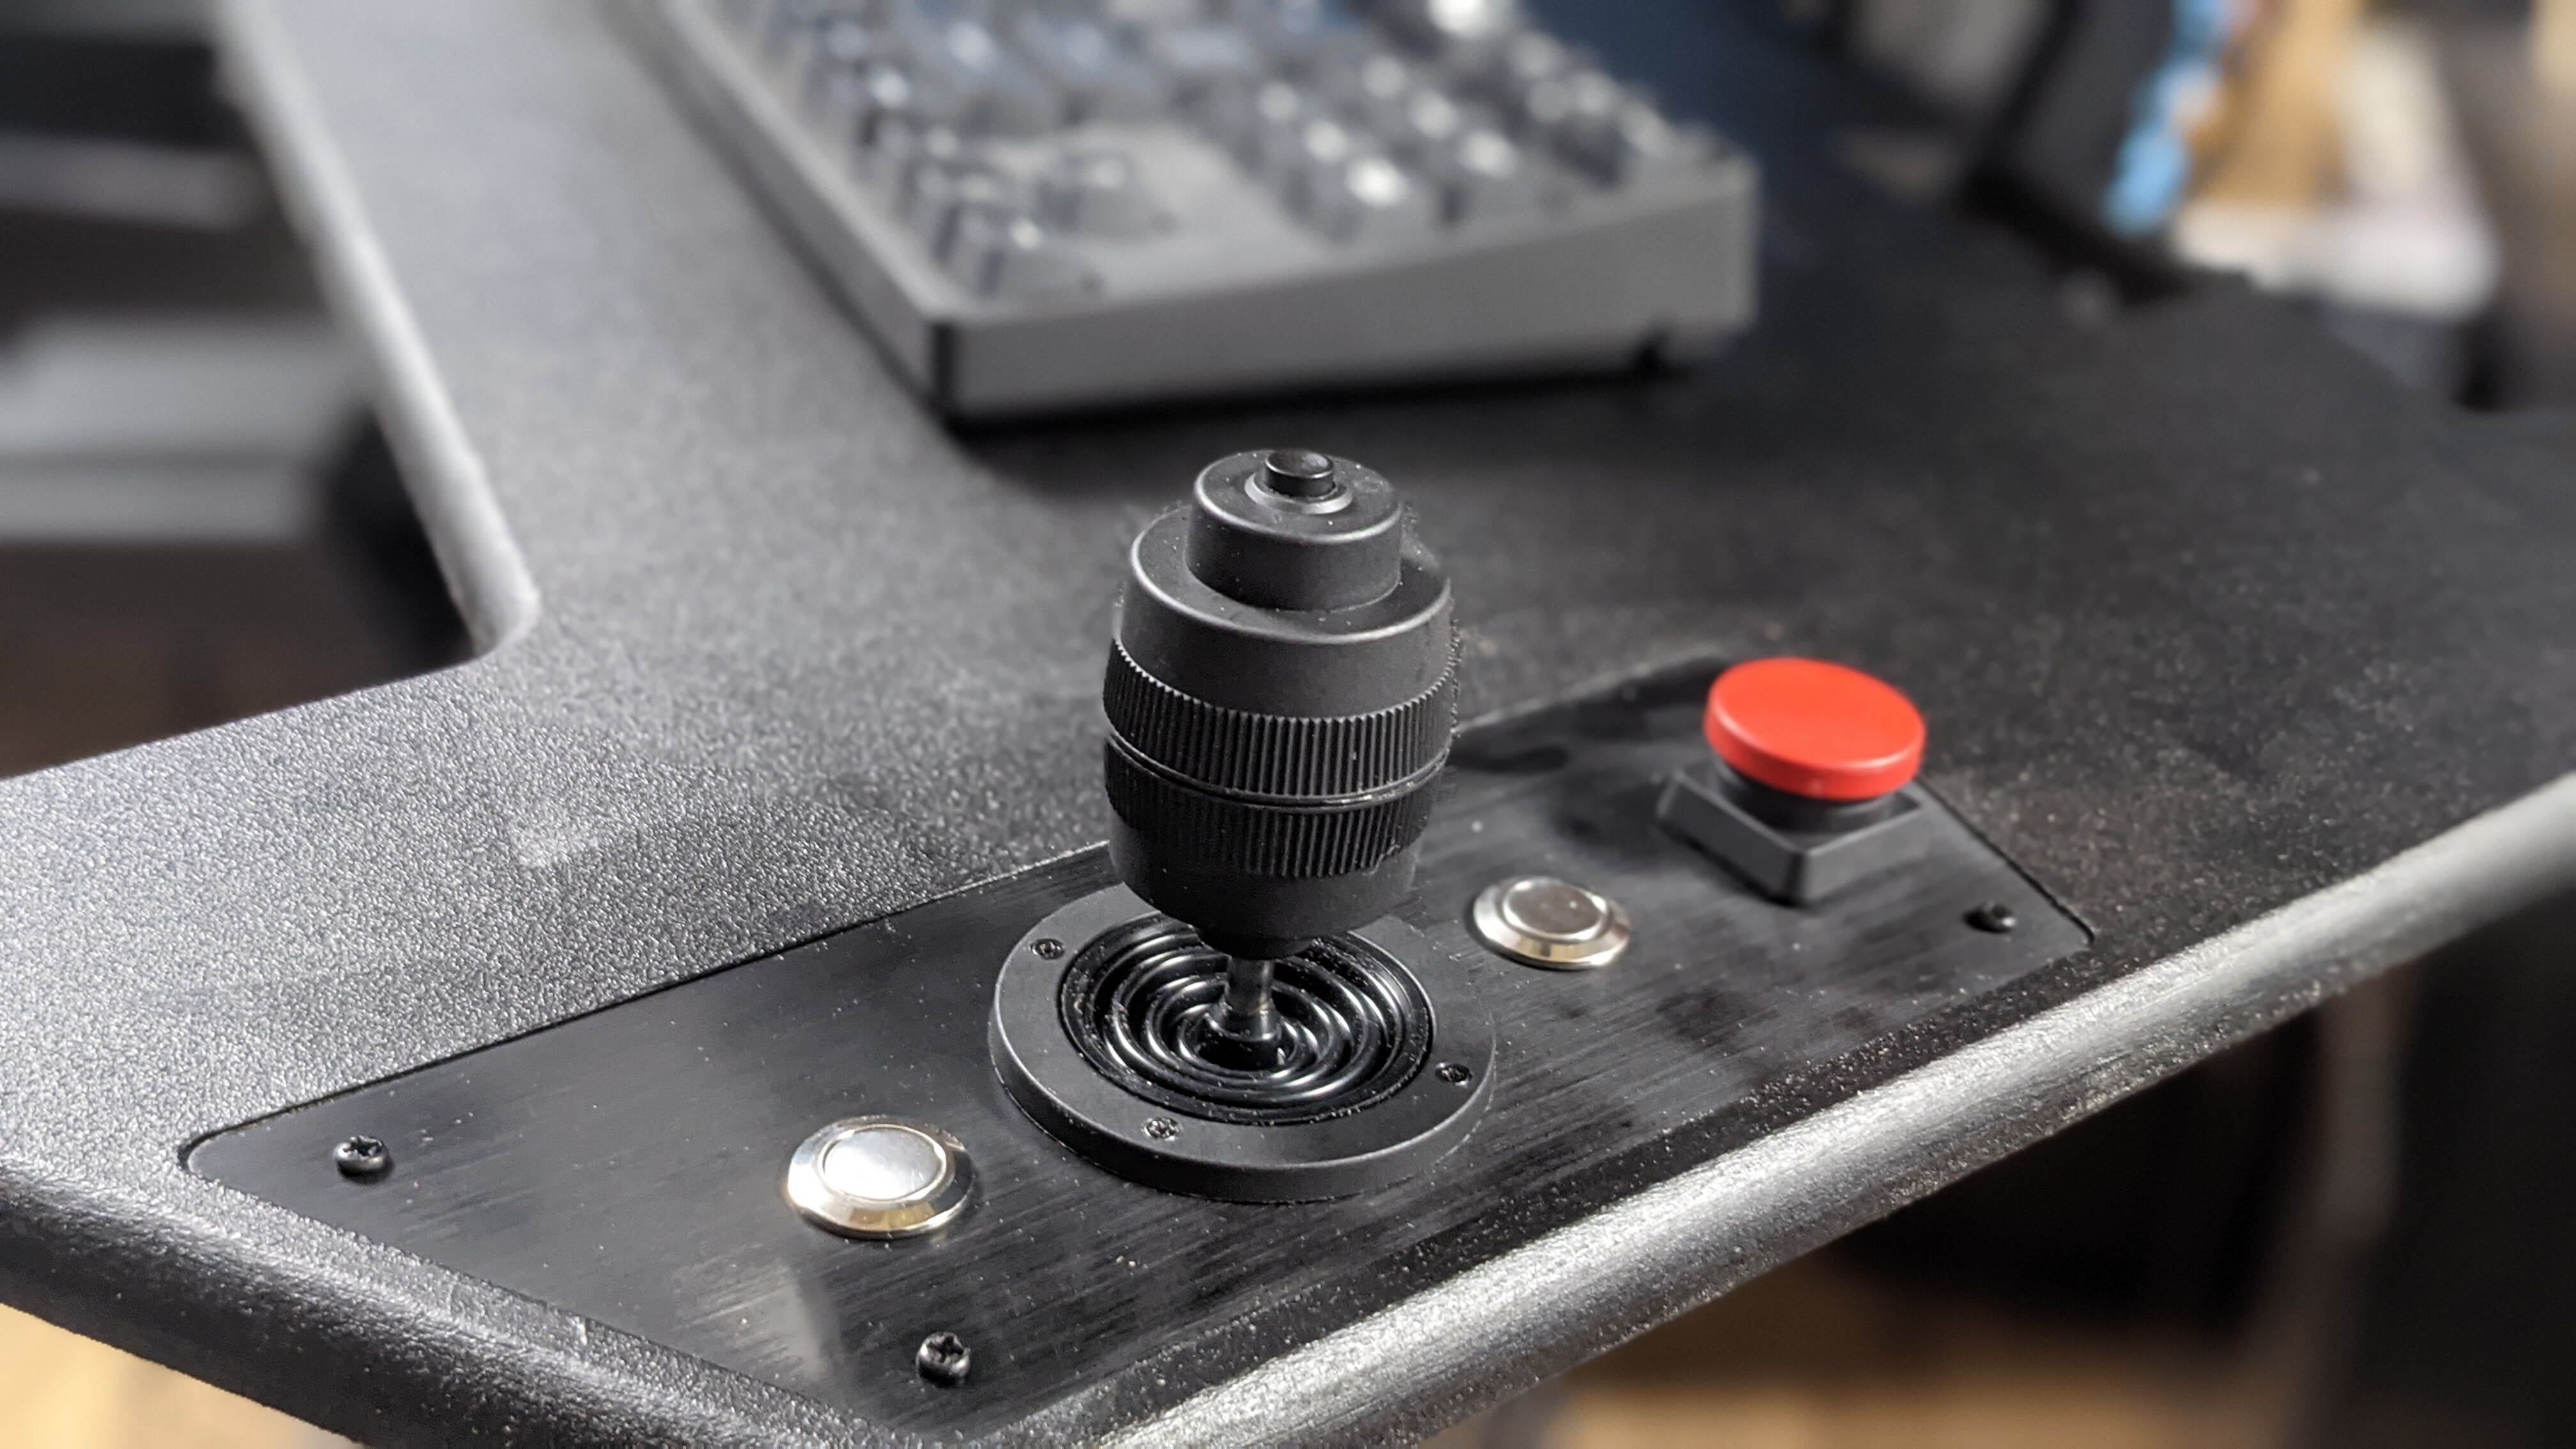
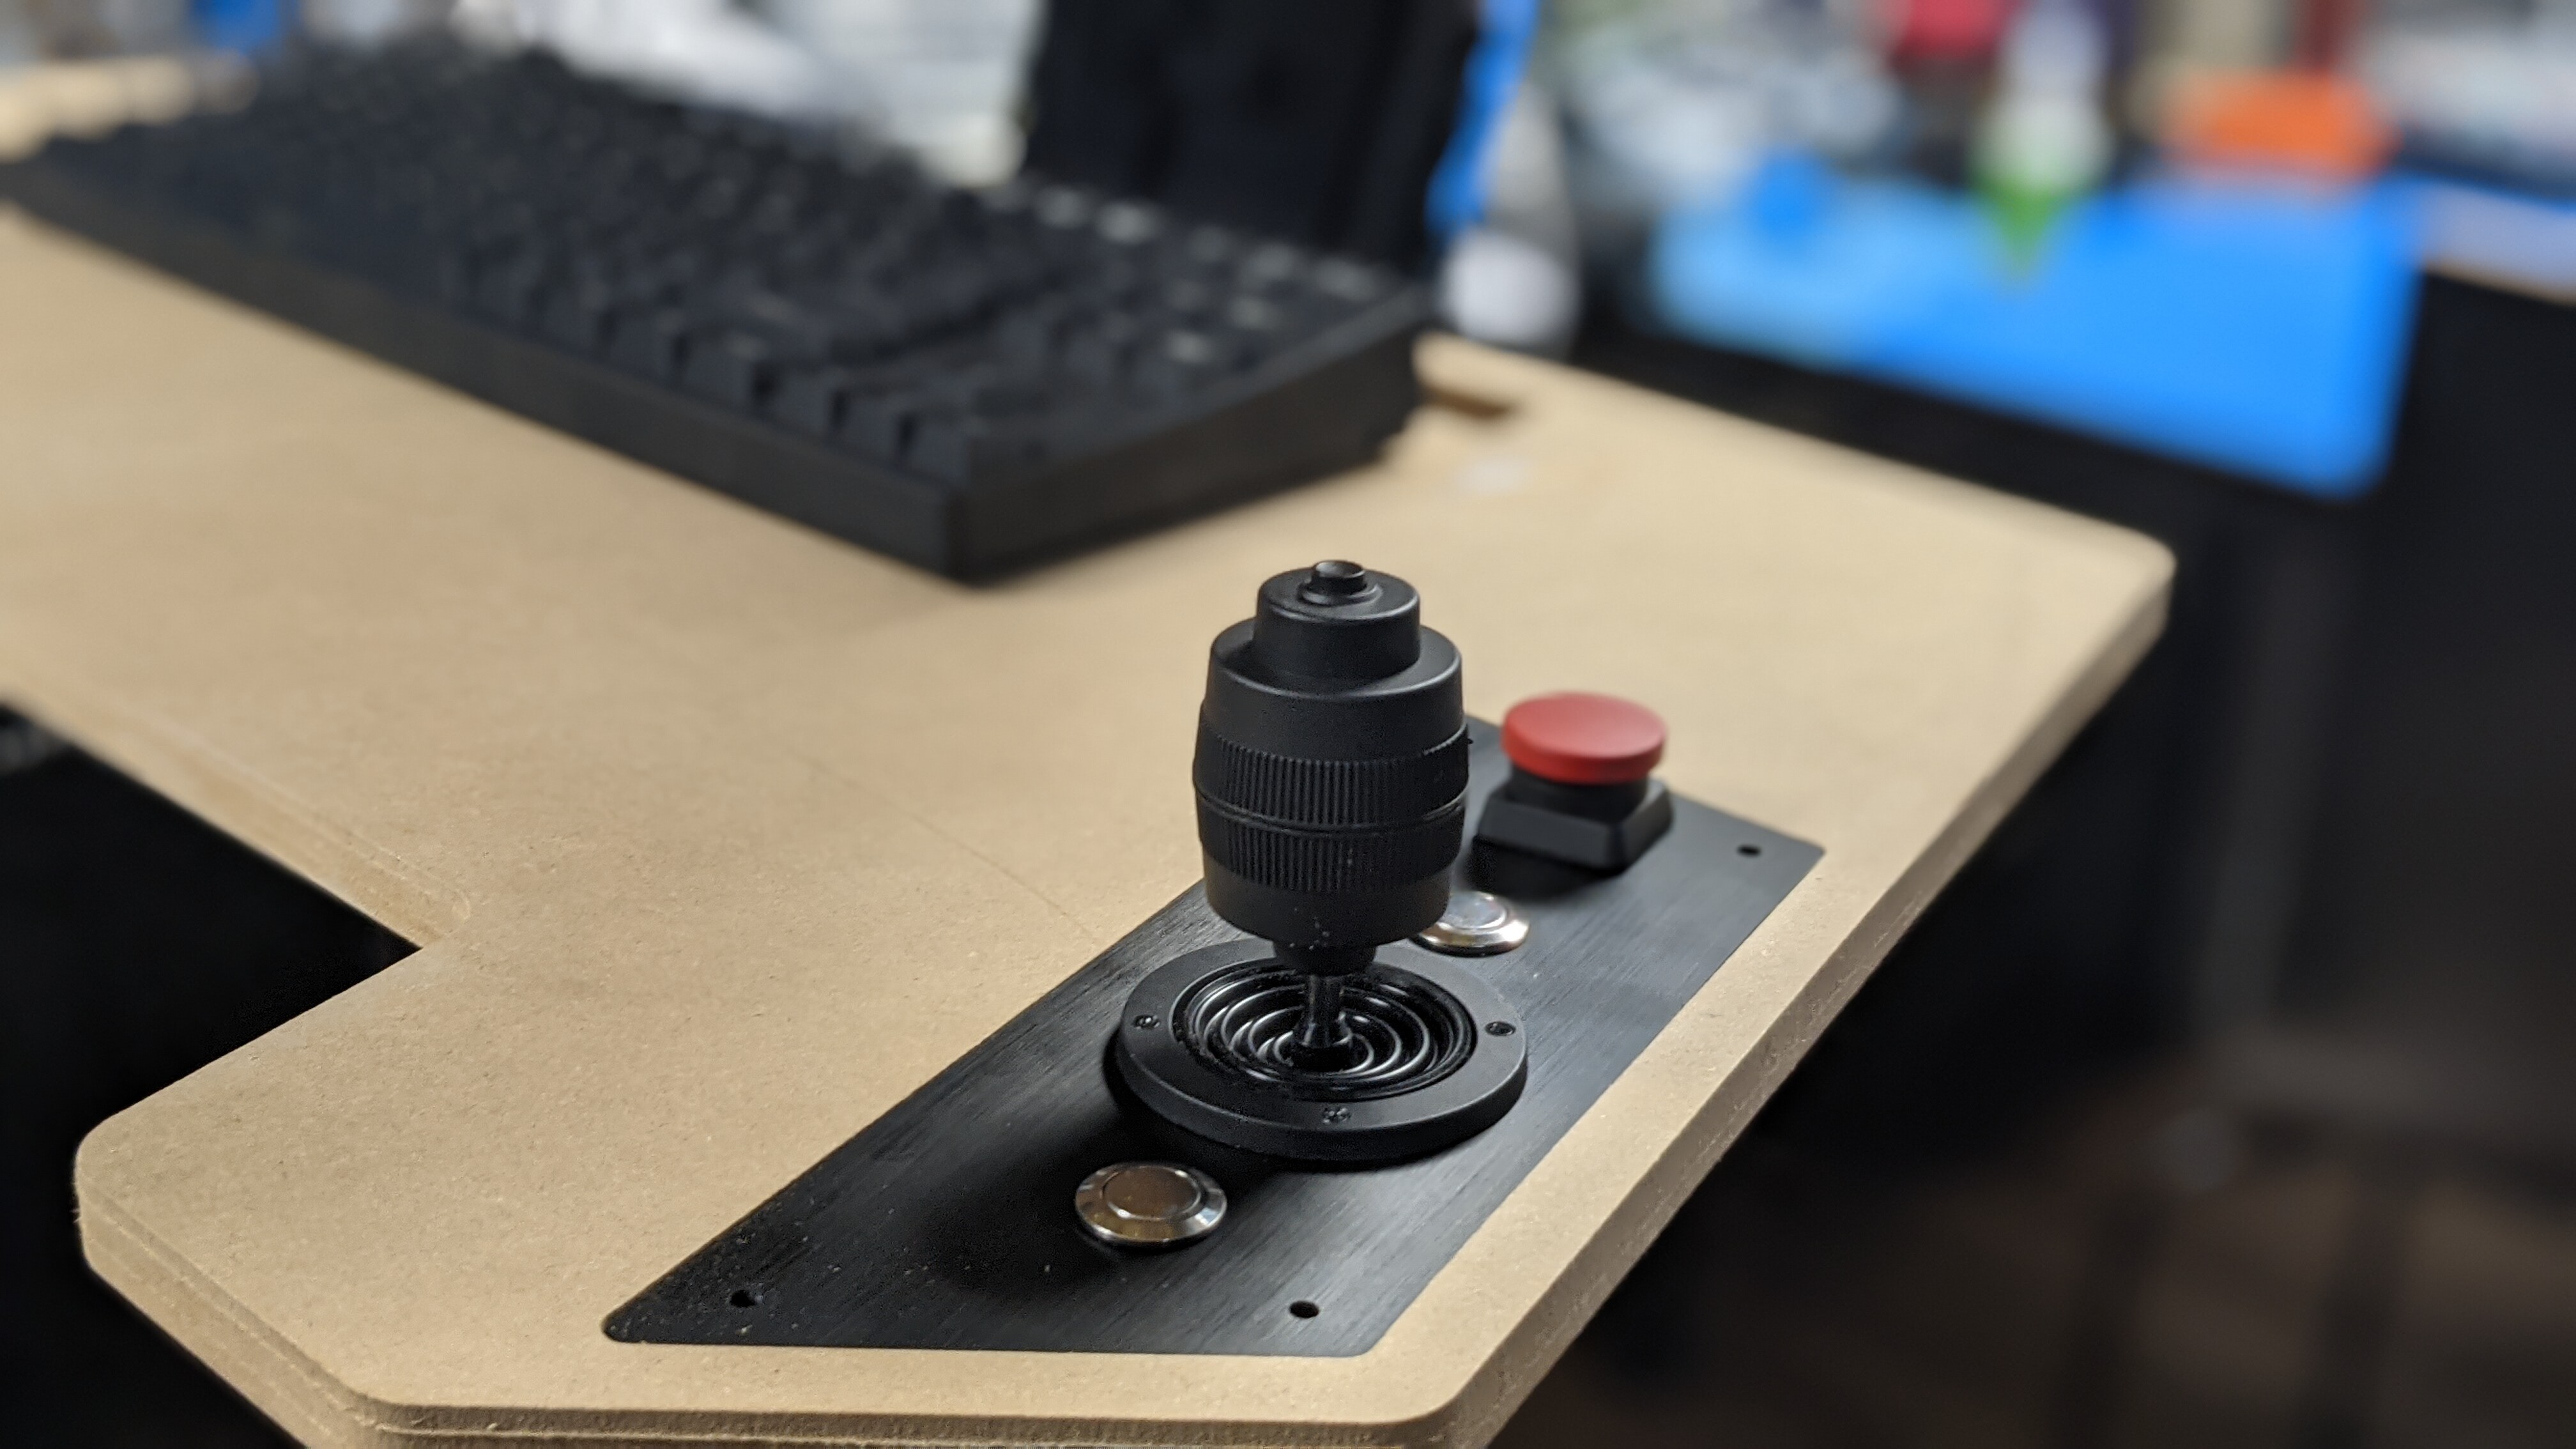
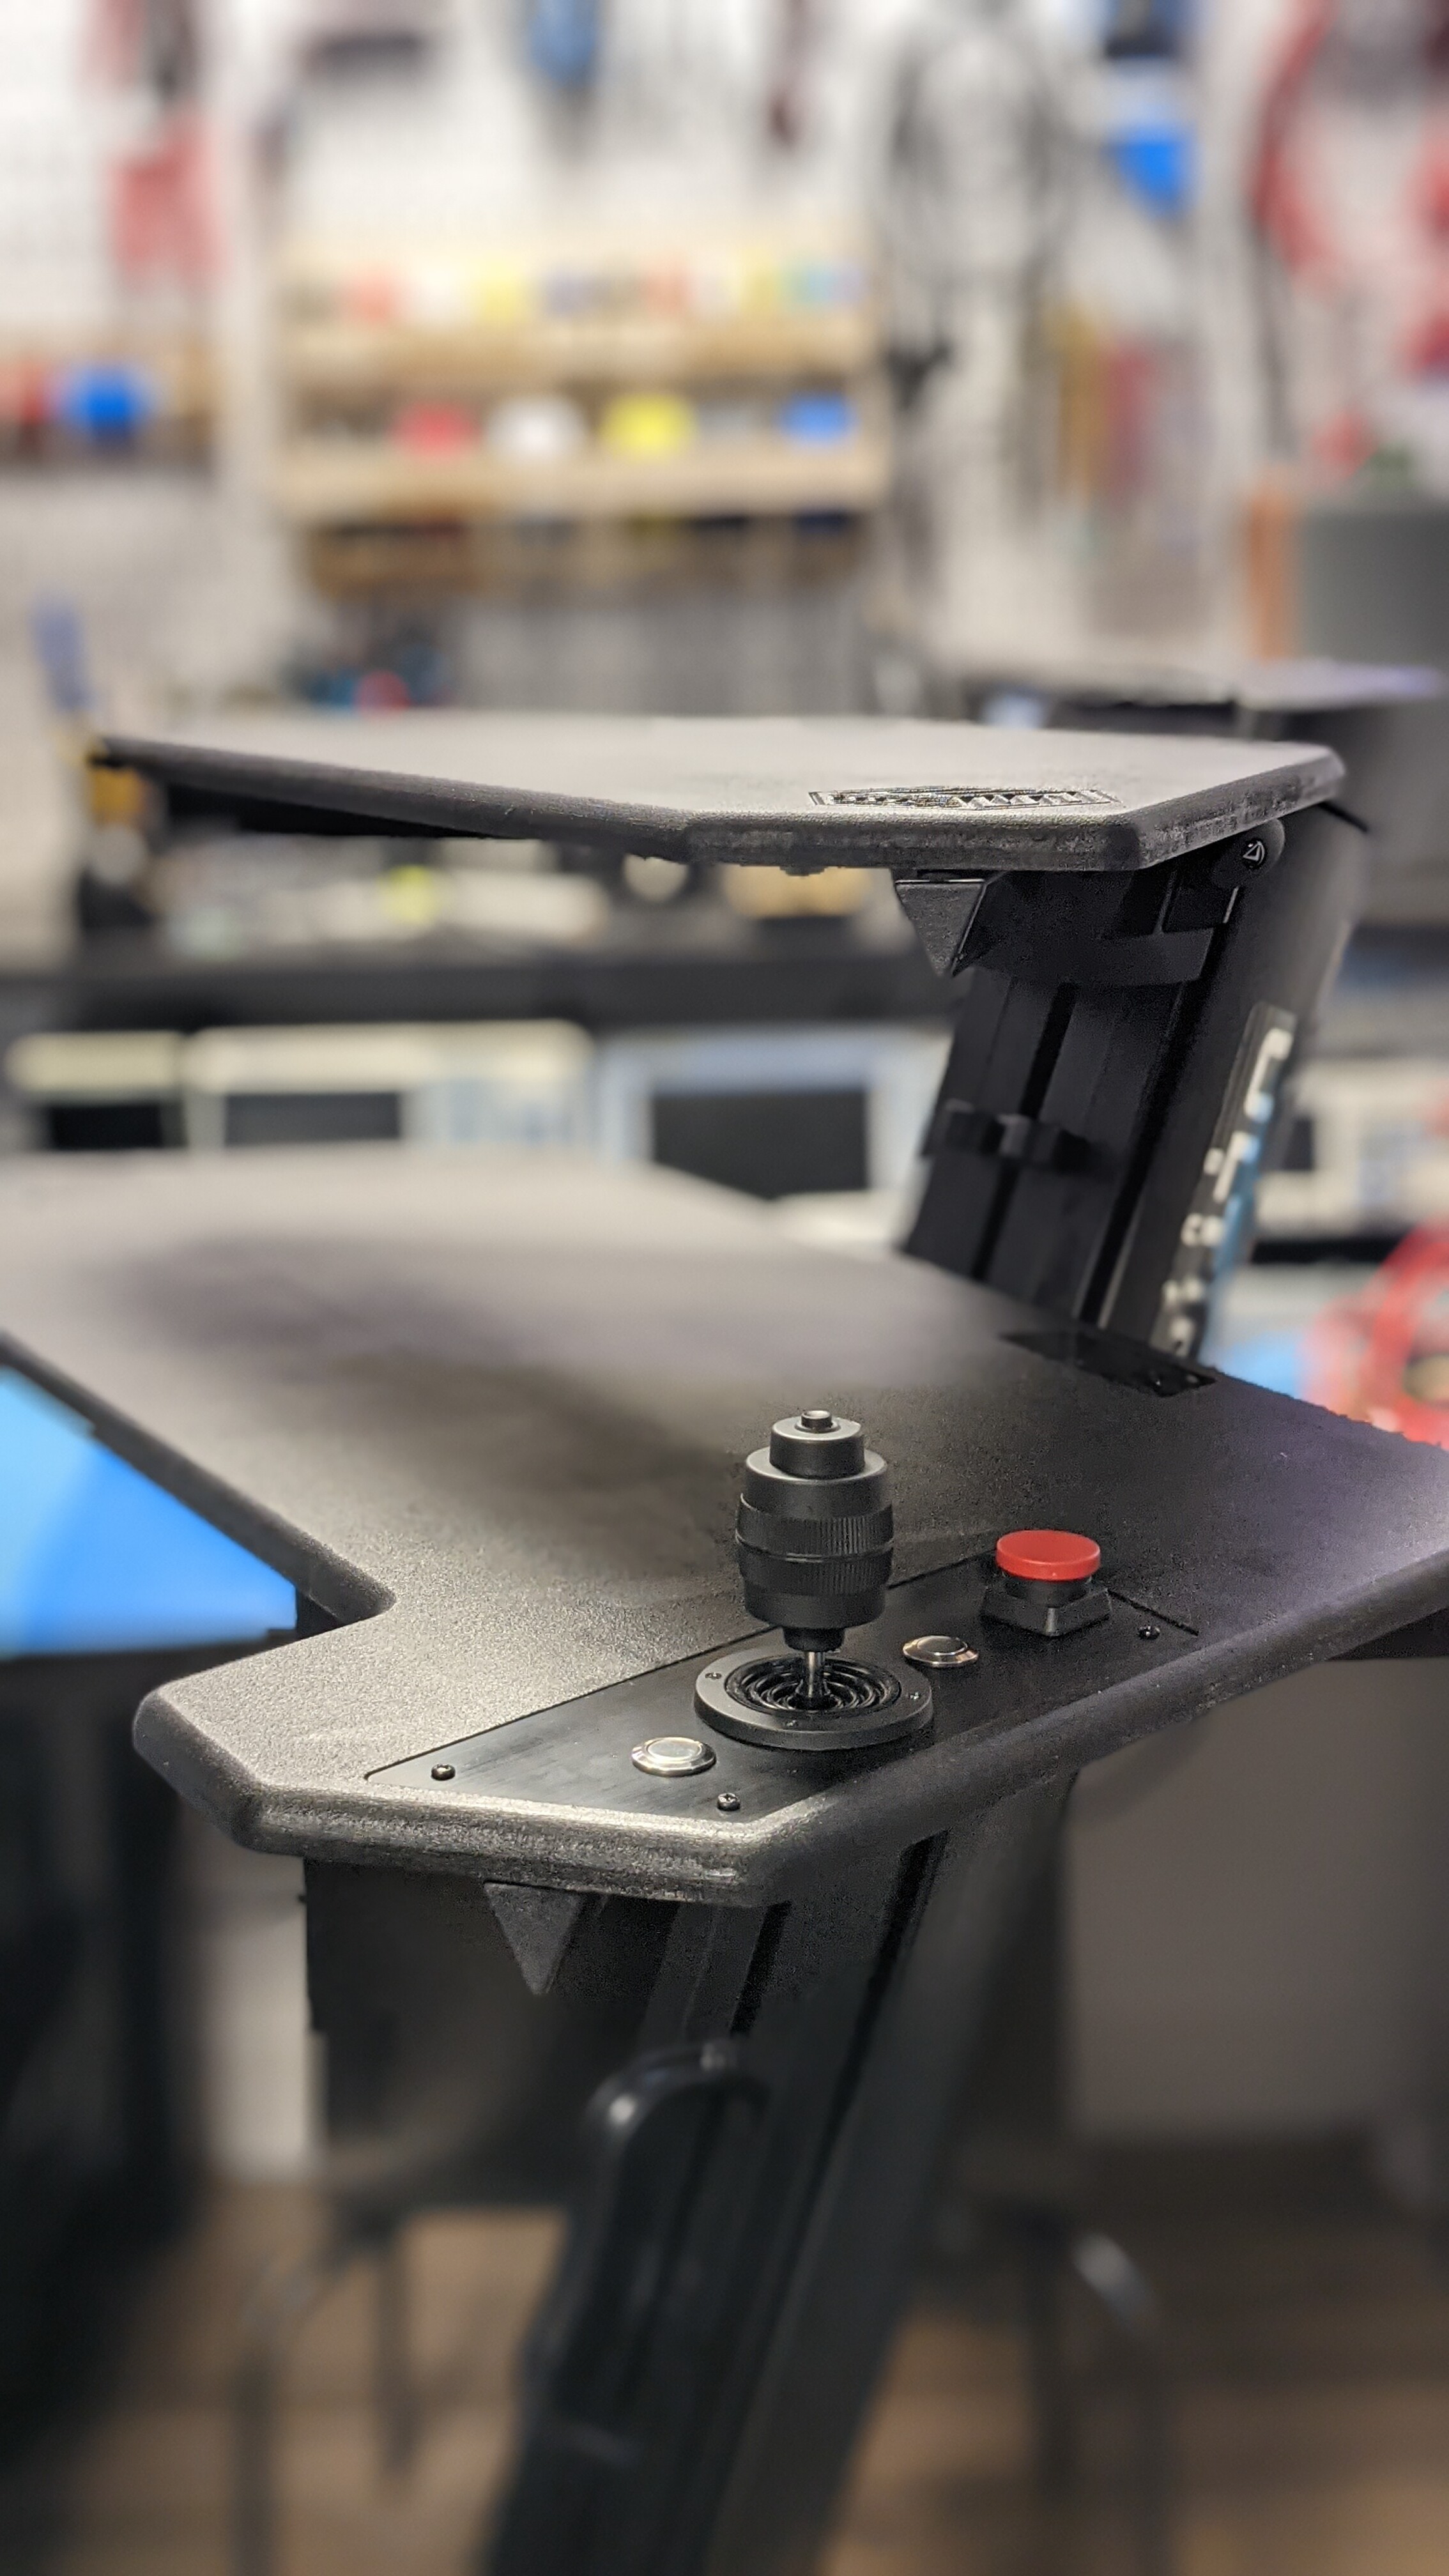
Next I turned my sights on the keyboard tray, and this is where I decided to get fancy. I decided to build in some joysticks and buttons so I had one less thing to juggle. At first I was going to model everything directly into the MDF sheet, but wanted some flexibility to change it later and was concerned about the rigidity of the MDF in a thin x-section. Instead the joystick panels are laser cut and screw into the MDF panel recess - and it all works beautifully.
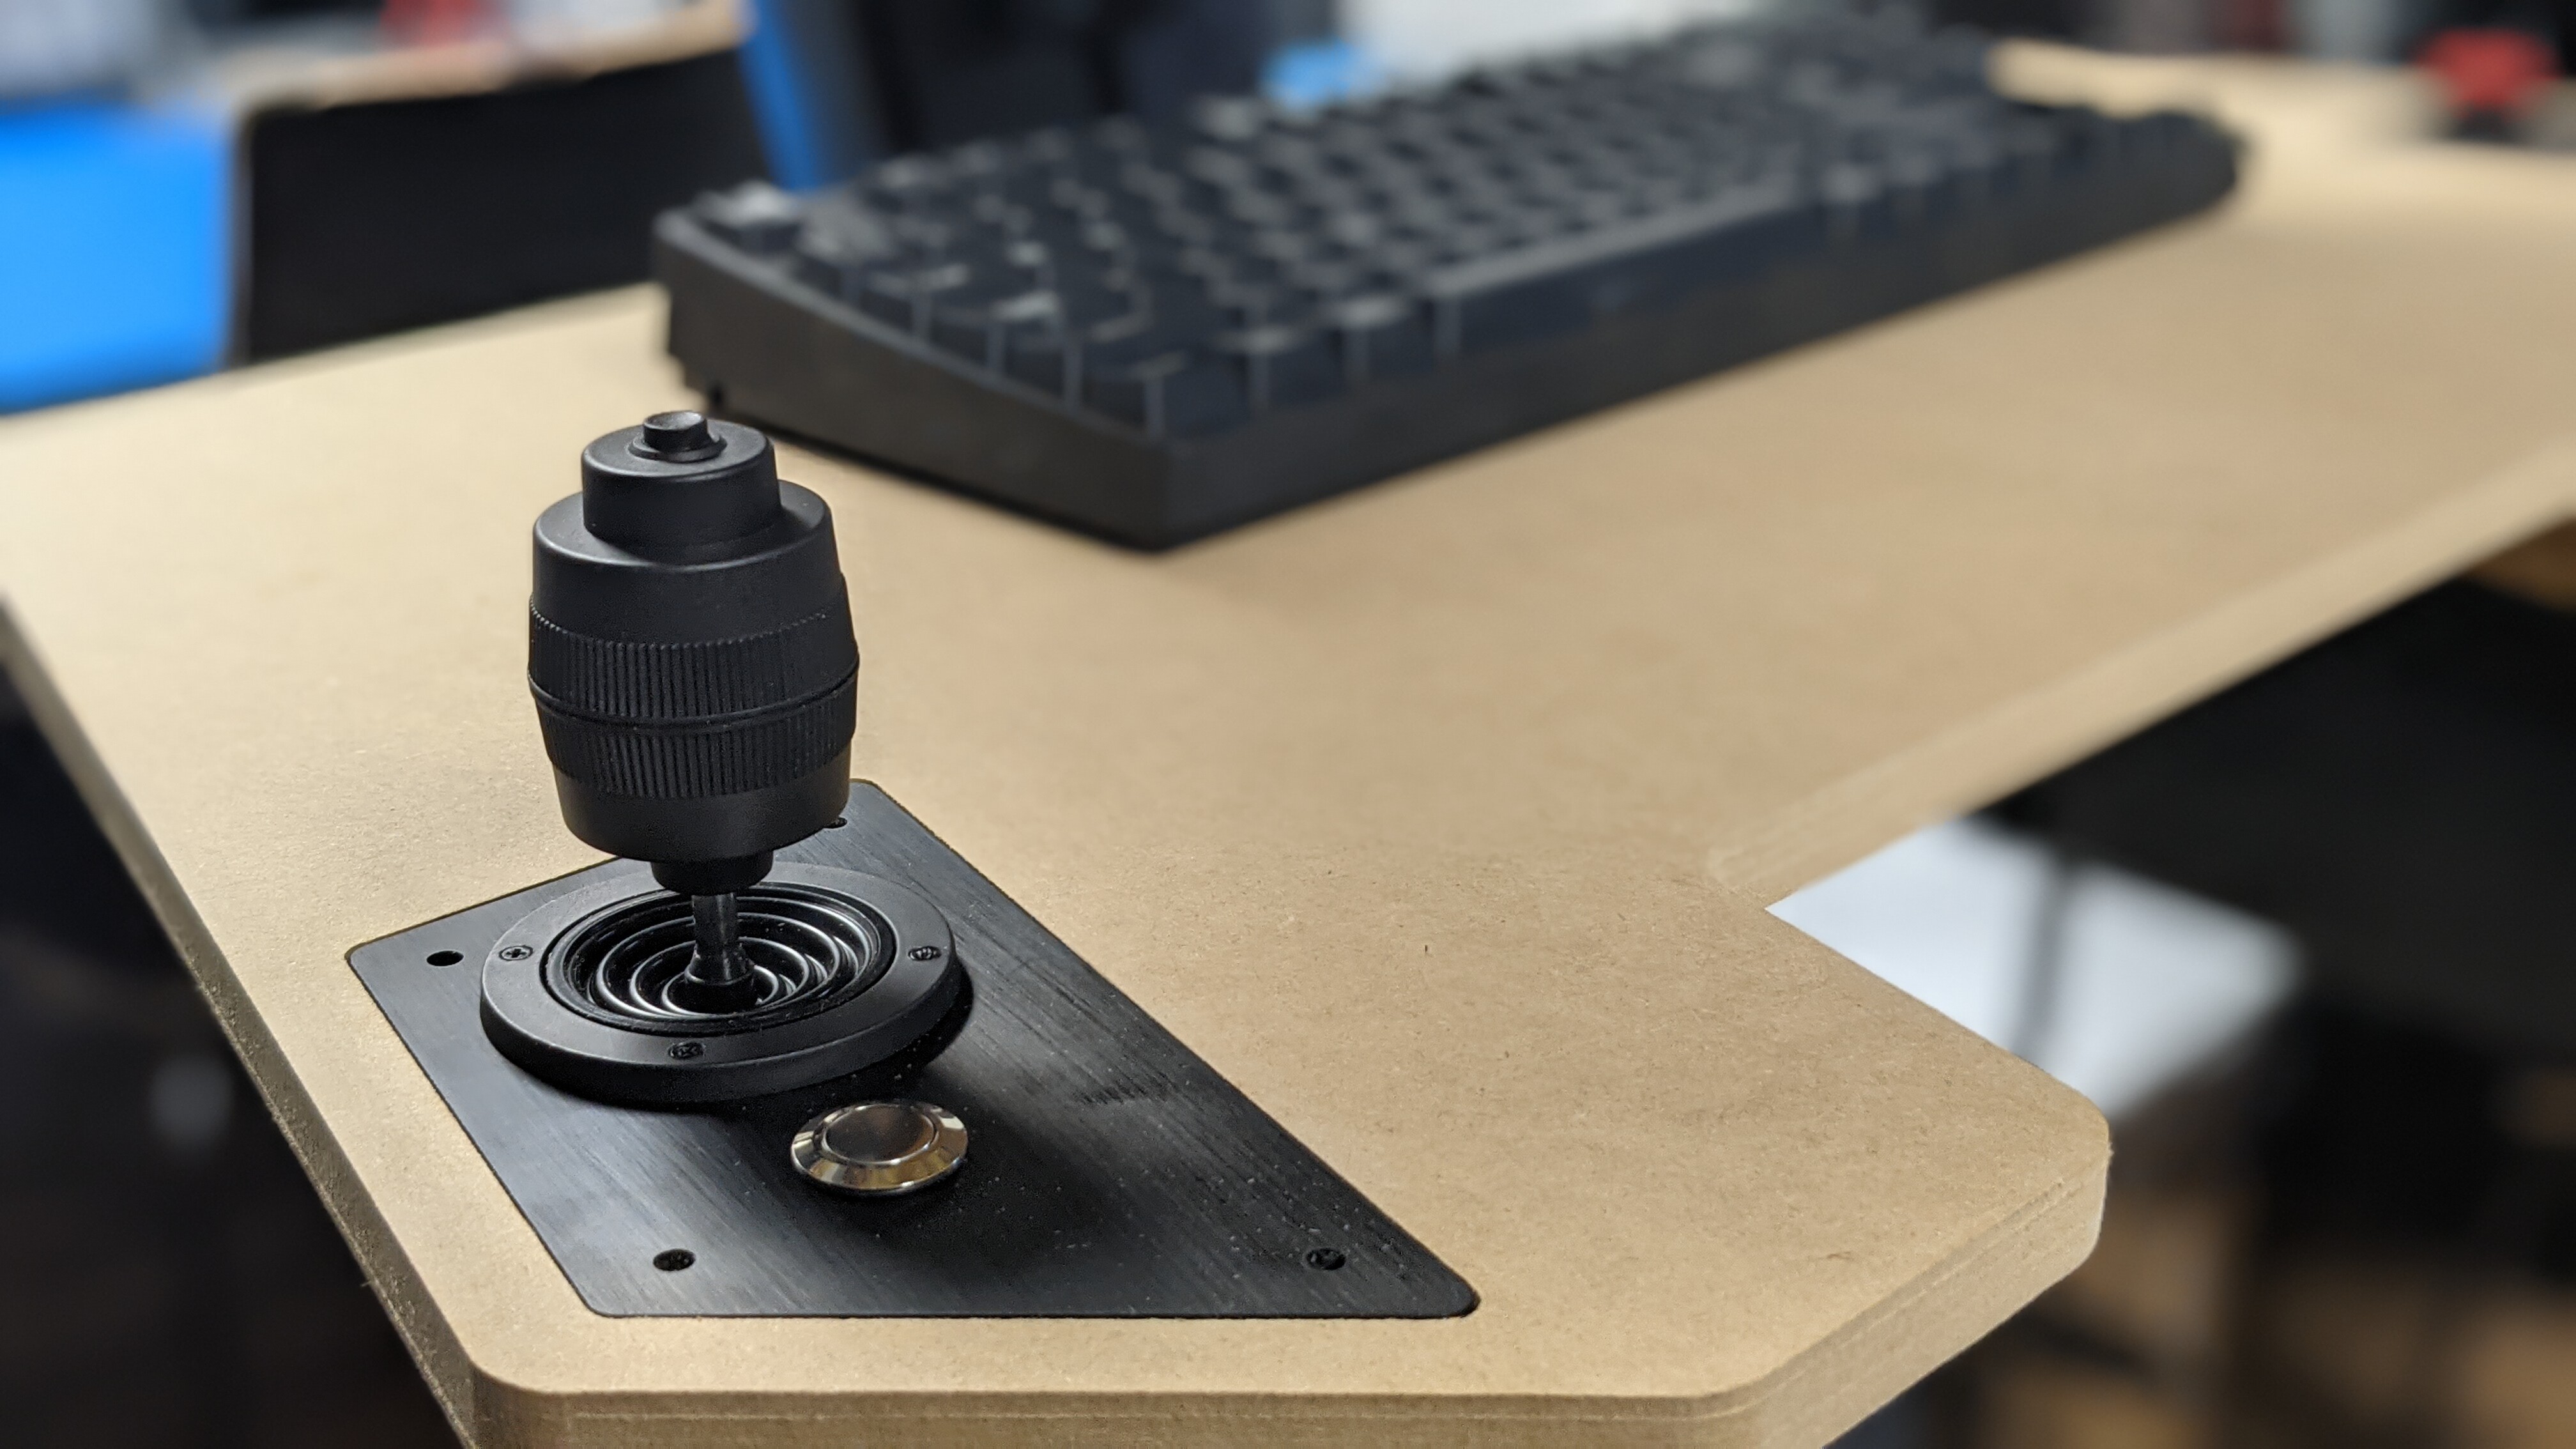
Here prior to paint, with the keyboard that will also live on the shelf. I notched the tray so I can stand closer to it while still having my joystick controls on each wing.
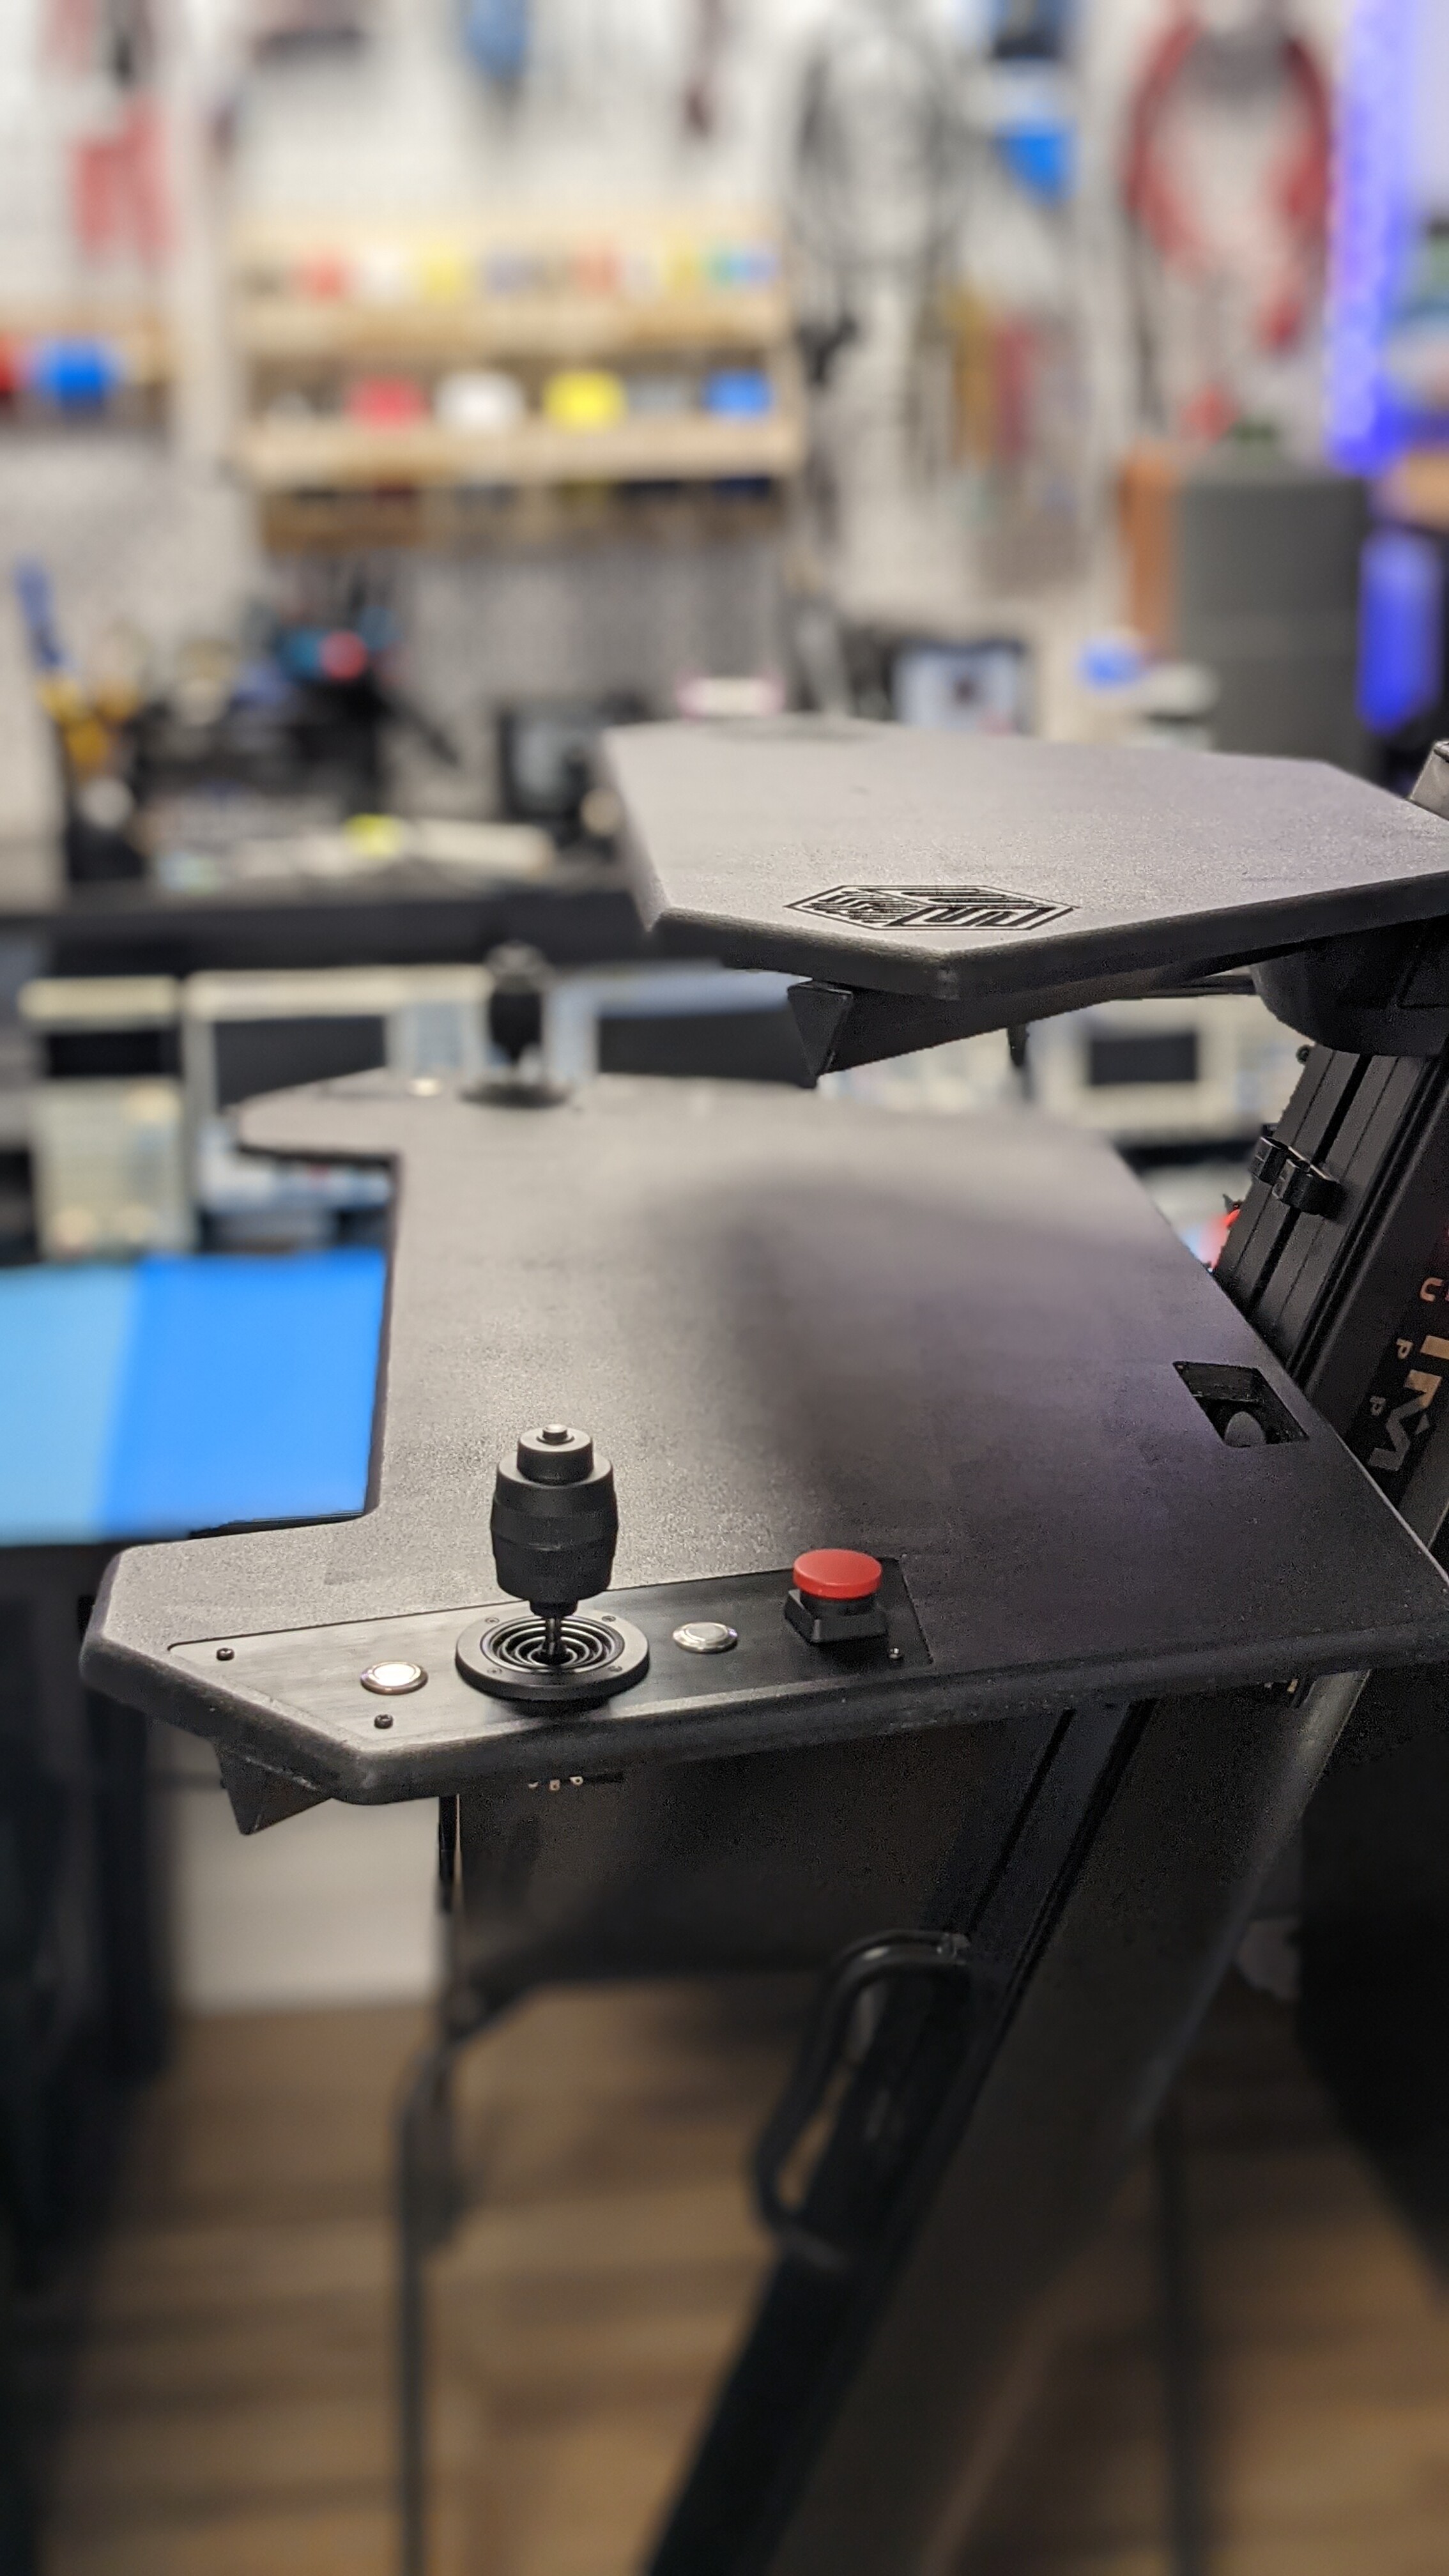
The finished stand, all painted and installed. Now I am waiting on the monitor stand to arrive, after which I can use the stand to code the joystick controls and user interface for my robots!!
Apparently I just needed to wait a few minutes for the stand to arrive . NOW all assembled, which means I have to finish wiring up the 3 axis joysticks.
Wow, this looks fantastic! Would you mind posting the brand/model of that stand? I’d like to find one for my shop as well.
Also see that you’re using the same joystick as me (it was one of the only ones I could find). I found calibration was kind of hard with it, since the joystick was pretty loose (and I couldn’t identify an easy way to tighten it up). Curious if you run into those same issues.
Thanks! It’s the Apex keyboard stand from Ultimate Support. They have a few variations depending on how many tiers you want and if you need a boom mount on the top. Versions of it have been made for a few decades seems like, so fortunately there is a nice supply of used ones around.
I only really looked at the centering and did notice that I was going to have to add a large dead zone because it doesn’t always snap back to the same center point, but that was expected. I’ll let you know how it goes with the rest of calibration. In my case I am probably using these primarily for velocities, which hides some of the inaccuracy. The button action seems good and repeatable though.
A few weeks later @theworkshope finishes calibration and adds post, “hey’s guys look at this Youtube video, I would say calibration went fairly well”… Look at Youtube video of Dan freenstyle/freehand carving something up with this awesome control platform hooked up to the Shapeoko controller
Kidding aside great work, amongst others I enjoy seeing your creations on this community site.
Haha!! At that point I should get a Shaper origin. I actually do want to get into recording more videos, it just adds a lot more thought process to build cycle.
@Caffein8ted@mingle Well it wasn’t quite a few weeks later… but here you go. Not a Shapeoko demo yet, would have to figure out the piping for that one!
I ended up setting a fairly wide deadzone in the middle, mostly because I want to be able to control an independent axis easily without going into specific driving modes. That means I need to reject small inputs from a neighboring axis, which ends up working pretty well. I’m ignoring about 30% of the stick movement centered around zero. Everything else is working great so far!
Very nice! I have this joystick hooked up to my Shapeoko via cncjs. Currently via a very hacky pendant plugin. I can’t quite get the continuous jogging feature of grbl 1.1 to work very well.
@Julien What do you guys mean when you say “smooth” jogging? Is this adding something you don’t get in CM or is it needed because of using a different gcode sender?
When I use my Rii wireless keyboard (like shown in some of the other threads) with CM, holding a direction button down continuously moves that axis. The only discontinuous part is switching between axis, but that’s probably more of a feature for precise positioning anyway. I’d like to understand the problem a bit better.
Quite the opposite actually, it’s to get CM’s capability of a smooth continuous jog when a jog key is pressed, in other G-code senders that don’t natively implement it (as surprising as it sounds)
Using step movements gets old very quickly, especially when you have had a taste of CM’s jog before.
May have to split this thread off as joystick control in cncjs looks like a real rabbit hole. Skeeves me out to have to manually setup and run all these random bits of software to stitch everything together. In a single program it’s at least debuggable and traceable, but seems like a lot of points of failure until you find success. Then you stop
Hmmm… If I hold a key down in CM on my Shapeoko for too long when using the “Fast” speedishness, I get a dialog popping up saying something equivalent to “tried to send something when it was busy and I thought I’d stop and tell you”. I just assume my keyboard repeat rate is too fast for CM. Smooth jogging would be great.
Haven’t seen that myself, usually I am moving around 8 inches or less of distance at the fast rate, but occasionally I drive it back to the corner manually.


 . NOW all assembled, which means I have to finish wiring up the 3 axis joysticks.