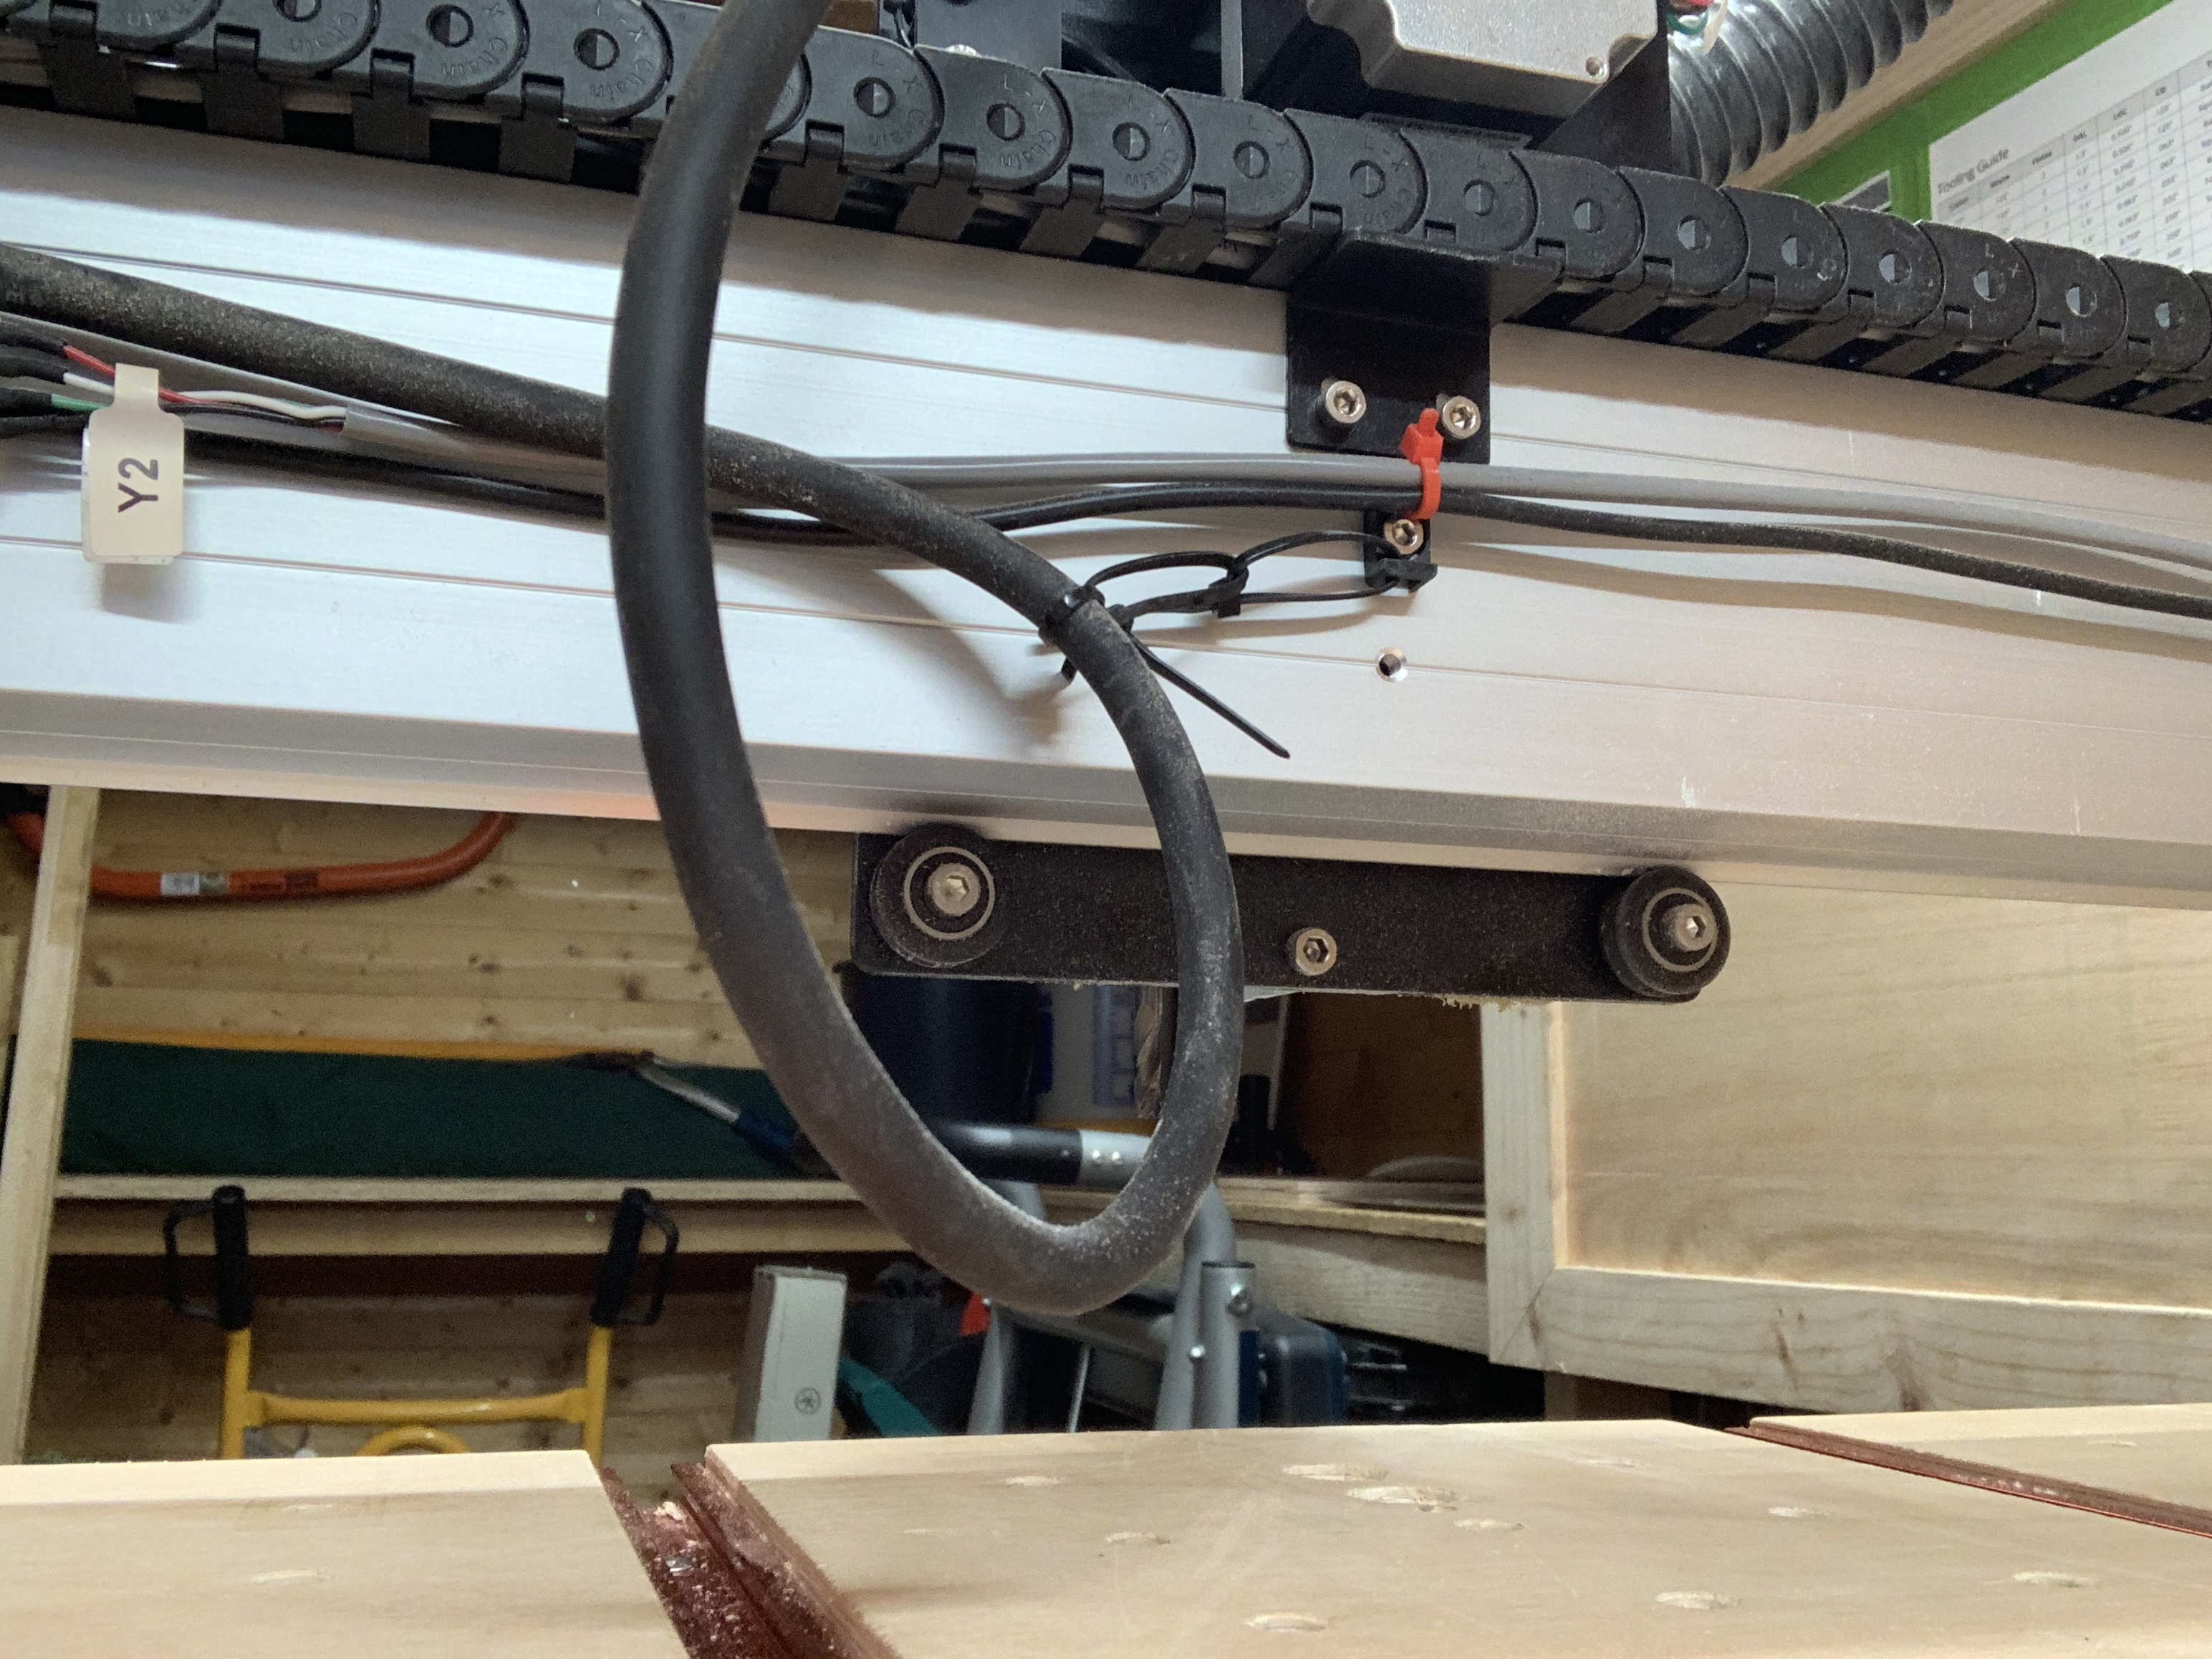
I had a near miss yesterday when the router cable (between the router and the end plate) along the rear of the X rail snagged on one of the clamps I was using to hold my work piece down.
Looking at the assembly guide, the way the cable is ‘managed’ does lend itself to looping down onto the work piece and, as in this case, can lead (ahem) to a disaster.
Has anyone made any improvements that will prevent this, please? I was thinking of suspending it from the roof of the enclosure with a bungee, but would appreciate your solutions, before I go ahead with the re-modelling.
I like the way you think … “Look BEFORE You Leap!”
I routed (pun intended) my cable to the right on my XXL where the signal lines go to the left. It is tied on the outside of my drag chain, and then takes a large radius reverse to the right. It hangs off the right Y channel where I have it extended to my power switch. Never had any trouble with it that way.
Hi @NewToThis, can you remind me which machine you have, and could you please take a snapshot of the back of your machine showing how the router cable is attached? It should definitely not hang below the bottom the X rail.
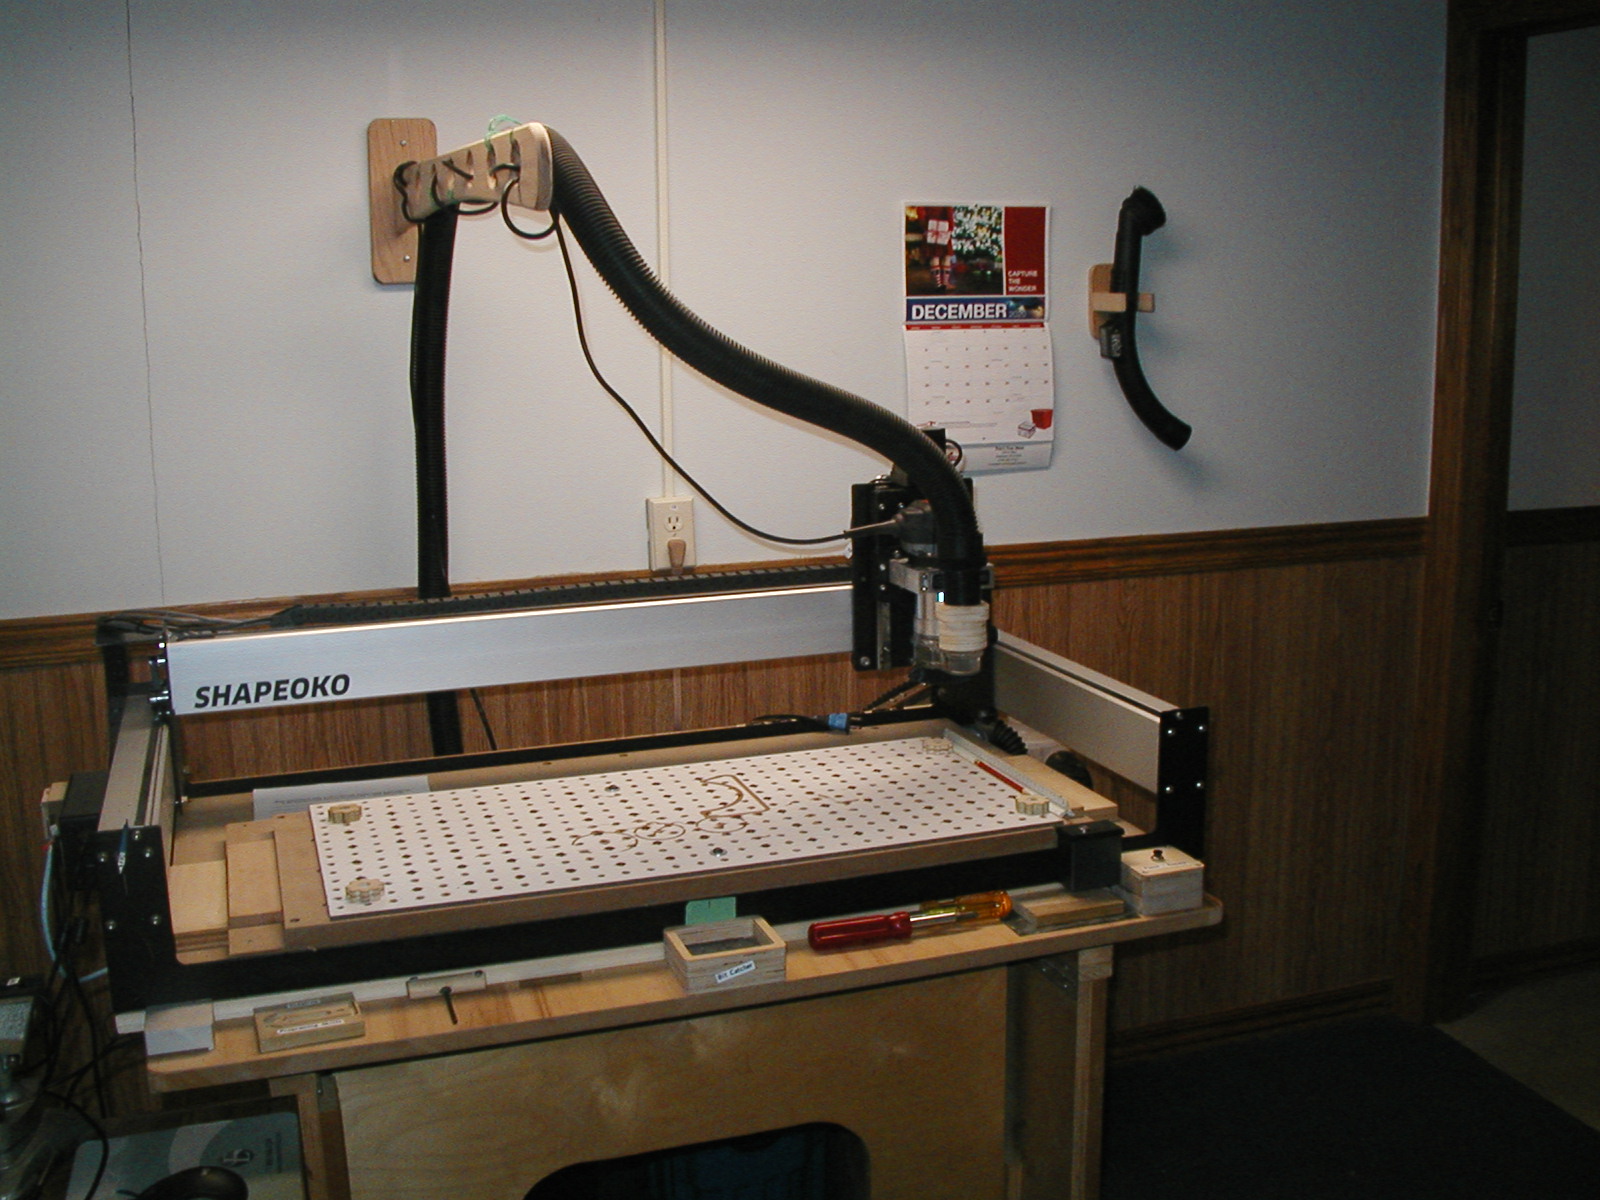
I do not have an enclosure so a swinging overhead arm was the solution.
I do not have an enclosure as access to the machine was an important part of my installation. Trying to make adjustments / upgrades / repairs in an environment that requires 6’ octopus arms with toothpick sized fingers with the strength of Superman becomes frustrating very quickly. This is something I ran into at customer sites when I was working as a computer tech and I was not going to recreate after I retired.
In addition to the great advice of using bungie cords to the ceiling, I would use a number of them to guide/orient/support the router cable against the rail (before it leaves towards the ceiling) such that it just cannot hang lower than the X rail
I like the idea of using cable ties to the drag chain, though!
Slightly off topic: I don’t understand (again!) why Carbide won’t supply split grommets, rather than using the awful cable tie method to secure the router cable through the end plate
Add a rubber grommet to the cutout used to manage wiring on the end plates, #1152 RG-XJ from True Value works well (cut a slot to the center so as to load the wire).
And as a newbie, I wouldn’t have known better. In fact, the positioning of the router cable caused my first issue with the XXL leading to one of my first posts on this forum: here
I couldn’t find the correct size over here, so ordered the nearest match I could get, but I’ll have to try harder. The problem is, no one sells ‘a grommet’ - I had to buy 68!
I tried searching for #1152 RG-XJ but ended up finding your modification!
Any instruction that allows any cable to hang down below the bottom edge of the X axis rail is bad and should not be followed. That is a disaster waiting to happen. All my cabling is above the rail or hanging from the ceiling of my enclosure. I don’t have anything special, just a few zip ties with the screw hole connected to a piece of MDF on the ceiling.
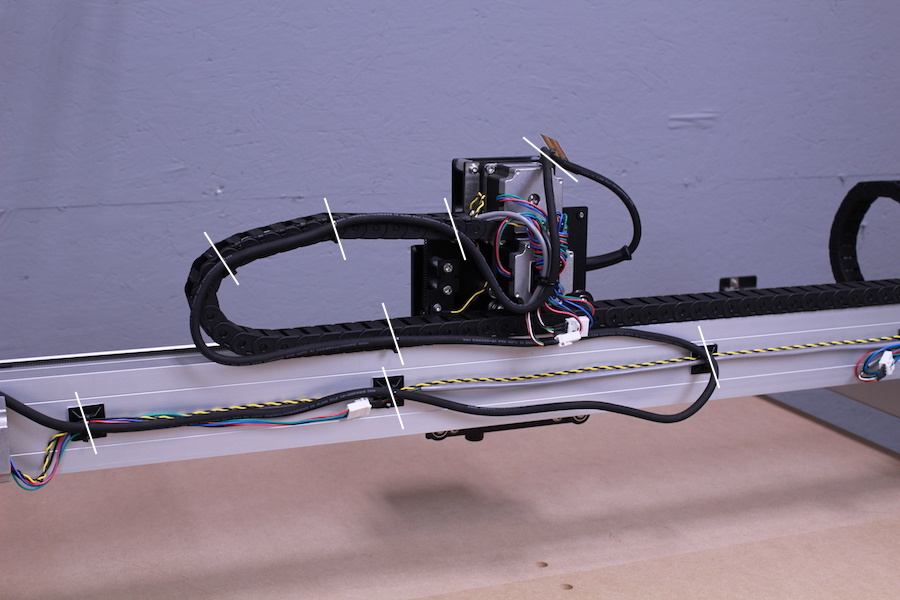
I did my normal “over-design, over-build” for cable management with monster drag chain and custom 3D printed brackets. If you have a printer, you can print them. The files are here. You can use all but the HDZ bracket, since my HDZ was an original BeaverCNC, but you might be able to modify it slightly depending on what Z axis you have.
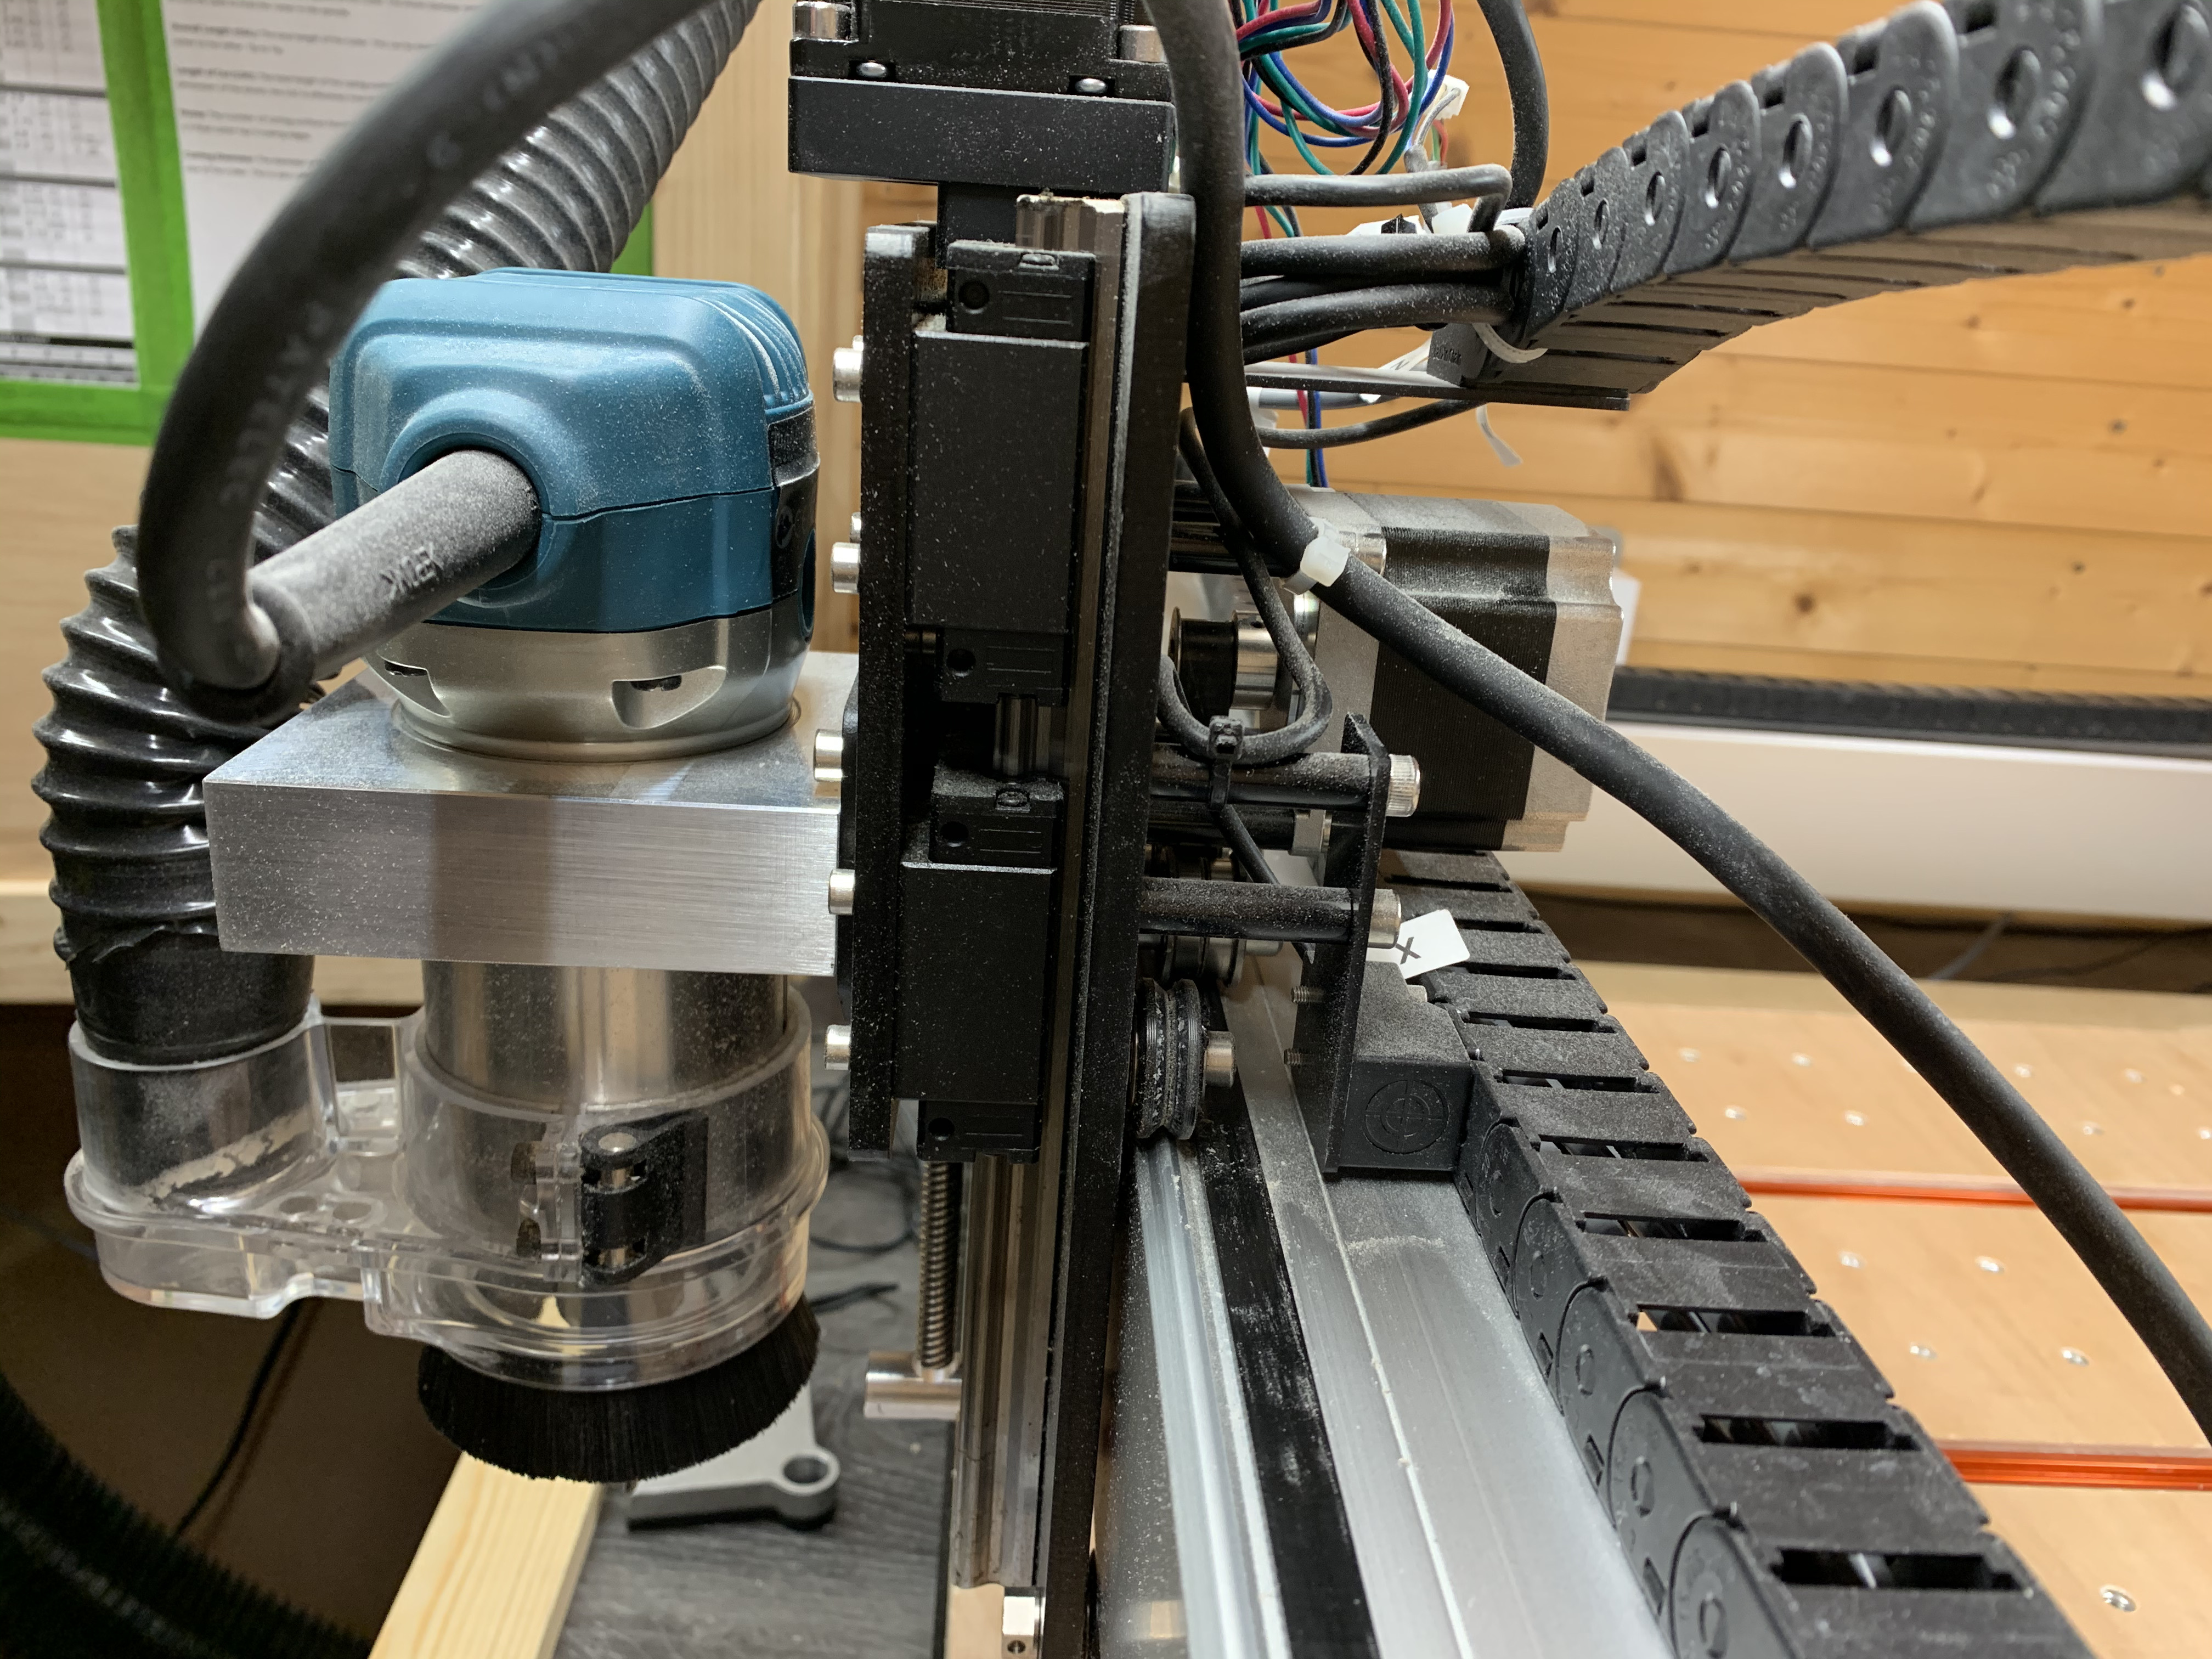
I am able to get inside the drag chain:
1 x VFD wire (~5/8" diameter)
2 x 1/2" cooling tubes
1 x 1/4" air line
3 x stepper motor wires
1 x power wire
2 x 10ga ground wire
EDIT: Sorry, I fixed the Google Drive link to the files. I was at work when I posted it and I can’t access Google drive from there.
.
The router power cable is a source of noise and interference which the Shapeoko is known to be sensitive to. Separation between the noise source and the Shapeoko cabling is key to managing this issue.
When using drag chains it’s pretty easy to pop the covers and lay cable or hose into the chain without re-terminating.
@NewToThis I encountered the same issue yesterday when installing mine. Seems like a very weird way to recommend the wiring, I couldnt work out another way without making the cable to tight to travel all the way across to the Y1 carriage. @72begin I like your swinging arm method of hanging I think I will switch to something similar if I decide not to build an enclosure.