See:
1 Like
Yes it does. The wipers will distribute the oil. I clean mine often, so I don’t bother with the oil ports. I clean the rails & ballscrews, then use an old toothbrush with Vactra-II to coat them directly. Jog the machine to expose what was below the axis assemblies & get the dry spots.
2 Likes
Got my upgrade kit installed today. Man I forgot how many screws there are in the table. Super easy process that took an hour and a half.
While I wait for my leg kit to arrive I’m wondering if anyone has any experience with these kinds of casters?
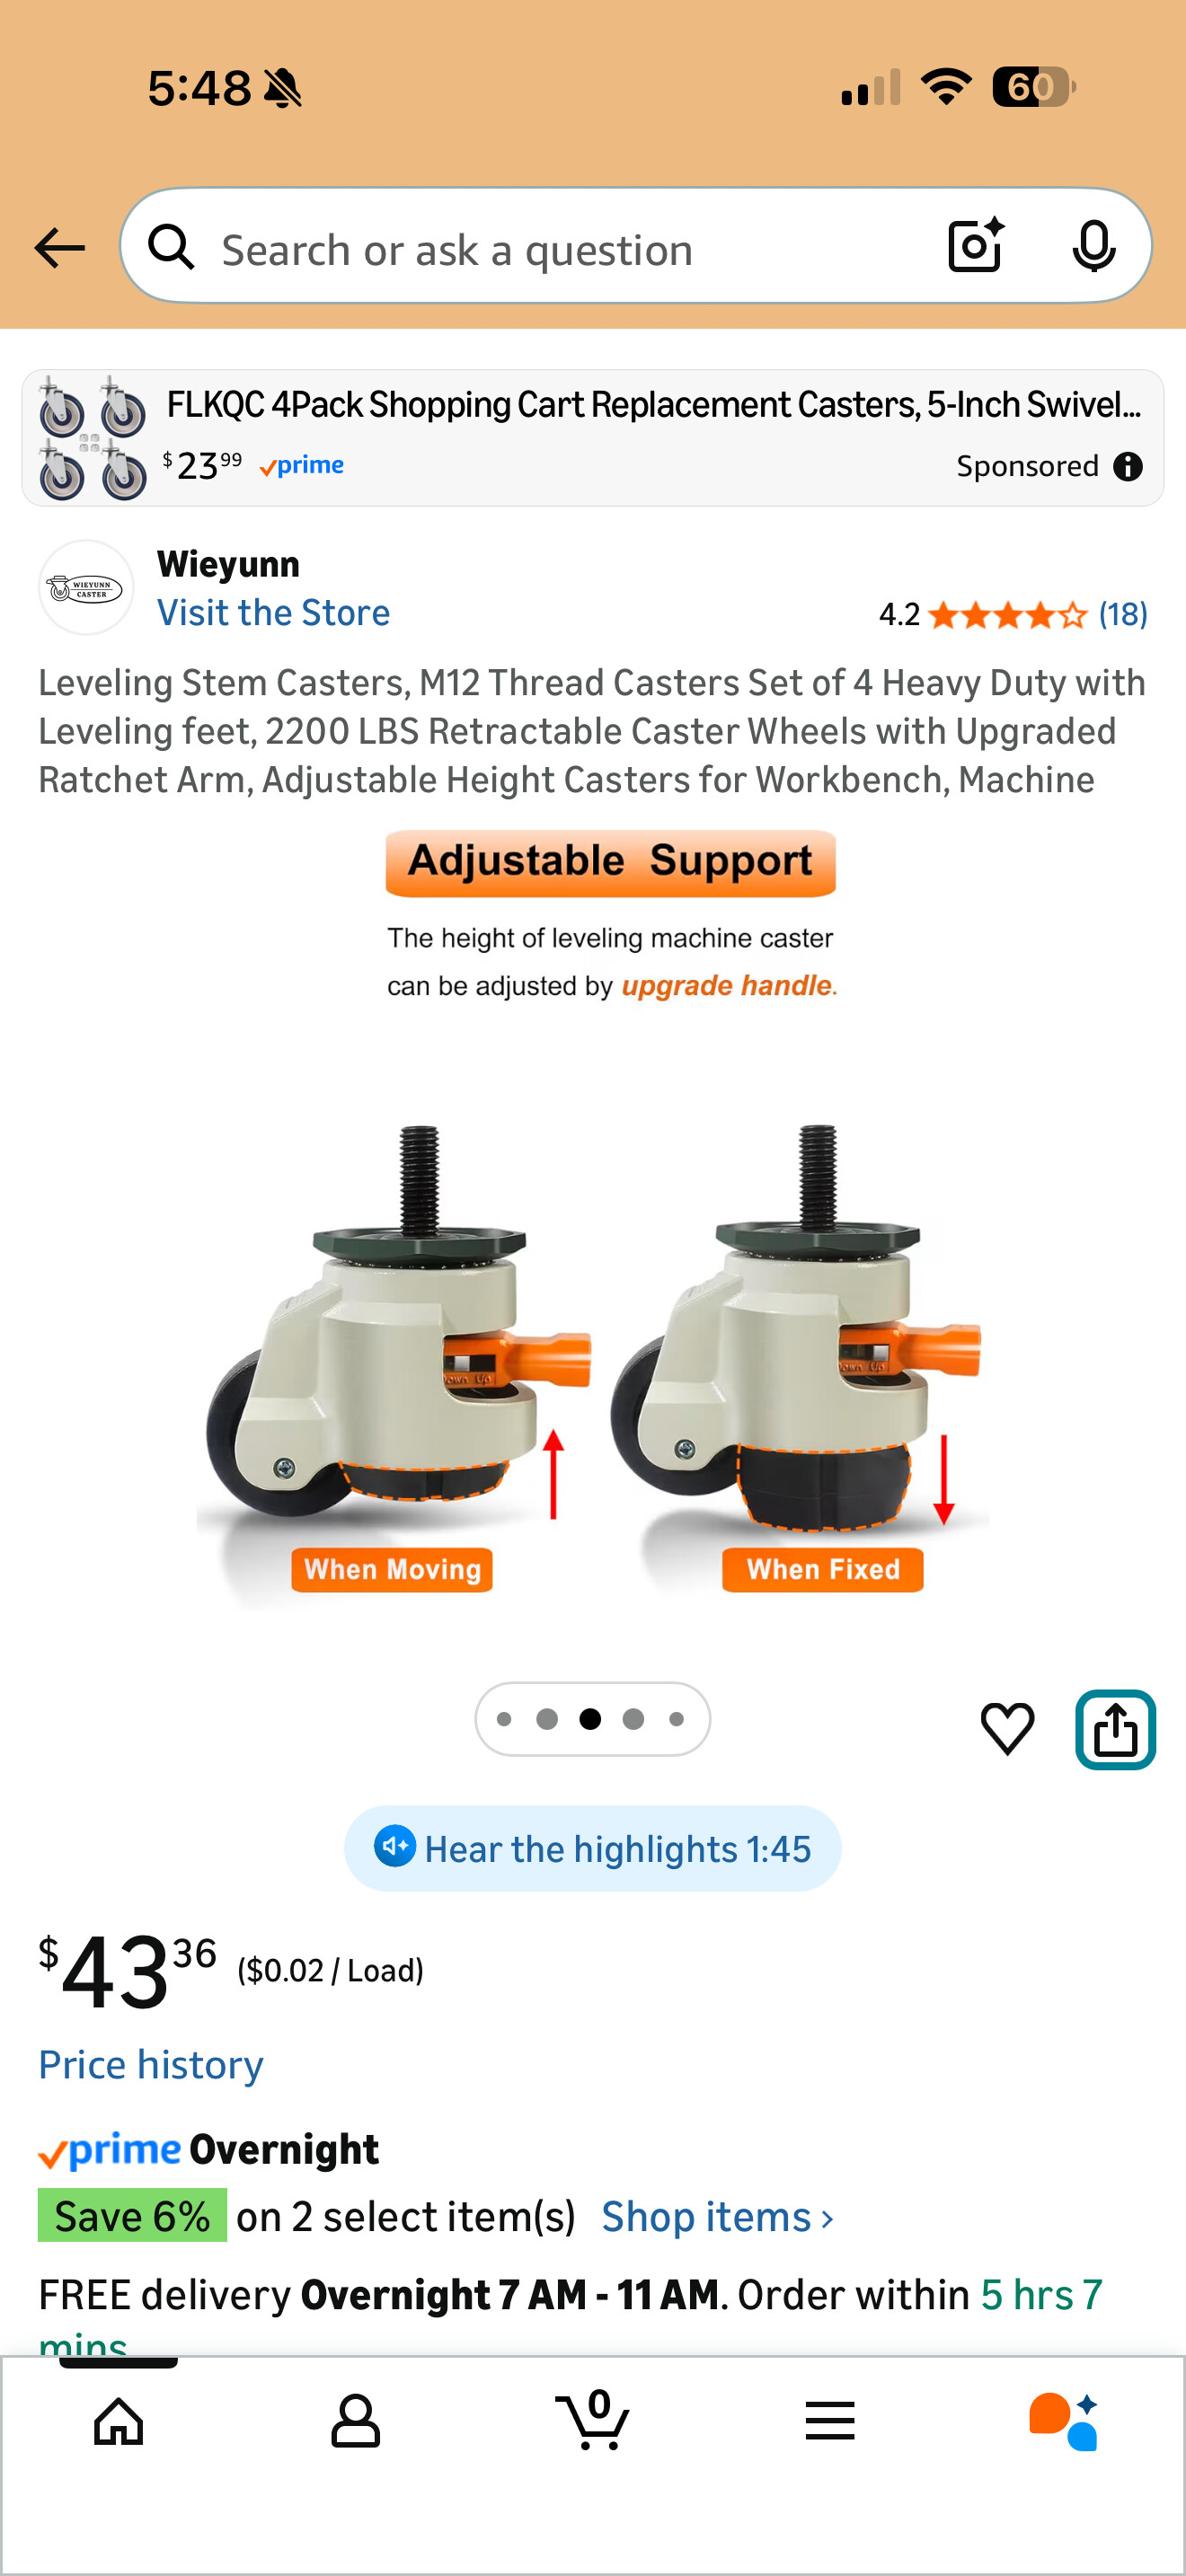
See the comments from the last couple of days in this thread:
1 Like
I have those on a large hydraulic lift table I use as an assembly table.
It’s a bit time consuming to get the table up and down off the feet. But it works well allows me to keep it sold and it moves easily on flat concrete when I need to move it.
The table is almost 500 lbs and it’s been moved with over 1k lbs on the table.
Did you disassemble/replace one extrusion at a time or disassemble and reassemble as if a new machine?
I have a set of those casters and they work great. You do have to kneel down to get to them but worth it to me in my opinion.
I have those on my enclosure. They work great.
I followed the instructions that are referenced via QR code in the box. They also did a video on YouTube.
Direct answer. I took the wooden slats off propped it on a couple 2 by 4s on middle extrusions replace front and back extrusion one at a time. Place some scrap material under newly installed extrusions, pulled original 2x4, and replaced the center ones one at a time.
Only complaint is that they don’t include a new cable tray with the kit (note: the “what’s included” section on the store doesn’t state that it’s included) for the left side y stepper but I did get a complete set of table hardware. I’d gladly given that up in favor of a cable tray.
3 Likes
I got my 5.1 upgrade kit Wednesday and I agree. I just kept the replacement hardware in the bag and used the old hardware. I Goo Gone-ed the old wire channel from the original extrusion and replaced the adhesive strip to transfer to the 5.1 extrusion. I sent the same input on that to the folks at C3D.  I also 3D printed a few wire clips since I have a leg kit going on this weekend. I don’t think there’s provisions for the wire to the front right panel (where the green “C” logos is). So I’ll use the 3D printed clips or some of the adhesive zip tie pads for the right side.
Not to figure how to mount my mini computer and monitor holder, as well as redesign my various holders for things to be 3D printed for the leg kit instead of my bench.
3 Likes
Thanks for the reply.
So, pretty much swap one for one once’s the spoil board are removed. I thought the Y cable tray was reusable but it seems pretty stuck on. Perhaps it could be added to the site for purchase if reusing the original is not an option?
What say ye C3D?
2 Likes
Link your 3d prints (if allowed) I’m hoping that I can do some too so that I can avoid all the detritus that collects in the 6 inches of table in front of the machine.
3 Likes
Feedback for version 1.1 or version 2 of the leg kit.
- I’ve seen it quite a bit in other stuff with bent sheet metal but you don’t allow for enough tolerance in your screw holes for things to be slightly misaligned due to variances in parts.
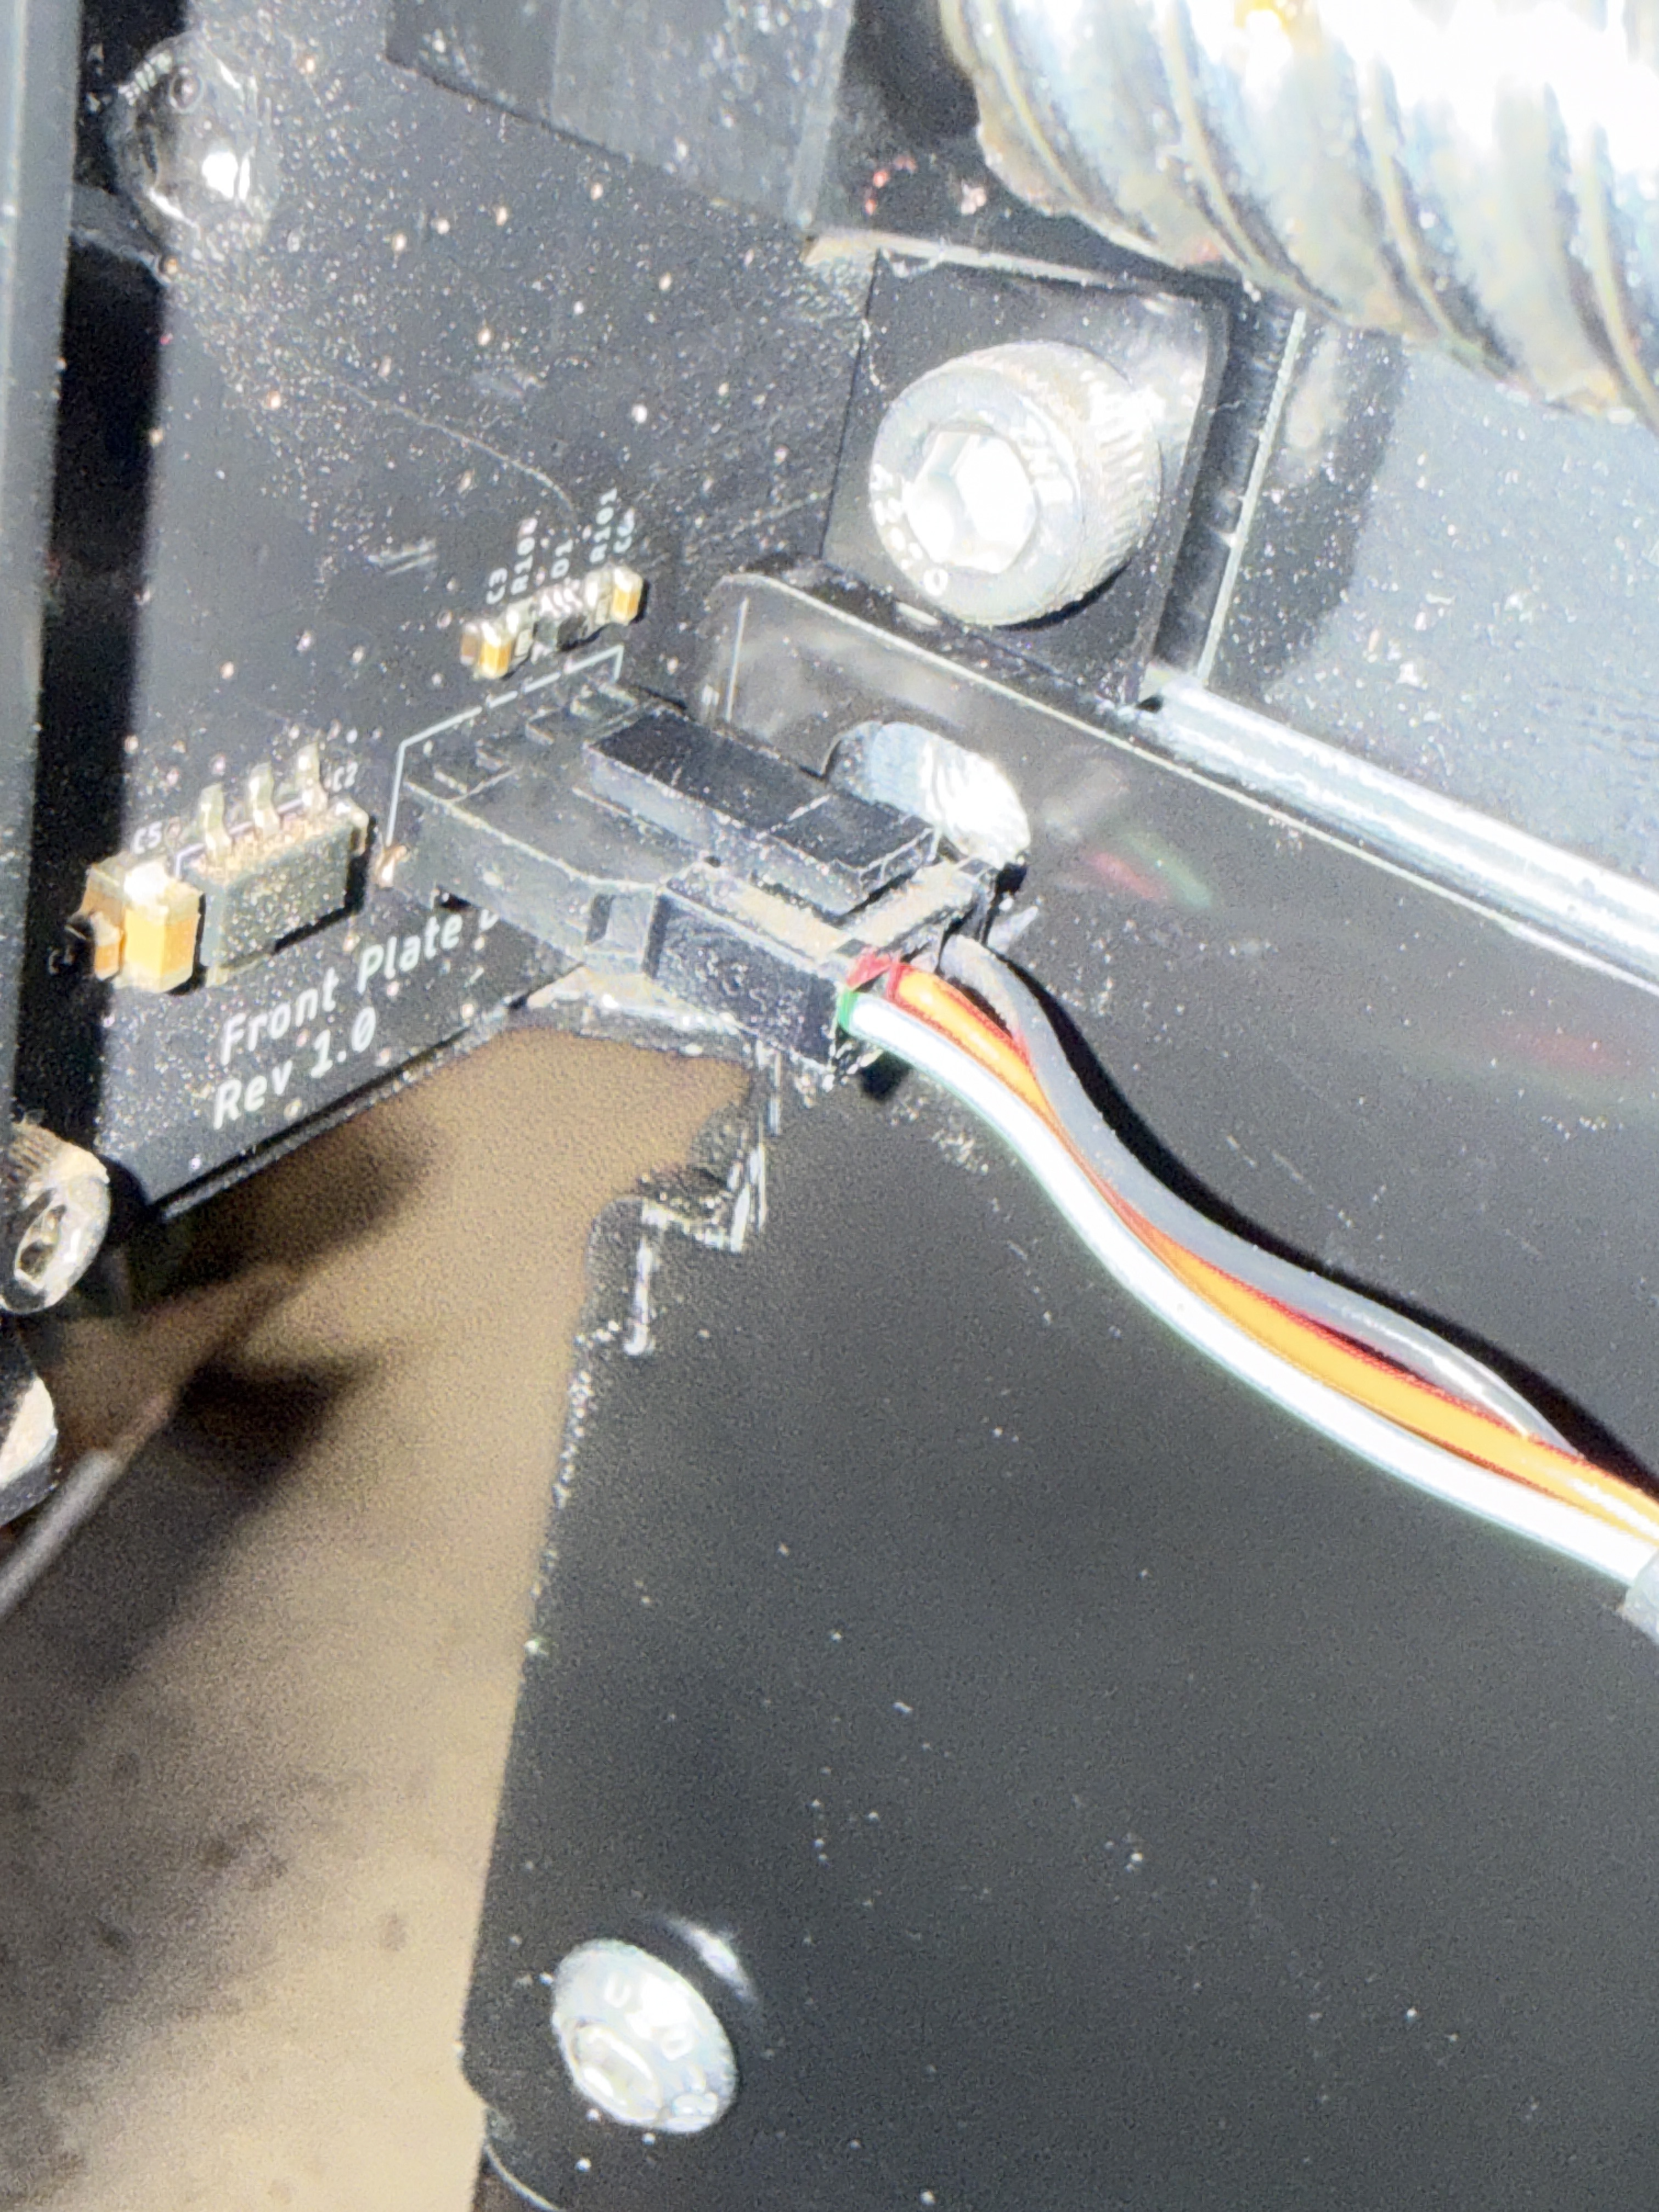
- Revision 1 of the front panel board has the connector right in line of the top left screw hole. Doesn’t impact stability or anything but may be a good idea to call out in the instructions.
1 Like
Here’s my Etsy shop. I think they allow it, if not it’ll go bye-bye. I’m going to add some specific parts for the 5.1 and leg kits.
1 Like
I installed something similar on my table. They work good.
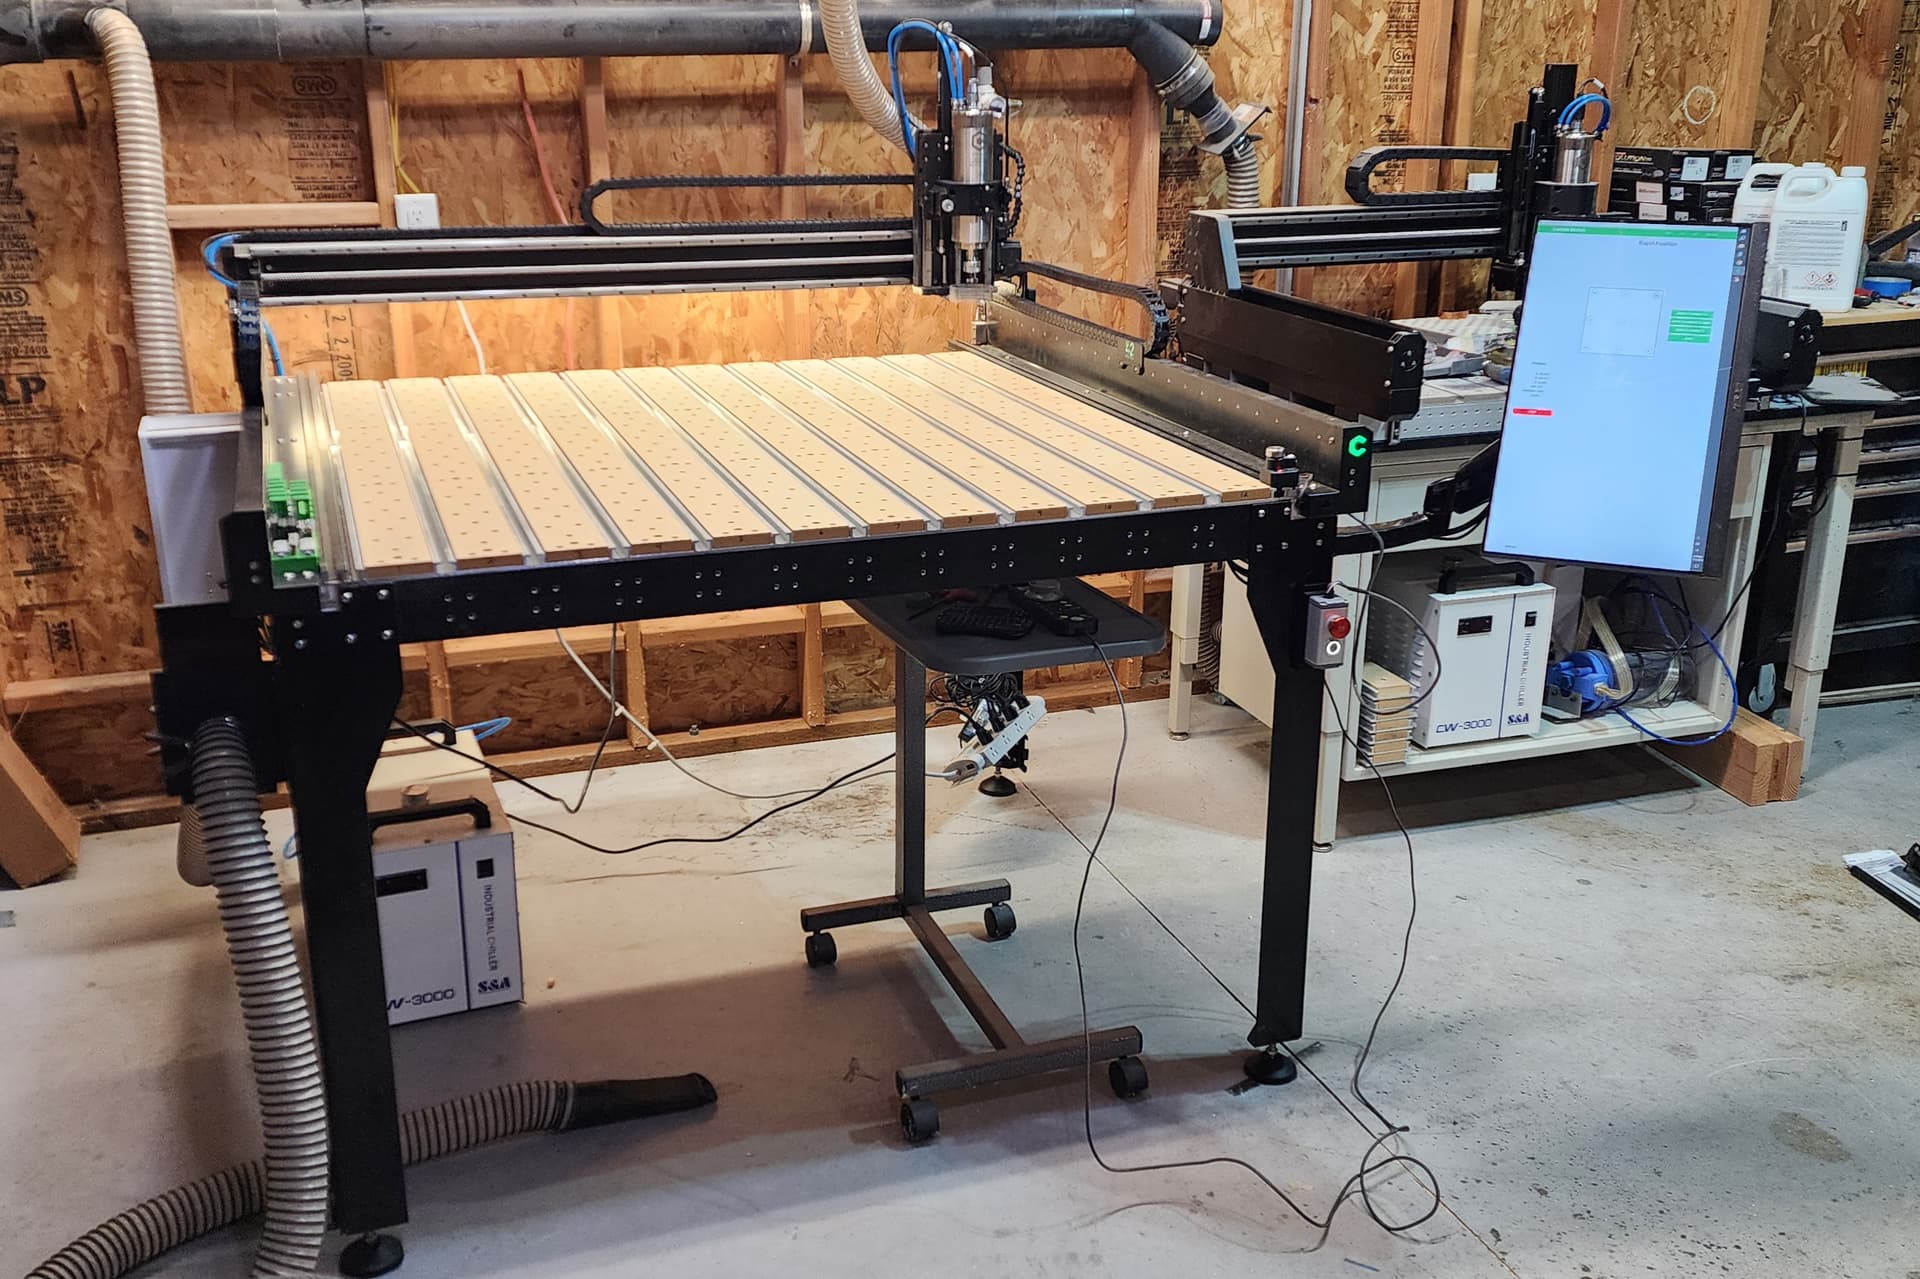
Got the 5.1 upgrade and leg kits installed and the machine re-calibrated. MAN… it’s beefy. Way more rigid than my initial release S5Pro on a Rockler Rock-Steady bench with 1.5" thick top and the bottom enclosed to prevent the bench from racking. I was worried about racking with the leg kit not being braced… I’m no longer worried.  Climbing around on the bed and dancing like I was on American Bandstand and Soul Train was about as stable as being on a stage. Although, sadly, my dancing was not improved. Ye olde scientific Meyers method of standing on the machine to test rigidity has been surpassed!
What I was REALLY impressed with was how straight the front extrusion is and how well I could dial the machine in. After a proper squaring of the machine and adjusting the Y homing switches, it only deviated 0.005" across the whole X travel with a dial indicator on the spindle. There was only 0.002" between the left and right sides with one dip of 0.005" close to the right side for around 6". The tolerance on the extrusion combined with powder coat thickness was 0.005" across 48". That makes the vertical machining feature really precise all things considered. That’s insane for something that I bolted together in my garage and literally danced on.
I like being able to clean under the machine easily. Even being more accessible makes maintiance easier. Also more storage for rolling things. I might break down the bench it used to be on to roll under it now. I also designed and 3D printed a 100mm VESA mount for my mini pc and mounted the arm for my touch screen. And yes, my first attempt to mount my power conditioning power strip was a failure. That will get fixed tomorrow.
My singular criticism of the leg kit is that I’d like more holes and/or slots for 4mm or 6mm bolts. That would let me do a better job of wire management and accessory mounting. I did some slight redesigns of my 3D printed accessories to work with the 5.1 extrusion and leg kit. The revisions are printing now.
12 Likes
Oh man, you are dating yourself. Anyone that remembers those is too old to be dancing up there.
3 Likes
I’m only 47, but both were reruns when I was a kid.
Thanks for the review Josh. I’m looking forward to the video of the dance scene!  I was on the fence as to whether or not get the upgrade. Now I’m going to need to revisit it.
2 Likes
Nice! What are your thoughts on how well casters would do on it? My shop is such that I need to have the ability to move every tool around
1 Like
@Brew I don’t need to immortalize my poor dancing skills.
@SirGariff If you use double locking or the kind that have the living pad, should work well. But that would raise it up more. I’m 5’8" and the bed already at the highest I’d like it for such a deep reach. I have the ones that pop up and you can remove on the bottom/sides of the legs. But after adjusting the feet for level, they don’t pop up the machine anymore. They barely worked with the feet adjusted to be a short as possible. So I may make adapter plates to drop the brackets 1" or so.
4 Likes